Embed Size (px)
Citation preview

EURO ® PAVING SYSTEM

Adbri Masonry is Australia’s leading masonry manufacturer supplying
quality concrete bricks, blocks, pavers, retaining walls, erosion control
products and architectural masonry throughout Australia.
In addition to manufacturing a full complement of high quality
products there are a range of other benefits to working with
Adbri Masonry including:
• Comprehensive technical testing in our N.A.T.A
Accredited Testing Laboratory
• Access to a national transport network
• Access to our Contracting Services Division (internal design, certify,
supply and install division)
• Experienced in-house engineers who can provide design support
for commercial projects
• Knowledgeable architectural and engineering consultants
• The ability to create customised colour solutions for individual
projects. Select products only. Minimum quantities and lead
times apply.
adbri masonry 2

Adbri Masonry’s Euro® Paving System is Australia’s premium flooring solution.
These designer pavers are masterfully crafted on a state of the art Italian paving
machine before samples are tested in our in house N.A.T.A. Accredited Testing
Laboratory. Euro® pavers are available in a variety of sizes from small format
300x300mm pavers through to oversized 600x600mm paving slabs. The range
consists of six definitive surface textures which present new opportunities to
enhance designs with stunning detail that will compliment projects in every
environment.
Our natural palette of rich colour tones are created using premium Bayferrox®
colour pigments which are hand crafted by colour specialists in Germany.
The use of these quality colour pigments allows Adbri Masonry to blend an array
of rich hues that provide increased flexibility and reliability for designers.
EURO® PAVING SYSTEM
Product Specification Tools pg 4
Texture pg 6
Standard Colour Range pg 7
Visual Colour Portfolio pg 8
Euro® Made to Order pg 9
Paver Sizes pg 10
Tactile Pavers pg 11
Edging Options pg 11
Euro® Classic pg 12-13
Euro® Slate pg 14-15
Euro® Stone pg 16-17
Euro® Honed pg 18-19
Euro® Shotblast pg 20-21
Euro® Polished pg 22-23
Installation and Specification Guide pg 24-30
3adbri masonry
CONTENTS

Once you have selected a Euro® paving solution from the Euro® Paving Range our consultants can provide you with 100 x 100mm samples for use in your client
meetings and project boards. These samples are accurate within their tolerances of natural colour variations that may occur in raw materials. Samples should
always be sighted before orders are con�rmed.
100 x 100 Sample Chips
adbri masonry 4

adbri masonry 5
Euro
® S
tone
| Ri
verin
a

EURO® TEXTURES
6
Differentiate your design with one of six distinctive surface textures. The Euro® Classic, Slate and Stone textures are stocked in a range of standard colours.
The remaining textures are available as ‘Made To Order’ products where minimum order quantities and production lead times apply.
TEXTURES
Euro® Classic
Euro® Slate
Euro® Stone
Euro® Honed
Euro® Shotblast
Euro® Polished

*Product colour in stock for Euro® Classic and MTO for Euro® Slate and Stone
STANDARD COLOURS
7
Looking for more colour tones? Please turn over to see more options from our colour portfolio.
Please note your colour selection will change depending on the �nish of the Euro® paver. Please seek samples before ordering products.
Produced with
Produced with
Premium UV stable colour pigments
Premium UV stable colour pigments
adbri masonry
STANDARD COLOUR RANGE
EURO ® CLASSIC AND SLATE COLOUR OPTIONS
EURO® STONE, HONED, SHOTBLAST AND POLISHED
Coloured using
ATHENS CYPRUS*
RIVERINA ZURICH
PRAGUE
PRAGUE

VISUAL COLOUR PORTFOLIO
Over the years our experienced team has worked with many clients to produce project speci�c colour and aggregate designs. Samples of our previous creations can be seen below.
8 adbri masonry
WESLEY COLLEGE PROJECTAdbri Masonry created over 650m2 of Euro® Honed pavers in three Made To Order colours. The resulting check pattern with tanned streak brought together the many rich elements of this space.

Your Paver Swatch
For more information email us at [email protected] or call 1300 365 565
While there are a range of standard colours to choose from, creativity has been catered for with the introduction of our personalised Made to Order service. This is ideal for designers looking to create with colour and provide a stamp of individuality on paved projects.
As your individuality is made to order, minimum quantities and production lead times apply. Here’s how it works;
Choose a texture �nish
Create a blend of aggregates
Select a base colour1
2
3
MADE TO ORDER COLOURS

PAVER SIZES
300 x 300 x 5
5
400 x 400 x 5
5
400 x 400 x 3
0
600 x 600 x 5
0
400 x 400 x 4
0600 x 3
00 x 55
600 x 400 x 40
Our Made To Order sizes are not held in stock but made to order for your project. Minimum quantities and lead times apply. When applying the Stone, Honed, Shotblast and Polished textures a nominal 3mm is taken from the paver height.
PAVER SIZES AND AVAILABILITY
Paver Sizes Available Euro® Classic Euro® Slate Euro® Stone Euro® Honed Euro® Shotblast
Euro® Polished
Standard 400 x 400 x 40mm • • •
600 x 400 x 40mm •
Made To Order
300 x 300 x 55mm • • • • •
400 x 400 x 30mm • • • •
400 x 400 x 40mm • • •
400 x 400 x 55mm • • • • • •
600 x 300 x 55mm • • • • •
600 x 400 x 30mm • • • • •
600 x 400 x 40mm • • • •
600 x 400 x 60mm • • • • •
600 x 600 x 50mm • • • • •
Euro® Shotblast | Made to Order Colour Euro® Honed | Made to Order Colour10

Full BullnoseFull Bullnose
Half Bullnose
Pencilnose
Sharknose
Half Bullnose
Reverse Sharknose
EDGING OPTIONSTACTILE PAVERS
300 x 300 x 40mm
Adbri Masonry’s range of quality tactile pavers are practical and hard wearing. Unlike other
tactile products, the raised directional and hazardous indicators are incorporated into the
design of the paver, giving the bene�t of minimal maintenance and ensuring the indicators
will not be sheered off.
With a virtually unlimited combination of colours and aggregates available, these vital
pavement aides will compliment any project.
Adbri Masonry also offer a range of tread treatment solutions for use in stair applications,
all of which comply with Australian Standards. This option is ONLY AVAILABLE IN NSW.
AVAILABLE FINISHES - Made To Order Product
AVAILABLE SIZES
Directional Type CHazard Type A
All Euro® pavers can have an edge pro�le applied for use
in speci�c applications such as pool coping and steps.
The Sharknose pro�le is offered as standard while the
other edging options are available as Made To Order
products. Minimum quantities and lead times apply.
Standard Edge Pro�les
Special Edge Pro�les - Made to Order Products
11
TREAD TREATMENTS

Euro
® C
lass
ic |
Pra
gue
adbri masonry 12
Euro® Classic
The lightly textured surface of the Euro® Classic paver can be used to enhance paved spaces with an understated aesthetic appeal.

Our Made To Order products are not held in stock but are available.Minimum quantities and lead times apply for Made To Order products.
13adbri masonry
Euro
® C
lass
ic |
Ath
ens
timel
ess
>un
touc
hed
>na
tura
l >
Euro® Classic pavers boast a traditional pressed surface texture which features a light
abrasion ensuring suitable resistance to slip, making these pavers ideal for all external
paving applications. The smooth, �at surface means these pavers are easy to clean and
maintain ensuring aesthetic appeal is maintained over time.
STANDARD COLOURS
Athens Cyprus Prague
Euro® Classic No. per m2 Unsealed slip resistance
Standard 400 x 400 x 40mm 6.25
P5Very low risk of slipping on
surface when wetMade To Order
300 x 300 x 55mm 11.1
400 x 400 x 30mm 6.25
400 x 400 x 55mm 6.25
600 x 300 x 55mm 5.55
600 x 400 x 30mm 4.17
600 x 400 x 40mm 4.17
600 x 400 x 60mm 4.17
600 x 600 x 50mm 2.78
Choose from a standard colour or create your own. Minimum quantities and lead times apply for Made To Order products.
400 x 400 x 40mm
SIZES
Standard Size400 x 400 x 40mm
MTO (Made To Order)300 x 300mm | 400 x 400mm | 600 x 300mm | 600 x 400mm | 600 x 600mm

adbri masonry 14
Euro® Slate
The random, windswept aesthetic of the Euro® Slate paver brings the look and feel of traditional European style to your paved spaces.
Euro
® S
late
| A
then
s
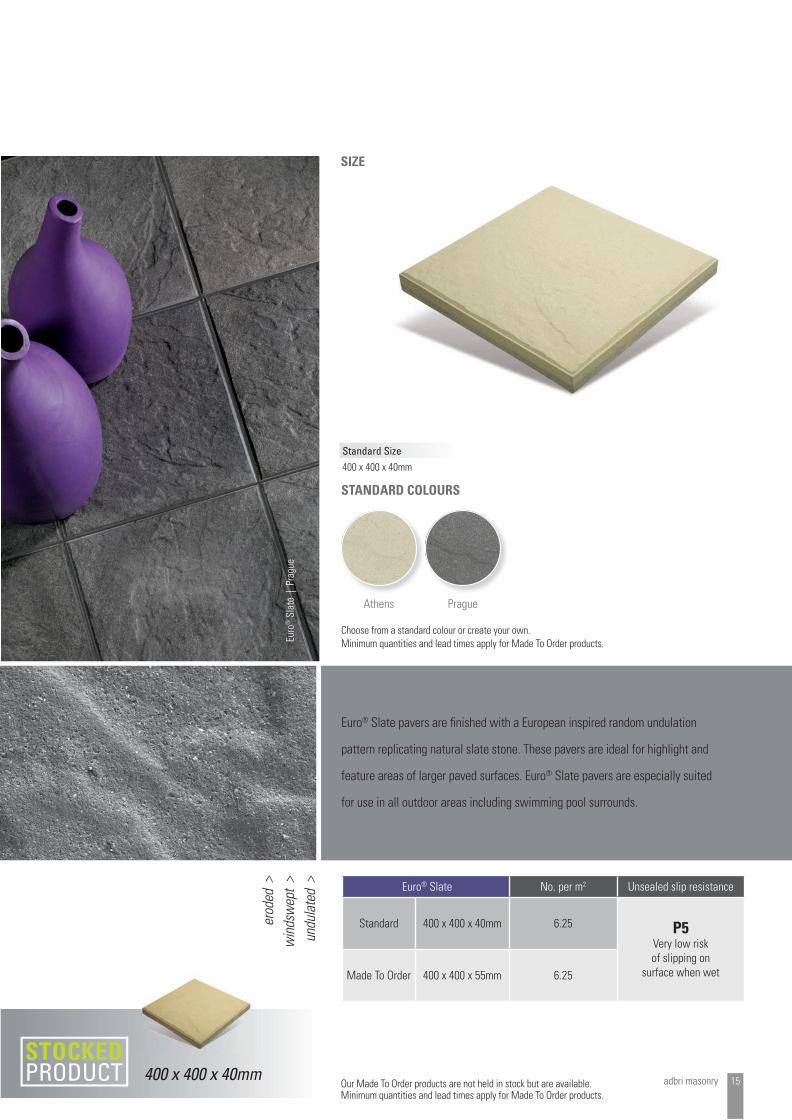
Euro® Slate No. per m2 Unsealed slip resistance
Standard 400 x 400 x 40mm 6.25 P5Very low risk of slipping on
surface when wetMade To Order 400 x 400 x 55mm 6.25
Our Made To Order products are not held in stock but are available.Minimum quantities and lead times apply for Made To Order products.
15adbri masonry
Euro® Slate pavers are �nished with a European inspired random undulation
pattern replicating natural slate stone. These pavers are ideal for highlight and
feature areas of larger paved surfaces. Euro® Slate pavers are especially suited
for use in all outdoor areas including swimming pool surrounds.
Athens Prague
Euro
® S
late
| P
ragu
e
erod
ed >
w
inds
wep
t >
undu
late
d >
Choose from a standard colour or create your own. Minimum quantities and lead times apply for Made To Order products.
400 x 400 x 40mm
Standard Size400 x 400 x 40mm
STANDARD COLOURS
SIZE

Euro® Stone | Riverinaadbri masonry 16
Euro® Stone
Euro® Stone evokes a gentle weathered surface, creating an authentic �nish to add an organic mood to any environment.

Our Made To Order products are not held in stock but are available.Minimum quantities and lead times apply for Made To Order products.
17adbri masonry
Euro
® S
tone
| C
ypru
s
coar
se >
au
then
tic >
ex
folia
te > Euro® Stone No. per m2 Unsealed slip resistance
Standard 400 x 400 x 40mm 6.25
P5Very low risk of slipping on
surface when wet
600 x 400 x 40mm 4.16
Made To Order
300 x 300 x 55mm 11.1
400 x 400 x 30mm 6.25
400 x 400 x 55mm 6.25
600 x 300 x 55mm 5.55
600 x 400 x 30mm 4.17
600 x 400 x 60mm 4.17
600 x 600 x 50mm 2.78
Prague* Riverina Zurich*
Choose from a standard colour or create your own. Minimum quantities and lead times apply for Made To Order products.
A gentle shotblast exfoliates the surface of this permium paver exposing the natural
granite and marble stones within to induce a light sparkle in sun lit areas. Available in an
array of contrasting colour options, utilise Euro® Stone for an injection of light and texture
into paved areas.
400 x 400 x 40mm600 x 400 x 40mm
COLOUR OPTIONS
SIZES
Standard Size400 x 400 x 40mm | 600 x 400 x 40mm*
MTO (Made To Order)300 x 300mm | 400 x 400mm | 600 x 300mm | 600 x 400mm | 600 x 600mm
*Standard colour Prague and Zurich

Euro
® H
oned
| M
ade
to O
rder
Col
ours
adbri masonry 18
Euro® Honed
The near polished, honed �nish of these pavers provide a sleek textural option that meets slip requirements.

19adbri masonry
Euro
® H
oned
| M
ade
to O
rder
Col
ours
wea
ther
ed >
orga
nic
>sm
ooth
>
Adbri Masonry’s Euro® Honed pavers effortlessly combine quality and aesthetics to
deliver a premium architectural pavement solution. The Honed �nish is achieved by
honing the paver surface before a very light shot blast is applied which textures the
surface enough to ensure all slip resistance criteria are met. This creates a premium
smooth paver that is suitable for all external environments including streetscapes,
council projects and paved commercial precincts.
Choose from a standard colour or create your own. Minimum quantities and lead times apply for Made To Order products.
Prague Riverina Zurich
COLOUR OPTIONS
SIZES
Our Made To Order products are not held in stock but are available.Minimum quantities and lead times apply for Made To Order products.
MADE TO ORDER PRODUCT
Euro® Honed No. per m2 Unsealed slip resistance
Made To Order
300 x 300 x 52mm 11.1
P5Very low risk of slipping on
surface when wet
400 x 400 x 27mm 6.25
400 x 400 x 37mm 6.25
400 x 400 x 47mm 6.25
600 x 300 x 52mm 5.55
600 x 400 x 27mm 4.17
600 x 400 x 37mm 4.17
600 x 400 x 57mm 4.17
600 x 600 x 46mm 2.78
MTO (Made To Order)300 x 300mm | 400 x 400mm | 600 x 300mm | 600 x 400mm | 600 x 600mmPlease allow a nominal 3mm off the paver height as this texture is calibrated to ensure consistency.

Euro
® S
hotb
last
| M
ade
to O
rder
Col
ours
adbri masonry 20
Euro® Shotblast
The pitted, abrasive texture of the Euro® Shotblast paver provides additional peace of mind for paved public areas where slip resistance is a concern.

21adbri masonry
Euro
® S
hotb
last
| M
ade
to O
rder
Col
ours
grit
>
text
ural
>
pitte
d >
SIZES
The popular Euro® Shotblast texture is achieved when the pavers are subject to
a moderate shot blast process through a speciality machine. The mildly abrasive
surface exceeds slip requirements making Euro® Shotblast pavers an excellent
selection for external pavements and commercial spaces.
Choose from a standard colour or create your own. Minimum quantities and lead times apply for Made To Order products.
COLOUR OPTIONS
Our Made To Order products are not held in stock but are available.Minimum quantities and lead times apply for Made To Order products.
MADE TO ORDER PRODUCT
Euro® Shotblast No. per m2 Unsealed slip resistance
Made To Order
300 x 300 x 52mm 11.1
P5Very low risk of slipping on
surface when wet
400 x 400 x 27mm 6.25
400 x 400 x 37mm 6.25
400 x 400 x 47mm 6.25
600 x 300 x 52mm 5.55
600 x 400 x 27mm 4.17
600 x 400 x 37mm 4.17
600 x 400 x 57mm 4.17
600 x 600 x 46mm 2.78
MTO (Made To Order)300 x 300mm | 400 x 400mm | 600 x 300mm | 600 x 400mm | 600 x 600mmPlease allow a nominal 3mm off the paver height as this texture is calibrated to ensure consistency.
Prague Riverina Zurich

Euro
® P
olis
hed
| M
ade
to O
rder
Col
our
Euro® Polished | Made to Order Colouradbri masonry 22
Euro® Polished
Surfaces are silky and hard wearing courtesy of a �ne polishing process which expose a brilliant array of inner aggregates giving your project an elegantly �nessed texture.

23adbri masonry
Euro
® P
olis
hed
| M
ade
to O
rder
Col
our
eleg
ant
> �n
esse
d >
sle
ek >
Elegant and hard wearing, Euro® Polished tiles are the perfect choice for internal
commercial �ooring applications such as shopping centres and foyers. Euro® Polished
tiles are honed and then polished to expose the rich colours of the natural aggregates
while taking all surface texture off the tiles so that it is completely smooth.
The Polished tiles are only suitable for indoor applications.
Choose from a standard colour or create your own. Minimum quantities and lead times apply for Made To Order products.
SIZES
COLOUR OPTIONS
Our Made To Order products are not held in stock but are available.Minimum quantities and lead times apply for Made To Order products.
Euro® Polished No. per m2 Unsealed slip resistance
Made To Order
300 x 300 x 52mm 11.1
P5Very low risk of slipping on
surface when wet
400 x 400 x 27mm 6.25
400 x 400 x 37mm 6.25
400 x 400 x 47mm 6.25
600 x 300 x 52mm 5.55
600 x 400 x 27mm 4.17
600 x 400 x 37mm 4.17
600 x 400 x 57mm 4.17
600 x 600 x 46mm 2.78MADE TO ORDER PRODUCT
MTO (Made To Order)300 x 300mm | 400 x 400mm | 600 x 300mm | 600 x 400mm | 600 x 600mmPlease allow a nominal 3mm off the paver height as this texture is calibrated to ensure consistency.
Prague Riverina Zurich

1.1 FLAGSLarge format concrete pavers with a gross plan area greater than 0.08m2,
laid on a bedding course to form a surfacing layer.
1.2 PEDESTRIAN PAVEMENTSPavements subject only to foot traffic. These include footpaths not subject
to vehicle over-run or parking, pedestrian precincts which are completely closed
to vehicle access, residential paths and patios and hard landscaping.
Low Volume - residential paths, paths in public gardens, pavements at schools
or campuses, hard landscape areas, common outdoor areas of residential
buildings. Suburban shopping area pavements, pedestrian areas around
institutional buildings, sporting or recreational areas. Pavements with less than
3000 passes per day.
Medium Volume - Pavements with greater than 3000 and less than 30,000
passes per day.
High Volume - Pavements with high-volume pedestrian traffic exceeding
30,000 passes per day - typically inner-city and major suburban pedestrian malls
and paths.
1.3 PEDESTRIAN AND LIGHT VEHICLE PAVEMENTSPavements carrying pedestrians and light vehicles only. This includes
residential driveways.
1.4 PEDESTRIAN AND COMMERCIAL VEHICLE PAVEMENTSAreas carrying both pedestrians and mixed vehicular traffic. Normally mall
traffic will comprise a mix of light vehicles such as delivery vans with a gross
weight less than 3 tonnes and commercial vehicles such as trucks, emergency
and service vehicles having gross weights of 3 tonnes or more. This category
of pavement includes commercial vehicle crossovers, driveways carrying
occasional truck traffic, footpaths subject to truck overrun or parking, pedestrian
malls accepting service vehicles and commercial vehicles, pedestrian crossing
and lightly trafficked streets.
1.5 LIGHT VEHICLESLight vehicles (LV) are vehicles which when fully-loaded have a gross weight
of less than 3 tonnes. This category includes cars, utilities, delivery vans and
some light 2-axle trucks.
1.6 COMMERCIAL VEHICLESCommercial vehicles (CV) are vehicles having a gross weight of 3 tonnes
or more and which comply with state or commonwealth and dimensions of
normal on-road vehicles. Off-road, industrial, oversize, abnormally loaded or
overloaded vehicles are specifically excluded from this guide. This vehicle
category principally comprises 2 and 3 axle trucks. Trucks having 5 axles or
more should not comprise more than 5% of the commercial vehicles. If data
on the gross weights of the vehicles to be carried on the pavement are not
available then all vehicles fitted with dual tyres and all trucks shall be classed
as commercial vehicles.
INSTALLATION AND SPECIFICATION GUIDE1 - Definitions of pavement types
adbri masonry 24

2 - Euro® Paver System Selection
25adbri masonry
Pavement Type Base Layer Type Bedding Type Euro® Pave Finish Euro® Pave Nominal Size (mm)
Pedestrian
Flexible - Compacted Roadbase Sand
Classic / Slate300 x 300 x 55400 x 400 x 40400 x 400 x 55
600 x 300 x 55600 x 600 x 50
Honed / Shotblast / Stone300 x 300 x 52400 x 400 x 37400 x 400 x 52
600 x 300 x 52600 x 600 x 46
Rigid - Reinforced Concrete Slab
Sand
Classic / Slate300 x 300 x 55400 x 400 x 40400 x 400 x 55
600 x 400 x 40600 x 300 x 55600 x 600 x 50
Honed / Shotblast / Stone300 x 300 x 52400 x 400 x 37400 x 400 x 52
600 x 400 x 37600 x 300 x 52600 x 600 x 46
Mortar
Classic / Slate300 x 300 x 55400 x 400 x 40400 x 400 x 55
600 x 400 x 40600 x 300 x 55600 x 600 x 50
Honed / Shotblast / Polished* / Stone
300 x 300 x 52400 x 400 x 37400 x 400 x 52
600 x 400 x 37600 x 300 x 52600 x 600 x 46
Adhesive
Classic / Slate300 x 300 x 55400 x 400 x 40400 x 400 x 55
600 x 400 x 40600 x 300 x 55600 x 600 x 50
Honed / Shotblast / Polished* / Stone
300 x 300 x 52400 x 400 x 37400 x 400 x 52
600 x 400 x 37600 x 300 x 52600 x 600 x 46
Pods
Classic / Slate 300 x 300 x 55400 x 400 x 40
600 x 400 x 40400 x 400 x 55600 x 600 x 50
Honed / Shotblast / Polished* / Stone
300 x 300 x 52400 x 400 x 37
600 x 400 x 37400 x 400 x 52600 x 600 x 46
Pedestrian and Light Vehicle Areas
Flexible - Compacted Roadbase SandClassic / Slate 300 x 300 x 55 400 x 400 x 55
Honed / Shotblast / Stone 300 x 300 x 52 400 x 400 x 52
Rigid - Reinforced Concrete Slab
MortarClassic / Slate / Stone 300 x 300 x 55 400 x 400 x 40
400 x 400 x 55
Honed / Shotblast / Polished* / Stone 300 x 300 x 52 400 x 400 x 37
400 x 400 x 52
Adhesive
Classic / Slate300 x 300 x 55400 x 400 x 40400 x 400 x 55
600 x 400 x 40600 x 300 x 55600 x 600 x 50
Honed / Shotblast / Polished* / Stone
300 x 300 x 52400 x 400 x 37400 x 400 x 52
600 x 400 x 37600 x 300 x 52600 x 600 x 46
Pedestrian and Commercial Vehicles Rigid - Reinforced Concrete Slab Adhesive
Classic / Slate / Stone 300 x 300 x 55 400 x 400 x 55
Honed / Shotblast / Polished* / Stone 300 x 300 x 52 400 x 400 x 52
*Note: The polished finish is for internal use only.

adbri masonry 26
3 - Euro® Paving System Construction Options
3.1 RIGID PAVEMENT SYSTEMA minimum 20 MPa reinforced concrete base is required for all rigid pavement
construction as per engineers detail and be level to within a tolerance of 3mm
in 3m. This concrete base is to be designed to accommodate all of the loads
independent of the paving units. Do not attempt to use these beddings over
granular base.
3.1.1 Euro® pavers bedded on mortar
- Thoroughly clean and prepare the concrete base surface by removing any
foreign material.
- Dampen concrete base and prepare and apply a slurry bonding mix.
The slurry coat must remain moist to assist mortar bond. Broom the slurry onto
the concrete surface ensuring only sufficient slurry is placed so that it does not
dry out prior to it being covered by the mortar bedding.
- Expansion and control joint locations need to be identified prior to laying.
Control joints need to be provided at intervals of no more than 4m and must
mirror all concrete base control joints.
- Mortar comprising freshly mixed 1:3 cement-sand or 1:3 lime-sand in proportions
by weight (note: proprietary plasticisers and retarders are available to modify
the mortar performance) should be placed and screeded at nominal 15 to 30
mm thick. If thickness greater than 30mm is needed then a levelling screed
comprising of cement and aggregate in the proportions of 1:4 should be used.
The aggregate blend should be 80/20 blend of 5mm stone and sand. The levelling
screed should be cured for 24 hours before Euro® pavers are laid. Alternatively
Mapei Planicrete SP admixture can be used refer Mapei Data Sheet No. 700.
- Considerations for weather conditions need to be taken into account when
screeding mortar bed, to ensure that mix does not dry out. As soon as possible
after screeding mortar, sprinkle dry cement evenly over area where laying
is active. Depending on moisture content of mortar bed, dampening of dry
cement may be required using a water mist spray.
- Tamper down paver to ensure embedment and full adhesion between
Euro pavers, mortar bed and concrete base.
- Where pavers are to have grouted joints, joints should be at least 5mm
and preferably 10mm in width and filled using a non shrink cementitious grout.
Joints of less than 5mm in width may be filled with jointing sand.
- The mortar bed must have stiffened sufficiently prior to filling with a non shrink
cementitious grout. Ensure grout completely fills joints. Immediately after
grouting pavement wipe pavers clean with clean water and a sponge.
- After pavement completed restrict all access for 24 hours.
3.1.2 Euro® pavers bedded on Mapei adhesive
Contact Mapei for your nearest distributor and technical support toll free
1800 652 666.
- Thoroughly clean and prepare the concrete base surface by removing any
residual laitance, curing compounds, oils, greases and dirt by either diamond
grinding, shot blasting, scabbling, scrubbing and/or washing with high
pressure water. This work should be carried out in accordance with AS3958-1
1991’Ceramic Tiles Part 1: Guide to the Installation of Ceramic Tiles’ and AS3958-
2 1992 ‘Ceramic Tiles Part 2: Guide to the Selection of a Ceramic Tiling System.
- Remove Euro® pavers from their pallet and place them upside down and
adjacent to the proposed work area. The back face of the Euro® pavers should
then be wiped clean to remove any dust using a flat sponge and clean water
and allowed to dry.
- Mix the Mapei ‘Drop and Go’ proprietary adhesive in accordance with the
Mapei Data Sheet No. 107.
- Apply the adhesive to the concrete surface with a curved notched trowel (8 to
15 mm notches) using a scraping motion to work the material into good contact
with the surface to be covered. The selection of the correct trowel depends on
the evenness of the substrate. Refer to Mapei data sheet No.107 for further
information on trowel sizes. Do not spread more material than can be covered
with tiles within 5 minutes.
- Lay and lightly twist the Euro® pavers onto the adhesive ensuring 100% full
bedding, ensuring a true surface without lipping and providing the correct joint
spacing between the Euro® pavers. Should the adhesive form a skin, remove
and re-spread the adhesive. Periodically inspect a paver by lifting to ensure
correct coverage.
- Ensure any residue adhesive on the surface of the Euro® paver and between
joints is removed with a wet sponge without delay, otherwise it will harden
and can only be removed by mechanical means.
- After completion of the pavement, restrict all access for pedestrian traffic for
4 hours and light vehicle traffic for 24 hours on dry substrate depending on the
time of year and weather conditions (eg in winter the completed pavement
may have to be left for 5 to 7 days-refer to Mapei data sheet No.107 for
further information).
- Mix the proprietary grout in accordance with the manufacturers instructions to
a fluid consistency.
- Pre wet the area to be grouted with clean water and apply grout with a squeegee
to the grout line and allow to firm up. Without delay, wipe excess grout off the
surface of the Euro® pavers with clean water and a sponge by moving in diagonal
strokes over the joints. Avoid excess clean up water getting into the joints, as it
will weaken the joint. Joints should be full and free of any voids and pits.
- Provide expansion joints at all locations where the Euro® pavers abut
restraining surfaces and provide expansion and control joints in the paved
surface directly over any expansion and control joints that occur in the slab.
- Interior installations shall have control joints at a maximum of 6m x 6m and
exterior applications at 4m x 4m or at centres specified by the engineer. Control
joints shall be raked or cut through the adhesive bed to the concrete base
surface. All control joints shall be filled with an appropriate flexible material.

3.1.3 Euro® pavers bedded on sand
- Base is to be constructed with sufficient cross fall to prevent ponding.
- Finish profile of base must reflect finished paver surface.
- Ensure edge restraints are in place to contain the bedding sand eg
mortar edging, mortared down edge pavers, adjacent structures,
kerbs, channels. Note: edge restraints must also be capable of accepting traffic
loads.
- Thoroughly clean and prepare the concrete base surface by removing
any foreign material.
- Deliver, stockpile and cover using tarpaulins or plastic sheets sufficient
bedding sand for the complete project. Sand should only be drawn from
the stockpile when needed for use that day.
- Place and spread sufficient sand for the planned amount of paving that day
and screed to a nominal uncompacted thickness of 30mm (compacted
thickness of 25mm). Note, it is bad practice to place and spread excessive
amounts of sand prior to laying because of possible exposure to rain or hot
windy conditions. These conditions can result in moisture variations within the
sand causing uneven compaction and poor surface finish. If wet sand results
from rain, it should be removed and replaced with fresh dry sand.
- Rigid screed rails of aluminium, steel or timber are common for straight
surfaces. Flexible plastic or metal tubing can be used when curved surfaces
are required. Note: when the screed rails are removed, the resulting groove
must be filled and screeded ahead of the laying face.
- Place set out string lines as required along the perimeter of the project.
If possible the project should be set out to minimise the amount of edge
cutting of the Euro® pavers.
- Bring Euro® pavers up to the laying face and lay them within the string lines
whilst standing on pavers that have already been laid. Lay pavers so a nominal
2 to 5mm joint is achieved using either a ‘stack bond’ or ‘stretcher bond’
pattern. As laying progresses, uneven joints and non-aligned paving units
should be corrected. Cuts can be placed as the work progresses or separately
on completion of the layed area either way the cuts but should be placed
before the paved surface is compacted.
- Commence initial compaction of the paving using a high-frequency, low
amplitude plate compactor with a plate area of not less than 0.25m2. To protect
the paver surface and provide cushioning cover the metal base with 12mm
plywood or thick rubber-backed carpet square. During compaction the pavers
are vibrated into the bedding sand with some sand forced up into the joints
providing initial lock-up between adjacent units. Initial compaction usually
requires three passes of the plate compactor to be fully effective using
a systematic approach to ensure all areas are compacted.
- Following initial compaction and prior to any traffic, spread joint filling sand
over the pavement and broom back and forward until all joints are filled. Note:
for ease of filling the joints, the joint filling sand and pavement surface should
be dry. Topping up of the joint filling sand may be necessary at some future
time due to self compaction or loss, so the pavement should be monitored
for this condition.
- Sweep the pavement clean removing any debris or accumulation of jointing sand.
- Commence final compaction of the paving with two passes using a systematic
approach to ensure all areas of the pavement are compacted. The process
of brushing sand into the joints and compacting should be repeated as often
as necessary to fill the joints completely.
- Clean up of the site can be carried out once the joints have been totally
filled and final compaction completed. Any chipped or cracked pavers should
be replaced and pavers stained during installation cleaned. Only following
completion of this work should any specified sealants or protective coatings
be applied to the pavers.
3.1.4 Euro® pavers supported on proprietary pods
- Pods are to be supported by rigid concrete base.
- Concrete base is to be constructed with sufficient cross fall to prevent ponding
- Finished profile of concrete base must reflect finished paver surface
- Pods are to be adjusted to ensure that required surface levels are within
acceptable tolerance.
3.2 FLEXIBLE PAVEMENT SYSTEMA compacted granular material base installed to design depth with a layer
of bedding sand installed on top. Design depth shall be based on traffic loads
and CBR of foundation material.
3.2.1 Euro® pavers bedded on sand.
- Trim, compact (if necessary) and prepare the subgrade to the desired set
out and levels. If the subgrade is not excavated to the correct depth, the
required base course will be thinner than required and may result in failure
of the pavement. If over excavation of the subgrade exists, a suitable filling
material that achieves the specified CBR must be placed and compacted to
bring the subgrade up to the desired level.
- Spread the base layer materials (typically crushed rock with a maximum
aggregate size of 20mm) evenly over the subgrade to a depth that will result in
a final compacted thickness complying with the project specification
or engineers’ design. Compaction of roadbase is normally performed using
a heavy plate compactor or vibrating roller.
- If a plate compactor is used, a maximum loose thickness placement layer
of 100mm is recommended. If a roller is used the loose layer thickness can be
increased to 200mm. Oversized or segregated material should be discarded.
- Deliver, stockpile and cover, using tarpaulins or plastic sheets with sufficient
bedding sand for the complete project. Sand should only be drawn from the
stockpile when needed for use that day.
- Place and spread sufficient sand for the planned amount of paving that day and
screed to a nominal uncompacted thickness of 30mm (compacted thickness
of 25mm). Note, it is bad practice to place and conditions. These conditions
can result in moisture variations within the sand causing uneven compaction
and poor surface finish. If wet sand results from rain, it should be removed and
replaced with fresh dry sand.
27adbri masonry

adbri masonry 28
- Rigid screed rails of aluminium, steel or timber are common for straight
surfaces. Flexible plastic or metal tubing can be used when curved surfaces
are required. Note: when the screed rails are removed, the resulting groove
must be filled and screeded ahead of the laying face.
- Place set out string lines as required along the perimeter of the project.
If possible the project should be set out to minimise the amount of edge
cutting of the Euro® pavers.
- Bring Euro® pavers up to the laying face and lay them within the string lines
whilst standing on pavers that have already been laid. Lay pavers so a nominal
2 to 5mm joint is achieved using either a ‘stack bond’ or ‘stretcher bond’
pattern. As laying progresses, uneven joints and non-aligned paving units
should be corrected. Cuts can be placed as the work progresses or separately
on completion of the layed area, either way the cuts but should be placed
before the paved surface is compacted.
- Commence initial compaction of the paving using a high-frequency,
low amplitude plate compactor with a plate area of not less than 0.25m2 To
protect the paver surface and provide cushioning, cover the metal base with
12mm plywood or thick rubber-backed carpet square. During compaction the
pavers are vibrated into the bedding sand with some sand forced up into the
joints providing initial lock-up between adjacent units. Initial compaction
usually requires three passes of the plate compactor to be fully effective using
a systematic approach to ensure all areas are compacted.
- Following initial compaction and prior to any vehicular traffic, spread joint
filling sand over the pavement and broom back and forward until all joints
are filled. Note: for ease of filling the joints, the joint filling sand and pavement
surface should be dry. Topping up of the joint filling sand may be necessary
at some future time due to self compaction or loss, so the pavement should
be monitored for this condition.
- Sweep the pavement clean removing any debris or accumulation
of jointing sand.
- Commence final compaction of the paving with two passes using a systematic
approach to ensure all areas of the pavement are compacted. The process of
brushing sand into the joints and compacting should be repeated as often as
necessary to fill the joints completely.
- Clean up of the site can be carried out once the joints have been totally
filled and final compaction completed. Any chipped or cracked pavers should
be replaced and pavers stained during installation cleaned. Only following
completion of this work should any specified sealants or protective coatings
be applied to the pavers.
3.3 PODSThe use of pod support systems has grown in popularity for balcony and rooftop
applications, and is an ideal way to support pedestrian only loads. Pods allow
the paving units to be supported over the waterproof membranes that are
typically applied in these applications.
Pod supports have the advantage of holding the paving units above the concrete
slab surface, allowing free drainage around the paving units and allowing services
to be installed without any direct load being applied to them. They are also
environmentally friendly as the suspended paving units prevent direct sunlight
from being absorbed by the slab and retaining the heat, and the air flow around
the suspended paving units ensures the slab surface itself remains shaded and
cooled. This in turn reduces air conditioning requirements for these buildings.
Pod support systems also allow you to create a level wearing surface by
supporting the paving units above a slab that may require falls to drainage
outlets to be provided on its surface.
The paving pods are proprietary products. There are two distinct types of paving
pods, the Fixed pod that will uniformly lift the paving units a set distance over
the slab surface, and the Adjustable pods that allow variation in the way the
paving unit is supported.
The Fixed pods are pod systems that have no adjustable parts. They lift the
paving unit a set distance above the slab surface, this distance is determined by
the thickness of the base component of the pod. These units are used to allow
drainage around the units and to remove the requirements for sands, mortars or
adhesives on site, but they can only be used where it will be acceptable for the
paved surface to reflect all the falls on the slab surface.
Adjustable pods are a more intricate system that allows the pods to be stacked
so the paving units can be supported a greater distance above the slab surface,
they also break the support pad into quadrants so that each paving unit
supported by the pod can be supported at a different level or angle. These pod
units are especially advantageous where there is a desire to install services
over a slab surface or where the pavement surface is required to be flat and
level and not to reflect the falls cast into the slab, these benefits are in addition
to the free draining advantage offered by all pod systems.
3.4 BASE COURSE
3.3.1 Rigid System
The base course for a rigid system requires a minimum 20 MPa reinforced
concrete slab construction in accordance with the engineers detail taking into
account the California Bearing Raio (CBR) of the subgrade and excepted traffic
volumes.
3.3.2 Flexible System
The base for a flexible system is normally constructed from unbound granular
crushed rock roadbase with maximum aggregate size of 20mm. The nominated
base thickness must take into account the California Bearing Ratio (CBR)
of the subgrade and expected traffic volumes. Typical properties of the roadbase
material are shown in table 3.1 over page.

TABLE 3.2 - PROPERTIES OF BEDDING AND JOINT SAND
TABLE 3.1 - PROPERTIES OF ROADBASE MATERIAL
Percent Passing
Sleve Size Bedding Sand Joint Filling Sand
9.52mm 100 N/A
4.75mm 90-100 N/A
2.36mm 75-100 100
1.18mm 55-90 75-95
600 microns 35-59 50-80
300 microns 8-30 20-45
150 microns 0-10 5-15
75 microns 0-5 0-5
Roadbase property Size (mm)Percentage Passing Sleeve Size
Class A Class B26.5mm 100 10019.0mm 95-100 95-10013.2mm 78-92 78-929.52mm 68-83 68-834.75mm 44-64 44-642.36mm 29-47 30-48425 microns 12-20 14-2375 microns 2-6 6-10Liquid limit (max) 20 20Plasticity Index (max) 6 6Los Angeles Test % loss (max) 40 40CBR after soaking at 98% - -Modi�ed maximum dry density 100% (min) 80% (min)
29adbri masonry
3.9 MAPEI ADHESIVE ‘DROP AND GO’
TECHNICAL DATA AT 23˚C-50% R-H (Refer Mapei Data Sheet No. 107).
- Classi�cation according to EN 12004 C2F
- Application thickness (mm) 3-20
- Tensile adhesive strength according to EN 1348 (N/mm2)
- Initial 2.0
- After heat ageing 1.9
- After water immersion 1.3
- After freeze-thaw cycles 1.2
- Pot life 60 min
- Open time according to EN 1346 15 min
- Adjustment time 30 min
- Set to light traf�c 4 hours
- Waiting time for grouting 4 hours
- Ready to use 24 hours
3.5 BEDDING SANDBedding sand for either a rigid or �exible system should be a course,
well graded, angular, non plastic, containing no deleterious materials such
as stones, clay lumps or excessive organic material and be similar to washed
sand used as �ne aggregate in concrete. Bricklayers sands, crusher dust, sands
containing salt, beach sand or single-sized sands are not suitable. Typical
properties
of bedding sand are shown in Table 3.2.
3.6 JOINT FILLING SANDJoint �lling sand for either a rigid or �exible system should be �ne, round,
well graded and free from contaminants such as clay and soluble salts which
are likely to cause staining ef�orescence of the paving units. A washed, white
sand is recommended and should, ideally, be kiln-dried. Typical properties of
joint �lling sand are shown in Table 3.2.
3.7 BONDING SLURRY COAT FOR MORTARThe slurry bonding coat is normally a mixture of 1 part GP cement and 1 part
water. Alternatively Mapei Planicrete SP proprietary bonding admixture mixed
with 1 part GP cement can be used (refer Mapei Data Sheet No. 700).
3.8 LEVELLING SCREEDThe levelling screed comprises a 1 GP cement and 4 parts aggregate
in a blend of 80 percent 5mm stone and 20 percent clean sand.

adbri masonry 30
4.1 STANDARD PROFILE400 x 400 x 30
300 x 300 x 55
600 x 300 x 55
4.2 SLIP RESISTANCE CLASSIFICATIONWet Pendulum Test in accordance with AS/NZS 4586: 1999 Appendix A Using
TRRL Rubber in the Pendulum Test.
4.3 ABRASION RESISTANCEAbrasion Resistance Test in accordance with AS/NZS 4456.9:2003
Requirement in accordance with CMAA Document MA44.
4.4 BREAKING LOADBreaking Load Test in accordance with AS/NZS 4456.5:2003.
4.5 DATA SHEETSDue to the wide scope of materials, �nishes and pro�les in the Euro® paver
range, please consult Adbri Masonry for a data speci�cation sheet directly
applicable to your paver selection.
4 - Euro® Paver System Speci�cation
3.10 MORTARMortar generally comprises 1:3 GP cement-clean sand or 1:3 lime-clean sand in
proportions by weight (note: proprietary plasticisers and retarders are available
to modify the mortar performance).
3.11 PODSPaver spacer/drainage pods shall be a proprietary to type to allow
for height adjustment.
3.12 THE USE OF SEALANTSThe use of sealants on the Euro® pavers is not compulsory, but is readily utilised
to satisfy individual requirements. Sealing of Euro® generally relates to one of
three issues, avoiding permanent staining, water penetration and the aesthetic
appeal of the pavement. There are numerous proprietary brands of sealants
on the market and due to their diversity it is vital that consultation with the
manufacturer and applicators be considered prior to sealing pavement.
Environex can supply a range of cleaners and sealers to clean and protect Euro
pavers.
Cleaner- Anti-Eff - A cleaner that will remove ef�orescence.
Sealers:- Tuscan Seal - A penetrating sealer for a natural �nish that will not alter the
look of the paver or reduce slip resistance.
- Concrete and Clay Paver Sealer - An acrylic coating sealer that will darken the
appearance, create a sheen and reduce slip resistance.
Contact Environex for nearest distribution and technical support on 1800 999 196.
For more information call: 1300 365 565www.adbrimasonry.com.au

31adbri masonry
Euro
® S
tone
| P
ragu
e
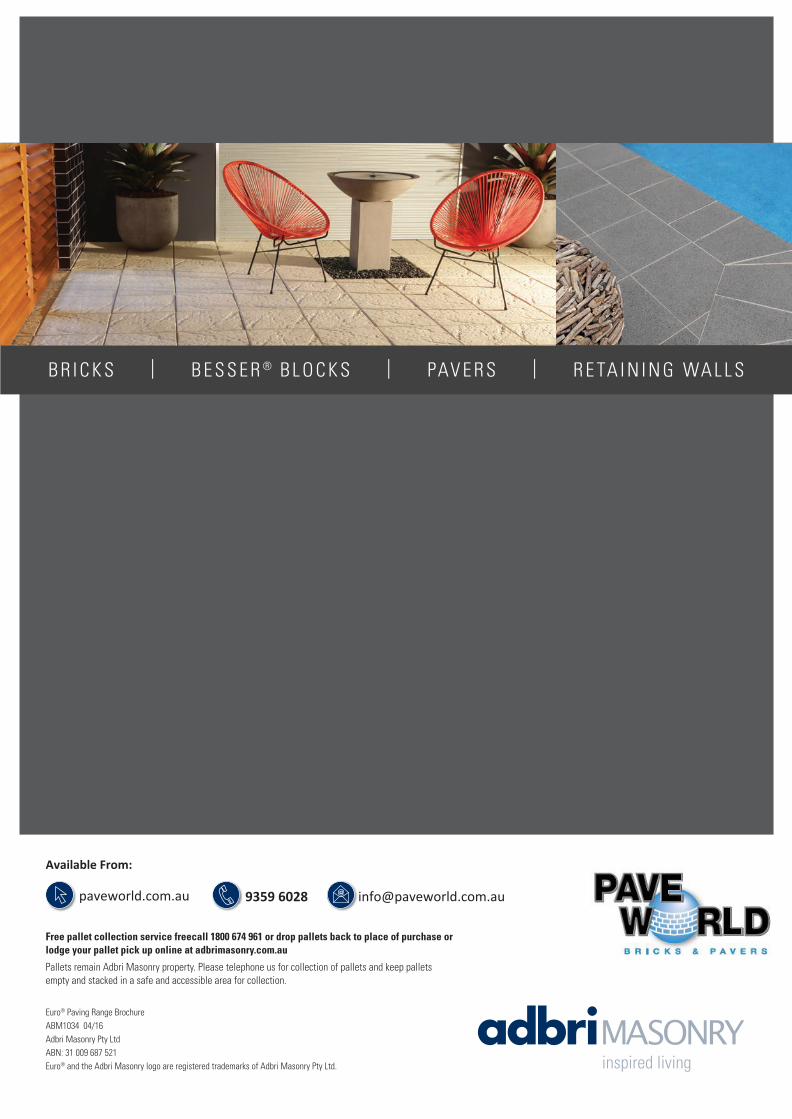
Available From:
paveworld.com.au 9359 6028 [email protected] 1300 365 565 adbrimasonry.com.au
Free pallet collection service freecall 1800 674 961 or drop pallets back to place of purchase or lodge your pallet pick up online at adbrimasonry.com.au
Pallets remain Adbri Masonry property. Please telephone us for collection of pallets and keep pallets empty and stacked in a safe and accessible area for collection.
Euro® Paving Range BrochureABM1034 04/16Adbri Masonry Pty Ltd ABN: 31 009 687 521Euro® and the Adbri Masonry logo are registered trademarks of Adbri Masonry Pty Ltd.
B R I C K S | B E S S E R ® B L O C K S | PAV E R S | R E TA I N I N G WA L L S