Embed Size (px)
Citation preview
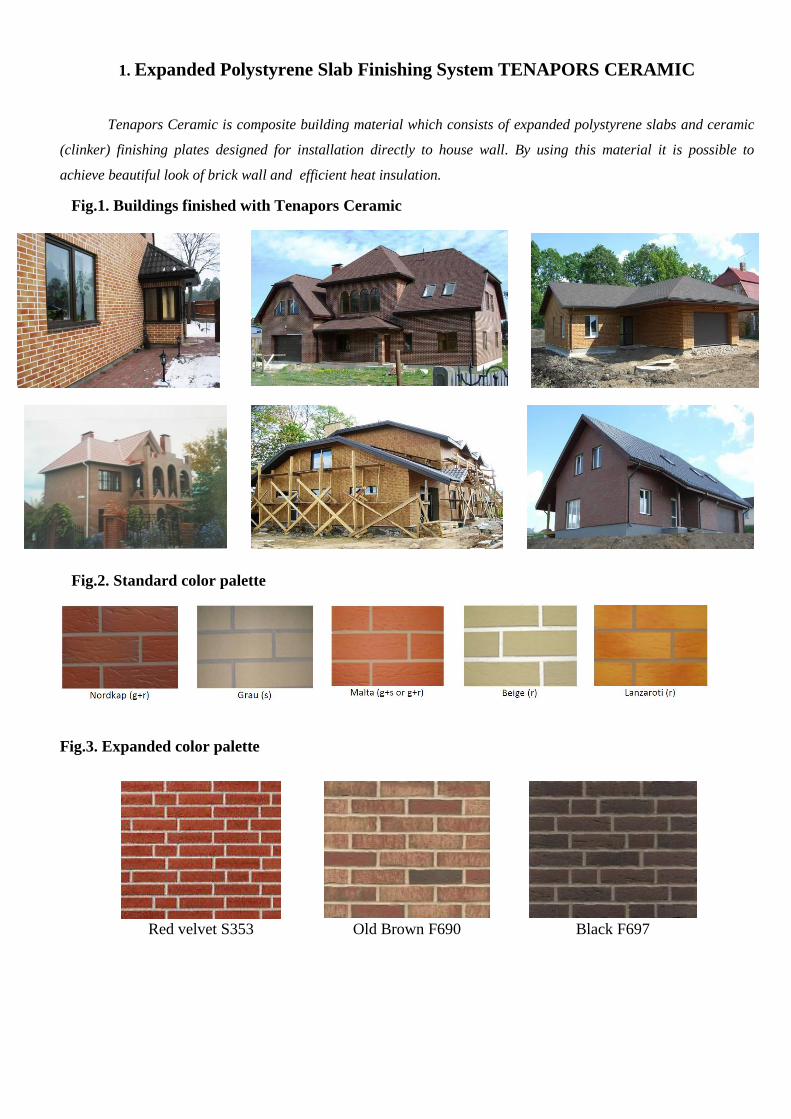
1. Expanded Polystyrene Slab Finishing System TENAPORS CERAMIC
Tenapors Ceramic is composite building material which consists of expanded polystyrene slabs and ceramic
(clinker) finishing plates designed for installation directly to house wall. By using this material it is possible to
achieve beautiful look of brick wall and efficient heat insulation.
Fig.3. Expanded color palette
Red velvet S353 Old Brown F690 Black F697
Fig.1. Buildings finished with Tenapors Ceramic
Fig.2. Standard color palette

Expanded polystyrene slab finishing system TENAPORS CERAMIC provides:
• high-quality brick walls effect,
• efficient heat insulation of buildings,
• original variety of colors for façade finishing,
• can be applied for newly built structures as well for buildings refurbishing
• quick and easy installation to any type of wall (concrete, expanded-clay lightweight concrete,
wooden, etc.),
• ability to perform installation work in any season of a year.
To provide customers with high quality finishing technology and high labor efficiency, expanded
polystyrene slabs finishing system Tenapors Ceramic consists of the following types of assembly parts:
Fig.4. TENAPORS CERAMIC assembly parts
TENAPORS CERAMIC L TENAPORS CERAMIC H TENAPORS CERAMIC C
Copper S352 Red relief F335 Old Red & Purple F664
Old Purple S357 Black & Brown F685 Red & black velvet S356
Tenapors Ceramic system consists of slabs with various geometric sizes and different thickness that are
shown in table below:
Table 1. Linear sizes Tenapors Ceramic assembly parts.
2. Construction principles of Tenapors Ceramic.
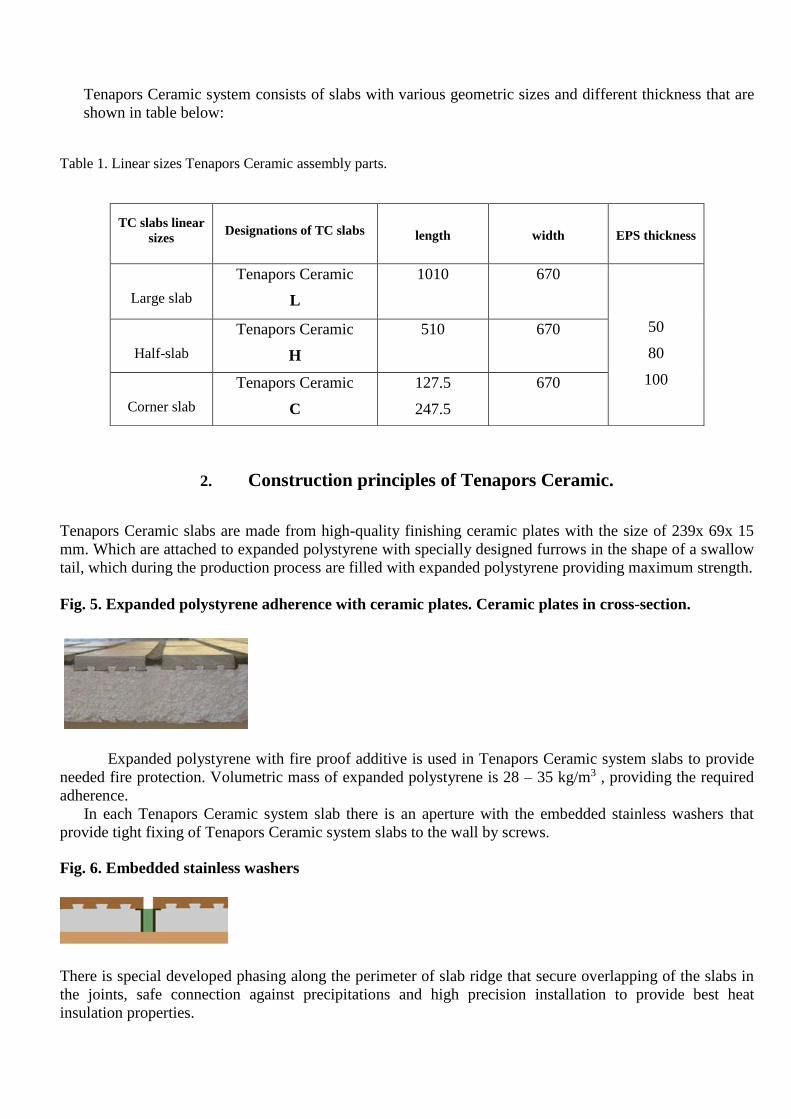
Tenapors Ceramic slabs are made from high-quality finishing ceramic plates with the size of 239x 69x 15
mm. Which are attached to expanded polystyrene with specially designed furrows in the shape of a swallow
tail, which during the production process are filled with expanded polystyrene providing maximum strength.
Fig. 5. Expanded polystyrene adherence with ceramic plates. Ceramic plates in cross-section.
Expanded polystyrene with fire proof additive is used in Tenapors Ceramic system slabs to provide
needed fire protection. Volumetric mass of expanded polystyrene is 28 – 35 kg/m3 , providing the required
adherence.
In each Tenapors Ceramic system slab there is an aperture with the embedded stainless washers that
provide tight fixing of Tenapors Ceramic system slabs to the wall by screws.
Fig. 6. Embedded stainless washers
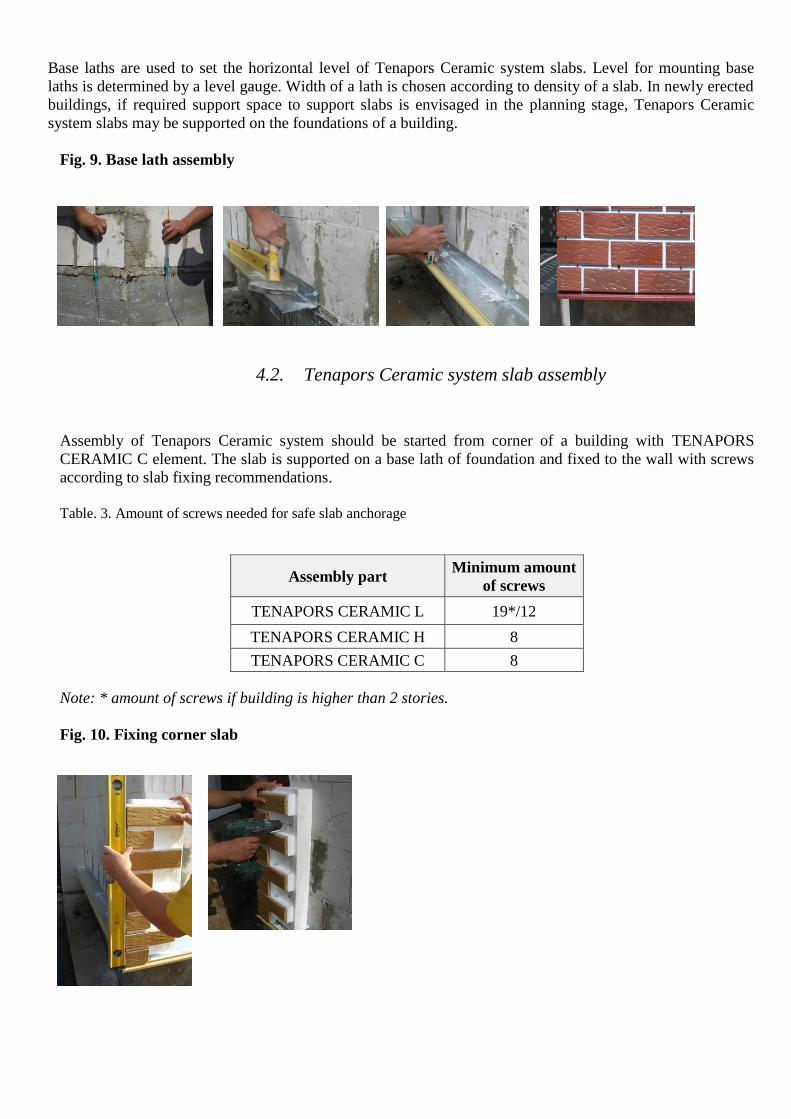
There is special developed phasing along the perimeter of slab ridge that secure overlapping of the slabs in
the joints, safe connection against precipitations and high precision installation to provide best heat
insulation properties.
TC slabs linear
sizes Designations of TC slabs
length
width
EPS thickness
Large slab
Tenapors Ceramic
L
1010 670
50
80
100
Half-slab
Tenapors Ceramic
H
510 670
Corner slab
Tenapors Ceramic
C
127.5
247.5
670
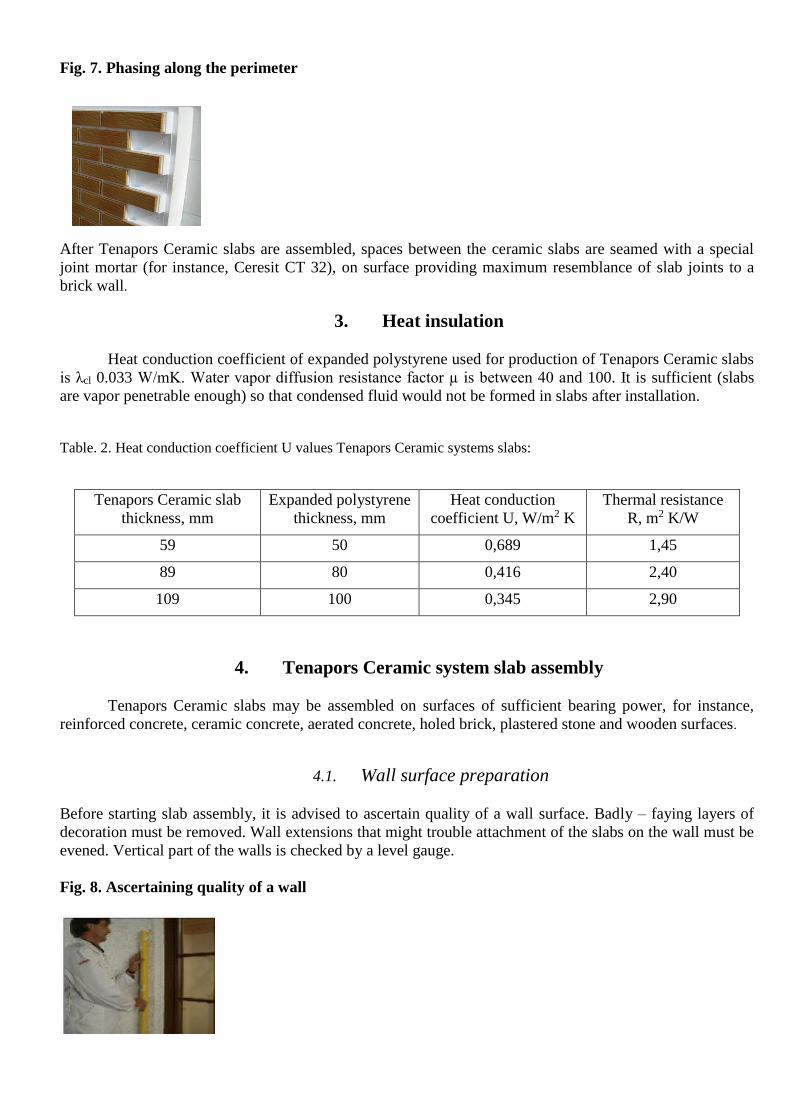
Fig. 7. Phasing along the perimeter
After Tenapors Ceramic slabs are assembled, spaces between the ceramic slabs are seamed with a special
joint mortar (for instance, Ceresit CT 32), on surface providing maximum resemblance of slab joints to a
brick wall.
3. Heat insulation
Heat conduction coefficient of expanded polystyrene used for production of Tenapors Ceramic slabs
is λcl 0.033 W/mK. Water vapor diffusion resistance factor µ is between 40 and 100. It is sufficient (slabs
are vapor penetrable enough) so that condensed fluid would not be formed in slabs after installation.
Table. 2. Heat conduction coefficient U values Tenapors Ceramic systems slabs:
Tenapors Ceramic slab
thickness, mm
Expanded polystyrene
thickness, mm
Heat conduction
coefficient U, W/m2 K
Thermal resistance
R, m2 K/W
59 50 0,689 1,45
89 80 0,416 2,40
109 100 0,345 2,90
4. Tenapors Ceramic system slab assembly
Tenapors Ceramic slabs may be assembled on surfaces of sufficient bearing power, for instance,
reinforced concrete, ceramic concrete, aerated concrete, holed brick, plastered stone and wooden surfaces.
4.1. Wall surface preparation
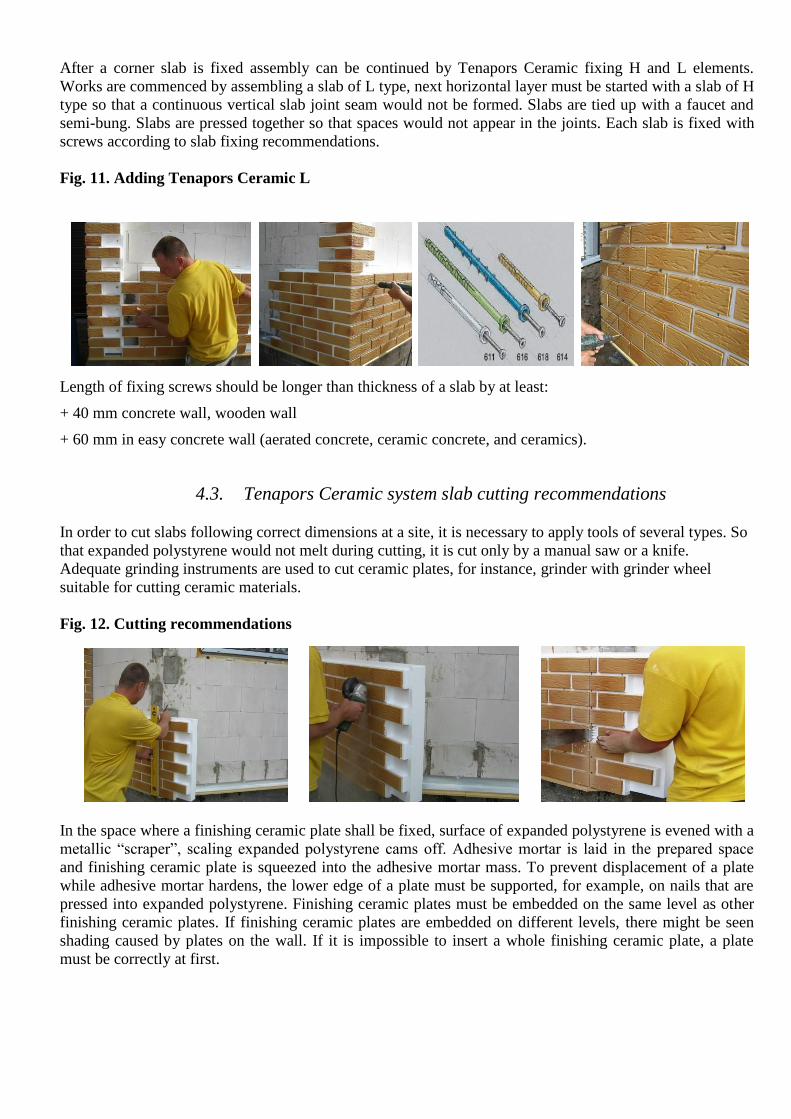
Before starting slab assembly, it is advised to ascertain quality of a wall surface. Badly – faying layers of
decoration must be removed. Wall extensions that might trouble attachment of the slabs on the wall must be
evened. Vertical part of the walls is checked by a level gauge.
Fig. 8. Ascertaining quality of a wall
Base laths are used to set the horizontal level of Tenapors Ceramic system slabs. Level for mounting base
laths is determined by a level gauge. Width of a lath is chosen according to density of a slab. In newly erected
buildings, if required support space to support slabs is envisaged in the planning stage, Tenapors Ceramic
system slabs may be supported on the foundations of a building.
Fig. 9. Base lath assembly
4.2. Tenapors Ceramic system slab assembly
Assembly of Tenapors Ceramic system should be started from corner of a building with TENAPORS
CERAMIC C element. The slab is supported on a base lath of foundation and fixed to the wall with screws
according to slab fixing recommendations.
Table. 3. Amount of screws needed for safe slab anchorage
Assembly part Minimum amount
of screws
TENAPORS CERAMIC L 19*/12
TENAPORS CERAMIC H 8
TENAPORS CERAMIC C 8
Note: * amount of screws if building is higher than 2 stories.
Fig. 10. Fixing corner slab
After a corner slab is fixed assembly can be continued by Tenapors Ceramic fixing H and L elements.
Works are commenced by assembling a slab of L type, next horizontal layer must be started with a slab of H
type so that a continuous vertical slab joint seam would not be formed. Slabs are tied up with a faucet and
semi-bung. Slabs are pressed together so that spaces would not appear in the joints. Each slab is fixed with
screws according to slab fixing recommendations.
Fig. 11. Adding Tenapors Ceramic L
Length of fixing screws should be longer than thickness of a slab by at least:
+ 40 mm concrete wall, wooden wall
+ 60 mm in easy concrete wall (aerated concrete, ceramic concrete, and ceramics).
4.3. Tenapors Ceramic system slab cutting recommendations
In order to cut slabs following correct dimensions at a site, it is necessary to apply tools of several types. So
that expanded polystyrene would not melt during cutting, it is cut only by a manual saw or a knife.
Adequate grinding instruments are used to cut ceramic plates, for instance, grinder with grinder wheel
suitable for cutting ceramic materials.
Fig. 12. Cutting recommendations
In the space where a finishing ceramic plate shall be fixed, surface of expanded polystyrene is evened with a
metallic “scraper”, scaling expanded polystyrene cams off. Adhesive mortar is laid in the prepared space
and finishing ceramic plate is squeezed into the adhesive mortar mass. To prevent displacement of a plate
while adhesive mortar hardens, the lower edge of a plate must be supported, for example, on nails that are
pressed into expanded polystyrene. Finishing ceramic plates must be embedded on the same level as other
finishing ceramic plates. If finishing ceramic plates are embedded on different levels, there might be seen
shading caused by plates on the wall. If it is impossible to insert a whole finishing ceramic plate, a plate
must be correctly at first.
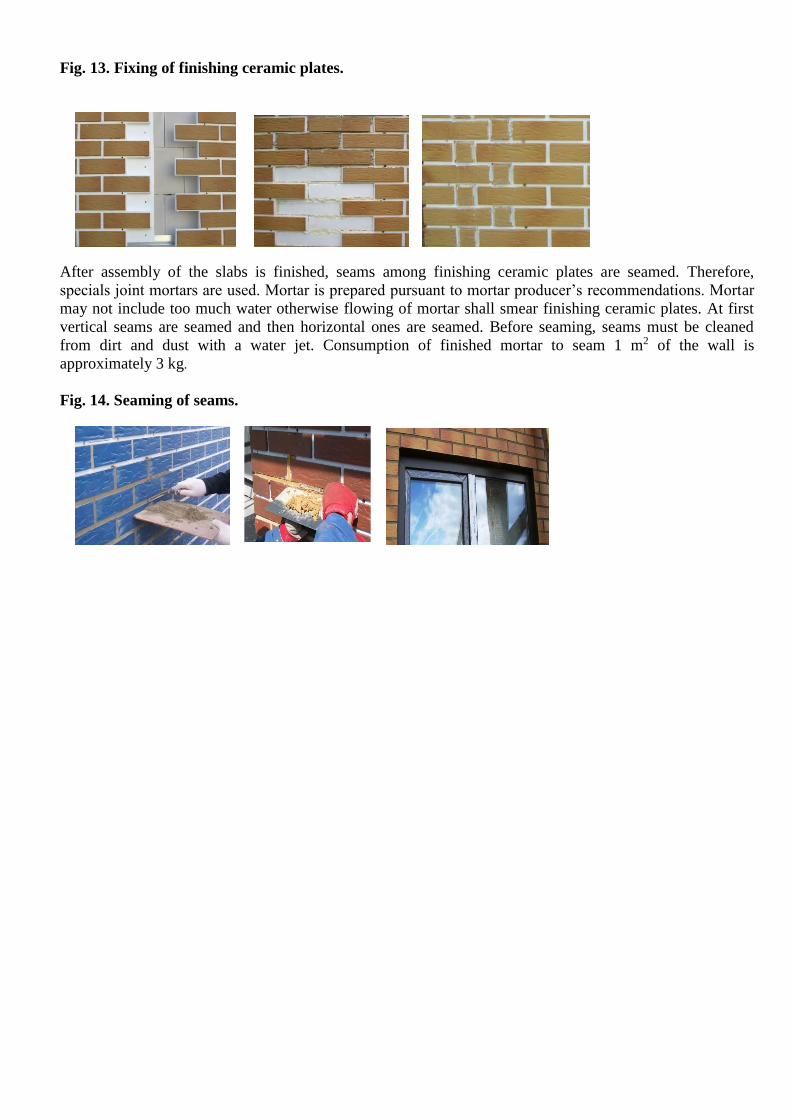
Fig. 13. Fixing of finishing ceramic plates.
After assembly of the slabs is finished, seams among finishing ceramic plates are seamed. Therefore,
specials joint mortars are used. Mortar is prepared pursuant to mortar producer’s recommendations. Mortar
may not include too much water otherwise flowing of mortar shall smear finishing ceramic plates. At first
vertical seams are seamed and then horizontal ones are seamed. Before seaming, seams must be cleaned
from dirt and dust with a water jet. Consumption of finished mortar to seam 1 m2 of the wall is
approximately 3 kg.
Fig. 14. Seaming of seams.
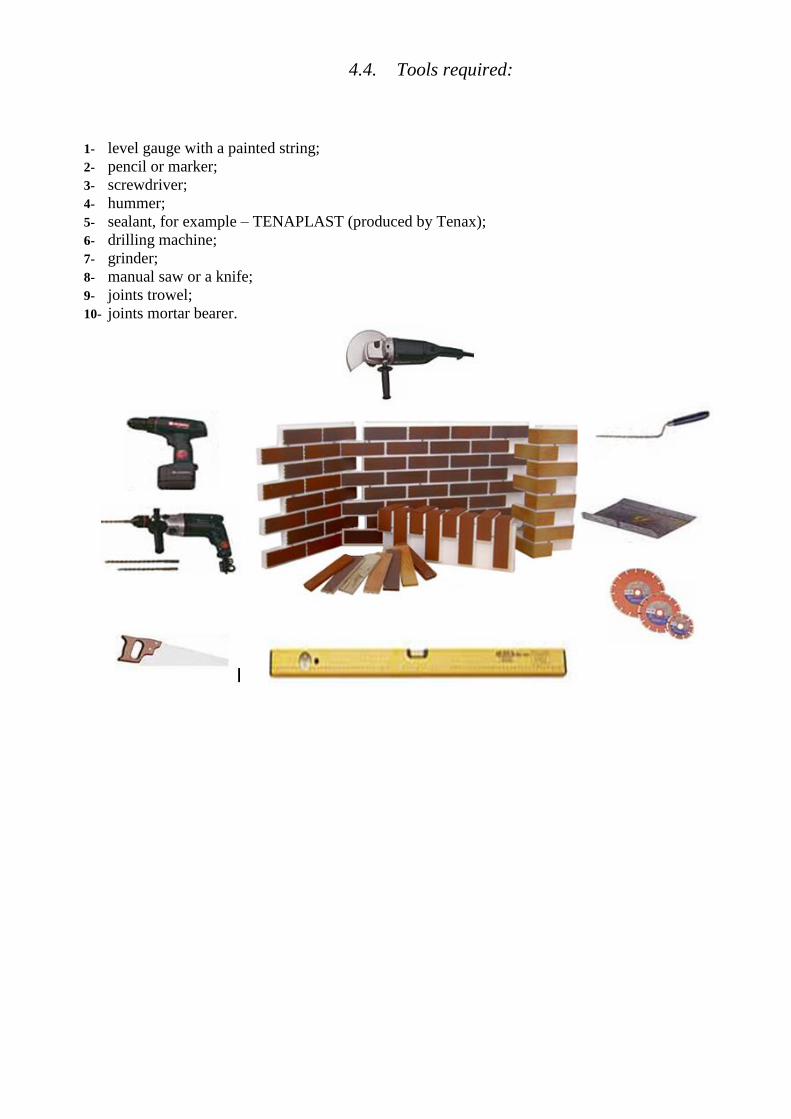
4.4. Tools required:
1- level gauge with a painted string;
2- pencil or marker;
3- screwdriver;
4- hummer;
5- sealant, for example – TENAPLAST (produced by Tenax);
6- drilling machine;
7- grinder;
8- manual saw or a knife;
9- joints trowel;
10- joints mortar bearer.