Embed Size (px)
Citation preview


EPIK APPLICATION FORM INSTRUCTIONS
3
For tertiary education, list all of the institutions in the order attended.
→ Major Information: Put your primary academic focus or
concentration (major) here. Do not list any specific classes.
→ Double Major: If you were a double major, list both majors. For
example: English/History, etc.
→ Overall Grade: Put your final or current GPA, percentage (ex.
57%), or honors grade (ex. 2:1) in this space. You must show the
grade on your school’s scale (ex. 3.2/4.0 or 8.9/12.0). For applicants
whose grade is a percentage or in a different format put your overall
grade as listed by your school (ex. 65% or 2:1, or etc.).
→ Diploma Information: It is important for us to know when you will
receive your physical diploma. If you already possess your diploma,
please leave this section blank. If you are in the last semester at
your university, contact your registrar’s office and obtain the
approximate date of when you will receive the diploma.
If there are further listings that do not fit in the rows provided for either
section above, check the box at the bottom of the relevant section and
add these entries to the addendum, page 6 of the application.
⑧-2 English Teaching
Certification / Valid
Teaching Certification
List all English Teaching Certifications and Valid Teaching
certifications.
→ Title of Certification: Select the appropriate certification from the
drop-down. If requested, list the qualifications in the field below. For
example, Teaching Certification > Elementary English, etc.
→ Program Name: Put the name of the TEFL/TESOL/CELTA provider
or the issuing authority for any certification or license, etc.
→ Issue Date/Expected Date: If the certificate has been issued,
please select “Issue Date” from the drop-down and enter the issue
date below. If the course/certification/etc. is currently in progress,
please select “Expected Date” from the drop-down and enter the
expected issue date below.
→ Total Course Hours: For TEFL/TESOL/CELTA certifications please
list the total number of hours you have completed or will have
completed at the end of the courses. For non-TEFL/TESOL/CELTA
certifications, please leave these boxes empty.
⑨-1 Current Employment Please list your current occupation. If you are currently a student,
please enter “Student” under “Job Title” and your university under the
“Employer” sections. If you have graduated within 6 months, please

EPIK APPLICATION FORM INSTRUCTIONS
4
enter “Recent Graduate.” If you are currently unemployed, enter
“Unemployed.”
★NOTE: If your current position is a teaching position, fill in the
school name, subject and age range boxes. Also, enter your official
contract end date.
⑨-2 Teaching Experience
→List all teaching experience obtained (excluding current teaching
experience listed in 9-1). All requested information should be provided
including for all teaching experience in Korea.
If there are further listings that do not fit in the rows provided, check
the box at the bottom of this section and add these entries to the
addendum, page 6 of the application.
Instructions for Page 3 of the Application Form
⑨-3 Contact Information
for South Korea Teaching
Experience (Including
TaLK)
Enter the requested information for main co-teachers/mentor teachers
or direct supervisors who have worked with you in a close,
supervisory role. List information for each teaching experience in
Korea only.
If there are further listings that do not fit in the rows provided, check
the box at the bottom of this section and add these entries to the
addendum, page 6 of the application.
⑨-4 Previous EPIK
Experience and
Orientation Information
Select an answer for both questions and enter the location and date
of the first EPIK orientation you attended..
⑨-5 Non-Teaching Work
Experience
→List all work experience obtained (excluding current experience
listed in 9-1). All requested information should be provided.
If there are further listings that do not fit in the rows provided, check
the box at the bottom of this section and add these entries to the
addendum, page 6 of the application.
⑩ Salary Level In the row labeled “CURRENT QUALIFICATION”, please select the
box which corresponds to the salary level for which you currently
qualify. In the row labeled “EXPECTED QUALIFICATION”, please
select an “X” in the box which corresponds to the salary level for
which you expect to qualify by the time you would begin the EPIK
contract. Please fill both in, even if the current and expected

EPIK APPLICATION FORM INSTRUCTIONS
5
qualifications are the same.
Current level 3 applicants may still apply, but all applicants MUST
provide proof of level 2 or above qualification no later than 6 weeks
prior to the intended start date.
⑪Joint Applicant or
Dependents
→ Joint Application: If you have a joint applicant, please enter their
name and select the appropriate information.
→ Dependents: If you have any legal dependents accompanying you
who are not joint applicants, please list their names and select the
appropriate information.
If there are further listings that do not fit in the rows provided, check
the box at the bottom of this section.
⑫-1 Placement Preference
Applicants should ultimately be flexible about working anywhere in
Korea. If you have a specific preference for placement location,
please select that location from the drop-down. Final placement in
that location is not guaranteed. If you have no particular preference
for placement location, please select flexible from the drop-down.
⑫-2 Preference for a Later
Start Date
The majority of the positions for the Spring 2019 term are in February.
Late intake positions start in late March and late April. Mark your
preference for whether you wish to be considered for the main, late,
or both main and late intakes.
If applying late for a term or submitting documents too late to secure a
position, please select whether you wish for us to notify you of
application for the following term.
Instructions for Page 4 of the Application Form
⑬ Additional Personal
Information
Please select yes or no for each question. Aside from question 1, if
you answer “yes” to any of the questions, please make sure to explain
in detail in the column on the right side.
→Tattoos and Piercings: If “Yes”, in the space provided, please
indicate where the tattoo or piercing is located. For tattoos, please
give a short description of the image and size of all tattoos.
→Criminal Record: Applicants with any criminal record should contact
the EPIK Office or their recruiting agency to verify their eligibility.
→ Vegetarian and Vegans: EPIK recommends that vegetarians and
vegans research life in Korea and available food products before
arrival
EPIK APPLICATION FORM INSTRUCTIONS
6
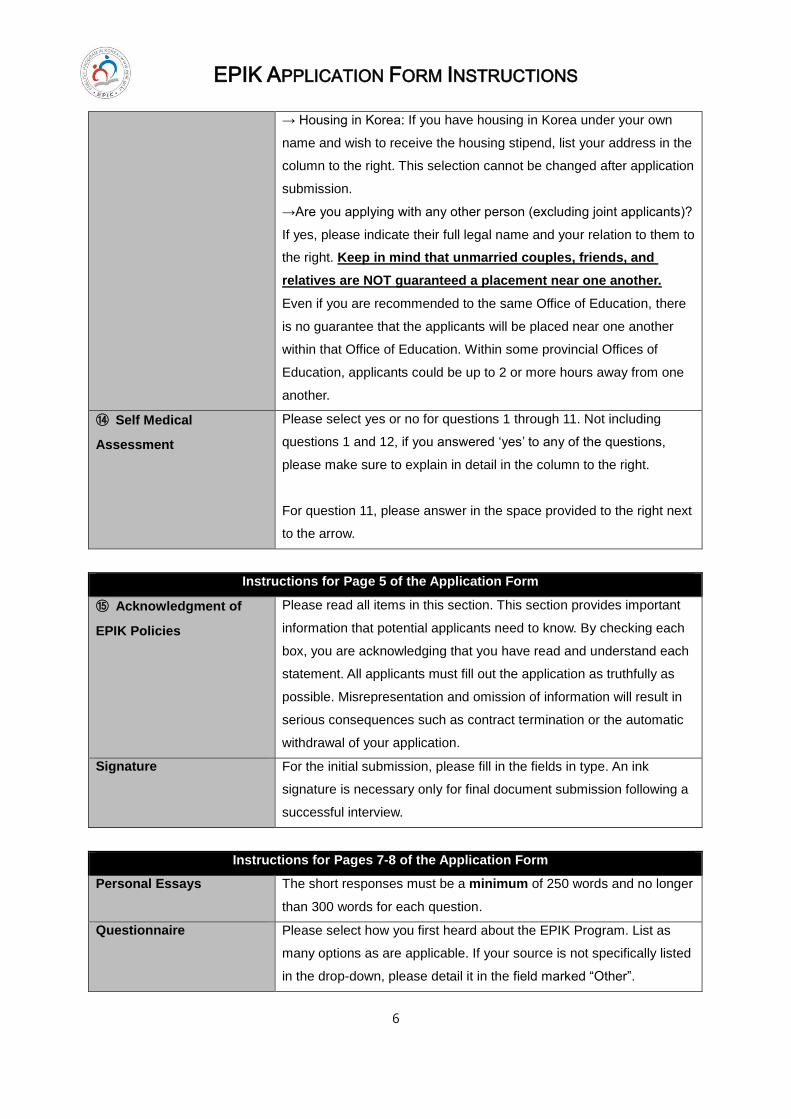
→ Housing in Korea: If you have housing in Korea under your own
name and wish to receive the housing stipend, list your address in the
column to the right. This selection cannot be changed after application
submission.
→Are you applying with any other person (excluding joint applicants)?
If yes, please indicate their full legal name and your relation to them to
the right. Keep in mind that unmarried couples, friends, and
relatives are NOT guaranteed a placement near one another.
Even if you are recommended to the same Office of Education, there
is no guarantee that the applicants will be placed near one another
within that Office of Education. Within some provincial Offices of
Education, applicants could be up to 2 or more hours away from one
another.
⑭ Self Medical
Assessment
Please select yes or no for questions 1 through 11. Not including
questions 1 and 12, if you answered ‘yes’ to any of the questions,
please make sure to explain in detail in the column to the right.
For question 11, please answer in the space provided to the right next
to the arrow.
Instructions for Page 5 of the Application Form
⑮ Acknowledgment of
EPIK Policies
Please read all items in this section. This section provides important
information that potential applicants need to know. By checking each
box, you are acknowledging that you have read and understand each
statement. All applicants must fill out the application as truthfully as
possible. Misrepresentation and omission of information will result in
serious consequences such as contract termination or the automatic
withdrawal of your application.
Signature For the initial submission, please fill in the fields in type. An ink
signature is necessary only for final document submission following a
successful interview.
Instructions for Pages 7-8 of the Application Form
Personal Essays
The short responses must be a minimum of 250 words and no longer
than 300 words for each question.
Questionnaire Please select how you first heard about the EPIK Program. List as
many options as are applicable. If your source is not specifically listed
in the drop-down, please detail it in the field marked “Other”.


EPIK APPLICATION FORM INSTRUCTIONS
8
this lesson. Anything that you will use in the course of your lesson
should be listed here. Do not list URLs or link websites in this
section.
When submitting your application, please attach any handouts,
worksheets, PPTs, etc to the application email. Please do not
attach more than 2 pages. For PPTs, please shrink to fit 1 or 2
pages, and the full PPT is not necessary.
Objectives
For the first box, please give the general goals or objectives for
the class using the prompt sentence provided. You may list
multiple objectives.
In the following boxes, list the Key Expressions and Key
Vocabulary that will be taught in the lesson. These are phrases
or specific words that students will be able to understand and use
by the end of the lesson. For key expressions, a good example
would include a prompt question with different answer patterns.
Introduction (Enter planned duration in minutes on the left.)
For the greeting, this isn’t just a space for you to write ‘Hello’ or
‘How are you?’ It’s from this point where you frame the entire
lesson. Engaging the class, getting them to think right away, and
giving them the lesson focus are what you should try to do in the
greeting. In this section, explain how you plan to grab the
students’ attention.
Following the greeting, review could be an interactive
question/answer activity about what you did with the students
during the last class, or it could be accomplished by showing the
students some of the material that you used previously to spark
their memories. Most importantly, you should review what is
linked to the material that you will cover in the current lesson.
Even if you’re moving from ‘fruit’ to ‘vegetables’, you could still
show them flashcards from the former class and ask, “Do you like
fruit?” and follow it with, “What food don’t you like?” to lead into
vegetables. Describe how you plan to do this in your lesson.

EPIK APPLICATION FORM INSTRUCTIONS
9
Development (Enter planned duration in minutes on the left.)
The development section of your lesson plan will be divided into
three distinct parts: Presentation, Practice, and Production. Each
part should be fully detailed and explained in the provided
spaces. Please avoid listing just bullet-points and relying solely
on outlines. Give full-sentences and explain how each part
relates to the class objectives and covers the key vocabulary and
key expressions. Please also avoid having sections where
students are quietly working on worksheets or handouts. The
lesson should be focused on conversation and having students
speaking and listening. Writing and reading are of course
important, but when using worksheets or handouts, try to make
them interactive.
For the PRESENTATION explain how you will be introducing
students to the new materials (key vocabulary and key
expressions). Will you be using a video clip, a song, flashcards, a
skit, etc. to introduce students to the new concepts? How will you
use these materials in the presentation? How should students be
reacting and how will you check for understanding and
comprehension? The presentation is often teacher-oriented but
do include any student involvement you wish to employ during
the presentation.
In the PRACTICE, students get a chance to practice and use the
concepts (key expressions and key vocabulary) that were
presented in the presentation part. This section should consist of
1 to 2 games or activities where students can interact with the
teacher or other students to practice the new concepts aloud.
Teachers can use this section to check pronunciation and
understanding. Please explain your games or activities in this
section and specifically show how students will use the key
expressions and vocabulary during these.
Finally, for the PRODUCTION, the teacher will take a step back
and allow students to show what they have learned. This part
should also consist of 1 or 2 games or activities, but these should

EPIK APPLICATION FORM INSTRUCTIONS
10
be more focused on having students use the lesson concepts
more independently. They should be asked or tasked to solve
problems or answer independent questions using the key
expressions they have learned. Groups and pairings can be used
during the practice activity, but they really shine in the production
section.
Conclusion (Enter planned duration in minutes on the left.)
For the summary and closing, a good idea here is to go back to
your ‘Presentation’ part and go over what was covered. Whether
it is on the board or in a PPT, the students should be able to say
what the ‘Key Expressions’ were and identify what was achieved
with an appropriate prompt. For example: “What’s your favorite
fruit?” for the student to respond, “My favorite fruit is…”
For the “Evaluation of Objectives” section even a simple/quick
post-assessment is important in order to see how each student
has progressed and in what areas further review or learning may
be necessary. Please describe your plans for evaluating your
students’ progress toward the lesson objectives.
Next Class
Just as ‘Greetings’ isn’t about ‘Hello’, the ‘Closing’ isn’t about
‘Good-bye’. This is the most important part of your next lesson
because it is here where you let your students know what they
will be covering in the next class. After praising the students for
their performance during today’s class, you should tell them if
they will be continuing with more work on the day’s topic in the
next class, or if they will be moving on to something different. If it
is different, now would be a good time to see how much prior
knowledge your students have by eliciting some of the
vocabulary you might be using. For example, saying that you will
be looking at transportation in the next class and getting them to
list, ‘car’, ‘plane’, ‘train’, etc. is a good finish and good preparation
for the next lesson.

EPIK APPLICATION FORM INSTRUCTIONS
11
Time Conversion Chart
Korea (KST) Seoul
GMT +9 9:00 10:00 11:00 14:00 15:00 16:00 17:00
Australia Sydney
GMT +10 10:00 11:00 12:00 15:00 16:00 17:00 18:00
Canada Vancouver GMT –8
16:00 17:00 18:00 21:00 22:00 23:00 24:00
Canada Toronto GMT –5
19:00 20:00 21:00 24:00 1:00 2:00 3:00
Ireland Dublin GMT
24:00 1:00 2:00 5:00 6:00 7:00 8:00
New Zealand Auckland GMT +12
12:00 13:00 14:00 17:00 18:00 19:00 20:00
South Africa Cape Town
GMT+2 2:00 3:00 4:00 7:00 8:00 9:00 10:00
England London
GMT 24:00 1:00 2:00 5:00 6:00 7:00 8:00
U.S.A. Pacific
GMT –8 16:00 17:00 18:00 21:00 22:00 23:00 24:00
U.S.A. Mountain GMT –7
17:00 18:00 19:00 22:00 23:00 24:00 1:00
U.S.A. Central GMT –6
18:00 19:00 20:00 23:00 24:00 1:00 2:00
U.S.A. Eastern GMT –5
19:00 20:00 21:00 24:00 1:00 2:00 3:00
Note that all times are in standard time and do NOT reflect Daylight saving time.

stephenseifert May 24, 2015
How to Make the Best ESL Lesson Plans with a PPP Templatefluentu.com/blog/educator-english/esl-lesson-plan-template/
Want your students to be enthused, energetic learners?
Then I’ve got a secret for you.
It’s all in the lesson plan.
ESL lesson plans are the cornerstone to teaching.
What goes into a well-developed lesson plan is an essential part of the classroom experience.
The material is just as important as your structure, giving your students an optimal learning environment.
So how do you build an awesome lesson plan?
We’re glad you asked! Following the presentation, practice and production (PPP) template will help keep you on track, deliver new material effectively andmost importantly, help your students build new English skills and confidence.
What Makes an ESL Lesson Plan Exceptional?
Relevant material
Keeping your ESL lesson plans relevant is the golden rule for lesson plan success. Relevant material is often overlooked by new and veteran teachersalike. The importance you put on getting to know your students is essential in every stage of the lesson plan format.
Taking a few moments to gauge your student’s level, their interests, hobbies, work and home life will make developing your lesson plan easier. Plus, yourstudents will stay engaged in the material if it’s relatable to their lives.
Clear aims and objectives
First things first, what are your aims and objectives? Setting clear aims and objectives is the best way to begin your brainstorming. Having a goodunderstanding of your main goal for the lesson (aims) and how you propose to reach that goal (objectives) will undoubtedly help in your lesson plandevelopment.
Share aims and objectives
It’s also a great idea to share your aims and objectives with your students, letting them know exactly what they will accomplish and the process they willundertake to get there. Communication with your class is very important.
Grading
The ESL concept of grading is also an essential part of your lesson plan structure. (Careful, we’re not talking correcting work and giving letter gradeshere—this is a different “grading”). Grading is the concept of climbing a hill, starting off with something easy or relatable to your students and thenclimbing higher in the material, making it more challenging as you ascend.
Put yourself in their shoes
Put yourself in your students’ shoes while you are crafting your amazing lesson plan. Ask yourself, how can I start small and build on each topic I presentto maximize learning?
Grading is a small piece of the ESL lesson plan formula, but when combined with a solid structure, the formula will be nothing less of spectacular for youand your students.
PPP structure
There are a few different strategies out there in the vast landscape of ESL lesson plan templates, but one tends to apex above all others. Presentation,practice and production (PPP) is one of the the most used lesson plan formats in ESL. PPP allows you to develop a structured, graded and time efficientlesson plan that conveys the material in an understandable way for your students.
PPP time pyramid
Developing PPP structure can also be time sensitive. Think about PPP as a pyramid cut into 3 sections. Presentation (P1) will be the tip of the pyramid,practice (P2) is in the middle and production (P3) is the base. If your class is 1 hour long, then your time breakdown will include 15 minutes ofPresentation (P1), 20 minutes of practice (P2) and 25 minutes of production (P3). You can see production has the largest amount of time allocated, sinceit is at the base.
To speak or not to speak
1/7

Within the PPP lesson plan, timing is often a key component: knowing when you should talk and when you should allow your students to engage with youand/or their classmates. One strategy ESL teachers use is marking time limits for each activity in the margins of the lesson plan sheet, giving you an ideaof how long each activity should last.
Presentation: Giving Your Students the Information to SucceedPresentation is the first step in the PPP lesson plan template, and is the most important. This is your time to shine, to convey the information you workedso hard preparing to your eager students. Presentation is the main part of teaching, where you will begin your grading process: presenting the newEnglish material to your class and noting the time you have delegated for your presentation.
Teacher to student talk time
Some call this the actual teaching period, and you will see that in P2-Practice and P3-Production you will teach less and observe more. Presentation timecan vary depending on the time allotted for the class and how well the students pick up the new material. One key aspect to remember is that you will bedoing most of the talking during presentation. Teachers should talk approximately 75% of the time during presentation.
Introducing new material
Introducing new material to your class is why you became a teacher, so remembering relevancy and grading, the first bit of new material should besomething familiar to your students—possibly material discussed in a previous class.
Sample presentation activity
Visuals are extra useful in your introduction. For example, if you are discussing items in the home, you could develop your presentation around photosfrom your home, noting different items associated with vocabulary as well as preposition use. “The toaster is on the counter,” would be a great way tointroduce vocabulary (nouns) with prepositions of place.
Get animated
Remember how boring it was when you had a teacher who only lectured, telling what you need to know with little enthusiasm? Well, don’t be that teacher;break the mold and become animated. Students learn through context, so tell a story or present new material using pictures and other resources thatexcite students to learn more. Peaking interest is essential.
Analyzing
Once introduction is complete, you can begin the analyzing phase of presentation. This is when you let your students discover the material by analyzing itwith a closer eye. You are still in control of your classroom, so keep presenting, but ask questions regarding the new material and make your studentsthink more about what it is they are seeing and hearing.
You can also use this period of presentation to check in with your students, making sure they are understanding the new material by asking them lots ofgreat questions, each one a bit more challenging than the previous.
Excellent presentation techniques:
1. Don’t let your students off the hook so easily. Ask questions that will help them understand the new material and try not to tell them answers,allowing them to work it out with an English thinking mind.
2. Use visuals to stimulate understanding and to get your students enthused about a topic. If you are presenting key places in a city or town,using pictures of your students’ town’s will invoke interest and be relevant to their world.
3. Make presentation of vocabulary an exciting activity. Start with what they know, a bedroom for example, and then break down the vocabularyinside of the bedroom.
2/7
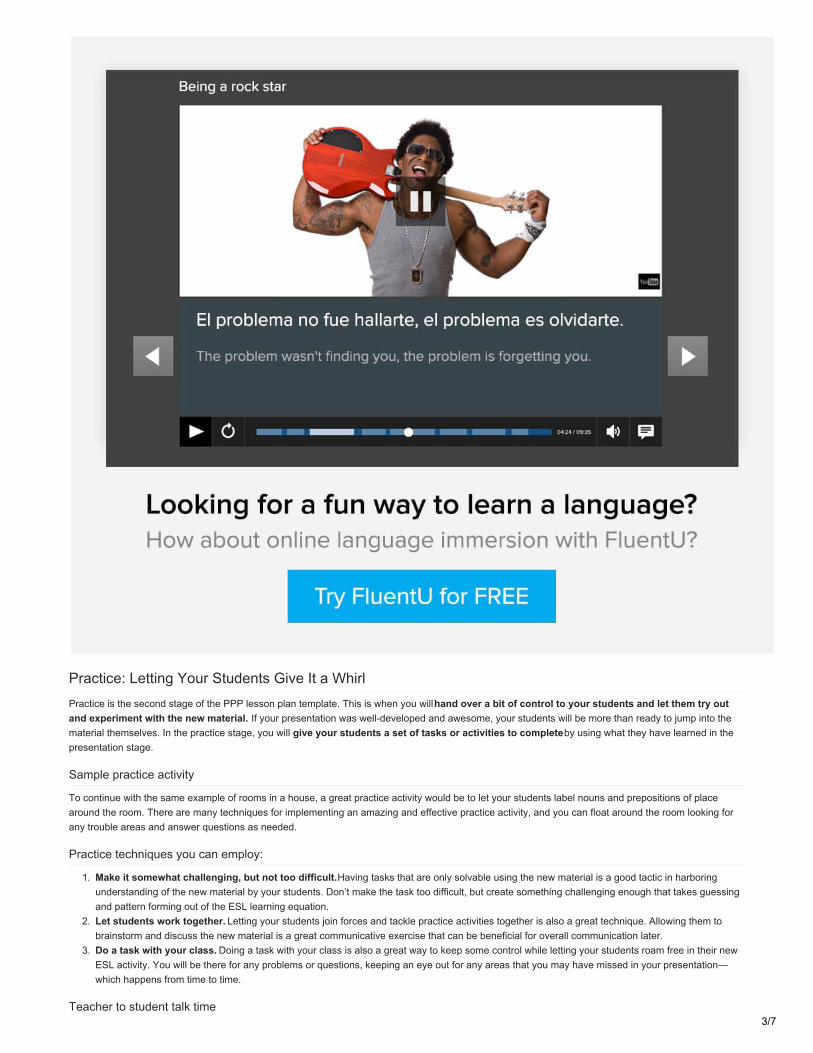
Practice: Letting Your Students Give It a WhirlPractice is the second stage of the PPP lesson plan template. This is when you will hand over a bit of control to your students and let them try outand experiment with the new material. If your presentation was well-developed and awesome, your students will be more than ready to jump into thematerial themselves. In the practice stage, you will give your students a set of tasks or activities to complete by using what they have learned in thepresentation stage.
Sample practice activity
To continue with the same example of rooms in a house, a great practice activity would be to let your students label nouns and prepositions of placearound the room. There are many techniques for implementing an amazing and effective practice activity, and you can float around the room looking forany trouble areas and answer questions as needed.
Practice techniques you can employ:
1. Make it somewhat challenging, but not too difficult. Having tasks that are only solvable using the new material is a good tactic in harboringunderstanding of the new material by your students. Don’t make the task too difficult, but create something challenging enough that takes guessingand pattern forming out of the ESL learning equation.
2. Let students work together. Letting your students join forces and tackle practice activities together is also a great technique. Allowing them tobrainstorm and discuss the new material is a great communicative exercise that can be beneficial for overall communication later.
3. Do a task with your class. Doing a task with your class is also a great way to keep some control while letting your students roam free in their newESL activity. You will be there for any problems or questions, keeping an eye out for any areas that you may have missed in your presentation—which happens from time to time.
Teacher to student talk time3/7

In the practice stage, the students will do most of the talking, practicing and discussing the new material with you and their classmates. Generally, youwould try to let your students speak 65% of the time, with you jumping in now and again to point out anything new or answer any questions that mayarise.
Transition into practice
A smooth transition into the practice stage is always a good plan, keeping the direction and flow of the lesson moving along without breaking yourstudent’s attention to the material. In one of the above techniques we discussed students and teachers doing tasks together, and this is the optimal wayto make that smooth transition from presentation to practice. Participating with the whole class using small tasks or questions based on the new materialis a good way to make this transition, keeping your students’ focus on the material and task at hand.
Pair practice
After a smooth transition into the practice stage, you can begin pair and group activities, loosening your control on the class. It is important to alwaysmaintain some form of control, ensuring the new material is the topic within the groups and teams while watching for any issues that may arise about thematerial. Putting students in pairs will help them communicate more and learn about their fellow classmates.
Group practice
The same goes for groups, but there can be an added element to group work. Try dividing the class for a competition to make them more eager andenthused to focus on the material. Pair and group work is also a great time for students to learn from one another, letting them discuss and work thingsout as a team is an excellent communicative experience.
Production: Students Take New Material to the Next LevelProduction is the final stage in the PPP ESL lesson plan template, one that can be challenging and rewarding for both you and your students. Theproduction stage is also referred to as the fluency stage, since your students will now be like birds leaving the nest for the first time.
Teacher talk time
In the production stage, teacher talk time is at its lowest—almost nonexistent. Let your students be creative and develop their own work, speaking 90% ofthe time to your meager 10%. It’s important for them to gain confidence with their English voice on their own.
Letting your students loose
After having learned the new material, and then practiced it, now it’s their time to show off their stuff. Most production activities involve writing or speaking,and sometimes both are combined if necessary. This allows your students to build confidence and be creative when using the new material, as it’s solelyin their hands.
Sample production activity
Carrying our example lesson through the final step, you can now let your students craft a short story or presentation involving the many things they havein their own home. They can write a script and present it to the class during production.
Production in pairs
Similar to the practice stage, you can separate your class into pairs or groups for production, but the key thing to remember is that they must become thecreative masters of the material. You release your budding ESL learners into pairs and groups to construct dialogues, monologues, scripted plays and soon. One great pair exercise you can use is to have two students create a script using the new material and then let them act it out in front of the class.
Production in groups
Group production activities can be a bit more intensive, letting groups write and act out short scenes, surely a fun theatrical performance for all.Production is all about the student, so if you are floating around the classroom not receiving many questions, you know your presentation and practicewas well-received.
5 Concepts to Remember When Developing Your Best ESL Lesson Plan1. Know your student’s English level, their interests, profession, hobbies, travel experiences, home life and age. All these things are helpful in any lessonplan development.
2. Know what your students need to learn and understand during the presentation stage in order to be successful in the practice and production stages ofthe PPP ESL lesson plan. Things like vocabulary, grammar rules and relative information on the topic are essential.
3. Think about any problems that may arise during your lesson, at each PPP stage. This is a good strategy for ESL learning, since questions arise oftenand you can be more than prepared to answer them.
4. Develop your lesson plan with material and any other things you may need in mind. Having great material ready to go is not only beneficial for yourstudents, but will save you time and energy later, like during class.
5. Allow time for communicative activities, letting your students engage in conversation with one another. This is why most ESL learners are in theclassroom—to communicate—so let them have a bit of discussion from time to time.
4/7

A great, fun and material-rich lesson will keep your students encouraged to learn more and build their confidence as English speakers.
So for lesson plan success, be sure to construct a well-developed and exciting lesson plan using the PPP template. Good luck, and enjoy!
Stephen Seifert is a writer, editor, professor of English and adventurer. With over 7 years of teaching experience to students worldwide, he enjoys themany aspects of culture and traditions different from his own. Stephen continues his search for writing inspiration, boldly enjoying life to the fullest.
Oh, and One More Thing…If you liked these tips, you’ll love using FluentU in your classroom. FluentU takes real-world videos—like music videos, cartoons, documentaries andmore—and turns them into personalized language learning lessons for you and your students.
It’s got a huge collection of authentic English videos that people in the English-speaking world actually watch on the regular. There are tons of greatchoices there when you’re looking for songs for in-class activities.
You’ll find music videos, musical numbers from cinema and theater, kids’ singalongs, commercial jingles and much, much more.
On FluentU, all the videos are sorted by skill level and are carefully annotated for students. Words come with example sentences and definitions.Students will be able to add them to their own vocabulary lists, and even see how the words are used in other videos.
5/7

For example, if a student taps on the word “brought,” they’ll see this:
Plus, these great videos are all accompanied by interactive features and active learning tools for students, like multimedia flashcards and fun gameslike “fill in the blank.”
6/7

It’s perfect for in-class activities, group projects and solo homework assignments. Not to mention, it’s guaranteed to get your students excited aboutEnglish!
If you liked this post, something tells me that you'll love FluentU, the best way to teach English with real-world videos.
Bring English immersion to your classroom!
7/7