Embed Size (px)
DESCRIPTION
Final portfolio for the second half of semester
Citation preview

City College
Of San Francisco
By:
Guillermo Martinez
Instructor:
Jerry Lum
Spring 2012
ARCH 101 FINAL PORTFOLIO

At the beginning of the second half of the semester I wanted to start developing my craftsmanship a little bit more. I was taking history of architecture at the same time, from that class….
HYPERBOLIC PARABOLIC

I took inspiration from Felix Candela to
develop my own hyperbolic parabolic version.
WAVY ROOF

Experimenting with materials was critical, trying to find the right material to use as skin. A material that was translucent, flexible, and strong enough to withstand the harsh wind currents typical of the area
MATERIALS

The iteration where I got the first idea for my final project was this one. I started getting a glimpse of my intention out on the site. I did not know how I was going to build it though.
BREAKTHROUGH

The space defined by this structure appealed
to me because it felt pretty secure inside as well as a shelter from the elements.
THE SPACE WITHIN

The curvilinear elements are seen from every
angle, the way the different parts of this iteration connect to each other adds to its complexity
ARCHES

This configuration is a repetition of 7 identical
curved, wing-like elements.
The order in which they are arranged is what gives its conplexity.
TOP VIEW

Having the configuration
determined, I proceeded to add the skin to the different elements.
SKIN

The space inside this
iteration feels confined
but with the release
feeling at each end of
the structure, the options
to exit on either side could
be block by some type of
fence of wall.
CANTILEVER

An evolution from the previous work, this last
iteration before taking it to the next step which is constructing it to human scale.
FINAL

In this iteration, the middle segment receives a greater complexity creating a more rigid and appealing aesthetic feel. The added material also provides with much needed structural integrity.
SPINE

This is the middle segment of the full-size construction.
After several days spent researching the materials and tools required, construction began.
AT THE SITE

Although Pvc was not my
choice of material at the
beginning, after a week
of research I found
perfect fittings which
made it a really sound
material to use because it
is flexible ,yet really strong.
PVC
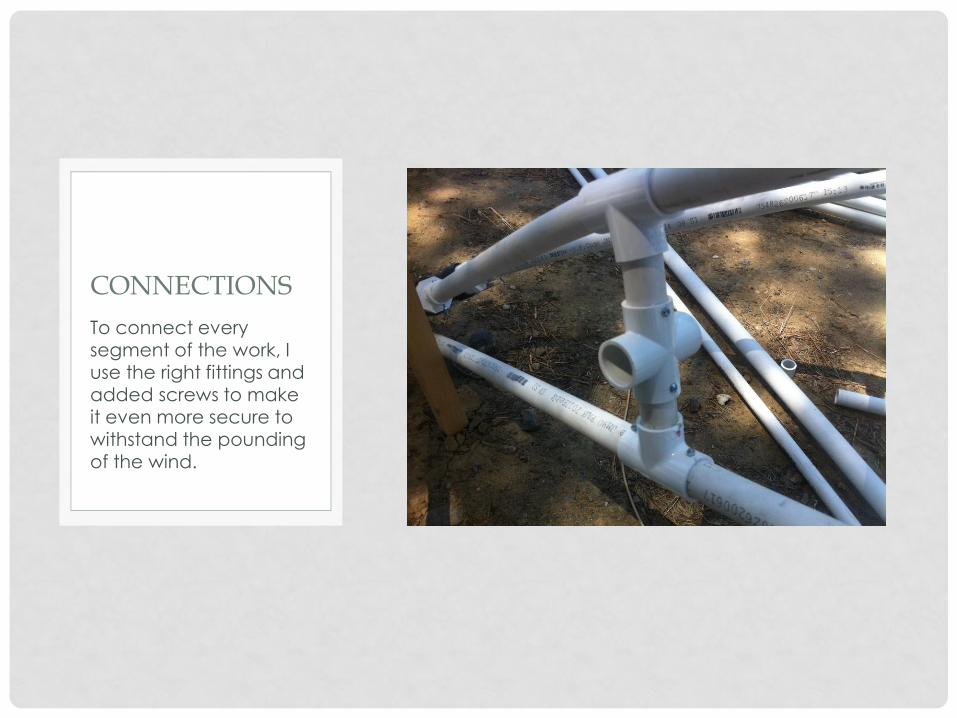
To connect every segment of the work, I
use the right fittings and added screws to make it even more secure to withstand the pounding of the wind.
CONNECTIONS

The tips of my “wings” were difficult to figure out since there was nothing obvious to use.
After experimenting for a while at the store, I found the street grade plastic wyes that I had to adapt to the material and size I used.
WYE
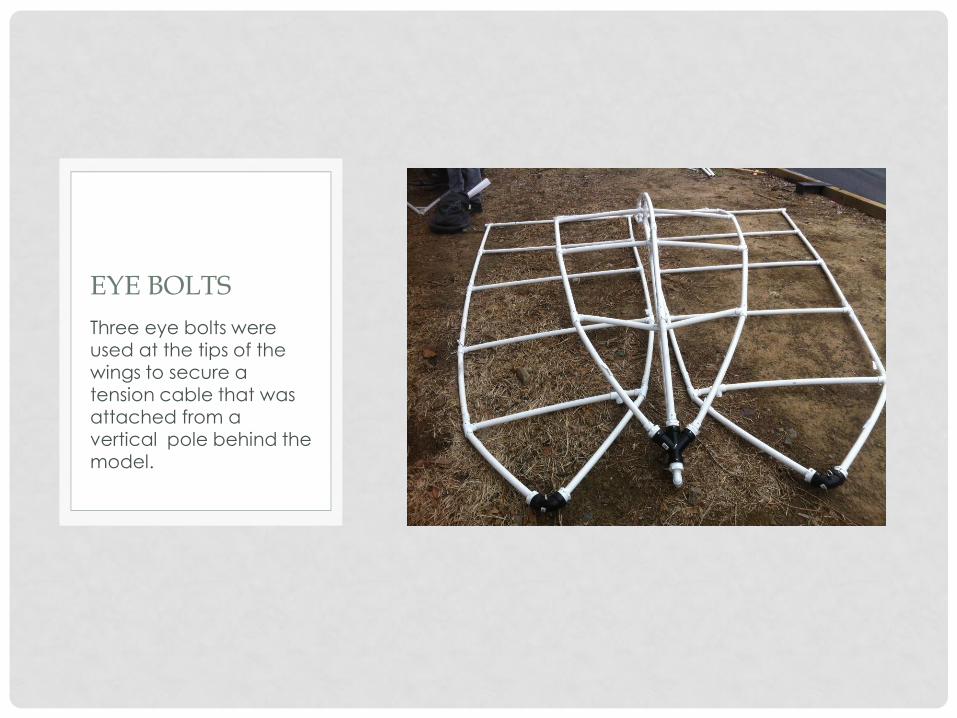
Three eye bolts were used at the tips of the
wings to secure a tension cable that was attached from a vertical pole behind the model.
EYE BOLTS

The horizontal segments were added every two
feet to create the curved shape that the exterior vertical segments acquired.
2 FEET

Here I was trying to figure out a way to
connect the opposite segment to help counterweight the force of the wind…boy is it windy today.
HOW TO CONNECT?

I had to do a lot of thinking about the issue of connecting the last segment, and the deadline is coming soon. After each day I have to lower everything to the floor because the wind is blowing so fiercely.
I THINK I GOT IT
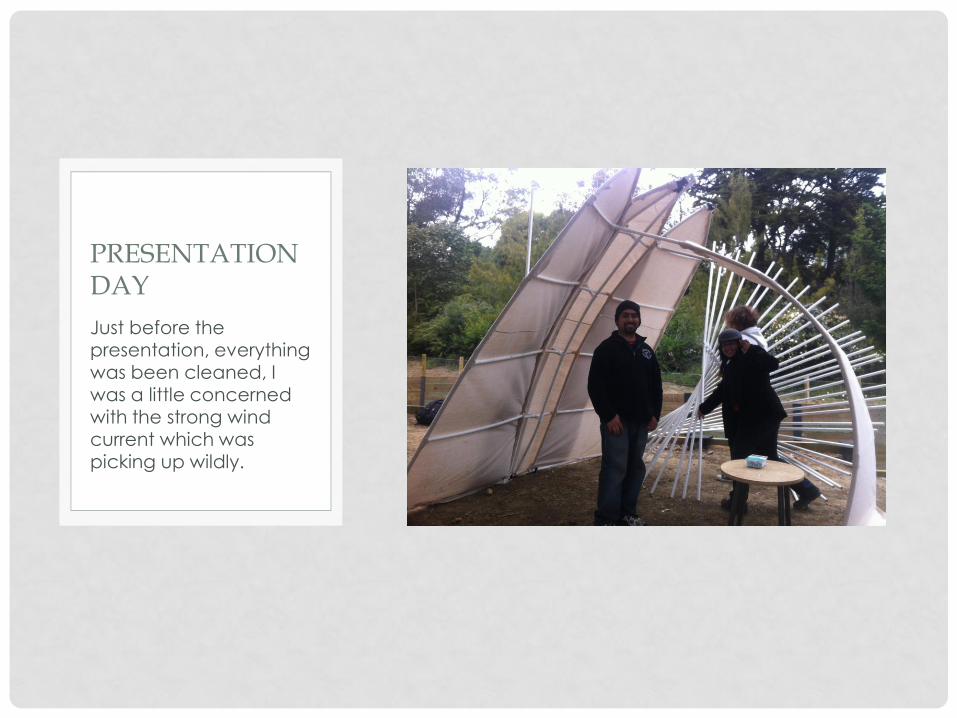
Just before the presentation, everything
was been cleaned, I was a little concerned with the strong wind current which was picking up wildly.
PRESENTATION DAY

Although my work was designed to be responsive design, dealing with the issue of the wind made me a little nervous, but all the way until the end, I stood by my work.
WIND

The different components behaved differently, according with the amount of force that was applied on them from exposure to the wind currents that day.
THEY MOVE!!

Seen from below one can appreciate the way the skeleton was designed and secured.
The way the light filters through the canvas soften the ambient feel of the space inside.
SECURED?
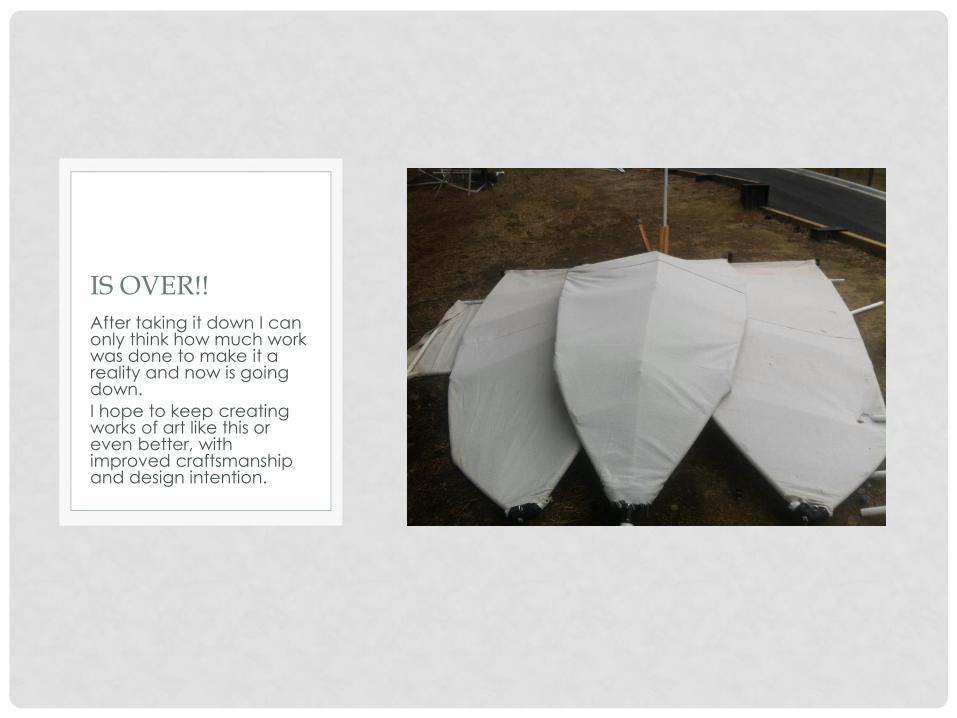
After taking it down I can only think how much work was done to make it a reality and now is going down.
I hope to keep creating works of art like this or even better, with improved craftsmanship and design intention.
IS OVER!!