Embed Size (px)
Citation preview

Fintech OSInstallation Guide
Document Version: 18.1.5067

Table of ContentsIntroduction. . . . . . . . . . . . . . . . . . . . . . . . . . . . . . . . . . . . . . . . . . . . . . . . . . . . . . . . . . . . . . . . . . . . . . . . . . . . . . . . 1
Essential terms . . . . . . . . . . . . . . . . . . . . . . . . . . . . . . . . . . . . . . . . . . . . . . . . . . . . . . . . . . . . . . . . . . . . . . . . . . . 1
How this guide must be used . . . . . . . . . . . . . . . . . . . . . . . . . . . . . . . . . . . . . . . . . . . . . . . . . . . . . . . . . . . . . . 4
About doc-vars . . . . . . . . . . . . . . . . . . . . . . . . . . . . . . . . . . . . . . . . . . . . . . . . . . . . . . . . . . . . . . . . . . . . . . . . . . . 5
Global doc-vars definitions . . . . . . . . . . . . . . . . . . . . . . . . . . . . . . . . . . . . . . . . . . . . . . . . . . . . . . . . . . . . . . . . . . 7
Generally applicable considerations . . . . . . . . . . . . . . . . . . . . . . . . . . . . . . . . . . . . . . . . . . . . . . . . . . . . . . . . . 12
MainDb . . . . . . . . . . . . . . . . . . . . . . . . . . . . . . . . . . . . . . . . . . . . . . . . . . . . . . . . . . . . . . . . . . . . . . . . . . . . . . . . . . . 14
Pre-requisites . . . . . . . . . . . . . . . . . . . . . . . . . . . . . . . . . . . . . . . . . . . . . . . . . . . . . . . . . . . . . . . . . . . . . . . . . . . 14
1st/clean install . . . . . . . . . . . . . . . . . . . . . . . . . . . . . . . . . . . . . . . . . . . . . . . . . . . . . . . . . . . . . . . . . . . . . . . . . . 14
Based on a main FTOS database from another FTOS environment . . . . . . . . . . . . . . . . . . . . . . . . . 15
Based on a new/blank database. . . . . . . . . . . . . . . . . . . . . . . . . . . . . . . . . . . . . . . . . . . . . . . . . . . . . . . . . 15
Upgrade . . . . . . . . . . . . . . . . . . . . . . . . . . . . . . . . . . . . . . . . . . . . . . . . . . . . . . . . . . . . . . . . . . . . . . . . . . . . . . . . 16
PortalWebApp . . . . . . . . . . . . . . . . . . . . . . . . . . . . . . . . . . . . . . . . . . . . . . . . . . . . . . . . . . . . . . . . . . . . . . . . . . . . . 16
Pre-requisites . . . . . . . . . . . . . . . . . . . . . . . . . . . . . . . . . . . . . . . . . . . . . . . . . . . . . . . . . . . . . . . . . . . . . . . . . . . 16
1st/clean install . . . . . . . . . . . . . . . . . . . . . . . . . . . . . . . . . . . . . . . . . . . . . . . . . . . . . . . . . . . . . . . . . . . . . . . . . . 17
Upgrade . . . . . . . . . . . . . . . . . . . . . . . . . . . . . . . . . . . . . . . . . . . . . . . . . . . . . . . . . . . . . . . . . . . . . . . . . . . . . . . . 19
DesignerWebApp . . . . . . . . . . . . . . . . . . . . . . . . . . . . . . . . . . . . . . . . . . . . . . . . . . . . . . . . . . . . . . . . . . . . . . . . . . . 19
Pre-requisites . . . . . . . . . . . . . . . . . . . . . . . . . . . . . . . . . . . . . . . . . . . . . . . . . . . . . . . . . . . . . . . . . . . . . . . . . . . 19
1st/clean install . . . . . . . . . . . . . . . . . . . . . . . . . . . . . . . . . . . . . . . . . . . . . . . . . . . . . . . . . . . . . . . . . . . . . . . . . . 19
Upgrade . . . . . . . . . . . . . . . . . . . . . . . . . . . . . . . . . . . . . . . . . . . . . . . . . . . . . . . . . . . . . . . . . . . . . . . . . . . . . . . . 21
JobServer . . . . . . . . . . . . . . . . . . . . . . . . . . . . . . . . . . . . . . . . . . . . . . . . . . . . . . . . . . . . . . . . . . . . . . . . . . . . . . . . . . 22
Doc-var definitions . . . . . . . . . . . . . . . . . . . . . . . . . . . . . . . . . . . . . . . . . . . . . . . . . . . . . . . . . . . . . . . . . . . . . . 22
Pre-requisites . . . . . . . . . . . . . . . . . . . . . . . . . . . . . . . . . . . . . . . . . . . . . . . . . . . . . . . . . . . . . . . . . . . . . . . . . . . 23
Standard job configuration . . . . . . . . . . . . . . . . . . . . . . . . . . . . . . . . . . . . . . . . . . . . . . . . . . . . . . . . . . . . . . . 23
1st/clean install . . . . . . . . . . . . . . . . . . . . . . . . . . . . . . . . . . . . . . . . . . . . . . . . . . . . . . . . . . . . . . . . . . . . . . . 23
Upgrade . . . . . . . . . . . . . . . . . . . . . . . . . . . . . . . . . . . . . . . . . . . . . . . . . . . . . . . . . . . . . . . . . . . . . . . . . . . . . . 24
MessageBus (OCS) job configuration. . . . . . . . . . . . . . . . . . . . . . . . . . . . . . . . . . . . . . . . . . . . . . . . . . . . . . . 24
1st/clean install . . . . . . . . . . . . . . . . . . . . . . . . . . . . . . . . . . . . . . . . . . . . . . . . . . . . . . . . . . . . . . . . . . . . . . . 24
Upgrade . . . . . . . . . . . . . . . . . . . . . . . . . . . . . . . . . . . . . . . . . . . . . . . . . . . . . . . . . . . . . . . . . . . . . . . . . . . . . . 25
MessageComposer job configuration . . . . . . . . . . . . . . . . . . . . . . . . . . . . . . . . . . . . . . . . . . . . . . . . . . . . . . 26
1st/clean install . . . . . . . . . . . . . . . . . . . . . . . . . . . . . . . . . . . . . . . . . . . . . . . . . . . . . . . . . . . . . . . . . . . . . . . 26
Upgrade . . . . . . . . . . . . . . . . . . . . . . . . . . . . . . . . . . . . . . . . . . . . . . . . . . . . . . . . . . . . . . . . . . . . . . . . . . . . . . 26
MessageBus (OCS) + MessageComposer job configuration . . . . . . . . . . . . . . . . . . . . . . . . . . . . . . . . . . . 27
1st/clean install . . . . . . . . . . . . . . . . . . . . . . . . . . . . . . . . . . . . . . . . . . . . . . . . . . . . . . . . . . . . . . . . . . . . . . . 27
Upgrade . . . . . . . . . . . . . . . . . . . . . . . . . . . . . . . . . . . . . . . . . . . . . . . . . . . . . . . . . . . . . . . . . . . . . . . . . . . . . . 27
DebuggingServer . . . . . . . . . . . . . . . . . . . . . . . . . . . . . . . . . . . . . . . . . . . . . . . . . . . . . . . . . . . . . . . . . . . . . . . . . . . 27
1st/clean install . . . . . . . . . . . . . . . . . . . . . . . . . . . . . . . . . . . . . . . . . . . . . . . . . . . . . . . . . . . . . . . . . . . . . . . . . . 27
DebuggingUi . . . . . . . . . . . . . . . . . . . . . . . . . . . . . . . . . . . . . . . . . . . . . . . . . . . . . . . . . . . . . . . . . . . . . . . . . . . . . . . 28

1st/clean install . . . . . . . . . . . . . . . . . . . . . . . . . . . . . . . . . . . . . . . . . . . . . . . . . . . . . . . . . . . . . . . . . . . . . . . . . . 28

IntroductionThis guide describes how to perform the following operations:
• A 1st/clean install of Fintech OS v18.1.0
• An upgrade to Fintech OS v18.1.0 from older versions down to and including v16.6.0.
This document is not sufficient to successfully upgrade from versions olderthan v16.6.0. You must first upgrade to v16.6.0 using legacy methods (notavailable in here) and then return to this guide.
Go through this introductory chapter all the way to How this guide must be used toget an overview about what needs to be executed for each of the above operations.
To understand and successfully put in practice instructions from this guide you should have at leastthe following IT professional skills:
• Windows Server administration at beginner level
• Network administration at the level required for your network
• IIS administration at beginner level
• SQL Server administration at beginner level
• Raw XML file editing at medium level
This document is provided in 3 formats, all with exactly the same content. Use the format mostsuitable to your need, as follows:
• Use HTML (the .html file) if you want to read this guide on a screen
• Use PDF (the .pdf file) if you want to print this guide
• Use AsciiDoc (the .adoc file) only if you want to compare this guide with one of its previousAsciiDoc versions in order to see exactly what changed
Essential termsFintech OS (a.k.a. FTOS) release [kit]
A FTOS release is a FTOS variant/build recognized by the Fintech OS organization.
1

Important FTOS release properties
Build id
Unique id among all FTOS release; e.g. CORE~RLS~Main~18.1.x b123
Version number
Unique id only among GOLD FTOS releases; e.g. v18.1.0
Implicit validity
Validity as estimated before going through QA; e.g. alpha, beta, RC
Explicit validity
Validity as determined after QA; e.g. GOLD (only releases supported for use inproduction are assigned GOLD validity)
A FTOS release kit is a set of files containing all items necessary to install/upgrade-to saidrelease.
FTOS installation [component]
A FTOS installation is a collection of installed components, including configurations, setup towork together with a sufficient level of independence from other [FTOS] installations.
This guide avoids using the term component in any other sense except that ofFTOS installation component.
Example 1. FTOS installation component examples
• One or more FTOS SQL Server databases
• One or more FTOS IIS web applications
• One or more FTOS Windows services
• One or more Windows / Active Directory accounts created to be used by some otherFTOS installation component(s) (e.g. a FTOS Windows service)
• One or more firewall/router configurations required by some other FTOS installationcomponent(s) (e.g. a route setup to let a FTOS IIS web application access a FTOS SQLServer database)
FTOS installation components are chosen with a level of granularity that ensures successfulupgrade/uninstall without disturbing other [FTOS] installations living side-by-side (e.g. adatabase is a FTOS installation component, not the whole SQL Server instance; a web applicationor Windows service are FTOS installation components, not the whole IIS web site or machine;etc.)
FTOS installation components might be shared with other [FTOS] installations (e.g. you mightaccount certain firewall/routing/SQL Server server-level/IIS server-level configurations asbelonging to multiple [FTOS] installations).
2

It’s your responsibility to identify shared FTOS installation components andensure they’re only uninstalled when they’re no longer used by any [FTOS]installation.
FTOS environment
A FTOS environment is a stable definition and context for a series of FTOS installations. A FTOSinstallation has a single associated - or is said to be installed in a - FTOS environment.
The FTOS environment is defined and its context is created before any installation is realized(i.e. is completed and works) according to environment’s definition. The environment continuesto exist even at times when, temporarily, no associated installation exists.
About the difference between FTOS environment and FTOSinstallation
To better understand this difference, let’s assume you have multiple [2: It’s common tohave multiple FTOS installations for a large variety of reasons. Some organizations needmore than 1 PROD installation. For a given PROD installation, most organizations needmore than 1 UAT installation (e.g. to separate functional tests made by key business usersfrom technical tests made by Operations (e.g. to test some security/networking change or amajor version upgrade for SQL Server or Windows Server)). Some organizations needmore types of installations (DIT, SIT, etc.) than just UAT and PROD. Hopefully it’s obviouswhy more than 1 FTOS installation is commonly needed.] side-by-side UAT (UserAcceptance Testing) FTOS installations beside the PROD (Production) installation. Let’s callUAT1 one of these UAT installations where you perform all final testing for a new FTOSrelease before you deploy it in PROD.
Over time UAT1 will be reinstalled many times (e.g. to test successive FTOS releases) butevery time in a very similar manner (i.e. on the same machines, in the same directories,with the same names for database, services and URLs), the similarity being very desirableto avoid pointless problems (e.g. for a given kind of tests, testers want to access the sameURLs over time). The FTOS environment is this stable definition and context while a FTOSinstallation is what’s actually installed in the environment at a given time.
Servicing operation
Any major operation executed by following this guide, such as: 1st/clean install or upgrade.
Local path
A Windows local path. e.g. C:\Program Files (x86), C:\Windows\winhlp32.exe
UNC path
A Windows local network path (a.k.a. path over a Windows network share) in UNC format. e.g.\\APPSRV02\SharedDocs, \\FILESRV2\Kit\install.exe
3
How this guide must be usedThis document is structured in chapters, each with sections and sub-sections. Dedicated chaptersaddress servicing operations details (e.g. 1st/clean install, upgrade) for all major FTOS installationcomponents.
It’s outside this document’s scope to explain FTOS' general deploymentarchitecure. It’s assumed you know the latter (i.e. you know the FTOS installationcomponents and how they’re related) and you’ve designed or have been handedthe deployment diagram for the particular FTOS environment where you’ll applychanges by following this guide.
Within each chapter, instructions are provided as if the FTOS installation component covered bythe given chapter is the only one that needs to be installed/upgraded in the FTOS environment. Thiswas necessary to provide you with an easy to follow overall document structure but it means youneed to slightly adjust instructions when applying a servicing operation to a FTOS environment as awhole. See the tips below for help on how to do that.
• For a 1st/clean install go through this document in its natural order
• For an upgrade:
◦ Stop/Deactivate all FTOS installation components (e.g. stop & switch tomanual-start Windows services or Web applications) except the FTOSdatabase
◦ Upgrade the FTOS database
◦ Upgrade each FTOS installation component in the order their chapters arelisted in this document but in each chapter skip instructions forstarting/activating the component
◦ After you’ve upgraded all FTOS installation components, go through themin the same order as during upgrade and apply the skipped start/activateinstructions
4

Even though considerable effort has been spent to provide you with a welldesigned document structure and instructions that are as ready to use as possible,this guide is not something to be followed 100% mechanically. Instead, you mustuse it as a basis for developing your Operations runbooks for FTOS and whendoing so you must apply your professional skills (and common sense) to adjust theprovided instructions [4: Your FTOS Operations runbooks should contain muchmore than just slightly adjusted instructions from this guide. Runbooks mustcontain step by step ready to use instructions for your FTOS environment(s) (withreal machine names/IPs, directory/file paths, etc.) including instructions related tothe IT infrastructure surrounding the FTOS environment (e.g. pre-upgrade backup,pre-upgrade suspend and post-upgrade resume monitoring of the FTOSenvironment, disaster recovery instructions in case a change runs into a majorfailure, pre-upgrade suspend and post-upgrade resume access to the FTOSenvironment via firewall rules, etc.] in order to obtain runbooks that can befollowed 100% mechanically in your particular context (or you can automaterunbooks through scripts or DevOps automation server jobs (e.g. Ansible Tower,RunDeck, Jenkins, etc.)).
About doc-varsMany instructions in this guide require you to customize them for your particular FTOSenvironment and then execute the customized result (e.g. customize a command line provided byFTOS by filling in an actual path to an installation directory of your choice or the name/IP of amachine of your choice).
To provide you with the most ready to use instructions, this guide uses so-called documentvariables (a.k.a. doc-vars). Doc-vars are a mechanism to express concise references to somethingthat was previously associated with the referenced variables.
Doc-vars definition and scope
Doc-vars are always defined before they are used and their definition has a scope. With theexception of doc-vars defined in Global doc-vars definitions which apply to the whole guide, allother doc-vars are defined in special sub-sections named "Doc-var definitions" and by default applyonly to the parent section and all its sub-sections.
5
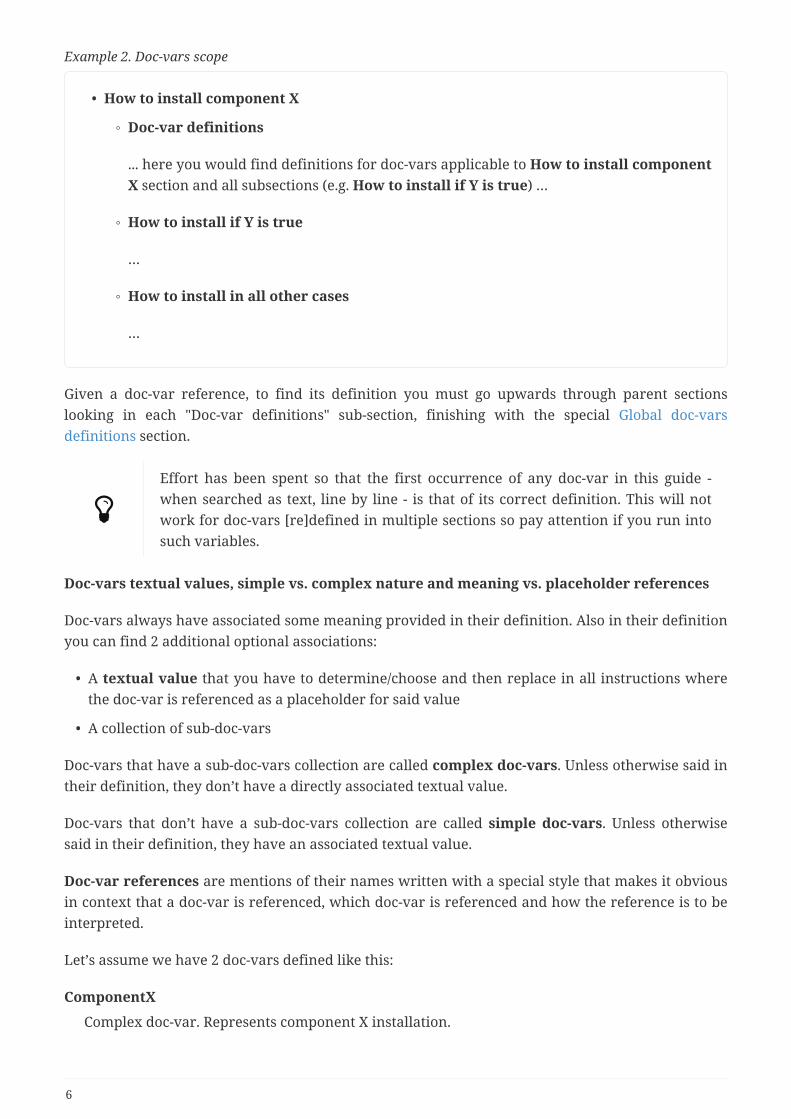
Example 2. Doc-vars scope
• How to install component X
◦ Doc-var definitions
... here you would find definitions for doc-vars applicable to How to install componentX section and all subsections (e.g. How to install if Y is true) …
◦ How to install if Y is true
…
◦ How to install in all other cases
…
Given a doc-var reference, to find its definition you must go upwards through parent sectionslooking in each "Doc-var definitions" sub-section, finishing with the special Global doc-varsdefinitions section.
Effort has been spent so that the first occurrence of any doc-var in this guide -when searched as text, line by line - is that of its correct definition. This will notwork for doc-vars [re]defined in multiple sections so pay attention if you run intosuch variables.
Doc-vars textual values, simple vs. complex nature and meaning vs. placeholder references
Doc-vars always have associated some meaning provided in their definition. Also in their definitionyou can find 2 additional optional associations:
• A textual value that you have to determine/choose and then replace in all instructions wherethe doc-var is referenced as a placeholder for said value
• A collection of sub-doc-vars
Doc-vars that have a sub-doc-vars collection are called complex doc-vars. Unless otherwise said intheir definition, they don’t have a directly associated textual value.
Doc-vars that don’t have a sub-doc-vars collection are called simple doc-vars. Unless otherwisesaid in their definition, they have an associated textual value.
Doc-var references are mentions of their names written with a special style that makes it obviousin context that a doc-var is referenced, which doc-var is referenced and how the reference is to beinterpreted.
Let’s assume we have 2 doc-vars defined like this:
ComponentX
Complex doc-var. Represents component X installation.
6

ComponentX_InstallDir
Simple doc-var. Represents parent doc-var’s installation directory.
The simplest type of doc-var reference is a meaning reference, which points to the meaning of thedoc-var from its definition. If the doc-var has an associated textual value, it can be ignored for thiskind of reference.
A meaning reference can appear anywhere and it’s styled like: ComponentX
Example 3. A more extended meaning reference example
ComponentX is never to be installed on a Windows server that is an Active Directorycontroller. Also, you must ensure ComponentX_InstallDir sits on a drive with at least 100 GB offree space.
The other kind of reference is a placeholder reference, which points to the textual valueassociated with the doc-var and demands you to replace the reference with the textual value. Aplaceholder reference naturally also points to the meaning of the doc-var, helping you betterunderstand the context where it appears.
A placeholder reference is usually embedded in text that you must otherwise use verbatim (suchtext has its own style in a monospaced font) and it’s styled like: ComponentX_InstallDir
Example 4. A more extended placeholder reference example
• Execute in cmd.exe: MD "ComponentX_InstallDir" xcopy.exe /I /S . "ComponentX_InstallDir"
CD /D "ComponentX_InstallDir"
• Assuming the textual value of ComponentX_InstallDir is C:\CompX, the previous instructionsmust be interpreted as:MD "C:\CompX" xcopy.exe /I /S . "C:\CompX"
CD /D "C:\CompX"
Doc-var names
Names for doc-vars that are not sub-doc-vars (i.e. doc-vars that don’t have a parent doc-var) aremade out of only alphanumerical characters (e.g. ComponentX).
Names for doc-vars that are sub-doc-vars are composed from parent doc-var name, followed by anunderscore, followed by their own name made out of only alphanumerical characters (e.g.ComponentX_InstallDir).
Global doc-vars definitions
7

ReleaseKit
Complex doc-var. Represents the FTOS release kit associated with this guide. You must either betold where to find it or you already know if you’re now reading the guide copy found in theFTOS release kit.
ReleaseKit_Dir
Simple doc-var. The local/UNC absolute path of ReleaseKit.Example: c:\kits\Fintech OS\releases\FTOS-CORE-RLS-v18.1.0.0-b123-GOLD
ReleaseKit_Name
Simple doc-var. ReleaseKit_Dir directory name without path.Example: FTOS-CORE-RLS-v18.1.0.0-b123-GOLD
ReleaseKit_VersionNo
Simple doc-var. ReleaseKit version number. Determine its value from ReleaseKit_Name by takingeverything after FTOS-CORE-RLS-v until the 1st -.Example: If ReleaseKit_Name is FTOS-CORE-RLS-v18.1.0.0-b123-GOLD then ReleaseKit_VersionNo is18.1.0.0
TargetInstallation
Simple doc-var. Represents the FTOS installation you’ll service (install/upgrade) by followinginstructions from this guide.
TargetEnvironment
Simple doc-var. Represents the FTOS environment for TargetInstallation.
MainDb
Simple doc-var. Name you choose for the main FTOS database used by TargetEnvironment.
MainDb_OldVersionNo
Simple doc-var. MainDb version number as found before install/upgrade. Determine its value asfollows:
• If you’re installing MainDb based on a new/blank database:
◦ Then: Leave MainDb_OldVersionNo undefined because its value is not needed
◦ Else:
▪ Determine PortalWebApp_OldVersionNo's value
If you restored MainDb from a backup taken from another FTOSenvironment then you’ll need to determinePortalWebApp_OldVersionNo from the other environment
▪ If PortalWebApp_OldVersionNo >= 17.1.5:
▪ Then: Leave MainDb_OldVersionNo undefined because its value is not needed
▪ Else: If PortalWebApp_OldVersionNo >= 17.1.0:
▪ Then: Set MainDb_OldVersionNo to 17.1.0
8

▪ Else: If PortalWebApp_OldVersionNo is 16.6.0 or 16.7.0 or 17.0.0
▪ Then: Set MainDb_OldVersionNo to PortalWebApp_OldVersionNo
▪ Else:
STOP! You can’t use this guide to directly upgradeMainDb. See Introduction.
MainDbServer
Simple doc-var. Full name of the SQL Server instance you choose for hosting MainDb, asreturned by the following T-SQL:
SELECT @@SERVERNAME;
PortalWebApp
Complex doc-var. Represents the FTOS Portal Web Application installation component.
PortalWebApp_Machine
Simple doc-var. Name of the Windows machine you choose to host PortalWebApp on.
PortalWebApp_InstallDir
Simple doc-var. The local absolute path on PortalWebApp_Machine of a not yet existent directorywhere you choose to install PortalWebApp files in.
PortalWebApp_OldVersionNo
Simple doc-var. PortalWebApp version number as found before install/upgrade. Determine itsvalue as follows:
• If PortalWebApp is installed (i.e. you’re performing an upgrade):
◦ Then: On PortalWebApp_Machine open Windows Explorer, navigate toPortalWebApp_InstallDir\bin, right click on EBS.Core.Common.dll, click on Properties menuentry and go to Details tab. Set PortalWebApp_OldVersionNo to the value of the FileVersion field.
◦ Else: Set PortalWebApp_OldVersionNo to 0.0.0.0
PortalWebApp_IisAppName
Simple doc-var. Name you choose for PortalWebApp's IIS application.
PortalWebApp_IisAppPoolName
Simple doc-var. Name of the IIS application pool you choose to run PortalWebApp_IisAppNamein. It can be a not yet existent pool as there are instructions on how to create it.
PortalWebApp_IisWebSiteName
Simple doc-var. Name of the IIS web site you choose to host PortalWebApp_IisAppName in.
PortalWebApp_UploadEbsDir
9

Simple doc-var. A local/UNC absolute path of a directory you choose forPortalWebApp_IisAppName to store dynamically generated files or files uploaded by users, to beconsumed later by itself or other FTOS installation components or just to be served back tousers.It’s strongly recommended to choose the value PortalWebApp_InstallDir\UploadEBS.
PortalWebApp_LoginUrl
Simple doc-var. Login URL for PortalWebApp_IisAppName. Determine its value based on thisformat http://PortalWebApp_Machine/PortalWebApp_IisAppName/Account/LogOn which assumesPortalWebApp_IisWebSiteName works on port 80 without SSL. If the assumption is wrong, adjustthe format accordingly.
PortalWebApp_DbCred
Complex doc-var. The SQL Server credential you choose for PortalWebApp_IisAppName to usewhen connecting to MainDb for normal operation.
PortalWebApp_DbCred_Type
Simple doc-var. Determine its value as follows:
• If PortalWebApp_DbCred is a SQL Server built in authentication credential:
◦ Then: Value is SqlBuiltinAuth
◦ Else (i.e. it’s a Windows integrated authentication credential): Value is WindowsAuth
PortalWebApp_DbCred_User
Simple doc-var. If PortalWebApp_DbCred_Type = SqlBuiltinAuth then setPortalWebApp_DbCred_User to PortalWebApp_DbCred's user name. Otherwise leavePortalWebApp_DbCred_User undefined.
PortalWebApp_DbCred_Password
Simple doc-var. If PortalWebApp_DbCred_User is defined then setPortalWebApp_DbCred_Password to PortalWebApp_DbCred password. Otherwise leavePortalWebApp_DbCred_Password undefined.
DesignerWebApp
Complex doc-var. Represents the FTOS Designer Web Application installation component. Thiscomponent is newly introduced with FTOS v18.1.0.
DesignerWebApp_Machine
Simple doc-var. Name of the Windows machine you choose to host DesignerWebApp on.
DesignerWebApp_InstallDir
Simple doc-var. The local absolute path on DesignerWebApp_Machine of a not yet existentdirectory where you choose to install DesignerWebApp files in.
DesignerWebApp_OldVersionNo
Simple doc-var. DesignerWebApp version number as found before install/upgrade. Determine itsvalue as follows:
10
• If DesignerWebApp is installed (i.e. you’re performing an upgrade):
◦ Then: On DesignerWebApp_Machine open Windows Explorer, navigate toDesignerWebApp_InstallDir\bin, right click on EBS.Core.Common.dll, click on Propertiesmenu entry and go to Details tab. Set DesignerWebApp_OldVersionNo to the value of theFile Version field.
◦ Else: Set DesignerWebApp_OldVersionNo to 0.0.0.0
DesignerWebApp_IisAppName
Simple doc-var. Name you choose for DesignerWebApp's IIS application.
DesignerWebApp_IisAppPoolName
Simple doc-var. Name of the IIS application pool you choose to runDesignerWebApp_IisAppName in. It can be a not yet existent pool as there are instructions onhow to create it.
DesignerWebApp_IisWebSiteName
Simple doc-var. Name of the IIS web site you choose to host DesignerWebApp_IisAppName in.
DesignerWebApp_UploadEbsDir
Simple doc-var. A local/UNC absolute path usable by DesignerWebApp_IisAppName to accesscontent from PortalWebApp_UploadEbsDir.
• If DesignerWebApp_Machine is the same as PortalWebApp_Machine:
◦ Then: Set DesignerWebApp_UploadEbsDir to PortalWebApp_UploadEbsDir
◦ Else: Set DesignerWebApp_UploadEbsDir to a UNC absolute path that maps to the samedirectory as PortalWebApp_UploadEbsDir
DesignerWebApp_LoginUrl
Simple doc-var. Login URL for DesignerWebApp_IisAppName. Determine its value based on thisformat http://DesignerWebApp_Machine/DesignerWebApp_IisAppName/Account/LogOn which assumesDesignerWebApp_IisWebSiteName works on port 80 without SSL. If the assumption is wrong,adjust the format accordingly.
DesignerWebApp_DbCred
Complex doc-var. The SQL Server credential you choose for DesignerWebApp_IisAppName to usewhen connecting to MainDb for normal operation.
DesignerWebApp_DbCred_Type
Simple doc-var. Determine its value as follows:
• If DesignerWebApp_DbCred is a SQL Server built in authentication credential:
◦ Then: Value is SqlBuiltinAuth
◦ Else (i.e. it’s a Windows integrated authentication credential): Value is WindowsAuth
DesignerWebApp_DbCred_User
Simple doc-var. If DesignerWebApp_DbCred_Type = SqlBuiltinAuth then set
11

DesignerWebApp_DbCred_User to DesignerWebApp_DbCred's user name. Otherwise leaveDesignerWebApp_DbCred_User undefined.
DesignerWebApp_DbCred_Password
Simple doc-var. If DesignerWebApp_DbCred_User is defined then setDesignerWebApp_DbCred_Password to DesignerWebApp_DbCred password. Otherwise leaveDesignerWebApp_DbCred_Password undefined.
JobServer
Complex doc-var. Represents a FTOS JobServer installation component. Because this componentcan be installed in multiple instances and configurations, JobServer as defined here doesn’trepresent any of them in particular. The doc-var will be reassigned a more practical meaning inlater instructions. This component is newly introduced with FTOS v18.1.0.
DebuggingServer
Complex doc-var. Represents the FTOS DebuggingServer installation component.
DebuggingServer_Machine
Simple doc-var. Name of the Windows machine you choose to host DebuggingServer on.
DebuggingServer_InstallDir
Simple doc-var. The local absolute path on DebuggingServer_Machine of a not yet existentdirectory where you choose to install DebuggingServer files in.
DebuggingUi
Complex doc-var. Represents the FTOS DebuggingUi installation component.
DebuggingUi_Machine
Simple doc-var. Name of the Windows machine you choose to install DebuggingUi on.
DebuggingUi_InstallDir
Simple doc-var. The local absolute path on DebuggingUi_Machine of a not yet existent directorywhere you choose to install DebuggingUi files in.
Generally applicable considerations• On any Windows Server machine you must operate with a Windows / Active Directory account
that is in the local Administrators group, working in elevated mode (i.e. running asAdministrator)
Consequence
Make sure you run all executables "as Administrator", including cmd.exe bothwhen you type commands interactively or when you execute .bat files, whichyou should always execute by typing their names in an elevated cmd.exewindow and not via mouse clicks.
• The Windows / Active Directory account you’re operating with must have full access rights on
12

ReleaseKit_Dir (some instructions produce logs which by default are written somewhere inReleaseKit_Dir).
A solution that covers this requirement and generally speeds up file operationsis to copy ReleaseKit_Dir on each machine where you need to use it. This is OKas long as you compensate for the varying value of ReleaseKit_Dir from onemachine to the next.
• On any SQL Server instance you must operate with a SQL Server account that is in the sysadminSQL Server role
• About instructions where you have to execute BasicDbUpgrader.exe
◦ You can execute this tool from any machine with connectivity to MainDb as long as themachine has .NET Framework >= 4.5 and SQLCMD.EXE installed. SQLCMD is auto-installedwith SQL Server Management Studio but it can also be installed by itself.
◦ BasicDbUpgrader.exe instructions will work exactly as provided if MainDbServer usesdynamic ports and you can connect via Windows integrated authentication. If you need toconnect to a specific port or with SQL Server built in authentication then you’ll need toslightly adjust the given instructions. Run BasicDbUpgrader.exe without any arguments tosee help on how to do that (see -s, -u and -p parameters).
◦ The account you use with BasicDbUpgrader.exe to apply servicing operations (e.g. to applyupgrade/migration scripts) on MainDb, must be in the sysadmin SQL Server role
• You must edit text files (including compare and merge editing; including XML and cmd.exebatch file editing) with an editor [5: for general text file editing we recommend the freelyavailable https://notepad-plus-plus.org while for compare-and-merge text file editing werecommend the freely available http://winmerge.org] that supports UTF8 with and without BOMand doesn’t change file encoding when you save your edits.
Do not use Windows' builtin notepad.exe.
• If you have trouble when editing XML that requires XML encoding, then you can’t use the sameeditor for XML files as for text files. Use a specialized XML editor [6: Unless you have betteroptions, we recommend the freely available https://github.com/Microsoft/XmlNotepad/releases].
• You must notice if any instruction is terminated by an error signaled through common patterns(e.g. error popup window / message box, obvious terminating error message printed in aconsole window) and, unless specifically instructed otherwise in context or by FTOS Support orit’s clear for you how to fix the problem (e.g. out of space), stop following the normalinstructions and instead abandon the servicing operation and revert TargetEnvironment to aprevious good state.
13

Defining a mechanism and strategy for how to revert TargetEnvironment to aprevious good state is specific to your context and part of your Operationsbusiness (e.g. some choose virtual machine snapshots, some choose uninstalland reinstall of the previous FTOS release, etc.). You should develop these stepsand include them in your Operations runbooks [3: Your FTOS Operationsrunbooks should contain much more than just slightly adjusted instructionsfrom this guide. Runbooks must contain step by step ready to use instructionsfor your FTOS environment(s) (with real machine names/IPs, directory/filepaths, etc.) including instructions related to the IT infrastructure surroundingthe FTOS environment (e.g. pre-upgrade backup, pre-upgrade suspend andpost-upgrade resume monitoring of the FTOS environment, disaster recoveryinstructions in case a change runs into a major failure, pre-upgrade suspendand post-upgrade resume access to the FTOS environment via firewall rules,etc.].
• Once you successfully went through a servicing operation where you defined/changed doc-varsyou must save these values with your Operations documentation. You must retrieve the saveddoc-var values before executing a servicing operation that requires them (e.g. upgrade).
It’s recommended to maintain up to date values in a table-like structure wheredoc-vars are lines and FTOS environments are columns.
• Where this guide mentions something as applicable for a certain chapter, section or sub-section,you must consider it applicable for all its deeper sub-sections, unless/until otherwise specified.
MainDb
Pre-requisites• MainDbServer must be SQL Server 2012 or newer
◦ With the following installed features:Database Engine Services
Client Tools Connectivity
◦ With SQL_Latin1_General_CP1_CI_AS as server level collation, as returned by the following T-SQL:
SELECT SERVERPROPERTY('collation');
1st/clean installYou should execute instructions from this section on the machine hosting MainDbServer. You canexecute them from any machine that can execute T-SQL against MainDbServer but, if you need to, itwill be more difficult to restore MainDb from a backup file.
14

Choose to install MainDb in one of the following two ways:
• Based on a main FTOS database from another FTOS environment (or an older version ofMainDb)
◦ This choice is common when TargetEnvironment is a clone of another environment (e.g.TargetEnvironment is an UAT environment and it’s cloned from a PROD environment)
• Based on a new/blank database
◦ This choice is common when TargetEnvironment is built from scratch using just resourcesfrom ReleaseKit
Based on a main FTOS database from another FTOS environment
1. Create a SQL Server backup file for the main FTOS database from the other environment.
Unless the other environment has customizations/requirements that impactthe backup process (e.g. complex database backup setup, replicationconfigurations, custom backup software, etc.), you can closely follow theseinstructions: Create a Full Database Backup using SQL Server ManagementStudio
2. Copy/move the backup file to a location that can be accessed by MainDbServer
3. Create MainDb on MainDbServer by restoring from the backup file
Unless MainDbServer has customizations/requirements that impact the restoreprocess, you can closely follow these instructions: Restore a Database to a NewLocation using SQL Server Management Studio
4. Grant full access on MainDb for DesignerWebApp_DbCred and PortalWebApp_DbCred
Based on a new/blank database
1. Create MainDb as a new SQL Server database on MainDbServer
Unless MainDbServer has customizations/requirements that impact thecreation of new databases (e.g. database physical files must be located on acertain device, backup / other maintenance procedures / mechanisms must beupdated, etc.), you can closely follow these instructions: Create a Databaseusing SQL Server Management Studio
2. Execute in cmd.exe: "ReleaseKit\SQL\BasicDbUpgrader.exe" -s "MainDbServer" -d "MainDb" -i
Ignore warnings about not having specified -v or -l. In this case they are notrequired.
3. Follow all steps from MainDb \ Upgrade
4. Grant full access on MainDb for DesignerWebApp_DbCred and PortalWebApp_DbCred
15

UpgradeYou must execute instructions from this section on a machine that can connect and execute T-SQLagainst MainDbServer.
1. Execute in cmd.exe: "ReleaseKit\SQL\BasicDbUpgrader.exe" -s "MainDbServer" -d "MainDb"
You should be presented with a report on which scripts will be applied onMainDb
a. If the command was terminated by an error like Db is not initialized for use with
BasicDbUpgrader and MainDb_OldVersionNo is between 16.6.0 and 17.1.5 then:
i. Execute in cmd.exe: "ReleaseKit\SQL\BasicDbUpgrader.exe" -s "MainDbServer" -d "MainDb" -i -v "MainDb_OldVersionNo"
2. Execute in cmd.exe: "ReleaseKit\SQL\BasicDbUpgrader.exe" -s "MainDbServer" -d "MainDb" -g
a. This command will upgrade MainDb and it will take a few minutes to complete, dependingmostly on how old MainDb_OldVersionNo is vs. ReleaseKit_VersionNo
PortalWebApp
Pre-requisites• On PortalWebApp_Machine:
◦ Windows Server 2008 R2 SP1 or newer
Below are details about which Windows Server roles and features arerequired. They were determined on a Windows Server 2012 R2. You mustdetermine the equivalents for your particular Windows Server version (e.g.2008 R2, 2016)
▪ Required Server Roles: Web Server (IIS)
▪ Required Features:
▪ .NET Framework 3.5 Features \ .NET Framework 3.5 (includes .NET 2.0 and 3.0)
▪ .NET Framework 4.5 Features \ .NET Framework 4.5
▪ .NET Framework 4.5 Features \ ASP.NET 4.5
▪ .NET Framework 4.5 Features \ WCF Services \ HTTP Activation
▪ .NET Framework 4.5 Features \ WCF Services \ TCP Port Sharing
▪ Windows PowerShell \ Windows PowerShell 4.0
▪ Windows Process Activation Service \ Process Model
▪ Windows Process Activation Service \ Configuration APIs
▪ Required Web Server Role (IIS) \ Role Services:
16

▪ Web Server \ Common HTTP Features \ Default Document
▪ Web Server \ Common HTTP Features \ Directory Browsing
▪ Web Server \ Common HTTP Features \ HTTP Errors
▪ Web Server \ Common HTTP Features \ Static Content
▪ Web Server \ Common HTTP Features \ HTTP Redirection
▪ Web Server \ Health and Diagnostics \ HTTP Logging
▪ Web Server \ Performance \ Static Content Compression
▪ Web Server \ Performance \ Dynamic Content Compression
▪ Web Server \ Security \ Request Filtering
▪ Web Server \ Security \ Basic Authentication
▪ Web Server \ Security \ URL Authorization
▪ Web Server \ Security \ Windows Authentication
▪ Web Server \ Application Development \ .NET Extensibility 4.5
▪ Web Server \ Application Development \ Application Initialization
▪ Web Server \ Application Development \ ASP.NET 4.5
▪ Web Server \ Application Development \ ISAPI Extensions
▪ Web Server \ Application Development \ ISAPI Filters
▪ Web Server \ Application Development \ Server Side Includes
▪ Web Server \ Application Development \ WebSocket Protocol
▪ Web Server \ Management Tools \ IIS Management Scripts and Tools
◦ .NET Framework 4.6.2 or newer
1st/clean installYou must execute instructions from this section on PortalWebApp_Machine.
The next steps will fail if any of the following are true:
• PortalWebApp_InstallDir or PortalWebApp_IisAppName already exist
• PortalWebApp_IisWebSiteName doesn’t already exist
1. Create a new batch file named PortalWebAppInstaller.Install.bat in a directory of your choiceand add in a single command line as follows:
a. If PortalWebApp_DbCred_Type = SqlBuiltinAuth
▪ Then: Use this command line: powershell.exe -File "ReleaseKit\PortalWebApp\PortalWebAppInstaller.ps1" -p_MainCommand Install-p_InstallDir PortalWebApp_InstallDir -p_IisWebSite PortalWebApp_IisWebSiteName-p_IisApp PortalWebApp_IisAppName -p_IisAppPool PortalWebApp_IisAppPoolName-p_DbConnServer MainDbServer -p_DbConnSqlAuthUser PortalWebApp_DbCred_User-p_DbConnSqlAuthPass PortalWebApp_DbCred_Password
17

▪ Else: Use this command line: powershell.exe -File "ReleaseKit\PortalWebApp\PortalWebAppInstaller.ps1" -p_MainCommand Install-p_InstallDir PortalWebApp_InstallDir -p_IisWebSite PortalWebApp_IisWebSiteName-p_IisApp PortalWebApp_IisAppName -p_IisAppPool PortalWebApp_IisAppPoolName-p_DbConnServer MainDbServer
2. Execute in cmd.exe: PortalWebAppInstaller.Install.bat
This command does the following:
◦ Creates PortalWebApp_InstallDir and copies in PortalWebApp files fromReleaseKit
◦ Creates web.config.OriginalForReference in PortalWebApp_InstallDir, as aclone of web.config from ReleaseKit, to be used later in case there’s a needto compare against the web.config as it came with ReleaseKit
◦ Configures MainDb connection in web.config
◦ Creates PortalWebApp_IisAppPoolName if it doesn’t already exist (if it existsit will not be changed and will just be used as is)
◦ Grants recursive full NTFS access rights on PortalWebApp_InstallDir for theWindows account used to run PortalWebApp_IisAppPoolName
◦ [Re]Starts PortalWebApp_IisAppPoolName
3. Edit XML file PortalWebApp_InstallDir\web.config and in XML node/configuration/system.web/authentication/forms set XML attribute name to.EBSCORE_Portal_PortalWebApp_IisAppPoolName
Snippet from web.config showing where you must edit
<forms name="..." protection="All" timeout="60" cookieless="UseCookies" />
4. If PortalWebApp_UploadEbsDir is not PortalWebApp_InstallDir\UploadEBS then:
a. Delete PortalWebApp_InstallDir\UploadEBS
b. Create a new IIS Virtual Directory under PortalWebApp_IisAppName using UploadEBS forAlias and PortalWebApp_UploadEbsDir for Physical path
c. If PortalWebApp_UploadEbsDir is a local absolute path:
i. Then: Modify NTFS access rights on PortalWebApp_UploadEbsDir and grant full rights forthe Windows account used to run PortalWebApp_IisAppPoolName
If PortalWebApp_IisAppPoolName uses the default IIS app pool identityconfiguration (i.e. ApplicationPoolIdentity, as is the case ifPortalWebAppInstaller.ps1 created PortalWebApp_IisAppPoolName foryou) then you’ll need to grant rights to the automatically createdWindows virtual account IIS AppPool\PortalWebApp_IisAppPoolName
ii. Else (i.e. it’s a UNC path):
A. Modify Windows network share access rights on PortalWebApp_UploadEbsDir and
18

grant full rights for the Windows account used by PortalWebApp_IisAppPoolName toaccess it
If PortalWebApp_IisAppPoolName uses the default IIS app poolidentity configuration (i.e. ApplicationPoolIdentity, as is the case ifPortalWebAppInstaller.ps1 created PortalWebApp_IisAppPoolNamefor you) then you’ll need to grant rights for PortalWebApp_Machine'sown Windows account (i.e. a Windows / Active Directory accountthat has the same name as PortalWebApp_Machine Windowsmachine name).
B. Modify NTFS access rights on the directory behind PortalWebApp_UploadEbsDirWindows network share and grant full access for the Windows account used byPortalWebApp_IisAppPoolName to access it
5. Open in a web browser PortalWebApp_LoginUrl and check the page appears as expected.
UpgradeYou must execute instructions from this section on PortalWebApp_Machine.
1. Create a new batch file named PortalWebAppInstaller.Upgrade.bat in a directory of your choiceand add in the following single command line: powershell.exe -File "ReleaseKit\PortalWebApp\PortalWebAppInstaller.ps1" -p_MainCommand Upgrade -p_InstallDirPortalWebApp_InstallDir
2. Execute in cmd.exe: PortalWebAppInstaller.Upgrade.bat
This command does the following:
◦ Overwrites all files from PortalWebApp_InstallDir with PortalWebApp filesfrom ReleaseKit, except for web.config which is not overwritten in case youcustomized it
◦ [Re]Starts PortalWebApp_IisAppPoolName
3. Open in a web browser PortalWebApp_LoginUrl and check the page appears as expected.
DesignerWebApp
Pre-requisites• On DesignerWebApp_Machine: Same as on PortalWebApp_Machine (See PortalWebApp \ Pre-
requisites)
1st/clean installYou must execute instructions from this section on DesignerWebApp_Machine.
19

The next steps will fail if any of the following are true:
• DesignerWebApp_InstallDir or DesignerWebApp_IisAppName already exist
• DesignerWebApp_IisWebSiteName doesn’t already exist
1. Create a new batch file named DesignerWebAppInstaller.Install.bat in a directory of yourchoice and add in a single command line as follows:
a. If DesignerWebApp_DbCred_Type = SqlBuiltinAuth
▪ Then: Use this command line: powershell.exe -File "ReleaseKit\DesignerWebApp\DesignerWebAppInstaller.ps1" -p_MainCommand Install-p_InstallDir DesignerWebApp_InstallDir -p_IisWebSite DesignerWebApp_IisWebSiteName-p_IisApp DesignerWebApp_IisAppName -p_IisAppPool DesignerWebApp_IisAppPoolName-p_DbConnServer MainDbServer -p_DbConnSqlAuthUser DesignerWebApp_DbCred_User-p_DbConnSqlAuthPass DesignerWebApp_DbCred_Password
▪ Else: Use this command line: powershell.exe -File "ReleaseKit\DesignerWebApp\DesignerWebAppInstaller.ps1" -p_MainCommand Install-p_InstallDir DesignerWebApp_InstallDir -p_IisWebSite DesignerWebApp_IisWebSiteName-p_IisApp DesignerWebApp_IisAppName -p_IisAppPool DesignerWebApp_IisAppPoolName-p_DbConnServer MainDbServer
2. Execute in cmd.exe: DesignerWebAppInstaller.Install.bat
This command does the following:
◦ Creates DesignerWebApp_InstallDir and copies in DesignerWebApp filesfrom ReleaseKit
◦ Creates web.config.OriginalForReference in DesignerWebApp_InstallDir, asa clone of web.config from ReleaseKit, to be used later in case there’s a needto compare against the web.config as it came with ReleaseKit
◦ Configures MainDb connection in web.config
◦ Creates DesignerWebApp_IisAppPoolName if it doesn’t already exist (if itexists it will not be changed and will just be used as is)
◦ Grants recursive full NTFS access rights on DesignerWebApp_InstallDir forthe Windows account used to run DesignerWebApp_IisAppPoolName
◦ [Re]Starts DesignerWebApp_IisAppPoolName
3. Edit XML file DesignerWebApp_InstallDir\web.config and in XML node/configuration/system.web/authentication/forms set XML attribute name to.EBSCORE_Designer_DesignerWebApp_IisAppPoolName
Snippet from web.config showing where you must edit
<forms name="..." protection="All" timeout="60" cookieless="UseCookies" />
4. Create a new IIS Virtual Directory under DesignerWebApp_IisAppName using UploadEBS forAlias and DesignerWebApp_UploadEbsDir for Physical path
5. If DesignerWebApp_UploadEbsDir is a local absolute path:
20

a. Then: Modify NTFS access rights on DesignerWebApp_UploadEbsDir and grant full rights forthe Windows account used to run DesignerWebApp_IisAppPoolName
If DesignerWebApp_IisAppPoolName uses the default IIS app pool identityconfiguration (i.e. ApplicationPoolIdentity, as is the case ifDesignerWebAppInstaller.ps1 created DesignerWebApp_IisAppPoolName foryou) then you’ll need to grant rights to the automatically created Windowsvirtual account IIS AppPool\DesignerWebApp_IisAppPoolName
b. Else (i.e. it’s a UNC path):
i. Modify Windows network share access rights on DesignerWebApp_UploadEbsDir andgrant full rights for the Windows account used by DesignerWebApp_IisAppPoolName toaccess it
If DesignerWebApp_IisAppPoolName uses the default IIS app poolidentity configuration (i.e. ApplicationPoolIdentity, as is the case ifDesignerWebAppInstaller.ps1 created DesignerWebApp_IisAppPoolNamefor you) then you’ll need to grant rights for DesignerWebApp_Machine'sown Windows account (i.e. a Windows / Active Directory account thathas the same name as DesignerWebApp_Machine Windows machinename).
ii. Modify NTFS access rights on the directory behind DesignerWebApp_UploadEbsDirWindows network share and grant full rights for the Windows account used byDesignerWebApp_IisAppPoolName to access it
6. Open in a web browser DesignerWebApp_LoginUrl and check the page appears as expected.
UpgradeYou must execute instructions from this section on DesignerWebApp_Machine.
1. Create a new batch file named DesignerWebAppInstaller.Upgrade.bat in a directory of yourchoice and add in the following single command line: powershell.exe -File "ReleaseKit\DesignerWebApp\DesignerWebAppInstaller.ps1" -p_MainCommand Upgrade -p_InstallDirDesignerWebApp_InstallDir
2. Execute in cmd.exe: DesignerWebAppInstaller.Upgrade.bat
This command does the following:
◦ Overwrites all files from DesignerWebApp_InstallDir with DesignerWebAppfiles from ReleaseKit, except for web.config which is not overwritten in caseyou customized it
◦ [Re]Starts DesignerWebApp_IisAppPoolName
3. Open in a web browser DesignerWebApp_LoginUrl and check the page appears as expected.
21

JobServerAny FTOS JobServer instance comes with a set of standard jobs configured and enabled by default.Standard jobs can be disabled and additional jobs may be installed via plugins (e.g. MessageBus(OCS) plugin, MessageComposer plugin).
If JobServer_JobConfig is:
• StandardJobCfg then:
◦ Go to section JobServer \ Standard job configuration
• MessageBusJobCfg then:
◦ Go to section JobServer \ MessageBus (OCS) job configuration
• MessageComposerJobCfg then:
◦ Go to section JobServer \ MessageComposer job configuration
• MessageBusMessageComposerJobCfg then:
◦ Go to section JobServer \ MessageBus (OCS) + MessageComposer job configuration
Doc-var definitionsJobServer
Complex doc-var. Represents the FTOS JobServer installation component instance that you’recurrently servicing.
JobServer_Id
Simple doc-var. Alphanumerical id you choose for JobServer. It must be unique across allJobServer instances in TargetEnvironment.Examples: 1, Standard1, MessageBusMessageComposer2
JobServer_Machine
Simple doc-var. Name of the Windows machine you choose to install JobServer on.
JobServer_InstallDir
Simple doc-var. The local absolute path on JobServer_Machine of a not yet existent directorywhere you choose to install JobServer files in.
JobServer_WinSvcName
Simple doc-var. Name of the Windows service that runs JobServer. Set JobServer_WinSvcName toFtosJobServer-JobServer_Id.
JobServer_JobConfig
Simple doc-var. Determine its value depending on the job configuration you choose forJobServer:
22

If you choose this job configuration Then setJobServer_JobConfig to
Standard(i.e. standard jobs enabled and no plugin jobs installed)
StandardJobCfg
MessageBus (OCS)(i.e. standard jobs disabled and MessageBus (OCS) plugin jobs installedand enabled)
MessageBusJobCfg
MessageComposer(i.e. standard jobs disabled and MessageComposer plugin jobsinstalled and enabled)
MessageComposerJobCfg
MessageBus (OCS) + MessageComposer(i.e. standard jobs disabled, MessageBus (OCS) + MessageComposerjobs installed and enabled)
MessageBusMessageComposerJobCfg
JobServer_UploadEbsDir
Simple doc-var. A local/UNC absolute path usable by JobServer_WinSvcName to access contentfrom PortalWebApp_UploadEbsDir.
• If JobServer_JobConfig is MessageBusJobCfg or MessageBusMessageComposerJobCfg
◦ Then: If JobServer_Machine is the same as PortalWebApp_Machine:
▪ Then: Set JobServer_UploadEbsDir to PortalWebApp_UploadEbsDir
▪ Else: Set JobServer_UploadEbsDir to a UNC absolute path that maps to the samedirectory as PortalWebApp_UploadEbsDir
◦ Else: Leave JobServer_UploadEbsDir undefined because its value is not needed
JobServer_DbCred
Complex doc-var. The SQL Server credential you choose for JobServer to use when connecting toMainDb for normal operation.
Pre-requisites• On JobServer_Machine:
◦ .NET Framework 4.6.1 or newer
Standard job configuration
1st/clean install
You must execute instructions from this section on JobServer_Machine.
1. Create directory JobServer_InstallDir
2. Copy all files from ReleaseKit_Dir\JobServer to JobServer_InstallDir
3. Edit XML file JobServer_InstallDir\connections.config as follows:
a. In XML node /connectionStrings/add[@name='EbsSqlServer'] set XML attribute
23
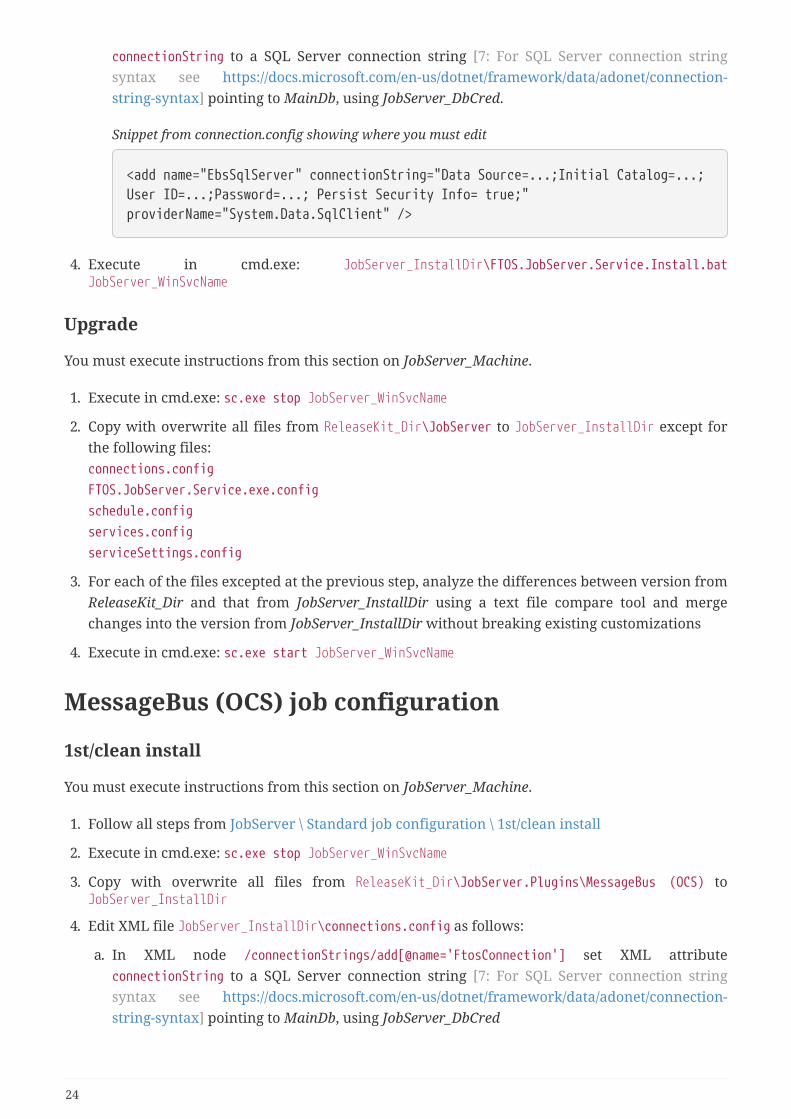
connectionString to a SQL Server connection string [7: For SQL Server connection stringsyntax see https://docs.microsoft.com/en-us/dotnet/framework/data/adonet/connection-string-syntax] pointing to MainDb, using JobServer_DbCred.
Snippet from connection.config showing where you must edit
<add name="EbsSqlServer" connectionString="Data Source=...;Initial Catalog=...;User ID=...;Password=...; Persist Security Info= true;"providerName="System.Data.SqlClient" />
4. Execute in cmd.exe: JobServer_InstallDir\FTOS.JobServer.Service.Install.batJobServer_WinSvcName
Upgrade
You must execute instructions from this section on JobServer_Machine.
1. Execute in cmd.exe: sc.exe stop JobServer_WinSvcName
2. Copy with overwrite all files from ReleaseKit_Dir\JobServer to JobServer_InstallDir except forthe following files:connections.config
FTOS.JobServer.Service.exe.config
schedule.config
services.config
serviceSettings.config
3. For each of the files excepted at the previous step, analyze the differences between version fromReleaseKit_Dir and that from JobServer_InstallDir using a text file compare tool and mergechanges into the version from JobServer_InstallDir without breaking existing customizations
4. Execute in cmd.exe: sc.exe start JobServer_WinSvcName
MessageBus (OCS) job configuration
1st/clean install
You must execute instructions from this section on JobServer_Machine.
1. Follow all steps from JobServer \ Standard job configuration \ 1st/clean install
2. Execute in cmd.exe: sc.exe stop JobServer_WinSvcName
3. Copy with overwrite all files from ReleaseKit_Dir\JobServer.Plugins\MessageBus (OCS) toJobServer_InstallDir
4. Edit XML file JobServer_InstallDir\connections.config as follows:
a. In XML node /connectionStrings/add[@name='FtosConnection'] set XML attributeconnectionString to a SQL Server connection string [7: For SQL Server connection stringsyntax see https://docs.microsoft.com/en-us/dotnet/framework/data/adonet/connection-string-syntax] pointing to MainDb, using JobServer_DbCred
24

Snippet from connections.config showing where you must edit
<add name="FtosConnection" connectionString="Data Source=...;InitialCatalog=...; User ID=...;Password=...;MultipleActiveResultSets=True;"providerName="System.Data.SqlClient" />
5. Edit XML file JobServer_InstallDir\serviceSettings.config as follows:
a. In XML node /appSettings/add[@name='AttachmentPath'] set XML attribute value toJobServer_UploadEbsDir
Snippet from serviceSettings.config showing where you must edit
<add key="AttachmentPath" value="...\EBS.Core.Web.MVC\UploadEBS"/>
6. If JobServer_UploadEbsDir is a local absolute path:
a. Then: Modify NTFS access rights on JobServer_UploadEbsDir and grant full rights for theWindows account used to run JobServer_WinSvcName
By default this account is LocalSystem
b. Else (i.e. it’s a UNC path):
i. Modify Windows network share access rights on JobServer_UploadEbsDir and grant fullrights for the Windows account used by JobServer_WinSvcName to access it
By default this account is JobServer_Machine's own Windows account(i.e. a Windows / Active Directory account that has the same name asJobServer_Machine Windows machine name).
ii. Modify NTFS access rights on the directory behind JobServer_UploadEbsDir Windowsnetwork share and grant full rights for the Windows account used byJobServer_WinSvcName to access it
7. Execute in cmd.exe: sc.exe start JobServer_WinSvcName
Upgrade
You must execute instructions from this section on JobServer_Machine.
1. Follow all steps from JobServer \ Standard job configuration \ Upgrade
2. Execute in cmd.exe: sc.exe stop JobServer_WinSvcName
◦ Copy with overwrite all files from ReleaseKit_Dir\JobServer.Plugins\MessageBus (OCS) toJobServer_InstallDir except for the following files:connections.config
schedule.config
services.config
serviceSettings.config
25

3. For each of the files excepted at the previous step, analyze the differences between version fromReleaseKit_Dir and that from JobServer_InstallDir using a text file compare tool and mergechanges into the version from JobServer_InstallDir without breaking existing customizations
4. Execute in cmd.exe: sc.exe start JobServer_WinSvcName
MessageComposer job configuration
1st/clean install
You must execute instructions from this section on JobServer_Machine.
1. Follow all steps from JobServer \ Standard job configuration \ 1st/clean install
2. Execute in cmd.exe: sc.exe stop JobServer_WinSvcName
3. Copy with overwrite all files from ReleaseKit_Dir\JobServer.Plugins\MessageComposer toJobServer_InstallDir
4. Edit XML file JobServer_InstallDir\connections.config as follows:
a. In XML node /connectionStrings/add[@name='FtosConnection'] set XML attributeconnectionString to a SQL Server connection string [7: For SQL Server connection stringsyntax see https://docs.microsoft.com/en-us/dotnet/framework/data/adonet/connection-string-syntax] pointing to MainDb, using JobServer_DbCred
Snippet from connections.config showing where you must edit
<add name="FtosConnection" connectionString="Data Source=...;InitialCatalog=...; User ID=...;Password=...;MultipleActiveResultSets=True;"providerName="System.Data.SqlClient" />
5. Execute in cmd.exe: sc.exe start JobServer_WinSvcName
Upgrade
You must execute instructions from this section on JobServer_Machine.
1. Follow all steps from JobServer \ Standard job configuration \ Upgrade
2. Execute in cmd.exe: sc.exe stop JobServer_WinSvcName
3. Copy with overwrite all files from ReleaseKit_Dir\JobServer.Plugins\MessageComposer toJobServer_InstallDir except for the following files:connections.config
schedule.config
services.config
serviceSettings.config
4. For each of the files excepted at the previous step, analyze the differences between version fromReleaseKit_Dir and that from JobServer_InstallDir using a text file compare tool and mergechanges into the version from JobServer_InstallDir without breaking existing customizations
5. Execute in cmd.exe: sc.exe start JobServer_WinSvcName
26

MessageBus (OCS) + MessageComposer jobconfiguration
1st/clean install
You must execute instructions from this section on JobServer_Machine.
1. Follow all steps from JobServer \ MessageBus (OCS) job configuration \ Install
2. Follow all steps from JobServer \ MessageComposer job configuration \ Upgrade starting at step2
Upgrade
1. Follow all steps from JobServer \ MessageBus (OCS) job configuration \ Upgrade
2. Follow all steps from JobServer \ MessageComposer job configuration \ Upgrade starting at step2
DebuggingServer
1st/clean installYou must execute instructions from this section on DebuggingServer_Machine, unless otherwisespecified.
You can use a single DebuggingServer instance for multiple PortalWebAppinstances from multiple FTOS environments.
1. Create directory DebuggingServer_InstallDir
2. Copy all files from ReleaseKit_Dir\DebuggingServer to DebuggingServer_InstallDir
3. Execute in cmd.exe: powershell.exe -File "DebuggingServer_InstallDir\setup-as-service.ps1"
◦ This will install and start a Windows service named RavenDB that will listenfor incoming connections on port 8080
◦ A web browser will open, pointing to the web interface for RavenDB. Youcan just ignore and close this browser window.
4. On PortalWebApp_Machine, edit XML file PortalWebApp_InstallDir\web.config and add a newchild XML node named add under /configuration/appSettings
a. Add 2 XML attributes to the new node:
i. 1st XML attribute named key with value feature.development-debugging-server
ii. 2nd XML attribute named value with value http://DebuggingServer_Machine:8080
27

Snippet from web.config showing how you must edit
<appSettings> <add key="feature.development-debugging-server" value="..." /> ...</appSettings>
DebuggingUi
1st/clean installYou must execute instructions from this section on DebuggingUi_Machine.
1. Create directory DebuggingUi_InstallDir
2. Copy all files from ReleaseKit_Dir\DebuggingUi to DebuggingUi_InstallDir
3. Execute in cmd.exe: DebuggingUi_InstallDir\FTOS.Debugger.exe
4. In the newly opened Fintech-OS Debugger application click on main menu entry Server \ Connectto debug server… and type in the URL http://DebuggingServer_Machine:8080
a. Alternatively, if you always use the same DebuggingServer URL, edit XML fileDebuggingUi_InstallDir\FTOS.Debugger.exe.config and set the value of the XML attribute/configuration/appSettings/add[@key='feature.development-debugging-server']/@value tohttp://DebuggingServer_Machine:8080
Snippet from FTOS.Debugger.exe.config showing how you must edit
<add key="feature.development-debugging-server" value="..." />
28