Embed Size (px)
Citation preview

FLAV-R-FRESH®
Holding & Display CabinetsFDW Series
Installation &Operating Manual
I&W #07.05.013.00
This manual contains important safety informationconcerning the maintenance, use and operation ofthis product. Failure to follow the instructions contained in this manual may result in serious injury.If you are unable to understand the contents of thismanual, please bring it to the attention of yoursupervisor. Do not operate this equipment unless you have read and understood the contents of this manual.
Este manual contiene importante información sobreseguridad concerniente al mantenimiento, uso y operación de este producto. Cualquier falla en el seguimiento de las instrucciones contenidas eneste manual puede resultar en un serio daño. Si ustedno puede entender el contenido de este manual porfavor pregunte a su supervisor. No opere este equipoal menos que haya leído y comprendido el contenidode este manual.
nbfehvijfhvjeivfeifgjehjehjevhjevhejiivhuighjilgvijfdegvfeghejghej;vjfevjneko;vjek;ejnoo
nbfehvijfhvjeivfeifgjehjehjevhjevhejiivhuighjilgvijfdegvfeghejghej;vjfevjneko;vjek;ejnoo
nbfehvijfhvjeivfeifgjehjehjevhjevhejiivhuighjilgvijfdegvfeghejghej;vjfevjneko;vjek;ejnoo
nbfehvijfhvjeivfeifgjehjehjevhjevhejiivhuighjilgvijfdegvfeghejghej;vjfevjneko;vjek;ejnoo

and Display Cabinets. We recommend all installation,operating and safety instructions appearing in thismanual be read prior to installation or operation of yourHatco Holding and Display Cabinet. Safety instructionsthat appear in this manual after a warning symboland the words WARNING or CAUTION printed inbold face are very important. WARNING meansthere is the possibility of serious injury or death to yourself or others. CAUTION means there is the possibility of minor or moderate injury.CAUTION without the symbol signifies the possibilityof equipment or property damage only.
Hatco Flav-R-Fresh Holding and Display Cabinets are a product of extensive research and field testing. The materials used were selected for maximumdurability, attractive appearance and optimumperformance. Every unit is thoroughly inspected and tested prior to shipment.
i
INTRODUCTION
Hatco Flav-R-Fresh Holding and Display Cabinets are designed to hold prepared foods for prolongedperiods of time while maintaining that “just-made”quality. Hatco Holding and Display Cabinets provide the best environment for food products by regulating the air temperature while at the same time balancing the humidity level. The use of controlled moisturizedheat maintains serving temperature and food texturelonger than conventional dry holding equipment.
The Flav-R-Fresh air flow pattern is designed to maintain consistent cabinet temperature withoutdrying out foods. The precise combination of heat and humidity creates a “blanket” effect around the food.The air flow rate enables the cabinet to recovertemperature rapidly after opening and closing the door.
This manual provides the installation, safety and operating instructions for the Flav-R-Fresh Holding
CONTENTSImportant Owner Information.....................................iIntroduction ...................................................................iImportant Safety Instructions .....................................1Model Descriptions .......................................................2
All Models ..............................................................2Model FDW-1 .........................................................2Model FDW-2 .........................................................2Model FDW-1X ......................................................2Model FDW-2X ......................................................2
Specifications.................................................................3Plug Configurations ................................................3Electrical Rating Chart............................................3Dimensions..............................................................4
Installation.....................................................................4General ....................................................................4Floor Sheet ..............................................................4
Display Racks .........................................................4Legs .........................................................................4Glass Panels ............................................................4Reversible Access Door ..........................................5Striker Plate Replacement.......................................5Location ..................................................................5
Operation.......................................................................6Food Holding Guide .....................................................7Maintenance ..................................................................8
Cleaning ..................................................................8Draining the Reservoir............................................8Removing Lime & Mineral Deposits .....................9Display Light Bulb Replacement............................9
Accessories...................................................................10Hatco Limited Warranty............................................11Authorized Parts Distributors....................Back Cover
IMPORTANT OWNER INFORMATIONRecord the model number, serial number (identificationplate located on the lower right hand side, front cornerof the unit), voltage and purchase date of your Flav-R-Fresh® Holding and Display Cabinet in thespaces below. Please have this information availablewhen calling Hatco for service assistance.
Model No. ____________________________________
Serial No. ____________________________________
Voltage ______________________________________
Date of Purchase ______________________________
Business 8:00 a.m. to 5:00 p.m. Hours: Central Standard Time
(Summer Hours: June to September – 8:00 a.m. to 5:00 p.m. C.D.T. Monday through Thursday8:00 a.m. to 2:30 p.m. C.D.T. Friday)
Telephone: (800) 558-0607; (414) 671-6350
Fax: (800) 690-2966 (Parts & Service)(414) 671-3976 (International)
Additional information can be found by visiting our web site at www.hatcocorp.com
Form No. FDWM-0602

WARNINGS
Genuine Hatco Replacement Parts are specified to operate safely in the environments in which they are used. Some aftermarket or generic replacement parts do not have the characteristics that will allow them to operatesafely in Hatco equipment. It is essential to useHatco Replacement Parts when repairing Hatcoequipment. Failure to use Hatco ReplacementParts may subject operators of the equipment to hazardous electrical voltage, resulting in electrical shock or burn.
CAUTIONS
Some exterior surfaces on the Display Cabinet will get hot. Use caution when touching theseareas to avoid injury.
The unit must be transported in an uprightposition. If laid on its side, all glass surfaces mustbe secured with tape, and water must be drainedfrom the unit.
Locate the Display Cabinet at the proper counterheight, in an area that is convenient for use. The location should be level to prevent the cabinet or its contents from accidentally falling.
Unit is not weatherproof. For safe and properoperation locate the unit indoors where the ambient air temperature is a minimum of 70°F (21°C).
CAUTIONS
Water Quality Requirements – Incoming waterin excess of 3.0 grains of hardness per gallon(GPG) (.75 grains of hardness per liter) must be treated and softened before being used. Watercontaining over 3.0 GPG (.75 GPL) will decreasethe efficiency and reduce the operating life of the unit.
Use only non-abrasive cleaners. Abrasive cleanerscould scratch the finish of your Flav-R-FreshHolding and Display Cabinet marring itsappearance and making it susceptible to soilaccumulation.
Do not use deionized water. Deionized water willgreatly shorten the life of the water reservoirand heating element.
IMPORTANT SAFETY INSTRUCTIONS
1
WARNINGS
To prevent electric shock or injury, turn the powerswitch off, unplug the unit from the power sourceand allow to cool completely before performingany maintenance or cleaning.
Plug cabinet into a properly grounded electricaloutlet of the correct voltage, size and plugconfiguration. If the plug and receptacle do notmatch, contact a qualified electrician to determinethe proper voltage and size and install the properelectrical outlet.
Overfilling can cause electrical shock. Stop fillingwhen low-water light goes off.
To avoid any injury, turn the power off to the unitand allow to cool before draining.
To prevent any injury discontinue use if powercord is frayed or worn.
Only bulbs which meet or exceed N.S.F standards,specifically designed for food holding areas must be used. Breakage of bulbs not speciallycoated could result in personal injury and/or food contamination.
For safe and proper operation, the DisplayCabinet must be located a reasonable distancefrom combustible walls and materials. If safedistances are not maintained, discoloration or combustion could occur.
If service is required on this unit, contact yourAuthorized Hatco Service Agent, or contact the Hatco Service Department at 800-558-0607 or 414-671-6350; fax 800-690-2966 orInternational fax 414-671-3976.
This product has no “user” serviceable parts. To avoid damage to the unit or injury topersonnel, use only Authorized Hatco ServiceAgents and Genuine Hatco Parts when service is required.
Form No. FDWM-0602
IMPORTANT! Read the following important safety instructions to avoid personal injury or death,and to avoid damage to the equipment or property.

MODEL DESCRIPTIONS
2
ALL MODELS All display cabinets feature stainless steel constructionwith incandescent lights, tempered glass sides and door.The standard access door can be hinged left or right,optional French doors are available. The pretzel tree is stainless steel and the other display racks are chrome-plated.
MODEL FDW-1The Flav-R-Fresh model FDW-1 is a single door modelwith a motorized rotating display. See Figure 1. It comesstandard with a pizza rack that holds up to four (4)round pizza pans with a maximum diameter of 15" (38 cm). The rotating rack automatically pauses whenthe door is opened. An optional rotating pretzel tree or 4-shelf multi-purpose stationary rack is also available.
NOTE: Model FDW-1 cannot be converted to a modelFDW-2.
MODEL FDW-2The FDW-2 is the same as model FDW-1, but has anadditional door on the opposite side of the controls for easy pass-through convenience.
MODEL FDW-1XThe FDW-1X is similar to the FDW-1, but features a 4-shelf multi-purpose stationary rack instead of therotating display. See Figure 2. The rack can hold panswith a maximum width of 13-1/2" (34 cm) and depth of 13" (33 cm).
NOTE: Model FDW-1X cannot be converted to a modelFDW-1 or FDW-2X.
MODEL FDW-2XThe FDW-2X is the same as model FDW-1X, but has an additional door on the opposite side of the controlsfor easy pass-through convenience.
Figure 1. Flav-R-Fresh Model FDW-1
Figure 2. Flav-R-Fresh Model FDW-1X
Form No. FDWM-0602
nbfehvijfhvjeivfeifgjehjehjevhjevhejiivhuighjilgvijfdegvfeghejghej;vjfevjneko;vjek;ejnoo
nbfehvijfhvjeivfeifgjehjehjevhjevhejiivhuighjilgvijfdegvfeghejghej;vjfevjneko;vjek;ejnoo
nbfehvijfhvjeivfeifgjehjehjevhjevhejiivhuighjilgvijfdegvfeghejghej;vjfevjneko;vjek;ejnoo
nbfehvijfhvjeivfeifgjehjehjevhjevhejiivhuighjilgvijfdegvfeghejghej;vjfevjneko;vjek;ejnoo
nbfehvijfhvjeivfeifgjehjehjevhjevhejiivhuighjilgvijfdegvfeghejghej;vjfevjneko;vjek;ejnoo
nbfehvijfhvjeivfeifgjehjehjevhjevhejiivhuighjilgvijfdegvfeghejghej;vjfevjneko;vjek;ejnoo
nbfehvijfhvjeivfeifgjehjehjevhjevhejiivhuighjilgvijfdegvfeghejghej;vjfevjneko;vjek;ejnoo
nbfehvijfhvjeivfeifgjehjehjevhjevhejiivhuighjilgvijfdegvfeghejghej;vjfevjneko;vjek;ejnoo

SPECIFICATIONS
3 Form No. FDWM-0602
ELECTRICAL RATING CHART
* NEMA 5-20P for Canada
Model Voltage Hertz Watts Amps Plug Configuration Shipping Weight
FDW-1 100 60 1452 14.5 NEMA 5-15P 80 lbs. (36 kg)120 60 1470 12.3 NEMA 5-15P* 80 lbs. (36 kg)220 50 1450 6.6 CEE 7/7 Schuko 80 lbs. (36 kg)240 50 1460 6.1 BS-1363 80 lbs. (36 kg)
220-230 (CE) 50 1585 6.9 CEE 7/7 Schuko 80 lbs. (36 kg)230-240 (CE) 50 1460 6.1 BS-1363 80 lbs. (36 kg)
FDW-1X 100 60 1452 14.5 NEMA 5-15P 82 lbs. (37 kg)120 60 1470 12.3 NEMA 5-15P* 82 lbs. (37 kg)220 50 1450 6.6 CEE 7/7 Schuko 82 lbs. (37 kg)240 50 1460 6.1 BS-1363 82 lbs. (37 kg)
220-230 (CE) 50 1585 6.9 CEE 7/7 Schuko 82 lbs. (37 kg)230-240 (CE) 50 1460 6.1 BS-1363 82 lbs. (37 kg)
FDW-2 100 60 1452 14.5 NEMA 5-15P 86 lbs. (39 kg)120 60 1470 12.3 NEMA 5-15P* 86 lbs. (39 kg)220 50 1450 6.6 CEE 7/7 Schuko 86 lbs. (39 kg)240 50 1460 6.1 BS-1363 86 lbs. (39 kg)
220-230 (CE) 50 1585 6.9 CEE 7/7 Schuko 86 lbs. (39 kg)230-240 (CE) 50 1460 6.1 BS-1363 86 lbs. (39 kg)
FDW-2X 100 60 1452 14.5 NEMA 5-15P 88 lbs. (40 kg)120 60 1470 12.3 NEMA 5-15P* 88 lbs. (40 kg)220 50 1450 6.6 CEE 7/7 Schuko 88 lbs. (40 kg)240 50 1460 6.1 BS-1363 88 lbs. (40 kg)
220-230 (CE) 50 1585 6.9 CEE 7/7 Schuko 88 lbs. (40 kg)230-240 (CE) 50 1460 6.1 BS-1363 88 lbs. (40 kg)
Shaded area reflects export models only.
PLUG CONFIGURATIONSUnits are supplied from the factory with an electricalcord and plug installed. Plugs are supplied according to the applications as shown in Figure 3.
WARNINGPlug unit into a properly grounded electrical outlet of the correct voltage, size and plugconfiguration. If the plug and receptacle do notmatch, contact a qualified electrician to determinethe proper voltage and size and install the properelectrical outlet.
WARNINGTo prevent any injury discontinue use if power cordis frayed or worn.
NEMA 5-15P
CEE 7/7 Schuko BS 1363
NEMA 5-20P
Figure 3. Plug Configurations

SPECIFICATIONS
INSTALLATION
1
2
3 4
5
6
F
LOW
MED
HIGH
HUMIDITY TEMPERATURE
CABINET TEMPERATURE
POWER
WATER FILL
A
C
B
4Form No. FDWM-0602
Figure 4. Dimensions
Figure 5 Shipping Tabs for Glass Panels
Width Depth HeightModel (A) (B) (C)
FDW-1 18" 19-1/2" 27-1/2"(46 cm) (50 cm) (70 cm)
FDW-2 18" 20-7/8" 27-1/2"(46 cm) (53 cm) (70 cm)
FDW-1X 18" 19-1/2" 27-1/2"(46 cm) (50 cm) (70 cm)
FDW-2X 18" 20-7/8" 27-1/2"(46 cm) (53 cm) (70 cm)
DIMENSIONS - FDW MODELS
TabGENERALThe Flav-R-Fresh Holding and Display Cabinets are shipped with most components installed and ready for operation. The following installation instructionsmust be performed before plugging in and operating the cabinet.
FLOOR SHEETThe stainless steel floor in all Flav-R-Fresh units is protected during shipping with a sheet of corrugatedcardboard. This protection must be removed prior to cabinet operation.
DISPLAY RACKSThe chrome-plated display racks have packing material and cardboard attached for protection duringshipping. This protection must be removed prior to cabinet operation.
LEGSThe Flav-R-Fresh cabinets are shipped with four 1" (2.5 cm) metal screw-type feet attached to the bottom of the unit. If you ordered the cabinet with the optional 4" (10 cm) Adjustable Legs, see ACCESSORIES forinstallation instructions.
GLASS PANELSThe Flav-R-Fresh Holding and Display Cabinets havetempered glass panels that are protected during shippingby rubber tabs along the glass edges and tape to securelyhold the panels. See Figure 5. These tabs and tape must be removed prior to cabinet operation.
NOTE: If installing 4" (10 cm) legs, do not removeglass protection until leg installation is complete. See ACCESSORIES.

INSTALLATION
5 Form No. FDWM-0602
CAUTIONThe unit must be transported in an upright position.If laid on its side, all glass surfaces must be securedwith tape, and water must be drained from the unit.
REVERSIBLE ACCESS DOORThe Flav-R-Fresh access door may be hinged on eitherthe left or right side for your convenience. See Figure 6.To reverse the door hinge, follow these instructions:
1. Remove the top hinge pin screw holding door to hinge. Remove nylon washer.
2. Tip the door assembly toward you (away fromcabinet) and lift gently to clear the bottom hingeassembly. Remove nylon washers.
3. Remove the screws holding hinges to the cabinet.
4. Remove screws from non-hinge side of the cabinetand insert them in the other side, where the hingescrews were.
5. Mount hinges on the opposite side, using the originalhinge mounting screws. Do not tighten the screws.
6. Carefully rotate the door 180° and re-install the hinge pin screw that was removed in Step 1.
7. Remove the hinge pin screw on the end that is nowthe top.
8. Carefully place the door assembly with the two (2)nylon washers onto the bottom hinge.
9. Tip/tilt the door assembly towards the cabinet and align the door top with the hinge. Re-install the other door hinge pin with one (1) nylon washer.
10. With the door in place, tighten the hinge mountingscrews, making sure the door is level and in place.
STRIKER PLATE REPLACEMENT1. Carefully remove striker plate from bottom of door
and clean adhesive from the plate and door glass.
2. Position the striker plate on the top of the door,making sure when the door is closed the striker platelocates squarely against the magnet and mark theposition.
3. Clean glass with a non-oily cleaner, such as isopropyl alcohol (rubbing alcohol), and do not touch the surface.
4. Attach the striker plate to the glass door at themarked position using a N.S.F. approved silicon typeadhesive. Let the adhesive dry before closing the door against the magnet.
Figure 6. Reversible Access Door
LOCATIONCAUTION
Locate the Display Cabinet at the proper counterheight, in an area that is convenient for use. The location should be level to prevent the cabinet or its contents from accidentally falling.
WARNINGFor safe and proper operation, the Display Cabinetmust be located a reasonable distance fromcombustible walls and materials. If safe distances are not maintained, discoloration or combustioncould occur.
CAUTIONThe unit must be transported in an upright position.If laid on its side, all glass surfaces must be securedwith tape, and water must be drained from the unit.
CAUTIONUnit is not weatherproof. For safe and properoperation locate the unit indoors where the ambientair temperature is a minimum of 70°F (21°C).
Striker Plate

OPERATION
6Form No. FDWM-0602
1. Plug the cabinet into a properly grounded electricaloutlet of the correct voltage, size and plugconfiguration. See ELECTRICALSPECIFICATIONS for details.
2. Place the power switch in the “on” position. The humidity cycle and low water indicators willlight up at this time. See Figure 7.
CAUTIONWater Quality Requirements – Incoming waterin excess of 3.0 grains of hardness per gallon (GPG)(.75 grains of hardness per liter) must be treated and softened before being used. Water containingover 3.0 GPG (.75 GPL) will decrease the efficiencyand reduce the operating life of the unit.
NOTE: Product failure caused by liming or sedimentbuildup is not covered under warranty.
3. Fill the water reservoir with softened or distilledwater. To fill the reservoir, lift up the fill cup coverand pull forward. See Figure 7. Slowly pour the water into the cup until the red light for lowwater indication goes off.
WARNINGOverfilling can cause electrical shock. Stop fillingwhen low-water light goes off.
Use of softened or distilled water is recommended to preserve the life of the electrical and mechanicalcomponents in the reservoir. Do not use deionizedwater. If “hard” water is used, the reservoir willrequire periodic cleaning and deliming. SeeMAINTENANCE for deliming instructions.
CAUTIONDo not use deionized water. Deionized water willgreatly shorten the life of the water reservoirand heating element.
NOTE: Product failure caused by deionized water is notcovered by warranty.
NOTE: On the initial fill the water reservoir capacityis 96 ounces or 3/4 of a gallon (2.8 liters).
4. Set the humidity selector to the desired level. Set the temperature selector to the desiredtemperature. See the FOOD HOLDING GUIDE for recommendations.
Temperature IndicatorOn/Off Switch
Humidity Selector
Humidity Cycle LightLow Water Indicator Temperature Selector
Reservoir Fill Cup
nbfehvijfhvjeivfeifgjehjehjevhjevhejiivhuighjilgvijfdegvfeghejghej;vjfevjneko;vjek;ejnoo
nbfehvijfhvjeivfeifgjehjehjevhjevhejiivhuighjilgvijfdegvfeghejghej;vjfevjneko;vjek;ejnoo
nbfehvijfhvjeivfeifgjehjehjevhjevhejiivhuighjilgvijfdegvfeghejghej;vjfevjneko;vjek;ejnoo
nbfehvijfhvjeivfeifgjehjehjevhjevhejiivhuighjilgvijfdegvfeghejghej;vjfevjneko;vjek;ejnoo
Figure 7. Flav-R-Fresh Control Panel
NOTE: Temperature and humidity settings may varydepending upon product make-up and consistency. The temperature indicator displays the lowesttemperature pint inside the cabinet, not the product temperature.
Allow 20 minutes to preheat a full reservoir of water.The Flav-R-Fresh is then ready to hold foods at the humidity and temperature selected.
The reservoir capacity permits uninterrupted operationfor approximately 3-6 hours, depending on the settingsand how frequently the door is opened. When the redlow water indicator light is lit, add water to thereservoir. The water reservoir refill capacity isapproximately 48 ounces, or three (3) pints (1.5 liters).Units with the Auto-Fill option are filled automaticallywhen the red low water indicator light comes on.
CAUTIONSome exterior surfaces on the Display Cabinet will get hot. Use caution when touching these areasto avoid injury.
WARNINGTo prevent any injury discontinue use if power cordis frayed or worn.

Maximum Humidity TemperatureType of Food Holding Time Setting Setting °F °CBiscuits 4 Hours 4 2.5 130 55Chicken Pieces (Fried) 4 Hours 7 5 175 80Croissants 4 Hours 1 3 140 60Fruit Pies 3-1/2 Hours 4 3 140 60Onion Rings 1/2 to 1 Hour 1 5 175 80Pizza - Thick Crust 1 Hour 4 6 185 85
- Thin Crust 1 Hour 5 5.5 180 82Pretzels 3 Hours 4 3 140 60Wrapped Sandwiches 2 Hours 4 5.5 180 82
OPERATION
7 Form No. FDWM-0602
FOOD HOLDING GUIDE
NOTE: All times and settings are recommendations only and may vary depending on product preparation, cookingtime and internal food temperature.

MAINTENANCE
8Form No. FDWM-0602
CLEANINGWARNING
To prevent electric shock or injury, turn the powerswitch off, unplug the unit from the power sourceand allow to cool completely before performing any maintenance or cleaning.
WARNINGTo prevent any injury discontinue use if power cordis frayed or worn.
Hatco Flav-R-Fresh cabinets are made of stainless steeland aluminum. To preserve the bright finish, it is recommended that the exterior and interior surfacesbe wiped daily with a damp cloth. Food pans should be removed and washed. Stubborn stains may be removed with a good stainless steel cleaner or a non-abrasive cleaner.
CAUTIONUse only non-abrasive cleaners. Abrasive cleanerscould scratch the finish of your Flav-R-FreshHolding and Display Cabinet marring its appearanceand making it susceptible to soil accumulation.
Clean the glass sides using a common glass cleaner. Forhard-to-clean stains, removal of the glass is suggested.
To Remove The Glass:
1. Lift the glass to be cleaned from the bottom of the cabinet.
2. Pull the lower edge away from the cabinet.
3. Carefully lower the glass until the top clears the cabinet.
To Replace The Glass:
1. Position the glass with the top edge under the cabinet lip and raise the glass until it clears the bottom channel of the cabinet.
2. Move the bottom of the glass towards the cabinetuntil the glass rests against the cabinet frame.
3. Carefully lower the glass until it rests in the bottomchannel of the cabinet.
To Remove The Rotating Rack For Cleaning(Models FDW-1 and FDW-2):
1. Open the front access door.
2. Remove the two (2) pins from the rotating rackcoupling located at the top of the rack inside the cabinet. See Figure 8.
Figure 8. Removing Motorized Display Racks
3. Lower the connecting coupling until it is free of themotor shaft and remove the rack from the cabinet.
To Replace The Rotating Rack:
1. Insert the rack into the cabinet through the accessdoor and place and rack bottom point in the dimplelocated at the center of the cabinet floor.
2. Slide the rack coupling up onto the motor shaft andalign the coupling holes.
3. Insert the two (2) pins through the coupling andthrough the shafts.
DRAINING THE RESERVOIRWARNING
To avoid any injury, turn the power off to the unitand allow to cool before draining.
It is recommended that the Flav-R-Fresh water reservoir be drained prior to moving the cabinet and after removing lime or mineral deposits from the water reservoir.
NOTE: The drain hose assembly is located inside the cabinet at the right front corner.
To drain the reservoir insert the drain fitting with hoseinto the water outlet, located on the ceiling of thecabinet. Once the fitting is installed, water will begin to drain from the hose.
NOTE: Position a container to hold the water while draining.

MAINTENANCE
9 Form No. FDWM-0602
Once the unit has finished draining, the drain assemblycan be removed by pressing the release tab and gentlypulling the fitting out.
The Hatco Flav-R-Fresh Holding and Display Cabinetsare designed for maximum durability and performance,with minimum maintenance. The rack motor and blowermotor are permanently lubricated and require nomaintenance.
NOTE: If the water used has an excessive amount of lime or mineral content, follow the instructions forperiodic cleaning and deliming of the water reservoir.
REMOVING LIME & MINERALDEPOSITS1. Turn the power switch off and unplug the unit from
its power source.
2. After the unit has cooled down, drain all remainingwater out of the unit.
3. Fill the unit with a mixture of water and delimer.
NOTE: The delimer used should be a safe, non-toxic,non-corrosive solution. Follow the delimer’s instructionsfor proper mixture of water and delimer solution.
4. Allow the unit to stand with the mixture in thereservoir for the recommended period of time. (The time required will vary depending on the solution used and amount of deposits in the reservoir.)
5. After the deliming period, drain the solution fromthe tank.
6. Continue to fill and drain the unit with water onlyuntil the discharge is clear and all deliming solutionhas been removed and rinsed.
7. Plug the cabinet power cord into its power sourceand fill the unit as usual for daily operation.
NOTE: How often this procedure must be performeddepends on the lime and mineral content of the waterused for daily operation.
DISPLAY LIGHT BULB REPLACEMENTThe display light is an incandescent bulb whichilluminates the warming area. This bulb has a specialcoating to guard against injury and food contaminationin the event of breakage.
To replace a bulb, disconnect the power supply and waituntil the unit has cooled. Display lamps have a threadedbase. Unscrew the bulb from the unit and replace it witha new specially coated incandescent bulb. Hatco shatter-resistant bulbs meet N.S.F. standards for foodholding and display areas.
WARNINGOnly bulbs which meet or exceed N.S.F. standards,specifically designed for food holding areas must beused. Breakage of bulbs not specially coated couldresult in personal injury and/or food contamination.
WARNINGIf service is required on this unit, contact yourAuthorized Hatco Service Agent, or contact the Hatco Service Department at 800-558-0607 or 414-671-6350; fax 800-690-2966 or Internationalfax 414-671-3976.
WARNINGThis product has no “user” serviceable parts. To avoid damage to the unit or injury to personnel,use only Authorized Hatco Service Agents and Genuine Hatco Parts when service is required.
WARNINGGenuine Hatco Replacement Parts are specified to operate safely in the environments in which theyare used. Some aftermarket or generic replacement parts do not have the characteristicsthat will allow them to operate safely in Hatcoequipment. It is essential to use Hatco ReplacementParts when repairing Hatco equipment. Failure to use Hatco Replacement Parts may subjectoperators of the equipment to hazardous electricalvoltage, resulting in electrical shock or burn.

ACCESSORIES
10Form No. FDWM-0602
LENGTHEN
SHORTEN
Figure 9. Installation of Adjustable Legs
4-Tier Circle Rack*Model FDW4TCR
Top Tier: 4-5/8" (12 cm)on center.
All others: 3-3/4" (10 cm)on centers.
3-Tier Pretzel Tree*Model FDW4TPT
Top 2 Tiers: 6" (15 cm) on centers.Bottom Tier: 6-1/8" (16 cm) on center.
4-Shelf Multi-Purpose RackModel FDW4SMP
Top 3 Tiers: 4" (10 cm)on center.
Bottom Tier: 3" (8 cm) on center.
1st & 3rd racks are removable.
*Racks designed for use with motorized display.
Figure 10. Display Racks
4" (10 cm) ADJUSTABLE LEGSTo install the 4" (10 cm) appliance legs, place the uniton its side. Be sure to secure all glass with tape.Remove the four (4) 1" (2.5 cm) metal screw type feet.Screw the 4" (10 cm) legs into the holes provided. Afterall the legs are tightened, return the unit to its uprightposition. If the unit is not level or rocks, turn the adjustable tip of the appropriate leg to correct the condition. See Figure 9.
FRENCH DOORSAttractive French doors are available on all Flav-R-Fresh models. When used on models FDW-1 or FDW-2, only one door controls the rack pause switch.
DISPLAY RACKSA chrome-plated 4-tier circle rack, a chrome-plated 4-shelf multi-purpose rack and a stainless steel pretzeltree are available to “customize” Flav-R-Fresh to yourfoodservice operation. See Figure 10.
MERCHANDISING DECALSIGNS/GRAPHICSSelf-adhesive merchandising decal signs and graphicsare available to promote your food products. The signsare designed to be installed on three (3) sides of the cabinet above the glass panels. Merchandisingdecal signs are red with yellow letters reading PIZZAor PRETZELS. Graphic decals feature food illustrationsonly and are available for Pizza, Chicken, Pretzels andBiscuits/Croissants.
Before installing decals, clean the stainless steel sidepanels with a non-oily cleaner, such as isopropyl alcohol(rubbing alcohol). After the cleaned surfaces have dried,simply remove the protective backing form the sign or decal and apply to the panel. Any air pockets or bubbles behind the sticker can be removed byrubbing gently with soft cloth from the center towardsthe outer edges.
HATCO LIMITED WARRANTY
11 Form No. FDWM-0602
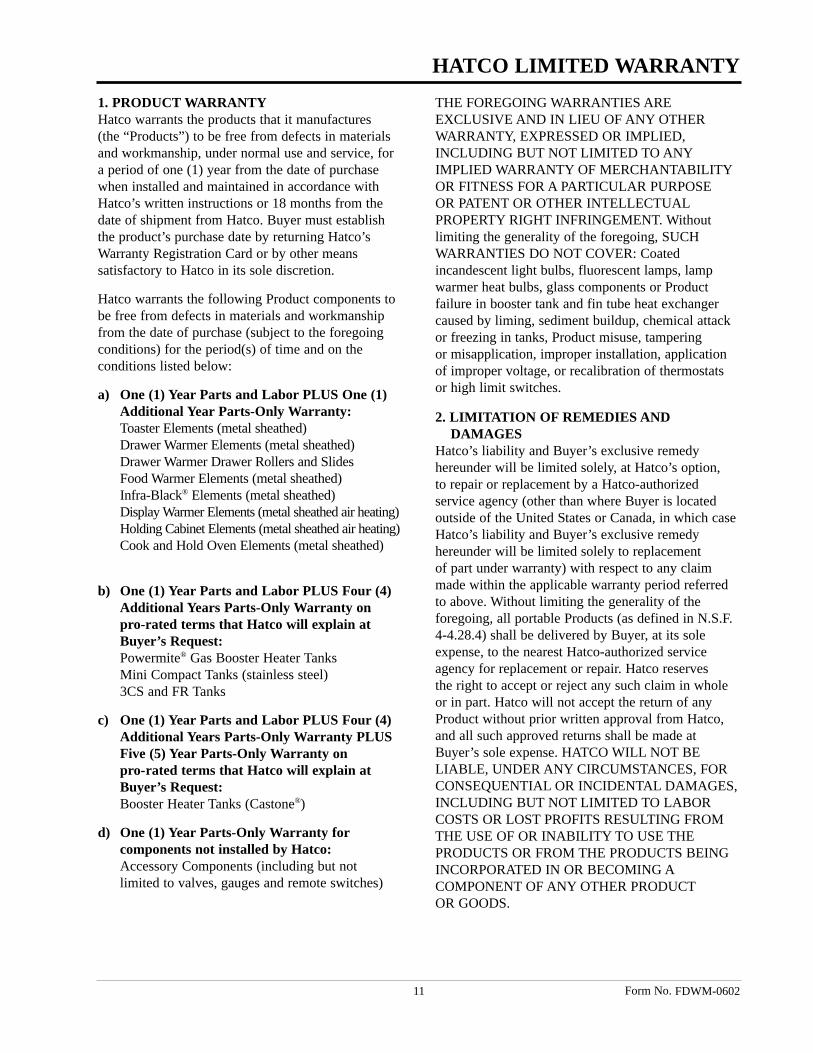
1. PRODUCT WARRANTYHatco warrants the products that it manufactures (the “Products”) to be free from defects in materialsand workmanship, under normal use and service, fora period of one (1) year from the date of purchasewhen installed and maintained in accordance withHatco’s written instructions or 18 months from thedate of shipment from Hatco. Buyer must establishthe product’s purchase date by returning Hatco’sWarranty Registration Card or by other meanssatisfactory to Hatco in its sole discretion.
Hatco warrants the following Product components tobe free from defects in materials and workmanshipfrom the date of purchase (subject to the foregoingconditions) for the period(s) of time and on theconditions listed below:
a) One (1) Year Parts and Labor PLUS One (1) Additional Year Parts-Only Warranty:Toaster Elements (metal sheathed)Drawer Warmer Elements (metal sheathed)Drawer Warmer Drawer Rollers and SlidesFood Warmer Elements (metal sheathed)Infra-Black® Elements (metal sheathed)Display Warmer Elements (metal sheathed air heating)Holding Cabinet Elements (metal sheathed air heating)Cook and Hold Oven Elements (metal sheathed)
b) One (1) Year Parts and Labor PLUS Four (4) Additional Years Parts-Only Warranty on pro-rated terms that Hatco will explain at Buyer’s Request:Powermite® Gas Booster Heater TanksMini Compact Tanks (stainless steel)3CS and FR Tanks
c) One (1) Year Parts and Labor PLUS Four (4) Additional Years Parts-Only Warranty PLUS Five (5) Year Parts-Only Warranty on pro-rated terms that Hatco will explain at Buyer’s Request:Booster Heater Tanks (Castone®)
d) One (1) Year Parts-Only Warranty forcomponents not installed by Hatco:Accessory Components (including but not limited to valves, gauges and remote switches)
THE FOREGOING WARRANTIES ARE EXCLUSIVE AND IN LIEU OF ANY OTHERWARRANTY, EXPRESSED OR IMPLIED,INCLUDING BUT NOT LIMITED TO ANYIMPLIED WARRANTY OF MERCHANTABILITYOR FITNESS FOR A PARTICULAR PURPOSE OR PATENT OR OTHER INTELLECTUALPROPERTY RIGHT INFRINGEMENT. Withoutlimiting the generality of the foregoing, SUCH WARRANTIES DO NOT COVER: Coatedincandescent light bulbs, fluorescent lamps, lampwarmer heat bulbs, glass components or Productfailure in booster tank and fin tube heat exchangercaused by liming, sediment buildup, chemical attackor freezing in tanks, Product misuse, tampering or misapplication, improper installation, applicationof improper voltage, or recalibration of thermostats or high limit switches.
2. LIMITATION OF REMEDIES AND DAMAGES
Hatco’s liability and Buyer’s exclusive remedy hereunder will be limited solely, at Hatco’s option, to repair or replacement by a Hatco-authorized service agency (other than where Buyer is locatedoutside of the United States or Canada, in which caseHatco’s liability and Buyer’s exclusive remedyhereunder will be limited solely to replacement of part under warranty) with respect to any claimmade within the applicable warranty period referredto above. Without limiting the generality of theforegoing, all portable Products (as defined in N.S.F.4-4.28.4) shall be delivered by Buyer, at its soleexpense, to the nearest Hatco-authorized serviceagency for replacement or repair. Hatco reserves the right to accept or reject any such claim in wholeor in part. Hatco will not accept the return of anyProduct without prior written approval from Hatco,and all such approved returns shall be made atBuyer’s sole expense. HATCO WILL NOT BELIABLE, UNDER ANY CIRCUMSTANCES, FORCONSEQUENTIAL OR INCIDENTAL DAMAGES,INCLUDING BUT NOT LIMITED TO LABORCOSTS OR LOST PROFITS RESULTING FROMTHE USE OF OR INABILITY TO USE THEPRODUCTS OR FROM THE PRODUCTS BEINGINCORPORATED IN OR BECOMING ACOMPONENT OF ANY OTHER PRODUCTOR GOODS.

NOTES
12Form No. FDWM-0602

NOTES
13 Form No. FDWM-0602

HATCO CORPORATIONP.O. Box 340500, Milwaukee, WI 53234-0500 U.S.A.
(800) 558-0607 (414) 671-6350Parts & Service Fax (800) 690-2966 Int’l. Fax (414) 671-3976
www.hatcocorp.com
HATCO AUTHORIZED PARTS DISTRIBUTORS
Part No. 07.04.110.00 Form No. FDWM-0602
ALABAMAJones McLeod Appl. Svc.Birmingham 205-251-0159
ARIZONAAuth. Comm. Food Equip.Phoenix 602-234-2443Byassee Equipment Co.Phoenix 602-252-0402
CALIFORNIAIndustrial ElectricHuntington Beach 714-379-7100Chapman Appl. ServiceSan Diego 619-298-7106P & D ApplianceS. San Francisco 650-635-1900COLORADOHawkins Commercial ApplianceEnglewood 303-781-5548
DELAWAREFood Equipment ServiceWilmington 302-996-9363
FLORIDAWhaley Foodservice RepairJacksonville 904-725-7800Nass Service Co., Inc.Orlando 407-425-2681B.G.S.I.Pompano Beach 954-971-0456Comm. Appliance ServiceTampa 813-663-0313
GEORGIASoutheastern Rest. Svc.Norcross 770-446-6177
HAWAIIBurney’s Comm. Service, Inc.Honolulu 808-848-1466Food Equip Parts & ServiceHonolulu 808-847-4871
ILLINOISParts TownLombard 708-865-7278Eichenauer Elec. ServiceDecatur 217-429-4229Midwest Elec. Appl. ServiceElmhurst 630-279-8000Cone’s Repair ServiceMoline 309-797-5323
INDIANAGCS ServiceIndianapolis 317-545-9655
IOWAElectric Motor Service Co.Davenport 319-323-1823
KENTUCKYGCS ServiceLouisville 502-3671788
LOUISIANAChandlers Parts & ServiceBaton Rouge 225-272-6620Bana Comm. Parts, Inc.Shreveport 318-631-6550
MARYLANDElectric Motor ServiceBaltimore 410-467-8080GCS ServiceSilver Spring 301-585-7550
MASSACHUSETTSAce Service Co., Inc.Needham 781-449-4220
MICHIGANCommercial Kitchen ServiceBay City 517-893-4561Bildons Appliance ServiceDetroit 248-478-3320Midwest Food Equip. ServiceGrandville 616-261-2000
MINNESOTAGCS ServiceMinneapolis 612-546-4221
MISSOURIGCS ServiceKansas City 816-920-5999Commercial Kitchen ServicesSt. Louis 314-890-0700Kaemmerlen Parts & ServiceSt. Louis 314-535-2222
NEBRASKAAnderson ElectricOmaha 402-341-1414
NEVADABurney’s CommercialLas Vegas 702-736-0006Hi. Tech Commercial ServiceN. Las Vegas 702-649-4616NEW JERSEYJay Hill RepairFairfield 973-575-9145Service PlusFlanders 973-691-6300NEW YORKAcme American Repairs, Inc.Brooklyn 718-456-6544Alpro Service Co.Brooklyn 718-386-2515
NEW YORK (continued)Appliance InstallationBuffalo 716-884-7425Northern Parts Dist.Plattsburgh 518-563-3200J. B. Brady, Inc.Syracuse 315-422-9271NORTH CAROLINAAuthorized ApplianceCharlotte 704-377-4501
OHIOAkron/Canton Comm. Svc. Inc.Akron 330-753-6635Certified Service CenterCincinnati 513-772-6600GCS ServiceColumbus 614-476-3225Electrical Appl. Repair ServiceIndependence 216-459-8700E. A. Wichman Co.Toledo 419-385-9121
OKLAHOMAHagar Rest. Service, Inc.Oklahoma City 405-235-2184Krueger, Inc.Oklahoma City 405-528-8883
OREGONBressie Electric Co.Portland 503-231-7171Ron’s Service, Inc.Portland 503-624-0890PENNSYLVANIAAuthorized Factory ServiceCoraopolis 412-262-2330FAST Comm. Appl. ServicePhiladelphia 215-288-4800GCS ServicePittsburgh 412-787-1970K & D Service Co.Harrisburg 717-236-9039Elmer Schultz ServicesPhiladelphia 215-627-5401Electric Repair Co.Reading 610-376-5444RHODE ISLANDMarshall Electric Co.Providence 401-331-1163SOUTH CAROLINAWhaley Foodservice RepairW. Columbia 803-791-4420TENNESSEECamp ElectricMemphis 901-527-7543
TEXASStove Parts SupplyFort Worth 817-831-0381Armstrong Repair ServiceHouston 713-666-7100Commercial Kitchen Repair Co.San Antonio 210-735-2811San Antonio Rest. Equip.San Antonio 210-532-1660
UTAHGCS ServiceSalt Lake City 801-487-3653VIRGINIADaubersNorfolk 757-855-4097DaubersSpringfield 703-866-3600WASHINGTONRestaurant Appl. ServiceSeattle 206-524-8200WISCONSINA.S.C., Inc.Madison 608-246-3160A.S.C., Inc.Milwaukee 414-543-6460
CANADA
BRITISH COLUMBIAKey Food Equipment ServiceVancouver 604-433-4484ONTARIOR.G. Henderson Ltd.Toronto 416-422-5580Choquette CKSOttawa 613-739-8458QUÉBECChoquette CKSMontreal 514-722-2000Choquette CKSQuébec City 418-681-3944
Printed in U.S.A. June 2002