Embed Size (px)
Citation preview
SecurityShield™ for Microsoft ISA servers
version 1.0
Installation Guide
COPYRIGHTCopyright © 2004 Networks Associates Technology, Inc. All Rights Reserved. No part of this publication may be reproduced, transmitted, transcribed, stored in a retrieval system, or translated into any language in any form or by any means without the written permission of Networks Associates Technology, Inc., or its suppliers or affiliate companies. To obtain this permission, write to the attention of the Network Associates legal department at: 5000 Headquarters Drive, Plano, Texas 75024, or call +1-972-963-8000.
TRADEMARK ATTRIBUTIONSActive Firewall, Active Security, ActiveSecurity (in Katakana), ActiveHelp, ActiveShield, AntiVirus Anyware and design, Bomb Shelter, Certified Network Expert, Clean-Up, CleanUp Wizard, ClickNet, CNX, CNX Certification Certified Network Expert and design, Covert, Design (Stylized E), Design (Stylized N), Disk Minder, Distributed Sniffer System, Distributed Sniffer System (in Katakana), Dr Solomon’s, Dr Solomon’s label, Entercept, Enterprise SecureCast, Enterprise SecureCast (in Katakana), ePolicy Orchestrator, EZ SetUp, First Aid, ForceField, GMT, GroupShield, GroupShield (in Katakana), Guard Dog, HomeGuard, Hunter, IntruShield, Intrusion Prevention Through Innovation, IntruVert Networks, LANGuru, LANGuru (in Katakana), M and Design, McAfee, McAfee (in Katakana), McAfee and design, McAfee.com, McAfee VirusScan, NA Network Associates, Net Tools, Net Tools (in Katakana), NetCrypto, NetOctopus, NetScan, NetShield, NetStalker, Network Associates, Network Associates Coliseum, NetXray, NotesGuard, Nuts & Bolts, Oil Change, PC Medic, PCNotary, PrimeSupport, Recoverkey, Recoverkey - International, Registry Wizard, RingFence, Router PM, SecureCast, SecureSelect, Sniffer, Sniffer (in Hangul), SpamKiller, Stalker, TIS, TMEG, Total Network Security, Total Network Visibility, Total Network Visibility (in Katakana), Total Virus Defense, Trusted Mail, UnInstaller, Virex, Virus Forum, ViruScan, VirusScan, WebScan, WebShield, WebShield (in Katakana), WebSniffer, WebStalker, WebWall, What’s The State Of Your IDS?, Who’s Watching Your Network, WinGauge, Your E-Business Defender, Zip Manager are registered trademarks or trademarks of Network Associates, Inc. and/or its affiliates in the US and/or other countries. Sniffer® brand products are made only by Network Associates, Inc. All other registered and unregistered trademarks herein are the sole property of their respective owners.
LICENSE INFORMATIONLicense AgreementNOTICE TO ALL USERS: CAREFULLY READ THE APPROPRIATE LEGAL AGREEMENT CORRESPONDING TO THE LICENSE YOU PURCHASED, WHICHSETS FORTH THE GENERAL TERMS AND CONDITIONS FOR THE USE OF THE LICENSED SOFTWARE. IF YOU DO NOT KNOW WHICH TYPE OF LICENSEYOU HAVE ACQUIRED, PLEASE CONSULT THE SALES AND OTHER RELATED LICENSE GRANT OR PURCHASE ORDER DOCUMENTS THATACCOMPANIES YOUR SOFTWARE PACKAGING OR THAT YOU HAVE RECEIVED SEPARATELY AS PART OF THE PURCHASE (AS A BOOKLET, A FILEON THE PRODUCT CD, OR A FILE AVAILABLE ON THE WEB SITE FROM WHICH YOU DOWNLOADED THE SOFTWARE PACKAGE). IF YOU DO NOTAGREE TO ALL OF THE TERMS SET FORTH IN THE AGREEMENT, DO NOT INSTALL THE SOFTWARE. IF APPLICABLE, YOU MAY RETURN THE PRODUCTTO NETWORK ASSOCIATES OR THE PLACE OF PURCHASE FOR A FULL REFUND.
AttributionsThis product includes or may include:� Software developed by the OpenSSL Project for use in the OpenSSL Toolkit (http://www.openssl.org/).�� Cryptographic software written by Eric A. Young andsoftware written by Tim J. Hudson.�� Some software programs that are licensed (or sublicensed) to the user under the GNU General Public License (GPL) or othersimilar Free Software licenses which, among other rights, permit the user to copy, modify and redistribute certain programs, or portions thereof, and have access tothe source code. The GPL requires that for any software covered under the GPL which is distributed to someone in an executable binary format, that the source codealso be made available to those users. For any such software covered under the GPL, the source code is made available on this CD. If any Free Software licensesrequire that Network Associates provide rights to use, copy or modify a software program that are broader than the rights granted in this agreement, then such rightsshall take precedence over the rights and restrictions herein.� � Software originally written by Henry Spencer, Copyright 1992, 1993, 1994, 1997 Henry Spencer.� Software originally written by Robert Nordier, Copyright © 1996-7 Robert Nordier.�� Software written by Douglas W. Sauder.�� Software developed by theApache Software Foundation (http://www.apache.org/). A copy of the license agreement for this software can be found at www.apache.org/licenses/LICENSE-2.0.txt.�� International Components for Unicode (“ICU”) Copyright © 1995-2002 International Business Machines Corporation and others.�� Software developedby CrystalClear Software, Inc., Copyright © 2000 CrystalClear Software, Inc.� � FEAD® Optimizer® technology, Copyright Netopsystems AG, Berlin, Germany.� Outside In® Viewer Technology © 1992-2001 Stellent Chicago, Inc. and/or Outside In® HTML Export, © 2001 Stellent Chicago, Inc.�� Software copyrighted byThai Open Source Software Center Ltd. and Clark Cooper, © 1998, 1999, 2000.�� Software copyrighted by Expat maintainers.�� Software copyrighted by TheRegents of the University of California, © 1989. �� Software copyrighted by Gunnar Ritter.�� Software copyrighted by Sun Microsystems®, Inc.© 2003.�� Softwarecopyrighted by Gisle Aas. © 1995-2003.� � Software copyrighted by Michael A. Chase, © 1999-2000.� � Software copyrighted by Neil Winton, © 1995-1996.� Software copyrighted by RSA Data Security, Inc., © 1990-1992.�� Software copyrighted by Sean M. Burke, © 1999, 2000.�� Software copyrighted by MartijnKoster, © 1995.�� Software copyrighted by Brad Appleton, © 1996-1999. �� Software copyrighted by Michael G. Schwern, © 2001.�� Software copyrighted byGraham Barr, © 1998.�� Software copyrighted by Larry Wall and Clark Cooper, © 1998-2000.�� Software copyrighted by Frodo Looijaard, © 1997.�� Softwarecopyrighted by the Python Software Foundation, Copyright © 2001, 2002, 2003. A copy of the license agreement for this software can be found at www.python.org.� Software copyrighted by Beman Dawes, © 1994-1999, 2002.�� Software written by Andrew Lumsdaine, Lie-Quan Lee, Jeremy G. Siek © 1997-2000 University ofNotre Dame.�� Software copyrighted by Simone Bordet & Marco Cravero, © 2002.�� Software copyrighted by Stephen Purcell, © 2001.�� Software developedby the Indiana University Extreme! Lab (http://www.extreme.indiana.edu/).�� Software copyrighted by International Business Machines Corporation and others,© 1995-2003.� � Software developed by the University of California, Berkeley and its contributors.� � Software developed by Ralf S. Engelschall<[email protected]> for use in the mod_ssl project (http://www.modssl.org/).� � Software copyrighted by Kevlin Henney, © 2000-2002.� � Softwarecopyrighted by Peter Dimov and Multi Media Ltd. © 2001, 2002.�� Software copyrighted by David Abrahams, © 2001, 2002. See http://www.boost.org/libs/bind/bind.html for documentation.�� Software copyrighted by Steve Cleary, Beman Dawes, Howard Hinnant & John Maddock, © 2000.�� Software copyrighted byBoost.org, © 1999-2002.�� Software copyrighted by Nicolai M. Josuttis, © 1999.�� Software copyrighted by Jeremy Siek, © 1999-2001.�� Software copyrightedby Daryle Walker, © 2001.�� Software copyrighted by Chuck Allison and Jeremy Siek, © 2001, 2002.�� Software copyrighted by Samuel Krempp, © 2001. Seehttp://www.boost.org for updates, documentation, and revision history.�� Software copyrighted by Doug Gregor ([email protected]), © 2001, 2002.�� Softwarecopyrighted by Cadenza New Zealand Ltd., © 2000.� � Software copyrighted by Jens Maurer, © 2000, 2001.� � Software copyrighted by Jaakko Järvi([email protected]), © 1999, 2000.�� Software copyrighted by Ronald Garcia, © 2002.�� Software copyrighted by David Abrahams, Jeremy Siek, and DaryleWalker, © 1999-2001.� � Software copyrighted by Stephen Cleary ([email protected]), © 2000.� � Software copyrighted by Housemarque Oy <http://www.housemarque.com>, © 2001.�� Software copyrighted by Paul Moore, © 1999.�� Software copyrighted by Dr. John Maddock, © 1998-2002.�� Softwarecopyrighted by Greg Colvin and Beman Dawes, © 1998, 1999.�� Software copyrighted by Peter Dimov, © 2001, 2002.�� Software copyrighted by Jeremy Siek andJohn R. Bandela, © 2001.�� Software copyrighted by Joerg Walter and Mathias Koch, © 2000-2002.
PATENT INFORMATIONProtected by US Patents 6,029,256; 6,230,288; 6,496,875; 6,594,686; 6,622,150; 6,668,289; 6,684,329.
Issued June 2004 / SecurityShield software version 1.0DOCUMENT BUILD 022-EN
Contents
Preface . . . . . . . . . . . . . . . . . . . . . . . . . . . . . . . . . . . . . . . . . . . . . . . 5
Audience . . . . . . . . . . . . . . . . . . . . . . . . . . . . . . . . . . . . . . . . . . . . . . . . . . . . . . . . . . . . . . . 5
Conventions . . . . . . . . . . . . . . . . . . . . . . . . . . . . . . . . . . . . . . . . . . . . . . . . . . . . . . . . . . . . 6
Getting information . . . . . . . . . . . . . . . . . . . . . . . . . . . . . . . . . . . . . . . . . . . . . . . . . . . . . . . 7
Contacting McAfee Security & Network Associates . . . . . . . . . . . . . . . . . . . . . . . . . . . . . . . 8
1 About SecurityShield 1.0 . . . . . . . . . . . . . . . . . . . . . . . . . . . . . . . . . 9
What is SecurityShield? . . . . . . . . . . . . . . . . . . . . . . . . . . . . . . . . . . . . . . . . . . . . . . . . . . . . 9
How does SecurityShield work? . . . . . . . . . . . . . . . . . . . . . . . . . . . . . . . . . . . . . . . . . . . . . 9
SecurityShield features . . . . . . . . . . . . . . . . . . . . . . . . . . . . . . . . . . . . . . . . . . . . . . . . . . . 11
Virus scanning of e-mail messages and web access . . . . . . . . . . . . . . . . . . . . . . . . 11
Content filtering by policies . . . . . . . . . . . . . . . . . . . . . . . . . . . . . . . . . . . . . . . . . . . . 11
Enterprise rollout, administration, updating and reporting using McAfee ePolicy Orchestrator . . . . . . . . . . . . . . . . . . . . . . . . . . . . . . . . . . . . . . . . . . . . . . . . . . . . . 12
Remote administration . . . . . . . . . . . . . . . . . . . . . . . . . . . . . . . . . . . . . . . . . . . . . . . 12
Rapid installation of supporting components . . . . . . . . . . . . . . . . . . . . . . . . . . . . . . . 13
Comfort pages and Keep Alive . . . . . . . . . . . . . . . . . . . . . . . . . . . . . . . . . . . . . . . . . 13
Anti-spam add-on package . . . . . . . . . . . . . . . . . . . . . . . . . . . . . . . . . . . . . . . . . . . . 13
2 Preparing for Installation . . . . . . . . . . . . . . . . . . . . . . . . . . . . . . . . 15
System requirements . . . . . . . . . . . . . . . . . . . . . . . . . . . . . . . . . . . . . . . . . . . . . . . . . . . . . 15
Rights and permissions . . . . . . . . . . . . . . . . . . . . . . . . . . . . . . . . . . . . . . . . . . . . . . . . . . . 16
SecurityShield software distributions . . . . . . . . . . . . . . . . . . . . . . . . . . . . . . . . . . . . . . . . . 17
Important considerations . . . . . . . . . . . . . . . . . . . . . . . . . . . . . . . . . . . . . . . . . . . . . . . . . . 17
Optional components . . . . . . . . . . . . . . . . . . . . . . . . . . . . . . . . . . . . . . . . . . . . . . . . . . . . . 17
Installation checklist . . . . . . . . . . . . . . . . . . . . . . . . . . . . . . . . . . . . . . . . . . . . . . . . . . . . . 18
After the installation . . . . . . . . . . . . . . . . . . . . . . . . . . . . . . . . . . . . . . . . . . . . . . . . . . 19
Installation Guide iii
Contents
3 Installing the Software . . . . . . . . . . . . . . . . . . . . . . . . . . . . . . . . . . 21
Downloading the installation files . . . . . . . . . . . . . . . . . . . . . . . . . . . . . . . . . . . . . . . . . . . . 21
Installing SecurityShield . . . . . . . . . . . . . . . . . . . . . . . . . . . . . . . . . . . . . . . . . . . . . . . . . . 21
Installing Alert Manager . . . . . . . . . . . . . . . . . . . . . . . . . . . . . . . . . . . . . . . . . . . . . . 24
Installing Outbreak Manager . . . . . . . . . . . . . . . . . . . . . . . . . . . . . . . . . . . . . . . . . . . 27
Installing Black and White List Server . . . . . . . . . . . . . . . . . . . . . . . . . . . . . . . . . . . . 27
Installing the Anti-spam feature . . . . . . . . . . . . . . . . . . . . . . . . . . . . . . . . . . . . . . . . . 27
Final stage of installation . . . . . . . . . . . . . . . . . . . . . . . . . . . . . . . . . . . . . . . . . . . . . . 27
Installing for remote administration . . . . . . . . . . . . . . . . . . . . . . . . . . . . . . . . . . . . . . . . . . 28
Registering your details . . . . . . . . . . . . . . . . . . . . . . . . . . . . . . . . . . . . . . . . . . . . . . . . . . . 28
Installing SecurityShield from the command line . . . . . . . . . . . . . . . . . . . . . . . . . . . . . . . . 29
Installing SecurityShield on array servers . . . . . . . . . . . . . . . . . . . . . . . . . . . . . . . . . . . . . 31
Changes to your system after installation . . . . . . . . . . . . . . . . . . . . . . . . . . . . . . . . . . . . . 32
Testing the anti-virus software . . . . . . . . . . . . . . . . . . . . . . . . . . . . . . . . . . . . . . . . . . . . . . 33
Testing the anti-spam software . . . . . . . . . . . . . . . . . . . . . . . . . . . . . . . . . . . . . . . . . . . . . 34
Using Microsoft Windows Performance Monitors . . . . . . . . . . . . . . . . . . . . . . . . . . . . . . . 34
Repairing SecurityShield . . . . . . . . . . . . . . . . . . . . . . . . . . . . . . . . . . . . . . . . . . . . . . . . . . 35
Removing SecurityShield from your computer . . . . . . . . . . . . . . . . . . . . . . . . . . . . . . . . . . 36
Index . . . . . . . . . . . . . . . . . . . . . . . . . . . . . . . . . . . . . . . . . . . . . . . . 37
iv SecurityShield software version 1.0
Preface
This guide introduces McAfee® SecurityShield software version 1.0, and provides the following information:
� Overview of the product.
� Descriptions of product features.
� Detailed instructions for installing the software.
AudienceThis information is designed for system and network administrators who are responsible for their company’s anti-virus and security program.
Installation Guide 5
Preface
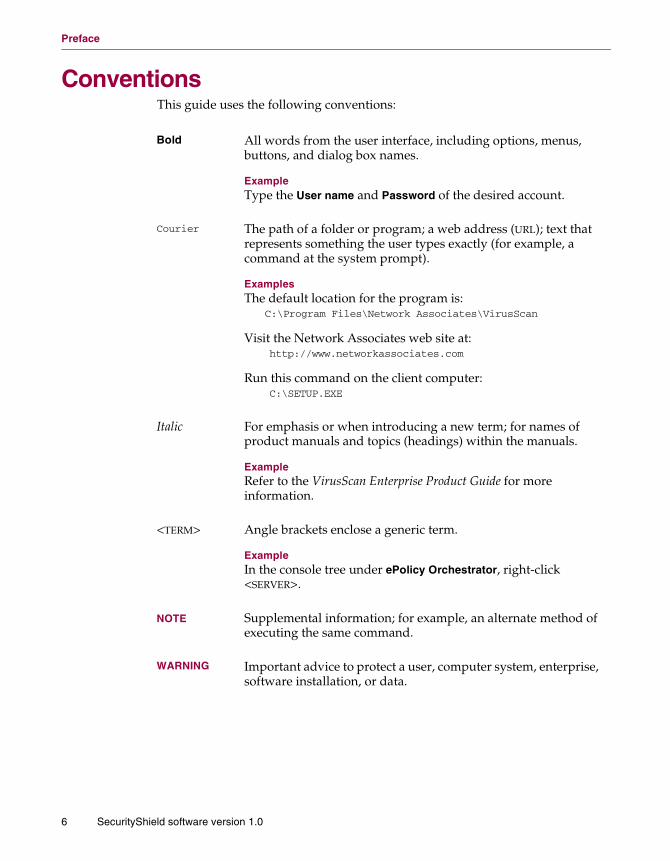
ConventionsThis guide uses the following conventions:
Bold All words from the user interface, including options, menus, buttons, and dialog box names.
ExampleType the User name and Password of the desired account.
Courier The path of a folder or program; a web address (URL); text that represents something the user types exactly (for example, a command at the system prompt).
ExamplesThe default location for the program is:
C:\Program Files\Network Associates\VirusScan
Visit the Network Associates web site at:http://www.networkassociates.com
Run this command on the client computer:C:\SETUP.EXE
Italic For emphasis or when introducing a new term; for names of product manuals and topics (headings) within the manuals.
ExampleRefer to the VirusScan Enterprise Product Guide for more information.
<TERM> Angle brackets enclose a generic term.
ExampleIn the console tree under ePolicy Orchestrator, right-click <SERVER>.
NOTE Supplemental information; for example, an alternate method of executing the same command.
WARNING Important advice to protect a user, computer system, enterprise, software installation, or data.
6 SecurityShield software version 1.0
Preface
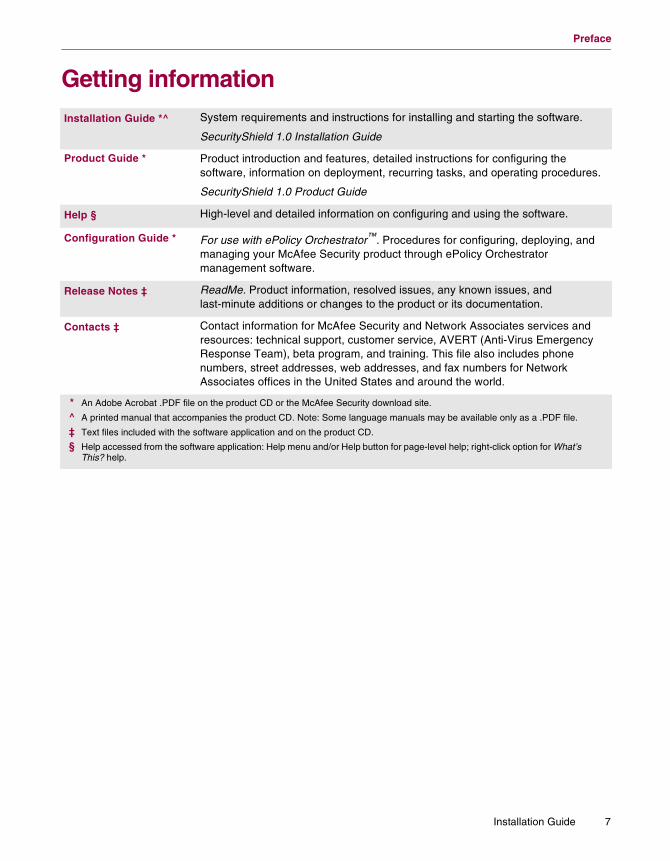
Getting informationInstallation Guide *^ System requirements and instructions for installing and starting the software.
SecurityShield 1.0 Installation Guide
Product Guide * Product introduction and features, detailed instructions for configuring the software, information on deployment, recurring tasks, and operating procedures.
SecurityShield 1.0 Product Guide
Help § High-level and detailed information on configuring and using the software.
Configuration Guide * For use with ePolicy Orchestrator™. Procedures for configuring, deploying, and managing your McAfee Security product through ePolicy Orchestrator management software.
Release Notes ‡ ReadMe. Product information, resolved issues, any known issues, and last-minute additions or changes to the product or its documentation.
Contacts ‡ Contact information for McAfee Security and Network Associates services and resources: technical support, customer service, AVERT (Anti-Virus Emergency Response Team), beta program, and training. This file also includes phone numbers, street addresses, web addresses, and fax numbers for Network Associates offices in the United States and around the world.
* An Adobe Acrobat .PDF file on the product CD or the McAfee Security download site.
^ A printed manual that accompanies the product CD. Note: Some language manuals may be available only as a .PDF file.
‡ Text files included with the software application and on the product CD.
§ Help accessed from the software application: Help menu and/or Help button for page-level help; right-click option for What’sThis? help.
Installation Guide 7
Preface
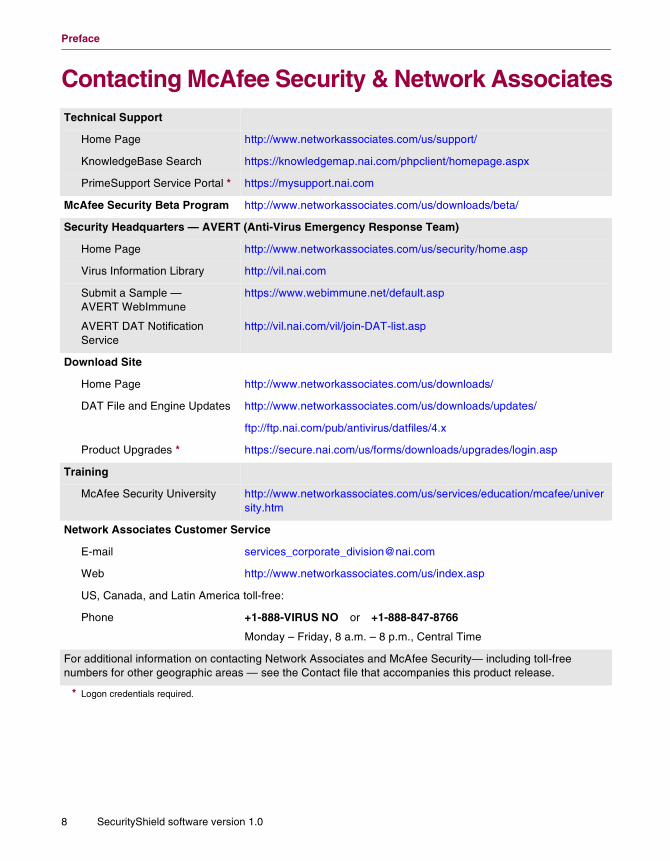
Contacting McAfee Security & Network AssociatesTechnical Support
Home Page http://www.networkassociates.com/us/support/
KnowledgeBase Search https://knowledgemap.nai.com/phpclient/homepage.aspx
PrimeSupport Service Portal * https://mysupport.nai.com
McAfee Security Beta Program http://www.networkassociates.com/us/downloads/beta/
Security Headquarters — AVERT (Anti-Virus Emergency Response Team)
Home Page http://www.networkassociates.com/us/security/home.asp
Virus Information Library http://vil.nai.com
Submit a Sample — AVERT WebImmune
AVERT DAT Notification Service
https://www.webimmune.net/default.asp
http://vil.nai.com/vil/join-DAT-list.asp
Download Site
Home Page http://www.networkassociates.com/us/downloads/
DAT File and Engine Updates http://www.networkassociates.com/us/downloads/updates/
ftp://ftp.nai.com/pub/antivirus/datfiles/4.x
Product Upgrades * https://secure.nai.com/us/forms/downloads/upgrades/login.asp
Training
McAfee Security University http://www.networkassociates.com/us/services/education/mcafee/university.htm
Network Associates Customer Service
E-mail [email protected]
Web http://www.networkassociates.com/us/index.asp
US, Canada, and Latin America toll-free:
Phone +1-888-VIRUS NO or +1-888-847-8766
Monday – Friday, 8 a.m. – 8 p.m., Central Time
For additional information on contacting Network Associates and McAfee Security— including toll-free numbers for other geographic areas — see the Contact file that accompanies this product release.
* Logon credentials required.
8 SecurityShield software version 1.0
1
About SecurityShield 1.0This section introduces McAfee SecurityShield 1.0 and describes how it protects data passing through your Microsoft ISA (Internet Security and Acceleration) server from viruses and other potentially harmful or undesirable content.
The following topics are included:
� What is SecurityShield?
� How does SecurityShield work?.
� SecurityShield features on page 11.
What is SecurityShield? SecurityShield software provides protection against viruses and other threats for several versions of Microsoft ISA servers. See the list in the table, System requirements on page 15.
NOTEBe aware that in some implementations for the Small Business Servers, data does not pass through the ISA filters.
How does SecurityShield work?The SecurityShield software attaches special filters to the ISA software enabling it to filter transmissions that use many of the common protocols such as HTTP, SMTP and FTP.
After the ISA server receives an e-mail message or a web access, the application and web filters provided by SecurityShield scan the item for potentially harmful software such as viruses, Trojan horse programs, and worms. SecurityShield can also scan for other types of content within the item, using the policies and rules that you have defined within the SecurityShield software.
Installation Guide 9

About SecurityShield 1.0
You administer SecurityShield through a simple user interface. This can take two forms:
� If IIS is installed on the ISA server, you can administer the SecurityShield software using Internet Explorer.
� If IIS is not installed on the ISA server, you can administer the SecurityShield software using secure process-to-process communication (“named pipes”) within the same Microsoft network.
Using these interfaces, you can administer the SecurityShield software locally (from the ISA server itself) or remotely (from another computer within the network). Furthermore, you can administer any number of ISA servers from a single point. Both interfaces have a similar appearance and identical features.
Figure 1-1. How SecurityShield works
ISA
IISSecurityShield
Application and web filters
User interface -Internet Explorer
Internet
User interface -over network
Your network
10 SecurityShield software version 1.0
About SecurityShield 1.0
SecurityShield featuresThis release of the SecurityShield software introduces the following major features:
� Virus scanning of e-mail messages and web access.
� Content filtering by policies.
� Enterprise rollout, administration, updating and reporting using McAfee ePolicy Orchestrator.
� Remote administration.
� Rapid installation of supporting components on page 13.
� Comfort pages and Keep Alive on page 13.
� Anti-spam add-on package on page 13
Virus scanning of e-mail messages and web access
Content filtering by policies
Description SecurityShield can scan e-mail messages and web accesses that pass through the Microsoft ISA server. The protocols that are scanned include FTP (port mode), SMTP, HTTP, Web Proxy, and FTP over HTTP.
Where to find For more information about configuring SecurityShield for scanning, see the Product Guide.
Description SecurityShield use policies to examine data that passes through the ISA server via e-mail messages and web access. SecurityShield can check file sizes, scan for specific words (such as profanity) or phrases, and scan for viruses.
Policies can be applied to specific addresses and different protocols (for inbound or outbound data).
Benefits Policy enforcement enables you to tailor rules to each protocol.
Where to find For more information about setting up policies, see the Product Guide.
Installation Guide 11
About SecurityShield 1.0
Enterprise rollout, administration, updating and reporting using McAfee ePolicy Orchestrator
Remote administration
Description SecurityShield integrates with McAfee ePolicy Orchestrator™ to provide a centralized method for rolling out, administering and updating the SecurityShield software across your Microsoft ISA servers. The ePolicy Orchestrator software also enables centralized reporting of SecurityShield activity.
Benefits The ability to centrally manage an organization-wide implementation of the SecurityShield software reduces the time required to administer and update the system.
Where to find For more information about using ePolicy Orchestrator to rollout, configure and administer your SecurityShield installations, see the Configuration Guide.
Description Although the protection offered by SecurityShield runs on the ISA server itself, you can control the product remotely from any computer that has access to the server. Furthermore any number of ISA servers can be controlled from a single point.
Access is available via two methods:
� A web browser interface (Internet Explorer).
In this case, the ISA server must also host IIS (Microsoft Internet Information Server). The remote computer requires only Internet Explorer. See System requirements on page 15 for required versions.
� A similar, HTML-style interface.
This interface is effective within the same Microsoft Network. Some SecurityShield components must be installed on the remote computer. This type of access is useful if IIS is not available or is not in use.
Benefits The ability to manage the server protection remotely.
Where to find for more information about the user interface, see the Product Guide.
12 SecurityShield software version 1.0
About SecurityShield 1.0
Rapid installation of supporting components
Comfort pages and Keep Alive
Anti-spam add-on package
Description SecurityShield can also be used with McAfee’s Alert Manager™ and Outbreak Manager™ products.
To enable you to customize your installation and complete the installation quickly, we provide a single user interface from which to launch each installation.
Benefits Rapid and customizable installation.
Where to find For more information, see Optional components on page 17, and Downloading the installation files on page 21.
Description Where a large item is being scanned, some delays can occur before data is passed from the server to the client. This can cause two problems. Connections can close because of time-outs, so SecurityShield uses keep alive — passing the data in several parts. Users can experience delays while waiting to view pages from web servers, so SecurityShield provides comfort pages — informing users that their requests are being processed.
Benefits Reduced risk of disconnections due to time-outs. Improved experience for end users.
Where to find For more information about the user interface, see the Product Guide.
Description Increasingly, “spam” — unsolicited bulk-e-mail (UBE) — is becoming an problem within the workplace. Spam consumes system resources by taking up bandwidth and storage within your corporate systems, and distracts staff as they have to deal with the unwanted messages. SecurityShield includes an optional anti-spam add-on package.
Benefits By scanning and deleting the obvious spam, and marking the potential spam so that it can be easily checked, SecurityShield helps you reduce its effects considerably.
Where to find For more information about spam, see the Product Guide. For information about activation packages, see the release notes that accompany that software.
Installation Guide 13
About SecurityShield 1.0
14 SecurityShield software version 1.0
2
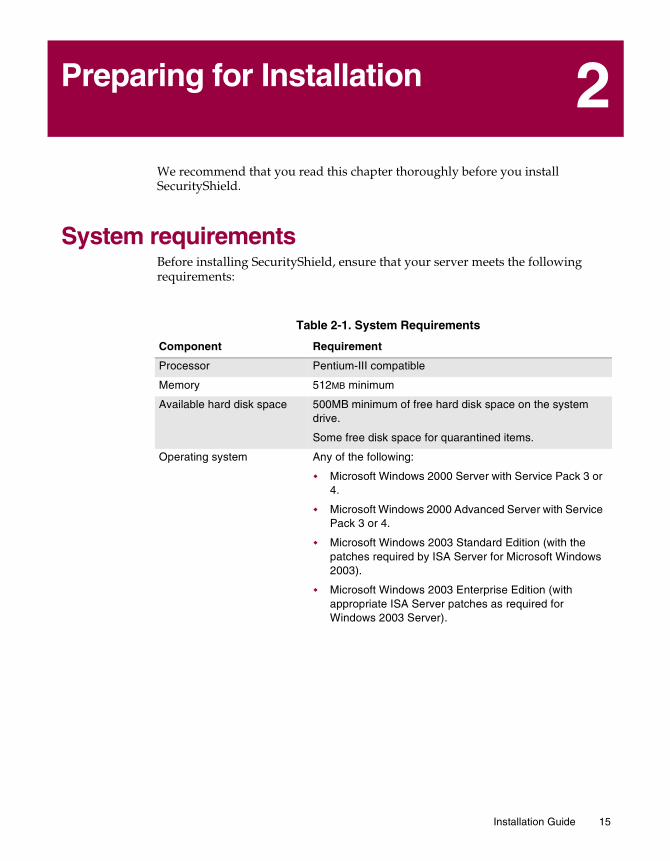
Preparing for InstallationWe recommend that you read this chapter thoroughly before you install SecurityShield.
System requirements Before installing SecurityShield, ensure that your server meets the following requirements:
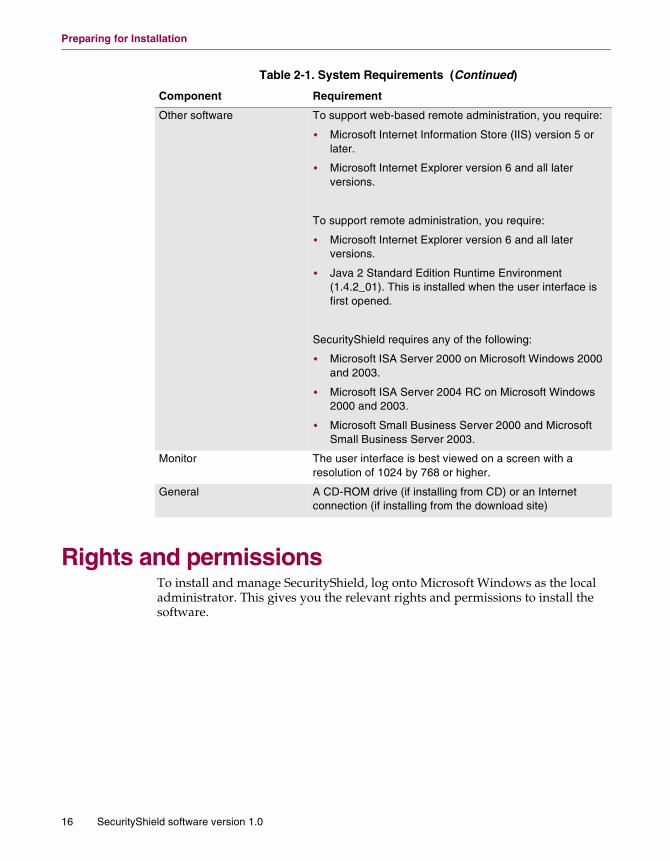
Table 2-1. System Requirements
Component Requirement
Processor Pentium-III compatible
Memory 512MB minimum
Available hard disk space 500MB minimum of free hard disk space on the system drive.
Some free disk space for quarantined items.
Operating system Any of the following:
� Microsoft Windows 2000 Server with Service Pack 3 or 4.
� Microsoft Windows 2000 Advanced Server with Service Pack 3 or 4.
� Microsoft Windows 2003 Standard Edition (with the patches required by ISA Server for Microsoft Windows 2003).
� Microsoft Windows 2003 Enterprise Edition (with appropriate ISA Server patches as required for Windows 2003 Server).
Installation Guide 15
Preparing for Installation
Rights and permissionsTo install and manage SecurityShield, log onto Microsoft Windows as the local administrator. This gives you the relevant rights and permissions to install the software.
Other software To support web-based remote administration, you require:
� Microsoft Internet Information Store (IIS) version 5 or later.
� Microsoft Internet Explorer version 6 and all later versions.
To support remote administration, you require:
� Microsoft Internet Explorer version 6 and all later versions.
� Java 2 Standard Edition Runtime Environment (1.4.2_01). This is installed when the user interface is first opened.
SecurityShield requires any of the following:
� Microsoft ISA Server 2000 on Microsoft Windows 2000 and 2003.
� Microsoft ISA Server 2004 RC on Microsoft Windows 2000 and 2003.
� Microsoft Small Business Server 2000 and Microsoft Small Business Server 2003.
Monitor The user interface is best viewed on a screen with a resolution of 1024 by 768 or higher.
General A CD-ROM drive (if installing from CD) or an Internet connection (if installing from the download site)
Table 2-1. System Requirements (Continued)
Component Requirement
16 SecurityShield software version 1.0
Preparing for Installation
SecurityShield software distributionsWe distribute SecurityShield in a number of ways:
� A compressed file to download from our web site.
� From a CD.
Once downloading a SecurityShield program archive or placing the installation CD in your computer’s CD-ROM drive, follow the installation steps in Installing SecurityShield on page 21.
Important considerationsSecurityShield protects data passing through the ISA server. We recommend that you protect the server’s local data and any bypassed data by using our other anti-virus products, such as VirusScan.
Before the installation, we recommend that you consider the following:
� SecurityShield uses Java applets to provide some banned content and anti-virus functions. For these functions to operate correctly, Microsoft Internet Explorer must be configured to allow Java Applets to be used.
� SecurityShield requires a version of the Java Standard Edition Runtime Environment (JRE). The installation files for this are included within the SecurityShield installation, and you are prompted to install this software — if it is not already installed — the first time you try to run the SecurityShield interface. A restart might be required after installation of JRE.
Optional components You can install some other useful components when you install SecurityShield:
� Alert Manager
Alert Manager enables our anti-virus products to notify you and other administrators in a variety of ways of virus attacks. You can use the alerts individually or in combinations to suit your working environment.
� Outbreak Manager
Outbreak Manager monitors e-mail, web access and FTP downloads to give warning of a major attack. It looks for multiple versions of the same virus, identical attachments or e-mail messages and other potentially harmful software appearing over a period that you specify. If Outbreak Manager identifies abnormal behavior, it responds immediately according to rules that you choose.
Installation Guide 17
Preparing for Installation
� Anti-spam add-on package
This package provides additional protection against spam, by filtering all incoming e-mail messages and assigning spam scores to each. You can then choose to block messages above a certain score, and to mark messages that have a lower score as possibly containing spam.
You can install the evaluation version or the licensed version of the anti-spam add-on package to your SecurityShield installation. The evaluation version is fully functioning, but is limited to 90 days use. You can convert the software to the licensed version by purchasing an activation package.
For more information about these components and the main features of the product, refer to the Product Guide.
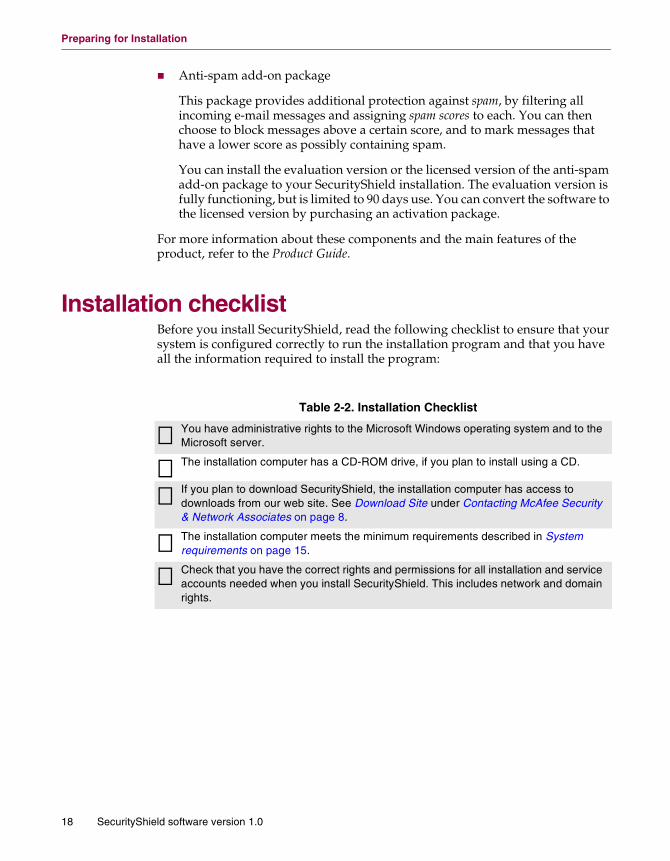
Installation checklistBefore you install SecurityShield, read the following checklist to ensure that your system is configured correctly to run the installation program and that you have all the information required to install the program:
Table 2-2. Installation Checklist
You have administrative rights to the Microsoft Windows operating system and to the Microsoft server.
The installation computer has a CD-ROM drive, if you plan to install using a CD.
If you plan to download SecurityShield, the installation computer has access to downloads from our web site. See Download Site under Contacting McAfee Security & Network Associates on page 8.
The installation computer meets the minimum requirements described in System requirements on page 15.
Check that you have the correct rights and permissions for all installation and service accounts needed when you install SecurityShield. This includes network and domain rights.
18 SecurityShield software version 1.0
Preparing for Installation
After the installationAfter installation, we recommend that you do the following:
� Allow other administrators in your organization access to the specified Detected Items database (quarantine location) where SecurityShield stores infected items.
� If you use Alert Manager to issue e-mail notifications when viruses are detected, specify a mailbox or mailboxes.
� Update the product with the latest virus definition (DAT) files.
� Set up rules for controlling content.
� Take a backup copy of the SecurityShield configuration file, McAfeeConfig.xml.
For information on updating, rules, and configuring and scheduling a scan, refer to the Product Guide.
Installation Guide 19

Preparing for Installation
20 SecurityShield software version 1.0
3
Installing the SoftwareThis section describes:
� How to install SecurityShield on a single Microsoft ISA server that does not have previous versions of SecurityShield already installed. The ISA software must be running on the installation server when you install SecurityShield. See Installing SecurityShield.
� How to install software to administer SecurityShield remotely. See Installing for remote administration on page 28.
Downloading the installation files1 Create a temporary folder on your hard disk.
2 Connect to the download area of our web site. See Download Site under Contacting McAfee Security & Network Associates on page 8.
3 Locate the SecurityShield section, and extract the archived folders to the temporary directory. You can obtain the necessary utilities to extract .ZIP archives from most electronic services, or use a CD directly to obtain the installation files.
Installing SecurityShield1 Close all open ISA server dialog boxes and other running applications.
2 In the temporary directory where you downloaded SecurityShield, or from the installation CD, double-click the SecurityShield folder. Inside this folder, locate another folder called Setup, nd double-click the Setup.exe file
3 The installation wizard starts. Click Next to continue in the copyright and user information window.
4 Click Next in the Components Selection screen. (Note that you can choose to install components like Alert Manager, Outbreak Manager, User-Level Black and White List Server, and Anti-spam for McAfee SecurityShield.)
5 A self-extracting program starts and this can take a few minutes.
Installation Guide 21
Installing the Software
Evaluation software
For evaluation versions of the software, the installation differs slightly:
� A panel appears before the license agreement, showing the expiry date of the evaluation software. Click OK to continue to the license agreement.
� The license agreement displays in English — regardless of your computer’s system language — and the license type options are disabled.
When you are using the software, a reminder panel appears near the end of the license period, showing the number of days remaining before the license expires.
The reminder panel appears several times before the license expires. If you are not ready to provide beta feedback, you can click OK to close the panel. If the license expires, SecurityShield stops scanning, sends a notification to the administrator, and logs the end of the period.
Installing the files
1 Click Next to display the Destination Folder dialog box.
To specify a different installation folder, click Browse and select the folder, then click OK. Click Next to install the software to the selected folder, otherwise just click Next to install the software to the default folder.
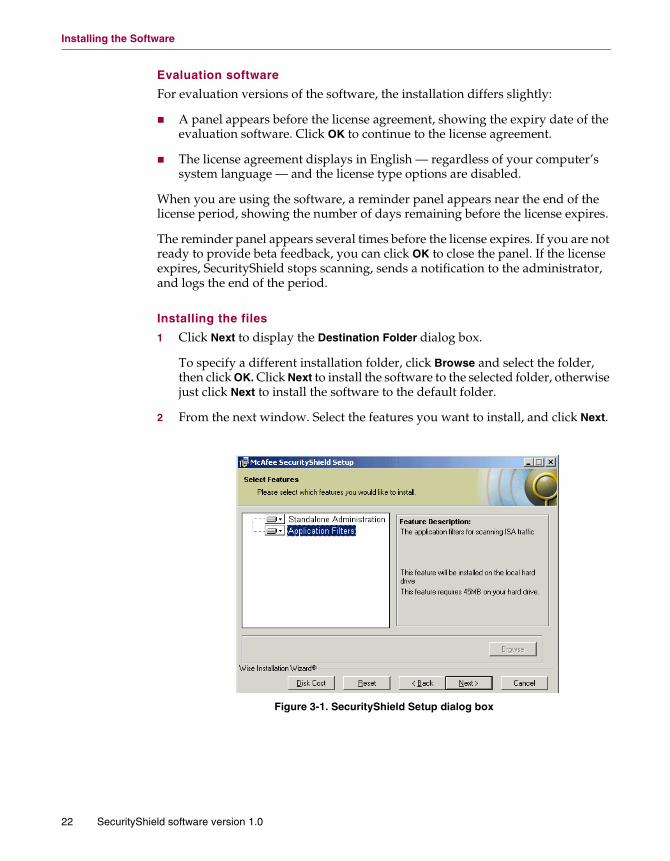
2 From the next window. Select the features you want to install, and click Next.
Figure 3-1. SecurityShield Setup dialog box
22 SecurityShield software version 1.0
Installing the Software
3 Select from the Select Features dialog box. Some features might not be available; the list depends on the software that its available on your computer.
4 Click Next to open the Ready to Install the Application dialog box.
5 Click Next to open the Updating System dialog box, which displays progress messages and a progress bar. The SecurityShield files are copied and the software is installed. This may take a few minutes.
While the files are being copied, you may click Cancel to return the system to its previous state.
On completion, the McAfee SecurityShield ... has been successfully installed dialog box opens.
6 Select any options. You may view the readme file and launch the interface.
7 Click Finish to complete the installation of SecurityShield, and to carry out the selected options.
If you do not have the Java 2 Runtime Environment already installed when the SecurityShield interface first opens, you are prompted to install it.
If you have chosen only SecurityShield, this completes the installation. If you have chosen other products to be installed (Alert Manager, Outbreak Manager, user Level Black and White List Server and Anti-spam for McAfee SecurityShield), proceed to the relevant sections which explain how to use the dialog boxes that open next. See page 24 to page 27.
� Application Filters Installs the application filters. This feature is available only when ISA server software is detected.
� Stand-alone administration
Installs a user interface to be used if IIS is not available or you prefer not to use IIS.
This feature is always available.
� Web administration Installs a user interface to be used via IIS and Internet Explorer
This feature is available only when an IIS server is detected.
Installation Guide 23
Installing the Software
Installing Alert ManagerAt stages within the installation, you need to provide specific information:
Alert Manager can be installed as a typical MSI installation. The setup.exe file is in the extracted folder under SecurityShield\AlertManager\0409 - for English. Double-clicking this will start the installation. A license agreement box is displayed. Accept the agreement and click Next. Proceed to Step 2 below.
1 If you are continuing with the installation from SecurityShield, a license agreement box is displayed. Accept the agreement and click Next.
2 On the Service Account Information dialog box, enter the user name and password to be used, then click Next. You can do one of the following:
� Select Use System Account to use the system account for the current user.
� Type a user name and password in the User Name and Password fields.
NOTEIf you specify a user name and password, make sure that user account has sufficient rights on the specified system to perform all of the alerting methods you want to configure. Administrator rights are recommended.
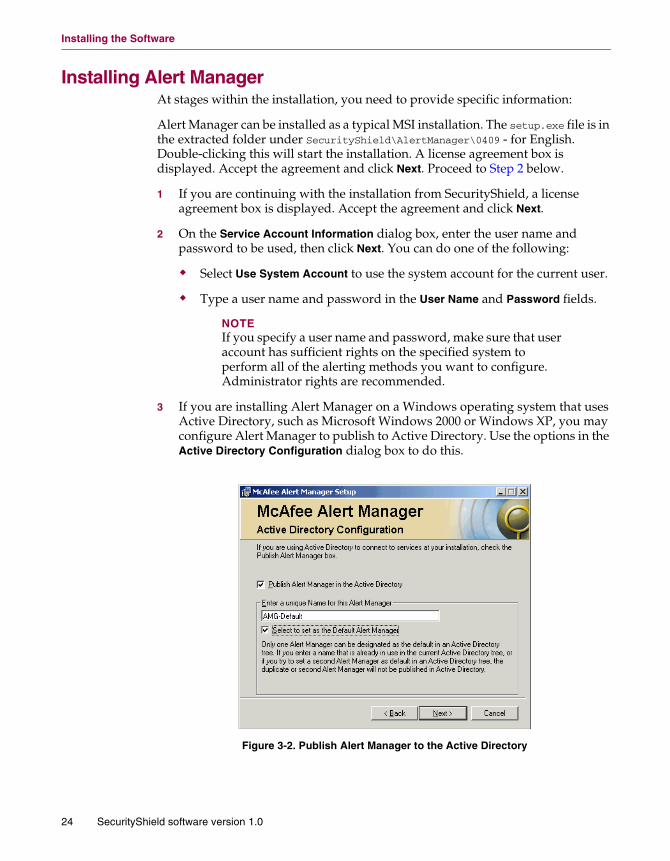
3 If you are installing Alert Manager on a Windows operating system that uses Active Directory, such as Microsoft Windows 2000 or Windows XP, you may configure Alert Manager to publish to Active Directory. Use the options in the Active Directory Configuration dialog box to do this.
Figure 3-2. Publish Alert Manager to the Active Directory
24 SecurityShield software version 1.0

Installing the Software
NOTEYou see this installation dialog box only if you are installing Alert Manager on a computer that is running a Windows operating system with Active Directory and is already part of the Active Directory domain.
If you want to publish Alert Manager to the Active Directory and do not see this dialog box during installation, your server might not have Active Directory correctly configured. See your operating system documentation for more information on how to do this.
To publish Alert Manager to Active Directory:
a Select Publish Alert Manager in the Active Directory.
b Type a unique name for the Alert Manager in the text box. If you have multiple instances of Alert Manager published in the Active Directory, each one must have a unique name.
c If you want this installation of Alert Manager to be the default, select Select to set as the default Alert Manager.
NOTEWhile there can be many instances of Alert Manager in the Active Directory, there can be only one default.
If another Alert Manager is already in the Active Directory domain and has also been set to be the default, the new Alert Manager instance will not publish to Active Directory.
d Click Next.
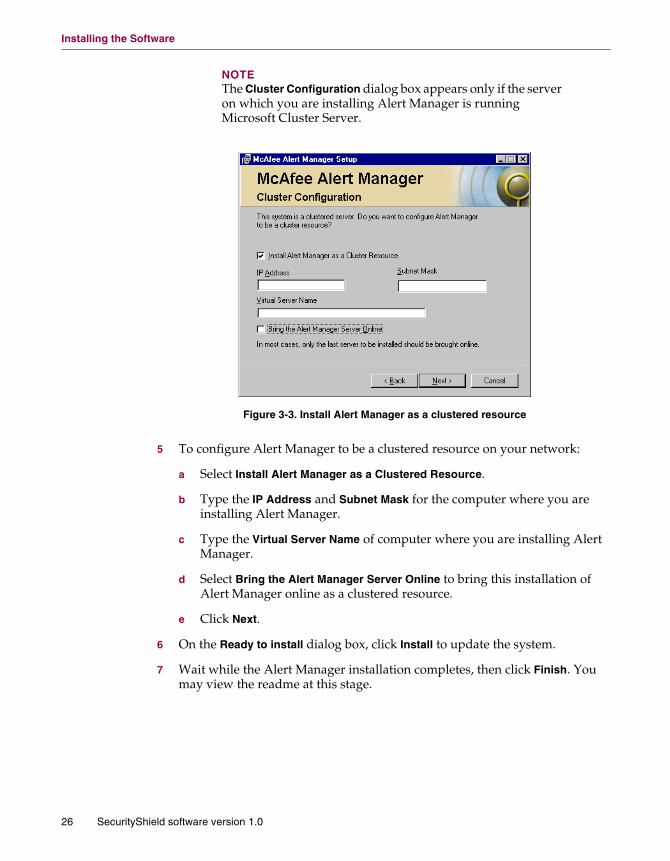
4 If you are installing Alert Manager as a clustered resource, the Cluster Configuration dialog box appears.
Installation Guide 25
Installing the Software
NOTEThe Cluster Configuration dialog box appears only if the server on which you are installing Alert Manager is running Microsoft Cluster Server.
5 To configure Alert Manager to be a clustered resource on your network:
a Select Install Alert Manager as a Clustered Resource.
b Type the IP Address and Subnet Mask for the computer where you are installing Alert Manager.
c Type the Virtual Server Name of computer where you are installing Alert Manager.
d Select Bring the Alert Manager Server Online to bring this installation of Alert Manager online as a clustered resource.
e Click Next.
6 On the Ready to install dialog box, click Install to update the system.
7 Wait while the Alert Manager installation completes, then click Finish. You may view the readme at this stage.
Figure 3-3. Install Alert Manager as a clustered resource
26 SecurityShield software version 1.0
Installing the Software
Installing Outbreak ManagerOutbreak Manager can be installed as a typical MSI installation. The Outbreak Manager Windows Installer Package file is in the extracted folder under SecurityShield\OutbreakManager. Double-clicking this will start the installation. A license agreement box is displayed. Accept the agreement and click Next. Proceed to Step 2 below.
1 If you are continuing with the installation from SecurityShield, a license agreement window is displayed. Accept the agreement and click Next.
2 A “Welcome” window is displayed. Click Next to proceed. A Ready to Install window is displayed.
3 Click Next to proceed. The installation progress is displayed on the Updating System window.
4 Click Finish. A user-level screen is displayed. Although an option is available, do not restart at this point.
Installing Black and White List Server1 If you have chosen this option with the installation from SecurityShield and are
continuing from there, a “Welcome” dialog box is displayed. Click Next to continue.
2 The Destination Folder dialog box is displayed. Click Next to accept the default folder, else click Browse to choose a new location and then click Next.
3 A Ready to Install dialog box is displayed. Click Next to proceed. The installation progress is displayed on screen.
4 Click Finish.
Installing the Anti-spam feature 1 If you have chosen this option with the installation from SecurityShield and are
continuing from there, a “Welcome” dialog box is displayed. Click Next to continue.
2 A license agreement box is displayed. Accept the agreement, and click OK.
3 Click Finish.
Final stage of installationIf you have chosen multiple components to install, the final window shows you that the McAfee SecurityShield installation is complete, and you may view the readme file and launch the interface.
Installation Guide 27
Installing the Software
Installing for remote administrationTo provide remote administration of the SecurityShield software on an ISA server, you must install a single component of the SecurityShield software on the remote computer. The process is similar to the main installation described on Installing SecurityShield on page 21.
When the Select Features dialog box opens (Step 3 on page 23), select only the stand-alone administration.
Registering your details To register your details in our customer database, click Register. You can either register SecurityShield via the Internet, or you can print out and fax the registration information.
To register via the Internet
1 Select Direct Connection to the Internet. Click Finish to open an Internet connection and your web browser.
2 Follow the instructions given in the On-line Product Registration pages.
3 To complete the installation and close the Setup Wizard, click OK.
4 In some cases, you may be asked to restart the server.
To register using the Print and fax option
1 Select Print and fax option. Click Next to display the User Registration dialog box.
2 Fill in the relevant information.
3 On completion, click either Save to save the registration information to your computer, or Print to print the Registration Summary. Fax the information to the number given in the Registration Summary.
4 Click Finish to return to the Setup Wizard.
5 To complete the installation and close the Setup Wizard, click OK.
In some cases, you may be asked to restart the server.
28 SecurityShield software version 1.0
Installing the Software
Installing SecurityShield from the command lineYou can install SecurityShield from the command line, using the SecurityShield command. This command runs the installation program SecurityShield.msi.
WARNINGDo not run SecurityShield.exe directly from the command line on a system that has any previous versions of SecurityShield installed.
1 Extract the files from the .ZIP file, and save them to a local drive on the Microsoft ISA server.
2 From the command prompt, run SecurityShield.exe.
The syntax for SecurityShield.exe is:
SecurityShield.exe /qn [INSTALLDIR=<path-to-installation-directory>][SAUI=1][WEBUI=1][FILTERS=1][CONFIG=<XML-configuration-file>] [SITELIST=<XML-sitelist-file>] /i <path-to-msi>SecurityShield.msi
The command must be on a single line. Each parameter and its value is joined with an equals sign without spaces. If you need to include a space, enclose the value within double-quotes (“). For example: INSTALLDIR=”C:\Program Files\McAfee”
The parameters are as follows:
� /qn
Sets the installation to unattended, or silent, mode.
� /i <path-to-msi>SecurityShield.msi
Specifies the SecurityShield MSI file which is used for installation.
� INSTALLDIR=<path-to-installation-directory>
Defines the directory where you want to install SecurityShield. If this is not specified, the installer prompts you for this information.
During a silent installation, you are not prompted for the directory. SecurityShield installs to the default installation directory on the boot drive:<x>:\Program Files\Network Associates\SecurityShield (where <x> is the boot drive, usually C.).
� SAUI=1
Installs a stand-alone user interface. The installer creates a shortcut to this interface in the Start menu under Programs, Network Associates, McAfee SecurityShield for Microsoft ISA Server. Where this feature is installed, the user can launch the user interface at the end of a successful install if it is not a “silent” install.
Installation Guide 29

Installing the Software
� WEBUI=1
Installs a HTTP-based user interface. The installer creates a “SecurityShield” virtual directory within IIS such that the user interface can be accessed via a URL similar to:
http://<host-address>/SecurityShield/splash.htm
where <host-address> is the IP address or the fully qualified domain name (FQDN) of the HTTP server that hosts the user-interface files. This is commonly the ISA server itself, but it can be any computer that has visibility of the server holding the main Microsoft ISA services.
� FILTERS=1
Installs the filters for all the available protocols.
� CONFIG=<XML-configuration-file>
Defines the SecurityShield McAfeeConfig.xml configuration file, created from another SecurityShield server on your network, that should replace the default SecurityShield configuration upon install. The full path is required. See Creating a configuration file for more information on exporting configuration files from SecurityShield.
If you wish to install SecurityShield with the default settings, you do not require the CONFIG parameter.
� SITELIST=<XML-sitelist-file>
Defines the full path to the SiteList.xml file that defines the locations for the virus definition (DAT) files.
You can specify any or all of the parameters. If none are specified, you are prompted for the installation directory, and default values are used for configuration.
Examples
� To install SecurityShield silently with default options:
SecurityShield.exe /i SecurityShield.msi /qn
� To install SecurityShield silently with Filters, and a stand-alone user interface and a HTTP-based user interface but with a different installation directory:
SecurityShield.exe /i SecurityShield.msi /qn INSTALLDIR=C:\abc
� To install SecurityShield silently with Filters alone:
SecurityShield.exe /i SecurityShield.msi /qn FILTERS=1
� To install SecurityShield silently with a stand-alone user interface alone.
SecurityShield.exe /i SecurityShield.msi /qn SAUI=1
30 SecurityShield software version 1.0
Installing the Software
� To install SecurityShield silently with a HTTP-based user interface alone.
SecurityShield.exe /i SecurityShield.msi /qn WEBUI=1
� To install SecurityShield silently with Filters and a stand-alone user interface.
SecurityShield.exe /i SecurityShield.msi /qn FILTERS=1 SAUI=1
� To install SecurityShield silently with Filters and a HTTP-based user interface.
SecurityShield.exe /i SecurityShield.msi /qn FILTERS=1 WEBUI=1
� To uninstall SecurityShield silently.
SecurityShield.exe /x SecurityShield.msi /qn
Creating a configuration file
To create a configuration file:
NOTEYou can create a configuration file only if you already have at least one SecurityShield installation on your network.
1 In the SecurityShield menu, select Import and Export Configuration.
2 Click Save to open a file browser.
3 Specify the path and name of the file, and click Save to close the dialog box.
The file is saved in XML format, and the default name is McAfeeConfigXML.cfg. You can now use this file to override the default SecurityShield configuration during installation. See the description of the configuration file on page 30.
Installing SecurityShield on array servers1 Set up the array as required for Microsoft ISA Server 2000.
2 Log onto the primary domain controller in the array.
3 Install SecurityShield on the primary domain controller as described in this chapter.
4 Continue installing SecurityShield on other array members as described in this chapter.
Installation Guide 31
Installing the Software
Changes to your system after installationAfter you have installed SecurityShield on your system for the first time, you will notice the following changes:
� The product is installed in the folder specified during installation. Typically this is C:\Program Files\Network Associates\McAfee SecurityShield.
� A Detected Items database is created the first time that a virus or banned content is detected. The database is created on the McAfee SecurityShield\bin folder.
� Extra filters are added to the ISA software. See Verifying that the extra filters are present.
� Several services are added. You can see these in the Services console. The following services start automatically when SecurityShield is installed:
� McAfee Framework Service
� McAfee SecurityShield
� McAfee Alert Manager service (optional). This may already exist on your computer if you are running other McAfee anti-virus software.
� McAfee Outbreak Manager service (optional). This service may already exist on your system if you are running other McAfee anti-virus software. It operates as a Microsoft Windows service, and continually monitors your computer.
� McAfee Log Service. This service is specifically designed to track and log issues with our software on your system. The information obtained can be used to help analyze and correct any problems.
Verifying that the extra filters are present
To verify that the extra filters are present:
1 Open the ISA Management Console.
2 From the tree, select the server, then select Extension | Application Filters.
3 In the list, look for FTP Inbound Filter and FTP Outbound Filter. The list has similar pairs of filters for other protocols — including SMTP.
For web proxy scanning, use Extension | Web Filters, then Web Proxy Filter.
32 SecurityShield software version 1.0
Installing the Software
Disabling unused protocols
If you do not intend to use a protocol, we recommend that you disable it to prevent misuse. To disable any of the protocols:
1 Open the ISA Management Console.
2 From the tree, select the server, then select Extension | Application Filters.
3 Select a filter, for example, FTP Inbound Filter.
4 Right-click the filter and select Properties.
5 On the Configuration tab, deselect Enable scanning, then click OK.
Note that you will have to disable scanning in each direction — inbound and outbound filters.
Testing the anti-virus softwareTo test the anti-virus feature of the software, you can create a test file, then send it to the ISA server from any location that is not protected by the “firewall.” You can for example, place the test file inside an e-mail message, as an attachment, a file within a .ZIP file, on an FTP directory, or make it available for downloading from a web site.
The EICAR Standard AntiVirus Test File is a combined effort by anti-virus vendors throughout the world to implement one standard by which customers can verify their anti-virus installations.
To create the test file:
1 Copy the following line (without line breaks) into its own file, as the first line in the file, then save the file with the name EICAR.COM:
X5O!P%@AP[4\PZX54(P^)7CC)7}$EICAR-STANDARD-ANTIVIRUS-TEST-FILE!$H+H*
You must use a plain text editor to do this — not Microsoft Word or WordPad.
The file size will be 68 or 70 bytes.
2 When you have finished testing your installation, delete any copies of the test file to avoid alarming unsuspecting users.
NOTEThis EICAR test file is NOT A VIRUS.
Installation Guide 33
Installing the Software
Testing the anti-spam softwareThe GTUBE (General Test mail for Unsolicited Bulk E-mail) provides a test by which you can verify that SecurityShield has installed correctly and is detecting incoming spam. The test e-mail message must be sent from an outside account.
1 On an SMTP client to your server, create a new e-mail message.
2 In the body of the message, copy the text below. In your message, the first line displayed below must be entered with no line breaks. The remainder of the text must be entered exactly as it is written and spelled here.
XJS*C4JDBQADN1.NSBN3*2IDNEN*GTUBE-STANDARD-ANTI-UBE-TEST-EMAIL*C.34X
Generic
Test for
Unsolicited
Bulk
3 Send the new e-mail message to a mailbox address so that the e-mail passes through the Microsoft ISA Server on which SecurityShield resides. SecurityShield scans the message, recognizes it as a spam e-mail message and deals with it accordingly. The GTUBE test overrides blacklists and whitelists.
Using Microsoft Windows Performance MonitorsWhen using the Microsoft Performance Monitors to evaluate and monitor SecurityShield, please be aware that some of the information presented by the Performance Monitor might not correspond directly to the number of items scanned. The Performance Monitor displays the number of items that SecurityShield scans, but this may not correspond directly to the number of items handled by ISA. For example, a single web page can contain several parts, and a single e-mail message can have several attachments.
34 SecurityShield software version 1.0
Installing the Software
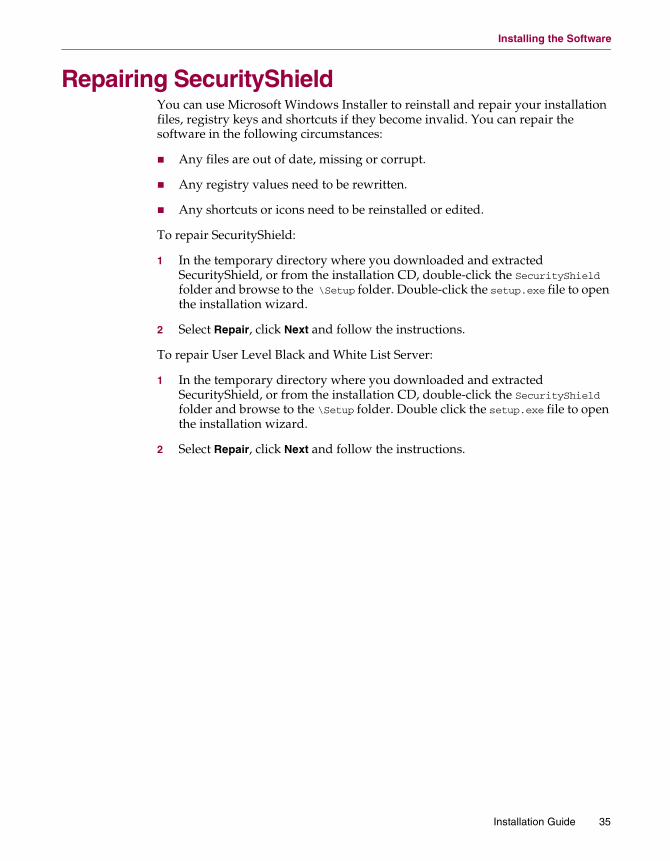
Repairing SecurityShield You can use Microsoft Windows Installer to reinstall and repair your installation files, registry keys and shortcuts if they become invalid. You can repair the software in the following circumstances:
� Any files are out of date, missing or corrupt.
� Any registry values need to be rewritten.
� Any shortcuts or icons need to be reinstalled or edited.
To repair SecurityShield:
1 In the temporary directory where you downloaded and extracted SecurityShield, or from the installation CD, double-click the SecurityShield folder and browse to the \Setup folder. Double-click the setup.exe file to open the installation wizard.
2 Select Repair, click Next and follow the instructions.
To repair User Level Black and White List Server:
1 In the temporary directory where you downloaded and extracted SecurityShield, or from the installation CD, double-click the SecurityShield folder and browse to the \Setup folder. Double click the setup.exe file to open the installation wizard.
2 Select Repair, click Next and follow the instructions.
Installation Guide 35

Installing the Software
Removing SecurityShield from your computerYou can remove SecurityShield and other optional software (such as Alert Manager and Outbreak Manager) by using the Microsoft Windows Installer, or the standard Add/Remove Programs function in the Control Panel. if you are using the Microsoft Windows Installer, chose the Remove option when prompted.
NOTEIf you remove SecurityShield, your users are not protected against viruses. Remove the program only when you are sure that you no longer require this protection.
The SecurityShield services are stopped, and SecurityShield is removed from your system. This may take a few minutes. During the removal of SecurityShield, the Microsoft Installer determines which files to remove. Only files that were part of the installation are removed. Files that contain information generated during operation of SecurityShield, such as the Detected Items database, are not removed. You must decide whether to keep or remove the files.
Removing SecurityShield software using the command line
To remove SecurityShield, use:
SecurityShield.exe /x SecurityShield.msi /qn
Removing Anti-spam software
Anti-Spam is not listed under Add/Remove Programs and it cannot be removed by using the Windows Installer. Windows Installer will report an error stating that SecurityShield is missing.
To remove this component, do the following. After SecurityShield and all other optional products are removed, browse to the folder where SecurityShield was installed and delete this remaining component.
36 SecurityShield software version 1.0
Index
AActive Directory, publishing Alert Manager to, 24Alert Manager, 17audience for this manual, 5AVERT (Anti-Virus Emergency Response Team),
contacting, 8
Bbeta program, contacting, 8
Cclustered resource, 25components
Alert Manager, 17anti-spam package, 18Outbreak Manager, 17
contacting McAfee Security, 8content management policy, 11conventions used in this manual, 6customer service, contacting, 8
DDAT file updates, web site, 8Detected Items database, removing, 36documentation for the product, 7download web site, 8
EePolicy Orchestrator support, 12
Ffeatures, 11 to 13
anti-spam, 13comfort pages, 13content management, 11ePolicy Orchestrator support, 12keep alive, 13rapid installation of supporting
components, 13remote administration, 12virus scanning, 11
Ggetting information, 7
IIIS and Internet Explorer, 10installation
checklist, 18optional components, 17permissions, 16preparing, 15rights, 16things to do afterwards, 19
JJava 2 Runtime Environment, 23Java applets, 17
KKnowledgeBase search, 8
Mmanagement and reporting via ePolicy
Orchestrator, 12manuals, 7McAfee Security University, contacting, 8
Installation Guide 37
Nnamed pipes, 10
Ooverview, 9
Pperformance monitors, 34PrimeSupport, 8product documentation, 7product overview, 9product training, contacting, 8
Rreminder panel, 22requirements, 15
Ssecurity headquarters, contacting AVERT, 8service portal, PrimeSupport, 8submitting a sample virus, 8system requirements, 15
Ttechnical support, 8testing the anti-virus software, 33training web site, 8
Uupgrade web site, 8user interface, administration, 10
VVirus Information Library, 8virus scanning, 11virus, submitting a sample, 8viruses, not scanned, 17VirusScan, 17
38 SecurityShield software version 1.0