Embed Size (px)
Citation preview
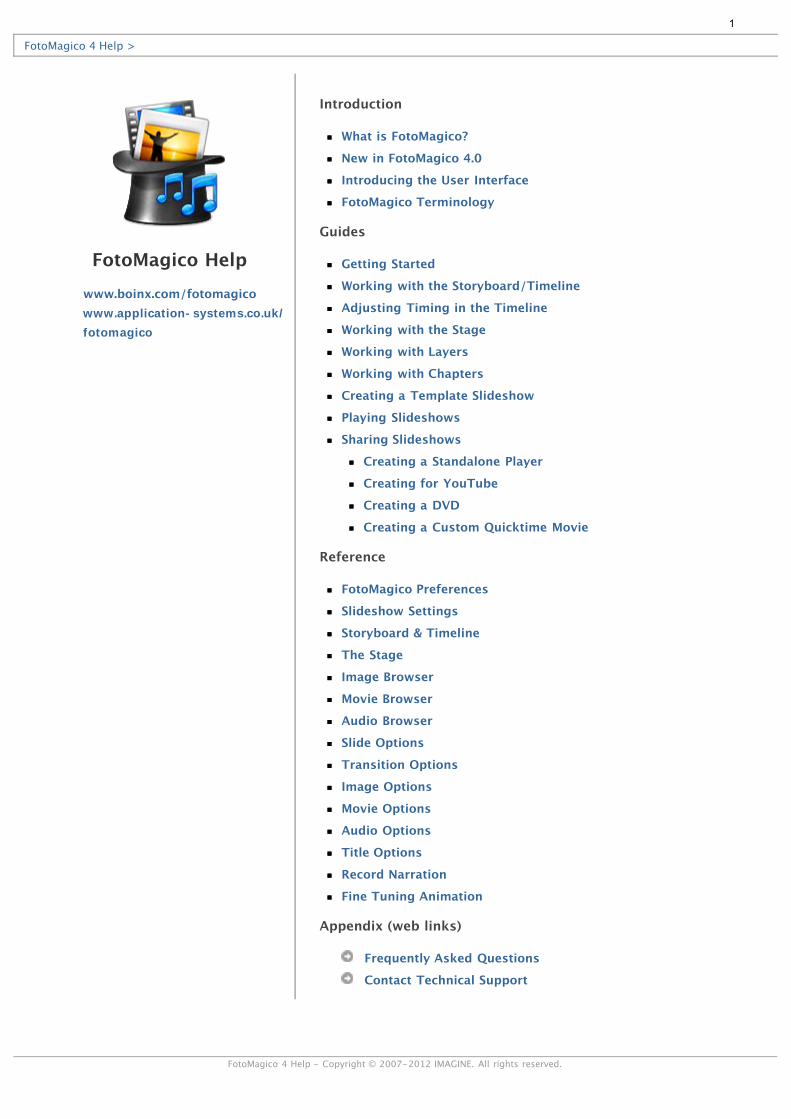
FotoMagico Helpwww.boinx.com/fotomagicowww.application-systems.co.uk/fotomagico
Introduction
What is FotoMagico?
New in FotoMagico 4.0
Introducing the User Interface
FotoMagico Terminology
Guides
Getting Started
Working with the Storyboard/Timeline
Adjusting Timing in the Timeline
Working with the Stage
Working with Layers
Working with Chapters
Creating a Template Slideshow
Playing Slideshows
Sharing Slideshows
Creating a Standalone Player
Creating for YouTube
Creating a DVD
Creating a Custom Quicktime Movie
Reference
FotoMagico Preferences
Slideshow Settings
Storyboard & Timeline
The Stage
Image Browser
Movie Browser
Audio Browser
Slide Options
Transition Options
Image Options
Movie Options
Audio Options
Title Options
Record Narration
Fine Tuning Animation
Appendix (web links)
Frequently Asked Questions
Contact Technical Support
FotoMagico 4 Help >
FotoMagico 4 Help - Copyright © 2007-2012 IMAGINE. All rights reserved.
1
What is FotoMagico?FotoMagico is an application for creating and presenting live multimedia slideshows. The primary goalis to present your pictures with the best possible image quality that your display device offers. Typicaldisplay devices are your computer's screen, a TV set, or projector.
Aside from high image quality, the focus lies on easy and powerful authoring of your presentation.FotoMagico provides a simple, yet elegant and intuitive user interface. Using FotoMagico, you can:
Create stunning slideshow presentations.
Use photos from an iPhoto, Aperture, or Adobe Lightroom library or any folder on a local drive.
Zoom, move, and rotate the images to highlight the most important areas of your photos.
Animate your photos using 'Pan & Zoom'. This type of animation is also known as the Ken Burnseffect.
Add video to your slideshow. All file formats that can be read and played by QuickTime aresupported by FotoMagico.
Add titles to your slideshow to create a compelling narrative.
Use music and sound effects from your iTunes library to create an appropriate atmosphere for yourslideshow.
Record narration directly in FotoMagico while your slideshow is playing.
Precisely control timing and other details of your slideshow.
Control your slideshows interactively during playback.
Remote control your slideshow with an iPhone or the remote control that shipped with your Mac.
Share your slideshows with others in a variety of formats.
If you want to share your finished slideshows with other people who do not have FotoMagico installedon their computer, you have a host of options that let you do just that, e.g. creating a standaloneplayer, creating a DVD, or publishing your slideshow to YouTube. Please refer to Sharing Slideshows formore information.
FotoMagico 4 Help > Introduction > What is FotoMagico?
FotoMagico 4 Help - Copyright © 2007-2012 IMAGINE. All rights reserved.
2
New in FotoMagico 4.0?
Timelineadds a Timeline view to the existing Storyboard view. While Storyboard view is more suited to add andarrange slides, the Timeline view is better when you need to fine-tune the timing of your slideshow.For more information, see Working with the Storyboard/Timeline and Adjusting Timing in the Timeline.
Audio Waveforms and Audio MarkersSyncing audio with the audio in your slideshow has become much easier with the addition of the audiowaveform display. Authoring of audio markers, a feature that has existed for a long time in FotoMagicohas also become much easier to use, now that editing them has been moved to the Timeline.For more information, see Adjusting Timing in the Timeline.
Multiple LayersMultiple layers of images, movies, or titles now lets you create effects that weren’t possible before.Each layer can be animated independently. For example: image slides with multiple titles which arefaded and animated independently, picture-in-picture effects, movies on top of image layers, orpseudo 3D effects.For more information, see Working with Layers.
Collapsible TracksThe Storyboard/Timeline lets you collapse audio or visual (images, titles, movies) tracks to save verticalscreen real-estate, which is especially convenient for small Notebook screens. When visual tracks arecollapsed, you can hover the mouse over a collapsed stack of slides, to automatically expand thatstack. This is a quick and convenient way to see all layers, while still conserving vertical screen real-estate.For more information, see Working with the Storyboard/Timeline.
Inline Authoring HelpBoth the Storyboard and the Timeline offer inline help by displaying popover alerts for commonauthoring errors. These alerts also offer simple one-click solutions to these problems.For more information, see Working with the Storyboard/Timeline.
Custom Audio Fade-ins and Fade-outsIn previous version of Fotomagico audio fades were dependant on the chosen visual transition betweenslides. The new version gives you the option to change fade-ins or fade-outs by dragging the left orright edges of audio in the Timeline view to change fade-in or fade-out offsets, in addition toadjusting volume.For more information, see Adjusting Timing in the Timeline.
Many User Interface ImprovementsFotomagico 4 offers many small improvements to the user interface, including an improved menulayout. This should help to make your authoring workflow more productive.
FotoMagico 4 Help > Introduction > New in FotoMagico 4.0?
FotoMagico 4 Help - Copyright © 2007-2012 IMAGINE. All rights reserved.
3
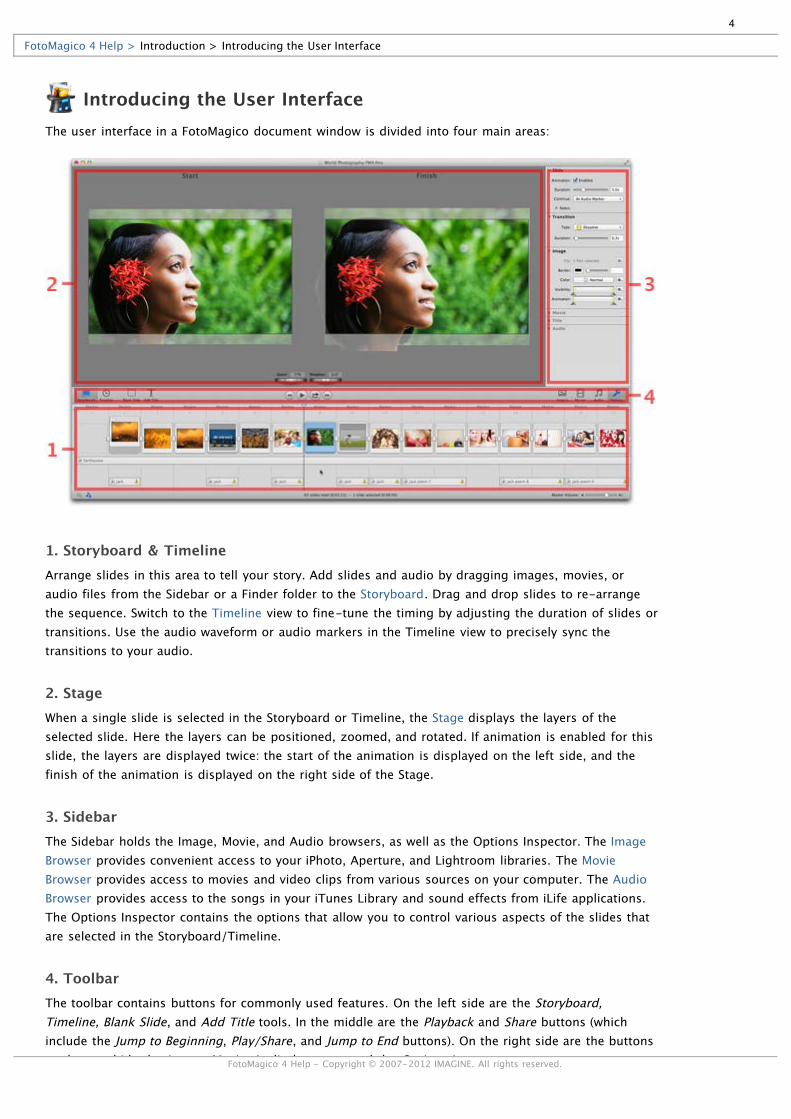
Introducing the User InterfaceThe user interface in a FotoMagico document window is divided into four main areas:
1. Storyboard & TimelineArrange slides in this area to tell your story. Add slides and audio by dragging images, movies, oraudio files from the Sidebar or a Finder folder to the Storyboard. Drag and drop slides to re-arrangethe sequence. Switch to the Timeline view to fine-tune the timing by adjusting the duration of slides ortransitions. Use the audio waveform or audio markers in the Timeline view to precisely sync thetransitions to your audio.
2. StageWhen a single slide is selected in the Storyboard or Timeline, the Stage displays the layers of theselected slide. Here the layers can be positioned, zoomed, and rotated. If animation is enabled for thisslide, the layers are displayed twice: the start of the animation is displayed on the left side, and thefinish of the animation is displayed on the right side of the Stage.
3. SidebarThe Sidebar holds the Image, Movie, and Audio browsers, as well as the Options Inspector. The ImageBrowser provides convenient access to your iPhoto, Aperture, and Lightroom libraries. The MovieBrowser provides access to movies and video clips from various sources on your computer. The AudioBrowser provides access to the songs in your iTunes Library and sound effects from iLife applications.The Options Inspector contains the options that allow you to control various aspects of the slides thatare selected in the Storyboard/Timeline.
4. ToolbarThe toolbar contains buttons for commonly used features. On the left side are the Storyboard,Timeline, Blank Slide, and Add Title tools. In the middle are the Playback and Share buttons (whichinclude the Jump to Beginning, Play/Share, and Jump to End buttons). On the right side are the buttonsto show or hide the Image, Movie, Audio browsers, and the Options Inspector.
FotoMagico 4 Help > Introduction > Introducing the User Interface
FotoMagico 4 Help - Copyright © 2007-2012 IMAGINE. All rights reserved.
4
Other Windows and MenusThere are other parts of the user interface that are important at various stages of the slideshowauthoring process:
Preferences - Parameters that apply to FotoMagico as a whole are controlled in the Preferenceswindow. Open the window by selecting Preferences... from the FotoMagico menu.
Slideshow Settings - Parameters that apply to a slideshow as a whole (for example: stage size,background color and a watermark image) are controlled in the Slideshow Settings sheet. Open thesheet by selecting Settings... from the Slideshow menu.
Instant Slideshow Assistant - If you want to create a nice slideshow without a lot of effort, createa new document, add some images, a song, and then choose Instant Slideshow... from theSlideshow menu. Select from a few options and then let the assistant create a simple slideshow -
which you can customize later if desired.
Share Assistant - The Share Assistants helps you share your finished slideshow with others in avariety of formats. Select an option from the Share menu or click the Play Fullscreen/Share button.
Info Panel - The Info Panel displays information about an image, movie, or audio file that isselected in the Sidebar, Storyboard or Timeline. Open the Info Panel by selecting Get Info from theFile menu.
5
FotoMagico TerminologySlideshow - Your entire project, which is made up of images, movies, titles, transitions and audio.Your end product.
Slide - A container that holds visual items (images, movies or titles).
Visual item - A visual item can be an image, a movie, or a title.
Frame - Visual items are displayed in the Storyboard/Timeline with a frame. When selected, theframe highlights blue.
Thumbnail - A reduced-size of an image, movie, or title to help recognize the visual item.
Transition - The effect applied between two consecutive slides. There are many types of transitioneffects. The most common ones are Dissolve, Fade, and Cut.
Transition Interval - The Timeline depicts the transition interval as a stairstep shape. Drag thelower-left edge to change the slide duration of the previous slide. Drag the upper-right edge tochange the transition duration itself.
Image item - A single-still image you add to a slide.
Title item - A text element you add to a slide.
Movie item - A Quicktime movie you add to a slide.
Audio item - A song or other audio file that is added to the slideshow.
Audio track - An entire track of audio, which includes music, audio effects, and voice-over ornarration.
Playhead - The thin vertical line with the blue triangle at the top that you drag horizontally in theStoryboard or Timeline to move to a location.
Geometry - The parameters (position, zoom and rotation) of a visual item that determine where itshows up on the Stage. The geometry applies to both the start and finish of a visual item.
Animation - Moving from the start geometry to the finish geometry of a visual item creates ananimation. In the Stage, the start of the animation displays on the left side, and the finish of theanimation displays on the right side.
Jog wheel - The wheels that display when a slide is selected to adjust the Zoom and Rotation ofthe selected visual item.
Timescale slider - (Timeline view only) Allows you to drag the slider to increase and decrease thehorizontal scale of the Timeline.
Audio marker - Thin red lines that display in the audio waveform (of the Timeline) or in thetoolbar (of the Storyboard) that are manually added to indicate a location in the audio. Right-clickor double click on the marker to display audio marker information.
Fade-in - A gradual increase in volume at the beginning of an audio item.
Fade-out - A gradual decrease in volume at the end of an audio item.
Duration - The total time of a slide or how long the animation of the slide takes.
FotoMagico 4 Help > Introduction > FotoMagico Terminology
FotoMagico 4 Help - Copyright © 2007-2012 IMAGINE. All rights reserved.
6
Getting StartedThis section explains how to create your first slideshow. Let's assume you created an album called "MySlideshow" in iPhoto, which contains all the images you intend to use in your slideshow.
The following steps also apply if you prefer to use Aperture or Lightroom instead of iPhoto asyour image library.
1. Launch FotoMagicoAn empty document appears, or if you didn't set the Preferences to create an empty document uponlaunch, you need to create one in the following step.
2. Create a new documentChoose New from the File menu or press the ⌘ N keys.
3. Select a desired display deviceAn assistant appears which lets you select the desired display device. For example, a computer screen,a television, or a projector. In this tutorial, select Monitor and the Display of this Macintosh radiobutton. Then click the Choose button.
4. Show the Image BrowserThe Stage and the Storyboard are both empty. If the Sidebar does not display the Image Browser, thenpress the ⌘ 1 keys to display the Image Browser. The table (or popup menu) at the top of theImage Browser lists the iPhoto library and all iPhoto albums. Select the album called 'My Slideshow'from this table (or popup menu). The Image browser displays all images in this album.
If you have a lot of albums in your image library, this popup can quickly grow too long to beuseful. In this case it is easier to drag the divider below the popup downwards, so that thepopup changes to a scrollable list view.
5. Drag images from the Image Browser to the StoryboardClick in the Image browser to select a single image or press the ⌘ A keys to select all images. Thendrag the images to the Storyboard at the bottom of the window.
FotoMagico 4 Help > Guides > Getting Started
FotoMagico 4 Help - Copyright © 2007-2012 IMAGINE. All rights reserved.
7
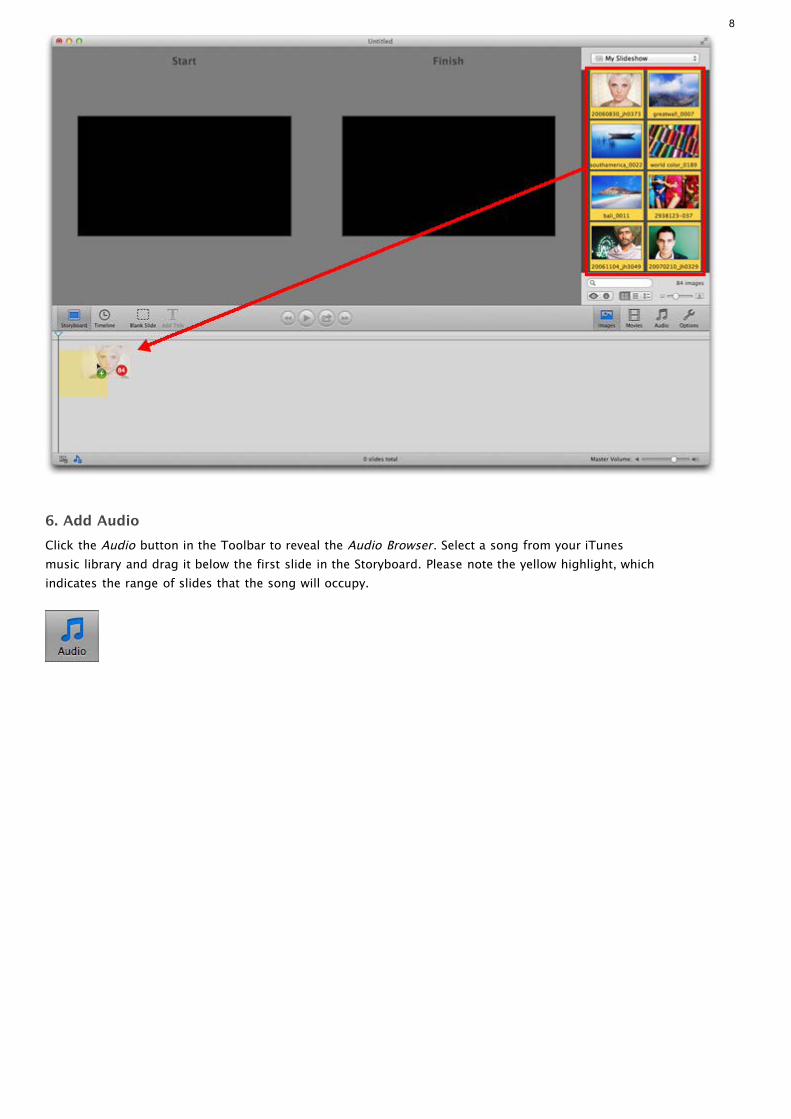
6. Add AudioClick the Audio button in the Toolbar to reveal the Audio Browser. Select a song from your iTunesmusic library and drag it below the first slide in the Storyboard. Please note the yellow highlight, whichindicates the range of slides that the song will occupy.
8
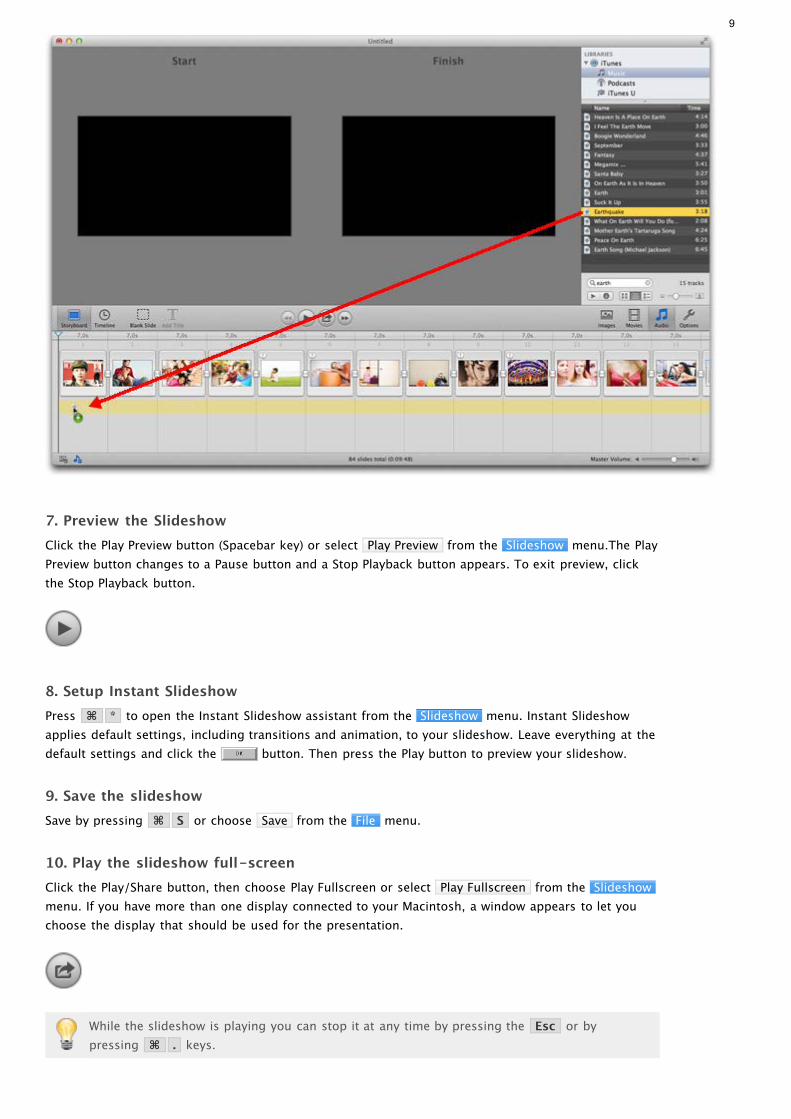
7. Preview the SlideshowClick the Play Preview button (Spacebar key) or select Play Preview from the Slideshow menu.The PlayPreview button changes to a Pause button and a Stop Playback button appears. To exit preview, clickthe Stop Playback button.
8. Setup Instant SlideshowPress ⌘ * to open the Instant Slideshow assistant from the Slideshow menu. Instant Slideshowapplies default settings, including transitions and animation, to your slideshow. Leave everything at thedefault settings and click the OK button. Then press the Play button to preview your slideshow.
9. Save the slideshowSave by pressing ⌘ S or choose Save from the File menu.
10. Play the slideshow full-screenClick the Play/Share button, then choose Play Fullscreen or select Play Fullscreen from the Slideshowmenu. If you have more than one display connected to your Macintosh, a window appears to let youchoose the display that should be used for the presentation.
While the slideshow is playing you can stop it at any time by pressing the Esc or bypressing ⌘ . keys.
9
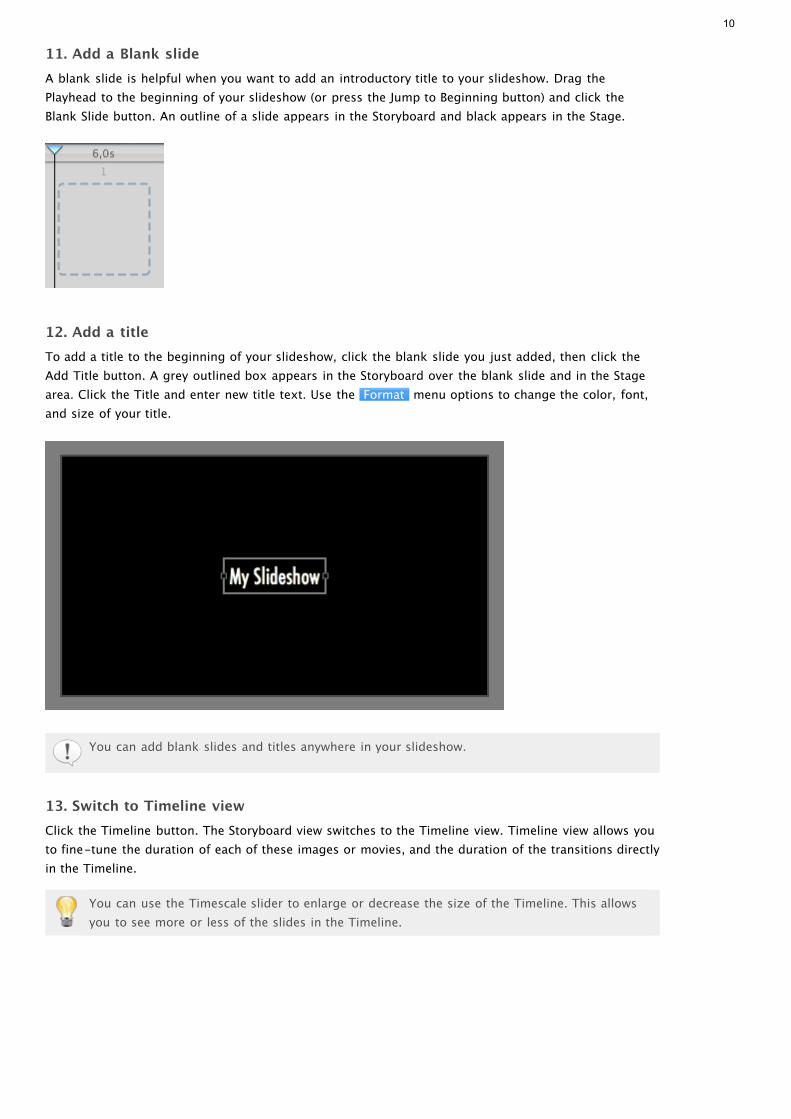
11. Add a Blank slideA blank slide is helpful when you want to add an introductory title to your slideshow. Drag thePlayhead to the beginning of your slideshow (or press the Jump to Beginning button) and click theBlank Slide button. An outline of a slide appears in the Storyboard and black appears in the Stage.
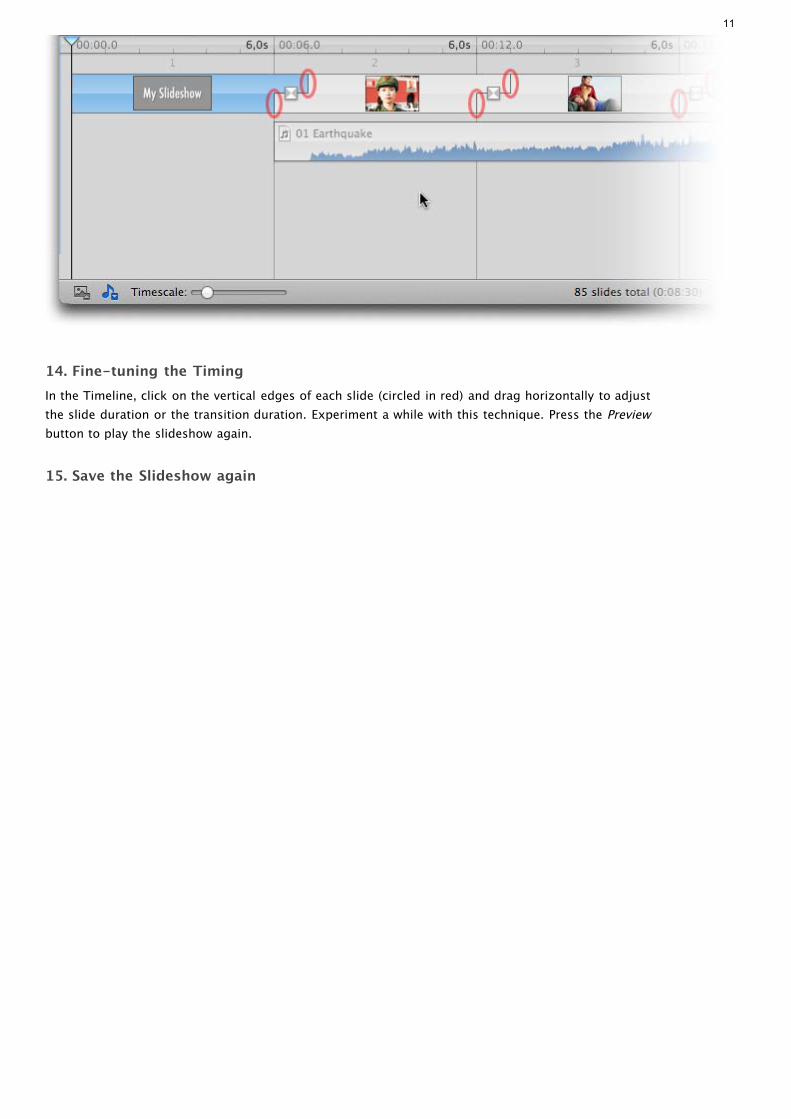
12. Add a titleTo add a title to the beginning of your slideshow, click the blank slide you just added, then click theAdd Title button. A grey outlined box appears in the Storyboard over the blank slide and in the Stagearea. Click the Title and enter new title text. Use the Format menu options to change the color, font,and size of your title.
You can add blank slides and titles anywhere in your slideshow.
13. Switch to Timeline viewClick the Timeline button. The Storyboard view switches to the Timeline view. Timeline view allows youto fine-tune the duration of each of these images or movies, and the duration of the transitions directlyin the Timeline.
You can use the Timescale slider to enlarge or decrease the size of the Timeline. This allowsyou to see more or less of the slides in the Timeline.
10
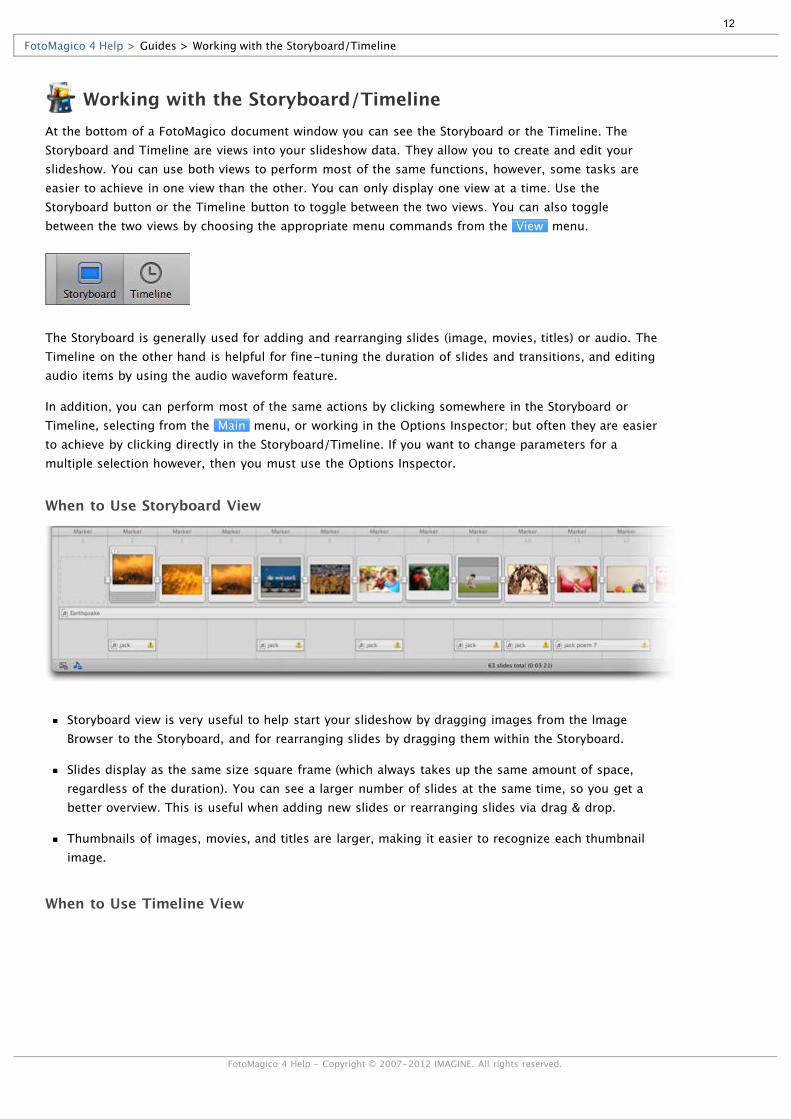
14. Fine-tuning the TimingIn the Timeline, click on the vertical edges of each slide (circled in red) and drag horizontally to adjustthe slide duration or the transition duration. Experiment a while with this technique. Press the Previewbutton to play the slideshow again.
15. Save the Slideshow again
11
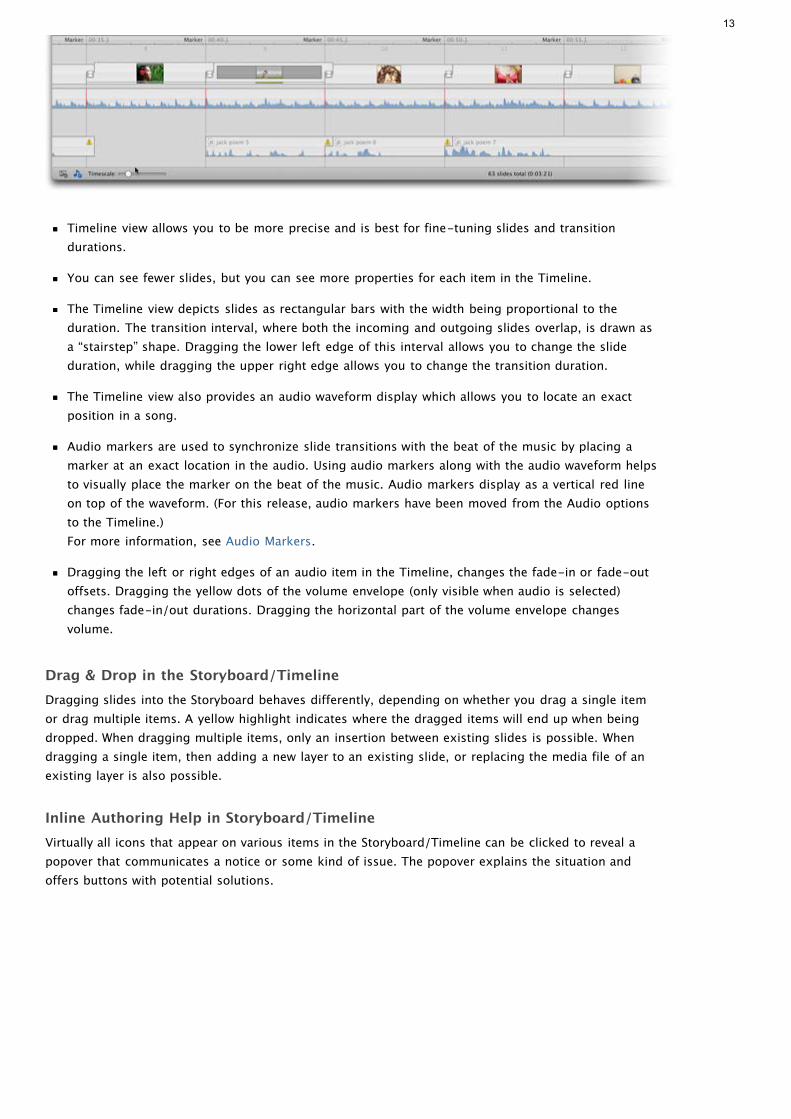
Working with the Storyboard/TimelineAt the bottom of a FotoMagico document window you can see the Storyboard or the Timeline. TheStoryboard and Timeline are views into your slideshow data. They allow you to create and edit yourslideshow. You can use both views to perform most of the same functions, however, some tasks areeasier to achieve in one view than the other. You can only display one view at a time. Use theStoryboard button or the Timeline button to toggle between the two views. You can also togglebetween the two views by choosing the appropriate menu commands from the View menu.
The Storyboard is generally used for adding and rearranging slides (image, movies, titles) or audio. TheTimeline on the other hand is helpful for fine-tuning the duration of slides and transitions, and editingaudio items by using the audio waveform feature.
In addition, you can perform most of the same actions by clicking somewhere in the Storyboard orTimeline, selecting from the Main menu, or working in the Options Inspector; but often they are easierto achieve by clicking directly in the Storyboard/Timeline. If you want to change parameters for amultiple selection however, then you must use the Options Inspector.
When to Use Storyboard View
Storyboard view is very useful to help start your slideshow by dragging images from the ImageBrowser to the Storyboard, and for rearranging slides by dragging them within the Storyboard.
Slides display as the same size square frame (which always takes up the same amount of space,regardless of the duration). You can see a larger number of slides at the same time, so you get abetter overview. This is useful when adding new slides or rearranging slides via drag & drop.
Thumbnails of images, movies, and titles are larger, making it easier to recognize each thumbnailimage.
When to Use Timeline View
FotoMagico 4 Help > Guides > Working with the Storyboard/Timeline
FotoMagico 4 Help - Copyright © 2007-2012 IMAGINE. All rights reserved.
12
Timeline view allows you to be more precise and is best for fine-tuning slides and transitiondurations.
You can see fewer slides, but you can see more properties for each item in the Timeline.
The Timeline view depicts slides as rectangular bars with the width being proportional to theduration. The transition interval, where both the incoming and outgoing slides overlap, is drawn asa “stairstep” shape. Dragging the lower left edge of this interval allows you to change the slideduration, while dragging the upper right edge allows you to change the transition duration.
The Timeline view also provides an audio waveform display which allows you to locate an exactposition in a song.
Audio markers are used to synchronize slide transitions with the beat of the music by placing amarker at an exact location in the audio. Using audio markers along with the audio waveform helpsto visually place the marker on the beat of the music. Audio markers display as a vertical red lineon top of the waveform. (For this release, audio markers have been moved from the Audio optionsto the Timeline.)For more information, see Audio Markers.
Dragging the left or right edges of an audio item in the Timeline, changes the fade-in or fade-outoffsets. Dragging the yellow dots of the volume envelope (only visible when audio is selected)changes fade-in/out durations. Dragging the horizontal part of the volume envelope changesvolume.
Drag & Drop in the Storyboard/TimelineDragging slides into the Storyboard behaves differently, depending on whether you drag a single itemor drag multiple items. A yellow highlight indicates where the dragged items will end up when beingdropped. When dragging multiple items, only an insertion between existing slides is possible. Whendragging a single item, then adding a new layer to an existing slide, or replacing the media file of anexisting layer is also possible.
Inline Authoring Help in Storyboard/TimelineVirtually all icons that appear on various items in the Storyboard/Timeline can be clicked to reveal apopover that communicates a notice or some kind of issue. The popover explains the situation andoffers buttons with potential solutions.
13
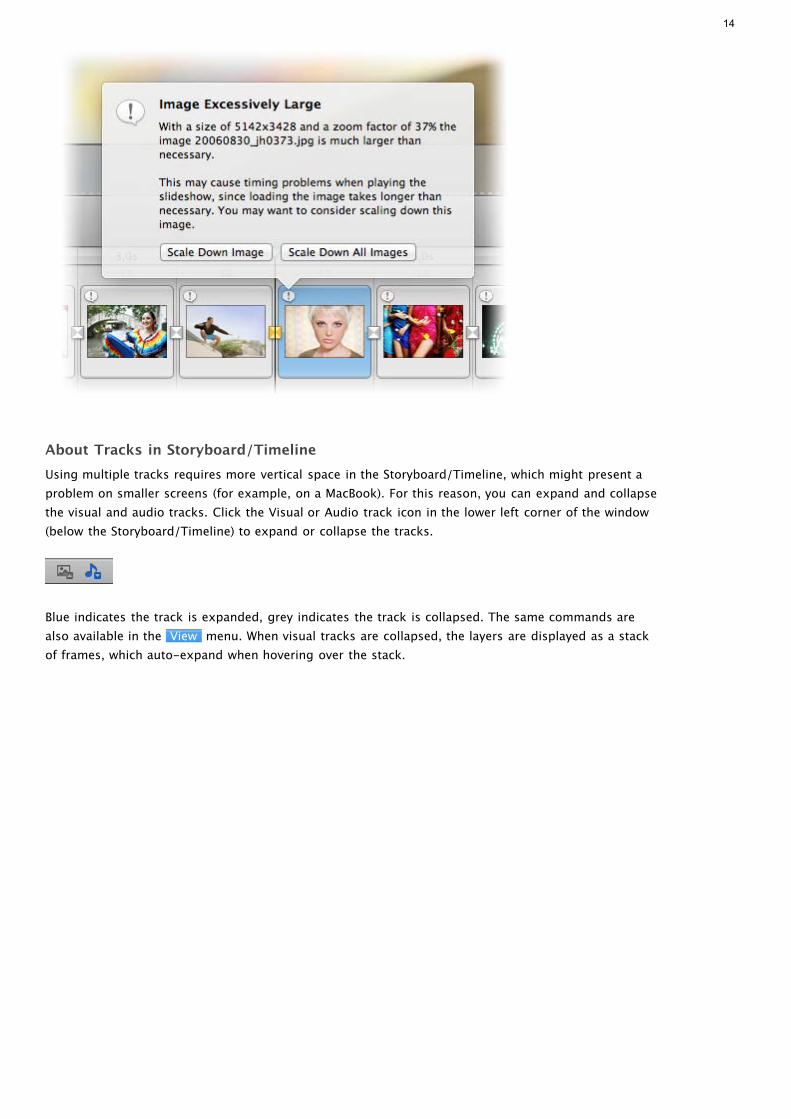
About Tracks in Storyboard/TimelineUsing multiple tracks requires more vertical space in the Storyboard/Timeline, which might present aproblem on smaller screens (for example, on a MacBook). For this reason, you can expand and collapsethe visual and audio tracks. Click the Visual or Audio track icon in the lower left corner of the window(below the Storyboard/Timeline) to expand or collapse the tracks.
Blue indicates the track is expanded, grey indicates the track is collapsed. The same commands arealso available in the View menu. When visual tracks are collapsed, the layers are displayed as a stackof frames, which auto-expand when hovering over the stack.
14
Adjusting Timing in the TimelineThis section describes how to adjust slide durations, audio fade-ins/fade-outs, audio volume and syncimages to audio.
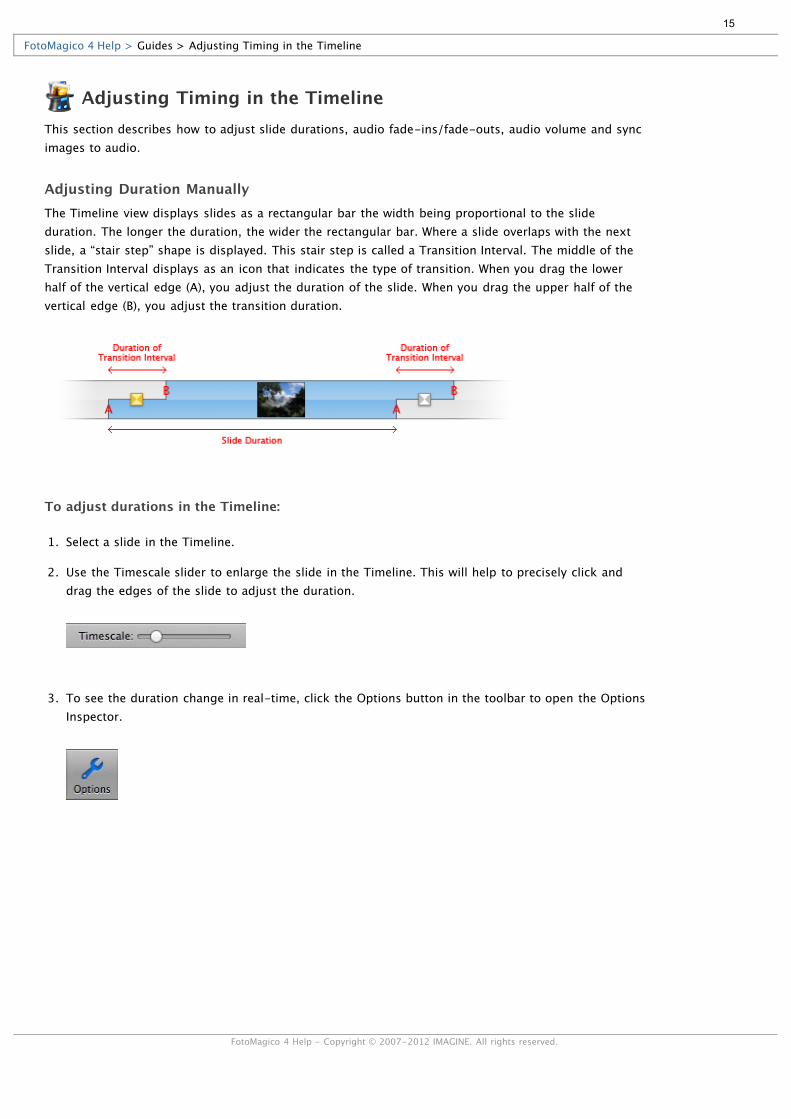
Adjusting Duration ManuallyThe Timeline view displays slides as a rectangular bar the width being proportional to the slideduration. The longer the duration, the wider the rectangular bar. Where a slide overlaps with the nextslide, a “stair step” shape is displayed. This stair step is called a Transition Interval. The middle of theTransition Interval displays as an icon that indicates the type of transition. When you drag the lowerhalf of the vertical edge (A), you adjust the duration of the slide. When you drag the upper half of thevertical edge (B), you adjust the transition duration.
To adjust durations in the Timeline:
1. Select a slide in the Timeline.
2. Use the Timescale slider to enlarge the slide in the Timeline. This will help to precisely click anddrag the edges of the slide to adjust the duration.
3. To see the duration change in real-time, click the Options button in the toolbar to open the OptionsInspector.
FotoMagico 4 Help > Guides > Adjusting Timing in the Timeline
FotoMagico 4 Help - Copyright © 2007-2012 IMAGINE. All rights reserved.
15
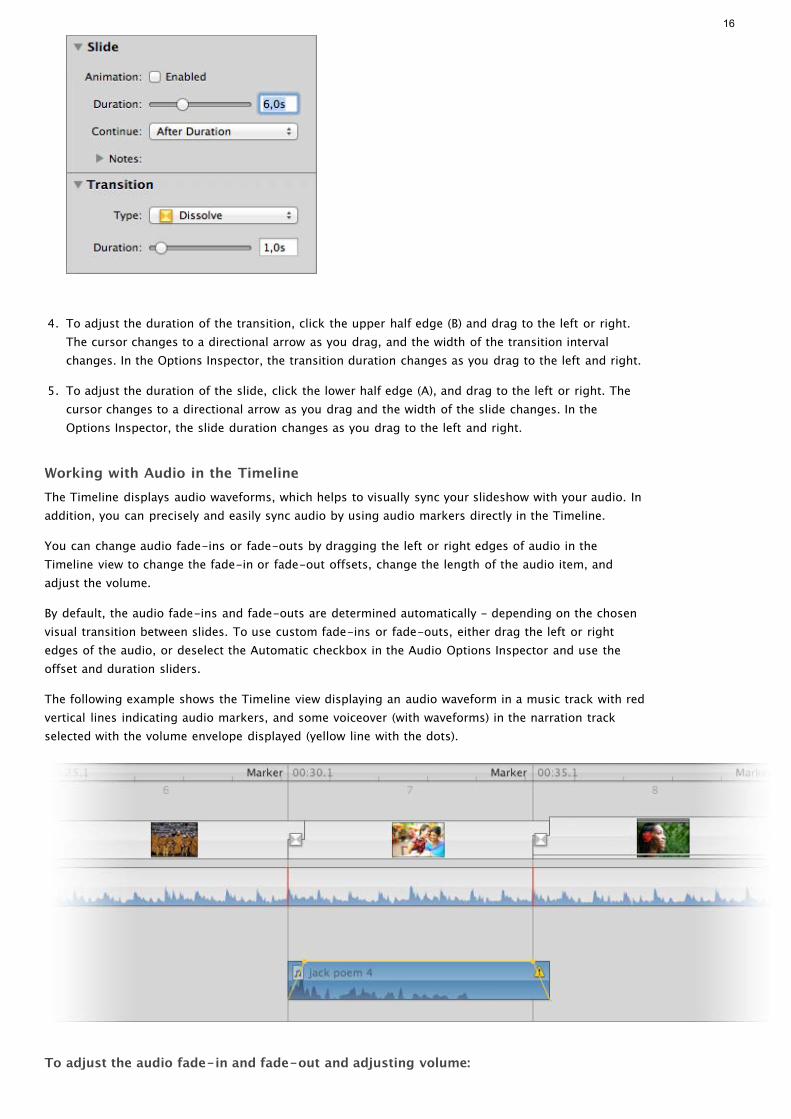
4. To adjust the duration of the transition, click the upper half edge (B) and drag to the left or right.The cursor changes to a directional arrow as you drag, and the width of the transition intervalchanges. In the Options Inspector, the transition duration changes as you drag to the left and right.
5. To adjust the duration of the slide, click the lower half edge (A), and drag to the left or right. Thecursor changes to a directional arrow as you drag and the width of the slide changes. In theOptions Inspector, the slide duration changes as you drag to the left and right.
Working with Audio in the TimelineThe Timeline displays audio waveforms, which helps to visually sync your slideshow with your audio. Inaddition, you can precisely and easily sync audio by using audio markers directly in the Timeline.
You can change audio fade-ins or fade-outs by dragging the left or right edges of audio in theTimeline view to change the fade-in or fade-out offsets, change the length of the audio item, andadjust the volume.
By default, the audio fade-ins and fade-outs are determined automatically - depending on the chosenvisual transition between slides. To use custom fade-ins or fade-outs, either drag the left or rightedges of the audio, or deselect the Automatic checkbox in the Audio Options Inspector and use theoffset and duration sliders.
The following example shows the Timeline view displaying an audio waveform in a music track with redvertical lines indicating audio markers, and some voiceover (with waveforms) in the narration trackselected with the volume envelope displayed (yellow line with the dots).
To adjust the audio fade-in and fade-out and adjusting volume:
16

1. In the Timeline view, select an audio item. The audio item highlights in blue and a yellow line withtwo dots at each end appears.
2. Click the Options button to show the Audio Options in the sidebar.
3. You can uncheck Automatic next to the Fadein and Fadeout options, or as you drag the yellow dotsin the Timeline, the Automatic option is turned off. This allows you to manually adjust the offsetand the duration of the audio fade-in or fade-out with the sliders.
If you want to go back to the default settings anytime, check the Automatic option again.
4. To adjust the fade-in duration, click and drag the left yellow dot horizontally. To adjust the fade-out duration, click and drag the right yellow dot horizontally.
5. To adjust the audio volume, click and drag the yellow horizontal line up or down. Dragging upincreases the volume, dragging down decreases the volume.
Syncing with the Audio Waveform and Adding Audio MarkersThe audio waveform in the Timeline view displays a sample plot of the volume (amplitude) of an audiofile. Waveforms display for all audio tracks (music, effects, narration) in the Timeline.
This visual representation of the audio waveform allows you to locate certain points of a song (effect ornarration) by identifying big amplitudes (louder sounds) or low amplitudes (softer sounds). You canthen match slide durations to beats in the audio. For example, you might want to start a title at acertain point when the audio increases in volume. The waveform helps you to visually pinpoint theexact location. As you locate and sync these locations in the waveform, you can add an audio markerto indicate a specific location.
You can add an audio marker by right-clicking in the waveform and selecting Audio Marker > Addfrom the context menu or by pressing the M key in the Timeline while the slideshow is playing. Anaudio marker in the Timeline is indicated by a thin red vertical line.For more information see Audio Markers.
To sync your audio:
1. With audio and images loaded in your slideshow, click the Timeline button.The audio waveform displays in the audio tracks. If you don’t see all the tracks of audio displayed,click the Audio tracks icon at the bottom of the Timeline or press Ctrl A . a blue icon indicatesthat the tracks are expanded, a grey icon indicates that the tracks are collapsed.
2. Select a single audio item (by clicking on it), and then click the Preview button in the toolbar to startplaying the slideshow.
3. While the slideshow is playing, press the M key with the beat of the music.Each time you press the M key, an audio marker is created at the current time. A red vertical lineappears as an audio marker. The slide’s Continue type is automatically set to “At Audio Marker.”
17
4. Stop playback of the slideshow by clicking the Stop button in the toolbar.
5. Click on an audio marker (red line) and drag it left or right to move it to the desired location, if itwas not precise enough before.
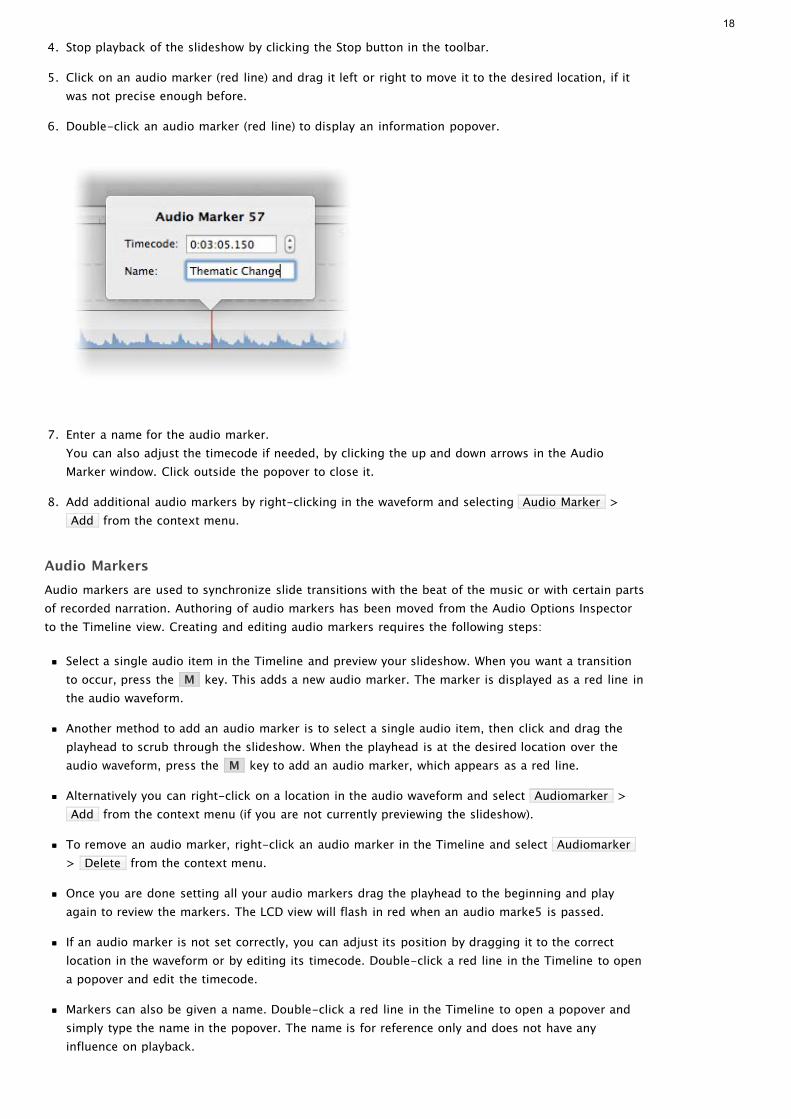
6. Double-click an audio marker (red line) to display an information popover.
7. Enter a name for the audio marker.You can also adjust the timecode if needed, by clicking the up and down arrows in the AudioMarker window. Click outside the popover to close it.
8. Add additional audio markers by right-clicking in the waveform and selecting Audio Marker >Add from the context menu.
Audio MarkersAudio markers are used to synchronize slide transitions with the beat of the music or with certain partsof recorded narration. Authoring of audio markers has been moved from the Audio Options Inspectorto the Timeline view. Creating and editing audio markers requires the following steps:
Select a single audio item in the Timeline and preview your slideshow. When you want a transitionto occur, press the M key. This adds a new audio marker. The marker is displayed as a red line inthe audio waveform.
Another method to add an audio marker is to select a single audio item, then click and drag theplayhead to scrub through the slideshow. When the playhead is at the desired location over theaudio waveform, press the M key to add an audio marker, which appears as a red line.
Alternatively you can right-click on a location in the audio waveform and select Audiomarker >Add from the context menu (if you are not currently previewing the slideshow).
To remove an audio marker, right-click an audio marker in the Timeline and select Audiomarker> Delete from the context menu.
Once you are done setting all your audio markers drag the playhead to the beginning and playagain to review the markers. The LCD view will flash in red when an audio marke5 is passed.
If an audio marker is not set correctly, you can adjust its position by dragging it to the correctlocation in the waveform or by editing its timecode. Double-click a red line in the Timeline to opena popover and edit the timecode.
Markers can also be given a name. Double-click a red line in the Timeline to open a popover andsimply type the name in the popover. The name is for reference only and does not have anyinfluence on playback.
18

Once you are satisfied with the audio markers, go to the Slide Options Inspector and set theContinue Type of the slides above the audio item to Continue at Audio Marker.
With audio markers you can synchronize slide transitions with the beat of your music. If audiomarkers are placed fairly close together, exact timing cannot be guaranteed. FotoMagiconeeds to load media files for the next slide before it can proceed to this slide. If an audiomarker was missed in the process, the transition to the next slide will occur when anotheraudio marker is passed.
This limitation only applies to a live presentation. When exporting your slideshow to aQuickTime movie, the exact timing is always respected.
19
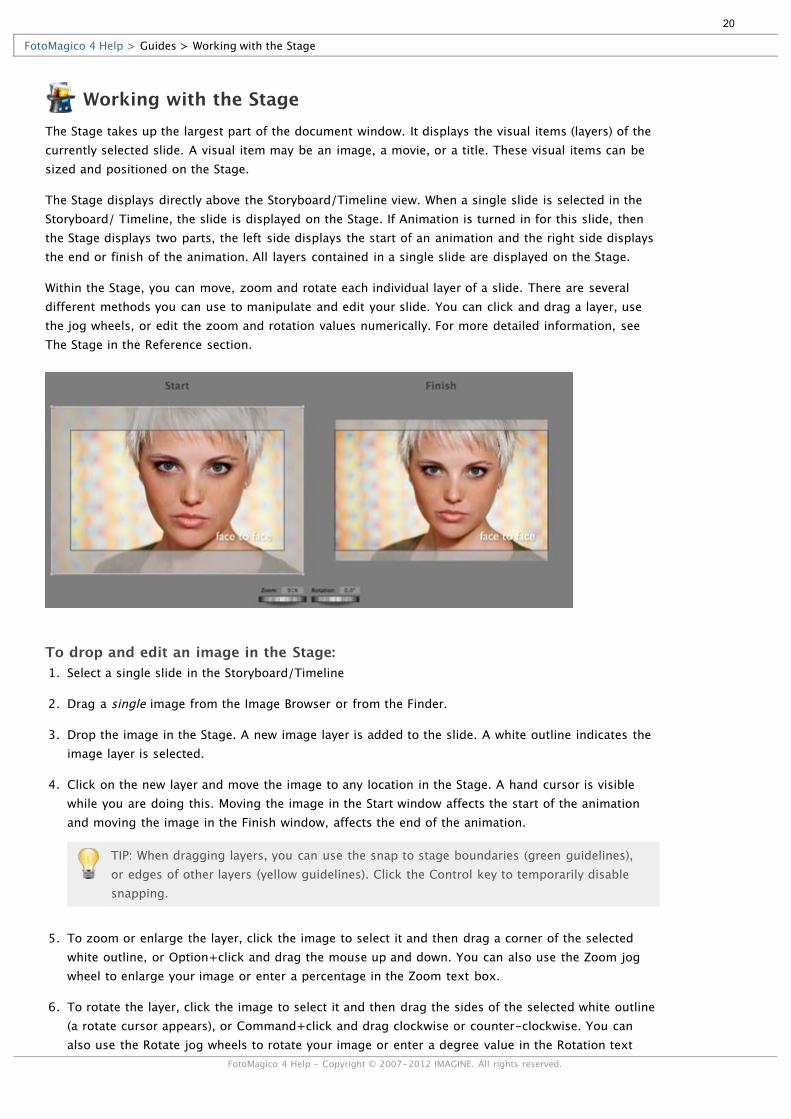
Working with the StageThe Stage takes up the largest part of the document window. It displays the visual items (layers) of thecurrently selected slide. A visual item may be an image, a movie, or a title. These visual items can besized and positioned on the Stage.
The Stage displays directly above the Storyboard/Timeline view. When a single slide is selected in theStoryboard/ Timeline, the slide is displayed on the Stage. If Animation is turned in for this slide, thenthe Stage displays two parts, the left side displays the start of an animation and the right side displaysthe end or finish of the animation. All layers contained in a single slide are displayed on the Stage.
Within the Stage, you can move, zoom and rotate each individual layer of a slide. There are severaldifferent methods you can use to manipulate and edit your slide. You can click and drag a layer, usethe jog wheels, or edit the zoom and rotation values numerically. For more detailed information, seeThe Stage in the Reference section.
To drop and edit an image in the Stage:1. Select a single slide in the Storyboard/Timeline
2. Drag a single image from the Image Browser or from the Finder.
3. Drop the image in the Stage. A new image layer is added to the slide. A white outline indicates theimage layer is selected.
4. Click on the new layer and move the image to any location in the Stage. A hand cursor is visiblewhile you are doing this. Moving the image in the Start window affects the start of the animationand moving the image in the Finish window, affects the end of the animation.
TIP: When dragging layers, you can use the snap to stage boundaries (green guidelines),or edges of other layers (yellow guidelines). Click the Control key to temporarily disablesnapping.
5. To zoom or enlarge the layer, click the image to select it and then drag a corner of the selectedwhite outline, or Option+click and drag the mouse up and down. You can also use the Zoom jogwheel to enlarge your image or enter a percentage in the Zoom text box.
6. To rotate the layer, click the image to select it and then drag the sides of the selected white outline(a rotate cursor appears), or Command+click and drag clockwise or counter-clockwise. You canalso use the Rotate jog wheels to rotate your image or enter a degree value in the Rotation textbox.
FotoMagico 4 Help > Guides > Working with the Stage
FotoMagico 4 Help - Copyright © 2007-2012 IMAGINE. All rights reserved.
20

7. Continue to add additional layers to the slide by dragging to the Stage again. A slide can have up tosix layers.
21
Working with LayersLayers are a way to add multiple images, movies, or titles to a slide. For example: you can have a slidewith one image and multiple titles, a picture-in-picture slide, or a slide with a movie on top of animage. There are numerous creative ways to use layers. Each layer can be animated and fadedindependently. A slide can have a total of six layers, regardless of the layer type (image, movie, ortitle).
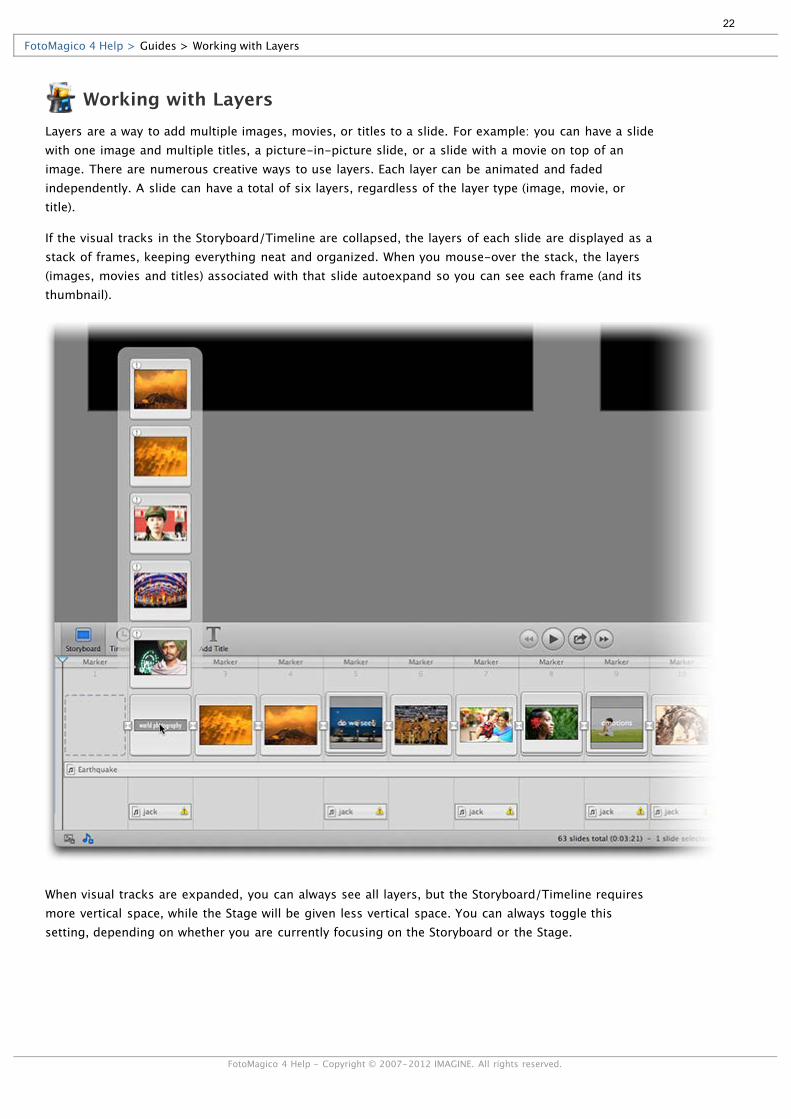
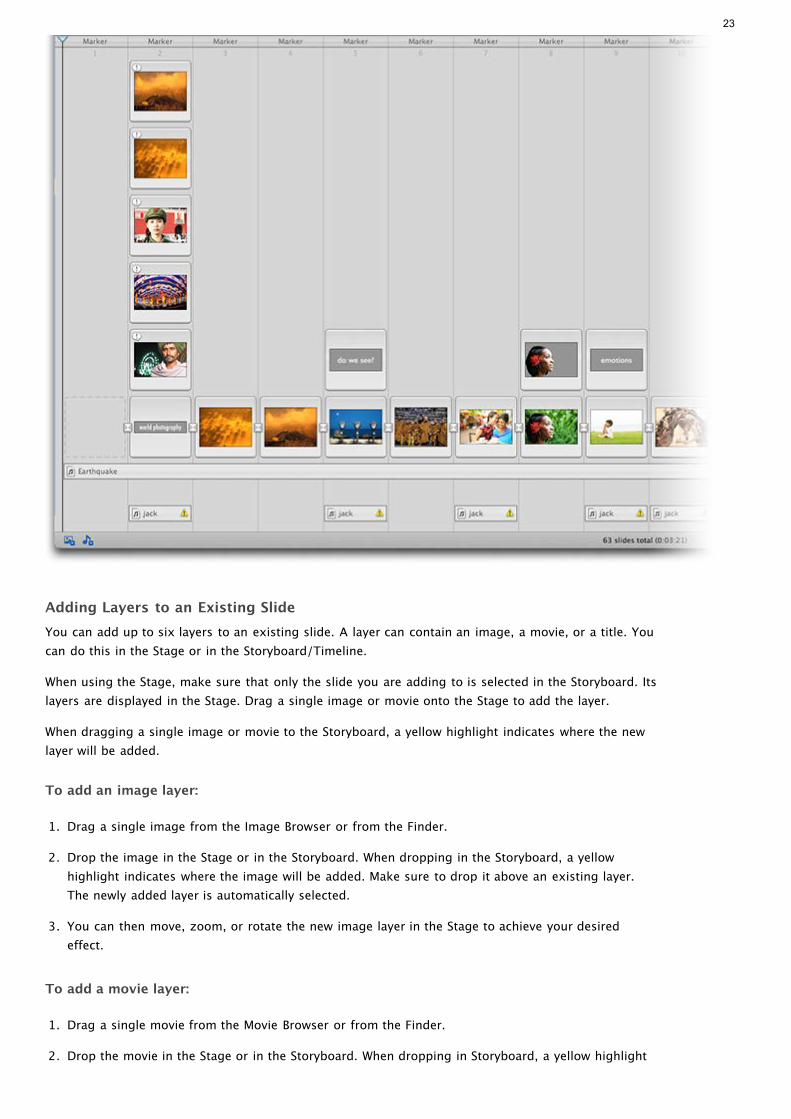
If the visual tracks in the Storyboard/Timeline are collapsed, the layers of each slide are displayed as astack of frames, keeping everything neat and organized. When you mouse-over the stack, the layers(images, movies and titles) associated with that slide autoexpand so you can see each frame (and itsthumbnail).
When visual tracks are expanded, you can always see all layers, but the Storyboard/Timeline requiresmore vertical space, while the Stage will be given less vertical space. You can always toggle thissetting, depending on whether you are currently focusing on the Storyboard or the Stage.
FotoMagico 4 Help > Guides > Working with Layers
FotoMagico 4 Help - Copyright © 2007-2012 IMAGINE. All rights reserved.
22
Adding Layers to an Existing SlideYou can add up to six layers to an existing slide. A layer can contain an image, a movie, or a title. Youcan do this in the Stage or in the Storyboard/Timeline.
When using the Stage, make sure that only the slide you are adding to is selected in the Storyboard. Itslayers are displayed in the Stage. Drag a single image or movie onto the Stage to add the layer.
When dragging a single image or movie to the Storyboard, a yellow highlight indicates where the newlayer will be added.
To add an image layer:
1. Drag a single image from the Image Browser or from the Finder.
2. Drop the image in the Stage or in the Storyboard. When dropping in the Storyboard, a yellowhighlight indicates where the image will be added. Make sure to drop it above an existing layer.The newly added layer is automatically selected.
3. You can then move, zoom, or rotate the new image layer in the Stage to achieve your desiredeffect.
To add a movie layer:
1. Drag a single movie from the Movie Browser or from the Finder.
2. Drop the movie in the Stage or in the Storyboard. When dropping in Storyboard, a yellow highlight
23
indicates where the movie will be added. Make sure to drop it above an existing layer. The newlyadded layer is automatically selected.
3. You can then move, zoom, or rotate the new movie layer to achieve your desired effect.
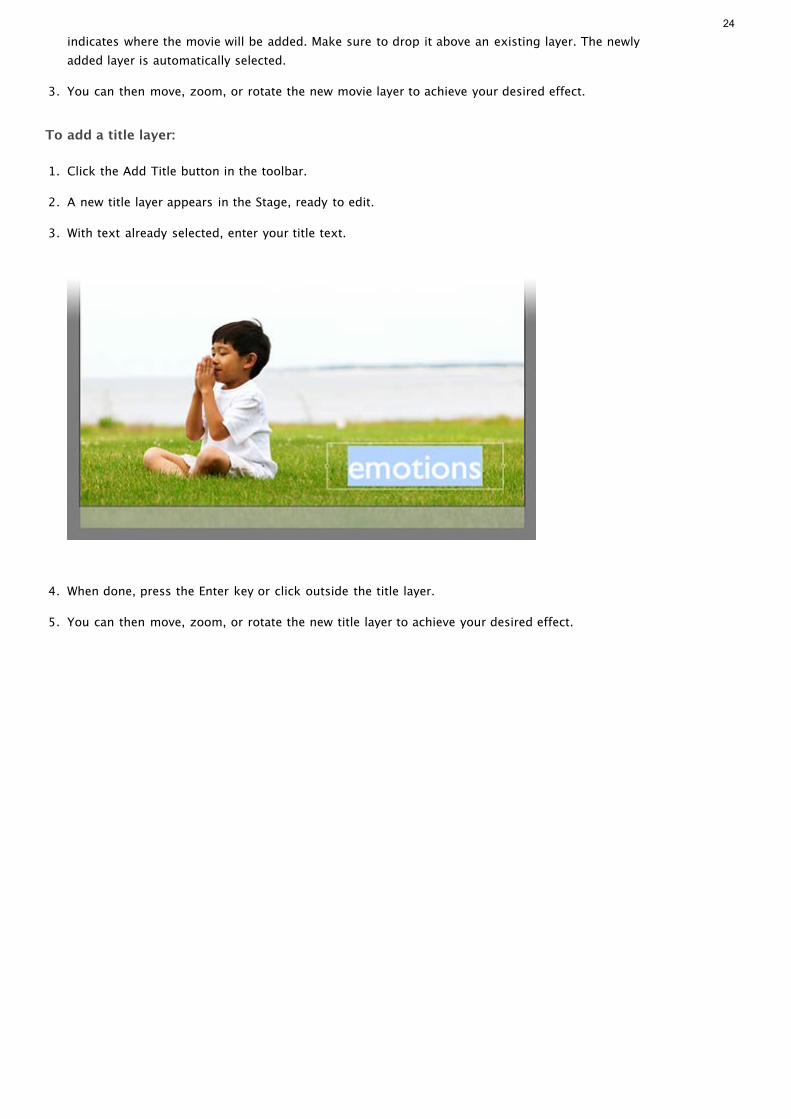
To add a title layer:
1. Click the Add Title button in the toolbar.
2. A new title layer appears in the Stage, ready to edit.
3. With text already selected, enter your title text.
4. When done, press the Enter key or click outside the title layer.
5. You can then move, zoom, or rotate the new title layer to achieve your desired effect.
24
Working with ChaptersIf your slideshow is very long, chapters can help to structure your slideshow into logical parts. Chaptersoffer several benefits during authoring and playback, they include:
Chapters can be collapsed or expanded in the Storyboard. Collapsing chapters that you are notcurrently working on saves a lot of horizontal space and thus less horizontal scrolling is required.
Chapters can have custom background colors. Color coding your chapters help with quicknavigation as you are working on large projects. Instead of looking for particular thumbnails as youare scrolling through your Storyboard, simply look for the correct chapter background color. Youcan assign colors based on the status of the chapters: Red for needs work, Yellow for minor tweaks,and Green for done.
Chapters can have a custom hotkey, which can be used for navigating during authoring andplayback.
During playback you can jump to the start of the previous or next chapter. If assigned customhotkeys to your chapters, you can also jump to any chapter during playback.
To create a chapter:1. To create a new chapter, move the Playhead in the Storyboard or Timeline to the first slide of the
intended new chapter.
2. Select Chapter > Add from the Slideshow menu or Control+click in the Storyboard to displaythe context menu. A new chapter is added next to the playhead and the default name is selected sothat you can enter a custom name for the new chapter.
3. Press ↵ when you are finished typing the name.
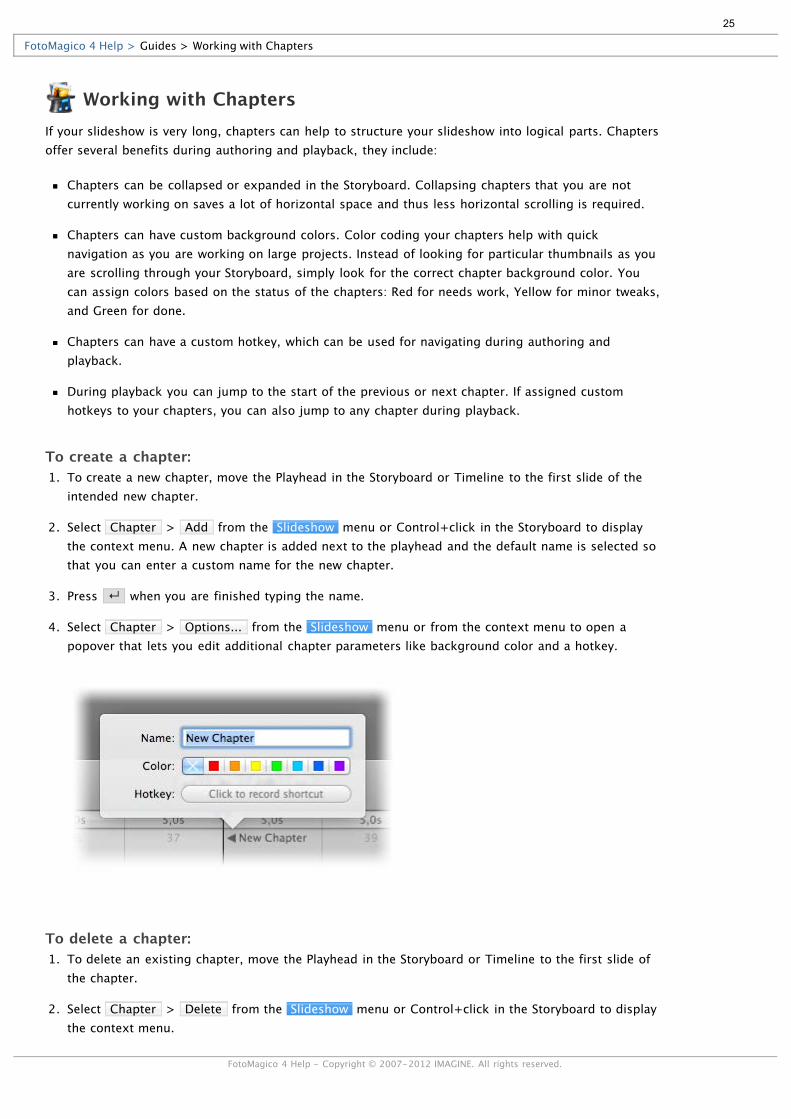
4. Select Chapter > Options... from the Slideshow menu or from the context menu to open apopover that lets you edit additional chapter parameters like background color and a hotkey.
To delete a chapter:1. To delete an existing chapter, move the Playhead in the Storyboard or Timeline to the first slide of
the chapter.
2. Select Chapter > Delete from the Slideshow menu or Control+click in the Storyboard to displaythe context menu.
FotoMagico 4 Help > Guides > Working with Chapters
FotoMagico 4 Help - Copyright © 2007-2012 IMAGINE. All rights reserved.
25
To collapse and expand chapters:You can collapse a chapter, to take up less horizontal space and thus a lot less scrolling is required tomove around in your slideshow. You can also expand a chapter that you are currently working on, toeasily focus on a specific chapter.
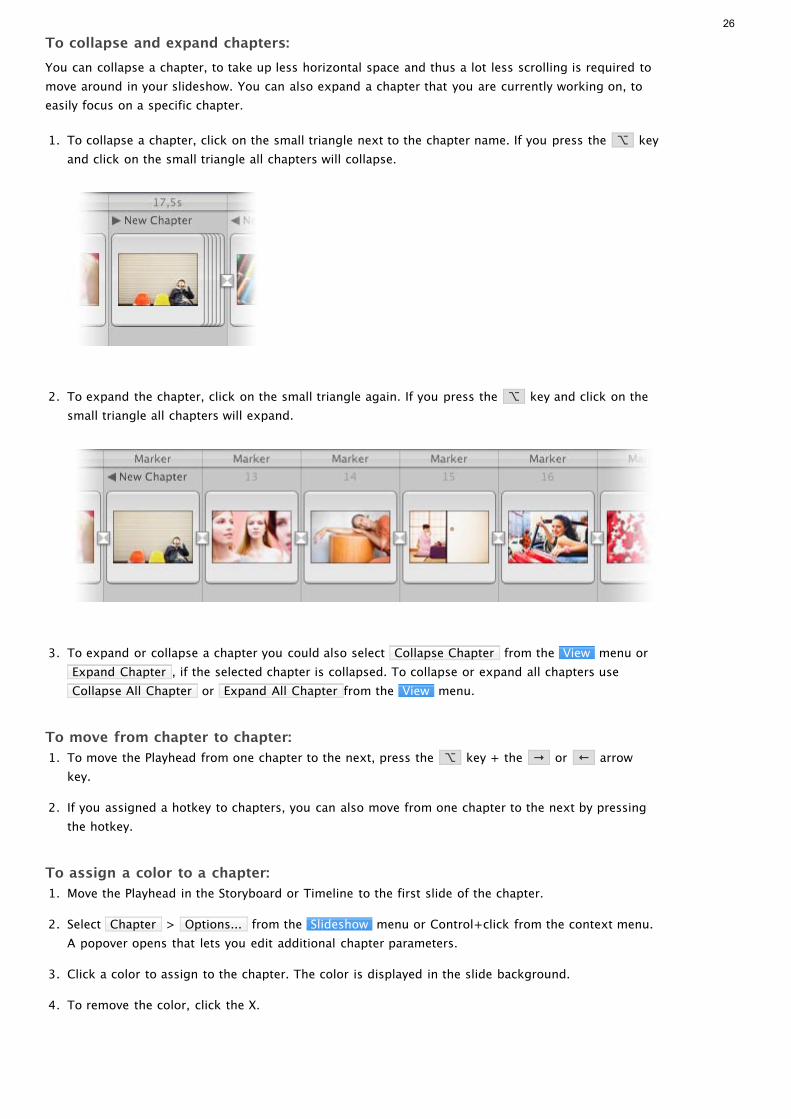
1. To collapse a chapter, click on the small triangle next to the chapter name. If you press the ⌥ keyand click on the small triangle all chapters will collapse.
2. To expand the chapter, click on the small triangle again. If you press the ⌥ key and click on thesmall triangle all chapters will expand.
3. To expand or collapse a chapter you could also select Collapse Chapter from the View menu orExpand Chapter , if the selected chapter is collapsed. To collapse or expand all chapters useCollapse All Chapter or Expand All Chapter from the View menu.
To move from chapter to chapter:1. To move the Playhead from one chapter to the next, press the ⌥ key + the → or ← arrow
key.
2. If you assigned a hotkey to chapters, you can also move from one chapter to the next by pressingthe hotkey.
To assign a color to a chapter:1. Move the Playhead in the Storyboard or Timeline to the first slide of the chapter.
2. Select Chapter > Options... from the Slideshow menu or Control+click from the context menu.A popover opens that lets you edit additional chapter parameters.
3. Click a color to assign to the chapter. The color is displayed in the slide background.
4. To remove the color, click the X.
26
Creating a Template SlideshowTemplates are an easy way to quickly create new slideshows that don’t need a whole lot of changes. Byusing an existing slideshow, you can easily save the slideshow under a new filename and simplyreplace the images of existing slides to create a new slideshow based on the old one. For example, youcan create a Wedding Template or a Senior Portrait Template, which already contains all slides, titles,and music. When you get the job to produce another wedding slideshow, just use this template andreplace the existing images with the new ones.
You can replace images in the Stage, as well as in the Storyboard and Timeline view. Since thethumbnails are quite small in Timeline view, working in in the Storyboard or Stage is usually easier.
To create a template:1. Open an existing slideshow document.
2. Select Save As... from the File menu. The Save As dialog opens.
3. Enter a new filename for your slideshow, then click Save.
4. To replace an image, drag the new image from the Image Browser or Finder and drop it onto thethumbnail in the Storyboard. You can also drop the image directly onto a layer in the Stage whilepressing the Option key. The image you want to replace highlights in yellow.
5. You can replace the movie file of an existing movie layer in the same way.
6. To replace audio, drag an audio file from the Audio Browser or the Finder onto an existing audioitem in the Storyboard. When it highlights yellow, drop the file.
To make replacing in the Stage even simpler, right-click on a layer in the Stage and selectFile > Is Placeholder from the context menu. Once a layer is a placeholder, pressing theOption key is no longer necessary for replacing. This should be done in the original
slideshow before it was saved under a different filename.
FotoMagico 4 Help > Guides > Creating a Template Slideshow
FotoMagico 4 Help - Copyright © 2007-2012 IMAGINE. All rights reserved.
27
Playing SlideshowsThere are two options for playing a slideshow: previewing in the document window and playing in full-screen mode. If you have multiple displays connected to your computer, or if you have a projectorconnected to your Mac, you can choose any of those displays or the projector for a full-screenpresentation.
When playing your slideshow, FotoMagico tries to respect the timing you specified duringauthoring. However, if slide durations are fairly short, and the image files are large, yourcomputer may not be able to load the image files quickly enough to keep up with the fastpace you specified.
In this case you can either slow down the pace by making the slide durations a bit longer, oryou can scale down your image files, so that loading doesn't take as long.
Previewing in the WindowTo preview part of your slideshow, click on the Preview button in the toolbar (filled triangle), choosePlay from the Slideshow menu, or press the Spacebar key.
If you want to stop the preview, click the Play button again, or choose Stop from the Slideshow menu,or press the Esc or the ⌘ . keys.
Playing in Fullscreen ModeTo play the slideshow, first click on the Rewind button to move the playhead to the beginning of theslideshow, then click on the Play Fullscreen/Share button in the toolbar, then choose Play Fullscreen...or choose Play Fullscreen... from the Slideshow menu.
If there is more than one display device available (e.g. a projector connected to your MacBook Pro), asheet will appear which lets you select which display should be used for full-screen playback. Thissheet looks similar to the Displays pane in the System Preferences.
If you want to stop the slideshow, press the Esc or the ⌘ . keys or click the Menu button on theApple remote control.
Using the TeleprompterThe teleprompter helps you with live narration of your slideshow while presenting it in front of anaudience. It displays the slide notes in a scrolling list on the second screen while presenting theslideshow itself on another screen or projector.
The teleprompter requires that at least two displays are connected to your Mac. One of these may alsobe a projector. Since the teleprompter will be displayed in the document window, it will only be visibleif you move the document window to the screen which will not be used for the full-screenpresentation. For example, if you have a projector connected to your MacBook Pro, move the documentwindow to the internal display, and use the projector for the full-screen presentation.
FotoMagico 4 Help > Guides > Playing Slideshows
FotoMagico 4 Help - Copyright © 2007-2012 IMAGINE. All rights reserved.
28
Choose Play Fullscreen from the Slideshow menu and in the sheet that appears select thepresentation screen and 'Use Teleprompter' from the Options popup menu. Playback will start after theteleprompter has been prepared.
On the left side, the teleprompter displays the current slide, its duration, and a small progress barwhich gives you an idea how long the current slide is still going to be visible. This is helpful to paceyour live narration. The right side displays a scrolling list of slide notes, which remind you of what totalk about during the slideshow. The notes for the current slide are displayed in bright white, whilenotes for upcoming slides are displayed in a dimmed dark gray.
Preparing the teleprompter may take a while for very long slideshows. Playback will start afterthe preparation has completed.
Some Macs may not be powerful enough to display both the full-screen playback and theteleprompter at the same time, without some stuttering occurring in the animation of theimages. In this case you may need to refrain from using the teleprompter.
Interactive ControlSlideshows can be controlled interactively while playing. This interactive control is available whenpreviewing in a window, playing full-screen, using a standalone player or a screensaver. Playback canbe controlled interactively with the keyboard, the Apple remote control, or mouse clicks:
Pause/play slideshow - Press the Spacebar key to pause the slideshow or the Play/Pause buttonon the Apple remote control.
Jump forward/backward - Press the → key or the Forward button on the Apple remote controlto advance to the next slide. Press the ← key or Backward button on the Apple remote control togo back to the preceding slide.
Volume Control - Use the scroll wheel of your mouse or Apple Remote volume keys to control themaster volume. Lower the volume while you are speaking live and increase it when the music ismore important.
Continue at mouse click - If your slideshow contains slides with Continue at mouse click, theslideshow will pause at the end of these slides. Once you click the mouse button, the slideshow willadvance to the next slide.
Stop slideshow - Press the Esc or ⌘ . keys to stop the presentation at any time. Image andaudio will fade out before the slideshow stops.
Presenting with the iPhone Remote ApplicationFotoMagico now supports remote controlling of full-screen presentations with an iPhone app which isavailable separately at the iTunes App Store. Find out more about the FotoMagico Remote app andwhere to purchase it at www.boinx.com/fotomagico/iphone/.For help on using the iPhone Remote Control, visit www.boinx.com/fotomagico/support/iphone/.
29
Sharing SlideshowsAfter you have created and played a slideshow in Boinx FotoMagico, you may want to share yourslideshow with others who do not have FotoMagico or even a Mac computer. FotoMagico offers avariety of options to share your slideshows. You can choose these options from the Share menu orfrom the Play Fullscreen/Share button:
StandalonePlayer
Creates a stand-alone player application that can be playedon any Mac running Mac OS X Leopard or later. As a playercontains high resolution images and can be controlledinteractively, it is the best way to share a slideshow withanybody using a Mac.
YouTubeCreates a video suitable for uploading to YouTube. After thevideo has been rendered and compressed, it will beautomatically uploaded to your YouTube account.
iPhone/iPod
Creates a movie that uses the full capabilities of youriPhone/iPod. You can choose the iPhone/iPod model andFotoMagico will use the best possible settings that arecompatible with your selection and the correspondingrecommendations of Apple. You could also add your movie toiTunes for syncing.
iPad
Creates a movie that uses the full capabilities of your iPad.You can choose the iPad model and FotoMagico will use thebest possible settings that are compatible with your selectionand the corresponding recommendations of Apple. You couldalso add your movie to iTunes for syncing.
Apple TV
Creates a movie that uses the full capabilities of your AppleTV. You can choose the Apple TV model and FotoMagico willuse the best possible settings that are compatible with yourselection and the corresponding recommendations of Apple.You could also add your movie to iTunes for syncing.
DVD
This plug-in helps you to create a movie that can then beburned to a DVD using a third-party application such as iDVDor Roxio Toast Titanium. Due to the limitations of the NTSCand PAL video standards the result will not look as good asthe original slideshow, but can be played on any DVD playerconnected to a TV or projector.
QuickTimeMovie
The QuickTime plug-in gives you access to all the tediouscompression settings of QuickTime. Here you can really finetune all aspects and even create preset settings for futureuse.
Image Quality and Distribution ReachSome of the choices listed above provide excellent image quality, but a limited distribution reach, whileother choices reach a wider audience, but with reduced image quality. Keep this tradeoff in mind when
FotoMagico 4 Help > Guides > Sharing Slideshows
FotoMagico 4 Help - Copyright © 2007-2012 IMAGINE. All rights reserved.
30
choosing how to share your slideshow.
Standalone players, screen savers, and presenting from within FotoMagico provide the best possibleimage quality, but require an Mac model to present the slideshow. Burning the slideshow to a DVD letsanybody with a consumer DVD player view the slideshow, but image quality is reduced due to technicallimitations of the video format. Exporting a movie for handheld devices like an iPod, iPhone or iPad willlet you watch a slideshow on the go, but image quality is limited by the LCD screen. Exporting yourslideshow for the web lets anybody watch your slideshow, but image quality is limited by bandwidthlimits of typical internet connections.
How to Share Your SlideshowSelect how you want to share your slideshow from the Share menu or click the Play Fullscreen/Sharebutton (some selections are only available when pressing the Option / Alt key) to open an assistant,that will guide you through the process of sharing your slideshow. Click on the Continue button afterentering the necessary information in each page of the assistant.
Standalone players always retain 100% quality because they use the FotoMagico slideshow playbackengine. For this reason they are the preferred choice to share a slideshow at full quality. All otherchoices export your slideshow to an intermediate format (usually a QuickTime movie), which results insome image quality loss.
For some choices (e.g. DVD) the quality will always be the same, but in other cases (e.gQuickTime) the quality can vary greatly, depending on the output size, frame rate, andcompression options that are chosen.
The following pages will explain some common sharing options in more detail:
Creating a Standalone Player
Creating for YouTube
Creating a DVD
Creating a Custom QuickTime Movie
31
Creating a Standalone PlayerOnce your slideshow is finished you may want to share it with other people who do not haveFotoMagico installed on their computer. Creating a standalone player is the best option, because itdisplays the slideshow with the original FotoMagico playback engine, thus retaining the full quality ofyour slideshow.
Select Standalone Player... from the Share menu or click the Play Fullscreen/Share button. Click onthe Continue button and the assistant will guide you through the necessary steps to create astandalone player.
Standalone players are compatible with Intel Mac models running Mac OS X 10.6 (SnowLeopard) or newer, which have a reasonably modern graphics card. Any Mac that is able torun FotoMagico can also run a standalone player.
If your slideshow has missing images or audio files, you will first see a page that lists themissing files. If you used protected audio files (songs purchased from the iTunes Music Store),these will also be listed.
The use of DRM Protected audio is not recommended as it limits the distribution of the playerto 5 different computers, which need to be authorized to play the audio. For this reason itmakes more sense to use unprotected audio.
Step 1 of 4: Provide InfoOn the first page of the assistant you can enter information about the author of the slideshow,copyright info, a web page URL, and a contact email. This information can either be displayed after theplayer stops playing the slideshow.
Step 2 of 4: Select OptionsSelect expiration options. A player can be set to expire after playing the slideshow a certain number oftimes, or after a certain date.
Step 3 of 4: Choose DestinationSpecify where the standalone player should be saved. FotoMagico will suggest a reasonable filenameand destination folder. Accept the defaults or enter a new filename and destination folder. Please makesure to select a folder on a volume that has enough free disk space. Also make sure to only select afolder for which you have write permissions.
If you choose a folder which does not have the correct permissions or if the volume does nothave enough free disk space, then an alert will be displayed at the bottom of the assistantand the Start button will be disabled. In this case you need to choose a different folder ordifferent volume.
If none of your volumes have enough free disk space, you need to attach another externalhard disk or free up some space on your internal hard disk by deleting things you do notneed anymore.
Step 4 of 4: ExportingClick the Start button. The player will be created in the destination folder you specified in the previousstep. The assistant will close automatically.
FotoMagico 4 Help > Guides > Creating a Standalone Player
FotoMagico 4 Help - Copyright © 2007-2012 IMAGINE. All rights reserved.
32

33
Creating a YouTube VideoOnce your slideshow is finished you may want to share it with others as a YouTube video. In order todo this, you will need a YouTube account. If you do not have a YouTube account, you need to set oneup on YouTube.
Select YouTube... from the Share menu or click the Play Fullscreen/Share button. Click on theContinue button and the assistant will guide you through the necessary steps to create a YouTubevideo.
If your slideshow has missing images or audio files, you will first see a page that lists themissing files. If you used DRM protected audio files (songs purchased from the iTunes MusicStore), these will also be listed.
Step 1 of 5: Select OptionsSelect the video resolution (SD 480p, HD 720p, or HD 1080p).
Step 2 of 5: Choose DestinationSpecify where your YouTube video should be saved. FotoMagico will suggest a reasonable filename anddestination folder. Accept the defaults or enter a new filename and destination folder, then click theChoose... button. Please make sure to select a folder on a volume that has enough free disk space.
Also make sure to only select a folder for which you have write permissions.
If you choose a folder which does not have the correct permissions or if the volume does nothave enough free disk space, then an alert will be displayed at the bottom of the assistantand the Start button will be disabled. In this case you need to choose a different folder ordifferent volume.
If none of your volumes have enough free disk space, you need to attach another externalhard disk or free up some space on your internal hard disk by deleting stuff you do not needanymore.
Step 3 of 5: Upload InformationEnter your YouTube account information and password. Select what type of slideshow (video) you areuploading from the Category popup, enter the title and a brief description of the slideshow and selectif the slideshow (video) is private.
FotoMagico 4 Help > Guides > Creating a YouTube Video
FotoMagico 4 Help - Copyright © 2007-2012 IMAGINE. All rights reserved.
34

Step 4 of 5: ExportingClick the Start button. The video will be rendered and saved in the destination folder you specified inthe previous step and then uploaded to YouTube.
Step 5 of 5: Finish UpYour video may not be available immediately for viewing, because YouTube still needs some time toprocess the video. Please be patient. You can also select to embed your YouTube video in your ownweb page by clicking the Generate HTML button. Click Finish to close the assistant.
35
Creating a DVDMany users wish to present slideshows in the comfort of their living room, using their TV set and DVDplayer. While this does no justice to the quality of FotoMagico slideshows, FotoMagico helps you createa DVD of your slideshow. FotoMagico does not burn a DVD directly. Instead it creates a QuickTimemovie file and relies on third party software like Apple iDVD or Roxio Toast Titanium to burn the DVD.
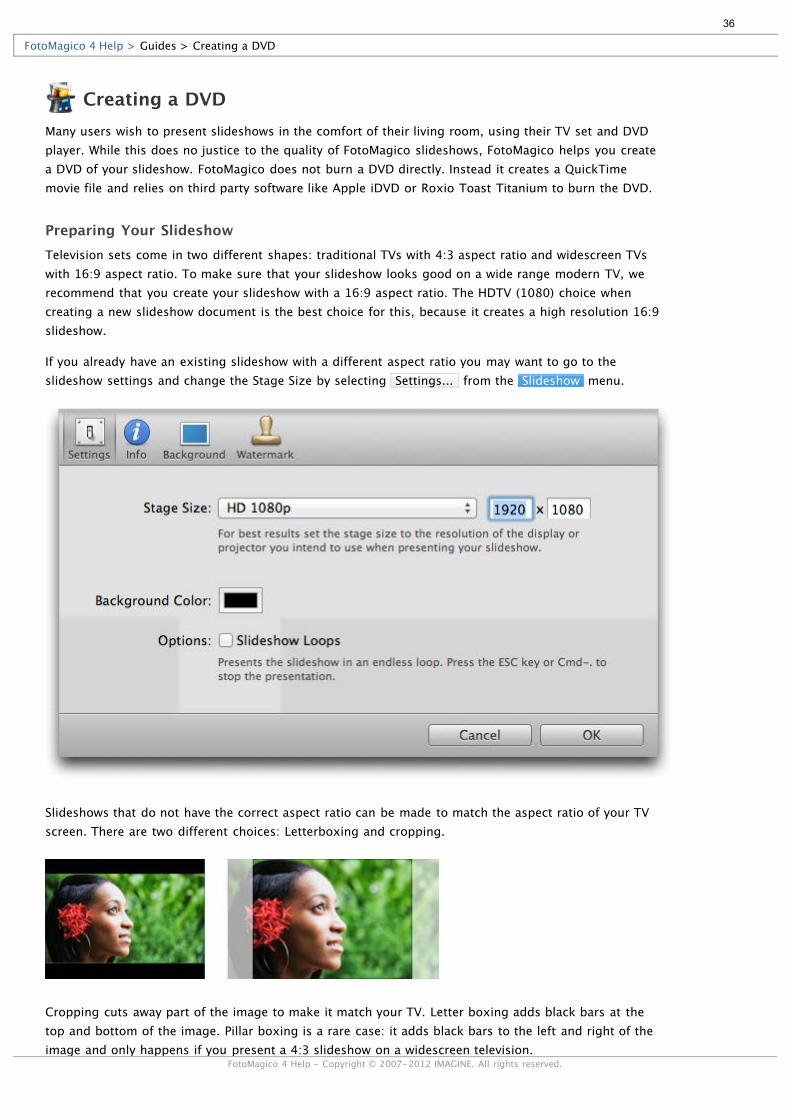
Preparing Your SlideshowTelevision sets come in two different shapes: traditional TVs with 4:3 aspect ratio and widescreen TVswith 16:9 aspect ratio. To make sure that your slideshow looks good on a wide range modern TV, werecommend that you create your slideshow with a 16:9 aspect ratio. The HDTV (1080) choice whencreating a new slideshow document is the best choice for this, because it creates a high resolution 16:9slideshow.
If you already have an existing slideshow with a different aspect ratio you may want to go to theslideshow settings and change the Stage Size by selecting Settings... from the Slideshow menu.
Slideshows that do not have the correct aspect ratio can be made to match the aspect ratio of your TVscreen. There are two different choices: Letterboxing and cropping.
Cropping cuts away part of the image to make it match your TV. Letter boxing adds black bars at thetop and bottom of the image. Pillar boxing is a rare case: it adds black bars to the left and right of theimage and only happens if you present a 4:3 slideshow on a widescreen television.
FotoMagico 4 Help > Guides > Creating a DVD
FotoMagico 4 Help - Copyright © 2007-2012 IMAGINE. All rights reserved.
36
Exporting Your SlideshowSelect the DVD... option from the Share menu. An assistant will appear that guides you throughsteps necessary to create a DVD.
If your slideshow has missing images or audio files, you will first see a page that lists themissing files. If you used protected audio files (songs purchased from the iTunes Music Store),these will also be listed.
DRM protected audio files cannot be used. We recommend that you burn those songs to anAudio CD in iTunes and reimport them back into iTunes. This strips the DRM protection fromthe audio files and will lead to minor loss of audio quality, but the resulting audio files canbe used without any restrictions. Please refer to the iTunes Help for details on burning AudioCDs and importing songs.
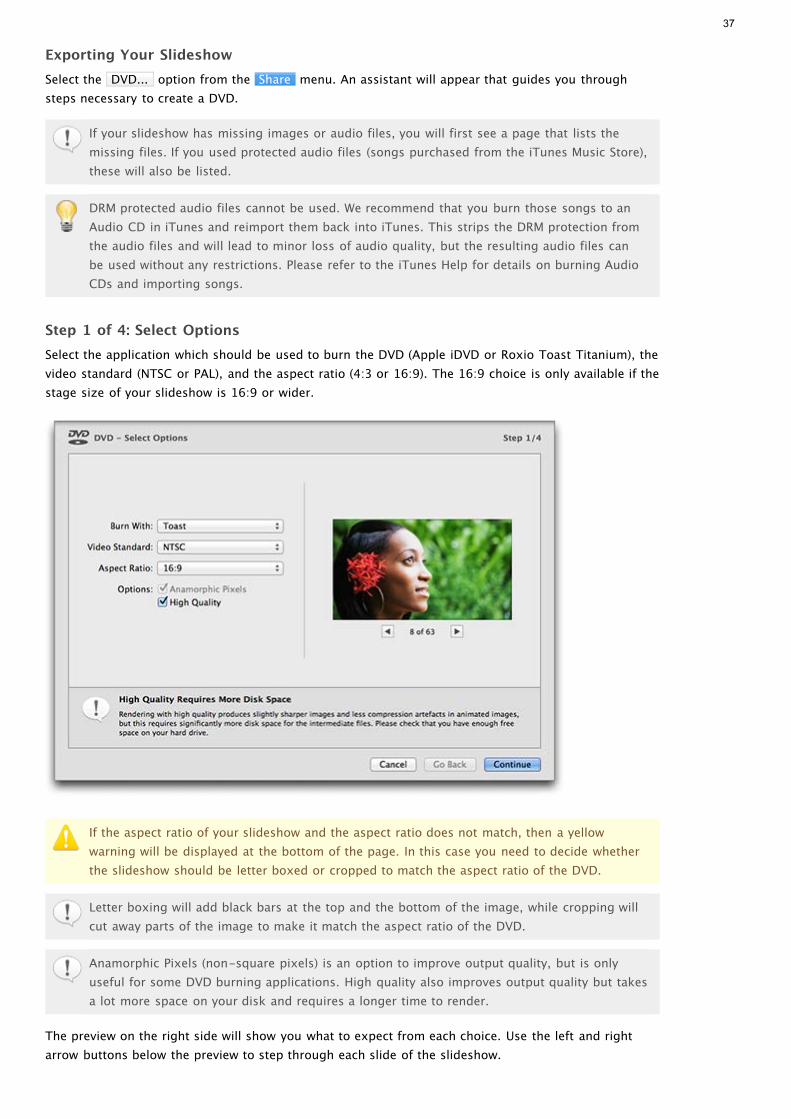
Step 1 of 4: Select OptionsSelect the application which should be used to burn the DVD (Apple iDVD or Roxio Toast Titanium), thevideo standard (NTSC or PAL), and the aspect ratio (4:3 or 16:9). The 16:9 choice is only available if thestage size of your slideshow is 16:9 or wider.
If the aspect ratio of your slideshow and the aspect ratio does not match, then a yellowwarning will be displayed at the bottom of the page. In this case you need to decide whetherthe slideshow should be letter boxed or cropped to match the aspect ratio of the DVD.
Letter boxing will add black bars at the top and the bottom of the image, while cropping willcut away parts of the image to make it match the aspect ratio of the DVD.
Anamorphic Pixels (non-square pixels) is an option to improve output quality, but is onlyuseful for some DVD burning applications. High quality also improves output quality but takesa lot more space on your disk and requires a longer time to render.
The preview on the right side will show you what to expect from each choice. Use the left and rightarrow buttons below the preview to step through each slide of the slideshow.
37
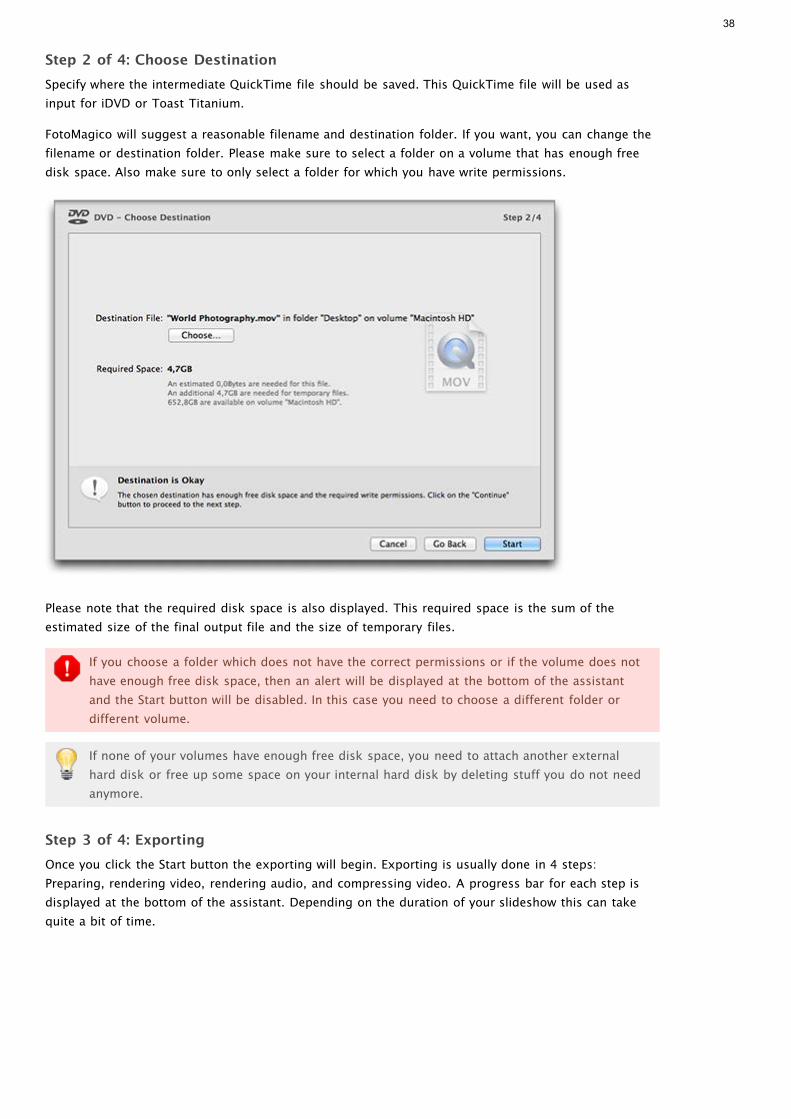
Step 2 of 4: Choose DestinationSpecify where the intermediate QuickTime file should be saved. This QuickTime file will be used asinput for iDVD or Toast Titanium.
FotoMagico will suggest a reasonable filename and destination folder. If you want, you can change thefilename or destination folder. Please make sure to select a folder on a volume that has enough freedisk space. Also make sure to only select a folder for which you have write permissions.
Please note that the required disk space is also displayed. This required space is the sum of theestimated size of the final output file and the size of temporary files.
If you choose a folder which does not have the correct permissions or if the volume does nothave enough free disk space, then an alert will be displayed at the bottom of the assistantand the Start button will be disabled. In this case you need to choose a different folder ordifferent volume.
If none of your volumes have enough free disk space, you need to attach another externalhard disk or free up some space on your internal hard disk by deleting stuff you do not needanymore.
Step 3 of 4: ExportingOnce you click the Start button the exporting will begin. Exporting is usually done in 4 steps:Preparing, rendering video, rendering audio, and compressing video. A progress bar for each step isdisplayed at the bottom of the assistant. Depending on the duration of your slideshow this can takequite a bit of time.
38
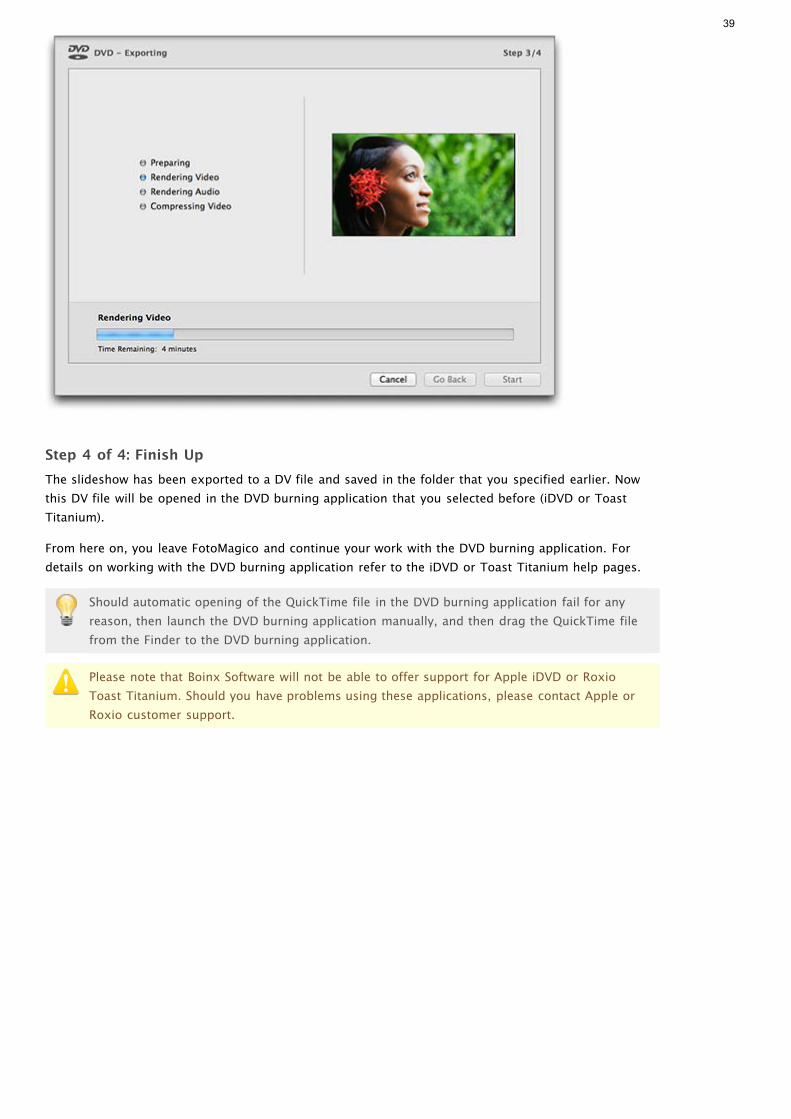
Step 4 of 4: Finish UpThe slideshow has been exported to a DV file and saved in the folder that you specified earlier. Nowthis DV file will be opened in the DVD burning application that you selected before (iDVD or ToastTitanium).
From here on, you leave FotoMagico and continue your work with the DVD burning application. Fordetails on working with the DVD burning application refer to the iDVD or Toast Titanium help pages.
Should automatic opening of the QuickTime file in the DVD burning application fail for anyreason, then launch the DVD burning application manually, and then drag the QuickTime filefrom the Finder to the DVD burning application.
Please note that Boinx Software will not be able to offer support for Apple iDVD or RoxioToast Titanium. Should you have problems using these applications, please contact Apple orRoxio customer support.
39

Creating a Custom QuickTime MovieShould none of the other sharing options be sufficient for your needs, you may want to considerexporting your slideshow to a custom QuickTime movie. Please note, that this is not for the faint ofheart, as quite a bit of QuickTime knowledge may be required to obtain good results.
Hold the Option key and select QuickTime Movie... from the Share menu. An assistant appearsthat guides you through steps necessary to create a QuickTime movie.
If your slideshow has missing images or audio files, you will first see a page that lists themissing files. If you used protected audio files (songs purchased from the iTunes Music Store),these will also be listed.
The use of DRM protected audio is not recommended as it cannot be exported to QuickTimemovies. We recommend that you burn protected songs to an Audio CD in iTunes and re-import them back into iTunes. This strips the DRM protection from the audio files and willlead to minor loss of audio quality, but the resulting audio files can be used without anyrestrictions. Please refer to the iTunes Help for details on burning Audio CDs and importingsongs.
Step 1 of 4: Select OptionsSelect the size, pixel aspect ratio, frame rate, and the compression options of the exported movie.
If you only specify the width or the height for the QuickTime movie, the missing value will becalculated automatically. If you specify both the width and height, then this size will be used, even ifthe aspect ratio does not match the aspect ratio of your slideshow. In this case you will get radiobuttons that let you choose whether you want to letterbox or crop your slideshow to make it matchyour export movie size.
If you specify both width and height, you also get the option to enter a custom pixel aspect ratio,which may be necessary if your exported movie is indented for video output, which often requires non-square pixels.
Frame rates between 1 fps and 60 fps are supported. The Motion Blur checkbox will be enabled forlower frame rate. Using motion blur helps avoid low frame rate artifacts, but rendering times aresignificantly increased.
Click Customize... to change the QuickTime compression settings. There are numerous QuickTimecodecs to choose from and each is slightly different, so an explanation in these help pages is notpossible. Please note that some prior knowledge with QuickTime compression settings is required toachieve good results!
Once you find good settings that lead to acceptable results you may want to save them forlater access. Choose the Save Preset... command from the Settings popup. Specify a namefor the preset file. Then, you can recall these settings by simply selecting the name of thepreset from the Settings popup.
Boinx Software Support can help you with specific questions about how to use FotoMagico,but due to limited resources will not be able to help with general questions about QuickTimecompression settings. You may want to contact Apple Support in this case.
Step 2 of 4: Choose DestinationSpecify where the exported QuickTime movie will be saved. FotoMagico will suggest a reasonable
FotoMagico 4 Help > Guides > Creating a Custom QuickTime Movie
FotoMagico 4 Help - Copyright © 2007-2012 IMAGINE. All rights reserved.
40
filename, but you can also specify your name and location. Please make sure to select a folder that hasenough free disk space and write permissions.
If you choose a folder which does not have the correct permissions or if the volume does nothaveenough free disk space, then an alert will be displayed at the bottom of the assistant andthe Start button will be disabled. In this case you need to choose a different folder ordifferent volume.
If none of your volumes have enough free disk space, you need to attach another externalhard disk or free up some space on your internal hard disk by deleting stuff you do not needanymore.
Step 3 of 4: ExportingOnce you click the Start button the exporting will begin. Exporting is usually done in 4 steps:Preparing, rendering video, rendering audio, and compressing video. A progress bar for each step isdisplayed at the bottom of the assistant. Depending on the duration of your slideshow this can takequite a bit of time.
Step 4 of 4: Finish UpThe slideshow has been exported to a QuickTime movie. You may now further process it in QuickTimePlayer or other video editing applications like iMovie or Final Cut Pro. Click the Open in QuickTimePlayer button to open the movie or click the Reveal in Finder button to locate the file.
Provided that you used the correct settings, you can also create a DVD with iDVD, ToastTitanium, or DVD Studio Pro. Simply drag the exported movie file to your DVD authoringapplication of choice and proceed from there.
41
FotoMagico PreferencesThis is where you apply settings that affect the application's behavior globally. To open the preferencespane, select Preferences from the FotoMagico menu or press ⌘ ; . Preferences are grouped into fivedifferent areas, each of which is represented by a tab in the preferences window:
GeneralCreate new document at application launch - when checked, this will create an empty documentafter launching the application.
Show assistant when creating new document - opens an assistant that guides you through theprocess of setting up a document.
External editors - lets you choose applications for editing images, movies, and audio files.
Number of undo steps - enter the number of undo steps you can perform, default is 10.
LibrariesMedia libraries - lets you choose whether iPhoto, Aperture, Lightroom, iTunes and Flickr librariesshould be loaded. Excluding some libraries reduces the memory footprint and loading times.
Browser appearance - determines how image and movie thumbnails are being displayed in theImage Browser and Movie Browser. Choose whether thumbnails should be displayed with a border,shadow, and name. The background color for the Image browser can also be selected.
AuthoringThe When inserting images section determines which default animation is applied to images that areadded to a slideshow.
Apply automatic animation - When checked a slow animation with alternating zoom in and zoomout is applied to inserted slides.
Keep landscape images completely visible - When checked a small zoom level is applied, so thathorizontal images are completely visible on the stage. If unchecked, a higher zoom level makessure that the image covers the stage and no background is visible.
Keep portrait images completely visible - When checked a small zoom level is applied, so thatvertical images are completely visible on the stage. If unchecked, a higher zoom level makes surethat the image covers the stage and no background is visible.
If you want more control over the animation, then use the Instant Slideshow... assistantfrom the Slideshow menu, or change the settings in the Options Inspector at a later time.
The When adding audio section determines if newly added audio is initially linked to slides. Theaudio can either stay where it is, or it can move along with the slides above it as you rearrangeslides. This behavior can be decided for each audio item and can be changed in the Audio OptionsInspector later.
Always link audio to slides - When checked, the audio will always stay with the slides when youmove them.
Never link audio to slides - When checked, the audio will stay where it is. If you move slides, theaudio will not move.
FotoMagico 4 Help > Reference > FotoMagico Preferences
FotoMagico 4 Help - Copyright © 2007-2012 IMAGINE. All rights reserved.
42
Let Fotomagico choose (depending on situation) - When checked, FotoMagico will decide if theaudio should be linked if dropped below the existing slides, or unlinked if dropped into an emptysection in the Storyboard/Timeline.
PlayingOptions that apply when playing your slideshow:
Spacebar preview behaviour - Defines whether pressing the Spacebar key to preview a slideshowstarts/stops playback, or whether it starts/pauses playback.
De-interlace - When checked video files are displayed with a de-interlacing algorithm. This leadsto much nicer video playback, but this option requires more processing power. If video playbackstutters on your computer, you may want to turn off this feature.
iPhone Remote - When enabled the iPhone remote application for FotoMagico (separately availableon the iTunes app store) can be used for interactively controlling a live presentation. Enter a PINcode to protect your Macintosh from unauthorized access to FotoMagico.
Software UpdateDetermines whether and how often FotoMagico will look for updates. In addition to that, you alwaysclick the Check Now to find out whether a new version is available. You can also decide to send usinformation about your system configuration, which allows us to improve support for future releases.
Never - Never look for new versions of FotoMagico.
Monthly - Check monthly whether a new version is available.
Weekly - Check weekly whether a new version is available.
Daily - Check daily whether a new version is available.
43
Slideshow SettingsThe settings control important aspects of your slideshow, like the stage size and background color. Toopen the settings sheet, select Settings... from the Slideshow menu.
SettingsStage Size - The stage size determines the aspect ratio of your slideshow. For best results, choosea stage size that matches the resolution of your intended display device, like a Cinema Display or aFull HD projector. If your slideshow is likely to be presented on a variety of different displays, thenselect the largest display you are targeting.
The stage size can be changed for an existing slideshow. Please note that aspect ratiochanges can have unexpected results for slides with pan & zoom animation. In this caseplease inspect all slides to make sure everything still looks as intended.
Background Color - Choose any background color for your slideshow. The background color isvisible when images are zoomed smaller than the stage size. It is also visible on blank slides andon title slides.
Transparent background colors are currently not supported.
Slideshow Loops - When this checkbox is selected, the slideshow will play endlessly until the Esckey is pressed. This mode is useful for kiosks or product demos.
InfoEnter slideshow specific information like title, subtitle and description, as well as personal informationlike author, organization, copyright, and contact URL in these fields.
BackgroundAllows you to select a background image for your slideshow. This image is only visible if your slideimages do not cover the entire stage. The background image is not animated.
Image - Displays the selected image.
Choose - Click this button to open a file panel and select an image file.
Remove - Click this button to remove the background image.
WatermarkA watermark (foreground image) is superimposed on every single slide in your slideshow. You canfreely position and zoom your watermark on the stage, but this position cannot change over time, i.e. itcannot be animated.
A logo or copyright message can be superimposed over your slideshow to create branding for yourwork.
Choose - Click this button open a file panel and select an image file.
Remove - Click this button to remove the superimposed watermark.
Opacity - Drag this slider to make the watermark partly transparent.
FotoMagico 4 Help > Reference > Slideshow Settings
FotoMagico 4 Help - Copyright © 2007-2012 IMAGINE. All rights reserved.
44

45
Storyboard & TimelineThe Storyboard and Timeline view at the bottom of the document window is the main area forauthoring your slideshow. The Storyboard and Timeline view have a header, one or more visual tracks,and up to 3 audio tracks.
They both allow you to create and edit your slideshow. You can use both views to perform most of thesame functions, however, some tasks are easier to achieve in one view than the other. You can onlydisplay one view at a time. Use the Storyboard button or the Timeline button to toggle between the twoviews.
The Storyboard is generally used for adding and rearranging slides. Whereas the Timeline is helpful forfine-tuning the duration of slides and transitions, and editing audio.
For information on the differences between the Storyboard and Timeline, see Working with theStoryboard/Timeline.
The visual track contains the slides. Each slide can hold up to 6 layers (images, movies, or titles).The layers are displayed as frames that are stacked vertically. A blank slide is displayed as anempty dashed outline.
The music track holds audio files. Music can span multiple slides.
The sound effects track usually holds short audio clips that provide ambience for a single slide, butmay also span multiple slides.
The narration track holds recorded narration for the slideshow. It can span multiple slides if thenarration was recorded in one session, or can be broken up into several different audio files thatspan fewer slides.
You can expand and collapse the visual and audio tracks. Collapsing reduces the required verticalspace, which is helpful on smaller notebook displays. When visual tracks are collapsed, the layersare displayed as a stack of frames, which auto-expand when you mouseover the stack.
Chapters can help structure your slideshow into logical parts. Each chapter would contain a groupof slides and audio items. Chapters can be color-coded for easy identification as you are quicklyscroll through your slideshow.
Dragging to the Storyboard or TimelineDragging files from the Finder or from the media browsers in the Sidebar adds new elements to theslideshow. The yellow highlight on the background indicates where the new items will be inserted oradded.
Image Files - Inserts new slides with the images at the dropped position.
Movie Files - Inserts new slides with the movies at the dropped position.
RTF Text Files - Titles are added to existing slides at the dropped position.
Audio Files - Audio items will be added starting at the dropped position and will span as manyslides as necessary to cover the length of the audio files. If necessary, empty slides will be added atthe end of the slideshow. You can shorten an audio item by dragging its right edge to span fewerslides.
You can drag an audio file to the Storyboard or Timeline, and then add the images later. This
FotoMagico 4 Help > Reference > Storyboard & Timeline
FotoMagico 4 Help - Copyright © 2007-2012 IMAGINE. All rights reserved.
46
workflow is useful for authors who want to start out with pre-composed music and then addappropriate images after. In previous versions of FotoMagico you always had to start byadding images first, and then add the music.
Arranging ContentTelling a story is all about arranging your images in a good sequence. To rearrange the content youcan:
Select images, movies, titles, or audio items by clicking on them. When selected, they highlight inblue.
Make a multiple selection by clicking on the background and drag a rectangle across multiple items.
Make a multiple selection by clicking on the first item, then press the Up Arrow key and click on thelast item.
Extend the selection by pressing the ⌘ key and clicking on another item.
It is possible to make non-consecutive selections. This helps with rearranging your content,as well as with editing options of multiple items at once.
Drag selected items to a new location.
The dragged items will be inserted in a consecutive fashion when dragging a non-consecutiveselection to a new location in the Storyboard or Timeline.
Delete selected items by pressing the ⌫ backspace key or by choosing the Delete item from theEdit menu.
Change the range of slides an audio item spans, by dragging the left or right edge of this audioitem.
Double-clicking an item reveals the Options Inspector so you can edit parameters for the selecteditems.
The HeaderThe header displays the following information above each slide:
If a slide is set to continue after its duration, the header displays the slide duration. Double-clickthe duration to edit the duration for a single slide.
If a slide is set to continue at a mouse click, the header displays Click.
If a slide is set to continue at an audio marker, the header displays Marker.
Right-click, or Control+click on the text in the header to change the continue type for a slide.
If the chosen slide duration or transition duration yields problematic timing, a yellow warning iconis displayed. Click on this icon to show a popover that explains the situation and what to do aboutit.
The new warning for problematic timing helps you to author slideshows that are guaranteedto be playable on a wide variety of Macintosh computers. Try to follow the suggestions in theexplanatory popovers.
The Playhead
47
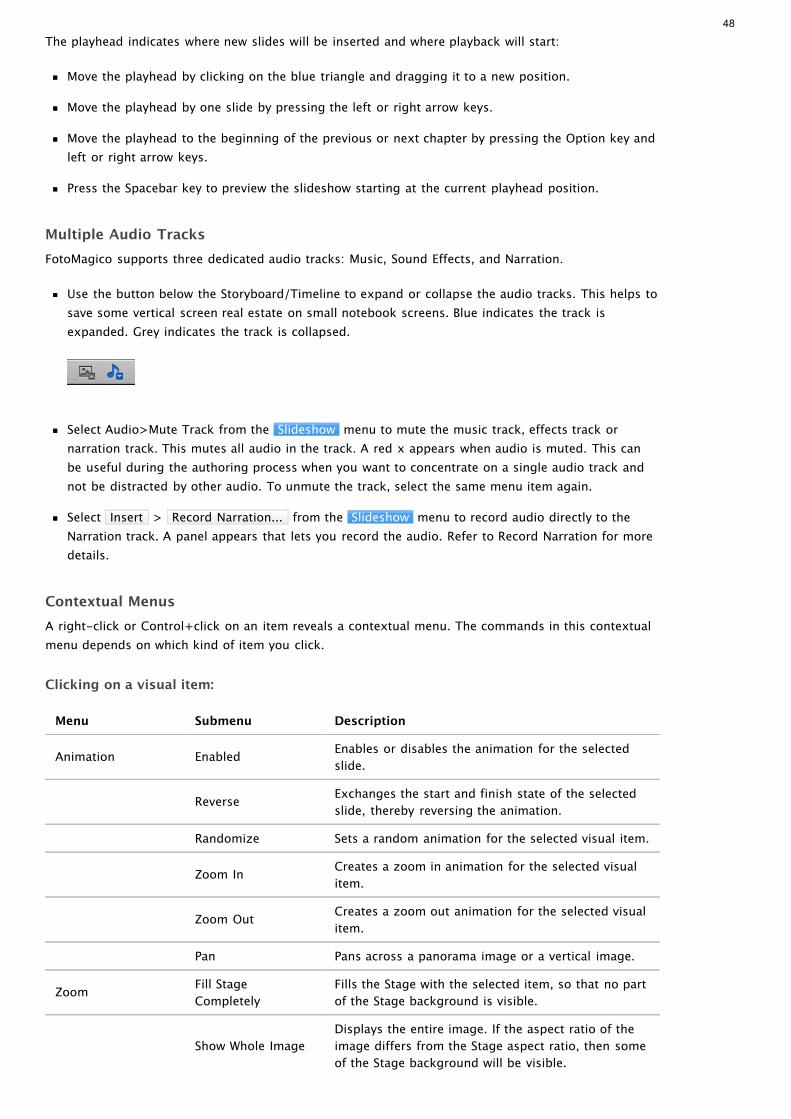
The playhead indicates where new slides will be inserted and where playback will start:
Move the playhead by clicking on the blue triangle and dragging it to a new position.
Move the playhead by one slide by pressing the left or right arrow keys.
Move the playhead to the beginning of the previous or next chapter by pressing the Option key andleft or right arrow keys.
Press the Spacebar key to preview the slideshow starting at the current playhead position.
Multiple Audio TracksFotoMagico supports three dedicated audio tracks: Music, Sound Effects, and Narration.
Use the button below the Storyboard/Timeline to expand or collapse the audio tracks. This helps tosave some vertical screen real estate on small notebook screens. Blue indicates the track isexpanded. Grey indicates the track is collapsed.
Select Audio>Mute Track from the Slideshow menu to mute the music track, effects track ornarration track. This mutes all audio in the track. A red x appears when audio is muted. This canbe useful during the authoring process when you want to concentrate on a single audio track andnot be distracted by other audio. To unmute the track, select the same menu item again.
Select Insert > Record Narration... from the Slideshow menu to record audio directly to theNarration track. A panel appears that lets you record the audio. Refer to Record Narration for moredetails.
Contextual MenusA right-click or Control+click on an item reveals a contextual menu. The commands in this contextualmenu depends on which kind of item you click.
Clicking on a visual item:
Menu Submenu Description
Animation Enabled Enables or disables the animation for the selectedslide.
Reverse Exchanges the start and finish state of the selectedslide, thereby reversing the animation.
Randomize Sets a random animation for the selected visual item.
Zoom In Creates a zoom in animation for the selected visualitem.
Zoom Out Creates a zoom out animation for the selected visualitem.
Pan Pans across a panorama image or a vertical image.
Zoom Fill StageCompletely
Fills the Stage with the selected item, so that no partof the Stage background is visible.
Show Whole ImageDisplays the entire image. If the aspect ratio of theimage differs from the Stage aspect ratio, then someof the Stage background will be visible.
48
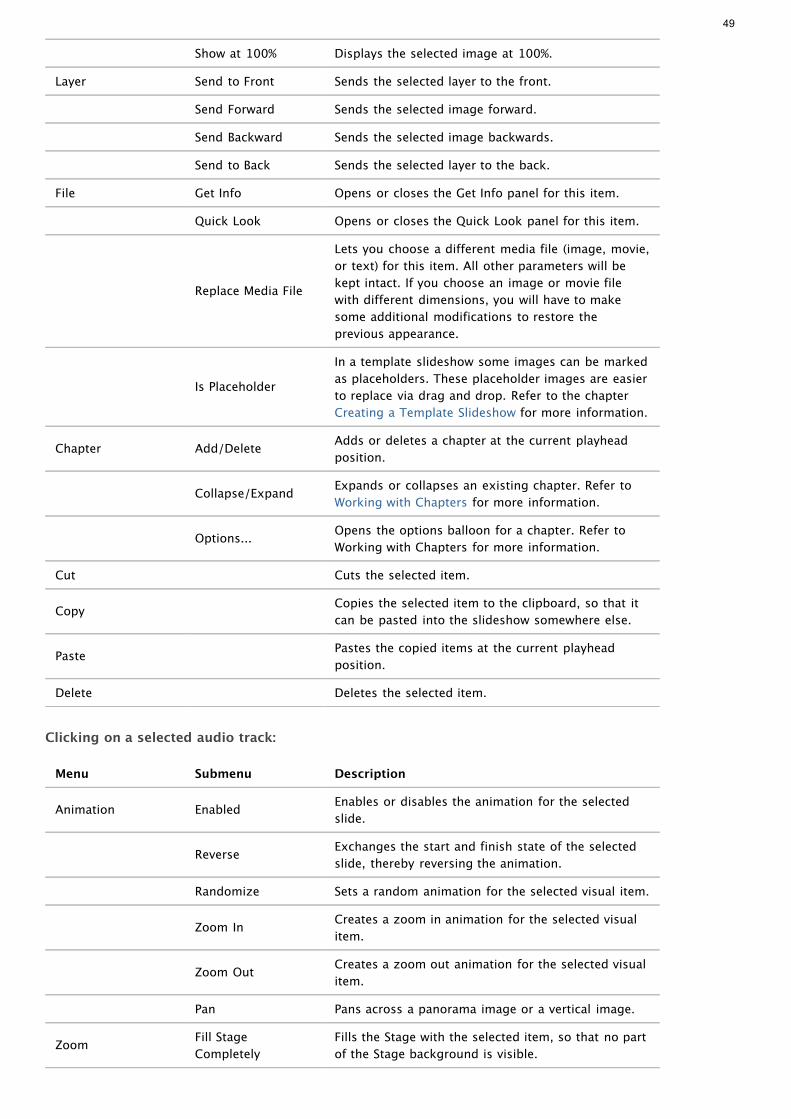
Show at 100% Displays the selected image at 100%.
Layer Send to Front Sends the selected layer to the front.
Send Forward Sends the selected image forward.
Send Backward Sends the selected image backwards.
Send to Back Sends the selected layer to the back.
File Get Info Opens or closes the Get Info panel for this item.
Quick Look Opens or closes the Quick Look panel for this item.
Replace Media File
Lets you choose a different media file (image, movie,or text) for this item. All other parameters will bekept intact. If you choose an image or movie filewith different dimensions, you will have to makesome additional modifications to restore theprevious appearance.
Is Placeholder
In a template slideshow some images can be markedas placeholders. These placeholder images are easierto replace via drag and drop. Refer to the chapterCreating a Template Slideshow for more information.
Chapter Add/Delete Adds or deletes a chapter at the current playheadposition.
Collapse/Expand Expands or collapses an existing chapter. Refer toWorking with Chapters for more information.
Options... Opens the options balloon for a chapter. Refer toWorking with Chapters for more information.
Cut Cuts the selected item.
Copy Copies the selected item to the clipboard, so that itcan be pasted into the slideshow somewhere else.
Paste Pastes the copied items at the current playheadposition.
Delete Deletes the selected item.
Clicking on a selected audio track:
Menu Submenu Description
Animation Enabled Enables or disables the animation for the selectedslide.
Reverse Exchanges the start and finish state of the selectedslide, thereby reversing the animation.
Randomize Sets a random animation for the selected visual item.
Zoom In Creates a zoom in animation for the selected visualitem.
Zoom Out Creates a zoom out animation for the selected visualitem.
Pan Pans across a panorama image or a vertical image.
Zoom Fill StageCompletely
Fills the Stage with the selected item, so that no partof the Stage background is visible.
49
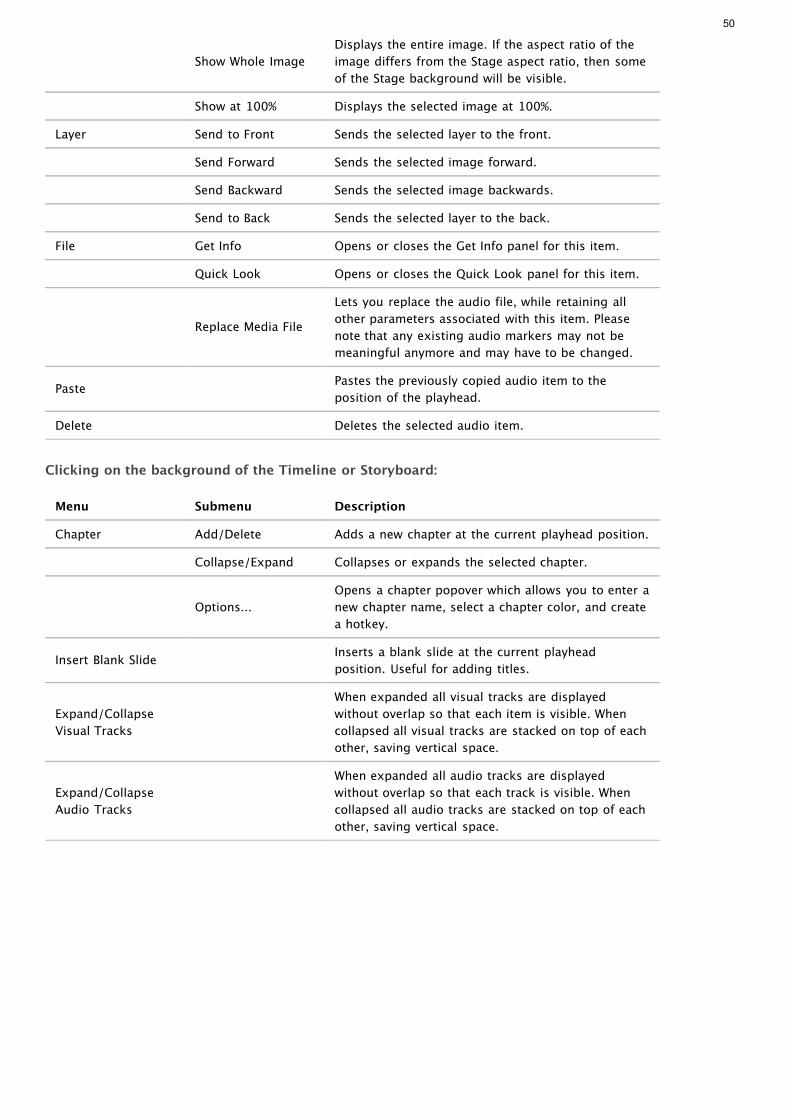
Show Whole ImageDisplays the entire image. If the aspect ratio of theimage differs from the Stage aspect ratio, then someof the Stage background will be visible.
Show at 100% Displays the selected image at 100%.
Layer Send to Front Sends the selected layer to the front.
Send Forward Sends the selected image forward.
Send Backward Sends the selected image backwards.
Send to Back Sends the selected layer to the back.
File Get Info Opens or closes the Get Info panel for this item.
Quick Look Opens or closes the Quick Look panel for this item.
Replace Media File
Lets you replace the audio file, while retaining allother parameters associated with this item. Pleasenote that any existing audio markers may not bemeaningful anymore and may have to be changed.
Paste Pastes the previously copied audio item to theposition of the playhead.
Delete Deletes the selected audio item.
Clicking on the background of the Timeline or Storyboard:
Menu Submenu Description
Chapter Add/Delete Adds a new chapter at the current playhead position.
Collapse/Expand Collapses or expands the selected chapter.
Options...Opens a chapter popover which allows you to enter anew chapter name, select a chapter color, and createa hotkey.
Insert Blank Slide Inserts a blank slide at the current playheadposition. Useful for adding titles.
Expand/CollapseVisual Tracks
When expanded all visual tracks are displayedwithout overlap so that each item is visible. Whencollapsed all visual tracks are stacked on top of eachother, saving vertical space.
Expand/CollapseAudio Tracks
When expanded all audio tracks are displayedwithout overlap so that each track is visible. Whencollapsed all audio tracks are stacked on top of eachother, saving vertical space.
50
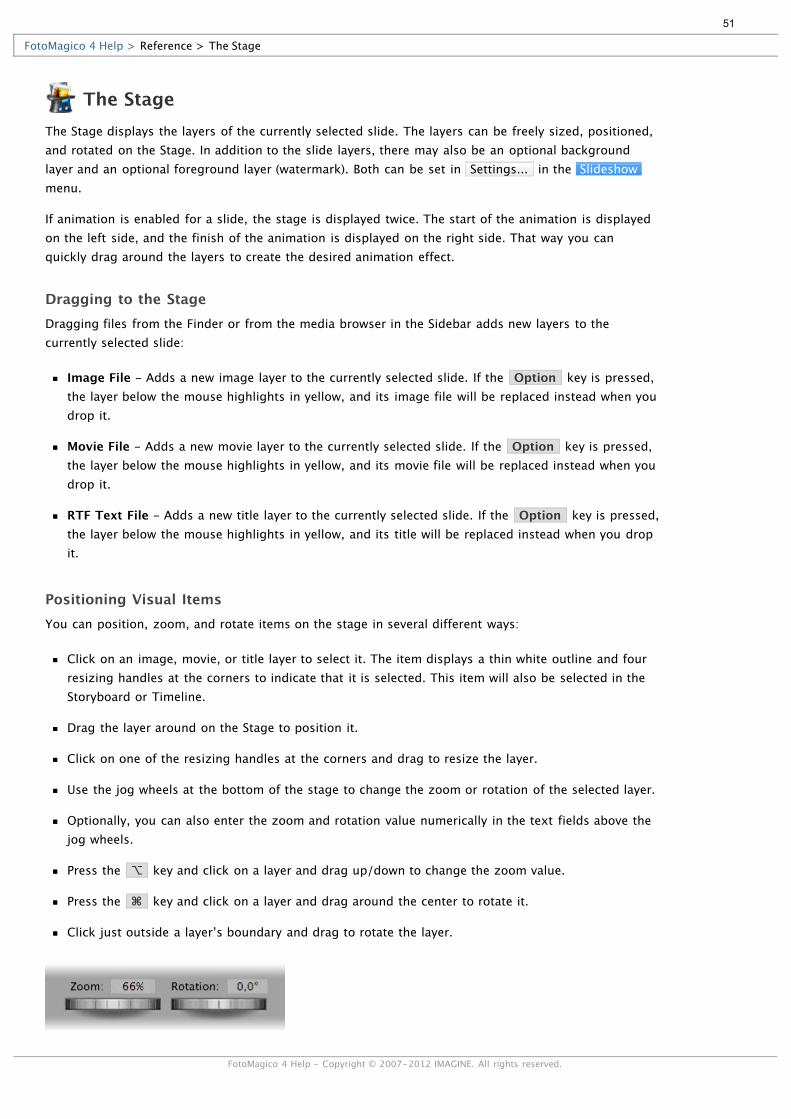
The StageThe Stage displays the layers of the currently selected slide. The layers can be freely sized, positioned,and rotated on the Stage. In addition to the slide layers, there may also be an optional backgroundlayer and an optional foreground layer (watermark). Both can be set in Settings... in the Slideshowmenu.
If animation is enabled for a slide, the stage is displayed twice. The start of the animation is displayedon the left side, and the finish of the animation is displayed on the right side. That way you canquickly drag around the layers to create the desired animation effect.
Dragging to the StageDragging files from the Finder or from the media browser in the Sidebar adds new layers to thecurrently selected slide:
Image File - Adds a new image layer to the currently selected slide. If the Option key is pressed,the layer below the mouse highlights in yellow, and its image file will be replaced instead when youdrop it.
Movie File - Adds a new movie layer to the currently selected slide. If the Option key is pressed,the layer below the mouse highlights in yellow, and its movie file will be replaced instead when youdrop it.
RTF Text File - Adds a new title layer to the currently selected slide. If the Option key is pressed,the layer below the mouse highlights in yellow, and its title will be replaced instead when you dropit.
Positioning Visual ItemsYou can position, zoom, and rotate items on the stage in several different ways:
Click on an image, movie, or title layer to select it. The item displays a thin white outline and fourresizing handles at the corners to indicate that it is selected. This item will also be selected in theStoryboard or Timeline.
Drag the layer around on the Stage to position it.
Click on one of the resizing handles at the corners and drag to resize the layer.
Use the jog wheels at the bottom of the stage to change the zoom or rotation of the selected layer.
Optionally, you can also enter the zoom and rotation value numerically in the text fields above thejog wheels.
Press the ⌥ key and click on a layer and drag up/down to change the zoom value.
Press the ⌘ key and click on a layer and drag around the center to rotate it.
Click just outside a layer’s boundary and drag to rotate the layer.
FotoMagico 4 Help > Reference > The Stage
FotoMagico 4 Help - Copyright © 2007-2012 IMAGINE. All rights reserved.
51
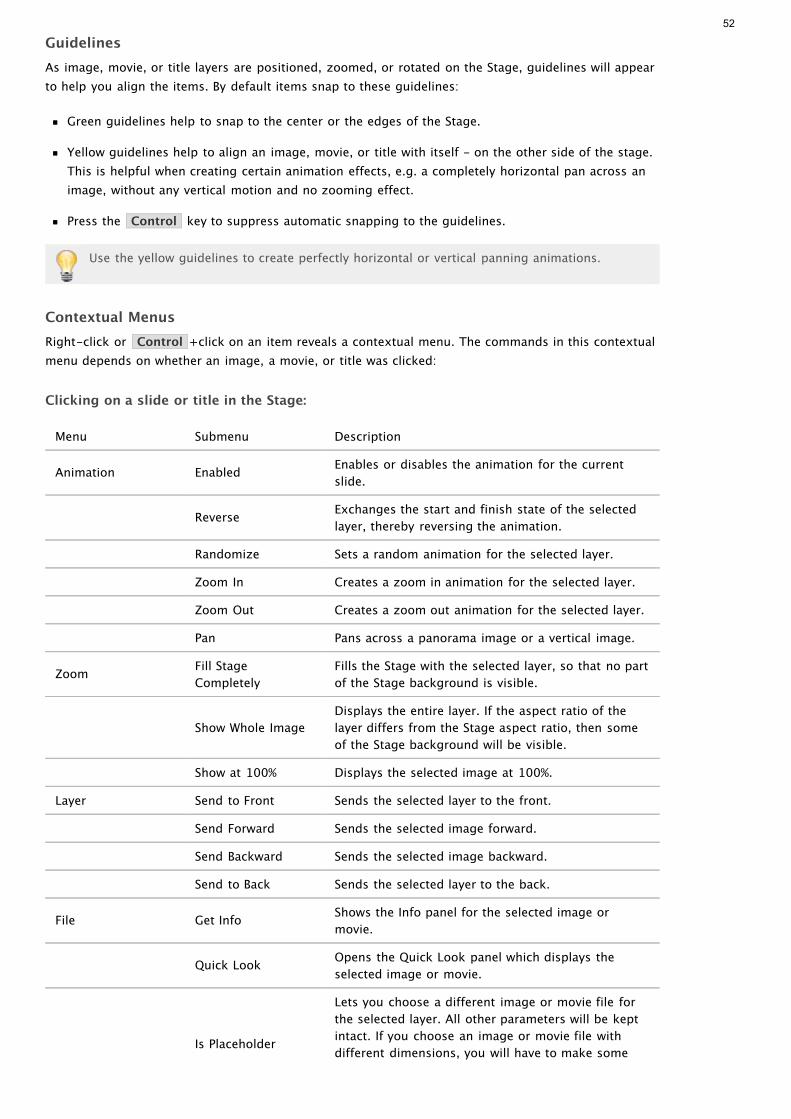
GuidelinesAs image, movie, or title layers are positioned, zoomed, or rotated on the Stage, guidelines will appearto help you align the items. By default items snap to these guidelines:
Green guidelines help to snap to the center or the edges of the Stage.
Yellow guidelines help to align an image, movie, or title with itself - on the other side of the stage.This is helpful when creating certain animation effects, e.g. a completely horizontal pan across animage, without any vertical motion and no zooming effect.
Press the Control key to suppress automatic snapping to the guidelines.
Use the yellow guidelines to create perfectly horizontal or vertical panning animations.
Contextual MenusRight-click or Control +click on an item reveals a contextual menu. The commands in this contextualmenu depends on whether an image, a movie, or title was clicked:
Clicking on a slide or title in the Stage:
Menu Submenu Description
Animation Enabled Enables or disables the animation for the currentslide.
Reverse Exchanges the start and finish state of the selectedlayer, thereby reversing the animation.
Randomize Sets a random animation for the selected layer.
Zoom In Creates a zoom in animation for the selected layer.
Zoom Out Creates a zoom out animation for the selected layer.
Pan Pans across a panorama image or a vertical image.
Zoom Fill StageCompletely
Fills the Stage with the selected layer, so that no partof the Stage background is visible.
Show Whole ImageDisplays the entire layer. If the aspect ratio of thelayer differs from the Stage aspect ratio, then someof the Stage background will be visible.
Show at 100% Displays the selected image at 100%.
Layer Send to Front Sends the selected layer to the front.
Send Forward Sends the selected image forward.
Send Backward Sends the selected image backward.
Send to Back Sends the selected layer to the back.
File Get Info Shows the Info panel for the selected image ormovie.
Quick Look Opens the Quick Look panel which displays theselected image or movie.
Is Placeholder
Lets you choose a different image or movie file forthe selected layer. All other parameters will be keptintact. If you choose an image or movie file withdifferent dimensions, you will have to make some
52
additional modifications to restore the previousappearance.
Cut Cuts the selected layer.
Copy Copies the selected layer to the clipboard.
Paste Pastes the previously copied layer on top of existinglayers.
Delete Deletes the selected layer.
Copy Geometry Copies all geometry parameters (position, zoom,rotation) of the selected layer to the clipboard.
Paste Geometry
After changing the selection, the geometryparameters can be pasted onto another layer. Thatway layers can be precisely aligned within a singleslide or across multiple slides.
Copy AnimationCopies all animation parameters of the selected layerto the clipboard, so that they can be pasted to otherlayers.
Paste Animation
After changing the selection, pastes previouslycopied animation parameters onto the selected layer.That way animation effects can be transferredbetween slides.
Clicking in Stage background:
Menu Submenu Description
Show Action SafeArea
Displays a dashed rectangle indicating the area ofthe stage that is 'safe' for displaying action(animation).
Show Title SafeArea
Displays a dashed rectangle indicating the area ofthe stage that is 'safe' for placing titles.
53
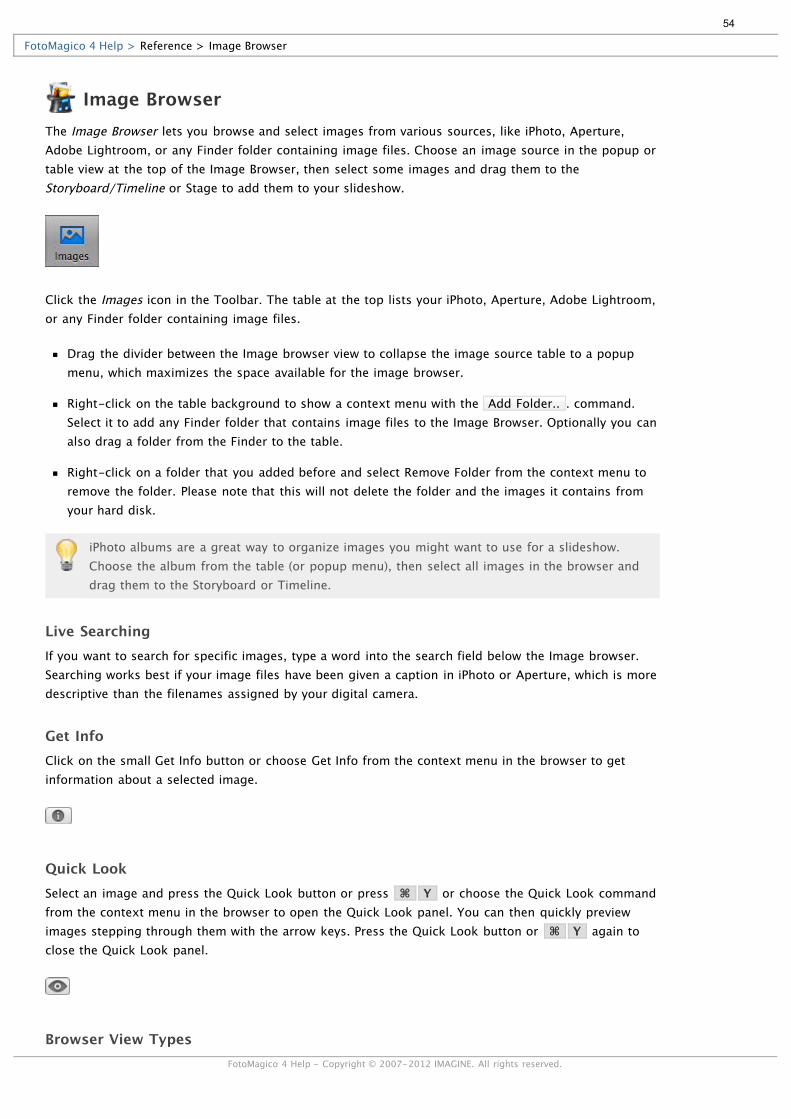
Image BrowserThe Image Browser lets you browse and select images from various sources, like iPhoto, Aperture,Adobe Lightroom, or any Finder folder containing image files. Choose an image source in the popup ortable view at the top of the Image Browser, then select some images and drag them to theStoryboard/Timeline or Stage to add them to your slideshow.
Click the Images icon in the Toolbar. The table at the top lists your iPhoto, Aperture, Adobe Lightroom,or any Finder folder containing image files.
Drag the divider between the Image browser view to collapse the image source table to a popupmenu, which maximizes the space available for the image browser.
Right-click on the table background to show a context menu with the Add Folder.. . command.Select it to add any Finder folder that contains image files to the Image Browser. Optionally you canalso drag a folder from the Finder to the table.
Right-click on a folder that you added before and select Remove Folder from the context menu toremove the folder. Please note that this will not delete the folder and the images it contains fromyour hard disk.
iPhoto albums are a great way to organize images you might want to use for a slideshow.Choose the album from the table (or popup menu), then select all images in the browser anddrag them to the Storyboard or Timeline.
Live SearchingIf you want to search for specific images, type a word into the search field below the Image browser.Searching works best if your image files have been given a caption in iPhoto or Aperture, which is moredescriptive than the filenames assigned by your digital camera.
Get InfoClick on the small Get Info button or choose Get Info from the context menu in the browser to getinformation about a selected image.
Quick LookSelect an image and press the Quick Look button or press ⌘ Y or choose the Quick Look commandfrom the context menu in the browser to open the Quick Look panel. You can then quickly previewimages stepping through them with the arrow keys. Press the Quick Look button or ⌘ Y again toclose the Quick Look panel.
Browser View TypesSelect to display the images in your browser in icon, list, or combo view (a combination of both icon
FotoMagico 4 Help > Reference > Image Browser
FotoMagico 4 Help - Copyright © 2007-2012 IMAGINE. All rights reserved.
54

and list).
Icon SizeDrag the Icon Size slider to enlarge or decrease the size of the image icons displayed in the browser.This slider is not available in List view.
55
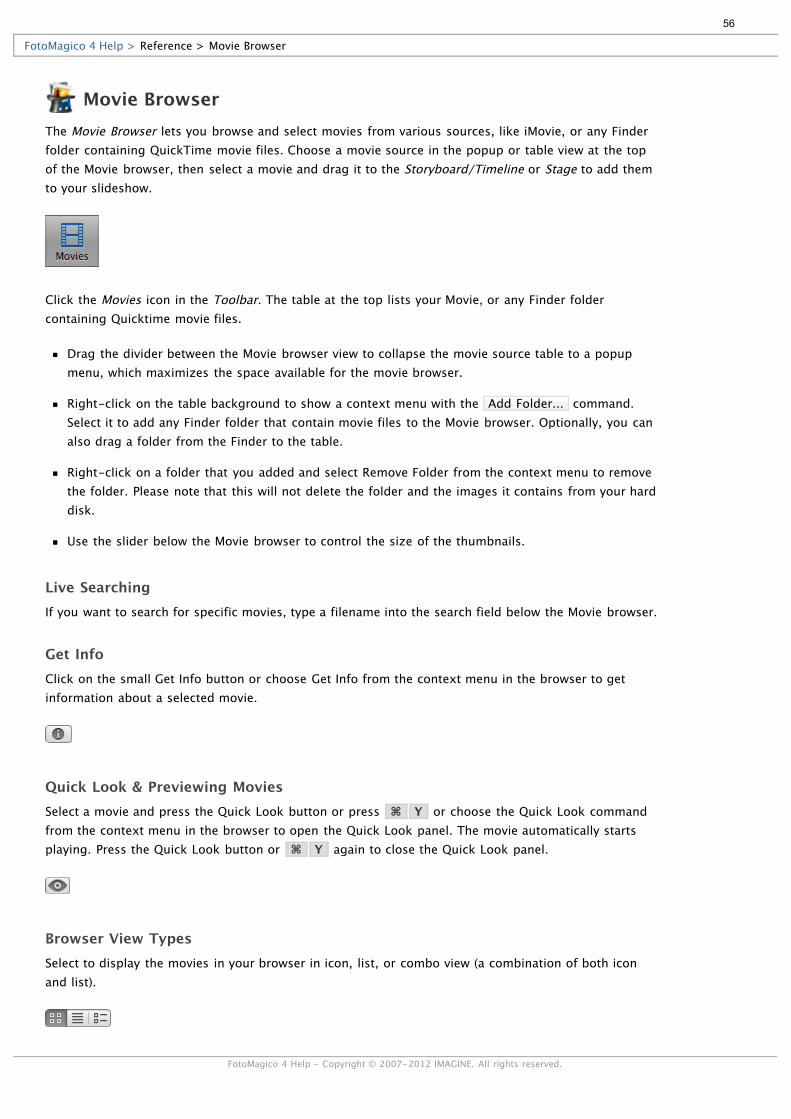
Movie BrowserThe Movie Browser lets you browse and select movies from various sources, like iMovie, or any Finderfolder containing QuickTime movie files. Choose a movie source in the popup or table view at the topof the Movie browser, then select a movie and drag it to the Storyboard/Timeline or Stage to add themto your slideshow.
Click the Movies icon in the Toolbar. The table at the top lists your Movie, or any Finder foldercontaining Quicktime movie files.
Drag the divider between the Movie browser view to collapse the movie source table to a popupmenu, which maximizes the space available for the movie browser.
Right-click on the table background to show a context menu with the Add Folder... command.Select it to add any Finder folder that contain movie files to the Movie browser. Optionally, you canalso drag a folder from the Finder to the table.
Right-click on a folder that you added and select Remove Folder from the context menu to removethe folder. Please note that this will not delete the folder and the images it contains from your harddisk.
Use the slider below the Movie browser to control the size of the thumbnails.
Live SearchingIf you want to search for specific movies, type a filename into the search field below the Movie browser.
Get InfoClick on the small Get Info button or choose Get Info from the context menu in the browser to getinformation about a selected movie.
Quick Look & Previewing MoviesSelect a movie and press the Quick Look button or press ⌘ Y or choose the Quick Look commandfrom the context menu in the browser to open the Quick Look panel. The movie automatically startsplaying. Press the Quick Look button or ⌘ Y again to close the Quick Look panel.
Browser View TypesSelect to display the movies in your browser in icon, list, or combo view (a combination of both iconand list).
FotoMagico 4 Help > Reference > Movie Browser
FotoMagico 4 Help - Copyright © 2007-2012 IMAGINE. All rights reserved.
56

Icon SizeDrag the Icon Size slider to enlarge or decrease the size of the movie icons displayed in the browser.This slider is not available in List view.
57
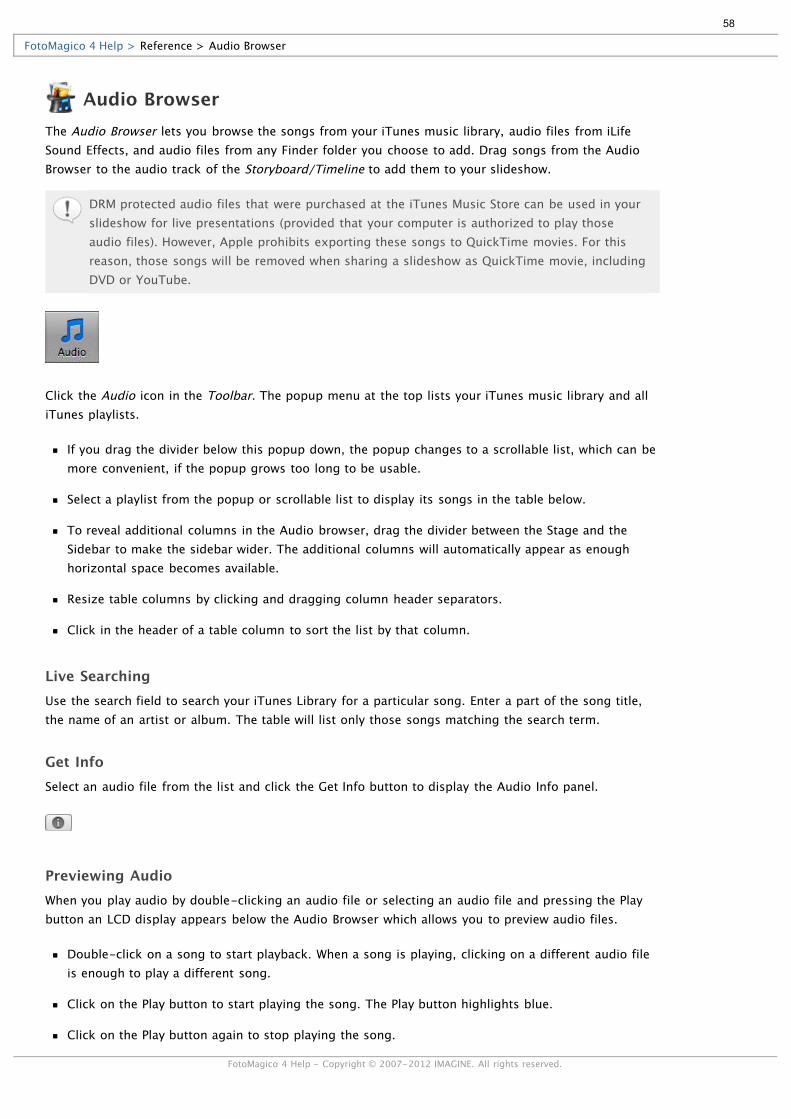
Audio BrowserThe Audio Browser lets you browse the songs from your iTunes music library, audio files from iLifeSound Effects, and audio files from any Finder folder you choose to add. Drag songs from the AudioBrowser to the audio track of the Storyboard/Timeline to add them to your slideshow.
DRM protected audio files that were purchased at the iTunes Music Store can be used in yourslideshow for live presentations (provided that your computer is authorized to play thoseaudio files). However, Apple prohibits exporting these songs to QuickTime movies. For thisreason, those songs will be removed when sharing a slideshow as QuickTime movie, includingDVD or YouTube.
Click the Audio icon in the Toolbar. The popup menu at the top lists your iTunes music library and alliTunes playlists.
If you drag the divider below this popup down, the popup changes to a scrollable list, which can bemore convenient, if the popup grows too long to be usable.
Select a playlist from the popup or scrollable list to display its songs in the table below.
To reveal additional columns in the Audio browser, drag the divider between the Stage and theSidebar to make the sidebar wider. The additional columns will automatically appear as enoughhorizontal space becomes available.
Resize table columns by clicking and dragging column header separators.
Click in the header of a table column to sort the list by that column.
Live SearchingUse the search field to search your iTunes Library for a particular song. Enter a part of the song title,the name of an artist or album. The table will list only those songs matching the search term.
Get InfoSelect an audio file from the list and click the Get Info button to display the Audio Info panel.
Previewing AudioWhen you play audio by double-clicking an audio file or selecting an audio file and pressing the Playbutton an LCD display appears below the Audio Browser which allows you to preview audio files.
Double-click on a song to start playback. When a song is playing, clicking on a different audio fileis enough to play a different song.
Click on the Play button to start playing the song. The Play button highlights blue.
Click on the Play button again to stop playing the song.
FotoMagico 4 Help > Reference > Audio Browser
FotoMagico 4 Help - Copyright © 2007-2012 IMAGINE. All rights reserved.
58

Click and drag the diamond shaped playhead to scrub through the song.
Click the time display to cycle through elapsed (default), remaining and total playing time.
Browser View TypesSelect to display the audio files in your browser in icon, list, or combo view (a combination of both iconand list).
Icon SizeDrag the Icon Size slider to enlarge or decrease the size of the audio icons displayed in the browser.This slider is not available in List view.
59
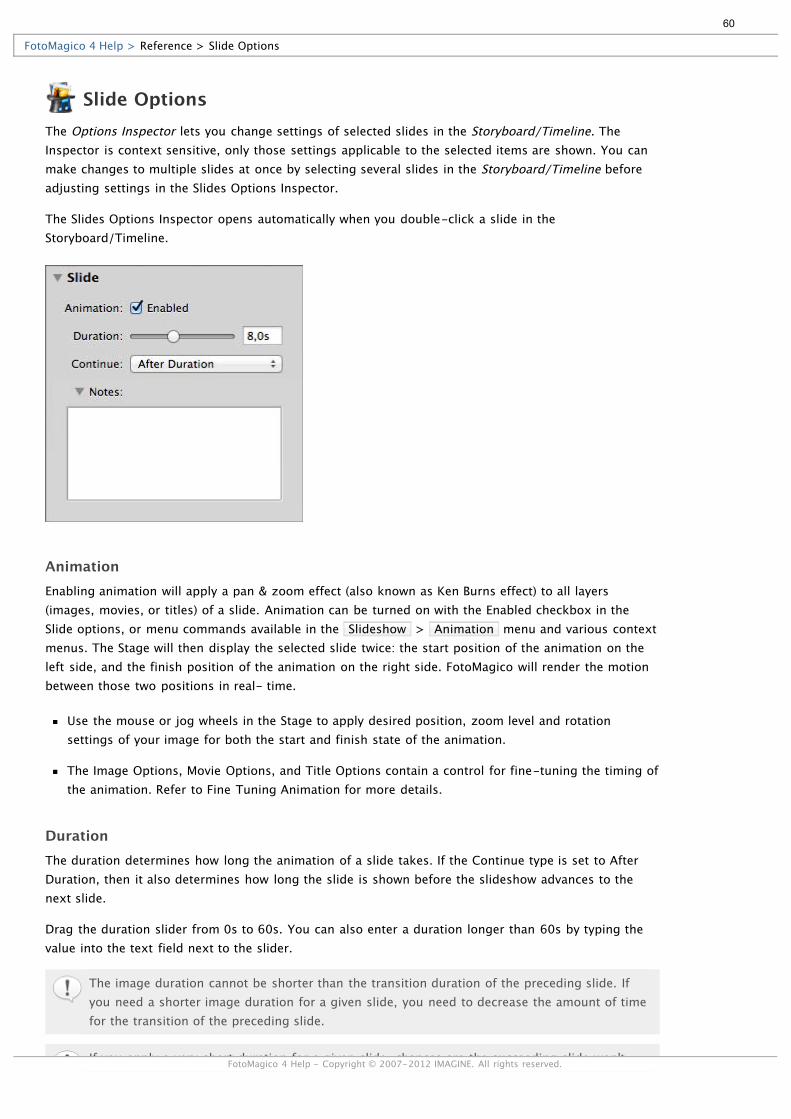
Slide OptionsThe Options Inspector lets you change settings of selected slides in the Storyboard/Timeline. TheInspector is context sensitive, only those settings applicable to the selected items are shown. You canmake changes to multiple slides at once by selecting several slides in the Storyboard/Timeline beforeadjusting settings in the Slides Options Inspector.
The Slides Options Inspector opens automatically when you double-click a slide in theStoryboard/Timeline.
AnimationEnabling animation will apply a pan & zoom effect (also known as Ken Burns effect) to all layers(images, movies, or titles) of a slide. Animation can be turned on with the Enabled checkbox in theSlide options, or menu commands available in the Slideshow > Animation menu and various contextmenus. The Stage will then display the selected slide twice: the start position of the animation on theleft side, and the finish position of the animation on the right side. FotoMagico will render the motionbetween those two positions in real- time.
Use the mouse or jog wheels in the Stage to apply desired position, zoom level and rotationsettings of your image for both the start and finish state of the animation.
The Image Options, Movie Options, and Title Options contain a control for fine-tuning the timing ofthe animation. Refer to Fine Tuning Animation for more details.
DurationThe duration determines how long the animation of a slide takes. If the Continue type is set to AfterDuration, then it also determines how long the slide is shown before the slideshow advances to thenext slide.
Drag the duration slider from 0s to 60s. You can also enter a duration longer than 60s by typing thevalue into the text field next to the slider.
The image duration cannot be shorter than the transition duration of the preceding slide. Ifyou need a shorter image duration for a given slide, you need to decrease the amount of timefor the transition of the preceding slide.
If you apply a very short duration for a given slide, chances are the succeeding slide won't
FotoMagico 4 Help > Reference > Slide Options
FotoMagico 4 Help - Copyright © 2007-2012 IMAGINE. All rights reserved.
60

get preloaded quickly enough. In this case, the slideshow will advance to the next slide assoon as the media files of this slide have been loaded into video memory. The amount of timethat is necessary to preload the media files can vary, depending on the speed of yourcomputer.
ContinueThe Continue type determines how and when the slideshow advances to the next slide. There areseveral options:
After Duration - The slide will be shown for the specified duration before advancing to the nextslide. Set the slide duration with the Duration slider or by entering numeric values in the text field.
At Mouse Click - The slideshow will pause at the end of this slide until you press the mousebutton to continue. Even though the slideshow is paused while waiting for the mouse click, audiocontinues to play in the background. In this case you may want the audio loop endlessly.
At Audio Marker - The slideshow advances to the next slide as soon as an audio marker in thecurrently playing audio item is passed.
When selected, these options also display in the header of the Storyboard/Timeline aboveeach slide as the duration time, Click or Marker
If you choose continue At Audio Marker, make sure the audio item contains enough audiomarkers, or your slideshow might get stuck. Read more about audio markers in AdjustingTiming in the Timeline.
NotesUse the text field to enter teleprompter notes for the selected slide. These notes will be displayed inthe teleprompter or on the iPhone remote app during a live presentation.For more information, see Using the Teleprompter.
Using teleprompter notes helps you to remember your live narration during the slideshow.
You can also use the notes field to enter notes or text to yourself about the slides during authoring.For example, 'replace this image with an updated photo.'
61
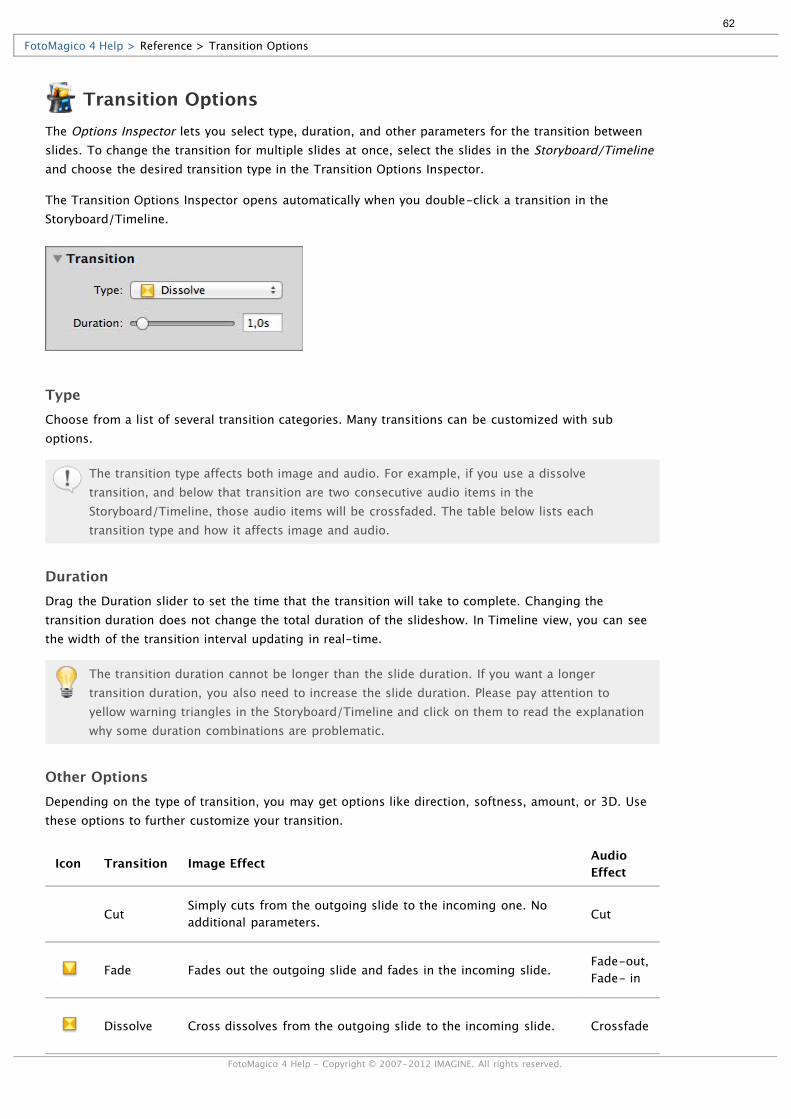
Transition OptionsThe Options Inspector lets you select type, duration, and other parameters for the transition betweenslides. To change the transition for multiple slides at once, select the slides in the Storyboard/Timelineand choose the desired transition type in the Transition Options Inspector.
The Transition Options Inspector opens automatically when you double-click a transition in theStoryboard/Timeline.
TypeChoose from a list of several transition categories. Many transitions can be customized with suboptions.
The transition type affects both image and audio. For example, if you use a dissolvetransition, and below that transition are two consecutive audio items in theStoryboard/Timeline, those audio items will be crossfaded. The table below lists eachtransition type and how it affects image and audio.
DurationDrag the Duration slider to set the time that the transition will take to complete. Changing thetransition duration does not change the total duration of the slideshow. In Timeline view, you can seethe width of the transition interval updating in real-time.
The transition duration cannot be longer than the slide duration. If you want a longertransition duration, you also need to increase the slide duration. Please pay attention toyellow warning triangles in the Storyboard/Timeline and click on them to read the explanationwhy some duration combinations are problematic.
Other OptionsDepending on the type of transition, you may get options like direction, softness, amount, or 3D. Usethese options to further customize your transition.
Icon Transition Image Effect AudioEffect
CutSimply cuts from the outgoing slide to the incoming one. Noadditional parameters. Cut
Fade Fades out the outgoing slide and fades in the incoming slide.Fade-out,Fade- in
Dissolve Cross dissolves from the outgoing slide to the incoming slide. Crossfade
FotoMagico 4 Help > Reference > Transition Options
FotoMagico 4 Help - Copyright © 2007-2012 IMAGINE. All rights reserved.
62
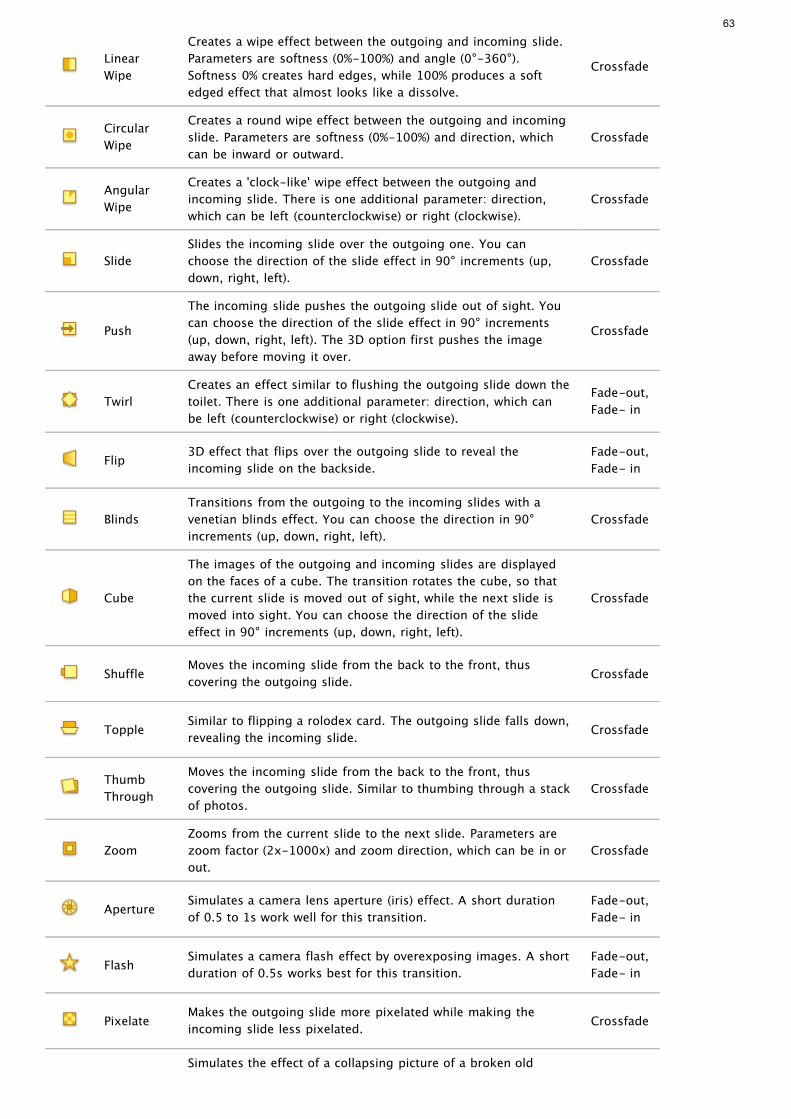
LinearWipe
Creates a wipe effect between the outgoing and incoming slide.Parameters are softness (0%-100%) and angle (0°-360°).Softness 0% creates hard edges, while 100% produces a softedged effect that almost looks like a dissolve.
Crossfade
CircularWipe
Creates a round wipe effect between the outgoing and incomingslide. Parameters are softness (0%-100%) and direction, whichcan be inward or outward.
Crossfade
AngularWipe
Creates a 'clock-like' wipe effect between the outgoing andincoming slide. There is one additional parameter: direction,which can be left (counterclockwise) or right (clockwise).
Crossfade
SlideSlides the incoming slide over the outgoing one. You canchoose the direction of the slide effect in 90° increments (up,down, right, left).
Crossfade
Push
The incoming slide pushes the outgoing slide out of sight. Youcan choose the direction of the slide effect in 90° increments(up, down, right, left). The 3D option first pushes the imageaway before moving it over.
Crossfade
TwirlCreates an effect similar to flushing the outgoing slide down thetoilet. There is one additional parameter: direction, which canbe left (counterclockwise) or right (clockwise).
Fade-out,Fade- in
Flip3D effect that flips over the outgoing slide to reveal theincoming slide on the backside.
Fade-out,Fade- in
BlindsTransitions from the outgoing to the incoming slides with avenetian blinds effect. You can choose the direction in 90°increments (up, down, right, left).
Crossfade
Cube
The images of the outgoing and incoming slides are displayedon the faces of a cube. The transition rotates the cube, so thatthe current slide is moved out of sight, while the next slide ismoved into sight. You can choose the direction of the slideeffect in 90° increments (up, down, right, left).
Crossfade
ShuffleMoves the incoming slide from the back to the front, thuscovering the outgoing slide. Crossfade
ToppleSimilar to flipping a rolodex card. The outgoing slide falls down,revealing the incoming slide. Crossfade
ThumbThrough
Moves the incoming slide from the back to the front, thuscovering the outgoing slide. Similar to thumbing through a stackof photos.
Crossfade
ZoomZooms from the current slide to the next slide. Parameters arezoom factor (2x-1000x) and zoom direction, which can be in orout.
Crossfade
ApertureSimulates a camera lens aperture (iris) effect. A short durationof 0.5 to 1s work well for this transition.
Fade-out,Fade- in
FlashSimulates a camera flash effect by overexposing images. A shortduration of 0.5s works best for this transition.
Fade-out,Fade- in
PixelateMakes the outgoing slide more pixelated while making theincoming slide less pixelated. Crossfade
Simulates the effect of a collapsing picture of a broken old
63

Broken TV television. Works best with a duration of 3s and a blank slideafterwards.
Fade-out,Fade- in
RandomAllows FotoMagico to randomly select transitions. A sheetappears which allows you to deselect those transitions that youdo not want chosen as random transitions.
64
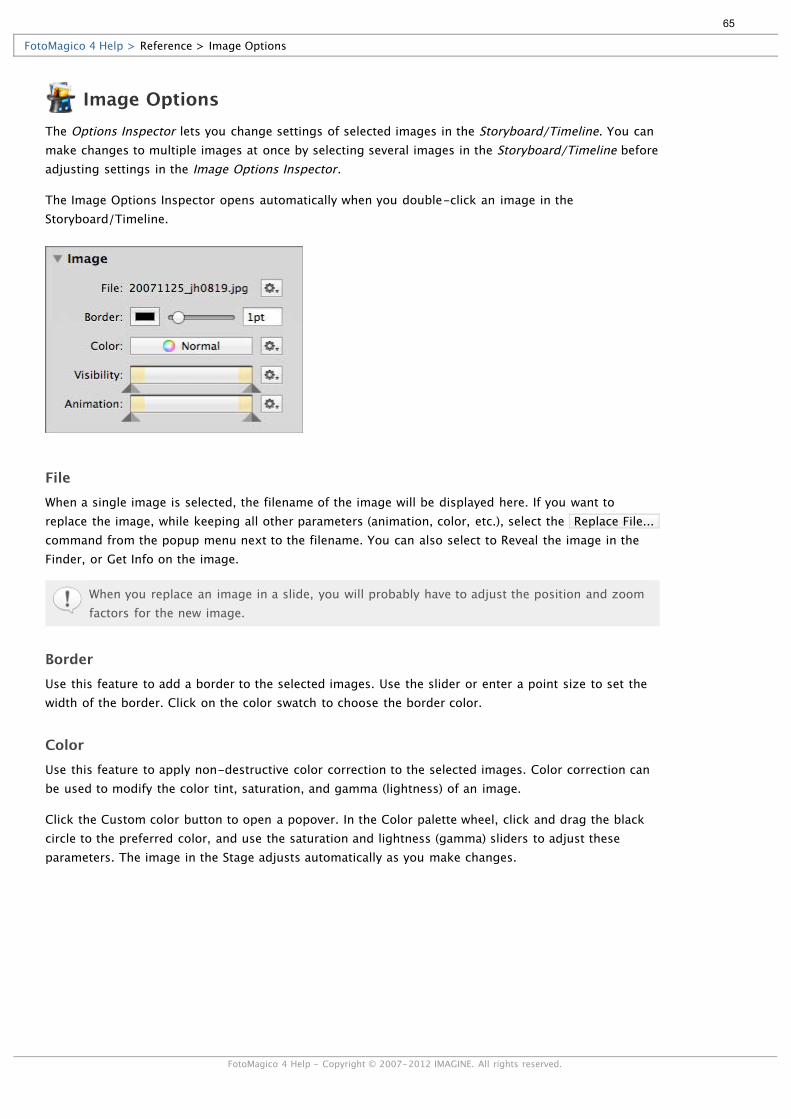
Image OptionsThe Options Inspector lets you change settings of selected images in the Storyboard/Timeline. You canmake changes to multiple images at once by selecting several images in the Storyboard/Timeline beforeadjusting settings in the Image Options Inspector.
The Image Options Inspector opens automatically when you double-click an image in theStoryboard/Timeline.
FileWhen a single image is selected, the filename of the image will be displayed here. If you want toreplace the image, while keeping all other parameters (animation, color, etc.), select the Replace File...command from the popup menu next to the filename. You can also select to Reveal the image in theFinder, or Get Info on the image.
When you replace an image in a slide, you will probably have to adjust the position and zoomfactors for the new image.
BorderUse this feature to add a border to the selected images. Use the slider or enter a point size to set thewidth of the border. Click on the color swatch to choose the border color.
ColorUse this feature to apply non-destructive color correction to the selected images. Color correction canbe used to modify the color tint, saturation, and gamma (lightness) of an image.
Click the Custom color button to open a popover. In the Color palette wheel, click and drag the blackcircle to the preferred color, and use the saturation and lightness (gamma) sliders to adjust theseparameters. The image in the Stage adjusts automatically as you make changes.
FotoMagico 4 Help > Reference > Image Options
FotoMagico 4 Help - Copyright © 2007-2012 IMAGINE. All rights reserved.
65
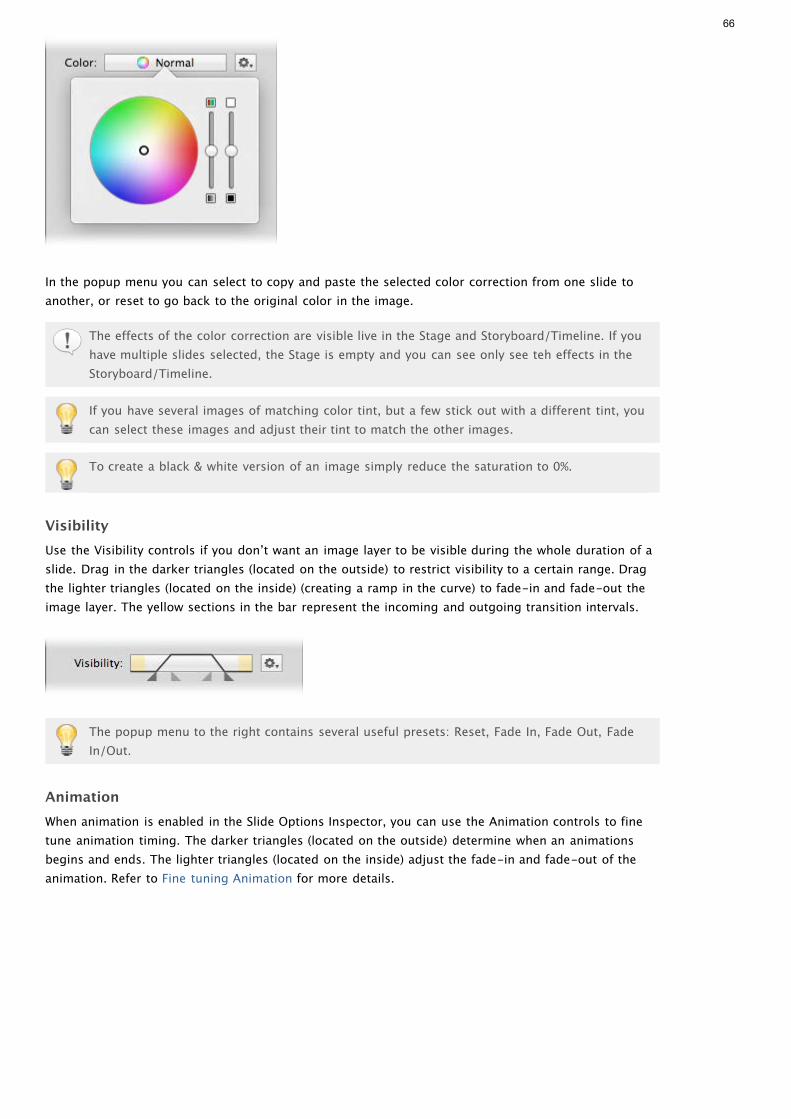
In the popup menu you can select to copy and paste the selected color correction from one slide toanother, or reset to go back to the original color in the image.
The effects of the color correction are visible live in the Stage and Storyboard/Timeline. If youhave multiple slides selected, the Stage is empty and you can see only see teh effects in theStoryboard/Timeline.
If you have several images of matching color tint, but a few stick out with a different tint, youcan select these images and adjust their tint to match the other images.
To create a black & white version of an image simply reduce the saturation to 0%.
VisibilityUse the Visibility controls if you don’t want an image layer to be visible during the whole duration of aslide. Drag in the darker triangles (located on the outside) to restrict visibility to a certain range. Dragthe lighter triangles (located on the inside) (creating a ramp in the curve) to fade-in and fade-out theimage layer. The yellow sections in the bar represent the incoming and outgoing transition intervals.
The popup menu to the right contains several useful presets: Reset, Fade In, Fade Out, FadeIn/Out.
AnimationWhen animation is enabled in the Slide Options Inspector, you can use the Animation controls to finetune animation timing. The darker triangles (located on the outside) determine when an animationsbegins and ends. The lighter triangles (located on the inside) adjust the fade-in and fade-out of theanimation. Refer to Fine tuning Animation for more details.
66
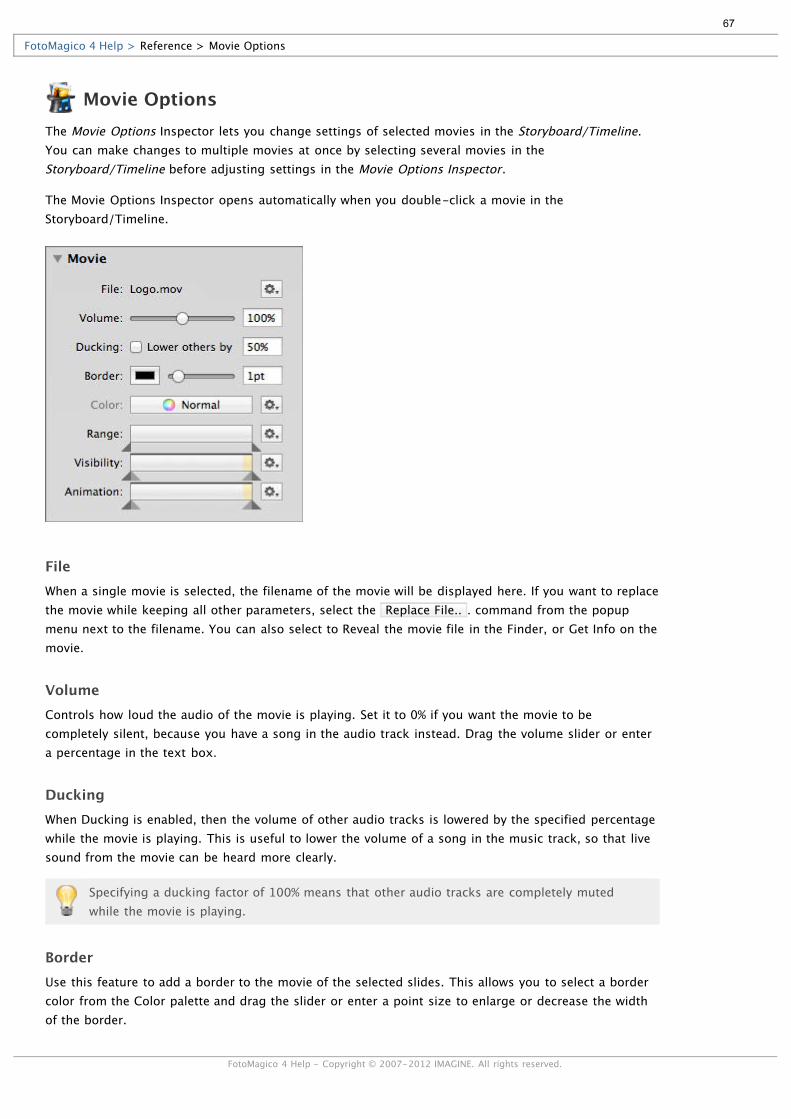
Movie OptionsThe Movie Options Inspector lets you change settings of selected movies in the Storyboard/Timeline.You can make changes to multiple movies at once by selecting several movies in theStoryboard/Timeline before adjusting settings in the Movie Options Inspector.
The Movie Options Inspector opens automatically when you double-click a movie in theStoryboard/Timeline.
FileWhen a single movie is selected, the filename of the movie will be displayed here. If you want to replacethe movie while keeping all other parameters, select the Replace File.. . command from the popupmenu next to the filename. You can also select to Reveal the movie file in the Finder, or Get Info on themovie.
VolumeControls how loud the audio of the movie is playing. Set it to 0% if you want the movie to becompletely silent, because you have a song in the audio track instead. Drag the volume slider or entera percentage in the text box.
DuckingWhen Ducking is enabled, then the volume of other audio tracks is lowered by the specified percentagewhile the movie is playing. This is useful to lower the volume of a song in the music track, so that livesound from the movie can be heard more clearly.
Specifying a ducking factor of 100% means that other audio tracks are completely mutedwhile the movie is playing.
BorderUse this feature to add a border to the movie of the selected slides. This allows you to select a bordercolor from the Color palette and drag the slider or enter a point size to enlarge or decrease the widthof the border.
Color
FotoMagico 4 Help > Reference > Movie Options
FotoMagico 4 Help - Copyright © 2007-2012 IMAGINE. All rights reserved.
67
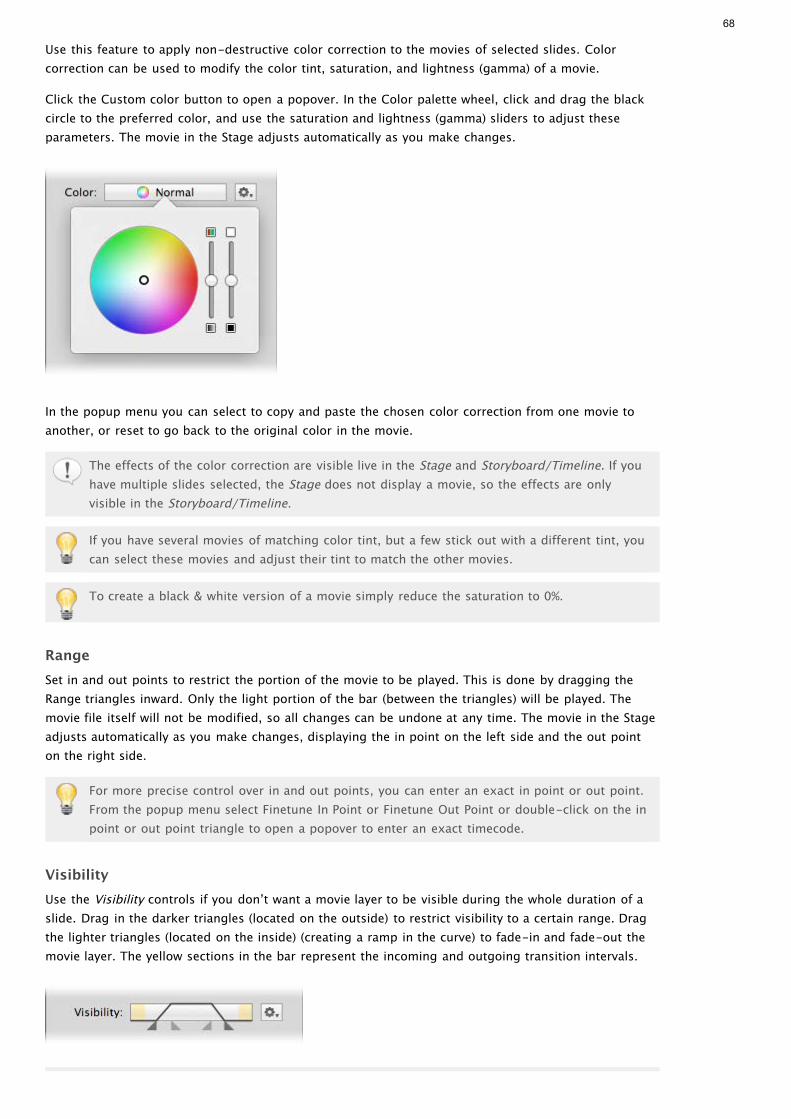
Use this feature to apply non-destructive color correction to the movies of selected slides. Colorcorrection can be used to modify the color tint, saturation, and lightness (gamma) of a movie.
Click the Custom color button to open a popover. In the Color palette wheel, click and drag the blackcircle to the preferred color, and use the saturation and lightness (gamma) sliders to adjust theseparameters. The movie in the Stage adjusts automatically as you make changes.
In the popup menu you can select to copy and paste the chosen color correction from one movie toanother, or reset to go back to the original color in the movie.
The effects of the color correction are visible live in the Stage and Storyboard/Timeline. If youhave multiple slides selected, the Stage does not display a movie, so the effects are onlyvisible in the Storyboard/Timeline.
If you have several movies of matching color tint, but a few stick out with a different tint, youcan select these movies and adjust their tint to match the other movies.
To create a black & white version of a movie simply reduce the saturation to 0%.
RangeSet in and out points to restrict the portion of the movie to be played. This is done by dragging theRange triangles inward. Only the light portion of the bar (between the triangles) will be played. Themovie file itself will not be modified, so all changes can be undone at any time. The movie in the Stageadjusts automatically as you make changes, displaying the in point on the left side and the out pointon the right side.
For more precise control over in and out points, you can enter an exact in point or out point.From the popup menu select Finetune In Point or Finetune Out Point or double-click on the inpoint or out point triangle to open a popover to enter an exact timecode.
VisibilityUse the Visibility controls if you don’t want a movie layer to be visible during the whole duration of aslide. Drag in the darker triangles (located on the outside) to restrict visibility to a certain range. Dragthe lighter triangles (located on the inside) (creating a ramp in the curve) to fade-in and fade-out themovie layer. The yellow sections in the bar represent the incoming and outgoing transition intervals.
68

The popup menu to the right contains several useful presets: Reset, Fade In, Fade Out, FadeIn/Out.
AnimationWhen animation is enabled in the Slide Options Inspector, you can use the Animation controls to finetune animation timing. The darker triangles (located on the outside) determine when an animationsbegins and ends. The lighter triangles (located on the inside) adjust the fade-in and fade-out of theanimation. Refer to Fine Tuning Animation for more details.
69

Audio OptionsThe Audio Options Inspector lets you change settings of selected audio in the Storyboard/Timeline. Youcan make changes to multiple audio items at once by selecting several items in the Storyboard/Timelinebefore adjusting settings in the Audio Options Inspector.
The Audio Options Inspector opens automatically when you double-click and audio item in theStoryboard/Timeline.
FileWhen a single audio file is selected, the filename will be displayed here. If you want to replace theaudio file while keeping all other parameters, select the Replace File… command from the popupmenu next to the filename. You can also select to Show the audio file in the Finder, or Get Info on theaudio.
Audio LoopsIf the audio is not long enough for the slides it spans, then selecting Audio Loops makes sure that theaudio is repeated while those slides are visible.
This may be useful for interactive presentations when you don't know how long it will take topresent a sequence of slides.
It may not be appropriate for narration or music that has been carefully synced to the slideswith audio markers.
Linked to SlidesAudio can behave in two different ways when slides are being rearranged. The audio can either staywhere it is, or it can move along with the slides above it as they are rearranged. This behavior can bedecided for each audio item separately and can be controlled by selecting the Linked to Slides option orby using the command Link Audio to Slides in the context menu of the audio item.
The Authoring pane in the Preferences window has a section that lets you select whether newly addedaudio should be linked, unlinked, or whether FotoMagico should choose intelligently (depending on thesituation). In this third case, audio will be linked if dropped below existing slides in the Music orNarration tracks, or unlinked if dropped into an empty section of the Storyboard.
FotoMagico 4 Help > Reference > Audio Options
FotoMagico 4 Help - Copyright © 2007-2012 IMAGINE. All rights reserved.
70
You may want to link audio to slides when you have completed a chapter in your slideshowwith carefully synced audio. If you then add or delete slides before that chapter, the audiomoves along with the slides and everything stays in sync.
In other cases, you may elect to not link the audio. This may be the case for background(ambient) sound where exact synchronization is not needed, or while you are still working ona chapter. Unlinked audio always stays in the same spot, regardless of how the slides above itare being rearranged.
Locked TimingWhen Locked Timing is enabled audio is paused when the slideshow is paused. Audio also jumps to theappropriate position if the slideshow jumps back to the previous slide or skips ahead to the next slide.In other words, with locked timing, audio always stays in sync with the visuals.
This is especially useful for those parts of the slideshow that have been carefully synced withthe audio - e.g. for music that contains audio markers, or recorded narration.
It may not be appropriate for sound effects that merely provide an ambience for a slide.
RangeSet in and out points to restrict the portion of the audio to be played. This is done by dragging theRange triangles inward. Only the light portion of the bar (between the triangles) will be played. Theaudio file itself will not be modified, so all changes can be undone at any time. The audio waveform inthe Timeline adjusts automatically as you make changes.
For more precise control over in and out points, you can enter an exact in point or out point. From thepopup menu, select Finetune In Point or Finetune Out Point or double-click on the in point or outpoint triangles to open a popover to enter an exact timecode or use the jog wheel.
In the Timeline, you can also press the Option key while clicking and dragging in the waveform toset the in point. This is helpful when there is silence in the beginning of your audio and you want toskip over the silence.
VolumeControls how loud the audio is playing. Adjusting the volume is useful when different songs have beenrecorded at different levels and do not playback with similar loudness. Click and drag the Volumeslider or enter a percentage in the text field.
You can also interactively adjust the volume directly in the Timeline. Click and drag the top of theyellow line and drag up and down to increase or decrease the volume.
DuckingWhen Ducking is enabled, the volume of other audio tracks is lowered by the specified percentage whilethis audio item is playing. This may be useful to lower the volume of music, while a sound effect ornarration is playing. The default ducking factor is 50%, but you can enter a different percentage.
Specifying a ducking factor of 100% means that other audio tracks are completely mutedwhile this audio item is playing.
Using a ducking factor around 70% is useful for narration. That way, music is lowered enoughso that the narrator can be heard clearly.
71
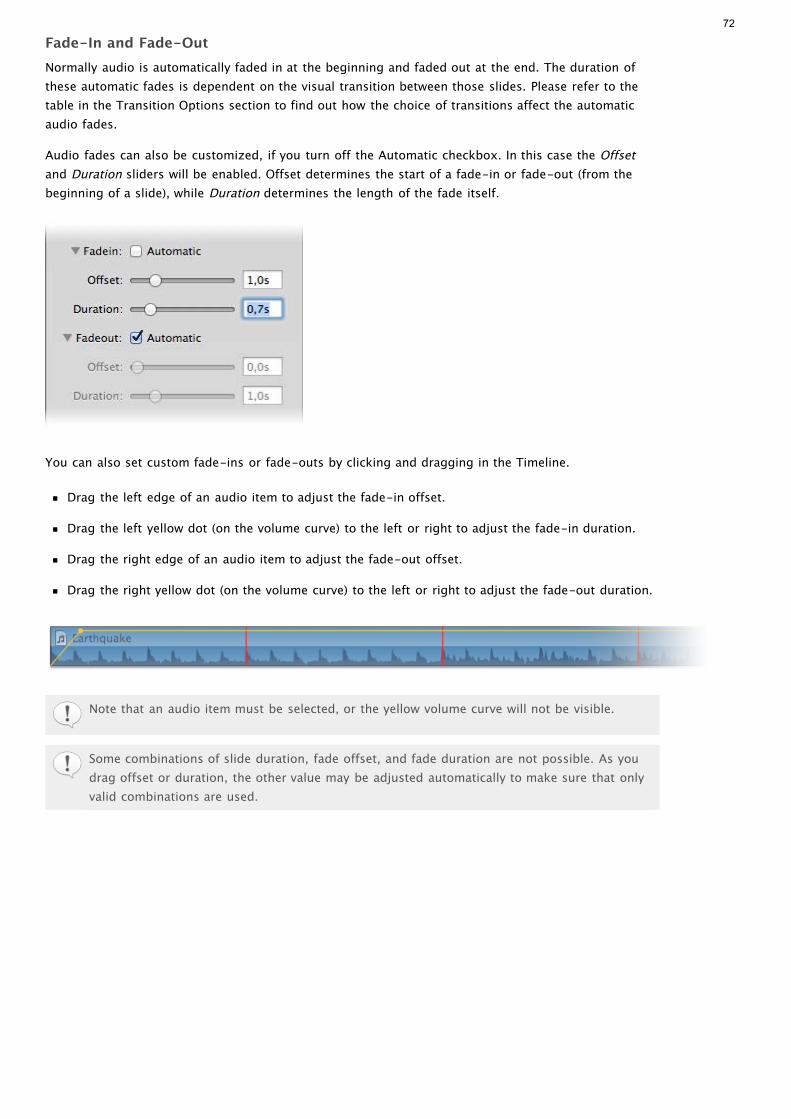
Fade-In and Fade-OutNormally audio is automatically faded in at the beginning and faded out at the end. The duration ofthese automatic fades is dependent on the visual transition between those slides. Please refer to thetable in the Transition Options section to find out how the choice of transitions affect the automaticaudio fades.
Audio fades can also be customized, if you turn off the Automatic checkbox. In this case the Offsetand Duration sliders will be enabled. Offset determines the start of a fade-in or fade-out (from thebeginning of a slide), while Duration determines the length of the fade itself.
You can also set custom fade-ins or fade-outs by clicking and dragging in the Timeline.
Drag the left edge of an audio item to adjust the fade-in offset.
Drag the left yellow dot (on the volume curve) to the left or right to adjust the fade-in duration.
Drag the right edge of an audio item to adjust the fade-out offset.
Drag the right yellow dot (on the volume curve) to the left or right to adjust the fade-out duration.
Note that an audio item must be selected, or the yellow volume curve will not be visible.
Some combinations of slide duration, fade offset, and fade duration are not possible. As youdrag offset or duration, the other value may be adjusted automatically to make sure that onlyvalid combinations are used.
72
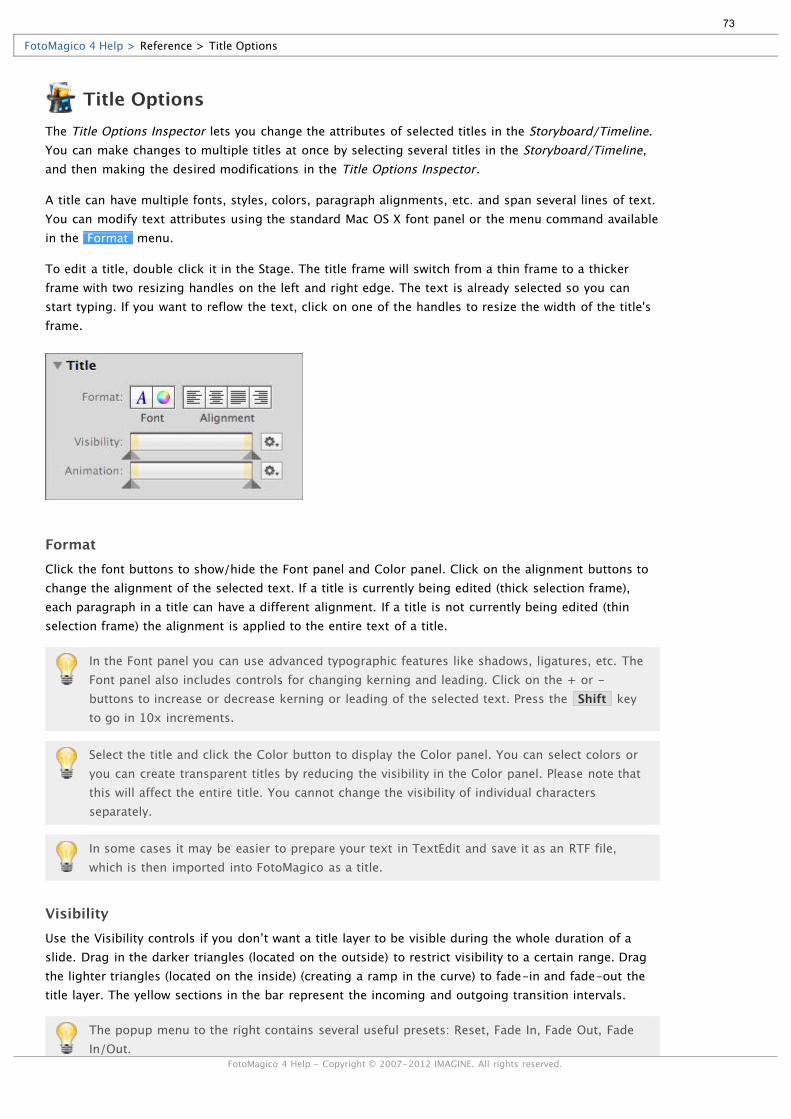
Title OptionsThe Title Options Inspector lets you change the attributes of selected titles in the Storyboard/Timeline.You can make changes to multiple titles at once by selecting several titles in the Storyboard/Timeline,and then making the desired modifications in the Title Options Inspector.
A title can have multiple fonts, styles, colors, paragraph alignments, etc. and span several lines of text.You can modify text attributes using the standard Mac OS X font panel or the menu command availablein the Format menu.
To edit a title, double click it in the Stage. The title frame will switch from a thin frame to a thickerframe with two resizing handles on the left and right edge. The text is already selected so you canstart typing. If you want to reflow the text, click on one of the handles to resize the width of the title'sframe.
FormatClick the font buttons to show/hide the Font panel and Color panel. Click on the alignment buttons tochange the alignment of the selected text. If a title is currently being edited (thick selection frame),each paragraph in a title can have a different alignment. If a title is not currently being edited (thinselection frame) the alignment is applied to the entire text of a title.
In the Font panel you can use advanced typographic features like shadows, ligatures, etc. TheFont panel also includes controls for changing kerning and leading. Click on the + or -buttons to increase or decrease kerning or leading of the selected text. Press the Shift keyto go in 10x increments.
Select the title and click the Color button to display the Color panel. You can select colors oryou can create transparent titles by reducing the visibility in the Color panel. Please note thatthis will affect the entire title. You cannot change the visibility of individual charactersseparately.
In some cases it may be easier to prepare your text in TextEdit and save it as an RTF file,which is then imported into FotoMagico as a title.
VisibilityUse the Visibility controls if you don’t want a title layer to be visible during the whole duration of aslide. Drag in the darker triangles (located on the outside) to restrict visibility to a certain range. Dragthe lighter triangles (located on the inside) (creating a ramp in the curve) to fade-in and fade-out thetitle layer. The yellow sections in the bar represent the incoming and outgoing transition intervals.
The popup menu to the right contains several useful presets: Reset, Fade In, Fade Out, FadeIn/Out.
FotoMagico 4 Help > Reference > Title Options
FotoMagico 4 Help - Copyright © 2007-2012 IMAGINE. All rights reserved.
73

AnimationWhen animation is enabled in the Slide Options Inspector, you can use the Animation controls to finetune animation timing. The darker triangles (located on the outside) determine when an animationsbegins and ends. The lighter triangles (located on the inside) adjust the fade-in and fade-out of theanimation. Refer to Fine Tuning Animation for more details.
74
Record NarrationIn FotoMagico you can record audio directly to the Narration track. Select Insert >Record Narration... from the Slideshow menu to reveal the Record Narration panel. First select the
desired workflow and input source (microphone). You may also want to adjust the input level of theselected microphone.
Workflow: Define new timing - Adjusts the duration of each slide as you speak. Whenever youclick on the Set Audio marker & Continue button, a new audio marker is added to the recordedaudio, the slide's continue type is changed to marker, and the slideshow advances to the next slide.
Workflow: Keep existing timing - Does not modify the existing timing while you are recordingyour narration. This is useful for slideshows that have already been carefully timed to music. Pleasenote that you may have to adapt the length of your narration to the existing slide durations tomake it fit. The Set Audio marker & Continue button will be disabled in this workflow.
Source - Select the desired audio input source (microphone).
Input Level - Adjust the input level to get a satisfactory recording.
Playback - Keeping Mute Other Audio selected is useful to avoid feedback during recording, unlessyou are using headphones for your audio output.
Start/Stop Recording - Click on this button to start playback of the slideshow at the currentplayhead position and record your narration. A new audio item will automatically appear in theNarration track.
FotoMagico 4 Help > Reference > Record Naration
FotoMagico 4 Help - Copyright © 2007-2012 IMAGINE. All rights reserved.
75
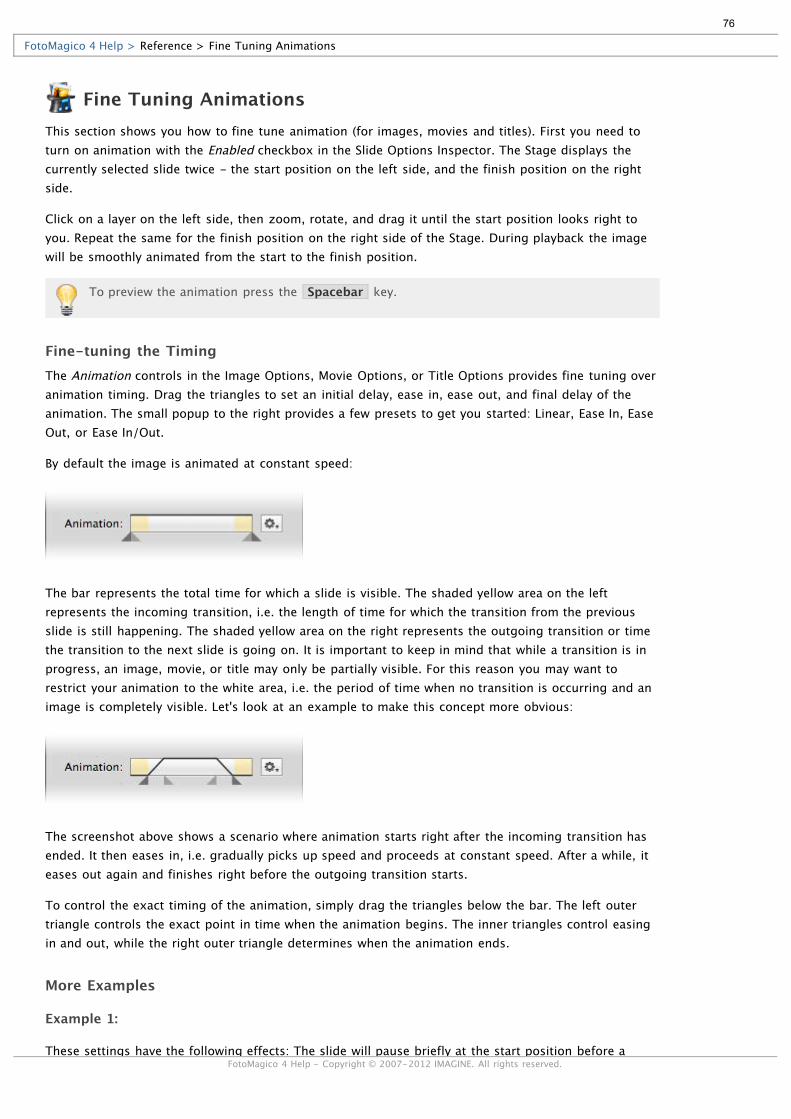
Fine Tuning AnimationsThis section shows you how to fine tune animation (for images, movies and titles). First you need toturn on animation with the Enabled checkbox in the Slide Options Inspector. The Stage displays thecurrently selected slide twice - the start position on the left side, and the finish position on the rightside.
Click on a layer on the left side, then zoom, rotate, and drag it until the start position looks right toyou. Repeat the same for the finish position on the right side of the Stage. During playback the imagewill be smoothly animated from the start to the finish position.
To preview the animation press the Spacebar key.
Fine-tuning the TimingThe Animation controls in the Image Options, Movie Options, or Title Options provides fine tuning overanimation timing. Drag the triangles to set an initial delay, ease in, ease out, and final delay of theanimation. The small popup to the right provides a few presets to get you started: Linear, Ease In, EaseOut, or Ease In/Out.
By default the image is animated at constant speed:
The bar represents the total time for which a slide is visible. The shaded yellow area on the leftrepresents the incoming transition, i.e. the length of time for which the transition from the previousslide is still happening. The shaded yellow area on the right represents the outgoing transition or timethe transition to the next slide is going on. It is important to keep in mind that while a transition is inprogress, an image, movie, or title may only be partially visible. For this reason you may want torestrict your animation to the white area, i.e. the period of time when no transition is occurring and animage is completely visible. Let's look at an example to make this concept more obvious:
The screenshot above shows a scenario where animation starts right after the incoming transition hasended. It then eases in, i.e. gradually picks up speed and proceeds at constant speed. After a while, iteases out again and finishes right before the outgoing transition starts.
To control the exact timing of the animation, simply drag the triangles below the bar. The left outertriangle controls the exact point in time when the animation begins. The inner triangles control easingin and out, while the right outer triangle determines when the animation ends.
More Examples
Example 1:
These settings have the following effects: The slide will pause briefly at the start position before a
FotoMagico 4 Help > Reference > Fine Tuning Animations
FotoMagico 4 Help - Copyright © 2007-2012 IMAGINE. All rights reserved.
76
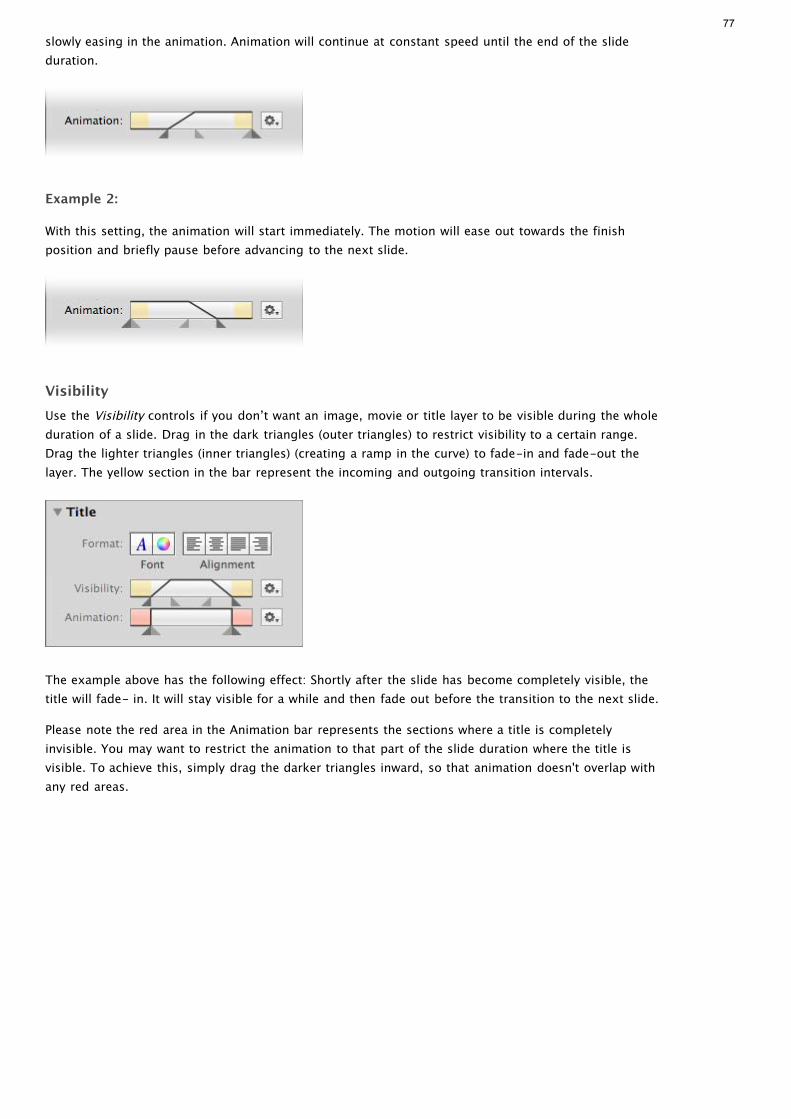
slowly easing in the animation. Animation will continue at constant speed until the end of the slideduration.
Example 2:
With this setting, the animation will start immediately. The motion will ease out towards the finishposition and briefly pause before advancing to the next slide.
VisibilityUse the Visibility controls if you don’t want an image, movie or title layer to be visible during the wholeduration of a slide. Drag in the dark triangles (outer triangles) to restrict visibility to a certain range.Drag the lighter triangles (inner triangles) (creating a ramp in the curve) to fade-in and fade-out thelayer. The yellow section in the bar represent the incoming and outgoing transition intervals.
The example above has the following effect: Shortly after the slide has become completely visible, thetitle will fade- in. It will stay visible for a while and then fade out before the transition to the next slide.
Please note the red area in the Animation bar represents the sections where a title is completelyinvisible. You may want to restrict the animation to that part of the slide duration where the title isvisible. To achieve this, simply drag the darker triangles inward, so that animation doesn't overlap withany red areas.
77