Embed Size (px)
Citation preview
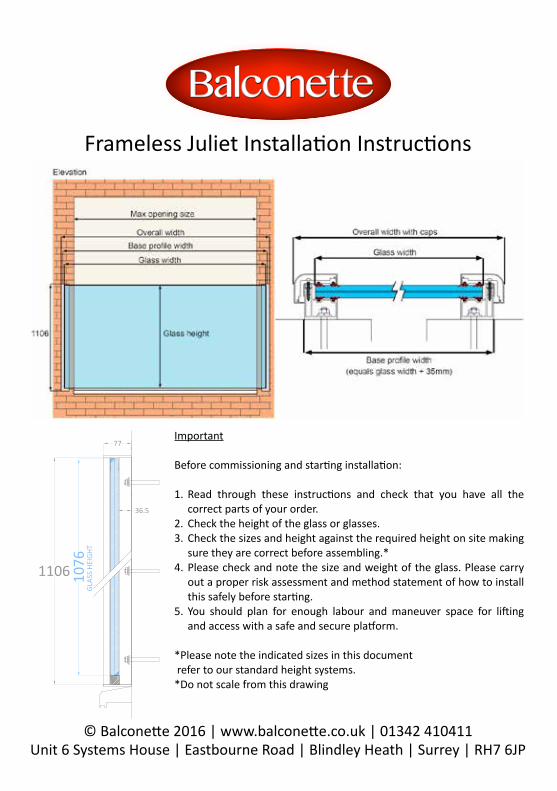
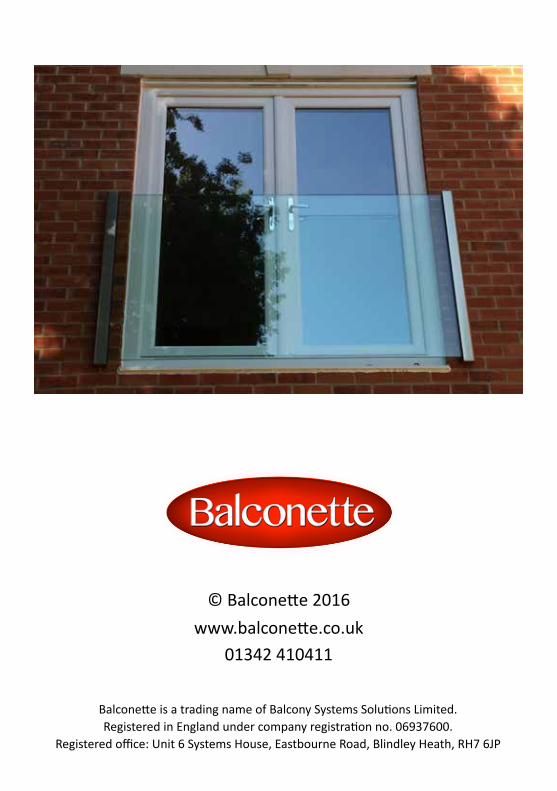
Frameless Juliet Installa/on Instruc/ons
Important
Before commissioning and star2ng installa2on:
1. Read through these instruc2ons and check that you have all the correct parts of your order.
2. Check the height of the glass or glasses.3. Check the sizes and height against the required height on site making
sure they are correct before assembling.*4. Please check and note the size and weight of the glass. Please carry
out a proper risk assessment and method statement of how to install this safely before star2ng.
5. You should plan for enough labour and maneuver space for liIing and access with a safe and secure plaJorm.
*Please note the indicated sizes in this document refer to our standard height systems.*Do not scale from this drawing
© Balcone4e 2016 | www.balcone4e.co.uk | 01342 410411 Unit 6 Systems House | Eastbourne Road | Blindley Heath | Surrey | RH7 6JP

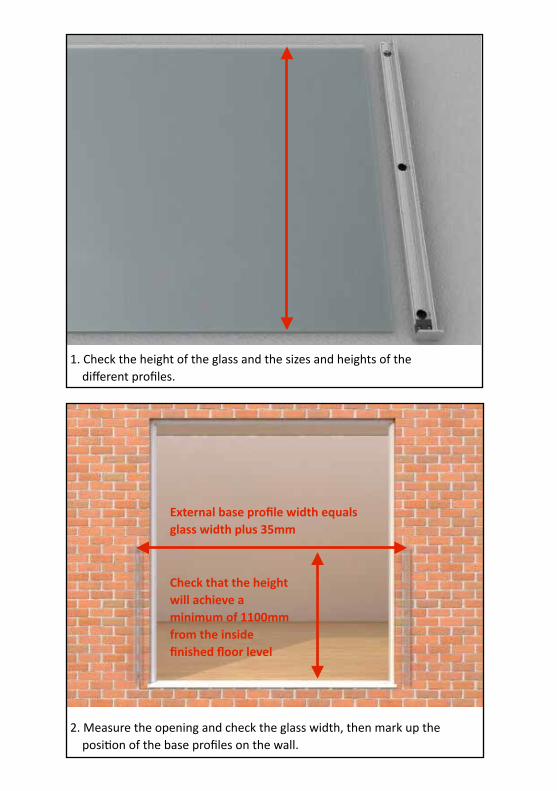
1. Check the height of the glass and the sizes and heights of the different profiles.
2. Measure the opening and check the glass width, then mark up the posi>on of the base profiles on the wall.
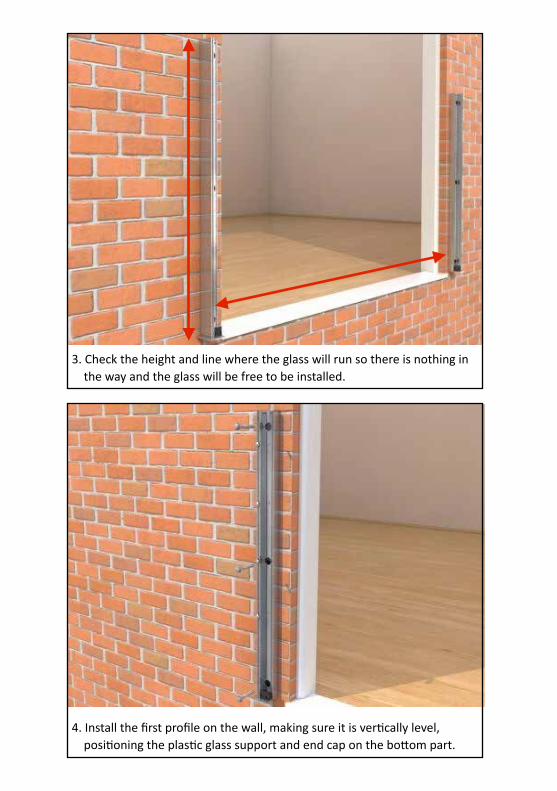
3. Check the height and line where the glass will run so there is nothing in the way and the glass will be free to be installed.
4. Install the first profile on the wall, making sure it is ver>cally level, posi>oning the plas>c glass support and end cap on the boEom part.
External base profile width equals glass width plus 35mm
Check that the height will achieve a minimum of 1100mm from the inside finished floor level
1. Check the height of the glass and the sizes and heights of the different profiles.
2. Measure the opening and check the glass width, then mark up the posi>on of the base profiles on the wall.
3. Check the height and line where the glass will run so there is nothing in the way and the glass will be free to be installed.
4. Install the first profile on the wall, making sure it is ver>cally level, posi>oning the plas>c glass support and end cap on the boEom part.
External base profile width equals glass width plus 35mm
Check that the height will achieve a minimum of 1100mm from the inside finished floor level
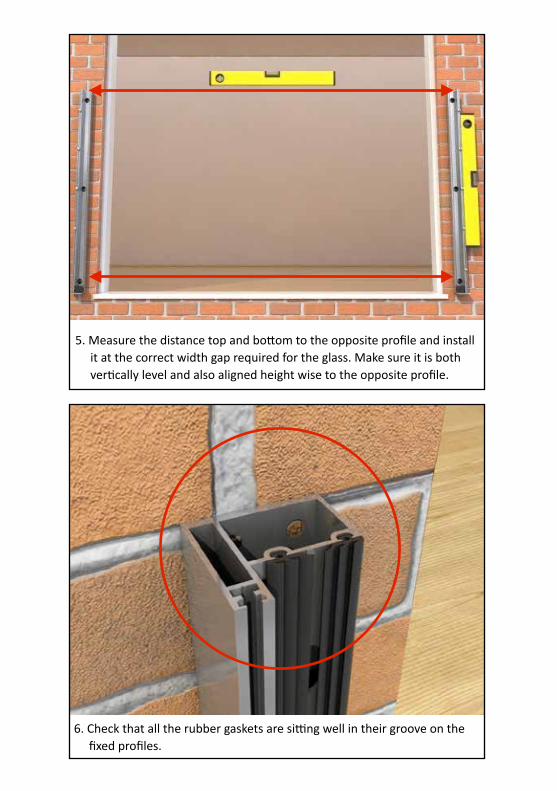
5. Measure the distance top and boEom to the opposite profile and install it at the correct width gap required for the glass. Make sure it is both ver>cally level and also aligned height wise to the opposite profile.
6. Check that all the rubber gaskets are siIng well in their groove on the fixed profiles.
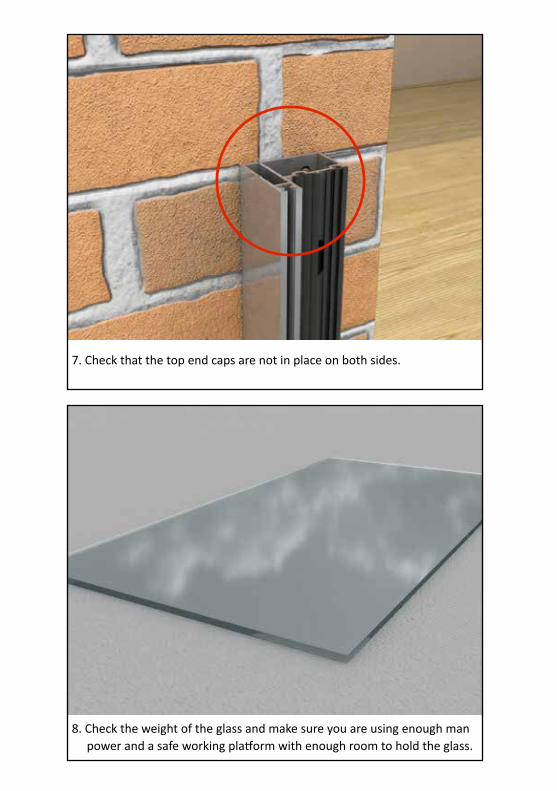
7. Check that the top end caps are not in place on both sides.
8. Check the weight of the glass and make sure you are using enough man power and a safe working plaMorm with enough room to hold the glass.
5. Measure the distance top and boEom to the opposite profile and install it at the correct width gap required for the glass. Make sure it is both ver>cally level and also aligned height wise to the opposite profile.
6. Check that all the rubber gaskets are siIng well in their groove on the fixed profiles.
7. Check that the top end caps are not in place on both sides.
8. Check the weight of the glass and make sure you are using enough man power and a safe working plaMorm with enough room to hold the glass.
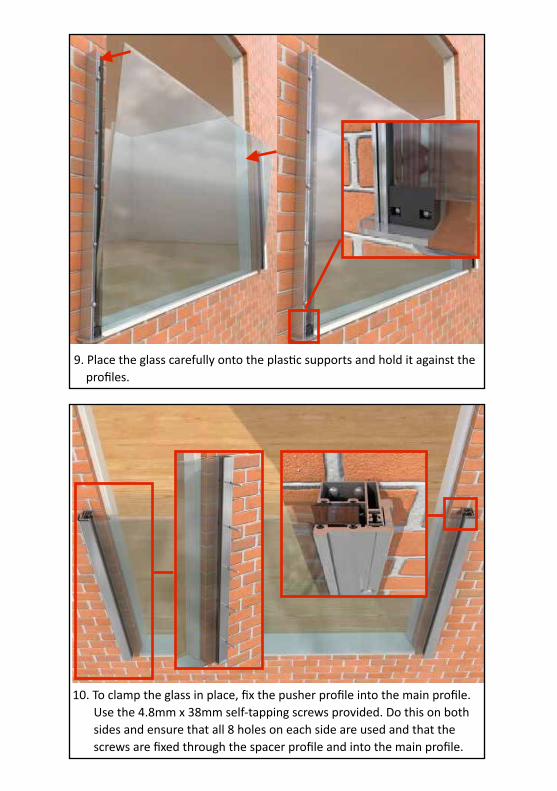
9. Place the glass carefully onto the plas>c supports and hold it against the profiles.
10. To clamp the glass in place, fix the pusher profile into the main profile. Use the 4.8mm x 38mm self-‐tapping screws provided. Do this on both sides and ensure that all 8 holes on each side are used and that the screws are fixed through the spacer profile and into the main profile.
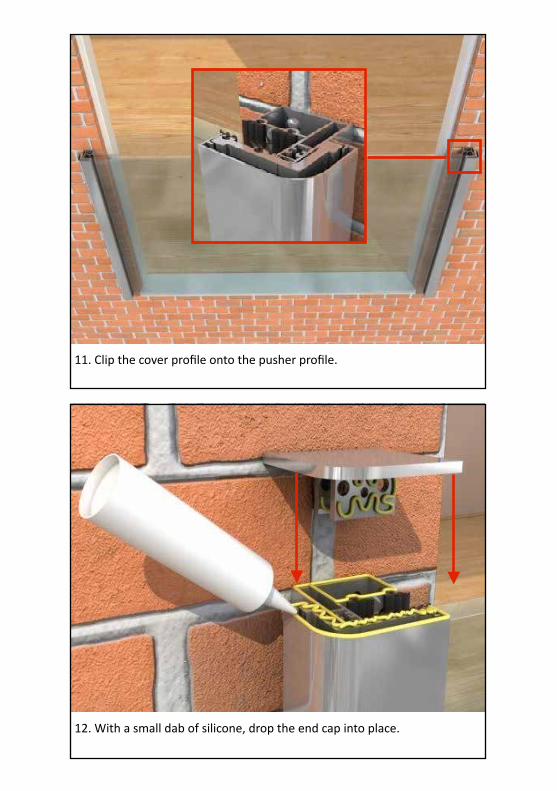
11. Clip the cover profile onto the pusher profile.
12. With a small dab of silicone, drop the end cap into place.
9. Place the glass carefully onto the plas>c supports and hold it against the profiles.
10. To clamp the glass in place, fix the pusher profile into the main profile. Use the 4.8mm x 38mm self-‐tapping screws provided. Do this on both sides and ensure that all 8 holes on each side are used and that the screws are fixed through the spacer profile and into the main profile.
11. Clip the cover profile onto the pusher profile.
12. With a small dab of silicone, drop the end cap into place.

© BalconeEe 2016
www.balconeEe.co.uk01342 410411
BalconeEe is a trading name of Balcony Systems Solu>ons Limited. Registered in England under company registra>on no. 06937600.
Registered office: Unit 6 Systems House, Eastbourne Road, Blindley Heath, RH7 6JP