Embed Size (px)
Citation preview

Please visit and leave comments at the original blog post: http://jenniferwangbears.com/free-pattern-amigurumi-sorda/
1 / 11
Free Pattern: Amigurumi Panda
Cub “Sorda”
Pattern #2 just so happens to be the cutest panda cub in existence! (´ ▽`).。o♡
You’ve already met Sorda in my previous post, but now it’s time to grab your crochet hooks and
make her for yourself!
In this free pattern you will be making the revised Sorda pattern, which:
raises the body colour change up by one row (Sorda’s head looked like a giant light bulb
before!)
removes the decreases below the body stripe, previously causing it to curve (an
interesting effect which I may try again in the future)
neatens the decreases as the body closes.
© 2014 by Jennifer Wang Bears. All rights reserved
Please visit and leave comments at the original blog post: http://jenniferwangbears.com/free-pattern-amigurumi-sorda/
2 / 11
Many hours went into designing and creating my patterns, so please do not steal them, sell them,
claim them as your own, or repost them in part or in full on your own blog, website or anywhere
else.
Sharing is okay as long as you use no more than TWO IMAGES and link back to my website.
You can also sell any finished products you make yourself.
Have fun with this pattern! Sorda is very simple to make, and you can really get creative with
colours and embellishments. Feel free to post your finished Sorda panda to my Facebook or
Ravelry pages – I can’t wait to see your finished amigurumis!
Note: All finished projects shared with me will be displayed in a special gallery on my blog and
FB page, and will include a link back to the creator’s blog/website where applicable.
Before you get started…
Patterns worked using US crochet terminology (I learned how to crochet from Youtuber
Mikey’s free Curtzy Crochet program)
Rows are worked in continuous rounds/spirals. Do not join unless instructed to do so.
Unless instructed to do otherwise, repeat the sequence given between the asterisks (eg.
*1sc in next 3st, then 2sc in next st*) until the required number of stitches in brackets ( )
is reached.
READ ALL INSTRUCTIONS before attempting this pattern. This will prepare you for
the steps ahead, and give you a chance to tweak the design where appropriate.
Click on each image to view the enlarged version.
US Crochet terms/techniques this pattern assumes you
already know:
magic circle (there are many excellent video tutorials online showing how to do this)
st = stitch
ch = chain
sl st = slip stitch
sc = single crochet
2tog = two together decrease = 1sc into 2st, thereby turning two stitches into one
inv dec = invisible decrease (I prefer this method to 2tog, as it leaves a much neater finish)
f/o = fasten off
You will need:
Yarn in any colours you wish. If you want to follow this pattern exactly: A = white; B =
black (I used 8ply 100% acrylic, but you could replace this with whatever you like,
provided you match it with the appropriate-sized crochet hook. You want to aim for a
fairly tight stitch with no gaps between the stitches.
Crochet hook (I used 3.5mm)

Please visit and leave comments at the original blog post: http://jenniferwangbears.com/free-pattern-amigurumi-sorda/
3 / 11
7.5mm safety eyes (you could also use buttons, beads or felt, or simply embroider or
needle felt the eyes on)
Merino wool for needle felting (preferably in white and black), plus any other wool or
yarn colour you’d like to use for facial shading
Needle felting needles and a foam block (this will spare your fingers!)
Wool needle (handy for weaving yarn tails in)
Polyfill for stuffing (I used the stuffing from an old cushion, ’cause I’m classy like that)
Row markers (this could be as simple as a short piece of yarn or string. Place it in the last
stitch of each row so you don’t lose your place as you complete the rounds)
Pins for marking out the eyes and holding pieces in place before hand sewing
Pocket mirror or digital camera (never trust your eyes when observing your needle felting
work! Use a mirror or take pictures to constantly make sure Sorda’s face is symmetrical
as you needle felt the muzzle)
Now, on to the pattern! ヽ(*⌒∇⌒*)ノ
HEAD~
1. With A, magic circle with 7 st (7)
2. 2sc in 1st around (14)
3. *1sc, then 2sc* around (21)
4. *1sc in next 2st, then 2sc in next st* around (28)
5. *1sc in next 6st, then 2sc in next st* around (32)
6-9. 1sc around for 4 rows (32)
10. *1sc in next 7st, then 2sc in next st* around (36)
11. 1sc around (36)
12. *1sc in next 4st, then 2tog OR inv dec* around (30)
13. *1sc* around (30)
14. *2tog OR inv dec, then 1 sc in next 4st* around (25)
15. *2tog OR inv dec, then 1sc in next 3st* around. Switch to B on last st (20). DO NOT CUT!
Continue to body.

Please visit and leave comments at the original blog post: http://jenniferwangbears.com/free-pattern-amigurumi-sorda/
4 / 11
BODY~
16. With B, sl st, then 2sc in next st. *1sc, then 2sc in next st* around (30)
17. *1sc in next 2st, then 2sc in next st* around (40)
18. *2tog OR inv dec, then 1sc in next 6st* around. Switch to A on last st (35)
19. Sl st, 1sc in next 14st (switch to B on last st), sl st, 1sc in next 16 st (switch to A on last st), sl
st, then 1sc in next 2st (35)
20. 1sc in next 19st (switch to B on last st), sl st, 1sc in next 11st (switch to B on last st), sl st,
1sc in next 3st (35)
COLOUR CHANGES ARE OVER. Now is a good opportunity to stuff the head firmly with
polyfill.
21. 1sc around (35)
22. *1sc in next 6st, then 2sc in next st* around (40)
23-24. 1sc around for 2 rows (40)
25. *1sc in next 6st, 2tog OR inv dec* around (35)
26. *1sc in next 3st, 2tog OR inv dec* around (28)
27. *1sc in next 2st, 2tog OR inv dec* around (21)
If you need to, stuff the head some more. Stuff the body firmly
28. *1sc, then 2tog OR inv dec* around (14)
29. 2tog OR inv dec around (7)
30. 2tog twice and f/o. Weave the opening closed using the remaining yarn tail & pull to tighten.
Knot off and hide the yarn tail inside the body.
ARMS & LEGS~ (make 4)
1. With B, magic circle with 6st (6)
2. 2sc in 1st around (12)
3-8. 1sc around for 6 rows (12)
Please visit and leave comments at the original blog post: http://jenniferwangbears.com/free-pattern-amigurumi-sorda/
5 / 11
9. *1sc, then 2tog OR inv dec* around (9)
10. f/o and leave a long tail for sewing
Lightly stuff the arms and legs (keep the ends connected to the body stuffing-free). The less
stuffing you use, the limper they will hang (this may be a good thing, depending on what you
prefer)
EARS~ (make 2)
1. With B, magic circle with 6st (6)
2. 2sc in 1st around (12)
3. 1sc around (12)
4. f/o and weave yarn tail in and out the end row to pinch the opening closed. Leave long tail for
sewing.
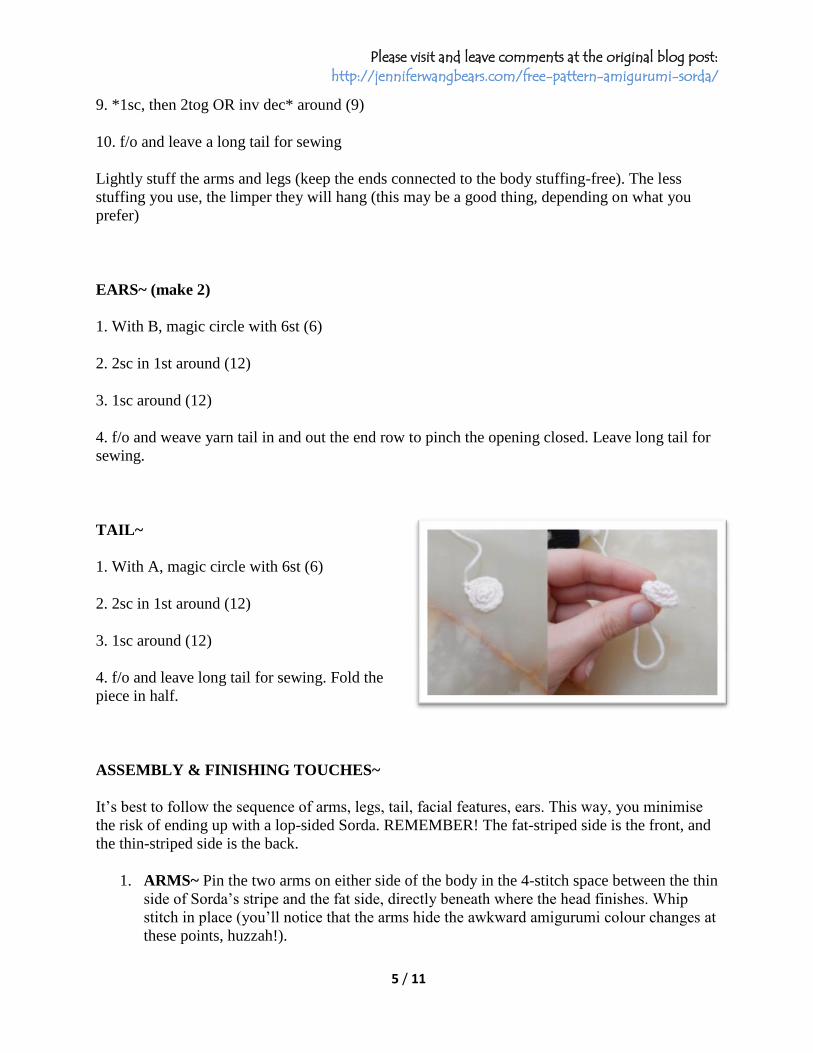
TAIL~
1. With A, magic circle with 6st (6)
2. 2sc in 1st around (12)
3. 1sc around (12)
4. f/o and leave long tail for sewing. Fold the
piece in half.
ASSEMBLY & FINISHING TOUCHES~
It’s best to follow the sequence of arms, legs, tail, facial features, ears. This way, you minimise
the risk of ending up with a lop-sided Sorda. REMEMBER! The fat-striped side is the front, and
the thin-striped side is the back.
1. ARMS~ Pin the two arms on either side of the body in the 4-stitch space between the thin
side of Sorda’s stripe and the fat side, directly beneath where the head finishes. Whip
stitch in place (you’ll notice that the arms hide the awkward amigurumi colour changes at
these points, huzzah!).

Please visit and leave comments at the original blog post: http://jenniferwangbears.com/free-pattern-amigurumi-sorda/
6 / 11
2. LEGS~ You have the option of making Sorda sitting or standing. If you would like her to
be sitting, sew the legs in line with the arms, about 4 rows down from where B rows ends.
I didn’t like how the legs splayed out to the sides, so I sewed them in place at another
point further down the leg to follow the curve of the body.
If you’d like your Sorda to stand, sew the legs in line with the arms lower down the base
of the body. You may need to add stuffing to the legs to make them a little more
supportive.
3. TAIL~ Whip stitch the folded tail between the legs at the back of the body. If you’ve
decided to make Sorda sitting, experiment with tail placement to make sure your Sorda
can sit on her own without rolling over or leaning back too far.
4. FACIAL FEATURES~ Now comes the fun part.
1. NEEDLE SCULTPING~ This simply involves making eye indents for the safety
eyes or whatever eyes you will be using, thereby also creating a bridge for the
nose.
1. Use two pins to mark where your eyes will be as evenly between the arms
as you can. This will be about 5 rows from where colour B begins, with 3-
4 stitches in between.
Please visit and leave comments at the original blog post: http://jenniferwangbears.com/free-pattern-amigurumi-sorda/
7 / 11
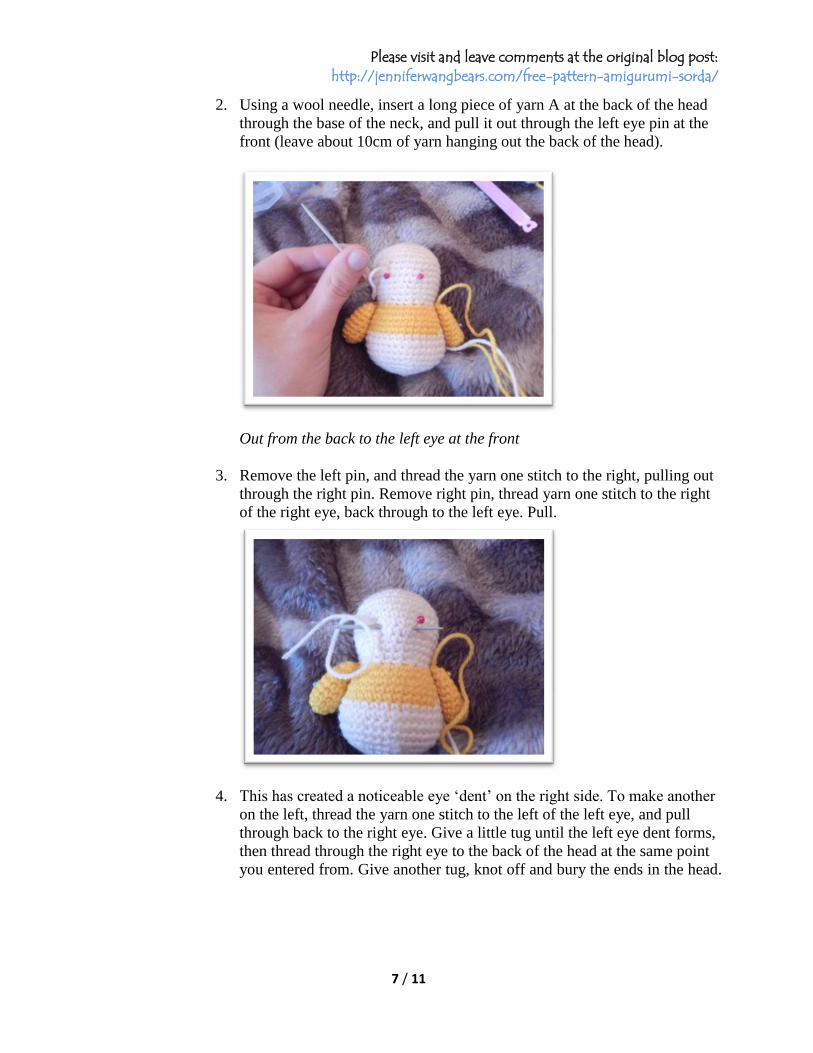
2. Using a wool needle, insert a long piece of yarn A at the back of the head
through the base of the neck, and pull it out through the left eye pin at the
front (leave about 10cm of yarn hanging out the back of the head).
Out from the back to the left eye at the front
3. Remove the left pin, and thread the yarn one stitch to the right, pulling out
through the right pin. Remove right pin, thread yarn one stitch to the right
of the right eye, back through to the left eye. Pull.
4. This has created a noticeable eye ‘dent’ on the right side. To make another
on the left, thread the yarn one stitch to the left of the left eye, and pull
through back to the right eye. Give a little tug until the left eye dent forms,
then thread through the right eye to the back of the head at the same point
you entered from. Give another tug, knot off and bury the ends in the head.

Please visit and leave comments at the original blog post: http://jenniferwangbears.com/free-pattern-amigurumi-sorda/
8 / 11
Don’t be afraid to give a good tug, and work back and forth as many times
as you need to
2. EYES~ As previously mentioned, I like to add the safety eyes AFTER I stuff and
close the head and body. To do this, get two long lengths of yarn A and tie one
each to the stem of each safety eye (make sure you double knot it). Insert the eyes
(no need for the safety eye backing) into each eye indent on the head. Use a wool
needle to thread the yarn tails of both eyes into the eye insertion point and out the
base of the neck at the back (make sure you thread both tails out at the SAME
point). PULL FIRMLY until the eyes are snug in the socket. Adjust or start again
if you are not happy with the position. Tie both yarn tails together at the back and
bury the ends in the head.
*Optional* you can also add glue to the back of each safety eye, but I find its not
necessary*

Please visit and leave comments at the original blog post: http://jenniferwangbears.com/free-pattern-amigurumi-sorda/
9 / 11
3. NEEDLE FELTING~ My favourite part! This is where Sorda really comes to
life.
1. Using a foam block as your base, needle felt a chunk of merino wool into
a small ball, It should be fairly compact, but nowhere near rock-hard.
Needle felt this ball below and between Sorda’s eyes until it becomes
firmer and more compacted. This will be Sorda’s muzzle!
Looks gigantic, but the wool will compact as you needle felt, so you need
to overcompensate at first
2. Similarly, make two smaller balls of the same size and attach them to each
side of the muzzle, beginning just under the eyes. These will be the cheeks.
Keep needle felting over the muzzle and adding more wool to make sure

Please visit and leave comments at the original blog post: http://jenniferwangbears.com/free-pattern-amigurumi-sorda/
10 / 11
these three parts blend together seamlessly.
3. Once you’re happy with the overall shape you’ve achieved it’s time to
disguise the off-white merino wool with the colour of yarn A. Snip up
little bits of yarn A and tease them apart by lightly flicking a needle felting
needle though them while on the foam mat. Roll the teased ends into a ball
and needle felt them evenly over the muzzle. This may take a bit of
practise, but be patient and go slowly or else you may stab yourself
(ouch!). Check under natural light to make sure you are spreading the
colour evenly.
4. Needle felt or embroider the nose and mouth, use yarn B to needle felt the
eye patches.

Please visit and leave comments at the original blog post: http://jenniferwangbears.com/free-pattern-amigurumi-sorda/
11 / 11
The most time-consuming part is perfecting the muzzle and adding the
smaller details. Don’t be worried though ~ needle felting is very forgiving,
and you can simply rip off the parts you don’t like and start again ;)
4. EARS~ This is the final part! Pin both ears on either side of the centre head spiral.
You may need to test different positions to make sure you achieve the look you
want. Sew the ears in place, and you’re done!
Hooray!
You now have your very own Sorda amigurumi!
*(*´∀`*)☆
Don’t forget to post your finished Sorda to my Facebook and/or Ravelry pages! I would love to
see which colours you used.