Embed Size (px)
DESCRIPTION
Garmin Rino 120/130. CCSOSARP Standard GPS/FRS/GMRS. Objectives. After this class you should be able to: Power on a Rino Set the radio channel & code Set the unit name/ID Enable Send/Poll Location Poll a contact Send location Understand radio user interface basics. Objectives (cont.). - PowerPoint PPT Presentation
Citation preview
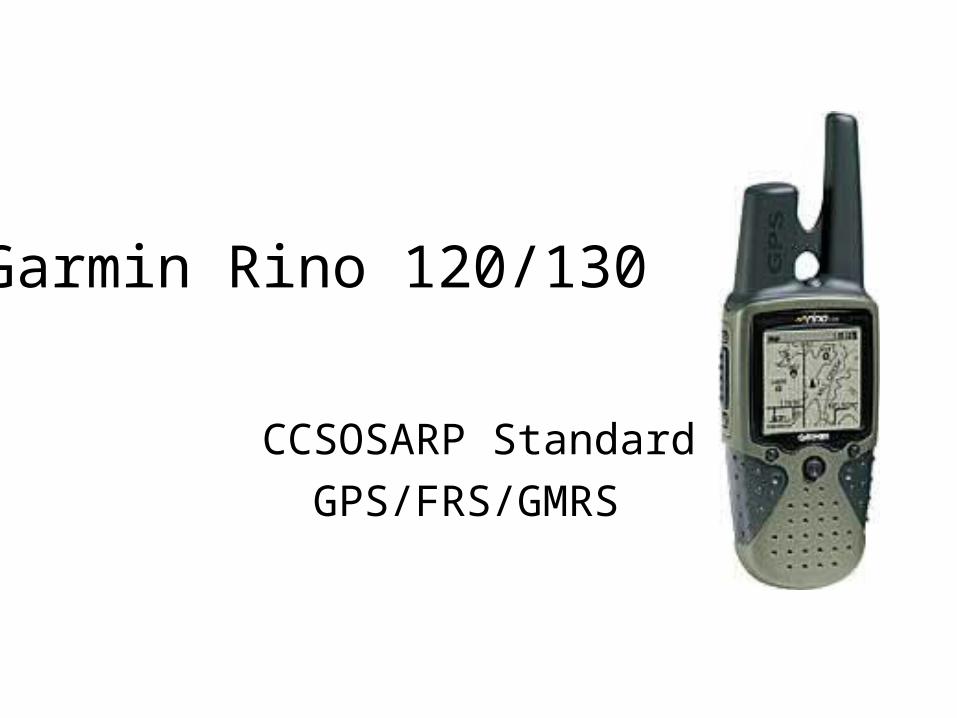
Garmin Rino 120/130
CCSOSARP Standard
GPS/FRS/GMRS

Objectives
• After this class you should be able to:– Power on a Rino– Set the radio channel & code– Set the unit name/ID– Enable Send/Poll Location– Poll a contact– Send location– Understand radio user interface basics
Objectives (cont.)
• After this class you should be able to:– Mark GPS Waypoints on Rino– Goto a Waypoint, Contact, or Place– Clear & Save Tracks & Trips– Determine distance and direction to a “Contact”– Navigate with the Navigation Screen– Understand GPS user interface basics
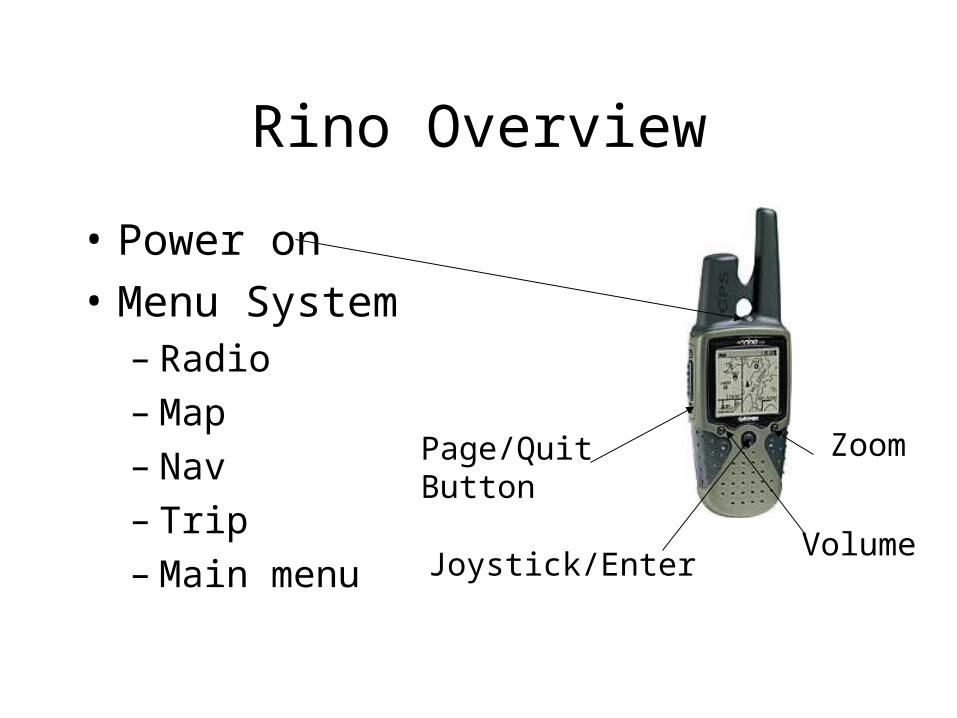
Rino Overview
• Power on
• Menu System– Radio – Map– Nav– Trip– Main menu
Page/Quit Button
Joystick/Enter
Zoom
Volume

Main Page Rotation Scheme, by Page/Quit Button orMain Page Menu (upper right status bar)

Radio Page
BatteryMeter
Radio On
Send/Poll LocationEnabled
Option Menu
Page RotationMenu
Code
Channel #1-14 FRS15-22 GMRS
Key Radio Functions
• Communicate
• Auto-location/Polling (enable)
• Setup channel/code
• Setup ID
• Contacts: accept, review, poll

Radio Controls
Call Button
Push to Talk
Headset Connector
Volume buttonPops up menu
Microphone port

Radio Auto-location
• Sends location on Xmit (PTT) or Call
• FRS (or GMRS w/license)
• Must be on correct channel # w/correct code
Channel
Code
Radio onSend/Poll Locationenabled
Radio Auto-location
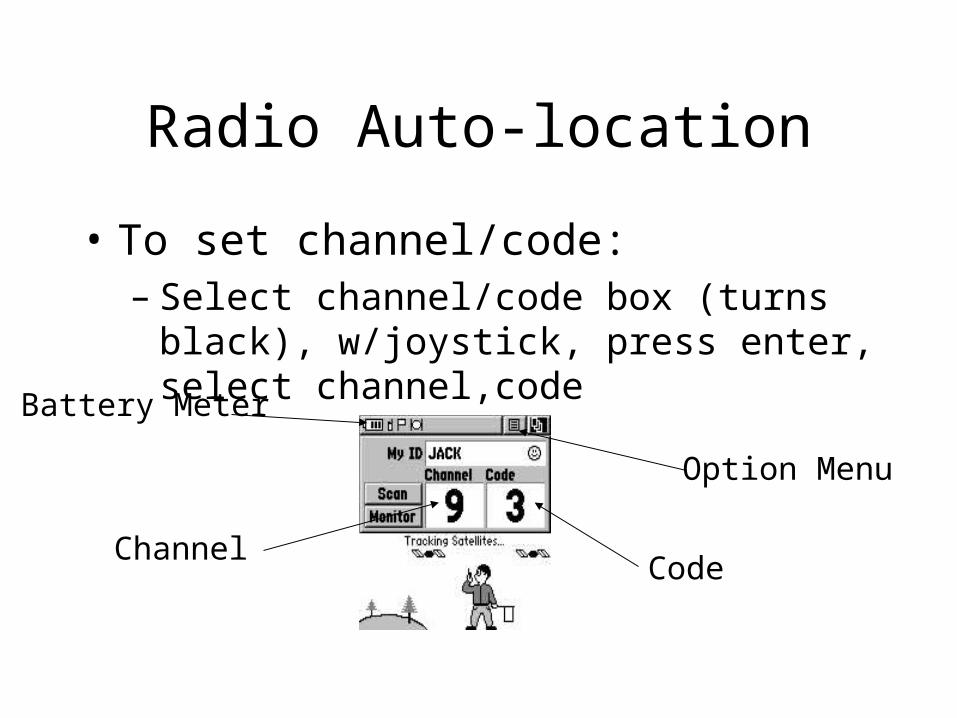
• To set channel/code:– Select channel/code box (turns black),
w/joystick, press enter, select channel,code
ChannelCode
Battery Meter
Option Menu

Radio Auto-location
• FRS (or GMRS w/license)– Must have correct ID (Assigned according to
CCSOSARP S.O.P TBD)
ID set like channel/code select & edit w/joystick
Radio setup to enable Auto-Location
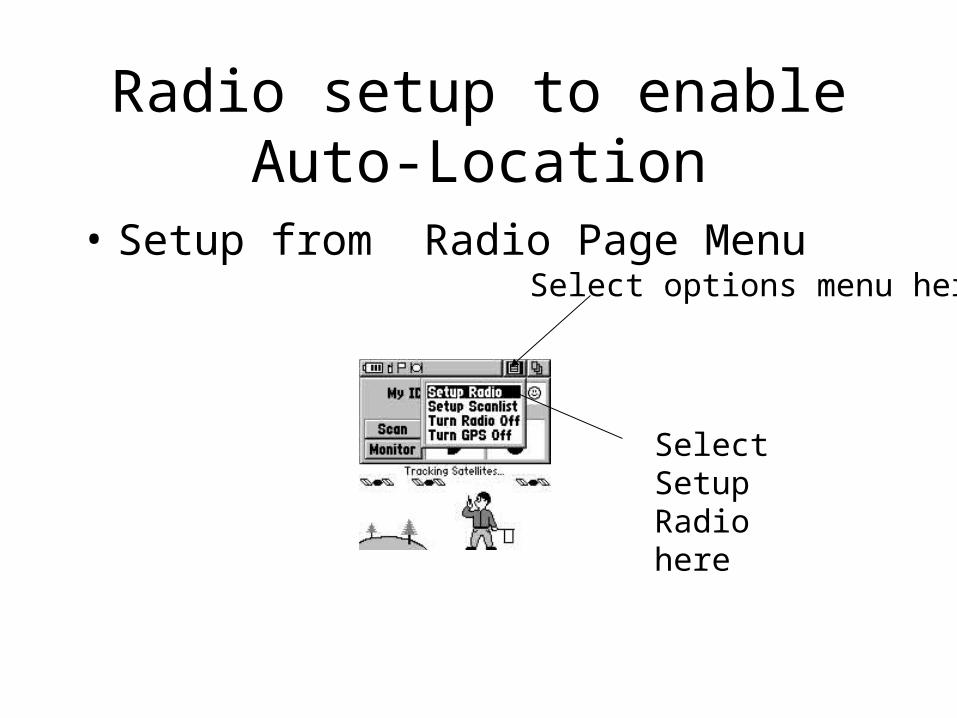
• Setup from Radio Page MenuSelect options menu here
Select Setup Radio here

Radio set up page
• Send location & Allow polling- must both be ON
• Many other radio options are here too– VOX level– GMRS on/off ( GMRS requires license)– Headset type– Microphone sensitivity
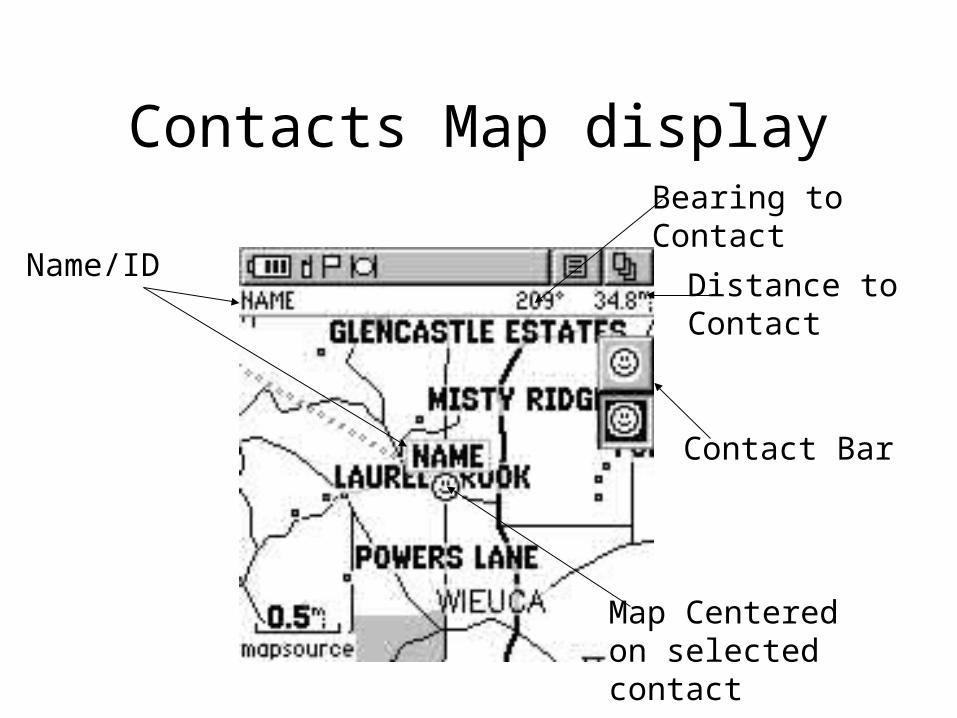
Contacts Map display
Name/ID
Map Centered on selected contact
Contact Bar
Distance to Contact
Bearing to Contact
Selecting Contacts
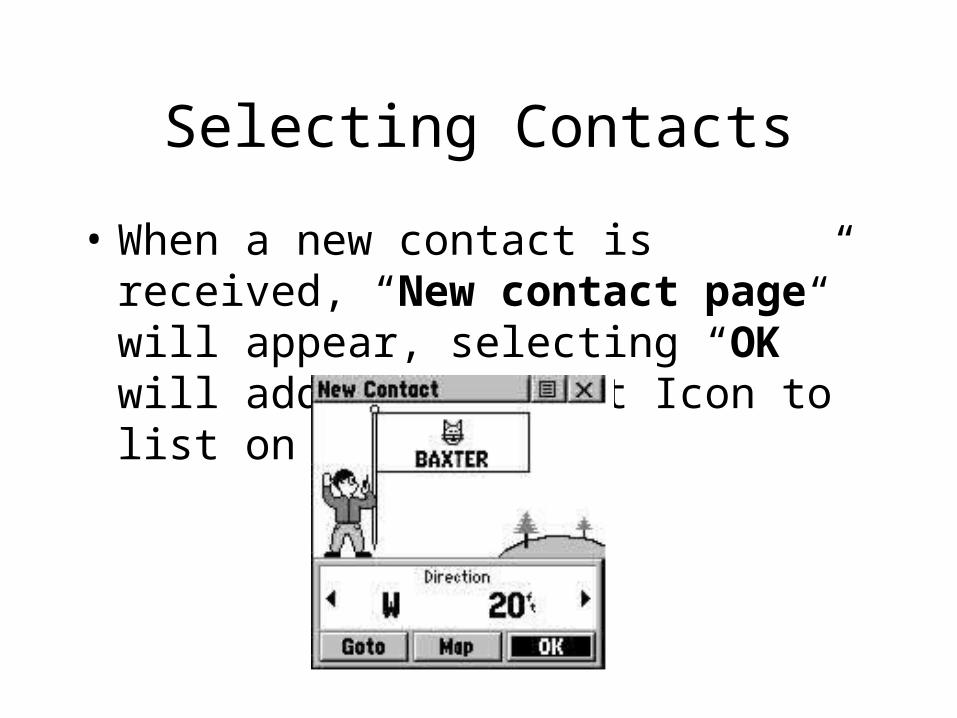
• When a new contact is received, “New contact page” will appear, selecting “OK” will add new contact Icon to list on Map page

Review Contact
• To review a Contact, Highlight the desired contact on the contact bar
• Map page will center on contact– Display-name, direction, distance
Or
• From Find ‘N Go Menu-
select “Contacts”, select contact

Poll a Contact
• Polling a Contact is requesting that Contact’s Rino send you it’s location (with out Contact intervention). – From the contacts detail page (accessed by Find
‘N Go or map page Icon) select the “option menu”
– Select “Poll Location”

Top Level Menus - Radio• Many ways to get there
– Nested menus– Joystick navigation– Page/Quit button– Shortcut menu, zoom button

Key GPS Functions
• Set Waypoint
• GoTo
• Clear Trip & Tracks
• Navigate
• Determine distance & direction of “Contacts”
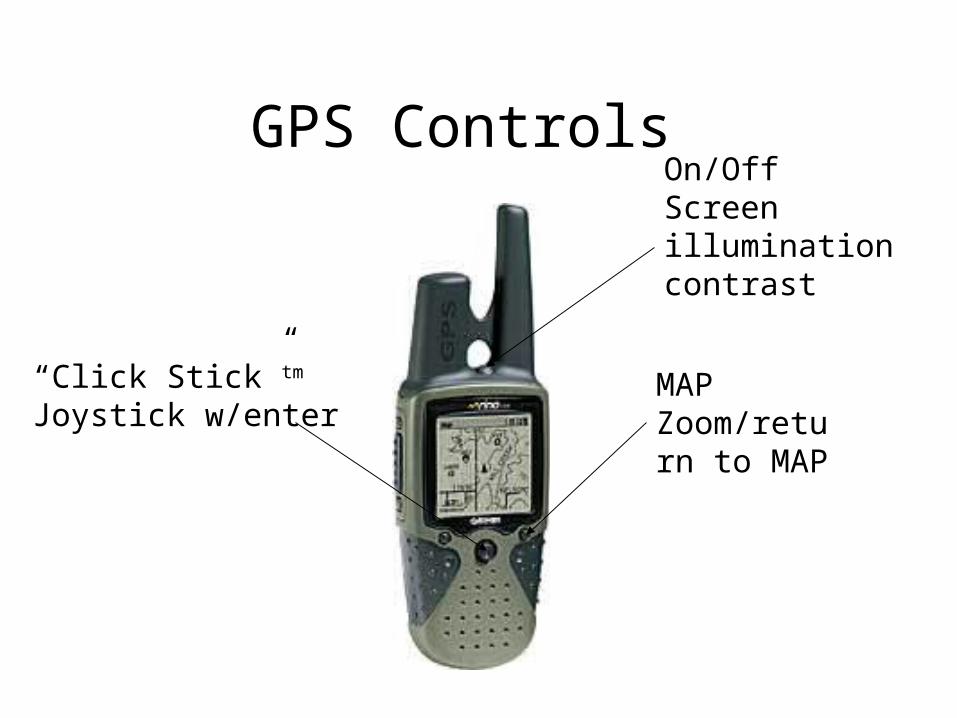
GPS Controls
MAP Zoom/return to MAP
“Click Stick”tm
Joystick w/enter
On/Off Screen illumination contrast

Setting Waypoints & Goto
• From any menu pressing the joystick/enter and holding for 1-2 seconds brings up the Shortcut menu– This menu allows you to Mark (current location
as a) Waypoint. – Find & Go ( Goto) menu– Enable Disable keylock (keyboard can be
locked/unlocked

Setting Waypoints & Goto (cont.)
• Set Waypoint & Find ‘N Go can be set from Main Menu as well
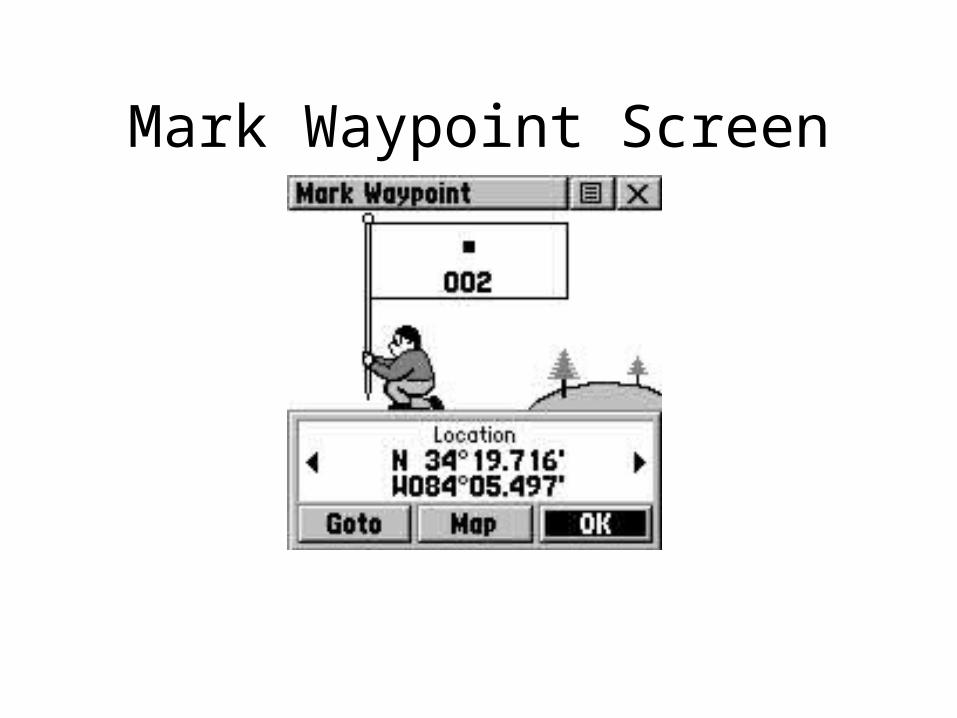
Mark Waypoint Screen
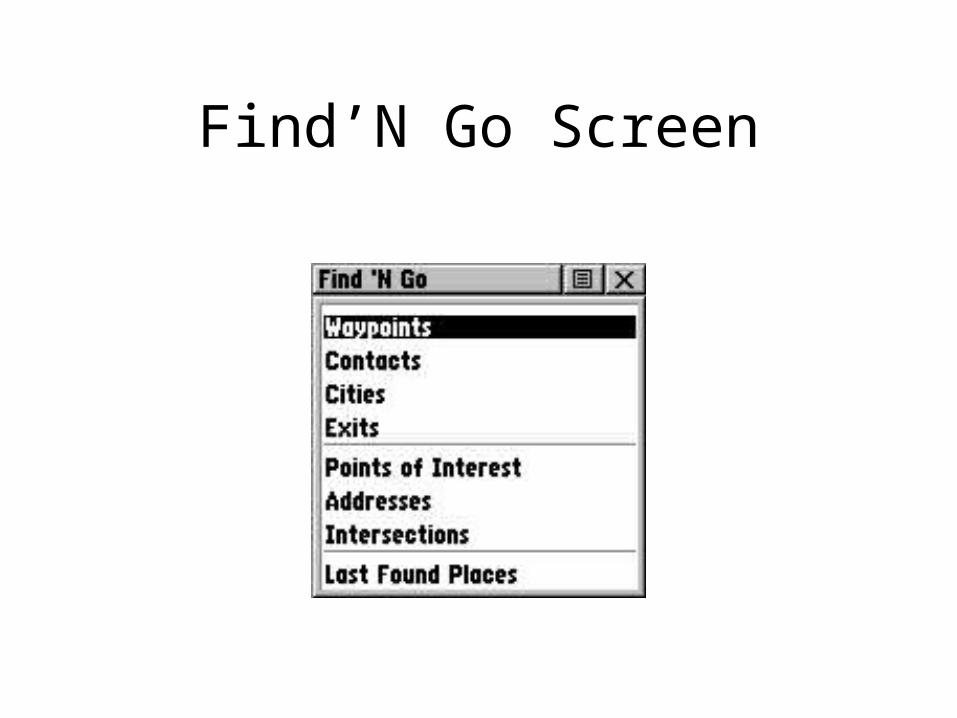
Find’N Go Screen
Top Level Menus - GPS Screen shots
– Map– Navigation– Trip– Main
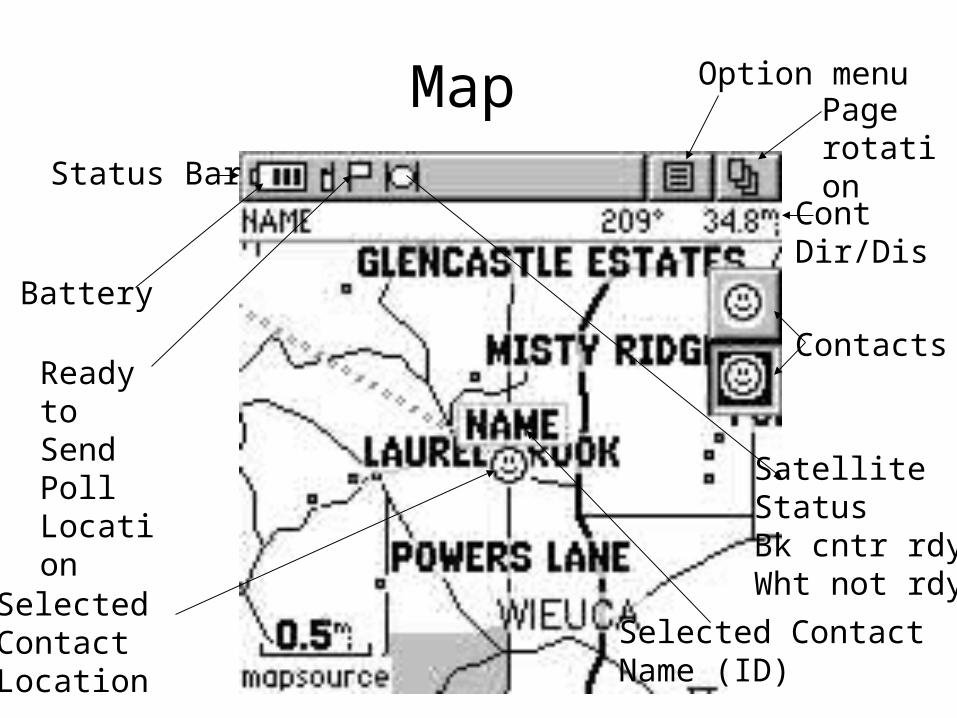
Map Page rotation
Status Bar
Battery
Option menu
Ready to SendPoll Location
SatelliteStatusBk cntr rdyWht not rdy
Contacts
Selected Contact Location
Selected ContactName (ID)
ContDir/Dis
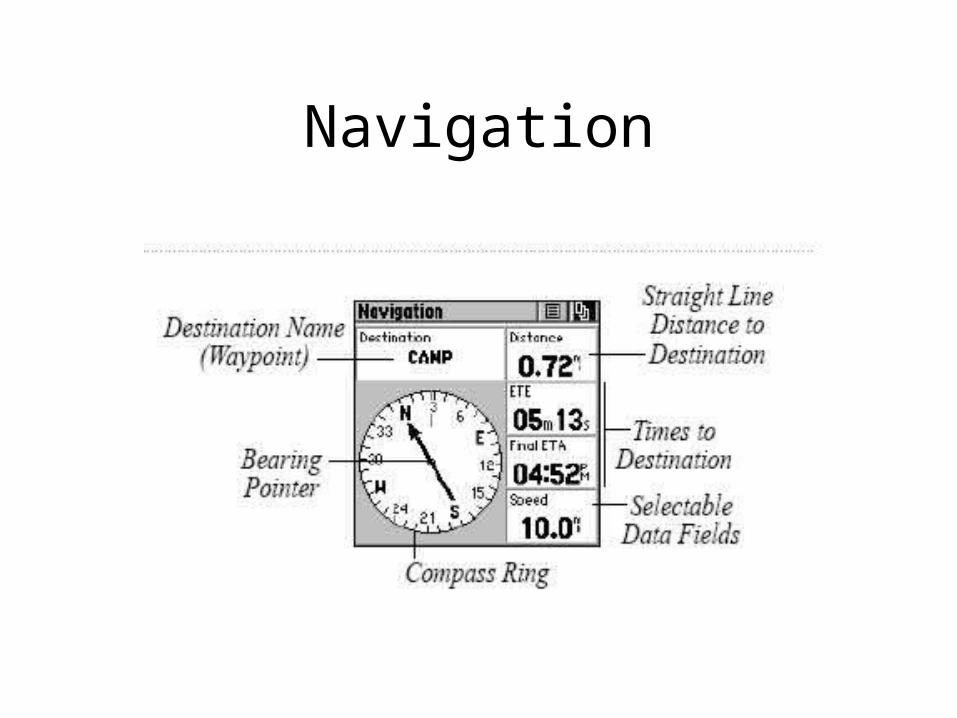
Navigation

Trip
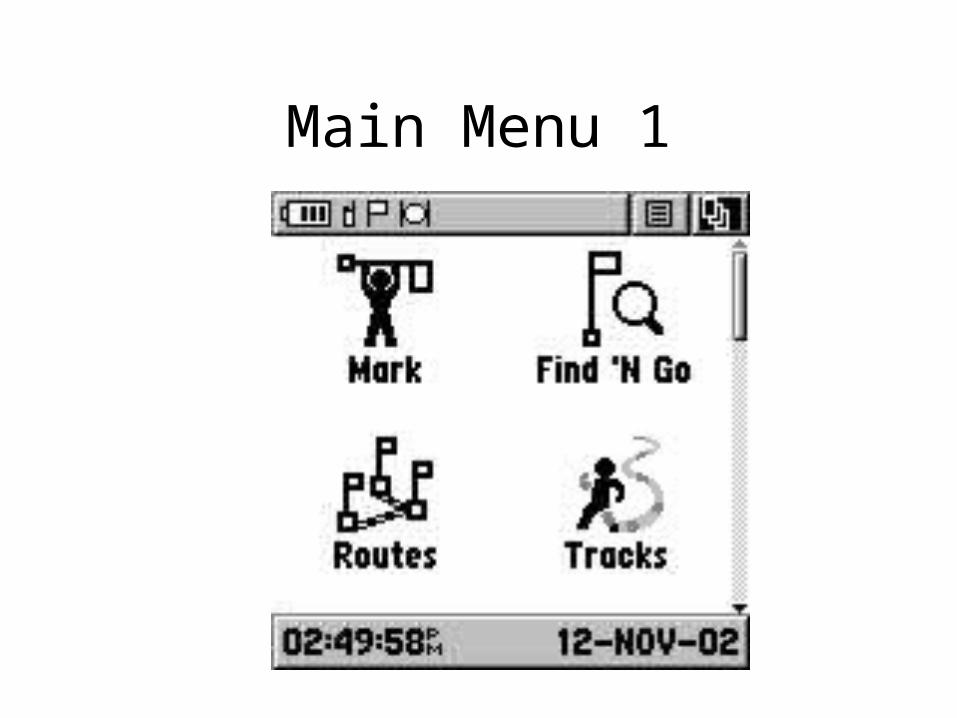
Main Menu 1
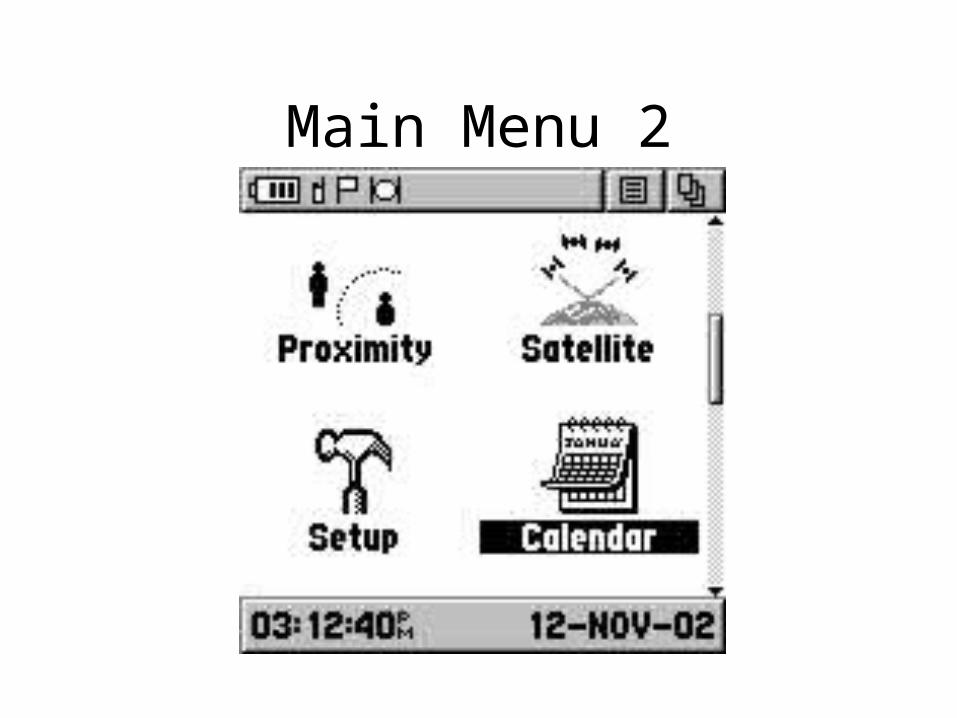
Main Menu 2

Key Sub menus from Main
Setup menu
Satellite pageProximity alarms

Setup

Satellite

Proximity

Main Menu 3
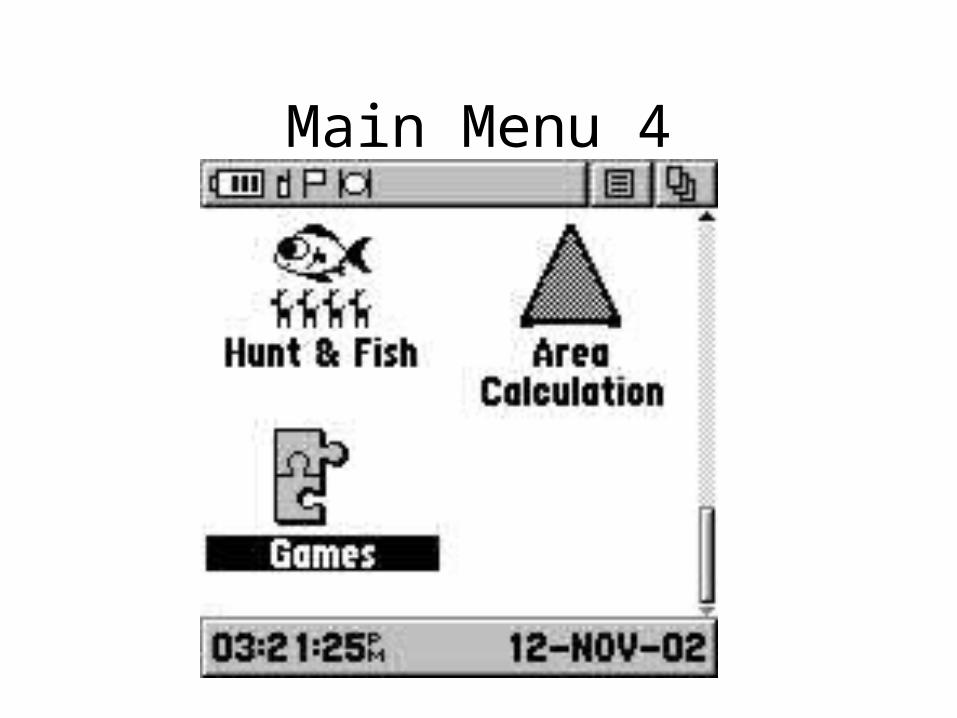
Main Menu 4

Top Level Menus (cont.)• Many ways to get
there– Joystick
• Select Rotation
Icon in status bar
drops a list of selectable pages

Top Level Menus (cont.)• Many ways to
get there– Page/Quit
button
Page/Quit

Top Level Menus (cont.)• Many ways to
get there• Shortcut
menu• Zoom
Press & hold joystick/enter for Shortcut menu
From any page other than MAP, Zoom returns to MAP

Summary
• GPS & Radio functions follow nested menus– Menus are accessible by:
• Sub-menu/joystick
• Page/Quit button
• Enter hold (shortcut)
• Radio operations require proper setup to allow location ID
• Garmins Controls and displays are redundant with many paths to the same information