Embed Size (px)
Citation preview

GeoServer User ManualRelease 1.7.4
GeoServer
April 28, 2009


Contents
1 Introduction 31.1 Overview . . . . . . . . . . . . . . . . . . . . . . . . . . . . . . . . . . . . . . . . . . . . . . . . 31.2 Getting Involved . . . . . . . . . . . . . . . . . . . . . . . . . . . . . . . . . . . . . . . . . . . . 4
2 Installation 72.1 Installing Java . . . . . . . . . . . . . . . . . . . . . . . . . . . . . . . . . . . . . . . . . . . . . . 72.2 Installing GeoServer . . . . . . . . . . . . . . . . . . . . . . . . . . . . . . . . . . . . . . . . . . 92.3 Upgrading GeoServer . . . . . . . . . . . . . . . . . . . . . . . . . . . . . . . . . . . . . . . . . 11
3 Getting Started 153.1 Web Administration Interface Quickstart . . . . . . . . . . . . . . . . . . . . . . . . . . . . . . 153.2 Adding a Shapefile . . . . . . . . . . . . . . . . . . . . . . . . . . . . . . . . . . . . . . . . . . . 183.3 Adding a PostGIS Table . . . . . . . . . . . . . . . . . . . . . . . . . . . . . . . . . . . . . . . . 233.4 Styling a Map . . . . . . . . . . . . . . . . . . . . . . . . . . . . . . . . . . . . . . . . . . . . . . 29
4 GeoServer Data Directory 334.1 Introduction to the Data Directory . . . . . . . . . . . . . . . . . . . . . . . . . . . . . . . . . . 334.2 Creating a New Data Directory . . . . . . . . . . . . . . . . . . . . . . . . . . . . . . . . . . . . 374.3 Setting the Data Directory . . . . . . . . . . . . . . . . . . . . . . . . . . . . . . . . . . . . . . . 37
5 Web Administration Interface 415.1 Interface basics . . . . . . . . . . . . . . . . . . . . . . . . . . . . . . . . . . . . . . . . . . . . . 415.2 Admin menu . . . . . . . . . . . . . . . . . . . . . . . . . . . . . . . . . . . . . . . . . . . . . . 425.3 Config menu . . . . . . . . . . . . . . . . . . . . . . . . . . . . . . . . . . . . . . . . . . . . . . 435.4 Demo menu . . . . . . . . . . . . . . . . . . . . . . . . . . . . . . . . . . . . . . . . . . . . . . . 67
6 Working with Data 736.1 Shapefile . . . . . . . . . . . . . . . . . . . . . . . . . . . . . . . . . . . . . . . . . . . . . . . . . 736.2 PostGIS . . . . . . . . . . . . . . . . . . . . . . . . . . . . . . . . . . . . . . . . . . . . . . . . . 756.3 Directory . . . . . . . . . . . . . . . . . . . . . . . . . . . . . . . . . . . . . . . . . . . . . . . . 786.4 External Web Feature Server . . . . . . . . . . . . . . . . . . . . . . . . . . . . . . . . . . . . . 786.5 ArcSDE . . . . . . . . . . . . . . . . . . . . . . . . . . . . . . . . . . . . . . . . . . . . . . . . . 816.6 Geographic Markup Language (GML) . . . . . . . . . . . . . . . . . . . . . . . . . . . . . . . . 856.7 MySQL . . . . . . . . . . . . . . . . . . . . . . . . . . . . . . . . . . . . . . . . . . . . . . . . . 88
i

6.8 Oracle . . . . . . . . . . . . . . . . . . . . . . . . . . . . . . . . . . . . . . . . . . . . . . . . . . 896.9 Oracle Next Generation . . . . . . . . . . . . . . . . . . . . . . . . . . . . . . . . . . . . . . . . 946.10 SQL Server . . . . . . . . . . . . . . . . . . . . . . . . . . . . . . . . . . . . . . . . . . . . . . . 966.11 Vector Product Format . . . . . . . . . . . . . . . . . . . . . . . . . . . . . . . . . . . . . . . . . 996.12 Database Connection Pooling . . . . . . . . . . . . . . . . . . . . . . . . . . . . . . . . . . . . . 100
7 Styling 1037.1 Introduction to SLD . . . . . . . . . . . . . . . . . . . . . . . . . . . . . . . . . . . . . . . . . . 1037.2 SLD Cook Book . . . . . . . . . . . . . . . . . . . . . . . . . . . . . . . . . . . . . . . . . . . . . 1057.3 SLD Reference . . . . . . . . . . . . . . . . . . . . . . . . . . . . . . . . . . . . . . . . . . . . . 131
8 Services 1398.1 Web Feature Service . . . . . . . . . . . . . . . . . . . . . . . . . . . . . . . . . . . . . . . . . . 1398.2 Web Map Service . . . . . . . . . . . . . . . . . . . . . . . . . . . . . . . . . . . . . . . . . . . . 1478.3 Web Coverage Service . . . . . . . . . . . . . . . . . . . . . . . . . . . . . . . . . . . . . . . . . 151
9 Security 1539.1 Accessing secured resources . . . . . . . . . . . . . . . . . . . . . . . . . . . . . . . . . . . . . 1539.2 Users and roles . . . . . . . . . . . . . . . . . . . . . . . . . . . . . . . . . . . . . . . . . . . . . 1539.3 Service-level security . . . . . . . . . . . . . . . . . . . . . . . . . . . . . . . . . . . . . . . . . . 1549.4 Layer-level security . . . . . . . . . . . . . . . . . . . . . . . . . . . . . . . . . . . . . . . . . . 1559.5 Disabling security . . . . . . . . . . . . . . . . . . . . . . . . . . . . . . . . . . . . . . . . . . . 157
10 Caching with GeoWebCache 15910.1 Setup . . . . . . . . . . . . . . . . . . . . . . . . . . . . . . . . . . . . . . . . . . . . . . . . . . . 15910.2 Using GeoWebCache . . . . . . . . . . . . . . . . . . . . . . . . . . . . . . . . . . . . . . . . . . 16010.3 Demo page . . . . . . . . . . . . . . . . . . . . . . . . . . . . . . . . . . . . . . . . . . . . . . . 16110.4 Seeding and refreshing . . . . . . . . . . . . . . . . . . . . . . . . . . . . . . . . . . . . . . . . 162
11 Google Earth 16511.1 Overview . . . . . . . . . . . . . . . . . . . . . . . . . . . . . . . . . . . . . . . . . . . . . . . . 16511.2 Quickstart . . . . . . . . . . . . . . . . . . . . . . . . . . . . . . . . . . . . . . . . . . . . . . . . 16511.3 KML Styling . . . . . . . . . . . . . . . . . . . . . . . . . . . . . . . . . . . . . . . . . . . . . . 16911.4 Tutorials . . . . . . . . . . . . . . . . . . . . . . . . . . . . . . . . . . . . . . . . . . . . . . . . . 19111.5 Features . . . . . . . . . . . . . . . . . . . . . . . . . . . . . . . . . . . . . . . . . . . . . . . . . 191
12 Running In A Production Environment 20112.1 Java Considerations . . . . . . . . . . . . . . . . . . . . . . . . . . . . . . . . . . . . . . . . . . 20112.2 Container Considerations . . . . . . . . . . . . . . . . . . . . . . . . . . . . . . . . . . . . . . . 20212.3 Configuration Considerations . . . . . . . . . . . . . . . . . . . . . . . . . . . . . . . . . . . . 20212.4 Data Considerations . . . . . . . . . . . . . . . . . . . . . . . . . . . . . . . . . . . . . . . . . . 20412.5 Other Considerations . . . . . . . . . . . . . . . . . . . . . . . . . . . . . . . . . . . . . . . . . 204
13 Extensions 20713.1 GeoSearch . . . . . . . . . . . . . . . . . . . . . . . . . . . . . . . . . . . . . . . . . . . . . . . . 20713.2 Imagemap . . . . . . . . . . . . . . . . . . . . . . . . . . . . . . . . . . . . . . . . . . . . . . . . 20713.3 OGR Output . . . . . . . . . . . . . . . . . . . . . . . . . . . . . . . . . . . . . . . . . . . . . . 20713.4 REST . . . . . . . . . . . . . . . . . . . . . . . . . . . . . . . . . . . . . . . . . . . . . . . . . . . 20713.5 GeoExt Styler . . . . . . . . . . . . . . . . . . . . . . . . . . . . . . . . . . . . . . . . . . . . . . 22213.6 WFS Versioning . . . . . . . . . . . . . . . . . . . . . . . . . . . . . . . . . . . . . . . . . . . . . 222
14 Tutorials 223
15 Frequently Asked Questions 22515.1 General . . . . . . . . . . . . . . . . . . . . . . . . . . . . . . . . . . . . . . . . . . . . . . . . . 225
ii

15.2 Installation . . . . . . . . . . . . . . . . . . . . . . . . . . . . . . . . . . . . . . . . . . . . . . . 22515.3 Configuration . . . . . . . . . . . . . . . . . . . . . . . . . . . . . . . . . . . . . . . . . . . . . . 22515.4 Troubleshooting . . . . . . . . . . . . . . . . . . . . . . . . . . . . . . . . . . . . . . . . . . . . 225
16 Advanced GeoServer Configuration 22716.1 WMS Decorations . . . . . . . . . . . . . . . . . . . . . . . . . . . . . . . . . . . . . . . . . . . 227
iii

iv

GeoServer User Manual, Release 1.7.4
GeoServer is a open source software server written in Java that allows users to share and edit geospatialdata. Designed for interoperability, it publishes data from any major spatial data source using open stan-dards.
Being a community-driven project, GeoServer is developed, tested, and supported by a diverse group ofindividuals and organizations from around the world.
GeoServer is the reference implementation of the Open Geospatial Consortium (OGC) Web Feature Service(WFS) and Web Coverage Service (WCS) standards, as well as a high performance certified compliant WebMap Service (WMS). GeoServer forms a core component of the Geospatial Web.
Contents 1

GeoServer User Manual, Release 1.7.4
2 Contents

CHAPTER 1
Introduction
Welcome to the GeoServer User Guide. This document is a comprehensive guide to all aspects of us-ing GeoServer. Targeting all users this document covers topics from initial installation to advanced fea-tures.
For those who wish to get started with GeoServer right away can skip to the Installation section. For thosewho want more information about just what GeoServer is and what it can do for you can continue on to theOverview section. Thanks for choosing GeoServer!
1.1 Overview
GeoServer is an open source software server written in Java that allows users to share and edit geospa-tial data. Designed for interoperability, it publishes data from any major spatial data source using openstandards.
Being a community-driven project, GeoServer is developed, tested, and supported by a diverse group ofindividuals and organizations from around the world.
GeoServer is the reference implementation of the Open Geospatial Consortium (OGC) Web Feature Ser-vice (WFS) and Web Map Service (WMS) standards. GeoServer forms a core component of the GeospatialWeb.
1.1.1 History
GeoServer was started in 2001 by The Open Planning Project (TOPP), a non-profit technology incubatorbased in New York. TOPP was creating a suite a tools to enable open democracy and to help make govern-ment more transparent. The first of these was GeoServer, which came out of a recognition that a suite oftools to enable citizen involvement in government and urban planning would be greatly enhanced by theability to share spatial data.
The GeoServer founders envisioned a Geospatial Web, analogous to the World Wide Web. With the WorldWide Web, one can search for and download text. With the Geospatial Web, one can search for and down-load spatial data. Data providers would be able to publish their data straight to this web, and users coulddirectly access it, as opposed to the now indirect and cumbersome methods of sharing data that exist to-day.
3

GeoServer User Manual, Release 1.7.4
Those involved with GeoServer founded the Geotools project, an open source GIS Java toolkit. ThroughGeotools, support for Shapefiles, Oracle databases, ArcSDE integration, and much more was added.
Around the same time as GeoServer was founded, The OpenGIS Consortium (now the Open GeospatialConsortium) was working on the Web Feature Service standard. It specifies a protocol to make spatial datadirectly available on the web, using GML (Geographic Markup Language), an interoperable data format. AWeb Map Service was also created, a protocol for creating and displaying map images created from spatialdata.
Other projects became interrelated. Refractions Research created PostGIS, a free and open spatial database,which enabled GeoServer to connect to a free database. Also, MetaCarta created OpenLayers, an opensource browser-based map viewing utility. Together, these tools are all have enhanced the functionality ofGeoServer.
GeoServer can now output data to many other spatial data viewers, such as Google Earth, a popular 3-Dvirtual globe. In addition, GeoServer is currently working directly with Google in order to allow GeoServerdata to be searchable on Google Maps. Soon a search for spatial data will be as easy as a Google search fora web page. Thus GeoServer is continuing on its mission to make spatial data more accessible to all.
1.1.2 License
GeoServer is licensed under the GNU General Public License.
1.2 Getting Involved
There are many ways that one can help out with the GeoServer project. GeoServer fully embraces an opensource development model that does not see a split between user and developer, producer and consumer,but instead sees everyone as a valuable resource in a collaborative quest to build something better than anyof us could alone.
1.2.1 Development
Helping to develop GeoServer is the obvious way to help out. Developers usually start with bug fixes andsmall patches, and then move into larger contributions as they learn the system. Our developers are morethan happy to help out as you learn and get acquainted, and we try our hardest to keep our code clean andwell documented.
1.2.2 Documentation
One of the best and most needed ways to help out is with documentation. Our official documentationis contained as part of our official code repository in order to maintain a uniform look and feel to ourdocumentation. However, we also maintain a wiki, where any and all users can post their own documen-tation, tips and tricks, and any other information that is useful to GeoServer. Like code contributions, if theGeoServer Project Steering Committee deems that user-contributed documentation is a valuable additionto the official documentation base, it will be added.
1.2.3 Mailing lists
GeoServer maintains two email lists: GeoServer Users and GeoServer Developers. These lists are publiclyavailable and are a great resource for those who are new to GeoServer, who need a question answered, or
4 Chapter 1. Introduction

GeoServer User Manual, Release 1.7.4
who are interested in contributing code. The Users list is mainly for those who have questions relating tothe use of GeoServer, and the Developers list is for more code-specific and roadmap-based discussions. Ifyou see a question asked on these lists that you know the answer to, please respond!
1.2.4 IRC
GeoServer has an IRC channel, #geoserver, on the Freenode network. GeoServer developers frequent thischannel, and so it is a great way to give and receive information in real time.
1.2.5 Bug tracking
If you have a problem when working with GeoServer, then please let us know through the mailing lists.GeoServer uses JIRA , a bug tracking website, to manage code. As GeoServer is open source, everyone isencouraged to fix bugs and submit patches. Even if you are not a core developer, you can still submit apatch through JIRA, and a developer will assess the patch and apply it to the code.
1.2.6 Translation
We would like GeoServer available in as many languages as possible, just as we want spatial data to beavailable to all. The two areas of GeoServer to translate are the text for the Web Administration Tool and thisdocumentation. Eventually we would even like to set up GeoServer community sites in different languages,if you are interested in this please let us know.
1.2.7 Suggest improvements
If you have suggestions as to how we can make GeoServer better, we would love to hear them. You cancontact us through the mailing lists or in IRC.
1.2.8 Spread the word
A further way to help out the GeoServer project is to spread the word about it. Word of mouth informationsharing is more powerful than any amount spent on marketing, adn the more people who use our software,the better it will become.
1.2.9 Fund improvements
A final way to help out is to push for GeoServer to be used in your own organization. A number of com-merical organizations offer support for GeoServer, and any improvements made due to that funding willbenefit the entire project.
1.2. Getting Involved 5

GeoServer User Manual, Release 1.7.4
6 Chapter 1. Introduction

CHAPTER 2
Installation
GeoServer is written in Java, and requires a Java Development Kit (JDK) installed on a system in order torun. The JDK is different from a Java Runtime Evnironment (JRE), which is what is most often installed onsystems.
The following pages explain how to install Java, and then to install GeoServer. Specific instructions are alsogiven for upgrading a pre-existing GeoServer instance.
If a Java JDK is already installed on the system you can jump ahead to the Installing GeoServer section.Otherwise continue on to the next section, Installing Java.
2.1 Installing Java
The instructions for installing a Java Development Kit (JDK) are dependent on your operating system.Please follow the instructions below for your operating system.
2.1.1 Windows
1. Visit the Sun Java downloads page. The most recent version of Java is Java 1.6 (which is also knownas Java 6). Choose the Java SE Development Kit (JDK) 6 ... option.
2. Choose the appropriate platform, Windows or Windows x64, and proceed with the download.
3. Run the installer accepting the defaults.
7

GeoServer User Manual, Release 1.7.4
Warning: If a Java Runtime Environment (JRE) is already installed on the system it may be desirableto disable the JRE that comes with the JDK. This can be done on the Custom Setup screen of the installer.
8 Chapter 2. Installation

GeoServer User Manual, Release 1.7.4
1. Create a new environment variable named JAVA_HOME and set it to the location of the JDK installedin the previous step.
2.1.2 Linux
Warning: Many Linux distributions come with a JDK pre installed. While theoretically GeoServer willrun on any Java virtual machine it is strongly recommended that a Sun virtual machine is used.
2.1.3 Mac OS X
On Mac OS X systems Apple provides a JDK so no installation is necessary.
2.2 Installing GeoServer
GeoServer installation can take one of two forms:
1. Web Archive (WAR) mode inside of an external servlet container such as Tomcat
2. Standalone mode inside of an embedded Jetty container
2.2. Installing GeoServer 9

GeoServer User Manual, Release 1.7.4
Instructions for the WAR mode can be found in the Web Archive section. Instructions for the Standalone modeare dependent on operating system. Following the instructions for below for the target platform.
2.2.1 Windows
1. Visit http://geoserver.org/display/GEOS/Stable.
2. Choose the Windows Installer option and proceed with the download.
3. Run the installer accepting the defaults.
Warning: If you receive the following dialect while running the installer:
It means one of two things. Either:1. A Java JDK is not installed on the system or2. The JAVA_HOME environment variable is not set properly
Proceed to the Installing Java section for instructions.
1. Start GeoServer by navigating from the Start Menu to Programs -> GeoServer 1.7.0 ->Start GeoServer.
2. Visit http://localhost:8080/geoserver in a web browser.
2.2.2 Linux
1. Visit http://geoserver.org/display/GEOS/Stable.
2. Choose the Binary Package option and proceed with the download.
3. From the command line unzip the archive:
% unzip geoserver-1.7.0-bin.zip
4. Start GeoServer by changing directory to geoserver-1.7.0/bin and executing the startup.shscript:
% cd geoserver-1.7.0/bin% sh startup.sh
5. Visit http://localhost:8080/geoserver in a web browser.
2.2.3 Mac OS X
As of 1.7.0 we should have a dmg installer. Update the docs.
10 Chapter 2. Installation

GeoServer User Manual, Release 1.7.4
2.2.4 Web Archive
1. Visit http://geoserver.org/display/GEOS/Stable.
2. Choose the Web Archive option and proceed with the download.
3. Extract the file geoserver.war file from the downloaded archive.
4. Deploy geoserver.war inside the servlet container.
5. Visit http://localhost:8080/geoserver in a web browser.
Note: Replace port 8080 with whatever port the servlet container is configured to listen on.
2.2.5 Post installation
At this point GeoServer should be up and running but it is strongly recommend that some post-install con-figuration is carried out.
Data directory
By default GeoServer is configured to run of an internal data directory. To ensure a smooth upgrade pathwhen installing new versions of GeoServer it is recommended that an external data directory is set up.Proceed to the next section: GeoServer Data Directory.
Server performance
By default GeoServer is not configured for optimal performance. If GeoServer is being run in a productionenvironment in which maximal performance is necessary it is recommended that the default configurationbe changed based on Running In A Production Environment.
2.3 Upgrading GeoServer
2.3.1 Performing a minor upgrade
A minor GeoServer upgrade occurs when moving to a newer version of GeoServer that has a differ-ent “patch” number. For example moving from GeoServer 1.7.0 to 1.7.1, or moving from 1.7.0 to 1.7.4,etc...
For all upgrades it is strongly recommended that GeoServer is running with an external data directory. Seethe :ref: section.
Warning: It is strongly recommend that the GeoServer data directory is backed up before performingany upgrade.
Standalone upgrade
Note: This section applies if GeoServer is being run in Standalone mode and not inside of a servlet con-tainer.
2.3. Upgrading GeoServer 11

GeoServer User Manual, Release 1.7.4
If GeoServer is configured to run with an external data directory and the GEOSERVER_DATA_DIR is setappropriately, then upgrading only involves installing the new GeoServer version. The new version willrecognize the envioronment variable and run accordingly.
If GeoServer is configured to run with an internal data directory then the data directory from the oldinstallation must be copied and overwrite the data directory from the new installation:
% lsgeoserver-1.7.0 geoserver-1.7.1
% rm -rf geoserver-1.7.1/data_dir% cp -R geoserver-1.7.0/data_dir geoserver-1.7.1
Web Archive upgrade
Note: This section applies if GeoServer is being run in Web Archive mode inside of a servlet container orapplication server.
Upgrading GeoServer inside of a servlet container is specific to the container being run. The instructionsbelow describe the generic process but it is important to review the servlet container documentation re-garding web application upgrades.
If GeoServer is configured to run with an external data directory:
1. Undeploy the old GeoServer version.
2. Deploy the new GeoServer version.
If the web application uses the GEOSERVER_DATA_DIR context parameter in the web.xml file to locate thedirectory then perform the following additional steps:
1. Edit web.xml, and point the GEOSERVER_DATA_DIR context parameter to the location of the datadirectory.
2. Restart the GeoServer web application. This step may be unnecessary if the servlet container supportsautomatic reloading upon file modification.
If GeoServer is configured to run with an internal data directory:
Warning: Undeploying the web application will delete the data directory. You must copy the datadirectory to a location external to the web application.
1. Backup the data directory.
2. Undeploy the old geoserver version.
3. Deploy the new geoserver version.
4. Copy the backed up data directory into the web application root over-writting the existing directory.
5. Restart the web application.
Example:
% cp -R /opt/tomcat5/webapps/geoserver/data /backups<<undeploy old version>><<deploy new version>>% rm -rf /opt/tomcat5/webapps/geoserver/data% cp -R /backups/data /opt/tomcat5/webapps/geoserver<<restart web application>>
12 Chapter 2. Installation

GeoServer User Manual, Release 1.7.4
2.3.2 Performing a major upgrade
A minor GeoServer upgrade occurs when moving to a newer version of GeoServer that has a different “mi-nor” number. For example moving from GeoServer 1.6.0 to 1.7.0, or moving from 1.5.5 to 1.7.1, etc...
Performing a major upgrade is the same process as performing a minor upgrade with an additional step.To perform a full upgrade:
1. Follow the steps in the previous section: Performing a minor upgrade.
2. Stop GeoServer.
3. Remove the Geotools directory from the operating system temporary file system storage.
Note: On Windows systems this directory is C:\Documents and Settings\<user>\LocalSettings\Temp. On Linux and Mac OS systems this directory is usually /tmp.
4. Restart GeoServer.
2.3. Upgrading GeoServer 13

GeoServer User Manual, Release 1.7.4
14 Chapter 2. Installation

CHAPTER 3
Getting Started
This section of the user guide contains a number of tutorials designed to get new GeoServer users perform-ing common tasks quickly and easily.
3.1 Web Administration Interface Quickstart
The Web Administration Tool is a web based used to configure all aspects of GeoServer, fromadding data to tweaking service settings. The web admin tool is accessed via web browser athttp://<host>:<port>/geoserver. http://localhost:8080/geoserver in a default installation runningon the local host.
15

GeoServer User Manual, Release 1.7.4
3.1.1 Logging in
In order to change any server settings a user must first be authenticated. Any time the user navigates toConfig from the main page authentication will take place.
Note: The default adminstrator username is “admin”, and the default password is “geoserver”. To changethese defaults see the :ref: section.
3.1.2 Submit-Apply-Save workflow
Making a change to server configuration with the web admin tool follows a three phase process:
1. Submit the page.
At this point the change has been sent to the server, but not applied to the GeoServer instance.
2. Apply the change.
16 Chapter 3. Getting Started

GeoServer User Manual, Release 1.7.4
Once the change has been applied it is live. However if GeoServer is shutdown the change will notpersist.
3. Save the change.
Saving persists all applied changes to disk so that the change is realized on subsequent GeoServerstartups.
3.1.3 Map Preview
The map preview tool provides a built-in OpenLayers map for each layer being published by a GeoServerinstance. It can be a useful tool for verifying the configuration of a particular layer, or as a means to explorea layer visually.
The map preview tool is found by navigating to the Demo section from the main Welcome page and selectingMap Preview.
3.1. Web Administration Interface Quickstart 17

GeoServer User Manual, Release 1.7.4
3.1.4 Sample request tool
The sample request tool provides a form based interface for executing requests against GeoServer. It can bea useful tool for experimenting with various GET and POST requests.
The sample request tool is found by navigating to the Demo section from the main Welcome page andselecting Sample Requests.
As well as allowing the user to specify request, the sample request tool also provides a set of “pre-canned”requests. These requests originate from the demo directory inside of the GeoServer data directory.
3.2 Adding a Shapefile
This tutorial walks through the steps of publishing a Shapefile with GeoServer.
Note: This tutorial assumes that GeoServer is running on http://localhost:8080/geoserver.
18 Chapter 3. Getting Started

GeoServer User Manual, Release 1.7.4
3.2.1 Getting started
1. Download the zip file nyc_roads.zip. It contains a shapefile with a subset of roads from New YorkCity that will be used during in this tutorial.
2. Unzip nyc_roads.zip into <GEOSERVER_DATA_DIR>/data where GEOSERVER_DATA_DIR is theroot of the GeoServer data directory. Unzipping the archive will result in the following four files:
nyc_roads.shpnyc_roads.shxnyc_roads.dbfnyc_roads.prj
3.2.2 Create a new data store
The first step is to create a data store for the Shapefile. The data store tells GeoServer how the shapefileshould be loaded, in particular where it is located.
1. In a web browser navigate to http://localhost:8080/geoserver.
2. Navigate to Config->Data->DataStores.
3. Create a new data store by clicking the New link.
3.2. Adding a Shapefile 19

GeoServer User Manual, Release 1.7.4
4. Select Shapefile from the drop down and enter “nyc_roads_shapefile” in the text field. Then clickthe New button.
5. Specify the Shapefile location by entering file:data/nyc_roads.shp in the url text field. Thenclick the Submit button.
6. Click the Apply button located in the upper left hand corner of the page.
20 Chapter 3. Getting Started

GeoServer User Manual, Release 1.7.4
3.2.3 Configure the feature type
The next step is to configure the feature type for the Shapefile. The feature type tells GeoServer how theshapefile should be published.
1. Set the style by selecting line from the Style drop down list.
2. Generate the bounds by clicking the Generate button.
3. Scroll to the bottom of the and click the Submit button.
4. Finalize changes by clicking the Apply button in the upper left hand corner of the page.
3.2. Adding a Shapefile 21

GeoServer User Manual, Release 1.7.4
22 Chapter 3. Getting Started

GeoServer User Manual, Release 1.7.4
3.2.4 Preview the Layer
The final step is to verify that the Shapefile has been published properly. To do this Map Preview will beused.
Navigate to the map preview and select the topp:nyc_roads link.
If the shapefile was added properly the result should be an OpenLayers map:
3.3 Adding a PostGIS Table
This tutorial walks through the steps of publishing a PostGIS table with GeoServer.
Note: This tutorial assumes that GeoServer is running on http://localhost:8080/geoserver.
Note: This tutorial assumes PostGIS has been previously installed on the system.
3.3.1 Getting started
1. Download the zip file nyc_buildings.zip. It contains a PostGIS dump of a subset of buildings fromNew York City that will be used during in this tutorial.
2. Create a PostGIS database called “nyc”. This can be done with the following command line:
3.3. Adding a PostGIS Table 23

GeoServer User Manual, Release 1.7.4
24 Chapter 3. Getting Started

GeoServer User Manual, Release 1.7.4
createdb -T template_postgis nyc
If the PostGIS install is not set up with the “postgis_template” then the following sequence of com-mands will perform the equivalent:
...
3. Unzip nyc_buildings.zip to some location on the file system. This will result in the filenyc_buildings.sql.
4. Import nyc_buildings.sql into the nyc database:
psql -f nyc_buildings.sql nyc
3.3.2 Create a new data store
The first step is to create a data store for the PostGIS database “nyc”. The data store tells GeoServer how toconnect to the database.
1. In a web browser navigate to http://localhost:8080/geoserver.
2. Navigate to Config->Data->DataStores.
3. Create a new data store by clicking the New link.
4. Select PostGIS from the drop down and enter “nyc_postgis” in the text field. Then click the Newbutton.
5. Specify the PostGIS database connection parameters:
host localhostport 5432schema publicdatabase nyc
Warning: The username and password parameters specific to the user who created the postgisdatabase. Depending on how PostgreSQL is configured the password parameter may be unnec-essary.
6. Click the Submit button.
7. Click the Apply button located in the upper left hand corner of the page.
3.3. Adding a PostGIS Table 25

GeoServer User Manual, Release 1.7.4
26 Chapter 3. Getting Started

GeoServer User Manual, Release 1.7.4
3.3. Adding a PostGIS Table 27

GeoServer User Manual, Release 1.7.4
3.3.3 Create a new feature type
The next step is to configure the feature type for the nyc_buildings table. The feature type tells GeoServerhow the table should be published.
1. Set the style by selecting polygon from the Style drop down list.
2. Generate the bounds by clicking the Generate button.
3. Scroll to the bottom of the and click the Submit button.
4. Finalize changes by clicking the Apply button in the upper left hand corner of the page.
28 Chapter 3. Getting Started

GeoServer User Manual, Release 1.7.4
3.3.4 Preview the layer
The final step is to verify that the table has been published properly. To do this Map Preview will beused.
Navigate to the map preview and select the topp:nyc_buildings link.
If the table was added properly the result should be an OpenLayers map:
3.4 Styling a Map
When a new dataset is added to GeoServer the layer for it is usually assigned a very basic style. To properlyvisualize the data a style specific to that data must be created.
3.4. Styling a Map 29

GeoServer User Manual, Release 1.7.4
30 Chapter 3. Getting Started

GeoServer User Manual, Release 1.7.4
This tutorial walks through the steps to create a new style in GeoServer and provides an introduction to theStyled Layer Descriptor (SLD) styling language.
Note: It is assumed that the tutorials Adding a Shapefile and Adding a PostGIS Table have been com-pleted.
3.4.1 Getting started
Before continuing with this tutorial it is strongly recommended that the section Introduction to SLD be firstread.
3.4.2 Creating a new style
3.4. Styling a Map 31

GeoServer User Manual, Release 1.7.4
32 Chapter 3. Getting Started

CHAPTER 4
GeoServer Data Directory
The GeoServer data directory is the location on the file system where GeoServer stores all of its configuration.This configuration defines such things as: What data is served by GeoServer? Where is that data is located?How should services such as WFS and WMS interact with and server that data? And more. The datadirectory also contains a number of support files used by GeoServer for various purposes.
To learn more about the structure of the GeoServer data directory continue onto the Introduction to the DataDirectory section. Or to learn how to create a directory for a GeoServer installation jump to the Creating aNew Data Directory section.
4.1 Introduction to the Data Directory
The following figure shows the structure of a “vanilla” GeoServer data directory:
data_directory/catalog.xmlservices.xmlcoverages/data/demo/featureTypes/palettes/plugIns/security/styles/templates/user_projections/www/
4.1.1 catalog.xml and services.xml
The catalog.xml file contains a list of all the data sources that GeoServer is configured to serve. It containsreferences to shapefiles, PostGIS databases, GeoTIFF files, and many other types of data. The catalog filealso contains other information such as a set of namespaces used by the WFS, and a set of SLD styles usedby the WMS.
catalog.xml is a XML file which has the following format:
33

GeoServer User Manual, Release 1.7.4
<catalog><datastores>...
</datastores>
<formats>...
</formats>
<namespaces>...
</namespaces>
<styles>...
</styles></catalog>
The services.xml file contains all service level configuration. Among many things this validation optionsfor the WFS, image rendering parameters for the WMS, etc... The services file contains an entry for eachservice published by GeoServer. This currently includes a WMS, WFS, and WCS entry.
services.xml is a XML file which has the following format:
<services><service type="WMS">..
</service><service type="WFS">..
</service><service type="WCS">..
</service></services>
4.1.2 coverages and featureTypes
The coverages and featureTypes directories contains metadata about “layers” which arepublished by GeoServer. A vector layer corresponds to the featureTypes directory, and araster layer corresponds to the coverages directory. The term layer refers to both types.
For each layer published by GeoServer a sub-directory is created under the coverages or featureTypesdirectory, depending on if the layer is raster or vector based. The following figure shows the contains of thetwo respective directories from the data directory of a vanilla GeoServer installation:
coverages/arc_sample/img_sample/img_sample2_Pk50095/mosaic_sample/sfDem_dem/
featureTypes/DS_giant_polygon_giant_polygon/
34 Chapter 4. GeoServer Data Directory

GeoServer User Manual, Release 1.7.4
DS_poi_poi/DS_poly_landmarks_poly_landmarks/DS_tiger_roads_tiger_roads/sfArchsites_archsites/sfBugsites_bugsites/sfRestricted_restricted/sfRoads_roads/sfStreams_streams/states/tasmania_cities/tasmania_roads/tasmania_state_boundaries/tasmania_water_bodies/
Each sub-directory contains a file named info.xml which contains metadata about the layer. Such meta-data includes:
• The spatial reference system or “projection” of the dataset
• The spatial extent of the dataset
• The default style used by the WMS when rendering the layer
TODO: document info.xml in more detail TODO: write a “todo” role extension :)
4.1.3 data
Not to the confused with the “GeoServer data directory” itself, the data directory is a location where actualdata can be stored. This directly is commonly used to store shapefiles and raster files but can be used forany data that is file based.
The main benefit of storing data files inside of the data directory is portability. Consider a shapefilelocated external to the data directory at a location C:\gis_data\foo.shp. The datastore entry incatalog.xml for this shapefile would like the following:
<datastore id="foo_shapefile"><connectionParams>
<parameter name="url" value="file://C:/gis_data/foo.shp" /></connectionParams>
</datastore>
Now consider trying to port this data directory to another host running GeoServer. The problem exists inthat the location C:\gis_data\foo.shp probably does not exist on the second host. So either the filemust be copied to the new host, or catalog.xml must be changed to reflect a new location.
Such steps can be avoided by storing foo.shp inside of the data directory. In such a case the datastoreentry in catalog.xml becomes:
<datastore id="foo_shapefile"><connectionParams><parameter name="url" value="file:data/foo.shp"/>
</connectionParams></datastore>
The value attribute is re-written to be relative. In this way the entire data directory can be archived, copiedto the new host, un-archived, and used directly with no additional changes.
4.1. Introduction to the Data Directory 35

GeoServer User Manual, Release 1.7.4
4.1.4 demo
The demo directory contains files which define the sample requests available in the Sample Request Tool(http://localhost:8080/geoserver/demoRequest.do). For more information see the Sample request tool sec-tion for more information.
4.1.5 palettes
The palettes directory is used to store pre-computed Image Palettes. Image palettes are used by theGeoServer WMS as way to reduce the size of produced images while maintaining image quality.
4.1.6 security
The security directory contains all the files used to configure the GeoServer security subsystem. Thisincludes a set of property files which define access roles, along with the services and data each role is autho-rized to access. See the Security section for more information.
4.1.7 styles
The styles directory contains a number of Styled Layer Descriptor (SLD) files which contain styling in-formation used by the GeoServer WMS. For each file in this directory there is a corresponding entry incatalog.xml:
<style id="point_style" file="default_point.sld"/>
See the Styling for more information about styling and SLD .
4.1.8 templates
The template directory contains files used by the GeoServer templating subsystem. Templates are used tocustomize the output of various GeoServer operations.
4.1.9 user_projections
The user_projections directory contains a single file called epsg.propertieswhich is used to definecustom spatial reference systems which are not part of the official EPSG database.
4.1.10 www
The www directory is used to allow GeoServer to act like a regular web server and serve regular files. Whilenot a replacement for a full blown web server the www directory can be useful for serving OpenLayers mapapplications.
36 Chapter 4. GeoServer Data Directory

GeoServer User Manual, Release 1.7.4
4.2 Creating a New Data Directory
The easiest way to create a new data directory is to copy one that comes with a standard GeoServer instal-lation.
If GeoServer is running in Standalone mode the data directory is located at <installationroot>/data_dir.
Note: On Windows systems the <installation root> is located at C:\Program Files\GeoServer1.7.0.
If GeoServer is running in Web Archive mode inside of a servlet container, the data directory is located at<web application root>/data.
Once the data directory has been found copy it to a new external location. To point a GeoServer instance atthe new data directory proceed to the next section Setting the Data Directory.
4.3 Setting the Data Directory
Setting up a GeoServer data directory is dependent on the type of GeoServer installation. Follow the in-structions below specific to the target platform.
4.3.1 Windows
On Windows platforms the location of the GeoServer data directory is controlled by theGEOSERVER_DATA_DIR environment variable.
Note: When the GEOSERVER_DATA_DIR environment variable is not set, the directory data_dir underthe root of the GeoServer installation is used.
To set the GEOSERVER_DATA_DIR:
On Windows XP systems:
1. From the Desktop or Start Menu right-click the My Computer icon and select Properties.
2. On the resulting dialog select the Advanced tab and click the Environment Variables button.
3. Click the New button and create a environment variable called GEOSERVER_DATA_DIR and set it tothe desired location.
4.2. Creating a New Data Directory 37

GeoServer User Manual, Release 1.7.4
On Windows Vista systems:
4.3.2 Linux
On Linux platforms the location of the GeoServer data directory is controlled by theGEOSERVER_DATA_DIR environment variable. Setting the variable can be achieved with the follow-ing command (in a bash shell):
% export GEOSERVER_DATA_DIR=/var/lib/geoserver_data
Place the command in the .bash_profile or .bashrc file (again assuming a bash shell). Ensure that thisdone for the user GeoServer will be run by.
4.3.3 Mac OS X
4.3.4 Web Archive
When running GeoServer inside of a servlet container the data directory can be specified in a number ofways. The recommended method is to set a servlet context parameter. An alternative is to set a Java SystemProperty.
38 Chapter 4. GeoServer Data Directory

GeoServer User Manual, Release 1.7.4
Servlet context parameter
Servlet context parameter’s are specified in the WEB-INF/web.xml file for the GeoServer applica-tion:
<web-app>...<context-param><param-name>GEOSERVER_DATA_DIR</param-name><param-value>/var/lib/geoserver_data</param-value>
</context-param>...
</web-app>
Java system property
Depending on the servlet container used it is also possible to specify the data directory location with aJava System Property. This method can be useful during upgrades, as it prevents the need to set the datadirectory on every single upgrade.
Warning: Using a system property will typically set the property for all applications running in theservlet container, not just GeoServer.
Setting the Java System Property is dependent on the servlet container.
In Tomcat:
Edit the file bin/setclasspath.sh under the root of the Tomcat installation. Specify theGEOSERVER_DATA_DIR system property by setting the CATALINA_OPTS variable:
CATALINA_OPTS="-DGEOSERVER_DATA_DIR=/var/lib/geoserver_data"
In Glassfish:
Edit the file domains/<<domain>>/config/domain.xml under the root of the Glassfish installation,where <<domain>> refers to the domain that the GeoServer web application is deployed under. Add a<jvm-options> inside of the <java-config> element:
...<java-config>
...<jvm-options>-DGEOSERVER_DATA_DIR=/var/lib/geoserver_data</jvm-options>
</java-config>...
4.3. Setting the Data Directory 39

GeoServer User Manual, Release 1.7.4
40 Chapter 4. GeoServer Data Directory

CHAPTER 5
Web Administration Interface
5.1 Interface basics
The Web Administration Interface is a easy-to-use, web-based graphical interface for viewing and config-uring GeoServer.
5.1.1 Accessing
By default, GeoServer will start a web server on localhost at port 8080 accessible by the followingURL:
http://localhost:8080/geoserver
Note: How to change this?
When correctly configured, the welcome page will show up in your browser.
Note: Image of main page here
5.1.2 Welcome page
The Welcome page contains lots of information at a glance, in the form of the health bars on the left sideof the page. These colored bars will show graphically any misconfigurations of the WFS, WMS, and WCSaspects of GeoServer (if applicable).
Warning: Add description of what the bar colors mean
The welcome page contains many links for through various areas of the GeoServer configuration. There arealso externals links to the GeoServer homepage at http://geoserver.org .
Handy links are available to the WCS GetCapabilities, WFS GetCapabilities, and WMS GetCapabilities doc-uments. Also, a quick link to the SRS List, a listing of all projections accesible from within GeoServer.
The majority of the configuration settings are contained in three menu trees, the Admin menu, Config menu,and Demo menu.
41

GeoServer User Manual, Release 1.7.4
5.2 Admin menu
The Admin menu contains information about the currently running GeoServer. The information displayedis:
Figure 5.1: Figure 1: The Admin menu
Option DescriptionLocksConnectionsMemoryVersion of JVMJAI is availableJAI mem capacityJAI mem usedJAI mem thresholdJAI tile threadsJAI tile priority
Also available are diagnostic links.
Option DescriptionFree LocksFree MemoryFree JAI Memory
42 Chapter 5. Web Administration Interface

GeoServer User Manual, Release 1.7.4
5.3 Config menu
5.3.1 Security and Making Changes
Logging In
When first navigating to the Config menu, you will be asked to log in. This security measure preventsunauthorized persons from making changes to GeoServer. The default username and password is adminand geoserver. These can be changed only by editing the security/users.properties file in theGeoServer Data Directory.
Figure 5.2: Login screen
Enter your username and password in the form, and click Submit. You may also check the box that saysRemember my login on this computer in order to prevent having to log in subsequently (although thissetting is specific only to the computer, and will not globally affect security).
Apply, Save, Load
Note: Talk about Apply, Save, Load here!
5.3. Config menu 43

GeoServer User Manual, Release 1.7.4
Figure 5.3: Config menu
5.3.2 Server
The Server Configuration page, accessed from the Server link, is where global server settings are made.
Option DescriptionMaximum FeaturesVerboseVerboseExceptionsNumber of DecimalsCharacter SetProxy base URLLogging ProfileSuppress StdOut loggingLog LocationJAI mem capacityJAI mem thresholdJAI tile threadsJAI tile priorityJAI cache recyclingJAI Image-I/O CachingJAI JPEG native accelerationJAI PNG native accelerationJAI Mosaic operation native accelerationTile Cache
This page also has space for contact information. This information is contained in the capabilities docu-ments and will be publicly accessible.
OptionContact PersonOrganizationPositionAddress TypeAddressCityState/ProvincePostal CodeCountryPhone NumberFax NumberEmail Address
44 Chapter 5. Web Administration Interface

GeoServer User Manual, Release 1.7.4
Figure 5.4: Server Configuration page
5.3. Config menu 45

GeoServer User Manual, Release 1.7.4
Figure 5.5: Server Configuration page, continued
46 Chapter 5. Web Administration Interface

GeoServer User Manual, Release 1.7.4
5.3.3 WCS
This section is for configuring the Web Coverage Service in GeoServer.
Figure 5.6: WCS Configuration page
Contents
The WCS Contents page allows the WCS to be enabled or disabled. When disabled, WCS requests will notbe processed. The Online Resource box is a URL which contains information relevant to the WCS.
Figure 5.7: WCS Contents page
Description
The WCS Description page is where information about the WCS is populated. This information is publiclyavailable via the WCS capabilities document.
5.3. Config menu 47

GeoServer User Manual, Release 1.7.4
Figure 5.8: WCS Description page
48 Chapter 5. Web Administration Interface

GeoServer User Manual, Release 1.7.4
Option DescriptionNameTitleAccess ConstraintsFeesMaintainerKeywordsAbstract
CoveragePlugins
The WCS CoveragePlugins page displays a list of all the coverage formats supported in GeoServer. Addi-tional coverage formats can be supported by installing extensions. Please see the section on Working withData for information on other formats.
Figure 5.9: WCS CoveragePlugins page
5.3.4 WMS
This section is for configuring the Web Map Service in GeoServer.
Contents
The WMS Contents page allows the WMS to be enabled or disabled. When disabled, WCS requests will notbe processed. The Online Resource box is a URL which contains information relevant to the WCS.
The Limited Capabilities CRS List is a box listing of the supported spatial reference systems (SRS).GeoServer supports a large amount of SRSs, and a list of them is contained in the WMS capabilities docu-ment, which can make the document very long. By default, this box is empty, which means that GeoServerwill return all supported SRS. By populating this box, only those specifically mentioned in the box will besupported (and contained in the WMS capabilities document).
5.3. Config menu 49

GeoServer User Manual, Release 1.7.4
Figure 5.10: WMS Configuration page
Figure 5.11: WMS Contents page
50 Chapter 5. Web Administration Interface

GeoServer User Manual, Release 1.7.4
The Base Maps section is where layer groups are configured. Layer groups are collections of WMS layersthat can be conveniently referenced as one.
The page displays a list of currently configured layer groups. The configuration options for each layergroup are:
Option DescriptionLayer-groupName
The name of the layer group.
Base MapLayers
A list of layers comprising the layer group, separated by commas.
Base MapStyles
The style used for the layer group. If blank, the layers will use their defaultconfigured styles.
SRS The projection to use for the layer group.Envelope The bounding box for the layer group. Enter coordinates, or click the GEnerate
button to automatically generate them.
To create a new layer group, click the Add New Layer-Group button.
Description
The WMS Description page is the area where information about the WMS is populated. This informationis publicly available via the WFS capabilities document.
Option DescriptionNameTitleAccess ConstraintsFeesMaintainerKeywordsAbstract
Rendering
The WMS Rendering page has various options for how to generate WMS tiles. The SVG Rendering optiondoes WHAT. The Interpolation does WHAT.
The other options concern watermarking. CONTINUE.
Note: Obviously, the info above needs to be fleshed out.
5.3.5 WFS
This section is for configuring the Web Feature Service in GeoServer.
Contents
The WFS Contents page allows for configuration of the WFS. The WFS can be enabled or disabled here.When disabled, WFS requests will not be processed. There are three other checkboxes: srsName as XMLwhich does WHAT, Strict CITE Test Conformance, which does WHAT, and Generate feature boundswhich does WHAT. The Service Level determines WHAT. The Online Resource box is a URL which con-tains information relevant to the WFS.
5.3. Config menu 51

GeoServer User Manual, Release 1.7.4
Figure 5.12: WMS Description page
52 Chapter 5. Web Administration Interface

GeoServer User Manual, Release 1.7.4
Figure 5.13: WMS Rendering page
Figure 5.14: WFS Configuration page
5.3. Config menu 53

GeoServer User Manual, Release 1.7.4
Note: Fill in descriptions of the above, obviously.
Figure 5.15: WFS Contents page
Description
The WFS Description page is the area where information about the WFS is populated. This information ispublicly available via the WFS capabilities document.
Option DescriptionNameTitleAccess ConstraintsFeesMaintainerKeywordsAbstract
Validation
Note: Description on Validation
Note: More screenshots of Validation needed
54 Chapter 5. Web Administration Interface

GeoServer User Manual, Release 1.7.4
Figure 5.16: WFS Description page
5.3. Config menu 55

GeoServer User Manual, Release 1.7.4
Figure 5.17: WFS Validation page
5.3.6 Data
This section is for configuring your data. The majority of configuration of GeoServer is done in this sec-tion.
Namespace
A namespace is a container which is used to organize other items such as datastores and featuretypes. InGeoServer, a namespace is often used to group similar layers together. Layers are often referred to by theirnamespace, a colon, and the featuretype. (Ex: topp:states) Two different featuretypes having the same namecan exist as long as they are in different namespaces. (Ex: ns1:mylayer, ns2:mylayer)
On this page, you can register a new namespace, edit (configure) an existing namespace, or delete (unreg-ister) a namespace. You can also set the default namespace.
New
The New page allows new namespaces to be created. Enter a name, and click Submit to edit the newnamespace.
Edit
The Edit page allows new or existing namespaces to be configured. Enter a URI (Uniform Resource Indi-cator). This is a unique identifier, often just a URL. Each namespace must have a unique URI. You can canthis value for Prefix, but it is usually left to be the same as the name of the namespace.
56 Chapter 5. Web Administration Interface

GeoServer User Manual, Release 1.7.4
Figure 5.18: Namespace Configuration page
Figure 5.19: New Namespace page
5.3. Config menu 57

GeoServer User Manual, Release 1.7.4
Figure 5.20: Edit Namespace page
Coveragestores
A coveragestore is a file or group of files that contain one or more coverages (raster data). It is necessary toregister a coveragestore in GeoServer before any coverages from that coveragestore can be loaded.
Figure 5.21: Coveragestore Configuration page
On this page, you can register a new coveragestore, edit (configure) an existing coveragestore, or delete(unregister) a coveragestore.
New
The New page is where new coveragestores are loaded. Select an option under Coverage Data Set Descrip-tion and name the coveragestore in the box entitled Coverage Data Set ID. Click Submit to continue. Thenext page will configure the coveragestore. The exact contents of this page will depend on the specific for-mat chosen, so please see the section on Working with Data for information on specific data formats.
58 Chapter 5. Web Administration Interface

GeoServer User Manual, Release 1.7.4
Note: GeoServer supports many formats natively, but many more can be added through extensions. Pleasesee the section on Working with Data for information on specific data formats.
Figure 5.22: New Coveragestore page
Edit
The Edit page is where existing coveragestores can be configured. The exact contents of this page willdepend on the specific format chosen, so please see the section on Working with Data for information onspecific data formats.
Datastores
A datastore is a file, group of files, or database that contains featuretypes (vector data). It is necessary toregister a datastore in GeoServer before any featuretypes can be loaded.
On this page, you can register a new datastore, edit (configure) an existing datastore, or delete (unregister)a datastore.
New
The New page is where new datastores are loaded. Select an option under Feature Data Set Descriptionand name the datastore in the box entitled Feature Data Set ID. Click Submit to continue. The next pagewill configure the datastore. The exact contents of this page will depend on the specific format chosen, soplease see the section on Working with Data for information on specific data formats.
Note: GeoServer supports many formats natively, but many more can be added through extensions. Pleasesee the section on Working with Data for information on specific data formats.
Edit
The Edit page is where existing datastores can be configured. The exact contents of this page will dependon the specific format chosen, so please see the section on Working with Data for information on specific dataformats.
5.3. Config menu 59

GeoServer User Manual, Release 1.7.4
Figure 5.23: Edit Coveragestore page
Figure 5.24: Datastore Configuration page
60 Chapter 5. Web Administration Interface

GeoServer User Manual, Release 1.7.4
Figure 5.25: New Datastore page
Figure 5.26: Edit Datastore page
5.3. Config menu 61

GeoServer User Manual, Release 1.7.4
Style
Styles are methods of rendering geospatial data. Styles for GeoServer are written in Styled Layer Descriptor(SLD), a subset of XML. Please see the section on Styling for more information on working with styles.
Figure 5.27: Style Configuration page
On this page, you can register or create a new style, edit (configure) an existing style, or delete (unregister)a style.
New
Create a new style here. Enter the name of the style and click New to go to the Edit page.
Figure 5.28: New Style page
62 Chapter 5. Web Administration Interface

GeoServer User Manual, Release 1.7.4
Edit
The Edit page presents two options for entering an SLD. There is the option of typing/pasting in SLDcode, or selecting and uploading a local file that contains the SLD. There are two checkboxes, one to FullyValidate against the SLD schema and to Toggle Editor. The first box, when checked, ensures that the codeis fully compliant with the SLD schema. The second box toggles between two different text editors in thewindow.
FeatureTypes
A featuretype is a data layer that contains geographic features in a vector format. Featuretypes are con-tained inside datastores, which need to be loaded prior to registering the featuretype.
On this page, you can register a new featuretype, edit (configure) an existing featuretype, or delete (unreg-ister) a featuretype.
New
Register a new featuretype on this page. Select an available featuretype from the list, click New and you willbe taken to the featuretype Edit page. (If the featuretype in question is not listed, make sure the datastorethat contains the featuretype is properly registered.)
Edit
Note: Add description of FT edit here!
Coverages
A coverage is a data layer that contains geographic data in a raster format. Coverages are within coverage-stores, which need to be registered prior to registering the coverage.
On this page, you can register a new coverage, edit (configure) an existing coverage, or delete (unregister)a coverage.
New
Register a new coverage on this page. Select an available coverage from the list, click New and you will betaken to the coverage Edit page. (If the coverage in question is not listed, make sure the coveragestore thatcontains the coverage is properly registered.)
Edit
Note: Add description of Coverage edit here!
5.3. Config menu 63

GeoServer User Manual, Release 1.7.4
Figure 5.29: Edit Style page
64 Chapter 5. Web Administration Interface

GeoServer User Manual, Release 1.7.4
Figure 5.30: Featuretype Configuration page
Figure 5.31: New Featuretype page
5.3. Config menu 65

GeoServer User Manual, Release 1.7.4
Figure 5.32: Edit Featuretype page
Figure 5.33: Coverage Configuration page
66 Chapter 5. Web Administration Interface

GeoServer User Manual, Release 1.7.4
Figure 5.34: New Coverage page
5.4 Demo menu
The Demo menu contains helpful links to various demos and information pages regarding GeoServer andits various features.
5.4.1 Map Preview
The Map Preview page is a listing of all registered featuretypes and layer groups configured in GeoServer.The page has quick links to output these layers in various formats.
Note: These are not all fo the output formats available through GeoServer. Please see the section on Servicesfor more information on output formats.
The output formats accessible from this page are:
Option DescriptionOpenLayersGenerates a simple OpenLayers application.KML Uses the KML reflector to output KML (Keyhole Markup Language).GeoRSS Outputs GeoRSS, a geographic form of an RSS feed.PDF Takes a snapshot of the default WMS output and creates a document in PDF (Portable
Document Format).SVG Takes a snapshot of the default WMS output and creates a document in SVG (Scalable
Vector Graphics) format.
OpenLayers output
The OpenLayers output has some advanced filters that are not available when using a standalone version ofOpenLayers. The application that is generated contains a header which has options for easy configurationof display.
To toggle this menu, click on the icon at the top left of the OpenLayers window.
The possible configuration options are:
5.4. Demo menu 67

GeoServer User Manual, Release 1.7.4
Figure 5.35: Edit Coverage page
68 Chapter 5. Web Administration Interface

GeoServer User Manual, Release 1.7.4
Figure 5.36: Demo menu
5.4. Demo menu 69

GeoServer User Manual, Release 1.7.4
Figure 5.37: Map Preview page
70 Chapter 5. Web Administration Interface

GeoServer User Manual, Release 1.7.4
Figure 5.38: OpenLayers demo
Figure 5.39: Customizing the OpenLayers demo application
5.4. Demo menu 71

GeoServer User Manual, Release 1.7.4
Option DescriptionTiling Sets whether the window is populated with a single tile (redrawn with every refresh), or as
a grid of tiles (refreshed only as necessary).Antialias Sets the antialias of the tiles. Options are Full, Text Only, and Disabled.Format Sets the image format of the tiles. Options are PNG 24bit, PNG 8bit, GIF, and JPEG.Width/HeightThese values set the width and height of the OpenLayers application window. If set to
Auto, the application will determine tha optimal size.Fliter Allows custom queries to run on the dataset. Options are CQL, OGC, and FeatureID. The
specific query should be entered in the box next to this field.
5.4.2 Documentation
This is a link to the online GeoServer documentation.
Warning: These demos may change, so this section is unpopulated for now.
5.4.3 Overlay on Google Maps
5.4.4 Sample Requests
5.4.5 WFS-T demo
5.4.6 GeoRSS
5.4.7 WMS Example
72 Chapter 5. Web Administration Interface

CHAPTER 6
Working with Data
This section discusses the various types of data sources that can be accessed from GeoServer.
6.1 Shapefile
Note: While GeoServer has good support for the Shapefile format, it is not the recommended format ofchoice in a production environment. Databases such as PostGIS are more suitable in production and offerbetter performance and scalability.
6.1.1 Adding a Shapefile
As with all vector formats, adding a Shapefile to GeoServer involves adding a new data store through theweb administration tool. This process is described step by step in the Adding a Shapefile tutorial.
6.1.2 Shapefile options
url The location of the Shapefile. See the section below about Relative vs absolutefile paths.
create spatialindex
A flag which indicates if a spatial index should be created for the Shapefile.
charset Specifies the character set to use when reading attribute information from theassociated DBF file.
memory mappedbuffer
A flag which indicates wether memory mapped i/o should be used whenreading the shapefile.
6.1.3 Relative vs absolute file paths
When specifying the location of a Shapefile can be given as an absolute path or a relative path. An absolutefile path specifies the location from the root of the file system. For example:
file:C:\gis_data\shapefiles\my_shapefile.shp
73

GeoServer User Manual, Release 1.7.4
Figure 6.1: Configuring a shapefile as a datastore
74 Chapter 6. Working with Data

GeoServer User Manual, Release 1.7.4
A relative file path specifies the location relative to the root of the GeoServer data directory. For exam-ple:
file:data/shapefiles/my_shapefile.shp
6.1.4 Performance considerations
6.1.5 Common problems
6.2 PostGIS
PostGIS is an open source spatial database based on PostgreSQL and is currently the most popular opensource spatial database today. PostGIS was developed by Refractions Research.
6.2.1 Adding a PostGIS database
As with all vector formats, adding a PostGIS database to GeoServer involves adding a new data storethrough the web administration tool. This process is described step by step in the Adding a PostGIS Tabletutorial.
6.2.2 PostGIS options
host The database host.port The port the database is listening for connections on. The default is
5432 for PostGIS.schema The database schema to load tables from. The default for PostGIS is
the public schema.user The name of the user to connect to the database as.password The password to use when connecting to the database. Left blank for
no password.wkb_enabled Specifies wether Well Known Binary (WKB) or Well Known Text
(WKT) should be used when reading and writing geometry objects toand from PostGIS. It is recommended that WKB be used as it is fasterand more accurate than WKT.
loose bbox Flag which controls how bounding box comparisons are madeagainst geometries in the database. See the Using loose bounding boxsection below for more information.
estimated_extent Flag affecting how table bounds are calculated. See the Usingestimated extent section below.
max connectionsmin connectionsvalidate connections
Connection pool configuration parameters. See the DatabaseConnection Pooling section for details.
6.2.3 Using loose bounding box
When set only the bounding box of a geometry is used which results in a significant performance gain. Thedownside is that some geometries may be considered inside of a bounding box when they are technicallynot.
6.2. PostGIS 75

GeoServer User Manual, Release 1.7.4
Figure 6.2: Configuring a PostGIS datastore
76 Chapter 6. Working with Data

GeoServer User Manual, Release 1.7.4
If the primary use of the database is through the WMS this flag can be set as a loss of some accuracy isusually acceptable. However if using with the WFS and making use of BBOX filtering capabilities, this flagshould not be set.
6.2.4 Using estimated extent
When set GeoServer will make use the PostGIS estimated_extent function when calculating the spatialextent of a table. While setting this flag can result in a serious performance gain caution should be takenwhen setting it.
6.2.5 Publishing a PostGIS view
Publishing a view follows the same process as publishing a table. The only additional step is to manuallyensure that the view has an entry in the geometry_columns table.
For example consider a table with the schema:
my_table( id int PRIMARY KEY, name VARCHAR, the_geom GEOMETRY )
Also consider the following view:
CREATE VIEW my_view as SELECT id, the_geom FROM my_table;
Ad this point the table cannot be published by GeoServer. The following step to manually create thegeometry_columns entry is necessary:
INSERT INTO geometry_columns VALUES (’’,’public’,’my_view’,’my_geom‘, 2, 4326, ’POINT’ );
6.2.6 Performance considerations
GEOS
GEOS (Geometry Engine Open Source) is an additional component which optionally can be installed withPostGIS. ...
If PostGIS is installed on Windows via the installer it is automatically included. On other platforms likeLinux it is optional. It is recommended that GEOS be installed in any PostGIS instance used by GeoServeras GeoServer makes use of its functionality when doing spatial operations like intersections. When GEOS isdisabled these operations are performed internally in GeoServer which results in a performance hit.
Spatial indexing
Creating a spatial index on tables with a spatial component (ie geometry column) is strongly recommended.Any table of non-trivial size which does not have a spatial index will be slow to query spatially. ...
6.2. PostGIS 77

GeoServer User Manual, Release 1.7.4
6.2.7 Common problems
Primary keys
The transactional nature of a relational database makes formats such as PostGIS ideal for transactional WFS.However in order to enable the transactional extensions on a table it must have a primary key. Any tablewithout a primary key defined on it is considered as read only.
6.3 Directory
Loading and configuring multiple shapefiles can be a very time consuming process. But if your shape-files all exist in one directory, they can be added in as individual datastores simultaneously by using thedirectory datastore.
Note: While GeoServer has good support for the Shapefile format, it is not the recommended format ofchoice in a production environment. Databases such as PostGIS are more suitable in production and offerbetter performance and scalability.
6.3.1 Adding a directory
Navigate to the new datastore page (Config > Data > Datastores > New) in the Web Administration Interface.In the drop down list for Feature Data Set Description, select Directory of spatial files. Name this datastorein the field marked Feature Data Set ID and click New.
On the next page, select the namespace to use (this will be used as a prefix for each shapefile in the direc-tory), a description (if any), and the path to the directory. This should be one level inside the GeoServerdata directory’s data directory. (Example: file:data/myshpfolder) When done, click Submit. (Applyand Save as you would normally do.)
All of the shapefiles contained in the directory will be registered, but none of them will be available un-til they are individually configured (by going to the Create New FeatureType page at Config > Data >Featuretypes > New).
6.4 External Web Feature Server
6.4.1 Overview
GeoServer has the ability to load data from a remote Web Feature Server (WFS). This is useful if the WFSlacks certain functionality that GeoServer contains. For example, if the WFS is not also a Web Map Server(WMS), data from the WFS can be cascaded through GeoServer to utilize GeoServer’s WMS. If the remoteWFS has a WMS but that WMS cannot output KML, data can be cascaded through GeoServer’s WMS tooutput KML.
6.4.2 Adding an external WFS
To connect to an external WFS, it is necessary to load it as a new datastore. Navigate to the Create NewFeature Data Set page (Config -> Data -> Datastore -> New) and an option for Web Feature Server willbe in the dropdown menu for Feature Data Set Description. Select this option, enter a name in the box forFeature Data Set ID, and click New.
78 Chapter 6. Working with Data

GeoServer User Manual, Release 1.7.4
Figure 6.3: Creating a new datastore from an external WFS
6.4.3 Web Feature Server options
The next page contains configuration options for connecting to the remote WFS. Fill out the form then clickSubmit. To apply the changes, click Apply then Save.
Option Re-quired?
Description
Feature Data Set ID N/A The name of the datastore as set on the previous page.Enabled N/A When this box is checked the datastore will be
available to GeoServerNamespace Yes The namespace associated with this datastore.Description No A description of this datastore.WFSDataStoreFactory:GET_CAPABILITIES_URLYes The URL of the GetCapabilities document of the
remote WFS.WFSDataStoreFactory:PROTOCOL No (T/F):WFSDataStoreFactory:USERNAME No The username to use for authentication with the WFS.WFSDataStoreFactory:PASSWORD No The password associated with the above username for
authentication with the WFS.WFSDataStoreFactory:ENCODING NoWFSDataStoreFactory:TIMEOUT NoWFSDataStoreFactory:BUFFER_SIZENoWFSDataStoreFactory:TRY_GZIP No (T/F):WFSDataStoreFactory:LENIENT No (T/F):WFSDataStoreFactory:MAXFEATURESNo Sets the maximum features for the remote WFS to
return.
You may now add featuretypes as you would normally do, by navigating to the Create New Feature Typepage (Config -> Data -> Featuretype -> New).
Note: Should more info go here, or should this point elsewhere?
6.4. External Web Feature Server 79

GeoServer User Manual, Release 1.7.4
Figure 6.4: Configuring a new datastore from an external WFS
80 Chapter 6. Working with Data

GeoServer User Manual, Release 1.7.4
6.4.4 Performance considerations
6.4.5 Common problems
6.5 ArcSDE
Warning: ArcSDE support is not enabled by default and requires the ArcSDE extension to be installedprior to use. Please see the section on Installing the ArcSDE extension for details.
ESRI’s ArcSDE is a spatial engine that runs on top of a relational database such as Oracle or SQL Server.GeoServer with the ArcSDE extension supports ArcSDE versions 9.2 and 9.3. It has been tested with Oracle10g and Microsoft SQL Server 2000 Developer Edition. The ArcSDE extension is based on the GeoToolsArcSDE driver and uses the ESRI Java API libraries. See the GeoTools ArcSDE page for more technicaldetails.
There are two types of ArcSDE data that can be added to GeoServer: vector and raster.
6.5.1 Vector support
ArcSDE provides efficient access to vector layers, (“featureclasses” in ArcSDE jargon), over a number ofrelational databases. GeoServer can set up featuretypes for registered ArcSDE featureclasses and spatialviews. For versioned ArcSDE featureclasses, GeoServer will work on the default database version, for bothread and write access.
Transactional support is enabled for featureclasses with a properly set primary key, regardless if the fea-tureclass is managed by a user or by ArcSDE. If a featureclass has no primary key set, it will be available asread-only.
6.5.2 Raster support
ArcSDE provides efficient access to multi-band rasters by storing the raw raster data as database blobs,dividing it into tiles and creating a pyramid. It also allows a compression method to be set for the tiled blobdata and an interpolation method for the pyramid resampling.
All the bands comprising a single ArcSDE raster layer must have the same pixel depth, which can be oneof 1, 4, 8, 16, and 32 bits per sample for integral data types. For 8, 16 and 32 bit bands, they may be signedor unsigned. 32 and 64 bit floating point sample types are also supported.
ArcSDE rasters may also be color mapped, as long as the raster has a single band of data typed 8 or 16 bitunsigned.
Finally, ArcSDE supports raster catalogs. A raster catalog is a mosaic of rasters with the same spectralproperties but instead of the mosaic being precomputed, the rasters comprising the catalog are independentand the mosaic work performed by the application at runtime.
Technical Detail StatusCompression methods LZW, JPEGNumber of bands Any number of bands except for 1 and 4 bit rasters (supported for
single-band only).Bit depth for color-mappedrasters
8 bit and 16 bit
Raster Catalogs Any pixel storage type
6.5. ArcSDE 81

GeoServer User Manual, Release 1.7.4
6.5.3 Installing the ArcSDE extension
Warning: Due to licensing requirements, not all files are included with the extension. To install ArcSDEsupport, it is necessary to download additional files. Just installing the ArcSDE extension will haveno effect.
GeoServer files
1. Download the ArcSDE extension from the GeoServer download page.
2. Extract the contents of the archive into the WEB-INF/lib directory of the GeoServer installation.
Required external files
There are three files required that are not packaged with the GeoServer extension:
File Notesjsde_sdk.jar Also known as jsde##_sdk.jar where ## is the version number, such as 92 for
ArcSDE version 9.2jpe_sdk.jar Also known as jpe##_sdk.jar where ## is the version number, such as 92 for
ArcSDE version 9.2icu4j_3_2.jarOnly needed for ArcSDE version 9.2 and newer
The first two files can be downloaded from ESRI’s website or copied from the ArcSDE installation media.To download the JSDE/JPE JAR files from ESRI’s website:
1. Navigate to http://support.esri.com/index.cfm?fa=downloads.patchesServicePacks.listPatches&PID=66
2. Find the link to the latest service pack for your version of ArcSDE
3. Scroll down to Installing this Service Pack -> ArcSDE SDK -> UNIX (regardless of your target OS)
4. Download any of the target files (but be sure to match 32/64 bit to your OS)
5. Open the archive, and extract the appropriate JARs.
Note: The JAR files may be in a nested archive inside this archive.
To download the third file (icu4j_3_2.jar):
1. Navigate to ftp://ftp.software.ibm.com/software/globalization/icu/icu4j/3.2/
2. Download the file icu4j_3_2.jar.
When downloaded, copy all three files to the WEB-INF/lib directory of the GeoServer installation.
After all GeoServer files and external files have been downloaded and copied, restart GeoServer.
6.5.4 Adding an ArcSDE vector datastore
In order to serve vector data layers, it is first necessary to register the ArcSDE instance as a datastore inGeoServer. Navigate to the Create New Feature Data Set page, accessed in the Datastores page in the Configmenu menu of the Web Administration Interface. (From the Welcome page: Config -> Data -> Datastore ->New) and an option for ArcSDE will be in the dropdown menu for Feature Data Set Description. Selectthis option, enter a name in the box for Feature Data Set ID, and click New.
Note: If ArcSDE is not an option in the Feature Data Set Description drop down box, the extension is notproperly installed. Please see the section on Installing the ArcSDE extension.
82 Chapter 6. Working with Data

GeoServer User Manual, Release 1.7.4
Figure 6.5: Creating a new ArcSDE datastore
6.5.5 Configuring an ArcSDE vector datastore
The next page contains configuration options for the ArcSDE vector datastore. Fill out the form then clickSubmit. To apply the changes, click Apply then Save.
Option Re-quired?
Description
Feature DataSet ID
N/A The name of the datastore as set on the previous page.
Enabled N/A When this box is checked the datastore will be available to GeoServerNamespace Yes The namespace associated with the datastore.Description No A description of the datastore.server Yes The URL of the ArcSDE instance.port Yes The port that the ArcSDE instance is set to listen to. Default is 5151.instance No The name of the specific ArcSDE instance, where applicable, depending
on the underlying database.user Yes The username to authenticate with the ArcSDE instance.password No The password associated with the above username for authentication
with the ArcSDE instance.pool.minConnectionsNo Connection pool configuration parameters. See the Database Connection
Pooling section for details.pool.maxConnectionsNo Connection pool configuration parameters. See the Database Connection
Pooling section for details.pool.timeOut No Connection pool configuration parameters. See the Database Connection
Pooling section for details.
You may now add featuretypes as you would normally do, by navigating to the Create New Feature Typepage, accessed from the FeatureTypes page in the Config menu menu of the Web Administration Interface (Fromthe Welcome page: Config -> Data -> Featuretypse -> New).
6.5.6 Adding an ArcSDE raster coveragestore
In order to serve raster layers (or coverages), it is first necessary to register the ArcSDE instance as a cover-agestore in GeoServer. Navigate to the Create New Coverage Data Set page, accessed from the Coverage-stores page in the Config menu menu of the Web Administration Interface (From the Welcome page: Config ->
6.5. ArcSDE 83

GeoServer User Manual, Release 1.7.4
Figure 6.6: Configuring a new ArcSDE vector datastore
84 Chapter 6. Working with Data

GeoServer User Manual, Release 1.7.4
Data -> Coveragestores -> New) and an option for ArcSDE Raster Format will be in the dropdown menufor Coverage Data Set Description. Select this option, enter a name in the box for Coverage Data Set ID,and click New.
Note: If ArcSDE Raster Format is not an option in the Coverage Data Set Description drop down box,the extension is not properly installed. Please see the section on Installing the ArcSDE extension.
Figure 6.7: Creating a new ArcSDE coveragestore
6.5.7 Configuring an ArcSDE raster coveragestore
The next page contains configuration options for the ArcSDE instance. Fill out the form then click Submit.To apply the changes, click Apply then Save.
Option Re-quired?
Description
Coverage DataSet ID
N/A The name of the coveragestore as set on the previous page.
Enabled N/A When this box is checked the coveragestore will be available toGeoServer.
Namespace Yes The namespace associated with the coveragestore.Type No The type of coveragestore. Leave this to say ArcSDE Raster.URL Yes The URL of the raster, of the form
sde://<user>:<pwd>@<server>/#<tableName>.Description No A description of the coveragestore.
You may now add coverages as you would normally do, by navigating to the Create New Coverage Typepage, accessed from the Coverages page in the Config menu menu of the Web Administration Interface (Fromthe Welcome page: Config -> Data -> Coverages -> New).
6.6 Geographic Markup Language (GML)
Geographic Markup Language (GML) is a XML based format for representing vector based spatialdata.
Note: GeoServer does not come built-in with support for GML, it must be installed through an extension.Proceed to Installing the GML extension for installation details.
6.6. Geographic Markup Language (GML) 85

GeoServer User Manual, Release 1.7.4
Figure 6.8: Configuring a new ArcSDE raster coveragestore
86 Chapter 6. Working with Data

GeoServer User Manual, Release 1.7.4
Warning: Currently the GML extension is unmaintained and carries unsupported status. While stillusable, do not expect the same reliability as with other drivers.
6.6.1 Supported versions
Currently GML version 2 is supported.
6.6.2 Installing the GML extension
1. Download the GML extension from the GeoServer download page.
Warning: Ensure the extension matching the version of the GeoServer installation is down-loaded.
2. Extract the contents of the archive into the WEB-INF/lib directory of the GeoServer installation.
6.6.3 Adding a GML file
Once the extension is properly installed GML will show up as an option when creating a new data store.
Figure 6.9: Creating a GML datastore
6.6.4 GML options
url The location of the GML file.
6.6. Geographic Markup Language (GML) 87

GeoServer User Manual, Release 1.7.4
Figure 6.10: Configuring a GML datastore
6.7 MySQL
MySQL is an open source relational database with some limited spatial functionality.
Note: GeoServer does not come built-in with support for MySQL, it must be installed through an extension.Proceed to Installing the MySQL extension for installation details.
Warning: Currently the MySQL extension is unmaintained and carries unsupported status. While stillusable, do not expect the same reliability as with other drivers.
6.7.1 Installing the MySQL extension
1. Download the MySQL extension from the GeoServer download page.
Warning: Ensure the extension matching the version of the GeoServer installation is down-loaded.
2. Extract the contents of the archive into the WEB-INF/lib directory of the GeoServer installation.
6.7.2 Adding a MySQL database
Once the extension is properly installed MySQL will show up as an option when creating a new datastore.
88 Chapter 6. Working with Data

GeoServer User Manual, Release 1.7.4
Figure 6.11: Creating a MySQL datastore
6.7.3 MySQL options
host The mysql server host name or ip address.port The port on which the mysql server is accepting
connections.database The name of the database to connect to.user The name of the user to connect to the mysql database as.password The password to use when connecting to the database.
Left blank for no password.max connectionsmin connectionsvalidate connections
Connection pool configuration parameters. See theDatabase Connection Pooling section for details.
6.8 Oracle
Oracle Spatial and Locator are the spatial extensions of Oracle.
Note: GeoServer does not come built-in with support for Oracle, it must be installed throughan extension. Proceed to Installing the Oracle extension for installation details.
6.8.1 Supported versions
6.8.2 Installing the Oracle extension
1. Download the Oracle extension from the GeoServer download page.
Warning: Ensure the extension matching the version of the GeoServer installation is down-loaded.
2. Extract the contents of the archive into the WEB-INF/lib directory of the GeoServer installation.
6.8. Oracle 89

GeoServer User Manual, Release 1.7.4
Figure 6.12: Configuring a MySQL datastore
90 Chapter 6. Working with Data

GeoServer User Manual, Release 1.7.4
6.8.3 Oracle Call Interface (OCI)
A connection can be established in one of two ways. The standard way to connect to oracle is with theJDBC driver, a completely portable Java library that runs as a thin client on any computer. This is therecommended way to establish an oracle connection..
An alternative is to establish an OCI (Oracle Call Interface) connection. This requires the OCI drivers tobe installed on the same machine as the GeoServer instance is running on. Connecting with OCI has thebenefit of increased performance.
6.8.4 Adding an Oracle database
Once the extension is properly installed Oracle and Oracle OCIwill show up as a options when creatinga new data store.
Figure 6.13: Creating an Oracle datastore
6.8.5 Oracle options
host The oracle server host name or ip address.port The port on which the oracle server is accepting
connections.user The name of the user to connect to the oracle database as.password The password to use when connecting to the database.
Left blank for no password.instance The name of the oracle instance being connected to.schema The database schema to access tables from.max connectionsmin connectionsvalidate connections
Connection pool configuration parameters. See theDatabase Connection Pooling section for details.
6.8. Oracle 91

GeoServer User Manual, Release 1.7.4
Figure 6.14: Configuring an Oracle datastore
92 Chapter 6. Working with Data

GeoServer User Manual, Release 1.7.4
Figure 6.15: Configuring Oracle OCI options
6.8. Oracle 93

GeoServer User Manual, Release 1.7.4
6.8.6 Oracle OCI options
aliasuser The name of the user to connect to the oracle database as.password The password to use when connecting to the database. Left blank for no password.schema The database schema to access tables from.
6.9 Oracle Next Generation
Oracle Spatial and Locator are the spatial extensions of Oracle.
Note: GeoServer does not come built-in with support for Oracle, it must be installed throughan extension. Proceed to Installing the Oracle extension for installation details.
6.9.1 Supported versions
6.9.2 Installing the Oracle NG extension
1. Download the Oracle NG extension from the GeoServer download page.
Warning: Ensure the extension matching the version of the GeoServer installation is down-loaded.
2. Extract the contents of the archive into the WEB-INF/lib directory of the GeoServer installation.
6.9.3 Adding an Oracle database
Once the extension is properly installed OracleNG will show up as an option when creating a new datastore.
Figure 6.16: Creating an Oracle datastore
94 Chapter 6. Working with Data

GeoServer User Manual, Release 1.7.4
6.9.4 Oracle options
Figure 6.17: Configuring an Oracle datastore
6.9. Oracle Next Generation 95

GeoServer User Manual, Release 1.7.4
host The oracle server host name or ip address.port The port on which the oracle server is accepting connections.database The name of the database to connect to.schema The database schema to access tables from.user The name of the user to connect to the oracle database as.password The password to use when connecting to the database. Left blank for
no password.Loose bbox Flag which controls how bounding box comparisons are made
against geometries in the database. See the Using loose bounding boxsection below for more information.
max connectionsmin connectionsvalidate connections
Connection pool configuration parameters. See the DatabaseConnection Pooling section for details.
6.9.5 Using loose bounding box
When set only the bounding box of a geometry is used which results in a significant performance gain. Thedownside is that some geometries may be considered inside of a bounding box when they are technicallynot.
If the primary use of the database is through the WMS this flag can be set as a loss of some accuracy isusually acceptable. However if using with the WFS and making use of BBOX filtering capabilities, this flagshould not be set.
6.10 SQL Server
Microsoft’s SQL Server <http://www.microsoft.com/sqlserver/2008/> is a relational database with spatial func-tionality.
Note: GeoServer does not come built-in with support for SQL Server, it must be installed through anextension. Proceed to Installing the SQL Server extension for installation details.
6.10.1 Supported versions
The extension supports SQL Server 2008.
6.10.2 Installing the SQL Server extension
1. Download the SQL Server extension from the GeoServer download page.
Warning: Ensure the extension matching the version of the GeoServer installation is down-loaded.
2. Extract the contents of the archive into the WEB-INF/lib directory of the GeoServer installation.
SQL Server JDBC driver
1. Navigate to JDBC driver download page.
2. Click the Download SQL Server 2005 JDBC Driver 1.2 link.
96 Chapter 6. Working with Data

GeoServer User Manual, Release 1.7.4
3. Click the Download button.
# Accept the license and choose the operating system.
# Extract the contents of the archive and copy the file sqljdbc.jar to the WEB-INF/lib directory ofthe GeoServer instance.
6.10.3 Adding a SQL Server database
Once the extension is properly installed SQL Server will show up as an option when creating a new datastore.
Figure 6.18: Creating a SQL Server datastore
6.10.4 SQL Server options
• – host
– The sql server instance host name or ip address.
• – port
– The port on which the sql server instance is accepting connections.
• – database
– The name of the database to connect to.
• – schema
– The database schema to access tables from.
• – user
– The name of the user to connect to the oracle database as.
• – password
– The password to use when connecting to the database. Left blank for no password.
6.10. SQL Server 97

GeoServer User Manual, Release 1.7.4
Figure 6.19: Configuring a SQL Server datastore
98 Chapter 6. Working with Data

GeoServer User Manual, Release 1.7.4
• – max connections
min connections
– Connection pool configuration parameters. See the Database Connection Pooling section for de-tails.
6.11 Vector Product Format
Vector Product Format (VPF) is a military standard for vector-based digital map products producedby the U.S. Department of Defense. For more information visit The National Geospatial-IntelligenceAgency.
Note: GeoServer does not come built-in with support for VPF, it must be installed through an extension.Proceed to Installing the VPF extension for installation details.
6.11.1 Installing the VPF extension
1. Download the VPF extension from the GeoServer download page.
Warning: Ensure the extension matching the version of the GeoServer installation is down-loaded.
2. Extract the contents of the archive into the WEB-INF/lib directory of the GeoServer installation.
6.11.2 Adding a VPF file
Once the extension is properly installed Vector Product Format Library will show up as an optionwhen creating a new data store.
Figure 6.20: Creating a VPF datastore
6.11. Vector Product Format 99

GeoServer User Manual, Release 1.7.4
Figure 6.21: Configuring a VPF datastore
6.11.3 VPF options
url The location of the VPF file.
6.12 Database Connection Pooling
When serving data from a spatial database connection pooling is an important aspect of achieving good per-formance. When GeoServer serves a request that involves loading data from a database table, a connectionmust first be established with the database. This connection comes with a cost as it takes time to set up sucha connection.
The purpose served by a connection pool is to maintain connection to an underlying database betweenrequests. The benefit of which is that connection setup only need to occur once on the first request. Subse-quent requests use existing connections and achieve a performance benefit as a result.
Whenever a data store backed by a database is added to GeoServer an internal connection pool is created.This connection pool is configurable.
100 Chapter 6. Working with Data

GeoServer User Manual, Release 1.7.4
Figure 6.22: Connection options
6.12.1 Connection pool options
maxconnections
The maximum number of connections the pool can hold. When the maximum number ofconnections is exceeded, additional requests that require a database connection will behalted until a connection from the pool becomes available. The maximum number ofconnections limits the number of concurrent requests that can be made against thedatabase.
minconnections
The minimum number of connections the pool will hold. This number of connections isheld even when there are no active requests. When this number of connections isexceeded due to serving requests additional connections are opened until the poolreaches its maximum size (described above).
validateconnections
Flag indicating wether connections from the pool should be validated before they areused. A connection in the pool can become invalid for a number of reasons includingnetwork breakdown, database server timeout, etc... The benefit of setting this flag is thatan invalid connection will never be used which can prevent client errors. The downsideof setting the flag is that a performance penalty is paid in order to validate connections.
6.12. Database Connection Pooling 101

GeoServer User Manual, Release 1.7.4
102 Chapter 6. Working with Data

CHAPTER 7
Styling
7.1 Introduction to SLD
Geospatial data has no intrinsic visual component. In order to see data, it must be styled, and given color,thickness, and other visible attributes. In GeoServer, this styling is accomplished using a markup languagecalled Styled Layer Descriptor, or SLD for short. SLD is an XML-based markup language and is verypowerful, though it can be intimidating. This page will give a basic introduction to what one can do withSLD and how GeoServer handles it.
Note: Since GeoServer uses SLD exclusively for styling, the terms “SLD” and “style” will often be usedinterchangeably.
7.1.1 Types of styling
Data that GeoServer can serve consists of three classes of shapes: Points, lines, and polygons. Lines (one di-mensional shapes) are the simplest, as they have only the edge to style (also known as “stroke”). Polygons,two dimensional shapes, have an edge and an inside (also known as a “fill”), both of which can be styleddifferently. Points, even though they lack dimension, have both an edge and a fill (not to mention a size)that can be styled. For fills, color can be specified; for strokes, color and thickness can be specified.
More advanced styling is possible than just color and thickness. Points can be specified with well-knownshapes like circles, squares, stars, and even custom graphics or text. Lines can be styled with a dash stylesand hashes. Polygons can be filled with a custom tiled graphics. Styles can be based on attributes in thedata, so that certain features are styled differently. Text labels on features are possible as well. Features canbe styled based on zoom level, with the size of the feature determining how it is displayed. The possibilitiesare vast.
7.1.2 Style metadata
7.1.3 GeoServer and SLD
Every layer (featuretype) registered with GeoServer needs to have at least one style associated with it.GeoServer comes bundled with a few basic styles, and any number of new styles can be added. It ispossible to change any layer’s associated style at any time in the featuretype edit page. (From the WebAdministration Interface: Config menu > Data) When adding a layer and a style to GeoServer at the same
103

GeoServer User Manual, Release 1.7.4
time, the style should be added first, so that the new layer can be associated with the style immediately.You can add a style in the Style menu. (From the Web Administration Interface : Config menu > Data)
7.1.4 Definitions
Symbolizer
Rule
FeatureTypeStyle
7.1.5 A basic style
This SLD takes a layer that contains points, and styles them as red circles with a size of 6 pixels. (This is thefirst example in the Points section of the SLD Cook Book.)
1 <?xml version="1.0" encoding="ISO-8859-1"?>2 <StyledLayerDescriptor version="1.0.0"3 xsi:schemaLocation="http://www.opengis.net/sld StyledLayerDescriptor.xsd"4 xmlns="http://www.opengis.net/sld"5 xmlns:ogc="http://www.opengis.net/ogc"6 xmlns:xlink="http://www.w3.org/1999/xlink"7 xmlns:xsi="http://www.w3.org/2001/XMLSchema-instance">8 <NamedLayer>9 <Name>Simple point</Name>
10 <UserStyle>11 <Title>GeoServer SLD Cook Book: Simple point</Title>12 <FeatureTypeStyle>13 <Rule>14 <PointSymbolizer>15 <Graphic>16 <Mark>17 <WellKnownName>circle</WellKnownName>18 <Fill>19 <CssParameter name="fill">#FF0000</CssParameter>20 </Fill>21 </Mark>22 <Size>6</Size>23 </Graphic>24 </PointSymbolizer>25 </Rule>26 </FeatureTypeStyle>27 </UserStyle>28 </NamedLayer>29 </StyledLayerDescriptor>
Don’t let the lengthy nature of this simple example intimidate; only a few lines are really important tounderstand. Line 14 states that we are using a “PointSymbolizer”, a style for point data. Line 17 statesthat we are using a “well known name,” a circle, to style the points. There are many well known names forshapes such as “square”, “star”, “triangle”, etc. Lines 18-20 states to fill the shape with a color of #FF0000(red). This is an RGB color code, written in hexadecimal, in the form of #RRGGBB. Finally, line 22 specifiesthat the size of the shape is 6 pixels in width. The rest of the structure contains metadata about the style,such as Name/Title/Abstract.
Many more examples can be found in the SLD Cook Book.
104 Chapter 7. Styling

GeoServer User Manual, Release 1.7.4
Note: You will find that some tags have prefixes, such as ogc: in front of them. The reason for this isbecause they are XML namespaces. In the tag on lines 2-7, there are two XML namespaces, one calledxmlns, and one called xmlns:ogc. Tags corresponding to the first namespace do not need a prefix, buttags corresponding to the second require a prefix of ogc:. It should be pointed out that the name of thenamespaces are not important: The first namespace could be xmlns:sld (as it often is) and then all ofthe tags in this example would require an sld: prefix. The important part is that the namespaces need tomatch the tags.
7.1.6 Troubleshooting
SLD is a type of programming language, not unlike creating a web page or building a script. As such, prob-lems may arise that may require troubleshooting. When adding a style into GeoServer, it is automaticallychecked for validation with the OGC SLD specification (although that may be bypassed), but it will not bechecked for errors. It is very easy to have syntax errors creep into a valid SLD. Most of the time this willresult in a blank map (nothing displayed), but sometimes errors will prevent the map from displaying atall.
The easiest way to fix errors in an SLD is to try to isolate the error. If the SLD is long and incorporates manydifferent rules and filters, try temporarily removing some of them to see if the errors go away.
To minimize errors when creating the SLD, it is recommended to use a text editor that is designed to workwith XML. Editors designed for XML can make finding and removing errors much easier by providingsyntax highlighting and (sometimes) built-in error checking.
7.2 SLD Cook Book
The SLD Cook Book is a collection of SLD “recipes” for creating various types of map styles. It is dividedinto four sections, the first three based on vector shapes (points, lines, and polygons) and the fourth sectionfor rasters. Each example contains an inline snippet of the code specific to the style, a screenshot showingactual GeoServer output, and a link to download the full SLD that created the output.
These examples use four data sets created especially for each section.
Warning: Add link to download shapefiles.
7.2.1 Points
Points, in theory, are the simplest shape. However, there are many different ways that a point can be styled,perhaps more than even lines and polygons.
The point layer that is used for the examples below contains information about the major cities for a fictionalcountry. The data contains attribute columns for city names (“name”) and population (“pop”).
Warning: Add link to point shapefile
Warning: The code examples shown on this page are not the full SLD code, as they omit the headerand footer information required for SLDs for the sake of brevity. Please use the links to download thefull SLDs for each example.
7.2. SLD Cook Book 105

GeoServer User Manual, Release 1.7.4
Simple Point
This example specifies points to be styled as red circles with a diameter of 6 pixels.
Details
There is one <Rule> in one <FeatureTypeStyle> for this style, which is the simplest possible situation.(All subsequent examples will share this characteristic unless otherwise specified.) Line 6 specifies theshape of the symbol (a circle), with line 8 determining the fill color to be red (#FF0000). Line 11 sets thesize of the graphic to be 6 pixels.
Code
1 <FeatureTypeStyle>2 <Rule>3 <PointSymbolizer>4 <Graphic>5 <Mark>6 <WellKnownName>circle</WellKnownName>7 <Fill>8 <CssParameter name="fill">#FF0000</CssParameter>9 </Fill>
10 </Mark>11 <Size>6</Size>12 </Graphic>
106 Chapter 7. Styling

GeoServer User Manual, Release 1.7.4
13 </PointSymbolizer>14 </Rule>15 </FeatureTypeStyle>
Warning: Add link to SLD
Simple Point With Stroke
This example adds a stroke (or border) around the simple point, colored black and with a thickness of 2pixels.
Details
Much of this example is similar to the simple point mentioned above. Lines 10-13 specify the stroke, withline 11 setting the color to black (#000000) and line 12 setting the width to 2 pixels. (Omitting line 12would revert the stroke-width to the default of 1 pixel.)
Code
1 <FeatureTypeStyle>2 <Rule>3 <PointSymbolizer>
7.2. SLD Cook Book 107

GeoServer User Manual, Release 1.7.4
4 <Graphic>5 <Mark>6 <WellKnownName>circle</WellKnownName>7 <Fill>8 <CssParameter name="fill">#FF0000</CssParameter>9 </Fill>
10 <Stroke>11 <CssParameter name="stroke">#000000</CssParameter>12 <CssParameter name="stroke-width">2</CssParameter>13 </Stroke>14 </Mark>15 <Size>6</Size>16 </Graphic>17 </PointSymbolizer>18 </Rule>19 </FeatureTypeStyle>
Warning: Add link to SLD
Rotated Square
This example uses a square instead of a circle, colors it green, sizes it larger, and rotates the square by 45degrees.
108 Chapter 7. Styling

GeoServer User Manual, Release 1.7.4
Details
Line 6 sets the shape of the point to be a square, with line 8 setting the color to a muted green (#009900).Line 11 sets the size of the square to be 12 pixels, and rotation is set to 45 degrees on line 12.
Code
1 <FeatureTypeStyle>2 <Rule>3 <PointSymbolizer>4 <Graphic>5 <Mark>6 <WellKnownName>square</WellKnownName>7 <Fill>8 <CssParameter name="fill">#009900</CssParameter>9 </Fill>
10 </Mark>11 <Size>12</Size>12 <Rotation>45</Rotation>13 </Graphic>14 </PointSymbolizer>15 </Rule>16 </FeatureTypeStyle>
Warning: Add link to SLD
Transparent Triangle
The example replaces the shape with a triangle, retains the black stroke, and sets the fill of the triangle to20% opacity (mostly transparent).
Details
Line 6 once again sets the shape, in this case to a triangle. Line 8 sets the fill color, and line 9 sets theopacity to 0.2 (20% opaque). This means the green color looks much lighter on a plain white background,although were the point imposed on a dark background, the resulting color would be different. Line 12and line 13 determine the stroke color and width, respectively. Finally, line 16 sets the size of the point tobe 12 pixels.
Code
1 <FeatureTypeStyle>2 <Rule>3 <PointSymbolizer>4 <Graphic>5 <Mark>6 <WellKnownName>triangle</WellKnownName>7 <Fill>8 <CssParameter name="fill">#009900</CssParameter>
7.2. SLD Cook Book 109

GeoServer User Manual, Release 1.7.4
9 <CssParameter name="fill-opacity">0.2</CssParameter>10 </Fill>11 <Stroke>12 <CssParameter name="stroke">#000000</CssParameter>13 <CssParameter name="stroke-width">2</CssParameter>14 </Stroke>15 </Mark>16 <Size>12</Size>17 </Graphic>18 </PointSymbolizer>19 </Rule>20 </FeatureTypeStyle>
Warning: Add link to SLD
Point As Graphic
This examples styles points as a graphic instead of as a simple shape.
Details
This style uses an external graphic. Lines 5-10 specify the details. Here, the graphic is contained in thesame directory as the style (the styles directory), so no path information is necessary, however an externalURL could have been used. Line 8 sets the path and file name of the graphic, with line 9 indicating the
110 Chapter 7. Styling

GeoServer User Manual, Release 1.7.4
file format (MIME type) of the graphic (image/png). Lines 11 determine the size of the displayed graphic,which can be independent of the actual size of the graphic itself, although in this case they are the same (32pixels).
Code
1 <FeatureTypeStyle>2 <Rule>3 <PointSymbolizer>4 <Graphic>5 <ExternalGraphic>6 <OnlineResource7 xlink:type="simple"8 xlink:href="smileyface.png" />9 <Format>image/png</Format>
10 </ExternalGraphic>11 <Size>32</Size>12 </Graphic>13 </PointSymbolizer>14 </Rule>15 </FeatureTypeStyle>
Warning: Add link to SLD
7.2. SLD Cook Book 111

GeoServer User Manual, Release 1.7.4
Point With Default Label
This example shows a text label on the simple point, showing the “name” attribute of the point. In theabsence of any other customization, this is how a label will be displayed.
Details
Lines 3-13 (the <PointSymbolizer>) are identical to the simple point example. The label style is set inthe <TextSymbolizer> on lines 14-22. Lines 15-17 determine what text to display, which in this case isthe value of the “name” attribute. Line 20 sets the text color. Don’t forget about line 18: although there isn’tany content in the <Font /> tag, it is still required by the OGC SLD specification.
Code
1 <FeatureTypeStyle>2 <Rule>3 <PointSymbolizer>4 <Graphic>5 <Mark>6 <WellKnownName>circle</WellKnownName>7 <Fill>8 <CssParameter name="fill">#FF0000</CssParameter>9 </Fill>
10 </Mark>11 <Size>6</Size>
112 Chapter 7. Styling

GeoServer User Manual, Release 1.7.4
12 </Graphic>13 </PointSymbolizer>14 <TextSymbolizer>15 <Label>16 <ogc:PropertyName>name</ogc:PropertyName>17 </Label>18 <Font />19 <Fill>20 <CssParameter name="fill">#000000</CssParameter>21 </Fill>22 </TextSymbolizer>23 </Rule>24 </FeatureTypeStyle>
Warning: Add link to SLD
Point With Styled Label
This example improves the label style by centering the label above the point and specifying the font nameand size.
Details
Lines 3-13 indicate the same simple point as above. The <TextSymbolizer> on lines 14-39 contain muchmore details about the label than in the previous example. Lines 15-17 specify the attribute to use to display
7.2. SLD Cook Book 113

GeoServer User Manual, Release 1.7.4
the label (again, “name”). Lines 18-23 set the font information: line 19 sets the font to be “Arial”, line 20sets the font size to 12, line 21 sets the font style to “normal”, and line 22 sets the font weight to “bold”.Lines 24-35 (<LabelPlacement>) determine the placement of the label relative to the point. There is the<AnchorPoint> (lines 26-29), which sets the place of intersection between the label and point, which here(line 27) is set to halfway (0.5) along the horizontal direction. There is also <Displacement> (lines 30-33),the offset of the label relative to the line, which in this case is 0 pixels in the horizontal direction (line 31)and 5 pixels in the vertical direction (lines 32). Finally, line 37 sets the font color to black (#000000).
The net result is a centered label placed slightly above the point.
Code
1 <FeatureTypeStyle>2 <Rule>3 <PointSymbolizer>4 <Graphic>5 <Mark>6 <WellKnownName>circle</WellKnownName>7 <Fill>8 <CssParameter name="fill">#FF0000</CssParameter>9 </Fill>
10 </Mark>11 <Size>6</Size>12 </Graphic>13 </PointSymbolizer>14 <TextSymbolizer>15 <Label>16 <ogc:PropertyName>name</ogc:PropertyName>17 </Label>18 <Font>19 <CssParameter name="font-family">Arial</CssParameter>20 <CssParameter name="font-size">12</CssParameter>21 <CssParameter name="font-style">normal</CssParameter>22 <CssParameter name="font-weight">bold</CssParameter>23 </Font>24 <LabelPlacement>25 <PointPlacement>26 <AnchorPoint>27 <AnchorPointX>0.5</AnchorPointX>28 <AnchorPointY>0.0</AnchorPointY>29 </AnchorPoint>30 <Displacement>31 <DisplacementX>0</DisplacementX>32 <DisplacementY>5</DisplacementY>33 </Displacement>34 </PointPlacement>35 </LabelPlacement>36 <Fill>37 <CssParameter name="fill">#000000</CssParameter>38 </Fill>39 </TextSymbolizer>40 </Rule>41 </FeatureTypeStyle>
Warning: Add link to SLD
114 Chapter 7. Styling

GeoServer User Manual, Release 1.7.4
Point With Rotated Label
This example rotates the previous label by 45 degrees and sets 25 pixels of displacement to make the labelfarther away from the point.
Details
Much of this is the same as the styled label above. There are only three important differences. Line 32specifies 25 pixels of vertical displacement (instead of 5 pixels as used before). Lines 54-56 specify a rotationof 45 degrees counter-clockwse. (Rotation values increase clockwise, which is why the value is negative.)Finally, line 38 sets the font color to be a shade of purple (#99099).
Code
1 <FeatureTypeStyle>2 <Rule>3 <PointSymbolizer>4 <Graphic>5 <Mark>6 <WellKnownName>circle</WellKnownName>7 <Fill>8 <CssParameter name="fill">#FF0000</CssParameter>9 </Fill>
10 </Mark>11 <Size>6</Size>
7.2. SLD Cook Book 115

GeoServer User Manual, Release 1.7.4
12 </Graphic>13 </PointSymbolizer>14 <TextSymbolizer>15 <Label>16 <ogc:PropertyName>name</ogc:PropertyName>17 </Label>18 <Font>19 <CssParameter name="font-family">Arial</CssParameter>20 <CssParameter name="font-size">12</CssParameter>21 <CssParameter name="font-style">normal</CssParameter>22 <CssParameter name="font-weight">bold</CssParameter>23 </Font>24 <LabelPlacement>25 <PointPlacement>26 <AnchorPoint>27 <AnchorPointX>0.5</AnchorPointX>28 <AnchorPointY>0.0</AnchorPointY>29 </AnchorPoint>30 <Displacement>31 <DisplacementX>0</DisplacementX>32 <DisplacementY>25</DisplacementY>33 </Displacement>34 <Rotation>-45</Rotation>35 </PointPlacement>36 </LabelPlacement>37 <Fill>38 <CssParameter name="fill">#990099</CssParameter>39 </Fill>40 </TextSymbolizer>41 </Rule>42 </FeatureTypeStyle>
Warning: Add link to SLD
Attribute-Based Point
This example alters the look of the points based on the population attribute.
Details
The populations of the cities are as follows:
City (“name”) Population (“pop”)Borfin 157860Supox City 578231Ruckis 98159Thisland 34879Synopolis 24567San Glissando 76024Detrainia 205609
(The labels have been removed in this example to simplify the style. Please refer to the previous exampleto see which points refer to which cities.)
116 Chapter 7. Styling

GeoServer User Manual, Release 1.7.4
This style contains more than one <Rule>. Each rule varies the style based on the value of the population(“pop”) attribute for each point. The order of the rules does not matter.
The first rule, on lines 2-22, specifies the styling of those points whose population attribute is less than50,000. Lines 5-10 set this filter, with lines 6-9 setting the “less than” filter, line 7 denoting the attribute, andand line 8 with the value of 50,000. The graphic is a circle (line 14), and the size is 8 pixels (line 19).
The second rule (lines 23-49) is very similar, specifying a style for points whose population attribute isbetween 50,000 and 100,000. The population filter is set on lines 36-37, and it is longer than the first rulebecause two criteria need to be set: PropertyIsGreaterThanOrEqualTo and PropertyIsLessThan.(Notice the And in lines 27 and 36.) The size of the graphic is changed to be 12 pixels on line 46.
The third rule (lines 50-70) specifies a style for points whose population attribute is greater than 100,000.The population filter is set on lines 53-58, and the only other difference again is the size of the circle, whichin this rule (line 67) is 16 pixels.
The result of this style is that cities with a larger population have larger points.
Code
1 <FeatureTypeStyle>2 <Rule>3 <Name>SmallPop</Name>4 <Title>1 to 50000</Title>5 <ogc:Filter>6 <ogc:PropertyIsLessThan>7 <ogc:PropertyName>pop</ogc:PropertyName>8 <ogc:Literal>50000</ogc:Literal>
7.2. SLD Cook Book 117

GeoServer User Manual, Release 1.7.4
9 </ogc:PropertyIsLessThan>10 </ogc:Filter>11 <PointSymbolizer>12 <Graphic>13 <Mark>14 <WellKnownName>circle</WellKnownName>15 <Fill>16 <CssParameter name="fill">#0033CC</CssParameter>17 </Fill>18 </Mark>19 <Size>8</Size>20 </Graphic>21 </PointSymbolizer>22 </Rule>23 <Rule>24 <Name>MediumPop</Name>25 <Title>50000 to 100000</Title>26 <ogc:Filter>27 <ogc:And>28 <ogc:PropertyIsGreaterThanOrEqualTo>29 <ogc:PropertyName>pop</ogc:PropertyName>30 <ogc:Literal>50000</ogc:Literal>31 </ogc:PropertyIsGreaterThanOrEqualTo>32 <ogc:PropertyIsLessThan>33 <ogc:PropertyName>pop</ogc:PropertyName>34 <ogc:Literal>100000</ogc:Literal>35 </ogc:PropertyIsLessThan>36 </ogc:And>37 </ogc:Filter>38 <PointSymbolizer>39 <Graphic>40 <Mark>41 <WellKnownName>circle</WellKnownName>42 <Fill>43 <CssParameter name="fill">#0033CC</CssParameter>44 </Fill>45 </Mark>46 <Size>12</Size>47 </Graphic>48 </PointSymbolizer>49 </Rule>50 <Rule>51 <Name>LargePop</Name>52 <Title>Greater than 100000</Title>53 <ogc:Filter>54 <ogc:PropertyIsGreaterThanOrEqualTo>55 <ogc:PropertyName>pop</ogc:PropertyName>56 <ogc:Literal>100000</ogc:Literal>57 </ogc:PropertyIsGreaterThanOrEqualTo>58 </ogc:Filter>59 <PointSymbolizer>60 <Graphic>61 <Mark>62 <WellKnownName>circle</WellKnownName>63 <Fill>64 <CssParameter name="fill">#0033CC</CssParameter>65 </Fill>66 </Mark>
118 Chapter 7. Styling

GeoServer User Manual, Release 1.7.4
67 <Size>16</Size>68 </Graphic>69 </PointSymbolizer>70 </Rule>71 </FeatureTypeStyle>
Warning: Add link to SLD
Zoom-Based Point
This example alters the look of the points based on zoom level.
Figure 7.1: Zoomed out
Details
Zoom-based styles can be some of the most complex SLD files. When combined with attribute-based styles,SLD files can grow quite cumbersome. However, zoom-based styles can also make your maps much morerealistic, since one is used to seeing things get larger as one zooms in. That is precisely what this exampleshows. The points (now all styled identically) will vary in size based on the zoom level.
Note: Determining the zoom level is beyond the scope of this page.
7.2. SLD Cook Book 119

GeoServer User Manual, Release 1.7.4
Figure 7.2: Partially zoomed
120 Chapter 7. Styling

GeoServer User Manual, Release 1.7.4
Figure 7.3: Zoomed in
7.2. SLD Cook Book 121

GeoServer User Manual, Release 1.7.4
Warning: Where do we point people who want to know more?
This style contains three rules. (The order of the rules does not matter.) The first rule (lines 2-16) is for thelargest scale denominator (when the view is “zoomed in”). The zoom is set on line 4, applicable to any mapwith a scale denominator of 160,000,000 or less. The rule draws a circle (line 8) with a size of 12 pixels (line13). The second rule (lines 17-32) is the middle zoom level. The zoom is set on lines 19-20, applicable toany map with a scale denominator between 160,000,000 and 320,000,000. The rule draws a circle with a sizeof 8 pixels (line 29). The third rule (lines 33-47) is the display when the map is the most zoomed out. Thezoom is set on line 35, applicable to any map with a scale denominator of 320,000,000 or more. The ruledraws a circle with a size of 4 pixels (lines 44).
The result of this style is that points are drawn larger as one zooms in and smaller as one zooms out.
Code
1 <FeatureTypeStyle>2 <Rule>3 <Name>Large</Name>4 <MaxScaleDenominator>160000000</MaxScaleDenominator>5 <PointSymbolizer>6 <Graphic>7 <Mark>8 <WellKnownName>circle</WellKnownName>9 <Fill>
10 <CssParameter name="fill">#CC3300</CssParameter>11 </Fill>12 </Mark>13 <Size>12</Size>14 </Graphic>15 </PointSymbolizer>16 </Rule>17 <Rule>18 <Name>Medium</Name>19 <MinScaleDenominator>160000000</MinScaleDenominator>20 <MaxScaleDenominator>320000000</MaxScaleDenominator>21 <PointSymbolizer>22 <Graphic>23 <Mark>24 <WellKnownName>circle</WellKnownName>25 <Fill>26 <CssParameter name="fill">#CC3300</CssParameter>27 </Fill>28 </Mark>29 <Size>8</Size>30 </Graphic>31 </PointSymbolizer>32 </Rule>33 <Rule>34 <Name>Small</Name>35 <MinScaleDenominator>320000000</MinScaleDenominator>36 <PointSymbolizer>37 <Graphic>38 <Mark>39 <WellKnownName>circle</WellKnownName>40 <Fill>
122 Chapter 7. Styling

GeoServer User Manual, Release 1.7.4
41 <CssParameter name="fill">#CC3300</CssParameter>42 </Fill>43 </Mark>44 <Size>4</Size>45 </Graphic>46 </PointSymbolizer>47 </Rule>48 </FeatureTypeStyle>
Warning: Add link to SLD
7.2.2 Lines
Lines, by having length but no width, can seem to be a simple shape. However, there are many tricks formaking nicer lines, which is especially important when styling roads.
The line layer used in the examples below contain road information about a section of Supox, a major cityin the fictional country of Frungy. Download this layer.
Warning: Add link to line data
Simple line
This example shows a basic line style, colored black with a thickness of three (3) pixels.
Warning: Add code
Warning: Add screenshot
Warning: Add link to SLD
Better line style
An often used trick for improving the style of lines is to draw the line twice, once with a small thickness,and once with a slightly larger thickness. This has the effect of creating a “fill and stroke” look for lines.This example fakes a blue fill and a gray stroke by drawing a blue line at 3 pixels, and a gray line at 5pixels.
Since these lines are drawn twice, the order of the drawing is very important. In this style, all of the graylines are drawn first, followed by all of the blue lines. This not only ensures that the blue lines won’t beobscured, but also allows for better styling at intersections (so the inner lines “connect”).
Warning: Add code
Warning: Add screenshot
7.2. SLD Cook Book 123

GeoServer User Manual, Release 1.7.4
Warning: Add link to SLD
Dashed line
This example takes the simple line and creates a dashed line. The style as drawn consists of five (5) pixelsof drawn line, followed by two (2) pixels of blank space.
Warning: Add code
Warning: Add screenshot
Warning: Add link to SLD
Railroad (hatching)
This example leverages the use of hatching to create a railroad style. Both the line and the hatches are black,with a two (2) pixel thickness.
Warning: Add code
Warning: Add screenshot
Warning: Add link to SLD
Default label
This example shows a text label on the simple line. In the absence of any other customization, this is how alabel will be displayed.
Warning: Add code
Warning: Add screenshot
Warning: Add link to SLD
Label following line
Warning: Add description
124 Chapter 7. Styling

GeoServer User Manual, Release 1.7.4
Warning: Add code
Warning: Add screenshot
Warning: Add link to SLD
Repeated label
If the lines are very long, it may be advantageous to repeat the label in multiple places. However, two manyrepeats can clutter up your map. This example repets the label every one hundred (100) pixels.
Warning: Add code
Warning: Add screenshot
Warning: Add link to SLD
Displaced label
This example shows the labels displaced from their lines by a distance of ten (10) pixels.
Warning: Add code
Warning: Add screenshot
Warning: Add link to SLD
Attribute-based style
There are various road classes in Supox, ranging from back roads to high-speed freeways. This examplestyles the lines differently based on road class.
Warning: Add more description
Warning: Add code
Warning: Add screenshot
Warning: Add link to SLD
7.2. SLD Cook Book 125

GeoServer User Manual, Release 1.7.4
Zoom-based style
When making a nice looking map, it is beneficial to make shapes look larger as the map is zoomed in. Thisexample the simple line style and adjusts it for multiple zoom levels. (Each zoom level effectively adds100% more code, so this example will be fairly long, although much of it is duplicated code.)
Warning: Add more description
Warning: Add code
Warning: Add screenshot
Warning: Add link to SLD
7.2.3 Polygons
Polygons are two dimensional shapes, having an edge (or “stroke”) and an inside (or “fill”). Many of thesame tricks for styling points and lines can be applied to polygons.
The polygon layer used in the examples below contain information about countries in and around thefictional country of Frungy. Download this layer.
Warning: Add link to polygon data
Simple polygon
This example shows a polygon styled in blue.
Details
There is one <Rule> in one <FeatureTypeStyle> for this style, which is the simplest possible situation.(All subsequent examples will share this characteristic unless otherwise specified.) Line 5 specifies the fillcolor of the polygon to be #000080, or a muted blue. The borders around the polygons as shown in thefigure are an artifacts of the renderer.
Code
1 <FeatureTypeStyle>2 <Rule>3 <PolygonSymbolizer>4 <Fill>5 <CssParameter name="fill">#000080</CssParameter>6 </Fill>7 </PolygonSymbolizer>8 </Rule>9 </FeatureTypeStyle>
126 Chapter 7. Styling

GeoServer User Manual, Release 1.7.4
Warning: Add link to SLD
Simple polygon with stroke
This example shows the above polygon but adds a stroke of grey, with a one (5) pixel thickness.
Warning: Add code
Warning: Add screenshot
Warning: Add link to SLD
Polygon opacity
This example alters the above style to have a 50% opacity of the blue fill.
Warning: Add code
Warning: Add screenshot
7.2. SLD Cook Book 127

GeoServer User Manual, Release 1.7.4
Warning: Add link to SLD
External graphic for fill
This example uses a graphic to be tiled as a fill for the polygon. The graphic is contained in the samedirectory as the polygon.
Warning: Add code
Warning: Add screenshot
Warning: Add link to SLD
Default label
This example shows a text label on the polygon. In the absence of any other customization, this is how alabel will be displayed.
Warning: Add code
Warning: Add screenshot
Warning: Add link to SLD
Adding space around label
This example adds space around the label to make sure it is not repeated too closely.
Warning: Add code
Warning: Add screenshot
Warning: Add link to SLD
Label halo
This example alters the look of the label by adding a white halo.
Warning: Add code
128 Chapter 7. Styling

GeoServer User Manual, Release 1.7.4
Warning: Add screenshot
Warning: Add link to SLD
Attribute-based style
This example styles the polygons based on the populations of the countries that they represent.
Warning: Add more description
Warning: Add code
Warning: Add screenshot
Warning: Add link to SLD
Zoom-based style
This example sets the labels only to be displayed at certain zoom levels
Warning: Add more description
Warning: Add code
Warning: Add screenshot
Warning: Add link to SLD
7.2.4 Rasters
Rasters are geographic data displayed in a grid. They are similar to graphics like PNG files, except thatinstead of each point containing visual information, each point contains geographic information.
The examples below use a data layer that contains an elevation model for the fictional city of Supox. Down-load this layer.
Warning: Add link to raster data
7.2. SLD Cook Book 129

GeoServer User Manual, Release 1.7.4
Two color gradient
This example shows a two color style with green at low elevations and brown at high elevations.
Warning: Add code
Warning: Add screenshot
Warning: Add link to SLD
Two color gradient with transparency
This example is identical to the above except it sets the layer to 50% opacity.
Warning: Add code
Warning: Add screenshot
Warning: Add link to SLD
Three color gradient with partial transparency
This example sets a three color style, with the third “color” being transparent, so that the green colorgradually fades away at lower elevations.
Warning: Add code
Warning: Add screenshot
Warning: Add link to SLD
Many color gradient
This example shows an eight color style.
Warning: Add code
Warning: Add screenshot
Warning: Add link to SLD
130 Chapter 7. Styling

GeoServer User Manual, Release 1.7.4
7.3 SLD Reference
A symbolizer specifies how data should be visualized. There are 5 types of symbolizers:PointSymbolizer, which is used to portray point data; LineSymbolizer, which is used to portrayline data; PolygonSymbolizer, which is used to portray polygon data; RasterSymbolizer, which isused to portray raster data; and TextSymbolizer, which is used to portray text labels.
Warning: Intro for filters and scale.
7.3.1 PointSymbolizer
The PointSymbolizer styles points, Points are elements that contain only position information.
Syntax
The outermost element is the <Graphic> tag. This determines the type of visualization. There are fivepossible tags to include inside the <Graphic> tag:
Tag Required? Description<ExternalGraphic>No (when using
<Mark>)Specifies an image file to use as the symbolizer.
<Mark> No (when using<ExternalGraphic>)
Specifies a common shape to use as the symbolizer.
<Opacity> No Determines the opacity (transparency) of symbolizers. Values rangefrom 0 (completely transparent) to 1 (completely opaque). Default is1.
<Size> Yes Determines the size of the symbolizer in pixels. When used with animage file, this will specify the height of the image, with the widthscaled accordingly.
<Rotation>No Determines the rotation of the graphic in degrees. The rotationincreases in the clockwise direction. Negative values indicatecounter-clockwise rotation. Default is 0.
Within the <ExternalGraphic> tag, there are also additional tags:
Tag Re-quired?
Description
<OnlineResource>Yes The location of the image file. Can be either a URL or a local pathrelative to the SLD.
<Format> Yes The MIME type of the image format. Most standard web imageformats are supported.
Within the <Mark> tag, there are also additional tags:
Tag Required? Description<WellKnownName>Yes The name of the common shape. Options are circle, square,
triangle, star, cross, or x. Default is square.<Fill> No (when
using<Stroke>)
Specifies how the symbolizer should be filled. Options are a<CssParameter name="fill"> specifying a color in the form#RRGGBB, or <GraphicFill> for a repeated graphic.
<Stroke> No (whenusing<Fill>)
Specifies how the symbolizer should be drawn on its border. Options area <CssParameter name="fill"> specifying a color in the form#RRGGBB or <GraphicStroke> for a repeated graphic.
7.3. SLD Reference 131

GeoServer User Manual, Release 1.7.4
Example
Consider the following symbolizer taken from the Simple Point example in the Points section in the SLDCook Book.
1 <PointSymbolizer>2 <Graphic>3 <Mark>4 <WellKnownName>circle</WellKnownName>5 <Fill>6 <CssParameter name="fill">#FF0000</CssParameter>7 </Fill>8 </Mark>9 <Size>6</Size>
10 </Graphic>11 </PointSymbolizer>
The symbolizer contains a <Graphic> tag, which is required. Inside this tag is the <Mark> tag and <Size>tag, which are the minimum required tags inside <Graphic> (when not using the <ExternalGraphic>tag). The <Mark> tag contains the <WellKnownName> tag and a <Fill> tag. No other tags are required.In summary, this example specifies the following:
1. Data will be rendered as points
2. Points will be rendered as circles
3. Circles will be rendered with a diameter of 6 pixels and filled with the color red
Further examples can be found in the Points section of the SLD Cook Book.
7.3.2 LineSymbolizer
The LineSymbolizer styles lines. Lines are one-dimensional geometry elements that contain position andlength. Lines can be comprised of multiple line segments.
Syntax
The outermost tag is the <Stroke> tag. This tag is required, and determines the visualization of the line.There are three possible tags that can be included inside the <Stroke> tag.
Tag Required? Description<GraphicFill> No Renders the pixels of the line with a repeated pattern.<GraphicStroke> No Renders the line with a repeated linear graphic.<CssParameter> No Determines the stroke styling parameters.
When using the <GraphicStroke> and <GraphicFill> tags, it is required to insert the <Graphic>tag inside them. The syntax for this tag is identical to that mentioned in the PointSymbolizer sectionabove.
Within the <CssParameter> tag, there are also additional parameters that go inside the actual tag:
132 Chapter 7. Styling

GeoServer User Manual, Release 1.7.4
Parameter Re-quired?
Description
name="stroke" No Specifies the solid color given to the line, in the form #RRGGBB. Default isblack (#000000).
name="stroke-width"No Specifies the width of the line in pixels. Default is 1.name="stroke-opacity"No Specifies the opacity (transparency) of the line. possible values are between
0 (completely transparent) and 1 (completely opaque). Default is 1.name="stroke-linejoin"No Determines how lines are rendered at intersections of line segments.
Possible values are mitre (sharp corner), round (rounded corner), andbevel (diagonal corner). Default is mitre.
name="stroke-linecap"No Determines how lines are rendered at ends of line segments. Possible valuesare butt (sharp square edge), round (rounded edge), and square (slightlyelongated square edge). Default is butt.
name="stroke-dasharray"No Encodes a dash pattern as a series of numbers separated by spaces.Odd-indexed numbers (first, third, etc) determine the length in pxiels todraw the line, and even-indexed numbers (second, fourth, etc) determinethe length in pixels to blank out the line. Default is an unbroken line.
name="stroke-dashoffset"No Specifies the distance in pixels into the dasharray pattern at which to startdrawing. Default is 0.
Warning: Maybe a screenshot of the different linecaps etc?
Example
7.3.3 PolygonSymbolizer
The LineSymbolizer styles polygons. Lines are two-dimensional geometry elements. They can containstyling information about their border (stroke) and their fill.
Syntax
A <PolygonSymbolizer> can have two outermost tags:
Tag Required? Description<Fill> No (when using <Stroke>) Determines the styling for the fill of the polygon.<Stroke> No (when using <Fill>) Determines the styling for the stroke of the polygon.
The details for the <Stroke> tag are identical to that mentioned in the LineSymbolizer section above.
Within the <Fill> tag, there are additional tags:
Tag Required? Description<GraphicFill> No Renders the fill of the polygon with a repeated pattern.<CssParameter> No Determines the fill styling parameters.
When using the <GraphicFill> tag, it is required to insert the <Graphic> tag inside it. The syntax forthis tag is identical to that mentioned in the PointSymbolizer section above.
Within the <CssParameter> tag, there are also additional parameters that go inside the actual tag:
7.3. SLD Reference 133

GeoServer User Manual, Release 1.7.4
Parameter Re-quired?
Description
name="fill" No Specifies the fill color for the polygon, in the form #RRGGBB. Default is grey(#808080).
name="fill-opacity"No Specifies the opacity (transparency) of the fill of the polygon. Possible valuesare between 0 (completely transparent) and 1 (completely opaque). Default is1.
Example
Consider the following symbolizer taken from the Simple Point example in the Polygons section in the SLDCook Book.
1 <PolygonSymbolizer>2 <Fill>3 <CssParameter name="fill">#000080</CssParameter>4 </Fill>5 </PolygonSymbolizer>
This symbolizer contains only a <Fill> tag. Inside this tag is a <CssParameter> that specifies a fill colorfor the polygont o be #000080, or a muted blue.
Further examples can be found in the Polygons section of the SLD Cook Book.
7.3.4 RasterSymbolizer
The RasterSymbolizer styles rasters. Rasters are not vectored matrix coverage data, such as satellite photosand digital elevation models (DEM).
Syntax
Warning: Coming soon
Example
Warning: Coming soon
7.3.5 TextSymbolizer
The TextSymbolizer specifies text labels.
Syntax
A <TextSymbolizer> contains the following tags:
134 Chapter 7. Styling

GeoServer User Manual, Release 1.7.4
Tag Re-quired?
Description
<Label> Yes Specifies the content of the text label<Font> No Specifies the font information for the labels.<LabelPlacement>No Sets the position of the label relative its associate feature.<Halo> No Creates a colored background around the text label, for low contrast
situations.<Fill> No Determines the fill color of the text label.
Each of the above tags have additional sub tags. For the <Label> tag:
Tag Required? Description
Within the <Font> tag, the <CssParameter> tag is the only tag included. There are four types of param-eters for this tag, each included inside the <CssParameter> tag:
Parameter Re-quired?
Description
name="font-family"No Determines the family name of the font to use for the label. Default isTimes.
name="font-style"No Determines the style of the font. Options are normal, italic, andoblique. Default is normal.
name="font-weight"No Determines the weight of the font. Options are normal and bold.Default is normal.
name="font-size"No Determines the size of the font in pixels. Default is 10.
Within the <LabelPlacement> tag, there are many tags for specifying the placement of the label:
Tag Required? Description
Within the <Halo> tag, there are two tags to specify the details of the halo:
Tag Required? Description<Radius> No Sets the size of the halo radius in pixels. Default is 1.<Fill> No Sets the color of the halo in the form of #RRGGBB. Default is white (#FFFFFF).
The <Fill> tag is identical to that described in the WHERE~? above.
Example
7.3.6 Filters
A filter is the mechanism in SLD for specifying predicates. Similar in nature to a “WHERE” clause in SQL,filters are the language for specifying which styles should be applied to which features in a data set.
The filter language used by SLD is itself an <OGC standard defined in the Filter Encoding specificationfreely available.
A filter is used to select a subset of features of a dataset to apply a symbolizer to.
There are three types of filters:
7.3. SLD Reference 135

GeoServer User Manual, Release 1.7.4
Attribute filters
Attribute filters are used to constrain the non-spatial attributes of a feature. Example
1 <PropertyIsEqualTo>2 <PropertyName>NAME</PropertyName>3 <Literal>Bob</Literal>4 </PropertyIsEqualTo>
The above filter selects those features which have a {{NAME}} attribute which has a value of “Bob”. Avariety of equality operators are available:
• PropertyIsEqualTo
• PropertyIsNotEqualTo
• PropertyIsLessThan
• PropertyIsLessThanOrEqualTo
• PropertyIsGreatherThan
• PropertyIsGreatherThanOrEqualTo
• PropertyIsBetween
Spatial filters
Spatial filters used to constrain the spatial attributes of a feature. Example
1 <Intersects>2 <PropertyName>GEOMETRY</PropertyName>3 <Literal>4 <gml:Point>5 <gml:coordinates>1 1</gml:coordinates>6 </gml:Point>7 </Literal>8 </Intersects>
The above filter selects those features with a geometry that intersects the point (1,1). A variety of spatialoperators are available:
• Intersects
• Equals
• Disjoint
• Within
• Overlaps
• Crosses
• DWithin
• Beyond
• Distance
136 Chapter 7. Styling

GeoServer User Manual, Release 1.7.4
Logical filters
Logical filters are used to create combinations of filters using the logical operators And, Or, and Not. Ex-ample
1 <And>2 <PropertyIsEqualTo>3 <PropertyName>NAME</PropertyName>4 <Literal>Bob</Literal>5 </PropertyIsEqualTo>6 <Intersects>7 <PropertyName>GEOMETRY</PropertyName>8 <Literal>9 <gml:Point>
10 <gml:coordinates>1 1</gml:coordinates>11 </gml:Point>12 </Literal>13 </Intersects>14 </And>
Rules
A rule combines a number of symbolizers with a filter to define the portrayal of a feature. Consider thefollowing example:
<Rule><ogc:Filter>
<ogc:PropertyIsGreaterThan><ogc:PropertyName>POPULATION</ogc:PropertyName><ogc:Literal>100000</ogc:Literal>
</ogc:PropertyIsGreaterThan></ogc:Filter><PointSymbolizer>
<Graphic><Mark><Fill><CssParameter name="fill">#FF0000</CssParameter>
</Mark></Graphic>
</PointSymbolizer></Rule>
The above rule applies only to features which have a POPULATION attribute greater than 100,000 andsymbolizes then with a red point.
An SLD document can contain many rules. Multiple rule SLD’s are the basis for “thematic styling”. Con-sider the above example expanded:
<Rule><ogc:Filter>
<ogc:PropertyIsGreaterThan><ogc:PropertyName>POPULATION</ogc:PropertyName><ogc:Literal>100000</ogc:Literal>
</ogc:PropertyIsGreaterThan></ogc:Filter><PointSymbolizer>
<Graphic>
7.3. SLD Reference 137

GeoServer User Manual, Release 1.7.4
<Mark><Fill><CssParameter name="fill">#FF0000</CssParameter>
</Mark></Graphic>
</PointSymbolizer></Rule><Rule>
<ogc:Filter><ogc:PropertyIsLessThan>
<ogc:PropertyName>POPULATION</ogc:PropertyName><ogc:Literal>100000</ogc:Literal>
</ogc:PropertyIsLessThan></ogc:Filter><PointSymbolizer>
<Graphic><Mark><Fill><CssParameter name="fill">#0000FF</CssParameter>
</Mark></Graphic>
</PointSymbolizer></Rule>
The above snippet defines an additional rule which engages when POPULATION is less than 100,000 andsymbolizes the feature as a green point.
Rules support the notion of scale dependence which allows one to specify the scale at which a rule shouldengage. This allows for different portrayals of a feature based on map scale. Consider the following exam-ple:
<Rule><MaxScaleDenominator>20000</MaxScaleDenominator><PointSymbolizer>
<Graphic><Mark><Fill><CssParameter name="fill">#FF0000</CssParameter>
</Mark></Graphic>
</PointSymbolizer></Rule><Rule>
<MinScaleDenominator>20000</MinScaleDenominator><PointSymbolizer>
<Graphic><Mark><Fill><CssParameter name="fill">#0000FF</CssParameter>
</Mark></Graphic>
</PointSymbolizer></Rule>
The above rules specify that at a scale below 1:20000 features are symbolized with red points, and at ascale above 1:20000 features are symbolized with blue points.
7.3.7 Scale
138 Chapter 7. Styling

CHAPTER 8
Services
GeoServer serves data using standard protocols established by the Open Geospatial Consortium. The WebFeature Service (WFS) allows for requests of geographical feature data (vectors). The Web Map Service(WMS) allows for requests of images generated from geographical data. Finally, the Web Coverage Service(WCS) allows for requests of coverage data (rasters). These services are the heart of GeoServer.
8.1 Web Feature Service
8.1.1 WFS basics
Warning: Add intro here
Differences between WFS versions
The major differences between the WFS versions are:
• WFS 1.1.0 returns GML3 as the default GML. In WFS 1.0.0 the default was GML2. (GeoServer stillsupports requests in both GML3 and GML2 formats.) GML3 has slightly different ways of specifyinga geometry.
• In WFS 1.1.0, the way to specify the SRS (Spatial Reference System, aka projection)is urn:x-ogc:def:crs:EPSG:XXXX, whereas in version 1.0.0 the specification washttp://www.opengis.net/gml/srs/epsg.xml#XXXX. This change has implications onthe axis order of the returned data.
• WFS 1.1.0 supports on-the-fly reprojection of data, which allows for data to be returned in a SRS otherthan the native.
Axis ordering
WFS 1.0.0 servers return geographic coordinates in longitude/latitude (x/y) order. This is the most com-mon way to distribute data as well (for example, most shapefiles adopt this order by default).
139

GeoServer User Manual, Release 1.7.4
However, the traditional axis order for geographic and cartographic systems is latitude/longitude (y/x),the opposite and WFS 1.1.0 specification respects this. This can cause difficulties when switching betweenservers with different WFS versions, or when upgading your WFS.
To sum up, the defaults are as follows:
• WFS 1.1.0 request = latitude/longitude
• WMS 1.0.0 request = longitude/latitude
GeoServer, however, in an attempt to minimize confusion and increase interoperability, has adopted thefollowing conventions when specifying projections in the follow formats:
• EPSG:xxxx - longitude/latitude
• http://www.opengis.net/gml/srs/epsg.xml#xxxx - longitude/latitude
• urn:x-ogc:def:crs:EPSG:xxxx - latitude/longitude
8.1.2 WFS output formats
WFS returns features and feature information in a number of possible formats. This page shows a list of theoutput formats. In all cases the syntax for setting an output format is:
outputFormat=<outputformat>
where <outputformat> is any of the options below.
Note: Some additional output formats are available with the use of an extension, such as Excel. This listapplies just to the basic GeoServer installation. The full list of output formats supported by your GeoServerinstance can be found by requesting your WFS GetCapabilities.
Format Syntax NotesGML2 outputFormat=GML2 Default option using WFS 1.0.0GML3 outputFormat=GML3 Default option using WFS 1.1.0Shapefile outputFormat=shape-zip Created in a ZIP archiveJSON outputFormat=jsonCSV outputFormat=csv
8.1.3 WFS vendor parameters
WFS Vendor parameters are options that are not defined in the official WFS specification, but are allowedby it. GeoServer supports a range of custom WFS parameters.
CQL filters
When specifying a WFS GetFeature GET request, a filter can be specified in CQL (Common Query Lan-guage), as opposed to encoding the XML into the request. CQL sports a much more compact and humanreadable syntax compared to OGC filters. CQL isn’t as flexible as OGC filters, however, and can’t encodeas many types of filters as the OGC specification does. In particular, filters by feature ID are not sup-ported.
140 Chapter 8. Services

GeoServer User Manual, Release 1.7.4
Example
A sample filter request using an OGC filter taken from a GET request:
filter=%3CFilter%20xmlns:gml=%22http://www.opengis.net/gml%22%3E%3CIntersects%3E%3CPropertyName%3Ethe_geom%3C/PropertyName%3E%3Cgml:Point%20srsName=%224326%22%3E%3Cgml:coordinates%3E-74.817265,40.5296504%3C/gml:coordinates%3E%3C/gml:Point%3E%3C/Intersects%3E%3C/Filter%3E
The same filter using CQL:
cql_filter=INTERSECT(the_geom,%20POINT%20(-74.817265%2040.5296504))
Reprojection
WFS 1.1 allows the ability to reproject data (to have GeoServer store the data in one projection and returnGML in another).
GeoServer supports this using WFS 1.0 as well. When doing a WFS 1.0 GetFeature GET request you can addthis parameter to specify the reprojection SRS:
srsName=<srsName>
where <srsName> is the code for the projection (such as EPSG:4326).
For POST requests, you can add the same code to the Query element.
XML request validation
By default, GeoServer is slightly more forgiving than the WFS specification requires. To force incomingXML requests to be strictly valid, use the following parameter:
strict=[true|false]
where false is the default option.
Example
Consider the following POST request:
<wfs:GetFeature service="WFS" version="1.0.0" xmlns:wfs="http://www.opengis.net/wfs"><Query typeName="topp:states"/>
</wfs:GetFeature>
This request will be processed successfully in GeoServer, but technically this request is invalid:
• The Query element should be prefixed with wfs:
• The namespace prefix has not been mapped to a namespace URI
Executing the above command with strict=true results in an error. For the request to be processed, itmust be altered:
<wfs:GetFeature service="WFS" version="1.0.0" xmlns:wfs="http://www.opengis.net/wfs" xmlns:topp="http://www.openplans.org/topp"><wfs:Query typeName="topp:states"/>
</wfs:GetFeature>
8.1. Web Feature Service 141

GeoServer User Manual, Release 1.7.4
GetCapabilities namespace filter
WFS GetCapabilities requests can be filtered to only return layers corresponding to a particular namespace.To do this, add the following code to your request:
namespace=<namespace>
where <namespace> is the namespace prefix you wish to filter on.
Using an invalid namespace prefix will not cause any errors, but the document returned will contain noinformation on any layers.
Note: This only affects the capabilities document, and not any other requests. WFS requests given to otherlayers, even when a different namespace is specified, will still be processed.
Warning: Using this parameter may cause your capabilities document to become invalid (as the WFSspecification requires the document to return at least one layer).
8.1.4 WFS reference
Introduction
The Web Feature Service (WFS) is a standard created by the OGC that refers to the sending and receiving ofgeospatial data through HTTP. WFS encodes and transfers information in Geography Markup Language, asubset of XML. The current version of WFS is 1.1.0. GeoServer supports both version 1.1.0 (the default sinceGeoServer 1.6.0) and version 1.0.0. There are differences between these two formats, some more subtle thanothers, and this will be noted where differences arise. The current version of WFS is 1.1. WFS version 1.0is still used in places, and we will note where there are differences. However, the syntax will often remainthe same.
An important distinction must be made between WFS and Web Map Service, which refers to the sending andreceiving of geographic information after it has been rendered as a digital image.
Benefits of WFS
One can think of WFS as the “source code” to the maps that one would ordinarily view (via WMS). WFSleads to greater transparency and openness in mapping applications. Instead of merely being able to look ata picture of the map, as the provider wants the user to see, the power is in the hands of the user to determinehow to visualize (style) the raw geographic and attribute data. The data can also be downloaded, furtheranalyzed, and combined with other data. The transactional capabilities of WFS allow for collaborativemapping applications. In short, WFS is what enables open spatial data.
Operations
WFS can perform the following operations:
142 Chapter 8. Services

GeoServer User Manual, Release 1.7.4
Operation DescriptionGetCapabilities Retrieves a list of the server’s data, as well as valid WFS operations and
parametersDescribeFeatureTypeRetrieves information and attributes about a particular datasetGetFeature Retrieves the actual data, including geometry and attribute valuesLockFeature Prevents a feature type from being editedTransaction Edits existing featuretypes by creating, updating, and deleting.GetGMLObject (Version 1.1.0 only) - Retrieves element instances by traversing XLinks that refer
to their XML IDs.
A WFS server that supports transactions is sometimes known as a WFS-T. GeoServer fully supports trans-actions.
GetCapabilities
The GetCapabilities operation is a request to a WFS server for a list of what operations and services (“ca-pabilities”) are being offered by that server.
A typical GetCapabilities request would look like this (at URL http://www.example.com/wfs):
Using a GET request (standard HTTP):
http://www.example.com/wfs?service=wfs&version=1.1.0&request=GetCapabilities
The equivalent using POST:
<GetCapabilitiesservice="WFS"xmlns="http://www.opengis.net/wfs"xmlns:xsi="http://www.w3.org/2001/XMLSchema-instance"xsi:schemaLocation="http://www.opengis.net/wfshttp://schemas.opengis.net/wfs/1.1.0/wfs.xsd"/>
GET requests are simplest to decode, so we will discuss them in detail, but the POST requests are anal-ogous. (The actual requests would be all on one line, with no line breaks, but our convention here is tobreak lines for clarity.) Here there are three parameters being passed to our WFS server, service=wfs,version=1.1.0, and request=GetCapabilities. At a bare minimum, it is required that a WFS re-quest have these three parameters (service, version, and request). GeoServer relaxes these requirements(setting the default version if omitted), but “officially” they are mandatory, so they should always be in-cluded. The service key tells the WFS server that a WFS request is forthcoming. The version key refers towhich version of WFS is being requested. Note that there are only two version numbers officially sup-ported: “1.0.0” and “1.1.0”. Supplying a value like “1” or “1.1” will likely return an error. The request key iswhere the actual GetCapabilities operation is specified.
The Capabilities document that is returned is a long and complex chunk of XML, but very important, and soit is worth taking a closer look. (The 1.0.0 Capabilities document is very different from the 1.1.0 documentdiscussed here, so beware.) There are five main components we will be discussing (other components arebeyond the scope of this document.):
8.1. Web Feature Service 143

GeoServer User Manual, Release 1.7.4
ServiceI-dentifica-tion
This section contains basic “header” information such as the Name and ServiceType.The ServiceType mentions which version(s) of WFS are supported.
Service-Provider
This section provides contact information about the company behind the WFS server,including telephone, website, and email.
Operations-Metadata
This section describes the operations that the WFS server recognizes and the parametersfor each operation. A WFS server can be set up not to respond to all aforementionedoperations.
Feature-TypeList
This section lists the available featuretypes. They are listed in the form“namespace:featuretype”. Also, the default projection of the featuretype is listed here,along with the resultant bounding box for the data in that projection.
Fil-ter_Capabilities
This section lists filters available in which to request the data. SpatialOperators (Equals,Touches), ComparisonOperators (LessThan, GreaterThan), and other functions are alllisted here. These filters are not defined in the Capabilities document, but most of them(like the ones mentioned here) are self-evident.
DescribeFeatureType
The purpose of the DescribeFeatureType is to request information about an individual featuretype beforerequesting the actual data. Specifically, DescribeFeatureType will request a list of features and attributesfor the given featuretype, or list the featuretypes available.
Let’s say we want a list of featuretypes. The appropriate GET request would be:
http://www.example.com/wfs?service=wfs&version=1.1.0&request=DescribeFeatureType
Note again the three required fields (service, version, and request). This will return the list of fea-turetypes, sorted by namespace.
If we wanted information about a specific featuretype, the GET request would be:
http://www.example.com/wfs?service=wfs&version=1.1.0&request=DescribeFeatureType&typeName=namespace:featuretype
The only difference between the two requests is the addition of typeName=namespace:featuretype,where featuretype is the name of the featuretype and namespace is the name of the namespace thatfeaturetype is contained in.
GetFeature
The GetFeature operation requests the actual spatial data. This is the “source code” spoken about previ-ously. More so than the other operations, it is complex and powerful. Obviously, not all of its abilities willbe discussed here.
The simplest way to run a GetFeature command is without any arguments.
http://www.example.com/wfs?service=wfs&version=1.1.0&
144 Chapter 8. Services

GeoServer User Manual, Release 1.7.4
request=GetFeature&typeName=namespace:featuretype
This syntax should be familiar from previous examples. The only difference is therequest=GetFeature.
It is not recommended to run this command in a web browser, as this will return the geometries for allfeatures in a featuretype. This can be a great deal of data. One way to limit the output is to specify afeature. In this case, the GET request would be:
http://www.example.com/wfs?service=wfs&version=1.1.0&request=GetFeature&typeName=namespace:featuretype&featureID=feature
Here there is the additional parameter of featureID=feature. Replace feature with the ID of thefeature you wish to retrieve.
If the name of the feature is unknown, or if you wish to limit the amount of features returned, there is themaxFeatures parameter.
http://www.example.com/wfs?service=wfs&version=1.1.0&request=GetFeature&typeName=namespace:featuretype&maxFeatures=N
In the above example, N is the number of features to return.
A question that may arise at this point is how the WFS server knows which N Features to return. The badnews is that it depends on the internal structure of the data, which may not be arranged in a very helpfulway. The good news is that it is possible to sort the features based on an attribute, via the following syntax.(This is new as of 1.1.0.)
http://www.example.com/wfs?service=wfs&version=1.1.0&request=GetFeature&typeName=namespace:featuretype&maxFeatures=N&sortBy=property
In the above example, sortBy=property determines the sort. Replace property with the attribute youwish to sort by. The default is to sort ascending. Some WFS servers require sort order to be specified, evenif ascending. If so, append a +A to the request. To sort descending, add a +D to the request, like so:
http://www.example.com/wfs?service=wfs&version=1.1.0&request=GetFeature&typeName=namespace:featuretype&maxFeatures=N&sortBy=property+D
8.1. Web Feature Service 145

GeoServer User Manual, Release 1.7.4
It is not necessary to to use sortBy with maxFeatures, but they can often complement each other.
To narrow the search not by feature, but instead by an attribute, use the propertyName key in the formpropertyName=property. You can specify a single property, or multiple properties separated by com-mas. For a single property from all features, use the following:
http://www.example.com/wfs?service=wfs&version=1.1.0&request=GetFeature&typeName=namespace:featuretype&propertyName=property
For a single property from just one feature:
http://www.example.com/wfs?service=wfs&version=1.1.0&request=GetFeature&typeName=namespace:featuretype&featureID=feature&propertyName=property
Or more than one property from a feature:
http://www.example.com/wfs?service=wfs&version=1.1.0&request=GetFeature&typeName=namespace:featuretype&featureID=feature&propertyName=property1,property2
All of these permutations so far have centered around parameters of a non-spatial nature, but it is also pos-sible to query for features based on geometry. While there are very limited tools available in a GET requestfor spatial queries (much more are available in POST requests using filters) one of the most important canbe used. This is known as the “bounding box” or BBOX. The BBOX allows us to ask for only such featuresthat are contained (or partially contained) inside a box of the coordinates we specify. The form of the bboxquery is bbox=a1,b1,a2,b2‘‘where ‘‘a, b, c, and d refer to coordinates.
Notice that the syntax wasn’t bbox=x1,y1,x2,y2 or bbox=y1,x1,y2,x1. The reason the coordinate-free a,b syntax was used above is because the order depends on the coordinate system used. To specifythe coordinate system, append srsName=CRS to the WFS request, where CRS is the coordinate referencesystem. As for which corners of the bounding box to specify (bottom left / top right or bottom right / topleft), that appears to not matter, as long as the bottom is first. So the full request for returning features basedon bounding box would look like this:
http://www.example.com/wfs?service=wfs&version=1.1.0&request=GetFeature&typeName=namespace:featuretype&bbox=a1,b1,a2,b2
146 Chapter 8. Services

GeoServer User Manual, Release 1.7.4
LockFeature
Transaction
GetGMLObject
8.2 Web Map Service
8.2.1 WMS basics
8.2.2 WMS output formats
WMS returns images in a number of possible formats. This page shows a list of the output formats. In allcases the syntax for setting an output format is:
format=<format>
where <format> is any of the options below.
Note: The list of output formats supported by your GeoServer instance can be found by a WMS GetCapa-bilities request.
For-mat
Syntax Notes
PNG format=image/png DefaultPNG8 format=image/png8Same as PNG, but computes an optimal 256 color (8 bit) palette, so the
image size is usually smallerJPEG format=image/jpegGIF format=image/gifTIFF format=image/tiffTIFF8 format=image/tiff8Same as TIFF, but computes an optimal 256 color (8 bit) palette, so the
image size is usually smallerGeo-TIFF
format=image/geotiffSame as TIFF, but includes extra GeoTIFF metadata
Geo-TIFF8
format=image/geotiff8Same as TIFF, but includes extra GeoTIFF metadata and computes anoptimal 256 color (8 bit) palette, so the image size is usually smaller
SVG format=image/svgPDF format=application/pdfGeoRSS format=rssKML format=kmlKMZ format=kmzOpen-Lay-ers
format=application/openlayersGenerates an OpenLayers HTML application.
8.2.3 WMS vendor parameters
WFS vendor parameters are options that are not defined in the official WFS specification, but are allowedby it. GeoServer supports a range of custom WFS parameters.
8.2. Web Map Service 147

GeoServer User Manual, Release 1.7.4
filter
The WMS specification does not allow for much filtering of data. GeoServer’s WMS filter options areexpanded to match those allowed by WFS.
The filter parameter encodes a list of OGC filters (in XML). The list is enclosed in () parenthesis. Whenthis parameter is used in a GET request, the brackets of XML need to be URL-encoded. If more than onelayer is specified in the layers parameter, then more than one filter can be specified here, each correspond-ing to a layer.
An example of an OGC filter encoded as part of a GET request:
filter=%3CFilter%20xmlns:gml=%22http://www.opengis.net/gml%22%3E%3CIntersects%3E%3CPropertyName%3Ethe_geom%3C/PropertyName%3E%3Cgml:Point%20srsName=%224326%22%3E%3Cgml:coordinates%3E-74.817265,40.5296504%3C/gml:coordinates%3E%3C/gml:Point%3E%3C/Intersects%3E%3C/Filter%3E
cql_filter
The cql_filter parameter is similar to the filter parameter, expect that the filter is encoded using CQL(Common Query Language). This makes the request much more human readable. However, CQL isn’t asflexible as OGC filters, and can’t encode as many types of filters as the OGC specification does. In particular,filters by feature ID are not supported. If more than one layer is specified in the layers parameter, thenmore than one filter can be specified here, each corresponding to a layer.
An example of the same filter as above using CQL:
cql_filter=INTERSECT(the_geom,%20POINT%20(-74.817265%2040.5296504))
featureid
The featureid parameter filters by feature ID, a unique value given to all features. Multiple features canbe selected by separating the featureids by comma, as seen in this example:
featureid=states.1,states.45
buffer
The buffer parameter specifies the number of extra pixels that should be taken into account when render-ing a map (using the GetMap operation). This is important for catching features that are outside the currentbounding box, but whose styling is thick enough to be visible inside the relevant area. GeoServer will tryto compute this buffer automatically by parsing the SLD, but that may fail if line widths and point sizes arenot literal values. When these size are linked to attributes, this parameter may be necessary.
The syntax for using a buffer is:
buffer=<bufferwidth>
where <bufferwidth> is the radius of the buffer in pixels.
Buffer also applies to the GetFeatureInfo operation. This creates a “search radius”, where feature info will bereturned for the area around the location of the request. This is useful when working with an OpenLayersmap (such as those generated by the Map Preview page) as it relaxes the need to click precisely on a pointfor the appropriate feature info to be returned.
The default value of the buffer parameter is 0 pixels.
148 Chapter 8. Services

GeoServer User Manual, Release 1.7.4
palette
It is sometimes advisable (for speed and bandwidth reasons) to downsample the bit depth of returnedmaps. The way to do this is to create an image with a limited color palette, and save it in the palettesdirectory inside your GeoServer Data Directory. It is then possible to specify the palette parameter of theform:
palette=<image>
where <image> is the filename of the palette image (without the extension). To force a web-safe palette,you can use the syntax palette=safe.
tiled
When using a tiled client such as OpenLayers, there can be issues with duplicated labels. To deal with this,GeoServer can create metatiles, that is, images are rendered and then split into smaller tiles (by default ina 3x3 pattern) before being served. In order for meta-tiling to work properly, the tile size must be set to256x256 pixels, and two extra parameters must be set.
The tiled parameter is of the form:
tiled=[yes|no]
For metatiling to function, this must be set to yes.
tilesorigin
The tilesorigin parameter, also necessary for metatiling, is of the form:
tilesorigin=x,y
where x and y are the coordinates of the lower left corner (the “origin”) of the layer in OpenLayers.
kmattr
The kmattr parameter determines whether the KML returned by GeoServer should include clickable at-tributes or not. This parameter primarily affects Google Earth rendering. The syntax is:
kmattr=[true|false]
kmscore
The kmscore parameter sets whether GeoServer should render data as vector or raster. This parameterprimarily affects Google Earth rendering. The syntax is:
kmscore=<value>
The possible values for this parameter are between 0 (force raster output) and 100 (force vector output).See the page on KML Scoring for more information on this parameter.
8.2. Web Map Service 149

GeoServer User Manual, Release 1.7.4
maxFeatures and startIndex
GeoServer WMS supports the parameters maxFeatures and startIndex. Both can be used together toprovide “paging” support. This is helpful in situations such as KML crawling, where it is desirable to beable to retrieve the map in sections when there are a large number of features.
Note that not every layer will support paging.
The startindex parameter specifies with a positive integer the index in an ordered list of features to startrendering. For a layer to be queried this way, the underlying feature source shall support paging (such asPostGIS).
The maxfeatures parameter sets a limit on the amount of features rendered, using a positive inte-ger. When used with startindex, the features rendered will be the ones starting at the startindexvalue.
layout
The layout option chooses a named layout for decorations, a tool for visually annotating GeoServer’sWMS output. Layouts can be used to add information such as compasses and legends to the maps youretrieve from GeoServer. WMS Decorations are discussed further in the Advanced GeoServer Configurationsection.
namespace
WMS GetCapabilities requests can be filtered to only return layers corresponding to a particular namespace.The syntax is:
namespace=<namespace>
where <namespace> is the namespace prefix.
Using an invalid namespace prefix will not cause any errors, but the document returned will not containinformation on any layers, only layer groups.
Note: This only affects the capabilities document, and not any other requests. WMS requests given to otherlayers, even when a different namespace is specified, will still be processed.
8.2.4 WMS reference
The Web Map Service (WMS) is a standard created by the OGC that refers to the sending and receving ofgeographically registered map images through HTTP. GeoServer supports WMS version 1.1.1, and so theinformation below will refer to this specific version unless otherwise noted.
WMS can perform the following operations:
Operation DescriptionGetCapabilities Retrieves a list of the server’s data, as well as valid WMS operations and parametersGetMap Retrieves a map image based on geographic dataGetFeatureInfo Retrieves information about particular features as shown on a map imageDescribeLayer Retrieves an XML description of a map layer
150 Chapter 8. Services

GeoServer User Manual, Release 1.7.4
GetCapabilities
GetMap
GetFeatureInfo
DescribeLayer
8.3 Web Coverage Service
8.3.1 WCS basics
8.3.2 WCS output formats
8.3.3 WCS vendor parameters
8.3.4 WCS reference
8.3. Web Coverage Service 151

GeoServer User Manual, Release 1.7.4
152 Chapter 8. Services

CHAPTER 9
Security
This section details the security subsystem in GeoServer. The system is based on Acegi.
9.1 Accessing secured resources
The Web Administration Interface is secured by form-based authentication, with an optional “remember-me” cookie setting. The OGC services are secured using HTTP BASIC authentication, provided on eachcall.
The form-based authentication is based on browser session, so if the same browser is used to access servicesas well, the authentication will be remembered.
Here is the process for accessing a secured resource:
1. If no authentication is provided, anonymous login will be assumed.
2. If any authentication information is included, it will be used.
• In the case of form-based information, a session will be created to store it.
• In the case of HTTP BASIC authentication, session integration will be performed only if a sessionis already available (to avoid overhead).
3. If the resource being accessed is secured and the current user is anonymous, authentication will berequested either using HTTP BASIC authentication (for services) or by using form based login (forthe web adminsitration interface).
4. If the resource accessed is secured and the currently authenticated user lacks sufficient access rights,an HTTP 404 error will be returned.
9.2 Users and roles
Security in GeoServer is a role-based system. Roles are created to serve particular functions (Examples:access WFS, administer UI, read certain layers), and users are linked to those roles.
153

GeoServer User Manual, Release 1.7.4
9.2.1 Setting users and roles
Linking users and roles is done via the file users.properties. This file is in the GeoServer data directoryin the security directory. Be default, this file contains one line:
admin=geoserver,ROLE_ADMINISTRATOR
There is only one predefined role: ROLE_ADMINISTRATOR. This role provides full access to all systemsinside GeoServer. This file links the user admin (with password geoserver) to this role.
Note: It should go without saying that if you are using GeoServer in a production environment, this defaultbehavior should be immediately changed.
Other users and roles can be created by adding to the users.properties file. The syntax is:
user=password,role[,role2,...]
where:
• user is the user name
• password is the password associated with that user
• role[,role2,...] is the name of the role(s) associated with this user
Although the default administrator role is ROLE_ADMINISTRATOR, the naming convention is not manda-tory. Multiple users can be linked with the same role. Users and passwords are case-sensitive.
9.3 Service-level security
Note: Service-level security and Layer-level security cannot be combined. For example, it is not possible tospecify access to a specific OGC service on one specific layer.
GeoServer allows access to be determined on a service level (WFS, WMS).
Access to services is linked to roles. (See also Users and roles.) Services and roles are linked in a filecalled services.properties, which is located in the security directory in your GeoServer data direc-tory.
9.3.1 Syntax
The syntax for setting security is as follows. (Parameters in brackets are optional.):
service[.method]=role[,role2,...]
where:
• service can be wfs, wms, or wcs
• method can be any method supported by the service. (Ex: GetFeature for WFS, GetMap for WMS)
• role[,role2,...] is the name(s) of predefined roles.
Note: Make sure that your role is linked to a user, unless you want to deny access to everyone. Set this inthe users.properties file.
154 Chapter 9. Security

GeoServer User Manual, Release 1.7.4
9.3.2 Examples
By default, no service-level security is set. Two examples are given in the service.properties file bydefault, commented out:
wfs.GetFeature=ROLE_WFS_READwfs.Transaction=ROLE_WFS_WRITE
The first line will link access to the WFS GetFeature method to the role ROLE_WFS_READ. The second linewill link access to the WFS Transactions to the role ROLE_WFS_WRITE.
9.4 Layer-level security
Note: Layer-level security and Service-level security cannot be combined. For example, it is not possible tospecify access to a specific OGC service on one specific layer.
GeoServer allows access to be determined on a per-layer basis.
Access to layers are linked to roles. (See also Users and roles.) Layers and roles are linked in a filecalled layers.properties, which is located in the security directory in your GeoServer data direc-tory.
9.4.1 Syntax
The syntax for setting security is as follows. (Parameters in brackets [] are optional):
namespace.layer.permission=role[,role2,...]
where:
• namespace is the name of the namespace. The wildcard * is used to indicate all namespaces.
• layer is the name of a featuretype or coverage. The wildcard * is used to indicate all layers.
• permission is the type of access permission (r for read access, w for write access).
• role[,role2,...] is the name(s) of predefined roles. The wildcard * is used to indicate the permission isapplied to all users, including anonymous users.
Each entry must have a unique combination of namespace, layer, and permission values. If a permission atthe global level is not specified, global permissions are assumed to allow read/write access. If a permissionfor a namespace is not specified, it inherits permissions from the global specification. If a permission for alayer is not specified, it inherits permissions from its namespace specification. If a user belongs to multipleroles, the least restrictive permission they inherit will apply.
The layers.properties file may contain a further directive that specifies the way in which GeoServerwill advertise secured layers and behave when a secured layer is accessed without the necessary privileges.The line is:
mode=option
where option can be one of three values:
9.4. Layer-level security 155

GeoServer User Manual, Release 1.7.4
Option Descriptionhide(default)
Hides layers that the user does not have read access to, and behaves as if a layer is read onlyif the user does not have write permissions. The capabilities documents will not contain thelayers the current user cannot access. This is the highest security mode. Because of this, itcan sometimes not work very well with clients such as uDig or Google Earth.
challengeAllows free access to metadata, but any attempt at accessing actual data is met by a HTTP401 code (which forces most clients to show an authentication dialog). The capabilitiesdocuments contain the full list of layers. DescribeFeatureType and DescribeCoverage workfine. This mode works fine with clients such as uDig or Google Earth.
mixed Hides the layers the user cannot read from the capabilities documents, but triggersauthentication for any other attempt to access the data or the metadata. This option is usefulif you don’t want the world to see the existence of some of your data, but you still wantselected people to whom you give direct data access links to get the data afterauthentication.
9.4.2 Examples
Protecting a single namespace and a single layer
The following entries demonstrate configuring GeoServer so that it is primarily a read-only server:
*.*.r=**.*.w=NO_ONEprivate.*.r=TRUSTED_ROLEprivate.*.w=TRUSTED_ROLEtopp.congress_district.w=STATE_LEGISLATORS
In this example, here is the map of roles to permissions:
Role private.* topp.* topp.congress_district (all other namespaces)NO_ONE (none) w (none) wTRUSTED_ROLE r/w r r rSTATE_LEGISLATURES (none) r r/w r(All other users) r r r r
Locking down GeoServer
The following entries demonstrate configuring GeoServer so that it is locked down:
*.*.r=TRUSTED_ROLE
*.*.w=TRUSTED_ROLEtopp.*.r=*army.*.r=MILITARY_ROLE,TRUSTED_ROLEarmy.*.w=MILITARY_ROLE,TRUSTED_ROLE
In this example, here is the map of roles to permissions:
Role topp.* army.* (All other namespaces)TRUSTED_ROLE r/w r/w r/wMILITARY_ROLE r r/w (none)(All other users) r (none) (none)
156 Chapter 9. Security

GeoServer User Manual, Release 1.7.4
A more complex situation
The following entries demonstrate configuring GeoServer with global-, namepace-, and layer-level permis-sions:
*.*.r=TRUSTED_ROLE
*.*.w=NO_ONEtopp.*.r=*topp.states.r=USA_CITIZEN_ROLE,LAND_MANAGER_ROLE,TRUSTED_ROLEtopp.states.w=NO_ONEtopp.poly_landmarks.w=LAND_MANAGER_ROLEtopp.military_bases.r=MILITARY_ROLEtopp.military_bases.w=MILITARY_ROLE
In this example, here is the map of roles to permissions:
Role topp.statestopp.poly_landmarkstopp.military_basestopp.(all otherlayers)
(All othernamespaces)
NO_ONE w r (none) w wTRUSTED_ROLE r r (none) r rMILITARY_ROLE (none) r r/w r (none)USA_CITIZEN_ROLEr r (none) r (none)LAND_MANAGER_ROLEr r/w (none) r (none)(All other users) (none) r (none) r (none)
Note: The entry topp.states.w=NO_ONE is not needed, because this permission would be inheritedfrom the global level, i.e. the line *.*.w=NO_ONE.
Invalid configuration file
The following set of entries would not be valid because the namespace, layer, and permission combinationsof the entries are not unique:
topp.state.rw=ROLE1topp.state.rw=ROLE2,ROLE3
9.5 Disabling security
If you are using an external security subsystem, you may want to disable the built-in security to preventconflicts.
Warning: Beware! If security is disabled, you’ll have to make sure the external one locks down theadministration interface, otherwise it will be completely unlocked!
To disable GeoServer security, first shut down GeoServer, open the web.xml file (located inside theWEB-INF directory) and comment out the “Acegi Filter Chain Proxy” filter definition parameters. Thesetwo pieces of code should look something like this:
<filter><filter-name>Acegi Filter Chain Proxy</filter-name><filter-class>org.acegisecurity.util.FilterToBeanProxy</filter-class><init-param>
9.5. Disabling security 157

GeoServer User Manual, Release 1.7.4
<param-name>targetClass</param-name><param-value>org.acegisecurity.util.FilterChainProxy</param-value>
</init-param></filter>
<filter-mapping><filter-name>Acegi Filter Chain Proxy</filter-name><url-pattern>/*</url-pattern>
</filter-mapping>
Comment these sections out. When GeoServer is restarted, the internal security subsystem will be com-pletely disabled.
158 Chapter 9. Security

CHAPTER 10
Caching with GeoWebCache
GeoWebCache is a WMS tiling client. It runs as a proxy server between a map client and map server,caching tiles as they are requested, eliminating redundant requests and saving large amounts of process-ing time. GeoWebCache has been integrated into GeoServer, although it is also available as a standaloneproduct.
These pages will discuss GeoServer’s built-in GeoWebCache instance. For information about the standaloneproduct, please see the GeoWebCache homepage.
10.1 Setup
10.1.1 Pointing GeoWebCache to GeoServer’s WMS
By default, GeoWebCache expects GeoServer to be accessible at the following URL:
http://localhost:8080/geoserver
To point GeoWebCache elsewhere, you will need to specify the location of your GeoServer instance’s WMSGetCapabilities path. Stop GeoServer if it is currently running, and then add the following code to yourGeoServer’s web.xml file (located in the WEB-INF directory):
<context-param><param-name>GEOSERVER_WMS_URL</param-name><param-value>http://example.com/path/wms?request=GetCapabilities</param-value>
</context-param>
Make sure to replace the URL inside <param-value> with your GeoServer instance’s WMS GetCapabili-ties path. Restart GeoServer when done.
159

GeoServer User Manual, Release 1.7.4
Note: There is a quick link to the WMS GetCapabilities path accessible from the Welcome page of the WebAdministration Interface. (See Interface basics for details.)
10.1.2 Setting the directory for cached data
GeoWebCache will automatically store cached tiles in the gwc directory inside your GeoServer data di-rectory. To change this, stop GeoServer (if it is running) and add the following code to your GeoServer’sweb.xml file (located in the WEB-INF directory):
<context-param><param-name>GEOWEBCACHE_CACHE_DIR</param-name><param-value>C:\temp</param-value>
</context-param>
Make sure to change the path inside <param-value> to the desired path. Restart GeoServer whendone.
10.2 Using GeoWebCache
Note: For an advanced discussion of using GeoWebCache, please see the GeoWebCache documenta-tion.
10.2.1 Cached requests vs. non-cached requests
GeoWebCache works as a proxy between your client and GeoServer, and therefore acts as its own WMS.To direct your client to GeoWebCache (and thus receive cached tiles) you only need to change the WMSURL.
If your application requests WMS tiles from GeoServer at this URL:
http://example.com/geoserver/wms
You can invoke GeoWebCache’s WMS instead at this URL:
http://example.com/geoserver/gwc/service/wms
In other words, add /gwc/service in between the path to your GeoServer instance and the WMScall.
As soon as tiles are requested through GeoWebCache, GeoWebCache automatically starts caching. Thismeans that initial requests for tiles will not be accelerated. To automate this process of requesting tiles, youcan seed the cache. See the section on Seeding and refreshing for more details.
10.2.2 Integration with external mapping sites
The Documentation on the GeoWebCache homepage contains examples for creating applications that inte-grate with:
• Google Maps
• Google Earth
• Microsoft Virtual Earth
160 Chapter 10. Caching with GeoWebCache

GeoServer User Manual, Release 1.7.4
10.2.3 Support for custom projections
The version of GeoWebCache that comes bundled with GeoServer automatically configures every layerserved in GeoServer with the two most common projections:
• EPSG:4326 (standard Latitude/Longitude)
• EPSG:900913 (Spherical Mercator, the projection used in Google Maps)
If you need another projection, you can create a custom configuration file, geowebcache.xml, in the samedirectory that contains the cache (this path was determined in the Setup section). This configuration fileis the same as used by the standalone version of GeoWebCache and documented on the GeoWebCacheConfiguration page. The configuration syntax directly supports the most common WMS parameters, suchas style, palette, and background color. To avoid conflicts, the layers in this file should be named differentlyfrom the ones that are automatically loaded from GeoServer.
10.2.4 Troubleshooting
Sometimes errors will occur when requesting data from GeoWebCache. Below are some of the most com-mon reasons.
Grid misalignment
Sometimes errors will occur saying that the “resolution is not supported” or the “bounds do not align.”When this happens, it is usually due to the client making requests that do not align with the grid of tilesthat GeoWebCache has created. The map bounds or layer bounds may differ from those of the grid, or theresolution may not be correct. If you are using OpenLayers as a client, looking at the source code of theincluded demos may provide more clues to matching up the grid.
10.3 Demo page
GeoWebCache comes with a demo page that allows quick access to some of the most basic functionality ofthe software. From within the demo page you can view configured layers, reload the configuration to addnew layers, and seed/refresh the existing cache on a per-layer basis.
Warning: Add screenshot of demo page
10.3.1 Loading
To view the GeoWebCache demo page, append /gwc/demo to the address of your GeoServer instance. Forexample, if your GeoServer is at the following address:
http://example.com/geoserver
The GeoWebCache demo page is accessible here:
http://example.com/geoserver/gwc/demo
If there is a problem loading this page, GeoWebCache may be set up incorrectly. Verify the steps on theUsing GeoWebCache page have been carried out successfully.
10.3. Demo page 161

GeoServer User Manual, Release 1.7.4
10.3.2 Refreshing layer list
The demo page contains a list of every layer that GeoWebCache is aware of. This is related (but not alwaysidentical) to the list of layers as published in GeoServer’s WMS GetCapabilities document. If changeshave been made to GeoServer, GeoWebCache will not automatically become aware of them. If there is adiscrepancy, the Reload Configuration button will poll GeoServer for the most up-to-date list. Pressing thisbutton will trigger authentication to GeoServer. Use the same username and password that you would useto log in to the Web Administration Interface. (See Security and Making Changes for more information.) After asuccessful login, the number of layers found and loaded will be displayed.
Warning: Add screenshot(s) of reload configuration
10.3.3 Layers and output formats
For each layer that GeoWebCache serves, links are available for the following functions:
Option DescriptionOpenLayers -EPSG:4326
Creates an OpenLayers application in the projection EPSG:4326 (standardLatitude/Longitude)
OpenLayers -EPSG:900913
Creates an OpenLayers application in the projection EPSG:900913 (SphericalMercator, the projection used in Google Maps)
Google Earth -KML (PNG)
Outputs raster KML for viewing in Google Earth
Google Earth -KML (vector)
Outputs vector KML for viewing in Google Earth
Custom
Also on the list is an option to Seed this layer. More on this option can be found on the Seeding and refreshingpage.
10.4 Seeding and refreshing
The primary benefit to GeoWebCache is that it allows for the acceleration of normal WMS tile requestprocessing by eliminating the need for the tiles to be regenerated for every request. That said, the tiles needto be generated at some point, and there are two ways for tiles to be generated.
10.4.1 Generating tiles
The first way for tiles to be generated is during normal map viewing. In this case, tiles are cached onlywhen they are requested, either through map browsing (such as in OpenLayers) or through manual WMStile requests. The first time a map view is requested it will be roughly at the same speed as a standardGeoServer WMS request. The second and subsequent map viewings will be greatly accelerated as those tileswill have already been generated. The main advantage to this method is that it requires no preprocessing,and that only the data that has been requested will be cached, thus potentially saving disk space as well. Thedisadvantage to this method is that map viewing will be intermittently accelerated, reducing the quality ofuser experience. The first way for tiles to be generated is during normal map viewing. In this case, tiles arecached only when they are requested, either through map browsing (such as in OpenLayers) or throughmanual WMS tile requests. The first time a map view is requested it will be roughly at the same speed asa standard GeoServer WMS request. The second and subsequent map viewings will be greatly acceleratedas those tiles will have already been generated. The main advantage to this method is that it requires
162 Chapter 10. Caching with GeoWebCache

GeoServer User Manual, Release 1.7.4
no preprocessing, and only the data requested will be cached, thus potentially saving disk space. Thedisadvantage to this method is that map viewing will be intermittently accelerated, reducing the quality ofthe user experience.
The other way for tiles to be generated is by seeding. Seeding is the process where map tiles are generatedand cached automatically. The advantage to this process is that the user experience is greatly enhanced, asby the time the user sees the map, it is already accelerated. The disadvantage to this process is that seedingcan be a very time- and disk-consuming process.
10.4.2 Seeding options
The Demo page contains a link next to each layer entitled Seed this layer. This link will trigger authenticationwith the GeoServer configuration. Use the same username and password that you would use to log in tothe Web Administration Interface. (See Security and Making Changes for more information.) After a successfullogin, a new page shows up with seeding options.
Warning: Add screenshot for seeding options page
The seeding options page contains various parameters for configuring the way that the layer isseeded.
Option DescriptionNumber ofthreads touse
Possible values are between 1 and 16.
Type ofoperation
Sets the operation. There are three possible values: Seed (adds missing tiles, butdoes not overwrite existing ones), Reseed (like Seed, but overwrites existing tiles)and Truncate (deletes all tiles within the given parameters)
SRS Specifies the projection to use when creating tiles (possible values are EPSG:4326and EPSG:900913)
Format Sets the image format of the tiles. Can be application/vnd.google-earth.kml+xml(Google Earth KML), image/gif (GIF), image/jpeg (JPEG), image/png (24 bit PNG),and image/png8 (8 bit PNG)
Zoom start Sets the minimum zoom level. Lower values indicate map views that are morezoomed out. When seeding, GeoWebCache will only create tiles for those zoomlevels inclusive of this value and Zoom stop.
Zoom stop Sets the maximum zoom level. Higher values indicate map views that are morezoomed in. When seeding, GeoWebCache will only create tiles for those zoomlevels inclusive of this value and Zoom start.
Bounding box (optional) Allows seeding to occur over a specified area, instead of the full extent ofthe layer. This is useful if your layer contains data over a large area, but theapplication will only request tiles from a certain area. The four boxes correspond toXmin, Ymin, Xmax, and Ymax.
When finished, click Submit.
Warning: Please be mindful when seeding your cache. Currently there is no progress bar to informyou of the time required to perform the operation, nor is there any intelligent handling of disk space. Inshort, the seed may take a very long time, and the cache may fill up your disk.
10.4. Seeding and refreshing 163

GeoServer User Manual, Release 1.7.4
10.4.3 Manually deleting cached content
If you have direct access to the file system on the server, you can also delete the appropriate layers in thecache directory (typically named gwc in the data directory, although this can be changed). The structure ofthe cache directory is [root] > layer > projection_zoomlevel.
164 Chapter 10. Caching with GeoWebCache

CHAPTER 11
Google Earth
This section contains information on Google Earth support in GeoServer.
Google Earth is a 3-D virtual globe program. A free download from Google, it allows the user to virtuallyview, pan, and fly around Earth imagery. The imagery on Google Earth is obtained from a variety of sources,mainly from commercial satellite and aerial photography providers.
Google Earth recognizes a markup language called KML (Keyhole Markup Language) for data exchange.GeoServer integrates with Google Earth by supporting KML as a native output format. Any data configuredto be served by GeoServer is thus able to take advantage of the full visualization capabilities of GoogleEarth.
11.1 Overview
11.1.1 Why use GeoServer with Google Earth?
GeoServer is useful when one wants to put a lot of data on to Google Earth. GeoServer automaticallygenerates KML that can be easily and quickly served and visualized in Google Earth. GeoServer oper-ates entirely through a Network Link, which allows it to selectively return information for the area beingviewed. With GeoServer as a robust and powerful server and Google Earth providing rich visualizations,they are a perfect match for sharing your data.
11.1.2 Standards-based implementation
GeoServer supports Google Earth by providing KML as a Web Map Service (WMS) output format. Thismeans that adding data published by GeoServer is as simple as constructing a standard WMS request andspecifying “application/vnd.google-earth.kml+xml” as the outputFormat. Since generating KML is justa WMS request, it fully supports Styling via SLD.
See the next section (Quickstart) to view GeoServer and Google Earth in action.
11.2 Quickstart
Note: If you are using GeoServer locally, the GEOSERVER_URL is usually
165

GeoServer User Manual, Release 1.7.4
http://localhost:8080/geoserver
11.2.1 Viewing a layer
Once GeoServer is installed and running, open up a web browser and navigate to the Welcome page. Navi-gate to the web_admin_map_preview by clicking Demo then Map Preview. You will be presented with a listof the currently configured layers in your GeoServer instance. Find the row that says topp:states. Tothe right of the layer click on the link that says KML.
Figure 11.1: The Map Preview page
If Google Earth is correctly installed on your computer, you will see a dialog asking how to open the file.Select Open with Google Earth.
When Google Earth is finished loading the result will be similar to below.
166 Chapter 11. Google Earth

GeoServer User Manual, Release 1.7.4
Figure 11.2: Open with Google Earth
11.2. Quickstart 167

GeoServer User Manual, Release 1.7.4
Figure 11.3: The topp:states layer rendered in Google Earth
11.2.2 Direct access to KML
All of the configured FeatureTypes are available to be output as KML (and thus loaded into Google Earth).The URL structure for KMLs is:
http://GEOSERVER_URL/wms/kml?layers=<layername>
For example, the topp:states layer URL is:
http://GEOSERVER_URL/wms/kml?layers=topp:states
11.2.3 Adding a Network Link
An alternative to serving KML directly into Google Earth is to use a Network Link. A Network Link allowsfor better integration into Google Earth. For example, using a Network Link enables the user to refresh thedata within Google Earth, without having to retype a URL, or click on links in the GeoServer Map Previewagain.
To add a Network Link, pull down the Add menu, and go to Network Link. The New Network Linkdialog box will appear. Name your layer in the Name field. (This will show up in My Places on the mainGoogle Earth screen.) Set Link to:
http://GEOSERVER_URL/wms/kml?layers=topp:states
168 Chapter 11. Google Earth

GeoServer User Manual, Release 1.7.4
(Don’t forget to replace the GEOSERVER_URL.) Click OK. You can now save this layer in your MyPlaces.
Figure 11.4: Adding a network link
Check out the sections on Tutorials and the KML Styling for more information.
11.3 KML Styling
11.3.1 Introduction
Keyhole Markup Langauge (KML), when created and output by GeoServer, is styled using Styled LayerDescriptors (SLD). This is the same approach used to style standard WMS output formats, but is a bitdifferent from how Google Earth is normally styled, behaving more like Cascading Style Sheets (CSS).The style of the map is specified in the SLD file as a series of rules, and then the data matching thoserules is styled appropriately in the KML output. For those unfamiliar with SLD, a goo place to start isthe Introduction to SLD. The remainder of this guide contains information about how to construct SLDdocuments in order to impact the look of KML produced by GeoServer.
11.3. KML Styling 169

GeoServer User Manual, Release 1.7.4
Contents
Basic SLD Creation Wizard
SLD Structure
Points
Lines
Polygons
Text Labels
Descriptions
11.3.2 Basic SLD Creation Wizard
GeoServer includes a very basic wizard for creating styles from scratch. This wizard can be accessed fromyour GeoServer’s admin page by going to the FeatureType editor. From the Welcome page, navigate toConfig -> Data -> FeatureTypes -> Edit) Click the button that says Create new SLD.
Figure 11.5: Figure 1: Invoking the SLD creation wizard
A new screen will appear that allows you to customize how your data will appear on a map. (Figure 2 refersto what will be seen when styling line data; styling polygons and points will make this page look slightlydifferent.) Fill in all the required fields. When finished, click Apply Style and then Finished.
11.3.3 SLD Structure
The following is a skeleton of a SLD document. It can be used as a base on which to expand upon to createmore interesting and complicated styles.
<StyledLayerDescriptor version="1.0.0"xsi:schemaLocation="http://www.opengis.net/sld StyledLayerDescriptor.xsd"xmlns="http://www.opengis.net/sld"xmlns:ogc="http://www.opengis.net/ogc"xmlns:xlink="http://www.w3.org/1999/xlink"xmlns:xsi="http://www.w3.org/2001/XMLSchema-instance"><NamedLayer>
<Name>Default Line</Name><UserStyle>
<Title>My Style</Title><Abstract>A style</Abstract>
170 Chapter 11. Google Earth

GeoServer User Manual, Release 1.7.4
Figure 11.6: Figure 2: Using the SLD creation wizard to style line data
11.3. KML Styling 171

GeoServer User Manual, Release 1.7.4
<FeatureTypeStyle><Rule>
<!-- symbolizers go here -->
</Rule></FeatureTypeStyle>
</UserStyle></NamedLayer>
</StyledLayerDescriptor>
Figure 3: Basic SLD structure
In order to test the code snippets in this document, create an SLD with the content as shown in Figure 3,and then add the specific code you wish to test in the space that says <!-- symbolizers go here -->.To view, edit, or add SLD files to GeoServer, navigate to Config -> Data -> Styles.
11.3.4 Points
In SLD, styles for points are specified via a PointSymbolizer. An empty PointSymbolizer element will resultin a default KML style:
<PointSymbolizer></PointSymbolizer>
Figure 11.7: Figure 4: Default point
Three aspects of points that can be specified are color, opacity, and the icon.
Point Color
The color of a point is specified with a CssParameter element and a fill attribute. The color is specifiedas a six digit hexadecimal code.
172 Chapter 11. Google Earth

GeoServer User Manual, Release 1.7.4
<PointSymbolizer><Graphic>
<Mark><Fill>
<CssParameter name="fill">#ff0000</CssParameter></Fill>
</Mark></Graphic>
</PointSymbolizer>
Figure 11.8: Figure 5: Setting the point color (#ff0000 = 100% red)
Point Opacity
The opacity of a point is specified with a CssParameter element and a fill-opacity attribute. The opac-ity is specified as a floating point number between 0 and 1, with 0 being completely transparent, and 1being completely opaque.
<PointSymbolizer><Graphic>
<Mark><Fill>
<CssParameter name="fill-opacity">0.5</CssParameter></Fill>
</Mark></Graphic>
</PointSymbolizer>
Point Icon
An icon different from the default can be specified with the ExternalGraphic element:
11.3. KML Styling 173

GeoServer User Manual, Release 1.7.4
Figure 11.9: Figure 6: Setting the point opacity (0.5 = 50% opaque)
<PointSymbolizer><Graphic>
<ExternalGraphic><OnlineResource xlink:type="simple"
xlink:href="http://maps.google.com/mapfiles/kml/pal3/icon55.png"/><Format>image/png</Format>
</ExternalGraphic></Graphic>
</PointSymbolizer>
Figure 11.10: Figure 7: A custom icon for points
In Figure 7, the custom icon is specified as a remote URL. It is also possible to place the graphic in theGeoServer styles directory, and then specify the filename only:
174 Chapter 11. Google Earth

GeoServer User Manual, Release 1.7.4
<PointSymbolizer><Graphic>
<ExternalGraphic><OnlineResource xlink:type="simple" xlink:href="icon55.png"/><Format>image/png</Format>
</ExternalGraphic></Graphic>
</PointSymbolizer>
Figure 8: Specifying a local file for a graphic point
11.3.5 Lines
Styles for lines are specified via a LineSymbolizer. An empty LineSymbolizer element will result ina default KML style:
<LineSymbolizer></LineSymbolizer>
Figure 11.11: Figure 9: Default line
11.3. KML Styling 175

GeoServer User Manual, Release 1.7.4
The aspects of the resulting line which can be specified via a LineSymbolizer are color, width, and opac-ity.
Line Color
The color of a line is specified with a CssParameter element and a stroke attribute. The color is specifiedas a six digit hexadecimal code.
<LineSymbolizer><Stroke>
<CssParameter name="stroke">#ff0000</CssParameter></Stroke>
</LineSymbolizer>
Figure 11.12: Figure 10: Line rendered with color #ff0000 (100% red)
Line Width
The width of a line is specified with a CssParameter element and a stroke-width attribute. The widthis specified as an integer (in pixels):
176 Chapter 11. Google Earth

GeoServer User Manual, Release 1.7.4
<LineSymbolizer><Stroke>
<CssParameter name="stroke-width">5</CssParameter></Stroke>
</LineSymbolizer>
Figure 11.13: Figure 11: Line rendered with a width of five (5) pixels
Line Opacity
The opacity of a line is specified with a CssParameter element and a fill-opacity attribute. Theopacity is specified as a floating point number between 0 and 1, with 0 being completely transparent, and 1being completely opaque.
<LineSymbolizer><Stroke>
<CssParameter name="stroke-opacity">0.5</CssParameter></Stroke>
</LineSymbolizer>
11.3. KML Styling 177

GeoServer User Manual, Release 1.7.4
Figure 11.14: Figure 12: A line rendered with 50% opacity
178 Chapter 11. Google Earth

GeoServer User Manual, Release 1.7.4
11.3.6 Polygons
Styles for polygons are specified via a PolygonSymbolizer. An empty PolygonSymbolizer elementwill result in a default KML style:
<PolygonSymbolizer></PolygonSymbolizer>
Polygons have more options for styling than points and lines, as polygons have both an inside (“fill”) andan outline (“stroke”). The aspects of polygons that can be specified via a PolygonSymbolizer are strokecolor, stroke width, stroke opacity, fill color, and fill opacity.
Polygon Stroke Color
The outline color of a polygon is specified with a CssParameter element and stroke attribute inside ofa Stroke element. The color is specified as a 6 digit hexadecimal code:
<PolygonSymbolizer><Stroke>
<CssParameter name="stroke">#0000FF</CssParameter></Stroke>
</PolygonSymbolizer>
Polygon Stroke Width
The outline width of a polygon is specified with a CssParameter element and stroke-width attributeinside of a Stroke element. The width is specified as an integer.
<PolygonSymbolizer><Stroke>
<CssParameter name="stroke-width">5</CssParameter></Stroke>
</PolygonSymbolizer>
Figure 14: Polygon with stroke width of five (5) pixels
Polygon Stroke Opacity
The stroke opacity of a polygon is specified with a CssParameter element and stroke attribute insideof a Stroke element. The opacity is specified as a floating point number between 0 and 1, with 0 beingcompletely transparent, and 1 being completely opaque.
<PolygonSymbolizer><Stroke>
<CssParameter name="stroke-opacity">0.5</CssParameter></Stroke>
</PolygonSymbolizer>
11.3. KML Styling 179

GeoServer User Manual, Release 1.7.4
Figure 11.15: Figure 13: Outline of a polygon (#0000FF or 100% blue)
180 Chapter 11. Google Earth

GeoServer User Manual, Release 1.7.4
11.3. KML Styling 181

GeoServer User Manual, Release 1.7.4
Figure 11.16: Figure 15: Polygon stroke opacity of 0.5 (50% opaque)
182 Chapter 11. Google Earth

GeoServer User Manual, Release 1.7.4
Polygon Fill Color
The fill color of a polygon is specified with a CssParameter element and fill attribute inside of a Fillelement. The color is specified as a six digit hexadecimal code:
<PolygonSymbolizer><Fill>
<CssParameter name="fill">#0000FF</CssParameter></Fill>
</PolygonSymbolizer>
Figure 11.17: Figure 16: Polygon fill color of #0000FF (100% blue)
Polygon Fill Opacity
The fill opacity of a polygon is specified with a CssParameter element and fill-opacity attributeinside of a Fill element. The opacity is specified as a floating point number between 0 and 1, with 0 beingcompletely transparent, and 1 being completely opaque.
11.3. KML Styling 183

GeoServer User Manual, Release 1.7.4
<PolygonSymbolizer><Fill>
<CssParameter name="fill-opacity">0.5</CssParameter></Fill>
</PolygonSymbolizer>
Figure 11.18: Figure 17: Polygon fill opacity of 0.5 (50% opaque)
11.3.7 Text Labels
There are two ways to specify a label for a feature in Google Earth. The first is with Freemarker templates(LINK?), and the second is with a TextSymbolizer. Templates take precedence over symbolizers.
Freemarker Templates
Specifying labels via a Freemarker template involves creating a special text file called title.ftl andplacing it into the featureTypes directory (inside the GeoServer data directory) for the dataset to belabeled. For example, to create a template to label the states dataset by state name one would create thefile here: <data_dir>/featureTypes/states/title.ftl. The content of the file would be:
184 Chapter 11. Google Earth

GeoServer User Manual, Release 1.7.4
${STATE_NAME.value}
Figure 11.19: Figure 18: Using a Freemarker template to display the value of STATE_NAME
For more information on Placemark Templates, please see our full tutorial (LINK FORTHCOMING).
TextSymbolizer
In SLD labels are specified with the Label element of a TextSymbolizer. (Note the ogc: prefix on thePropertyName element.)
<TextSymbolizer><Label>
<ogc:PropertyName>STATE_NAME</ogc:PropertyName></Label>
</TextSymbolizer>
The aspects of the resulting label which can be specified via a TextSymbolizer are color and opacity.
11.3. KML Styling 185

GeoServer User Manual, Release 1.7.4
Figure 11.20: Figure 19: Using a TextSymbolizer to display the value of STATE_NAME
186 Chapter 11. Google Earth

GeoServer User Manual, Release 1.7.4
TextSymbolizer Color
The color of a label is specified with a CssParameter element and fill attribute inside of a Fill element.The color is specified as a six digit hexadecimal code:
<TextSymbolizer><Label>
<ogc:PropertyName>STATE_NAME</ogc:PropertyName></Label><Fill>
<CssParameter name="fill">#000000</CssParameter></Fill>
</TextSymbolizer>
Figure 11.21: Figure 20: TextSymbolizer with black text color (#000000)
TextSymbolizer Opacity
The opacity of a label is specified with a CssParameter element and fill-opacity attribute inside of aFill element. The opacity is specified as a floating point number between 0 and 1, with 0 being completelytransparent, and 1 being completely opaque.
11.3. KML Styling 187

GeoServer User Manual, Release 1.7.4
<TextSymbolizer><Label>
<ogc:PropertyName>STATE_NAME</ogc:PropertyName></Label><Fill>
<CssParameter name="fill-opacity">0.5</CssParameter></Fill>
</TextSymbolizer>
Figure 11.22: Figure 21: TextSymbolizer with opacity 0.5 (50% opaque)
11.3.8 Descriptions
When working with KML, each feature is linked to a description, accessible when the feature is clicked on.By default, GeoServer creates a list of all the attributes and values for the particular feature.
It is possible to modify this default behavior. Much like with featureType titles, which are edited by creatinga title.ftl template, a custom description can be used by creating template called description.ftland placing it into the featureTypes directory (inside the GeoServer data directory) for the dataset. Forinstance, to create a template to provide a description for the states dataset, one would create the file:
188 Chapter 11. Google Earth

GeoServer User Manual, Release 1.7.4
Figure 11.23: Figure 22: Default description for a feature
11.3. KML Styling 189

GeoServer User Manual, Release 1.7.4
<data_dir>/featureTypes/states/description.ftl. As an example, if the content of the de-scription template is:
This is the state of ${STATE_NAME.value}.
The resultant description will look like this:
Figure 11.24: Figure 23: A custom description
It is also possible to create one description template for all featureTypes in a givennamespace. To do this, create a description.ftl file as above, and save it as<data_dir>/templates/<namespace>/description.ftl. Please note that if a descriptiontemplate is created for a specific featureType that also has an associated namespace description template,the featureType template (i.e. the most specific template) will take priority.
One can also create more complex descriptions using a combination of HTML and the attributes of the data.A full tutorial on how to use templates to create descriptions is available in our page on KML PlacemarkTemplates. (LINK?)
190 Chapter 11. Google Earth

GeoServer User Manual, Release 1.7.4
Basic SLD Creation Wizard SLD Structure Points Lines Polygons Text Labels Descriptions
11.4 Tutorials
11.4.1 Placemark Templates
11.4.2 Height Templates
11.4.3 Time Templates
11.4.4 Super-Overlays and GeoWebCache
11.4.5 Super-Overlays and Extrudes with Building Data
11.5 Features
This section delves into greater detail about the various functionality and options possible with KML outputand Google Earth.
11.5.1 KML Reflector
Standard WMS requests can be quite long and cumbersome. The following is an example of a request forKML output from GeoServer:
http://localhost:8080/geoserver/ows?service=WMS&request=GetMap&version=1.1.1&format=application/vnd.google-earth.kml+XML&width=1024&height=1024&srs=EPSG:4326&layers=topp:states&styles=population&bbox=-180,-90,180,90
GeoServer includes an alternate way of requesting KML, and that is to use the KML reflector. The KMLreflector is a simpler URL-encoded request that uses sensible defaults for many of the parameters in astandard WMS request. Using the KML reflector one can shorten the above request to:
http://localhost:8080/geoserver/wms/kml?layers=topp:states
Using the KML reflector
The only mandatory parameter is the layers parameter. The syntax is as follows:
http://GEOSERVER_URL/wms/kml?layers=<layer>
where GEOSERVER_URL is the URL of your GeoServer instance, and <layer> is the name of the feature-type to be served.
The following table lists the default assumptions:
11.4. Tutorials 191

GeoServer User Manual, Release 1.7.4
Key Valuerequest GetMapservice wmsversion 1.1.1srs EPSG:4326format applcation/vnd.google-earth.kmz+xmlwidth 256height 256bbox <layer bounds>kmattr truekmplacemark falsekmscore 50styles [default style for the featuretype]
Any of these defaults can be changed when specifying the request. For instance, to specify a particularstyle, one can append styles=population to the request:
http://localhost:8080/geoserver/wms/kml?layers=topp:states&styles=population
To specify a different bounding box, append the parameter to the request:
http://localhost:8080/geoserver/wms/kml?layers=topp:states&bbox=-124.73,24.96,-66.97,49.37
Reflector modes
The KML reflector can operate in one of three modes: superoverlay, refresh, and download.
The mode is set by appending the following parameter to the URL:
mode=<mode>
where <mode> is one of the three reflector modes. The details for each mode are as follows:
Mode Descriptionsuperoverlay(default for versions 1.7.1 and later) Returns KML as a super-overlay. A super-overlay is a
form of KML in which data is broken up into regions. Please see the section on KMLSuper-Overlays for more information.
refresh (default for versions prior to 1.7.1) Returns dynamic KML that can be refreshed/updated bythe Google Earth client. Data is refreshed and new data/imagery is downloaded whenzooming/panning stops. This mode can return either vector or raster (placemark oroverlay) The decision to return either vector or raster data is determined by the value ofkmscore. Please see the section on KML Scoring for more information.
download Returns KML which contains the entire data set. In the case of a vector layer, this willinclude a series of KML placemarks. With raster layers, this will include a single KMLground overlay. This is the only mode that doesn’t dynamically request new data from theserver, and thus is self-contained KML.
More about the “superoverlay” mode
When requesting KML using the superoverlay mode, there are four additional submodes available re-garding how and when data is requested. These options are set by appending the following parameter tothe KML reflector request:
192 Chapter 11. Google Earth

GeoServer User Manual, Release 1.7.4
superoverlay_mode=<submode>
where <submode> is one of the following options:
Sub-mode
Description
auto (default) Always returns vector features if the original data is in vector form, and returns rasterimagery if the original data is in raster form. This can sometimes be less than optimal if thegeometry of the features are very complicated, which can slow down Google Earth.
raster Always returns raster imagery, regardless of the original data. This is almost always faster,but all vector information is lost in this view.
overviewDisplays either vector or raster data depending on the view. At higher zoom levels, rasterimagery will be displayed, and at lower zoom levels, vector features will be displayed. Thedetermination for when to switch between vector and raster is made by the regionationparameters set on the server. See the section on KML Regionation for more information.
hybrid Displays both raster and vector data at all times.
11.5.2 Toggling Placemarks
Vector Placemarks
When GeoServer generates KML for a vector dataset, it attaches information from the data to each featurethat is created. When clicking on a vector feature, a pop-up window is displayed. This is called a placemark.By default this is a simple list which displays attribute data, although this information can be customizedusing Freemarker templates.
If you would like this information not to be shown when a feature is clicked (either for security reasons, orsimply to have a cleaner user interface), it is possible to disable this functionality. To do so, use the kmattrparameter in a KML request to turn off attribution.
The syntax for kmattr is as follows:
format_options=kmattr:[true|false]
Note that kmattr is a “format option”, so the syntax is slightly different from the usual key-value pair. Forexample:
http://localhost:8080/geoserver/wms/kml?layers=topp:states&format_options=kmattr:false
Raster Placemarks
Unlike vector features, where the placemark is enabled by default, placemarks are disabled by default withraster images of features. To enable this feature, you can use the kmplacemark format option in your KMLrequest. The syntax is similar to the kmattr format option specified above:
format_options=kmplacemark:[true|false]
For example, using the KML reflector, the syntax would be:
http://localhost:8080/geoserver/wms/kml?layers=topp:states&format_options=kmplacemark:true
11.5. Features 193

GeoServer User Manual, Release 1.7.4
11.5.3 Customizing Placemarks
KML output can leverage some powerful visualization abilities in Google Earth. Titles can be displayedon top of the features. Descriptions (custom HTML shown when clicking on a feature) can be addedto customize the views of the attribute data. In addition, using Google Earth’s time slider, time-basedanimations can be created. Finally, height of features can be set, as opposed to the default ground overlay.All of these can be accomplished by creating Freemarker templates. Freemarker templates are text files(with limited HTML code), saved in the GeoServer Data Directory, that utilize variables that link to specificattributes in the data.
Titles
Specifying labels via a template involves creating a special text file called title.ftl and placing itinto the featuretypes directory inside the GeoServer Data Directory for the dataset to be labeled. Forinstance, to create a template to label the states layer by state name, one would create the file:<data_dir>/featureTypes/states/title.ftl. The content of the file would be:
${STATE_NAME.value}
Descriptions
When working with KML, each feature is linked to a description, accessible when the feature is clicked on.By default, GeoServer creates a list of all the attributes and values for the particular feature.
It is possible to modify this default behavior. Much like with featuretype titles, which are edited by cre-ating a title.ftl template, specifying descriptions via a template involves creating a special text filecalled description.ftl and placing it into the featuretypes directory inside the GeoServer Data Di-rectory for the dataset to be labeled. For instance, a sample description template would be saved here:<data_dir>/featureTypes/states/description.ftl. The content of the file could be:
This is the state of ${STATE_NAME.value}.
The resulting description will look like this:
Warning: Add SS: A custom description
It is also possible to create one description template for all layers in a given namespace. To do this, create adescription.ftl file as above, and save it here:
<data_dir>/templates/<namespace>/description.ftl.
Please note that if a description template is created for a specific layer that also has an associated namespacedescription template, the layer template (i.e. the most specific template) will take priority.
11.5.4 KML Height and Time
Height
GeoServer by default creates two dimensional overlays in Google Earth. However, GeoServer can outputfeatures with height information (also called “KML extrudes”) if desired. This can have the effect of having
194 Chapter 11. Google Earth

GeoServer User Manual, Release 1.7.4
features “float” above the ground, or create bar graph style structures in the shape of the features. Theheight of features can be linked to an attribute of the data.
Setting the height of features is determined by using a KML Freemarker template. Create a filecalled height.ftl, and save it in the same directory as the featuretype in your GeoServer Data Di-rectory. For example, to create a height template for the states layer, the file should be saved in<data_dir>/featureTypes/states/height.ftl.
To set the height based on an attribute, the syntax is:
${ATTRIBUTE.value}
Replace the word ATTRIBUTE with the name of the height attribute in your data set.
Time
Google Earth also contains a “time slider”, which can allow animations of data, and show changes overtime. As with height, time can be linked to an attirbute of the data, as long as the data set has a date/timeattribute. Lnking this date/time attribute to the time slider in Google Earth is accomplished by creating aFreemarker template. Create a file called time.ftl, and save it in the same directory that contains yourdata’s info.xml.
To set the time based on an attribute the syntax is:
${DATETIME_ATTRIBUTE.value}
Replace the word DATETIME_ATTRIBUTE with the name of the date/time attribute. When creating KML,GeoServer will automatically link the data to the time element in Google Earth. If set successfully, the timeslider will automatically appear.
11.5.5 KML Legends
WMS includes a GetLegendGraphic operation which allows a WMS client to obtain a legend graphicfrom the server for a particular layer. Combining the legend with KML overlays allows the legend to beviewed inside Google Earth.
To get GeoServer to include a legend with the KML output, append legend=true to the KML reflectorrequest. For example:
http://localhost:8080/geoserver/wms/kml?layers=topp:states&legend=true
The resulting Google Earth output looks like this:
Warning: Add SS with legend.
11.5.6 Filters
Though not specific to Google Earth, GeoServer has the ability to filter data returned from the Web MapService. The KML Reflector will pass through any WMS filter or cql_filter parameter to GeoServerto constrain the response.
Note: Filters are basically a translation of a SQL “WHERE” statement into web form. Though limited toa single table, this allows users to do logical filters like “AND” and “OR” to make very complex queries,
11.5. Features 195

GeoServer User Manual, Release 1.7.4
leveraging numerical and string comparisons, geometric operations (“bbox”, “touches”, “intersects”, “dis-joint”), “LIKE” statements, nulls, and more.
Filter
There simplest filter is very easy to include. It is called the featureid filter, and it lets you filter to a singlefeature by its ID. The syntax is:
featureid=<feature>
where <feature> is the feature and its ID. An example would be:
http://localhost:8080/geoserver/wms/kml_reflect?layers=topp:states&featureid=states.5
This request will output only the state of Maryland. The feature IDs of your data are most easily found bydoing WFS or KML requests and examining the resulting output.
CQL Filter
Using filters in a URL can be very unwieldy, as one needs to include URL-encoded XML:
http:/localhost:8080/geoserver/wms/kml_reflect?layers=topp:states&FILTER=%3CFilter%3E%3CPropertyIsBetween%3E%3CPropertyName%3Etopp:LAND_KM%3C/PropertyName%3E%3CLowerBoundary%3E%3CLiteral%3E100000%3C/Literal%3E%3C/LowerBoundary%3E%3CUpperBoundary%3E%3CLiteral%3E150000%3C/Literal%3E%3C/UpperBoundary%3E%3C/PropertyIsBetween%3E%3C/Filter%3E
Instead, one can use Common Query Language (CQL), which allows one to specify the same statementmore succinctly:
http://localhost:8080/geoserver/wms/kml?layers=topp:states&CQL_FILTER=LAND_KM+BETWEEN+100000+AND+150000
This query will return all the states in the US with areas between 100,000 and 150,000 km^2.
11.5.7 KML Super-Overlays
Super-overlays are a form of KML in which data is broken up into regions. This allows Google Earth torefresh/request only particular regions of the map when the view area changes. Super-overlays are usedto efficiently publish large sets of data. (Please see Google’s page on super-overlays for more informa-tion.)
GeoServer supports two types of super-overlays: raster and vector. With raster super-overlays, GeoServerintelligently produces imagery appropriate to the current zoom level and dynamically outputs new im-agery when the zoom level changes. With vector super-overlays, feature data is requested for only thevisible features and new features are dynamically loaded as necessary. Raster super-overlays require lessresources on the client, but vector super-overlays have a higher output quality.
When using the KML Reflector, super-overlays are enabled by default, whether the data in question is rasteror vector. For more information on the various options for KML super-overlay output, please see the pageon the KML Reflector.
196 Chapter 11. Google Earth

GeoServer User Manual, Release 1.7.4
Raster Super-Overlays
Consider this image, which is generated from GeoServer. When zoomed out, the data is at a smallsize.
Warning: Add SS from old site, Fig 1
When zooming in, the image grows larger, but since the image is at low resolution (orignially designed tobe viewed small), the quality degrades.
Warning: Add SS from old site, Fig 2
However, in a super-overlay, the KML document requests a new image from GeoServer of a higher res-olution for that zoom level. As the new image is downloaded, the old image is replaced by the new im-age.
Warning: Add SS from old site, Fig 3
Raster Super-Overlays and GeoWebCache
GeoServer implements super-overlays in a way that is compatible with the WMS Tiling Client Recommen-dation. Super-overlays are generated such that the tiles of the super-overlay are the same tiles that a WMStiling client would request. One can therefore use existing tile caching mechanisms and reap a potentiallylarge performance benefit.
The easiest way to tile cache a raster super overlay is to use GeoWebCache which is built intoGeoServer:
http://GEOSERVER_URL/gwc/service/kml/<layername>.<imageformat>.kmz
where GEOSERVER_URL is the URL of your GeoServer instance.
It is also possible to use TileCache with raster super-overlays.
Vector Super-Overlays
GeoServer can include the feature information directly in the KML document. This has lots of benefits. Itallows the user to select (click on) features to see descriptions, toggle the display of individual features, aswell as have better rendering, regardless of zoom level. For large datasets, however, the feature informationcan take a long time to download and use a lot of client-side resources. Vector super-overlays allow theclient to only download part of a dataset, and request more features as necessary.
Vector super-overlays can use the process of KML Regionation to organize features into a hierarchy. Theregionation process can operate in a variety of modes. Most of the modes require a “regionation attribute”which is used to determine which features should be visible at a particular zoom level. Please see the KMLRegionation page for more details.
Vector Super-Overlays and GeoWebCache
As with raster super-overlays, it is possible to cache vector super-overlays using GeoWebCache. Below isthe syntax for generating a vector super-overlay KML document via GeoWebCache:
11.5. Features 197

GeoServer User Manual, Release 1.7.4
http://GEOSERVER_URL/gwc/service/kml/<layername>.kml.kmz
where GEOSERVER_URL is the URL of your GeoServer instance.
Unlike generating a super-overlay with the standard KML Reflector, it is not possible to specify the region-ation properties as part of the URL. These parameters must be set in the FeatureTypes configuration in theConfig menu section of the Web Administration Interface. (Config -> Data -> FeatureType -> Edit)
11.5.8 KML Regionation
Displaying vector features on Google Earth is a very powerful way of creating nicely-styled maps. How-ever, it is not always optimal to display all features at all times. Displaying too many features can createan unsightly map, and can adversely affect Google Earth’s performance. To combat this, GeoServer’s KMLoutput includes the ability to limit features based on certain criteria. This process is known as regionation.Regionation is active by default when using the superoverlay KML reflector mode.
Regionation Attributes
The most important aspect of regionation is to decide how to determine which features show up moreprominently than others. This can be done either by geometry, or by attribute. One should choose theoption that best exemplifies the relative “importance” of the feature. When choosing to regionate by geom-etry, only the larger lines and polygons will be displayed at higher zoom levels, with smaller ones beingdisplayed when zooming in. When regionating by an attribute, the higher value of this attribute will makethose features show up at higher zoom levels. (Choosing an attribute with a non-numeric value will beignored, and will instead default to regionation by geometry.)
Regionation Strategies
Regionation strategies sets how to determine which features should be shown at any given time or zoomlevel. There are five types of regionation strategies:
Strategy Descriptionbest_guess (default) The actual strategy is determined by the type of data being operated on. If the
data consists of points, the random strategy is used. If the data consists of lines orpolygons, the geometry strategy is used.
external-sortingCreates a temporary auxiliary database within GeoServer. It takes slightly extra time tobuild the index upon first request.
native-sortingUses the default sorting algorithm of the backend where the data is hosted. It is fasterthan external-sorting, but will only work with PostGIS datastores.
geometry Externally sorts by length (if lines) or area (if polygons).random Uses the existing order of the data and does not sort.
In most cases, the best_guess strategy is sufficient.
Setting Regionation Parameters
Regionation strategies and attributes are featuretype-specific, and therefore are set in the FeatureTypesediting page in the Config menu of the Web Administration Interface. (Config -> Data -> FeatureType ->Edit)
198 Chapter 11. Google Earth

GeoServer User Manual, Release 1.7.4
11.5.9 KML Scoring
Note: KML scoring only applies when using the super-overlay mode refresh. See KML Super-Overlaysfor more information.
GeoServer can return KML in one of two forms. The first is as a number of placemark elements (vec-tors). Each placemark corresponds to a feature in the underlying dataset. This form only applies to vectordatasets.
The second form is as an overlay (image). In this form the rendering is done by the GeoServer WMS andonly the resulting graphic is sent to Google Earth. This is the only form available for raster datasets, butcan be applied to vector datasets as well.
There are advantages to and disadvantages to each output mode when rendering vector data. Placemarkslook nicer, but there can be performance problems with Google Earth if the data set is large. Overlays putless of a strain on Google Earth, but aren’t as nice looking.
The following shows the same dataset rendered in Placemark form on the left and Overlay form on theright.
Warning: SS Placemark
Warning: SS Overlay
KML scoring is the process of determing whether to render features as rasters or as vectors.
The kmscore attribute
GeoServer makes the determination on whether to render a layer as raster or vector based on how manyfeatures are in the data set and an attribute called kmscore. The kmscore attribute determines the maxi-mum amount of vector features rendered. It is calculated by this formula:
maximum number of features = 10^(kmscore/15)
The following table shows the values of this threashold for various values of the kmscore parameter:
kmscore Maximum # of features0 Force overlay/raster output10 420 2130 10040 Approx. 45050 (default) Approx. 215060 Approx. 10,00070 Approx. 45,00080 Approx. 200,00090 Approx. 1,000,000100 Force placemark/vector output
The syntax for specifying kmscore is:
kmscore=<value>
where <value> is an integer between 0 and 100. For example:
11.5. Features 199
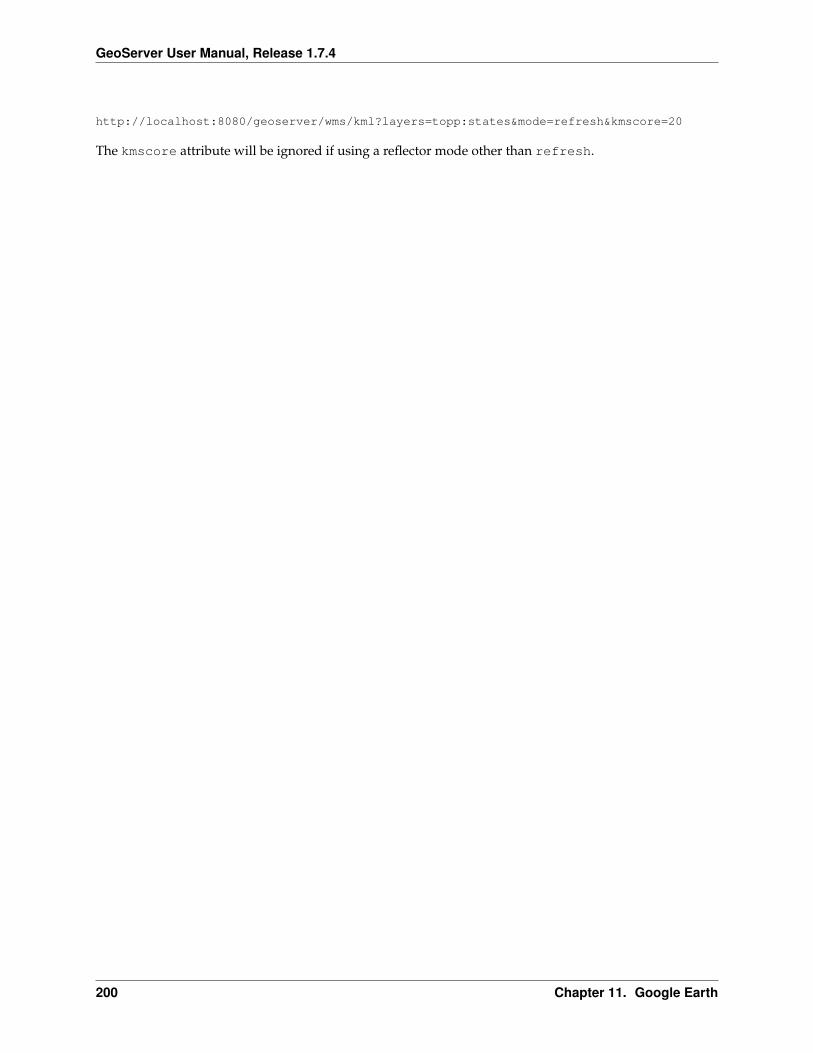
GeoServer User Manual, Release 1.7.4
http://localhost:8080/geoserver/wms/kml?layers=topp:states&mode=refresh&kmscore=20
The kmscore attribute will be ignored if using a reflector mode other than refresh.
200 Chapter 11. Google Earth

CHAPTER 12
Running In A Production Environment
GeoServer is geared towards many different uses, from the simple test to the enterprise-level data server.While many of the optimizations for GeoServer are set by default, here are some considerations for runningGeoServer in a production environment.
12.1 Java Considerations
12.1.1 Use Sun’s JDK
GeoServer speed depends a lot on the chosen Java Development Kit (JDK). For best performance, use SunJDK 1.6 (also known as JDK 6). If this is not possible, use Sun JDK 1.5. Non-Sun JDKs may work, but aregenerally not tested or supported. OpenJDK currently does not work with GeoServer, as it lacks sufficientsupport for 2D rendering.
12.1.2 Install native JAI extensions
The Java Advanced Imaging API (JAI) is an advanced image manipulation library built by Sun. GeoServerrequires JAI to work with coverages and leverages it for WMS output generation. By default, GeoServerships with the pure Java version of JAI, but for best performance, install the native JAI version in yourJDK.
Installing native JAI
Please refer to the GeoTools page on JAI installation
Once you have installed JAI, you may remove the JAI related files from your GeoServer instance:
jai_core-x.y.z.jarjai_imageio-x.y.jarjai_codec-x.y.z.jar
where x, y, and z refer to specific version numbers.
201

GeoServer User Manual, Release 1.7.4
12.2 Container Considerations
Java web containers such as Tomcat or Jetty ship with configurations that allow for quick startup but don’talways deliver the best performance.
12.2.1 Optimize your JVM
Set the following performance settings in the Java virtual machine for your container. These settings arenot specific to any container.
Option Description-server Enables the server Java Virtual Machine (JVM), which compiles bytecode
much earlier and with stronger optimizations. Startup and initial calls will beslower due to “just-in-time” (JIT) compilation taking longer, but subsequentcalls will be faster.
-Xmx256M -Xms48m Allocates extra memory to your server. By default, JVM will use only 64MB ofheap. If you’re serving just vector data, you’ll be streaming, so having morememory won’t increase performance. If you’re serving coverages, however,JAI will use a disk cache. -Xmx256M allocates 256MB of memory toGeoServer (use more if you have excess memory). It is also a good idea toconfigure the JAI tile cache size (see the Server page in the Web AdministrationInterface section) so that it uses 75% of the heap (0.75). -Xmx48m will tell thevirtual machine to grab a 48MB heap on startup, which will make heapmanagement more stable during heavy load serving.
-XX:SoftRefLRUPolicyMSPerMB=36000Increases the lifetime of “soft references” in GeoServer. GeoServer uses softreferences to cache datastore references and other similar requests. Makingthem live longer will increase the effectiveness of the cache.
-XX:MaxPermSize=128mIncreases the maximum size of permanent generation (or “permgen”)allocated to GeoServer to 128MB. Permgen is the heap portion where the classbytecode is stored. GeoServer uses lots of classes, and it may exhaust thatspace quickly, leading to out of memory errors. This is especially important ifyou’re deploying GeoServer along with other applications in the samecontainer, or if you need to deploy multiple GeoServer instances inside thesame container.
-XX:XX:+UseParallelGCEnables the throughput garbage collector.
For more information about JVM configuration, see the article Performance tuning garbage collection inJava.
12.3 Configuration Considerations
12.3.1 Use production logging
Logging may visibly affect the performance of your server. High logging levels are often necessary to trackdown issues, but by default you should run with low levels. (You can switch the logging levels at runtime,so don’t worry about having to stop the server to gather more information.)
You can change the logging level by going to the :ref:web_admin_config_server section of the Web Admin-istration Interface. You’ll want to choose the PRODUCTION configuration.
202 Chapter 12. Running In A Production Environment

GeoServer User Manual, Release 1.7.4
12.3.2 Set a service strategy
A service strategy is the method in which output is served to the client. This is a balance between properform (being absolutely sure of reporting errors with the proper OGC codes, etc) and speed (serving outputas quickly as possible). This is a decision to be made based on the function that GeoServer is provid-ing for you. You can configure the service strategy by modifying the web.xml file of your GeoServerinstance.
The possible strategies are:
Strategy DescriptionSPEED Serves output right away. This is the fastest strategy, but proper OGC errors are usually
omitted.BUFFER Stores the whole result in memory, and then serves it after the output is complete. This
ensures proper OGC error reporting, but delays the response quite a bit and can exhaustmemory if the response is large.
FILE Similar to BUFFER, but stores the whole result in a file instead of in memory. Slower thanBUFFER, but ensures there won’t be memory issues.
PARTIAL-BUFFERA balance between BUFFER and SPEED, this strategy tries to buffer in memory a few KBof response, then serves the full output.
12.3.3 Personalize your server
This is isn’t a performance consideration, but is just as important. In order to make GeoServer as usefulas possible, you should customize the server’s metadata to your organization. It may be tempting to skipsome of the configuration steps, and leave in the same keywords and abstract as the sample. But this willonly confuse potential users.
Here is a short list:
• Fill out WFS, WMS, and WCS Contents sections (this info will be broadcast as part of the GetCapabil-ities documents)
• Serve your data with your own namespace (and provide a correct URI)
• Remove default layers (such as topp:states)
12.3.4 Set security
GeoServer by default includes WFS-T (transactions), which lets users modify your data. If you don’t wantyour database modified, you can turn off transactions in the Config WFS Content section of the Web Admin-istration Interface. Set the Service Level to Basic. If you’d like some users to be able to modify somebut not all of your data, you will have to set up an external security service. An easy way to accomplishthis is to run two GeoServer instances and configure them differently, and use a simple authentication toonly allow certain users to have access.
For extra security, make sure that the connection to the datastore that is open to all is with a user who hasread only permissions. This will eliminate the possibility of a SQL injection (though GeoServer is generallynot vulnerable to that sort of attack).
12.3.5 Cache your data
Server-side caching of WMS tiles is the best way to increase performance. In caching, pre-rendered tiles willbe saved, eliminating the need for redundant WMS calls. There are several ways to set up WMS caching forGeoServer. GeoWebCache is the simplest method, as it comes bundled with GeoServer. (See the section on
12.3. Configuration Considerations 203

GeoServer User Manual, Release 1.7.4
Caching with GeoWebCache for more details.) Another option is TileCache. You can also use a more genericcaching system, such as OSCache (an embedded cache service) or Squid (a web cache proxy).
12.4 Data Considerations
12.4.1 Use an external data directory
GeoServer comes with a data directory inside the container. However, it is a good idea to separate thedata from the application. Using an external data directory allows for much easier upgrades, since thereis no risk of configuration information being overwritten. An external data directory also makes it easy totransfer your configuration elsewhere if desired. To point to an external data directory, you only need toedit the web.xml file.
12.4.2 Use a spatial database
Shapefiles are a very common format for geospatial data.. But if you are running GeoServer in a productionenvironment, it is better to convert your shapefiles to a spatial database, such as PostGIS. This is essentialif doing transactions (WFS-T). Most of the spatial databases provide shapefile conversion tools. Althoughthere are many options (see the section on Working with Data), PostGIS is recommended. Oracle, DB2, andArcSDE are also supported.
12.4.3 Pick the best performing coverage formats
There are very significant differences between performance of the various coverage formats.
Warning: http://geoserver.org/display/GEOSDOC/High+performance+coverage+serving is linkedto here. Once that page is added to these docs, let’s update this link.
12.5 Other Considerations
12.5.1 Host your application separately
GeoServer includes a few sample applications in the Demo menu, embedded right in the GeoServer con-tainer. We recommend against doing this for production instances. To make upgrades and troubleshootingeasier, please use a separate container for your application. It is fine to use one container manager (such asTomcat or Jetty) to host both GeoServer and your application.
12.5.2 Proxy your server
GeoServer can have the capabilities documents properly report a proxy. You can configure this in the ServerConfig menu of the Web Administration Interface and entering the URL of the external proxy in the field labeledProxy base URL.
204 Chapter 12. Running In A Production Environment

GeoServer User Manual, Release 1.7.4
12.5.3 Set up clustering
12.5.4 Publish your server’s capabilities documents
In order to make it easier to find your data, put a link to your capabilities document somewhere on the web.This will ensure that a search engine will crawl and index it. Also, see the section on GeoSearch on how toget your data crawled by Google’s geo crawler.
12.5. Other Considerations 205

GeoServer User Manual, Release 1.7.4
206 Chapter 12. Running In A Production Environment

CHAPTER 13
Extensions
Extensions add various bits of functionality to GeoServer, but do not come with the vanilla GeoServerdistribution.
13.1 GeoSearch
13.2 Imagemap
13.3 OGR Output
13.4 REST
The REST extension provides a RESTful interface through which clients can configure a GeoServer in-stance through simple HTTP calls. With it clients can programatically configure the data served byGeoServer.
For information on getting and installing the REST extensions proceed to the Installing the REST Extensionsection. For details about the API and some hands on examples proceed to the REST Configuration APIReference or REST Configuration Examples sections.
13.4.1 Installing the REST Extension
1. Download the REST extension from the GeoServer download page.
Warning: Ensure the extension matching the version of the GeoServer installation is down-loaded.
2. Extract the contents of the archive into the WEB-INF/lib directory of the GeoServer installation.
207

GeoServer User Manual, Release 1.7.4
13.4.2 Overview of REST
REST is an acronym for “REpresentational State Transfer”. The basic idea of REST is to rely on a fixed setof operations on named resources, where the representation of each resource is the same for retrieving andsetting information. In other words, if you retrieve data in an XML format, you can send data back to theserver in the same XML format to set it.
Operations on resources are implemented with the standard primitives of HTTP: GET, DELETE, PUT, POST,HEAD, etc. Each resource is represented as a standard URI.
For more information about REST visit the wikedia page.
13.4.3 REST Configuration API Reference
Formats and representations
A format specifies how a resource should be represented. A format is used:
• In an operation to specify what representation should be returned to the client
• In a POST or PUT operation to specify the representation being sent to the server
In a GET operation the format can be specified in a number of ways. The first is with the Accepts header.For instance setting the header to “text/xml” would specify the desire to have the resource returned asXML. The second method of specifying the format is via file extension. For example consider the resource“foo”. To request a representation of foo as XML the request uri would end with “foo.xml”. To request asJSON the request uri would end with “foo.json”. When no format is specified the server will use its owninternal format, usually html.
In a POST or PUT operation the format specifies 1) the representatin of the content being sent to the server,and 2) the representation of the resposne to be sent back. The former is specified with the Content-typeheader. To send a representation in XML, the content type “text/xml” or “application/xml” would beused. The latter is specified with the Accepts header as specified in the above paragraph describing aGET operation.
Authentication
POST, PUT, and DELETE requests (requests that modify resources) require the client to be authenticated.Currently the only supported method of authentication is Basic authentication. See the examples section forexamples of how to perform authentication with various clients and environments.
Status codes
A Http request uses a status code to relay the outcome of the request to the client. Different status codesare used for various purposes through out this document. These codes are described in detail by the httpspecification.
Workspaces
A workspace is a grouping of data stores. More commonly known as a namespace, it is commonly usedto group data that is related in some way.
208 Chapter 13. Extensions

GeoServer User Manual, Release 1.7.4
Note: For GeoServer 1.x a workspace can be considered the equivalent of a namespace, and the twoare kept in sync. For example, the namespace “topp, http://openplans.org/topp” corresponds to theworkspace “topp”.
Operations
/workspaces[.<format>]
Method Action Return Code Formats Default FormatGET List all workspaces 200 HTML, XML, JSON HTMLPOST Create a new workspace 201 with Location header XML, JSONPUT 405DELETE 405
Representations:
• HTML
• XML
• JSON
/workspaces/<ws>[.<format>]
Method Action Return Code Formats Default FormatGET Returns workspace ws 200 HTML, XML, JSON HTMLPOST 405PUT 200 Modify workspace ws XML, JSONDELETE 200 Delete workspace ws XML, JSON
Representations:
• HTML
• XML
• JSON
Exceptions:
• GET for a workspace that does not exist -> 404
• PUT that changes name of workspace -> 403
• DELETE against a workspace that is non-empty -> 403
/workspaces/default[.<format>]
Method Action Return Code Formats Default FormatGET Returns default workspace 200 HTML, XML, JSON HTMLPOST 405PUT 200 Set default workspace XML, JSONDELETE 405
Namespaces
A namespace is a uniquely identifiable grouping of feature types. A namespaces is identified by a prefixand a uri.
13.4. REST 209

GeoServer User Manual, Release 1.7.4
Note: In GeoServer 1.7.4 a namespace is used to group data stores, serving the same purpose as aworkspace. In 1.7.4 the two are kept in sync. Therefore when adding a new namespace a workspacewhose name matches the prefix of the namespace is implicitly created.
Operations
/namespaces[.<format>]
Method Action Return Code Formats Default FormatGET List all namespaces 200 HTML, XML, JSON HTMLPOST Create a new namespace 201 with Location header XML, JSONPUT 405DELETE 405
Representations:
• HTML
• XML
• JSON
/namespaces/<ns>[.<format>]
Method Action Return Code Formats Default FormatGET Returns namespace ns 200 HTML, XML, JSON HTMLPOST 405PUT 200 Modify namespace ns XML, JSONDELETE 200 Delete namespace ns XML, JSON
Representations:
• HTML
• XML
• JSON
Exceptions:
• GET for a namespace that does not exist -> 404
• PUT that changes prefix of namespace -> 403
• DELETE against a namespace whose corresponding workspace is non-empty -> 403
/namespaces/default[.<format>]
Method Action Return Code Formats Default FormatGET Returns default namespace 200 HTML, XML, JSON HTMLPOST 405PUT 200 Set default namespace XML, JSONDELETE 405
Data stores
A data store is a source of spatial data that is vector based. It can be a file in the case of a Shapefile, adatabase in the case of PostGIS, or a server in the case of a remote Web Feature Service.
210 Chapter 13. Extensions

GeoServer User Manual, Release 1.7.4
Operations
/workspaces/<ws>/datastores[.<format>]
Method Action Return Code Formats DefaultFormat
GET List all data stores inworkspace ws
200 HTML, XML,JSON
HTML
POST Create a new data store 201 with Locationheader
XML, JSON
PUT 405DELETE 405
Representations:
• HTML
• XML
• JSON
/workspaces/<ws>/datastores/<ds>[.<format>]
Method Action Return Code Formats Default FormatGET Return data store ds 200 HTML, XML, JSON HTMLPOST 405PUT Modify data store dsDELETE Delete data store ds
Representations:
• HTML
• XML
• JSON
Exceptions:
• GET for a data store that does not exist -> 404
• PUT that changes name of data store -> 403
• PUT that changes workspace of data store -> 403
• DELETE against a data store that contains configured feature types -> 403
/workspaces/<ws>/datastores/<ds>/file[.<extension>]
The extension parameter specifies the type of data store. The following extensions are supported:
Extension Datastoreshp Shapefilegml GML (Geographic Markup Language)properties Property file
13.4. REST 211

GeoServer User Manual, Release 1.7.4
MethodAction ReturnCode
Formats DefaultFormat
Pa-rame-ters
GET Get the underlying files for the data store as a zipfile with mime type application/zip.
200
POST 405PUT Creates or overwrites the files for data store ds. 200 See notes
below.config-ure
DELETE 405
Exceptions:
• GET for a data store that does not exist -> 404
• GET for a data store that is not file based -> 404
When the file for a datastore are PUT, it can be as a standalone file, or as a zipped archive. The standalonefile method is only applicable to data stores that work from a single file, GML for example. Data stores likeShapefile must be sent as a zip archive.
When uploading a zip archive the Content-type should be set to application/zip. When uploadinga standalone file the content type should be appropriately set based on the file type. The configureparameter is used to control how the data store is configured upon file upload. It can take one of the threevalues “first”, “none”, or “all”.
• first - Only setup the first feature type available in the data store. This is the default value.
• none - Do not configure any feature types.
• all - Configure all feature types.
Feature types
A feature type is a vector based spatial resource or data set that originates from a data store. In somecases, like Shapefile, a feature type has a one-to-one relationship with its data store. In other cases, likePostGIS, the relationship of feature type to data store is many-to-one, with each feature type correspondingto a table in the database.
Operations
/workspaces/<ws>/datastores/<ds>/featuretypes[.<format>]
Method Action Return Code Formats DefaultFormat
Param-eters
GET List all feature types indatastore ds
200 HTML, XML,JSON
HTML list
POST Create a new feature type 201 with Locationheader
XML, JSON
PUT 405DELETE 405
Representations:
• HTML
• XML
• JSON
212 Chapter 13. Extensions

GeoServer User Manual, Release 1.7.4
Exceptions:
• GET for a feature type that does not exist -> 404
• PUT that changes name of feature type -> 403
• PUT that changes data store of feature type -> 403
The list parameter is used to control the category of feature types that are returned. It can take one of thethree values “configured”, “available”, or “all”.
• configured - Only setup or configured feature types are returned. This is the default value.
• available - Only unconfigured feature types (not yet setup) but are available from the specifieddatastore will be returned.
• all - The union of configured and available.
/workspaces/<ws>/datastores/<ds>/featuretypes/<ft>[.<format>]
Method Action Return Code Formats Default FormatGET Return feature type ft 200 HTML, XML, JSON HTMLPOST 405PUT Modify feature type ft 200 XML,JSONDELETE Delete feature type ft 200
Representations:
• HTML
• XML
• JSON
Exceptions:
• GET for a feature type that does not exist -> 404
• PUT that changes name of feature type -> 403
• PUT that changes data store of feature type -> 403
Coverage stores
A coverage store is a source of spatial data that is raster based.
Operations
/workspaces/<ws>/coveragestores[.<format>]
Method Action Return Code Formats DefaultFormat
GET List all coverage stores inworkspace ws
200 HTML, XML,JSON
HTML
POST Create a new coverage store 201 with Locationheader
XML, JSON
PUT 405DELETE 405
Representations:
• HTML
13.4. REST 213

GeoServer User Manual, Release 1.7.4
• XML
• JSON
/workspaces/<ws>/coveragestores/<cs>[.<format>]
Method Action Return Code Formats Default FormatGET Return coverage store cs 200 HTML, XML, JSON HTMLPOST 405PUT Modify coverage store csDELETE Delete coverage store ds
Representations:
• HTML
• XML
• JSON
Exceptions:
• GET for a coverage store that does not exist -> 404
• PUT that changes name of coverage store -> 403
• PUT that changes workspace of coverage store -> 403
• DELETE against a coverage store that contains configured coverage -> 403
/workspaces/<ws>/coveragestores/<cs>/file[.<extension>]
The extension parameter specifies the type of coverage store. The following extensions are sup-ported:
Extension Coveragestoregeotiff GeoTIFFworldimage Geo referenced image (JPEG,PNG,TIF)mosaic Image mosaic
MethodAction Re-turnCode
For-mats
DefaultFormat
Parame-ters
GET Get the underlying files for the coverage store asa zip file with mime type application/zip.
200
POST 405PUT Creates or overwrites the files for coverage store
cs.200 See
notesbelow.
configure,coverage-Name
DELETE 405
Exceptions:
• GET for a data store that does not exist -> 404
• GET for a data store that is not file based -> 404
When the file for a coveragestore is PUT, it can be as a standalone file, or as a zipped archive. The stan-dalone file method is only applicable to coverage stores that work from a single file, GeoTIFF for example.Coverage stores like Image moscaic must be sent as a zip archive.
When uploading a zip archive the Content-type should be set to application/zip. When uploadinga standalone file the content type should be appropriately set based on the file type. The coverageNameparameter is used to specify the name of the coverage within the coverage store. This parameter is only
214 Chapter 13. Extensions

GeoServer User Manual, Release 1.7.4
relevant if the configure parameter is not equal to “none”. If not specified the resulting coverage willreceive the same name as its containing coverage store.
Note: Currently the relationship between a coverage store and a coverage is one to one. However there iscurrently work underway to support multi-dimensional coverages, so in the future this parameter is likelyto change.
Coverages
A coverage is a raster based data set which originates from a coverage store.
Operations
/workspaces/<ws>/coveragestores/<cs>/coverages[.<format>]
Method Action Return Code Formats DefaultFormat
GET List all coverages in coveragestore cs
200 HTML, XML,JSON
HTML
POST Create a new coverage 201 with Locationheader
XML, JSON
PUT 405DELETE 405
Representations:
• HTML
• XML
• JSON
/workspaces/<ws>/coveragestores/<cs>/coverages/<c>[.<format>]
Method Action Return Code Formats Default FormatGET Return coverage c 200 HTML, XML, JSON HTMLPOST 405PUT Modify coverage c 200 XML,JSONDELETE Delete coverage c 200
Representations:
• HTML
• XML
• JSON
Exceptions:
• GET for a coverage that does not exist -> 404
• PUT that changes name of coverage -> 403
• PUT that changes coverage store of coverage -> 403
Styles
A style describes how a resource (feature type or coverage) should be symbolized or rendered by a WebMap Service. In GeoServer styles are specified with SLD.
13.4. REST 215

GeoServer User Manual, Release 1.7.4
Operations
/styles[.<format>]
Method Action Return Code Formats Default Format ParametersGET Return all styles 200 HTML, XML, JSON HTMLPOST Create a new style 201 with Location header SLD, XML, JSON namePUT 405DELETE 405
Representations:
• HTML
• XML
• JSON
The name parameter specifies the name to be given to the style. This option is most useful when POSTinga style in SLD format, and an appropriate name can be not be inferred from the SLD itself.
/styles/<s>[.<format>]
Method Action Return Code Formats Default FormatGET Return style s 200 SLD, HTML, XML, JSON HTMLPOST 405PUT Modify style s 200 SLD,XML,JSONDELETE Delete style s 200
Representations:
• SLD
• HTML
• XML
• JSON
Exceptions:
• GET for a style that does not exist -> 404
• PUT that changes name of style -> 403
• DELETE against style which is referenced by existing layers -> 403
Layers
A layer is a published resource (feature type or coverage).
Note: In GeoServer 1.x a layer can considered the equivalent of a feature type or a coverage. In GeoServer2.x, the two will be separate entities, with the relationship from a feature type to a layer being one-to-many.
Operations
/layers[.<format>]
216 Chapter 13. Extensions

GeoServer User Manual, Release 1.7.4
Method Action Return Code Formats Default FormatGET Return all layers 200 HTML, XML, JSON HTMLPOST 405PUT 405DELETE 405
Representations:
• HTML
• XML
• JSON
/layers/<l>[.<format>]
Method Action Return Code Formats Default FormatGET Return layer l 200 HTML, XML, JSON HTMLPOST 405PUT Modify layer l 200 XML,JSONDELETE 405
Representations:
• HTML
• XML
• JSON
Exceptions:
• GET for a layer that does not exist -> 404
• PUT that changes name of layer -> 403
• PUT that changes resource of layer -> 403
/layers/<l>/styles[.<format>]
Method Action Return Code Formats Default FormatGET Return all styles for layer l 200 SLD, HTML, XML, JSON HTMLPOST Add a new style to layer l 201, with Location header XML, JSONPUT 405DELETE 405
Layer groups
A layer group is a grouping of layers and styles that can be accessed as a single layer in a WMS GetMaprequest. A Layer group is often referred to as a “base map”.
Operations
/layergroups[.<format>]
Method Action Return Code Formats Default FormatGET Return all layer groups 200 HTML, XML, JSON HTMLPOST Add a new layer group 201, with Location header XML,JSONPUT 405DELETE 405
13.4. REST 217

GeoServer User Manual, Release 1.7.4
Representations:
• HTML
• XML
• JSON
/layergroups/<lg>[.<format>]
Method Action Return Code Formats Default FormatGET Return layer group lg 200 HTML, XML, JSON HTMLPOST 405PUT Modify layer group lg 200 XML,JSONDELETE Delete layer group lg 200
Representations:
• HTML
• XML
• JSON
Exceptions:
• GET for a layer group that does not exist -> 404
• POST that specifies layer group with no layers -> 400
• PUT that changes name of layer group -> 403
13.4.4 REST Configuration Examples
This section contains a number of examples which illustrate various uses of the REST data configurationapi. The examples are grouped by environment/language.
cURL
The examples in this section use the cURL utility, which is a handy command line tool for executing HTTPrequests and transferring files. Though cURL is used the examples apply to any HTTP-capable tool orlibrary.
Adding a new workspace
The following creates a new workspace named “acme” with a POST request:
curl -u admin:geoserver -v -XPOST -H ’Content-type: text/xml’ \-d ’<workspace><name>acme</name></workspace>’ \http://localhost:8080/geoserver/rest/workspaces
The response should contain the following:
< HTTP/1.1 201 Created< Date: Fri, 20 Feb 2009 01:56:28 GMT< Location: http://localhost:8080/geoserver/rest/workspaces/acme< Server: Noelios-Restlet-Engine/1.0.5< Transfer-Encoding: chunked
218 Chapter 13. Extensions

GeoServer User Manual, Release 1.7.4
Note the Location response header which specifies the location of the newly created workspace. Thefollowing retrieves the new workspace as XML with a GET request:
curl -XGET -H ’Accept: text/xml’ http://localhost:8080/geoserver/rest/workspaces/acme
The response should look like:
<workspace><name>acme</name><dataStores><atom:link xmlns:atom="http://www.w3.org/2005/Atom" rel="alternate" href="http://localhost:8080/geoserver/rest/workspaces/acme/datastores.xml" type="application/xml"/>
</dataStores><coverageStores><atom:link xmlns:atom="http://www.w3.org/2005/Atom" rel="alternate" href="http://localhost:8080/geoserver/rest/workspaces/acme/coveragestores.xml" type="application/xml"/>
</coverageStores></workspace>
Specifying the Accept header to relay the desired representation of the workspace can be tedious. Thefollowing is an equivalent (yet less RESTful) request:
curl -XGET http://localhost:8080/geoserver/rest/workspaces/acme.xml
Uploading a Shapefile
In this example a new datastore will be created by uploading a Shapefile. The following uploads the zippedshapefile roads.zip and creates a new datastore named roads:
curl -u admin:geoserver -XPUT -H ’Content-type: application/zip’ \--data-binary @roads.zip \http://localhost:8080/geoserver/rest/workspaces/acme/datastores/roads/file.shp
The following retrieves the created data store as XML:
curl -XGET http://localhost:8080/geoserver/rest/workspaces/acme/datastores/roads.xml
<dataStore><name>roads</name><workspace><name>acme</name><atom:link xmlns:atom="http://www.w3.org/2005/Atom" rel="alternate" href="http://localhost:8080/geoserver/rest/workspaces/acme.xml" type="application/xml"/>
</workspace><connectionParameters><namespace>http://acme</namespace><url>file:/Users/jdeolive/devel/geoserver/1.7.4/data/minimal/data/roads/roads.shp</url>
</connectionParameters><featureTypes><atom:link xmlns:atom="http://www.w3.org/2005/Atom" rel="alternate" href="http://localhost:8080/geoserver/rest/workspaces/acme/datastores/roads/featuretypes.xml" type="application/xml"/>
</featureTypes></dataStore>
By default when a Shapefile is uploaded a feature type is automatically created. See:ref:‘web_admin_config_featuretypes‘_ for details on how to control this behaviour. The followingretrieves the created feature type as XML:
13.4. REST 219

GeoServer User Manual, Release 1.7.4
curl -XGEThttp://localhost:8080/geoserver/rest/workspaces/acme/datastores/roads/featuretypes/roads.xml
<featureType><name>roads</name><nativeName>roads</nativeName><namespace><name>acme</name><atom:link xmlns:atom="http://www.w3.org/2005/Atom" rel="alternate" href="http://localhost:8080/geoserver/rest/namespaces/acme.xml" type="application/xml"/>
</namespace>...
</featureType>
Changing a feature type style
In the previous example a Shapefile was uploaded, and in the process a feature type was created. Whenevera feature type is created an layer is implicitly created for it. The following retrieves the layer as XML:
curl -XGET http://localhost:8080/geoserver/rest/layers/acme:roads.xml
<layer><name>roads</name><path>/</path><type>VECTOR</type><defaultStyle><name>roads_style</name><atom:link xmlns:atom="http://www.w3.org/2005/Atom" rel="alternate" href="http://localhost:8080/geoserver/rest/styles/roads_style.xml" type="application/xml"/>
</defaultStyle><styles><style>
<name>line</name><atom:link xmlns:atom="http://www.w3.org/2005/Atom" rel="alternate" href="http://localhost:8080/geoserver/rest/styles/line.xml" type="application/xml"/>
</style></styles><resource class="featureType"><name>roads</name><atom:link xmlns:atom="http://www.w3.org/2005/Atom" rel="alternate" href="http://localhost:8080/geoserver/rest/workspaces/acme/datastores/roads/featuretypes/roads.xml" type="application/xml"/>
</resource><enabled>false</enabled>
</layer>
When the layer is created a default style named polygon is assigned to it. This style can viewed with aWMS GetMap request.
In this example a new style will be created and assigned to the layer created in the previous example. Thefollowing creates a new style named roads_style by uploading the file roads.sld:
curl -u admin:geoserver -XPUT -H ’Content-type: application/vnd.ogc.sld+xml’ \-d @roads.sld http://localhost:8080/geoserver/rest/styles/roads_style
The following applies the newly created style to the layer created in the previous example:
220 Chapter 13. Extensions

GeoServer User Manual, Release 1.7.4
curl -u admin:geoserver -XPUT -H ’Content-type: text/xml’ \-d ’<layer><defaultStyle><name>roads_style</name></defaultStyle></layer>’ \http://localhost:8080/geoserver/rest/layers/acme:roads
The new style can be viewed with the same GetMap request as above.
Adding a PostGIS database
Note: This section assumes that a PostGIS database named nyc is present on the local system and isaccessible by the user bob.
In this example a PostGIS database named nyc will be added as a new data store. In preparation create thedatabase and import the nyc.sql file:
psql nyc < nyc.sql
The following represents the new data store:
<dataStore><name>nyc</name><connectionParameters><host>localhost</host><port>5432</port><database>nyc</database><user>bob</user><dbtype>postgis</dbtype>
</connectionParameters></dataStore>
Save the above xml into a file named nycDataStore.xml. The following adds the new datastore:
curl -u admin:geoserver -XPOST -T nycDataStore.xml -H ’Content-type: text/xml’ \http://localhost:8080/geoserver/rest/workspaces/acme/datastores
Adding a PostGIS table
In this example two tables from the PostGIS database created in the previous example will be added asfeature types. The following adds the table buildings as a new feature type:
curl -u admin:geoserver -XPOST -H ’Content-type: text/xml’ \-d ’<featureType><name>buildings</name></featureType>’ \http://localhost:8080/geoserver/rest/workspaces/acme/datastores/nyc/featuretypes
The following retrieves the created feature type:
curl -XGET http://localhost:8080/geoserver/rest/workspaces/acme/datastores/nyc/featuretypes/buildings.xml
This GetMap request shows the rendered buildings layer.
The following adds the table parks as a new feature type:
13.4. REST 221

GeoServer User Manual, Release 1.7.4
curl -u admin:geoserver -XPOST -H ’Content-type: text/xml’ \-d ’<featureType><name>parks</name></featureType>’ \http://localhost:8080/geoserver/rest/workspaces/acme/datastores/nyc/featuretypes
This GetMap request shows the rendered parks layer.
Creating a layer group
In this example the layers added in previous examples will be used to create a layer group. First a fewstyles need to be added. The following adds a style for the buildings layer:
curl -u admin:geoserver -XPUT -H ’Content-type: application/vnd.ogc.sld+xml’ -d @buildings.sld \http://localhost:8080/geoserver/rest/styles/buildings_style
The following adds a style for the parks layer:
curl -u admin:geoserver -XPUT -H ’Content-type: application/vnd.ogc.sld+xml’ -d @parks.sld \http://localhost:8080/geoserver/rest/styles/parks_style
The following represents the new layer group:
<layerGroup><name>nyc</name><layers><layer>roads</layer><layer>parks</layer><layer>buildings</layer>
</layers><styles><style>roads_style</style><style>parks</style><style>buildings_style</style>
</styles></layerGroup>
Save the following in a file named nycLayerGroup.xml. The following creates the new layergroup:
curl -u admin:geoserver -XPOST -d @nycLayerGroup.xml -H ’Content-type: text/xml’ \http://localhost:8080/geoserver/rest/layergroups
This GetMap request shows the rendered layer group.
PHP
13.5 GeoExt Styler
13.6 WFS Versioning
For information about extensions that add support for additional data formats, such as arcsde_data or SQLServer, see the Working with Data section.
222 Chapter 13. Extensions

CHAPTER 14
Tutorials
223

GeoServer User Manual, Release 1.7.4
224 Chapter 14. Tutorials

CHAPTER 15
Frequently Asked Questions
15.1 General
15.2 Installation
15.3 Configuration
15.4 Troubleshooting
225

GeoServer User Manual, Release 1.7.4
226 Chapter 15. Frequently Asked Questions

CHAPTER 16
Advanced GeoServer Configuration
GeoServer provides a variety of options to customize your service for different situations. While noneof the configuration options discussed in this section are required for a basic GeoServer installation, theyallow you to adapt your GeoServer to your own needs, beyond the options exposed in OGC standardservices.
16.1 WMS Decorations
WMS Decorations provide a framework for visually annotating images from WMS with absolute, ratherthan spatial, positioning. Examples of decorations include compasses, legends, and watermarks.
16.1.1 Configuration
To use decorations in a GetMap request, the administrator must first configure a decoration layout. Theselayouts are stored in a subdirectory called layouts in the GeoServer Data Directory as XML files, one fileper layout. Each layout file must have the extension .xml. Once a layout foo.xml is defined, users canrequest it by adding &format_options=layout:foo to the request parameters.
Layout files follow a very simple XML structure; a root node named layout containing any number ofdecoration elements. Each decoration element has several attributes:
At-tribute
Meaning
type the type of decoration to use (see Decoration Types)affinity the region of the map image to which the decoration is anchoredoffset how far from the anchor point the decoration is drawnsize the maximum size to render the decoration. Note that some decorations may dynamically
resize themselves.
Each decoration element may also contain an arbitrary number of option elements providing a parametername and value:
<option name="foo" value="bar"/>
Option interpretation depends on the type of decoration in use.
227

GeoServer User Manual, Release 1.7.4
16.1.2 Decoration Types
While GeoServer allows for decorations to be added via extension, there is a core set of decorations includedin the default installation. These decorations include:
The image decoration (type="image") overlays a static image file onto the document. If height and widthare specified, the image will be scaled to fit, otherwise the image is displayed at full size.
Option Name Meaningurl provides the URL or file path to the image to draw (relative to the GeoServer data directory)opacity a number from 0 to 100 indicating how opaque the image should be.
The scaleratio decoration (type="scaleratio") overlays a text description of the map’s scale ratio ontothe document.
Option Name Meaningbgcolor the background color for the text. supports RGB or RGBA colors specified as hex values.fgcolor the color for the text and border. follows the color specification from bgcolor.
The scaleline decoration (type="scaleline") overlays a graphic showing the scale of the map in worldunits.
Option Name Meaningbgcolor the background color, as used in scaleratiofgcolor the foreground color, as used in scaleratiofontsize the size of the font to use
The legend decoration (type="legend") overlays a graphic containing legends for the layers in themap.
16.1.3 Example
A layout configuration file might look like this:
<layout><decoration type="image" affinity="bottom,right" offset="6,6" size="80,31">
<option name="url" value="pbGS_80x31glow.png"/></decoration>
<decoration type="scaleline" affinity="bottom,left" offset="36,6"/>
<decoration type="legend" affinity="top,left" offset="6,6" size="auto"/></layout>
Used against the states layer from the default GeoServer data, this layout produces an image like the fol-lowing.
228 Chapter 16. Advanced GeoServer Configuration

GeoServer User Manual, Release 1.7.4
Figure 16.1: The default states layer, drawn with the decoration layout above.
16.1. WMS Decorations 229