Embed Size (px)
Citation preview
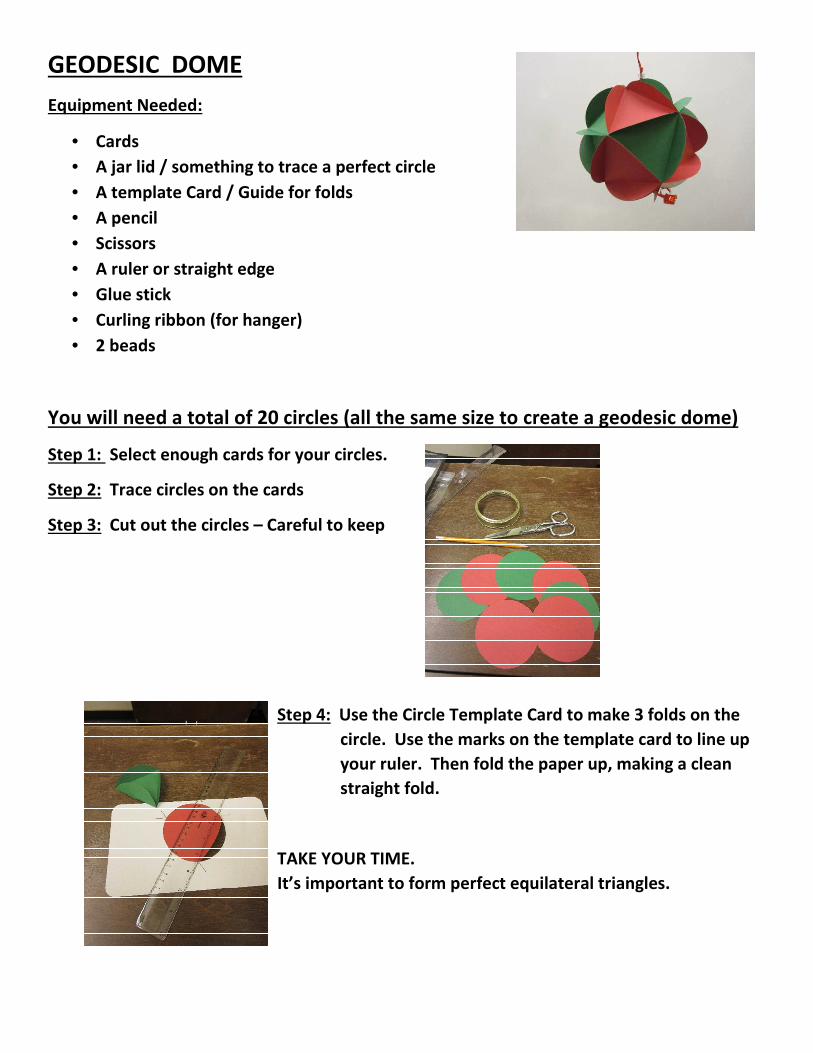
GEODESIC DOME
Equipment Needed:
• Cards
• A jar lid / something to trace a perfect circle
• A template Card / Guide for folds
• A pencil
• Scissors
• A ruler or straight edge
• Glue stick
• Curling ribbon (for hanger)
• 2 beads
You will need a total of 20 circles (all the same size to create a geodesic dome)
Step 1: Select enough cards for your circles.
Step 2: Trace circles on the cards
Step 3: Cut out the circles – Careful to keep
Step 4: Use the Circle Template Card to make 3 folds on the
circle. Use the marks on the template card to line up
your ruler. Then fold the paper up, making a clean
straight fold.
TAKE YOUR TIME.
It’s important to form perfect equilateral triangles.
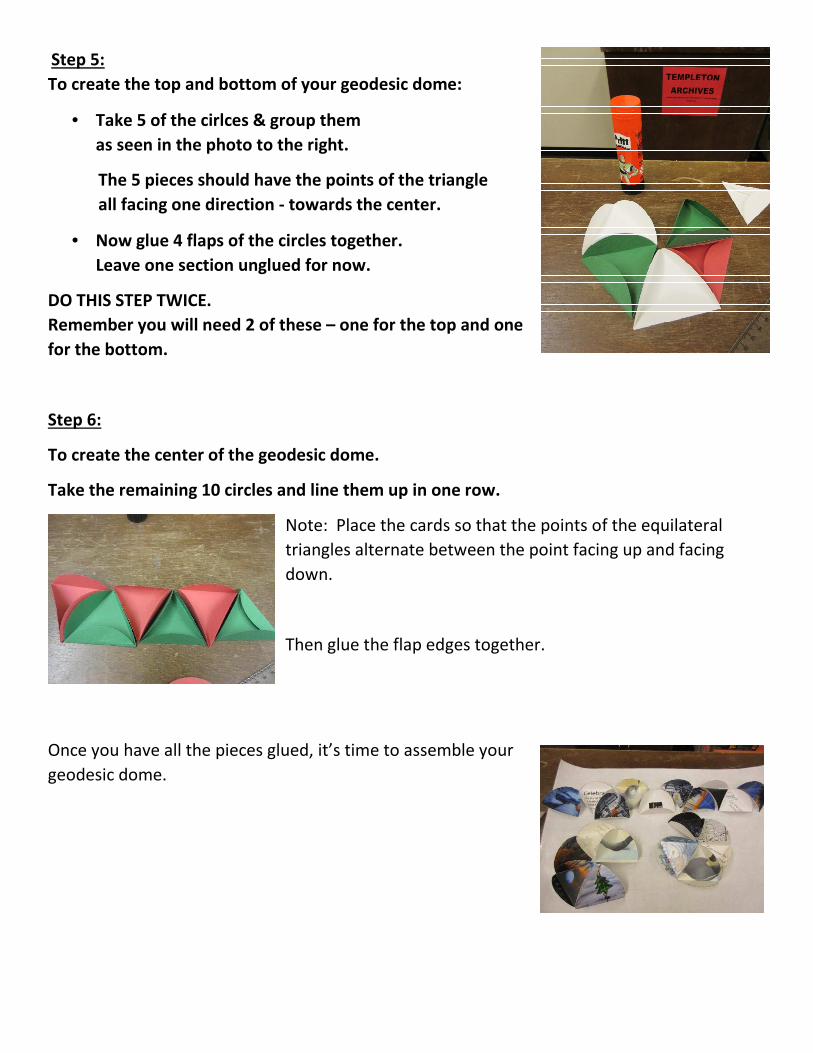
Step 5:
To create the top and bottom of your geodesic dome:
• Take 5 of the cirlces & group them
as seen in the photo to the right.
The 5 pieces should have the points of the triangle
all facing one direction - towards the center.
• Now glue 4 flaps of the circles together.
Leave one section unglued for now.
DO THIS STEP TWICE.
Remember you will need 2 of these – one for the top and one
for the bottom.
Step 6:
To create the center of the geodesic dome.
Take the remaining 10 circles and line them up in one row.
Note: Place the cards so that the points of the equilateral
triangles alternate between the point facing up and facing
down.
Then glue the flap edges together.
Once you have all the pieces glued, it’s time to assemble your
geodesic dome.
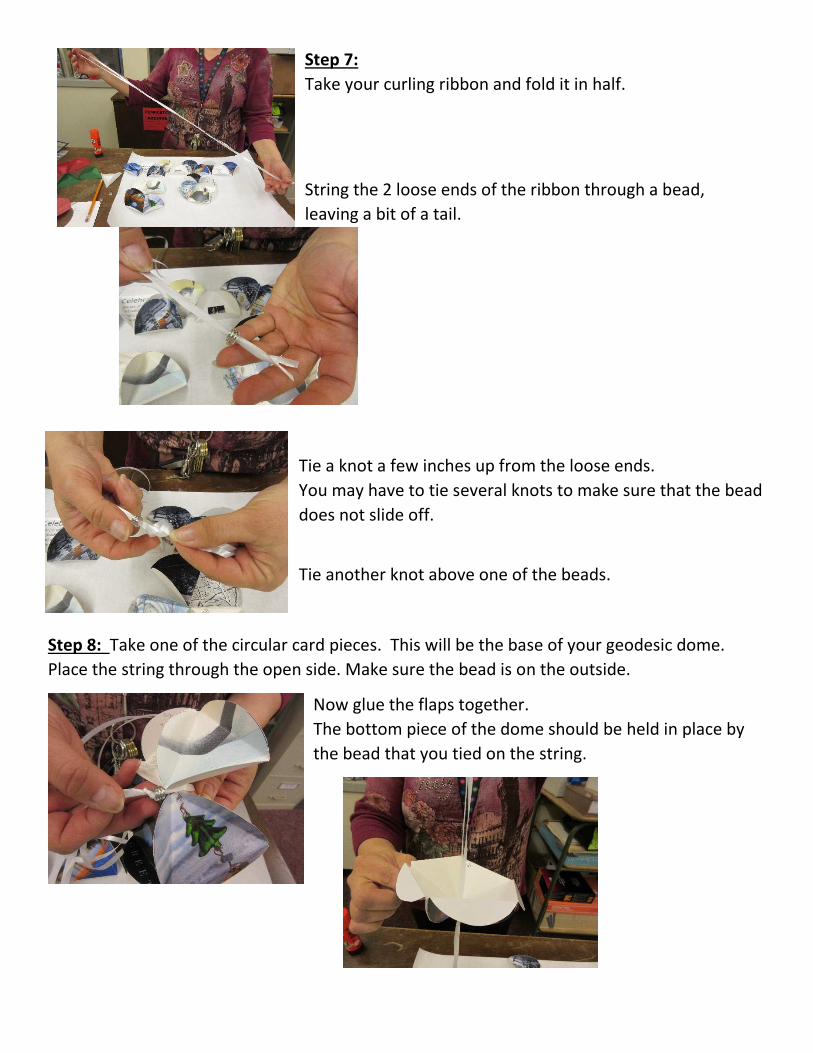
Step 7:
Take your curling ribbon and fold it in half.
String the 2 loose ends of the ribbon through a bead,
leaving a bit of a tail.
Tie a knot a few inches up from the loose ends.
You may have to tie several knots to make sure that the bead
does not slide off.
Tie another knot above one of the beads.
Step 8: Take one of the circular card pieces. This will be the base of your geodesic dome.
Place the string through the open side. Make sure the bead is on the outside.
Now glue the flaps together.
The bottom piece of the dome should be held in place by
the bead that you tied on the string.
Step 9:
Now take the long strip formed from the 10 circles and glue the ends together to form a
circle.
String over the curling ribbon, so the ribbon is in the center.
Glue the flaps from the circular piece onto the bottom piece. Take your time.
Make sure you’ve used enough glue & position the flaps so them meet up evenly.
Step 10: Now take the remaining circular piece.
Place it round the curling ribbon and glue the open ends together.
Now glue the all the remaining flaps onto the center piece of the geodesic dome.
Once you have all the flaps glued together, tie a knot at the top of the dome – to prevent the
dome from slipping off of the ribbon.
OPTIONAL: You can tie on another bead to top off the dome.
If desired … curl the bottom ribbon for the tail.