Embed Size (px)
Citation preview

Chapter: Basic Geometry TE - Teaching Tips
change text size | Print Friendly
Basics of Geometry
Author’s Note
This component of the Teacher’s Edition for the Basic Geometry FlexBook is designed to help teacher’s lesson plan. Suggestions for block planning, daily supplemental activities, and study skills tips are also included. It is recommended to hand out the Study Guides (at the end of each chapter and print-ready) at the beginning of each chapter and fill it out as the chapter progresses.
The Review Queue at the beginning of each section in the FlexBook is designed to be a warm-up for the beginning of each lesson and is intended to be done at the beginning of the period. Answers are at the end of each section.
The Know What? at the beginning of each section in the FlexBook is designed as a discussion point for the beginning of a lesson and then answered at the conclusion of the lesson. It can be added to homework or done as an end-of-the-lesson “quiz” to assess how students are progressing.
Throughout the text there are investigations pertaining to theorems or concepts within a lesson. These investigations may be constructions or detailed drawings that are designed to steer students towards discovering a theorem or concept on their own. This is a hands-on approach to learning the material and usually received well by low-level students. It provides them an opportunity to gain ownership of the material without being told to accept something as truth. These investigations may use: a ruler (or straightedge), compass, protractor, pencil/pen, colored pencils, construction paper, patty paper, or scissors. They can be done as a teacher-led activity, as a group, in pairs, or as an individual activity. If you decide to make an investigation teacher-led, have the students follow along, answer the questions in the text, and then draw their own conclusions. In a block period setting, these activities could be done as a group (because activities seem to take longer when students work in groups) with each group member owning a particular role. One or two students can do the investigation, one can record the group’s conclusions, and one can report back to the class.
At the beginning of the Review Questions, there is a bulleted list with the examples that are similar to which review questions. Encourage students to use this list to and then reference the examples to help them with their homework.
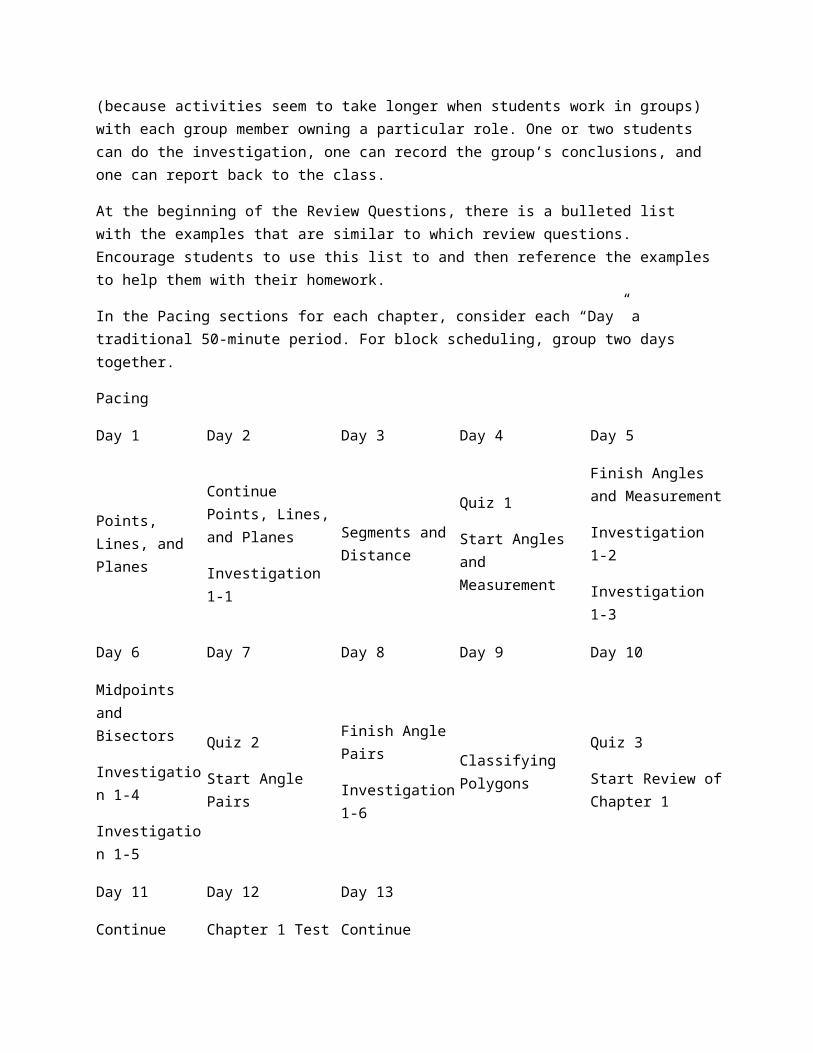
In the Pacing sections for each chapter, consider each “Day” a traditional 50-minute period. For block scheduling, group two days together.
Pacing
Day 1 Day 2 Day 3 Day 4 Day 5
Points, Lines, and Continue Points, Segments and Quiz 1 Finish Angles and
Day 1 Day 2 Day 3 Day 4 Day 5
PlanesLines, and Planes
Investigation 1-1Distance Start Angles and
Measurement
Measurement
Investigation 1-2
Investigation 1-3
Day 6 Day 7 Day 8 Day 9 Day 10
Midpoints and Bisectors
Investigation 1-4
Investigation 1-5
Quiz 2
Start Angle Pairs
Finish Angle Pairs
Investigation 1-6Classifying Polygons
Quiz 3
Start Review of Chapter 1
Day 11 Day 12 Day 13
Continue Review Chapter 1 Test
Continue testing (if needed)
Start Chapter 2
Points, Lines, and Planes
Goal
This lesson introduces students to the basic principles of geometry. Students will become familiar with the terms points, lines, and planes and how these terms are used to define other geometric vocabulary. Students will also be expected to correctly draw and label geometric figures.
Study Skills Tip
Geometry is very vocabulary-intensive, unlike Algebra. Devote 5-10 minutes of each class period to thoroughly defining and describing vocabulary. Use the Study Guides at the end of each chapter to assist you with this. Also make sure that students know how to correctly label diagrams. You can use personal whiteboards to perform quick vocabulary checks. Or, visit Discovery School’s puzzle maker to make word searches and crosswords ( http://puzzlemaker.discoveryeducation.com/).
Real World Connection
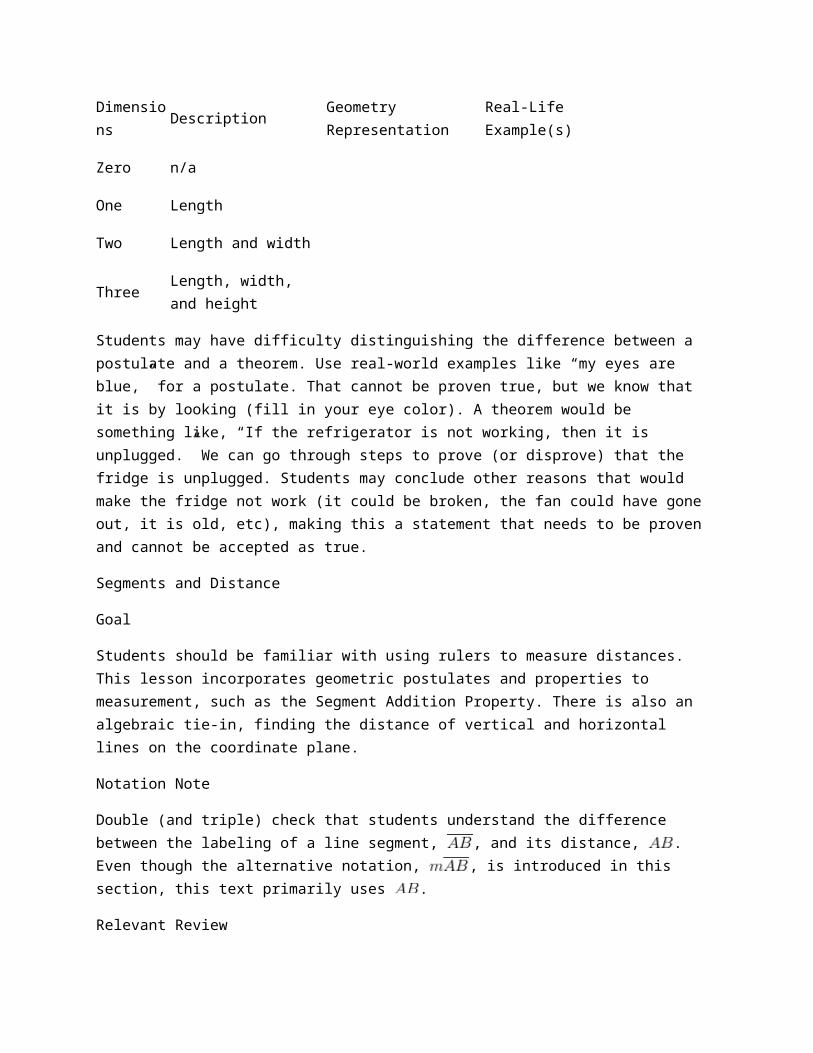
Have a class discussion to identify real-life examples of points, lines, planes in the classroom, as well as sets of collinear and coplanar. For example, points could be chairs, lines could be the intersection of the ceiling and wall, and the floor is a plane. If your chairs are four-legged, this is a fantastic example of why 3 points determine a plane, not four. Four legged chairs tend to wobble, while 3-legged stools remain stable. During this discussion, have students fill out the following table:
Dimensions Description Geometry Representation Real-Life Example(s)
Zero n/a
One Length
Two Length and width
Three Length, width, and height
Students may have difficulty distinguishing the difference between a postulate and a theorem. Use real-world examples like “my eyes are blue,” for a postulate. That cannot be proven true, but we know that it is by looking (fill in your eye color). A theorem would be something like, “If the refrigerator is not working, then it is unplugged.” We can go through steps to prove (or disprove) that the fridge is unplugged. Students may conclude other reasons that would make the fridge not work (it could be broken, the fan could have gone out, it is old, etc), making this a statement that needs to be proven and cannot be accepted as true.
Segments and Distance
Goal
Students should be familiar with using rulers to measure distances. This lesson incorporates geometric postulates and properties to measurement, such as the Segment Addition Property. There is also an algebraic tie-in, finding the distance of vertical and horizontal lines on the coordinate plane.
Notation Note
Double (and triple) check that students understand the difference between the labeling of a line segment, , and its distance, . Even though the alternative notation, , is introduced in this section, this text primarily uses .
Relevant Review
Students may need to review how to plot points and count the squares for the horizontal and vertical distances between two points. It might also be helpful add a few algebraic equations to the Review Queue. Problems involving the Segment Addition Postulate can be similar to solving an algebraic equation (Example 9).
Real World Connection
To review the concept of measurement, use an enlarged map of your community. Label several things on your map important to students – high school, grocery store, movie theatre, etc. Have students practice finding the distances between landmarks “as the crow flies” and using different street routes to determine the shortest distance between the two.
Teaching Strategy
The Segment Addition Postulate can seem simple to students at first. Start with basic examples, like Examples 5 and 6 and then progress to more complicated examples, like 7 and 8. Finally, introduce problems like Example 9. For more examples, see the Differentiated Instruction component. With the Segment Addition Postulate, you can start to introduce the concept of a proof. Use Example 7 and have students write out an explanation of their drawing. Tell students to use language such that the person reading their explanation knows nothing about math.
Angles and Measurement
Goal
This lesson introduces students to angles and how to use a protractor to measure them. Then, we will apply the Angle Addition Postulate in the same way as the Segment Addition Postulate.
Notation Note
Beginning geometry students may get confused regarding the ray notation. Draw rays in different directions so students become comfortable with the concept that ray notation always has the non-
arrow end over the endpoint (regardless of the direction the ray points). Reinforce that and represent the same ray.
Real World Connection
Have students Think-Pair-Share their answers to the opening question, “Can you think of real-life examples of rays?” Then, open up the discussion to the whole class.
Teaching Strategies
Using a classroom sized protractor will allow students to check to make sure their drawings are the same as yours. An overhead projector or digital imager is also a great way to demonstrate the proper way to use a protractor.
In this section, we only tell students that they can use three letters (and always three letters) to label and angle. In Chapter 2 we introduce the shortcut. We did not want the confusion that so commonly occurs where students will name any angle by only its vertex.
Stress the similarities between the Segment Addition Property and Angle Addition Property. Students will discover that many geometrical theorems and properties are quite similar.
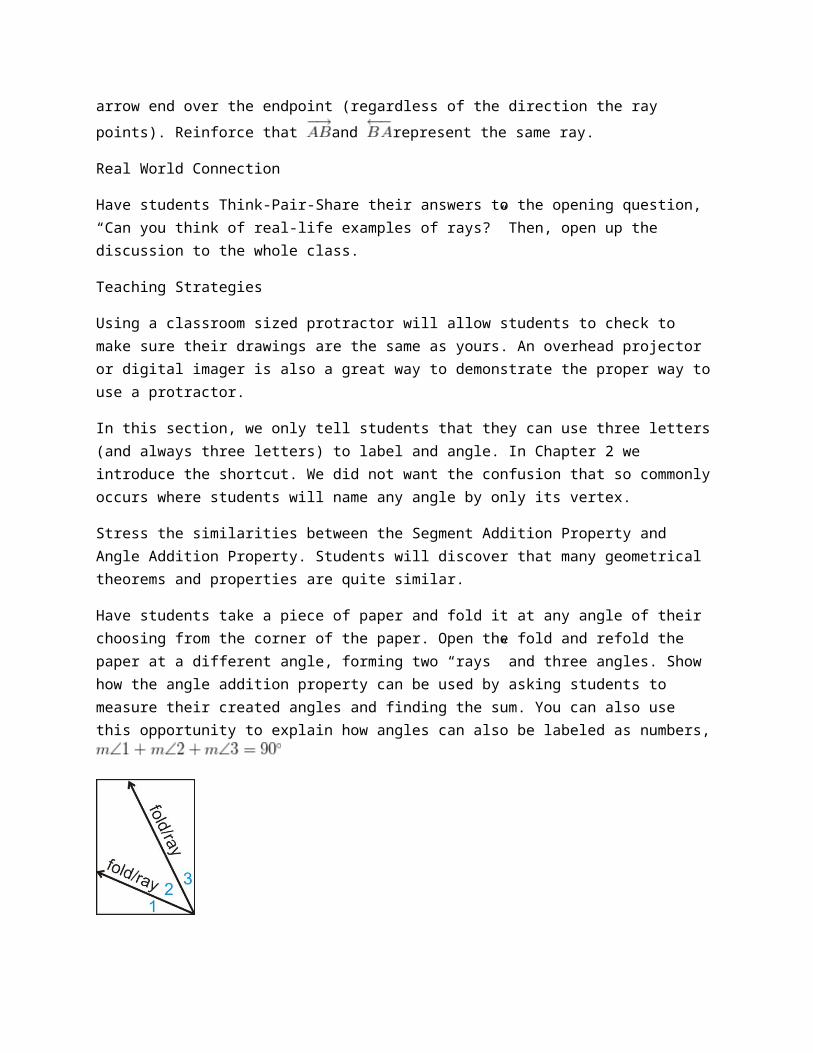
Have students take a piece of paper and fold it at any angle of their choosing from the corner of the paper. Open the fold and refold the paper at a different angle, forming two “rays” and three angles. Show how the angle addition property can be used by asking students to measure their created angles and finding the sum. You can also use this opportunity to explain how angles can also be labeled as numbers,

Student may need additional practice drawing and copying angles. This is the first time they have used a compass (in this course). Encourage students to play with the compass and show them how to use it to draw a circle and arcs. Once they are familiar with the compass (after 5-10 minutes), then go into Investigation 1-3. In addition to copying a angle, it might be helpful to walk students through copying a angle and an obtuse angle.
Midpoints and Bisectors
Goal
The lesson introduces students to the concept of congruency, midpoints, and bisectors. The difference between congruence and equality will also be stressed. Students will use algebra to write equivalence statements and solve for unknown variables.
Teaching Strategies
This is a great lesson for students to create a “dictionary” of all the notations learned thus far. In addition to the Study Guide, the dictionary provides an invaluable reference before assessments.
When teaching the Midpoint Postulate, reiterate to students that this really is the arithmetic average of the endpoints, incorporating algebra and statistics into the lesson. Explain the average between two numbers, is the sum divided by 2. The midpoint of two points is the exact same idea.
Ask students to define “bisector” on their own, before discussing a perpendicular bisector (Example 4). Hopefully students will construct multiple bisectors. This will help students visualize that there are an infinite amount of bisectors, and lead them to the fact there is only one perpendicular bisector and the Perpendicular Bisector Postulate.
With Investigations 1-4 and 1-5, students may need to repeat the construction a few times. Copy a handout with several line segments and different angle measures and have them practice the construction on their own or in pairs.
In this lesson and the previous lesson, we have introduced how to make drawings. Encourage students to redraw any pictures that are in the homework so they can mark congruent segments and angles. Also, let students know that it is ok to mark on quizzes and tests (depending on your preference).
Angle Pairs
Goal
This lesson introduces students to common angle pairs, the Linear Angle Postulate and the Vertical Angles Theorem.
Teaching Strategies
Students can get complementary and supplementary confused. A way to help them remember:
in Complementary also stands for Corner (in a right angle)
in Supplementary also stands for Straight (in a straight angle)
To illustrate the concept of the Linear Pair Postulate, offer several examples of linear pairs. Have students measure each angle and find the sum of the linear pair. Students should discover any linear pair is supplementary. Also explain that a linear pair must be adjacent. Discuss the difference between adjacent supplementary angles (a linear pair) and non-adjacent supplementary angles (same side interior angles, consecutive angles, or two angles in a drawing that are not next to each other).
To further illustrate the idea of vertical angles, repeatInvestigation 1-6 with two different intersecting lines. Also, encourage students two draw their intersecting lines at different angles than yours. This way, they will see that no matter the angle measures the vertical angles are always equal and the linear pairs are always supplementary. Draw this investigation on a piece of white paper and have students use the whole page. Then, when they are done, have them exchange papers with the students around them to reinforce that the angle measures do not matter.
in Vertical angles also stands for in Vertex. Vertical angles do not have to be “vertical” (one on top of the other). Students might get the definitions confused.
In this section there are a lot of Algebra tie-ins (Example 5, Review Questions 17-25). Students might need additional examples showing linear pairs and vertical angles with algebraic expression representations.
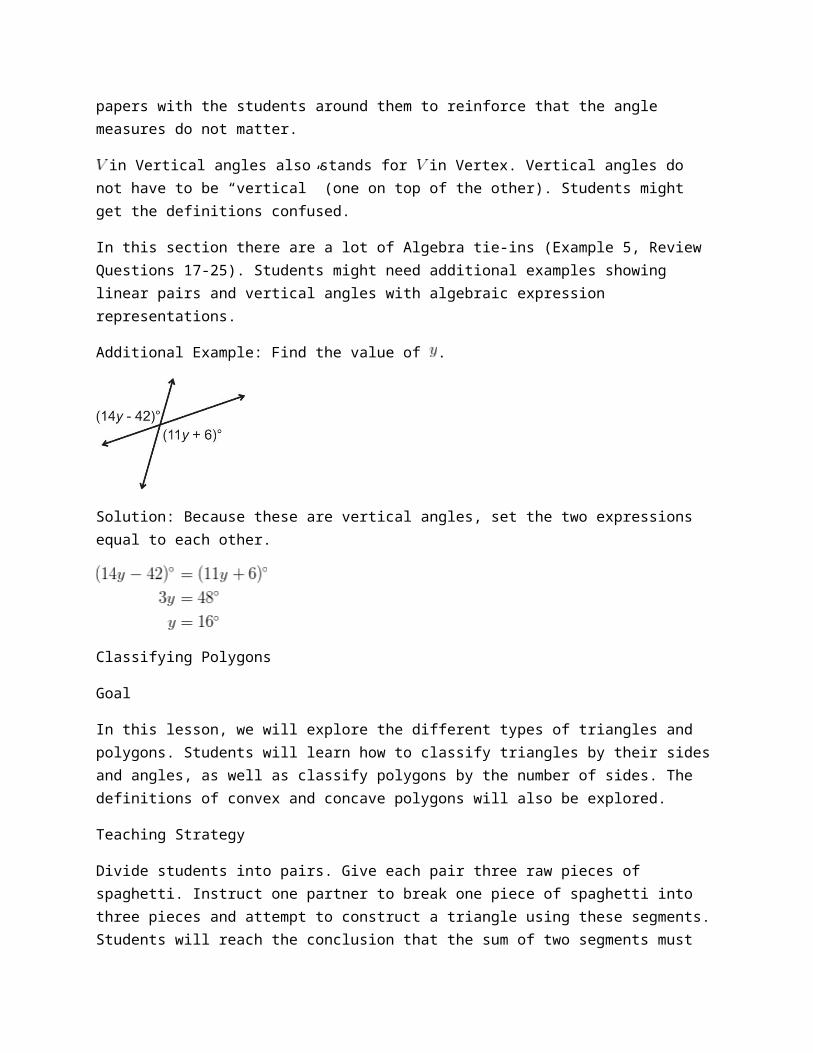
Additional Example: Find the value of .
Solution: Because these are vertical angles, set the two expressions equal to each other.
Classifying Polygons
Goal
In this lesson, we will explore the different types of triangles and polygons. Students will learn how to classify triangles by their sides and angles, as well as classify polygons by the number of sides. The definitions of convex and concave polygons will also be explored.
Teaching Strategy
Divide students into pairs. Give each pair three raw pieces of spaghetti. Instruct one partner to break one piece of spaghetti into three pieces and attempt to construct a triangle using these segments. Students will reach the conclusion that the sum of two segments must always be larger than the third if a triangle is to be formed. The Triangle Inequality Theorem is introduced in Chapter 4.
Next, have students create right, obtuse, acute, scalene, isosceles, and equilateral triangles with their pieces of spaghetti. Show them that if the spaghetti pieces’ endpoints are not touching, the polygon is not closed, and therefore not a polygon. You can use pieces of spaghetti on an overhead projector.
To show the difference between line segments and curves, introduce cooked spaghetti. The flexibility of the spaghetti demonstrates to students that segments must be straight in order to provide rigidity and follow the definitions of polygons.
After playing with the spaghetti, brainstorm the qualities of polygons and write them on the board (or overhead) and develop a definition. From here, you can compare and contrast convex and concave polygons. Use a Venn diagram to show the properties that overlap and those that are different.
Review
At the end of this chapter there is a Symbol Toolbox with all the labels and ways to mark drawings. Have students make flash cards with the symbols and markings on one side, and what they represent on the other. Students may also want to make flash cards for the definitions for the other words in the (and future) chapters.
In addition to the Study Guide, it might be helpful to go over the constructions from this chapter. You might want to have a Construction Toolbox, where students have one example of each construction they have learned. These construction pages can supplement the Study Guide and should be added to from chapter to chapter. As an added incentive, you might want to grade students’ Study Guides at the end of the chapter. Another option could be to allow students to use their Study Guide on tests and/or allow it to be extra credit. These options can change from test to test or at the teacher’s discretion.
Reasoning and Proof
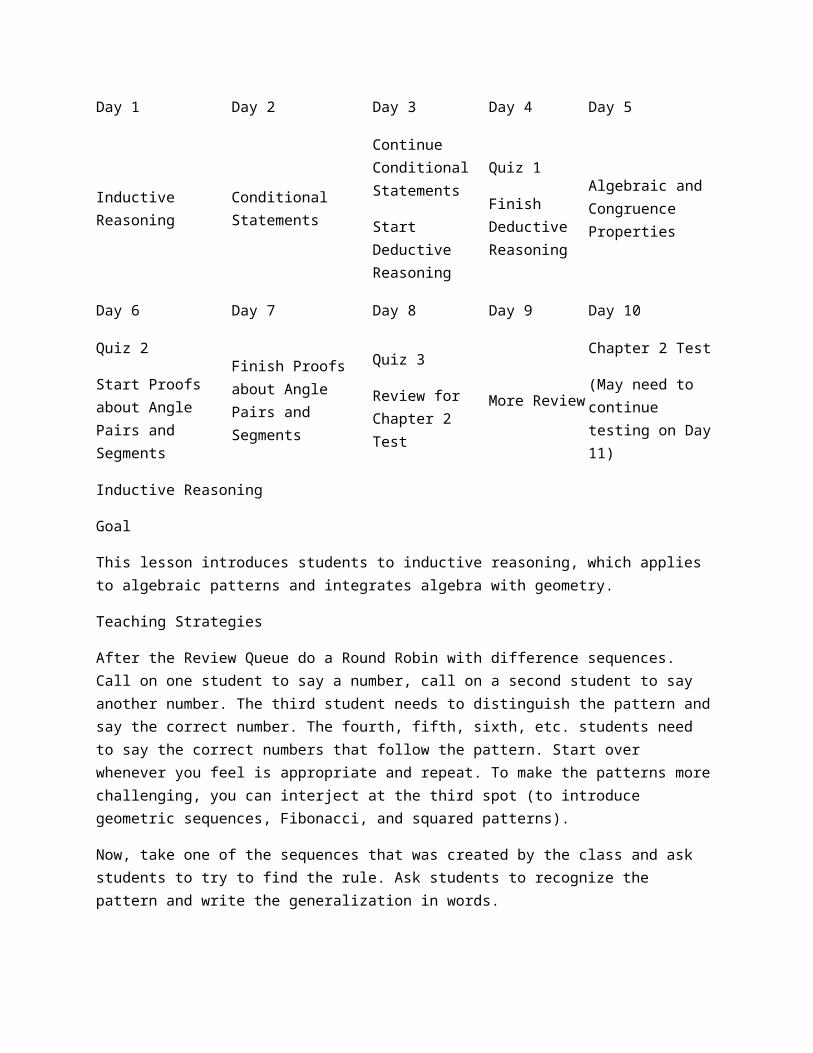
Pacing
Day 1 Day 2 Day 3 Day 4 Day 5
Inductive ReasoningConditional Statements
Continue Conditional Statements
Start Deductive Reasoning
Quiz 1
Finish Deductive Reasoning
Algebraic and Congruence Properties
Day 6 Day 7 Day 8 Day 9 Day 10
Quiz 2
Start Proofs about Angle Pairs and Segments
Finish Proofs about Angle Pairs and Segments
Quiz 3
Review for Chapter 2 Test
More Review
Chapter 2 Test
(May need to continue testing on Day 11)
Inductive Reasoning
Goal
This lesson introduces students to inductive reasoning, which applies to algebraic patterns and integrates algebra with geometry.
Teaching Strategies
After the Review Queue do a Round Robin with difference sequences. Call on one student to say a number, call on a second student to say another number. The third student needs to distinguish the pattern and say the correct number. The fourth, fifth, sixth, etc. students need to say the correct numbers that follow the pattern. Start over whenever you feel is appropriate and repeat. To make the patterns more challenging, you can interject at the third spot (to introduce geometric sequences, Fibonacci, and squared patterns).
Now, take one of the sequences that was created by the class and ask students to try to find the rule. Ask students to recognize the pattern and write the generalization in words.
Additional Example: Find the next three terms of the sequence 14, 10, 15, 11, 16, 12, ...
Solution: Students can look at this sequence in two different ways. One is to subtract 4 and then add 5. Another way is to take the odd terms as one sequence (14, 15, 16, ...) and then the even terms as another sequence (10, 11, 12, ...). Either way, the next three terms will be 17, 13, and 18.
Know What? Suggestion
When going over this Know What? (the locker problem) draw lockers on the front board (as many that will fit). Have students come up to the board and mark x’s to close the appropriate doors, as if they are acting out the problem. This will help students see the pattern.
Real Life Connection
Apply the idea of counterexample to real life situations. Begin by devising a statement, such as, “If the sun is shining, then you can wear shorts.” While this is true for warm weather states such as Florida and California, for those living in the Midwest or Northern states, it is quite common to be sunny and . Have students create their own statements and encourage other students to find counterexamples.
Conditional Statements
Goal
This lesson introduces conditional statements. Students will gain an understanding of how converses, inverses, and contrapositives are formed from a conditional.
Teaching Strategies
The first portion of this lesson may be best taught using direct instruction and visual aids. Design phrases you can laminate, such as “you are sixteen” and “you can drive.” Adhere magnets to the back of the phrases (to stick to the white board), or you can use a SMART board. Begin by writing the words “IF” and “THEN,” giving ample space to place your phrases. When discussing each type of conditional, show students how each is constructed by rearranging your phrases, yet leaving the words “IF” and “THEN” intact.
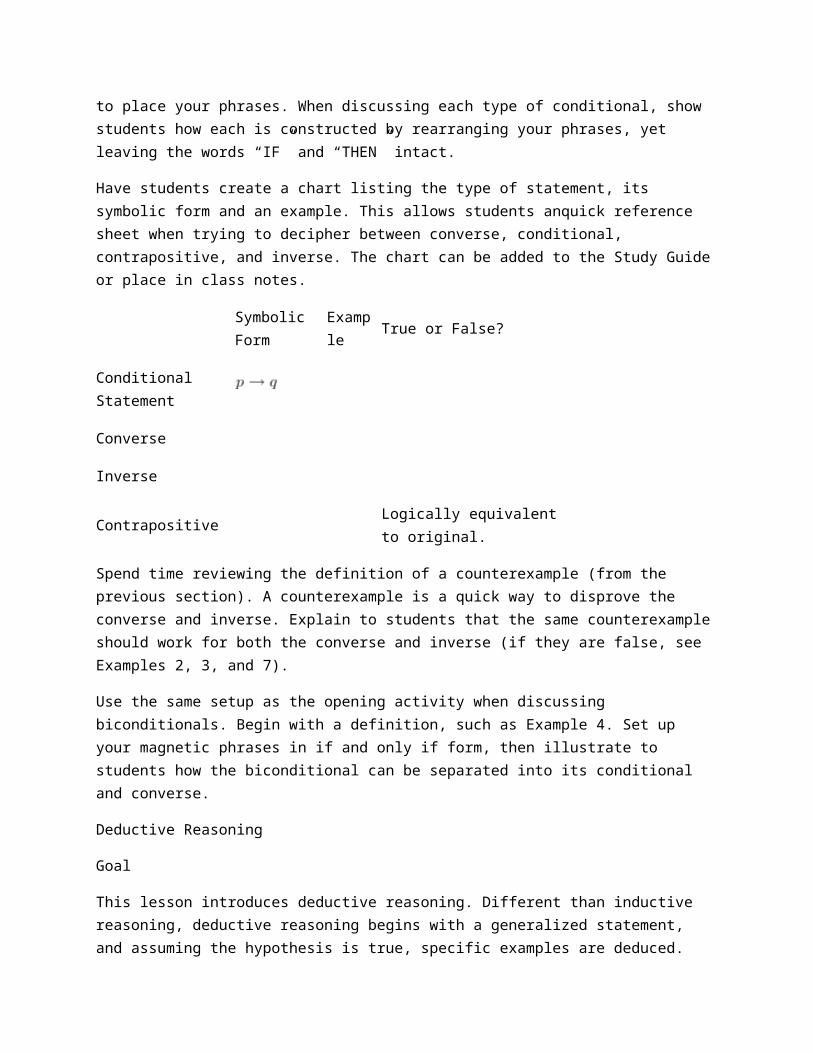
Have students create a chart listing the type of statement, its symbolic form and an example. This allows students anquick reference sheet when trying to decipher between converse, conditional, contrapositive, and inverse. The chart can be added to the Study Guide or place in class notes.
Symbolic Form Example True or False?
Conditional Statement
Converse
Inverse
Contrapositive Logically equivalent to original.
Spend time reviewing the definition of a counterexample (from the previous section). A counterexample is a quick way to disprove the converse and inverse. Explain to students that the same counterexample should work for both the converse and inverse (if they are false, see Examples 2, 3, and 7).
Use the same setup as the opening activity when discussing biconditionals. Begin with a definition, such as Example 4. Set up your magnetic phrases in if and only if form, then illustrate to students how the biconditional can be separated into its conditional and converse.
Deductive Reasoning
Goal
This lesson introduces deductive reasoning. Different than inductive reasoning, deductive reasoning begins with a generalized statement, and assuming the hypothesis is true, specific examples are deduced.
Teaching Strategies
Start this lesson by writing the Know What? on the board (or copy it onto a transparency). Have the students read each door (either out loud or to themselves) and try to reason which door the peasant should pick. This discussion can lend itself to the definitions of logic and deductive reasoning.
Students may or may not realize that they do deductive reasoning every day. Explain that solving an equation is an example of deductive reasoning. Try to brainstorm, as a class, other examples of deductive reasoning and inductive reasoning.
The best way for students to understand the Laws of Detachment, Contrapositive, and Syllogism is to do lots of practice. Make sure to include problems that do not have a logical conclusion. Like in Examples 7 and 8, it might be helpful for students to put the statements in symbolic form. This will make it easier for them to find the logical conclusion.
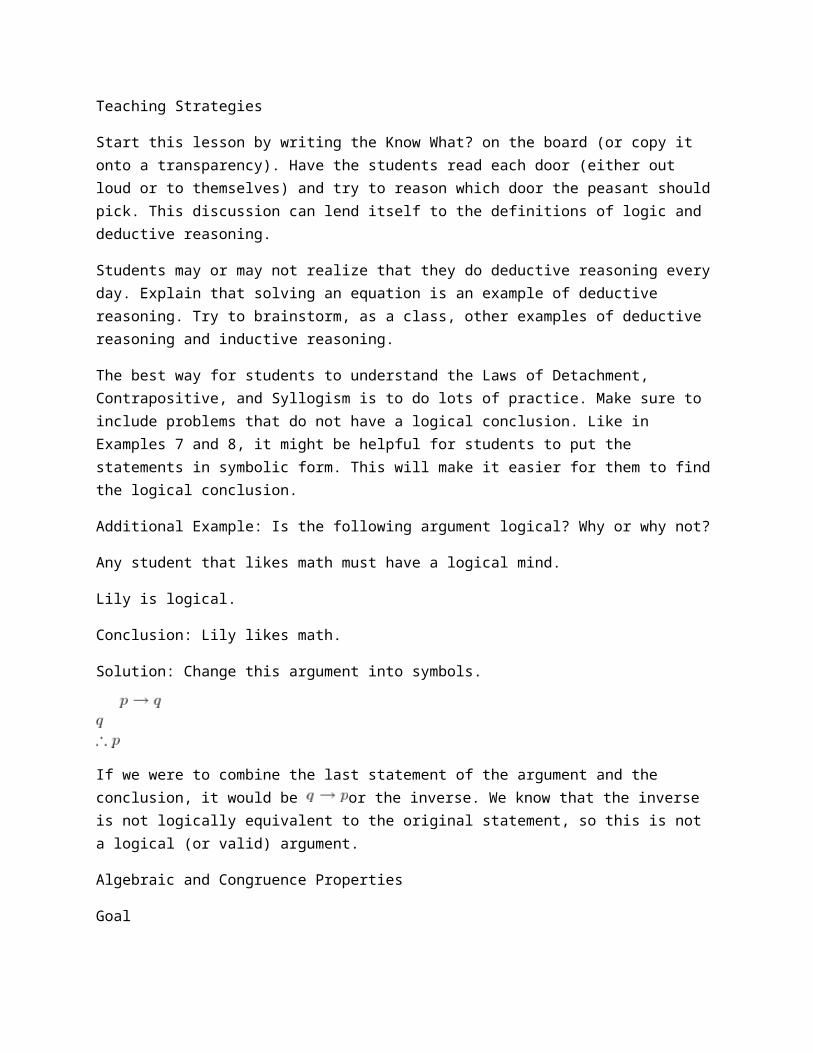
Additional Example: Is the following argument logical? Why or why not?
Any student that likes math must have a logical mind.
Lily is logical.
Conclusion: Lily likes math.
Solution: Change this argument into symbols.
If we were to combine the last statement of the argument and the conclusion, it would be or the inverse. We know that the inverse is not logically equivalent to the original statement, so this is not a logical (or valid) argument.
Algebraic and Congruence Properties
Goal
Students should have some familiarity with these properties. Here we can extend algebraic properties to geometric logic and congruence.
Teaching Strategy
Use personal whiteboards to do a spot check. Write down examples of each property ( , for example) either on the board or overhead. Then have students “race” to see who writes the correct answer on their whiteboard the fastest. If you do not want to make it a competition, just have students show you the answer quickly, 2-3 seconds, and then put their whiteboard down to erase. This could also be done as a competition in groups.
Stress to students that the properties of congruence can only be used with a symbol and properties of equality with an = sign. Remind students of the difference between congruence and equality that was discussed in Chapter 1.
Have students expand on the properties mentioned in this lesson. Students may come up with the multiplying fractions property, reciprocals, or cross-multiplication.
Prove Move
This lesson introduces proofs. In this text, we will primarily use two-column proofs. Because of the nature of this text, all homework questions and assessment relating to proofs will be fill-in-the-blank. Feel free to explain the concept of a paragraph proof and flow-chart proof, if you feel it would help your students.
Proofs can be very difficult for students to understand. They might ask “why” they have to give a reason for every step. Explain that not everyone reading their proof understands math as well as they or you do. Also, apply proofs (and logical arguments) to the real world. Lawyers use logical arguments all the time. Tell them it might help them they are trying to rationalize something with their parents; a new video game, longer curfew, etc. If they have a logical, fluid “proof” to present to their parents, the parents may be more apt to agree and give them what they are asking for.
Example 4 in the text outlines the basic steps of how to start and complete a proof. Encourage students to draw their own diagrams and mark on them. The bullet list after this example should be gone over several times and addressed as you present Example 5.
Diagrams
The best way to describe what you can and cannot assume is “looks are deceiving.” Reiterate to students that nothing can be assumed. The picture must be marked with notation such as tic marks, angle arcs, arrows, etc. in order for it to be used in a proof. If an angle looks like it is a right angle, it might not be. It needs to be explicitly stated in the Given or the angle must be marked.
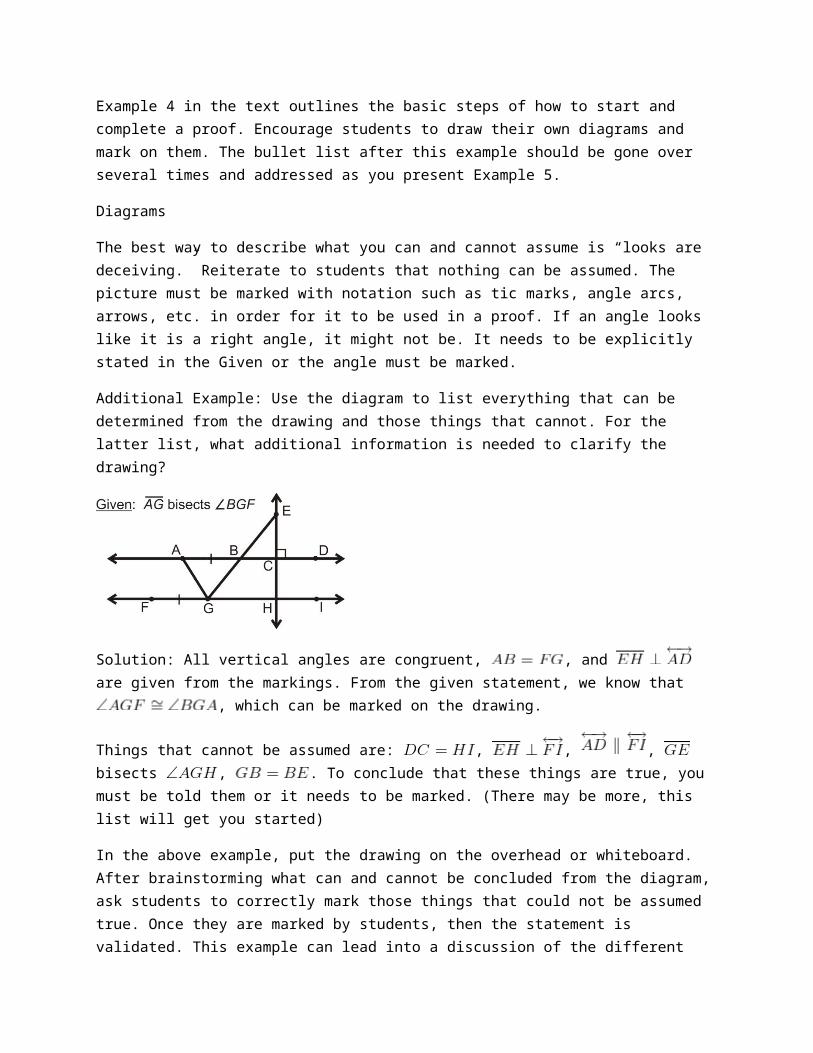
Additional Example: Use the diagram to list everything that can be determined from the drawing and those things that cannot. For the latter list, what additional information is needed to clarify the drawing?
Solution: All vertical angles are congruent, , and are given from the markings. From the given statement, we know that , which can be marked on the drawing.
Things that cannot be assumed are: , , , bisects , . To conclude that these things are true, you must be told them or it needs to be marked.
(There may be more, this list will get you started)
In the above example, put the drawing on the overhead or whiteboard. After brainstorming what can and cannot be concluded from the diagram, ask students to correctly mark those things that could not be assumed true. Once they are marked by students, then the statement is validated. This example can lead into a discussion of the different ways you can interpret two perpendicular lines (lines are perpendicular, four right angles, congruent linear pairs, etc). Let students know, in this instance, they only need to be told one of these pieces of information and the others can be concluded from it.
Proofs about Angle Pairs and Segments
Goal
Students will become familiar with two-column proofs and be able to fill out a short proof on their own.
Teaching Strategy
Like with the definitions of complementary and supplementary, the Same Angle Supplements Theorem and the Same Angle Complements Theorem can be confused by students. Remind them of the mnemonic in the Teaching Tips from Chapter 1 ( is for Complementary and Corner, is for Supplementary and a Straight angle).
Prove Move
There are several ways to approach the same proof. The order does not always matter, and sometimes different reasons can be used. For example, the Midpoint Postulate (every line segment has exactly one point that divides it equally in half) and the Definition of a Midpoint (a point that splits a line segment equally in half) can be used interchangeably.
Students may also get stuck on the reasons. Encourage students to not worry about getting the name quite right. If they can’t remember the name of a proof, tell them to write it all out. Depending on your preference, you can also let students use abbreviations for names of theorems as well. For example, the
Vertical Angles Theorem can be shortened to the VA Thm. Establish these abbreviations for the entire class so there is no confusion.
In the Proof of the Vertical Angles Theorem, steps 2-4 might seem redundant to students. Explain that they need to completely explain everything they know about linear pairs.
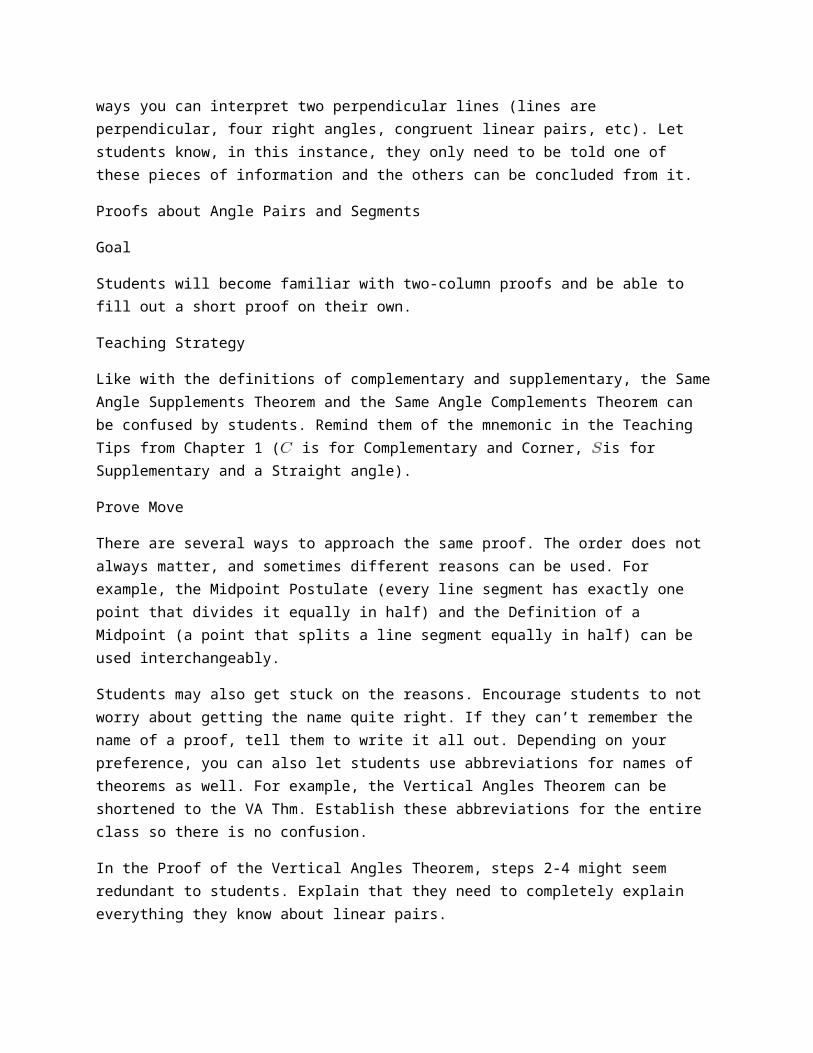
Additional Example: Complete the proof by matching each statement with its corresponding reason.
Solution: The order of the reasons is E, D, G, F, B, A, D
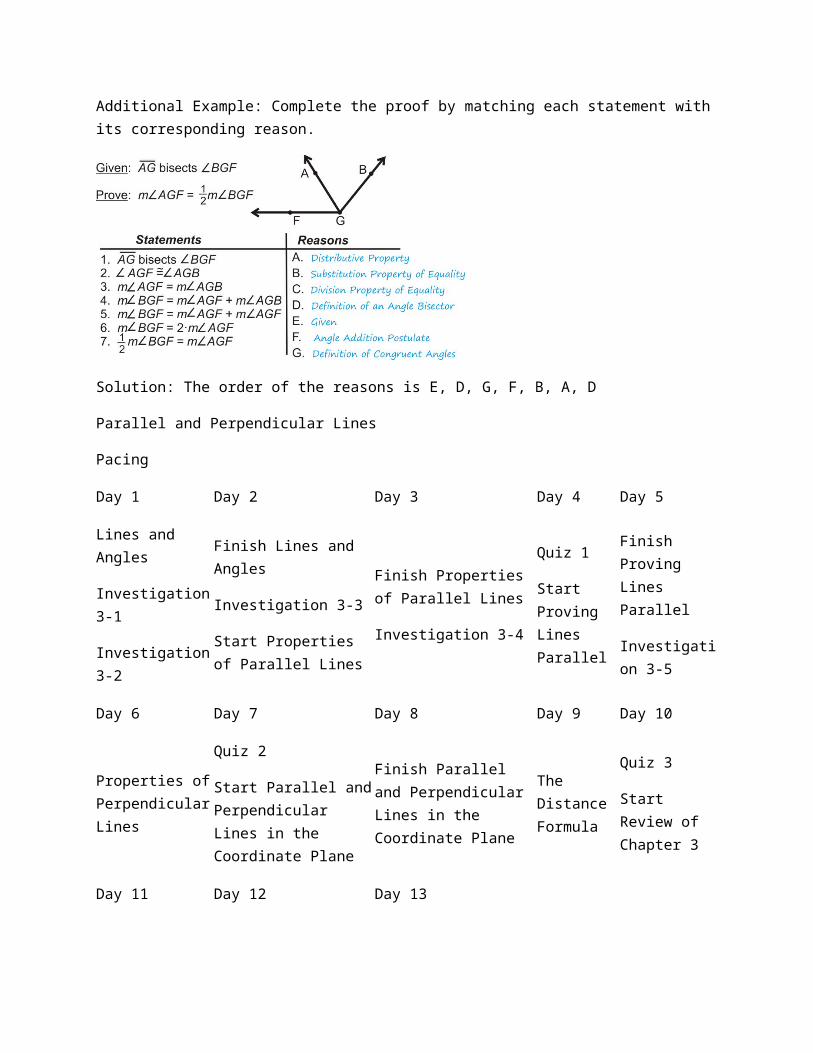
Parallel and Perpendicular Lines
Pacing
Day 1 Day 2 Day 3 Day 4 Day 5
Lines and Angles
Investigation 3-1
Investigation 3-2
Finish Lines and Angles
Investigation 3-3
Start Properties of Parallel Lines
Finish Properties of Parallel Lines
Investigation 3-4
Quiz 1
Start Proving Lines Parallel
Finish Proving Lines Parallel
Investigation 3-5
Day 6 Day 7 Day 8 Day 9 Day 10
Properties of Perpendicular Lines
Quiz 2
Start Parallel and Perpendicular Lines in the Coordinate Plane
Finish Parallel and Perpendicular Lines in the Coordinate Plane
The Distance Formula
Quiz 3
Start Review of Chapter 3
Day 11 Day 12 Day 13
Review Chapter 3 Chapter 3 Test Finish testing (if needed)
Day 1 Day 2 Day 3 Day 4 Day 5
Start Chapter 4
Lines and Angles
Goal
Students will be introduced to parallel, perpendicular, and skew lines in this lesson. Transversals and the angles formed by such are also introduced.
Teaching Strategies
To introduce skew lines, use two pencils and hold them in the air, like skew lines. This will help students visualize that skew lines are in different planes. Use Example 1 as a jumping off point and find more parallel, skew, and perpendicular lines, other than those listed in the solution.
Investigation 3-1 is a useful tool to help students visualize the Parallel Line Postulate. You can decide whether you want to do this activity individually or teacher-led. If you decide to make it a teacher-led demonstration, consider using the overhead and folding a transparency rather than patty paper.
Explore the similarities and differences between the Parallel Line Postulate and the Perpendicular Line Postulate. You can use a Venn diagram to aid in this discussion.
Investigations 3-2 and 3-3 demonstrate the Perpendicular Line Postulate. Guide students through these constructions using a whiteboard compass. If you do not have access to a whiteboard compass, tie a piece of string around your marker and use your finger as the pointer. Make the string at least 8 inches long. If you have access to an LCD screen or computer in the classroom, the website listed in these investigations (www.mathisfun.com) has a great animation of these constructions.
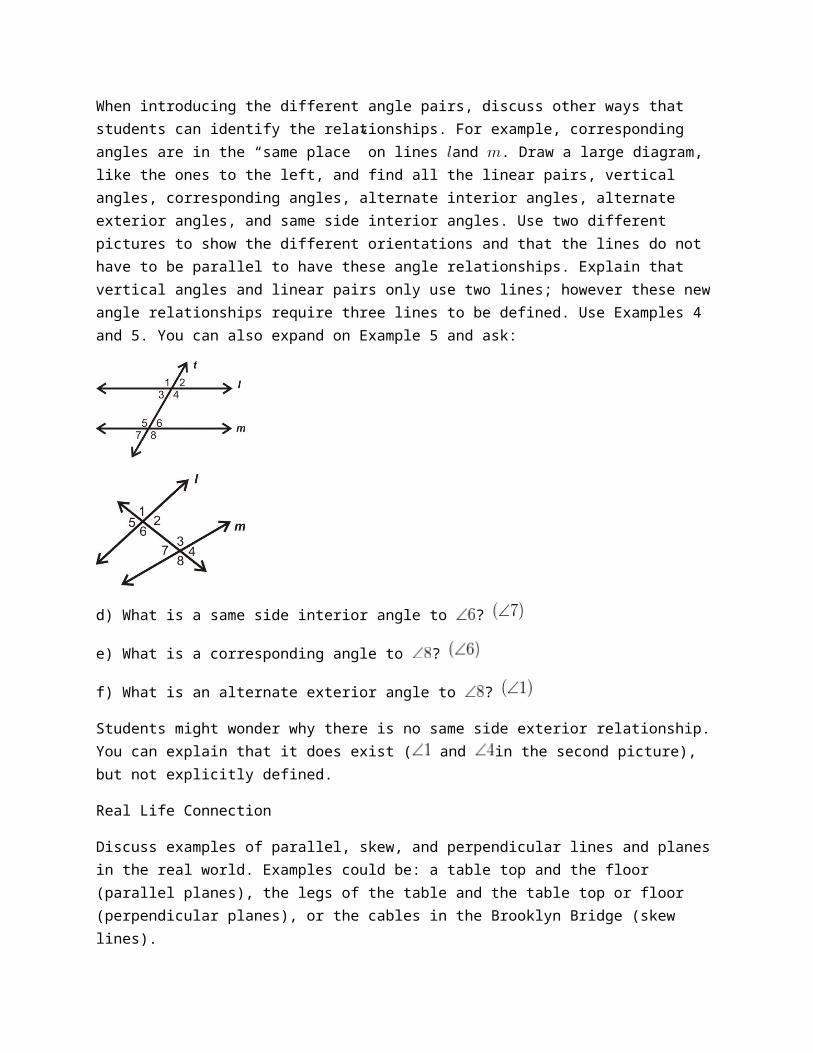
When introducing the different angle pairs, discuss other ways that students can identify the relationships. For example, corresponding angles are in the “same place” on lines and . Draw a large diagram, like the ones to the left, and find all the linear pairs, vertical angles, corresponding angles, alternate interior angles, alternate exterior angles, and same side interior angles. Use two different pictures to show the different orientations and that the lines do not have to be parallel to have these angle relationships. Explain that vertical angles and linear pairs only use two lines; however these new angle relationships require three lines to be defined. Use Examples 4 and 5. You can also expand on Example 5 and ask:
d) What is a same side interior angle to ?
e) What is a corresponding angle to ?
f) What is an alternate exterior angle to ?
Students might wonder why there is no same side exterior relationship. You can explain that it does exist ( and in the second picture), but not explicitly defined.
Real Life Connection
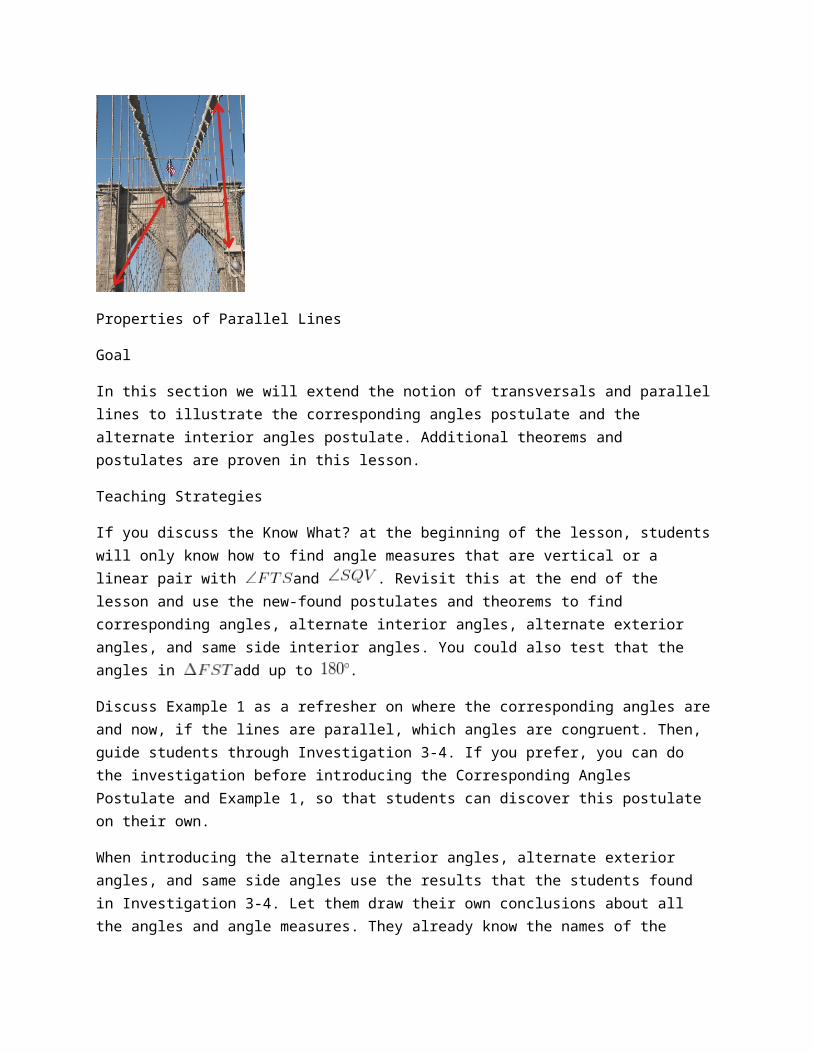
Discuss examples of parallel, skew, and perpendicular lines and planes in the real world. Examples could be: a table top and the floor (parallel planes), the legs of the table and the table top or floor (perpendicular planes), or the cables in the Brooklyn Bridge (skew lines).
Properties of Parallel Lines
Goal
In this section we will extend the notion of transversals and parallel lines to illustrate the corresponding angles postulate and the alternate interior angles postulate. Additional theorems and postulates are proven in this lesson.
Teaching Strategies
If you discuss the Know What? at the beginning of the lesson, students will only know how to find angle measures that are vertical or a linear pair with and . Revisit this at the end of the lesson and use the new-found postulates and theorems to find corresponding angles, alternate interior angles,
alternate exterior angles, and same side interior angles. You could also test that the angles in add up to .
Discuss Example 1 as a refresher on where the corresponding angles are and now, if the lines are parallel, which angles are congruent. Then, guide students through Investigation 3-4. If you prefer, you can do the investigation before introducing the Corresponding Angles Postulate and Example 1, so that students can discover this postulate on their own.
When introducing the alternate interior angles, alternate exterior angles, and same side angles use the results that the students found in Investigation 3-4. Let them draw their own conclusions about all the angles and angle measures. They already know the names of the relationships, so then ask students if any other relationships that they learned in the previous lesson are equal. This will allow you to explain the Alternate Interior Angles Theorem and Alternate Exterior Angles Theorem.
For the Same Side Interior Theorem, ask students which angles are same side interior and then ask what the relationship is. Students should notice that the two angles add up to .
Students may notice that there are other angles that are supplementary or congruent. Encourage students to make these observations even though there are no explicit theorems.
Reinforce to students that these theorems do not apply to parallel lines. Demonstrate this by drawing two non-parallel lines and a transversal. Measure all angles. Students will see the alternate interior angles, corresponding angles, and alternate interior angles are not congruent, nor are the consecutive interior angles supplementary.
Proving Lines Parallel
Goal
The converse of the previous lesson’s theorems and postulates are provided in this lesson. Students are encouraged to read through this lesson and follow along with the proofs.
Vocabulary
Let students rewrite theorems, postulates, and properties symbolically and using pictures. The converses and the Parallel Lines Property in this section are written in this way to help students understand them better. Continue to use this strategy throughout the text.
Teaching Strategies
Review the concept of a converse from Chapter 2. Then, introduce the converse of the Corresponding Angles Postulate and ask students if they think it is true. Investigation 3-5 is one way to show students that converse of the Corresponding Angle Postulate must be true. Remind students that Postulates do not need to be proven true. However, it is always nice to show students why.
Decide if you would like Investigation 3-5 to be student driven or teacher-led. As a teacher-led investigation, this activity will show students that the converse of the Corresponding Angles Postulate is true. As a student driven activity, encourage students to work in pairs. Before starting, demonstrate how to copy an angle (Investigation 2-2) and then allow students to work through the investigation. Expect it to take 15 minutes.
Investigation 3-5 can also be redone such that students copy the angle and place it in the location of the alternate interior or alternate exterior angle location.
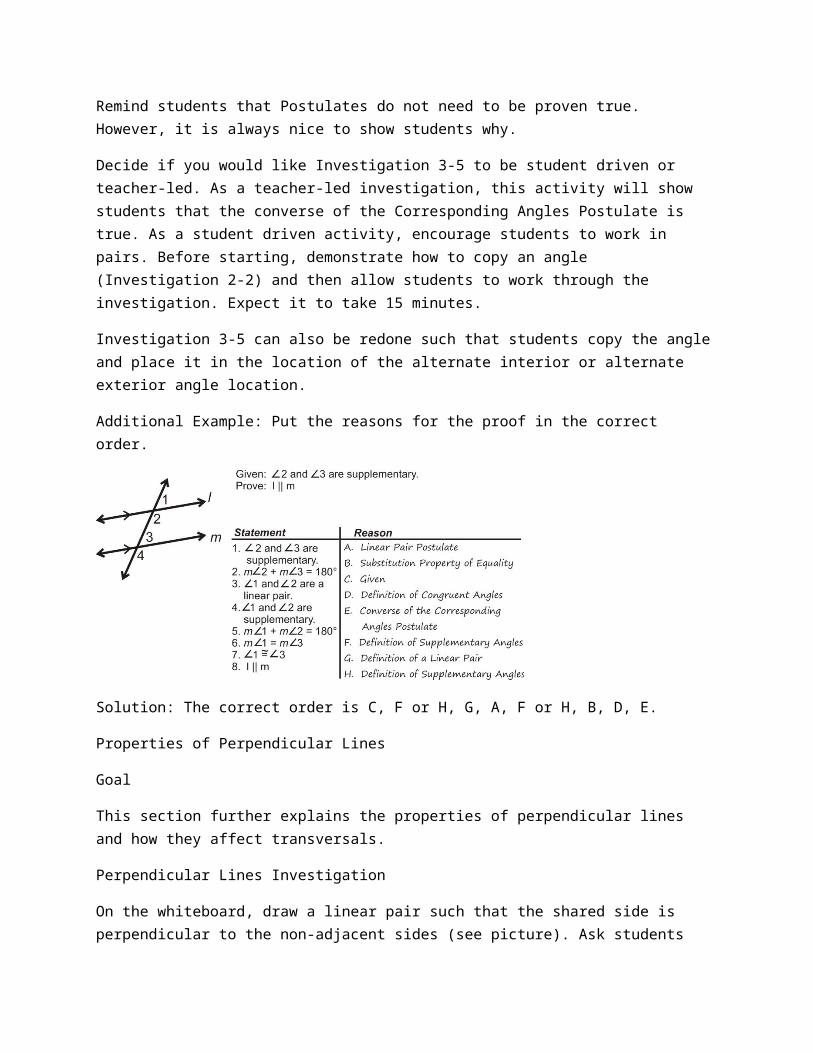
Additional Example: Put the reasons for the proof in the correct order.
Solution: The correct order is C, F or H, G, A, F or H, B, D, E.
Properties of Perpendicular Lines
Goal
This section further explains the properties of perpendicular lines and how they affect transversals.
Perpendicular Lines Investigation
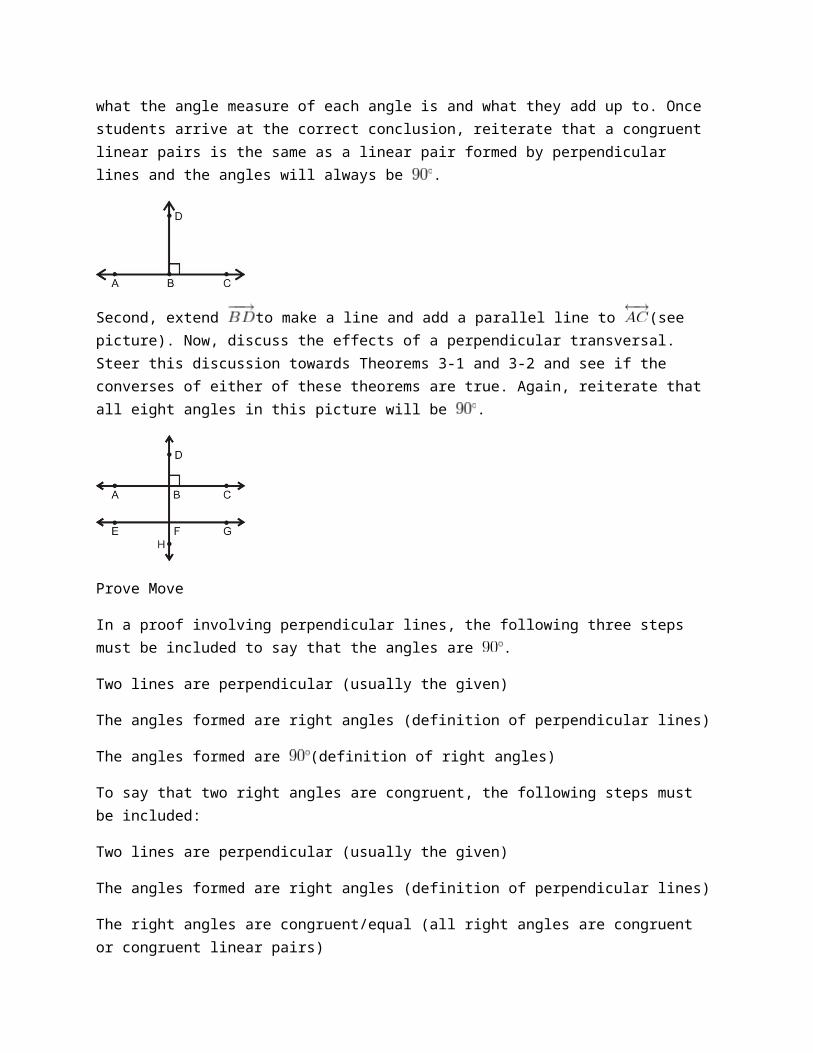
On the whiteboard, draw a linear pair such that the shared side is perpendicular to the non-adjacent sides (see picture). Ask students what the angle measure of each angle is and what they add up to. Once students arrive at the correct conclusion, reiterate that a congruent linear pairs is the same as a linear pair formed by perpendicular lines and the angles will always be .
Second, extend to make a line and add a parallel line to (see picture). Now, discuss the effects of a perpendicular transversal. Steer this discussion towards Theorems 3-1 and 3-2 and see if the
converses of either of these theorems are true. Again, reiterate that all eight angles in this picture will be .
Prove Move
In a proof involving perpendicular lines, the following three steps must be included to say that the angles are .
Two lines are perpendicular (usually the given)
The angles formed are right angles (definition of perpendicular lines)
The angles formed are (definition of right angles)
To say that two right angles are congruent, the following steps must be included:
Two lines are perpendicular (usually the given)
The angles formed are right angles (definition of perpendicular lines)
The right angles are congruent/equal (all right angles are congruent or congruent linear pairs)
This can seem repetitive to students because many of them will feel that it should be inferred that if two lines are perpendicular, then all the angles will be equal/right/ . This is not the case. Explain that they are writing a proof to someone who knows nothing about math or the definitions of perpendicular lines or right angles. They cannot assume that it is the math teacher that is reading each proof. See Example 3 in this section as an example of these steps.
Additional Example: Algebra Connection Solve for .
Solution: The three angles add up to , or and add up to .
Parallel and Perpendicular Lines in the Coordinate Plane
Goal
Students should feel comfortable with slopes and lines. Use this lesson as a review of key concepts needed to determine parallel and perpendicular lines in the coordinate plane. Then, we will apply the concepts learned in this chapter to the coordinate plane.
Real Life Connection
Ask students to brainstorm the many different interpretations of the word slope. Apply these to real world situations such as the slope of a mountain, or the part of a continent draining into a particular ocean (Alaska’s North Slope), the slope of a wheelchair ramp, etc. Discuss synonyms for slope: grade, slant, incline. Then, have students brainstorm further. Relate this back to the Know What? for this section. Explain how the slope and the grade are related. For example, in the Know What? the slope of
the California Incline is (see FlexBook). The grade of this incline is a percentage, so .
Relevant Review
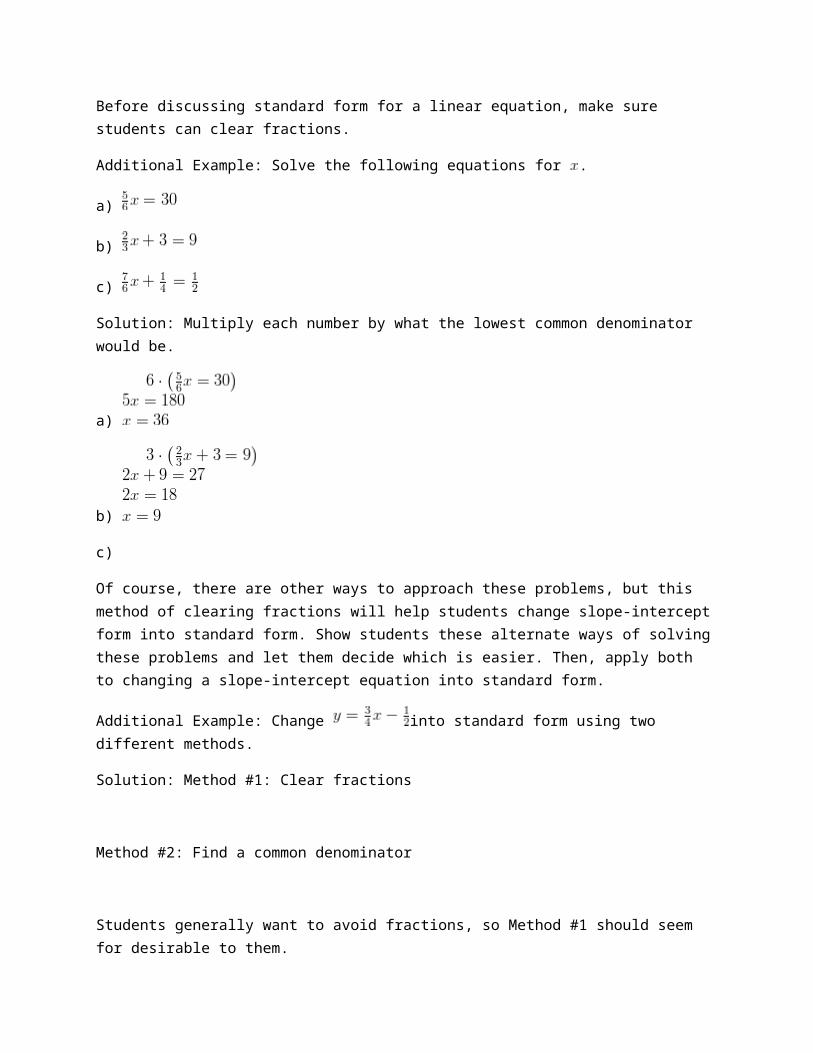
Before discussing standard form for a linear equation, make sure students can clear fractions.
Additional Example: Solve the following equations for .
a)
b)
c)
Solution: Multiply each number by what the lowest common denominator would be.
a)
b)
c)
Of course, there are other ways to approach these problems, but this method of clearing fractions will help students change slope-intercept form into standard form. Show students these alternate ways of solving these problems and let them decide which is easier. Then, apply both to changing a slope-intercept equation into standard form.
Additional Example: Change into standard form using two different methods.
Solution: Method #1: Clear fractions
Method #2: Find a common denominator
Students generally want to avoid fractions, so Method #1 should seem for desirable to them.
Teaching Strategies
When discussing the rise over run triangles, begin making the right triangle connection to students, demonstrating that every rise/run triangle will form a angle. When students are asked to find the distance between two points, they can use the Pythagorean Theorem.
Have students trace the top and bottom edges of a ruler onto a coordinate plane (use graph paper). Ask students to determine the equations for each line and compare the results. Students should notice that, if done correctly, the slopes will be equal. Recall that this is an easy way to draw parallel lines (Investigation 3-4).
The Distance Formula
Goal
Students are introduced to the Distance Formula and its applications.
Teaching Strategies
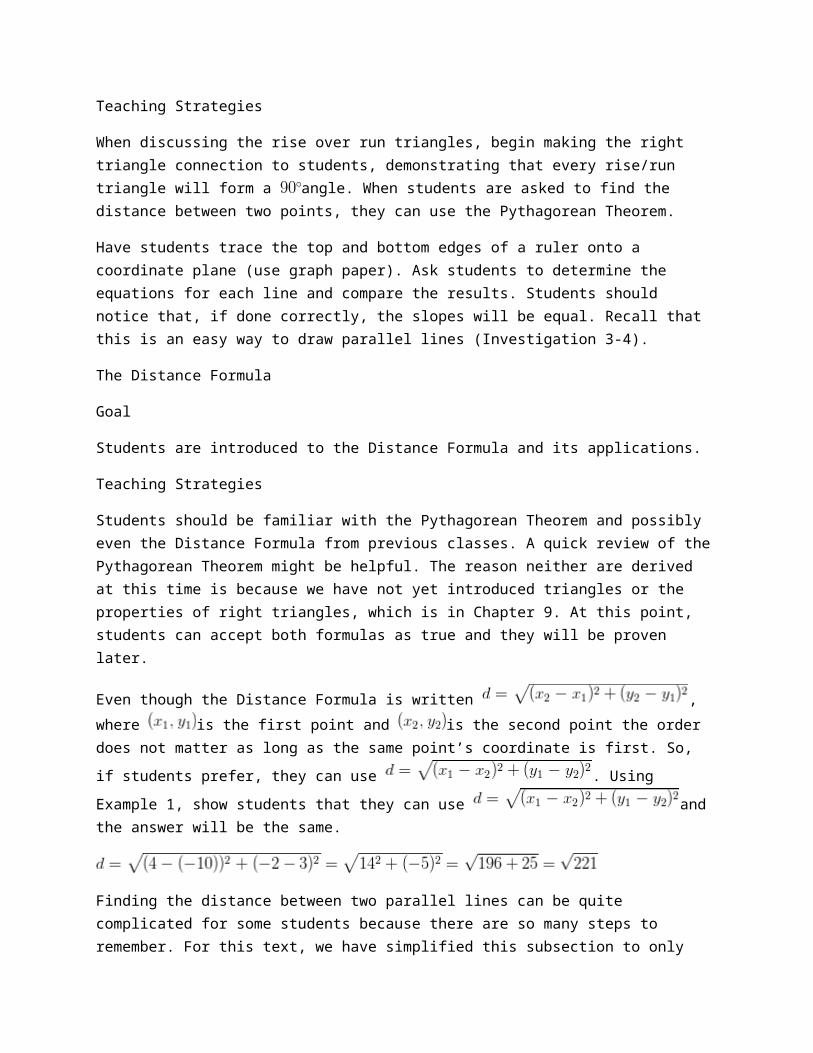
Students should be familiar with the Pythagorean Theorem and possibly even the Distance Formula from previous classes. A quick review of the Pythagorean Theorem might be helpful. The reason neither are derived at this time is because we have not yet introduced triangles or the properties of right triangles, which is in Chapter 9. At this point, students can accept both formulas as true and they will be proven later.
Even though the Distance Formula is written , where is the
first point and is the second point the order does not matter as long as the same point’s
coordinate is first. So, if students prefer, they can use . Using Example
1, show students that they can use and the answer will be the same.
Finding the distance between two parallel lines can be quite complicated for some students because there are so many steps to remember. For this text, we have simplified this subsection to only use lines with a slope of 1 or -1. Reinforce the steps used to find the distance between two parallel lines from Example 5.
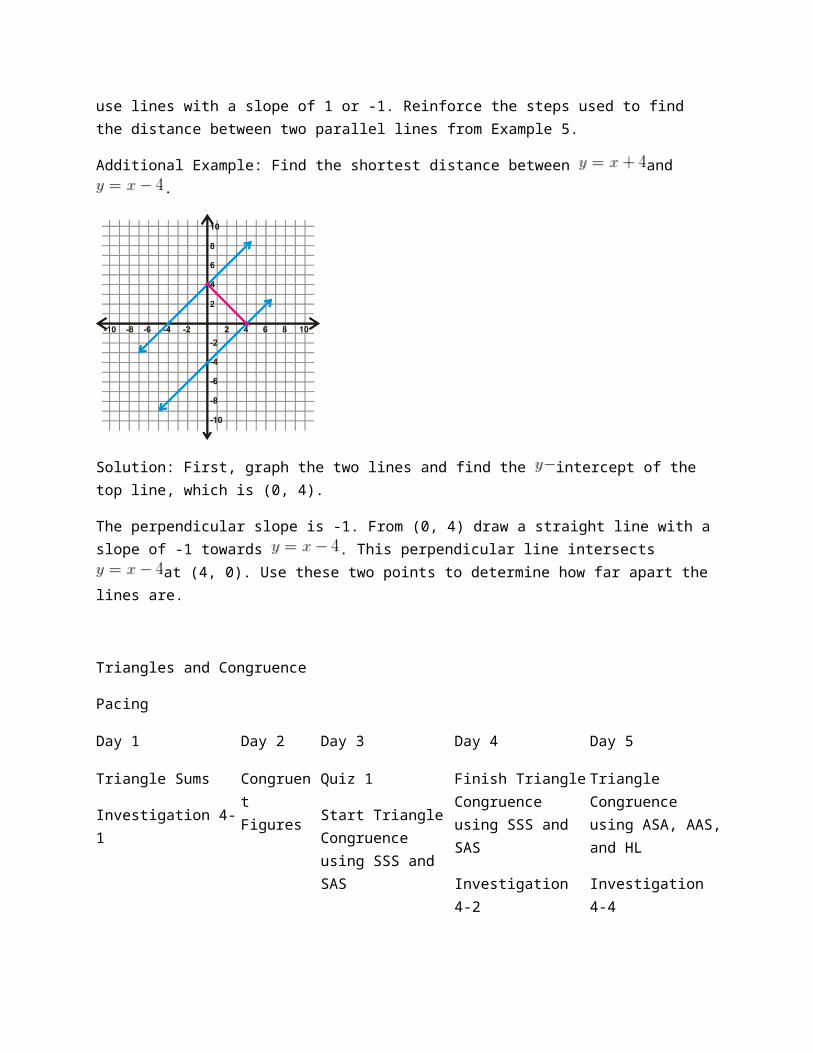
Additional Example: Find the shortest distance between and .
Solution: First, graph the two lines and find the intercept of the top line, which is (0, 4).
The perpendicular slope is -1. From (0, 4) draw a straight line with a slope of -1 towards . This perpendicular line intersects at (4, 0). Use these two points to determine how far apart the lines are.
Triangles and Congruence
Pacing
Day 1 Day 2 Day 3 Day 4 Day 5
Triangle Sums
Investigation 4-1
Congruent Figures
Quiz 1
Start Triangle Congruence using SSS and SAS
Finish Triangle Congruence using SSS and SAS
Investigation 4-2
Investigation 4-3
Triangle Congruence using ASA, AAS, and HL
Investigation 4-4
Day 6 Day 7 Day 8 Day 9 Day 10
More Triangle Congruence using ASA, AAS, and HL
Quiz 2
Isosceles and Equilateral Triangles
Investigation 4-5
Investigation 4-6
Quiz 3 Review Chapter 4
Day 11 Day 12
Day 1 Day 2 Day 3 Day 4 Day 5
Finish Review of Chapter 4
Chapter 4 Test
Triangle Sums
Goal
First, this lesson reviews the types of triangles. The Triangle Sum Theorem will be introduced and proven followed by the Exterior Angle Theorem.
Notation Note
A new symbol, , is introduced to label a triangle. The order of the vertices do not matter for a triangle (unlike when labeling an angle). Usually the vertices are written in alphabetical order.
Teaching Strategies
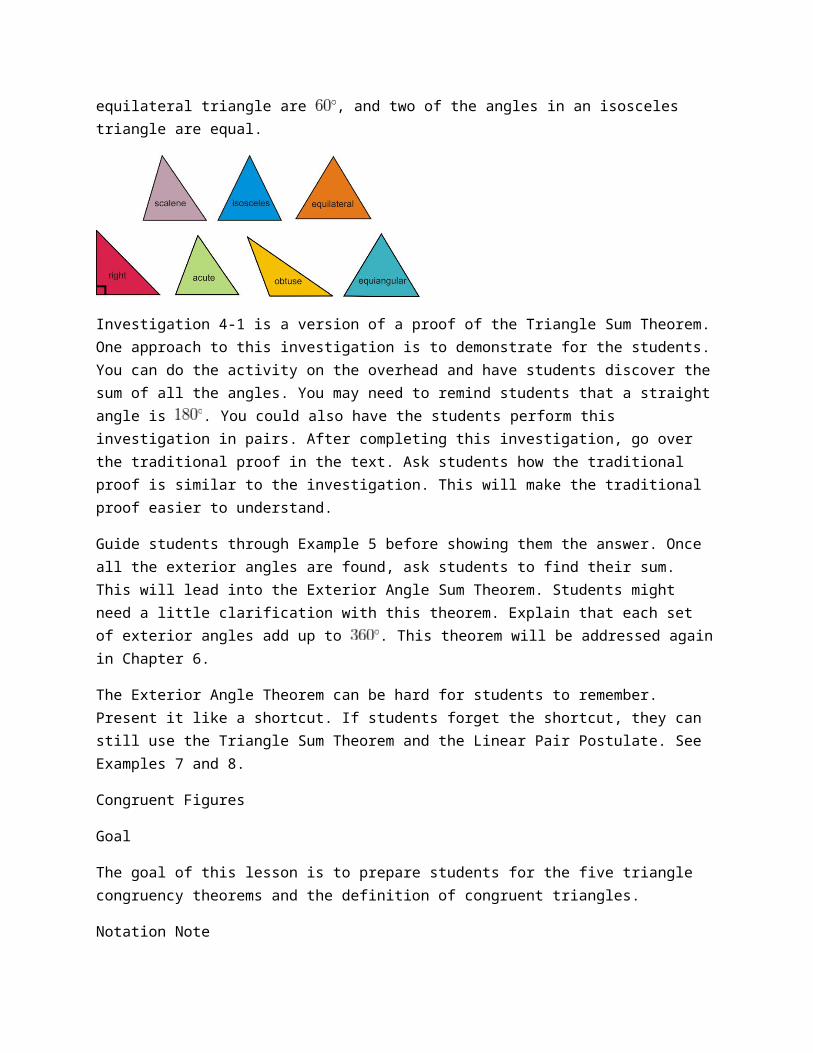
To review finding angle measures, give them the six triangles at the beginning of the section and have them use their protractors to measure all the angles. Then, discuss their results. Students should notice that all the angles add up to , all the angles in an equilateral triangle are , and two of the angles in an isosceles triangle are equal.
Investigation 4-1 is a version of a proof of the Triangle Sum Theorem. One approach to this investigation is to demonstrate for the students. You can do the activity on the overhead and have students discover the sum of all the angles. You may need to remind students that a straight angle is . You could also have the students perform this investigation in pairs. After completing this investigation, go over the traditional proof in the text. Ask students how the traditional proof is similar to the investigation. This will make the traditional proof easier to understand.
Guide students through Example 5 before showing them the answer. Once all the exterior angles are found, ask students to find their sum. This will lead into the Exterior Angle Sum Theorem. Students might need a little clarification with this theorem. Explain that each set of exterior angles add up to . This theorem will be addressed again in Chapter 6.
The Exterior Angle Theorem can be hard for students to remember. Present it like a shortcut. If students forget the shortcut, they can still use the Triangle Sum Theorem and the Linear Pair Postulate. See Examples 7 and 8.
Congruent Figures
Goal
The goal of this lesson is to prepare students for the five triangle congruency theorems and the definition of congruent triangles.
Notation Note
Revisit congruence notation from earlier lessons. This is the first time students will apply congruence to a shape. Remind them that figures are congruent and measurements are equal. So, two triangles can be congruent and the measurements of their sides would be equal. Stress the importance of labeling each congruency statement such that the congruent vertices match.
Stress the tic mark notation in relation to the congruency statement. Simply because the letters used are in alphabetical order does not necessarily mean they will line up this way in a congruency statement. Students must follow the tic marks around the figure when writing congruency statements.
Teaching Strategies
When writing congruence statements, have students put the first triangle’s vertices in alphabetical order. Then, match up the second triangle’s vertices so that the congruent angles are lined up. Remember that it is very common to use letters in alphabetical order, however they might not always line up so that the congruent triangles vertices will be in alphabetical order. For example, might not be congruent to , but it could be .
Rather than needing to know all three pairs of angles and sides are congruent, the Third Angle Theorem eliminates one set of angles. Now, students need to know that two sets of angles and three sets of sides are congruent to show that two triangles are congruent. Ask students if they think there are any other shortcuts to finding out if two triangles are congruent. Can they show that two triangles are congruent using 4 pieces of information? 3 pieces? This could be a discussion for the end of the lesson and lead into the next.
Prove Move
In this lesson, we introduce CPCTC (corresponding parts of congruent triangles are congruent). Even though this is not a theorem, it will be used in proving that parts of triangles are congruent. CPCTC can only be used after two triangles are stated and proven congruent in a proof.
The Reflexive Property of Congruence is commonly used in proofs to say that a shared side or angle is congruent to itself. We will discuss this more in the next section.
Triangle Congruence using SSS and SAS
Goal
This lesson introduces students to the formal concept of triangle congruency through the SSS and SAS Congruence Theorems.
Teaching Strategies
When introducing SSS Congruence Postulate let students do Investigation 4-2 individually. Walk through the classroom and assist students with the steps. Once they reach Step 5, ask if they can make another triangle with these three measurements. Every student should have a 3-4-5 right triangle and have them show each other their constructions. Have students rotate and flip their triangles, but demonstrate that they still have the same shape.
You can also use the Distance Formula to show that two triangles are congruent using SSS (Examples 5 and 6). In Example 5 the two triangles are congruent. Show students that they are in different places, flipped and rotated. Put this example on a transparency and cut out . Then, place it over
so that they are lined up. This also shows that the two triangles are congruent.
To introduce the SAS Congruence Theorem, you can either let students do Investigation 4-3 individually or in pairs. Like with the previous investigation, as students to compare their triangles to the triangles drawn by other students in the class. Again, they will see that all the triangles have the same shape and are congruent.
The concept of an included angle can be confusing for some students. Draw triangles to show students the difference. See picture.
Reinforce that the angle must be between the two sides to be a valid congruence theorem. The way the letters are written, SAS, also should remind students that the angle is between the two sides. SSA (or ASS) implies that the angle is not between the two sides.
Students may ask if SSA is a valid congruence theorem; it is not. There is an explanation of this in the next section. Also, students will realize that SSA and ASS are the same thing. You can address this however you seem fit. Some teachers approach it straight on while others may choose to avoid it and refer to this combination as SSA only.
Prove Move

When using SSS and SAS in a proof, students must present each piece as a step. For SSS, there needs to be three steps, one for each set of congruent sides. For SAS, there needs to be two steps for the two sets of congruent sides and one step for the included angles. Then, students can list the congruence statement and reason.
The Reflexive Property of Congruence can be used in triangle proofs. If two triangles share a side or an angle, the Reflexive Property is the reason this piece is congruent to itself. Students might feel as though this is an unnecessary step, but just remind them that they must right all three sets of congruent sides/angles in order to state that two triangles are congruent.
Triangle Congruence using ASA, AAS, and HL
Goal
Students will learn the ASA, AAS and HL Congruence Theorems and how to complete proofs using all five of the congruence theorems.
Teaching Strategies
Investigation 4-4 should be done individually and then students can compare their triangles with the students around them. Like with Investigations 4-2 and 4-3, students should realize that no other triangle can be drawn. Rotation and reflection do not change the shape of the triangle (Chapter 12).
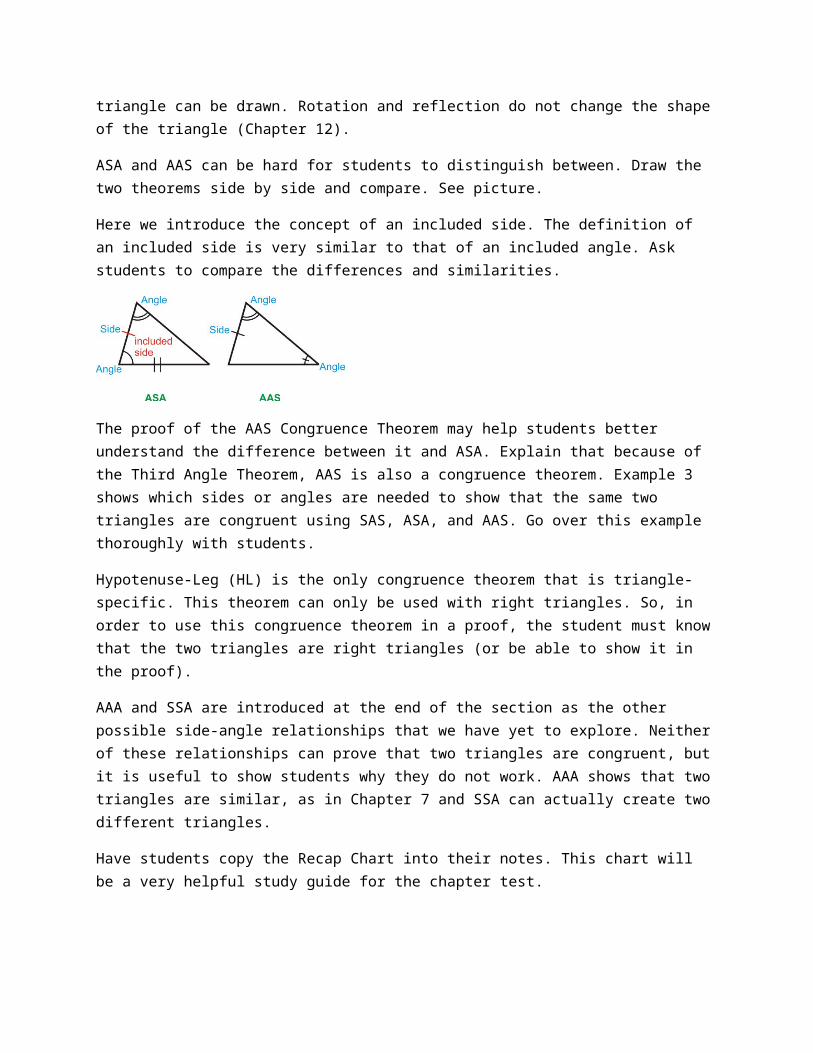
ASA and AAS can be hard for students to distinguish between. Draw the two theorems side by side and compare. See picture.
Here we introduce the concept of an included side. The definition of an included side is very similar to that of an included angle. Ask students to compare the differences and similarities.
The proof of the AAS Congruence Theorem may help students better understand the difference between it and ASA. Explain that because of the Third Angle Theorem, AAS is also a congruence theorem. Example 3 shows which sides or angles are needed to show that the same two triangles are congruent using SAS, ASA, and AAS. Go over this example thoroughly with students.
Hypotenuse-Leg (HL) is the only congruence theorem that is triangle-specific. This theorem can only be used with right triangles. So, in order to use this congruence theorem in a proof, the student must know that the two triangles are right triangles (or be able to show it in the proof).
AAA and SSA are introduced at the end of the section as the other possible side-angle relationships that we have yet to explore. Neither of these relationships can prove that two triangles are congruent, but it
is useful to show students why they do not work. AAA shows that two triangles are similar, as in Chapter 7 and SSA can actually create two different triangles.
Have students copy the Recap Chart into their notes. This chart will be a very helpful study guide for the chapter test.
Example 7 is the only example that touches on CPCTC, even though there are proofs that use it in the homework. Explain to students that they can only use CPCTC after they have proven two triangles are congruent.
This is a very challenging lesson for students. If you feel as though not everyone is grasping the concept of proofs or all the different triangle congruence theorems, slow down and go back over this lesson.
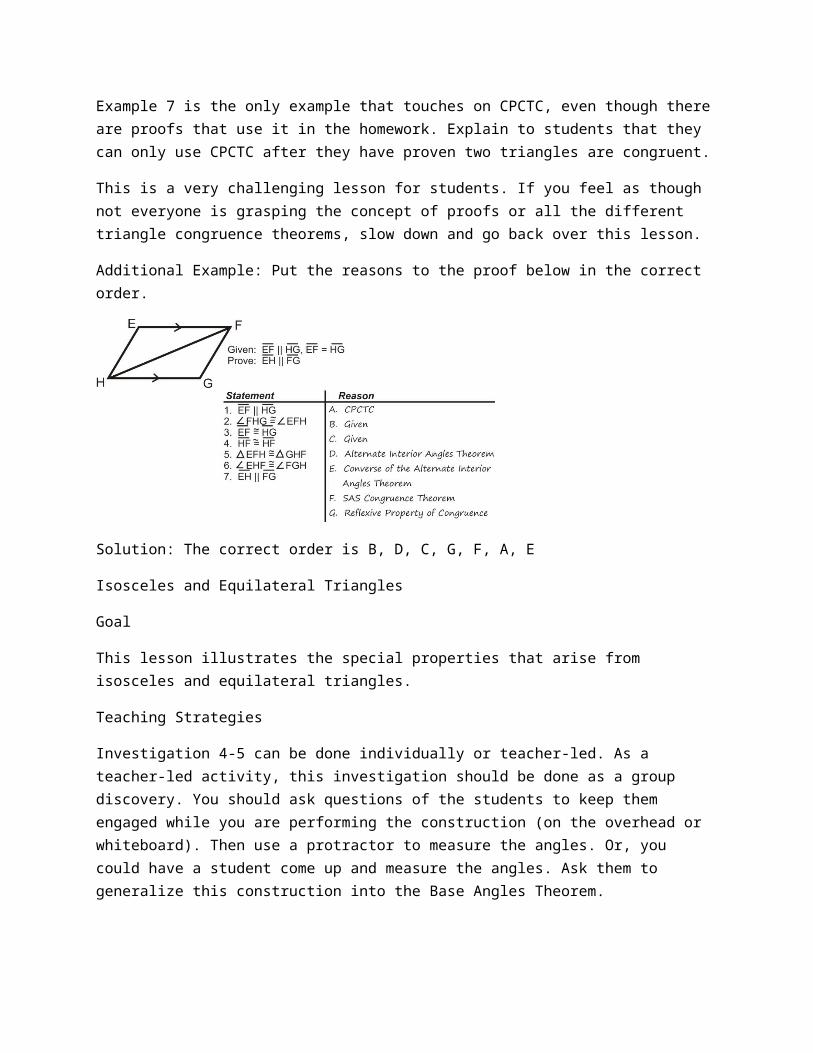
Additional Example: Put the reasons to the proof below in the correct order.
Solution: The correct order is B, D, C, G, F, A, E
Isosceles and Equilateral Triangles
Goal
This lesson illustrates the special properties that arise from isosceles and equilateral triangles.
Teaching Strategies
Investigation 4-5 can be done individually or teacher-led. As a teacher-led activity, this investigation should be done as a group discovery. You should ask questions of the students to keep them engaged while you are performing the construction (on the overhead or whiteboard). Then use a protractor to measure the angles. Or, you could have a student come up and measure the angles. Ask them to generalize this construction into the Base Angles Theorem.
This investigation also leads into the Isosceles Triangle Theorem. Have students duplicate (just before Example 1) in their notes. They should write down all markings and all corresponding congruence statements (for angles and sides) and any perpendicular statements. Stress that this theorem is only true at the vertex angle.
Investigation 4-6 can also be done individually or teacher-led. This investigation allows students to come to their own conclusion about equilateral triangles. They should discover that an equilateral triangle is also an equiangular triangle in Step 4.
Additional Example: Algebra Connection Solve for and .
Solution: It does not matter which variable you solve for first.
Relationships with Triangles
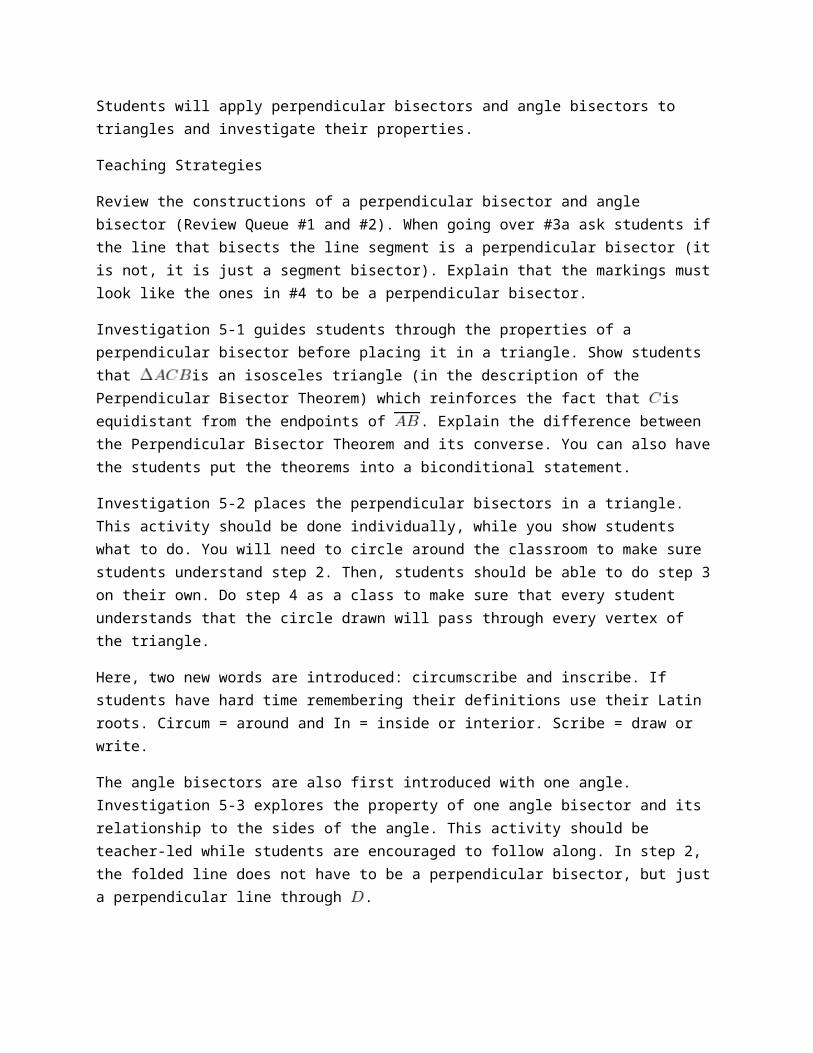
Pacing
Day 1 Day 2 Day 3 Day 4 Day 5
Midsegments
Start Perpendicular Bisectors and Angle Bisectors in Triangles
Investigation 5-1
Investigation 5-2
Finish Perpendicular Bisectors and Angle Bisectors in Triangles
Investigation 5-3
Investigation 5-4
Quiz 1
Start Medians and Altitudes in Triangles
Investigation 5-5
Finish Medians and Altitudes in Triangles
Investigation 5-6
Day 6 Day 7 Day 8 Day 9 Day 10
Inequalities in Triangles
Quiz 2
Start Extension: Indirect Proof
Finish Extension: Indirect Proof
Quiz 3 Review Chapter 5
Day 11 Day 12 Day 13
Review Chapter 5
Chapter 5 Test
Finish Chapter 5 Test (if needed)
Start Chapter 6
Midsegments
Goal
This lesson introduces students to midsegments and the properties they hold.
Vocabulary.
This lesson begins a chapter that is full of vocabulary and new types of line segments. As a new line segment is learned, have students write each one with its definition and a picture in a self-made table. By the end of this chapter, students should have: midsegment, perpendicular bisector, angle bisector, median, and altitude. You can also have students draw these line segments in acute, right and obtuse triangles. Make sure to include the appropriate labeling and congruence statements for each line segment within each triangle as well.
Notation Note
Review with students the difference between a line segment, and its distance . These notations will be used frequently in this chapter.
Teaching Strategies
Stress the properties of midsegments to students and make sure they understand the definition of a midsegment before moving on to the next section. Each segment in a triangle is very similar, so students tend to get them mixed up. A midsegment is unique because it connects two midpoints.
Examples 3-5 investigate the properties of a midsegment in the coordinate plane. Give students these examples without the solutions and have them work in pairs to arrive at the Midsegment Theorem on their own. At the completion of Example 5, ask students if they notice any similarities between the
slopes of and and the lengths of and . Explain that their findings are the Midpoint Theorem.
Discuss that a midsegment is both parallel and half the length of the third side. Stress to students that if a line is parallel to a side in a triangle that does not make it a midsegment. The parallel line must also connect the midpoints, pass through the midpoints, or cut the sides it passes through in half. Go over all of these different ways to state what a midpoint and midsegment are.
If you have access to an LCD display screen (in the classroom) or a computer lab, use the website http://www.mathopenref.com/trianglemidsegment.html (in the FlexBook) to play with midsegments within a triangle. It is a great resource to help students to better understand the Midsegment Theorem.
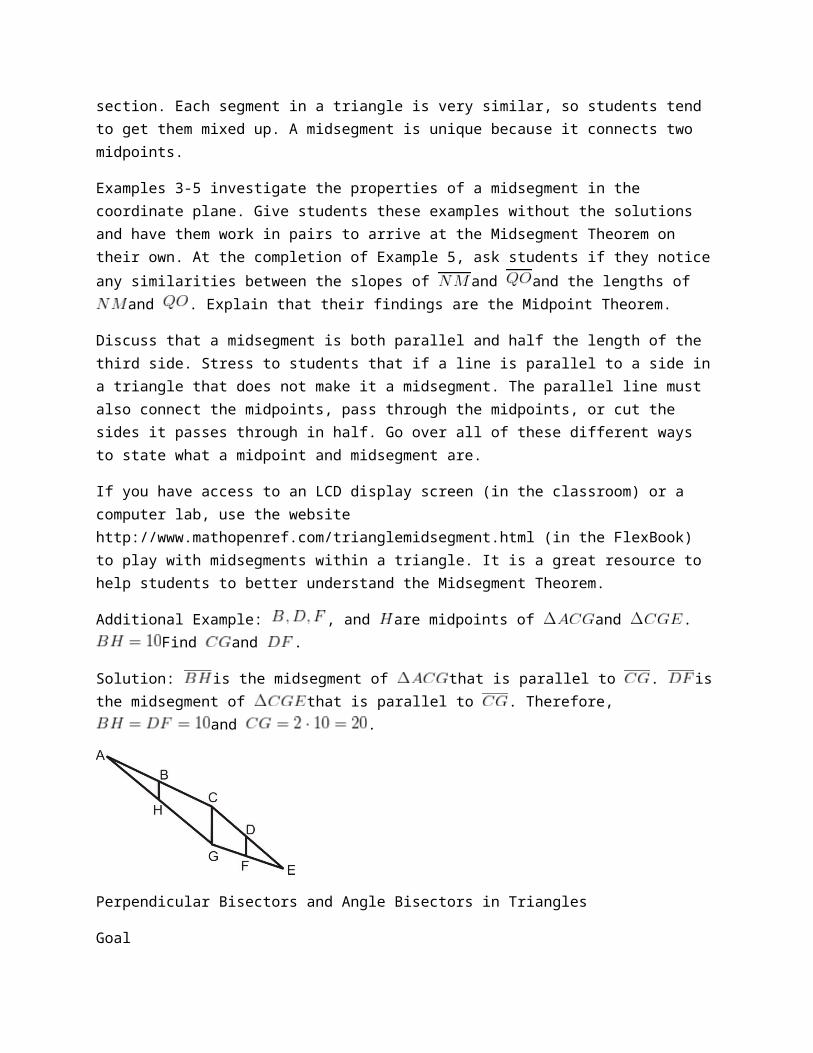
Additional Example: , and are midpoints of and . Find and .
Solution: is the midsegment of that is parallel to . is the midsegment of that is parallel to . Therefore, and .
Perpendicular Bisectors and Angle Bisectors in Triangles
Goal
Students will apply perpendicular bisectors and angle bisectors to triangles and investigate their properties.
Teaching Strategies
Review the constructions of a perpendicular bisector and angle bisector (Review Queue #1 and #2). When going over #3a ask students if the line that bisects the line segment is a perpendicular bisector (it is not, it is just a segment bisector). Explain that the markings must look like the ones in #4 to be a perpendicular bisector.
Investigation 5-1 guides students through the properties of a perpendicular bisector before placing it in a triangle. Show students that is an isosceles triangle (in the description of the Perpendicular Bisector Theorem) which reinforces the fact that is equidistant from the endpoints of . Explain the difference between the Perpendicular Bisector Theorem and its converse. You can also have the students put the theorems into a biconditional statement.
Investigation 5-2 places the perpendicular bisectors in a triangle. This activity should be done individually, while you show students what to do. You will need to circle around the classroom to make sure students understand step 2. Then, students should be able to do step 3 on their own. Do step 4 as a class to make sure that every student understands that the circle drawn will pass through every vertex of the triangle.
Here, two new words are introduced: circumscribe and inscribe. If students have hard time remembering their definitions use their Latin roots. Circum = around and In = inside or interior. Scribe = draw or write.
The angle bisectors are also first introduced with one angle. Investigation 5-3 explores the property of one angle bisector and its relationship to the sides of the angle. This activity should be teacher-led while students are encouraged to follow along. In step 2, the folded line does not have to be a perpendicular bisector, but just a perpendicular line through .
After Investigation 5-3 compare the properties of an angle bisector and a perpendicular bisector. Draw them next to each other with markings and draw a Venn diagram with the similarities and differences. If this lesson takes more than one day, this could be a good warm-up.
After analyzing the pictures, lead students towards the conclusion that is equidistant from the endpoints of (in picture 1) and is equidistant from the sides of . Then, to translate a perpendicular bisector into a triangle, the point where they all intersect would be equidistant from the endpoints of all the line segments, which are the vertices of the triangle. The point of intersection of the angle bisectors would be equidistant from all the sides of the angles which are also the sides of the triangle.
Just like with Investigation 5-2, lead students through this activity. Make sure every student understands how to fold the patty paper to create an angle bisector (step 2). Once they make all the angle bisectors, do step 4 together to ensure that every student understands that the circle will pass through the sides of the circle.
Students can get the properties of perpendicular bisectors and angle bisectors within triangles confused. One way to help students remember which is which show them that the point of intersection of the perpendicular bisectors can outside the triangle so the circle would go around the outside the circle (circumscribe). The point of intersection of the angle bisectors is always inside the triangle so the circle will always be inside the triangles (inscribed).
The points of concurrency of the perpendicular bisectors, angle bisectors and altitudes were intentionally left out of the Basic Geometry FlexBook to avoid confusion and to encourage students to focus on the theorems and properties of these lines. The Enrichment Teacher’s Edition FlexBook discusses the names of these points of concurrency if you would like to include them in your curriculum.
Medians and Altitudes in Triangles
Goal
Students will be introduced to medians and their point of intersection, the centroid. They will explore the properties of a centroid as well as learn how to construct an altitude.
Teaching Strategies
The median is now the third segment that passes through at least one midpoint. Make sure students understand the difference between a median, midsegment and a perpendicular bisector. Also, students may get the angle bisector confused with a median because sometimes it “looks like” (a fatal flaw in geometry) the angle bisector will pass through the opposite side’s midpoint. Students can never assume from a picture that the angle bisector and a median are the same. Discuss the cases when they are the same, this may alleviate some confusion. When a triangle is an isosceles triangle, the line segments are all the same when drawn from the vertex. Also when a triangle is equilateral, the line segments are all

the same regardless of which vertex they are drawn from. The following picture might better illustrate this point:
Points and are the midpoints of the sides they are on.
is a midsegment
is a perpendicular bisector
is an angle bisector
is a median
is an altitude
With Investigation 5-6, encourage students to construct more than one altitude on the given obtuse triangle. While we did not explore the point of intersection for the altitudes, there is one. Have students arrive at this conclusion on their own, while constructing the other altitudes in . While students are performing the constructions, encourage them to turn their paper around so that the side they are making the altitude perpendicular to is horizontal. This will make the process easier.
At the end of this lesson, compare all of the line segments within triangles. Use the table below. The answers are filled in, but draw on the board without answers and generate the answers as a class. You can also use the picture above to help students determine the properties of the line segments.
Pass through the midpoint(s)?
Pass through a vertex?
Perpendicular? Properties of the point of intersection
Midsegment Yes, two. No No No point of intersection
Angle Bisector No Yes NoEquidistant from the sides of a triangle; inscribed circle.
Perpendicular Bisector
Yes No YesEquidistant from the vertices of a triangle; circumscribed circle.
Median Yes Yes No The centroid; the “center of gravity” of a triangle. Also it splits the medians

Pass through the midpoint(s)?
Pass through a vertex?
Perpendicular? Properties of the point of intersection
into pieces.
Altitude No Yes Yes None
Check and recheck that students understand these five line segments before moving on. It is very common for students to get the definitions and properties confused.
Inequalities in Triangles
Goal
The purpose of this lesson is to familiarize students with the angle inequality theorems and the Triangle Inequality Theorem and the SAS and SSS Inequality Theorems.
Teaching Strategies
Students have probably figured out the Triangle Inequality Theorem but not actually put it into words. Ask the class if they can make a triangle out of the lengths 3 in, 5 in, and 9 in. You can give each student a few pieces of dry spaghetti and have them break the pieces so that they are the lengths above and then attempt to make a physical model. They will discover that it is impossible. Then, tell the class to break off 1 in of the 9 in piece and try again. Again, this will not work. Finally, tell them to break off
another -inch and try a third time. This time it will work. Analyze each set of numbers. You could also have students do this a fourth time and make the longest piece either 6 or 7 inches. They will still be able to make a triangle.
3, 5, 9 No triangle
3, 5, 8 No triangle
3, 5, 7.5 Yes!
3, 5, 6 Yes!
Guide students towards the Triangle Inequality Theorem. Example 4 explores the possible range of the third side, given two sides. Explain to students that this third side can be the shortest side, the longest side or somewhere in-between. We have no idea, so we have to propose a range of lengths that the third side could be. Have students shout out possible lengths of the third side and place them in a table. Then, show them the way to write the lengths as a compound inequality.
Example 4 leads students into the SAS Inequality Theorem, which compares two triangles where two sides are the same length and the included angles are different measurements. We know, from Chapter 4, that if the included angles are congruent, then the triangles would be congruent, but in this case, we know that one is bigger than the other. Logically, it follows that the triangle with the bigger included

angle will have the longer opposite side. This is a very wordy theorem; it might help to explain using the symbols and picture in the text. This theorem is also called the Hinge Theorem.
The SSS Inequality Theorem is the converse of the SAS Inequality Theorem. Now we know that two sides are congruent and the third sides are not. It follows that the angle opposite the longer side is going to be larger than the same angle in the other triangle. Example 6 is a good example of how this theorem works. You can also reverse the question and ask: If , what can we say about and
?
Extension: Indirect Proof
Goal
Students should be able to understand how an indirect proof is organized and executed.
Teaching Strategy
An indirect proof is a powerful reasoning tool that students might find useful outside of mathematics. Ask students what professions they think would use indirect proofs (also called proof by contradiction). Examples are lawyers (disproving innocence/guilt), doctors (disproving diagnosis), crime scene investigators (collecting evidence and trying to prove or disprove).
Additional Example: Prove .
Solution: Assume
Squaring both sides, we get .
But , therefore, .
Polygons and Quadrilaterals
Pacing
Day 1 Day 2 Day 3 Day 4 Day 5
Angles in Polygons
Investigation 6-1
Investigation 6-2
Properties of Parallelograms
Investigation 6-3
Quiz 1
Start Proving Quadrilaterals are Parallelograms
Finish Proving Quadrilaterals are Parallelograms
Rectangles, Rhombuses, and Squares
Investigation 6-4
Investigation 6-5
Day 6 Day 7 Day 8 Day 9 Day 10
Quiz 2 Finish Trapezoids Quiz 3 Finish Review of Chapter 6 Test
Day 1 Day 2 Day 3 Day 4 Day 5
Start Trapezoids and Kites
and Kites
Investigation 6-6Start Review of Chapter 6
Chapter 6
Angles in Polygons
Goal
Students will use the Triangle Sum Theorem to derive the Polygonal Sum Theorem by dividing a convex polygon into triangles. Students will also be reintroduced to the Exterior Angle Sum Theorem, but now it will be applied to any polygon.
Teaching Strategies
Using the Know What? at the beginning of this lesson, discuss where someone might see polygons in nature and the real world. Determine if any of these polygons are regular polygons or not. Students might need a review of the definition of a regular polygon.
Investigation 6-1 is intended to be a student-driven activity while the teacher monitors and leads or answers questions. Students should know what a quadrilateral, pentagon, and hexagon are from Chapter 1; however they may need a little review. Diagonals were also addressed in Chapter 1. Make sure that students only draw the diagonals in step 2 from one vertex so that none of the triangles overlap. In step 3 it might be helpful to write out the last column as a list, including the triangle;
. Then, ask students what the next number in the pattern should be. Continue this for a few more terms and then generalize into the Polygon Sum Formula.
Students might think that the Polygon Sum Formula and the Equiangular Polygon Formula are two different formulas for them to memorize. This is not the case. Tell students that they need to memorize the Polygon Sum Formula and then the Equiangular Polygon Formula simply divides the Polygon Sum Formula by the number of angles in the polygon. Stress to students that the Equiangular Polygon Formula can be used on equiangular polygons as well as regular polygons.
To introduce exterior angles for polygons, draw a triangle with its exterior angles. Students should remember that each set of exterior angles of a triangle add up to . Then, show students the exterior angles for a square. Each exterior angle is , so their sum would be as well. Now, have students complete Investigation 6-2 in pairs.
The first question in the review questions is a table with angle sums and individual angles in a regular n-gon. Complete this table at the end of the lesson so that students see the relationship between all the angles and their sums. If you would like, add a final column labeled “Each exterior angle in a regular n-gon.” Students can either use linear pairs with column 4 or divide by the number of sides.
Properties of Parallelograms
Goal
The purpose of this lesson is to familiarize students with properties special to parallelograms.
Notation Note
The notation for any quadrilateral or is the list of vertices, usually clockwise, such as (quadrilateral) or (pentagon). Students can start at any vertex they would like. The only requirement is that the vertices are listed such that they are next to each other in the picture. Quadrilateral could be:
Notice that the first vertex listed and the last vertex listed are next to each other.
Teaching Strategies
Investigation 6-3 enables students to discover the properties of parallelograms on their own. Encourage students to label the vertices of the parallelogram ( , for example) and then they can write equality/congruence statements for the angles and sides. Once they have all the equality/congruence statements written (step 3), have students write down all their conclusions and see if they can generate the parallelogram theorems on their own.
Students might wonder if there is a difference between consecutive angles and same side interior angles. Discuss this with your students. One could argue they are the same. Another could argue they are different because consecutive refers to two angles that are next to each other in a polygon. Same side interior angles refer to two angles that are formed by parallel lines and one transversal.
Encourage students to make as many connections as possible. For example, students have learned parallel lines are equidistant from each other. Make this connection to a parallelogram. If students drawn in the diagonals of a parallelogram; review that alternate interior angles are congruent.
In Example 3, we place the parallelogram in a coordinate plane. In this chapter we will show that certain quadrilaterals are parallelograms (and rhombuses, squares, and rectangles) when they are in the coordinate plane. In this section we introduce one method. Because the diagonals of a parallelogram bisect each other, their point of intersection should be the midpoint of each. Therefore, the midpoint of each diagonal will be the same point.
Proving Quadrilaterals are Parallelograms
Goal

Students will use triangle congruence postulates and theorems to prove quadrilaterals are parallelograms. Students will also determine if a quadrilateral is a parallelogram when placed in the coordinate plane.
Teaching Strategies
There are two main ways to prove that a quadrilateral is a parallelogram: formal proof and using the coordinate plane. If students are given a formal proof, they must prove that the two halves of a parallelogram (split by one of the diagonals) are congruent and then use of the converses used in this lesson. They will also have to use CPCTC somehow.
If students are doing a problem with a quadrilateral in the coordinate plane, then they must use the distance formula, slope formula, or midpoint formula. The distance formula would lend itself to the Opposite Sides Theorem Converse, and finding the slopes of all four sides is the definition of a parallelogram and the midpoint formula is the Parallelogram Diagonals Theorem Converse. Discuss all these options with students before allowing them to start class work or homework.
As a way to introduce the proof of the Opposite Sides Theorem Converse and the proof of Theorem 6-10 (Example 1), you can copy these theorems and then cut up the statements and reasons and put them in an envelope. Given an envelope to either pairs or groups of students and have them match up the statements with the corresponding reasons and put them in the correct order. On one side of the envelope, put the Given and Prove as well as the picture. This technique can be done for any proof.
Rectangles, Rhombuses and Squares
Goal
This lesson introduces rectangles, rhombuses, and squares. These are more specific types of parallelograms.
Teaching Strategies
Make sure students understand that everything that falls within a rhombus possess the same characteristics and properties of a parallelogram. A rectangle also has all the properties of a parallelogram as well as its properties. A square has all the properties of a rhombus, rectangle and parallelogram. Squares do not have any of its own unique properties.
Investigation 6-4 shows us that the diagonals of a rectangle are congruent. So, if the diagonals of a parallelogram are congruent, then the parallelogram is a rectangle. Investigation 6-5 explores the properties of the diagonals of a rhombus. Here, the diagonals are perpendicular and they bisect each angle in the rhombus. Note that students do not need to show both to be a rhombus. However, if they decide to use Theorem 6-16, they do need to show that the diagonals bisect all four angles of the rhombus. Therefore, it is much easier for students to use Theorem 6-15 (showing that the diagonals are perpendicular) to show a parallelogram is a rhombus.
Because there are no theorems regarding squares, make sure you go over Example 4 thoroughly. This is the only place we discuss all the properties of squares. Stress that a square holds all the properties of a parallelogram, rectangle, and rhombus. Ask students if they think it has any of its own properties. A square is a specific version of a rhombus, so the angles are bisected. Because a square is also a rectangle, the angles are all , so the bisected angles are all . In addition to the properties listed in Example 4, show students other ways to write some of these properties. For example, a rectangle has four congruent angles. Students can also write this as the sides are all perpendicular to each other.
At this point, students might have the different types of parallelograms confused. There are a lot of different properties and students might have them all mixed up in their heads. One way to help is to draw a hierarchy diagram with QUADRILATERALS at the top and then two arrows. One points to PARALLELOGRAMS and the other points to OTHER TYPES. Then, ask students if they can determine how rectangles, squares, and rhombuses fit into this diagram. The final diagram should look like:
Students can add to this diagram in the next lesson.
The steps after Example 5 are very helpful for students to determine if a parallelogram is a rectangle, rhombus or square. Here is an additional example, using these steps.
Additional Example: The vertices of are below. Determine the type of quadrilateral it is.
Solution: Let’s follow the steps.
1. The quadrilateral is graphed.
2. Do the diagonals bisect each other?
The diagonals bisect each other. This is a parallelogram.
3. Are the diagonals equal?
The diagonals are not equal. This is not a rectangle.
4. At this step, we know this figure is a rhombus. It cannot be a square because the diagonals are not equal, from step 3. So, to prove that it is a rhombus, we can either show that all the sides are equal or that the diagonals are perpendicular. It is easier to find the slopes of the diagonals than do the distance formula four times.
The diagonals are perpendicular, so this reaffirms our earlier conclusion that is a rhombus.
Trapezoids and Kites
Goal
This lesson introduces students to the special properties of kites, trapezoids, and isosceles trapezoids.
Teaching Strategies
After going over the definition of a trapezoid, discuss the difference between a trapezoid and a parallelogram. Students need to realize that a trapezoid has exactly one pair of parallel sides. It is not like the definition of an isosceles triangle (at least two congruent angles). Therefore, a parallelogram is not a trapezoid.
For a trapezoid to be isosceles, the non-parallel sides must be congruent. Describe an isosceles trapezoid as cutting off the top of an isosceles triangle. Therefore, Theorem 6-17 is a form of the Base Angles Theorem for isosceles triangles. Isosceles trapezoids also have congruent diagonals, like a rectangle. Ask students if isosceles trapezoids are rectangles. This is a great example of two different quadrilaterals that have the same property. Of course, rectangles are not isosceles trapezoids because rectangles have four congruent angles and two sets of parallel sides.
Just like triangles, a trapezoid also has a midsegment. Trapezoids only have one midsegment because it connects the non-parallel sides. For this reason, the midsegment is also parallel with the parallel sides. Stress that the length of the midsegment is the average of the lengths of the parallel sides. You could also say that the midsegment is halfway between the parallel sides, so its length is halfway between the lengths of the parallel sides.
Kites are very similar to rhombuses, but a rhombus is not a kite. The definition of a kite says “a quadrilateral with two sets of adjacent congruent sides.” All sides are congruent in a rhombus. Because a kite has two sets of congruent adjacent sides, it has some properties of rhombuses. Go over the similarities and differences between kites and rhombuses. At the end of this lesson, complete the hierarchy diagram that was started in the previous lesson.
Review Game
Have your students create flashcards with quadrilateral names on one side and important information or properties on the reverse. Have various types of quadrilaterals, both abstract and real world, ready to show students. Once students believe they have classified the quadrilateral, they are to hold up the appropriate name. Have students do this in pairs and keep score. You can give the winners bonus points on the test, candy, or a homework pass.
Similarity
Pacing
Day 1 Day 2 Day 3 Day 4 Day 5
Ratios & Proportions
Similar PolygonsQuiz 1
Start Similarity by AA
Finish Similarity by AA
Investigation 7-1
Similarity by SSS and SAS
Investigation 7-2
Day 6 Day 7 Day 8 Day 9 Day 10
Finish Similarity by SSS and SAS
Investigation 7-3
Quiz 2
Start Proportionality Relationships
Finish Proportionality Relationships
Similarity Transformations
Quiz 3
Extension: Self-Similarity
Day 11 Day 12 Day 13 Day 14 Day 15
Finish Extension: Self-Similarity
Start Review of Chapter 7
Extension Quiz
More Review of Chapter 7
Finish Review of Chapter 7
Chapter 7 Test Start Chapter 8
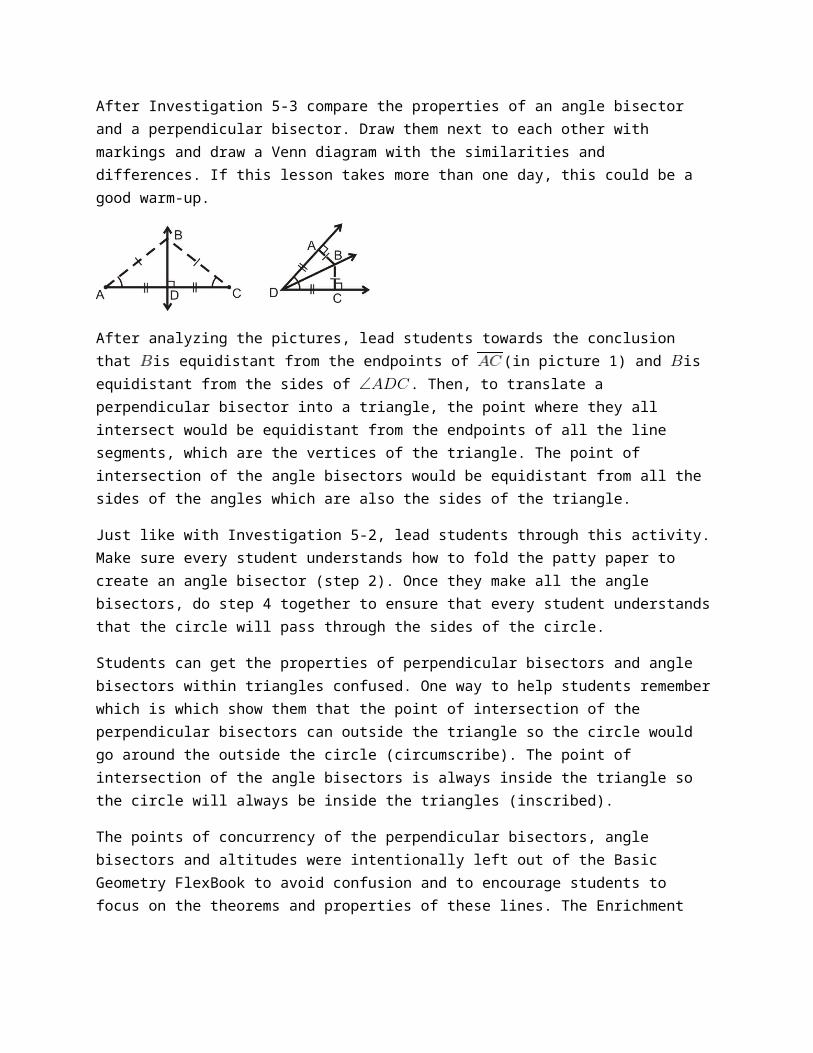
Without the Extension lesson, this chapter will take 12-13 days.
Ratios and Proportions
Goal
The purpose of this lesson is to reinforce the algebraic concept of ratios and proportions. Proportions are necessary when discussing similarity of geometric objects.
Teaching Strategies
The Know What? for this lesson is a little different than the ones in in previous lessons. Have students take this activity one step further and apply the concept of a scale drawing to their own room. Students can draw scale representations of their rooms (or even their whole house) and the furniture for an alternative assessment or a chapter project.
Ratios can be written three different ways. This text primarily uses fractions or the colon notation. Remind students that a ratio has no units and can be reduced just like a fraction. With rates, to contrast to with ratios, there are units. Rates are also fractions. Have students compare the similarities and differences between ratios and rates. Ask them to brainstorm types of ratios and rates.
Proportions are two ratios that are set equal to each other. The most common way to solve a proportion is cross-multiplication. Show students the proof of the Cross-Multiplication Theorem in the FlexBook. This proof makes the denominators the same, so that the numerators can be set equal to each other. Students can go through this whole process each time or they can use cross-multiplication, which can be considered a shortcut.
All of the corollaries in this lesson are considered the same as because when cross-multiplied you would end up with . Therefore, the placement of the and is important. When in doubt about if two proportions are the same, always have students cross-multiply.
Corollaries 7-4 and 7-5 are a little different from the previous three. To show that these proportions are true, it might be helpful for students to see the proofs. Each corollary is proven true when the last step
is because this is the same as the cross-multiplication of .
Proof of Corollary 7-4
Proof of Corollary 7-5

Brainstorm other possible reconfigurations of with students to see if there are any other possible “corollaries.” Have students cross-multiply their “true” proportions to check to see if they are valid.
Similar Polygons
Goal
This lesson connects the properties of proportions to similar polygons. An introduction to scale factors is also presented within this lesson.
Teaching Strategies
To see if students understand the definition of similar polygons, have students come up to the front board and draw pictures of two similar polygons or two non-similar polygons. You could also do this several times, before you give students the formal definition, and then students can generate one as a class.
After doing Examples 1 and 2, brainstorm with the class as to which specific types of triangles, quadrilaterals or polygons are always similar. For example, the text cites equilateral triangles and squares. This leads to the fact that all regular polygons are similar. Explore why just equilateral (rhombuses) or equiangular (rectangles) polygons are not always similar.
Students might wonder which value goes on top when finding the scale factor. Remind students that the scale factor is a ratio. In Example 4, it says “ to .” This is a ratio too. So, the side of
should go in the numerator and the sides of should go in the denominator. The triangle or figure listed first in the written-out ratio goes in the numerator and the figure listed second goes in the denominator.
In Example 5 we show that the scale factor could be or . It is useful for students to know that either can technically be the scale factor. The important thing is that they know when to use which fraction. Ask students which fraction is larger. Then explain that to find the sides of the larger rectangle we would multiply the sides of the smaller triangle by the larger ratio. To find the sides of the smaller rectangle, we would multiply the sides of the larger rectangle by the smaller ratio.
Similarity by AA
Goal
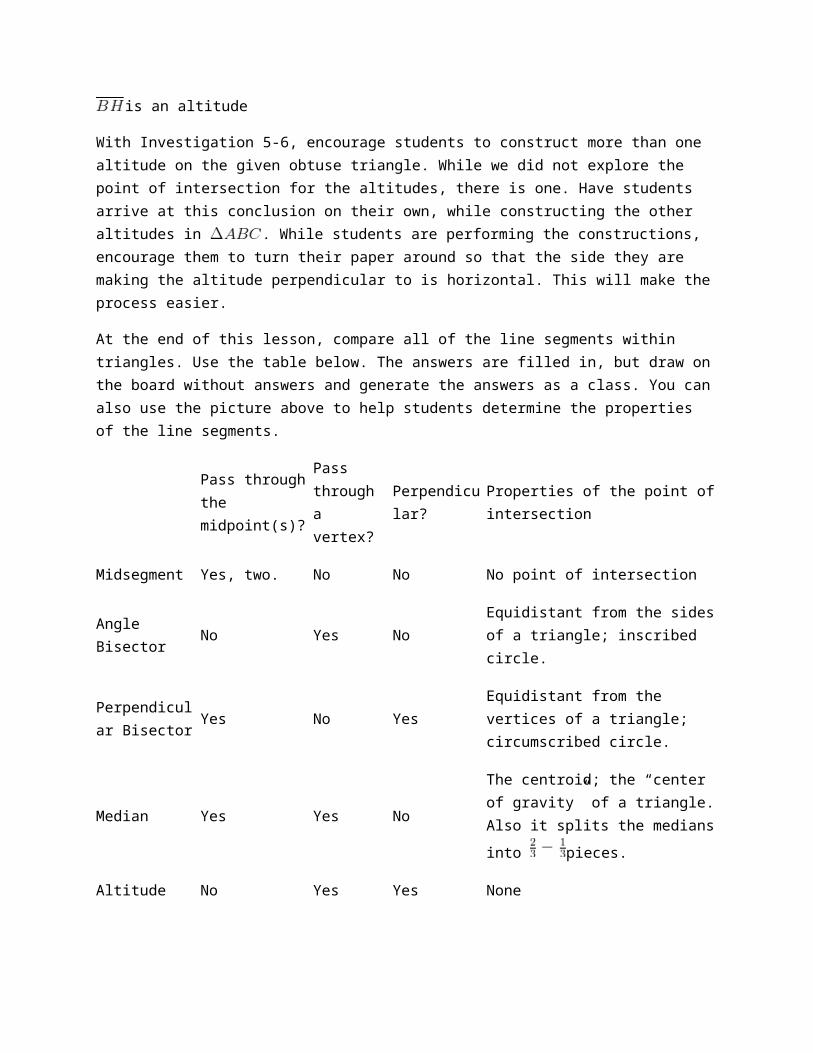
The purpose of this lesson is to enable students to see the relationship between triangle similarity and proportions. Here we discuss the AA Similarity Postulate and show how it can prove that two triangles are similar.
Teaching Strategies
Investigation 7-1 is designed to be teacher-led while the student also does the activity and follows along. Students can work individually or in pairs. One option is to have half the students make the triangle with a 3 inch side, like in step 1, and the other half make a triangle with a 4 inch side, like in step 3. Then, have each pair of students compare their two different triangles and complete step 4 together.
Students can find the corresponding sides in two similar triangles by identifying the congruent angles in the two triangles. Then, the sides that are opposite the congruent angles are corresponding. Students can also place the two largest sides together as corresponding, the shortest sides are corresponding and the middle sides are corresponding. You must be careful with this option, however. Students can only use this method when they know that the triangles are similar.
Another option for indirect measurement (other than Example 5) utilizes the Law of Reflection. It states that the angle at which a ray of light (ray of incidence) approaches a mirror will be the same angle in which the light bounces off (ray of reflection). This method is the basis of reflecting points in real world applications such as billiards and miniature golf. See the additional example below.
Additional Example: You want to shoot the red ball into the corner pocket, as shown below. How far must the cue ball travel in order to do this?
Solution: The answer is the total amount traveled by the cue ball, which is . First we need to find . Set up a proportion using similar triangles.
The cue ball must travel inches to sink the red ball.
Similarity by SSS and SAS
Goal
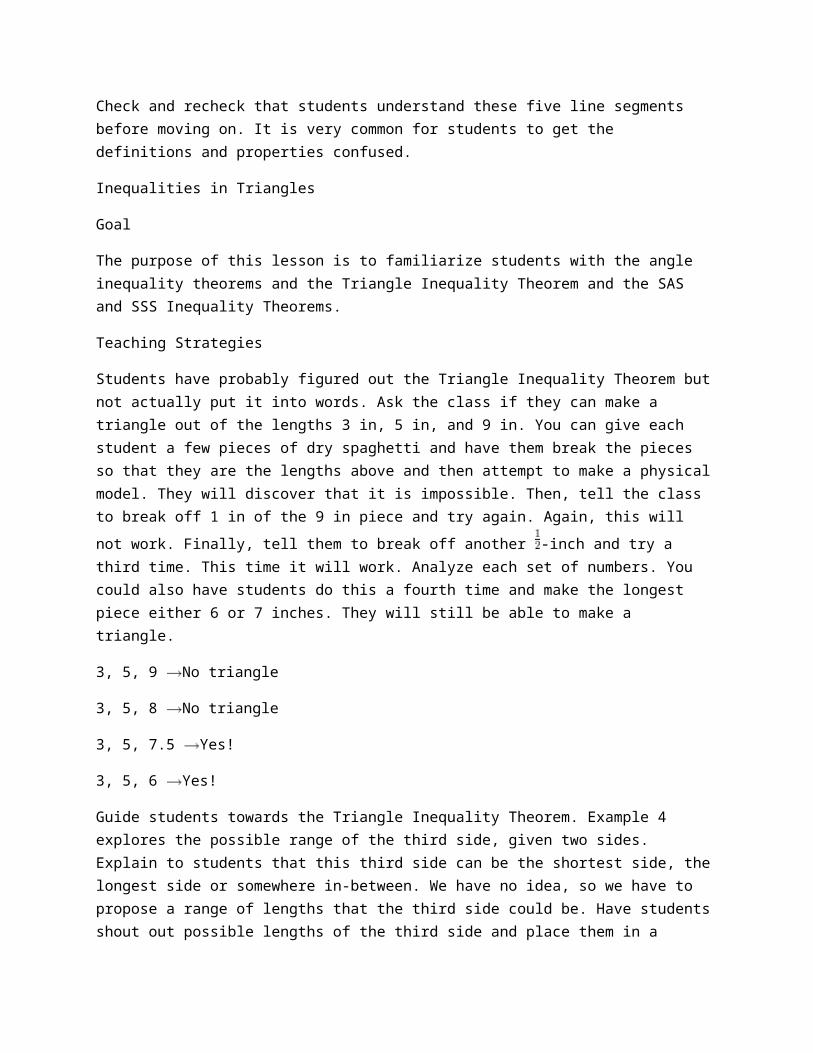
The purpose of this lesson is to extend the SSS and SAS Congruence Theorems to include similarity.
Teaching Strategies
After completing the Review Queue, introduce the lesson by asking students, “How can triangles be congruent and similar simultaneously?” Have a discussion with students about the answer to this question, including how we can prove that triangles are congruent or similar. This will lead into Investigation 7-2.
Investigation 7-2 uses the construction from Chapter 4 for SSS Congruence. Here, students will construct two similar 3-4-5 triangles and then determine if they actually are similar. Have students work in pairs for this activity and circulate to answer questions. Students might need a review of Investigation 4-2 before beginning this investigation. You can show students the provided link in the FlexBook as a review of this construction.
One could say that that SSS Congruence Theorem is a more specific version of the SSS Similarity Theorem. Discuss this point with your students.
As with the previous lesson, make sure students understand which sides are corresponding. If students do not match up corresponding sides, they may get the wrong answer to a homework problem or on a test. Review the points discussed in the previous lesson about how to match up corresponding sides.
Like with Investigation 7-2, you can split the class in half and have one half draw the triangle in step 1 and the other half draw the triangle in step 2 for Investigation 7-3. Then, have students from each half, pair up with someone from the other half and they can do steps 3 and 4 together.
Proportionality Relationships
Goal
In this lesson, students will learn about proportionality relationships when two parallel lines are split by two transversals.
Teaching Strategies
Example 1 can be done as a mini-investigation before Investigation 7-4. Discuss the properties of a midsegment and how it splits the two sides that it intersects. Find the ratio of the split sides (1:1) and the ratio of the similar triangles (1:2). Point out that these two ratios are always different.
Investigation 7-4 should be teacher-led and student can follow along, writing down any important information in their notes. They can sketch your drawings and write down your measurements from steps 3 and 6.
To make the proof of Triangle Proportionality Theorem easier to understand, you can utilize the technique presented earlier in this text where you would copy the entire proof, cut out the statements
and reasons (separately) and place it in an envelope. Then, students (in pairs or groups) can put the proof in the correct order.
Before introducing Theorem 7-7, show students an example, like Example 4. See if they can figure out the answer. In actuality, Example 4 really is not any different from the examples within triangles, just that the transversals do not intersect. Rather than being sides of triangles, now these lines are the transversals passing through parallel lines. Show students several different orientations (like Example 5), so they not confused by the homework problems.
Proportions with Angle Bisectors can be a little tricky for some students. Tell them to set up the proportion like the picture below:
Notice that this set-up is different from the proportion given in Theorem 7-8. Using the letters from the
theorem, the proportion would be , which is corollary 7-1.
Encourage students to use this set-up if they are having difficulties with the proportion given in the text.
Similarity Transformations
Goal
Dilations produce similar figures. This lesson introduces the algorithm to produce similar figures using measurements and a scale factor.
Teaching Strategies
To help students with this lesson’s Know What? show them pictures of different types of perspective drawings. Here are three very different examples to discuss.
An easy way to remember enlargements versus reductions is a rhyme. Have your students repeat the rhyme, “A reduction is a proper fraction.” Improper fractions are mixed numbers, and greater than 1,
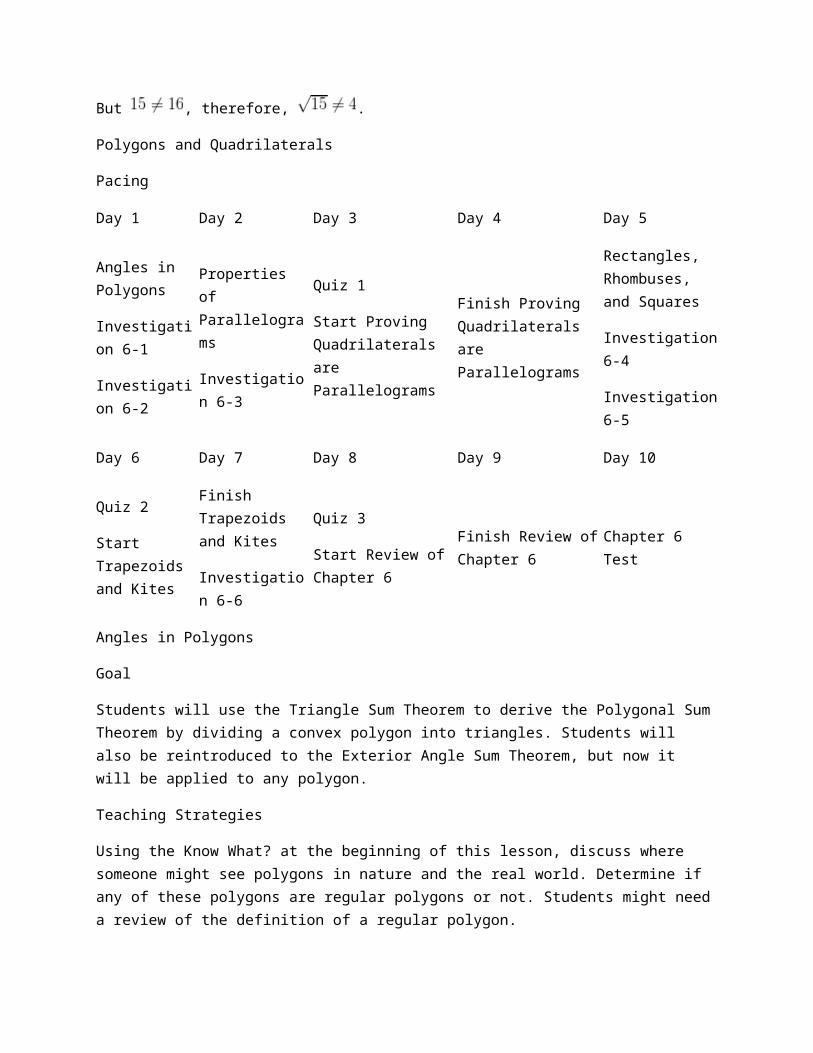
thus creating enlargements. Other texts might use other words for enlargements and reductions. Brainstorm with students synonyms for these words. Possibilities are: stretch and shrink or expansion or contraction.
Dilations can also be clarified using a photograph. School pictures are great examples of dilations. Suppose a typical photograph is . An enlargement does not alter the appearance. This is also true for shrinking photos for a . Using a base picture, bring in several enlargements and reductions to further illustrate this concept.
In Examples 1 and 2, a point is dilated. Recall that a point has no dimension, so it cannot be enlarged or reduced. Therefore, the distance from the center of the dilation is stretched and shrunk. Point out to students that the original distance is 6 units and the distance from to is three times 6 units, or 18 units.
Anytime a figure is dilated, the distance from the center of the dilation is also stretched or shrunk according to the scale factor. The dilated point will always be collinear with the original point as well. Even though the terminology image and preimage (the original image) are not introduced until Chapter 12, feel free to introduce it now.
Extension: Self-Similarity
Goal
This lesson introduces students to popular fractals. Fractals possess self-similarity and maintain the properties of similarity.
Teaching Strategies
This optional lesson is a great mathematical connection to art and nature. Show students examples of fractals in art and graphic design. See the examples below. The last picture is a type of broccoli called romanesco broccoli. You can sometimes find it in specialty grocery stores.
Mathematician Benoit Mandelbrot derived the term “fractal” from the Latin word frangere, meaning to fragment. A fractal is a geometric figure in which its branches are smaller versions of the “parent” figure. Most fractals are explained using higher level mathematics; however, students can create their own fractal patterns easily. The Mandelbrot set is illustrated in the middle picture above.
Additional Example: Follow these instructions to create a cauliflower fractal.
Hold your paper in landscape format.
Draw a horizontal segment , such that , in the center of the paper.
Find and mark , the midpoint of .
Find the midpoint from to . This is .
Use this quarter-length to be the length of . Draw such that it is perpendicular to at .
Draw lines and forming .
Repeat steps 3-6 for and
Continue to repeat this process for the legs of each new smaller triangle.
Final image:
The surface of this fractal (as you continue with smaller and smaller triangles) looks like the outside of a head of cauliflower.
Right Triangle Trigonometry
Pacing
Day 1 Day 2 Day 3 Day 4 Day 5
The Pythagorean Theorem
Investigation 8-1
The Pythagorean Theorem Converse
Quiz 1
Start Similar Right Triangles
Finish Similar Right Triangles
Special Right Triangles
Investigation 8-2
Day 6 Day 7 Day 8 Day 9 Day 10
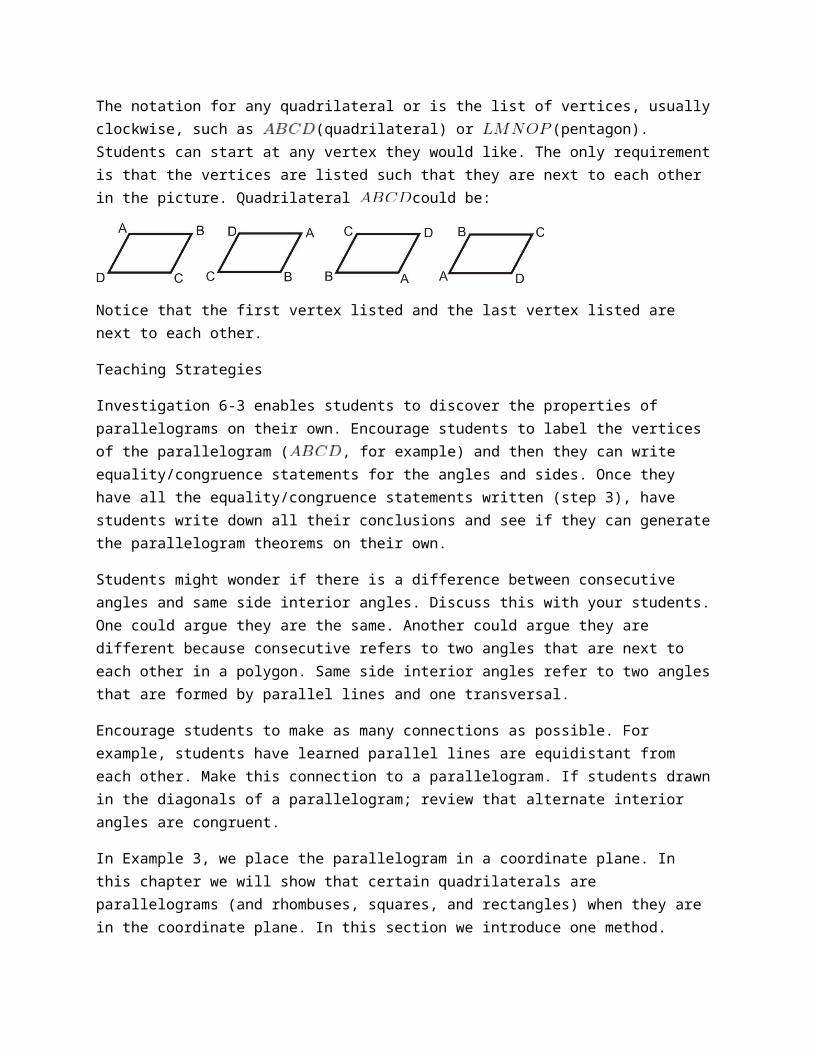
Day 1 Day 2 Day 3 Day 4 Day 5
Finish Special Right Triangles
Investigation 8-3
Quiz 2
Start Tangent, Sine, and Cosine Ratios
Finish Tangent, Sine, and Cosine Ratios
Solving Right Triangles
Finish Solving Right Triangles
Day 11 Day 12 Day 13
Quiz 3
Start Review of Chapter 8
Review Chapter 8 Chapter 8 Test Start Chapter 9
Be sure to take your time with this chapter. Remember that the Pacing Guide is merely a suggestion. Students can get caught up with vocabulary and theorems in this lesson.
The Pythagorean Theorem
Goal
This lesson introduces the Pythagorean Theorem. It has several applications which we will explore throughout this chapter.
Relevant Review
Thoroughly review the Simplifying and Reducing Radicals subsection in this lesson. In this and subsequent lessons, answers will be given in simplest radical form. Make sure students know how to add, subtract, multiply, divide, and reduce radicals before moving on. Present anything under the radical
like a variable. Students know they cannot add . Therefore, they cannot combine . This should make it easier for students to understand.
Teaching Strategies
Investigation 8-1 provides one proof of the Pythagorean Theorem. First, lead students through steps 1-3, then have them finish step 4 individually while you circle around to answer questions. Once students are done with this investigation, either take students to the computer lab or if you have an LCD screen, go to the site in the FlexBook to see two additional proofs of the Pythagorean Theorem. Both of these proofs are animated and provide another viewpoint.
There are several applications of the Pythagorean Theorem. Students need to be familiar with as many as possible. Go over each example to make sure students understand the range of questions that can be asked. Each of the examples, even though worded differently, are completed the same way. The

directions for a given problem can be one place where students can have confusion. Going over the different types of directions for the same type of problem can be very helpful.
Finally the Distance Formula is proven in this lesson. Students might already have an idea of how it works. Explain that it is a variation on the Pythagorean Theorem, especially the before we solve for ,
when the equation looks like . Notice in this section, the Distance Formula looks different than it did when it was introduced in Chapter 3. Recall that order does not matter, as long as the corresponding or value is first ( and are first or and are first).
Converse of the Pythagorean Theorem
Goal
This lesson applies the converse of Pythagorean’s Theorem to determine whether triangles are right, acute, or obtuse.
Relevant Review
Make sure students are comfortable squaring and simplifying radical numbers.
Teaching Strategies
The Converse of the Pythagorean Theorem basically says if the sides of a triangle do not satisfy the Pythagorean Theorem, then the triangle is not a right triangle. Theorems 8-3 and 8-4 extend this concept to determine if the non-right triangle is acute or obtuse. To help students remember which is which, tell them to think opposite. When ( is greater than ) the triangle is acute (all angles are less than ). When ( is less than ) the triangle is obtuse (one angle is greater than ). Also, when in doubt, have them draw the triangle, as best they can, to scale. Then, they can see what the triangle should be and they can do the Pythagorean Theorem to confirm or deny.
Remind students that the Triangle Inequality Theorem still holds. So, if they are given lengths like 5, 7, and 15, they need to be able to recognize that these lengths do not make a triangle at all. , so no triangle can be formed. If students do not see this, they will be doing unnecessary work, not to mention think that the triangle is obtuse. Review the Triangle Inequality Theorem as you are going through the examples in the text. No one likes to do extra work, if they do not have to.
Additional Example: Do the following lengths form a triangle? If so, is it acute, right, or obtuse?
a) 10, 15, 20
b) 7, 14, 21
c)
Solution: First, check all the lengths to see if they make a triangle. b) does not, , so those lengths cannot make a triangle. Let’s see what type of triangles a) and c) are.
a)
c)
Additional Example: Find an integer such that 9, 12, ____ represent an acute or obtuse triangle.
Solution: 9, 12, 15 would be a right triangle (this is a multiple of the Pythagorean triple, 3-4-5). So 8, 9, 10, 11, 12, 13, or 14 would work. If the integer is less than 8, then the triangle would be obtuse, with 12 as the longest side.
For an obtuse triangle, the third side could be less than 8, but greater than . And, it could
also be greater than 15, but less than . So, the possibilities are 4, 5, 6, 7, 16, 17, 18, 19, or 20.
Using Similar Right Triangles
Goal
Students will review similar triangles, primarily right triangles. Then, the concept of the geometric mean is introduced and applied to right triangles.
Relevant Review
Review similar triangles and their properties briefly before introducing Theorem 8-5. The two triangles formed by the altitude from the right angle in a right triangle are similar to the larger right triangle by AA (see Example 1). Show students how the three triangles fit together and which angles are congruent to each other and which sides are proportional (Examples 1 and 2).
Also, remind students that answers should be in simplest radical form. You may need to add a few simplifying and reducing radical questions in the Review Queue.
Teaching Strategies
Example 3 introduces the geometric mean as it applies to right triangles. You can choose to use this example before discussing the geometric mean or after it, after Example 7. It might be easier for students to see the geometric in its literal, algebraic form (without being applied to triangles) and practice it that way for a few examples, and then apply it to a right triangle.
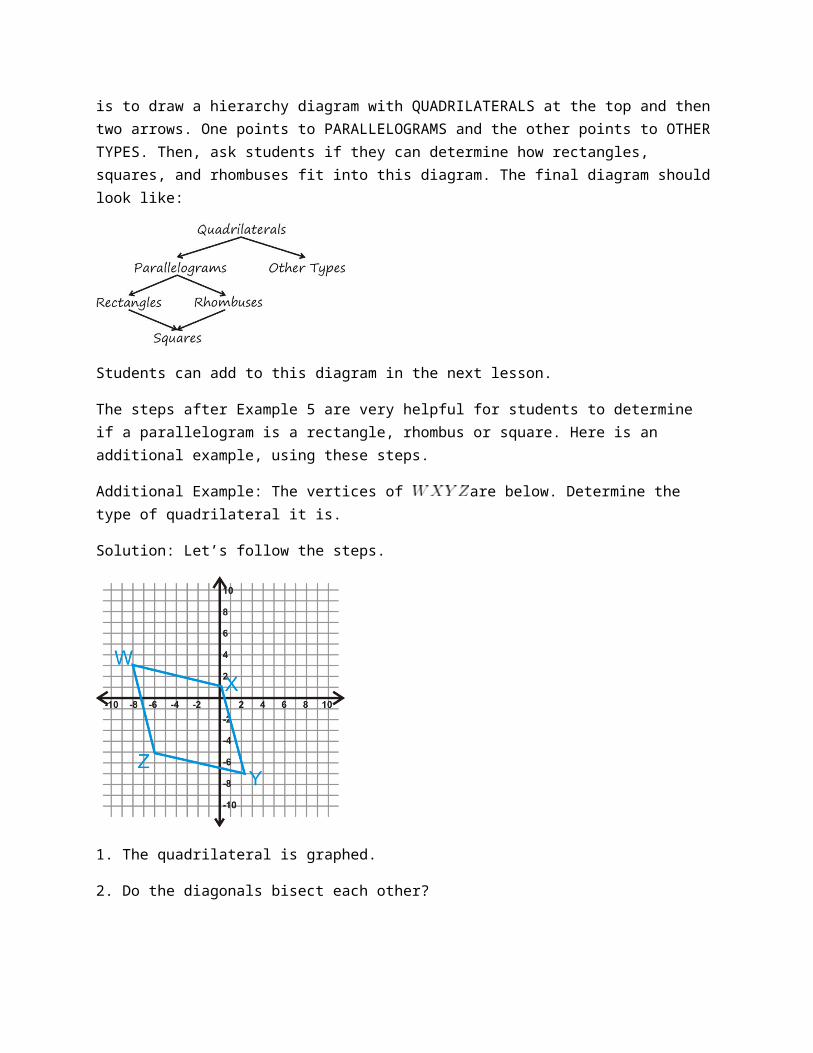
In Examples 5 and 6, it might be helpful to show students the corresponding proportions for the
geometric mean, and . Students will like the short cut, , but they should be shown the proportion first. The proportion directly relates to its application to right triangles.
Examples 3 and 7 apply the geometric mean to the right triangle. The set-up of these proportions, using similar triangles, is the same as the geometric mean. So, students can always use similar triangles, rather than memorize the geometric mean.
So often in math, there are two or even three ways to solve one problem. In Example 8, there are two ways presented to solve for . Encourage students to try the geometric mean, but they can also use the Pythagorean Theorem. Show students both methods and then brainstorm why one method could be preferred over the other. Students should be allowed to use which ever method they feel more comfortable with.
Special Right Triangles
Goal
The purpose of this lesson is to encourage the use of ratios to find values of the sides of special right triangles. These triangles are extremely useful in trigonometry.
Relevant Review
Special right triangle ratios are extended ratios. Here is an additional Review Queue question:
Additional Review Queue: The sides of a triangle are in the extended ratio 3:7:9. If the shortest side is 21, find the length of the other two sides.
Solution: We will rewrite the ratio as . So, , which means . Therefore, the other two sides are and .
Teaching Strategies
Students should complete Investigation 8-2 independently. Lead students through step 1, but then allow them to complete the Pythagorean Theorem in steps 2 and 3 on their own. Ask students if they see a pattern among the hypotenuses. Then, go over how to solve an isosceles triangle given various sides and with various square roots. They should know how to solve an isosceles right triangle when the legs are
not whole numbers. To find the legs, always divide the hypotenuse by and then simplify the radical. (Students might also notice there is a pattern here too. The leg will be the hypotenuse divided by 2 and
multiplied by . For example, if the hypotenuse is 20, the legs will be . This is a
little short cut.) To find the hypotenuse, multiply the leg by . Students may need to simplify the square root. Also, the diagonal of a square will always split the square into two 45-45-90 triangles. Make sure students notice this connection.
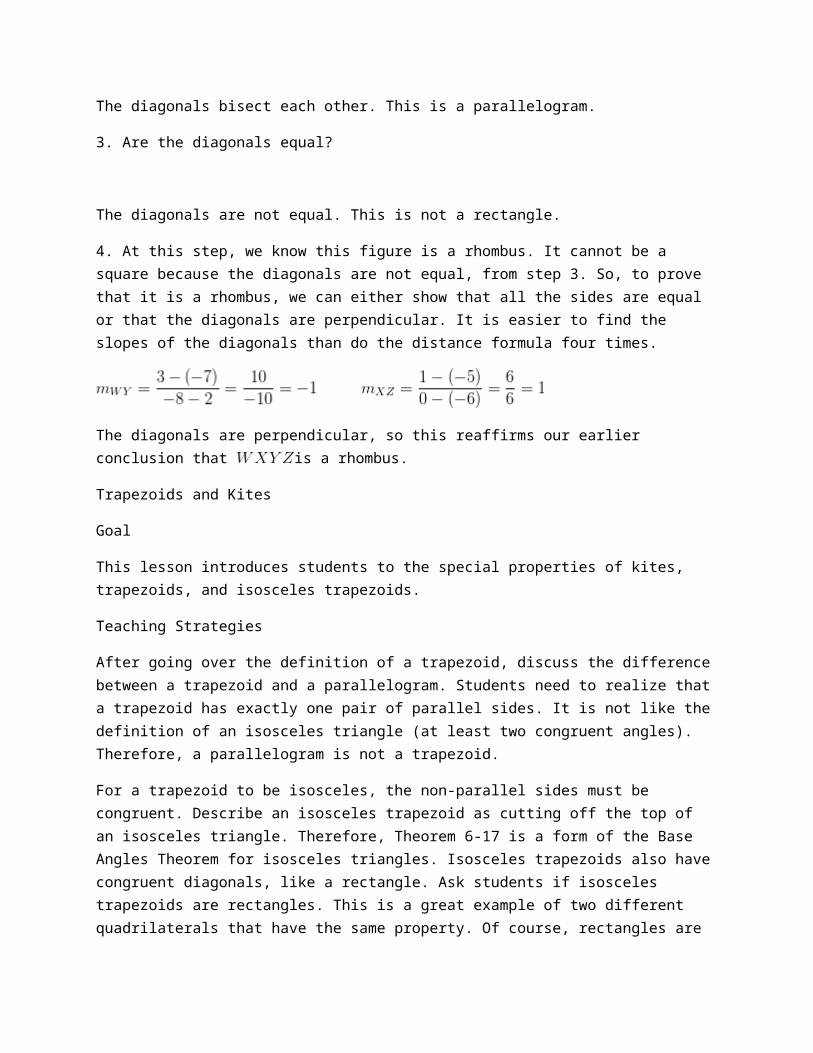
With 30-60-90 triangles, students must make the connection that it is half an equilateral triangle. In Investigation 8-3, lead students through steps 1-3, then allow the students complete steps 4 and 5 on their own. Students will have a hard time remembering this extended ratio. Some students will think
that should be the hypotenuse because 3 is bigger than 2. However, explain that , which is smaller than 2, so will always be the longest side, which is the hypotenuse. To solve 30-60-90 triangles, students will need to find the shortest leg, if they are not given it. If they are given the
hypotenuse, divide by 2, then they can multiply by to get the longer leg. If they are given the longer
leg, they will need to divide by (or use the shortcut as applied to the 45-45-90 triangle above, use 3
and where appropriate) to get the shorter leg, then multiply that by 2.
Students will also get these two ratios confused. One way to help them remember is for a 45-45-90
triangle there are 2 angles, so the hypotenuse is . For a 30-60-90 triangle all the angles are
divisible by 3, so the is in the radical for this ratio.
The best way for students to become comfortable with these ratios is to have them do lots of problems. Students can also make flashcards for these ratios. If students have trouble remembering these special shortcuts, encourage them to use Pythagorean’s Theorem and simplify the answer. The resulting answer will equal the shortcut.
Tangent, Sine and Cosine
Goal
This lesson introduces the trigonometric functions; sine, cosine and tangent.
Teaching Strategies
Before introducing the trig ratios, make sure students understand what adjacent and opposite mean and which angles they are in reference to. will always be the hypotenuse, but and can be either opposite or adjacent, depending on which acute angle we are using. At this point, do not overwhelm students with the fact that the trig functions can be applied to any angle; focus on acute angles in triangles.
Encourage students to make flash cards for the sine, cosine and tangent ratios and to use the pneumonic SOH-CAH-TOA (in FlexBook). Both of these things will help students internalize the ratios.
In the types of problems in this lesson, it will be very common that two of the three sides are given and students will need to use the Pythagorean Theorem to find the third side. This should always be done first, and then they can apply the ratios. Students will also need to reduce ratios and simplify any radicals. Show students several different orientations of the triangles (rotated, flipped, etc) so they are familiar with where an angle is and which sides are adjacent and opposite.
Have each student check to ensure their calculator is set to degrees (DEG), not radians (RAD). Having a calculator in radians will provide incorrect answers. When checking homework at the beginning of the class period, check the mode of students’ calculators as well.

When introducing how to find the sides of a right triangle, using the trig ratios, draw the triangle from Example 5 on the board with only one variable, . This will isolate and students should be able to see that the cosine ratio will solve for . Use the arrow to help illustrate that is adjacent to and 30 is the hypotenuse. After is found, redraw the triangle so is the only variable. Now, is isolated and students will be able to recognize that the sine ratio will solve for it. Again, use arrows, if needed.
Stress to students that they should only use information that they are given in the problem. Using “solved for” information will not give them the most accurate answer or it could be completely wrong (if the “solved for” answer used is incorrect).
To help illustrate the angles of elevation and depression, see the picture below.
Show this to students and ask what the angle of elevation from the cow to the goat is. Then, ask what the angle of depression from the sheep down to the cow is. Students should notice it is the same measurement and alternate interior angles. Fill in the angle of depression/elevations with any measurement.
Inverse Trigonometric Ratios
Goal
In the previous lesson, students used the special trigonometric values to determine approximate angle measurements. This lesson enables students to “cancel” a trigonometric function by applying its inverse to accurately find an angle measurement.
Relevant Review
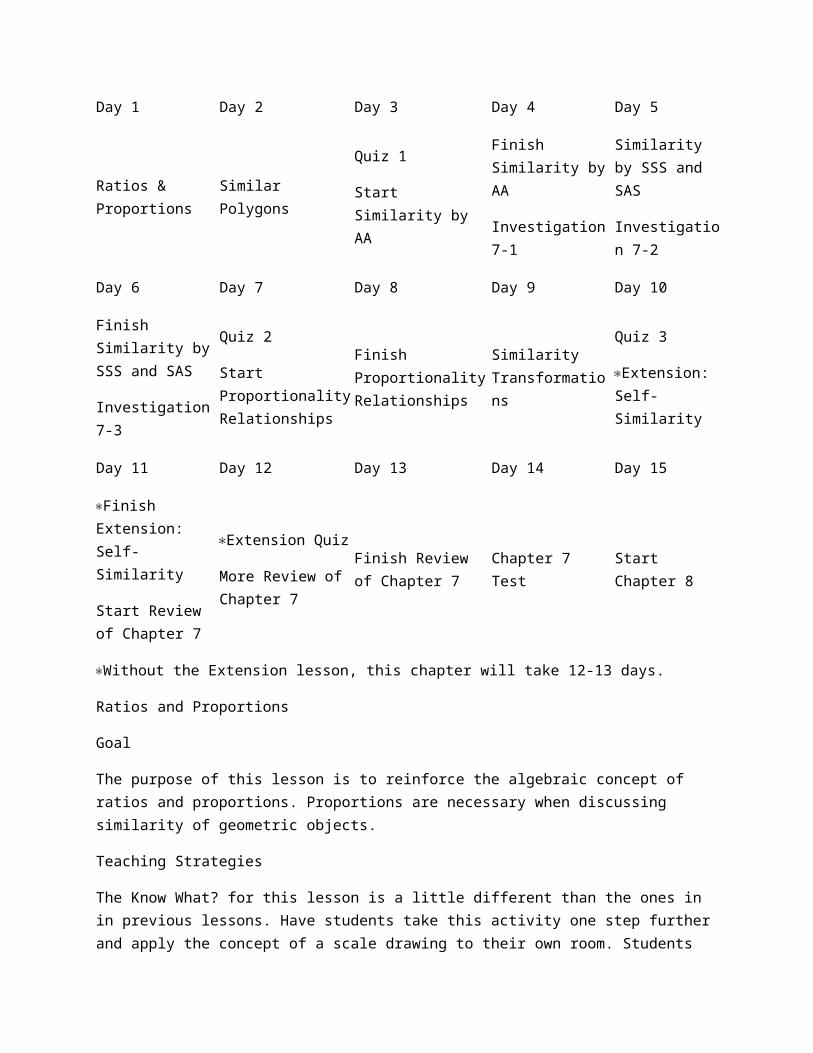
Begin by listing several mathematical operations on the board in one column. In a second column, title it “Inverse.” Be sure students understand what an inverse means (an inverse cancels an operation, leaving the original value undisturbed).
Operation Inverse Example
Addition
Multiplication
Squaring
Sine
Cosine
Tangent
The first four are typically easy for students (Subtraction, square root, multiplication, and addition). You may have to lead students a little more on the last two (inverse tangent and inverse sine). Students may say, “Un-tangent it.” Use the correct terminology here, but also use their wording, if at all possible. Students will be able to cancel the trigonometric function using the inverse of that function, even though they may use incorrect terminology.
Go over Example 1 thoroughly. Make sure every student understands how to input inverse trig functions into their calculator. Remind students that the set-up for inverse problems is the same as those from the previous lesson. However, instead of being given an angle measure, we leave it as a variable. Students need to solve for the angle and then put everything into the calculator at the same time. Get them in this habit so they will produce the most accurate answers. For example:
Example 5 is a special right triangle. Students will probably go through the motions and not notice that they can use the ratios learned in the Special Right Triangles lesson. Either way, students will still arrive at the correct answer, but point out to them to not go blindly into each question. Read a problem, re-read, and then decide how to answer.
Like the last lesson, real-life situations are a major application. At the end of this lesson, create a word problem as a class. Use the names of students or find the height of a local building. Make the problem personal. Then, add it to the test as an extra question or a bonus.
Circles
Pacing
Day 1 Day 2 Day 3 Day 4 Day 5
Parts of Circles & Tangent Lines
Investigation 9-1
Finish Parts of Circles & Tangent Lines
Start Properties of Arcs
Finish Properties of Arcs
Quiz 1
Start Properties of Chords
Finish Properties of Chords
Investigation 9-2
Investigation 9-3
Day 6 Day 7 Day 8 Day 9 Day 10
Inscribed Angles
Investigation 9-4
Finish Inscribed Angles
Investigation 9-5
Quiz 2
Start Angles from Chords, Secants, and Tangents
Investigation 9-6
Finish Angles from Chords, Secants and Tangents
Investigation 9-7
Investigation 9-8
Segments from Secants and Tangents
Day 11 Day 12 Day 13 Day 14 Day 15
Quiz 3
Start Extension: Equations of Circles
Finish Extension:
Equations of Circles
Review for Chapter 9 Test
Chapter 9 Test Start Chapter 10
Parts of Circles & Tangent Lines
Goal
This lesson introduces circles and several parts of circles. Then, we will explore the properties of tangent lines.
Notation Note
is the symbol for a circle. A circle is labeled using this symbol and its center. Some textbooks place a dot in the center, some do not. Do not confuse this symbol with an uppercase .
Teaching Strategies
There is a lot of vocabulary in this chapter. Encourage students to make flash cards for each word and the theorems. Give students index cards at the end of each class period so they can make flash cards in the last 5-10 minutes of all the terms they learned.
Discuss with students where one could find tangent circles, tangent lines, concentric circles, and intersecting circles in real life. Concentric circles can also be formed when raindrops hit a body of water,
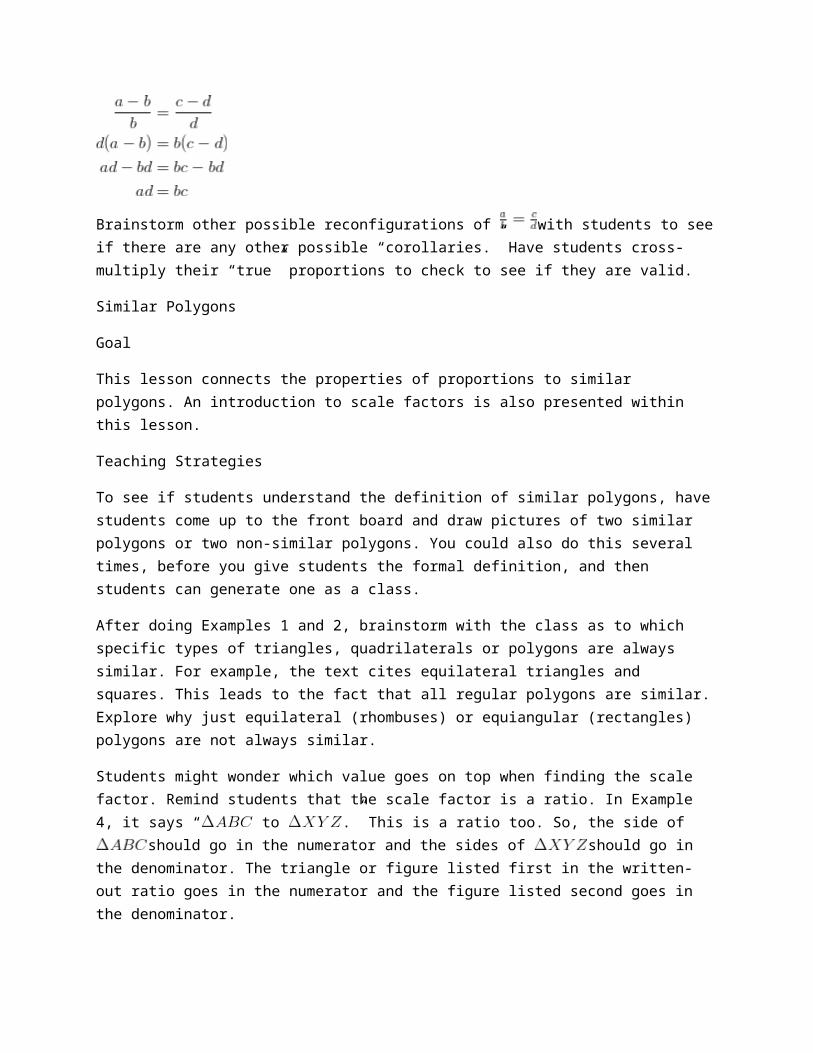
such as a lake or puddle. An example of intersecting circles can be a Venn diagram. Common external tangent lines could be the gears of a bicycle.
Investigation 9-1 can be done as a teacher-led activity or individually. For step 2, it can be difficult for students to draw a perfectly tangent line at point . You may need to circulate to ensure they each student has the correct drawing, to ensure that they get the correct measurement of . After measuring , ask students if they think this will happen at angle drawn to the point of tangency. Feel free to repeat this investigation with a larger or smaller circle so students can see two different cases. Lead them towards the Tangent to a Circle Theorem.
In this lesson and chapter, students will need to apply the Pythagorean Theorem. Having a tangent line and a radius that meet at the same point will always produce a angle. Therefore, students will need to recall all the information they learned in the last chapter (special right triangles, Pythagorean Theorem and its converse, and the trig ratios). Review these points, if needed, and proceed with Example 4.
Example 6 is an important example because it uses the converse of the Pythagorean Theorem to show that is not a point of tangency. Make sure students understand this point. In Example 7, students will need to draw an additional line, . Encourage students to draw in additional lines if ever needed.
If students wonder the reasoning behind Theorem 9-2, draw in radii and and segment . You can give students this additional example.
Additional Example: Put the reasons for the proof of Theorem 9-2 in the correct order.
Solution: , and .
Properties of Arcs
Goal
This lesson introduces arcs, central angles, their properties and how to measure them.
Notation Note
Use a curved line above the endpoints of the arc to label it. Some arcs, such as major arcs, require three letters to label it. Explain to students that they must use three letters for some arcs to distinguish between the two different arcs that have the same endpoints. If only two letters are used to label an arc, it is assumed that the arc is less than .
Teaching Strategies
When introducing arcs, discuss with students where they might see arcs and degrees in real life. Examples are pizza crust, pie crust, a basketball hoop (the rim), among others. An arc could be a piece of pizza crust or pie crust. Some students might be familiar with skateboarding or snowboarding. A jump is one rotation, a is one-and-a-half rotations, and a is two full rotations.
Make sure that students are comfortable with finding arc measures using central angles. This is the beginning of arc measures and corresponding angles in circles, so having a solid foundation is important. In Example 3, there are more congruent arcs than the ones that are listed. See if students can find other
possibilities: (all semicircles), , and
This would also be a good time to discuss different ways to label the same major arc.
For example, from above could also have been labeled .
The Arc Addition Postulate should be familiar to students; it is very similar to the Segment Addition Postulate and the Angle Addition Postulate. Rather than adding segments or angles, we are now adding arcs. This is a very useful postulate when trying to find all the arcs in a circle.
Properties of Chords
Goal
Students will find the lengths and learn the properties of chords in a circle.
Notation Note
There is no explicit way to mark that two arcs are congruent in a picture. Students will have to infer from other information if two arcs are congruent or not. Ways that they can tell are: if corresponding chords are congruent or if the central angles are congruent.
Teaching Strategies
Make sure students understand all the possible ways to interpret Theorem 9-3. First, if the chords are congruent, then the arcs are congruent. Second, the converse is also true (you may need to review “if and only if” and biconditional statements). Finally, you can also say that if the central angles are congruent, then the arcs are congruent AND the chords are congruent. The converse of this statement is also true.
In Investigation 9-2, the construction tells us that a diameter bisects a chord. From this, students should also see that the diameter is perpendicular. Therefore, the perpendicular bisector of a chord is also a
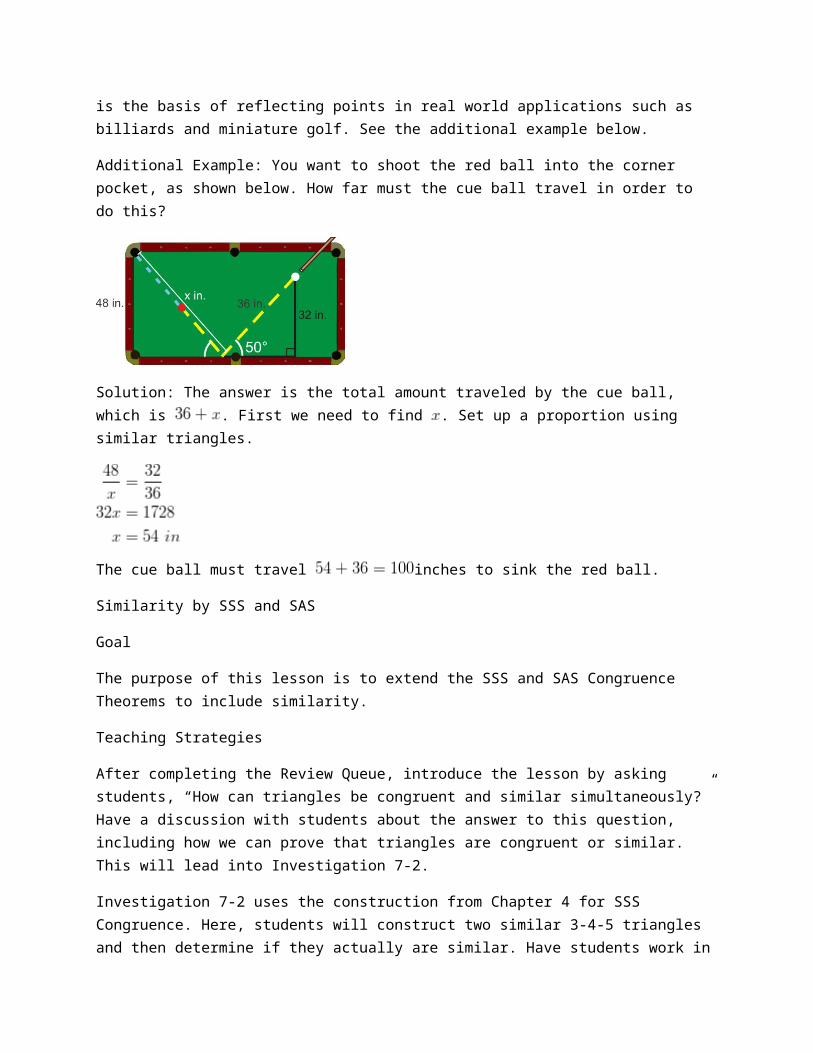
diameter (Theorem 9-4). Stress to students that other chords can be perpendicular to a chord and other chords can bisect a chord, but only the diameter is both. Remind students that every line segment has exactly one perpendicular bisector. Also, students should understand that not every diameter drawn that intersects a given chord will be its perpendicular bisector. This investigation is best done as a teacher-led activity.
Like Theorem 9-3, make sure students understand all the possible ways to interpret Theorems 9-4 and 9-5. Be careful, though. Write the converse of Theorem 9-4; if a line is a diameter, then it is also the perpendicular bisector of a chord. At first glance, students might think this is a true statement. Show students a counterexample or have a student come up and draw one (see Example 3). However, the converse of Theorem 9-5 is true; if the diameter bisects a chord and its corresponding arc, then the diameter is also perpendicular to the chord. When applying these theorems to a diagram, two of the following three things must be marked: chord is bisected, diameter passes through the center (to ensure that this chord is actually a diameter), or diameter is perpendicular to the chord. If two of these are marked, then it can be inferred that the third is also true.
Investigation 9-3 and Theorem 9-6 apply Theorems 9-3, 9-4, and 9-5 to two congruent chords in the same circle (or congruent circles). If you want, you can continue Investigation 9-3 on the same circle from Investigation 9-2. Draw a second chord that is the same length as (from Investigation 9-2) somewhere else in the circle. You can repeat step 2 from Investigation 9-2, rather than using step 2 from Investigation 9-3 as well. Both steps will produce the same result.
Review with students the definition of equidistant and why the shortest distance between a point and a line is the perpendicular line between them. In order for two chords to be congruent, using Theorem 9-6, the segments from the center to the chords must be marked congruent and perpendicular. Ask students if they notice any other properties of these segments. Students should notice that these segments are part of a diameter and that they also bisect each chord.
Finally, you can show students the following picture and see if they can find all the congruent chords, segments and arcs. Tell them that . This diagram applies all the theorems learned in this lesson.
There are semicircles and major arcs that are also congruent.
And, by HL, SSS, or ASA
Inscribed Angles
Goal
This lesson will demonstrate how to find measures of inscribed angles and intercepted arcs.
Relevant Review
At this point, it would be very helpful to review all the theorems and vocabulary learned in this chapter. Make sure students have a firm grasp on the chapter up to this point. The chapter gets continually harder, so it is important that they have a strong foundation.
Double-check that every student has his/her flash cards of vocabulary and theorems and make sure they are using them regularly. One way to spot-test students on vocabulary is to have them lie out all their flash cards with the vocab or the name of the theorem side up. Then, you read the definition or theorem out loud. The first student to raise the correct card gets some sort of reward; either candy or an extra credit point. You can also tally the points and if any student reaches 5 (or any number of your choosing), then they will receive extra credit or a homework pass.
Teaching Strategies
It is very important that students understand how an inscribed angle and intercepted arc are defined and relate to each other. Any angle in a circle can (and usually does) have an intercepted arc, even though it is defined in terms of an inscribed angle. The important point to note is that the intercepted arc is the interior arc with the given endpoints on the circle. The blue arcs below are considered intercepted arcs for the inscribed angles below.
For Investigation 9-4, it might be helpful to already have three (or more) drawn inscribed angles on a handout for students. Pass these out and they still should draw in the corresponding central angle. Do not rush through this activity. Walk around to answer questions and let students arrive at the Inscribed Angle Theorem on their own. Then, proceed with lots of practice problems and examples to get students used to using this theorem.
Draw the pictures for Theorems 9-8 and 9-9 before telling the students what exactly the theorems are. For Theorem 9-8, ask students if they can conclude anything about and . For Theorem 9-9, ask students what the measure of the intercepted arc is, then they should be able to determine the measure of the inscribed angle. Here, the wording might be a little off from what is in the theorem. Make sure students can infer everything from these two theorems. First, in 9-8, the triangles created are only similar, not necessarily congruent. In 9-9, the endpoints of the inscribed angles are on a diameter and the diameter would be the hypotenuse of a right triangle.
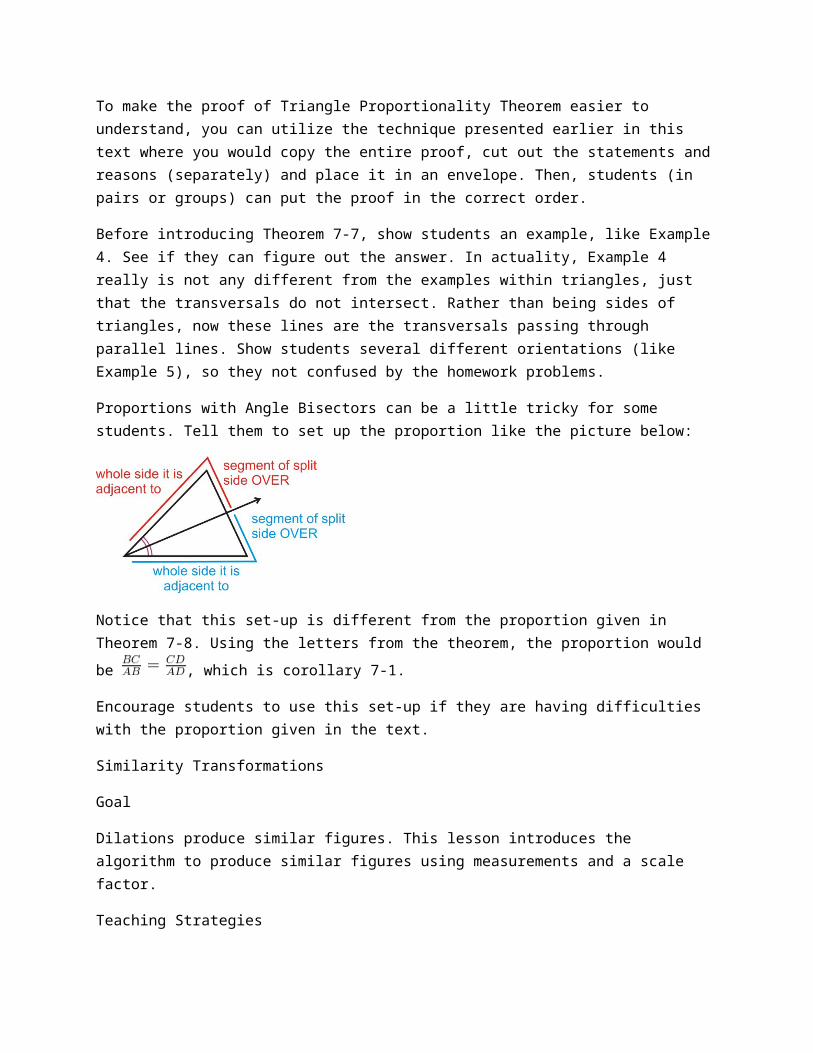
Investigation 9-5 should be a teacher-led demonstration that can easily be done on an overhead projector (pre-cut a transparency into an inscribed quadrilateral and color the angles). Guide students towards the next theorem. The word “cyclic” is not used to describe these types of quadrilaterals. You can choose whether or not you would like to introduce this vocabulary or use what is in the text.
Angles of Chords, Secants, and Tangents
Goal
This lesson further explores angles in circles. Students will be able to find the measures of angles formed by chords, secants, and tangents.
Teaching Strategies
This lesson divides angles in circles into three different categories: angles with the vertex ON the circle, angles with the vertex IN the circle, and angles with the vertex OUTSIDE the circle.
central angle = intercepted arc
angle inside = half the sum of the intercepted arcs
angle on circle = half intercept arc
angle outside = half the difference of the intercepted arcs
Use the pictures above to help students generate formulas for each case. Then, draw the other options for angles on circles and angles outside circles.
Example 2 shows students that Theorem 9-8 (from the previous lesson) works for any angle where the vertex is on the circle.
Investigations 9-6, 9-7, and 9-8 can all be teacher-led investigations where students follow along and the class discovers the formulas together. Allow students to guess the possibilities for the formulas, even if they are wrong. Developing the correct formula will give students ownership over the material and it will help them retain the information.
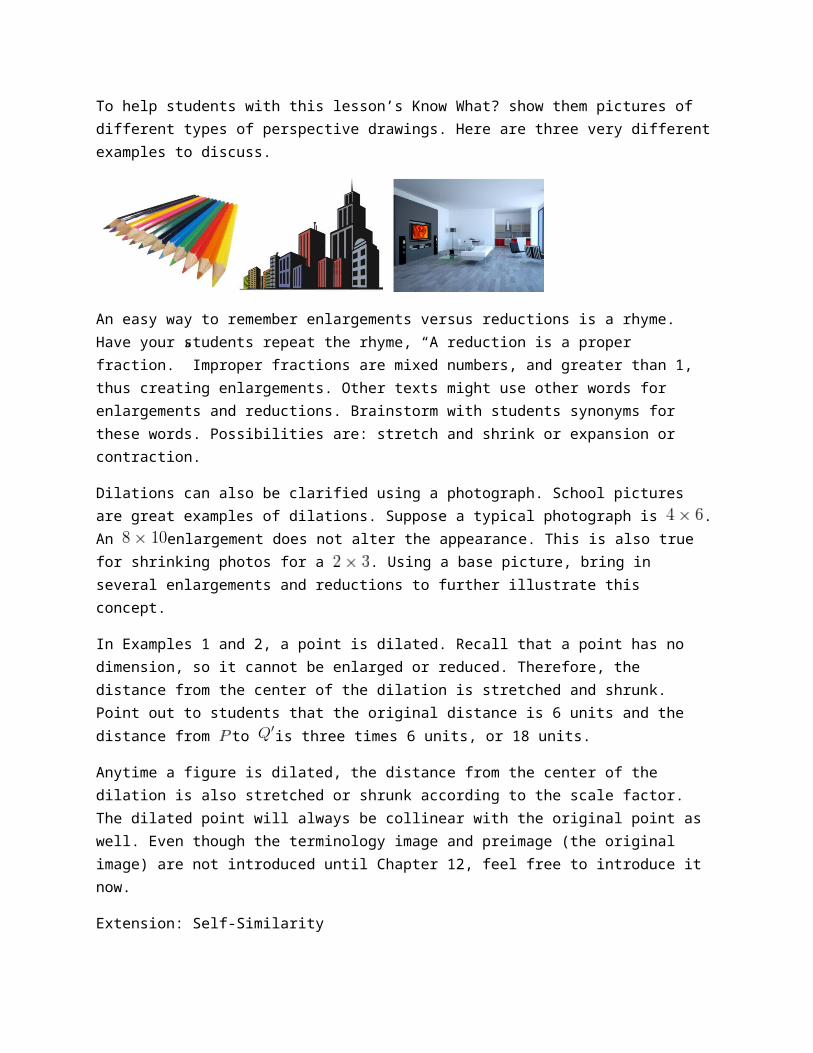
Make sure you do plenty of practice problems in class to ensure that students are using the correct formula in the appropriate place. Give students a handout with several problems. You can choose to put the formulas on the board, let them use notes, or use nothing at all. Include problems from the previous lesson(s) as well.
Segments of Chords, Secants, and Tangents
Goal
This goal of this lesson is to explain the formulas for determining segment lengths formed by intersecting secants and tangents.
Relevant Review
Students might need a little algebraic review with solving quadratic equations. Problems involving tangents and secants can become a factoring problem or use the quadratic formula. Students might also need a review of square roots and simplifying square roots.
Teaching Strategies
Get students organized with all the information from this lesson and the previous two lessons. Have students draw and complete the following table.
Picture Angle Formula Segment Formula
Sides of angle are radii. No formula
Sides are chords. No formula.
One side is a chord, other is a ray. No formula.
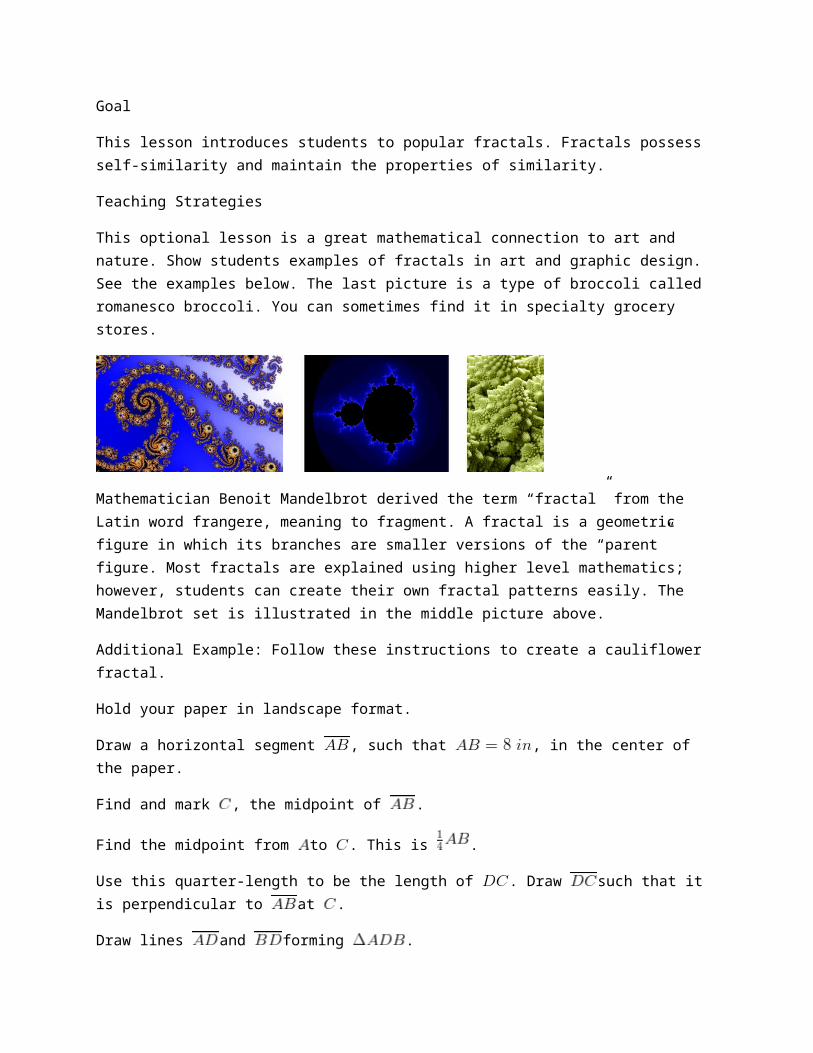
Picture Angle Formula Segment Formula
Extension: Writing and Graphing the Equations of Circles
Show students how a point can be on a circle, using the Pythagorean Theorem. For example, if the
equation of a circle is , is (3, -4) on the circle? Yes. If students plug in 3 for and -4 for , they will see that the Pythagorean Theorem holds true. Conversely, if we tested (-6, 2), we would find
that it is not on the circle because .
In Example 3, students might have problems finding the diameter. Remind them that the diameter is the longest chord in a circle. Students would need to count the squares vertically and horizontally to see where the longest segment would be (within the circle).
Perimeter and Area
Pacing
Day 1 Day 2 Day 3 Day 4 Day 5
Triangles and Parallelograms
Trapezoids, Rhombi, and Kites
More Trapezoids, Rhombi, and Kites
Start Area of Similar Polygons
Finish Area of Similar Polygons
Quiz 1
Start Circumference and Arc Length
Day 6 Day 7 Day 8 Day 9 Day 10
Finish Circumference and Arc Length
Investigation 10-1
Area of Circles and Sectors
Quiz 2
Start Review of Chapter 10
Review of Chapter 10
Chapter 10 Test
Triangles and Parallelograms
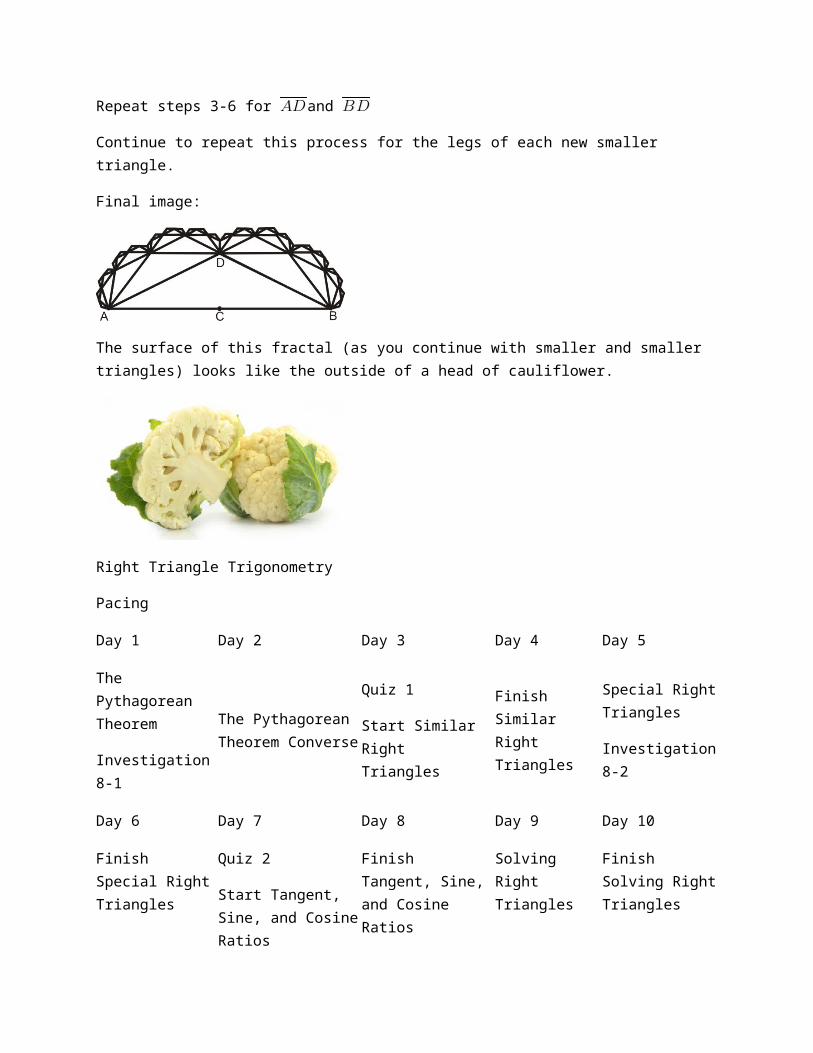
Goal
This lesson introduces students to the area and perimeter formulas for triangles, parallelograms and rectangles.
Relevant Review
Most of this lesson should be review for students. They have learned about area and perimeter of triangles and rectangles in a previous math class (Math 6, Pre-Algebra, or equivalent).
Notation Note
In this chapter, students need to use square units. If no specific units are given, students can write or .
Teaching Strategies
If students are having a hard time with the formulas for area and perimeter of a rectangle, place Example 3 on a piece of graph paper or transparency. Then, students can could the squares for the area and perimeter and you can generate the formula together.
If you count all the squares, there are 36 squares in the area, or square centimeters (red numbers). Counting around the rectangle (blue numbers), we see there are 26 squares. Therefore, the perimeter of this square is 26 cm.
This technique will also work for squares.
An important note, each problem will have some sort of units. Remind students that the shapes might not always be drawn to scale.
Example 5 is a counterexample for the converse of the Congruent Areas Postulate. Therefore, the converse is false. An additional counterexample would to have them draw all the possible rectangles with an area of . Use graph paper so students will see that each rectangle has 20 squares. Possible answers are: , and .
The Area Addition Postulate encourages students to separate a figure into smaller shapes. Always divide the larger shape into smaller shapes that students know how to find the area of.
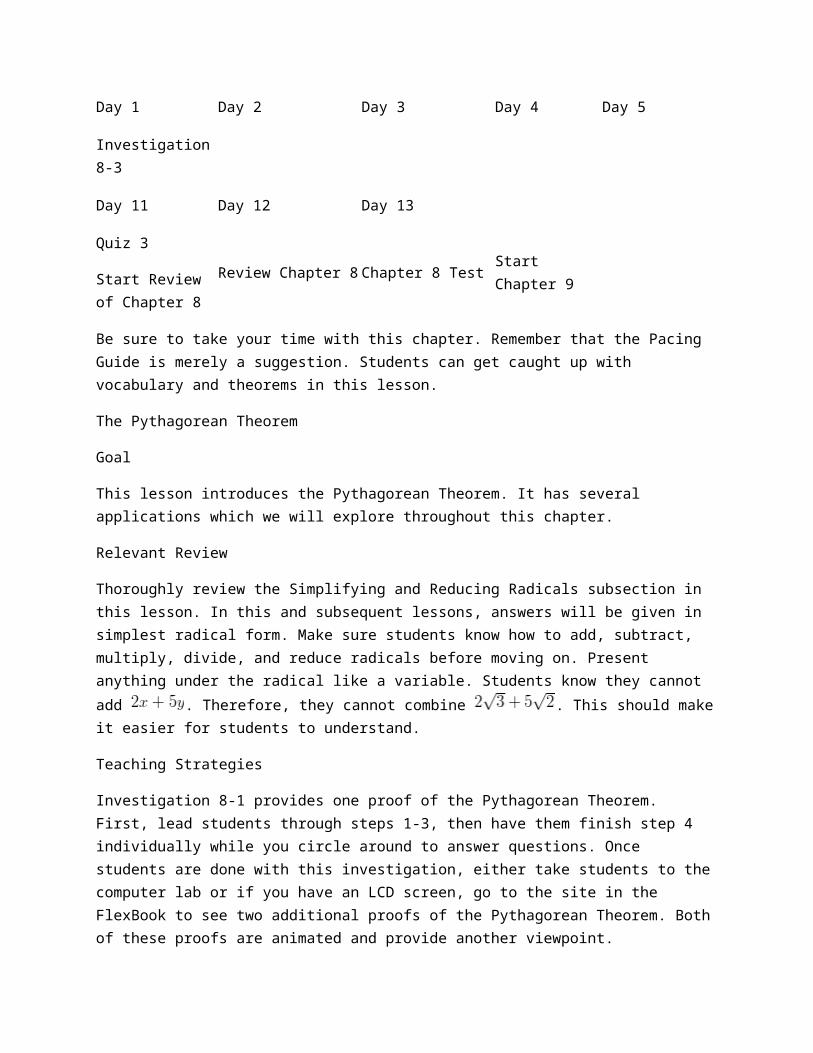
To show students the area of a parallelogram, cut out the picture (or draw a similar picture to cut out) of the parallelogram and then cut the side off and move it over so that the parallelogram is transformed into a rectangle. Explain to students that the line that you cut is the height of the parallelogram, which is not a side of the parallelogram. Then, cut this parallelogram along a diagonal to create a triangle. Here, students will see that the area of a triangle is half the area of a parallelogram. You may need to rotate the halves (triangles) so that they overlap perfectly. This will show the students that the triangles are congruent and each is exactly half of the parallelogram.
Create another set of flashcards for the area formulas in this chapter. These flashcards should be double-sided. The blank side should be a sketch of the figure and its name. The flip side should have the formula for its area and the formula for its perimeter. Students should create flashcards as the chapter progresses.
Trapezoids, Rhombi, and Kites
Goal
This lesson further expands upon area formulas to include trapezoids, rhombi, and kites.
Relevant Review
Students might need a quick review of the definitions of trapezoids, rhombi, and kites. Go over their properties (especially that the diagonals of rhombi and kites are perpendicular) and theorems. Students may know the area formula of a trapezoid from a previous math class.
Review the Pythagorean Theorem and special right triangles. There are several examples and review questions that will use these properties. If students do not remember the special right triangle ratios, they can use the Pythagorean Theorem.
Teaching Strategies
Use the same technique discussed in the previous lesson for the area of a parallelogram and triangle. Cut out two congruent trapezoids and demonstrate the explanation at the beginning of the lesson explaining the area of a trapezoid. Going over this with students (rather than just giving them a handout or reading it) will enable them to understand the formula better. These activities are done best on an overhead projector.
Conveniently, the area formula of the rhombus and kite are the same. Again, you can cut out a rhombus and kite, then cut them on the diagonals and piece each together to form a rectangle. Generate the formula with students. Another way to write the formula of a rhombus is to say that it has 4 congruent
triangles, with area . Multiplying this by 4, we get . This process is not as easily done with a kite because one of the diagonals is not bisected.
Additional Example: Find two different rhombi that have an area of .
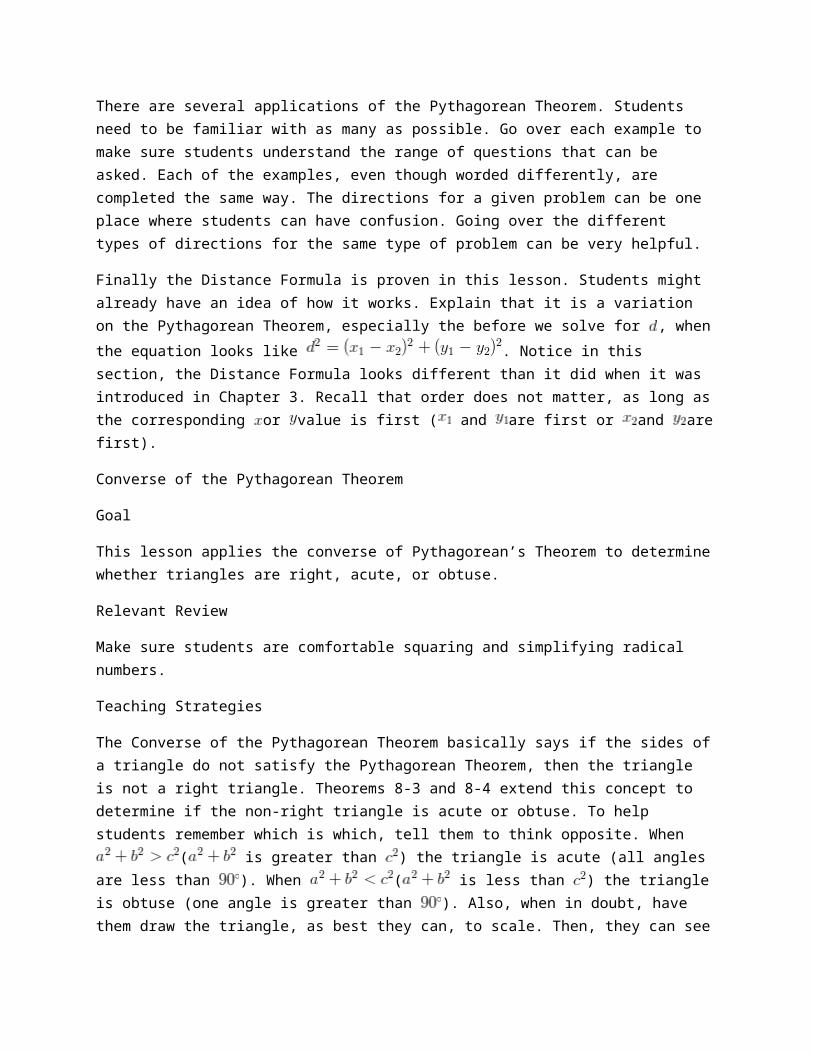
Solution: The diagonals are used to find the area, so when solving this problem, we are going to be
finding the diagonals’ lengths. , so . This means that the product of the diagonals is double the area.
The diagonals can be: 1 and 96, 2 and 48, 3 and 32, 4 and 24, 6 and 16, 8 and 12.
As an extension, you can students draw the rhombi. The diagonals bisect each other, so have the diagonals cut each other in half and then connect the endpoints of the diagonals to form the rhombus. Three examples are below.
Areas of Similar Polygons
Goal
Students will learn about the relationship between the scale factor of similar polygons and their areas. Students should also be able to apply area ratios to solving problems.
Relevant Review
Review the properties of similar shapes, primarily triangles and quadrilaterals, from Chapter 7. Remind students that the perimeter, sides, diagonals, etc. have the same ratio as the scale factor. The Review Queue reviews similar squares. As an additional question, ask students to find the perimeter of both squares and then reduce the ratio (smaller square = 40, larger square = 100, ratio is 2:5, the same as the ratio of the sides). Ask students why they think the ratio of the sides is the same as the ratio of the perimeters.
Teaching Strategies
Examples 1 and 2 lead students towards the Area of Similar Polygons Theorem. As an additional example (before introducing the Area of Similar Polygons Theorem), ask students to find the area of two more similar shapes. Having students repeat problems like Example 2, they should see a pattern and arrive at the theorem on their own.
Additional Example: Two similar triangles are below. Find their areas and the ratio of the areas. How does the ratio of the areas relate to the scale factor?

Solution: Each half of the isosceles triangles are 3-4-5 triangles. The smaller triangle has a height of 3 and the larger triangle has a height of 9 (because 12 is 3 time 4, so this triangle is three time larger than
the smaller triangle). The areas are: and .
The ratio of the area is . The ratios of the scale factor and areas relate by squaring the scale
factor, .
Circumference and Arc Length
Goal
The purpose of this lesson is to review the circumference formula and then derive a formula for arc length.
Relevant Review
The Review Queue is a necessary review of circles. Students need to be able to apply central angles, find intercepted arcs and inscribed angles. They also need to know that there are in a circle.
Teaching Strategies
Students may already know the formula for circumference, but probably do not remember where comes from. Investigation 10-1 is a useful activity so that students can see how was developed and why it is necessary to find the circumference and area of circles. You can decide to make this investigation teacher-led or allow students to work in pairs or groups. From this investigation, we see that the circumference is dependent upon .
When introducing arc length, first have students find the circumference of a circle with radius of
. Then, see what the length of the arc of a semicircle . Students should make the connection that the arc length of the semicircle will be half of the circumference. Then ask students what the arc length
of half of the semicircle is . Ask what the corresponding angle measure for this arc length would be
. See if students can reduce and if they make the correlation that the measure of this arc is a quarter of the total circumference, just like is a quarter of . Using this same circle, see if
students can find the arc length of a portion of the circle . Then, as students what portion
of the total circumference is. is of , just like is of . This should lead students towards the Arc Length Formula.
Students may wonder why it is necessary to leave answer in exact value, in terms of , instead of approximate (multiplying by 3.14). This is usually a teacher preference. By using the approximate value for , the answer automatically has a rounding error. Rounding the decimal too short will cause a much larger error than using the decimal to the hundred-thousandths place. Whatever your preference, be sure to explain both methods to your students. The review questions request that answers be left in terms of , but this can be easily changed, depending on your decision.
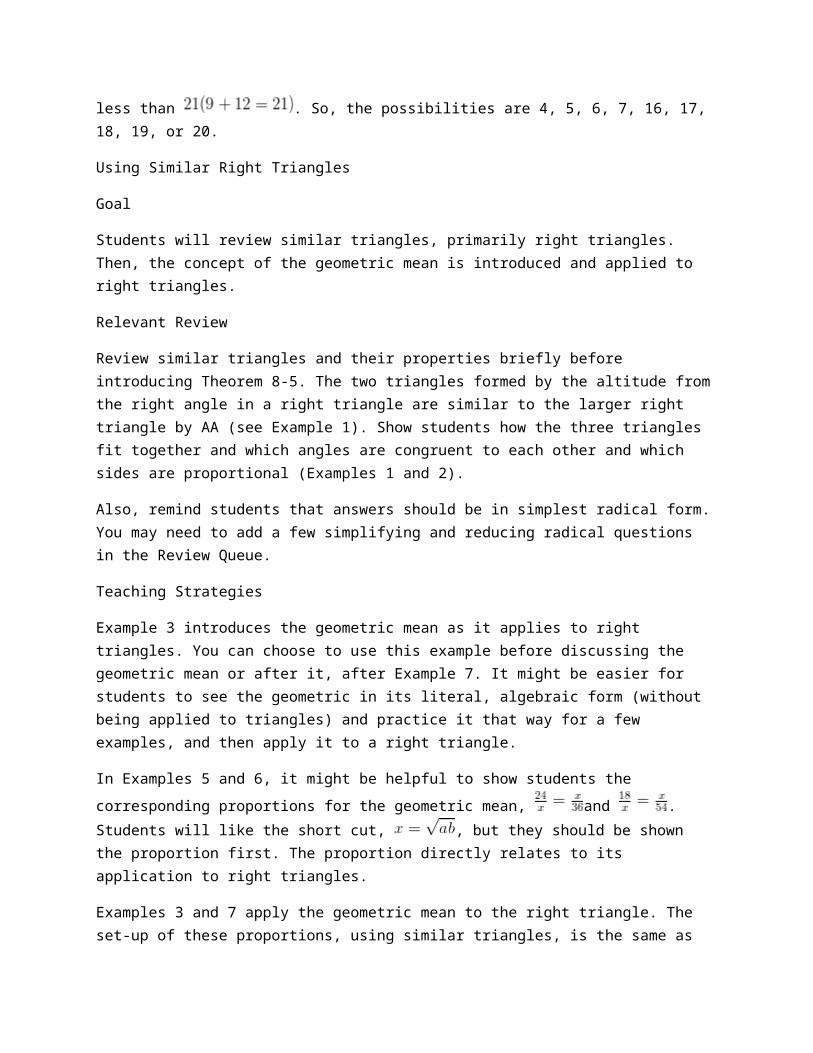
Area of Circles and Sectors
Goal
This lesson reviews the formula for the area of a circle and introduces the formula for the area of a sector and segment of a circle.
Teaching Strategies
If you have access to an LCD display or a computer lab, show students the animation of the area of a circle formula (link is in the FlexBook).
The formula for the area of a sector is very similar to the formula for arc length. Ask students to compare the two formulas. Stress to students that the angle fraction in the sector formula is the same as it is for the arc length formula. Therefore, students do not need to memorize a new formula; they just need to remember the angle fraction for both.
To find the area of the shaded regions (like Example 8), students will need to add or subtract areas of circles, triangles, rectangles, or squares in order to find the correct area. Encourage students to identify the shapes in these types of problems before they begin to solve it. At the end of this lesson, quickly go over problems 23-25, so that students know how to solve the problems that evening. Remind students to use the examples in the lesson to help them with homework problems.
Finding the area of a segment can be quite challenging for students. This text keeps the angles fairly simple, using special right triangle ratios. Depending on your level of student, you may decide to omit this portion of this lesson. If so, skip Example 9 and review questions 26-31.
Additional Example: Find the area of the blue shaded region below.
Solution: The triangle that is inscribed in the circle is a 45-45-90 triangle and its hypotenuse is on the
diameter of the circle. Therefore, the hypotenuse is and the radius is . The area of the shaded region is the area of the circle minus the area of the triangle.
The area of the shaded region is
Surface Area and Volume
Pacing
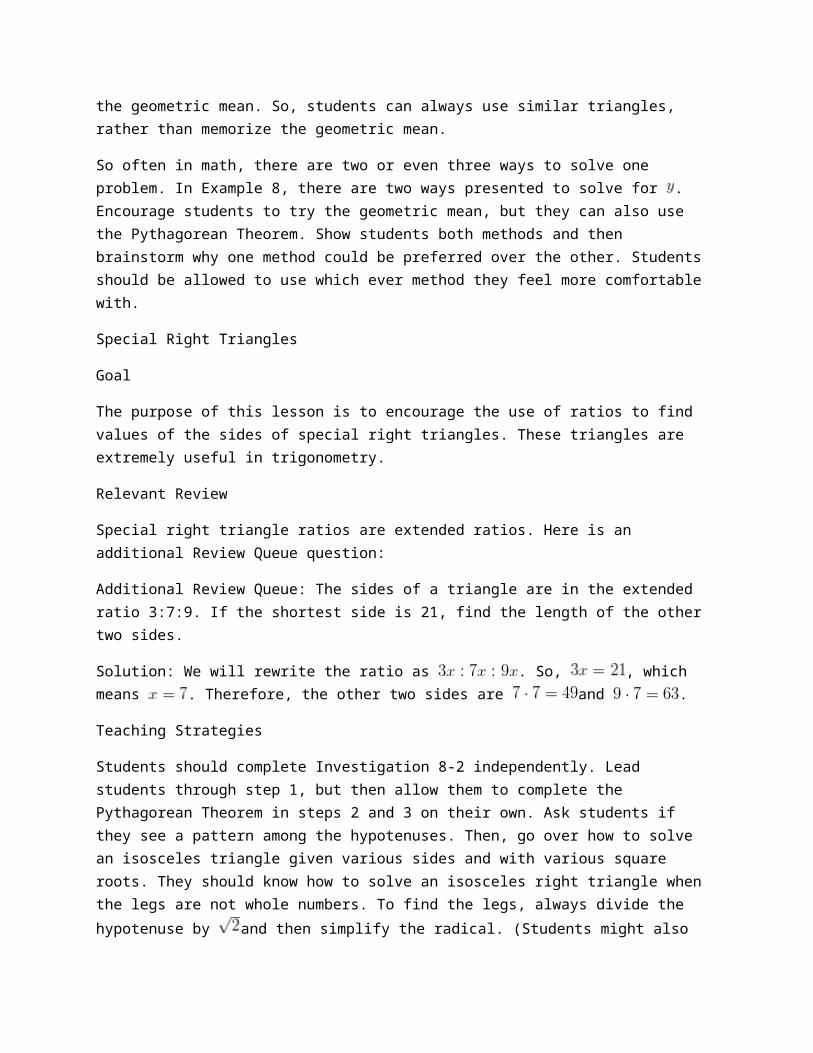
Day 1 Day 2 Day 3 Day 4 Day 5
Exploring SolidsSurface Area of Prisms & Cylinders
Finish Surface Area of Prisms & Cylinders
Quiz 1
Start Surface Area of Pyramids and Cones
Finish Surface Area of Pyramids and Cones
Day 6 Day 7 Day 8 Day 9 Day 10
Volume of Prisms & Cylinders
Quiz 2
Start Volume of Pyramids & Cones
Finish Volume of Pyramids & Cones
Investigation 11-1
Surface Area and Volume of Spheres
Quiz 3
Start Extension: Exploring Similar Solids
Day 11 Day 12 Day 13 Day 14 Day 15
Finish Extension: Exploring Similar Solids
Extension Quiz Start Review of Chapter 11
Review of Chapter 11 Chapter 11 Test Start Chapter 12
Exploring Solids
Goal
The purpose of this lesson is to introduce students to three-dimensional figures. Polyhedral figures are presented in this lesson and common terms such as edge, vertex, and face are explained, as well as how to name polyhedra.
Relevant Review
Students should know the definition of a regular polygon and how to find the area of various triangles and quadrilaterals.
Teaching Strategies
Like with previous chapters, it might be helpful for students to make flash cards of the vocabulary and theorems learned.
Discuss with students where they would see polyhedra, prisms, pyramids, cylinders, and cones in real life. Tell students to visualize themselves in a grocery store; there are several examples of these solids there. Examples could be: soup can (cylinder), Toblerone chocolate bar (triangular prism), oranges (sphere), or waffle cones (cone). Write down the items students come up with and draw a representation.

After going over Example 1 and putting the faces, vertices, and edges into a table, see if students can come up with Euler’s Theorem on their own. Students might wonder why they need to know Euler’s Theorem, when they can just count the number of vertices, edges, and faces. One application could be when the prism has so many sides that it becomes difficult to count the edges ( is always the largest of
and in the formula). Other applications are Examples 3 and 4, when you are not given a picture in the problem.
One way to “view” a three-dimensional solid is to use cross-sections. You might need to use physical models to help students understand this concept. For example, you could mold Play-doh into a cylinder or cube and “cut” them in different ways to show the different cross-sections. A cylinder can have a circle, oval (or portion of an oval), or rectangle as a cross-section.
Another way to “view a three-dimensional solid is to use a net. A net takes all the faces of a solid and lies them out flat and adjoining. Students need to be careful with nets. There can be several answers for one solid and depending on how the faces are laid out, the net might not even work. Be sure to show students nets that do not work. The activity in the link, http://illuminations.nctm.org/activitydetail.aspx?ID=84, gives students 20 possible nets of a cube and they need to find the 11 that work.
Surface Area of Prisms and Cylinders
Goal
Students will learn how to find the surface area of prisms and cylinders.
Relevant Review
Students should know how to find a net of a three-dimensional solid. They will also need to be able to find the area of triangles and quadrilaterals.
Teaching Strategies
The surface area can be difficult for students to visualize. Make sure they have a firm grasp on how to find nets of a three-dimension figure. Students need to find all the lengths and heights of the faces of a prism before finding the total surface area. For example, in Example 2, students need to find the length of the hypotenuse of the base because it is also the length of a rectangle.
Additional Example: Find the surface area of the trapezoidal prism. The bases are isosceles trapezoids.
Solution: First find the length of the legs of the isosceles trapezoid bases.
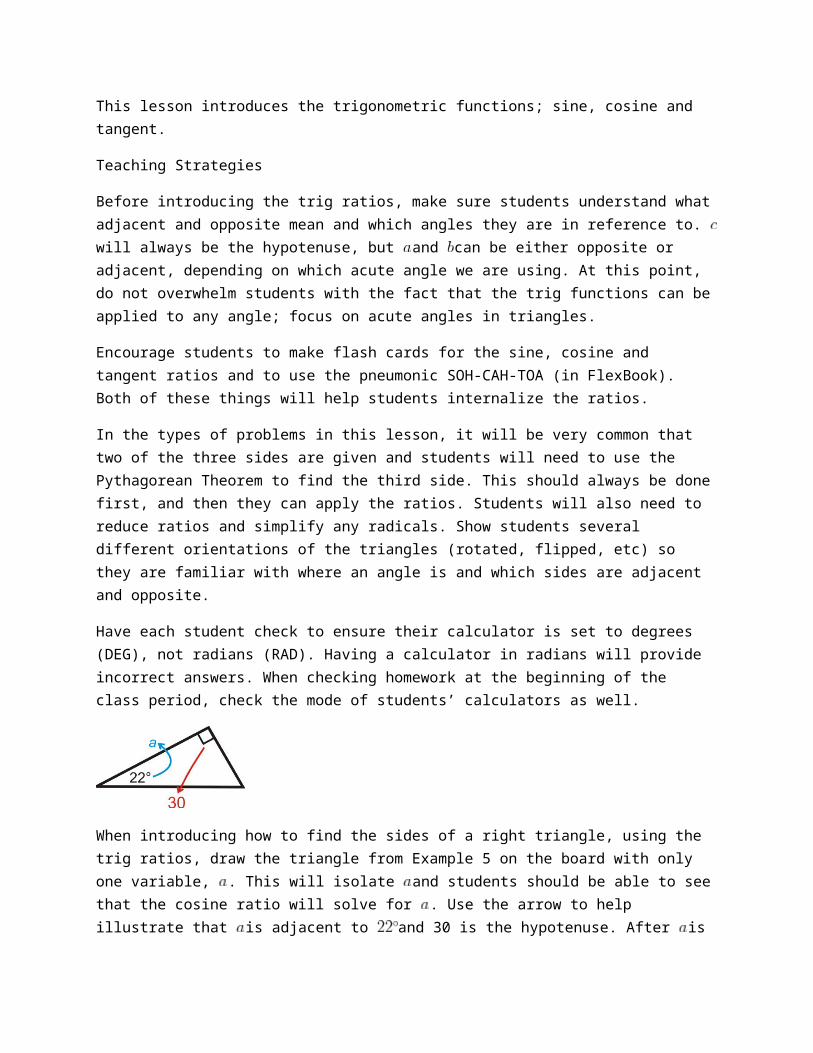
Here is the net for this prism.
Surface Area:
The surface area of a cylinder can be difficult for students to visualize. As the FlexBook suggests, take the label off of a soup can so that it opens up to a rectangle. Then, students will see that the width of the rectangle is the circumference of the circular base.
Surface Area of Pyramids and Cones
Goal
Students will learn the formulas for the surface area of a regular pyramid and cone.
Relevant Review
Students should review nets and the formula for the area of triangles and quadrilaterals. Students should also be able to apply the Pythagorean Theorem, Pythagorean triples, and special right triangle ratios.
Teaching Strategies
The slant height is a new term that applies to the lateral faces. It is only used to find the surface area of pyramids and cones. Students may need to use the actual height to find the slant height through the Pythagorean Theorem. Help students develop a formula for finding the slant height for different types of pyramids and cones. In this lesson, we will find the surface area of equilateral triangle based pyramids, square based pyramids, and right cones.

The most difficult of the three is the equilateral based pyramid. For the review questions in this section, the slant height for these pyramids is given. However, students will still need to find the altitude of the
base in order to find the area. Or, if students remember, they can use the formula, for the area of any equilateral triangle, where is the length of the sides.
Since students only need to worry about two types of pyramids (for surface area), then you could generate more specific surface area formulas for each one. They are:
Where is the edge length and is the slant height. Once students know the basic surface area, derive these with the class for and .
Compared to the pyramid, the surface area of a cone is relatively simple. Students will always be given two of the three pieces of information needed; , or (in the picture above). If the problem does not give , the slant height, then students will have to use the Pythagorean Theorem to solve for it.
Volume of Prisms and Cylinders
Goal
Students will learn how to find the volume of prisms and cylinders. They will also discover that the volume of an oblique prism or cylinder is the same as a right prism or cylinder with the same height.
Relevant Review
Students will still need to know how to find the area of triangles and quadrilaterals so they can properly apply the volume formulas in this lesson. Also, review with students how to “cube” and “cube root” a number. Lastly, review the definitions of prisms and cylinders, so students are clear about which faces are bases. This will be very helpful when using the volume formulas.
Teaching Strategies
Begin with a discussion of volume. Students might get volume, mass, and density confused. Volume is simply the amount of physical space a three-dimension takes up. Think of two different objects that have the same shape; a 12-pound bowling ball and a plastic empty sphere of the same size. Both of these solids have the same volume, but very different masses or densities. Therefore, an empty solid has the same volume as a full solid of the same size.
Volume is measured in cubic units, or . This is because the formula for volume always comes back to . Each of these have a unit associated with them. So, the answer would be .
Example 1 explores the concept of placing cubes (of whatever unit) into a prism to find its volume. Students can count all these cubes and find that there are 60 within the prism. Another option would be
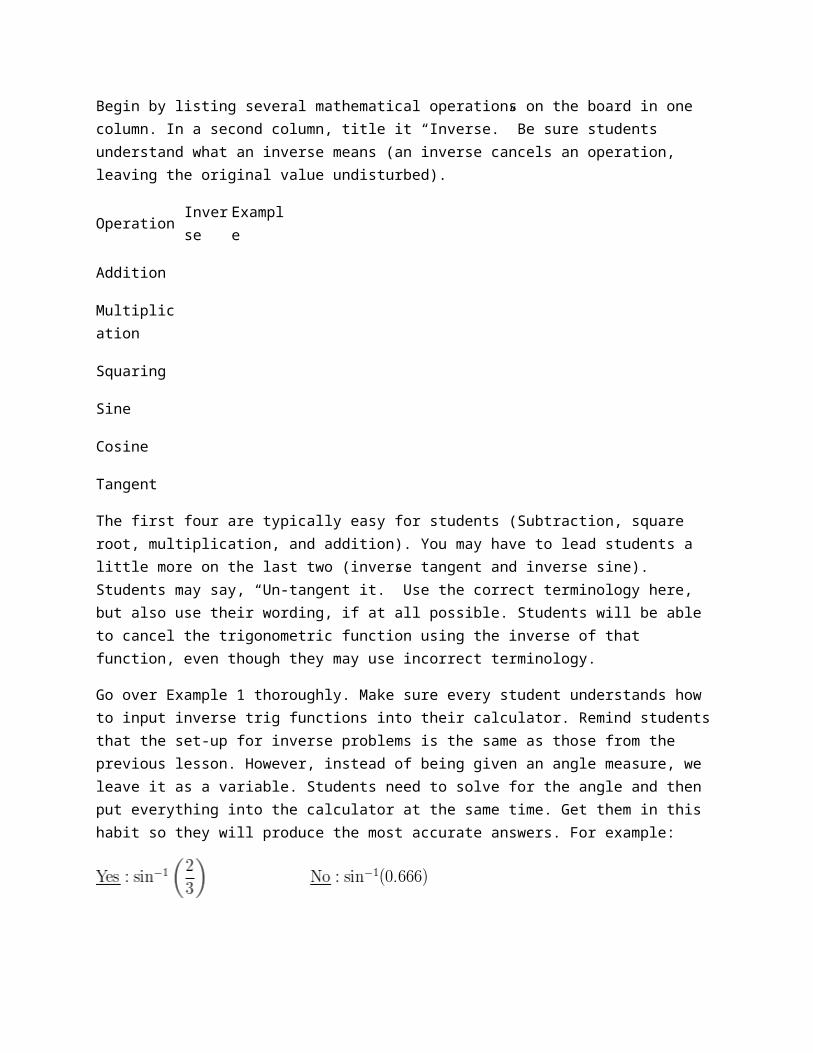
to show students what the area of each face is and then multiply that by the relative height. This will demonstrate that the order of multiplication does not matter.
Regardless of the order, the formula for the volume of a rectangular prism will be . It does not matter which face is the base for a rectangular prism.
Students will take the words “base” and “height” literally. However, in the formula for volume, the “height” might not always be the vertical length. As in Example 3, the apparent height of the solid is only the height of the base. The “height” in the formula is actually 7 ft, which looks like the length of the base. Students will think that the base of this tent is the rectangle on the bottom. However, we know that the bases are actually the triangles at the front and back of the tent. Be very careful when discussing the formula for volume and the definition of a prism. Review with students that the “bases” are the two congruent parallel faces. Before starting on a volume problem, students should examine the solid so they know which faces are the bases.
As with the case of an oblique prism, the sides are all parallelograms, however the bases will still be parallel. Students should know that the height of an oblique prism is not going to be an edge (like it is in a right prism), but a vertical length that is outside the solid. Review with students that the base of a cylinder is a circle.
Volume of Pyramids and Cones
Goal
In this lesson, students will discover that the volume of a prism is one-third the volume of a prism with the same base. This property also applies to cones. Then, they will find the volume of composite solids.
Relevant Review
Make sure students are comfortable finding the volume of prisms and cylinders from the previous lesson.
Teaching Strategies
Investigation 11-1 should be a teacher-led activity. You should pre-make the open nets of a cube and pyramid and then demonstrate that filling the pyramid three times will completely fill the cube.
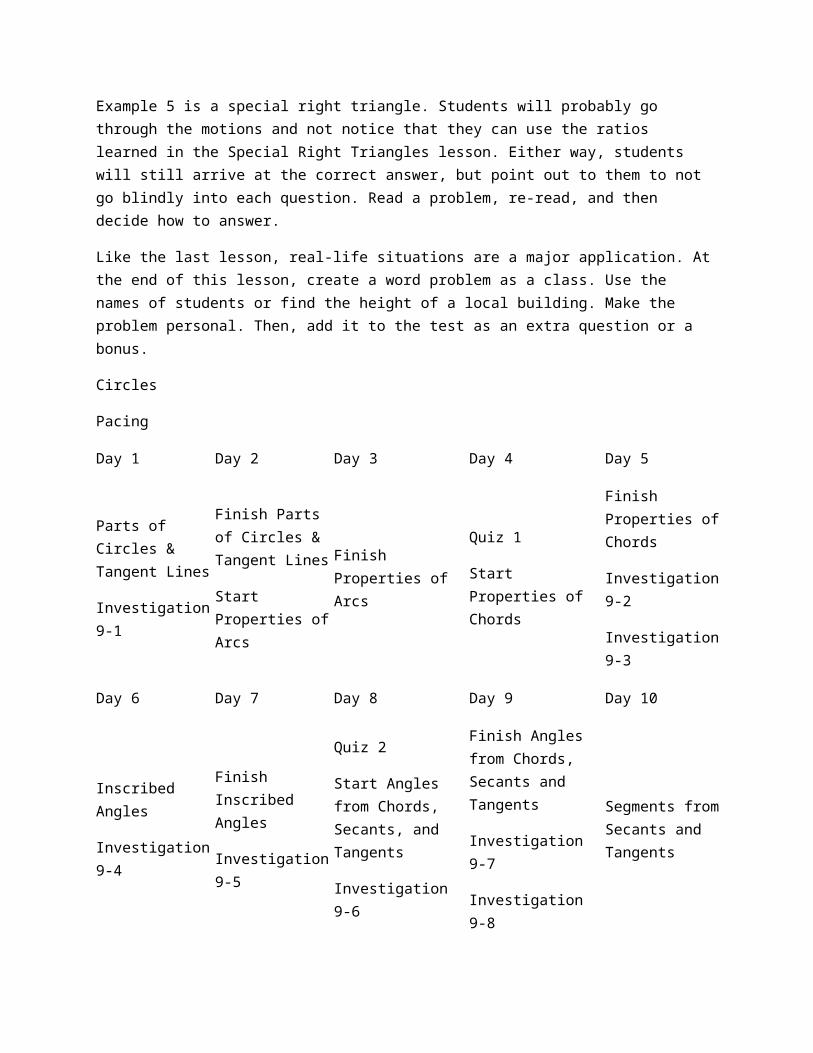
If you decide to allow students to do the investigation, be prepared for it to take 20-30 minutes. You should make the nets with students in case they have questions. Have students complete this activity in pairs and each student in the pair can make one net.
In this lesson, students should be able to find the volume of any triangle or quadrilateral based pyramid and any type of cone. If students are ever given the slant height, they will need to solve for the overall height of the pyramid or cone. If a cone is not a right cone, it will not have a slant height and students will need to be given the height in order to find the volume.
Like with surface area of pyramids, you can generate more specific formulas for the volume of an equilateral triangle based pyramid and a square based pyramid. They would be:
and are the base edge length and the height. You can also generate formulas for the volume of a rectangular based pyramid and a right triangle based pyramid.
Problems 3 and 6 will be quite difficult for students to complete (in the Review Questions). This is because the bases are equilateral triangles and they are given the slant height. If you desire, you can change the values given as the slant height to be the height of the pyramids. If you do this, the answers
will be and , respectively. Students will still need to find the area of the equilateral triangle
bases . If you do not alter the problems, students will have to find the height of the pyramids, using the slant height. This will be a difficult process, because students will have to recall the properties of the centroid (the point where the vertical height hits the base). Therefore, the distance from the bottom of the slant height to the centroid will be one-third the length of the entire altitude. (See the picture in the teaching tips for Surface Area of Pyramids and Cones.)
Surface Area and Volume of Spheres
Goal
Students will learn how to find the surface area and volume of spheres and hemispheres.
Relevant Review
Make sure students are comfortable with the formulas for circumference and area of a circle. Also, students will apply the formulas for the surface area and volume of cylinders and cones to composite solids.
Teaching Strategies
Ask students where they have seen spheres and hemispheres in real life. Discuss the parts of a sphere that are the same as a circle and those parts that are different. Be sure to show students the animated derivations of the surface area and volume by Russell Knightley.
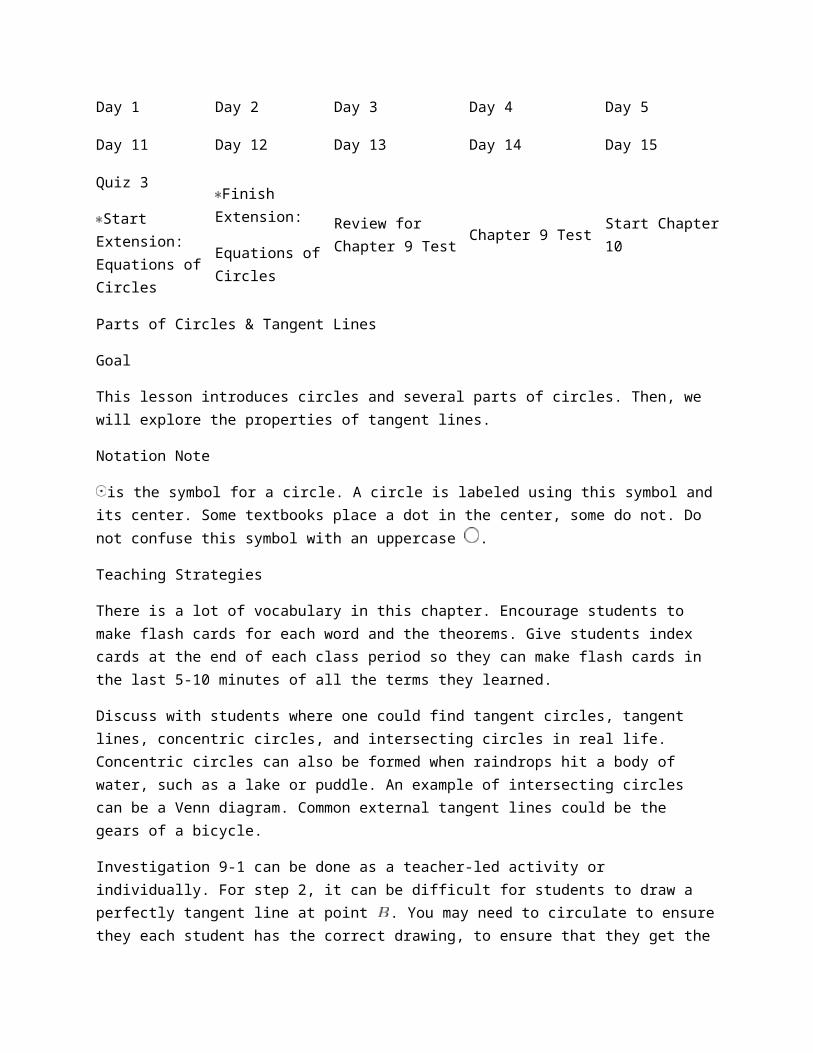
http://www.rkm.com.au/ANIMATIONS/animation-Sphere-Surface-Area-Derivation.html
http://www.rkm.com.au/ANIMATIONS/animation-Sphere-Volume-Derivation.html
When finding the surface area or volume of composite solids discuss with students what the parts are before starting each problem This will make it easier for students to complete the problem. Also, make sure they understand when to not include the top or bottom of cylinders or hemispheres in the total surface area (see Example 5).
Extension: Exploring Similar Solids
Goal
Students will understand the relationship between similar solids, their surface areas, and their volumes.
Relevant Review
The areas of similar polygons should be reviewed before starting this extension. Students should know that the square of the scale factor is the ratio of the areas of two similar shapes.
Teaching Strategies
Help students make the connection between the ratios of the areas of two similar shapes is the same as the ratio of the surface areas of two similar solids. Both are area, so both ratios will be the square of the scale factor. Following this pattern, ask students if they have an idea as to what the ratio of the volumes of two similar solids would be.
Additional Example: The two square based pyramids below are similar. Find the surface area and volume of both solids.
Solution: The scale factor is . The slant height of the smaller pyramid is
. Using the scale factor, the slant height of the larger
pyramid is .
Encourage students to find the ratios of the surface areas and volumes above to reinforce what was learned in this lesson.
Rigid Transformations
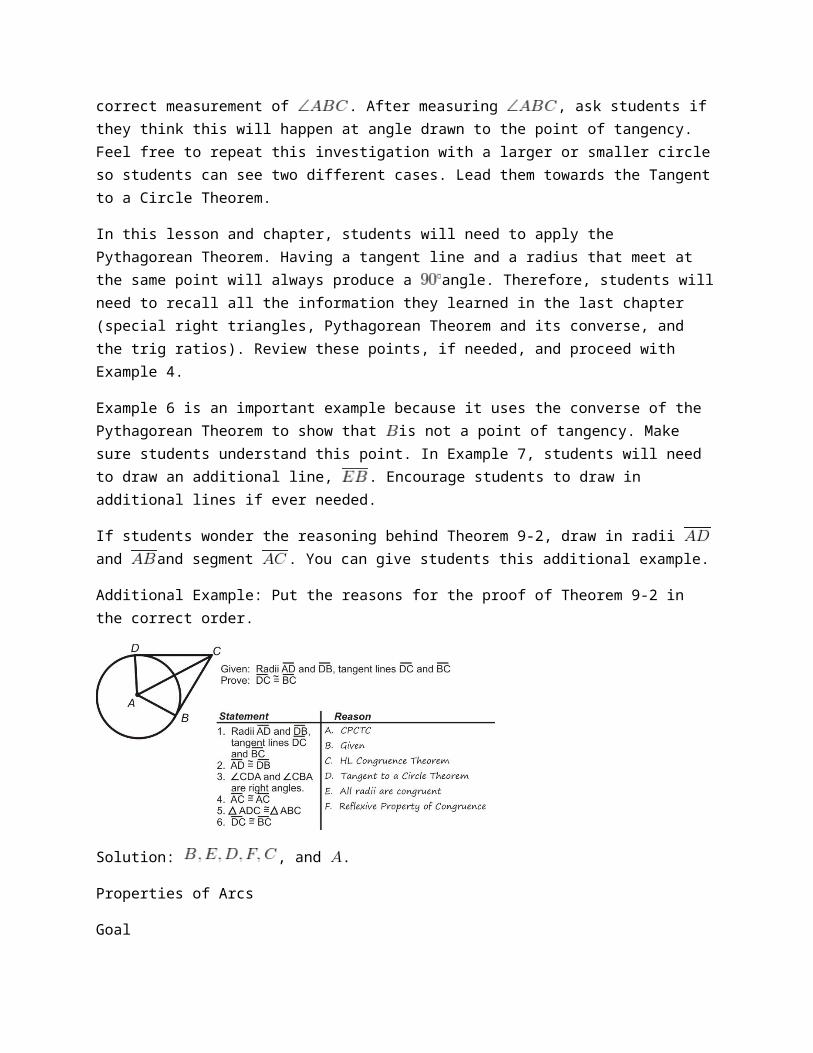
Pacing
Day 1 Day 2 Day 3 Day 4 Day 5
Exploring Symmetry Translations Reflections
Quiz 1
Start Rotations
Investigation 12-1
Finish Rotations
Day 6 Day 7 Day 8 Day 9 Day 10
Compositions of Transformations
Investigation 12-2
Quiz 2
Extension: Tessellating Polygons
Extension Quiz
Start Review of Chapter 12
Finish Review of Chapter 12
Chapter 12 Test
Exploring Symmetry
Goal
This lesson introduces line symmetry and rotational symmetry.
Teaching Strategies
The Know What? for this lesson provides a good starting point for a discussion about symmetry in nature. After defining line symmetry and rotational symmetry, discuss how both are found in nature and the real world. Then, go over the symmetry in the starfish.
Have your students write the alphabet in uppercase letters. Using one colored pencil, show which letters possess horizontal or vertical symmetry by drawing in the line. For example, , and have a line of horizontal symmetry. Using a second color, draw in the vertical lines of symmetry. Have a contest to determine who can write the longest word possessing one type of symmetry. For example, MAXIMUM is a word where all the letters have vertical symmetry. KICKBOXED has a horizontal line of symmetry. You could even do words like TOT. The entire word has vertical symmetry.
When discussing rotational symmetry, some textbooks may refer to the rotations as -fold rotational symmetry. This simply means that the is the number of times the figure can rotate onto itself. For example, a regular pentagon has 5-fold rotation symmetry, because it can be rotated 5 times of before returning to its original position.
Translations
Goal
The purpose of this lesson is to introduce the concept of translations in the coordinate plane.
Relevant Review
Students should be comfortable with the distance formula and finding the slope between two points.
Teaching Strategies
All the transformations in this chapter are rigid transformations or isometries. Students need to know that these transformations never change the size or shape of the preimage and, therefore, will always create congruent images.
A “translation rule” is not property defined in this lesson. A translation rule is the amount an image is translated (or moved) from the preimage. A rule can only be applied when the translation is in the coordinate plane. The horizontal movement is added or subtracted from and the vertical movement is added or subtracted from . The horizontal and vertical change will always be the same for every point
in a figure. For example, if the translation rule is for a triangle, each vertex of the triangle will be moved to the right one unit and down two units.
Additional Example:
a) If is the preimage, find the translation rule for image .
b) If is the preimage, find the translation rule for image .
Solution:
a) From to , the triangle is translated to the left 8 units and down 5 units. .
b) From to , the triangle is translated to the right 8 units and up 5 units. .
Reflections
Goal
Students will reflect a figure over a given line and find the rules for reflections over vertical and horizontal lines in the coordinate plane.
Teaching Strategies
Using patty paper (or tracing paper), have students draw a small scalene triangle on the right side of the paper. Fold the paper so that is covered and then trace it. Unfold the patty paper and label the vertices as and , the images of , and . Darken the fold line; this is the line of reflection. Use a ruler to draw . Mark the intersection of the reflecting line and point . Find and . Ask students what they notice about the distances and how the line intersects the line of reflection.
Students might have a hard time visualizing where a reflection should be placed. Tell students to use the activity described above to help them. They can fold their graph paper on the appropriate line (the axis, for example) and then trace the figure on the other side. Until they get used to using the rules, this can be one way for students to apply a reflection.
One way to help students remember the rules for reflections over vertical or horizontal is that the other coordinate is changed. For a reflection over the axis (or horizontal line), the value will stay the same and the value will change. For a reflection over the axis (or vertical line), the value will stay the same and the value will change. The new coordinates of an image depend on how far away the preimage points are. If a point is 5 units to the left of a line of reflection, then the image will be 5 units to the right of the line of reflection.
The only diagonal lines that we will reflect over in this chapter are and . Again, encourage students to fold their graph paper when starting rotations over these lines and completing homework or class work problems.
Rotations
Goal
In this lesson, students will learn about general rotations and in the coordinate plane. By the end of the lesson, students should be able to apply the rules of rotation for , and , as well as draw a rotation (using a protractor) of any degree.
Relevant Review
Make sure students remember how to draw and measure an angle, using a protractor. Practice this before starting Investigation 12-1.
Teaching Strategies
Investigation 12-1 should be done individually by each student. The teacher can also lead the students in the activity, on the overhead projector, if desired. Students need to be comfortable rotating a figure around a fixed point. Every student will need a protractor for this activity. After completing the
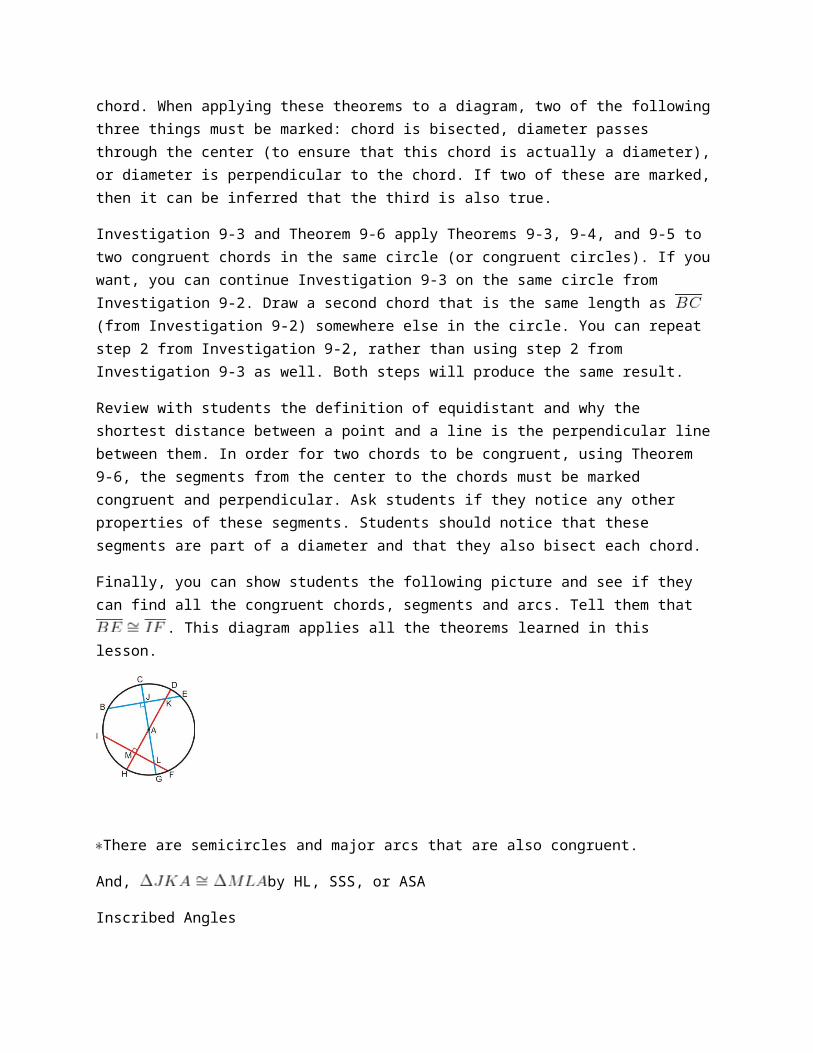
investigation, have students repeat it with another figure of their choosing. Encourage students to pick a figure that has straight sides, such as a quadrilateral or the letters or .
Unless otherwise stated, rotations are always done in a counterclockwise direction. Tell students this is because the quadrants are numbered in a counterclockwise direction. In the coordinate plane, the origin is always the center of rotation.
After going over the rules for the rotations of , and , compare the rules learned in the previous lesson to these (reflections over the and axis and and ). At this point, students know seven different reflection and rotation rules that are all very similar.
Reflection over axis:
Reflection over axis:
Reflection over :
Reflection over :
Rotation of :
Rotation of :
Rotation of :
All of these rules are different, but very similar. It is encouraged that students make flash cards for this rules to help them memorize each one. Ask students which ones have the and values switched and why they think that is. Also, see if they can make a correlation between the reflections over the and axis and the rotation of . These three are the only rules where there is just a sign change. As it will be seen in the next chapter, a rotation of is a composition of the double reflection over the axes. Students might be able to notice this by looking at the rules now. The reflection over the axis has a negative and the reflection over the axis has a negative . In the rotation of , both and are negative.
Composition of Transformations
Goal
This lesson introduces students to the concept of composition. Composition is the process of applying two (or more) operations to an object. In this lesson, we will only apply two transformations to an object and then determine what one transformation this double-translation is the same as.
Teaching Strategies
Students can get easily confused when applying compositions. They may attempt to perform the composition from left to right, as in reading a sentence. Point out to the students they must begin with
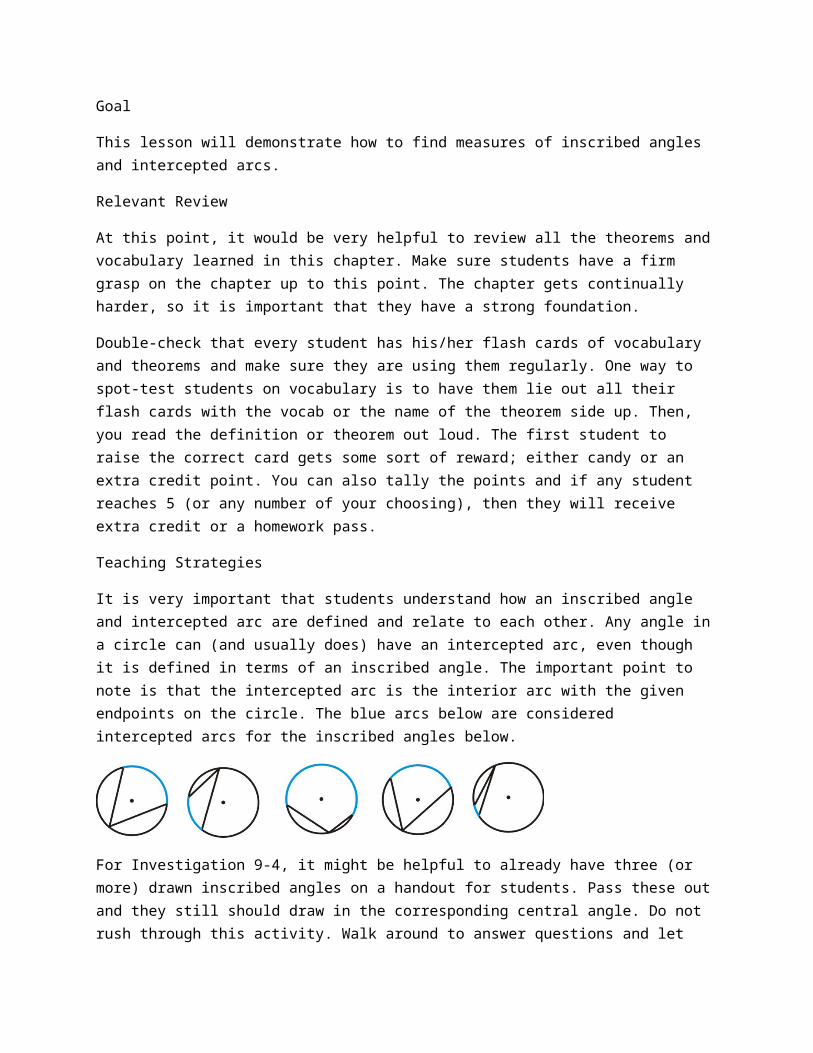
the object and, according to the order of operations, should perform the operation occurring within the parentheses first. A glide reflection is the only composition where order does not matter.
Have students do Example 6 and see if they can come up with the Reflection over the Axes Theorem on their own. You may need to do an additional example so students see the pattern.
Additional Example: Reflect over the axis and the axis. Find the coordinates of and the one transformation this double reflection is the same is.
Solution: The coordinates of and are:
From these coordinates, we see that a double reflection over the and axes is the same as a rotation of .
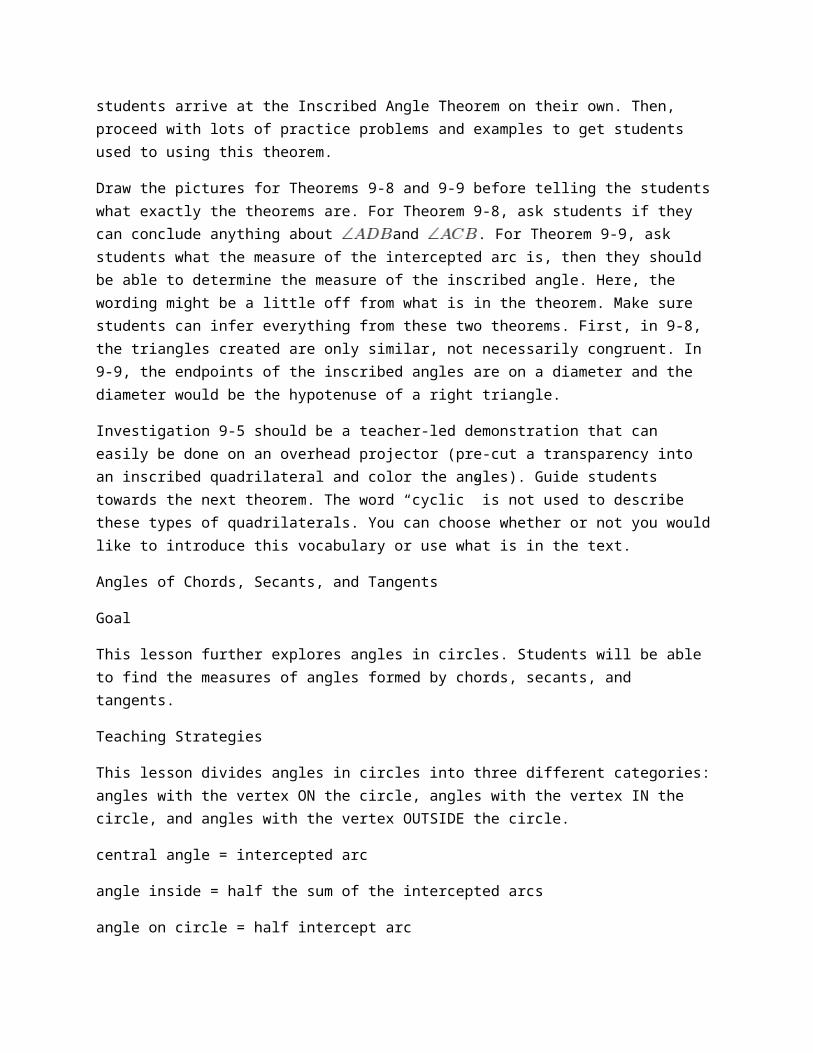
Investigation 12-2 should be a teacher-led activity. You can either have students perform the investigation along with you or you can just do the activity and have student write down the necessary information.
Extension: Tessellating Polygons
Goal
This lesson defines tessellations and shows students how to create a tessellation from regular polygons.
Relevant Review
Review with students the definition of a regular polygon and how many degrees are in a quadrilateral, pentagon, hexagon, octagon, etc.
Teaching Strategies
Take students to the computer lab and let them play with the Tessellation Artist, from the website given in the FlexBook ( http://www.mathisfun.com/geometry/tessellation-artist.html). This website does not create true tessellations, but it is fun for students to see if or how their drawing would tessellate.
Students may wonder if shapes other than regular polygons tessellate. You can show them the example below and then see if they can tessellate any quadrilateral. When tessellating this quadrilateral, make sure that every student has a different quadrilateral. When everyone is done, have the students hold up their tessellations or share them with each other.
Additional Example: Tessellate the quadrilateral below.
Solution: To tessellate any image you will need to reflect and rotate the image so that the sides all fit together. First, start by matching up the each side with itself around the quadrilateral.
Now, continue to fill in around the figures with either the original or the rotation.
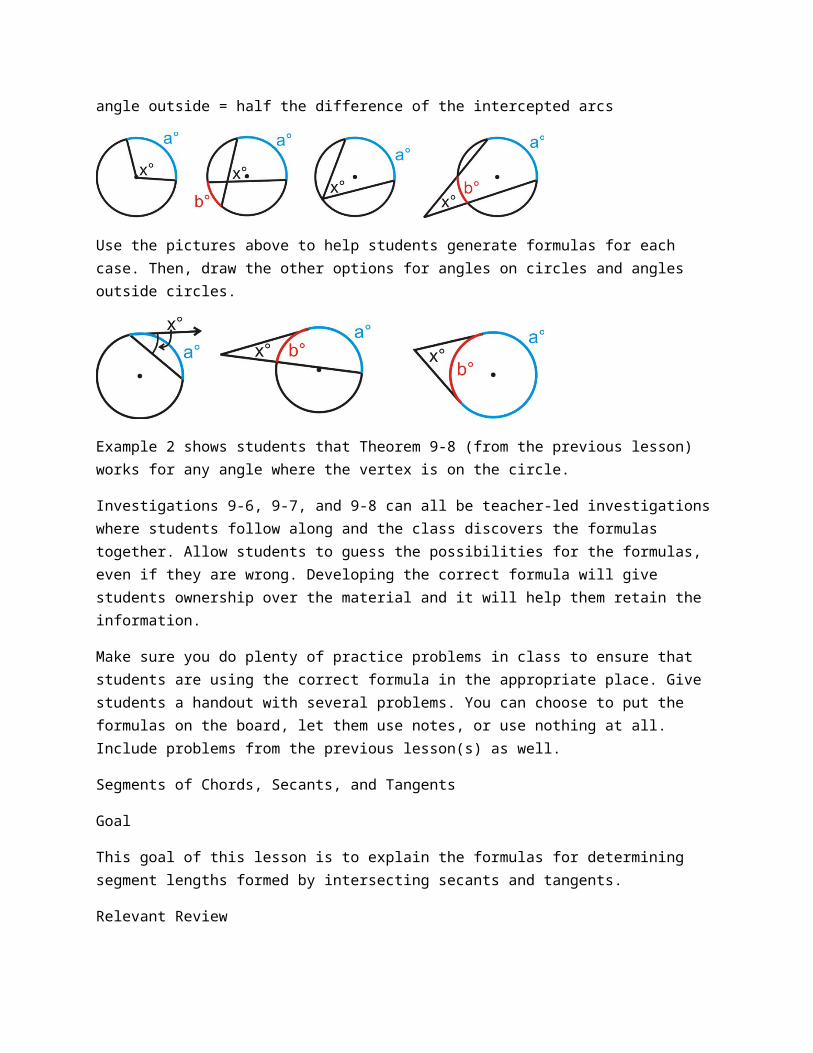
This is the final tessellation. You can continue to tessellate this shape forever.