Embed Size (px)
Citation preview
Getting Started in P3:Basic Tips and Techniques
Beverley M. SheaferAssistant Professor, CSUS
Sheafer / 2
Getting Started in P3: Basic Tips & Techniques
WELCOMELadies and Gentlemen
Sheafer / 3
Getting Started in P3: Basic Tips & Techniques
Focus of Presentation
• To give the occasional user or beginning scheduler a higher comfort level with the P3 software.
• To teach those basic skills needed to start using Primavera Project Planner for scheduling projects.
• To teach the tips and tricks to using the P3 software most effectively.
Sheafer / 4
Getting Started in P3: Basic Tips & Techniques
Aspects to be addressed
1. Capturing the overall project scope of work2. Defining the Activity Codes structure 3. Establishing the Cost Accounts Codes structure 4. Defining the Resources 5. Establishing the Calendar ID structure 6. Creating activities and their relationships 7. Organizing activities
Sheafer / 5
Getting Started in P3: Basic Tips & Techniques
1. Capturing the overall project scope of work
1.1 Using the Contract1.1.1 Instructions to Bidders1.1.2 The Agreement (Contract Terms and Conditions)1.1.3 Project Schedule Requirements1.1.4 Special Provisions
Sheafer / 6
Getting Started in P3: Basic Tips & Techniques
1. Capturing the overall project scope of work
Figure 1.1.1: Instruction to BiddersA Project description shall be provided, which illustrates the functional characteristics and particular features of the design, through text and drawings, in at least the detail indicated, foreach of the Project elements below.The Bidder shall provide a plan, which addresses how the final design and engineering, permitting, interface management, commissioning and testing will be completed within the constraints of the Project Schedule, while maintaining the railroad operation.
Sheafer / 7
Getting Started in P3: Basic Tips & Techniques
1. Capturing the overall project scope of work
Figure 1.1.2: The AgreementThe Project’s scope of Work includes the design and constructionof a new twin-track high-level fixed bridge over the South Fork of the New River, positioned within the existing right-of-way and approximately 1.7 miles of new twin-track alignment.
Sheafer / 8
Getting Started in P3: Basic Tips & Techniques
1. Capturing the overall project scope of work
Figure 1.1.3: Project Schedule RequirementsThe Contractor shall at its own expense prepare, maintain and update detailed Project Schedules for the review and acceptance of (The Owner), all as described in this Section 5. The Project Schedules shall be prepared in such a manner as to permit the orderly planning, organization, and execution of the Work and shall be sufficiently detailed to accurately depict all the Workrequired for Final Acceptance and Revenue Ready Status. The Contractor's and Subcontractors’ management personnel shall actively participate in its development and implementation.
Sheafer / 9
Getting Started in P3: Basic Tips & Techniques
1. Capturing the overall project scope of workFigure 1.1.4: Special Provisions
(The Owner) has created a Work Breakdown Structure (WBS) for the Project. The WBS is intended to provide a hierarchy of work to be accomplished to complete the Project. The hierarchical structure subdivides all of the Work elements into successively smaller increments of Work. Each division of the Work is definedas a level. The number of levels is determined based on the necessary detail required to track the Project elements. The level of detail provides a breakdown of the Project which facilitates the Project team with tracking and monitoring Project progress. The WBS provides a hierarchical structure to segregate Project elements to facilitate the collection and analysis of Project Data and to serve as a mechanism for payment and scheduling for Project design, procurement and construction.
Sheafer / 10
Getting Started in P3: Basic Tips & Techniques
1. Capturing the overall project scope of work
1.2 Developing the Work Breakdown Structure (WBS)1.2.1 Levels
• Width – number of characters• Separators – type of symbol
1.2.2 Codes• Use typical abbreviations and standards• Keep it simple
Sheafer / 11
Getting Started in P3: Basic Tips & Techniques
1. Capturing the overall project scope of work
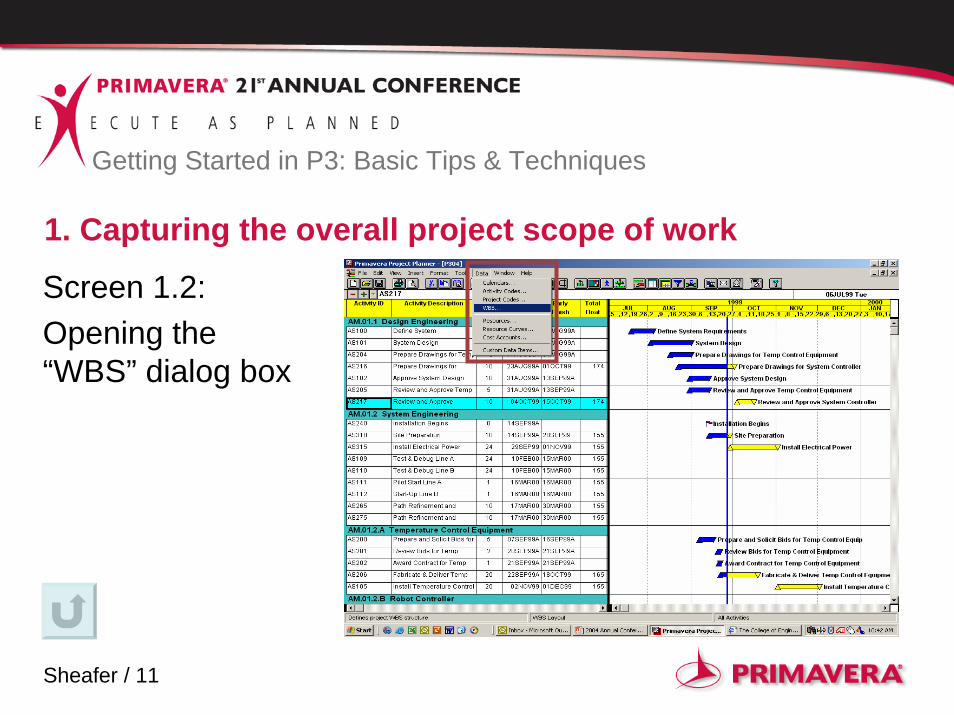
Screen 1.2:Opening the “WBS” dialog box
Sheafer / 12
Getting Started in P3: Basic Tips & Techniques
1. Capturing the overall project scope of work
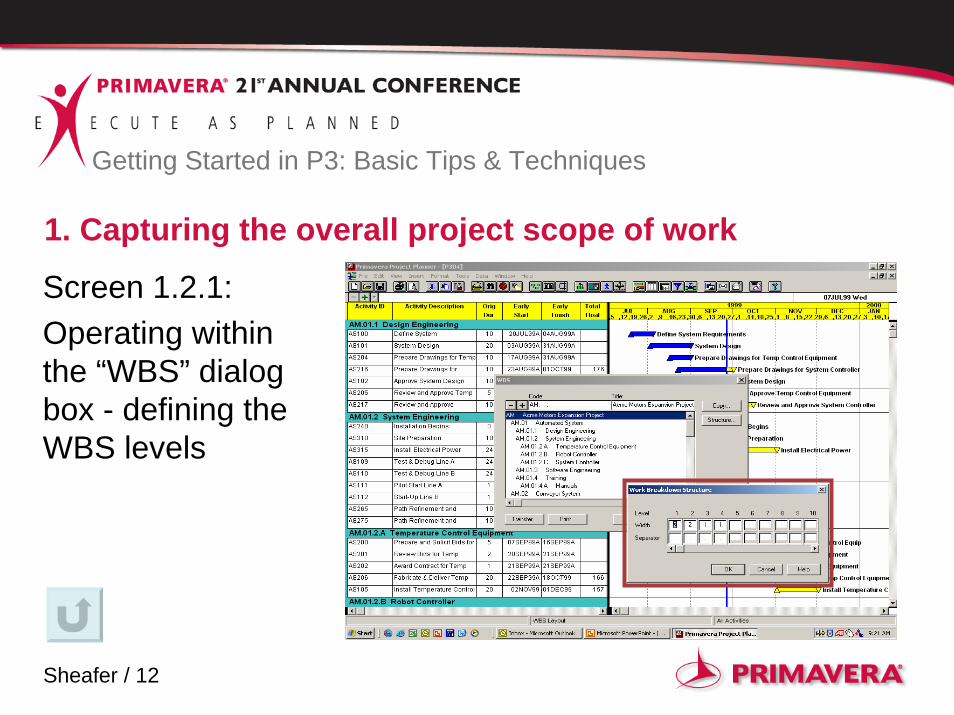
Screen 1.2.1:Operating within the “WBS” dialog box - defining the WBS levels

Sheafer / 13
Getting Started in P3: Basic Tips & Techniques
1. Capturing the overall project scope of work
Screen 1.2.2:Operating within the “WBS” dialog box - creating the WBS codes

Sheafer / 14
Getting Started in P3: Basic Tips & Techniques
2. Defining the Activity Codes structure
2.1 Codes (category)2.1.1 Name2.1.2 Length2.1.3 Description
2.2 Values (items within category)2.2.1 Value Code2.2.2 Description
Sheafer / 15
Getting Started in P3: Basic Tips & Techniques
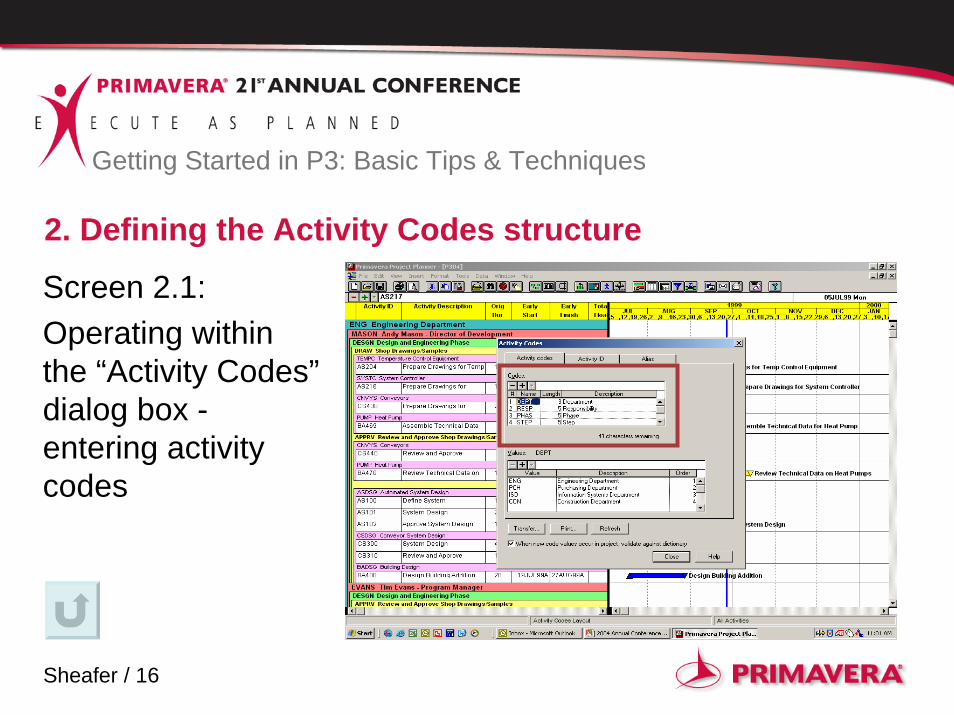
2. Defining the Activity Codes structure
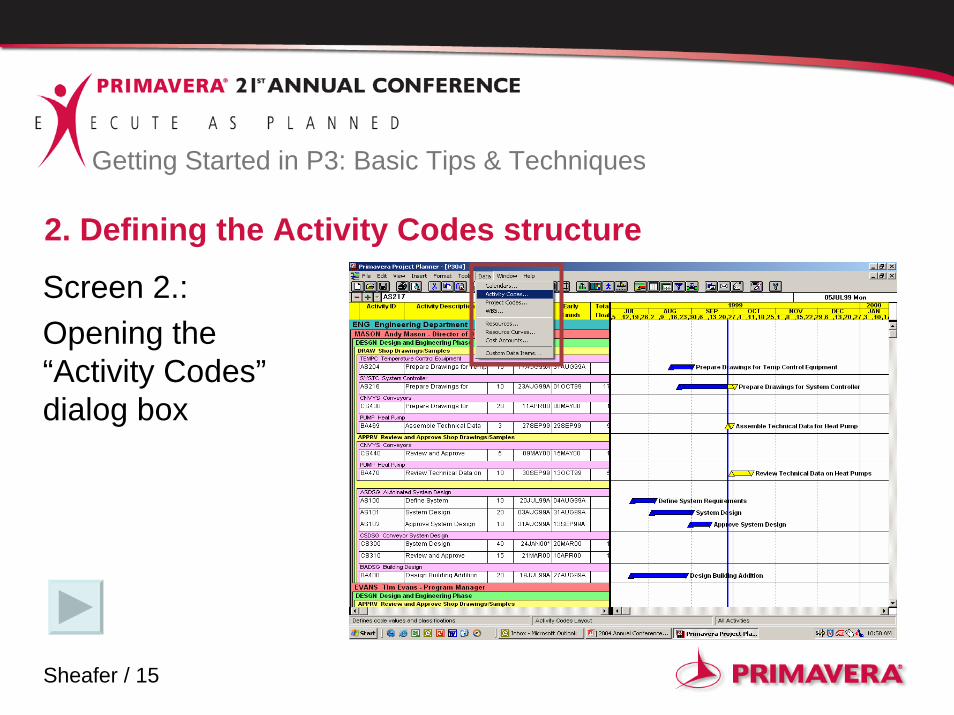
Screen 2.:Opening the “Activity Codes” dialog box
Sheafer / 16
Getting Started in P3: Basic Tips & Techniques
2. Defining the Activity Codes structure
Screen 2.1:Operating within the “Activity Codes” dialog box -entering activity codes
Sheafer / 17
Getting Started in P3: Basic Tips & Techniques
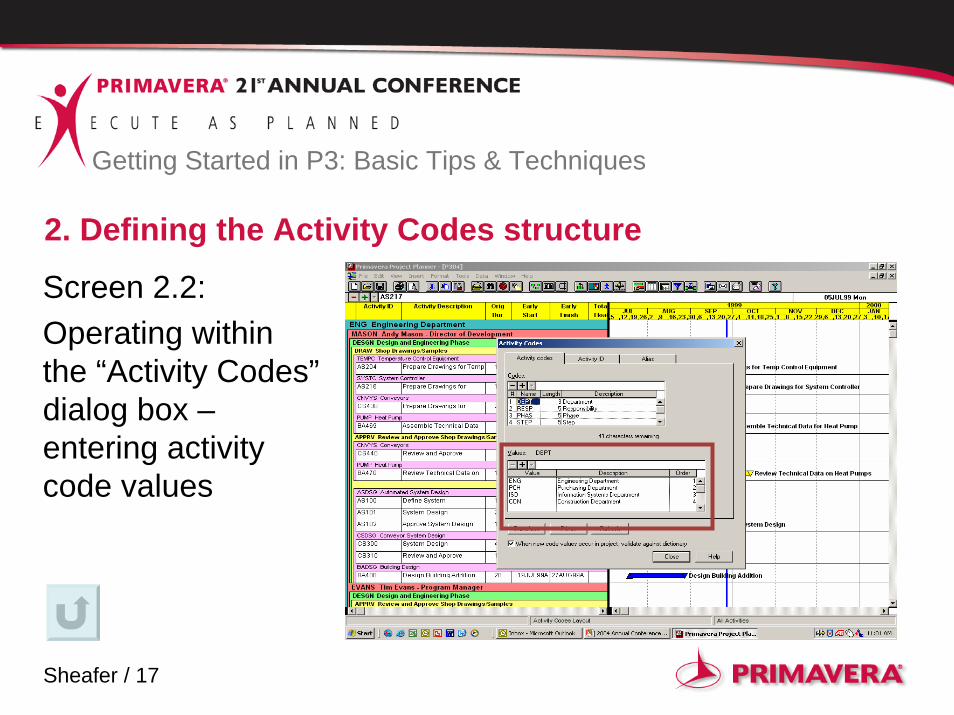
2. Defining the Activity Codes structure
Screen 2.2:Operating within the “Activity Codes” dialog box –entering activity code values
Sheafer / 18
Getting Started in P3: Basic Tips & Techniques
3. Establishing the Cost Accounts Codes structure
3.1 Categories3.1.1 Code3.1.2 Category Title
3.2 Titles3.2.1 Account Number3.2.2 Account Title
Sheafer / 19
Getting Started in P3: Basic Tips & Techniques
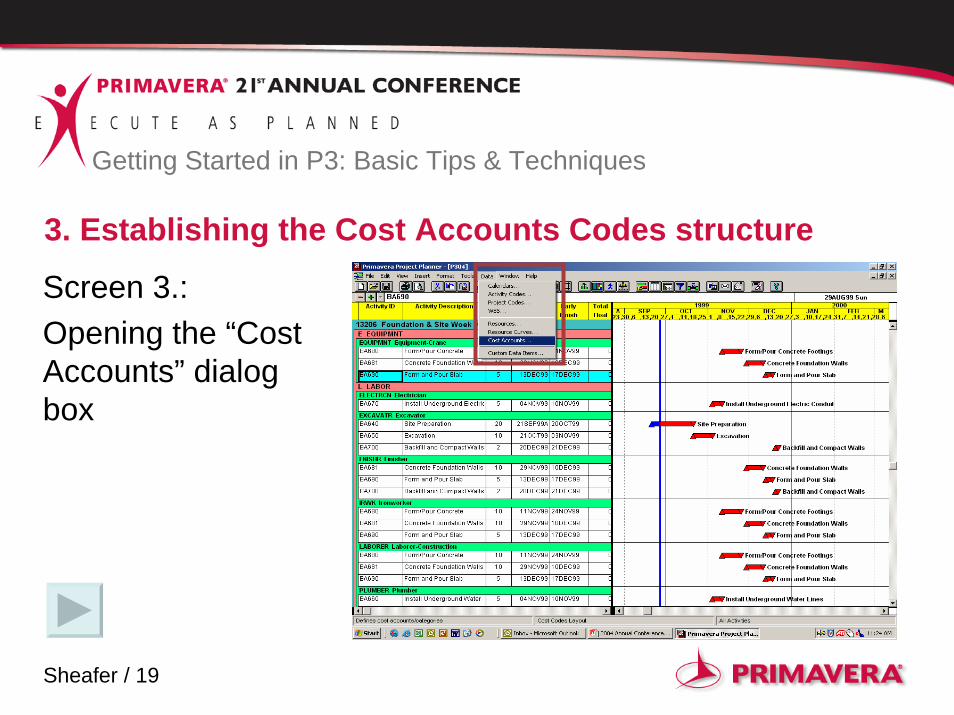
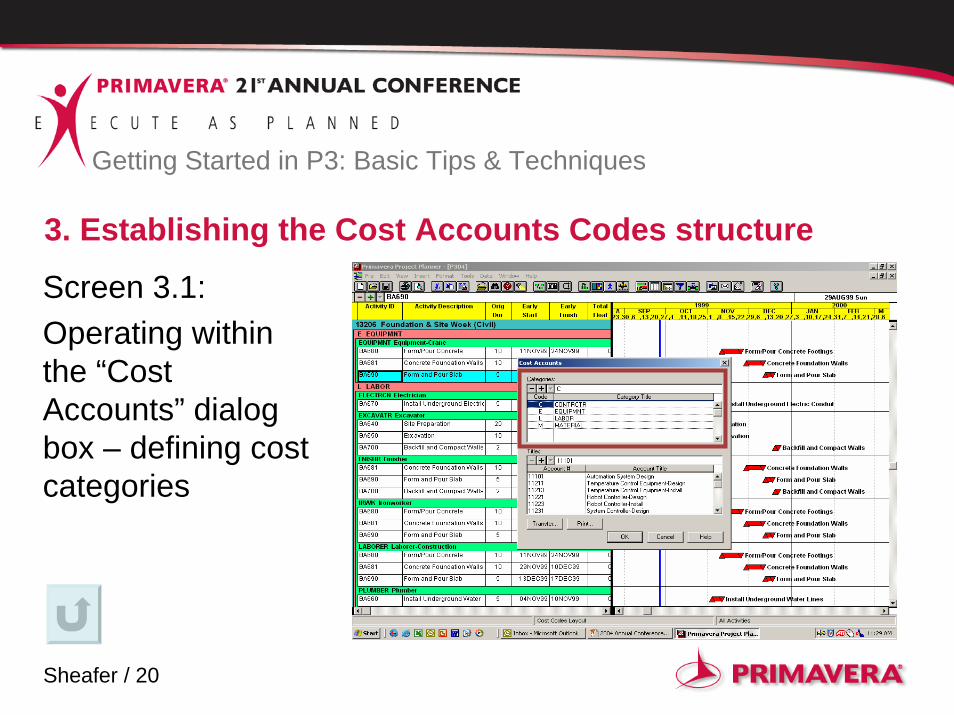
3. Establishing the Cost Accounts Codes structure
Screen 3.:Opening the “Cost Accounts” dialog box
Sheafer / 20
Getting Started in P3: Basic Tips & Techniques
3. Establishing the Cost Accounts Codes structure
Screen 3.1:Operating within the “Cost Accounts” dialog box – defining cost categories
Sheafer / 21
Getting Started in P3: Basic Tips & Techniques
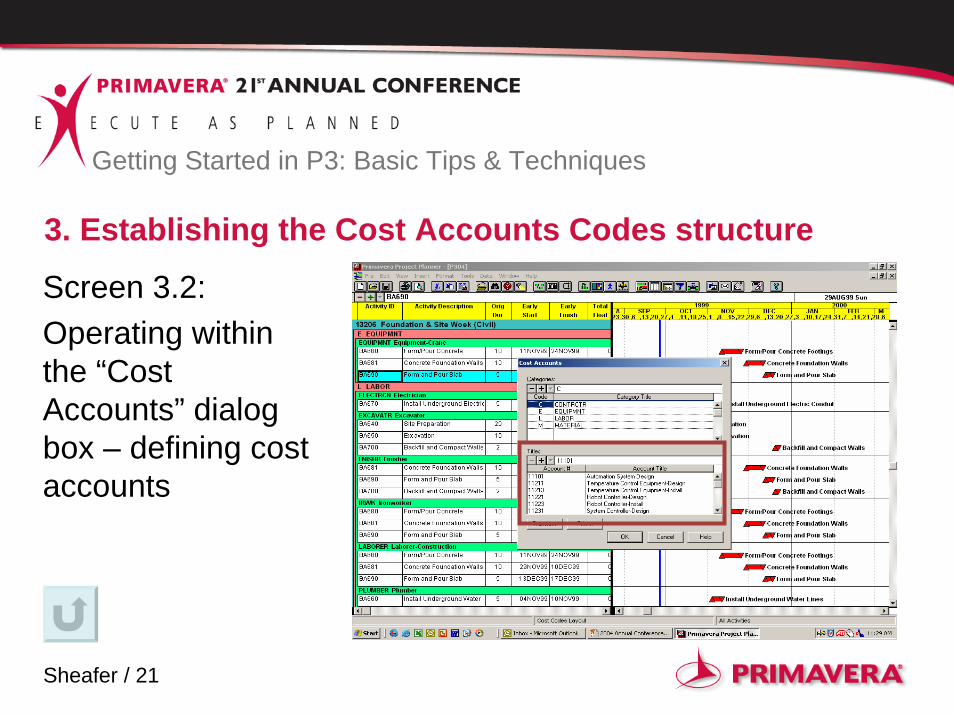
3. Establishing the Cost Accounts Codes structure
Screen 3.2:Operating within the “Cost Accounts” dialog box – defining cost accounts
Sheafer / 22
Getting Started in P3: Basic Tips & Techniques
4. Defining the Resources
4.1 Resources4.1.1 Resource Code4.1.2 Units4.1.3 Driving4.1.4 Base4.1.5 Description
4.2 Limits4.3 Prices
Sheafer / 23
Getting Started in P3: Basic Tips & Techniques
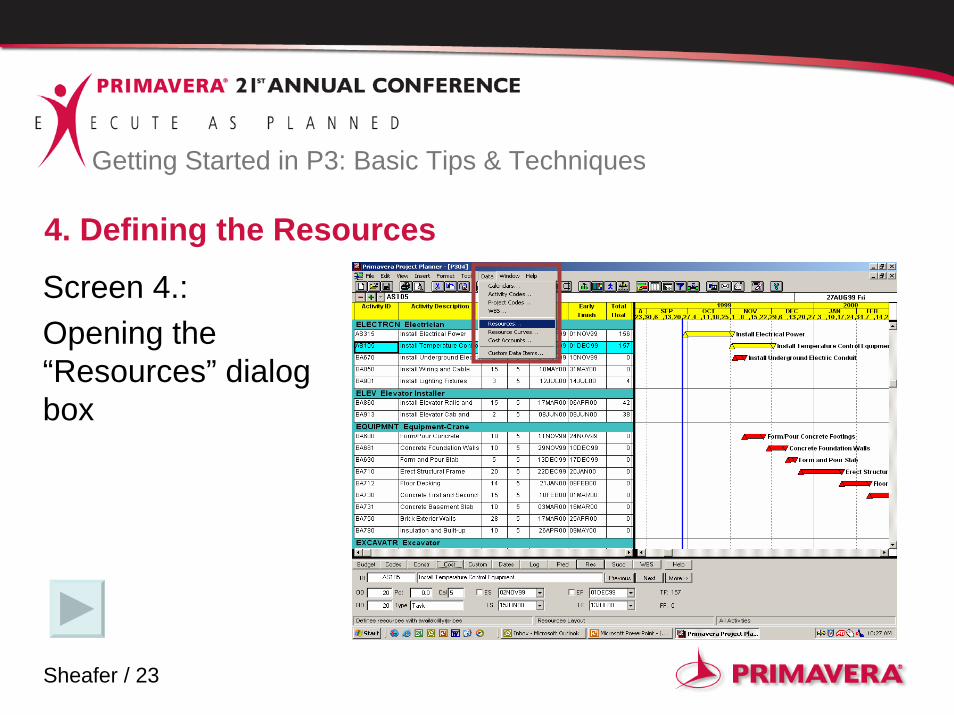
4. Defining the Resources
Screen 4.:Opening the “Resources” dialog box

Sheafer / 24
Getting Started in P3: Basic Tips & Techniques
4. Defining the Resources
Screen 4.1:Operating within the “Resources” dialog box –defining the resource
Sheafer / 25
Getting Started in P3: Basic Tips & Techniques
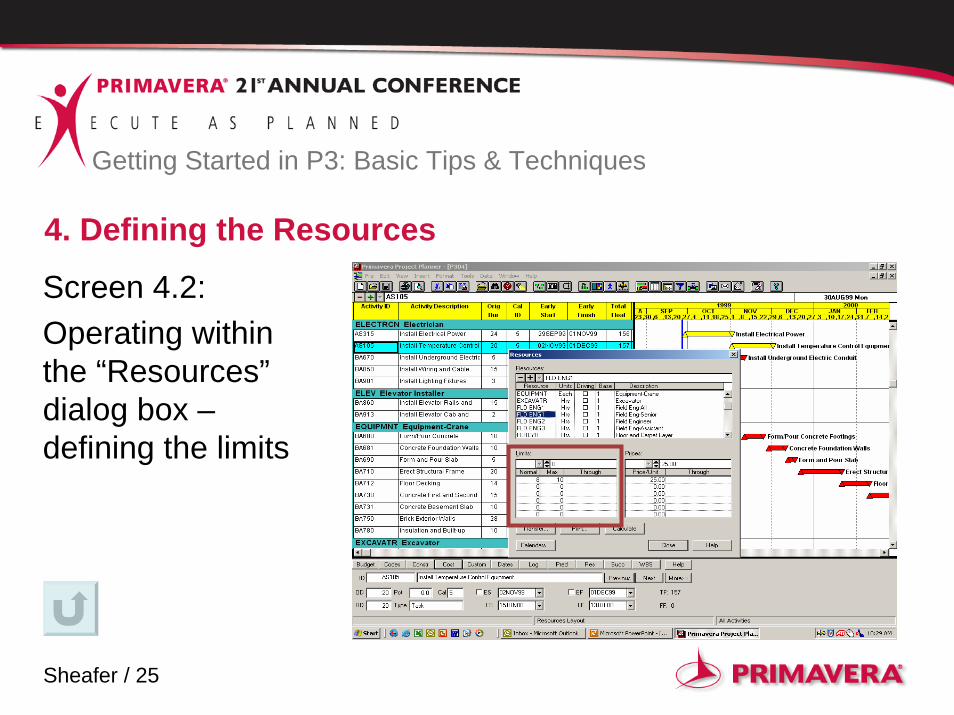
4. Defining the Resources
Screen 4.2:Operating within the “Resources” dialog box –defining the limits
Sheafer / 26
Getting Started in P3: Basic Tips & Techniques
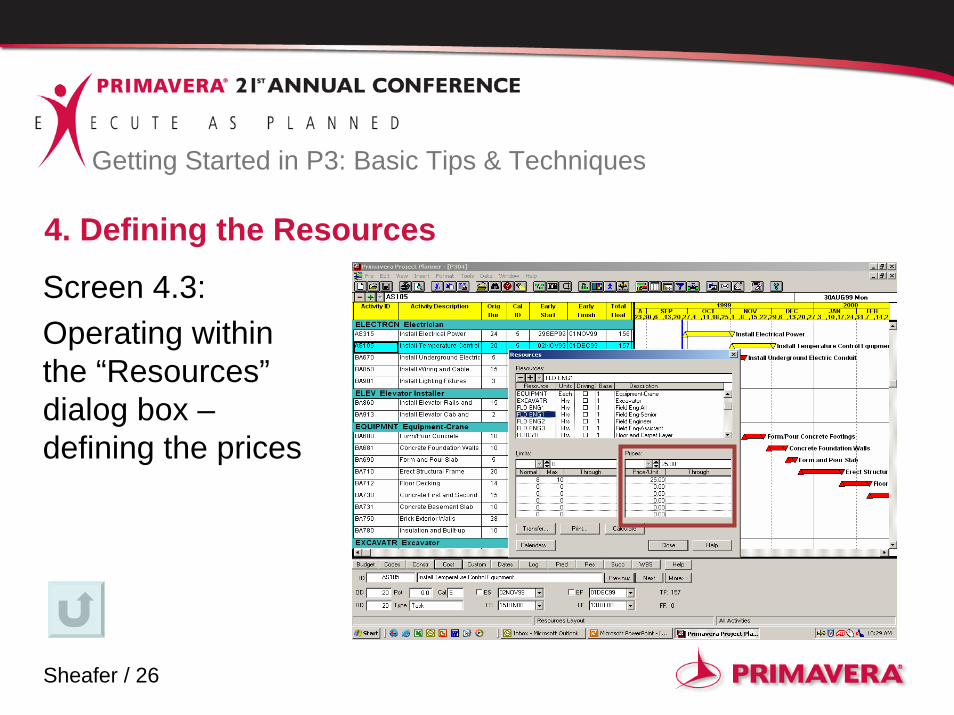
4. Defining the Resources
Screen 4.3:Operating within the “Resources” dialog box –defining the prices
Sheafer / 27
Getting Started in P3: Basic Tips & Techniques
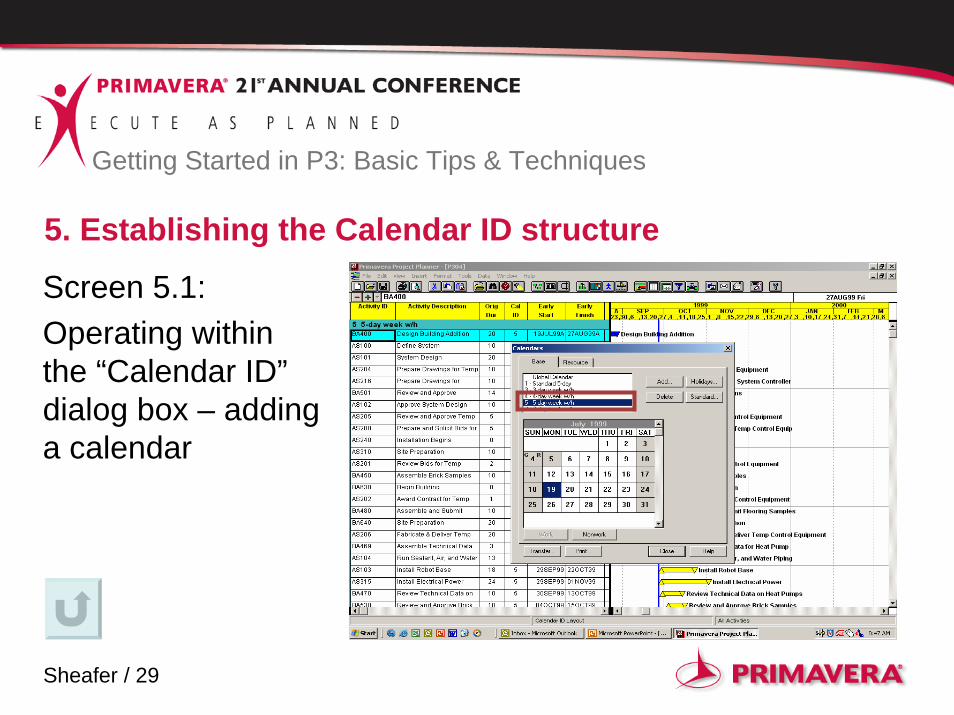
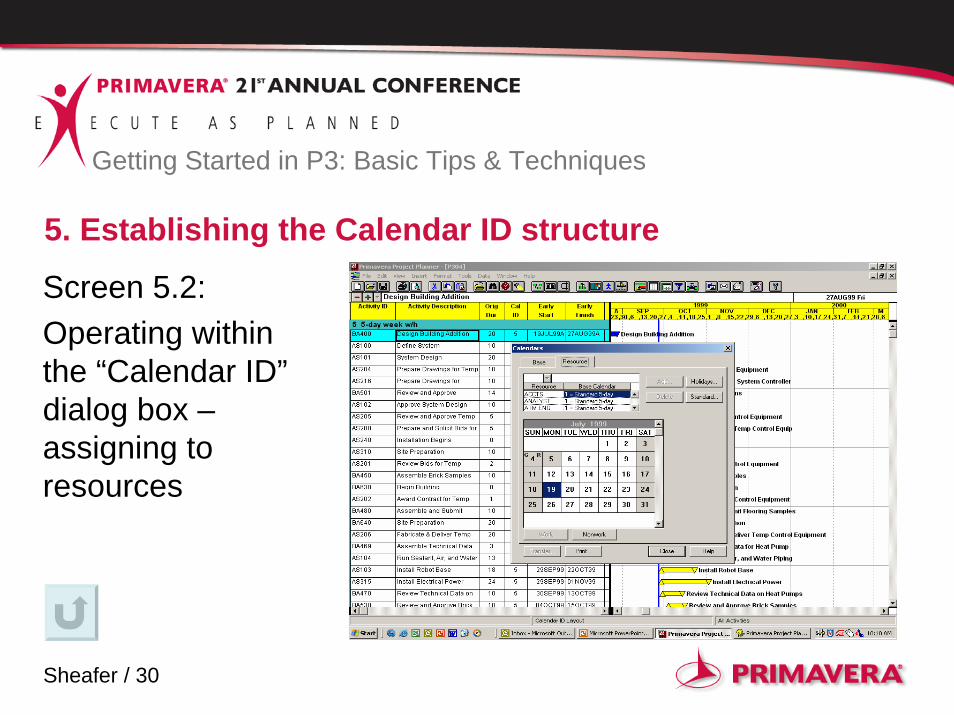
5. Establishing the Calendar ID structure
5.1 Calendars5.1.1 Standard (daily information)5.1.2 Holidays5.1.3 Work periods/Non-work periods
5.2 Assigning5.2.1 To activities5.2.2 To resources
Sheafer / 28
Getting Started in P3: Basic Tips & Techniques
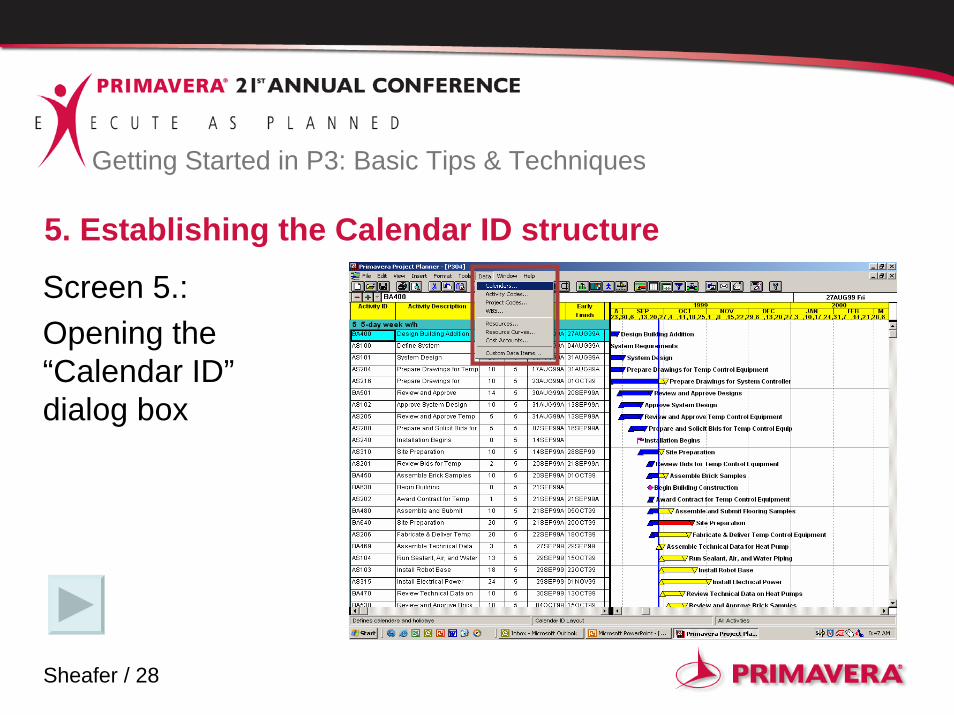
5. Establishing the Calendar ID structure
Screen 5.:Opening the “Calendar ID” dialog box
Sheafer / 29
Getting Started in P3: Basic Tips & Techniques
5. Establishing the Calendar ID structure
Screen 5.1:Operating within the “Calendar ID” dialog box – adding a calendar
Sheafer / 30
Getting Started in P3: Basic Tips & Techniques
5. Establishing the Calendar ID structure
Screen 5.2:Operating within the “Calendar ID” dialog box –assigning to resources

Sheafer / 31
Getting Started in P3: Basic Tips & Techniques
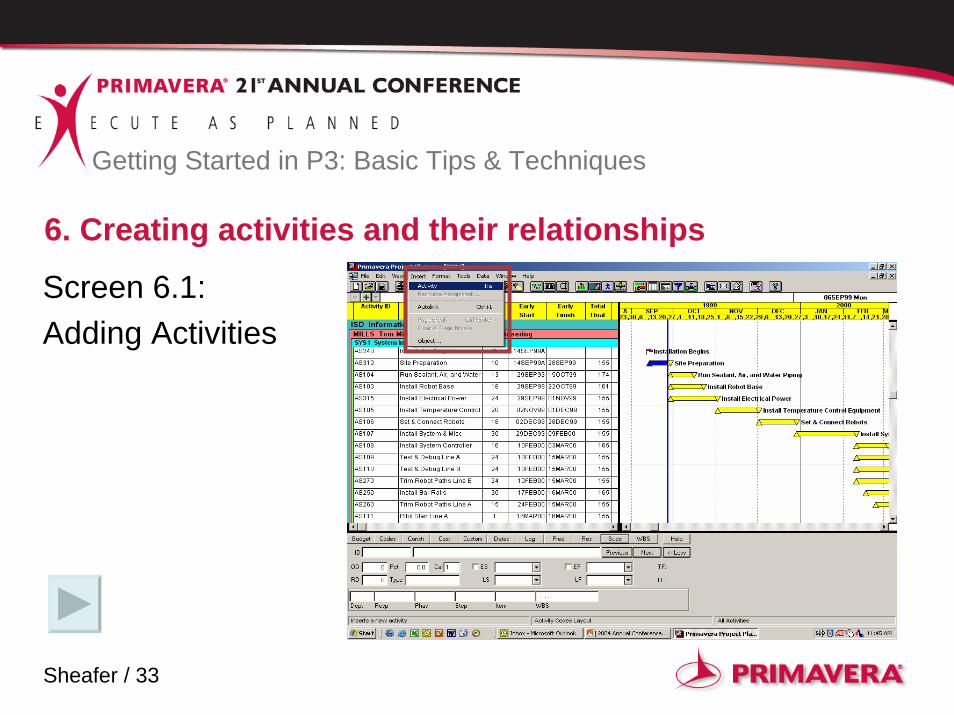
6. Creating activities and their relationships
6.1 Adding New activities6.1.1 Assigning Activity ID and Name6.1.2 Assigning Calendar ID and Original Duration6.1.3 Assigning Predecessors and Successors
6.2 Assigning the WBS6.3 Assigning Activity Codes
Sheafer / 32
Getting Started in P3: Basic Tips & Techniques
6. Creating activities and their relationships
6.4 Assigning Resources6.5 Assigning Cost Accounts
Sheafer / 33
Getting Started in P3: Basic Tips & Techniques
6. Creating activities and their relationships
Screen 6.1:Adding Activities
Sheafer / 34
Getting Started in P3: Basic Tips & Techniques
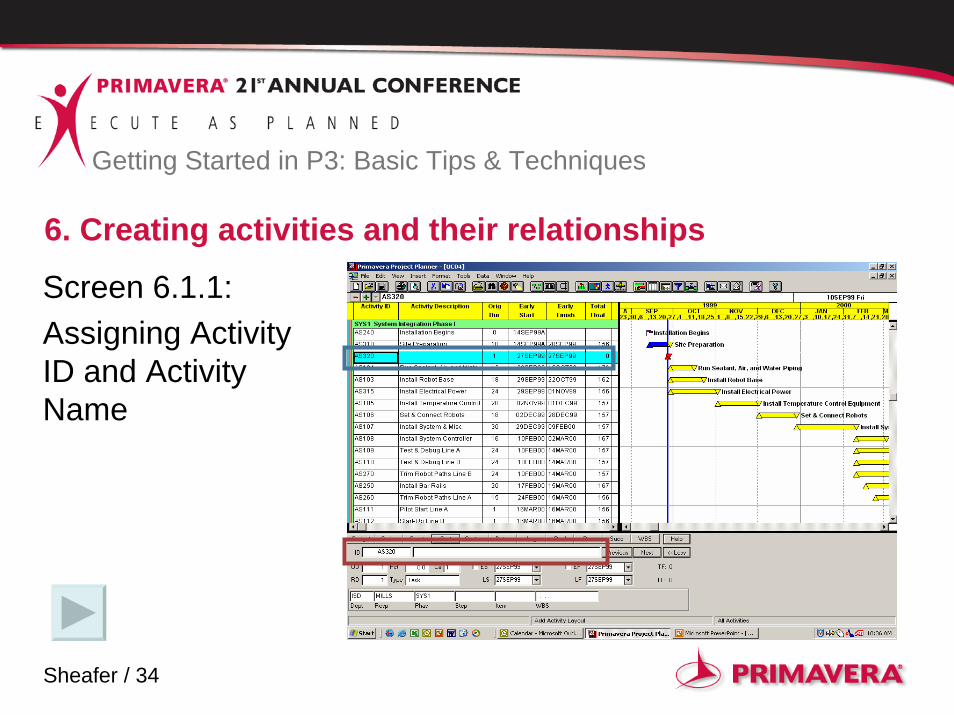
6. Creating activities and their relationships
Screen 6.1.1:Assigning Activity ID and Activity Name
Sheafer / 35
Getting Started in P3: Basic Tips & Techniques
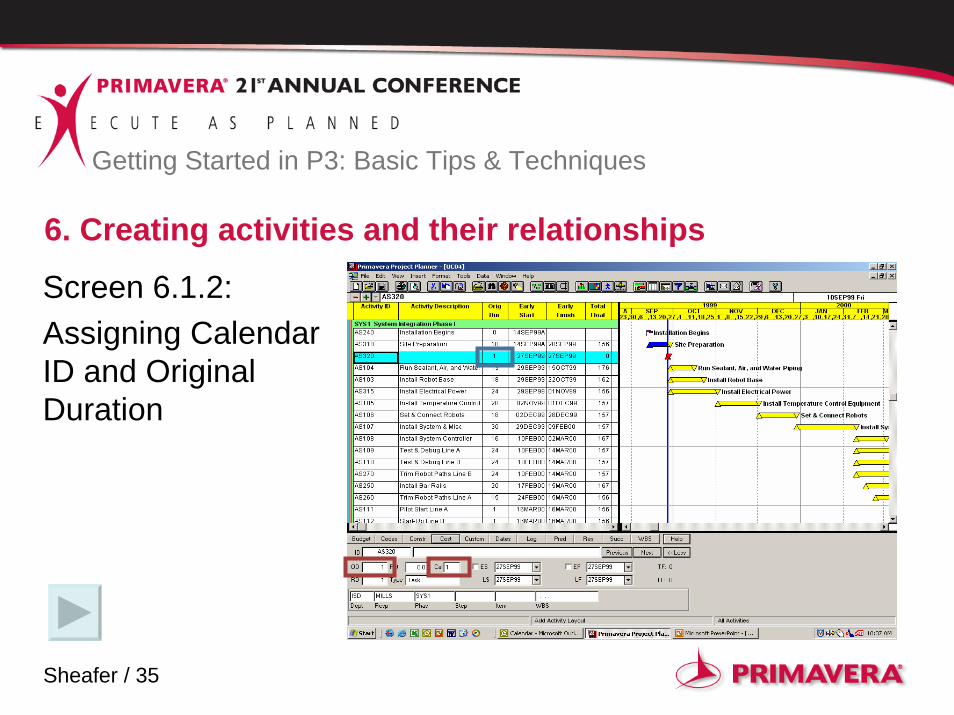
6. Creating activities and their relationships
Screen 6.1.2:Assigning Calendar ID and Original Duration
Sheafer / 36
Getting Started in P3: Basic Tips & Techniques
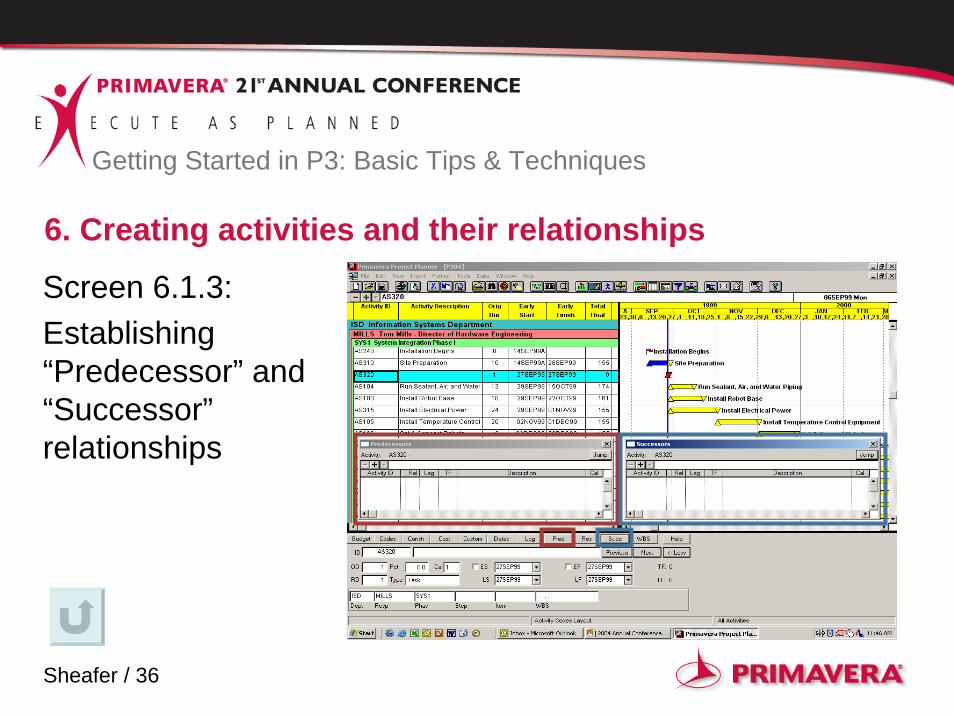
6. Creating activities and their relationships
Screen 6.1.3:Establishing “Predecessor” and “Successor” relationships
Sheafer / 37
Getting Started in P3: Basic Tips & Techniques
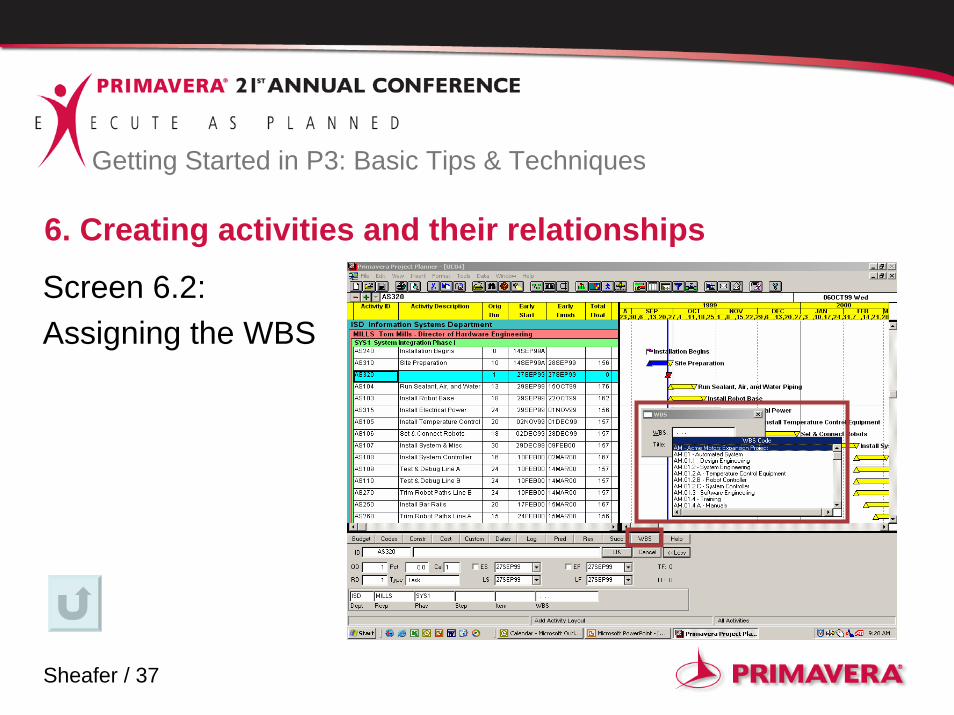
6. Creating activities and their relationships
Screen 6.2:Assigning the WBS
Sheafer / 38
Getting Started in P3: Basic Tips & Techniques
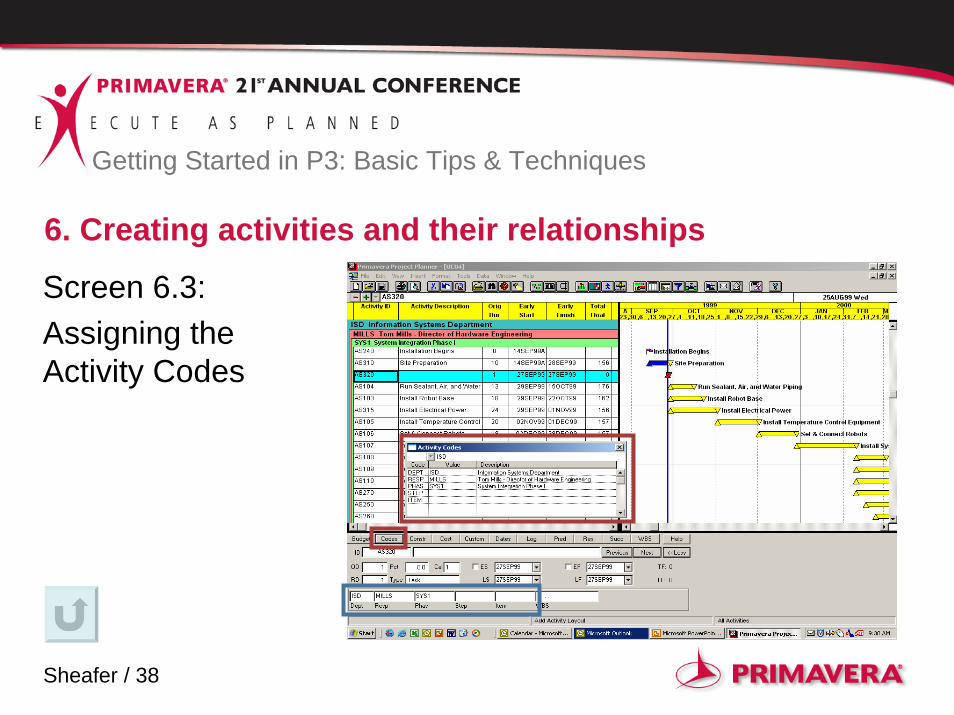
6. Creating activities and their relationships
Screen 6.3:Assigning the Activity Codes
Sheafer / 39
Getting Started in P3: Basic Tips & Techniques
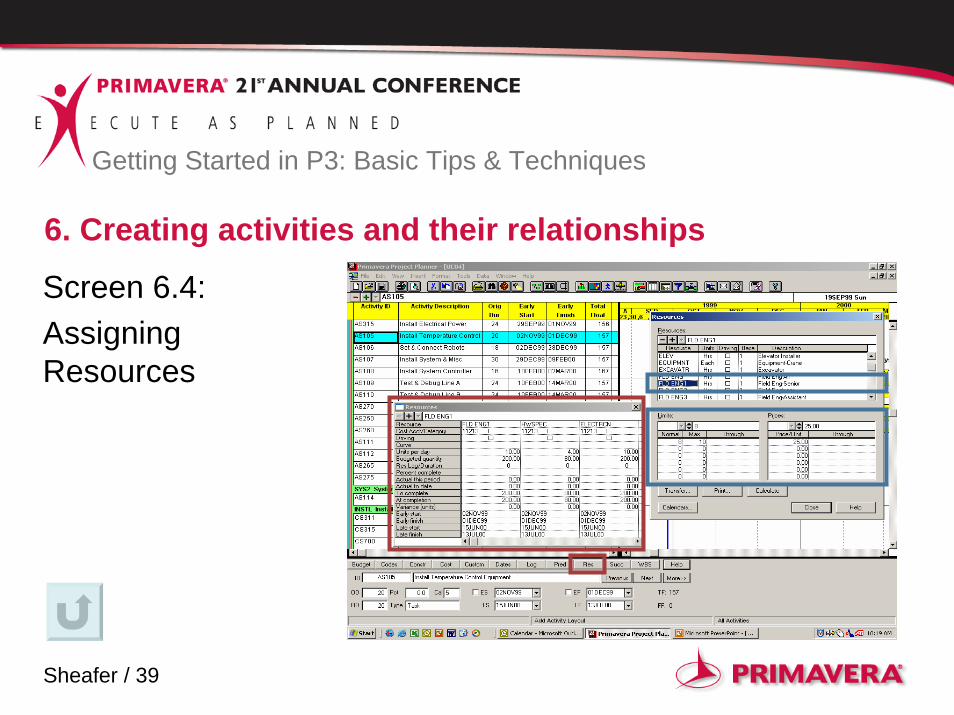
6. Creating activities and their relationships
Screen 6.4:Assigning Resources
Sheafer / 40
Getting Started in P3: Basic Tips & Techniques
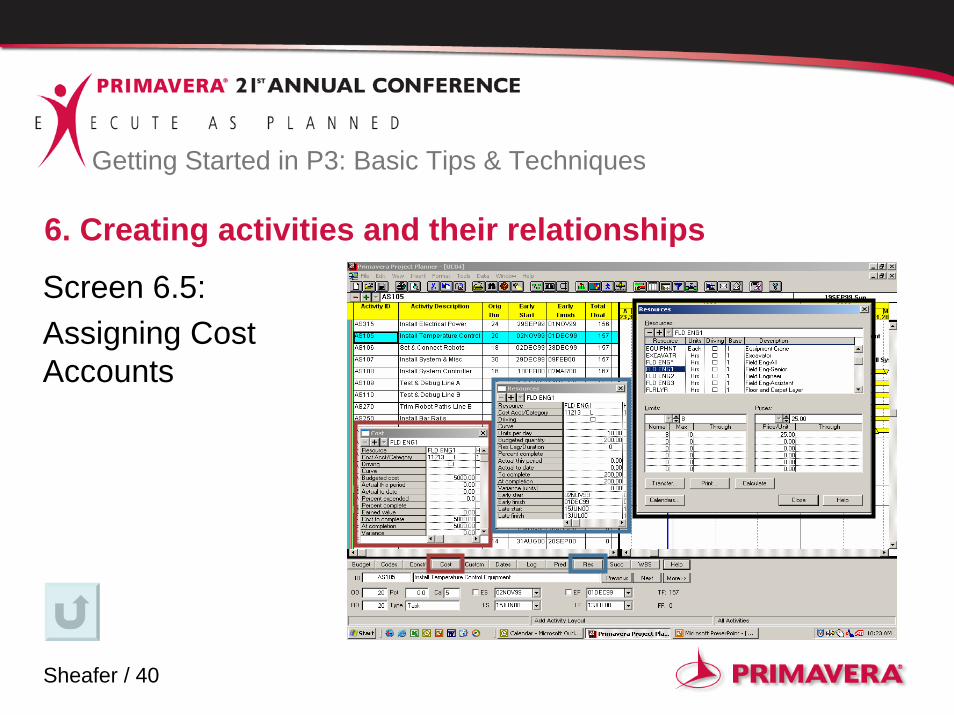
6. Creating activities and their relationships
Screen 6.5:Assigning Cost Accounts
Sheafer / 41
Getting Started in P3: Basic Tips & Techniques
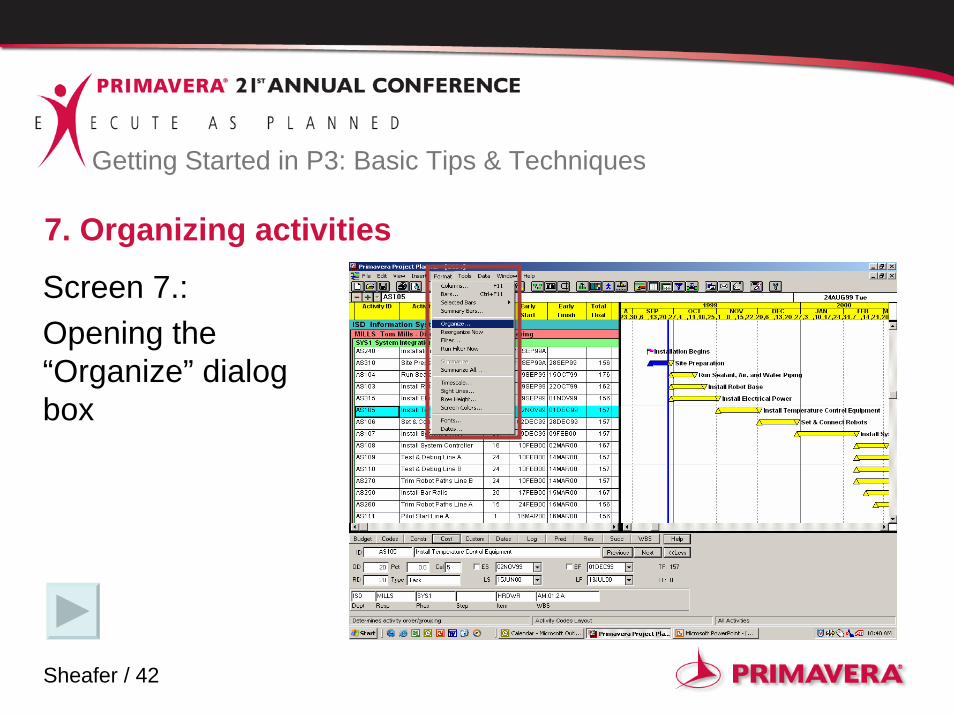
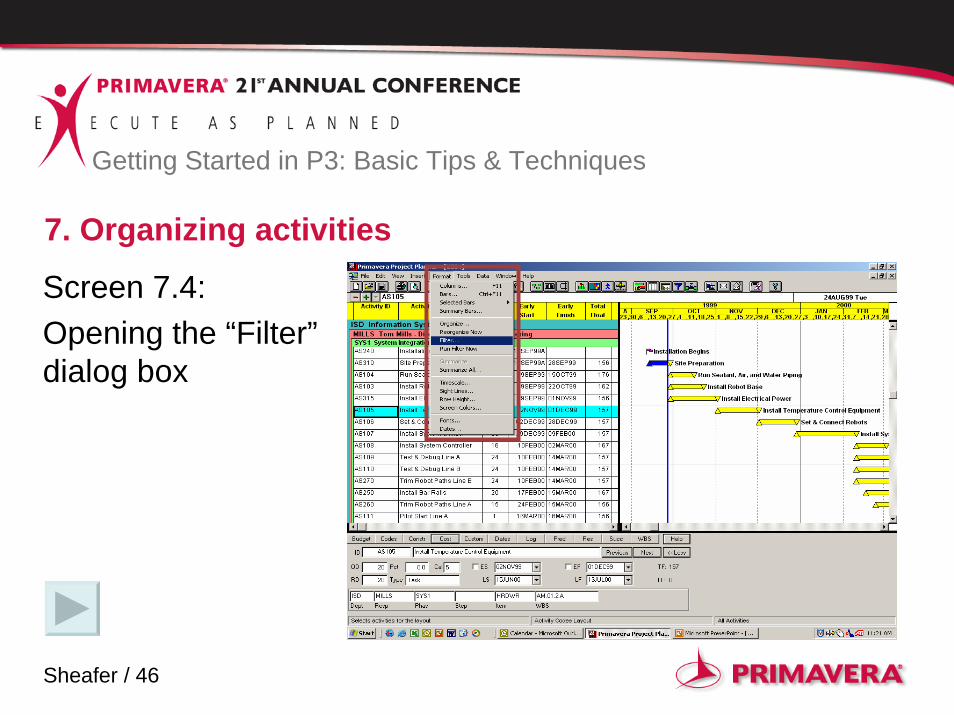
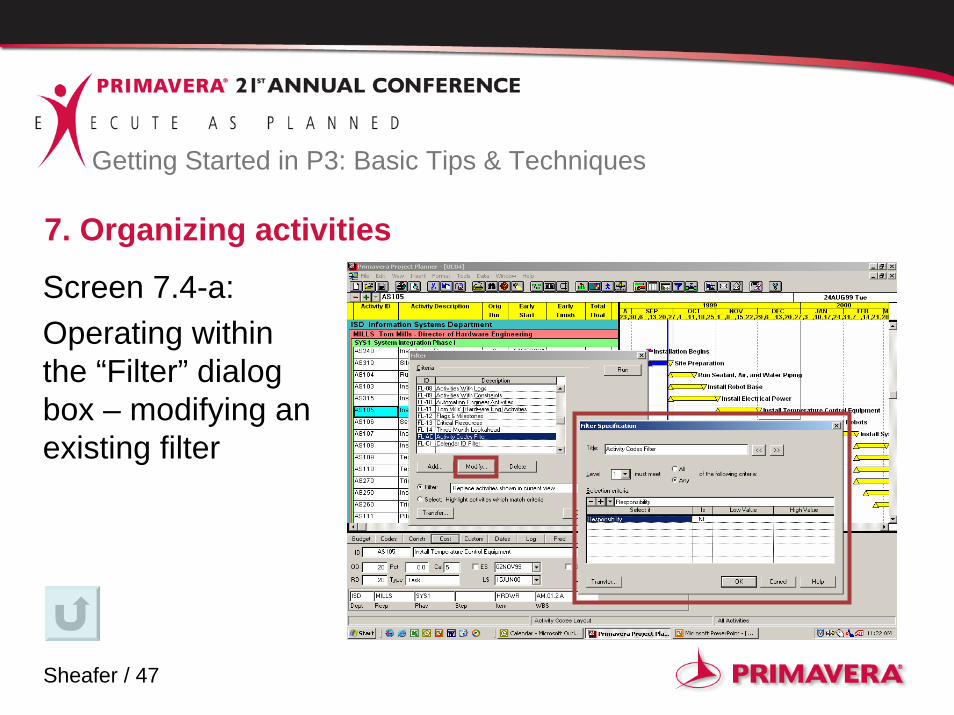
7. Organizing activities
7.1 Organize by7.2 Group by 7.3 Sort by7.4 Filtering
Sheafer / 42
Getting Started in P3: Basic Tips & Techniques
7. Organizing activities
Screen 7.:Opening the “Organize” dialog box
Sheafer / 43
Getting Started in P3: Basic Tips & Techniques
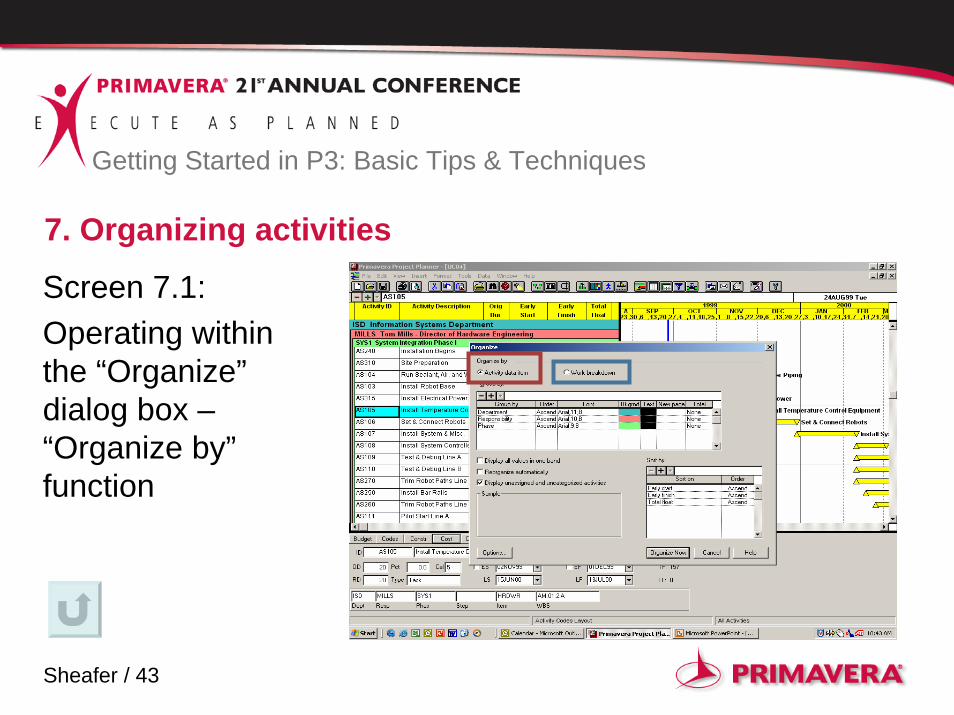
7. Organizing activities
Screen 7.1:Operating within the “Organize” dialog box –“Organize by” function
Sheafer / 44
Getting Started in P3: Basic Tips & Techniques
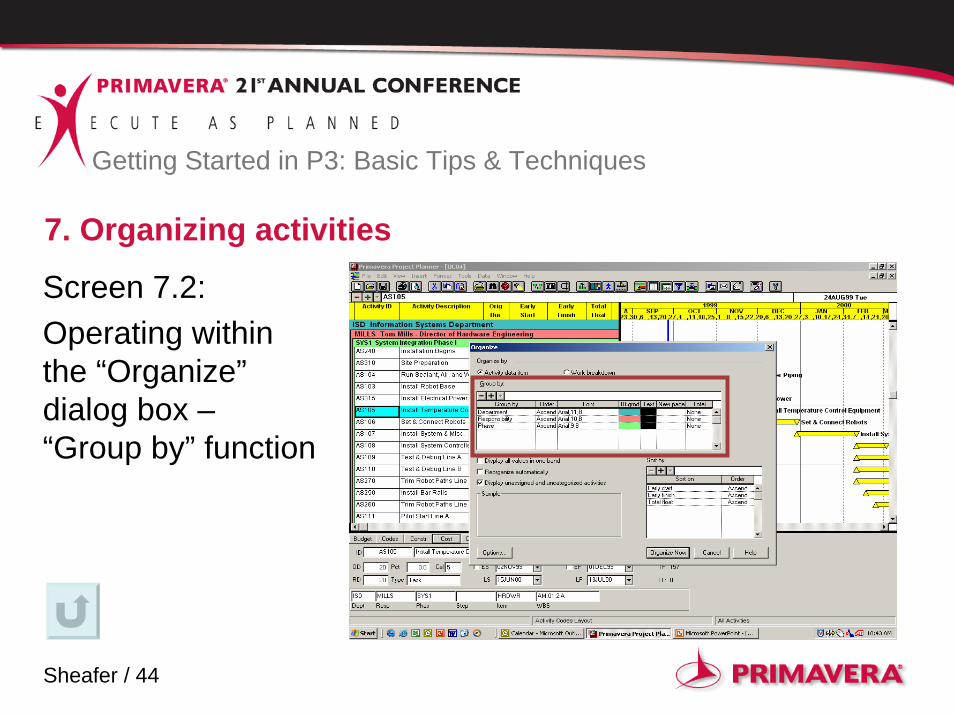
7. Organizing activities
Screen 7.2:Operating within the “Organize” dialog box –“Group by” function
Sheafer / 45
Getting Started in P3: Basic Tips & Techniques
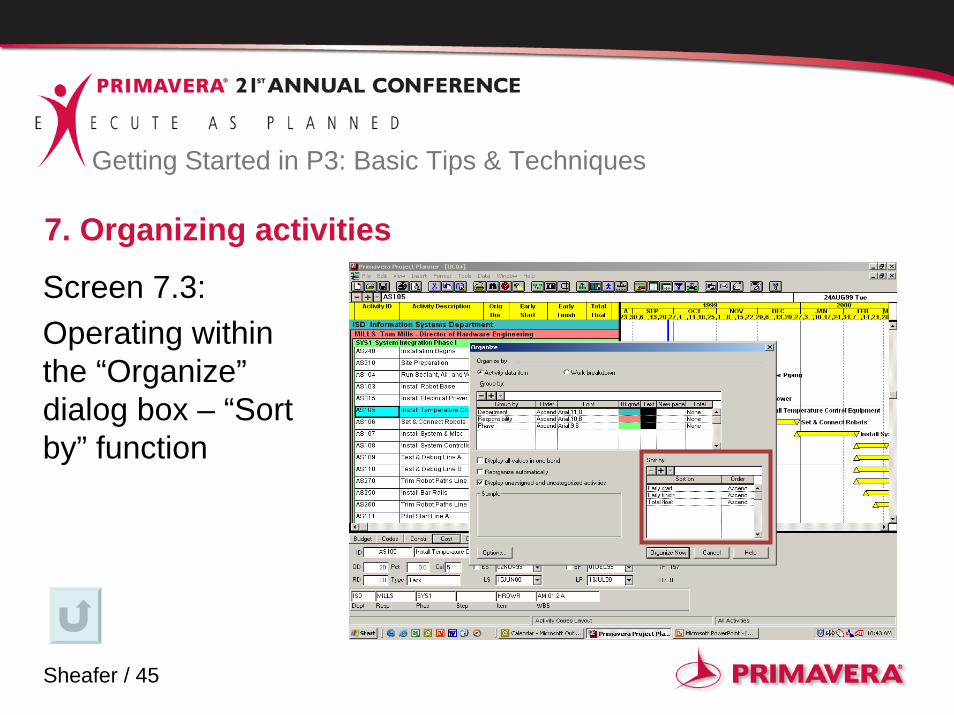
7. Organizing activities
Screen 7.3:Operating within the “Organize” dialog box – “Sort by” function
Sheafer / 46
Getting Started in P3: Basic Tips & Techniques
7. Organizing activities
Screen 7.4:Opening the “Filter” dialog box
Sheafer / 47
Getting Started in P3: Basic Tips & Techniques
7. Organizing activities
Screen 7.4-a:Operating within the “Filter” dialog box – modifying an existing filter
Sheafer / 48
Getting Started in P3: Basic Tips & Techniques
Summary
1. WBS2. Activity Codes3. Cost Accounts Codes4. Resources 5. Calendar ID6. Creating Activities7. Organizing Activities
Sheafer / 49
Getting Started in P3: Basic Tips & Techniques
QUESTIONS ?
Sheafer / 50
Getting Started in P3: Basic Tips & Techniques
THANK-YOULadies and Gentlemen
Sheafer / 51
Getting Started in P3: Basic Tips & Techniques
Suggested Resources
Construction Scheduling with Primavera Project Planner, 2nd edition by Leslie Feigenbaum
Project Scheduling and Management for Construction by David R. Pierce
Project Scheduling Handbook by Jonathan F. Hutchings
Sheafer / 52
Getting Started in P3: Basic Tips & Techniques
Contact InformationBeverley M. SheaferAssistant ProfessorConstruction Management Program
CSU, Sacramento6000 J Street, Sacramento CA 95819-6029
Office - 916-278-5349Email - [email protected]