Embed Size (px)
Citation preview
Getting Started with DCS 10
© 2012 FutureSoft, Inc. All Rights Reserved
For Administrators
ii Getting Started with DCS 10 for Administrators
© 1986-2012 by FutureSoft, Inc. All rights reserved.
DynaComm Connectivity Series™ Getting Started with DCS 10 for Administrators
This manual, and the software described in it, is furnished under a license agreement. Information in this document is subject to change without notice and does not represent a commitment on the part of FutureSoft. FutureSoft assumes no responsibility or liability for any errors or inaccuracies that may appear in this manual.
No part of this manual may be produced or transmitted in any form or by any means, electronic or mechanical, including photocopying and recording, or otherwise, without the prior, written permission of FutureSoft, Inc.
DynaComm, DynaComm Connectivity Series, DynaComm Client Option and FutureSoft are registered trademarks of FutureSoft, Incor-porated in the United States and/or other countries. All other trademarks are the property of their respective owners or licensors.
Edition 1—2012 (e1-051612)
Document #A-GSA-DCS10
Written and designed at:FutureSoft, Inc.1660 Townhurst Drive, Suite EHouston, Texas 77043 USA
Printed in the USA.1.800.989.8908
http://www.futuresoft.com
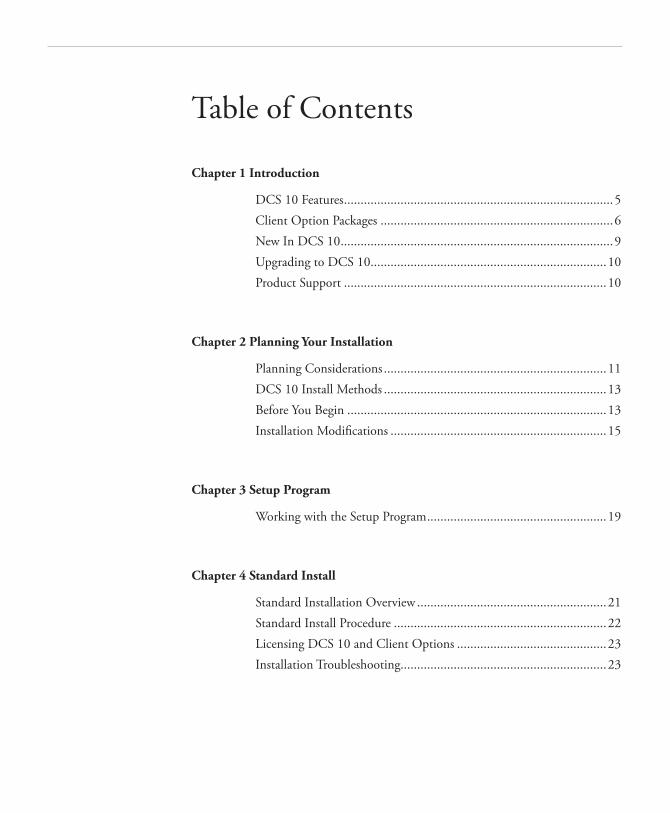
Table of Contents
Chapter 1 Introduction
DCS 10 Features .................................................................................5Client Option Packages ......................................................................6New In DCS 10 ..................................................................................9Upgrading to DCS 10 .......................................................................10Product Support ...............................................................................10
Chapter 2 Planning Your Installation
Planning Considerations ...................................................................11DCS 10 Install Methods ...................................................................13Before You Begin ..............................................................................13Installation Modifications .................................................................15
Chapter 3 Setup Program
Working with the Setup Program ......................................................19
Chapter 4 Standard Install
Standard Installation Overview .........................................................21Standard Install Procedure ................................................................22Licensing DCS 10 and Client Options .............................................23Installation Troubleshooting..............................................................23
4 Getting Started with DCS 10 for Administrators
Chapter 1IntroductionThank you for choosing the DynaComm Connectivity Series 10—the most powerful terminal emulation product available for Windows. FutureSoft maintains an excel-lent source of easily accessible information on the World Wide Web. Find answers to your questions, check out new product information, view demonstrations of FutureSoft products, and more at http://www.futuresoft.com
If you are new to the DynaComm family, review the Get-ting Started with DCS 10 manual which is designed to:
• IntroduceyoutothefeaturesandcapabilitiesoftheDynaComm Connectivity Series.
• Guideyouthroughinstallationofasingle-usercopyof the software.
• Demonstratehowtousethebasicfunctions.
If you are upgrading from a previous version of DynaComm, review this manual which is designed to:
• PresentanoverviewoftheDCS10productandallClient Options for a review of the scope of the DCS 10 product.
• Providealistofinstallationplanningconsiderationsto help you determine your site requirements.
• Detailedinformationofallavailableinstallmethods with DCS 10 to help you select the best method for your requirements.
Chapter 1 Introduction 5
• Drag-and-dropfilehandling
Load a session, memo, or script by dragging corre-sponding icon into the DCS application window.
• Eurosymbolsupport
Input or display the euro character representing Euro-pean Union common currency.
• MenuEditor
Use the menu editor to customize application-level menus to send a string, launch an application or script.
• OLE-complianttexteditor
An OLE-compliant text editor is included in the base product. Embed documents from other applications into a memo document.
• Powerfulevent-drivenscriptinglanguage
An integrated, full-featured script language with over 350 commands and functions that include condition-al execution, subroutine execution, event handling, and the creation of custom menus and dialog boxes.
• Toolbareditor
Customize application toolbar to create custom toolbar buttons to send a string, launch an application or script, or perform a menu command.
• Y2KCompliant
DCS 10 contains no date calculation functions. The only use of dates is through scripting functions that make a call to the Windows operating system and use the date provided by this system. Windows dates are based on a four-character year and, therefore, are not affected by the change of the century.
DCS 10 FeaturesStandard features in DCS 10 include:
• Fullsuiteofstandardemulations
Base product emulations include:
ADDS VP/60AT&T 605/705 ANSI-BBS (with SCO ANSI extensions)Digital VT Series (52/100/102/220/320/420)TeleVideo 925/950Wyse 50/60
Additional add-on emulations:
AT&T 4425 TN3270 TN5250HP 700/94 Tandem 6530
• Arangeofstandardconnectivityoptions
Base product connectors include:
Direct SerialMeridian LAT32Modem (TAPI)Telnet (TCP/IP and IPX/SPX)SSH 1SSH2
Additional connectors:
Microsoft SNA Server (with TN3270 Client Option)
Transport Layer Security (TLS) (with TN3270 Client Option
• Fullsuiteofstandardfiletransferprotocols
Base product file transfer protocols include:
Kermit FTPXYModem ZModem
Additional file transfer protocols:
IND$FILE (with TN3270 Client Option)IXF (with Tandem 6530 Client Option)
6 Getting Started with DCS 10 for Administrators
• WinHLLAPIandEHLLAPIsupport
DCS 10 includes both 32-bit EHLLAPI and 32-bit WinHLLAPI dynamic link libraries to support Microsoft® Windows® applications requiring HLLAPI interfaces. Custom applications can call these libraries directly to interact with TN3270 and TN5250 ses-sions.
Client Option PackagesTo expand the functionality of DCS 10 to meet specific enterprise requirements, client option packages for specific host environments are available. These emulation products are installed during installation of the base product. The licenses are activated from the DynaComm Connectivity Series 10 program group. Purchasing an individual emulator allows for supporting a unique computing environment and eliminates the expense of unnecessary emulations.
Each Client Option presents the same graphical interface as the base product to provide for a consistent computing environment. It also supports multiple emulation sessions from within a single instance of the application just as the base product allows.
AT&T 4425 Client Option
6 Supported Emulations
• AT&T4425
• Equivalent6539functionality
6 Network Connectivity
The AT&T 4425 Client Option supports the follow-ing connectors included in the base product:
• DirectSerial
• Modem (TAPI)
• Telnet(TCP/IPandIPX/SPX)
6 File Transfer Protocols
The AT&T 4425 Client Option supports the fol-lowing file transfer protocols included in the base product:
• FTP
• Kermit
• XModem
• YModem
• ZModem
Chapter 1 Introduction 7
HP 700/94 Client Option
6 Supported Emulations
• HP700/92
• HP700/94
6 Product Highlights
• Hotspotsupport
• Supportfordownloadablecharactersandsoftfonts
• On-screenfunctionkeys
6 Network Connectivity
The HP 700/94 Client Option supports the follow-ing connectors included in the base product:
• DirectSerial
• Modem(TAPI)
• Telnet(TCP/IPandIPX/SPX)
6 File Transfer Protocols
The HP 700/94 Client Option supports the following file transfer protocols included in the base product:
• FTP
• Kermit
• XModem
• YModem
• ZModem
Tandem 6530 Client Option
6 Supported Emulation
• Tandem6530
6 Product Highlights
• EM3270support
• Blockmodetypeahead
• Hotspotsupport
6 Network Connectivity
The Tandem 6530 Client Option supports the fol-lowing connectors included in the base product:
• DirectSerial
• Modem(TAPI)
• Telnet(TCP/IPandIPX/SPX)
6 File Transfer Protocols
The Tandem 6530 Client Option supports the fol-lowing file transfer protocols included in the base product:
• IXF
8 Getting Started with DCS 10 for Administrators
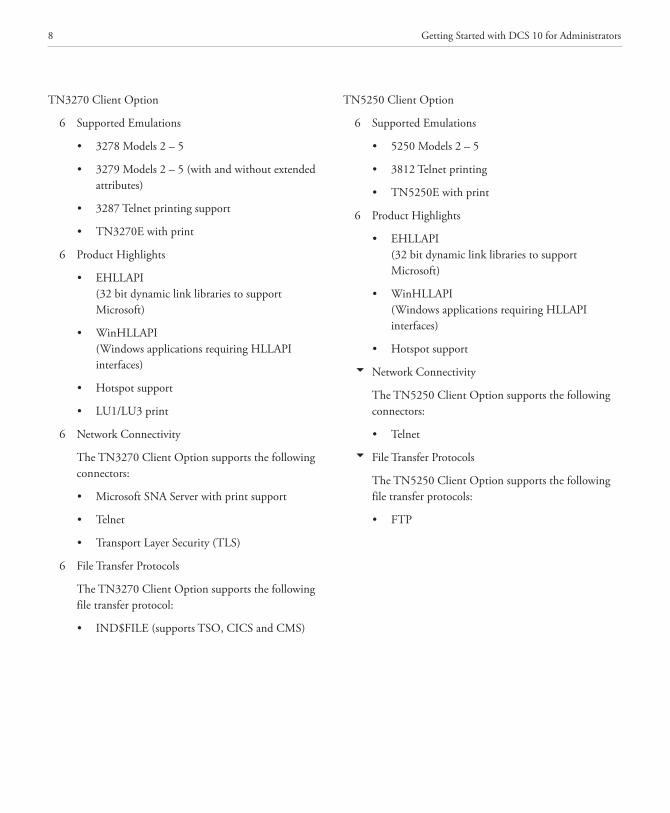
TN3270 Client Option
6 Supported Emulations
• 3278Models2–5
• 3279Models2–5(withandwithoutextendedattributes)
• 3287Telnetprintingsupport
• TN3270Ewithprint
6 Product Highlights
• EHLLAPI (32 bit dynamic link libraries to support Microsoft)
• WinHLLAPI (Windows applications requiring HLLAPI interfaces)
• Hotspotsupport
• LU1/LU3print
6 Network Connectivity
The TN3270 Client Option supports the following connectors:
• MicrosoftSNAServer with print support
• Telnet
• TransportLayerSecurity(TLS)
6 File Transfer Protocols
The TN3270 Client Option supports the following file transfer protocol:
• IND$FILE(supportsTSO,CICSandCMS)
TN5250 Client Option
6 Supported Emulations
• 5250Models2–5
• 3812Telnetprinting
• TN5250Ewithprint
6 Product Highlights
• EHLLAPI (32 bit dynamic link libraries to support Microsoft)
• WinHLLAPI (Windows applications requiring HLLAPI interfaces)
• Hotspotsupport
6 Network Connectivity
The TN5250 Client Option supports the following connectors:
• Telnet
6 File Transfer Protocols
The TN5250 Client Option supports the following file transfer protocols:
• FTP
Chapter 1 Introduction 9
New In DCS 106 Transport Layer Security (TLS) connectivity support
for TNS3270 Client Option
TLS option is now available on the Session sub-tab in the Session Properties dialog. Corresonding strings/keywords are provided in the EMULCONFIG and CONNCONFIG scripting commands.
6 Documentation Library Update
The DCS 10 documentation library consists of:
• Getting Started with DCS 10 for Users (ebook)
Designed for the end user; includes features overview, installation and configuration proce-dures and a tutorial covering the major DCS 10 functions.
• Getting Started with DCS 10 for Administrators (ebook)
Designed for the System Administrator; focuses on the use of Web Install and DynaComm Multi-user Administrator functions.
• Script Language Reference* (ebook)
Technical information for all commands and functions used in the DCS Scripting Language.
• Release Notes* (readme.doc)
Includes last minute information not included in the documentation as well as important items of particular significance.
• DCS 10 Online Reference* (Help system)
Technical information for DCS 10 features and functions and all Client Options.
• FSFTP Online Reference* (Help system)
Technical information for FutureSoft’s 32-bit File Transfer Protocol application.
• HLLAPI Auto-Launch Configuration Online Refer-ence* (Help system)
Technical information for using HLLAPI calls with third-party applications.
• Visual Basic Client Online Reference* (Help system)
Technical information for Visual Basic Interface functions.
• DCS 10 Administrator Online Reference* (Help system)
Technical information for installation and maintenance of DCS 10; includes DynaComm Multi-user Administrator information.
• Script Language Online Reference* (Help system)
Technical information for all commands and functions used in the DCS Scripting Language.
* These items are provided on the installation CD-ROM in the /documentation folder. The most current electronic documentation for DCS 10 can be down-loaded from http://www.futuresoft.com/.
10 Getting Started with DCS 10 for Administrators
Upgrading to DCS 10All DCS 7.1.0.4 (and earlier) installations must be removed before installing DCS 10. Do not install DCS 10 over an older installation of the DynaComm Connectivity Series.
Product SupportRegistered users of DCS may call FutureSoft Technical Sup-port for assistance. Standard telephone support is available weekdays, 8 a.m. to 5 p.m., Central Standard Time (CST).
Before contacting Technical Support, gather details about your question which should include all hardware and software configurations, the DynaComm version number (found through the About DynaComm option in the Help menu), any other software loaded (including TSRs) when you experienced the problem, and the exact sequence of steps that preceded the problem.
Phone Number: 800.261.6357
Fax Number: 281.496.1090
E-mail: [email protected]
Visit the FutureSoft web site for more information at:
http://www.futuresoft.com/
Chapter 2Planning Your InstallationPlanning ConsiderationsDCS 10 is a flexible product that offers a range of options for customizing application functions and appearance. Be-fore installing, develop a plan that is well designed through careful consideration of various installation parameters. The more planning you undertake, the easier the installation process.
To effectively design your installation, consider the follow-ing:
6 How much control over the functionality of DCS 10 should the end user be given?
6 Which components and sub-components of DCS 10 are required?
6 How will the DCS 10 application be distributed to the end user?
6 Will users be involved in the distribution process?
6 Which (if any) customized user files need to be dis-tributed to the users?
6 How will customized user files and updates be distrib-uted to the end user?
6 Can users be grouped to reduce the number of pos-sible configurations and thus reduce support responsi-bilities?
6 Is a specific time line required for the completion of all installs?
6 What connectivity upgrades or modifications are needed to support each installation?
6 What security issues must be considered for each site?
6 Do any client machines currently have DCS 7.0 that will be upgraded?
12 Getting Started with DCS 10 for Administrators
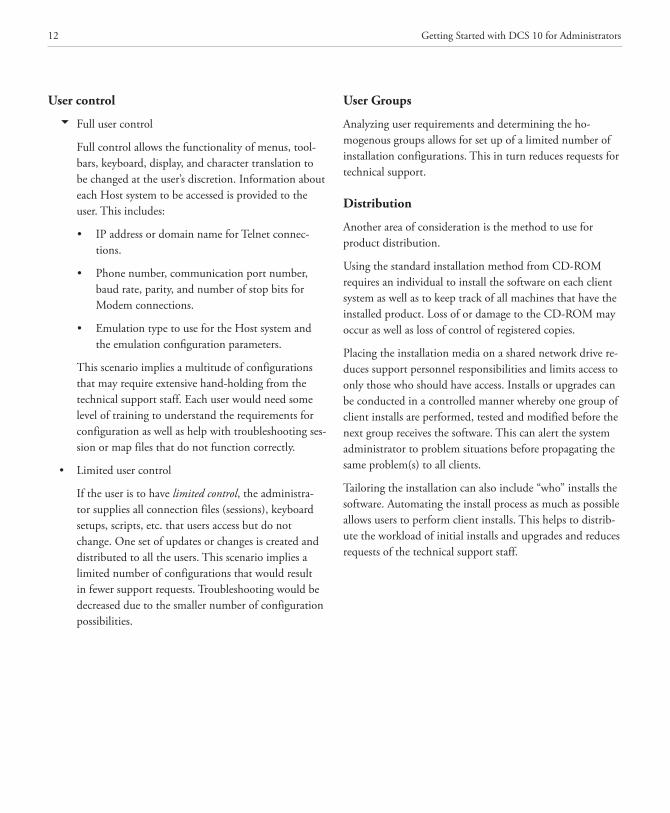
User control
6 Full user control
Full control allows the functionality of menus, tool-bars, keyboard, display, and character translation to be changed at the user’s discretion. Information about each Host system to be accessed is provided to the user. This includes:
• IPaddressordomainnameforTelnetconnec-tions.
• Phonenumber,communicationportnumber,baud rate, parity, and number of stop bits for Modem connections.
• Emulationtype to use for the Host system and the emulation configuration parameters.
This scenario implies a multitude of configurations that may require extensive hand-holding from the technical support staff. Each user would need some level of training to understand the requirements for configuration as well as help with troubleshooting ses-sion or map files that do not function correctly.
• Limitedusercontrol
If the user is to have limited control, the administra-tor supplies all connection files (sessions), keyboard setups, scripts, etc. that users access but do not change. One set of updates or changes is created and distributed to all the users. This scenario implies a limited number of configurations that would result in fewer support requests. Troubleshooting would be decreased due to the smaller number of configuration possibilities.
User Groups
Analyzing user requirements and determining the ho-mogenous groups allows for set up of a limited number of installation configurations. This in turn reduces requests for technical support.
Distribution
Another area of consideration is the method to use for product distribution.
Using the standard installation method from CD-ROM requires an individual to install the software on each client system as well as to keep track of all machines that have the installed product. Loss of or damage to the CD-ROM may occur as well as loss of control of registered copies.
Placing the installation media on a shared network drive re-duces support personnel responsibilities and limits access to only those who should have access. Installs or upgrades can be conducted in a controlled manner whereby one group of client installs are performed, tested and modified before the next group receives the software. This can alert the system administrator to problem situations before propagating the same problem(s) to all clients.
Tailoring the installation can also include “who” installs the software. Automating the install process as much as possible allows users to perform client installs. This helps to distrib-ute the workload of initial installs and upgrades and reduces requests of the technical support staff.
Chapter 2 Planning Your Installation 13
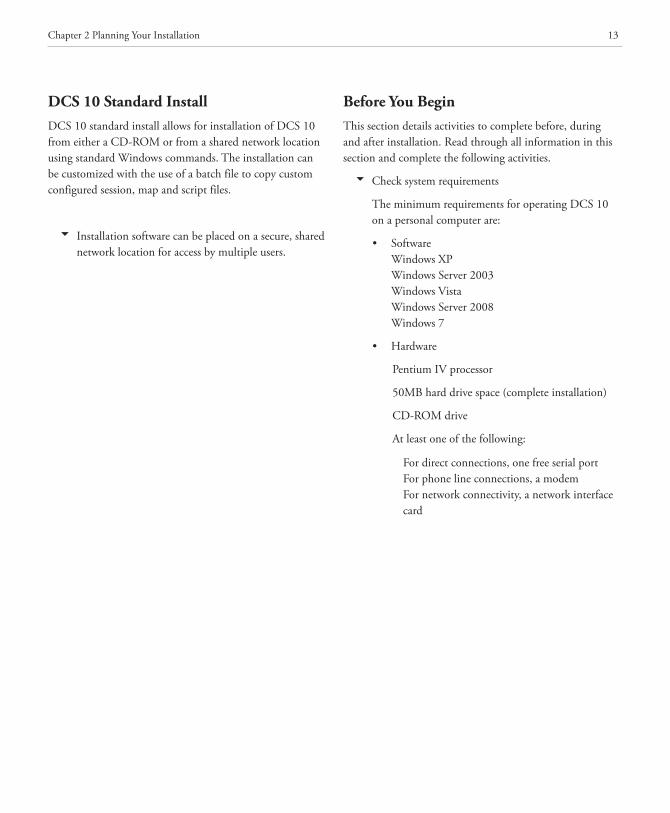
DCS 10 Standard InstallDCS 10 standard install allows for installation of DCS 10 from either a CD-ROM or from a shared network location using standard Windows commands. The installation can be customized with the use of a batch file to copy custom configured session, map and script files.
6 Installation software can be placed on a secure, shared network location for access by multiple users.
Before You BeginThis section details activities to complete before, during and after installation. Read through all information in this section and complete the following activities.
6 Check system requirements
The minimum requirements for operating DCS 10 on a personal computer are:
• SoftwareWindows XPWindows Server 2003Windows VistaWindows Server 2008Windows 7
• Hardware
Pentium IV processor
50MB hard drive space (complete installation)
CD-ROM drive
At least one of the following:
For direct connections, one free serial portFor phone line connections, a modemFor network connectivity, a network interface card
14 Getting Started with DCS 10 for Administrators
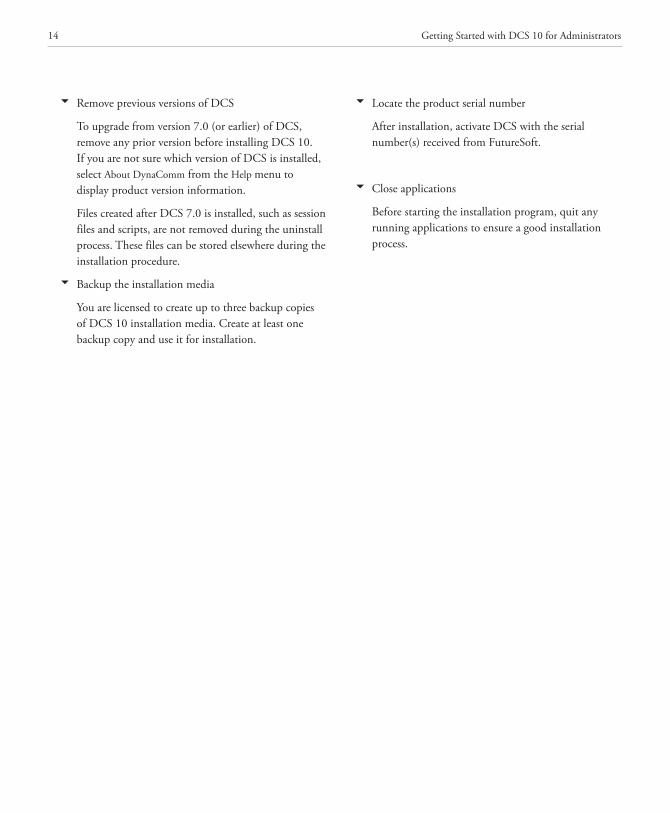
6 Remove previous versions of DCS
To upgrade from version 7.0 (or earlier) of DCS, remove any prior version before installing DCS 10. If you are not sure which version of DCS is installed, select About DynaComm from the Help menu to display product version information.
Files created after DCS 7.0 is installed, such as session files and scripts, are not removed during the uninstall process. These files can be stored elsewhere during the installation procedure.
6 Backup the installation media
You are licensed to create up to three backup copies of DCS 10 installation media. Create at least one backup copy and use it for installation.
6 Locate the product serial number
After installation, activate DCS with the serial number(s) received from FutureSoft.
6 Close applications
Before starting the installation program, quit any running applications to ensure a good installation process.
Chapter 2 Planning Your Installation 15
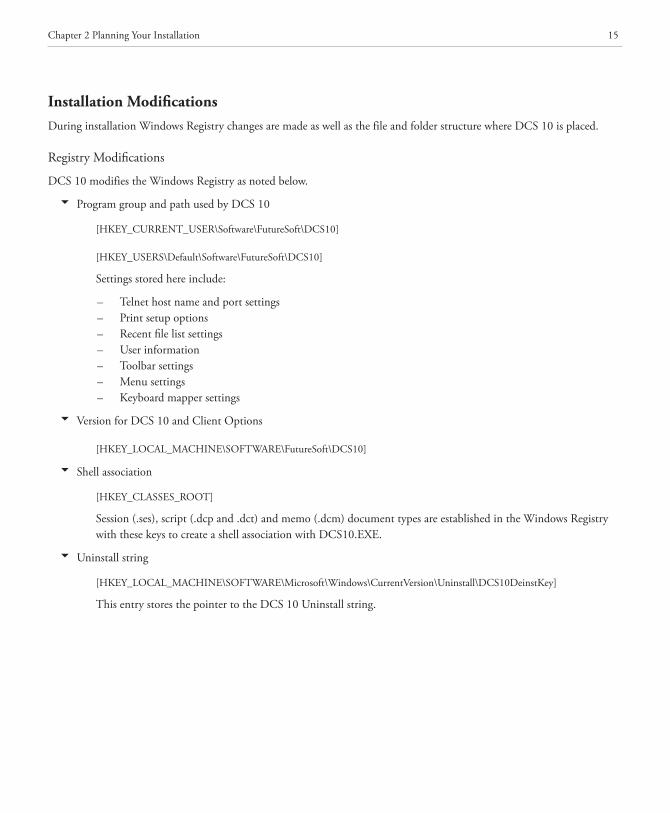
Installation ModificationsDuring installation Windows Registry changes are made as well as the file and folder structure where DCS 10 is placed.
Registry Modifications
DCS 10 modifies the Windows Registry as noted below.
6 Program group and path used by DCS 10
[HKEY_CURRENT_USER\Software\FutureSoft\DCS10]
[HKEY_USERS\Default\Software\FutureSoft\DCS10]
Settings stored here include:
– Telnet host name and port settings– Print setup options– Recent file list settings– User information– Toolbar settings– Menu settings– Keyboardmappersettings
6 Version for DCS 10 and Client Options
[HKEY_LOCAL_MACHINE\SOFTWARE\FutureSoft\DCS10]
6 Shell association
[HKEY_CLASSES_ROOT]
Session (.ses), script (.dcp and .dct) and memo (.dcm) document types are established in the Windows Registry with these keys to create a shell association with DCS10.EXE.
6 Uninstall string
[HKEY_LOCAL_MACHINE\SOFTWARE\Microsoft\Windows\CurrentVersion\Uninstall\DCS10DeinstKey]
This entry stores the pointer to the DCS 10 Uninstall string.
16 Getting Started with DCS 10 for Administrators
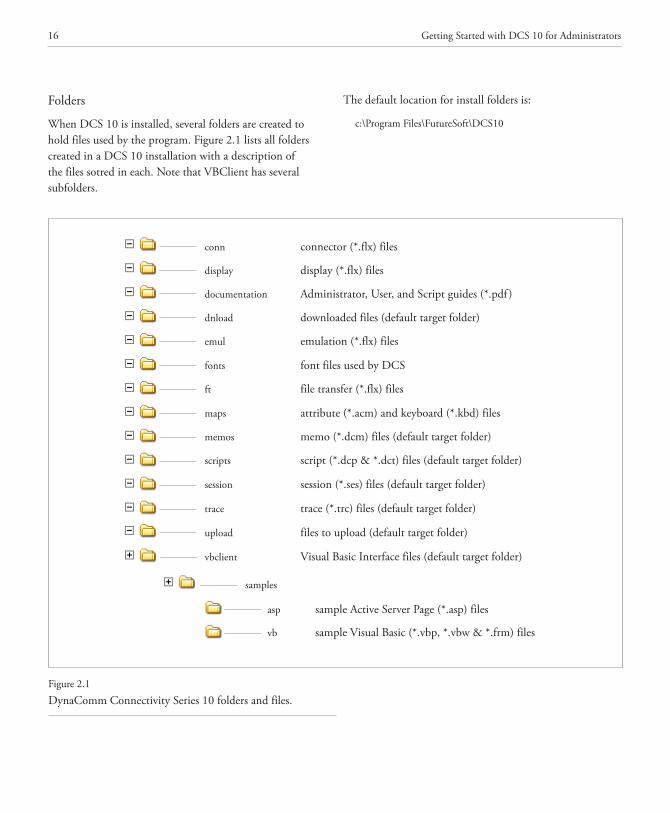
Folders
When DCS 10 is installed, several folders are created to hold files used by the program. Figure 2.1 lists all folders created in a DCS 10 installation with a description of the files sotred in each. Note that VBClient has several subfolders.
Figure 2.1
DynaComm Connectivity Series 10 folders and files.
conn connector (*.flx) files
display display (*.flx) files
documentation Administrator, User, and Script guides (*.pdf )
dnload downloaded files (default target folder)
emul emulation (*.flx) files
fonts font files used by DCS
ft file transfer (*.flx) files
maps attribute (*.acm) and keyboard (*.kbd) files
memos memo (*.dcm) files (default target folder)
scripts script (*.dcp & *.dct) files (default target folder)
session session (*.ses) files (default target folder)
trace trace (*.trc) files (default target folder)
upload files to upload (default target folder)
vbclient Visual Basic Interface files (default target folder)
samples
asp sample Active Server Page (*.asp) files
vb sample Visual Basic (*.vbp, *.vbw & *.frm) files
The default location for install folders is:
c:\ProgramFiles\FutureSoft\DCS10
Chapter 2 Planning Your Installation 17
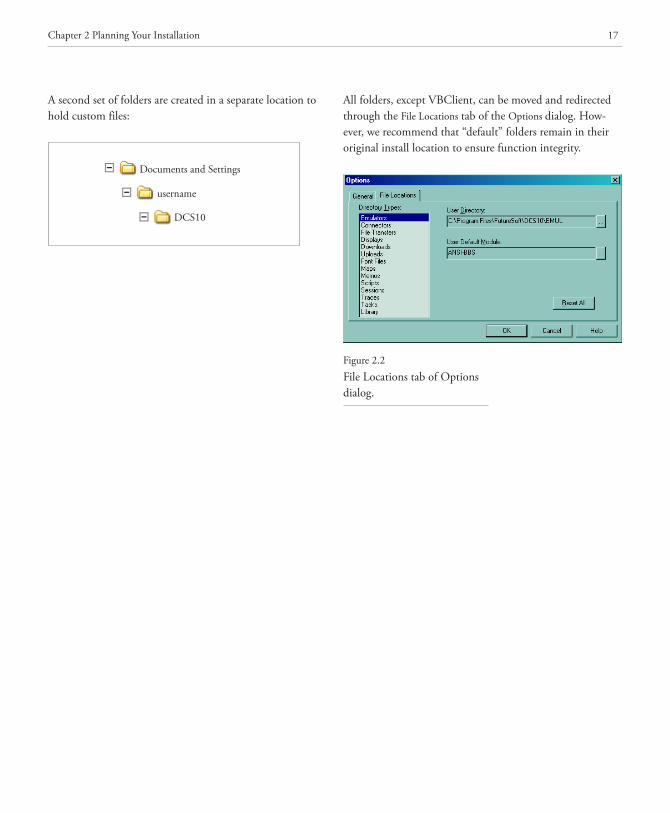
A second set of folders are created in a separate location to hold custom files:
All folders, except VBClient, can be moved and redirected through the File Locations tab of the Options dialog. How-ever, we recommend that “default” folders remain in their original install location to ensure function integrity.
Documents and Settings
username
DCS10
Figure 2.2
File Locations tab of Options dialog.
18 Getting Started with DCS 10 for Administrators
Files and File Types
When DCS 10 is installed, eight (8) file types are placed in the install folders. Each file type has a specific function within DCS 10.
6 Program support files have extensions of .acm, .kbm and .trc. These files are loaded by DCS 10 when a ses-sion file is opened. These files are not opened directly in DCS 10 or in any other application.
FutureSoft File Type File Extension
Script file (compiled script) *.dct
FutureSoft File Type File Extension
Memo document *.dcm
Script document *.dcp
Session document *.ses
FutureSoft File Type File Extension
Attribute Map file *.acm
KeyboardMapfile *.kbm
Trace Facility file *.trc
6 When a script document (.dcp) is compiled, a com-piled script file (.dct) is created. These files are run or executed inside DCS 10 and can be associated with an icon. Double-clicking the file name or associated icon starts DCS 10 and runs the script.
6 Session properties for emulations, connectors and file transfer protocols are stored in application files with an extension of .flx. These files are used by DCS 10 and are are not opened directly.
FutureSoft File Type File Extension
Emulation object file *.flx
Connector object file *.flx
File Transfer object file *.flx
6 Document files are opened and edited in DCS 10. These files can be associated with an icon placed on the desktop. Double-clicking on the file name or the associ-ated icon starts DCS 10 and opens the file.
Chapter 3Setup ProgramWorking with the Setup ProgramThe Setup Program guides you through the installation of DCS 10. Setup uses two basic functions: Starting and Exiting.
Before starting the Setup Program, be sure that you have reviewed the material in Chapter 2 Planning Your Installa-tion. That chapter provides background information for the responses required for the Setup Program.
Working with the Setup Program includes:
Step 1: Start the Setup program.
More than one method can be used to start the Setup Program.
Step 2: Respond to Setup screens to install appropriate components.
The Setup Program presents a series of screens that require a response for each. Details for each screen are provided in the following chapters.
Starting Setup
The Setup Program is started through the:
6 FutureSoft Connectivity Products menu
6 Windows Run dialog
6 Add/Remove Programs selection on the Control Panel
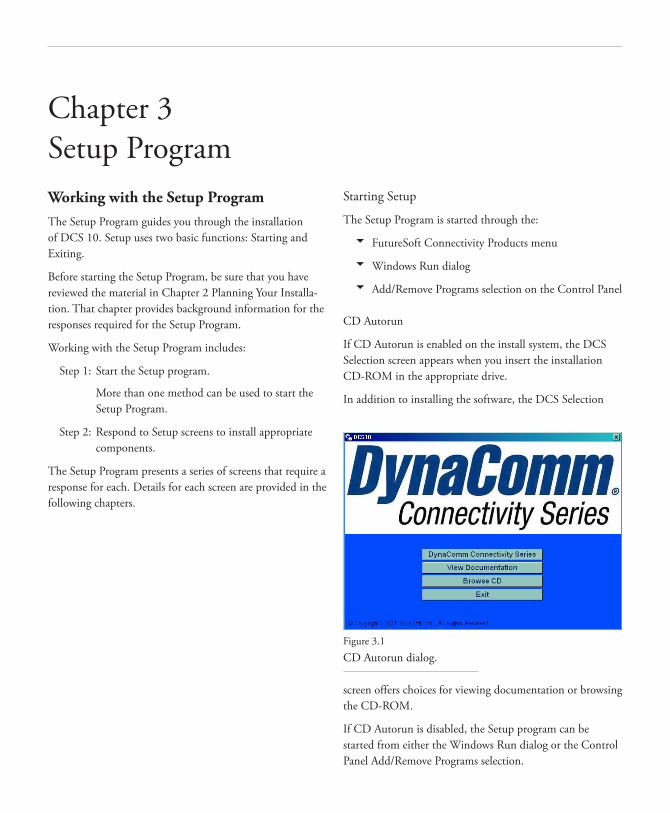
CD Autorun
If CD Autorun is enabled on the install system, the DCS Selection screen appears when you insert the installation CD-ROM in the appropriate drive.
In addition to installing the software, the DCS Selection
Windows Run Dialog
If CD Autorun is disabled, the Setu program can be started
Figure 3.1
CD Autorun dialog.
screen offers choices for viewing documentation or browsing the CD-ROM.
If CD Autorun is disabled, the Setup program can be started from either the Windows Run dialog or the Control Panel Add/Remove Programs selection.
20 Getting Started with DCS 10 for Administrators
Windows Run dialog.
6 To start the Setup Program from the Windows Run dialog:
1 Place the installation CD-ROM in the appropri-ate drive.
2 On the Windows taskbar, click Start and then select Run.
3 In the Run dialog, enter the CD-ROM drive name followed with “setup.exe”.
4 ClickOK.
The InstallShield Wizard dialog appears to indi-cate the status of the installation program load.
Control Panel
The Setup Program can also be started from the Add/Re-move Programs selection in the Control Panel window.
6 To start the Setup Program from the Windows Control Panel:
1 On the Windows taskbar, click Start.
2 Highlight Settings and select Control Panel.
3 Double-click Add/Remove Programs.
4 In the Add/Remove Programs Properties dialog, click Install.
5 Place the installation CD-ROM in the appropri-ate drive.
6 In the Run Installation Program dialog, click Next.
When Setup initialization is complete the Welcome screen appears. Setup is ready to begin installation of DCS 10.
Exiting Setup
During the installation process, if you click Cancel on any screen, the Exit Setup dialog appears.
6 To respond to this screen, click either:
• YestostoptheinstallationandexittheSetupProgram.
• Notoreturntothepreviousscreenandcontinuewith Setup.
Chapter 4Standard InstallStandard Installation OverviewThe Standard Install procedure is executed from a:
6 CD-ROM, or
6 Shared network location.
Two setup types for Standard Install are available:
6 Typical
Used to install base product with:
Emulators:
ADDS VP/60 Digital VT SeriesANSI-BBS TeleVideo 925/950AT&T 605/705 Wyse 50/60
Connectors:
Direct Serial TelnetMeridian LAT 32 Trace PlayModem
File Transfer Protocols:
FTP XYModemKermit ZModem
Any or all Client Options can be installed along with the base product.
Session Properties Control
Session properties usage is unlimited. The user is able to modify all application and session properties. This includes the ability to configure all emulation, connector and file transfer parameters as well as modify menus and toolbars to customize the application and/or sessions.
Access Control
Installation of DCS 10 can only be multi-user–anyuserthat can log on to the client system is able to use DCS 10.
Program Group Naming
The program group name can be changed to either:
6 An existing folder
6 A new folder
The install file location can also be changed to any location.
22 Getting Started with DCS 10 for Administrators
Standard Install ProcedureAfter completing pre-installation activities, follow the steps below to set up an individual copy of DCS 10. These steps use the standard install method for installing from a CD-ROM.
Some steps may ask to enter information or to make a choice. Read the descriptions carefully before completing the step. Most steps do allow you to return to the previous screen to make changes, if necessary. However, copying of DCS 10 files begins when you click Next on the Select Usage screen. To make corrections at this point, you will need to remove DCS 10 and reinstall.
Step 1: Start the Setup Program
Start the installation program using one of the techniques discussed in Chapter 2 Setup Program.
Step 2: Respond to Setup dialogs
Setup Dialog 1: Welcome
The Welcome message indicates that the Setup program is now ready to begin installation of DCS 10 and reminds you to quit any running applications. It also includes the copyright warning.
To respond to this dialog
6 Choose one of the following:
• Nextto continue with the installation.
• Cancelto exit Setup.
Setup Dialog 2: License Agreement
Installation and use of DCS 10 is governed by the terms of the online license agreement. Make sure you read and agree to the terms of the agreement before installing DCS 10.
If you have any questions about the terms of the online license agreement, please contact your FutureSoft account manager or send e-mail to [email protected].
To respond to this dialog
1 Choose to accept/not accept the license agreement terms.
2 Choose one of the following:
• Backto return to the Welcome dialog.
• Nextto continue with the installation.
• Cancelto exit Setup.
Setup Dialog 3: Confirm Installation
The confirm installation identifies you to DCS 10. You must complete both entries to continue the installation.
To respond to this dialog
1 Choose one of the following:
• Backto return to the Software License Agreement dialog.
• Nextto continue with the installation, or
• Cancelto exit Setup.
Setup Dialog 4: Select Installation Folder
The default location is recomended.
To respond to this dialog
1 Choose one of the following:
• Back to return to the previous dialog.
• Next to continue with the installation.
• Cancel to exit Setup.
Setup Dialog 5: Installing
The product is installing.
Chapter 4 Standard Install 23
Setup Dialog 6: Installation Complete
The Completed dialog is the last dialog displayed in the installation of DCS 10.
To respond to this dialog
6 Click close to complete the installation.
Installation of DCS 10 is complete.
Licensing DCS 10To activate your DCS10 license(s) use the activation utility from the DynaComm Connectivity Series 10 program group
To apply a valid serial number
1 On the Windows taskbar, click Start and highlight Programs.
2 Highlight DynaComm Connectivity Series 10 and click Product Activation.
Fill in the registration information.
3 Enter the serial number in the provided box and click “Online Activation”.
Fill in the registration information
4 In the User Information group, do the following:
a In User name, enter a complete user name.
b In Organization, enter a complete organization or group name.
5 Click OK.
A confirmation dialog appears.
Optionally, the activation utility can be run from a command line or in a batch file. The command takes the form of:
SNActivation /A #########################
where “#” represents the base product or Client Option serial number.
Note: A new Serial Number must be activated interactively once, before the command line option will work.
Installation TroubleshootingIf you encounter an error while installing DCS 10, one of the following common installation problems may have occurred:
6 General file transfer error
The Setup program was unable to copy the files to your destination directory. Make sure you have per-mission to write to or modify the specified destination directory.
6 Installation has detected a previous version of the DynaComm Connectivity Series
DCS 10 cannot be installed over a previous version of DCS. You must remove the previous version first, then install DCS 10.
6 Error reading disk drive
• MakesuretheCDdriveisinproperworkingorder. Try reading another CD in the same drive.
• MakesureyouhaveinsertedtheinstallationCDcorrectlyinthediskdrive–thelabelshouldbeface up.
• Ifthedriveisfunctioningandthemediaisprop-erly inserted, the disk may be defective. If you are installing from a backup copy, install from the original media instead. If you are installing from the original media, please contact your FutureSoft Account Manager for a replacement.