Embed Size (px)
Citation preview
1
2
CONTENTS
CHAPTER 1 ABOUT THIS GUIDE .............................................................................................................................. 3
CHAPTER 2 SOFTWARE INSTALLATION ................................................................................................................ 4
2.1 INTRODUCTION ........................................................................................................................................................... 4 2.2 INSTALLING THE ALTERA COMPLETE DESIGN SUITE ................................................................................................... 4 2.3 INSTALLING THE DE2I-150 CONTENTS........................................................................................................................ 5
CHAPTER 3 DEVELOPMENT BOARD SETUP ........................................................................................................... 6
3.1 INTRODUCTION ........................................................................................................................................................... 6 3.2 POWERING UP THE DE2I-150 BOARD .......................................................................................................................... 6
CHAPTER 4 INSTALLING THE USB-BLASTER DRIVER .......................................................................................... 9
4.1 INTRODUCTION ........................................................................................................................................................... 9 4.2 HARDWARE SETUP ...................................................................................................................................................... 9 4.3 INTALLING THE USB-BLASTER DRIVER FOR WINDOW 7 ........................................................................................... 11 4.4 INTALLING THE USB-BLASTER DRIVER FOR WINDOW XP ........................................................................................ 15
CHAPTER 5 PROGRAMMING THE FPGA ................................................................................................................. 19
5.1 INTRODUCTION ......................................................................................................................................................... 19
3
Chapter 1
About this Guide
The DE2i-150 Getting Started Guide contains a quick overview of the hardware and software setup including step-by-step procedures from installing the necessary software tools to using the DE2i-150 board. The main topics that this guide covers are listed below: Software Installation: Installing Quartus and the DE2i-150 CD contents Development Board Setup: Powering on the DE2i-150 USB-Blaster Driver: Installing the embedded USB Blaster circuit driver Programming the FPGA: Downloading an FPGA SRAM Objective File (.sof)
4
Chapter 2
Software Installation
22..11 IInnttrroodduuccttiioonn This section explains how to install the following software:
• Altera Complete Design Suite • DE2i-150 Development Board Contents
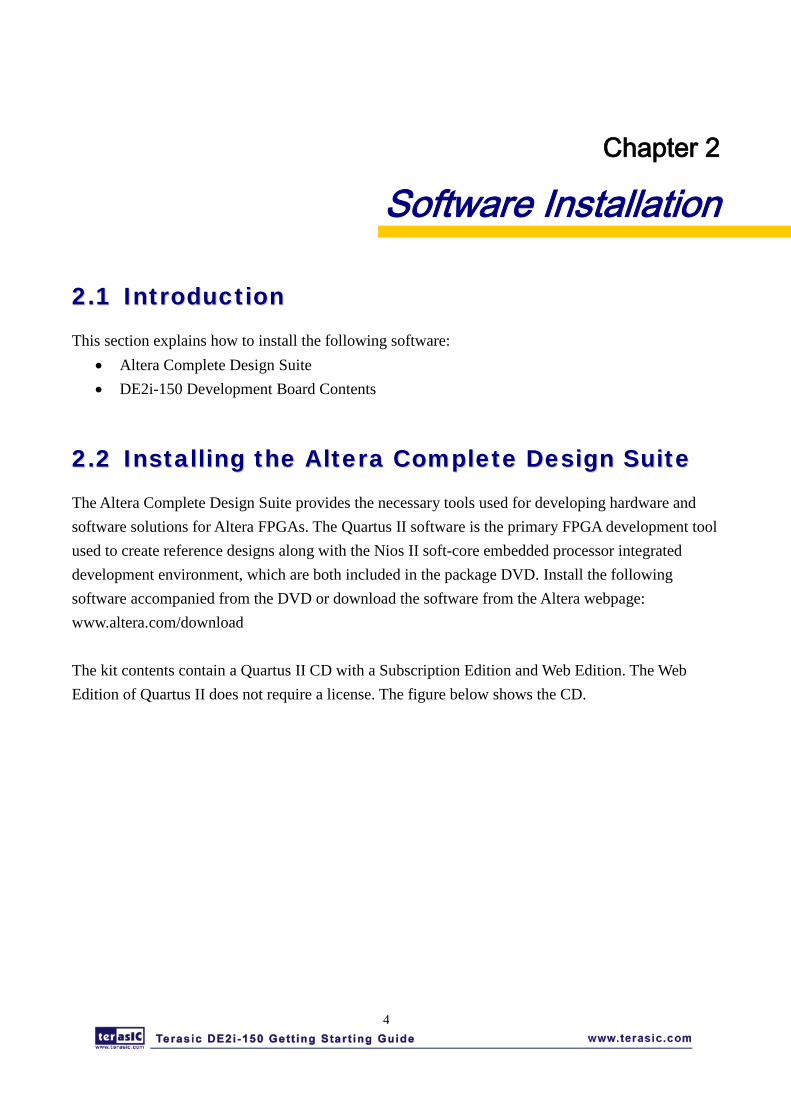
22..22 IInnssttaalllliinngg tthhee AAlltteerraa CCoommpplleettee DDeessiiggnn SSuuiittee The Altera Complete Design Suite provides the necessary tools used for developing hardware and software solutions for Altera FPGAs. The Quartus II software is the primary FPGA development tool used to create reference designs along with the Nios II soft-core embedded processor integrated development environment, which are both included in the package DVD. Install the following software accompanied from the DVD or download the software from the Altera webpage: www.altera.com/download The kit contents contain a Quartus II CD with a Subscription Edition and Web Edition. The Web Edition of Quartus II does not require a license. The figure below shows the CD.
5
The Web Edition of Quartus II supports developing and programming the Cyclone IV GX device on the DE2i-150. If you choose to install the Subscription Edition, please note that a purchased license will be required. For more information on the Subscription Edition, please go to the following link: http://www.altera.com/products/software/quartus-ii/subscription-edition/qts-se-index.html
22..33 IInnssttaalllliinngg tthhee DDEE22ii--115500 CCoonntteennttss To install the necessary components for development on the DE2i-150, copy the contents from the folder (DE2i-150_SYSTEM_CD) located in the DE2i-150 system CD to your computer. Table 2–1 lists the associated directory name and description of contents.
Table 2–1 DE2i-150 System CD Contents Directory Name Description of Contents
User Manual Contains the DE2i-150 documentation
Demonstrations Contains design examples of DE2i-150
Datasheet Contains the datasheets of the components on DE2i-150
Schematic Contains the schematic of DE2i-150
Tools Contains the design and testing tools for DE2i-150
6
Chapter 3
Development Board Setup
33..11 IInnttrroodduuccttiioonn The instructions in this section explain how to setup the DE2i-150 development board.
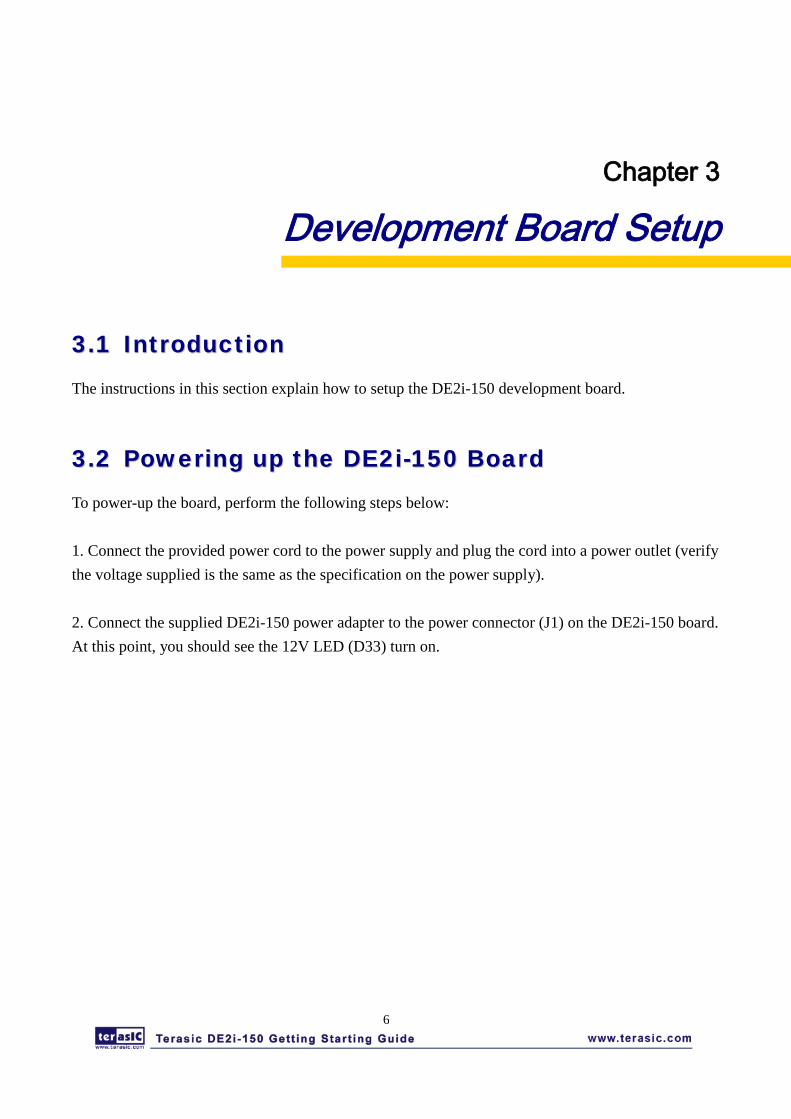
33..22 PPoowweerriinngg uupp tthhee DDEE22ii--115500 BBooaarrdd To power-up the board, perform the following steps below: 1. Connect the provided power cord to the power supply and plug the cord into a power outlet (verify the voltage supplied is the same as the specification on the power supply). 2. Connect the supplied DE2i-150 power adapter to the power connector (J1) on the DE2i-150 board. At this point, you should see the 12V LED (D33) turn on.
7
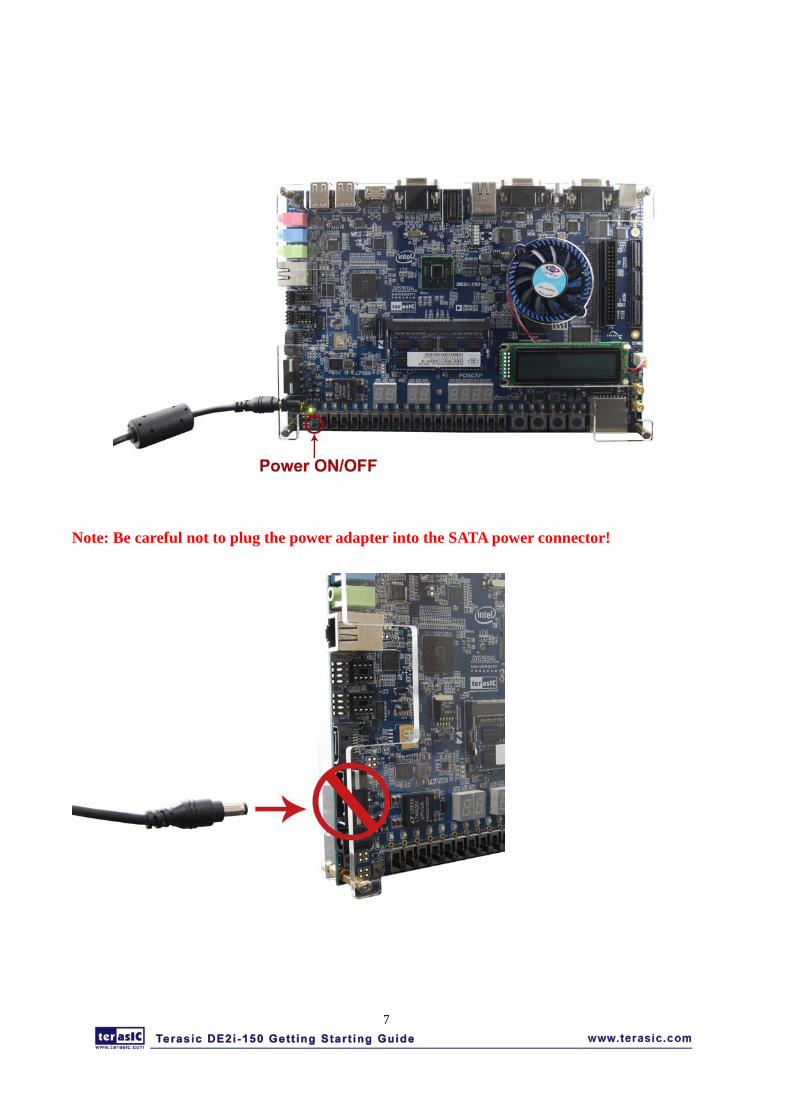
Note: Be careful not to plug the power adapter into the SATA power connector!
8
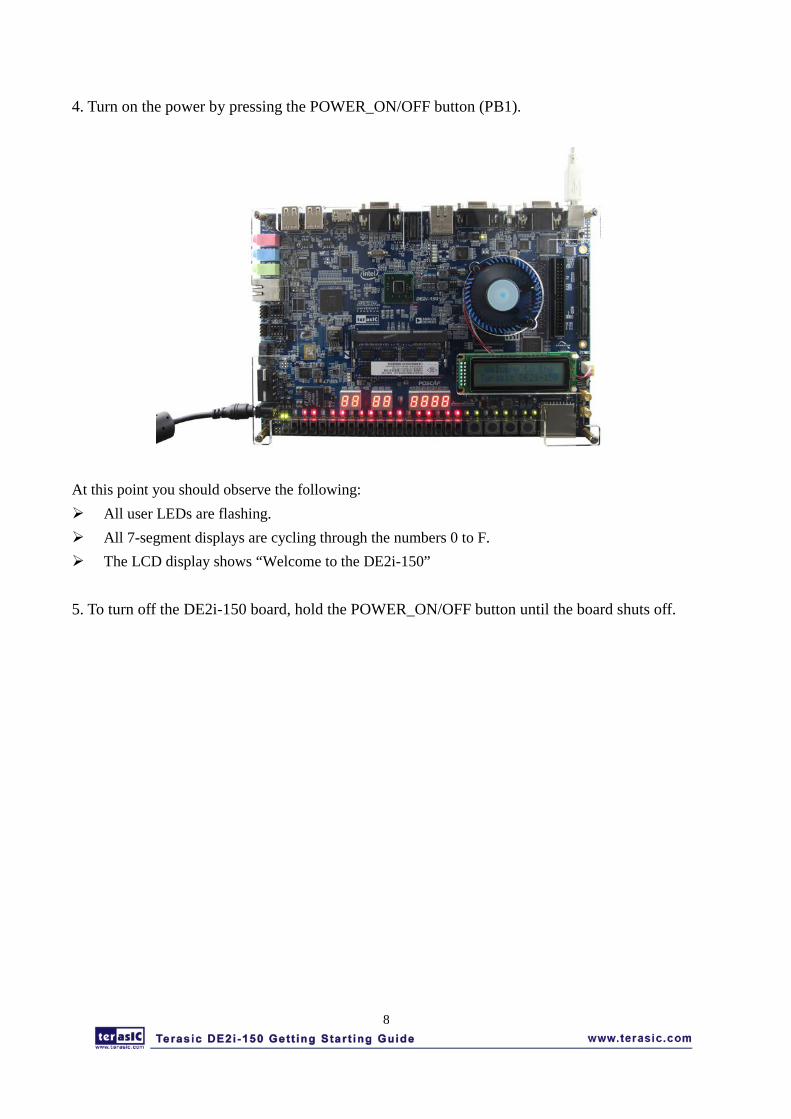
4. Turn on the power by pressing the POWER_ON/OFF button (PB1).
At this point you should observe the following: All user LEDs are flashing. All 7-segment displays are cycling through the numbers 0 to F. The LCD display shows “Welcome to the DE2i-150”
5. To turn off the DE2i-150 board, hold the POWER_ON/OFF button until the board shuts off.
9
Chapter 4
Installing the USB-Blaster Driver
44..11 IInnttrroodduuccttiioonn The DE2i-150 development board includes an integrated USB Blaster circuitry for FPGA programming. However, for the host computer and development board to communicate, you must install the USB-Blaster driver on the host computer. Before you begin the installation, verify whether the USB-Blaster driver is located under the directory: \<Quartus II installation directory>\drivers\usb-blaster. If the USB-Blaster driver is not found, confirm the Quartus II software is properly installed.
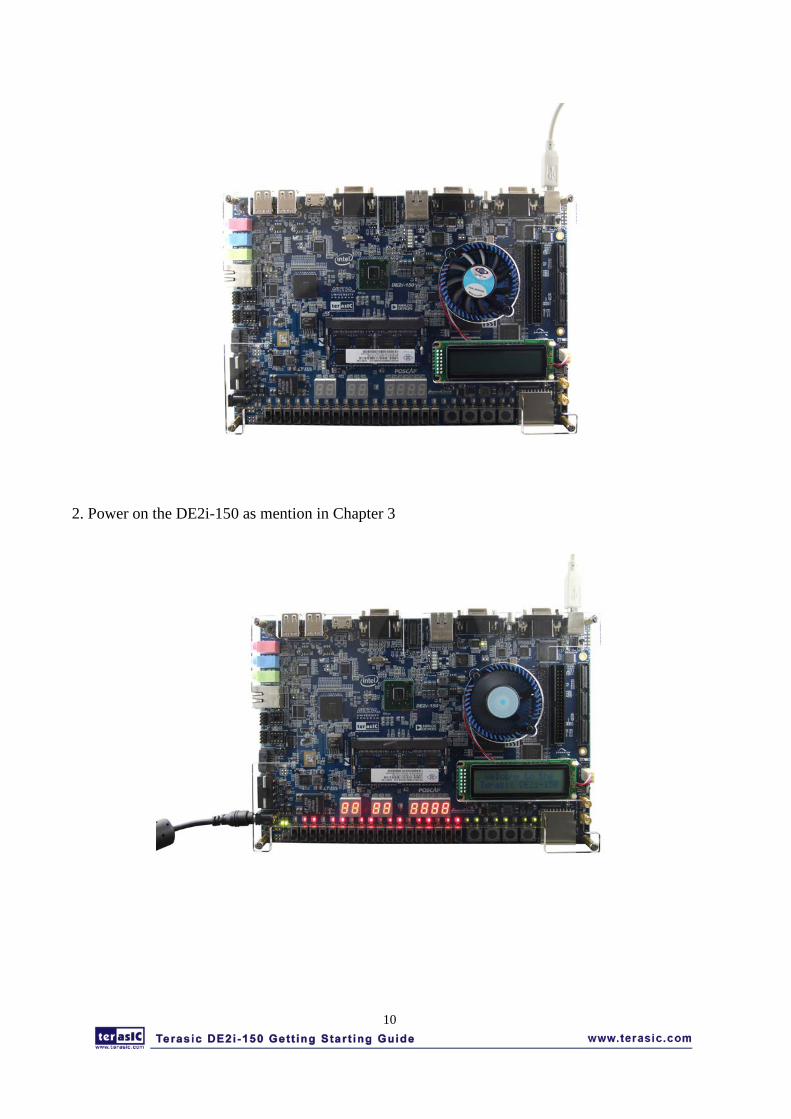
44..22 HHaarrddwwaarree SSeettuupp The steps below outline how to install the USB-Blaster driver. 1. Connect your computer to the development board by plugging the USB cable into the USB
connector (J9) of DE2i-150
10
2. Power on the DE2i-150 as mention in Chapter 3
11
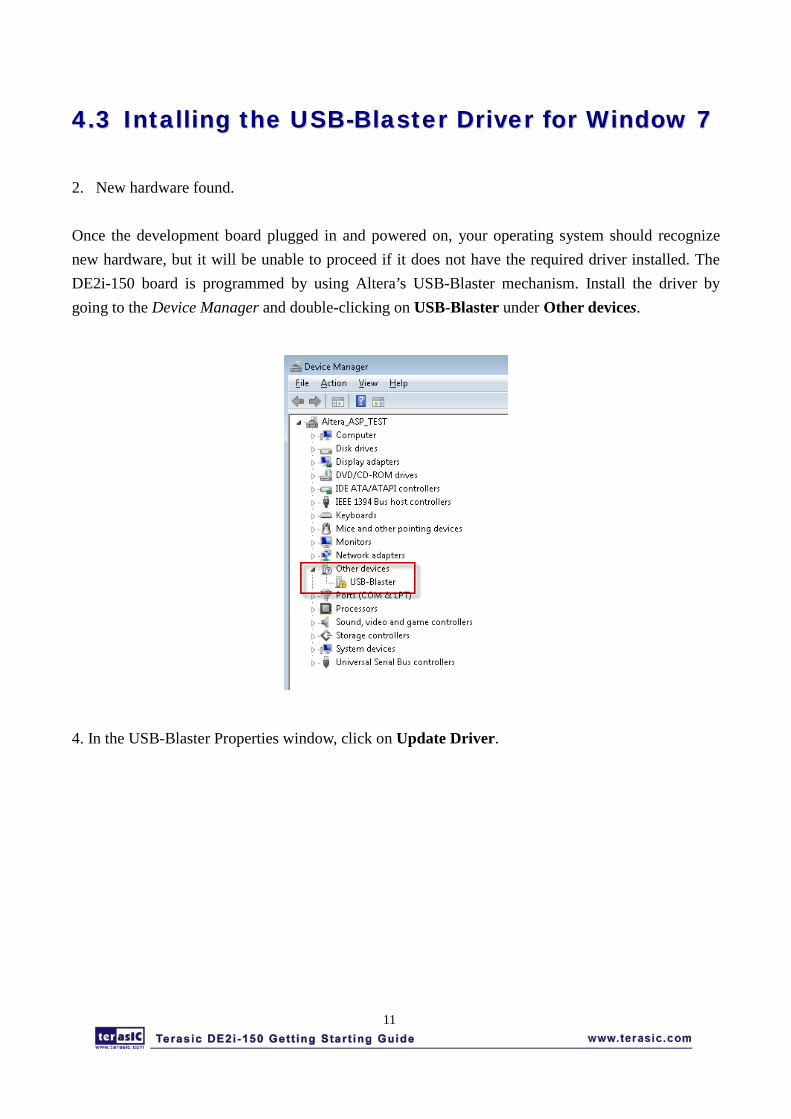
44..33 IInnttaalllliinngg tthhee UUSSBB--BBllaasstteerr DDrriivveerr ffoorr WWiinnddooww 77 2. New hardware found. Once the development board plugged in and powered on, your operating system should recognize new hardware, but it will be unable to proceed if it does not have the required driver installed. The DE2i-150 board is programmed by using Altera’s USB-Blaster mechanism. Install the driver by going to the Device Manager and double-clicking on USB-Blaster under Other devices.
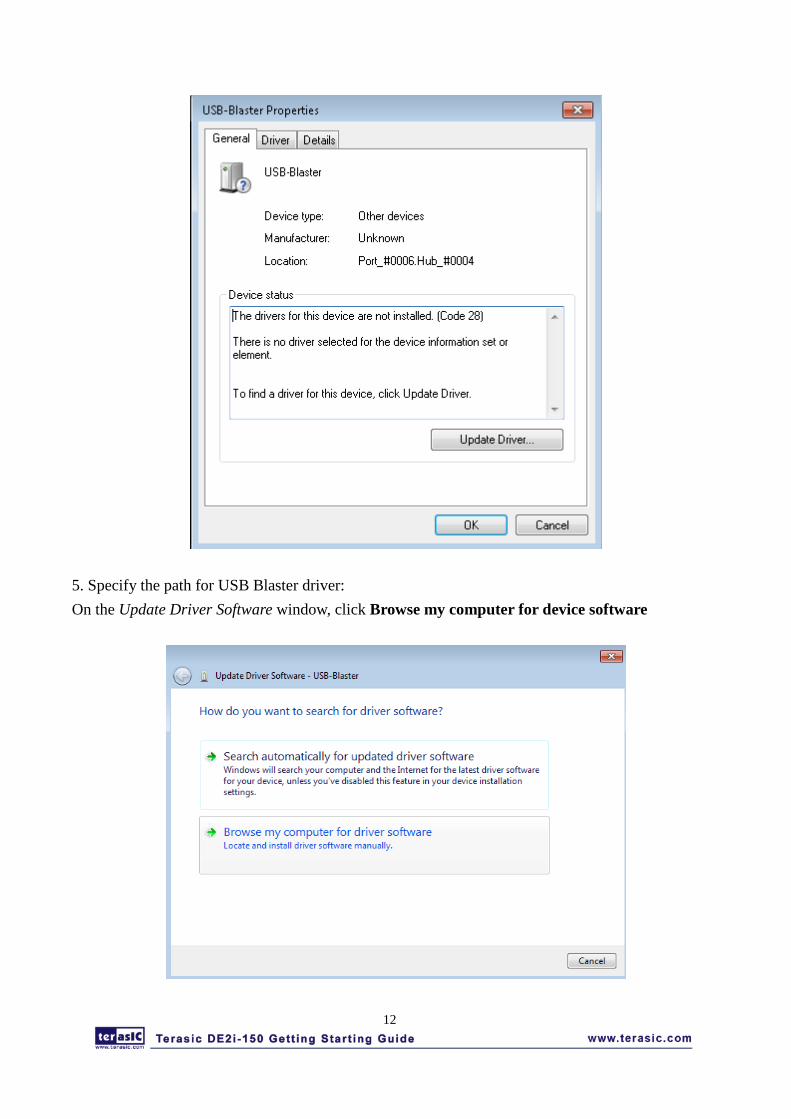
4. In the USB-Blaster Properties window, click on Update Driver.
12
5. Specify the path for USB Blaster driver: On the Update Driver Software window, click Browse my computer for device software
13
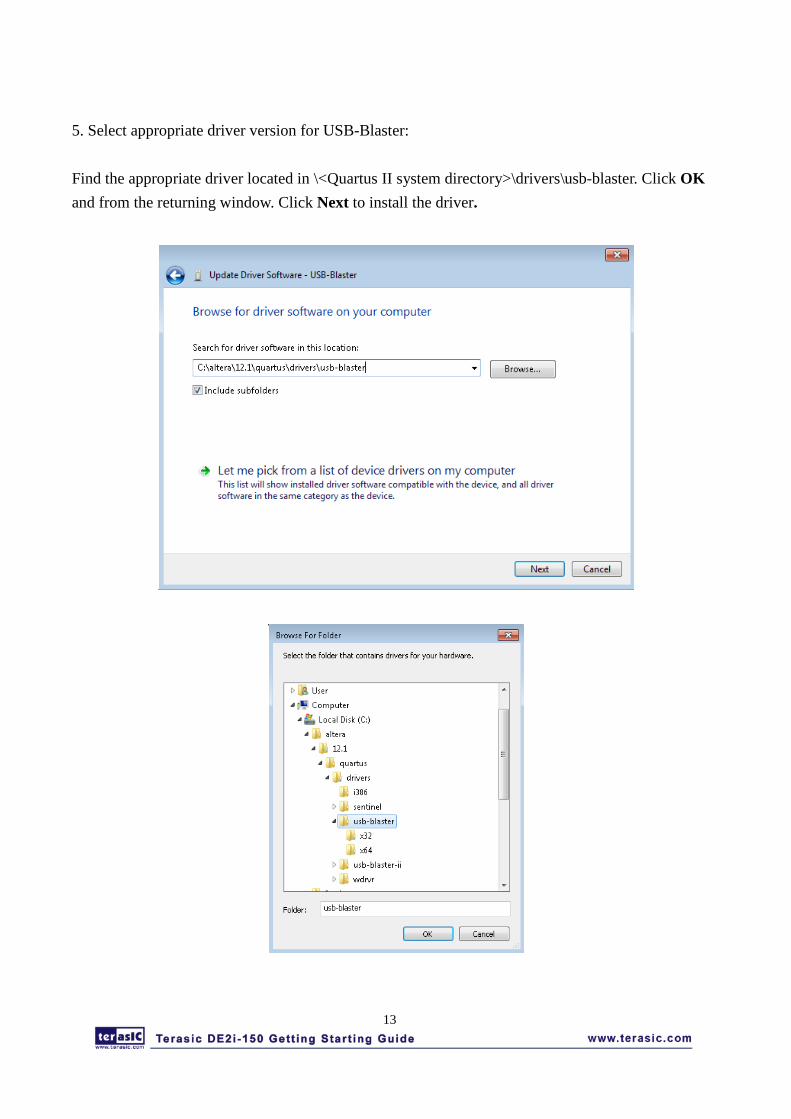
5. Select appropriate driver version for USB-Blaster:
Find the appropriate driver located in \<Quartus II system directory>\drivers\usb-blaster. Click OK and from the returning window. Click Next to install the driver.
14
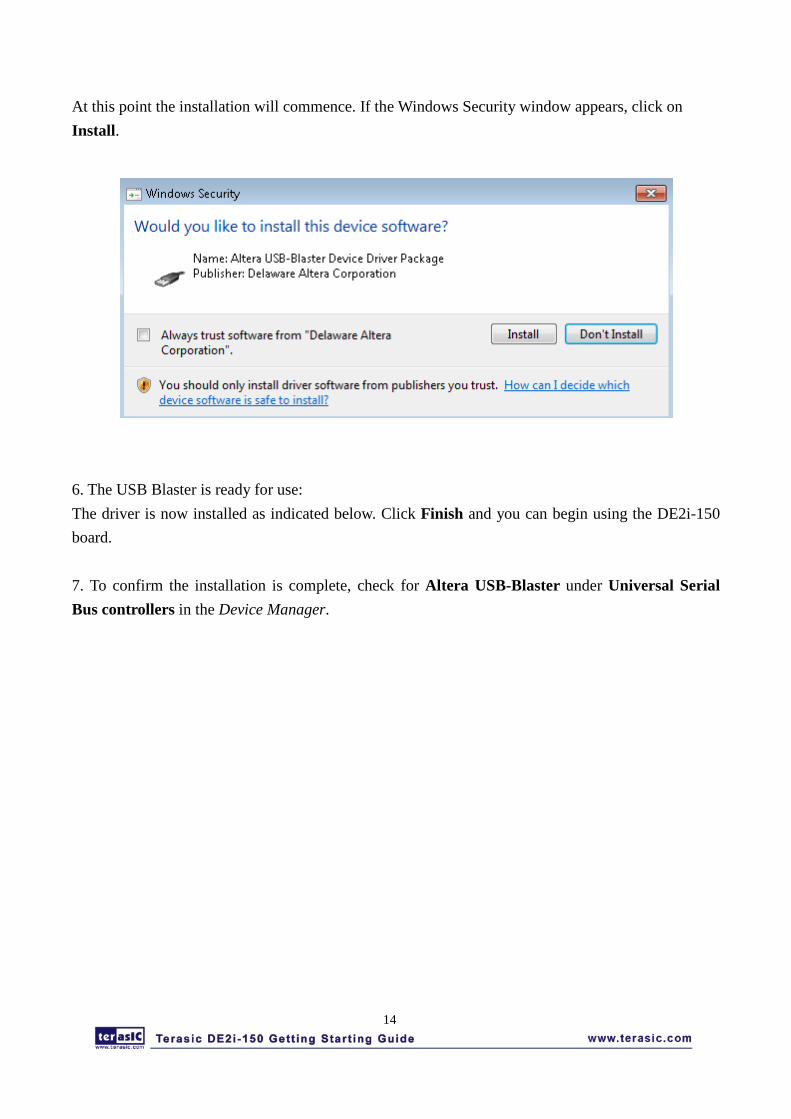
At this point the installation will commence. If the Windows Security window appears, click on Install.
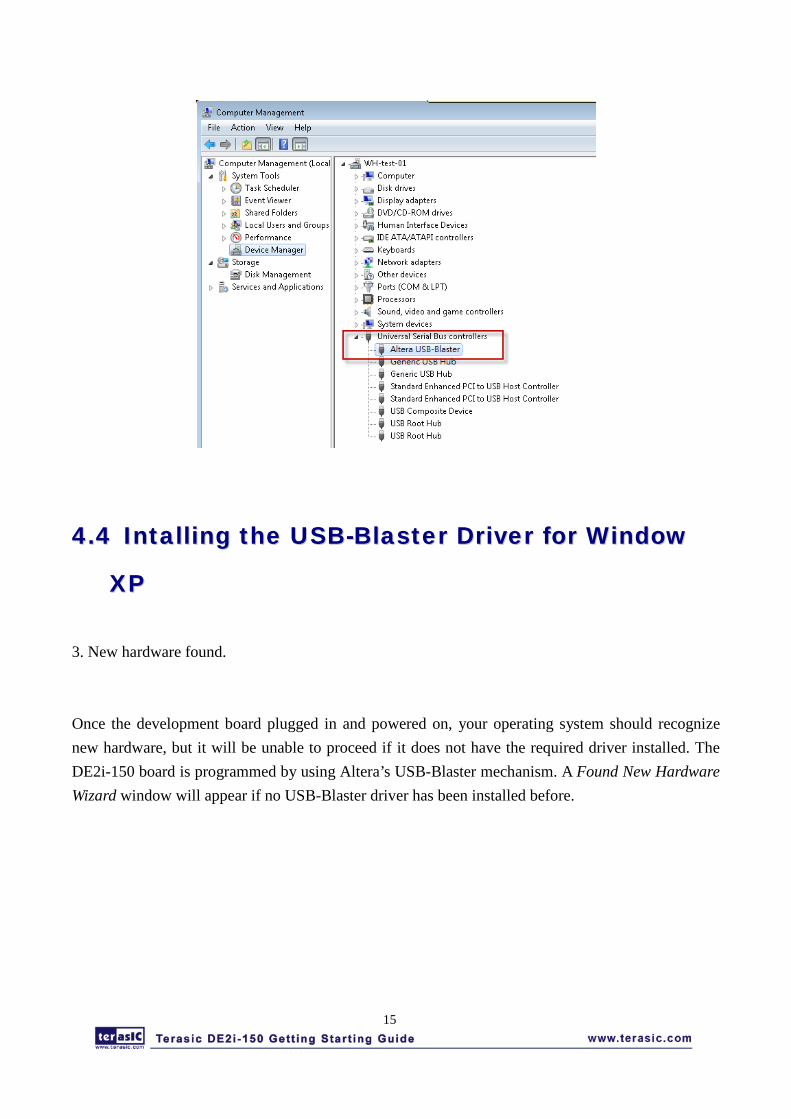
6. The USB Blaster is ready for use: The driver is now installed as indicated below. Click Finish and you can begin using the DE2i-150 board. 7. To confirm the installation is complete, check for Altera USB-Blaster under Universal Serial Bus controllers in the Device Manager.
15
44..44 IInnttaalllliinngg tthhee UUSSBB--BBllaasstteerr DDrriivveerr ffoorr WWiinnddooww
XXPP 3. New hardware found. Once the development board plugged in and powered on, your operating system should recognize new hardware, but it will be unable to proceed if it does not have the required driver installed. The DE2i-150 board is programmed by using Altera’s USB-Blaster mechanism. A Found New Hardware Wizard window will appear if no USB-Blaster driver has been installed before.
16
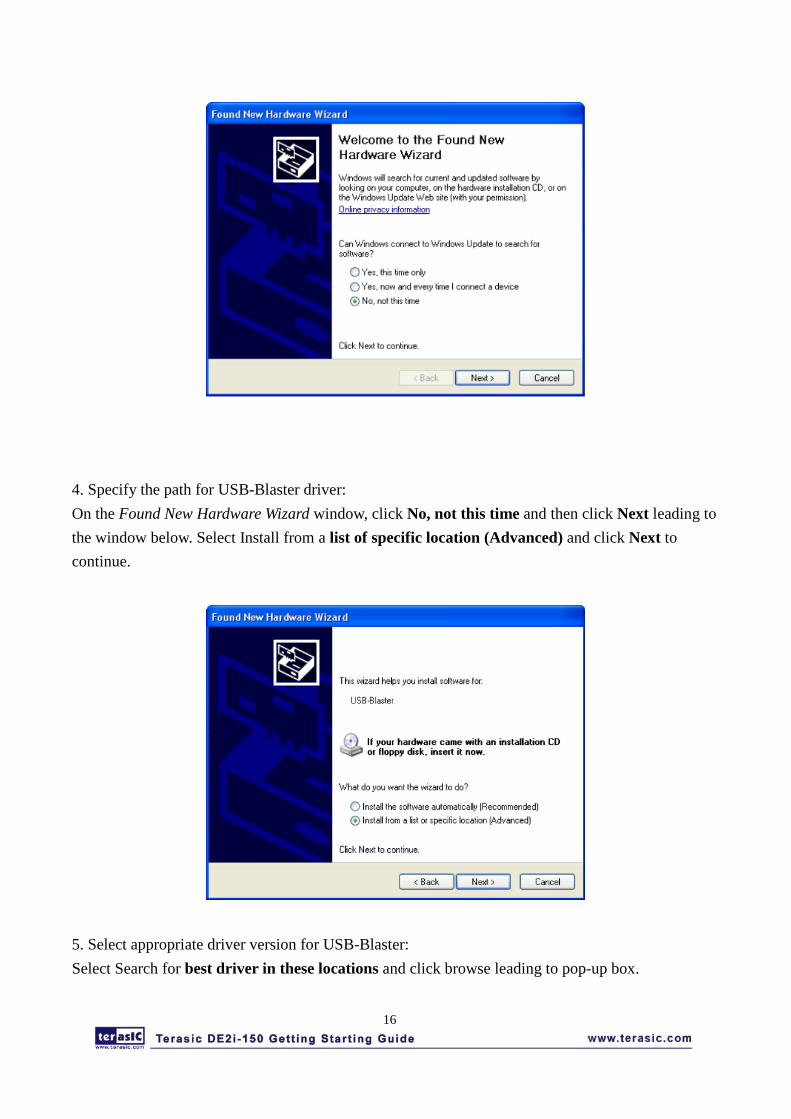
4. Specify the path for USB-Blaster driver: On the Found New Hardware Wizard window, click No, not this time and then click Next leading to the window below. Select Install from a list of specific location (Advanced) and click Next to continue.
5. Select appropriate driver version for USB-Blaster: Select Search for best driver in these locations and click browse leading to pop-up box.
17
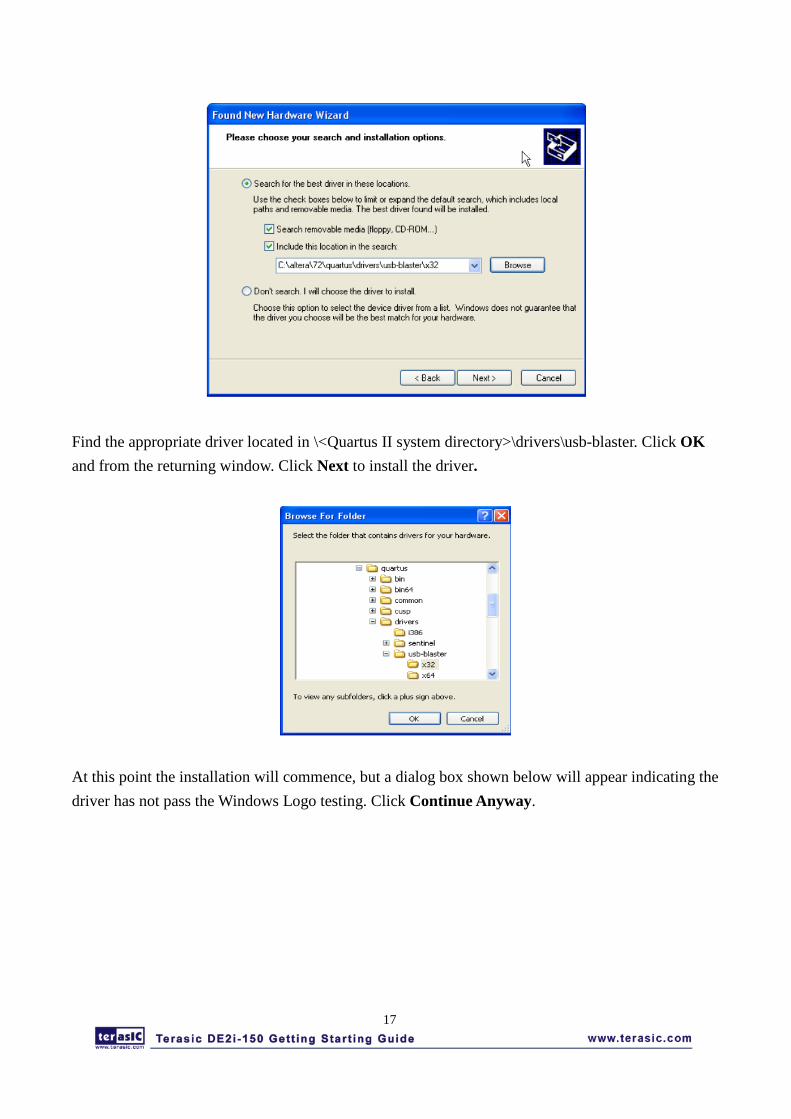
Find the appropriate driver located in \<Quartus II system directory>\drivers\usb-blaster. Click OK and from the returning window. Click Next to install the driver.
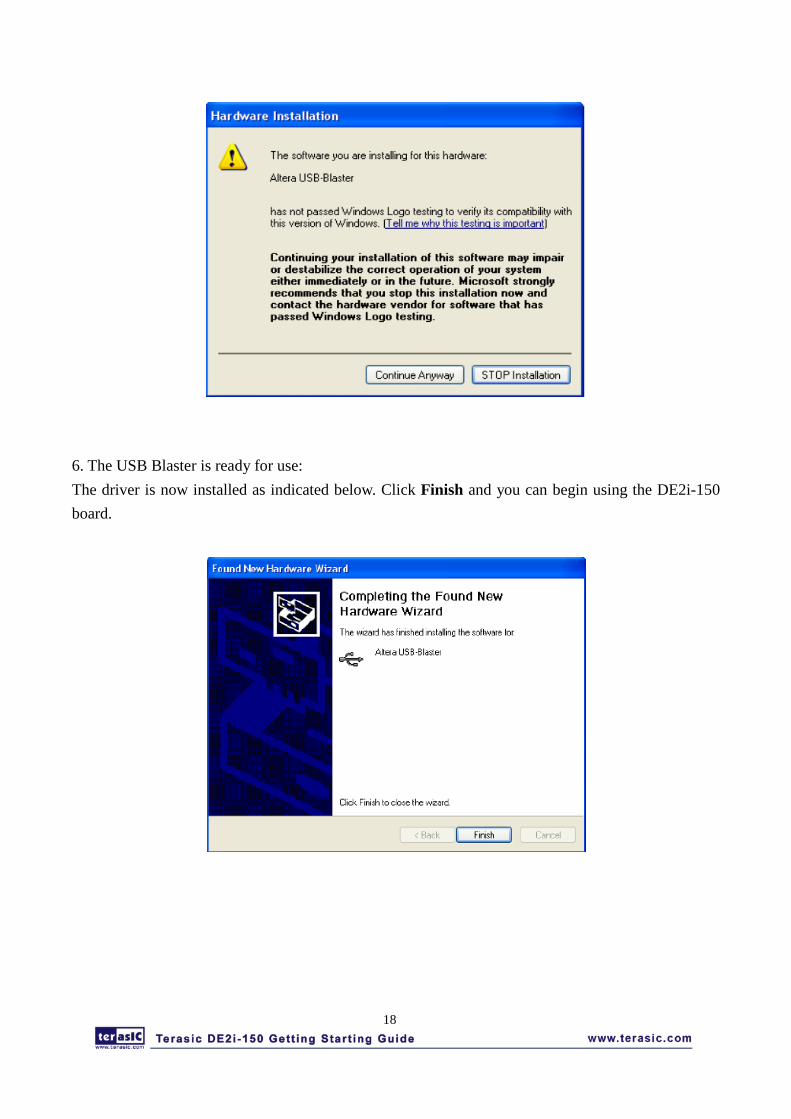
At this point the installation will commence, but a dialog box shown below will appear indicating the driver has not pass the Windows Logo testing. Click Continue Anyway.
18
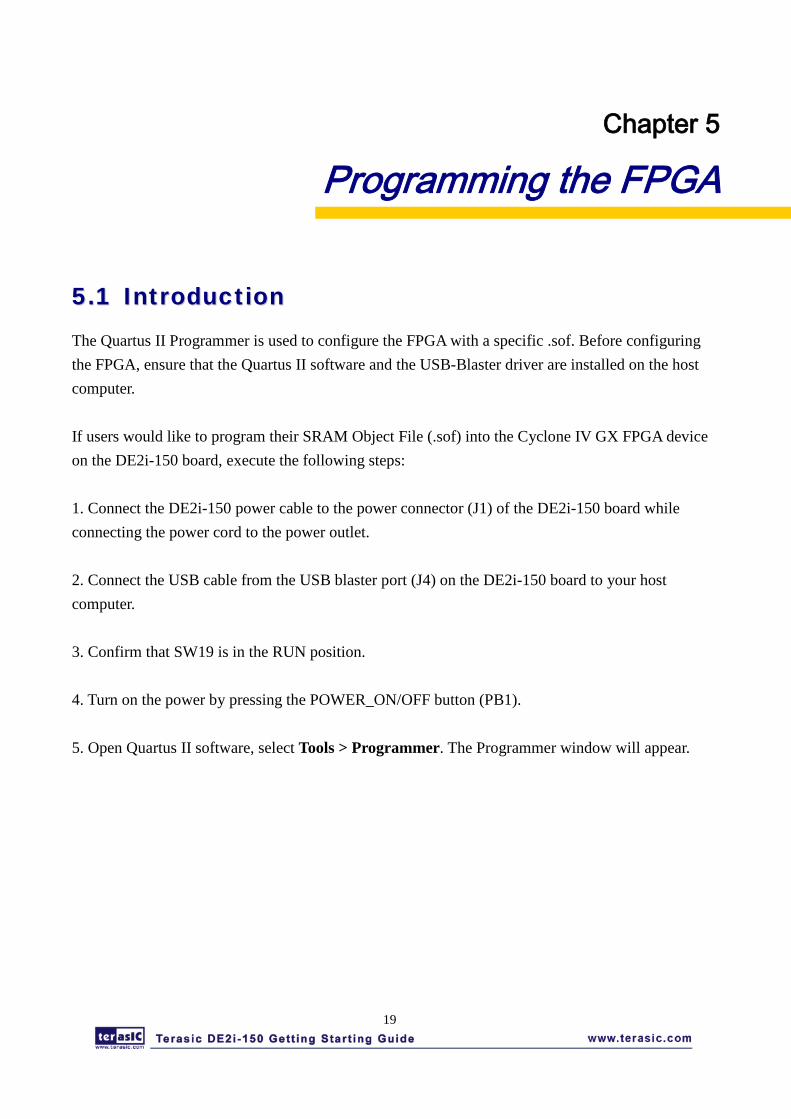
6. The USB Blaster is ready for use: The driver is now installed as indicated below. Click Finish and you can begin using the DE2i-150 board.
19
Chapter 5
Programming the FPGA
55..11 IInnttrroodduuccttiioonn The Quartus II Programmer is used to configure the FPGA with a specific .sof. Before configuring the FPGA, ensure that the Quartus II software and the USB-Blaster driver are installed on the host computer. If users would like to program their SRAM Object File (.sof) into the Cyclone IV GX FPGA device on the DE2i-150 board, execute the following steps: 1. Connect the DE2i-150 power cable to the power connector (J1) of the DE2i-150 board while connecting the power cord to the power outlet. 2. Connect the USB cable from the USB blaster port (J4) on the DE2i-150 board to your host computer. 3. Confirm that SW19 is in the RUN position. 4. Turn on the power by pressing the POWER_ON/OFF button (PB1). 5. Open Quartus II software, select Tools > Programmer. The Programmer window will appear.
20
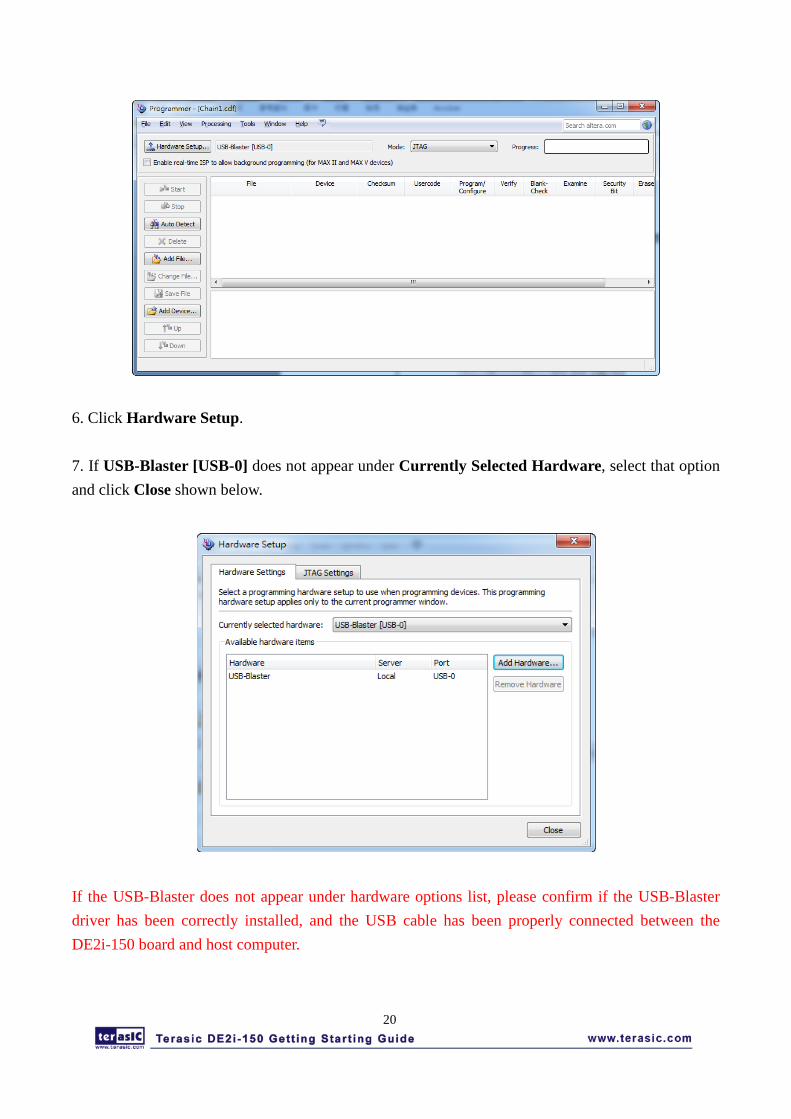
6. Click Hardware Setup. 7. If USB-Blaster [USB-0] does not appear under Currently Selected Hardware, select that option and click Close shown below.
If the USB-Blaster does not appear under hardware options list, please confirm if the USB-Blaster driver has been correctly installed, and the USB cable has been properly connected between the DE2i-150 board and host computer.

21
8. Click Add File to select the .sof file and click Open. 9. Select \Demonstrations\FPGA\My_First_FPGA\my_first_fpga.sof from the DE2i-150 system CD. 10. Turn on the Program/Configure option that corresponds to the .sof file and click Start which will automatically download the file onto the DE2i-150 board shown below.
11. After the download has been complete, you should be able to observe that LEDG0 to LEDG3 flash in differing frequencies, meaning that the .sof has been programmed successfully.
![Skaffold - storage.googleapis.com · [getting-started getting-started] Hello world! [getting-started getting-started] Hello world! [getting-started getting-started] Hello world! 5](https://img.pdfslide.net/doc/110x75/5ec939f2a76a033f091c5ac7/skaffold-getting-started-getting-started-hello-world-getting-started-getting-started.jpg)