Embed Size (px)
Citation preview
January 2012
Getting Started with Oracle Fusion Applications: Enterprise Structures for Financials
Getting Started with Oracle Fusion Applications: Enterprise Structures for Financials
Disclaimer
The following is intended to outline our general product direction. It is intended for information
purposes only, and may not be incorporated into any contract. It is not a commitment to deliver any
material, code, or functionality, and should not be relied upon in making purchasing decisions. The
development, release, and timing of any features or functionality described for Oracle’s products remains
at the sole discretion of Oracle.
Warning
The tasks presented in this guide are intended as a quick introduction or pilot implementation. The guide does not include all the setup tasks that are appropriate for a complete implementation.
Getting Started with Oracle Fusion Applications: Enterprise Structures for Financials
1
Table of Contents Introduction ............................................................................................................. 2
Documentation Note ............................................................................................... 2
Additional References............................................................................................. 2
Location of this Document ..................................................................................... 2
Prerequisites ........................................................................................................... 3
Table 1: Client Install Prerequisites ................................................................... 3
Setup and Maintenance Overview .......................................................................... 4
Chart of Accounts Overview ................................................................................... 4
Table 2: Define Chart of Accounts ..................................................................... 5
Table 3: Define Calendars ................................................................................... 9
Table 4: Define Currencies ............................................................................... 10
Accounting Configuration Overview .................................................................... 11
Table 5: Define Legal Entities ........................................................................... 12
Table 6: Define Ledgers .................................................................................... 14
Table 7: Open First Period ................................................................................ 16
Table 8: Define General Ledger Options .......................................................... 17
Table 9: Define Period Close Components ...................................................... 18
Table 10: Define Business Units ...................................................................... 20
Appendix of Topics ............................................................................................... 22
Creating a Value Set for Your Chart of Accounts: Example ........................... 22
Creating Chart of Accounts Structure and Instances: Examples .................. 22
Publishing an Account Hierarchy: Example .................................................... 25
Enabling Security on a Chart of Accounts: Example ...................................... 26
Creating a Cross Validation Rule: Example..................................................... 27
Entering Daily Rates Manually: Worked Example ........................................... 28
Updating Currency Rates: Worked Example ................................................... 29
Creating Legal Jurisdictions, Addresses and Authorities: Examples ........... 29
Creating Legal Entities, Registrations, and Reporting Units: Examples ....... 31
Creating Primary Ledgers: Example ................................................................ 34
Assigning Legal Entities and Balancing Segments: Examples ..................... 34
Mapping Chart of Accounts: Explained ........................................................... 36
Creating a New Segment Value Demo Script .................................................. 37
Creating an Accounting Hierarchy Demo Script ............................................. 38
Creating a Journal Approval Rule Demo Script .............................................. 40
Defining Business Units Demo Script .............................................................. 42
Getting Started with Oracle Fusion Applications: Enterprise Structures for Financials
2
Introduction
This guide provides a quick overview of how to do the following when setting up your pilot projects:
Define your financial enterprise structures
Perform your basic general ledger setup
Warning: The tasks presented in this guide are intended as a quick introduction or pilot implementation. The guide does not include all the setup tasks that are appropriate for a complete implementation.
Documentation Note
The topics listed here can be found in the Oracle Fusion Accounting Hub Implementation Guide in the Oracle Fusion Applications Technology Library unless otherwise noted.
The demos are available from Oracle Fusion Applications Help.
Topics below that are bolded have specific steps on how to perform the task.
The tasks in the boxes show the navigation path in Functional Setup Manager. The bolded tasks in the boxes are the tasks listed in the tables.
Additional References
Getting Started with Oracle Fusion Applications: Common Implementation (Document ID 1387777.1 on My Oracle Support)
Location of this Document
Getting Started with Oracle Fusion Applications: Enterprise Structures for Financials (Document ID 1387746.1 on My Oracle Support)
Getting Started with Oracle Fusion Applications: Enterprise Structures for Financials
3
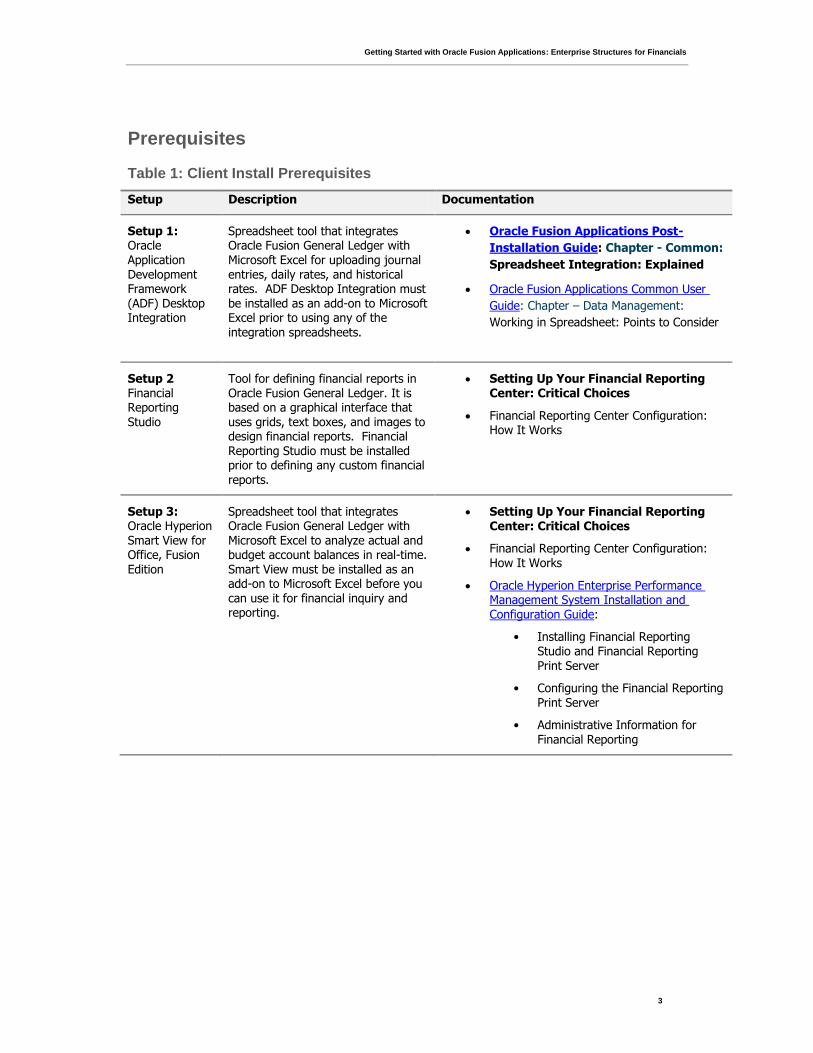
Prerequisites
Table 1: Client Install Prerequisites
Setup Description Documentation
Setup 1: Oracle Application Development Framework (ADF) Desktop Integration
Spreadsheet tool that integrates Oracle Fusion General Ledger with Microsoft Excel for uploading journal entries, daily rates, and historical rates. ADF Desktop Integration must be installed as an add-on to Microsoft Excel prior to using any of the
integration spreadsheets.
Oracle Fusion Applications Post-
Installation Guide: Chapter - Common:
Spreadsheet Integration: Explained
Oracle Fusion Applications Common User
Guide: Chapter – Data Management:
Working in Spreadsheet: Points to Consider
Setup 2 Financial Reporting Studio
Tool for defining financial reports in Oracle Fusion General Ledger. It is based on a graphical interface that uses grids, text boxes, and images to design financial reports. Financial Reporting Studio must be installed prior to defining any custom financial reports.
Setting Up Your Financial Reporting Center: Critical Choices
Financial Reporting Center Configuration: How It Works
Setup 3: Oracle Hyperion Smart View for Office, Fusion Edition
Spreadsheet tool that integrates Oracle Fusion General Ledger with Microsoft Excel to analyze actual and budget account balances in real-time. Smart View must be installed as an add-on to Microsoft Excel before you can use it for financial inquiry and reporting.
Setting Up Your Financial Reporting Center: Critical Choices
Financial Reporting Center Configuration:
How It Works
Oracle Hyperion Enterprise Performance Management System Installation and Configuration Guide:
• Installing Financial Reporting Studio and Financial Reporting Print Server
• Configuring the Financial Reporting Print Server
• Administrative Information for Financial Reporting
Getting Started with Oracle Fusion Applications: Enterprise Structures for Financials
4
Setup and Maintenance Overview
The Setup and Maintenance work area is a centralized interface for managing, configuring, and maintaining setup objects and components across Oracle Fusion Applications. You can access the Setup and Maintenance work area from the Navigator menu, under the Tools heading. To begin implementing your enterprise structures, you must create a new implementation project.
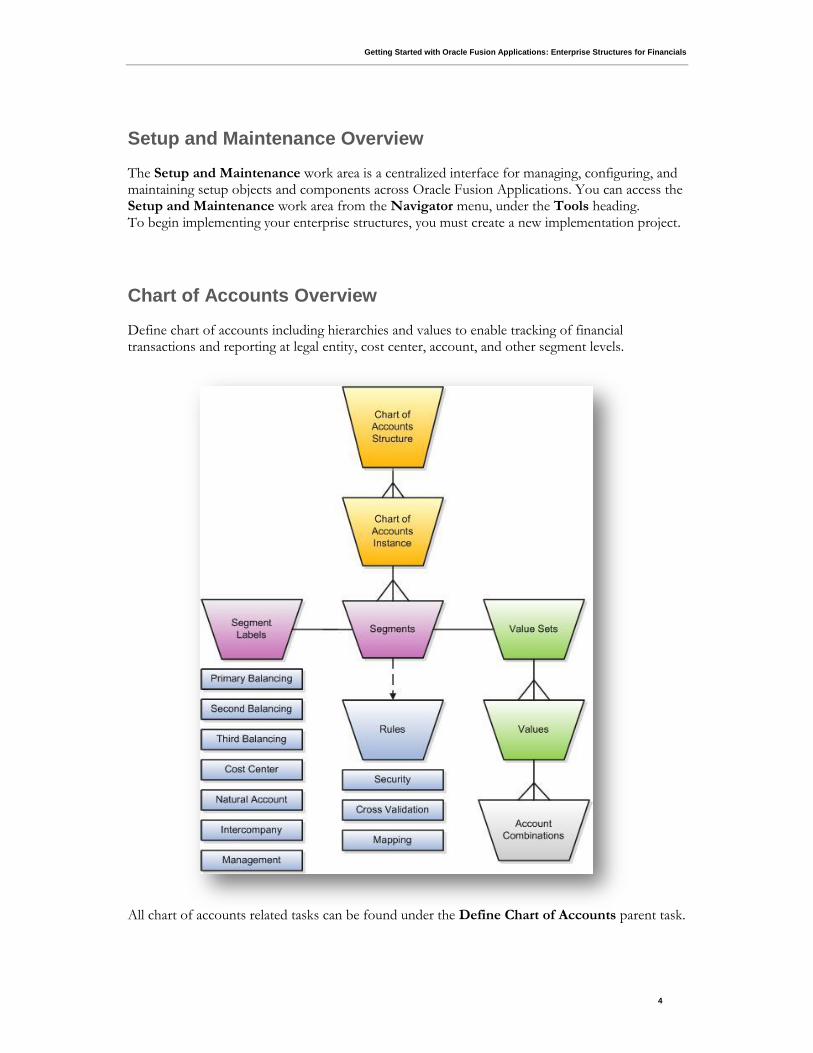
Chart of Accounts Overview
Define chart of accounts including hierarchies and values to enable tracking of financial transactions and reporting at legal entity, cost center, account, and other segment levels.
All chart of accounts related tasks can be found under the Define Chart of Accounts parent task.
Getting Started with Oracle Fusion Applications: Enterprise Structures for Financials
5
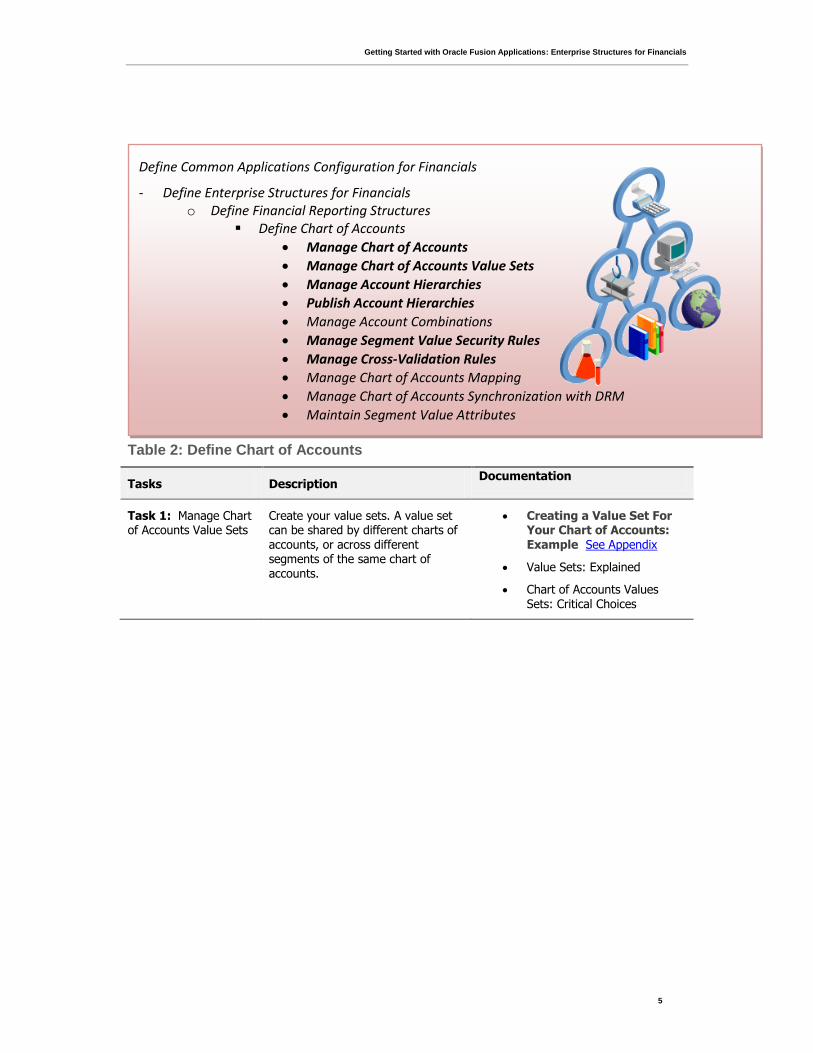
Table 2: Define Chart of Accounts
Tasks Description Documentation
Task 1: Manage Chart of Accounts Value Sets
Create your value sets. A value set can be shared by different charts of accounts, or across different segments of the same chart of accounts.
Creating a Value Set For Your Chart of Accounts: Example See Appendix
Value Sets: Explained
Chart of Accounts Values Sets: Critical Choices
Define Common Applications Configuration for Financials
- Define Enterprise Structures for Financials o Define Financial Reporting Structures
Define Chart of Accounts
Manage Chart of Accounts
Manage Chart of Accounts Value Sets
Manage Account Hierarchies
Publish Account Hierarchies
Manage Account Combinations
Manage Segment Value Security Rules
Manage Cross-Validation Rules
Manage Chart of Accounts Mapping
Manage Chart of Accounts Synchronization with DRM
Maintain Segment Value Attributes
Getting Started with Oracle Fusion Applications: Enterprise Structures for Financials
6
Tasks Description Documentation
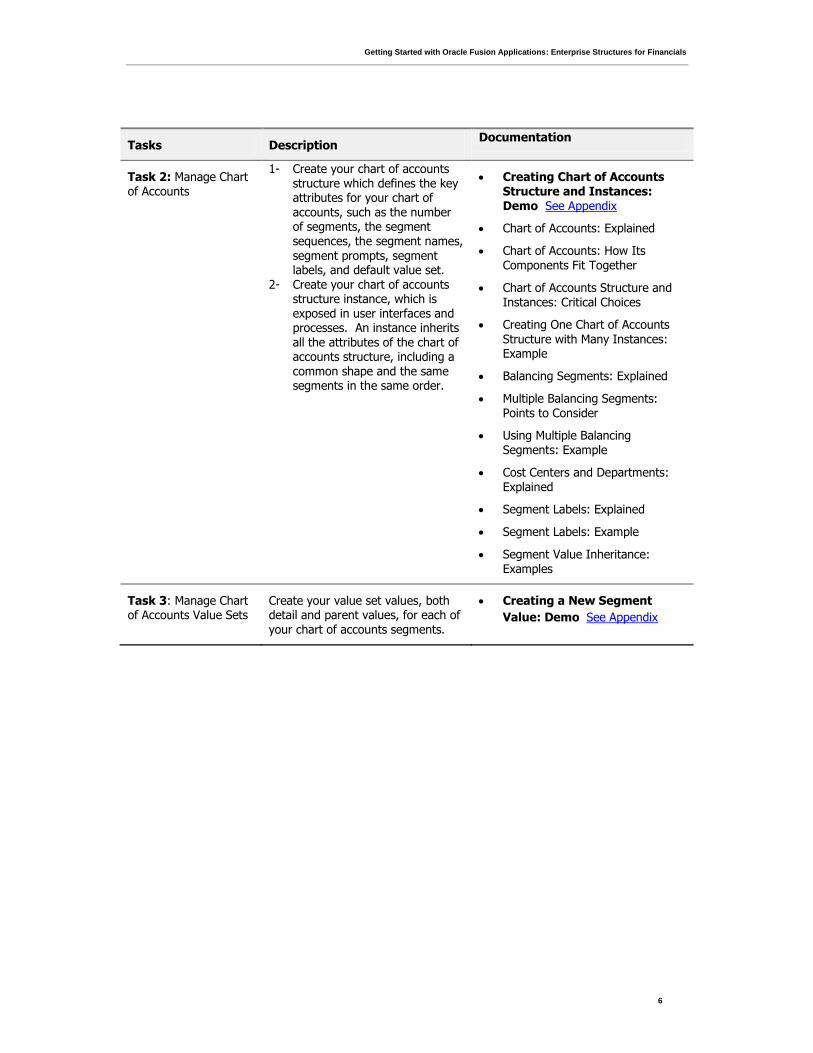
Task 2: Manage Chart of Accounts
1- Create your chart of accounts structure which defines the key attributes for your chart of accounts, such as the number of segments, the segment sequences, the segment names, segment prompts, segment labels, and default value set.
2- Create your chart of accounts structure instance, which is exposed in user interfaces and processes. An instance inherits
all the attributes of the chart of accounts structure, including a common shape and the same segments in the same order.
Creating Chart of Accounts Structure and Instances: Demo See Appendix
Chart of Accounts: Explained
Chart of Accounts: How Its Components Fit Together
Chart of Accounts Structure and Instances: Critical Choices
Creating One Chart of Accounts
Structure with Many Instances: Example
Balancing Segments: Explained
Multiple Balancing Segments: Points to Consider
Using Multiple Balancing Segments: Example
Cost Centers and Departments: Explained
Segment Labels: Explained
Segment Labels: Example
Segment Value Inheritance: Examples
Task 3: Manage Chart of Accounts Value Sets
Create your value set values, both detail and parent values, for each of your chart of accounts segments.
Creating a New Segment
Value: Demo See Appendix
Getting Started with Oracle Fusion Applications: Enterprise Structures for Financials
7
Tasks Description Documentation
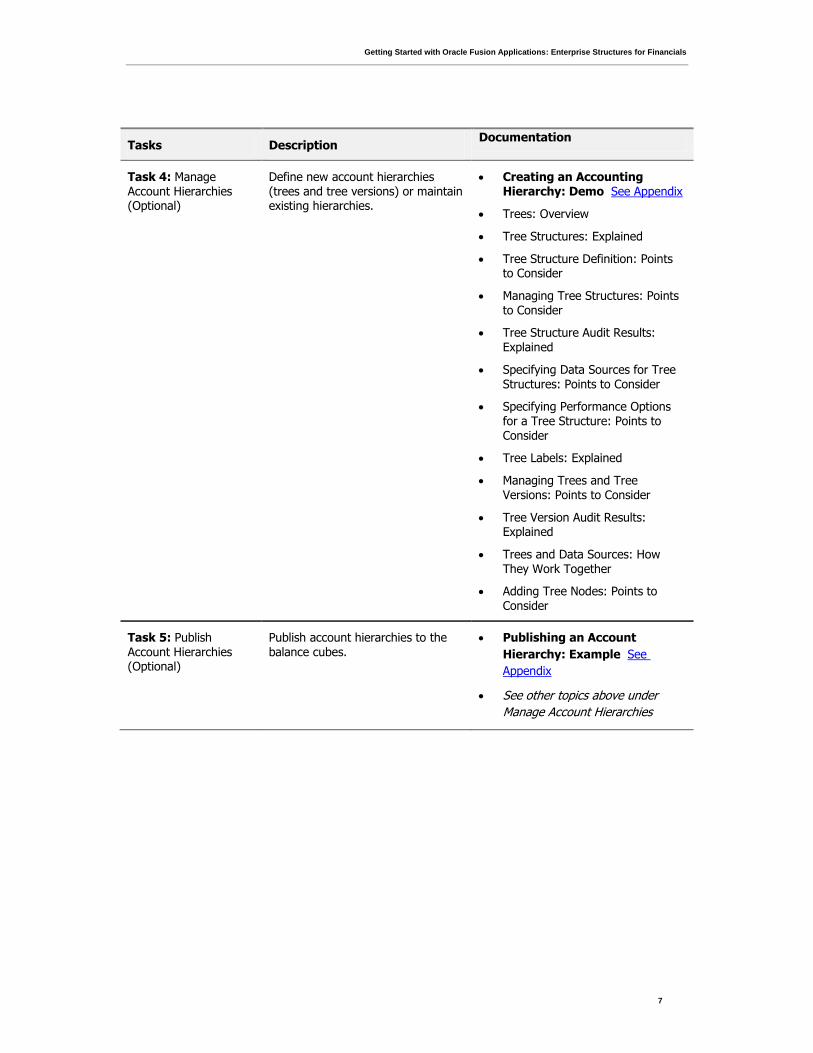
Task 4: Manage Account Hierarchies (Optional)
Define new account hierarchies (trees and tree versions) or maintain existing hierarchies.
Creating an Accounting Hierarchy: Demo See Appendix
Trees: Overview
Tree Structures: Explained
Tree Structure Definition: Points to Consider
Managing Tree Structures: Points to Consider
Tree Structure Audit Results: Explained
Specifying Data Sources for Tree Structures: Points to Consider
Specifying Performance Options for a Tree Structure: Points to Consider
Tree Labels: Explained
Managing Trees and Tree Versions: Points to Consider
Tree Version Audit Results: Explained
Trees and Data Sources: How They Work Together
Adding Tree Nodes: Points to Consider
Task 5: Publish Account Hierarchies (Optional)
Publish account hierarchies to the balance cubes.
Publishing an Account
Hierarchy: Example See
Appendix
See other topics above under
Manage Account Hierarchies
Getting Started with Oracle Fusion Applications: Enterprise Structures for Financials
8
Tasks Description Documentation
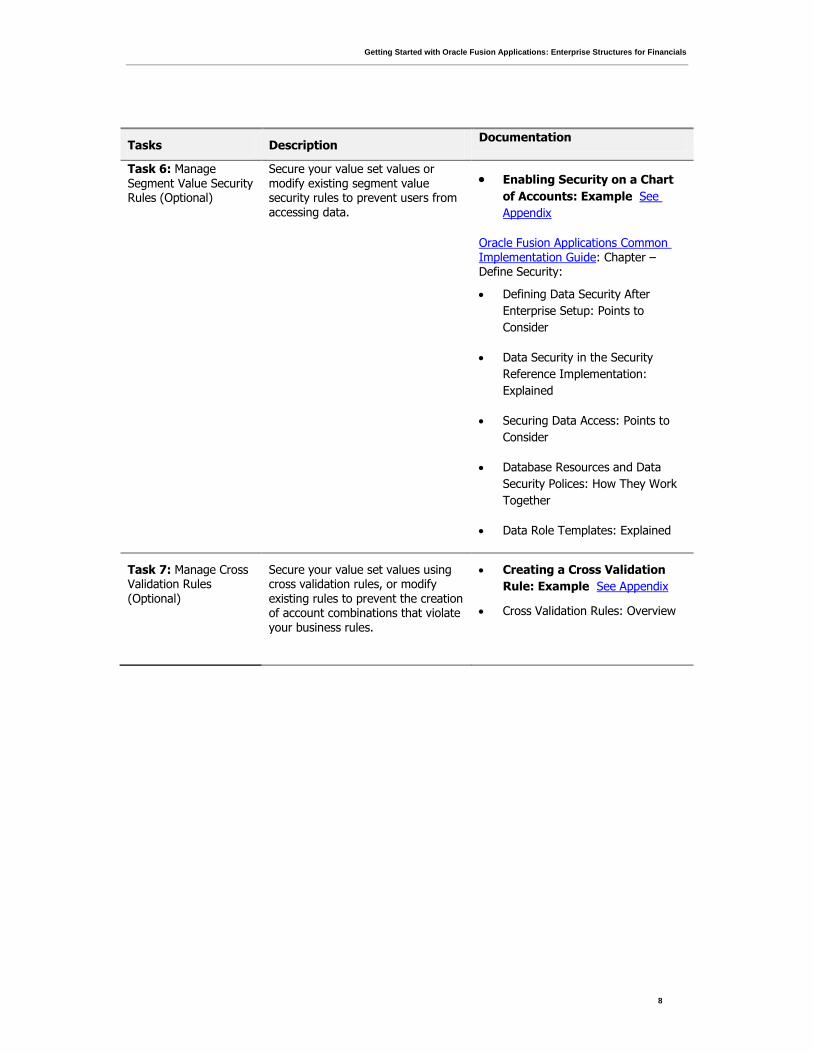
Task 6: Manage Segment Value Security Rules (Optional)
Secure your value set values or modify existing segment value security rules to prevent users from accessing data.
Enabling Security on a Chart
of Accounts: Example See
Appendix
Oracle Fusion Applications Common Implementation Guide: Chapter – Define Security:
Defining Data Security After
Enterprise Setup: Points to
Consider
Data Security in the Security
Reference Implementation:
Explained
Securing Data Access: Points to
Consider
Database Resources and Data
Security Polices: How They Work
Together
Data Role Templates: Explained
Task 7: Manage Cross Validation Rules (Optional)
Secure your value set values using cross validation rules, or modify existing rules to prevent the creation of account combinations that violate your business rules.
Creating a Cross Validation
Rule: Example See Appendix
Cross Validation Rules: Overview
Getting Started with Oracle Fusion Applications: Enterprise Structures for Financials
9
Table 3: Define Calendars
Tasks Description Documentation
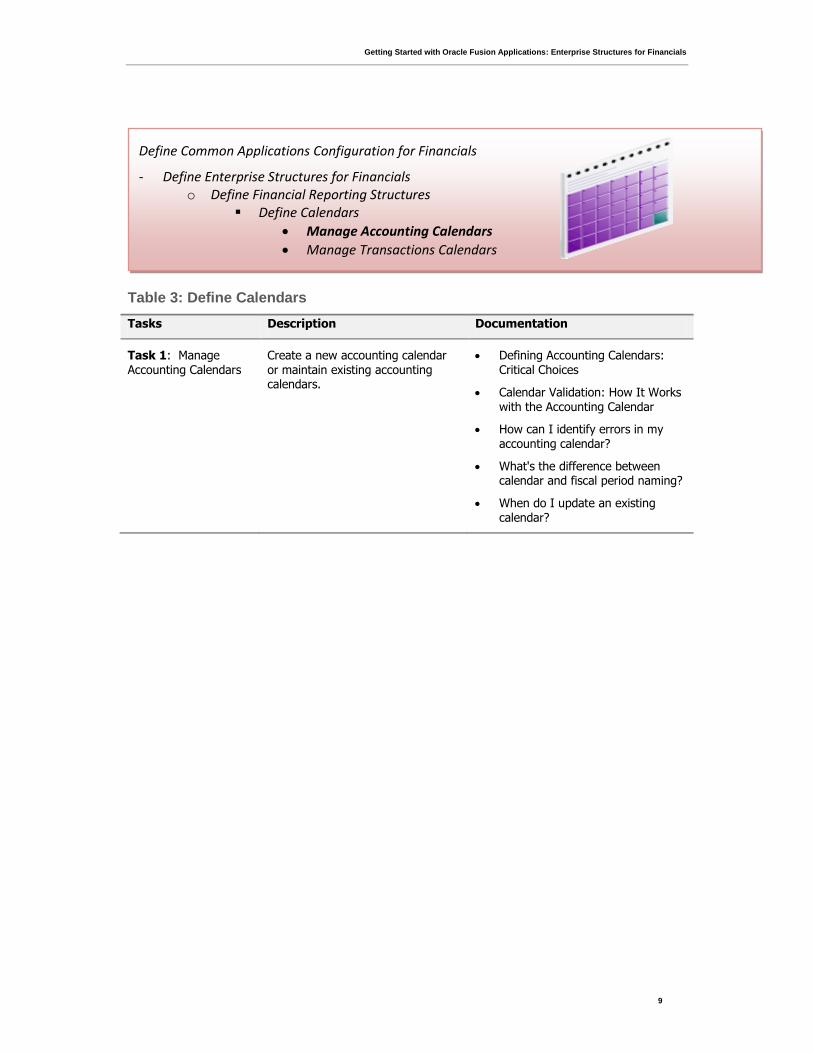
Task 1: Manage Accounting Calendars
Create a new accounting calendar or maintain existing accounting calendars.
Defining Accounting Calendars: Critical Choices
Calendar Validation: How It Works with the Accounting Calendar
How can I identify errors in my accounting calendar?
What's the difference between calendar and fiscal period naming?
When do I update an existing calendar?
Define Common Applications Configuration for Financials
- Define Enterprise Structures for Financials o Define Financial Reporting Structures
Define Calendars
Manage Accounting Calendars
Manage Transactions Calendars
Getting Started with Oracle Fusion Applications: Enterprise Structures for Financials
10
Table 4: Define Currencies
Tasks Description Documentation
Task 1: Manage Currencies
Create a new currency or maintain existing currencies.
Defining Currencies: Points to Consider
Euro Currency Derivation: Explained
When do I create or enable currencies?
What's the difference between precision, extended precision, and minimum accountable unit for a currency?
Task 2: Manage Conversion Rate Types
Create new conversion rate types or maintain existing rate types.
Creating Conversion Rate Types: Critical Choices
Using Rate Types: Examples
What's the difference between spot, corporate, user, and fixed rate types?
Task 3: Manage Daily Rates
Define the daily rates between the currencies using that rate type.
Entering Daily Rates Manually: Worked Example See Appendix
Updating Daily Rates: Worked Example See Appendix
Define Common Applications Configuration for Financials
- Define Enterprise Structures for Financials o Define Financial Reporting Structures
Define Currencies
Manage Currencies
Manage Conversion Rate Types
Manage Daily Rates
Getting Started with Oracle Fusion Applications: Enterprise Structures for Financials
11
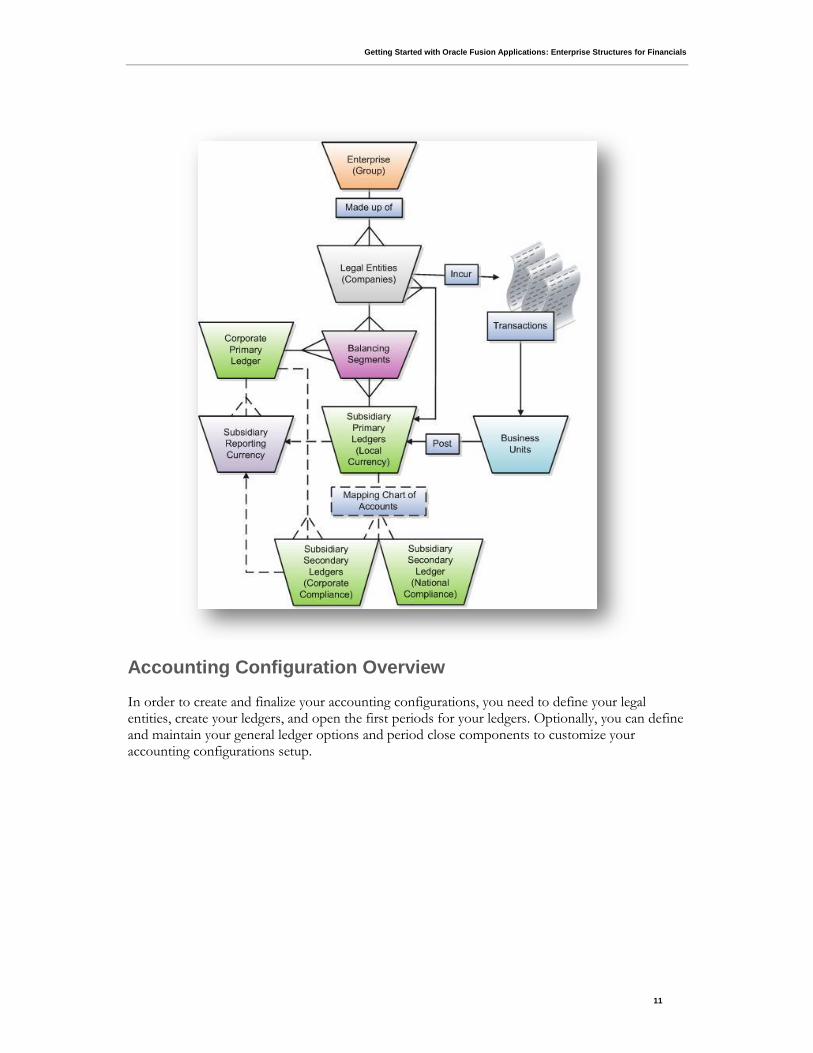
Accounting Configuration Overview
In order to create and finalize your accounting configurations, you need to define your legal entities, create your ledgers, and open the first periods for your ledgers. Optionally, you can define and maintain your general ledger options and period close components to customize your accounting configurations setup.
Getting Started with Oracle Fusion Applications: Enterprise Structures for Financials
12
Table 5: Define Legal Entities
Tasks Description Documentation Task 1: Manage Legal Jurisdictions
Create maintain information for a geographic area where you operate.
Creating Legal Jurisdictions, Addresses and Authorities: Examples See Appendix Jurisdictions and Legal Authorities: Explained Jurisdictions: Explained
Task 2: Manage Legal Authorities
Create and maintain information for governing bodies that operate within a jurisdiction.
Creating Legal Jurisdictions, Addresses and Authorities: Examples See Appendix Legal Authorities: Explained
Task 3: Manage Legal Addresses
Create the address a legal entity uses to register with a legal
authority. The legal address must be located within the territory entered.
Creating Legal Jurisdictions, Addresses and Authorities:
Examples See Appendix
Define Common Applications Configuration for Financials
- Define Enterprise Structures for Financials o Define Legal Jurisdictions and Authorities for Financials
Manage Legal Jurisdictions Manage Legal Authorities Manage Legal Addresses
o Define Legal Entities for Financials Manage Legal Entity Manage Legal Entity Registrations Manage Intercompany Exceptions Manage Legal Entity Financial Information Manage Legal Entity HCM Information Manage Legal Entity Tax Profiles Define Legal Reporting Units for Financials
Manage Legal Reporting Unit
Manage Legal Reporting Unit Registrations
Manage Associated Business Entities
Manage Legal Reporting Unit Tax Profiles
Manage Legal Reporting Unit Financial Information
Manage Associated Balancing Segments
Getting Started with Oracle Fusion Applications: Enterprise Structures for Financials
13
Tasks Description Documentation Task 4: Manage Legal Entity
Create and maintain information for legal entities and legal reporting units to achieve legal compliance for business activities.
Creating Legal Entities and Registrations: Examples See Appendix Legal Entities: Explained Legal Entity in Oracle Fusion: Points to Consider Creating Legal Entities in the Enterprise Structures Configurator: Points to Consider
Task 5: Manage Legal Entity Registrations
Define the identity related details of a legal entity with the appropriate government or legal authorities for the purpose of claiming and
ensuring legal or commercial rights and responsibilities.
Creating Legal Entities and Registrations: Examples See Appendix
Task 6: Manage Legal Reporting Units
Define components of legal entities such as branches, divisions, establishments, inventory organizations, and physical locations.
Oracle Fusion Applications Common Implementation Guide: Chapter – Define Enterprise Structures: Planning Legal Reporting Units: Points to Consider
Getting Started with Oracle Fusion Applications: Enterprise Structures for Financials
14
Table 6: Define Ledgers
Tasks Description Documentation
Task 1: Manage Primary Ledgers
Review and update self-contained accounting information set and define new information sets.
Creating a Primary Ledger: Example See Appendix
Ledgers and Subledgers: Explained
Ledgers: Points to Consider
Financial Ledgers: How They Fit Together
Task 2: Specify Ledger Options
Define the various additional attributes for the ledger.
Specifying Ledger Options:
Worked Example
Task 3: Assign Legal Entitles
Assign one or more legal entities to your configuration.
Assigning Legal Entities and
Balancing Segments:
Examples See Appendix
Task 4: Assign Balancing Segment Values to Legal Entities
Assign balancing segment values to legal entities.
Assigning Legal Entities and
Balancing Segments:
Examples See Appendix
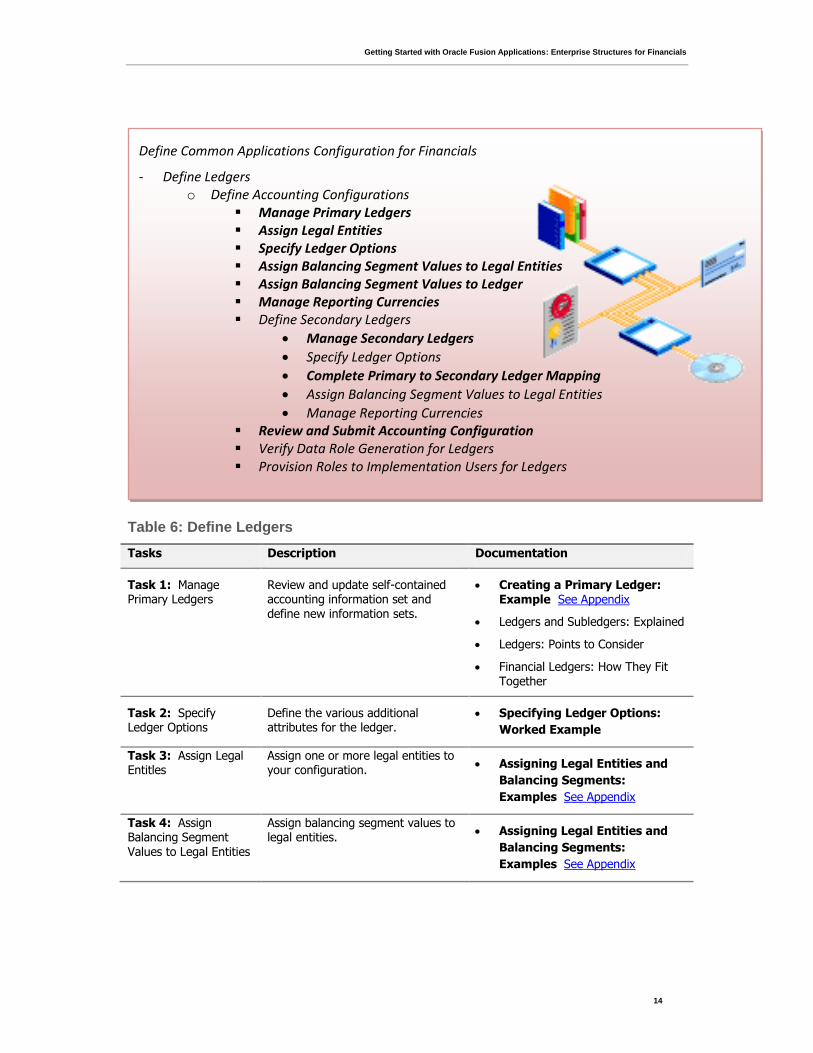
Define Common Applications Configuration for Financials
- Define Ledgers o Define Accounting Configurations
Manage Primary Ledgers Assign Legal Entities Specify Ledger Options Assign Balancing Segment Values to Legal Entities Assign Balancing Segment Values to Ledger Manage Reporting Currencies Define Secondary Ledgers
Manage Secondary Ledgers
Specify Ledger Options
Complete Primary to Secondary Ledger Mapping
Assign Balancing Segment Values to Legal Entities
Manage Reporting Currencies Review and Submit Accounting Configuration Verify Data Role Generation for Ledgers Provision Roles to Implementation Users for Ledgers
Getting Started with Oracle Fusion Applications: Enterprise Structures for Financials
15
Tasks Description Documentation
Task 5: Assign Balancing Segment Values to Ledgers
Assign balancing segment values to ledgers. The BSVs that are assigned to the ledger represent non-legal entity transactions, such as adjustments.
Assigning Legal Entities and
Balancing Segments:
Examples See Appendix
Task 6: Manage Reporting Currencies
Assign one or more reporting currencies to your ledger If you plan to run translation for your primary ledger, you must create a balance level reporting currency before
translating.
Reporting Currency Balances: How They are Calculated
Task 7: Manage Secondary Ledgers (Optional)
Review and update additional ledgers that are associated with the primary ledger for an accounting configuration, and define new secondary ledgers.
Note: Repeat the Primary Ledger tasks above for each secondary ledger.
Task 8: Complete Primary to Secondary Ledger Mapping
Finalize the required relationships and connections for converting transactions from the primary ledger to the secondary ledger.
Mapping Chart of Accounts: Explained See Appendix
Task 9: Review and Submit Accounting Configuration
Verify and submit the accounting configuration for completion. Creating a new accounting configuration will launch a process to create or update balances cubes.
Getting Started with Oracle Fusion Applications: Enterprise Structures for Financials
16
Table 7: Open First Period
Tasks Description Documentation
Task 1: Open First
Period
Open the first period for all the
ledgers you wish to transact with. This includes primary ledgers, secondary ledgers, and journal and subledger-level reporting currencies.
Opening First Period: Overview
Note: You cannot perform this task without performing these tasks:
Verify Data Role Generation for Ledgers Provision Roles to Implementation Users for Ledgers
For documentation on these and other user management tasks see: Getting Started with Oracle Fusion Applications User Management: Pilot Projects (Document ID 1387777.1 on My Oracle Support)
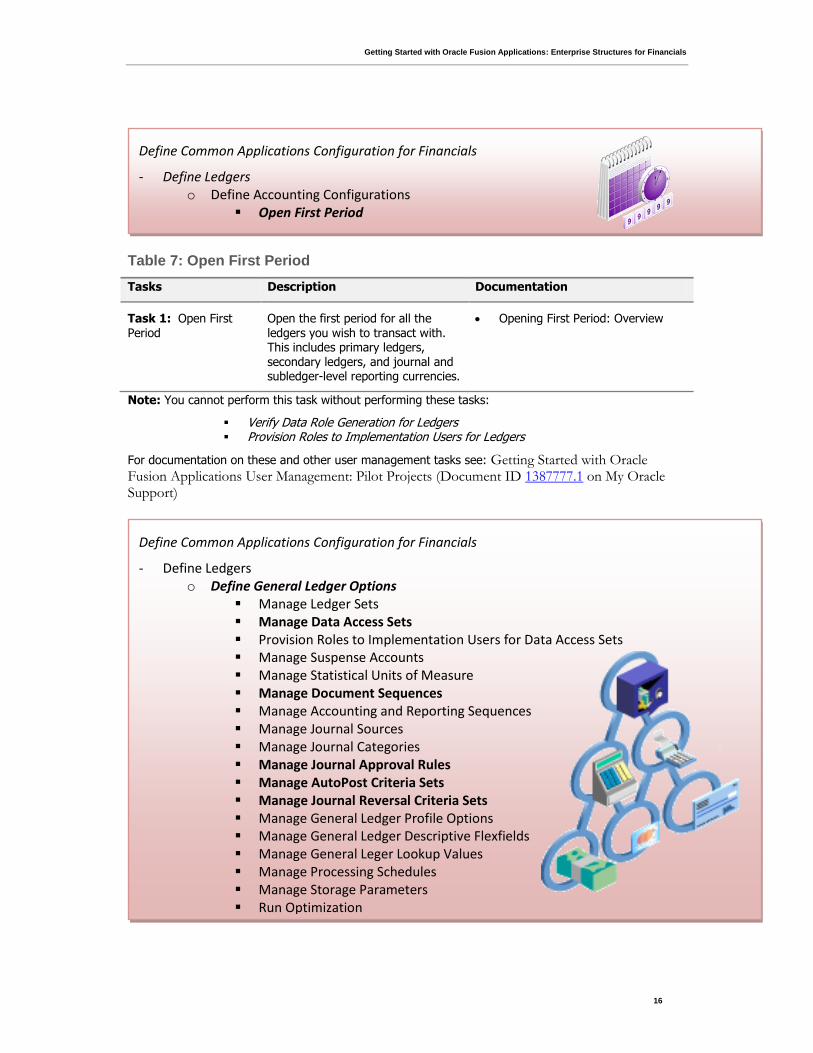
Define Common Applications Configuration for Financials
- Define Ledgers o Define General Ledger Options
Manage Ledger Sets Manage Data Access Sets Provision Roles to Implementation Users for Data Access Sets Manage Suspense Accounts Manage Statistical Units of Measure Manage Document Sequences Manage Accounting and Reporting Sequences Manage Journal Sources Manage Journal Categories Manage Journal Approval Rules Manage AutoPost Criteria Sets Manage Journal Reversal Criteria Sets Manage General Ledger Profile Options Manage General Ledger Descriptive Flexfields Manage General Leger Lookup Values Manage Processing Schedules Manage Storage Parameters Run Optimization
Define Common Applications Configuration for Financials
- Define Ledgers o Define Accounting Configurations
Open First Period
Getting Started with Oracle Fusion Applications: Enterprise Structures for Financials
17
Table 8: Define General Ledger Options
Tasks Description Documentation
Task 1: Manage Data Access Sets
Review and update existing collections of ledgers intended for data security, and create new collections.
Defining Data Security After Enterprise Setup: Points to Consider
Securing Data Access: Points to Consider
Data Security: Explained
Task 2: Manage Document Sequences
Create and assign sequential numbering to types of documents.
Document Sequences: Explained
Document Sequence Categories: Explained
Task 3: Manage Journal Approval Rules
Create and maintain journal approval rule criteria.
Creating a Journal Approval Rule Demo See Appendix
Approving Journals: Points to Consider
Task 4: Manage AutoPost Criteria Sets
Create and maintain sets of criteria to post matching journal batches automatically.
Creating Automatic Posting Criteria Sets Demo (Found in Oracle Applications Fusion Help)
Creating an AutoPost Criteria Set: Worked Example
Manually Generating the AutoPost Process: Examples
Task 5: Manage Journal Reverse Criteria Sets
Create and maintain criteria based on journal categories to reverse journal batches automatically.
Automatic Journal Reversals: How They Are Processed
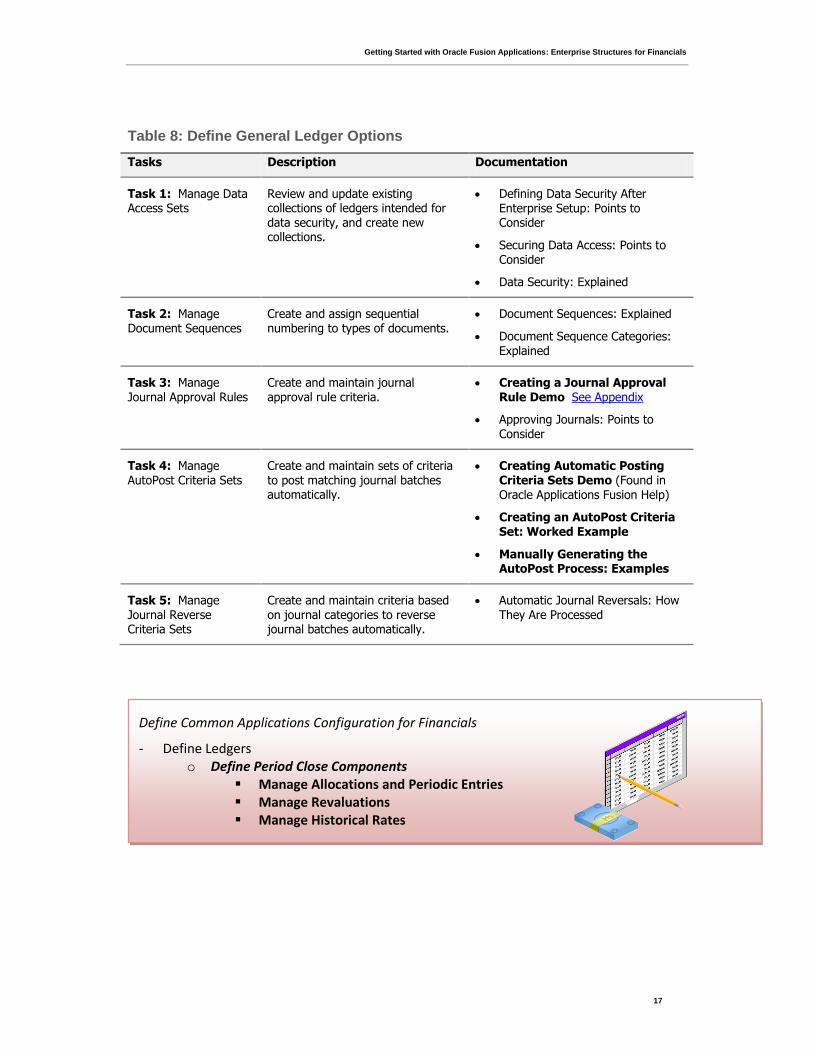
Define Common Applications Configuration for Financials
- Define Ledgers o Define Period Close Components
Manage Allocations and Periodic Entries Manage Revaluations Manage Historical Rates
Getting Started with Oracle Fusion Applications: Enterprise Structures for Financials
18
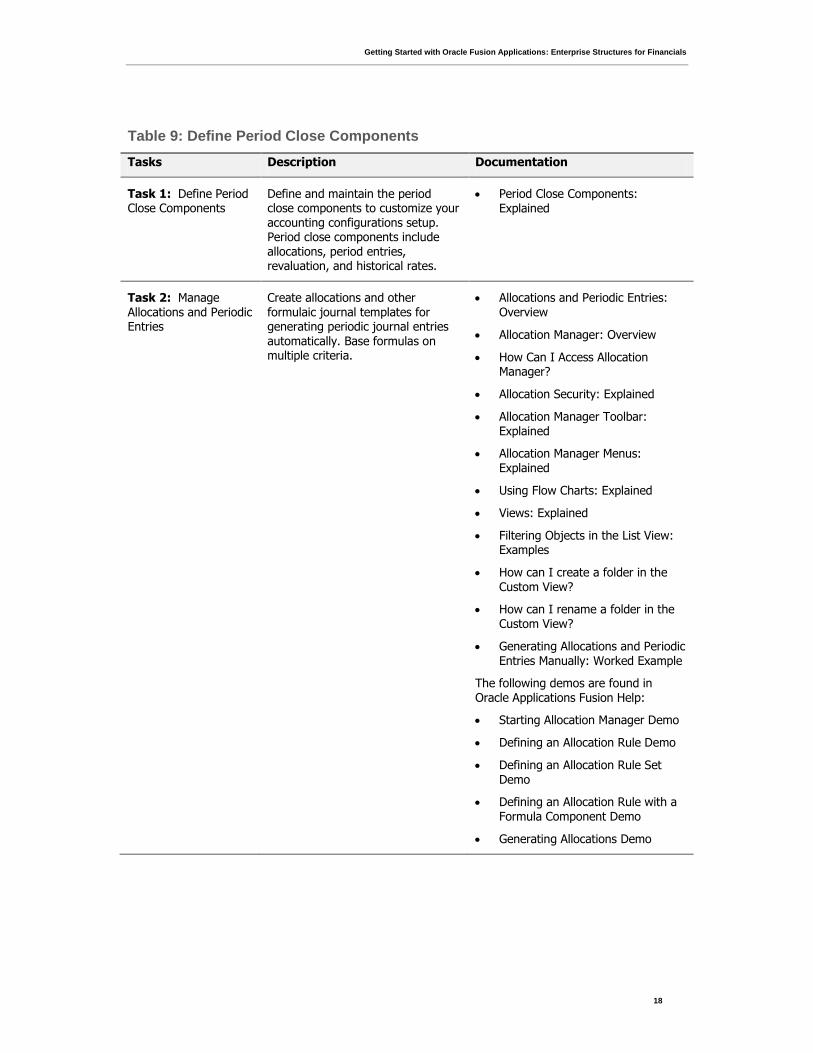
Table 9: Define Period Close Components
Tasks Description Documentation
Task 1: Define Period Close Components
Define and maintain the period close components to customize your accounting configurations setup. Period close components include allocations, period entries, revaluation, and historical rates.
Period Close Components: Explained
Task 2: Manage Allocations and Periodic Entries
Create allocations and other formulaic journal templates for generating periodic journal entries
automatically. Base formulas on multiple criteria.
Allocations and Periodic Entries: Overview
Allocation Manager: Overview
How Can I Access Allocation Manager?
Allocation Security: Explained
Allocation Manager Toolbar: Explained
Allocation Manager Menus: Explained
Using Flow Charts: Explained
Views: Explained
Filtering Objects in the List View: Examples
How can I create a folder in the Custom View?
How can I rename a folder in the Custom View?
Generating Allocations and Periodic Entries Manually: Worked Example
The following demos are found in Oracle Applications Fusion Help:
Starting Allocation Manager Demo
Defining an Allocation Rule Demo
Defining an Allocation Rule Set
Demo
Defining an Allocation Rule with a Formula Component Demo
Generating Allocations Demo
Getting Started with Oracle Fusion Applications: Enterprise Structures for Financials
19
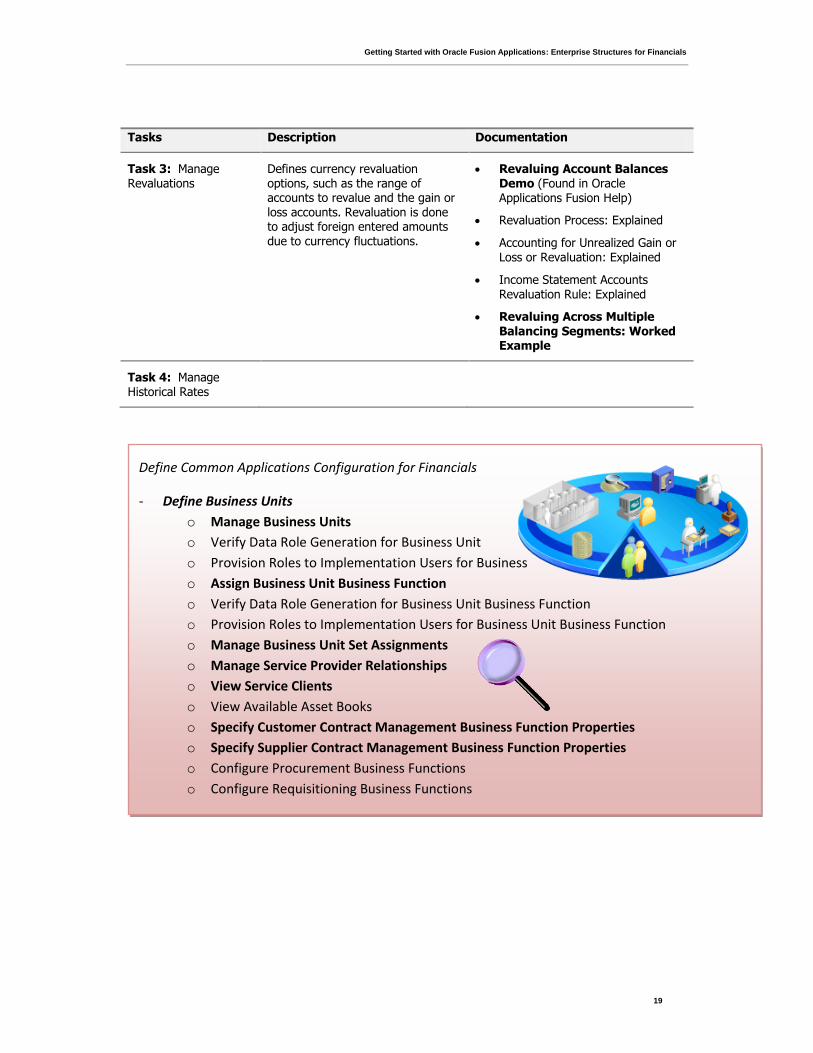
Tasks Description Documentation
Task 3: Manage Revaluations
Defines currency revaluation options, such as the range of accounts to revalue and the gain or loss accounts. Revaluation is done to adjust foreign entered amounts due to currency fluctuations.
Revaluing Account Balances Demo (Found in Oracle Applications Fusion Help)
Revaluation Process: Explained
Accounting for Unrealized Gain or Loss or Revaluation: Explained
Income Statement Accounts Revaluation Rule: Explained
Revaluing Across Multiple
Balancing Segments: Worked Example
Task 4: Manage Historical Rates
Define Common Applications Configuration for Financials
- Define Business Units
o Manage Business Units
o Verify Data Role Generation for Business Unit
o Provision Roles to Implementation Users for Business
o Assign Business Unit Business Function
o Verify Data Role Generation for Business Unit Business Function
o Provision Roles to Implementation Users for Business Unit Business Function
o Manage Business Unit Set Assignments
o Manage Service Provider Relationships
o View Service Clients
o View Available Asset Books
o Specify Customer Contract Management Business Function Properties
o Specify Supplier Contract Management Business Function Properties
o Configure Procurement Business Functions
o Configure Requisitioning Business Functions

Getting Started with Oracle Fusion Applications: Enterprise Structures for Financials
20
Table 10: Define Business Units
Tasks Description Documentation Task 1: Manage Business Units
Create and update business units. Defining Business Units: Demo See Appendix Oracle Fusion Applications Common Implementation Guide: Chapter – Define Enterprise Structures: Business Units: Explained Creating Business Units in the Enterprise Structures Configurator: Points to Consider Modeling Your Business Units in Your Enterprise Structure in Oracle Fusion:
Example
Task 2: Assign Business Unit Business Functions
Assign business functions to you business unit. If the business functions for the business unit involve generation of financial transactions, you must assign the business unit to a primary ledger and default legal entity.
Defining Business Units: Demo See Appendix Oracle Fusion Applications Common Implementation Guide: Section – Define Enterprise Structures: Business Functions: Explained Business Unit Hierarchy: Example
Task 3: Manage Business Unit Set Assignments
Define business unit set assignments. If the reference data set code assigned to the reference data set objects, based on the default set assigned to the business unit, then click Save and Close. This will properly assign the reference data sets to the reference data objects.
Defining Business Units: Demo See Appendix Oracle Fusion Applications Common Implementation Guide: Chapter – Define Enterprise Structures: Business Units and Reference Data Sets: How They work Together Defining Default Reference Data Sets: Points to Consider What reference data objects can be shared across business units?
Task 4: Manage Service Provider Relationships
Define a business unit with a Procurement business function and Requisitioning business function to set the service provider relationships.
Defining Business Units: Demo See Appendix Oracle Fusion Applications Common Implementation Guide: Chapter – Define Enterprise Structures: Shared Service Centers: Explained Shared Service Center: Points to Consider Service Provider Model: Explained
Task 5: View Service Clients
View client business units that use business functions provided by a
service provider business unit.
Shared Service Centers: Explained Shared Service Center: Points to
Consider Service Provider Model: Explained
Task 6: Specify Customer Contract Management Business Function Properties
Specify and manage currency conversion rules, project billing rules and default values, adoption rules for contract standards and policies, and other contract management functions.
Contract Terms Library Business Unit Setup: Explained Customer Contracts Business Unit Setup: Explained

Getting Started with Oracle Fusion Applications: Enterprise Structures for Financials
21
Tasks Description Documentation Task 7: Specify Supplier Contract Management Business Function Properties
Specify supplier contract management properties, such as contract standards, policies, and adoption rules.
Contract Terms Library Business Unit Setup: Explained Supplier Contracts Business Unit Setup: Explained
Getting Started with Oracle Fusion Applications: Enterprise Structures for Financials
22
Appendix of Topics
These topics will be available in Oracle Fusion Application Help, 11g Release 1 (11.1.3). For now they are here to help you successfully implement your pilots.
Creating a Value Set for Your Chart of Accounts: Example
Create your value sets before creating your chart of accounts. A value set can be shared by different charts of accounts or across different segments of the same chart of accounts.
Scenario
You are creating a company value set to be used in your chart of accounts for your enterprise, InFusion America, Inc. Follow these steps:
1. Navigate to the Manage Chart of Accounts Value Sets task from within your implementation project and click the Go to Task.
2. Click the Create icon on the toolbar of the Search Results table. The Create Value Set page opens.
3. Enter a unique Value Set Code, InFusion America Company, and an optional Description, Company values for InFusion America Inc.
4. Select General Ledger from the list in the Module field. 5. Select Independent as Validation Type. 6. Select Character as the Validation Data Type. 7. Click Save and Close.
Creating Chart of Accounts Structure and Instances: Examples
In Oracle Fusion General Ledger, the chart of accounts model is framed around the concept of a chart of accounts structure, under which one or more chart of accounts structure instances can be created. A chart of accounts structure defines the key attributes for your chart of accounts, such as the number of segments, the segment sequences, the segment names, segment prompts, segment labels, for example natural account and primary balancing, and default value sets.
The chart of accounts instance is exposed in the user interfaces and processes. By default, a chart of accounts instance inherits all the attributes of the chart of accounts structure, meaning that all instances of the same structure share a common shape and have the same segments in the same order. However, at the chart of accounts instance level, you can override the default value set assignments for your segments and assign a unique account hierarchy that determines the parent and child relationships between the value set values.

Getting Started with Oracle Fusion Applications: Enterprise Structures for Financials
23
At the chart of accounts instance level, determine if allow dynamic insertion is enabled to generate new account combinations dynamically instead of creating them manually.
Chart of Account Structure
You are creating a chart of accounts structure as you setup your chart of accounts for your enterprise, InFusion America, Inc. Follow these steps:
1. Navigate to the Manage Chart of Accounts page from the Functional Setup Manger by querying on Manage Chart of Accounts and clicking on the Go To Task.
2. Select General Ledger from the Module list of values and click Search. 3. Click Manage Structures to open the Manage Key Flexfield Structures page. 4. Select the General Ledger row and click the Create to open the Create Key
Flexfield Structure page. 5. Enter a unique Structure Code, INFUSION_AM_COA_STRUCTURE, and
Name, InFusion America COA Structure. Provide an optional Description, InFusion America Inc. Chart of Accounts Structure.
6. Select the - Delimiter to visually separate your segment values. 7. Click Save. 8. To create a new segment, click the Create to open the Create Key Flexfield
Segment page. 1. Enter the following parameters:
Parameter Value
Segment Code INFUSION_AM_CO
Name InFusion America Company
Description InFusion America Inc. Company
Sequence Number 1
Prompt Company
Short Prompt CO
Display Width 2
Column Name Segment1
Default Value Set Code INFUSION_AM_COMPANY
2. Select a segment label, Primary Balancing Segment, to indicate its purpose within your chart of accounts.
Getting Started with Oracle Fusion Applications: Enterprise Structures for Financials
24
Note
Two segment labels are required: primary balancing segment and natural account segment. These labels are not used with each other or with other labels in a specific segment.
3. Click Save and Close. 4. Click Done. 5. Define additional segments following the same process.
Chart of Account Instance
You are creating a chart of accounts instance as you setup your chart of accounts for your enterprise, InFusion America, Inc. Follow these steps:
1. Navigate to the Manage Chart of Accounts page from the Functional Setup Manger by querying on Manage Chart of Accounts and clicking on the Go To Task.
2. Select General Ledger from the Module list of values and click Search. 3. Select the General Ledger row and click Manage Structure Instances to open the
Manage Key Flexfield Structure Instance page. 4. Click the Create icon to open the Create Key Flexfield Structure Instance page. 5. Enter a unique Structure Instance Code, INFUSION_AM_COA_INSTANCE,
and Name, InFusion America COA Instance. Provide an optional Description, InFusion America Inc. Chart of Accounts Structure Instance.
6. Select Dynamic combination creation allowed to indicate that you want to dynamically generate account combinations.
7. Associate your instance with your Structure Name, InFusion America Structure.
Note
By default, an instance inherits the key attributes of the associated structure. Some attributes, such as the value set assigned to each the segment, can be modified.
8. Click Save. 9. Optionally, select the segment row and click Edit to modify instance segments. 10. Check Required, Displayed, and Business intelligence enabled check boxes.
Note
The Business Intelligence check box is only valid when enabled on segments with segment labels. Check the Required and Displayed options for all segments including those intended for future use. The recommended best practice is to define one segment for future use and set a default value. This ensures room for
Getting Started with Oracle Fusion Applications: Enterprise Structures for Financials
25
expansion in your chart of accounts and that the extra segment is populated in the account combinations.
11. Click OK. 12. Click Save and Close. 13. Define additional instances following the same process.
Note
Alternatively, proceed directly with creating your value set values by selecting the corresponding Value Set Code in the Segment Instances table.
14. Click Done. 15. Click Deploy Flexfield. 16. Click OK.
Publishing an Account Hierarchy: Example
Publish an account hierarchy to finalize a new or edited account hierarchy. Account hierarchies organize data and enable the creation of groups and rollups of information that exist within an organization. After creating or editing an accounting hierarchy, run the Publish Account Hierarchies, Maintain GL Value Sets, and Maintain Chart of Account Hierarchies processes before using the new or changed account hierarchy.
Scenario
You have made changes to your InFusion America account hierarchy. Follow these steps to publish your account hierarchy.
1. Navigate to the Setup and Maintenance work area. 2. Enter the Publish Account Hierarchies into the Name field. Click Search. 3. Click the Go to Task to open the Publish Account Hierarchies page. 4. Search for your InFusion America account hierarchy. 5. Click Expand to open the versions of your hierarchy. 6. Click the Publish button on the tool bar.
Note
For a new hierarchy, scroll over to verify the Publish check box is checked.
Getting Started with Oracle Fusion Applications: Enterprise Structures for Financials
26
Enabling Security on a Chart of Accounts: Example
Enabling security for a chart of accounts controls access to values in your account segments. Create and assign conditions and polices to rules and specific data roles to control access to your segment values during journal entry, account inquiry, and reporting.
Note
Before proceeding with these steps, determine what roles are defined and assigned in Oracle Identity Manager (OIM) for each ledger and its chart of accounts. The definition of security policies requires roles that are impacted by these rules to be specified.
Important: As soon as segment value security is enabled on the chart of accounts, all users will be denied access to that chart of accounts. The system administrator must specifically grant security policies to the users' roles to enable the users to access their values for that chart of accounts.
Scenario
In this example, you are responsible for creating a segment value security rule for each of your segments of your InFusion America chart of accounts.
1. Ensure that your tree and tree version definitions are properly set up.
Note
This step is important if you plan on using tree operators in your policy definitions since the policy may not provide the expected behavior if the hierarchy is not properly defined.
2. Navigate to the Setup and Maintenance page. 3. In the All Tasks tab, search for Manage Segment Value Security Rules. Click the Go to
Task. 4. Enter the desired information into the Value Set Code field. Click Search. 5. With the value set highlighted, click Edit. 6. Enable the Security enabled check box. 7. Enter the Data Security Resource Name. 8. Click Edit Data Security to begin defining the security condition and policy. 9. With the Condition tab selected, click Create to begin creating the condition.
Note
While defining each condition, you can choose to specify whether it uses tree operators or regular operators. Only the following operators are supported.
o For non-tree operators select from: Equal to Not Equal to
Getting Started with Oracle Fusion Applications: Enterprise Structures for Financials
27
Between Not Between
o For tree operators select from Is a last descendent of Is a descendent of
10. Click Save. 11. On the Policy tab, click Create in the General Information tab. 12. Enter information in the General Information tab. 13. Select the Role tab and search for the relevant data role to assign to this policy. 14. Click on the Rule tab in order to associate the relevant condition with the policy.
Note
The Row Set field determines the range of value set values affected by the policy.
o If Multiple Values is selected, then a condition must be specified. o If All Values is selected, then the policy grants access to all values in the value set
and no condition is needed. 15. Repeat these steps for the remaining value sets in your chart of accounts. 16. Click Save and Close. 17. Click Submit. 18. The last step is to deploy the chart of accounts from the Manage Key Flexfields page
before security is enabled for the chart of accounts.
Related Topics: Flexfield Deployment : Explained
Creating a Cross Validation Rule: Example
Create cross validation rules to prevent specific combinations of segment values in your account combinations, for example, preventing a particular cost center from being combined with a specific company value. Cross validation rules only affect the creation of new account combinations.
Scenario Enter a new cross validation rule to prevents your InFusion America Inc. company value 01 from being combined with your marketing department value 300 in an account combination. Your company, InFusion America Inc. does not have a marketing department. Navigate to the Manage Cross-Validation Rules task from within your implementation project, and then click the Go to Task icon. Select your InFusion America chart of accounts. Click the Create icon. Specify a unique rule Name, IFAM01, an optional Description, Do not combine Marketing Department, 300 with InFusion America, company 01. Enter an optional effective From Date of today. Check Enabled. Click on the Change filter condition on the Condition Filter. Enter Company equal to 01. The cross validation rule evaluates if Company 01 was entered and if it was, then the validation process continues to evaluate the rule.
Getting Started with Oracle Fusion Applications: Enterprise Structures for Financials
28
Note If you do not specify any statement in the condition filter, then the rule is always evaluated. Click on the Change filter condition on the Validation Filter. Enter Cost Center equal to 300. When the rule is evaluated, an account combination must contain a cost center other than 300 before it can be created. Enter an Error Message: Cost Center 300 is not allowed with Company 01. The message displays in the relevant user interfaces and processes when an account combination cannot be created because it violates the rule. Click Save and Close.
Entering Daily Rates Manually: Worked Example
You are required to enter the daily rates for currency conversion from Great Britain pounds sterling (GBP) to United States dollars (USD) each day for your company InFusion America Inc.
Oracle Application Development Framework (ADF) Desktop Integration is an Excel add-in that must be loaded onto each client. Because ADF Desktop Integration is an add-in to Microsoft Office products, you can use this feature only if they have Microsoft Excel 2007 or above, Internet Explorer 7 or above, and Microsoft Windows 7, XP Professional SP2, or Vista. Users must download the installation files from Navigator - Tools - Download Desktop Integrator Installer.
Entering Daily Rates
1. Navigate to the Period Close work area.
Use the Period Close work area to link to close processes and currency process.
2. Click the Manage Currency Rates link.
Use the Currency Rates Manager page to create, edit, and review currency rate types, daily rates, and historical rates.
3. Click the Daily Rates tab.
Use the Daily Rates tab to review and enter currency rates.
4. Click the Create in Spreadsheet button.
Use the Create Daily Rates spreadsheet to enter daily rates in a template that you can save and reuse.
5. Click in the From Currency field. Select the GBP - Pound Sterling list item. 6. Click in the To Currency field. Select the USD - US Dollar list item. 7. Click in the Conversion Rate field. Select the Spot list item
Getting Started with Oracle Fusion Applications: Enterprise Structures for Financials
29
8. Click in the From Conversion field. Enter the desired information into the From Conversion field. Enter a valid value e.g. "8/1/2011".
9. Click in the To Conversion Date field. Enter the desired information into the To Conversion Date field. Enter a valid value e.g. "8/1/2011".
10. Click in the Conversion Rate field. Enter the desired information into the Conversion Rate field. Enter a valid value e.g. "1.33225".
11. Click the Submit button. Click the OK button twice. 12. Review the Record Status column to verify that all rows were loaded successfully. 13. Save the template to use to enter daily rates frequently. You can save the spreadsheet to
either a local drive or a shared network drive.
Updating Currency Rates: Worked Example
You are required to change today's daily rates that were already entered. The rates you are changing are for currency conversion from Great Britain pounds sterling (GBP) to United States dollars (USD) for your company InFusion America Inc.
Currency conversion rates were entered by an automatic load to the Daily Rates table. They can also be entered through a spreadsheet.
Updating Currency Rates
1. Navigate to the Period Close work area. Use the Period Close work area to link to close processes and currency process.
2. Click the Manage Currency Rates link. Use the Currency Rates Manager page to create, edit, and review currency rate types, daily rates, and historical rates.
3. Click the Daily Rates tab. Use the Daily Rates tab to review and enter currency rates. 4. Click the From Currency list. Select the GBP - Pound Sterling list item. 5. Click the To Currency list. Select the USD - US Dollar list item. 6. Enter the dates for the daily rates that you are changing. Enter today's date. 7. Click the Rate Type list. Select the Spot list item. 8. Click the Search button. 9. Click in the Rate field. Enter the new rate of 1.7 in the Rate field. 10. Click in the Inverse Rate field. Enter the new inverse rate of 0.58822 in the Inverse Rate
field. 11. Click the Save button.
Creating Legal Jurisdictions, Addresses and Authorities: Examples
Define legal jurisdictions and related legal authorities to support multiple legal entity registrations, which are used by Oracle Fusion Tax and Oracle Fusion Payroll.
Legal Jurisdictions
Getting Started with Oracle Fusion Applications: Enterprise Structures for Financials
30
Create a legal jurisdiction by following these steps:
1. Navigate to the Manage Legal Jurisdictions page from the Setup and Maintenance work area by querying on the Manage Legal Jurisdictions task and selecting Go to Task.
2. Select Create. 3. Enter a unique Name, United States Income Tax. 4. Select a Territory, United States. 5. Select a Legislative Category, Income tax. 6. Select Identifying, Yes. Identifying indicates the first jurisdiction a legal entity must
register with to do business in a country. 7. Enter a Start Date if desired. You can also add an End Date to indicate a date that the
jurisdiction may no longer be used. 8. Select a Legal Entity Registration Code, EIN or TIN. 9. Select a Legal Reporting Unit Registration Code, Legal Reporting Unit Registration
Number. 10. Optionally enter one or more Legal Functions. 11. Select Save and Close.
Legal Addresses for Legal Entities and Reporting Units
Create a legal address for legal entities and reporting units by following these steps:
1. Navigate to the Manage Legal Address page from the Setup and Maintenance work area by querying on the Manage Legal Address task and selecting Go to Task.
2. Select Create. 3. Select Country. 4. Enter Address Line 1, Oracle Parkway. 5. Optionally enter Address Line 2, and Address Line 3. 6. Enter or Select Zip Code, 94065. 7. Select Geography 94065 and Parent Geography Redwood Shores, San Mateo, CA. 8. Optionally enter a Time Zone, US Pacific Time. 9. Select OK. 10. Select Save and Close.
Legal Authorities
Create a legal authority by following these steps:
1. Navigate to the Manage Legal Authorities page from the Setup and Maintenance work area by querying on the Manage Legal Authorities task and selecting Go to Task.
2. Enter the Name, California Franchise Tax Board. 3. Enter the Tax Authority Type, Reporting.
Note
Create an address for the legal authority.
Getting Started with Oracle Fusion Applications: Enterprise Structures for Financials
31
4. Select Create. 5. The Site Number is automatically assigned. 6. Optionally enter a Mail Stop. 7. Select Country, United States 8. Enter Address Line 1, 121 Spear Street, Suite 400. 9. Optionally enter Address Line 2, and Address Line 3. 10. Enter or Select Zip Code, 94105. 11. Select Geography 94105 and Parent Geography San Francisco, San Francisco, CA. 12. Select OK. 13. Optionally enter a Time Zone, US Pacific Time. 14. Optionally click the One-Time Address check box. 15. The From Date defaults to today's date. Update if necessary. 16. Optionally enter a To Date to indicate the last day the address can be used.
Note
You can optionally enter Address Purpose details.
17. Select Add Row. 18. Select Purpose. 19. The Purpose from Date will default to today's date. 20. Optionally enter a Purpose to Date. 21. Select OK. 22. Select Save and Close.
Creating Legal Entities, Registrations, and Reporting Units: Examples
Define a legal entity for each registered company or other entity recognized in law for which you want to record assets, liabilities, and income, pay transaction taxes, or perform intercompany trading.
Legal Entity
From within an implementation project, create a legal entity by following these steps:
Note
Working within an implementation project is required because you select a scope value within an implementation project. The scope value is the legal entity that you will create or select to work within for your implementation project.
1. Navigate to an implementation project that contains the Define Legal Entities task list from the Setup and Maintenance work area.
2. Select Go to Task for the Define Legal Entities task list within the implementation project.
Getting Started with Oracle Fusion Applications: Enterprise Structures for Financials
32
Note
The following message appears:
You must first select a scope value to perform the task. o Select and add an existing scope value to the implementation project. o Create a new scope value and then add it to the implementation project.
3. Select Create New. 4. From the Manage Legal Entities page select Create. 5. Accept the default Country, United States. 6. Enter Name, InFusion USA West. 7. Enter Legal Entity Identifier, US0033. 8. Optionally enter Start Date. When the start date is blank the legal entity is effective from
the creation date. 9. Optionally enter an End Date. 10. Optionally, if your legal entity should be registered to report payroll tax and social
insurance, select the Payroll statutory unit check box. 11. Optionally, if your legal entity has employees, select the Legal employer check box. 12. Optionally, if this legal entity is not a payroll statutory unit, select an existing payroll
statutory unit to report payroll tax and social instance on behalf of this legal entity.
Note
Enter the Registration Information.
13. Accept the default Identifying Jurisdiction, United States Income Tax. 14. Search for and select a Legal Address, 500 Oracle Parkway, Redwood Shores, CA 94065.
Note
The legal address must have been entered previously using the Manage Legal Address task.
15. Select OK. 16. Optionally enter a Place of Registration. 17. Enter the EIN or TIN. 18. Enter the Legal Reporting Unit Registration Number. 19. Select Save and Close to navigate back to the Manage Legal Entities page. 20. Select Done to return to your implementation project. An issue with the done button has
been fixed in 11g Release 1 (11.1.4). 21. In the Legal Entity choice list in the implementation project (just below the
implementation project name and code), click Select and Add Legal Entity to choose the legal entity that you just created, and set the scope for the remainder of your setup.
22. Search for and select your legal entity from the Manage Legal Entities page. 23. Select Save and Close.
This sets the scope for your task list to the selected legal entity, as indicated in the Legal Entity choice list above the Tasks and Task Lists table.
Getting Started with Oracle Fusion Applications: Enterprise Structures for Financials
33
Legal Entity Registrations
A legal entity registration with the same name as that of the legal entity will be created by default. To verify this, locate the Manage Legal Entity Registrations task and then select Go to Task. To create another registration for the legal entity follow these steps:
1. Navigate to your implementation project from the Setup and Maintenance work area. Verify that the parent Legal Entity scope value is set correctly.
2. Expand the Define Legal Entities task list within the implementation project. 3. Select Manage Legal Entity Registrations Go to Task. 4. Select Create. 5. Enter Jurisdiction. 6. Enter Registered Address. 7. Enter Registered Name. 8. Optionally enter Alternate Name, Registration Number, Place of Registration, Issuing
Legal Authority, and Issuing Legal Authority Address, Start Date, and End Date. 9. Save and Close.
Legal Reporting Unit
When a legal entity is created, a legal reporting unit with the same name as that of the entity is also automatically created. To create more legal reporting units or modify the settings follow these steps:
1. Navigate to your implementation project from the Setup and Maintenance work area. Verify that the parent Legal Entity scope value is set correctly.
2. Select Go to Task for the Define Legal Entities task list within the implementation project.
3. Select Create. 4. Enter Territory, United States. 5. Enter Name. 6. Optionally enter a Start Date.
Note
Enter Registration Information.
7. Search for and select Jurisdiction.
Note
Enter Main Legal Reporting Unit information.
8. Select the value Yes or No for the Main Legal Reporting Unit. Set value to yes only if you are creating a new main (primary) legal reporting unit.
9. Enter the Main Effective Start Date, 1/1/11. 10. Save and Close.
Getting Started with Oracle Fusion Applications: Enterprise Structures for Financials
34
Related Topics Legal Entities : Explained Planning Legal Reporting Units : Points to Consider Legal Entity in Oracle Fusion : Points to Consider
Creating Primary Ledgers: Example
Create a primary ledger as your main record-keeping ledger. Like any other ledger, a primary ledger records transactional balances by using a chart of accounts with a calendar, currency, and accounting rules implemented in an accounting method. The primary ledger is closely associated with the subledger transactions and provides context and accounting for them.
Scenario
Your company, InFusion Corporation is implementing Oracle Fusion Applications. You have been assigned the task of creating a primary ledger for your InFusion America entity.
1. Navigate to the Define Accounting Configurations task list and open Manage Primary Ledgers from within your implementation project. Click the Go to Task.
2. Click the Create icon. 3. Enter the following values:
Field Value
Name InFusion America
Description InFusion America primary ledger for recording transactions.
Chart of Accounts InFusion America Chart of Accounts
Accounting Calendar Standard Monthly
Currency USD
Accounting Method Standard Accrual
4. Click Save and Edit Task List to navigate back to the accounting configuration task list.
Note
You cannot change the chart of accounts, accounting calendar, or currency for your ledger after you save your ledger.
Assigning Legal Entities and Balancing Segments: Examples
Optionally, assign legal entities and balancing segments to your accounting configuration.
Assign Legal Entities
Getting Started with Oracle Fusion Applications: Enterprise Structures for Financials
35
Assign one or more legal entities to your configuration by following these steps:
1. Navigate to the Assign Legal Entities task. Click the Go to Task. 2. Click the Select and Add icon. 3. Click Search. Select your legal entities. 4. Click Apply. Click Done. 5. Click Save and Close.
Assign Balancing Segments to Legal Entities
Assign balancing segment values to your legal entities by following these steps:
1. Navigate to the Assign Balancing Segment Values to Legal Entities task. Click the Go to Task.
2. Click the Create icon. 3. Select the balancing segment value. Optionally, add a Start Date. 4. Click Save and Close to close the create page. 5. Click Save and Close.
Assign Balancing Segments to Ledgers
Assign balancing segment values directly to your ledger by following these steps:
1. Navigate to the Assign Balancing Segment Value to Ledger task. Click the Go to Task. 2. Select the balancing segment value. 3. Optionally enter a start date. 4. Click Save and Close.
Note
The balancing segment values that are assigned to the ledger represent nonlegal entity transactions, such as adjustments. If you use legal entities, you must assign balancing segment values to all legal entities before assigning values to the ledger. The only available balancing segment values that can be assigned to ledgers are those not assigned to legal entities.
Getting Started with Oracle Fusion Applications: Enterprise Structures for Financials
36
Mapping Chart of Accounts: Explained
The chart of accounts mapping feature supports the ability to correlate a source chart of accounts to a target chart of accounts to allow for the processing of balances or amounts. This is accomplished by either using segment rules, account rules, or a combination of both. A chart of accounts mapping is used by the posting process in propagating transactions from the primary ledger to its secondary ledger, providing the means to map the primary ledger chart of accounts to that of the secondary ledger. The mapping feature is used by both balance transfer processes for balance level secondary ledgers as well as cross ledger transfers, whereby balances from one ledger are copied to another ledger.
Segment Rules
Segment rules serve to map each segment of the target chart of accounts to an account value or segment in the source account. Three different mapping actions are available:
Assign a constant value for a segment in the target chart of accounts
Copy the value from the source segment to the corresponding target segment
Note
To use this action, the paired target and source segments must share identical values in their value sets.
Use roll up rules to aggregate source accounts to a corresponding target segment or account
o Create a single value mapping when a specific detail source segment value is given a detail target segment value.
o Use hierarchical roll up rules when a specific parent source value and all of its child segment values, are mapped to a given detail target segment value. This provides the ability to process groups of source segment values in one single roll up rule.
o Define parent source values in roll up rules when date effective versions of the hierarchy are used with the accounting date of the transactions produced by the processes that reference the chart of accounts mapping. This gives the additional benefit of self maintaining mappings since the hierarchies referenced change with time, and the applicable child values are processed automatically.
Account Rules In addition to segment rules, define account rules for the chart of accounts mapping. Account rules map a complete target account code combination against one or more source account code combinations. The source account code combinations can be defined segment by segment using:
Single detail account values
Detail account value ranges
Parent values for each segment
Getting Started with Oracle Fusion Applications: Enterprise Structures for Financials
37
Note
When using parent values, its child values for the date effective version of the hierarchy, are processed when the mapping is called.
Creating a New Segment Value Demo Script
1. Begin by navigating to the Setup and Maintenance work area. 2. Click the Navigator menu. 3. Click the Setup and Maintenance link. 4. Use the Setup and Maintenance work area to access tasks assigned to you or all tasks within
your offering. 5. Click the All Tasks tab. 6. Use the All Tasks tab to search for task lists and tasks. Navigate to your setup page directly
from the task. 7. You use the Manage Value Sets task to maintain your value sets. For example, you can create
new values and if appropriate, end date or disable existing values. 8. Enter the desired information into the Name field. Enter a valid value e.g. "Manage Value
Sets". 9. Click the Search button. 10. Select the Manage Value Sets task. 11. Click the Go to Task button. 12. Use the Manage Value Sets page to search for and review value sets for key, descriptive, and
extensible flexfields. 13. At least one of the fields marked with two asterisks (**) is required to perform the search. 14. Enter the desired information into the Value Set Code field. Enter a valid value e.g. "Fusion
Company". 15. Click the Search button. 16. Navigate to the Manage Values page where you can search for, create, and edit the values. 17. Click the Manage Values button. 18. Use the Manage Values page to search for, create, and edit values within a value set. 19. Create a new value for the Fusion Company value set by selecting the Create button. 20. Click the Create button. 21. Use the Create Value page to create new values for the selected value set. 22. Enter the desired information into the Value field. Enter a valid value e.g. "33". 23. Enter the desired information into the Description field. Enter a valid value e.g. "Big Wheels
Manufacturing Inc". 24. Accept the defaults for the mandatory value attributes. 25. If the Value Attributes region is not displayed, verify that the value set has been assigned to a
segment in the Accounting Key Flexfield structure. 26. Click the Save and Close button. 27. Click the Done button. 28. Click the Done button.
Getting Started with Oracle Fusion Applications: Enterprise Structures for Financials
38
Creating an Accounting Hierarchy Demo Script
1. Begin by navigating to the Setup and Maintenance work area. Click the Navigator link. 2. Click the Setup and Maintenance link. Use the Setup and Maintenance work area to access
tasks assigned to you or all tasks within your offering. 3. Click the All Tasks tab. Use the All Tasks tab to search for task lists and tasks. 4. Enter the desired information into the Name field. Enter "Manage Account Hierarchies" or
"Do not use". Select the Search button to find the Manage Account Hierarchies task. 5. Select the Go to Task icon to navigate to the Manage Account Hierarchies task. 6. Use the Manage Account Hierarchies page to search, create, and edit account hierarchies. 7. Click the Create Tree button to open the definition of the tree. 8. Use the Manage Account Hierarchies: Specify Definition page to define the basic details of
the tree. 9. Enter the name and code for the tree. For example, enter Fin_Tree_1 in the Name and Code
field. 10. Enter the desired information into the Name field. Enter a valid value e.g. "Fin_Tree_1". 11. Enter the desired information into the Code field. Enter a valid value e.g. "Fin_Tree_1". 12. To select the type of tree structure, click the Tree Structure list box. 13. Click the button to the right of the Tree Structure field. 14. Select Account Flexfield Hierarchy as the tree structure. 15. Click the Accounting Flexfield Hierarchy list item. 16. Enter the description for the tree. Enter the desired information into the Description field.
Enter a valid value e.g. "Tree for account dimension with Value Set 17812". 17. Click the Expand button to expand the Accounting Flexfield Hierarchy Detail Values and
Accounting Flexfield Hierarchy Parent Values rows. 18. Enter the Bind_ValueSetCode for Accounting Flexfield Hierarchy Detail Values and
Accounting Flexfield Hierarchy Parent Values. Enter the desired information into the Bind_ValueSetCode field. Enter a valid value e.g. "VF_Account 17812".
19. Enter the desired information into the Bind_ValueSetCode field. Enter a valid value e.g. "VF_Account 17812".
20. Select the Save button to save the Data Source Parameters. 21. A message confirms that your new values have been updated. Click the OK button. 22. Click the Next button. Click the Next button. 23. Select the Submit button to save your newly created tree structure. 24. Search for the tree structure you just created to add a tree version. Enter the desired
information into the Tree Code field. Enter a valid value e.g. "fin_tree". 25. Select the row. Click the Fin_Tree_1 row header. 26. Click the Create Tree Version button. 27. Click the Create Tree Version list item. 28. Enter the Name and Description for the tree version. Enter the desired information into the
Name field. Enter a valid value e.g. "Fin_Tree_Version". 29. Enter the desired information into the Description field. Enter a valid value e.g.
"Fin_Tree_Version". 30. Enter the effective start date for the tree version in the Effective Start Date field. Enter the
desired information into the Effective Start Date field. Enter "9/13/2011". 31. Click the Next button. 32. Select the OK button to acknowledge the confirmation of the creation of a new tree version. 33. Click the Add button to add tree nodes.
Getting Started with Oracle Fusion Applications: Enterprise Structures for Financials
39
34. Select the Specific value radio button to use a designated value as the Tree Node Type. Click the button to the right of the Data Source field.
35. Click the Accounting Flexfield Hierarchy Parent Values list item. 36. Click the vertical scrollbar. 37. Click the 99999 list item. 38. Use the Move button to move the selected node from the Available Nodes box to the
Selected Nodes box. 39. Click the OK button. 40. Select the parent node 99999 and click the Add button to add child nodes. 41. With the Tree Node Type, Specific value radio button selected, select the Data Source. 42. Click the button to the right of the Data Source field. 43. Select the Data Source list box and select Accounting Flexfield Hierarchy Parent Values. Click
the Accounting Flexfield Hierarchy Parent Values list item. 44. Select multiple nodes by using the Control key on your keyboard. In this example, 10000 and
14000 have been selected for you. Press the [Ctrl] key and click the 15000 list item. 45. Click the vertical scrollbar. 46. Press the [Ctrl] key and click the 19999 list item. 47. Click the Move button to move the selected nodes from the Available Nodes box to the
Selected Nodes box.. 48. Click the OK button. 49. Click the Expand button. 50. Select the 10000 node. 51. Click the Add button to further add child nodes to 10000. 52. With the Tree Node Type, Specific value radio button selected, select a Data Source. 53. Select Accounting Flexfield Hierarchy Detail Values. 54. Select multiple nodes by using the Control key on your keyboard. In this example, 11010,
11015, 11016, 11017, and 11018 have been selected for you. Press the [Ctrl] key and click the 11020 list item.
55. Click the Move button to move the selected nodes from the Available Nodes box to the Selected Nodes box.
56. Click the OK button. 57. Select the Submit button when you have specified all the nodes and child nodes for the tree. 58. Select the OK button to confirm the message. 59. Use the Action menu to select the Set Status menu, and the Active list item to activate the
tree. 60. Click the Set Status menu. 61. Click the Active list item. 62. Use the Audit Results region to start the Audit process. Once the audit is performed, the
status of the tree version can be set to active. 63. Click the Online Audit button in the Audit Results region to start the Audit process. 64. Select the OK button to acknowledge the message. 65. Select the tree version. Click the row header. 66. Click the Actions menu. 67. Column flattening optimizes parent-child information for run-time performance by storing an
additional column in a table for all parents of a child. Select Flatten menu and Column Flattening.
68. Click the Online Flattening button. 69. Select to OK button to acknowledge the message.
Getting Started with Oracle Fusion Applications: Enterprise Structures for Financials
40
70. Select the tree version. 71. Select the Actions and Flattening menus and Row Flattening. 72. Row flattening optimizes parent-child information for run-time performance by storing
additional rows in a table. 73. Click the Row Flattening list item. 74. Click the Online Flattening button. 75. Select the OK button to acknowledge the message.
Creating a Journal Approval Rule Demo Script
1. Begin by navigating to the Business Process Management (BPM) Worklist. 2. Click the View menu. 3. Click the Servers list item. 4. Click the Financials link. 5. Use the BPM Worklist to review and access tasks that you need to perform. 6. Click the Administration link. Use the Administration tab to set application preferences and to
access other administrative functions. 7. Click the Task Configuration tab. Use the Task Configuration tab to access tasks that you
need to review or maintain. 8. Select the Journal Approval task. 9. Click the FinGlJournalApproval (1.0) link. 10. Click the Data Driven tab. Use the Data Driven tab to configure task data driven rules. 11. Click the button to the right of the Select Ruleset field. 12. Select Supervisory rule set and create a new journal approval rule within that rule set. The
Supervisory rule set ascends the primary supervisory hierarchy, starting at the requestor or at a given approver, and generates the approval chain.
13. Click the SoaOLabel.JournalApprovalStage: Supervisory_JournalApprovalRuleSet list item. 14. Click the Edit Task button. 15. Click the New Rule button. 16. Click the New Rule list item. 17. Enter the desired information into the NAME field. Enter a valid value e.g. "Approval for
More than $10,000". 18. Expand the new rule to add other properties. 19. Enter the desired information into the Description field. Enter a valid value e.g. "Approval
rule for journals equal to or more than $10,000.". 20. Enable the Tree Mode to use the supervisory hierarchy. 21. Click the Tree Mode option. 22. Click the button to the right of the ROOT field. 23. Select the root for the rule. 24. Click the JournalBatch list item. 25. Select the variable to configure the IF condition of the approval rule. 26. Click the Test option. 27. Search for the Enable Journal Flag attribute. 28. Click the Expand button. 29. Click the vertical scrollbar. 30. Click the enableJeApprovalFlag list item.
Getting Started with Oracle Fusion Applications: Enterprise Structures for Financials
41
31. Click the OK button. 32. Set the Enable Journal Batch attribute to yes. 33. Enter the desired information into the Value field. Enter a valid value e.g. ""Y"". 34. Click the Insert Test button. 35. In the second condition specify that the maximum journal line net amount is equal to or more
than $10,000. 36. Click the Search button. 37. Click the Expand button. 38. Click the maxLineNetAmount list item. 39. Click the OK button. 40. Click the button to the right of the Operator field. 41. Select the Operator. 42. Click the same or more than list item. 43. Specify the amount limit for the IF condition. 44. Enter the desired information into the Value field. Enter a valid value e.g. "10000". 45. Enter the THEN part of the condition. 46. Click the button to the right of the Approval Group field. 47. Select Supervisory as the List Builder. 48. Click the Supervisory list item. 49. Click the Create Action button. 50. Set the number of levels for the approval process to use. 51. Enter the desired information into the Number of levels field. Enter a valid value e.g. "1". 52. Enter the starting participant in the supervisory hierarchy. 53. Click the Starting Participant search button. 54. Click the Get Manager option. 55. Enter the user for the list builder to use to start the approval process. 56. Enter the desired information into the Reference User field. Enter a valid value e.g.
""jcooper"". 57. Enter the desired information into the Hierarchy Type field. Enter a valid value e.g.
""MATERIAL"". 58. Enter the desired information into the Assignment ID field. Enter a valid value e.g. "123". 59. Enter the date the approval rule will be effective. 60. Enter the desired information into the Effective Date field. Enter a valid value e.g. "2008-08-
15". 61. Click the OK button. 62. Enter the Top Participant in the hierarchy. 63. Click the Top Participant search button. 64. Click the Get User option. 65. Enter the desired information into the Reference User field. Enter a valid value e.g.
""jcooper"". 66. Click the OK button. 67. Click the Save button. 68. Click the OK button. 69. Click the Collapse button. 70. Select the Commit Task button to deploy the journal approval rule. 71. Click the Commit Task button.
Getting Started with Oracle Fusion Applications: Enterprise Structures for Financials
42
Defining Business Units Demo Script
1. Begin by selecting the Setup and Maintenance link from the navigator. From the Setup and Maintenance work area, you will access an implementation project in order to define and maintain the business unit.
2. Click the Manage Implementation Projects link. You will use the existing BU Implementation Project-33 implementation project to define and maintain business units.
3. Expand the Financials task to the Define Business Units task. 4. Select the Define Business Units task. Click the Go to Task. When defining or maintaining
business units, the scope value is the business unit. Once you create, or select and add the business unit, it will appear in the Business Unit drop down list, in the Basic Information region of the implementation project. The business unit (scope value) that you want to work with must be selected from the Basic Information region, prior to selecting any task.
5. Create a new business unit (scope value) by clicking the Create New button. 6. Select the Select and Add button to select an existing business unit (scope value). You can
also select the Create New Business Unit and Select and Add Business Unit options from the Business Unit drop down list in the Basic Information region.
7. In this example, you will create a new business unit. This business unit will be utilized as a service provider business unit. Click the Create New button.
8. Enter the desired information into the Name field. Enter a valid value e.g. "InFusion Manufacturing".
9. Choose an existing reference data default set, or create a new one by selecting create from the choice list.
10. Click the button to the right of the Default Set field. 11. In this example, you will create a new reference data set. Click the Create link. 12. Enter the desired information into the Set Code field. Enter a valid value e.g.
"InFusion_Manufacturing". 13. Enter the desired information into the Set Name field. Enter a valid value e.g. "InFusion
Manufacturing SET". 14. Enter the desired information into the Description field. Enter "InFusion Manufacturing
Reference Data Set". 15. Click the OK button. Click the Save and Close button. 16. From the Business Unit drop down list, you can access the Select and Add Business Unit or
Create New Business Unit functions. Once created and selected, the business unit (scope value) must be selected from the drop down list to identify the business unit that you will work with. Select and add the business unit that you created.
17. Click the Select and Add Business Unit list item. 18. Enter the desired information into the Name field. Enter a valid value e.g. "InFusion
Manufacturing". 19. Click the Search button. 20. Click the InFusion Manufacturing row header. 21. Click the Save and Close button. 22. Select the Assign Business Unit Business Function task to assign business functions for the
selected business unit. Click the Go to Task. 23. Use the Assign Business Functions page to assign all business functions that this business unit
will perform. 24. Click the Billing and Revenue Management option.
Getting Started with Oracle Fusion Applications: Enterprise Structures for Financials
43
25. Business functions that can generate financial transactions will require a primary ledger and a default legal entity. When this type of business function is selected, the Primary Ledger and Default Legal Entity fields will become mandatory (as indicated by the asterisks). NOTE: These fields must be populated before selecting additional business functions.
26. Click the button to the right of the Primary Ledger field. 27. Click the Search... link. 28. Enter the desired information into the Ledger field. Enter a valid value e.g. "Vision Foods -
USA Ledger". Click the Search button. 29. Select the desired Ledger/Legal Entity combination. Click the Vision Foods - USA Ledger,
Vision Foods Production/Mfg Ltd. list item. 30. Click the OK button. 31. Click the Customer Payments option. 32. Click the Payables Invoicing option. 33. Click the Procurement option. 34. Click the Receiving option. 35. Click the Save and Close button.
NOTE: InFusion Manufacturing has been selected as the business unit (scope value). This selection must be done prior to selecting any task.
36. You will now manage the business unit set assignment by selecting the Manage Business Unit Set Assignments task. Click the Go to Task.
37. The default set of the business unit is assigned to each reference data object. However, you can change the assignment for each object. You can also select the Reference Data Set Code column to modify the code.
38. The Manage Set Assignments task is a mandatory step. Even if you do not change any of the sets assigned, the assignment is not complete until the Save button is selected.
39. In this example, you will not change the Reference Data Set Code. Click the Save and Close link.
40. Create a new business unit that will serve as a service client business unit, InFusion Services. 41. The service provider business unit, InFusion Manufacturing, will provide the procurement
business function to InFusion Services. InFusion Services will have the requisitioning business function. Click the button to the right of the Business Unit field.
42. Click the Create New Business Unit list item. 43. Click the Create button. 44. Enter the desired information into the Name field. Enter a valid value e.g. "InFusion
Services". 45. Click the button to the right of the Default Set field. Click the Search... link. 46. Enter the desired information into the Reference Data Set Name field. Enter a valid value e.g.
"InFusion Services". Click the Search button. 47. Click the InFusion Services list item. Click the OK button. 48. Click the Save and Close button. 49. Select and add the new business unit. 50. Click the button to the right of the Business Unit field. 51. Click the Select and Add Business Unit list item. 52. Enter the desired information into the Name field. Enter a valid value e.g. "InFusion
Services". Click the Search button. 53. Click the InFusion Services row header. 54. Click the Save and Close button. 55. Click the button to the right of the Business Unit field.
Getting Started with Oracle Fusion Applications: Enterprise Structures for Financials
44
56. Click the InFusion Services list item. 57. Assign the requisitioning business function to the new business unit. Click the Go to Task.
The Primary Ledger and Default Legal Entity have been entered for you. 58. Select the Business Unit Function, Requisitioning. Click the Enabled option. 59. Click the Save and Close button. Note that InFusion Services is selected as the business unit
(scope value). 60. You will now manage the business unit set assignment by selecting the Manage Business Unit
Set Assignments task. Click the Go to Task. 61. In this example, you will not change the Reference Data Set Code. NOTE: Even if you do not
change any of the sets assigned, the assignment is not complete until the Save button is selected. Click the Save and Close button.
62. You will now define the service provider relationship. Begin by selecting the service client business unit, InFusion Services.
63. Confirm that the Business Unit scope value is set to the requisitioning business unit. 64. Select the Manage Service Provider Relationships task. Click the Go to Task. 65. Add the business unit that will process requisitions on behalf of InFusion Services. 66. Click the Add Row button. 67. Search for the service provider business unit. 68. Enter the desired information into the Name field. Enter a valid value e.g. "InFusion
Manufacturing". Click the Search button. 69. Click the InFusion Manufacturing list item. 70. Click the Done button. 71. Click the Save and Close button. 72. View the service client for InFusion Manufacturing. 73. Click the button to the right of the Business Unit field. 74. Select the service provider business unit. 75. Click the InFusion Manufacturing list item. 76. Select the View Service Clients task. Click the Go to Task. Note that Infusion Services is listed
as a service client of InFusion Manufacturing. 77. Click the Done button.
\ Getting Started with Oracle Fusion Applications:
Enterprise Structures for Financials
January 2012
Oracle Corporation
World Headquarters
500 Oracle Parkway
Redwood Shores, CA 94065
U.S.A.
Worldwide Inquiries:
Phone: +1.650.506.7000
Fax: +1.650.506.7200
oracle.com
Copyright © 2011, Oracle and/or its affiliates. All rights reserved. This document is provided for information purposes only and the
contents hereof are subject to change without notice. This document is not warranted to be error-free, nor subject to any other
warranties or conditions, whether expressed orally or implied in law, including implied warranties and conditions of merchantability or
fitness for a particular purpose. We specifically disclaim any liability with respect to this document and no contractual obligations are
formed either directly or indirectly by this document. This document may not be reproduced or transmitted in any form or by any
means, electronic or mechanical, for any purpose, without our prior written permission.
Oracle and Java are registered trademarks of Oracle and/or its affiliates. Other names may be trademarks of their respective
owners.
AMD, Opteron, the AMD logo, and the AMD Opteron logo are trademarks or registered trademarks of Advanced Micro Devices. Intel
and Intel Xeon are trademarks or registered trademarks of Intel Corporation. All SPARC trademarks are used under license and are
trademarks or registered trademarks of SPARC International, Inc. UNIX is a registered trademark licensed through X/Open
Company, Ltd. 0410


![Oracle Fusion Middleware SAP ABAP BW Adapter Guide for ... · PDF file[1]Oracle® Fusion Middleware Getting Started with SAP ABAP BW Adapter for Oracle Data Integrator 12c (12.2.1.2.0)](https://img.pdfslide.net/doc/110x75/5aa0fe377f8b9a89178ed1f1/oracle-fusion-middleware-sap-abap-bw-adapter-guide-for-1oracle-fusion-middleware.jpg)