Embed Size (px)
Citation preview
GINGERBREAD HOUSE POP-UP CARD
Cut on this l ine
Fold on this l ine
Apply glue
Scissors
Glue
ASSEMBLY INSTRUC TIONS
YOU WILL NEED:
PAGE 1 OF 6
GINGERBREAD HOUSE POP-UP CARD
PAGE 2 OF 6
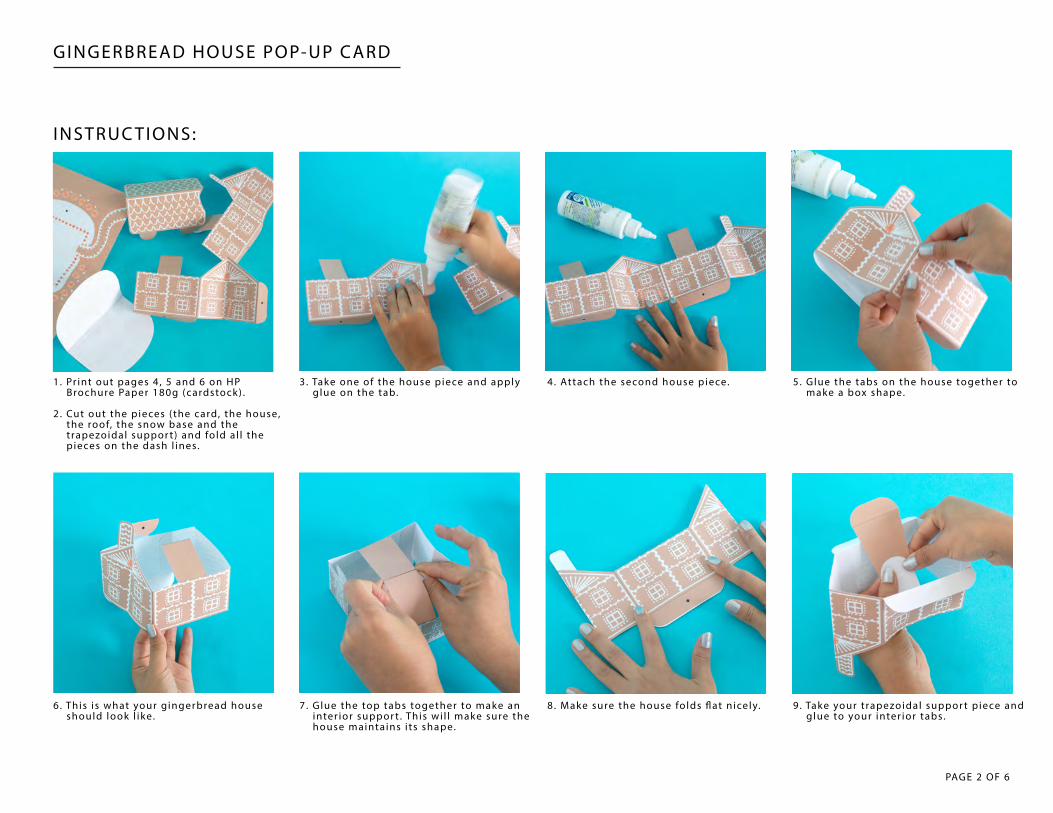
INSTRUC TIONS:
1. Pr int out pages 4 , 5 and 6 on HP Brochure Paper 180g (cardstock) .
2 . Cut out the pieces ( the card, the house, the roof, the snow base and the t rapezoidal suppor t) and fold a l l the p ieces on the dash l ines.
3 . Take one of the house piece and apply g lue on the tab.
4 . Attach the second house piece. 5 . Glue the tabs on the house together to make a box shape.
6 . This i s what your gingerbread house should look l ike.
8 . Make sure the house folds �at n icely.7 . Glue the top tabs together to make an inter ior suppor t . This wi l l make sure the house maintains i ts shape.
9 . Take your t rapezoidal suppor t piece and g lue to your inter ior tabs.
GINGERBREAD HOUSE POP-UP CARD
PAGE 3 OF 6
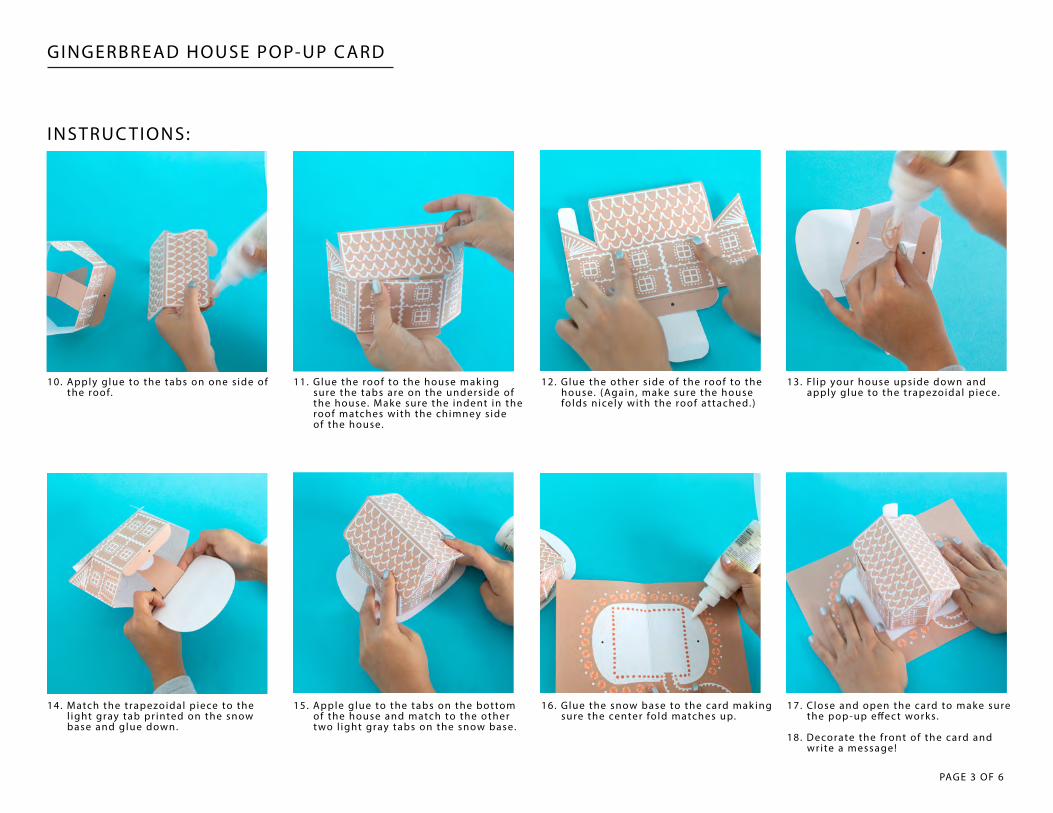
INSTRUC TIONS:
10. Apply glue to the tabs on one s ide of the roof.
11. Glue the roof to the house mak ing sure the tabs are on the unders ide of the house. Make sure the indent in the roof matches with the chimney s ide of the house.
12. Glue the other s ide of the roof to the house. (Again , make sure the house fo lds nicely with the roof attached. )
13. Fl ip your house upside down and apply glue to the t rapezoidal p iece.
14. Match the t rapezoidal p iece to the l ight gray tab pr inted on the snow base and glue down.
16. Glue the snow base to the card mak ing sure the center fo ld matches up.
15. Apple glue to the tabs on the bottom of the house and match to the other t wo l ight gray tabs on the snow base.
17. C lose and open the card to make sure the pop -up e�ec t works.
18. Decorate the f ront of the card and wr i te a message!
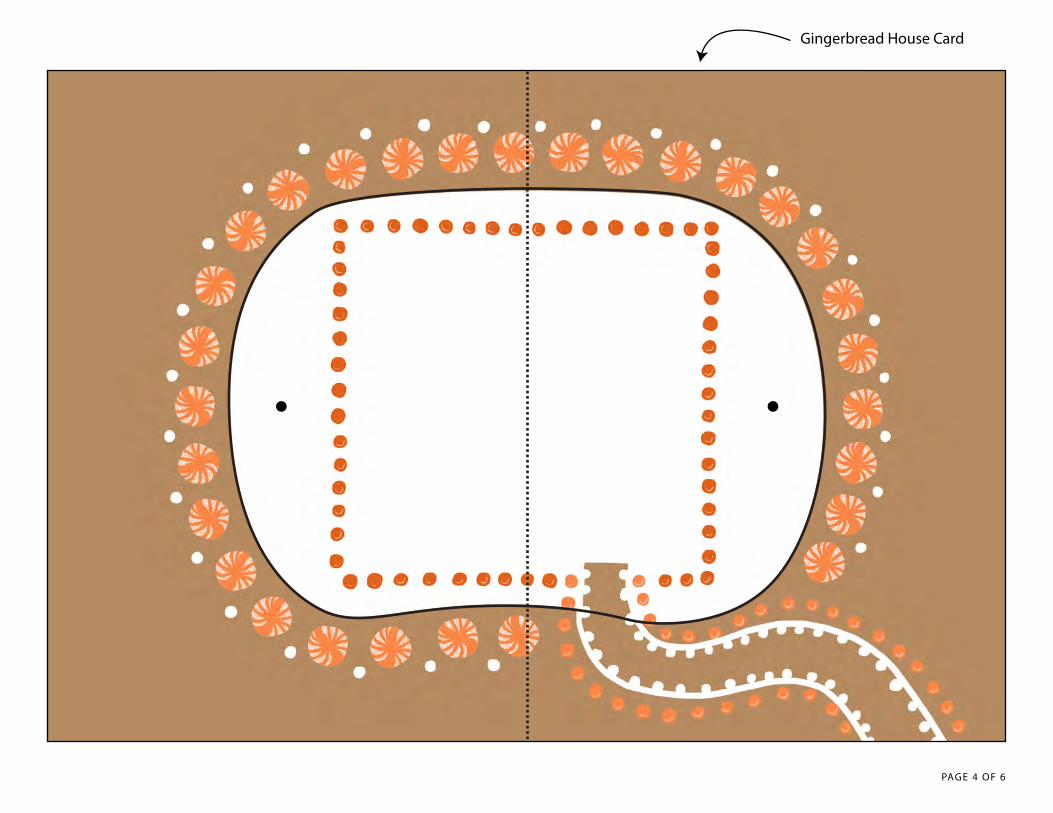
Gingerbread House Card
PAGE 4 OF 6
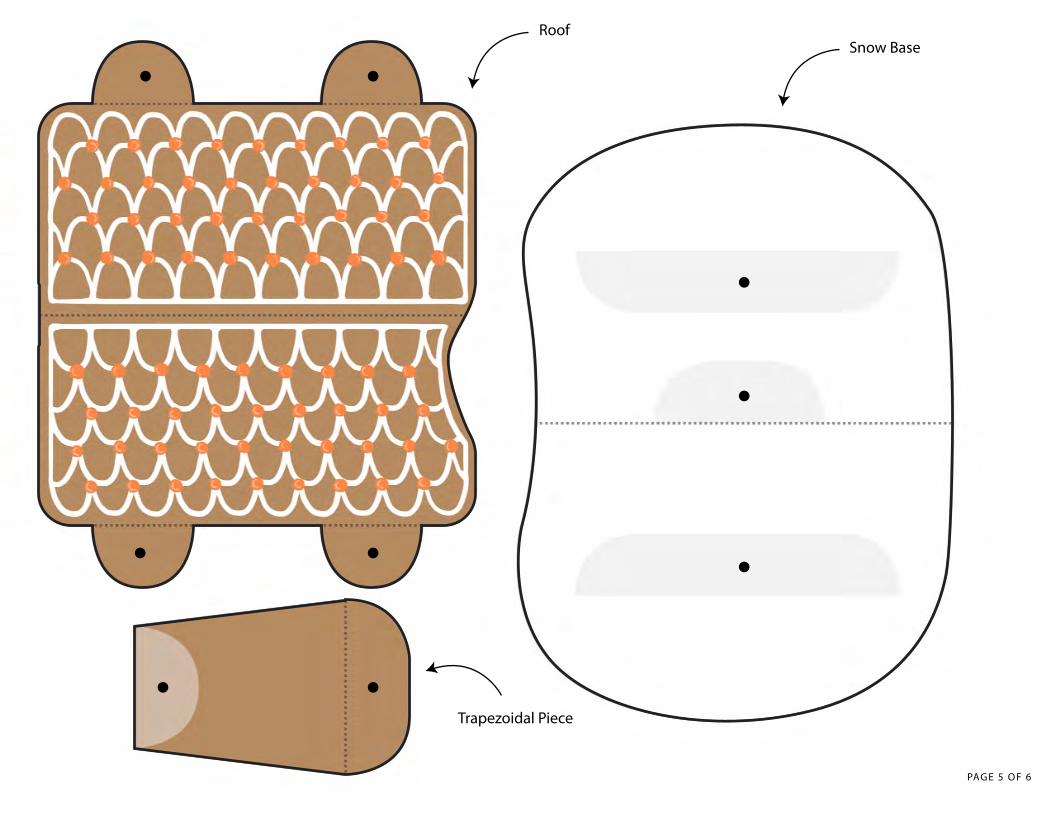
RoofSnow Base
Trapezoidal Piece
PAGE 5 OF 6
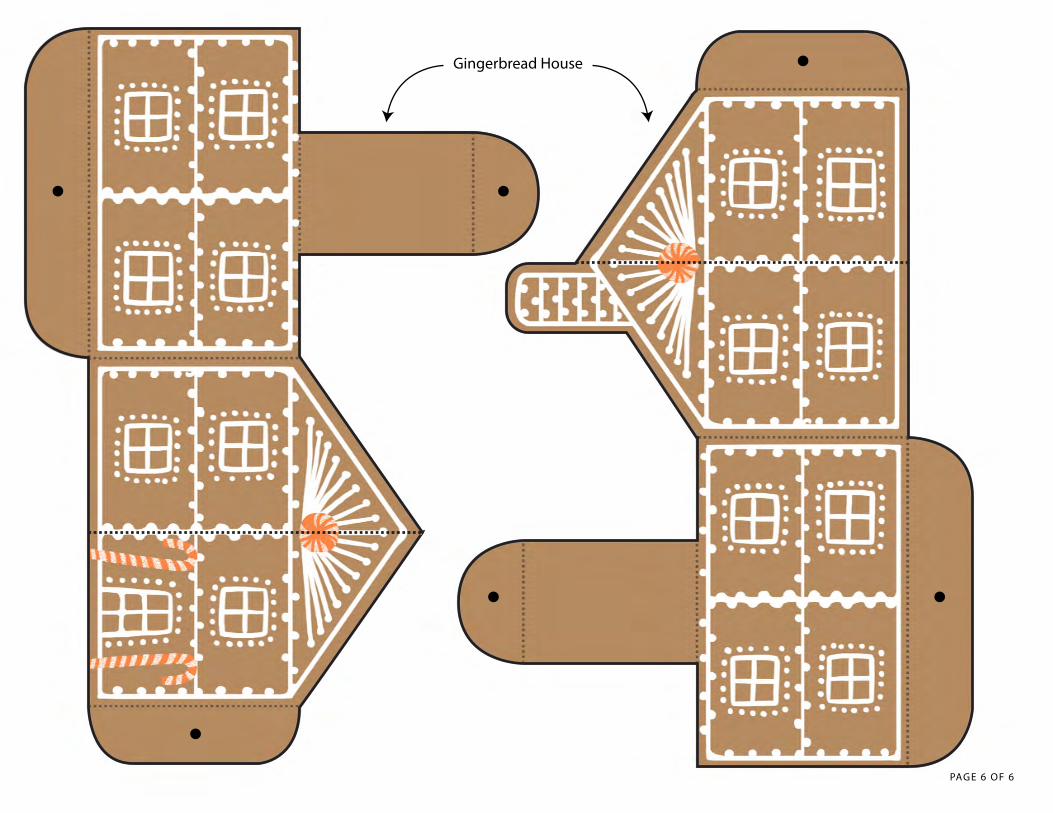
Gingerbread House
PAGE 6 OF 6
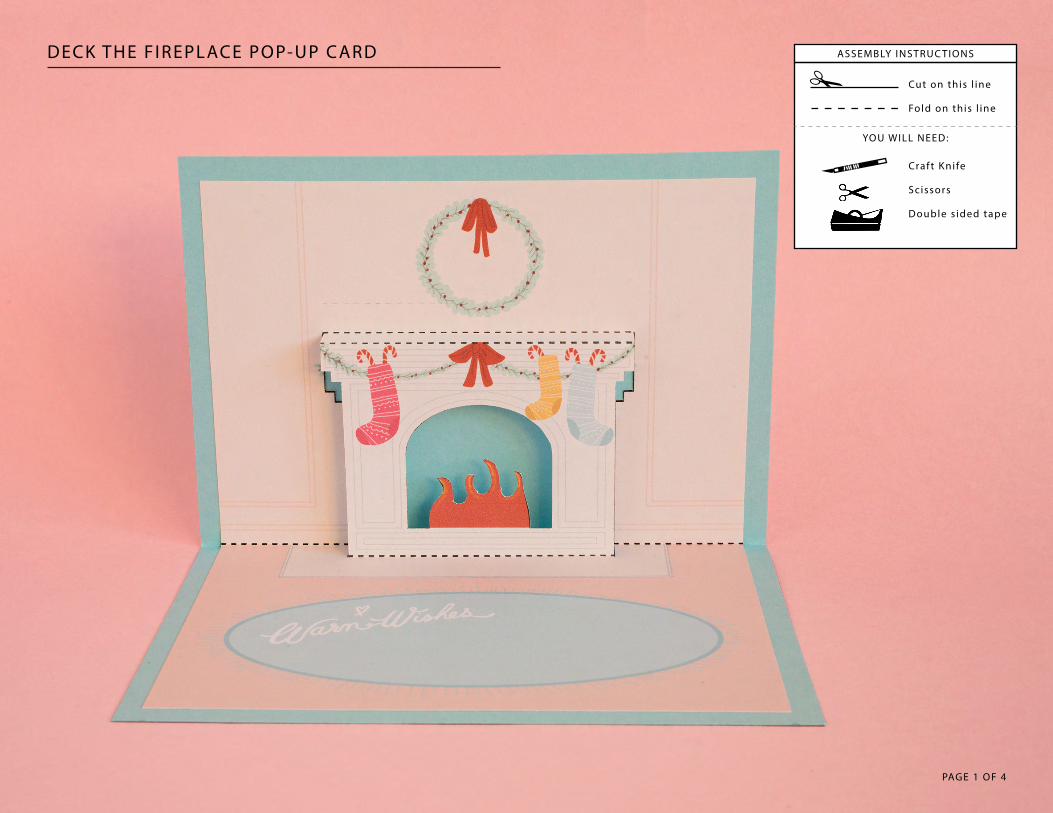
DECK THE F IREPLACE POP-UP CARD
Cut on this l ine
Fold on this l ine
Craf t K ni fe
Scissors
Double s ided tape
ASSEMBLY INSTRUC TIONS
YOU WILL NEED:
PAGE 1 OF 4
DECK THE F IREPLACE POP-UP CARD
PAGE 2 OF 4
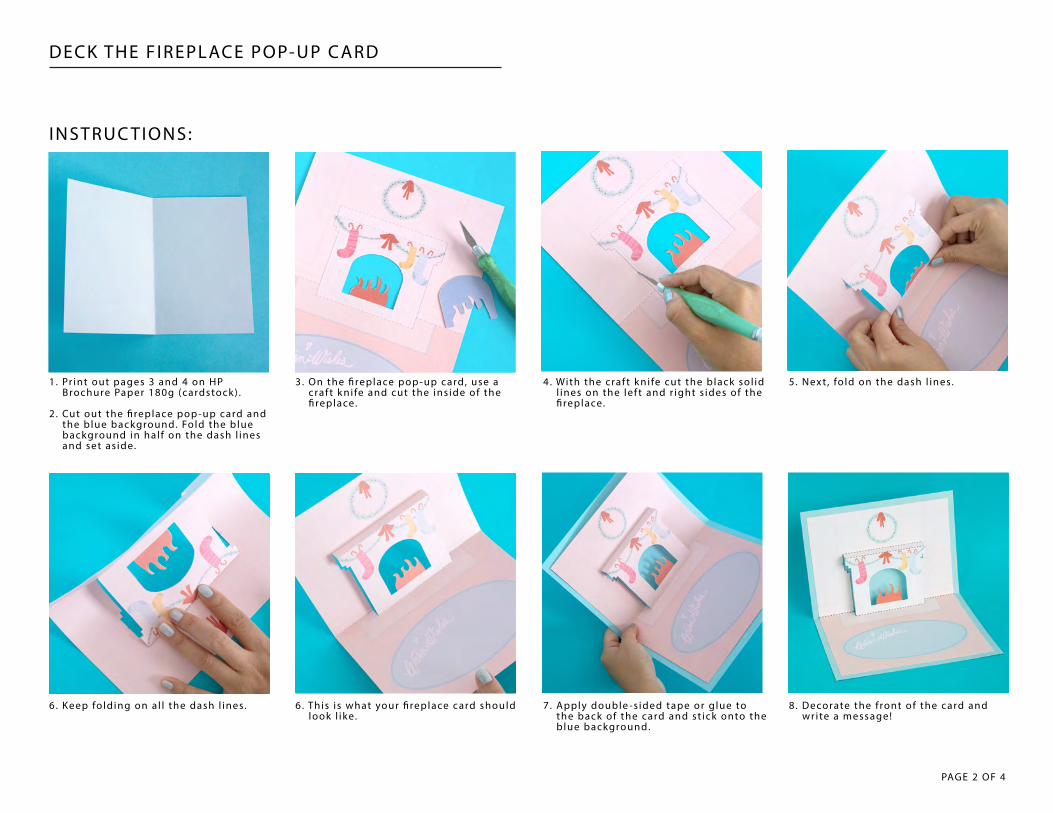
INSTRUC TIONS:
1. Pr int out pages 3 and 4 on HP Brochure Paper 180g (cardstock) .
2 . Cut out the �replace pop -up card and the blue background. Fold the blue background in hal f on the dash l ines and set as ide.
3 . On the �replace pop -up card, use a c raf t k ni fe and cut the ins ide of the �replace.
4 . With the craf t k ni fe cut the black sol id l ines on the lef t and r ight s ides of the �replace.
5 . Nex t , fo ld on the dash l ines.
6 . Keep folding on a l l the dash l ines. 7 . Apply double -s ided tape or g lue to the back of the card and st ick onto the b lue background.
6 . This i s what your �replace card should look l ike.
8 . Decorate the f ront of the card and wr i te a message!
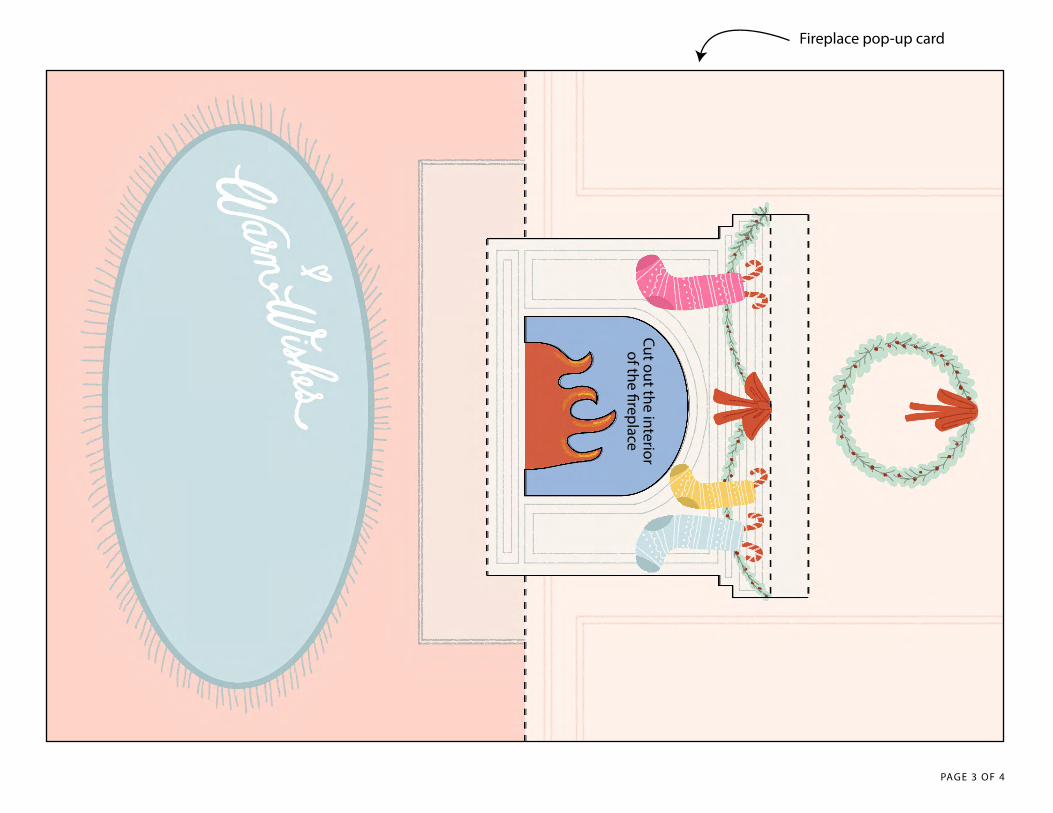
Fireplace pop-up card
PAGE 3 OF 4

Blue background
PAGE 4 OF 4
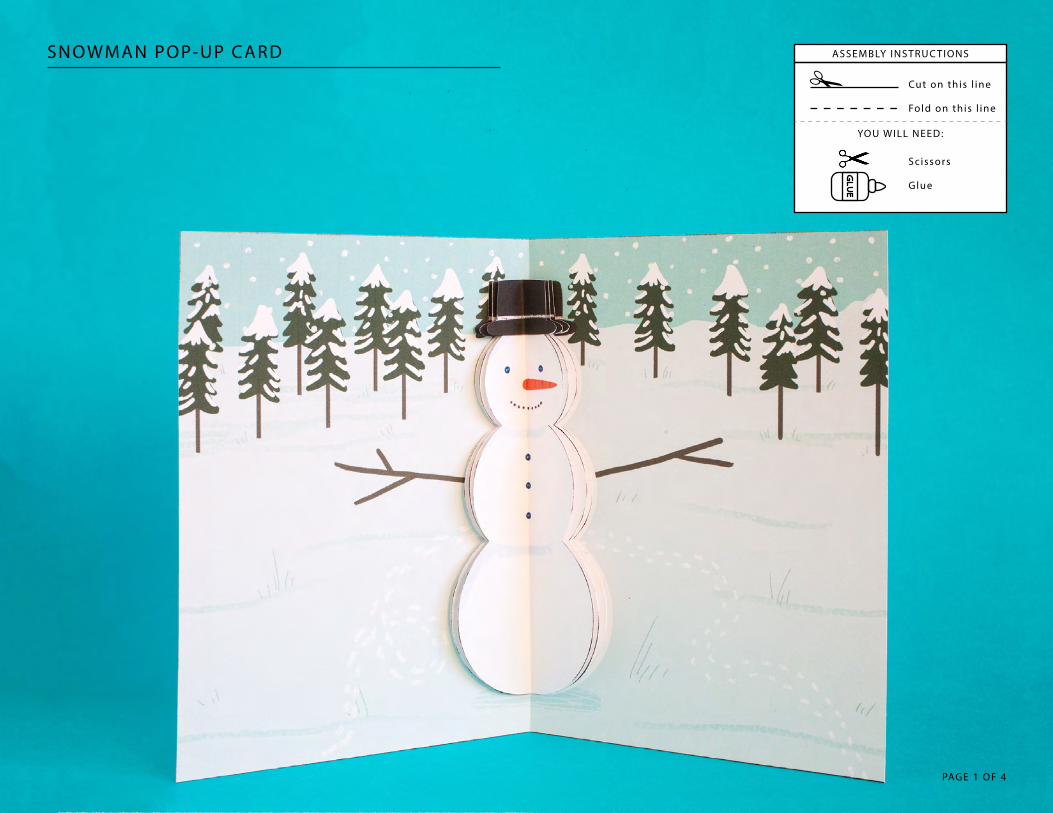
SNOWMAN POP-UP CARD
PAGE 1 OF 4
Cut on this l ine
Fold on this l ine
Scissors
Glue
ASSEMBLY INSTRUC TIONS
YOU WILL NEED:
GINGERBREAD HOUSE POP-UP CARD
PAGE 2 OF 4
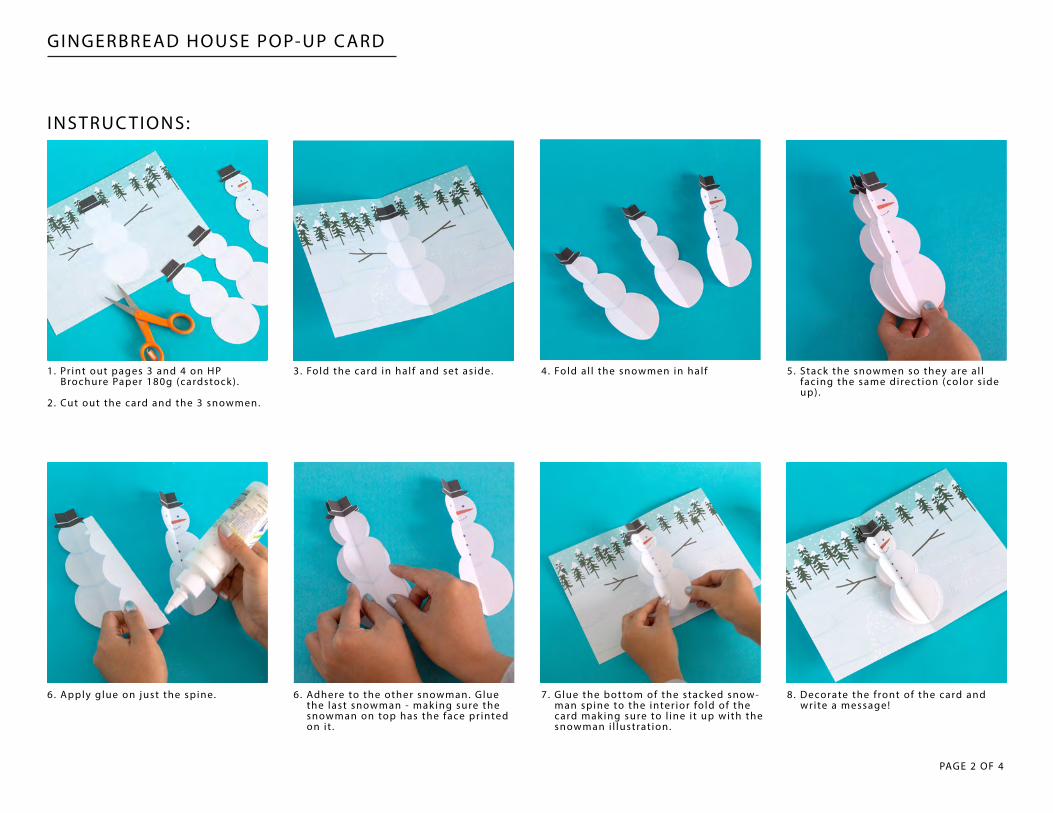
INSTRUC TIONS:
1. Pr int out pages 3 and 4 on HP Brochure Paper 180g (cardstock) .
2 . Cut out the card and the 3 snowmen.
3 . Fold the card in hal f and set as ide. 4 . Fold a l l the snowmen in hal f 5 . Stack the snowmen so they are a l l fac ing the same direc t ion (color s ide up) .
6 . Apply glue on just the spine. 7 . Glue the bottom of the stacked snow- man spine to the inter ior fo ld of the card mak ing sure to l ine i t up with the snowman i l lustrat ion.
6 . Adhere to the other snowman. Glue the last snowman - mak ing sure the snowman on top has the face pr inted on i t .
8 . Decorate the f ront of the card and wr i te a message!
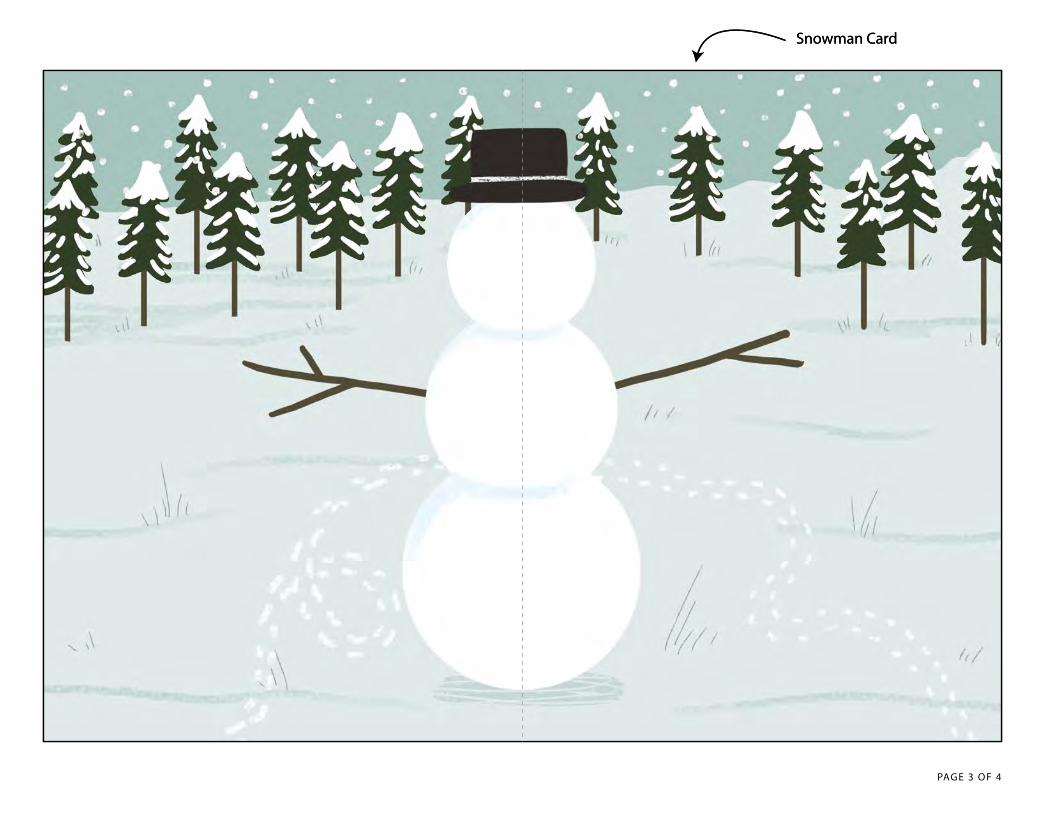
PAGE 3 OF 4
Snowman CardSnowman Card
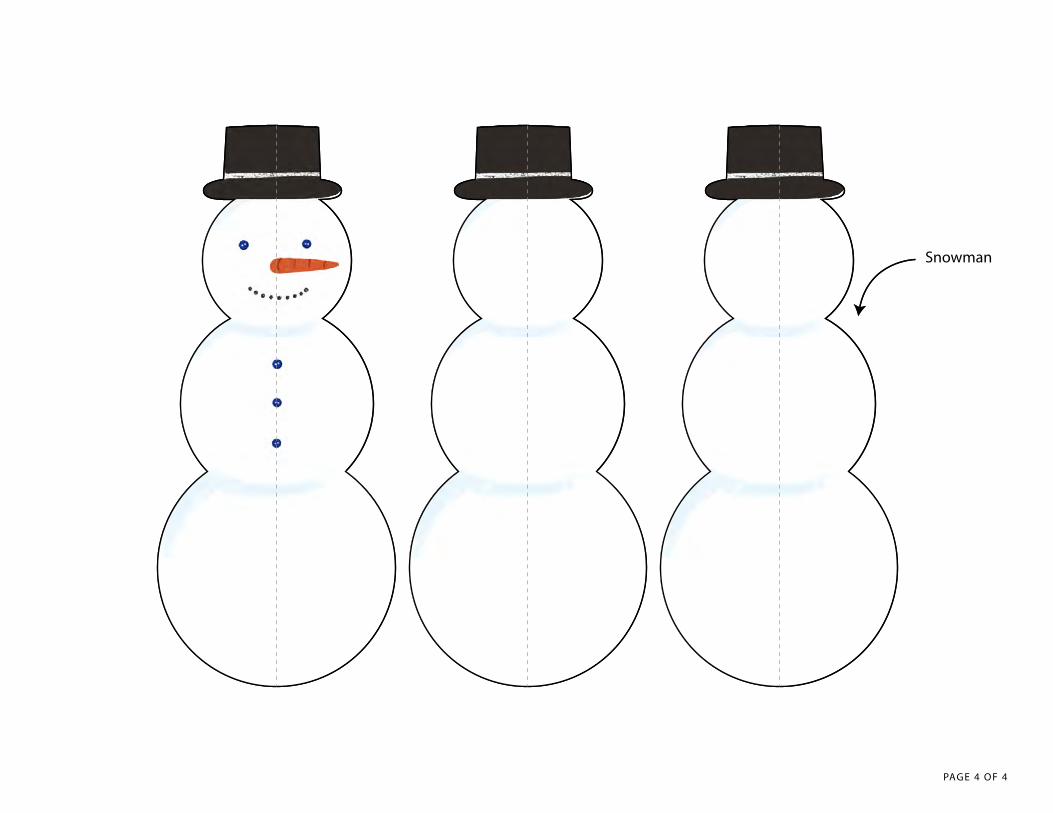
PAGE 4 OF 4
Snowman
![POP —up [Templates] pop-up Kitten birthday card eslgne * B ......POP —up [Templates] pop-up Kitten birthday card eslgne * B hard head body y Kagisippo ñyls ..-.UWJ)----- Birth](https://img.pdfslide.net/doc/110x75/61089be89475b242264f2740/pop-aup-templates-pop-up-kitten-birthday-card-eslgne-b-pop-aup-templates.jpg)