Embed Size (px)
Citation preview
2013-2015 Chevrolet/GMC 8” MyLink Navigation Interface i05
S1C016A-Y03E
Installation and User Manual
2016-2018 Chevrolet/GMC 8” MyLink Navigation Interface i06
S1C016A-Y10E / S1C016A-Y13E
And

DisclaimerPlease read this manual thoroughly
prior to installation. This manual shows a typical installation of a
S1C016A-Y03E, S1C016A-Y10E, S1C016A-Y13E. Your vehicle may vary.
Be sure ACC power is off before removing head unit. Use caution and if unsure seek professional assistance.
***Professional installation is strongly recommended***
Tech support available Mon - Fri, 9am-5pm (PST)
909-375-0633
Cover all surfaces with tape or plastic film to protect against scratching and damage to interior dash panels. Linkswell Automotive is in no way responsible for any damage
incurred during the installation.
Notice: This product has been verified in vehicles listed on the application guide only.
GM offers different software for Chevrolet, GMC, and Cadillac GUI Themes. Please confirm your vehicles model before your purchase.

Installation
- S1C016A-Y03E 1
- S1C016A-Y10E / S1C016A-Y13E 3
Switching to the Interface 5
Interface Homepage 6
Interface Settings 7
- GPS 8
- Media 9
- System 10
- Other 11
OBD Information 12
HDMI Input 14
USB Input 15
Navigation 16
Table Of Contents
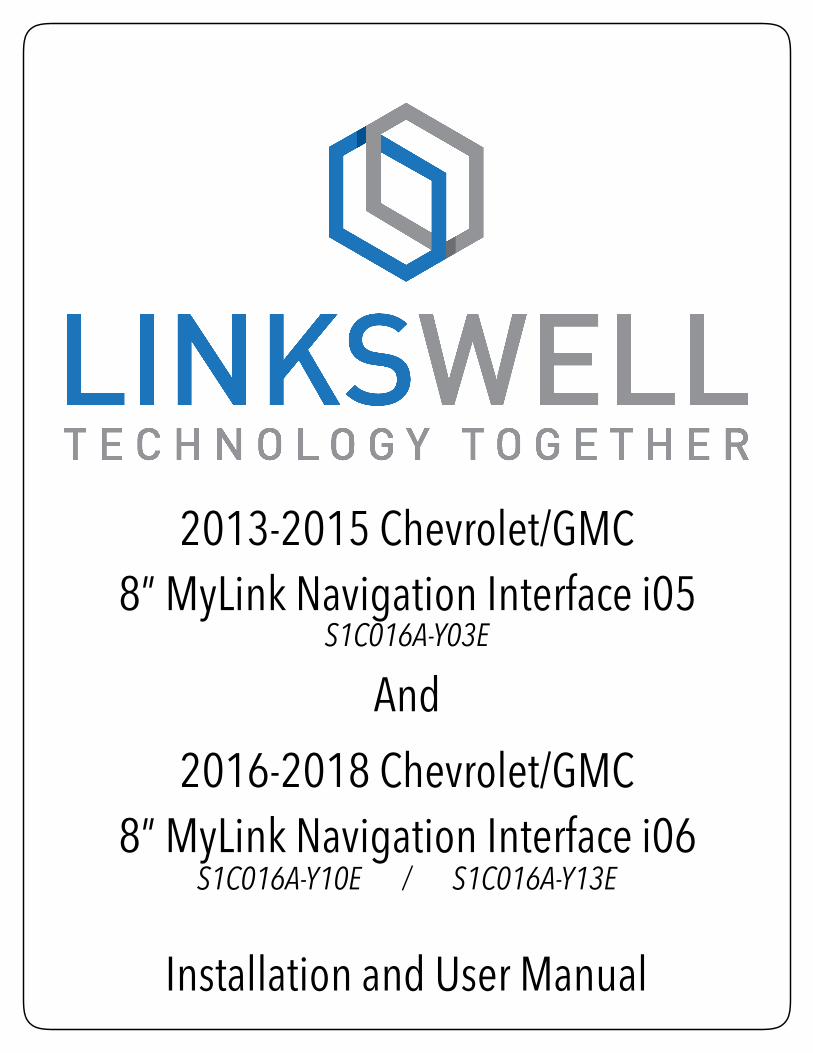
Factory Radio HMI ModuleBLUELVDS
Grey Power Plug
Black Power Plug
T- Harness
HDMI Input
1
Interface
Installation Diagram
LVDS Cable from
Vehicle
Left Front Speaker
USB
Rear View Camera Input
GPS Antenna
S1C016A-Y03E
Navigation Map SD

2
Installation Parts
1 Power T-Harnesses 4 GPS Antenna
2 LVDS Cable 5 USB extension
3 HDMI Cable 6 Rear Camera Input
7 Interface Module
12
34
56
7
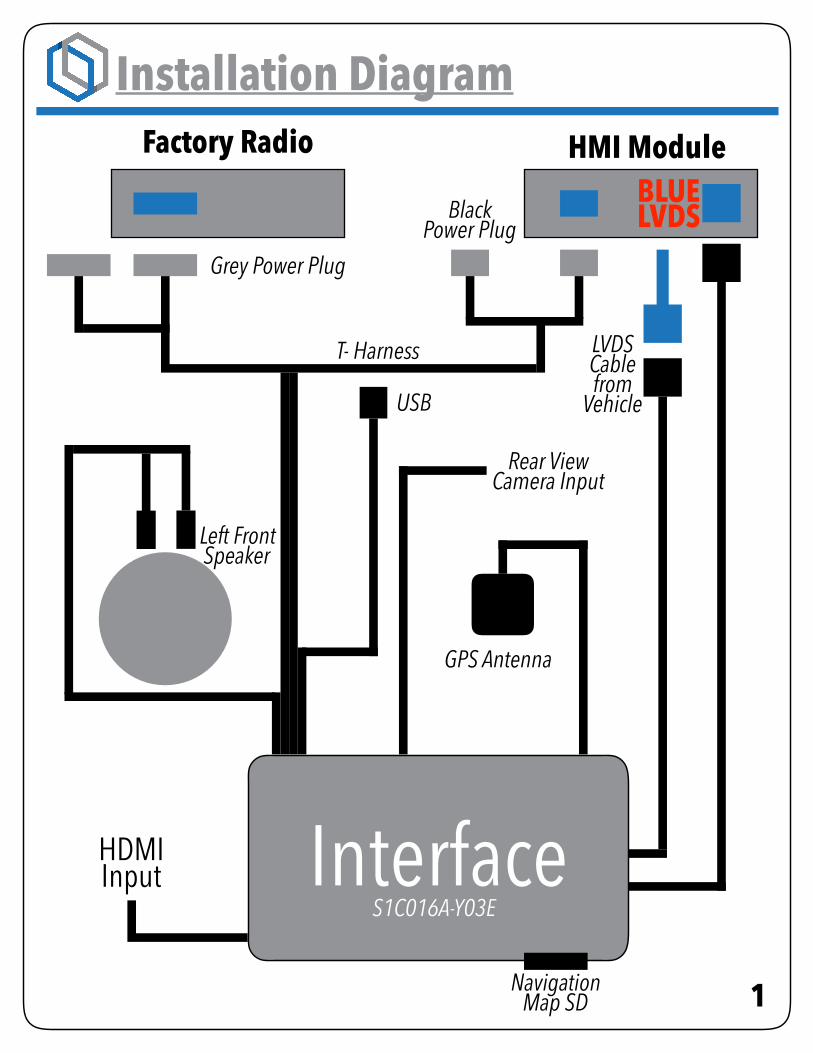
Factory Radio
HMI Module
LVDS
LVDS Cable
Grey Power Plug
Black Power Plug
T- Harness
HDMI Input
Rear Camera
USB
3
Interface
Installation DiagramFactory Screen
Factory Aux in
Box
Left Front Speaker
GPS Antenna
Navigation Map SD
S1C016A-Y13E / S1C016A-Y03E
4
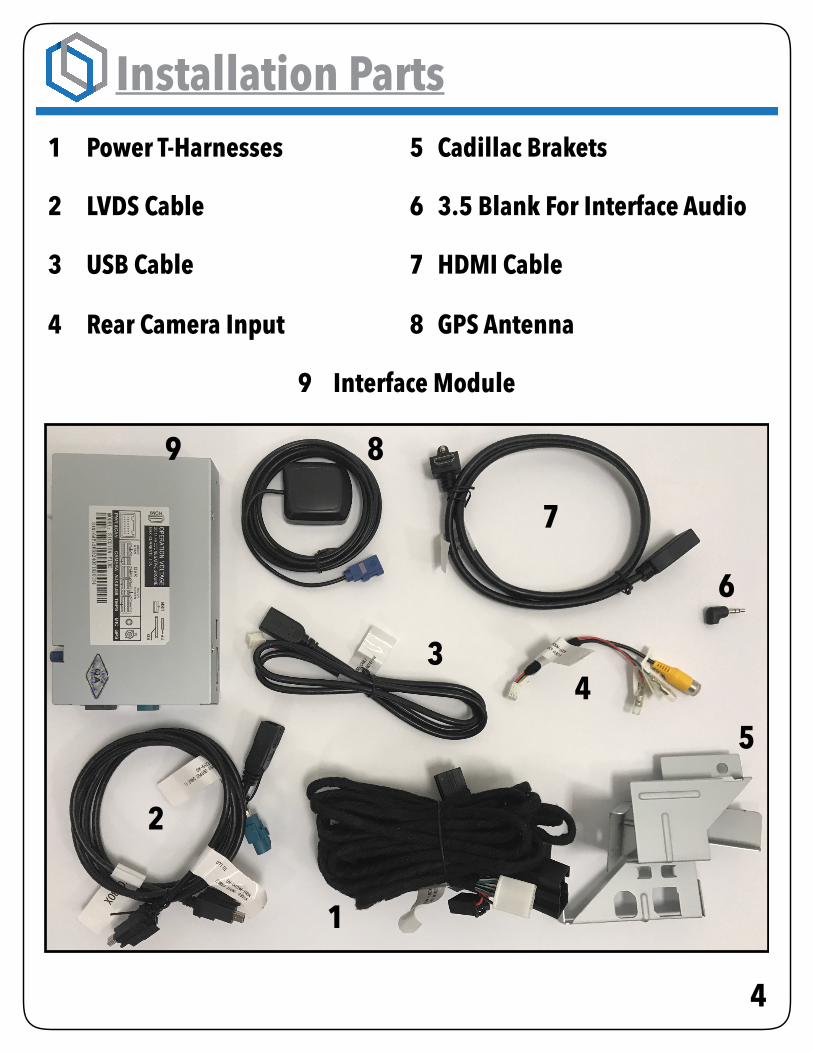
Installation Parts 1 Power T-Harnesses 5 Cadillac Brakets
2 LVDS Cable 6 3.5 Blank For Interface Audio
3 USB Cable 7 HDMI Cable
4 Rear Camera Input 8 GPS Antenna
9 Interface Module
1
2
34
5
6
7
89

5
Switching to the Interface
Switching between the OEM system and your newly installed interface is done easily by using the factory touch screen.
**The icons on your screen may vary depending on the year and model of your vehicle.** This will not effect the control of your new system.
Pressing the next icon on the screen will scroll through the different menu options. This will bring you into the
interface options.

6
Interface Homepage
Your interface menu homepage will look similar to this, having icons matching the style of your factory system. Your interface now adds four new icons.
Navigation, HDMI Video, OBD Info, and Settings.
To access the interfaces features, simply press the onscreen icons.
**The icons on your screen may vary depending on the year and model of your vehicle.** This will not effect the control of your new system
7
Interface Settings
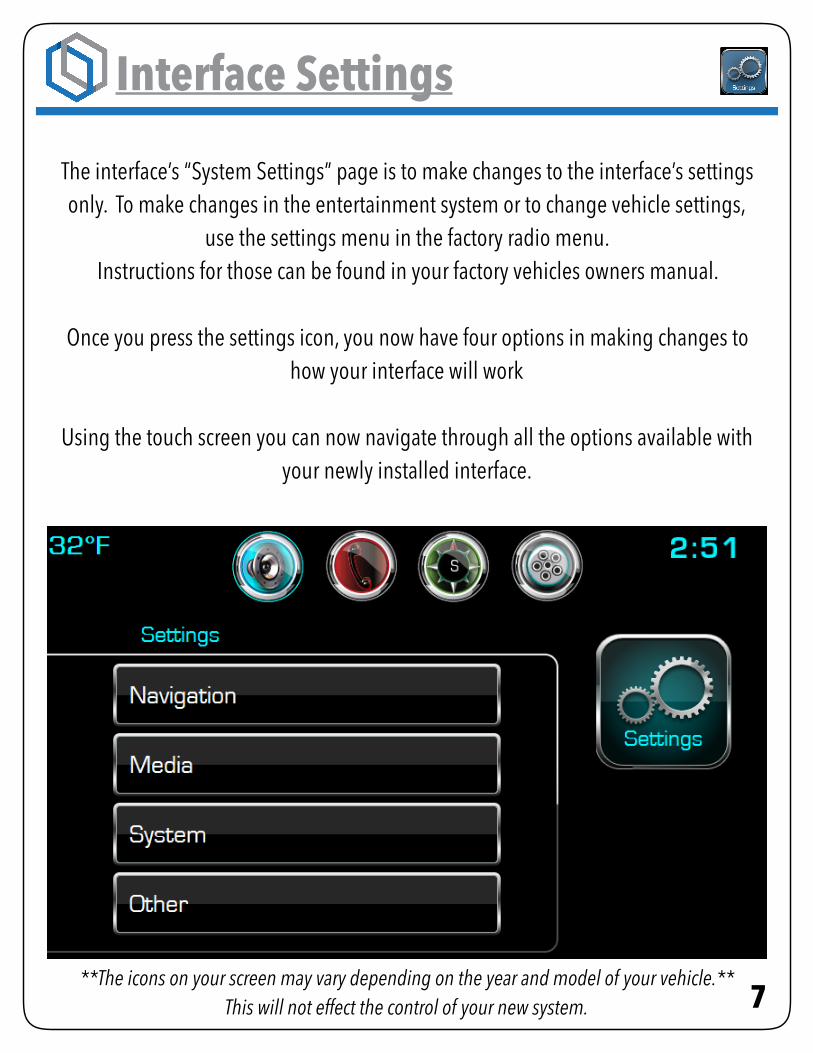
The interface’s “System Settings” page is to make changes to the interface’s settings only. To make changes in the entertainment system or to change vehicle settings,
use the settings menu in the factory radio menu. Instructions for those can be found in your factory vehicles owners manual.
Once you press the settings icon, you now have four options in making changes to how your interface will work
Using the touch screen you can now navigate through all the options available with your newly installed interface.
**The icons on your screen may vary depending on the year and model of your vehicle.** This will not effect the control of your new system.

8
Interface Navigation Settings
The interfaces Navigation Settings allows you to do the following:
GPS Voice: You can turn the Navigation Voice on and off.
GPS Volume Level: You can adjust the volume level of the Navigation.
Map Update: Use this when downloaded updated maps.
Navigation Options: Chose between the interfaces built in Navigation and the On Star Navigation.
**The icons on your screen may vary depending on the year and model of your vehicle.** This will not effect the control of your new system.

9
Interface Media Settings
The interfaces Media Settings allows you to do the following:
EQ: The interface comes with a 12 band EQ. Adjusting this EQ will only effect the sound that comes from the interfaces audio options.
**The icons on your screen may vary depending on the year and model of your vehicle.** This will not effect the control of your new system.
10
Interface System Settings
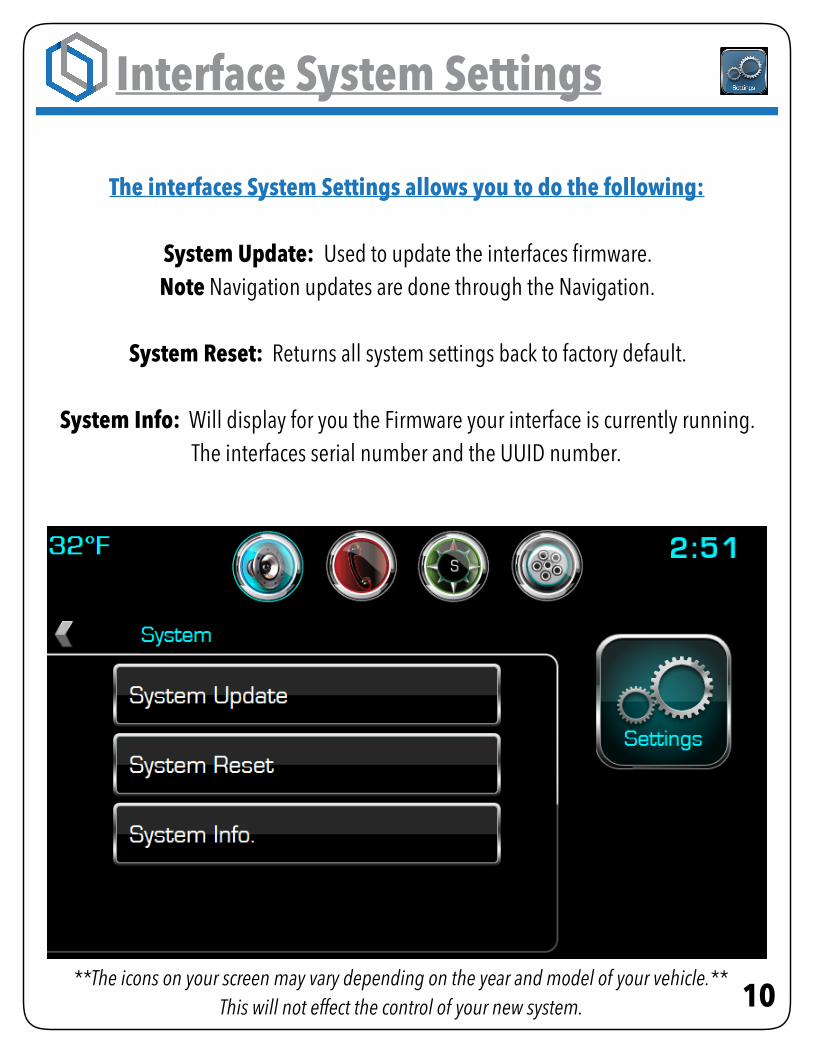
The interfaces System Settings allows you to do the following:
System Update: Used to update the interfaces firmware. Note Navigation updates are done through the Navigation.
System Reset: Returns all system settings back to factory default.
System Info: Will display for you the Firmware your interface is currently running. The interfaces serial number and the UUID number.
**The icons on your screen may vary depending on the year and model of your vehicle.** This will not effect the control of your new system.
11
Interface Other Settings
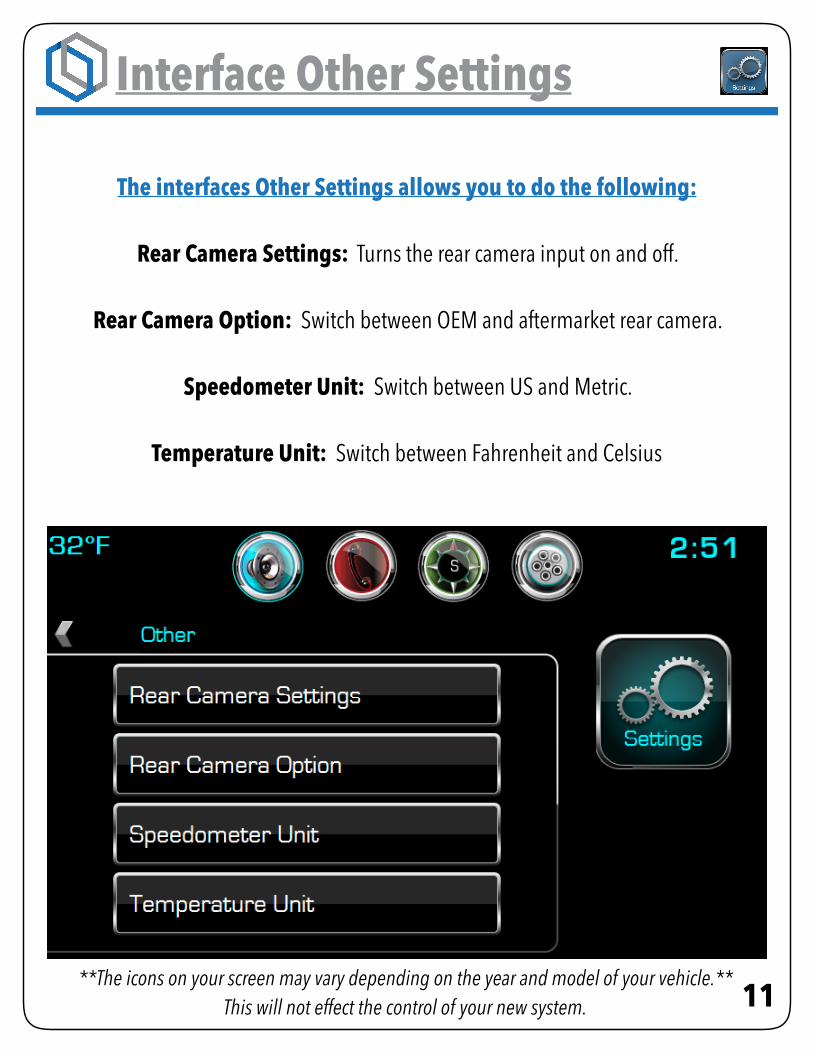
The interfaces Other Settings allows you to do the following:
Rear Camera Settings: Turns the rear camera input on and off.
Rear Camera Option: Switch between OEM and aftermarket rear camera.
Speedometer Unit: Switch between US and Metric.
Temperature Unit: Switch between Fahrenheit and Celsius
**The icons on your screen may vary depending on the year and model of your vehicle.** This will not effect the control of your new system.
12
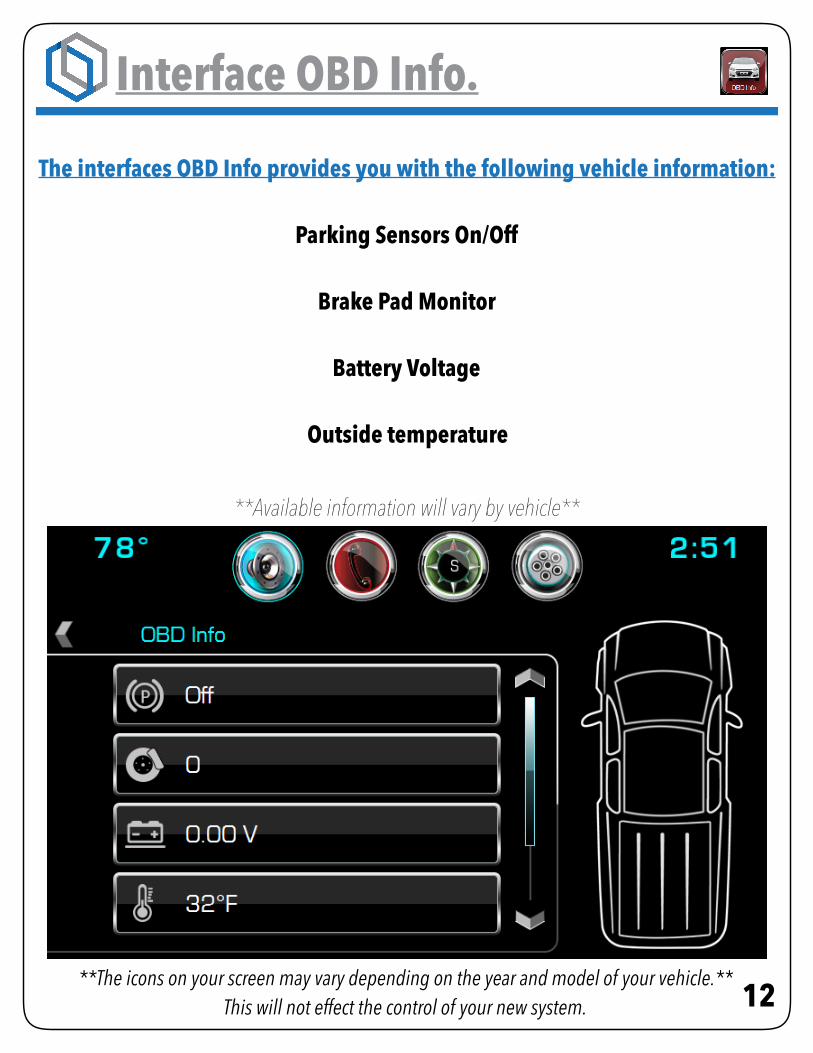
Interface OBD Info.
The interfaces OBD Info provides you with the following vehicle information:
Parking Sensors On/Off
Brake Pad Monitor
Battery Voltage
Outside temperature
**Available information will vary by vehicle**
**The icons on your screen may vary depending on the year and model of your vehicle.** This will not effect the control of your new system.
13
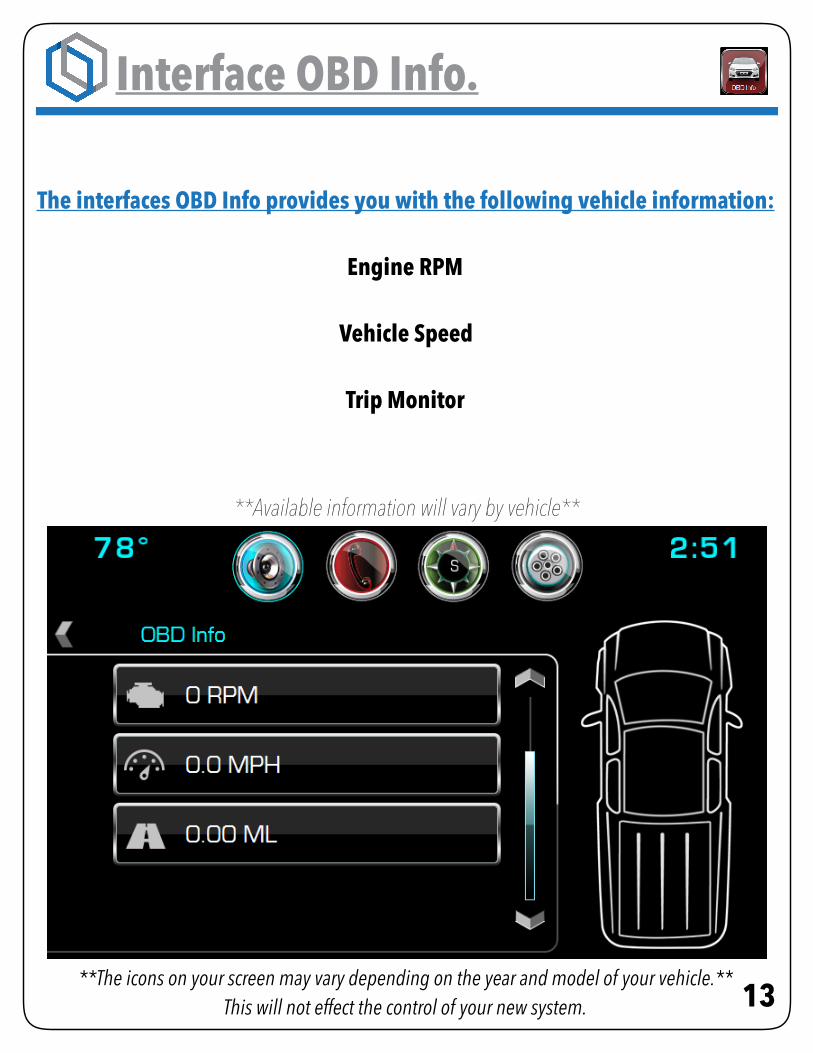
Interface OBD Info.
**Available information will vary by vehicle**
The interfaces OBD Info provides you with the following vehicle information:
Engine RPM
Vehicle Speed
Trip Monitor
**The icons on your screen may vary depending on the year and model of your vehicle.** This will not effect the control of your new system.
14
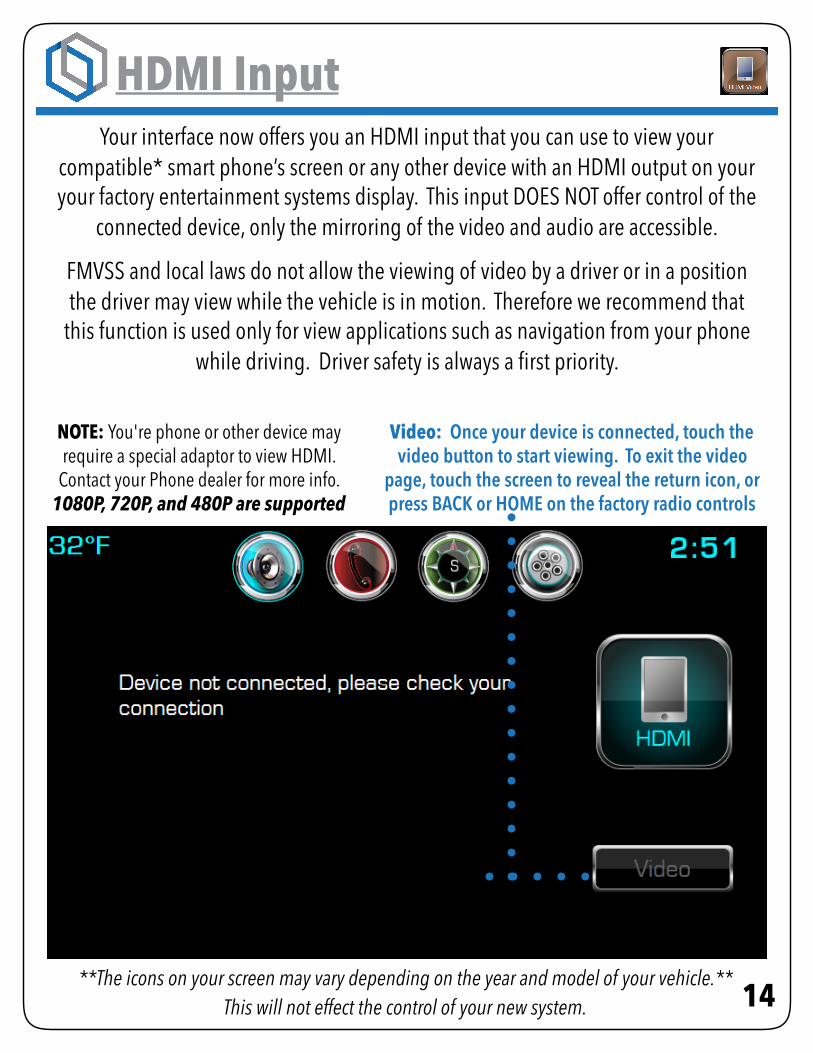
HDMI InputYour interface now offers you an HDMI input that you can use to view your
compatible* smart phone’s screen or any other device with an HDMI output on your your factory entertainment systems display. This input DOES NOT offer control of the
connected device, only the mirroring of the video and audio are accessible.
FMVSS and local laws do not allow the viewing of video by a driver or in a position the driver may view while the vehicle is in motion. Therefore we recommend that
this function is used only for view applications such as navigation from your phone while driving. Driver safety is always a first priority.
NOTE: You're phone or other device may require a special adaptor to view HDMI.
Contact your Phone dealer for more info. 1080P, 720P, and 480P are supported
Video: Once your device is connected, touch the video button to start viewing. To exit the video
page, touch the screen to reveal the return icon, or press BACK or HOME on the factory radio controls
**The icons on your screen may vary depending on the year and model of your vehicle.** This will not effect the control of your new system.
15
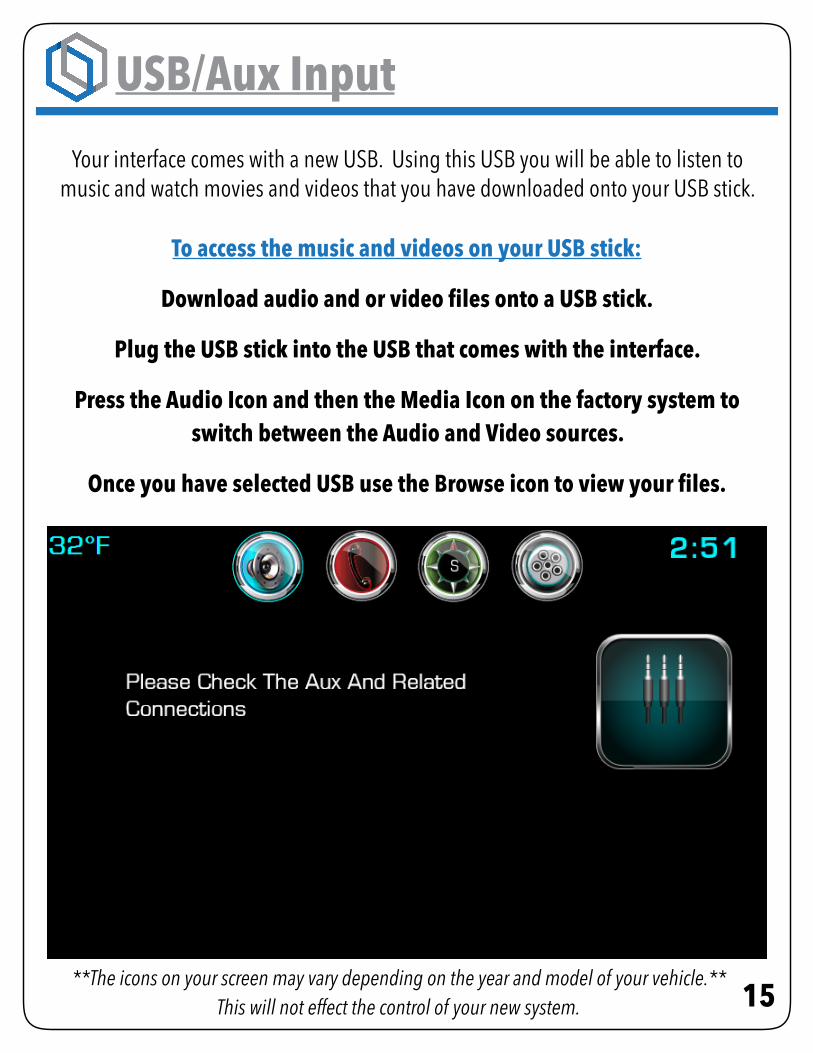
USB/Aux Input
Your interface comes with a new USB. Using this USB you will be able to listen to music and watch movies and videos that you have downloaded onto your USB stick.
To access the music and videos on your USB stick:
Download audio and or video files onto a USB stick.
Plug the USB stick into the USB that comes with the interface.
Press the Audio Icon and then the Media Icon on the factory system to switch between the Audio and Video sources.
Once you have selected USB use the Browse icon to view your files.
**The icons on your screen may vary depending on the year and model of your vehicle.** This will not effect the control of your new system.
16
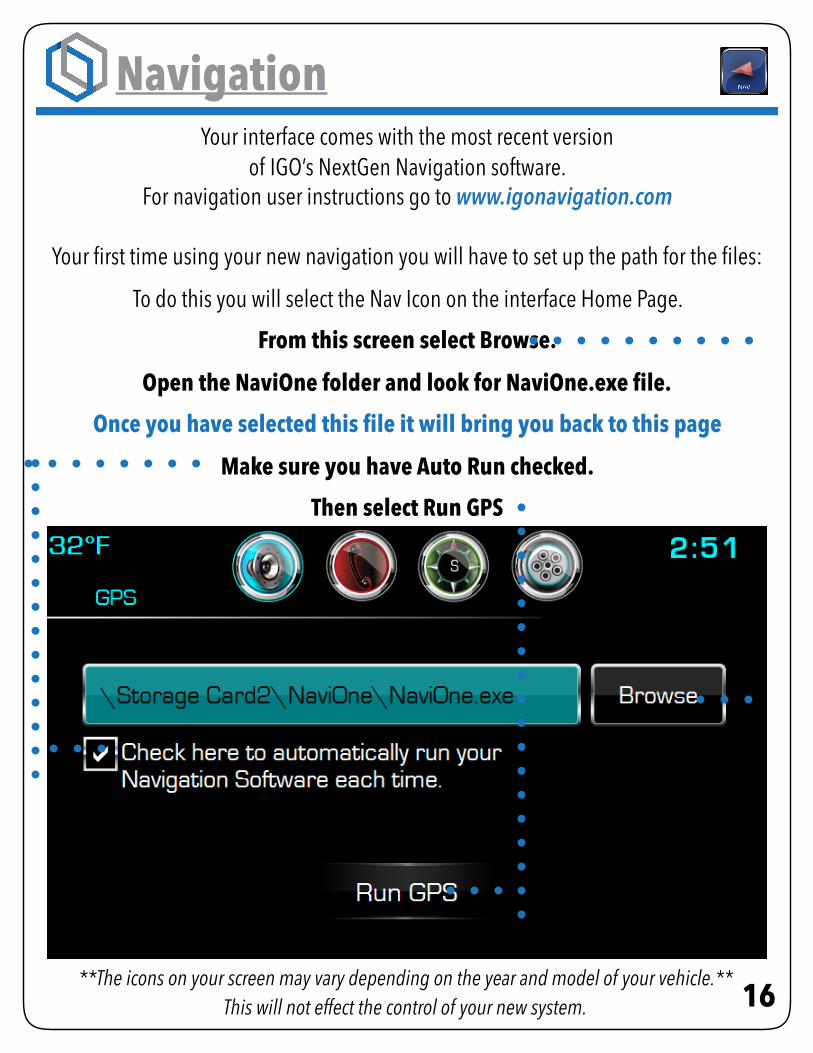
NavigationYour interface comes with the most recent version
of IGO’s NextGen Navigation software. For navigation user instructions go to www.igonavigation.com
Your first time using your new navigation you will have to set up the path for the files:
To do this you will select the Nav Icon on the interface Home Page. From this screen select Browse.
Open the NaviOne folder and look for NaviOne.exe file.
Once you have selected this file it will bring you back to this page
Make sure you have Auto Run checked.
Then select Run GPS
**The icons on your screen may vary depending on the year and model of your vehicle.** This will not effect the control of your new system.

909-375-0633
www.linkswellinc.com
LinksWell Inc on Facebook, Twitter, and Youtube