Embed Size (px)
Citation preview

GPS Data Logger and Video Composition Tool
17-May-13
VER.2.0.3
Installation Manual
Copyright© 2013 SPEC PLANNING Corporation All Rights Reserved.
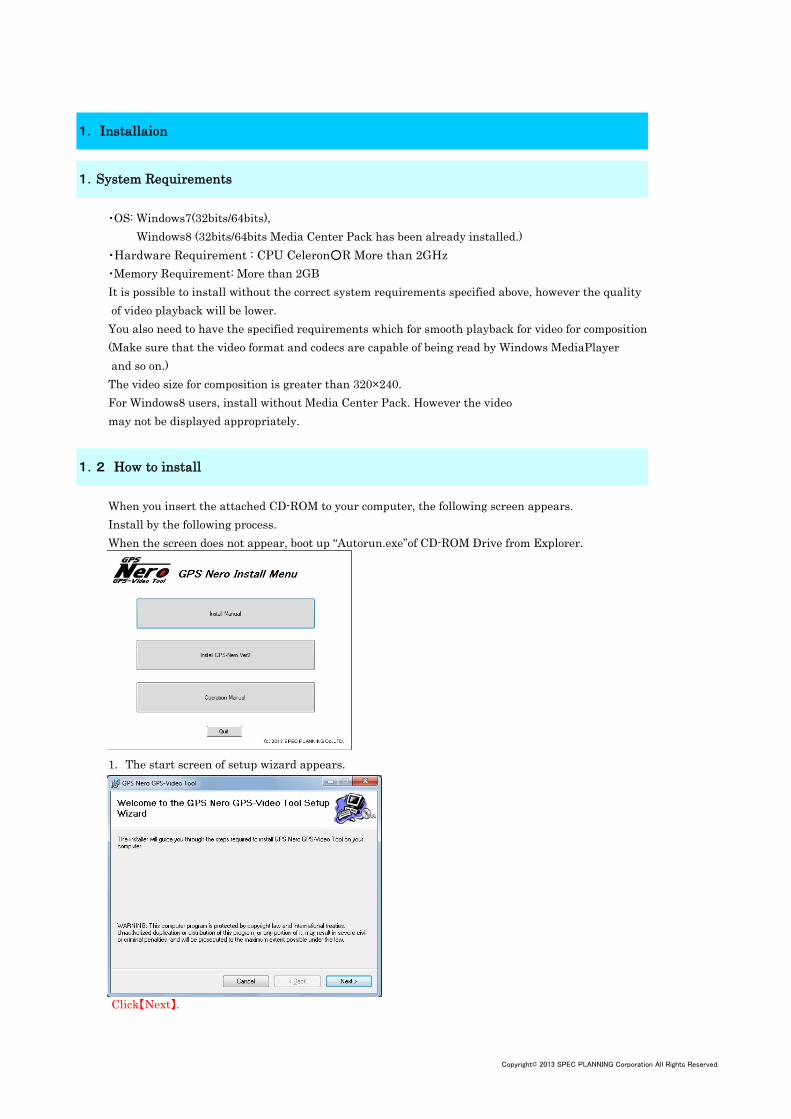
・OS: Windows7(32bits/64bits), Windows8 (32bits/64bits Media Center Pack has been already installed.)・Hardware Requirement : CPU Celeron○R More than 2GHz・Memory Requirement: More than 2GBIt is possible to install without the correct system requirements specified above, however the quality of video playback will be lower.You also need to have the specified requirements which for smooth playback for video for composition. (Make sure that the video format and codecs are capable of being read by Windows MediaPlayer and so on.)The video size for composition is greater than 320×240.For Windows8 users, install without Media Center Pack. However the videomay not be displayed appropriately.
When you insert the attached CD-ROM to your computer, the following screen appears. Install by the following process. When the screen does not appear, boot up “Autorun.exe”of CD-ROM Drive from Explorer.
1. The start screen of setup wizard appears.
Click【Next】.
1. Installaion
1.System Requirements
1.2 How to install
Copyright© 2013 SPEC PLANNING Corporation All Rights Reserved.
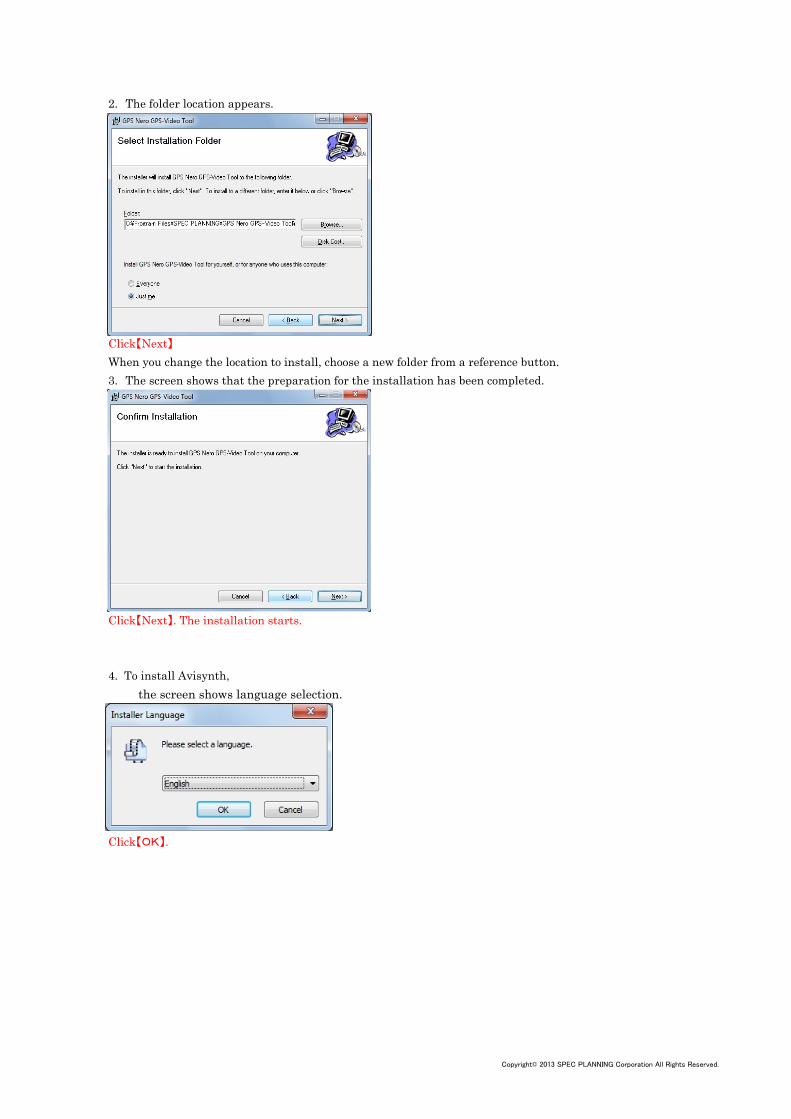
2. The folder location appears.
Click【Next】When you change the location to install, choose a new folder from a reference button.3. The screen shows that the preparation for the installation has been completed.
Click【Next】. The installation starts.
4. To install Avisynth,the screen shows language selection.
Click【OK】.
Copyright© 2013 SPEC PLANNING Corporation All Rights Reserved.
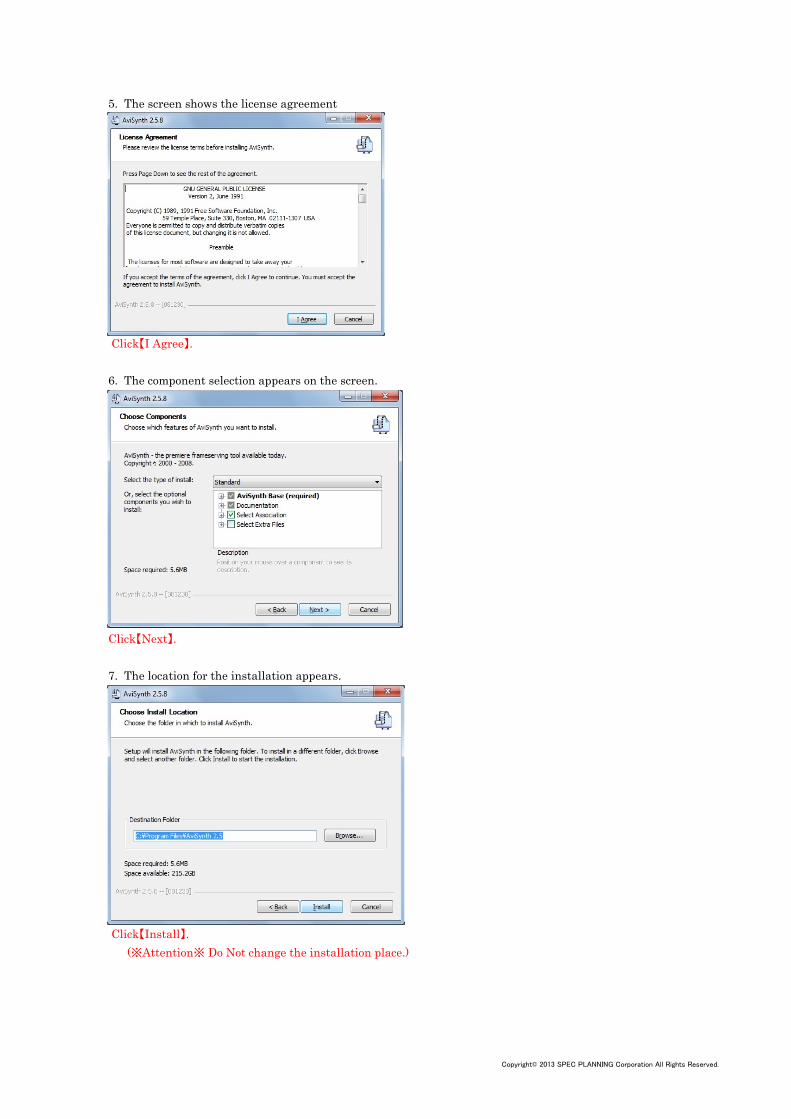
5. The screen shows the license agreement
Click【I Agree】.
6. The component selection appears on the screen.
Click【Next】.
7. The location for the installation appears.
Click【Install】. (※Attention※ Do Not change the installation place.)
Copyright© 2013 SPEC PLANNING Corporation All Rights Reserved.
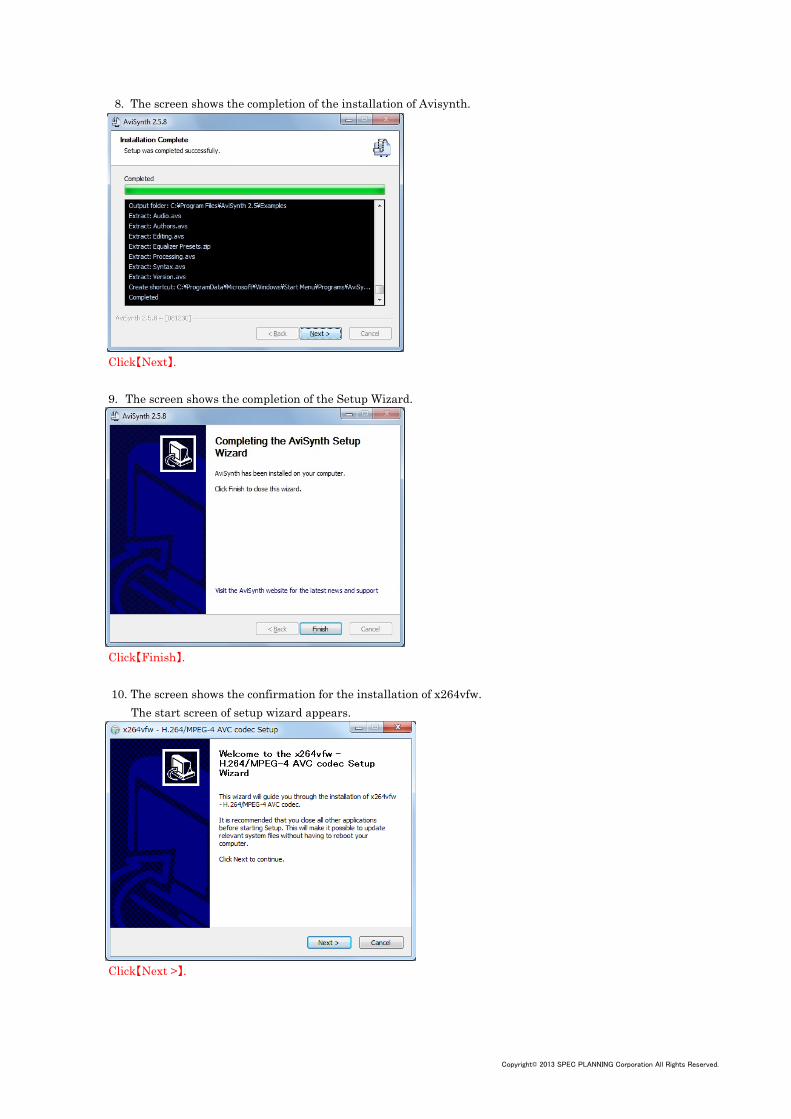
8. The screen shows the completion of the installation of Avisynth.
Click【Next】.
9. The screen shows the completion of the Setup Wizard.
Click【Finish】.
10. The screen shows the confirmation for the installation of x264vfw. The start screen of setup wizard appears.
Click【Next >】.
Copyright© 2013 SPEC PLANNING Corporation All Rights Reserved.
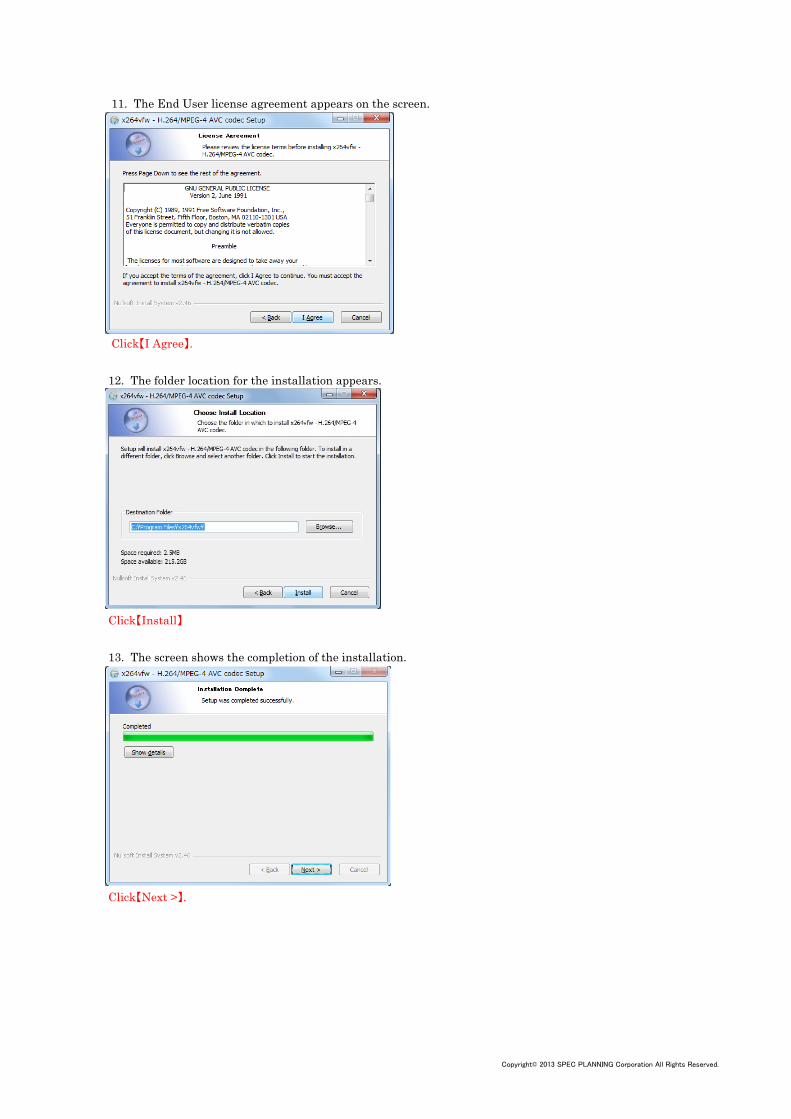
11. The End User license agreement appears on the screen.
Click【I Agree】.
12. The folder location for the installation appears.
Click【Install】
13. The screen shows the completion of the installation.
Click【Next >】.
Copyright© 2013 SPEC PLANNING Corporation All Rights Reserved.
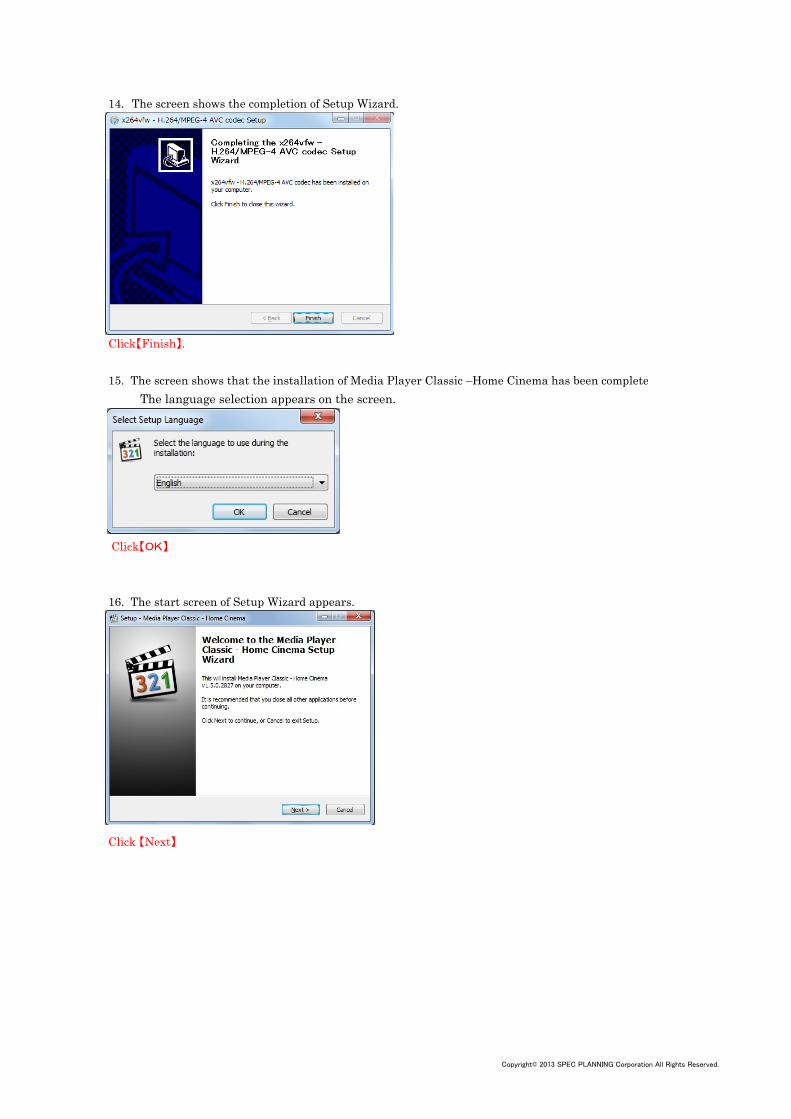
14. The screen shows the completion of Setup Wizard.
Click【Finish】.
15. The screen shows that the installation of Media Player Classic –Home Cinema has been completed. The language selection appears on the screen.
Click【OK】
16. The start screen of Setup Wizard appears.
Click 【Next】
Copyright© 2013 SPEC PLANNING Corporation All Rights Reserved.
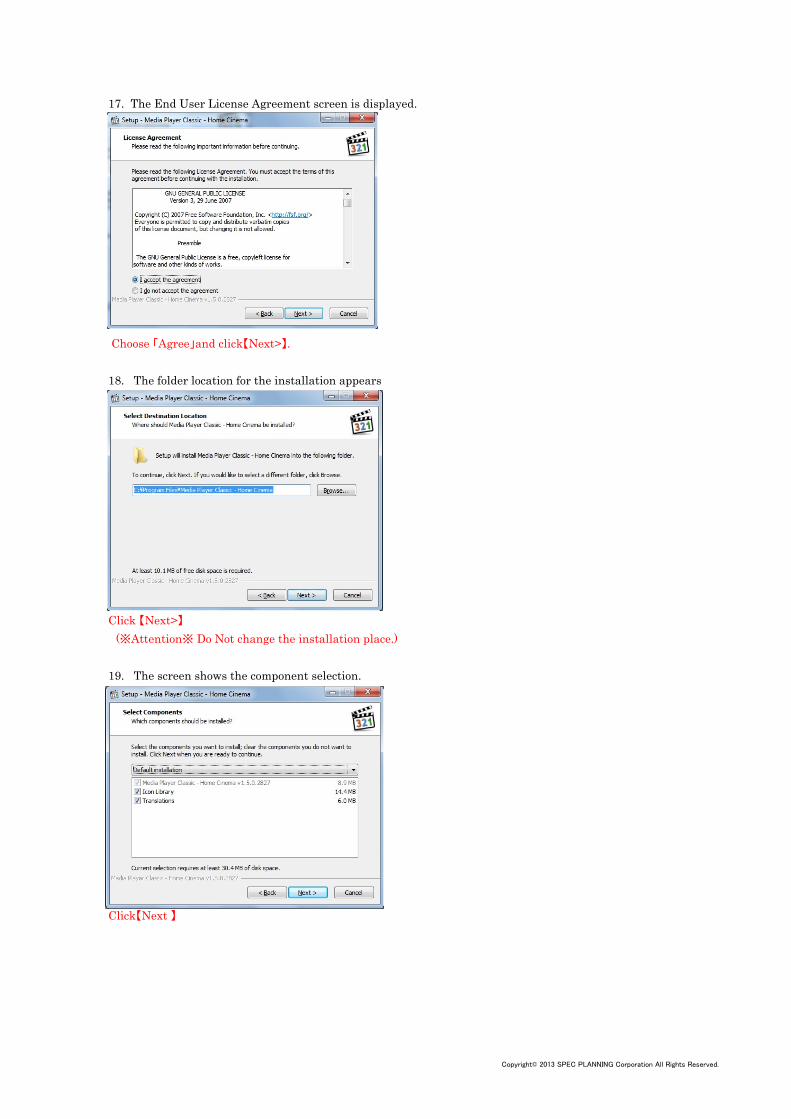
17. The End User License Agreement screen is displayed.
Choose 「Agree」and click【Next>】.
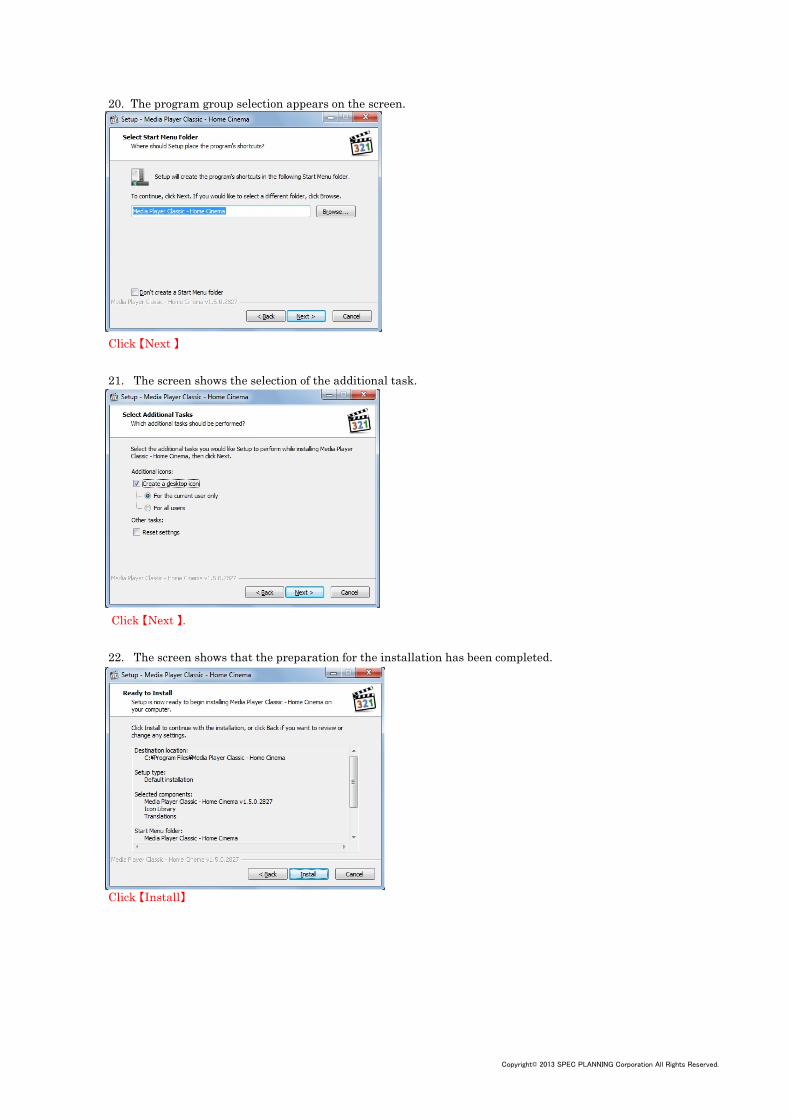
18. The folder location for the installation appears
Click 【Next>】
(※Attention※ Do Not change the installation place.)
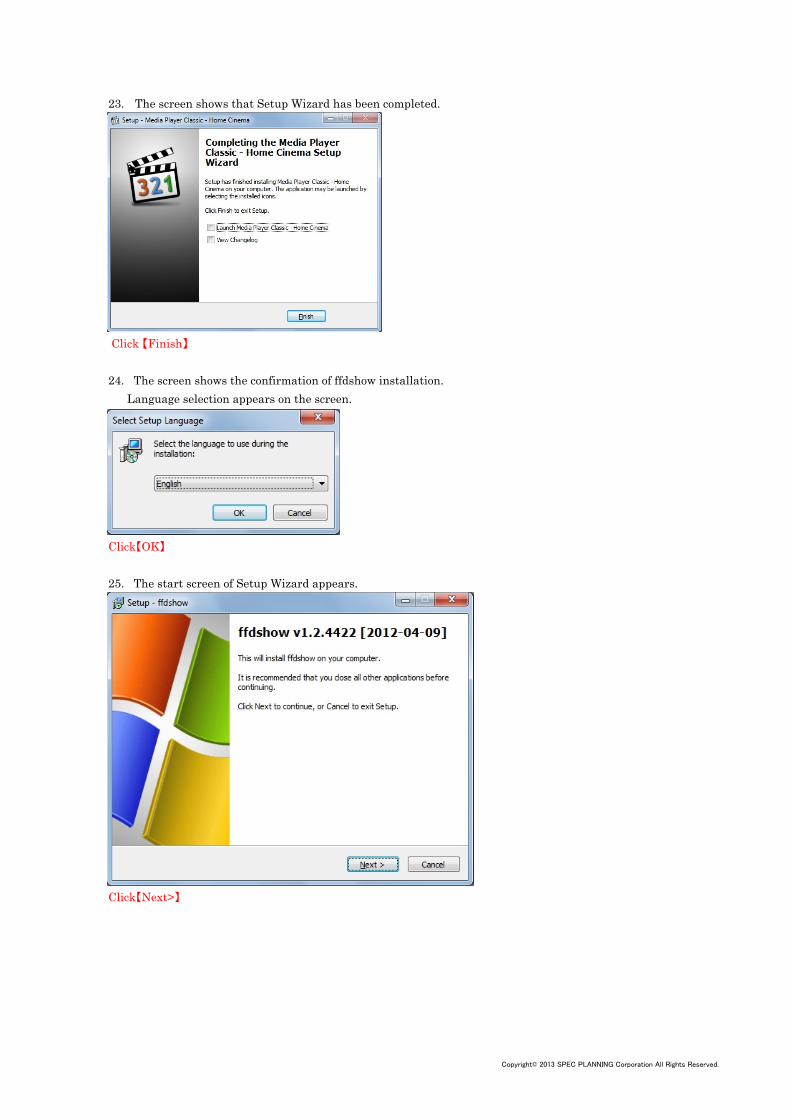
19. The screen shows the component selection.
Click【Next 】
Copyright© 2013 SPEC PLANNING Corporation All Rights Reserved.
20. The program group selection appears on the screen.
Click 【Next 】
21. The screen shows the selection of the additional task.
Click 【Next 】.
22. The screen shows that the preparation for the installation has been completed.
Click 【Install】
Copyright© 2013 SPEC PLANNING Corporation All Rights Reserved.
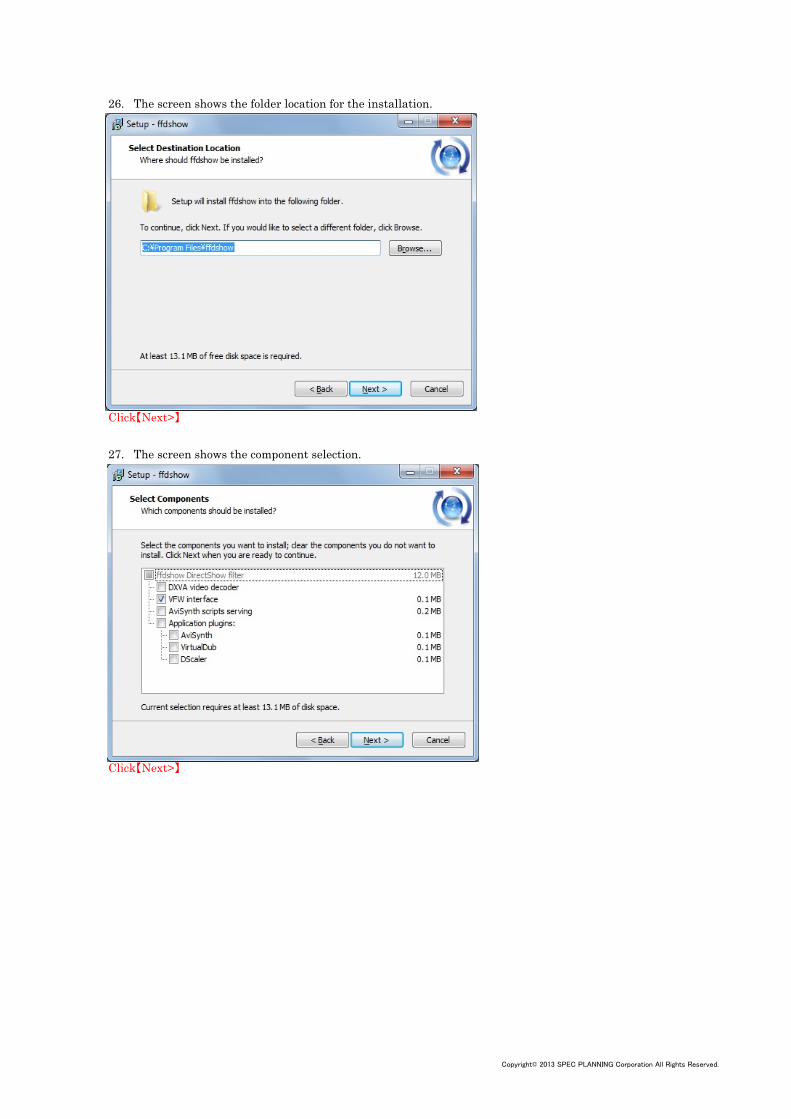
23. The screen shows that Setup Wizard has been completed.
Click 【Finish】
24. The screen shows the confirmation of ffdshow installation. Language selection appears on the screen.
Click【OK】
25. The start screen of Setup Wizard appears.
Click【Next>】
Copyright© 2013 SPEC PLANNING Corporation All Rights Reserved.
26. The screen shows the folder location for the installation.
Click【Next>】
27. The screen shows the component selection.
Click【Next>】
Copyright© 2013 SPEC PLANNING Corporation All Rights Reserved.
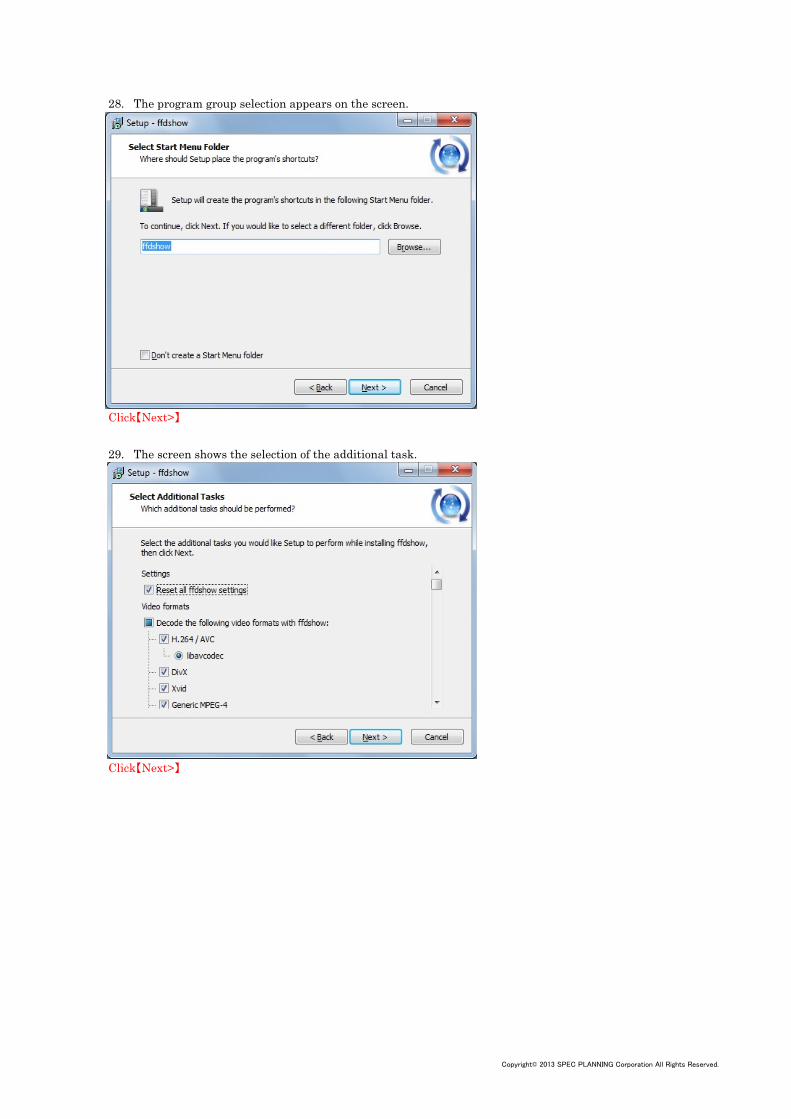
28. The program group selection appears on the screen.
Click【Next>】
29. The screen shows the selection of the additional task.
Click【Next>】
Copyright© 2013 SPEC PLANNING Corporation All Rights Reserved.
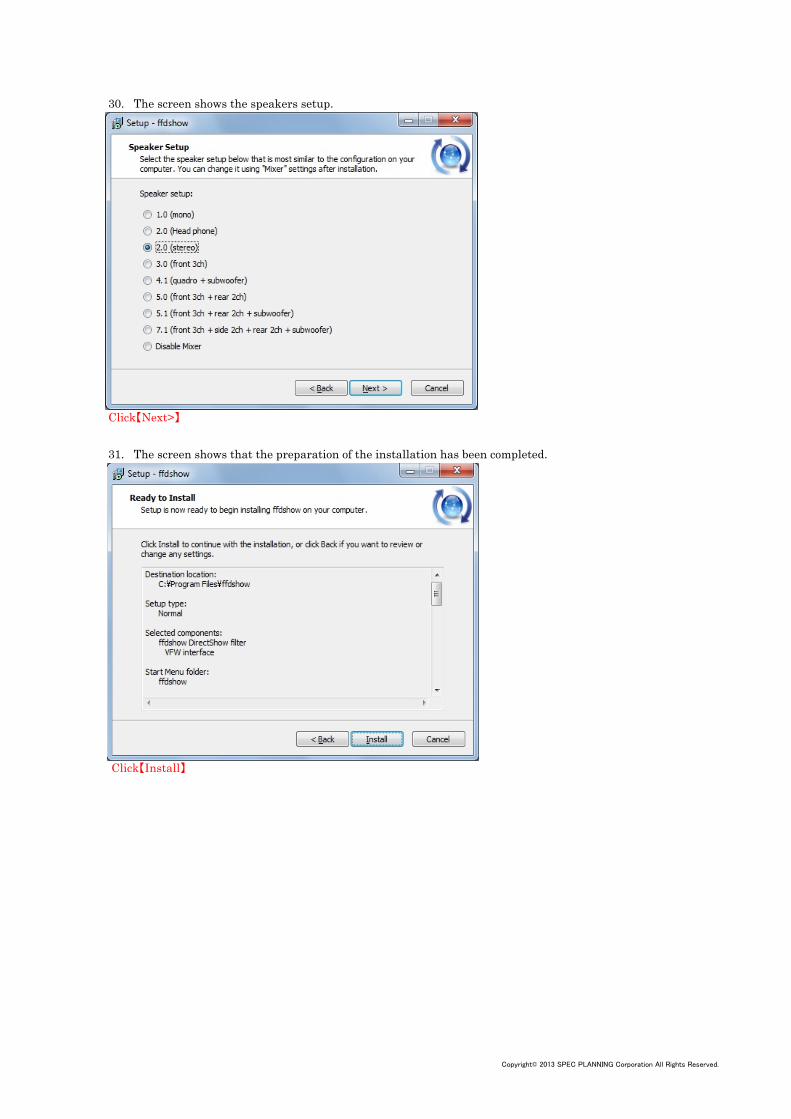
30. The screen shows the speakers setup.
Click【Next>】
31. The screen shows that the preparation of the installation has been completed.
Click【Install】
Copyright© 2013 SPEC PLANNING Corporation All Rights Reserved.
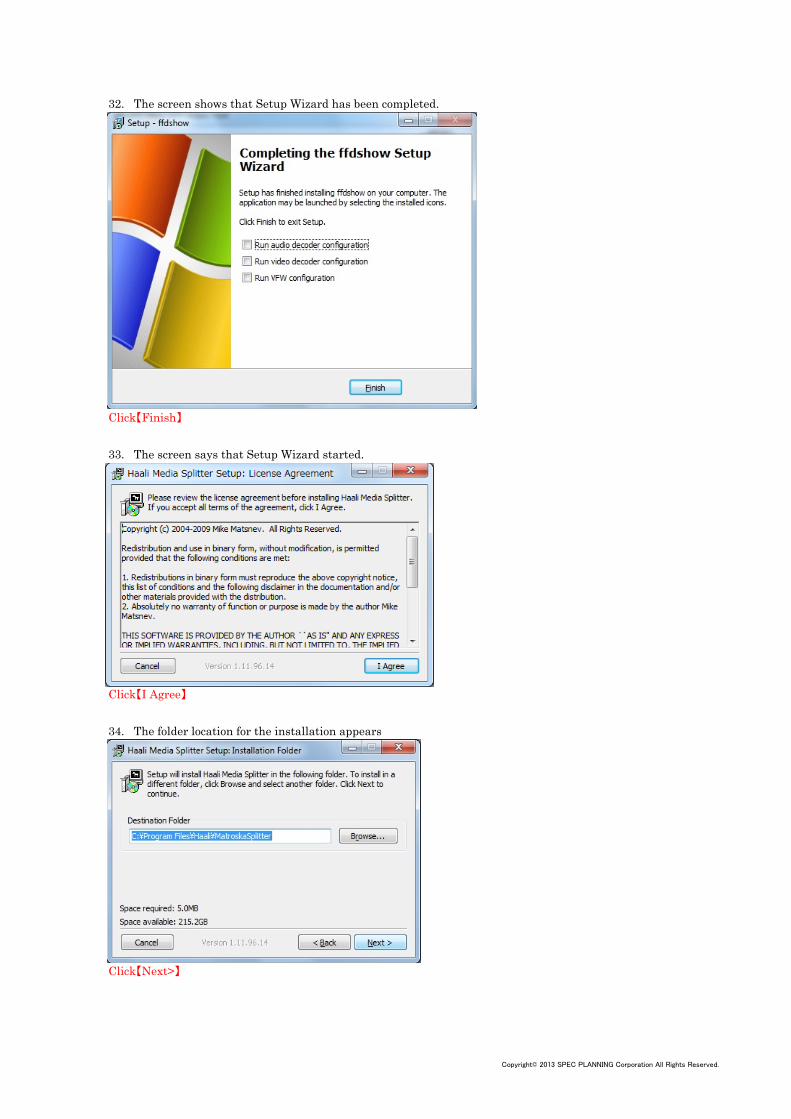
32. The screen shows that Setup Wizard has been completed.
Click【Finish】
33. The screen says that Setup Wizard started.
Click【I Agree】
34. The folder location for the installation appears
Click【Next>】
Copyright© 2013 SPEC PLANNING Corporation All Rights Reserved.
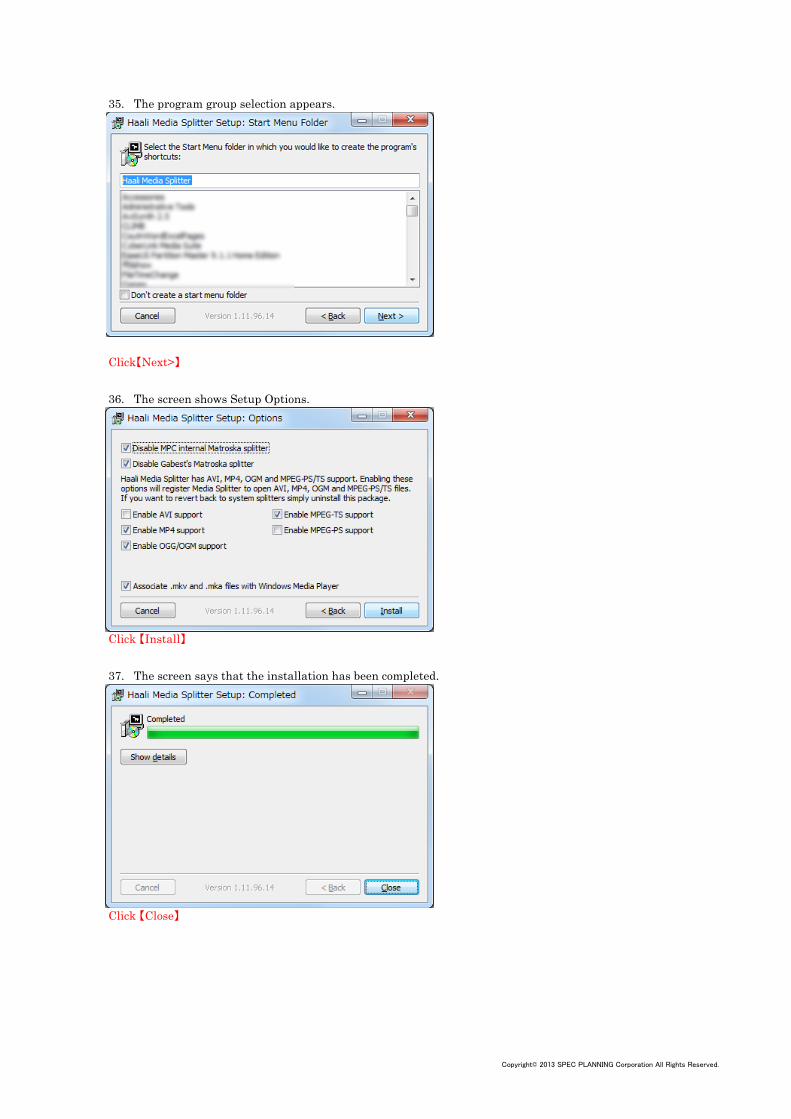
35. The program group selection appears.
Click【Next>】
36. The screen shows Setup Options.
Click 【Install】
37. The screen says that the installation has been completed.
Click 【Close】
Copyright© 2013 SPEC PLANNING Corporation All Rights Reserved.
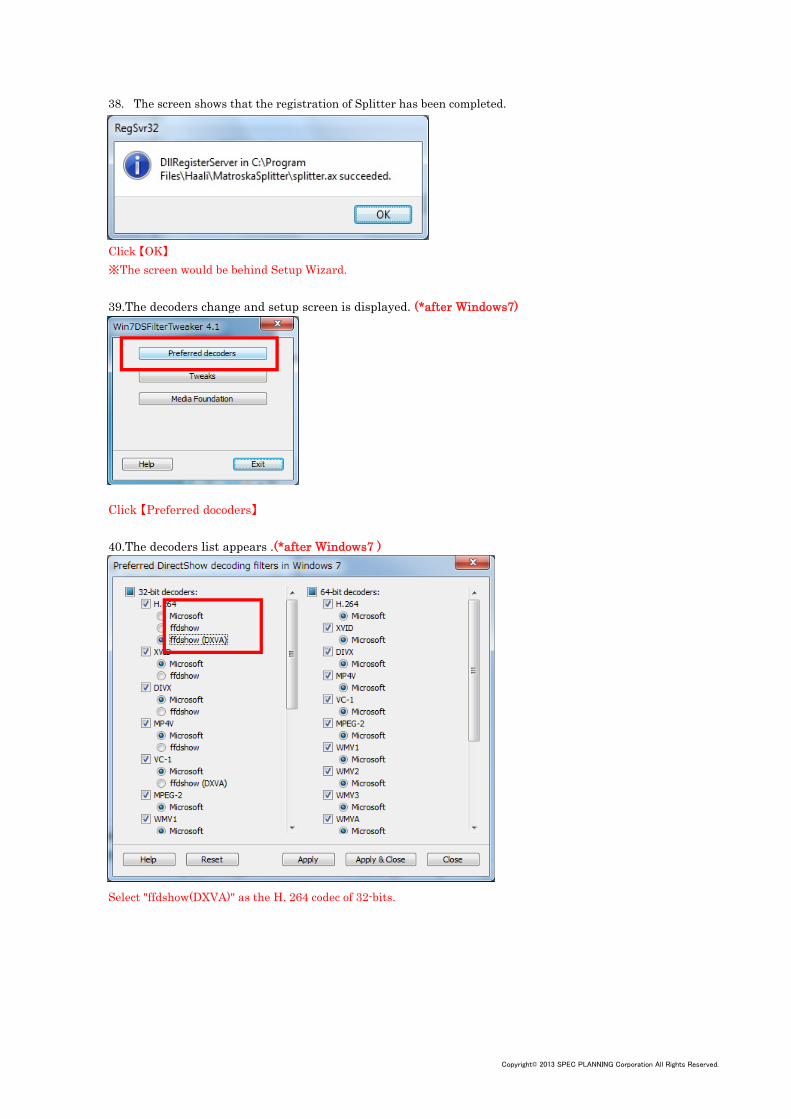
38. The screen shows that the registration of Splitter has been completed.
Click 【OK】
※The screen would be behind Setup Wizard.
39.The decoders change and setup screen is displayed. (*after Windows7)
Click 【Preferred docoders】
40.The decoders list appears .(*after Windows7 )
Select "ffdshow(DXVA)" as the H. 264 codec of 32-bits.
Copyright© 2013 SPEC PLANNING Corporation All Rights Reserved.
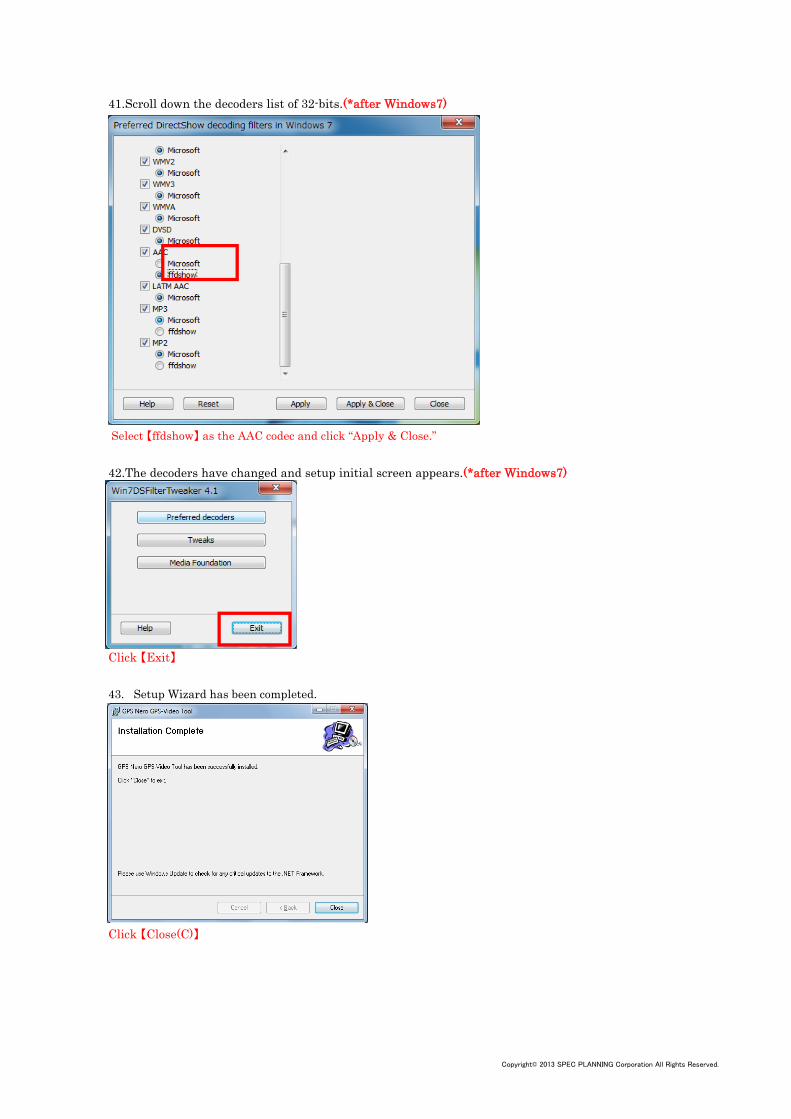
41.Scroll down the decoders list of 32-bits.(*after Windows7)
Select 【ffdshow】 as the AAC codec and click “Apply & Close.”
42.The decoders have changed and setup initial screen appears.(*after Windows7)
Click 【Exit】
43. Setup Wizard has been completed.
Click 【Close(C)】
Copyright© 2013 SPEC PLANNING Corporation All Rights Reserved.
The installation has been completed.For Windows7 or 8 users, if you do not follow the steps from 39 to 42, a malfunction might occur andcause the sound to not be played correctly and other errors might happen .In that case, setup Win7DSFilterTweaker_4_1.exe which is in the installation folder and start again.
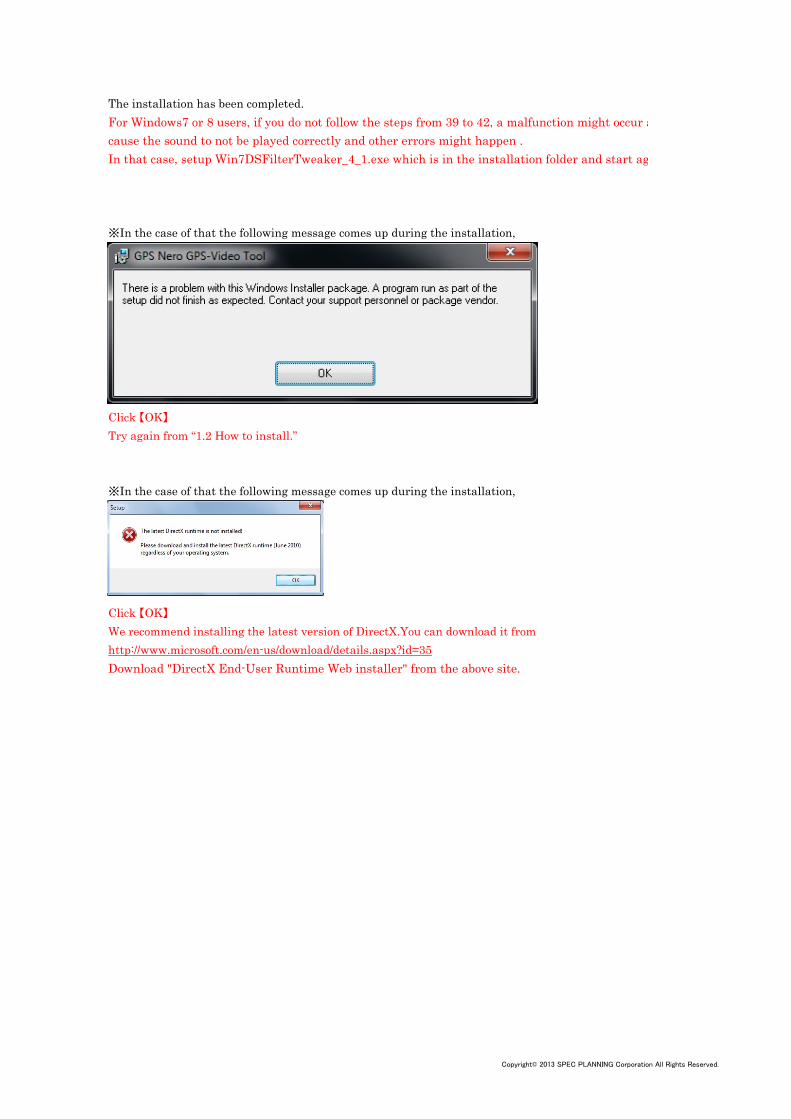
※In the case of that the following message comes up during the installation,
Click 【OK】
Try again from “1.2 How to install.”
※In the case of that the following message comes up during the installation,
Click 【OK】
We recommend installing the latest version of DirectX.You can download it from http://www.microsoft.com/en-us/download/details.aspx?id=35Download "DirectX End-User Runtime Web installer" from the above site.
Copyright© 2013 SPEC PLANNING Corporation All Rights Reserved.

※In the case of that the following message comes up during the installation,
Click “Accept.”
※In the case of that the following message comes up during the installation,
Click “Accept.”
Copyright© 2013 SPEC PLANNING Corporation All Rights Reserved.
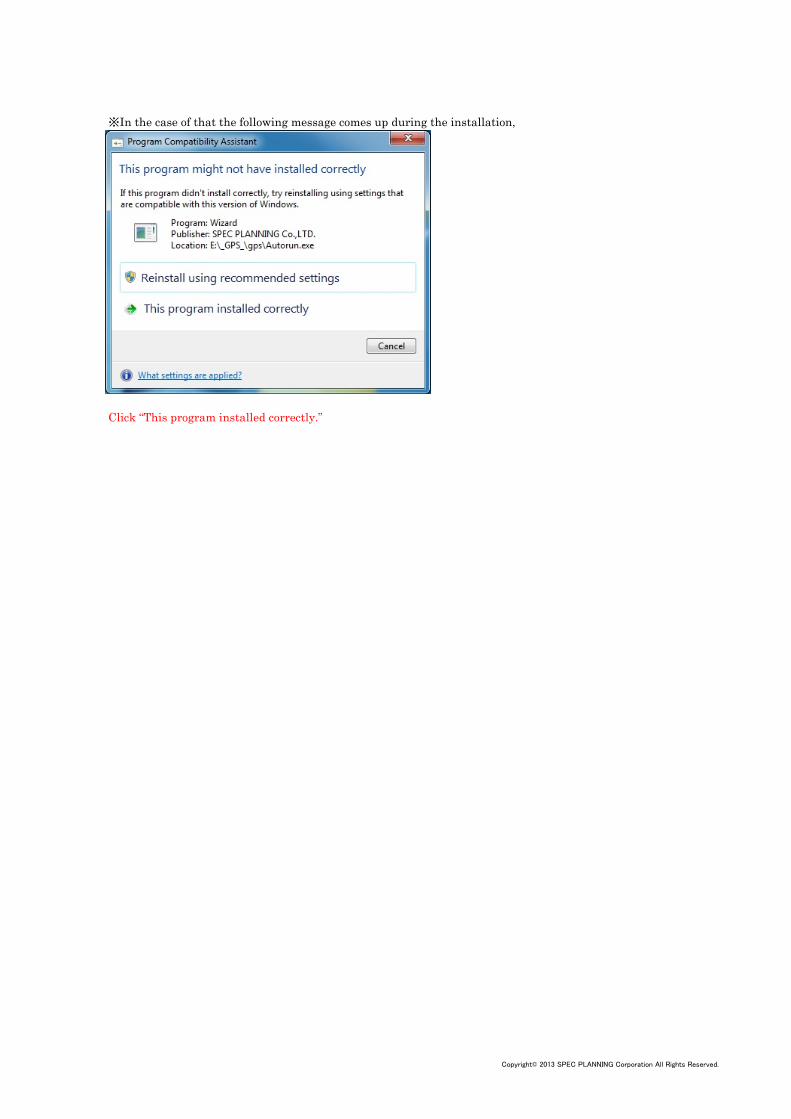
※In the case of that the following message comes up during the installation,
Click “This program installed correctly.”
Copyright© 2013 SPEC PLANNING Corporation All Rights Reserved.
We explain how to uninstall.
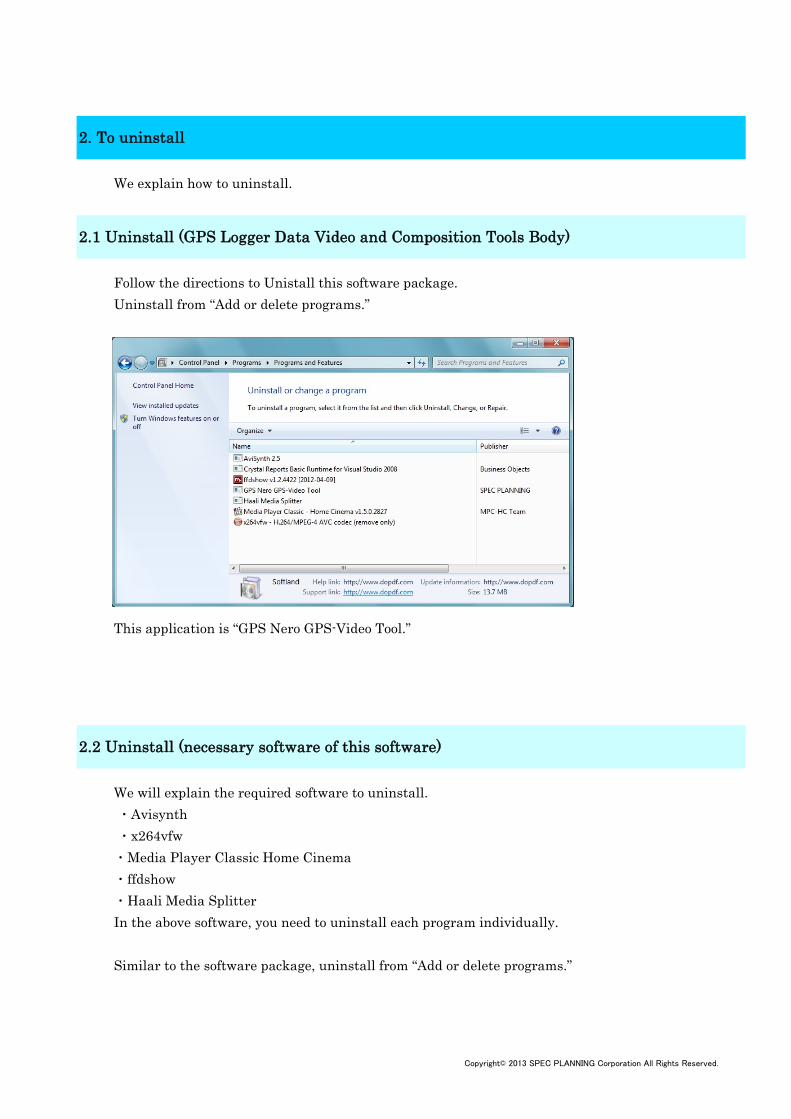
Follow the directions to Unistall this software package.Uninstall from “Add or delete programs.”
This application is “GPS Nero GPS-Video Tool.”
We will explain the required software to uninstall. ・Avisynth ・x264vfw・Media Player Classic Home Cinema・ffdshow・Haali Media SplitterIn the above software, you need to uninstall each program individually.
Similar to the software package, uninstall from “Add or delete programs.”
2. To uninstall
2.1 Uninstall (GPS Logger Data Video and Composition Tools Body)
2.2 Uninstall (necessary software of this software)
Copyright© 2013 SPEC PLANNING Corporation All Rights Reserved.