Embed Size (px)
Citation preview
Greenplum® Database 4.2
Utility GuideRev: A01

Copyright © 2012 EMC Corporation. All rights reserved.
EMC believes the information in this publication is accurate as of its publication date. The information is subject to change without notice.
THE INFORMATION IN THIS PUBLICATION IS PROVIDED “AS IS.” EMC CORPORATION MAKES NO REPRESENTATIONS OR WARRANTIES OF ANY KIND WITH RESPECT TO THE INFORMATION IN THIS PUBLICATION, AND SPECIFICALLY DISCLAIMS IMPLIED WARRANTIES OF MERCHANTABILITY OR FITNESS FOR A PARTICULAR PURPOSE.
Use, copying, and distribution of any EMC software described in this publication requires an applicable software license.
For the most up-to-date listing of EMC product names, see EMC Corporation Trademarks on EMC.com
All other trademarks used herein are the property of their respective owners.
Greenplum Database Utility Guide 4.2 - Contents
Greenplum Database Utility Guide - 4.2 - ContentsPreface ............................................................................................... 1
About This Guide.............................................................................. 1About the Greenplum Database Documentation Set ......................... 1Document Conventions .................................................................... 2Getting Support................................................................................ 3
Chapter 1: Management Utility Reference................................ 5Backend Server Programs ................................................................ 6gpactivatestandby ............................................................................ 7gpaddmirrors ................................................................................. 10gpbitmapreindex ............................................................................ 15gpcheck.......................................................................................... 17gpcheckperf ................................................................................... 19gpconfig ......................................................................................... 23gpcrondump................................................................................... 26gpdbrestore.................................................................................... 33gpdeletesystem.............................................................................. 36gpdetective .................................................................................... 38gp_dump........................................................................................ 41gpexpand ....................................................................................... 46gpfdist............................................................................................ 50gpfilespace ..................................................................................... 55gpinitstandby ................................................................................. 59gpinitsystem .................................................................................. 62gpload............................................................................................ 69gplogfilter....................................................................................... 81gpmapreduce ................................................................................. 84gpmigrator ..................................................................................... 87gpmigrator_mirror.......................................................................... 90gpmovemirrors............................................................................... 93gpperfmon_install .......................................................................... 95gppkg............................................................................................. 98gprecoverseg ................................................................................101gp_restore ....................................................................................107gpscp ............................................................................................111gpseginstall ...................................................................................113gpsnmpd.......................................................................................116gpssh ............................................................................................119gpssh-exkeys ................................................................................121gpstart ..........................................................................................124gpstate..........................................................................................127gpstop...........................................................................................131gpsys1 ..........................................................................................134
Chapter 2: Client Utility Reference ..........................................135Client Utility Summary ..................................................................136clusterdb .......................................................................................145createdb........................................................................................147createlang .....................................................................................149
Table of Contents 3
Greenplum Database Utility Guide 4.2 - Contents
createuser.....................................................................................151dropdb ..........................................................................................154droplang........................................................................................156dropuser .......................................................................................158ecpg..............................................................................................160pg_config ......................................................................................162pg_dump.......................................................................................165pg_dumpall ...................................................................................172pg_restore ....................................................................................176psql...............................................................................................181reindexdb......................................................................................204vacuumdb .....................................................................................206
Chapter 3: Oracle Compatibility Functions ............................209Installing Oracle Compatibility Functions .......................................209Oracle and Greenplum Implementation Differences.......................209Oracle Compatibility Functions Reference ......................................211
Table of Contents 4
Greenplum Database Utility Guide 4.2 – Preface
Preface
This guide provides information for system administrators and database superusers responsible for administering a Greenplum Database system.
• About This Guide• Document Conventions• Getting Support
About This GuideThis guide contains reference documentation for command-line utilities and client programs. This guide is intended for system and database administrators responsible for managing a Greenplum Database system.
This guide assumes knowledge of Linux/UNIX system administration, database management systems, database administration, and structured query language (SQL).
Because Greenplum Database is based on PostgreSQL 8.2.15, this guide assumes some familiarity with PostgreSQL. Links and cross-references to PostgreSQL documentation are provided throughout this guide for features that are similar to those in Greenplum Database.
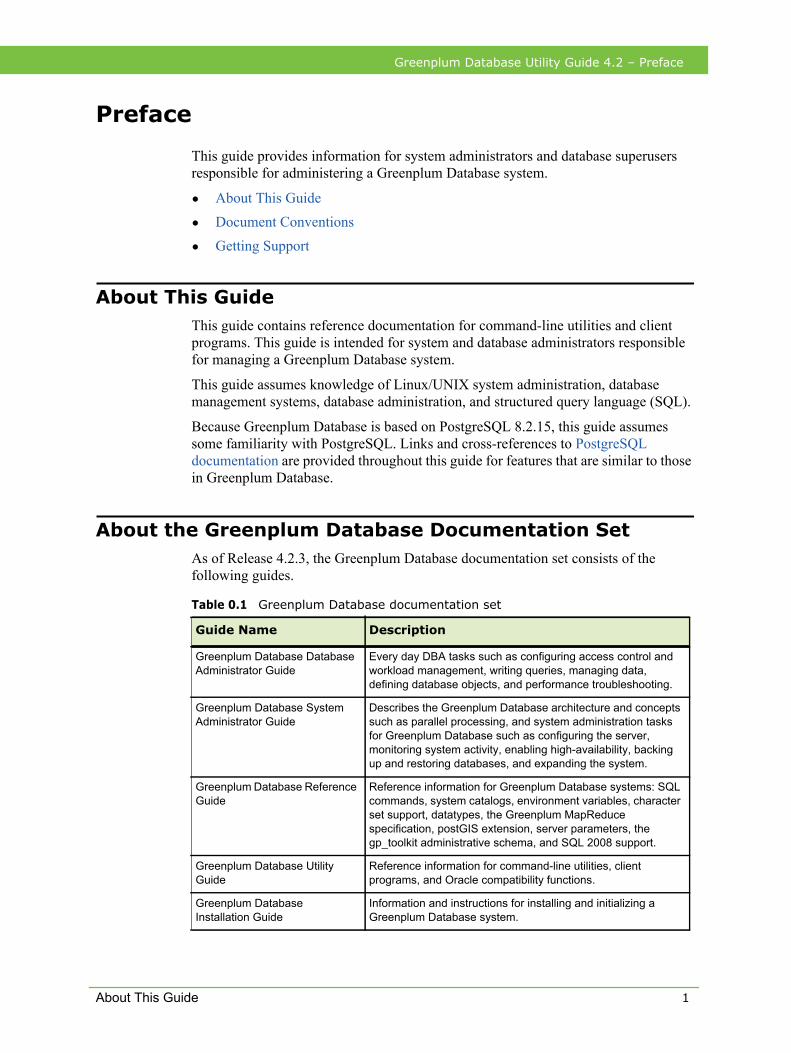
About the Greenplum Database Documentation SetAs of Release 4.2.3, the Greenplum Database documentation set consists of the following guides.
Table 0.1 Greenplum Database documentation set
Guide Name Description
Greenplum Database Database Administrator Guide
Every day DBA tasks such as configuring access control and workload management, writing queries, managing data, defining database objects, and performance troubleshooting.
Greenplum Database System Administrator Guide
Describes the Greenplum Database architecture and concepts such as parallel processing, and system administration tasks for Greenplum Database such as configuring the server, monitoring system activity, enabling high-availability, backing up and restoring databases, and expanding the system.
Greenplum Database Reference Guide
Reference information for Greenplum Database systems: SQL commands, system catalogs, environment variables, character set support, datatypes, the Greenplum MapReduce specification, postGIS extension, server parameters, the gp_toolkit administrative schema, and SQL 2008 support.
Greenplum Database Utility Guide
Reference information for command-line utilities, client programs, and Oracle compatibility functions.
Greenplum Database Installation Guide
Information and instructions for installing and initializing a Greenplum Database system.
About This Guide 1
Greenplum Database Utility Guide 4.2 – Preface
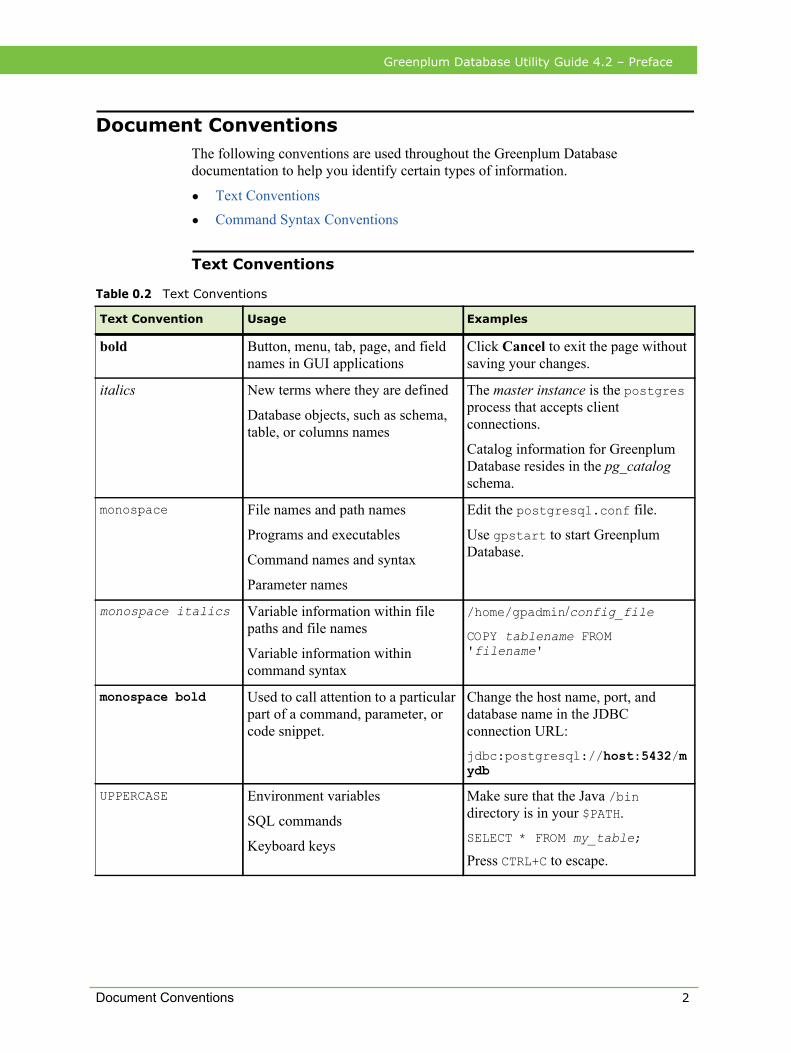
Document ConventionsThe following conventions are used throughout the Greenplum Database documentation to help you identify certain types of information.
• Text Conventions• Command Syntax Conventions
Text Conventions
Table 0.2 Text Conventions
Text Convention Usage Examples
bold Button, menu, tab, page, and field names in GUI applications
Click Cancel to exit the page without saving your changes.
italics New terms where they are defined
Database objects, such as schema, table, or columns names
The master instance is the postgres process that accepts client connections.
Catalog information for Greenplum Database resides in the pg_catalog schema.
monospace File names and path names
Programs and executables
Command names and syntax
Parameter names
Edit the postgresql.conf file.
Use gpstart to start Greenplum Database.
monospace italics Variable information within file paths and file names
Variable information within command syntax
/home/gpadmin/config_file
COPY tablename FROM 'filename'
monospace bold Used to call attention to a particular part of a command, parameter, or code snippet.
Change the host name, port, and database name in the JDBC connection URL:
jdbc:postgresql://host:5432/mydb
UPPERCASE Environment variables
SQL commands
Keyboard keys
Make sure that the Java /bin directory is in your $PATH.
SELECT * FROM my_table;
Press CTRL+C to escape.
Document Conventions 2
Greenplum Database Utility Guide 4.2 – Preface
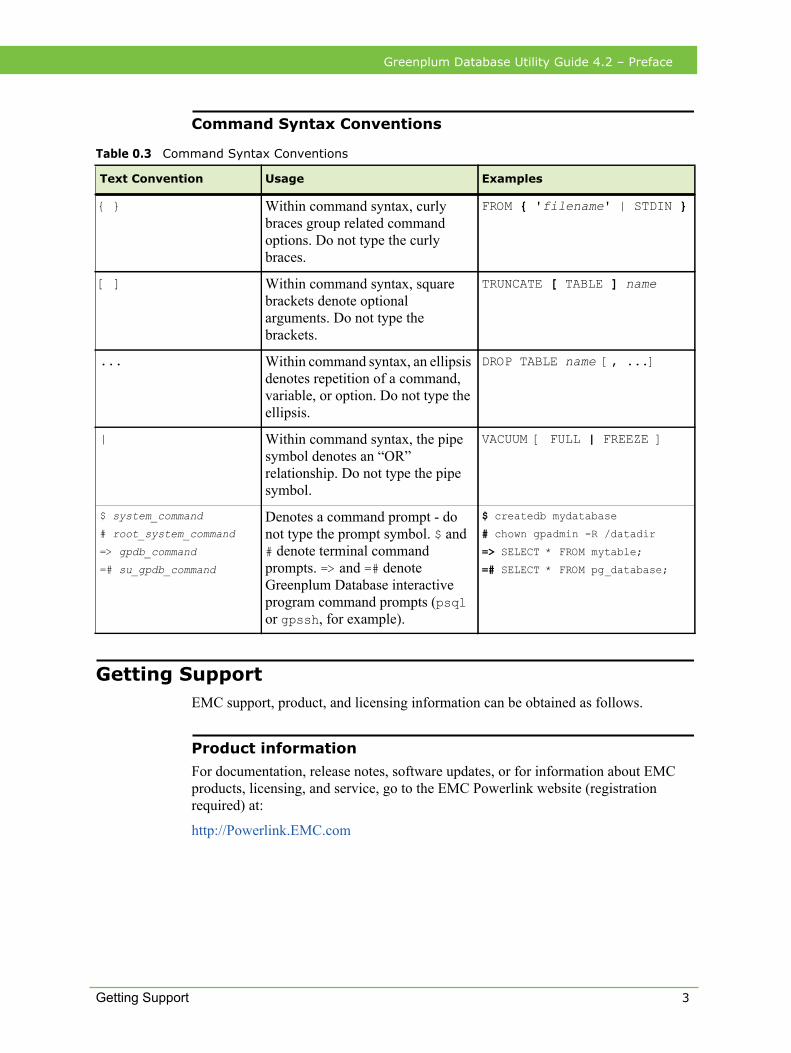
Command Syntax Conventions
Table 0.3 Command Syntax Conventions
Text Convention Usage Examples
{ } Within command syntax, curly braces group related command options. Do not type the curly braces.
FROM { 'filename' | STDIN }
[ ] Within command syntax, square brackets denote optional arguments. Do not type the brackets.
TRUNCATE [ TABLE ] name
... Within command syntax, an ellipsis denotes repetition of a command, variable, or option. Do not type the ellipsis.
DROP TABLE name [, ...]
| Within command syntax, the pipe symbol denotes an “OR” relationship. Do not type the pipe symbol.
VACUUM [ FULL | FREEZE ]
$ system_command# root_system_command=> gpdb_command=# su_gpdb_command
Denotes a command prompt - do not type the prompt symbol. $ and # denote terminal command prompts. => and =# denote Greenplum Database interactive program command prompts (psql or gpssh, for example).
$ createdb mydatabase
# chown gpadmin -R /datadir
=> SELECT * FROM mytable;
=# SELECT * FROM pg_database;
Getting SupportEMC support, product, and licensing information can be obtained as follows.
Product information
For documentation, release notes, software updates, or for information about EMC products, licensing, and service, go to the EMC Powerlink website (registration required) at:
http://Powerlink.EMC.com
Getting Support 3

Greenplum Database Utility Guide 4.2 – Preface
Technical support
For technical support, go to Powerlink and choose Support. On the Support page, you will see several options, including one for making a service request. Note that to open a service request, you must have a valid support agreement. Please contact your EMC sales representative for details about obtaining a valid support agreement or with questions about your account.
Getting Support 4
Greenplum Database Utility Guide 4.2– Chapter 1: Management Utility Reference
1. Management Utility Reference
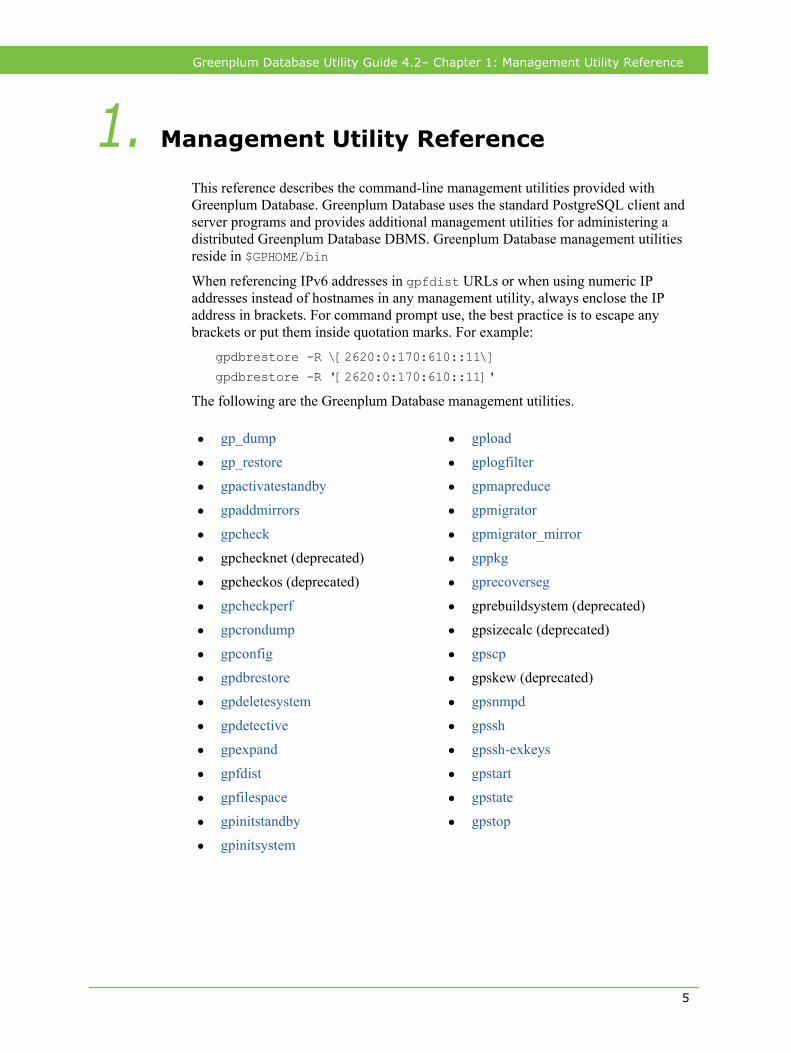
This reference describes the command-line management utilities provided with Greenplum Database. Greenplum Database uses the standard PostgreSQL client and server programs and provides additional management utilities for administering a distributed Greenplum Database DBMS. Greenplum Database management utilities reside in $GPHOME/bin
When referencing IPv6 addresses in gpfdist URLs or when using numeric IP addresses instead of hostnames in any management utility, always enclose the IP address in brackets. For command prompt use, the best practice is to escape any brackets or put them inside quotation marks. For example:
gpdbrestore -R \[2620:0:170:610::11\]
gpdbrestore -R '[2620:0:170:610::11]'
The following are the
• gp_dump• gp_restore• gpactivatestandby• gpaddmirrors• gpcheck• gpchecknet (deprecated)• gpcheckos (deprecated)• gpcheckperf• gpcrondump• gpconfig• gpdbrestore• gpdeletesystem• gpdetective• gpexpand• gpfdist• gpfilespace• gpinitstandby• gpinitsystem
• gpload• gplogfilter• gpmapreduce• gpmigrator• gpmigrator_mirror• gppkg• gprecoverseg• gprebuildsystem (deprecated)• gpsizecalc (deprecated)• gpscp• gpskew (deprecated)• gpsnmpd• gpssh• gpssh-exkeys• gpstart• gpstate• gpstop
Greenplum Database management utilities.
5
Greenplum Database Utility Guide 4.2– Chapter 1: Management Utility Reference
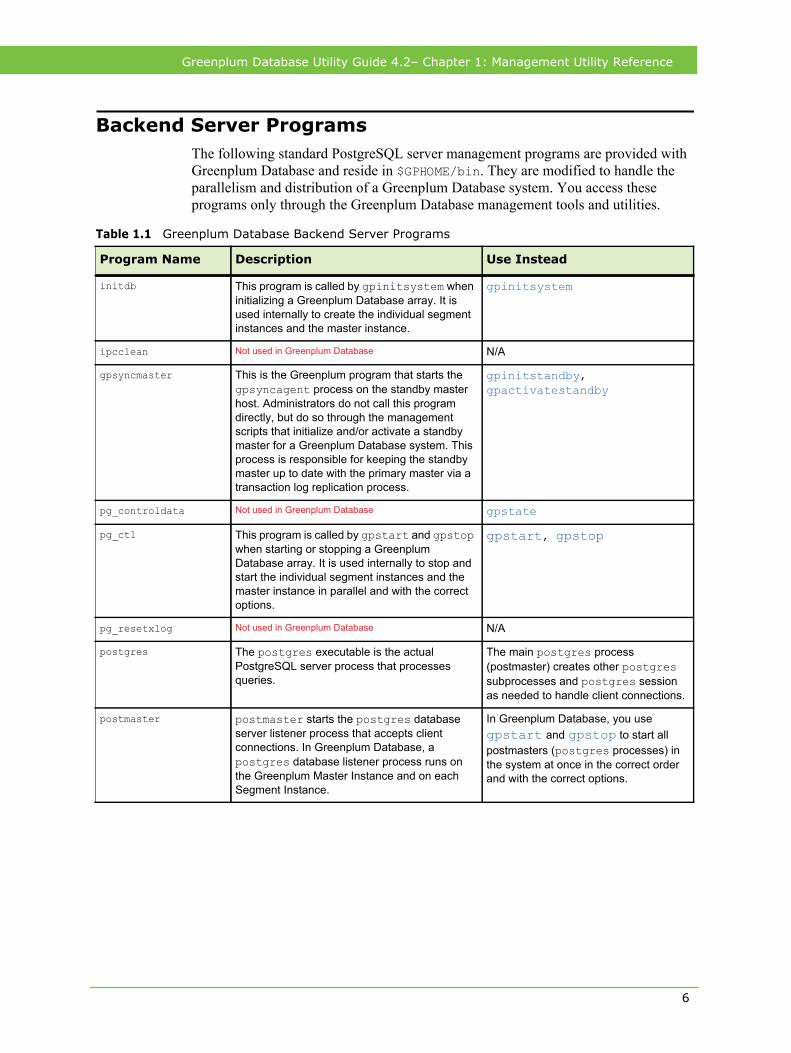
Backend Server ProgramsThe following standard PostgreSQL server management programs are provided with Greenplum Database and reside in $GPHOME/bin. They are modified to handle the parallelism and distribution of a Greenplum Database system. You access these programs only through the Greenplum Database management tools and utilities.
Table 1.1 Greenplum Database Backend Server Programs
Program Name Description Use Instead
This program is called by gpinitsystem when initializing a Greenplum Database array. It is used internally to create the individual segment instances and the master instance.
gpinitsystem
Not used in Greenplum Database N/A
This is the Greenplum program that starts the gpsyncagent process on the standby master host. Administrators do not call this program directly, but do so through the management scripts that initialize and/or activate a standby master for a Greenplum Database system. This process is responsible for keeping the standby master up to date with the primary master via a transaction log replication process.
gpinitstandby, gpactivatestandby
Not used in Greenplum Database gpstate
This program is called by gpstart and gpstop when starting or stopping a Greenplum Database array. It is used internally to stop and start the individual segment instances and the master instance in parallel and with the correct options.
gpstart, gpstop
Not used in Greenplum Database N/A
The postgres executable is the actual PostgreSQL server process that processes queries.
The main postgres process (postmaster) creates other postgres subprocesses and postgres session as needed to handle client connections.
postmaster starts the postgres database server listener process that accepts client connections. In Greenplum Database, a postgres database listener process runs on the Greenplum Master Instance and on each Segment Instance.
In Greenplum Database, you use gpstart and gpstop to start all postmasters (postgres processes) in the system at once in the correct order and with the correct options.
initdb
ipcclean
gpsyncmaster
pg_controldata
pg_ctl
pg_resetxlog
postgres
postmaster
6
Greenplum Database Utility Guide 4.2– Chapter 1: Management Utility Reference
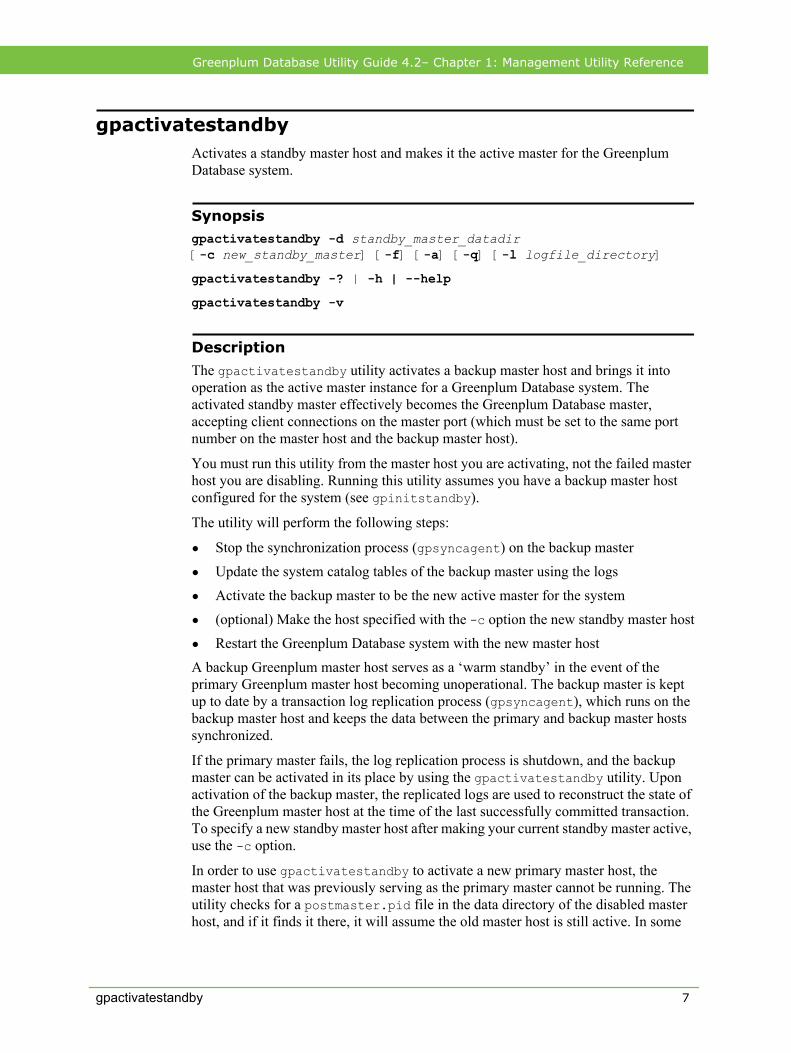
gpactivatestandbyActivates a standby master host and makes it the active master for the Greenplum Database system.
Synopsisgpactivatestandby -d standby_master_datadir [-c new_standby_master] [-f] [-a] [-q] [-l logfile_directory]
gpactivatestandby -? | -h | --help
gpactivatestandby -v
Description
The gpactivatestandby utility activates a backup master host and brings it into operation as the active master instance for a Greenplum Database system. The activated standby master effectively becomes the Greenplum Database master, accepting client connections on the master port (which must be set to the same port number on the master host and the backup master host).
You must run this utility from the master host you are activating, not the failed master host you are disabling. Running this utility assumes you have a backup master host configured for the system (see gpinitstandby).
The utility will perform the following steps:
• Stop the synchronization process (gpsyncagent) on the backup master• Update the system catalog tables of the backup master using the logs• Activate the backup master to be the new active master for the system• (optional) Make the host specified with the -c option the new standby master host• Restart the Greenplum Database system with the new master hostA backup Greenplum master host serves as a ‘warm standby’ in the event of the primary Greenplum master host becoming unoperational. The backup master is kept up to date by a transaction log replication process (gpsyncagent), which runs on the backup master host and keeps the data between the primary and backup master hosts synchronized.
If the primary master fails, the log replication process is shutdown, and the backup master can be activated in its place by using the gpactivatestandby utility. Upon activation of the backup master, the replicated logs are used to reconstruct the state of the Greenplum master host at the time of the last successfully committed transaction. To specify a new standby master host after making your current standby master active, use the -c option.
In order to use gpactivatestandby to activate a new primary master host, the master host that was previously serving as the primary master cannot be running. The utility checks for a postmaster.pid file in the data directory of the disabled master host, and if it finds it there, it will assume the old master host is still active. In some
gpactivatestandby 7
Greenplum Database Utility Guide 4.2– Chapter 1: Management Utility Reference
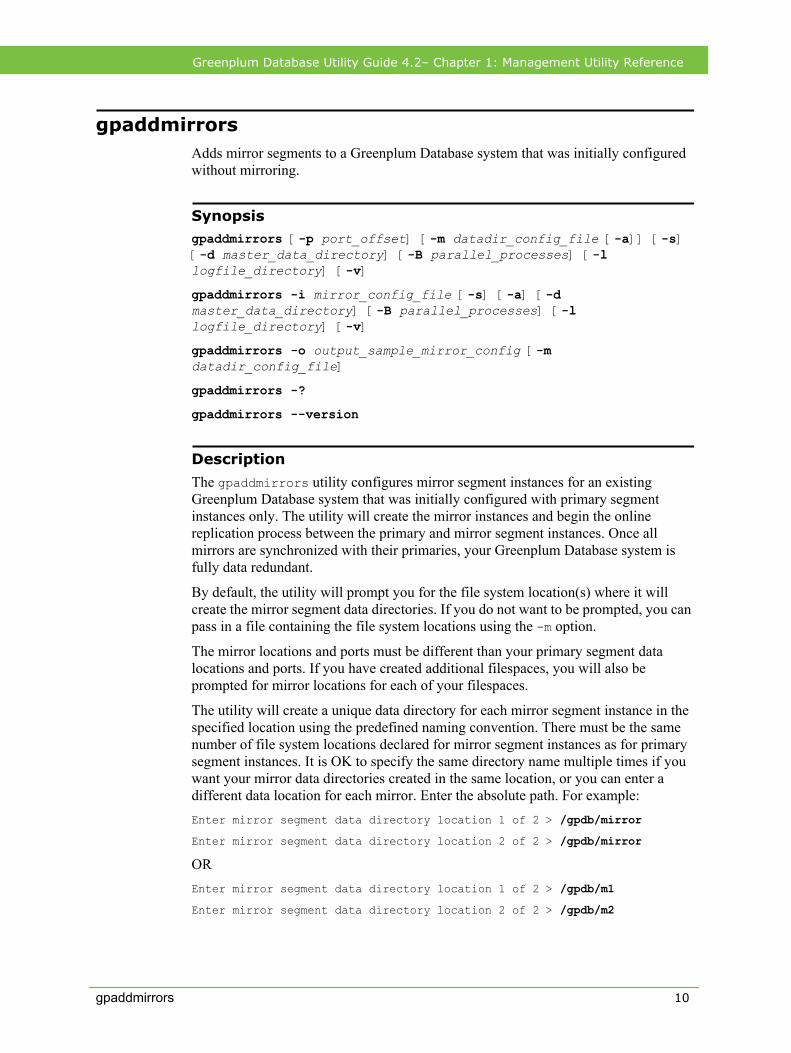
cases, you may need to remove the postmaster.pid file from the disabled master host data directory before running gpactivatestandby (for example, if the disabled master host process was terminated unexpectedly).
After activating a standby master, run ANALYZE to update the database query statistics. For example:
psql dbname -c 'ANALYZE;'
Options
-a (do not prompt)
Do not prompt the user for confirmation.
-c new_standby_master_hostnameOptional. After you activate your standby master you may want to specify another host to be the new standby, otherwise your Greenplum Database system will no longer have a standby master configured. Use this option to specify the hostname of the new standby master host. You can also use gpinitstandby at a later time to configure a new standby master host.
-d standby_master_datadirRequired. The absolute path of the data directory for the master host you are activating.
-f (force activation)
Use this option to force activation of the backup master host. Only use this option if you are sure that the backup and primary master hosts are consistent. This option may be useful if you have just initialized a new backup master using gpinitstandby, and want to activate it immediately.
-l logfile_directoryThe directory to write the log file. Defaults to ~/gpAdminLogs.
-q (no screen output)
Run in quiet mode. Command output is not displayed on the screen, but is still written to the log file.
-v (show utility version)
Displays the version, status, last updated date, and check sum of this utility.
-? | -h | --help (help)
Displays the online help.
Examples
Activate the backup master host and make it the active master instance for a Greenplum Database system (run from backup master host you are activating):
gpactivatestandby 8

Greenplum Database Utility Guide 4.2– Chapter 1: Management Utility Reference
gpactivatestandby -d /gpdata
Activate the backup master host and at the same time configure another host to be your new standby master:
gpactivatestandby -d /gpdata -c new_standby_hostname
See Also
gpinitsystem, gpinitstandby
gpactivatestandby 9
Greenplum Database Utility Guide 4.2– Chapter 1: Management Utility Reference
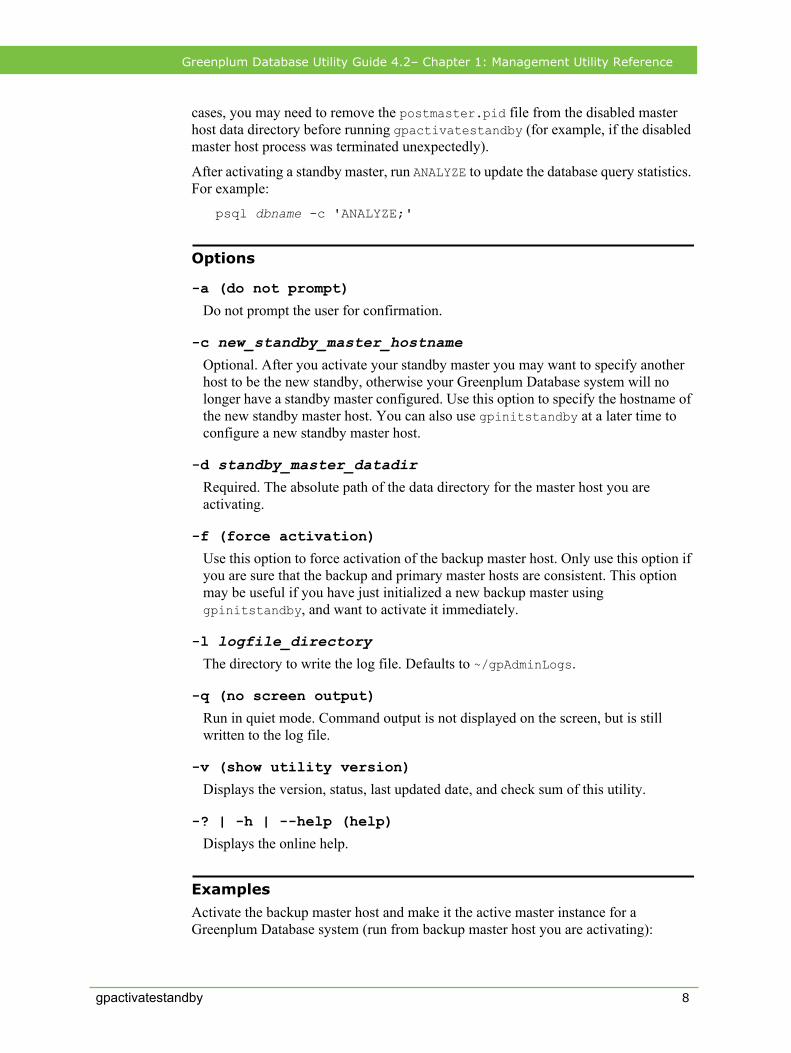
gpaddmirrorsAdds mirror segments to a Greenplum Database system that was initially configured without mirroring.
Synopsisgpaddmirrors [-p port_offset] [-m datadir_config_file [-a]] [-s] [-d master_data_directory] [-B parallel_processes] [-l logfile_directory] [-v]
gpaddmirrors -i mirror_config_file [-s] [-a] [-d master_data_directory] [-B parallel_processes] [-l logfile_directory] [-v]
gpaddmirrors -o output_sample_mirror_config [-m datadir_config_file]
gpaddmirrors -?
gpaddmirrors --version
Description
The gpaddmirrors utility configures mirror segment instances for an existing Greenplum Database system that was initially configured with primary segment instances only. The utility will create the mirror instances and begin the online replication process between the primary and mirror segment instances. Once all mirrors are synchronized with their primaries, your Greenplum Database system is fully data redundant.
By default, the utility will prompt you for the file system location(s) where it will create the mirror segment data directories. If you do not want to be prompted, you can pass in a file containing the file system locations using the -m option.
The mirror locations and ports must be different than your primary segment data locations and ports. If you have created additional filespaces, you will also be prompted for mirror locations for each of your filespaces.
The utility will create a unique data directory for each mirror segment instance in the specified location using the predefined naming convention. There must be the same number of file system locations declared for mirror segment instances as for primary segment instances. It is OK to specify the same directory name multiple times if you want your mirror data directories created in the same location, or you can enter a different data location for each mirror. Enter the absolute path. For example:Enter mirror segment data directory location 1 of 2 > /gpdb/mirror
Enter mirror segment data directory location 2 of 2 > /gpdb/mirror
OREnter mirror segment data directory location 1 of 2 > /gpdb/m1
Enter mirror segment data directory location 2 of 2 > /gpdb/m2
gpaddmirrors 10

Greenplum Database Utility Guide 4.2– Chapter 1: Management Utility Reference
Alternatively, you can run the gpaddmirrors utility and supply a detailed configuration file using the -i option. This is useful if you want your mirror segments on a completely different set of hosts than your primary segments. The format of the mirror configuration file is:
filespaceOrder=[filespace1_fsname[:filespace2_fsname:...]mirror[content]=content:address:port:mir_replication_port:pri_replication_port:fselocation[:fselocation:...]
For example (if you do not have additional filespaces configured besides the default pg_system filespace):
filespaceOrder=
mirror0=0:sdw1-1:60000:61000:62000:/gpdata/mir1/gp0
mirror1=1:sdw1-1:60001:61001:62001:/gpdata/mir2/gp1
The gp_segment_configuration, pg_filespace, and pg_filespace_entry system catalog tables can help you determine your current primary segment configuration so that you can plan your mirror segment configuration. For example, run the following query:
=# SELECT dbid, content, address as host_address, port,
replication_port, fselocation as datadir
FROM gp_segment_configuration, pg_filespace_entry
WHERE dbid=fsedbid
ORDER BY dbid;
If creating your mirrors on alternate mirror hosts, the new mirror segment hosts must be pre-installed with the Greenplum Database software and configured exactly the same as the existing primary segment hosts.
You must make sure that the user who runs gpaddmirrors (the gpadmin user) has permissions to write to the data directory locations specified. You may want to create these directories on the segment hosts and chown them to the appropriate user before running gpaddmirrors.
Options
-a (do not prompt)
Run in quiet mode - do not prompt for information. Must supply a configuration file with either -m or -i if this option is used.
-B parallel_processesThe number of mirror setup processes to start in parallel. If not specified, the utility will start up to 10 parallel processes depending on how many mirror segment instances it needs to set up.
-d master_data_directoryThe master data directory. If not specified, the value set for $MASTER_DATA_DIRECTORY will be used.
gpaddmirrors 11
Greenplum Database Utility Guide 4.2– Chapter 1: Management Utility Reference
-i mirror_config_fileA configuration file containing one line for each mirror segment you want to create. You must have one mirror segment listed for each primary segment in the system. The format of this file is as follows (as per attributes in the gp_segment_configuration, pg_filespace, and pg_filespace_entry catalog tables):
filespaceOrder=[filespace1_fsname[:filespace2_fsname:...]mirror[content]=content:address:port:mir_replication_port:pri_replication_port:fselocation[:fselocation:...]
Note that you only need to specify an name for filespaceOrder if your system has multiple filespaces configured. If your system does not have additional filespaces configured besides the default pg_system filespace, this file will only have one location (for the default data directory filespace, pg_system). pg_system does not need to be listed in the filespaceOrder line. It will always be the first fselocation listed after replication_port.
-l logfile_directoryThe directory to write the log file. Defaults to ~/gpAdminLogs.
-m datadir_config_fileA configuration file containing a list of file system locations where the mirror data directories will be created. If not supplied, the utility will prompt you for locations. Each line in the file specifies a mirror data directory location. For example:
/gpdata/m1
/gpdata/m2
/gpdata/m3
/gpdata/m4
If your system has additional filespaces configured in addition to the default pg_system filespace, you must also list file system locations for each filespace as follows:
filespace filespace1/gpfs1/m1
/gpfs1/m2
/gpfs1/m3
/gpfs1/m4
-o output_sample_mirror_configIf you are not sure how to lay out the mirror configuration file used by the -i option, you can run gpaddmirrors with this option to generate a sample mirror configuration file based on your primary segment configuration. The utility will prompt you for your mirror segment data directory locations (unless you provide these in a file using -m). You can then edit this file to change the host names to alternate mirror hosts if necessary.
gpaddmirrors 12
Greenplum Database Utility Guide 4.2– Chapter 1: Management Utility Reference
-p port_offsetOptional. This number is used to calculate the database ports and replication ports used for mirror segments. The default offset is 1000. Mirror port assignments are calculated as follows:
primary port + offset = mirror database port
primary port + (2 * offset) = mirror replication port
primary port + (3 * offset) = primary replication port
For example, if a primary segment has port 50001, then its mirror will use a database port of 51001, a mirror replication port of 52001, and a primary replication port of 53001 by default.
-s (spread mirrors)
Spreads the mirror segments across the available hosts. The default is to group a set of mirror segments together on an alternate host from their primary segment set. Mirror spreading will place each mirror on a different host within the Greenplum Database array. Spreading is only allowed if there is a sufficient number of hosts in the array (number of hosts is greater than or equal to the number of segment instances per host).
-v (verbose)
Sets logging output to verbose.
--version (show utility version)
Displays the version of this utility.
-? (help)
Displays the online help.
Examples
Add mirroring to an existing Greenplum Database system using the same set of hosts as your primary data. Calculate the mirror database and replication ports by adding 100 to the current primary segment port numbers:
$ gpaddmirrors -p 100
Add mirroring to an existing Greenplum Database system using a different set of hosts from your primary data:
$ gpaddmirrors -i mirror_config_file
Where the mirror_config_file looks something like this (if you do not have additional filespaces configured besides the default pg_system filespace):filespaceOrder=
mirror0=0:sdw1-1:52001:53001:54001:/gpdata/mir1/gp0
mirror1=1:sdw1-2:52002:53002:54002:/gpdata/mir2/gp1
mirror2=2:sdw2-1:52001:53001:54001:/gpdata/mir1/gp2
mirror3=3:sdw2-2:52002:53002:54002:/gpdata/mir2/gp3
gpaddmirrors 13

Greenplum Database Utility Guide 4.2– Chapter 1: Management Utility Reference
Output a sample mirror configuration file to use with gpaddmirrors -i:
$ gpaddmirrors -o /home/gpadmin/sample_mirror_config
See Also
gpinitsystem, gpinitstandby, gpactivatestandby
gpaddmirrors 14
Greenplum Database Utility Guide 4.2– Chapter 1: Management Utility Reference
gpbitmapreindexRebuilds bitmap indexes after a 3.3.x to 4.0.x upgrade.
Synopsisgpbitmapreindex -m { r | d | {l [-o output_sql_file]} }[-h master_host] [-p master_port] [-n number_of_processes] [-v]
gpmigrator --version
gpmigrator --help | -?
Description
The on-disk format of bitmap indexes has changed from release 3.3.x to 4.0.x. Users who upgrade must rebuild all bitmap indexes after upgrading to 4.0. The gpbitmapreindex utility facilitates the upgrade of bitmap indexes by either running the REINDEX command to reindex them, or running the DROP INDEX command to simply remove them. If you decide to drop your bitmap indexes rather than reindex, run gpbitmapreindex in list --outfile mode first to output a SQL file that you can use to recreate the indexes later. You must be the Greenplum Database superuser (gpadmin) in order to run gpbitmapreindex.
Options
-h host | --host hostSpecifies the host name of the machine on which the Greenplum master database server is running. If not specified, reads from the environment variable PGHOST or defaults to localhost.
-m {r|d|l} | --mode {reindex|drop|list}
Required. The bitmap index upgrade mode: either reindex, drop, or list all bitmap indexes in the system.
-n number_of_processes | --parallel number_of_processesThe number of bitmap indexes to reindex or drop in parallel. Valid values are 1-16. The default is 1.
-o output_sql_file | --outfile output_sql_fileWhen used with list mode, outputs a SQL file that can be used to recreate the bitmap indexes.
-p port | --port portSpecifies the TCP port on which the Greenplum master database server is listening for connections. If not specified, reads from the environment variable PGPORT or defaults to 5432.
gpbitmapreindex 15
Greenplum Database Utility Guide 4.2– Chapter 1: Management Utility Reference
-v | --verbose
Show verbose output.
--version
Displays the version of this utility.
-? | --help
Displays the online help.
Examples
Reindex all bitmap indexes:
gpbitmapreindex -m r
Output a file of SQL commands that can be used to recreate all bitmap indexes:
gpbitmapreindex -m list --outfile /home/gpadmin/bmp_ix.sql
Drop all bitmap indexes and run in verbose mode:
gpbitmapreindex -m d -v
See Also
Greenplum Database Reference Guide: REINDEX, DROP INDEX, CREATE INDEX
gpbitmapreindex 16
Greenplum Database Utility Guide 4.2– Chapter 1: Management Utility Reference
gpcheckVerifies and validates Greenplum Database platform settings.
Synopsisgpcheck -f hostfile_gpcheck [-m master_host] [-s standy_master_host] [--stdout | --zipout] [--config config_file]
gpcheck --zipin gpcheck_zipfile
gpcheck -?
gpcheck --version
Description
The gpcheck utility determines the platform on which you are running Greenplum Database and validates various platform-specific configuration settings. gpcheck can use a host file or a file previously created with the --zipout option to validate platform settings. At the end of a successful validation process, GPCHECK_NORMAL message displays. If GPCHECK_ERROR displays, one or more validation checks failed. You can use also gpcheck to gather and view platform settings on hosts without running validation checks.
Greenplum recommends that you run gpcheck as root. If you do not run gpcheck as root, the utility displays a warning message and will not be able to validate all configuration settings; Only some of these settings will be validated.
Options
--config config_fileThe name of a configuration file to use instead of the default file $GPHOME/etc/gpcheck.cnf (or ~/gpconfigs/gpcheck_dca_config on the EMC Greenplum Data Computing Appliance). This file specifies the OS-specific checks to run.
-f hostfile_gpcheckThe name of a file that contains a list of hosts that gpcheck uses to validate platform-specific settings. This file should contain a single host name for all hosts in your Greenplum Database system (master, standby master, and segments).
-m master_hostPerform special master host-specific validation tasks on this host.
-s standy_master_hostPerform special standby master host-specific validation tasks on this host.
gpcheck 17
Greenplum Database Utility Guide 4.2– Chapter 1: Management Utility Reference
--stdout
Display collected host information from gpcheck. No checks or validations are performed.
--zipout
Save all collected data to a .zip file in the current working directory. gpcheck automatically creates the .zip file and names it gpcheck_timestamp.tar.gz. No checks or validations are performed.
--zipin gpcheck_zipfileUse this option to decompress and check a .zip file created with the --zipout option. gpcheck performs validation tasks against the file you specify in this option.
-? (help)
Displays the online help.
--version
Displays the version of this utility.
Examples
Verify and validate the Greenplum Database platform settings by entering a host file and specifying the master host and the standby master host:
# gpcheck -f hostfile_gpcheck -m mdw -s smdw
Save Greenplum Database platform settings to a zip file:
# gpcheck -f hostfile_gpcheck -m mdw -s smdw --zipout
Verify and validate the Greenplum Database platform settings using a zip file created with the --zipout option:
# gpcheck --zipin gpcheck_timestamp.tar.gz
View collected Greenplum Database platform settings:
# gpcheck -f hostfile_gpcheck -m mdw -s smdw --stdout
See Alsogpcheckperf
gpcheck 18
Greenplum Database Utility Guide 4.2– Chapter 1: Management Utility Reference
gpcheckperfVerifies the baseline hardware performance of the specified hosts.
Synopsisgpcheckperf -d test_directory [-d test_directory ...] {-f hostfile_gpcheckperf | - h hostname [-h hostname ...]} [-r ds] [-B block_size] [-S file_size] [-D] [-v|-V]
gpcheckperf -d temp_directory {-f hostfile_gpchecknet | - h hostname [-h hostname ...]} [ -r n|N|M [--duration time] [--netperf] ] [-D] [-v|-V]
gpcheckperf -?
gpcheckperf --version
Description
The gpcheckperf utility starts a session on the specified hosts and runs the following performance tests:
• Disk I/O Test (dd test) — To test the sequential throughput performance of a logical disk or file system, the utility uses the dd command, which is a standard UNIX utility. It times how long it takes to write and read a large file to and from disk and calculates your disk I/O performance in megabytes (MB) per second. By default, the file size that is used for the test is calculated at two times the total random access memory (RAM) on the host. This ensures that the test is truly testing disk I/O and not using the memory cache.
• Memory Bandwidth Test (stream) — To test memory bandwidth, the utility uses the STREAM benchmark program to measure sustainable memory bandwidth (in MB/s). This tests that your system is not limited in performance by the memory bandwidth of the system in relation to the computational performance of the CPU. In applications where the data set is large (as in Greenplum Database), low memory bandwidth is a major performance issue. If memory bandwidth is significantly lower than the theoretical bandwidth of the CPU, then it can cause the CPU to spend significant amounts of time waiting for data to arrive from system memory.
• Network Performance Test (gpnetbench*) — To test network performance (and thereby the performance of the Greenplum Database interconnect), the utility runs a network benchmark program that transfers a 5 second stream of data from the current host to each remote host included in the test. The data is transferred in parallel to each remote host and the minimum, maximum, average and median network transfer rates are reported in megabytes (MB) per second. If the summary transfer rate is slower than expected (less than 100 MB/s), you can run the network test serially using the -r n option to obtain per-host results. To run a full-matrix bandwidth test, you can specify -r M which will cause every host to send and receive data from every other host specified. This test is best used to validate if the switch fabric can tolerate a full-matrix workload.
gpcheckperf 19
Greenplum Database Utility Guide 4.2– Chapter 1: Management Utility Reference
To specify the hosts to test, use the -f option to specify a file containing a list of host names, or use the -h option to name single host names on the command-line. If running the network performance test, all entries in the host file must be for network interfaces within the same subnet. If your segment hosts have multiple network interfaces configured on different subnets, run the network test once for each subnet.
You must also specify at least one test directory (with -d). The user who runs gpcheckperf must have write access to the specified test directories on all remote hosts. For the disk I/O test, the test directories should correspond to your segment data directories (primary and/or mirrors). For the memory bandwidth and network tests, a temporary directory is required for the test program files.
Before using gpcheckperf, you must have a trusted host setup between the hosts involved in the performance test. You can use the utility gpssh-exkeys to update the known host files and exchange public keys between hosts if you have not done so already. Note that gpcheckperf calls to gpssh and gpscp, so these Greenplum utilities must also be in your $PATH.
Options
-B block_sizeSpecifies the block size (in KB or MB) to use for disk I/O test. The default is 32KB, which is the same as the Greenplum Database page size. The maximum block size is 1 MB.
-d test_directoryFor the disk I/O test, specifies the file system directory locations to test. You must have write access to the test directory on all hosts involved in the performance test. You can use the -d option multiple times to specify multiple test directories (for example, to test disk I/O of your primary and mirror data directories).
-d temp_directoryFor the network and stream tests, specifies a single directory where the test program files will be copied for the duration of the test. You must have write access to this directory on all hosts involved in the test.
-D (display per-host results)
Reports performance results for each host for the disk I/O tests. The default is to report results for just the hosts with the minimum and maximum performance, as well as the total and average performance of all hosts.
--duration timeSpecifies the duration of the network test in seconds (s), minutes (m), hours (h), or days (d). The default is 15 seconds.
gpcheckperf 20
Greenplum Database Utility Guide 4.2– Chapter 1: Management Utility Reference
-f hostfile_gpcheckperfFor the disk I/O and stream tests, specifies the name of a file that contains one host name per host that will participate in the performance test. The host name is required, and you can optionally specify an alternate user name and/or SSH port number per host. The syntax of the host file is one host per line as follows:
[username@]hostname[:ssh_port]
-f hostfile_gpchecknetFor the network performance test, all entries in the host file must be for host adresses within the same subnet. If your segment hosts have multiple network interfaces configured on different subnets, run the network test once for each subnet. For example (a host file containing segment host address names for interconnect subnet 1):
sdw1-1
sdw2-1
sdw3-1
-h hostnameSpecifies a single host name (or host address) that will participate in the performance test. You can use the -h option multiple times to specify multiple host names.
--netperf
Specifies that the netperf binary should be used to perform the network test instead of the Greenplum network test. To use this option, you must download netperf from www.netperf.org and install it into $GPHOME/bin/lib on all Greenplum hosts (master and segments).
-r ds{n|N|M}
Specifies which performance tests to run. The default is dsn:
• Disk I/O test (d)• Stream test (s)• Network performance test in sequential (n), parallel (N), or full-matrix (M)
mode. The optional --duration option specifies how long (in seconds) to run the network test. To use the parallel (N) mode, you must run the test on an even number of hosts.If you would rather use netperf (www.netperf.org) instead of the Greenplum network test, you can download it and install it into $GPHOME/bin/lib on all Greenplum hosts (master and segments). You would then specify the optional --netperf option to use the netperf binary instead of the default gpnetbench* utilities.
gpcheckperf 21
Greenplum Database Utility Guide 4.2– Chapter 1: Management Utility Reference
-S file_sizeSpecifies the total file size to be used for the disk I/O test for all directories specified with -d. file_size should equal two times total RAM on the host. If not specified, the default is calculated at two times the total RAM on the host where gpcheckperf is executed. This ensures that the test is truly testing disk I/O and not using the memory cache. You can specify sizing in KB, MB, or GB.
-v (verbose) | -V (very verbose)
Verbose mode shows progress and status messages of the performance tests as they are run. Very verbose mode shows all output messages generated by this utility.
--version
Displays the version of this utility.
-? (help)
Displays the online help.
Examples
Run the disk I/O and memory bandwidth tests on all the hosts in the file host_file using the test directory of /data1 and /data2:
$ gpcheckperf -f hostfile_gpcheckperf -d /data1 -d /data2 -r ds
Run only the disk I/O test on the hosts named sdw1 and sdw2 using the test directory of /data1. Show individual host results and run in verbose mode:
$ gpcheckperf -h sdw1 -h sdw2 -d /data1 -r d -D -v
Run the parallel network test using the test directory of /tmp, where hostfile_gpcheck_ic* specifies all network interface host address names within the same interconnect subnet:
$ gpcheckperf -f hostfile_gpchecknet_ic1 -r N -d /tmp
$ gpcheckperf -f hostfile_gpchecknet_ic2 -r N -d /tmp
Run the same test as above, but use netperf instead of the Greenplum network test (note that netperf must be installed in $GPHOME/bin/lib on all Greenplum hosts):
$ gpcheckperf -f hostfile_gpchecknet_ic1 -r N --netperf -d /tmp
$ gpcheckperf -f hostfile_gpchecknet_ic2 -r N --netperf -d /tmp
See Also
gpssh, gpscp, gpcheck
gpcheckperf 22
Greenplum Database Utility Guide 4.2– Chapter 1: Management Utility Reference
gpconfigSets server configuration parameters on all segments within a Greenplum Database system.
Synopsisgpconfig -c param_name -v value [-m master_value | --masteronly] | -r param_name [--masteronly] | -l [--skipvalidation] [--verbose] [--debug]
gpconfig -s param_name [--verbose] [--debug]
gpconfig --help
Description
The gpconfig utility allows you to set, unset, or view configuration parameters from the postgresql.conf files of all instances (master, segments, and mirrors) in your Greenplum Database system. When setting a parameter, you can also specify a different value for the master if necessary. For example, parameters such as max_connections require a different setting on the master than what is used for the segments. If you want to set or unset a global or master only parameter, use the --masteronly option.
gpconfig can only be used to manage certain parameters. For example, you cannot use it to set parameters such as port, which is required to be distinct for every segment instance. Use the -l (list) option to see a complete list of configuration parameters supported by gpconfig.
When gpconfig sets a configuration parameter in a segment postgresql.conf file, the new parameter setting always displays at the bottom of the file. When you use gpconfig to remove a configuration parameter setting, gpconfig comments out the parameter in all segment postgresql.conf files, thereby restoring the system default setting. For example, if you use gpconfig to remove (comment out) a parameter and later add it back (set a new value), there will be two instances of the parameter; one that is commented out, and one that is enabled and inserted at the bottom of the postgresql.conf file.
After setting a parameter, you must restart your Greenplum Database system or reload the postgresql.conf files in order for the change to take effect. Whether you require a restart or a reload depends on the parameter. For more information about the server configuration parameters, see the Greenplum Database Reference Guide.
To show the currently set values for a parameter across the system, use the -s option.
gpconfig uses the following environment variables to connect to the Greenplum Database master instance and obtain system configuration information:
• PGHOST
• PGPORT
• PGUSER
gpconfig 23
Greenplum Database Utility Guide 4.2– Chapter 1: Management Utility Reference
• PGPASSWORD
• PGDATABASE
Options
-c | --change param_nameChanges a configuration parameter setting by adding the new setting to the bottom of the postgresql.conf files.
-v | --value valueThe value to use for the configuration parameter you specified with the -c option. By default, this value is applied to all segments, their mirrors, the master, and the standby master.
-m | --mastervalue master_valueThe master value to use for the configuration parameter you specified with the -c option. If specified, this value only applies to the master and standby master. This option can only be used with -v.
--masteronly
When specified, gpconfig will only edit the master postgresql.conf file.
-r | --remove param_nameRemoves a configuration parameter setting by commenting out the entry in the postgresql.conf files.
-l | --list
Lists all configuration parameters supported by the gpconfig utility.
-s | --show param_nameShows the value for a configuration parameter used on all instances (master and segments) in the Greenplum Database system. If there is a discrepancy in a parameter value between segment instances, the gpconfig utility displays an error message. Note that the gpconfig utility reads parameter values directly from the database, and not the postgresql.conf file. If you are using gpconfig to set configuration parameters across all segments, then running gpconfig -s to verify the changes, you might still see the previous (old) values. You must reload the configuration files (gpstop -u) or restart the system (gpstop -r) for changes to take effect.
--skipvalidation
Overrides the system validation checks of gpconfig and allows you to operate on any server configuration parameter, including hidden parameters and restricted parameters that cannot be changed by gpconfig. When used with the -l option (list), it shows the list of restricted parameters. This option should only be used to set parameters when directed by Greenplum Customer Support.
gpconfig 24
Greenplum Database Utility Guide 4.2– Chapter 1: Management Utility Reference
--verbose
Displays additional log information during gpconfig command execution.
--debug
Sets logging output to debug level.
-? | -h | --help
Displays the online help.
Examples
Set the work_mem parameter to 120MB in the master host file only:
gpconfig -c work_mem -v 120MB --masteronly
Set the max_connections setting to 100 on all segments and 10 on the master:
gpconfig -c max_connections -v 100 -m 10
Comment out all instances of the default_statistics_target configuration parameter, and restore the system default:
gpconfig -r default_statistics_target
List all configuration parameters supported by gpconfig:
gpconfig -l
Show the values of a particular configuration parameter across the system:
gpconfig -s max_connections
See Alsogpstop
gpconfig 25

Greenplum Database Utility Guide 4.2– Chapter 1: Management Utility Reference
gpcrondumpA wrapper utility for gp_dump, which can be called directly or from a crontab entry.
Synopsisgpcrondump -x database_name [-s schema | -t schema.table | -T schema.table] [--table-file=filename | --exclude-table-file=filename] [-u backup_directory] [-R post_dump_script] [-c] [-z] [-r] [-f free_space_percent] [-b] [-h] [-j | -k] [-g] [-G] [-C] [-d master_data_directory] [-B parallel_processes] [-a] [-q] [-y reportfile] [-l logfile_directory] [-v] { [-E encoding] [--inserts | --column-inserts] [--oids] [--no-owner | --use-set-session-authorization] [--no-privileges] [--rsyncable] [--ddboost]}
gpcrondump --ddboost-host ddboost_hostname --ddboost-user ddboost_user
gpcrondump --ddboost-config-remove
gpcrondump -o
gpcrondump -?
gpcrondump --version
Description
gpcrondump is a wrapper utility for gp_dump. By default, dump files are created in their respective master and segment data directories in a directory named db_dumps/YYYYMMDD. The data dump files are compressed by default using gzip.
gpcrondump allows you to schedule routine backups of a Greenplum database using cron (a scheduling utility for UNIX operating systems). Cron jobs that call gpcrondump should be scheduled on the master host.
gpcrondump is used to schedule Data Domain Boost backup and restore operations. gpcrondump is also used to set or remove one-time credentials for Data Domain Boost.
Return Codes
The following is a list of the codes that gpcrondump returns.
0 – Dump completed with no problems 1 – Dump completed, but one or more warnings were generated 2 – Dump failed with a fatal error
gpcrondump 26
Greenplum Database Utility Guide 4.2– Chapter 1: Management Utility Reference
Email Notifications
To have gpcrondump send out status email notifications, you must place a file named mail_contacts in the home directory of the Greenplum superuser (gpadmin) or in the same directory as the gpcrondump utility ($GPHOME/bin). This file should contain one email address per line. gpcrondump will issue a warning if it cannot locate a mail_contacts file in either location. If both locations have a mail_contacts file, then the one in $HOME takes precedence.
Options
-a (do not prompt)
Do not prompt the user for confirmation.
-b (bypass disk space check)
Bypass disk space check. The default is to check for available disk space, unless --ddboost is specified. When using Data Domain Boost, this option is alway enabled.
Note: Bypassing the disk space check generates a warning message. With a warning message, the return code for gpcrondump is 1 if the dump is successful. (If the dump fails, the return code is 2, in all cases.)
-B parallel_processesThe number of segments to check in parallel for pre/post-dump validation. If not specified, the utility will start up to 60 parallel processes depending on how many segment instances it needs to dump.
-c (clear old dump files first)
Clear out old dump files before doing the dump. The default is not to clear out old dump files. This will remove all old dump directories in the db_dumps directory, except for the dump directory of the current date.
If --ddboost is specified, only the old files on Data Domain Boost are deleted.
-C (clean old catalog dumps)
Clean out old catalog schema dump files prior to create.
--column-inserts
Dump data as INSERT commands with column names.
-d master_data_directoryThe master host data directory. If not specified, the value set for $MASTER_DATA_DIRECTORY will be used.
--ddboost
Use Data Domain Boost for this backup. Before using Data Domain Boost, set up the Data Domain Boost credential, as described in the next option below.
The following option is recommended if --ddboost is specified.
gpcrondump 27
Greenplum Database Utility Guide 4.2– Chapter 1: Management Utility Reference
• -z option (uncompressed)Backup compression (turned on by default) should be turned off with the -z option. Data Domain Boost will deduplicate and compress the backup data before sending it to the Data Domain system.
You can run a mixed backup that writes to both a local disk and Data Domain. If you want to use a backup directory on your local disk other than the default, use the –u option. For more information about mixed backups and Data Domain Boost, see the Greenplum Database System Administrator Guide.
Important: Never use the Greenplum Database default backup options with Data Domain Boost.
To maximize Data Domain deduplication benefits, retain at least 30 days of backups.
Note: The -b, -c, -f, -G, -g, -R, and -u options change if --ddboost is specified. See the options for details.
--ddboost-host ddboost_hostname --ddboost-user ddboost_userSets the Data Domain Boost credentials. Do not combine this options with any other gpcrondump options. Do not enter just one part of this option.
ddboost_hostname is the IP address of the host. There is a 30-character limit.
ddboost_user is the Data Domain Boost user name. There is a 30-character limit.
Example: gpcrondump --ddboost-host 172.28.8.230 --ddboost-user ddboostusername
After running gpcrondump with these options, the system verfies the limits on the host and user names and prompts for the Data Domain Boost password. Enter the password when prompted; the password is not echoed on the screen. There is a 40-character limit on the password that can include lowercase letters (a-z), uppercase letters (A-Z), numbers (0-9), and special characters ($, %, #, +, etc.).
The system verifies the password. After the password is verified, the system creates a file .ddconfig and copies it to all segments.
Note: If there is more than one operating system user using Data Domain Boost for backup and restore operations, repeat this configuration process for each of those users.
Important: Set up the Data Domain Boost credential before running any Data Domain Boost backups with the --ddboost option, described above.
--ddboost-config-remove
Removes all Data Domain Boost credentials from the master and all segments on the system. Do not enter this option with any other gpcrondump option.
-E encodingCharacter set encoding of dumped data. Defaults to the encoding of the database being dumped. See the Greenplum Database Reference Guide for the list of supported character sets.
gpcrondump 28
Greenplum Database Utility Guide 4.2– Chapter 1: Management Utility Reference
-f free_space_percentWhen checking that there is enough free disk space to create the dump files, specifies a percentage of free disk space that should remain after the dump completes. The default is 10 percent.
Note: This is option is not supported if --ddboost is specified.
-g (copy config files)
Secure a copy of the master and segment configuration files postgresql.conf, pg_ident.conf, and pg_hba.conf. These configuration files are dumped in the master or segment data directory to db_dumps/YYYYMMDD/config_files_<timestamp>.tar.
If --ddboost is specified, the file are located in the db_dumps directory on the default storage unit.
-G (dump global objects)
Use pg_dumpall to dump global objects such as roles and tablespaces. Global objects are dumped in the master data directory to db_dumps/YYYYMMDD/gp_global_1_1_<timestamp>. If --ddboost is specified, the file are located in the db_dumps directory on the default storage unit.
-h (record dump details)
Record details of database dump in database table public.gpcrondump_history in database supplied via -x option. Utility will create table if it does not currently exist.
--inserts
Dump data as INSERT, rather than COPY commands.
-j (vacuum before dump)
Run VACUUM before the dump starts.
-k (vacuum after dump)
Run VACUUM after the dump has completed successfully.
-l logfile_directoryThe directory to write the log file. Defaults to ~/gpAdminLogs.
--no-owner
Do not output commands to set object ownership.
--no-privileges
Do not output commands to set object privileges (GRANT/REVOKE commands).
-o (clear old dump files only)
Clear out old dump files only, but do not run a dump. This will remove the oldest dump directory except the current date’s dump directory. All dump sets within that directory will be removed.
gpcrondump 29
Greenplum Database Utility Guide 4.2– Chapter 1: Management Utility Reference
If --ddboost is specified, only the old files on Data Domain Boost are deleted.
--oids
Include object identifiers (oid) in dump data.
-q (no screen output)
Run in quiet mode. Command output is not displayed on the screen, but is still written to the log file.
-r (rollback on failure)
Rollback the dump files (delete a partial dump) if a failure is detected. The default is to not rollback.
Note: This option is not supported if --ddboost is specified.
-R post_dump_scriptThe absolute path of a script to run after a successful dump operation. For example, you might want a script that moves completed dump files to a backup host. This script must reside in the same location on the master and all segment hosts.
--rsyncable
Passes the --rsyncable flag to the gzip utility to synchronize the output occasionally, based on the input during compression. This synchronization increases the file size by less than 1% in most cases. When this flag is passed, the rsync(1) program can synchronize compressed files much more efficiently. The gunzip utility cannot differentiate between a compressed file created with this option, and one created without it.
-s schema_nameDump only the named schema in the named database.
-t schema.table_nameDump only the named table in this database. The -t option can be specified multiple times. If you want to specify multiple tables, you can also use the --table-file=filename option in order not to exceed the maximum token limit.
-T schema.table_nameA table name to exclude from the database dump. The -T option can be specified multiple times. If you want to specify multiple tables, you can also use the --exclude-table-file=filename option in order not to exceed the maximum token limit.
--exclude-table-file=filename Excludes all tables listed in the filename from the database dump. The file filename contains any number of tables, listed one per line.
gpcrondump 30
Greenplum Database Utility Guide 4.2– Chapter 1: Management Utility Reference
--table-file=filenameDumps only the tables listed in the filename. The file filename contains any number of tables, listed one per line.
-u backup_directorySpecifies the absolute path where the backup files will be placed on each host. If the path does not exist, it will be created, if possible. If not specified, defaults to the data directory of each instance to be backed up. Using this option may be desirable if each segment host has multiple segment instances as it will create the dump files in a centralized location rather than the segment data directories.
Note: This option is not supported if --ddboost is specified.
--use-set-session-authorization
Use SET SESSION AUTHORIZATION commands instead of ALTER OWNER commands to set object ownership.
-v | --verbose
Specifies verbose mode.
--version (show utility version)
Displays the version of this utility.
-x database_nameRequired. The name of the Greenplum database to dump. Multiple databases can be specified in a comma-separated list.
-y reportfileSpecifies the full path name where the backup job log file will be placed on the master host. If not specified, defaults to the master data directory or if running remotely, the current working directory.
-z (no compression)
Do not use compression. Default is to compress the dump files using gzip.
We recommend this option (-z) be used for NFS and Data Domain Boost backups.
-? (help)
Displays the online help.
Examples
Call gpcrondump directly and dump mydatabase (and global objects):
gpcrondump -x mydatabase -c -g -G
A crontab entry that runs a backup of the sales database (and global objects) nightly at one past midnight:
01 0 * * * /home/gpadmin/gpdump.sh >> gpdump.log
gpcrondump 31
Greenplum Database Utility Guide 4.2– Chapter 1: Management Utility Reference
The content of dump script gpdump.sh is:
#!/bin/bash
export GPHOME=/usr/local/greenplum-db
export MASTER_DATA_DIRECTORY=/data/gpdb_p1/gp-1
. $GPHOME/greenplum_path.sh
gpcrondump -x sales -c -g -G -a -q
See Also
gp_dump, gpdbrestore
gpcrondump 32
Greenplum Database Utility Guide 4.2– Chapter 1: Management Utility Reference
gpdbrestoreA wrapper utility around gp_restore. Restores a database from a set of dump files generated by gpcrondump.
Synopsisgpdbrestore { -t timestamp_key [-L] | -b YYYYMMDD | -R hostname:path_to_dumpset | -s database_name } [-T schema.table [,...]] [-e] [-G] [-B parallel_processes] [-d master_data_directory] [-a] [-q] [-l logfile_directory] [-v][-ddboost]
gpdbrestore -?
gpdbrestore --version
Description
gpdbrestore is a wrapper around gp_restore, which provides some convenience and flexibility in restoring from a set of backup files created by gpcrondump. This utility provides the following additional functionality on top of gp_restore:
• Automatically reconfigures for compression. • Validates the number of dump files are correct (For primary only, mirror only,
primary and mirror, or a subset consisting of some mirror and primary segment dump files).
• If a failed segment is detected, restores to active segment instances.• Do not need to know the complete timestamp key (-t) of the backup set to restore.
Additional options are provided to instead give just a date (-b), backup set directory location (-R), or database name (-s) to restore.
• The -R option allows the ability to restore from a backup set located on a host outside of the Greenplum Database array (archive host). Ensures that the correct dump file goes to the correct segment instance.
• Identifies the database name automatically from the backup set.• Allows you to restore particular tables only (-T option) instead of the entire
database. Note that single tables are not automatically dropped or truncated prior to restore.
• Can restore global objects such as roles and tablespaces (-G option).• Detects if the backup set is primary segments only or primary and mirror
segments and passes the appropriate options to gp_restore.• Allows you to drop the target database before a restore in a single operation.
Error Reporting
gpdbrestore does not report errors automatically. After the restore is completed, check the report status files to verify that there are no errors. The restore status files are stored in the db_dumps/<date>/ directory by default.
gpdbrestore 33
Greenplum Database Utility Guide 4.2– Chapter 1: Management Utility Reference
Options
-a (do not prompt)
Do not prompt the user for confirmation.
-b YYYYMMDDLooks for dump files in the segment data directories on the Greenplum Database array of hosts in db_dumps/YYYYMMDD. If --ddboost is specified, the systems looks for dump files on the Data Domain Boost host.
-B parallel_processesThe number of segments to check in parallel for pre/post-restore validation. If not specified, the utility will start up to 60 parallel processes depending on how many segment instances it needs to restore.
-d master_data_directoryOptional. The master host data directory. If not specified, the value set for $MASTER_DATA_DIRECTORY will be used.
--ddboost
Use Data Domain Boost for this restore, if the --ddboost option was passed when the data was dumped. Before using Data Domain Boost, make sure the one-time Data Domain Boost credential setup is complete. See the Greenplum Database System Administrator Guide for details.
-e (drop target database before restore)
Drops the target database before doing the restore and then recreates it.
-G (restore global objects)
Restores global objects such as roles and tablespaces if the global object dump file db_dumps/<date>/gp_global_1_1_<timestamp> is found in the master data directory.
-l logfile_directoryThe directory to write the log file. Defaults to ~/gpAdminLogs.
-L (list tablenames in backup set)
When used with the -t option, lists the table names that exist in the named backup set and exits. Does not do a restore.
-q (no screen output)
Run in quiet mode. Command output is not displayed on the screen, but is still written to the log file.
gpdbrestore 34

Greenplum Database Utility Guide 4.2– Chapter 1: Management Utility Reference
-R hostname:path_to_dumpsetAllows you to provide a hostname and full path to a set of dump files. The host does not have to be in the Greenplum Database array of hosts, but must be accessible from the Greenplum master.
-s database_nameLooks for latest set of dump files for the given database name in the segment data directories db_dumps directory on the Greenplum Database array of hosts.
-t timestamp_keyThe 14 digit timestamp key that uniquely identifies a backup set of data to restore. It is of the form YYYYMMDDHHMMSS. Looks for dump files matching this timestamp key in the segment data directories db_dumps directory on the Greenplum Database array of hosts.
-T schema.table_nameA comma-separated list of specific table names to restore. The named table(s) must exist in the backup set of the database being restored. Existing tables are not automatically truncated before data is restored from backup. If your intention is to replace existing data in the table from backup, truncate the table prior to running gpdbrestore -T.
-v | --verbose
Specifies verbose mode.
--version (show utility version)
Displays the version of this utility.
-? (help)
Displays the online help.
Examples
Restore the sales database from the latest backup files generated by gpcrondump (assumes backup files are in the segment data directories in db_dumps):
gpdbrestore -s sales
Restore a database from backup files that reside on an archive host outside the Greenplum Database array (command issued on the Greenplum master host):
gpdbrestore –R archivehostname:/data_p1/db_dumps/20080214
Restore global objects only (roles and tablespaces):
gpdbrestore -G
See Also
gpcrondump, gp_restore
gpdbrestore 35
Greenplum Database Utility Guide 4.2– Chapter 1: Management Utility Reference
gpdeletesystemDeletes a Greenplum Database system that was initialized using gpinitsystem.
Synopsisgpdeletesystem -d master_data_directory [-B parallel_processes] [-f] [-l logfile_directory] [-D]
gpdeletesystem -?
gpdeletesystem -v
Description
The gpdeletesystem utility will perform the following actions:
• Stop all postgres processes (the segment instances and master instance).• Deletes all data directories.Before running gpdeletesystem:
• Move any backup files out of the master and segment data directories.• Make sure that Greenplum Database is running.• If you are currently in a segment data directory, change directory to another
location. The utility fails with an error when run from within a segment data directory.
This utility will not uninstall the Greenplum Database software.
Options
-d data_directoryRequired. The master host data directory.
-B parallel_processesThe number of segments to delete in parallel. If not specified, the utility will start up to 60 parallel processes depending on how many segment instances it needs to delete.
-f (force)
Force a delete even if backup files are found in the data directories. The default is to not delete Greenplum Database instances if backup files are present.
-l logfile_directoryThe directory to write the log file. Defaults to ~/gpAdminLogs.
-D (debug)
Sets logging level to debug.
gpdeletesystem 36
Greenplum Database Utility Guide 4.2– Chapter 1: Management Utility Reference
-? (help)
Displays the online help.
-v (show utility version)
Displays the version, status, last updated date, and check sum of this utility.
Examples
Delete a Greenplum Database system:
gpdeletesystem -d /gpdata/gp-1
Delete a Greenplum Database system even if backup files are present:
gpdeletesystem -d /gpdata/gp-1 -f
gpdeletesystem 37
Greenplum Database Utility Guide 4.2– Chapter 1: Management Utility Reference
gpdetectiveCollects diagnostic information from a running Greenplum Database system.
Synopsisgpdetective [-h hostname] [-p port] [-U username] [-P password] [--start_date number_of_days | YYYY-MM-DD] [--end_date YYYY-MM-DD] [--diagnostics a|n|s|o|c] [--logs a|n|dbid[,dbid,... | -dbid]] [--cores t|f] [--pg_dumpall t|f] [--pg_dump_options option[,...]] [--tempdir temp_dir] [--connect t|f]
gpdetective -?
gpdetective -v
Description
The gpdetective utility collects information from a running Greenplum Database system and creates a bzip2-compressed tar output file. This output file can then be sent to Greenplum Customer Support to help with the diagnosis of Greenplum Database errors or system failures. The gpdetective utility runs the following diagnostic tests:
• gpstate to check the system status• gpcheck to make sure the recommended OS settings are set on all hosts• gpcheckcat and gpcheckdb to check the system catalog tables for
inconsistenciesgpdetective captures the following files and Greenplum system information:
• postgresql.conf configuration files (master and segments)• log files (master and segments)• Greenplum Database system configuration information• (optional) Core files• (optional) Schema DDL dumps for all databases and global objects (using
pg_dumpall)A bzip2-compressed tar output file containing this information is created in the current directory with a file name of gpdetective<timestamp>.tar.bz2.
gpdetective 38
Greenplum Database Utility Guide 4.2– Chapter 1: Management Utility Reference
Options
--connect t|f
Specifies if gpdetective should connect to the database to obtain system information. The default is true (t). If false (f), gpdetective only gathers information it can obtain without making a connection to the database. This information includes (from the master host):
• Log files• The master_data_directory/postgresql.conf file• The ~/gpAdminLogs directory• gpcheck output• Core files
--cores t|f
Determines whether or not the utility retrieves core files. The default is true (t).
--diagnostics a|n|s|o|c
Specifies the diagnostic tests to run: all (a), none (n), operating system (o) diagnostics, or catalog (c) diagnostics. The default is all (a).
--end_date YYYY-MM-DD
Sets the end date for the diagnostic information collected. The collected information ends at 00:00:00 of the specified date.
-h hostnameThe host name of the machine on which the Greenplum master database server is running. If not specified, reads from the environment variable PGHOST or defaults to localhost.
--logs a|n|dbid_listSpecifies which log file(s) to retrieve: all (a), none (n), a comma separated list of segment dbid numbers, or a range of dbid numbers divided by a dash (-) (for example, 3-6 retrieves logs from segments 3, 4, 5, and 6). The default is all (a).
-P passwordIf Greenplum Database is configured to use password authentication, you must also supply the database superuser password. If not specified, reads from ~/.pgpass if it exists.
--pg_dumpall t|f
Determines whether or not the utility runs pg_dumpall to collect schema DDL for all databases and global objects. The default is true (t).
gpdetective 39
Greenplum Database Utility Guide 4.2– Chapter 1: Management Utility Reference
--pg_dump_options option[,...]If --pg_dumpall is true, specifies a comma separated list of dump options to use when the pg_dumpall utility is called. See pg_dumpall for a valid list of dump options.
-p portThe TCP port on which the Greenplum master database server is listening for connections. If not specified, reads from the environment variable PGPORT or defaults to 5432.
--start_date number_of_days | YYYY-MM-DDSets the start date for the diagnostic information collected. Specify either the number of days prior, or an explicit past date.
--tempdir temp_dirSpecifies the temporary directory used by gpdetective. The default value is determined by the $TEMP, $TMP and $TMPDIR environment variables.
-U gp_superuserThe Greenplum database superuser role name to connect as (typically gpadmin). If not specified, reads from the environment variable PGUSER or defaults to the current system user name.
-v (show utility version)
Displays the version of this utility.
-? (help)
Displays the utility usage and syntax.
Examples
Collect all diagnostic information for a Greenplum Database system and supply the required connection information for the master host:
gpdetective -h mdw -p 54320 -U gpadmin -P mypassword
Run diagnostics and collect all logs and system information for the past two days:
gpdetective --start_date 2
Do not run diagnostic tests or schema dumps, just collect the log files of the master and segment 3:
gpdetective --diagnostics n --logs -1,3 --pg_dumpall f
See Also
gpstate, gpcheck, pg_dumpall
gpdetective 40
Greenplum Database Utility Guide 4.2– Chapter 1: Management Utility Reference
gp_dumpWrites out a database to SQL script files, which can then be used to restore the database using gp_restore.
Synopsisgp_dump [-a | -s] [-c] [-d] [-D] [-n schema] [-o] [-O] [-t table_name] [-T table_name] [-x] [-h hostname] [-p port] [-U username] [-W] [-i] [-v] [--gp-c] [--gp-d=backup_directory] [--gp-r=reportfile] [--gp-s=dbid [, ...]] database_name
gp_dump -? |--help
gp_dump --version
Description
The gp_dump utility dumps the contents of a database into SQL script files, which can then be used to restore the database schema and user data at a later time using gp_restore. During a dump operation, users will still have full access to the database.
The functionality of gp_dump is analogous to PostgreSQL’s pg_dump utility, which writes out (or dumps) the content of a database into a script file. The script file contains SQL commands that can be used to restore the databases, data, and global objects such as users, groups, and access permissions.
The functionality of gp_dump is modified to accommodate the distributed nature of a Greenplum database. Keep in mind that a database in Greenplum Database is actually comprised of several PostgreSQL instances (the master and all segments), each of which must be dumped individually. The gp_dump utility takes care of dumping all of the individual instances across the system.
The gp_dump utility performs the following actions and produces the following dump files:
On the master host
• Dumps CREATE DATABASE SQL statements into a file in the master data directory. The default naming convention of this file is gp_cdatabase_1_dbid_timestamp. This statement can be run on the master instance to recreate the user database(s).
• Dumps the user database schema(s) into a SQL file in the master data directory. The default naming convention of this file is gp_dump_1_dbid_timestamp. This file is used by gp_restore to recreate the database schema(s).
• Creates a dump file in the master data directory named gp_dump_1_dbid_timestamp_post_data that contains commands to rebuild objects associated with the tables.When the database is restored with gp_restore, first, the schema and data are restored, and then, the dump file is used to rebuilt the other objects associated with the tables.
gp_dump 41
Greenplum Database Utility Guide 4.2– Chapter 1: Management Utility Reference
• Creates a log file in the master data directory named gp_dump_status_1_dbid_timestamp.
• gp_dump launches a gp_dump_agent for each segment instance to be backed up. gp_dump_agent processes run on the segment hosts and report status back to the gp_dump process running on the master host.
On the segment hosts
• Dumps the user data for each segment instance into a SQL file in the segment instance’s data directory. By default, only primary (or active) segment instances are backed up. The default naming convention of this file is gp_dump_0_dbid_timestamp. This file is used by gp_restore to recreate that particular segment of user data.
• Creates a log file in each segment instance’s data directory named gp_dump_status_0_dbid_timestamp.
Note that the 14 digit timestamp is the number that uniquely identifies the backup job, and is part of the filename for each dump file created by a gp_dump operation. This timestamp must be passed to the gp_restore utility when restoring a Greenplum database.
Options
-a | --data-only
Dump only the data, not the schema (data definitions).
-s | --schema-only
Dump only the object definitions (schema), not data.
-c | --clean
Output commands to clean (drop) database objects prior to (the commands for) creating them.
-d | --inserts
Dump data as INSERT commands (rather than COPY). This will make restoration very slow; it is mainly useful for making dumps that can be loaded into non-PostgreSQL based databases. Note that the restore may fail altogether if you have rearranged column order. The -D option is safer, though even slower.
-D | --column-inserts
Dump data as INSERT commands with explicit column names (INSERT INTO table (column, ...) VALUES ...). This will make restoration very slow; it is mainly useful for making dumps that can be loaded into non-PostgreSQL based databases.
-n schema | --schema=schemaDumps the contents of the named schema only. If this option is not specified, all non-system schemas in the target database will be dumped. You cannot backup system catalog schemas (such as pg_catalog) with gp_dump.
gp_dump 42
Greenplum Database Utility Guide 4.2– Chapter 1: Management Utility Reference
Caution: In this mode, gp_dump makes no attempt to dump any other database objects that objects in the selected schema may depend upon. Therefore, there is no guarantee that the results of a single-schema dump can be successfully restored by themselves into a clean database.
-o | --oids
Dump object identifiers (OIDs) as part of the data for every table. Use of OIDs is not recommended in Greenplum Database, so this option should not be used if restoring data to another Greenplum Database installation.
-O | --no-owner
Do not output commands to set ownership of objects to match the original database. By default, gp_dump issues ALTER OWNER or SET SESSION AUTHORIZATION statements to set ownership of created database objects. These statements will fail when the script is run unless it is started by a superuser (or the same user that owns all of the objects in the script). To make a script that can be restored by any user, but will give that user ownership of all the objects, specify -O.
-t table | --table=tableDump only tables (or views or sequences) matching the table pattern. Multiple tables can be selected by writing multiple -t switches. Also, the table parameter is interpreted as a pattern according to the same rules used by psql’s \d commands, so multiple tables can also be selected by writing wildcard characters in the pattern. When using wildcards, be careful to quote the pattern if needed to prevent the shell from expanding the wildcards. The -n and -N switches have no effect when -t is used, because tables selected by -t will be dumped regardless of those switches, and non-table objects will not be dumped.
Note: When -t is specified, gp_dump makes no attempt to dump any other database objects that the selected table(s) may depend upon. Therefore, there is no guarantee that the results of a specific-table dump can be successfully restored by themselves into a clean database.
Note: -t cannot be used to specify a child table partition. To dump a partitioned table, you must specify the parent table name.
-T table | --exclude-table=tableDo not dump any tables matching the table pattern. The pattern is interpreted according to the same rules as for -t. -T can be given more than once to exclude tables matching any of several patterns. When both -t and -T are given, the behavior is to dump just the tables that match at least one -t switch but no -T switches. If -T appears without -t, then tables matching -T are excluded from what is otherwise a normal dump.
-x | --no-privileges | --no-acl
Prevents the dumping of access privileges (GRANT/REVOKE commands).
gp_dump 43
Greenplum Database Utility Guide 4.2– Chapter 1: Management Utility Reference
-h hostname | --host=hostnameThe host name of the Greenplum Database master host. If not provided, the value of $PGHOST or the local host is used.
-p port | --port=portThe Greenplum Database master port. If not provided, the value of $PGPORT or the port number provided at compile time is used.
-U username | --username=userThe database superuser account name, for example gpadmin. If not provided, the value of $PGUSER or the current OS user name is used.
-W (force password prompt)
Forces a password prompt. This will happen automatically if the server requires password authentication.
-i | --ignore-version
Ignores a version mismatch between gp_dump and the database server.
-v | --verbose
Specifies verbose mode. This will cause gp_dump to output detailed object comments and start/stop times to the dump file, and progress messages to standard error.
--gp-c (use gzip)
Use gzip for inline compression.
--gp-d=directorynameSpecifies the relative or absolute path where the backup files will be placed on each host. If this is a relative path, it is considered to be relative to the data directory. If the path does not exist, it will be created, if possible. If not specified, defaults to the data directory of each instance to be backed up. Using this option may be desirable if each segment host has multiple segment instances — it will create the dump files in a centralized location.
--gp-r=reportfileSpecifies the full path name where the backup job log file will be placed on the master host. If not specified, defaults to the master data directory or if running remotely, the current working directory.
--gp-s=dbid (backup certain segments)Specifies the set of active segment instances to back up with a comma-separated list of the segments dbid. The default is to backup all active segment instances.
gp_dump 44
Greenplum Database Utility Guide 4.2– Chapter 1: Management Utility Reference
database_nameRequired. The name of the database you want to dump. If not specified, the value of $PGDATABASE will be used. The database name must be stated last after all other options have been specified.
-? | --help (help)
Displays the online help.
--version (show utility version)
Displays the version of this utility.
Examples
Back up a database:
gp_dump gpdb
Back up a database, and create dump files in a centralized location on all hosts:
gp_dump --gp-d=/home/gpadmin/backups gpdb
Back up a particular schema only:
gp_dump -n myschema mydatabase
Back up a single segment instance only (by noting the dbid of the segment instance):
gp_dump --gp-s=5 gpdb
See Also
gp_restore, gpdbrestore, gpcrondump, pg_dump
gp_dump 45
Greenplum Database Utility Guide 4.2– Chapter 1: Management Utility Reference
gpexpandExpands an existing Greenplum Database across new hosts in the array.
Synopsisgpexpand [-f hosts_file] | -i input_file [-B batch_size] [-V] | {-d hh:mm:ss | -e 'YYYY-MM-DD hh:mm:ss'} [-analyze] [-n parallel_processes] | --rollback | --clean[-D database_name][--verbose] [--silent]
gpexpand -? | -h | --help
gpexpand --version
Prerequisites
• You are logged in as the Greenplum Database superuser (gpadmin).• The new segment hosts have been installed and configured as per the existing
segment hosts. This involves:• Configuring the hardware and OS• Installing the Greenplum software• Creating the gpadmin user account• Exchanging SSH keys.
• Enough disk space on your segment hosts to temporarily hold a copy of your largest table.
Description
The gpexpand utility performs system expansion in two phases: segment initialization and then table redistribution.
In the initialization phase, gpexpand runs with an input file that specifies data directories, dbid values, and other characteristics of the new segments. You can create the input file manually, or by following the prompts in an interactive interview.
If you choose to create the input file using the interactive interview, you can optionally specify a file containing a list of expansion hosts. If your platform or command shell limits the length of the list of hostnames that you can type when prompted in the interview, specifying the hosts with -f may be mandatory.
In addition to initializing the segments, the initialization phase performs these actions:
• Creates an expansion schema to store the status of the expansion operation, including detailed status for tables.
gpexpand 46
Greenplum Database Utility Guide 4.2– Chapter 1: Management Utility Reference
• Changes the distribution policy for all tables to DISTRIBUTED RANDOMLY. The original distribution policies are later restored in the redistribution phase.
To begin the redistribution phase, you must run gpexpand with either the -d (duration) or -e (end time) options. Until the specified end time or duration is reached, the utility will redistribute tables in the expansion schema. Each table is reorganized using ALTER TABLE commands to rebalance the tables across new segments, and to set tables to their original distribution policy. If gpexpand completes the reorganization of all tables before the specified duration, it displays a success message and ends.
Options
-a | --analyze
Run ANALYZE to update the table statistics after expansion. The default is to not run ANALYZE.
-B batch_sizeBatch size of remote commands to send to a given host before making a one-second pause. Default is 16. Valid values are 1-128.
The gpexpand utility issues a number of setup commands that may exceed the host’s maximum threshold for authenticated connections as defined by MaxStartups in the SSH daemon configuration. The one-second pause allows authentications to be completed before gpexpand issues any more commands.
The default value does not normally need to be changed. However, it may be necessary to reduce the maximum number of commands if gpexpand fails with connection errors such as 'ssh_exchange_identification: Connection closed by remote host.'
-c | --clean
Remove the expansion schema.
-d | --duration hh:mm:ssDuration of the expansion session from beginning to end.
-D database_nameSpecifies the database in which to create the expansion schema and tables. If this option is not given, the setting for the environment variable PGDATABASE is used. The database templates template1 and template0 cannot be used.
-e | --end ‘YYYY-MM-DD hh:mm:ss’Ending date and time for the expansion session.
-f | --hosts-file filenameSpecifies the name of a file that contains a list of new hosts for system expansion. Each line of the file must contain a single host name.
gpexpand 47
Greenplum Database Utility Guide 4.2– Chapter 1: Management Utility Reference
This file can contain hostnames with or without network interfaces specified. The gpexpand utility handles either case, adding interface numbers to end of the hostname if the original nodes are configured with multiple network interfaces.
-i | --input input_fileSpecifies the name of the expansion configuration file, which contains one line for each segment to be added in the format of:
hostname:address:port:fselocation:dbid:content:preferred_role:replication_port
If your system has filespaces, gpexpand will expect a filespace configuration file (input_file_name.fs) to exist in the same directory as your expansion configuration file. The filespace configuration file is in the format of:
filespaceOrder=filespace1_name:filespace2_name: ...dbid:/path/for/filespace1:/path/for/filespace2: ...dbid:/path/for/filespace1:/path/for/filespace2: ......
-n parallel_processesThe number of tables to redistribute simultaneously. Valid values are 1 - 16.
Each table redistribution process requires two database connections: one to alter the table, and another to update the table’s status in the expansion schema. Before increasing -n, check the current value of the server configuration parameter max_connections and make sure the maximum connection limit is not exceeded.
-r | --rollback
Roll back a failed expansion setup operation. If the rollback command fails, attempt again using the -D option to specify the database that contains the expansion schema for the operation that you want to roll back.
-s | --silent
Runs in silent mode. Does not prompt for confirmation to proceed on warnings.
-v | --verbose
Verbose debugging output. With this option, the utility will output all DDL and DML used to expand the database.
--version
Display the utility’s version number and exit.
-V | --novacuum
Do not vacuum catalog tables before creating schema copy.
-? | -h | --help
Displays the online help.
gpexpand 48

Greenplum Database Utility Guide 4.2– Chapter 1: Management Utility Reference
Examples
Run gpexpand with an input file to initialize new segments and create the expansion schema in the default database:
$ gpexpand -i input_file
Run gpexpand for sixty hours maximum duration to redistribute tables to new segments:
$ gpexpand -d 60:00:00
See Alsogpssh-exkeys
gpexpand 49
Greenplum Database Utility Guide 4.2– Chapter 1: Management Utility Reference
gpfdistServes data files to or writes data files out from Greenplum Database segments.
Synopsisgpfdist [-d directory] [-p http_port] [-l log_file] [-t timeout] [-S] [-v | -V] [-m max_length] [--ssl certificate_path]
gpfdist [-? | --help] | --version
Description
gpfdist is Greenplum’s parallel file distribution program. It is used by readable external tables and gpload to serve external table files to all Greenplum Database segments in parallel. It is used by writable external tables to accept output streams from Greenplum Database segments in parallel and write them out to a file.
In order for gpfdist to be used by an external table, the LOCATION clause of the external table definition must specify the external table data using the gpfdist:// protocol (see CREATE EXTERNAL TABLE).
Note: If the --ssl option is specified to enable SSL security, create the external table with the gpfdists:// protocol.
The benefit of using gpfdist is that you are guaranteed maximum parallelism while reading from or writing to external tables, thereby offering the best performance as well as easier administration of external tables.
For readable external tables, gpfdist parses and serves data files evenly to all the segment instances in the Greenplum Database system when users SELECT from the external table. For writable external tables, gpfdist accepts parallel output streams from the segments when users INSERT into the external table, and writes to an output file.
For readable external tables, if load files are compressed using gzip or bzip2 (have a .gz or .bz2 file extension), gpfdist uncompresses the files automatically before loading provided that gunzip or bunzip2 is in your path.
Note: Currently, readable external tables do not support compression on Windows platforms, and writable external tables do not support compression on any platforms.
Most likely, you will want to run gpfdist on your ETL machines rather than the hosts where Greenplum Database is installed. To install gpfdist on another host, simply copy the utility over to that host and add gpfdist to your $PATH.
Note: When using IPv6, always enclose the numeric IP address in brackets.You can also run gpfdist as a Windows Service. See “Running gpfdist as a Windows Service” on page 53 for more details.
gpfdist 50
Greenplum Database Utility Guide 4.2– Chapter 1: Management Utility Reference
Options
-d directoryThe directory from which gpfdist will serve files for readable external tables or create output files for writable external tables. If not specified, defaults to the current directory.
-l log_fileThe fully qualified path and log file name where standard output messages are to be logged.
-p http_portThe HTTP port on which gpfdist will serve files. Defaults to 8080.
-t timeoutSets the time allowed for Greenplum Database to establish a connection to a gpfdist process. Default is 5 seconds. Allowed values are 2 to 30 seconds. May need to be increased on systems with a lot of network traffic.
-S (use O_SYNC)
Opens the file for synchronous I/O with the O_SYNC flag. Any writes to the resulting file descriptor block gpfdist until the data is physically written to the underlying hardware.
-v (verbose)
Verbose mode shows progress and status messages.
-V (very verbose)
Verbose mode shows all output messages generated by this utility.
-m max_lengthSets the maximum allowed data row length in bytes. Default is 32768. Should be used when user data includes very wide rows (or when line too long error message occurs). Should not be used otherwise as it increases resource allocation. Valid range is 32K to 256MB. (The upper limit is 1MB on Windows systems.)
--ssl certificate_path
Adds SSL encryption to data transferred with gpfdist. After executing gpfdist with the --ssl certificate_path option, the only way to load data from this file server is with the gpfdists protocol. For information on the gpfdists protocol, see “gpfdists” on page 145.
The location specified in certificate_path must contain the following files:
• The server certificate file, server.crt• The server private key file, server.key• The trusted certificate authorities, root.crt
gpfdist 51

Greenplum Database Utility Guide 4.2– Chapter 1: Management Utility Reference
The root directory (/) cannot be specified as certificate_path.
-? (help)
Displays the online help.
--version
Displays the version of this utility.
gpfdist 52

Greenplum Database Utility Guide 4.2– Chapter 1: Management Utility Reference
Running gpfdist as a Windows Service
Greenplum Loaders allow gpfdist to run as a Windows Service. Follow the instructions below to download, register and activate gpfdist as a service:
1. Update your Greenplum Loader package to the latest version. This package is available from the EMC Download Center.
2. Register gpfdist as a Windows service:
a. Open a Windows command windowb. Run the following command:
sc create gpfdist binpath= "path_to_gpfdist.exe -p 8081 -d External\load\files\path -l Log\file\path"
You can create multiple instances of gpfdist by running the same command again, with a unique name and port number for each instance, for example:sc create gpfdistN binpath= "path_to_gpfdist.exe -p 8082 -d External\load\files\path -l Log\file\path"
3. Activate the gpfdist service:
a. Open the Windows Control Panel and select Administrative Tools>Services.b. Highlight then right-click on the gpfdist service in the list of services.c. Select Properties from the right-click menu, the Service Properties window
opens.Note that you can also stop this service from the Service Properties window.
d. Optional: Change the Startup Type to Automatic (after a system restart, this service will be running), then under Service status, click Start.
e. Click OK.Repeat the above steps for each instance of gpfdist that you created.
Examples
Serve files from a specified directory using port 8081 (and start gpfdist in the background):
gpfdist -d /var/load_files -p 8081 &
Start gpfdist in the background and redirect output and errors to a log file:
gpfdist -d /var/load_files -p 8081 -l /home/gpadmin/log &
To stop gpfdist when it is running in the background:
--First find its process id:ps ax | grep gpfdist
OR on Solaris
ps -ef | grep gpfdist
--Then kill the process, for example:
gpfdist 53

Greenplum Database Utility Guide 4.2– Chapter 1: Management Utility Reference
kill 3456
See AlsoCREATE EXTERNAL TABLE, gpload
See the Greenplum Database Reference Guide for information about CREATE EXTERNAL TABLE.
gpfdist 54
Greenplum Database Utility Guide 4.2– Chapter 1: Management Utility Reference
gpfilespaceCreates a filespace using a configuration file that defines per-segment file system locations. Filespaces describe the physical file system resources to be used by a tablespace.
Synopsisgpfilespace [connection_option ...] [-l logfile_directory] [-o [output_file_name]]
gpfilespace [connection_option ...] [-l logfile_directory] -c fs_config_file
gpfilespace --movetempfilespace {<filespace_name>|default}
gpfilespace --movetransfilespace {<filespace_name>|default}
gpfilespace --showtempfilespace
gpfilespace --showtransfilespace
gpfilespace -v | -?
Description
A tablespace requires a file system location to store its database files. In Greenplum Database, the master and each segment (primary and mirror) needs its own distinct storage location. This collection of file system locations for all components in a Greenplum system is referred to as a filespace. Once a filespace is defined, it can be used by one or more tablespaces.
When used with the -o option, the gpfilespace utility looks up your system configuration information in the Greenplum Database catalog tables and prompts you for the appropriate file system locations needed to create the filespace. It then outputs a configuration file that can be used to create a filespace. If a file name is not specified, a gpfilespace_config_# file will be created in the current directory by default.
Once you have a configuration file, you can run gpfilespace with the -c option to create the filespace in Greenplum Database.
You will need to create a filespace before you can use the gpfilespace --movetempfilespace or --movetransfilespace option to move your temporary or transaction files to the new location.
Use either gpfilespace --showtempfilespace or showtransfilespace options to show the name of the filespace currently associated with temporary or transaction files.
Note: If segments are down due to a power or nic failure, you may see inconsistencies during filespace creation. You may not be able to bring up the Greenplum Database.
gpfilespace 55
Greenplum Database Utility Guide 4.2– Chapter 1: Management Utility Reference
Options
-c | --config fs_config_fileA configuration file containing:
• An initial line denoting the new filespace name. For example:filespace:myfs
• One line each for the master, the primary segments, and the mirror segments. A line describes a file system location that a particular segment database instance should use as its data directory location to store database files associated with a tablespace. Each line is in the format of:hostname:dbid:/filesystem_dir/seg_datadir_name
-l | --logdir logfile_directoryThe directory to write the log file. Defaults to ~/gpAdminLogs.
-o | --output output_file_nameThe directory location and file name to output the generated filespace configuration file. You will be prompted to enter a name for the filespace, a master file system location, the primary segment file system locations, and the mirror segment file system locations. For example, if your configuration has 2 primary and 2 mirror segments per host, you will be prompted for a total of 5 locations (including the master). The file system locations must exist on all hosts in your system prior to running the gpfilespace utility. The utility will designate segment-specific data directories within the location(s) you specify, so it is possible to use the same location for multiple segments. However, primaries and mirrors cannot use the same location. After the utility creates the configuration file, you can manually edit the file to make any required changes to the filespace layout before creating the filespace in Greenplum Database.
--movetempfilespace {<filespace_name>|default}
Moves temporary files to a new filespace or to the default location.
--movetransfilespace {<filespace_name>|default}
Moves transaction files to a new filespace or to the default location.
--showtempfilespace
Show the name of the filespace currently associated with temporary files. This option checks that all primary and mirror segments, master and master standby are using the same filespace or temporary files.You will receive a warning message and an email if any inconsistencies exist.
--showtransfilespace
Show the name of the filespace currently associated with transaction files. This option checks that all primary and mirror segments, master and master standby are using the same filespace or transaction files.You will receive a warning message and an email if any inconsistencies exist.
gpfilespace 56
Greenplum Database Utility Guide 4.2– Chapter 1: Management Utility Reference
-v | --version (show utility version)
Displays the version of this utility.
-? | --help (help)
Displays the utility usage and syntax.
Connection Options
-h host | --host hostThe host name of the machine on which the Greenplum master database server is running. If not specified, reads from the environment variable PGHOST or defaults to localhost.
-p port | --port portThe TCP port on which the Greenplum master database server is listening for connections. If not specified, reads from the environment variable PGPORT or defaults to 5432.
-U username | --username superuser_nameThe database superuser role name to connect as. If not specified, reads from the environment variable PGUSER or defaults to the current system user name. Only database superusers are allowed to create filespaces.
-W | --password
Force a password prompt.
Examples
Create a filespace configuration file. You will be prompted to enter a name for the filespace, a master file system location, the primary segment file system locations, and the mirror segment file system locations. For example, if your configuration has 2 primary and 2 mirror segments per host, you will be prompted for a total of 5 locations (including the master). The file system locations must exist on all hosts in your system prior to running the gpfilespace utility:
$ gpfilespace -o .
Enter a name for this filespace
> fastdisk
Checking your configuration:
Your system has 2 hosts with 2 primary and 2 mirror segments per host.
Configuring hosts: [sdw1, sdw2]
Please specify 2 locations for the primary segments, one per line:
primary location 1> /gp_pri_filespc
gpfilespace 57
Greenplum Database Utility Guide 4.2– Chapter 1: Management Utility Reference
primary location 2> /gp_pri_filespc
Please specify 2 locations for the mirror segments, one per line:
mirror location 1> /gp_mir_filespc
mirror location 2> /gp_mir_filespc
Enter a file system location for the master:
master location> /gp_master_filespc
Example filespace configuration file:
filespace:fastdisk
mdw:1:/gp_master_filespc/gp-1
sdw1:2:/gp_pri_filespc/gp0
sdw1:3:/gp_mir_filespc/gp1
sdw2:4:/gp_mir_filespc/gp0
sdw2:5:/gp_pri_filespc/gp1
Execute the configuration file to create the filespace in Greenplum Database:
$ gpfilespace -c gpfilespace_config_1
See AlsoCREATE TABLESPACE
See the Greenplum Database Reference Guide for information about CREATE TABLESPACE.
gpfilespace 58
Greenplum Database Utility Guide 4.2– Chapter 1: Management Utility Reference
gpinitstandbyAdds and/or initializes a standby master host for a Greenplum Database system.
Synopsisgpinitstandby { -s standby_hostname | -r | -n } [-M smart | -M fast] [-a] [-q] [-D] [-L] [-l logfile_directory]
gpinitstandby -? | -v
Description
The gpinitstandby utility adds a backup master host to your Greenplum Database system. If your system has an existing backup master host configured, use the -r option to remove it before adding the new standby master host.
Before running this utility, make sure that the Greenplum Database software is installed on the backup master host and that you have exchanged SSH keys between hosts. Also make sure that the master port is set to the same port number on the master host and the backup master host.
See the Greenplum Database Installation Guide for instructions. This utility should be run on the currently active primary master host.
The utility will perform the following steps:
• Shutdown your Greenplum Database system• Update the Greenplum Database system catalog to remove the existing backup
master host information (if the -r option is supplied) • Update the Greenplum Database system catalog to add the new backup master
host information (use the -n option to skip this step)• Edit the pg_hba.conf files of the segment instances to allow access from the
newly added standby master.• Setup the backup master instance on the alternate master host• Start the synchronization process• Restart your Greenplum Database systemA backup master host serves as a ‘warm standby’ in the event of the primary master host becoming unoperational. The backup master is kept up to date by a transaction log replication process (gpsyncagent), which runs on the backup master host and keeps the data between the primary and backup master hosts synchronized. If the primary master fails, the log replication process is shut down, and the backup master can be activated in its place by using the utility. Upon activation of the backup master, the replicated logs are used to reconstruct the state of the master host at the time of the last successfully committed transaction.
The activated standby master effectively becomes the Greenplum Database master, accepting client connections on the master port and performing normal master operations such as SQL command processing and workload management.
gpinitstandby 59
Greenplum Database Utility Guide 4.2– Chapter 1: Management Utility Reference
Options
-a (do not prompt)
Do not prompt the user for confirmation.
-D (debug)
Sets logging level to debug.
-l logfile_directoryThe directory to write the log file. Defaults to ~/gpAdminLogs.
-L (leave database stopped)
Leave Greenplum Database in a stopped state after removing the warm standby master.
-M fast (fast shutdown - rollback)
Use fast shut down when stopping Greenplum Database at the beginning of the standby initialization process. Any transactions in progress are interrupted and rolled back.
-M smart (smart shutdown - warn)
Use smart shut down when stopping Greenplum Database at the beginning of the standby initialization process. If there are active connections, this command fails with a warning. This is the default shutdown mode.
-n (resynchronize)
Use this option if you already have a standby master configured, and just want to resynchronize the data between the primary and backup master host. The Greenplum system catalog tables will not be updated.
-q (no screen output)
Run in quiet mode. Command output is not displayed on the screen, but is still written to the log file.
-r (remove standby master)
Removes the currently configured standby master host from your Greenplum Database system.
-s standby_hostnameThe host name of the standby master host.
-v (show utility version)
Displays the version, status, last updated date, and check sum of this utility.
-? (help)
Displays the online help.
gpinitstandby 60
Greenplum Database Utility Guide 4.2– Chapter 1: Management Utility Reference
Examples
Add a backup master host to your Greenplum Database system and start the synchronization process:
gpinitstandby -s host09
Remove the existing backup master from your Greenplum system configuration:
gpinitstandby -r
Start an existing backup master host and synchronize the data with the primary master host - do not add a new Greenplum backup master host to the system catalog:
gpinitstandby -n
Note: Do not specify the -n and -s options in the same command.
gpinitstandby 61
Greenplum Database Utility Guide 4.2– Chapter 1: Management Utility Reference
gpinitsystemInitializes a Greenplum Database system using configuration parameters specified in the gpinitsystem_config file.
Synopsisgpinitsystem -c gpinitsystem_config [-h hostfile_gpinitsystem] [-B parallel_processes] [-p postgresql_conf_param_file] [-s standby_master_host] [--max_connections=number] [--shared_buffers=size] [--locale=locale] [--lc-collate=locale] [--lc-ctype=locale] [--lc-messages=locale] [--lc-monetary=locale] [--lc-numeric=locale] [--lc-time=locale] [--su_password=password] [-S] [-a] [-q] [-l logfile_directory] [-D]
gpinitsystem -?
gpinitsystem -v
Description
The gpinitsystem utility will create a Greenplum Database instance using the values defined in a configuration file. See “Initialization Configuration File Format” on page 65 for more information about this configuration file. Before running this utility, make sure that you have installed the Greenplum Database software on all the hosts in the array.
In a Greenplum Database DBMS, each database instance (the master and all segments) must be initialized across all of the hosts in the system in such a way that they can all work together as a unified DBMS. The gpinitsystem utility takes care of initializing the Greenplum master and each segment instance, and configuring the system as a whole.
Before running gpinitsystem, you must set the $GPHOME environment variable to point to the location of your Greenplum Database installation on the master host and exchange SSH keys between all host addresses in the array using gpssh-exkeys.
This utility performs the following tasks:
• Verifies that the parameters in the configuration file are correct.• Ensures that a connection can be established to each host address. If a host address
cannot be reached, the utility will exit.• Verifies the locale settings.• Displays the configuration that will be used and prompts the user for
confirmation.• Initializes the master instance.
gpinitsystem 62
Greenplum Database Utility Guide 4.2– Chapter 1: Management Utility Reference
• Initializes the standby master instance (if specified).• Initializes the primary segment instances.• Initializes the mirror segment instances (if mirroring is configured).• Configures the Greenplum Database system and checks for errors.• Starts the Greenplum Database system.
Options
-a (do not prompt)
Do not prompt the user for confirmation.
-B parallel_processesThe number of segments to create in parallel. If not specified, the utility will start up to 4 parallel processes at a time.
-c gpinitsystem_configRequired. The full path and filename of the configuration file, which contains all of the defined parameters to configure and initialize a new Greenplum system. See “Initialization Configuration File Format” on page 65 for a description of this file.
-D (debug)
Sets log output level to debug.
-h hostfile_gpinitsystemOptional. The full path and filename of a file that contains the host addresses of your segment hosts. If not specified on the command line, you can specify the host file using the MACHINE_LIST_FILE parameter in the gpinitsystem_config file.
--locale=locale | -n locale Sets the default locale used by Greenplum Database. If not specified, the LC_ALL, LC_COLLATE, or LANG environment variable of the master host determines the locale. If these are not set, the default locale is C (POSIX). A locale identifier consists of a language identifier and a region identifier, and optionally a character set encoding. For example, sv_SE is Swedish as spoken in Sweden, en_US is U.S. English, and fr_CA is French Canadian. If more than one character set can be useful for a locale, then the specifications look like this: en_US.UTF-8 (locale specification and character set encoding). On most systems, the command locale will show the locale environment settings and locale -a will show a list of all available locales.
--lc-collate=localeSimilar to --locale, but sets the locale used for collation (sorting data). The sort order cannot be changed after Greenplum Database is initialized, so it is important to choose a collation locale that is compatible with the character set encodings that
gpinitsystem 63
Greenplum Database Utility Guide 4.2– Chapter 1: Management Utility Reference
you plan to use for your data. There is a special collation name of C or POSIX (byte-order sorting as opposed to dictionary-order sorting). The C collation can be used with any character encoding.
--lc-ctype=localeSimilar to --locale, but sets the locale used for character classification (what character sequences are valid and how they are interpreted). This cannot be changed after Greenplum Database is initialized, so it is important to choose a character classification locale that is compatible with the data you plan to store in Greenplum Database.
--lc-messages=localeSimilar to --locale, but sets the locale used for messages output by Greenplum Database. The current version of Greenplum Database does not support multiple locales for output messages (all messages are in English), so changing this setting will not have any effect.
--lc-monetary=locale Similar to --locale, but sets the locale used for formatting currency amounts.
--lc-numeric=locale Similar to --locale, but sets the locale used for formatting numbers.
--lc-time=localeSimilar to --locale, but sets the locale used for formatting dates and times.
-l logfile_directoryThe directory to write the log file. Defaults to ~/gpAdminLogs.
--max_connections=number | -m numberSets the maximum number of client connections allowed to the master. The default is 250.
-p postgresql_conf_param_fileOptional. The name of a file that contains postgresql.conf parameter settings that you want to set for Greenplum Database. These settings will be used when the individual master and segment instances are initialized. You can also set parameters after initialization using the gpconfig utility.
-q (no screen output)
Run in quiet mode. Command output is not displayed on the screen, but is still written to the log file.
--shared_buffers=size | -b sizeSets the amount of memory a Greenplum server instance uses for shared memory buffers. You can specify sizing in kilobytes (kB), megabytes (MB) or gigabytes (GB). The default is 125MB.
gpinitsystem 64
Greenplum Database Utility Guide 4.2– Chapter 1: Management Utility Reference
-s standby_master_hostOptional. If you wish to configure a backup master host, specify the host name using this option. The Greenplum Database software must already be installed and configured on this host.
--su_password=superuser_password | -e superuser_passwordUse this option to specify the password to set for the Greenplum Database superuser account (such as gpadmin). If this option is not specified, the default password gparray is assigned to the superuser account. You can use the ALTER ROLE command to change the password at a later time.
Recommended security best practices:• Do not use the default password option for production environments.• Change the password immediately after installation.
-S (spread mirror configuration)
If mirroring parameters are specified, spreads the mirror segments across the available hosts. The default is to group the set of mirror segments together on an alternate host from their primary segment set. Mirror spreading will place each mirror on a different host within the Greenplum Database array. Spreading is only allowed if there is a sufficient number of hosts in the array (number of hosts is greater than the number of segment instances).
-v (show utility version)
Displays the version of this utility.
-? (help)
Displays the online help.
Initialization Configuration File Format
gpinitsystem requires a configuration file with the following parameters defined. An example initialization configuration file can be found in $GPHOME/docs/cli_help/gpconfigs/gpinitsystem_config.
ARRAY_NAME
Required. A name for the array you are configuring. You can use any name you like. Enclose the name in quotes if the name contains spaces.
MACHINE_LIST_FILE
Optional. Can be used in place of the -h option. This specifies the file that contains the list of segment host address names that comprise the Greenplum system. The master host is assumed to be the host from which you are running the utility and should not be included in this file. If your segment hosts have multiple network interfaces, then this file would include all addresses for the host. Give the absolute path to the file.
gpinitsystem 65
Greenplum Database Utility Guide 4.2– Chapter 1: Management Utility Reference
SEG_PREFIX
Required. This specifies a prefix that will be used to name the data directories on the master and segment instances. The naming convention for data directories in a Greenplum Database system is SEG_PREFIXnumber where number starts with 0 for segment instances (the master is always -1). So for example, if you choose the prefix gpseg, your master instance data directory would be named gpseg-1, and the segment instances would be named gpseg0, gpseg1, gpseg2, gpseg3, and so on.
PORT_BASE
Required. This specifies the base number by which primary segment port numbers are calculated. The first primary segment port on a host is set as PORT_BASE, and then incremented by one for each additional primary segment on that host. Valid values range from 1 through 65535.
DATA_DIRECTORY
Required. This specifies the data storage location(s) where the utility will create the primary segment data directories. The number of locations in the list dictate the number of primary segments that will get created per physical host (if multiple addresses for a host are listed in the host file, the number of segments will be spread evenly across the specified interface addresses). It is OK to list the same data storage area multiple times if you want your data directories created in the same location. The user who runs gpinitsystem (for example, the gpadmin user) must have permission to write to these directories. For example, this will create six primary segments per host:
declare -a DATA_DIRECTORY=(/data1/primary /data1/primary /data1/primary /data2/primary /data2/primary /data2/primary)
MASTER_HOSTNAME
Required. The host name of the master instance. This host name must exactly match the configured host name of the machine (run the hostname command to determine the correct hostname).
MASTER_DIRECTORY
Required. This specifies the location where the data directory will be created on the master host. You must make sure that the user who runs gpinitsystem (for example, the gpadmin user) has permissions to write to this directory.
MASTER_PORT
Required. The port number for the master instance. This is the port number that users and client connections will use when accessing the Greenplum Database system.
TRUSTED_SHELL
Required. The shell the gpinitsystem utility uses to execute commands on remote hosts. Allowed values are ssh. You must set up your trusted host environment before running the gpinitsystem utility (you can use gpssh-exkeys to do this).
gpinitsystem 66
Greenplum Database Utility Guide 4.2– Chapter 1: Management Utility Reference
CHECK_POINT_SEGMENTS
Required. Maximum distance between automatic write ahead log (WAL) checkpoints, in log file segments (each segment is normally 16 megabytes). This will set the checkpoint_segments parameter in the postgresql.conf file for each segment instance in the Greenplum Database system.
ENCODING
Required. The character set encoding to use. This character set must be compatible with the --locale settings used, especially --lc-collate and --lc-ctype. Greenplum Database supports the same character sets as PostgreSQL.
DATABASE_NAME
Optional. The name of a Greenplum Database database to create after the system is initialized. You can always create a database later using the CREATE DATABASE command or the createdb utility.
MIRROR_PORT_BASE
Optional. This specifies the base number by which mirror segment port numbers are calculated. The first mirror segment port on a host is set as MIRROR_PORT_BASE, and then incremented by one for each additional mirror segment on that host. Valid values range from 1 through 65535 and cannot conflict with the ports calculated by PORT_BASE.
REPLICATION_PORT_BASE
Optional. This specifies the base number by which the port numbers for the primary file replication process are calculated. The first replication port on a host is set as REPLICATION_PORT_BASE, and then incremented by one for each additional primary segment on that host. Valid values range from 1 through 65535 and cannot conflict with the ports calculated by PORT_BASE or MIRROR_PORT_BASE.
MIRROR_REPLICATION_PORT_BASE
Optional. This specifies the base number by which the port numbers for the mirror file replication process are calculated. The first mirror replication port on a host is set as MIRROR_REPLICATION_PORT_BASE, and then incremented by one for each additional mirror segment on that host. Valid values range from 1 through 65535 and cannot conflict with the ports calculated by PORT_BASE, MIRROR_PORT_BASE, or REPLICATION_PORT_BASE.
MIRROR_DATA_DIRECTORY
Optional. This specifies the data storage location(s) where the utility will create the mirror segment data directories. There must be the same number of data directories declared for mirror segment instances as for primary segment instances (see the DATA_DIRECTORY parameter). The user who runs gpinitsystem (for example, the gpadmin user) must have permission to write to these directories. For example:
declare -a MIRROR_DATA_DIRECTORY=(/data1/mirror /data1/mirror /data1/mirror /data2/mirror /data2/mirror /data2/mirror)
gpinitsystem 67
Greenplum Database Utility Guide 4.2– Chapter 1: Management Utility Reference
Examples
Initialize a Greenplum Database array by supplying a configuration file and a segment host address file, and set up a spread mirroring (-S) configuration:
$ gpinitsystem -c gpinitsystem_config -h hostfile_gpinitsystem -S
Initialize a Greenplum Database array and set the superuser remote password:
$ gpinitsystem -c gpinitsystem_config -h hostfile_gpinitsystem --su-password=mypassword
Initialize a Greenplum Database array with an optional standby master host:
$ gpinitsystem -c gpinitsystem_config -h hostfile_gpinitsystem -s host09
See Also
gpssh-exkeys, gpdeletesystem
gpinitsystem 68
Greenplum Database Utility Guide 4.2– Chapter 1: Management Utility Reference
gploadRuns a load job as defined in a YAML formatted control file.
Synopsisgpload -f control_file [-l log_file] [-h hostname] [-p port] [-U username] [-d database] [-W] [--gpfdist_timeout seconds] [[-v | -V] [-q]] [-D]
gpload -?
gpload --version
Prerequisites
The client machine where gpload is executed must have the following:
• Python 2.6.2 or later, pygresql (the Python interface to PostgreSQL), and pyyaml. Note that Python and the required Python libraries are included with the Greenplum Database server installation, so if you have Greenplum Database installed on the machine where gpload is running, you do not need a separate Python installation.Note: Greenplum Loaders for Windows supports only Python 2.5 (available from www.python.org).
• The gpfdist parallel file distribution program installed and in your $PATH. This program is located in $GPHOME/bin of your Greenplum Database server installation.
• Network access to and from all hosts in your Greenplum Database array (master and segments).
• Network access to and from the hosts where the data to be loaded resides (ETL servers).
Description
gpload is a data loading utility that acts as an interface to Greenplum Database’s external table parallel loading feature. Using a load specification defined in a YAML formatted control file, gpload executes a load by invoking the Greenplum parallel file server (gpfdist), creating an external table definition based on the source data defined, and executing an INSERT, UPDATE or MERGE operation to load the source data into the target table in the database.
Options
-f control_fileRequired. A YAML file that contains the load specification details. See “Control File Format” on page 71.
gpload 69
Greenplum Database Utility Guide 4.2– Chapter 1: Management Utility Reference
--gpfdist_timeout secondsSets the timeout for the gpfdist parallel file distribution program to send a response. Enter a value from 0 to 30 seconds (entering “0” to disables timeouts). Note that you might need to increase this value when operating on high-traffic networks.
-l log_fileSpecifies where to write the log file. Defaults to ~/gpAdminLogs/gpload_YYYYMMDD. See also, “Log File Format” on page 79.
-v (verbose mode)
Show verbose output of the load steps as they are executed.
-V (very verbose mode)
Shows very verbose output.
-q (no screen output)
Run in quiet mode. Command output is not displayed on the screen, but is still written to the log file.
-D (debug mode)
Check for error conditions, but do not execute the load.
-? (show help)
Show help, then exit.
--version
Show the version of this utility, then exit.
Connection Options
-d databaseThe database to load into. If not specified, reads from the load control file, the environment variable $PGDATABASE or defaults to the current system user name.
-h hostnameSpecifies the host name of the machine on which the Greenplum master database server is running. If not specified, reads from the load control file, the environment variable $PGHOST or defaults to localhost.
-p portSpecifies the TCP port on which the Greenplum master database server is listening for connections. If not specified, reads from the load control file, the environment variable $PGPORT or defaults to 5432.
-U usernameThe database role name to connect as. If not specified, reads from the load control file, the environment variable $PGUSER or defaults to the current system user name.
gpload 70

Greenplum Database Utility Guide 4.2– Chapter 1: Management Utility Reference
-W (force password prompt)
Force a password prompt. If not specified, reads the password from the environment variable $PGPASSWORD or from a password file specified by $PGPASSFILE or in ~/.pgpass. If these are not set, then gpload will prompt for a password even if -W is not supplied.
Control File Format
The gpload control file uses the YAML 1.1 document format and then implements its own schema for defining the various steps of a Greenplum Database load operation. The control file must be a valid YAML document.
The gpload program processes the control file document in order and uses indentation (spaces) to determine the document hierarchy and the relationships of the sections to one another. The use of white space is significant. White space should not be used simply for formatting purposes, and tabs should not be used at all.
The basic structure of a load control file is:
---
VERSION: 1.0.0.1
DATABASE: db_name
USER: db_username
HOST: master_hostname
PORT: master_port
GPLOAD:
INPUT:
- SOURCE:
LOCAL_HOSTNAME:
- hostname_or_ip
PORT: http_port
| PORT_RANGE: [start_port_range, end_port_range]
FILE:
- /path/to/input_file
SSL: true | false
CERTIFICATES_PATH: /path/to/certificates
- COLUMNS:
- field_name: data_type
gpload 71
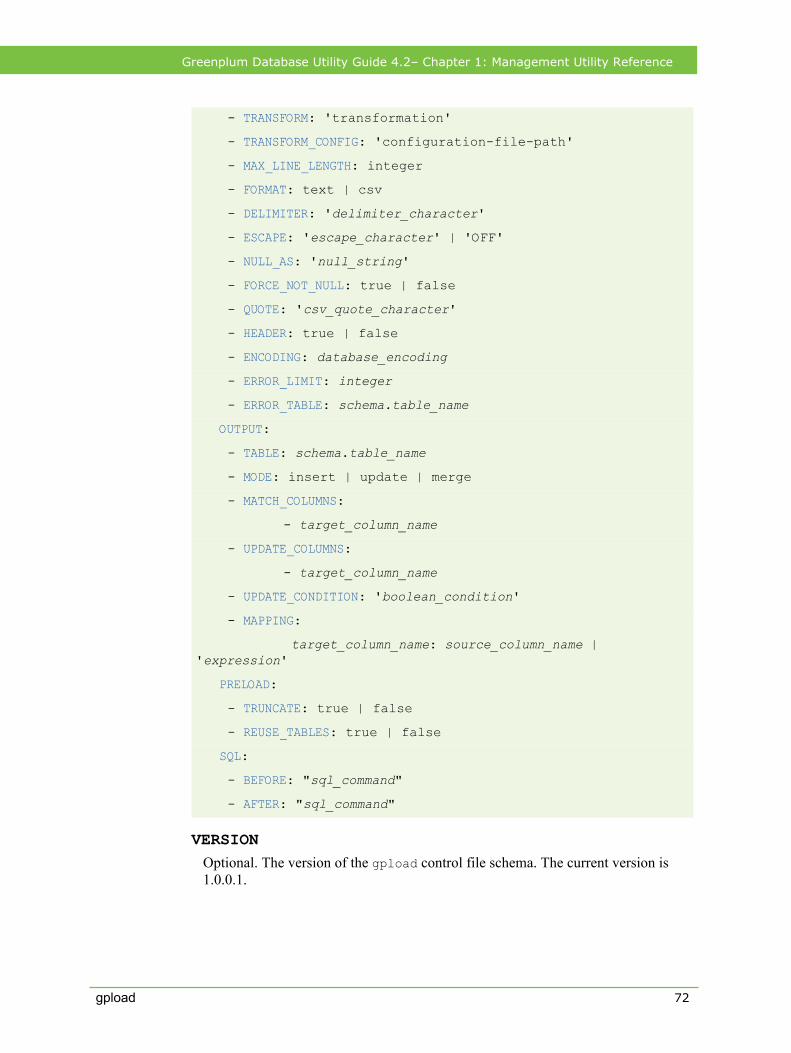
Greenplum Database Utility Guide 4.2– Chapter 1: Management Utility Reference
VERSION
Optional. The version of the gpload control file schema. The current version is 1.0.0.1.
- TRANSFORM: 'transformation'
- TRANSFORM_CONFIG: 'configuration-file-path'
- MAX_LINE_LENGTH: integer
- FORMAT: text | csv
- DELIMITER: 'delimiter_character'
- ESCAPE: 'escape_character' | 'OFF'
- NULL_AS: 'null_string'
- FORCE_NOT_NULL: true | false
- QUOTE: 'csv_quote_character'
- HEADER: true | false
- ENCODING: database_encoding
- ERROR_LIMIT: integer
- ERROR_TABLE: schema.table_name
OUTPUT:
- TABLE: schema.table_name
- MODE: insert | update | merge
- MATCH_COLUMNS:
- target_column_name
- UPDATE_COLUMNS:
- target_column_name
- UPDATE_CONDITION: 'boolean_condition'
- MAPPING:
target_column_name: source_column_name | 'expression'
PRELOAD:
- TRUNCATE: true | false
- REUSE_TABLES: true | false
SQL:
- BEFORE: "sql_command"
- AFTER: "sql_command"
gpload 72
Greenplum Database Utility Guide 4.2– Chapter 1: Management Utility Reference
DATABASE
Optional. Specifies which database in Greenplum to connect to. If not specified, defaults to $PGDATABASE if set or the current system user name. You can also specify the database on the command line using the -d option.
USER
Optional. Specifies which database role to use to connect. If not specified, defaults to the current user or $PGUSER if set. You can also specify the database role on the command line using the -U option.
If the user running gpload is not a Greenplum superuser, then the server configuration parameter gp_external_grant_privileges must be set to on in order for the load to be processed. See the Greenplum Database Server Parameter Guide for more information.
HOST
Optional. Specifies Greenplum master host name. If not specified, defaults to localhost or $PGHOST if set. You can also specify the master host name on the command line using the -h option.
PORT
Optional. Specifies Greenplum master port. If not specified, defaults to 5432 or $PGPORT if set. You can also specify the master port on the command line using the -p option.
GPLOAD
Required. Begins the load specification section. A GPLOAD specification must have an INPUT and an OUTPUT section defined.
INPUT
Required. Defines the location and the format of the input data to be loaded. gpload will start one or more instances of the gpfdist file distribution program on the current host and create the required external table definition(s) in Greenplum Database that point to the source data. Note that the host from which you run gpload must be accessible over the network by all Greenplum hosts (master and segments).
SOURCE
Required. The SOURCE block of an INPUT specification defines the location of a source file. An INPUT section can have more than one SOURCE block defined. Each SOURCE block defined corresponds to one instance of the gpfdist file distribution program that will be started on the local machine. Each SOURCE block defined must have a FILE specification.
For more information about using the gpfdist parallel file server and single and multiple gpfdist instances, see the Greenplum Database Database Administrator Guide.
gpload 73
Greenplum Database Utility Guide 4.2– Chapter 1: Management Utility Reference
LOCAL_HOSTNAME
Optional. Specifies the host name or IP address of the local machine on which gpload is running. If this machine is configured with multiple network interface cards (NICs), you can specify the host name or IP of each individual NIC to allow network traffic to use all NICs simultaneously. The default is to use the local machine’s primary host name or IP only.
PORT
Optional. Specifies the specific port number that the gpfdist file distribution program should use. You can also supply a PORT_RANGE to select an available port from the specified range. If both PORT and PORT_RANGE are defined, then PORT takes precedence. If neither PORT or PORT_RANGE are defined, the default is to select an available port between 8000 and 9000.
If multiple host names are declared in LOCAL_HOSTNAME, this port number is used for all hosts. This configuration is desired if you want to use all NICs to load the same file or set of files in a given directory location.
PORT_RANGE
Optional. Can be used instead of PORT to supply a range of port numbers from which gpload can choose an available port for this instance of the gpfdist file distribution program.
FILE
Required. Specifies the location of a file, named pipe, or directory location on the local file system that contains data to be loaded. You can declare more than one file so long as the data is of the same format in all files specified.
If the files are compressed using gzip or bzip2 (have a .gz or .bz2 file extension), the files will be uncompressed automatically (provided that gunzip or bunzip2 is in your path).
When specifying which source files to load, you can use the wildcard character (*) or other C-style pattern matching to denote multiple files. The files specified are assumed to be relative to the current directory from which gpload is executed (or you can declare an absolute path).
SSL
Optional. Specifies usage of SSL encryption. If SSL is set to true, gpload starts the gpfdist server with the --ssl option and uses the gpfdists protocol.
CERTIFICATES_PATH
Required when SSL is true; cannot be specified when SSL is false or unspecified. The location specified in CERTIFICATES_PATH must contain the following files:
• The server certificate file, server.crt
gpload 74
Greenplum Database Utility Guide 4.2– Chapter 1: Management Utility Reference
• The server private key file, server.key• The trusted certificate authorities, root.crt
The root directory (/) cannot be specified as CERTIFICATES_PATH.
COLUMNS
Optional. Specifies the schema of the source data file(s) in the format of field_name: data_type. The DELIMITER character in the source file is what separates two data value fields (columns). A row is determined by a line feed character (0x0a).
If the input COLUMNS are not specified, then the schema of the output TABLE is implied, meaning that the source data must have the same column order, number of columns, and data format as the target table.
The default source-to-target mapping is based on a match of column names as defined in this section and the column names in the target TABLE. This default mapping can be overridden using the MAPPING section.
TRANSFORM
Optional. Specifies the name of the input XML transformation passed to gpload. For more information about XML transformations, see the Greenplum Database Database Administrator Guide.
TRANSFORM_CONFIG
Optional. Specifies the location of the XML transformation configuration file that is specified in the TRANSFORM parameter, above.
MAX_LINE_LENGTH
Optional. An integer that specifies the maximum length of a line in the XML transformation data passed to gpload.
FORMAT
Optional. Specifies the format of the source data file(s) - either plain text (TEXT) or comma separated values (CSV) format. Defaults to TEXT if not specified. For more information about the format of the source data, see the Greenplum Database Database Administrator Guide.
DELIMITER
Optional. Specifies a single ASCII character that separates columns within each row (line) of data. The default is a tab character in TEXT mode, a comma in CSV mode. You can also specify a non-printable ASCII character via an escape sequence using the decimal representation of the ASCII character. For example, \014 represents the shift out character.
gpload 75
Greenplum Database Utility Guide 4.2– Chapter 1: Management Utility Reference
ESCAPE
Specifies the single character that is used for C escape sequences (such as \n,\t,\100, and so on) and for escaping data characters that might otherwise be taken as row or column delimiters. Make sure to choose an escape character that is not used anywhere in your actual column data. The default escape character is a \ (backslash) for text-formatted files and a " (double quote) for csv-formatted files, however it is possible to specify another character to represent an escape. It is also possible to disable escaping in text-formatted files by specifying the value 'OFF' as the escape value. This is very useful for data such as text-formatted web log data that has many embedded backslashes that are not intended to be escapes.
NULL_AS
Optional. Specifies the string that represents a null value. The default is \N (backslash-N) in TEXT mode, and an empty value with no quotations in CSV mode. You might prefer an empty string even in TEXT mode for cases where you do not want to distinguish nulls from empty strings. Any source data item that matches this string will be considered a null value.
FORCE_NOT_NULL
Optional. In CSV mode, processes each specified column as though it were quoted and hence not a NULL value. For the default null string in CSV mode (nothing between two delimiters), this causes missing values to be evaluated as zero-length strings.
QUOTE
Required when FORMAT is CSV. Specifies the quotation character for CSV mode. The default is double-quote (").
HEADER
Optional. Specifies that the first line in the data file(s) is a header row (contains the names of the columns) and should not be included as data to be loaded. If using multiple data source files, all files must have a header row. The default is to assume that the input files do not have a header row.
ENCODING
Optional. Character set encoding of the source data. Specify a string constant (such as 'SQL_ASCII'), an integer encoding number, or 'DEFAULT' to use the default client encoding. If not specified, the default client encoding is used. For information about supported character sets, see the the Greenplum Database Reference Guide.
ERROR_LIMIT
Optional. Enables single row error isolation mode for this load operation. When enabled, input rows that have format errors will be discarded provided that the error limit count is not reached on any Greenplum segment instance during input processing. If the error limit is not reached, all good rows will be
gpload 76
Greenplum Database Utility Guide 4.2– Chapter 1: Management Utility Reference
loaded and any error rows will either be discarded or logged to the table specified in ERROR_TABLE. The default is to abort the load operation on the first error encountered. Note that single row error isolation only applies to data rows with format errors; for example, extra or missing attributes, attributes of a wrong data type, or invalid client encoding sequences. Constraint errors, such as primary key violations, will still cause the load operation to abort if encountered. For information about handling load errors, see the Greenplum Database Database Administrator Guide.
ERROR_TABLE
Optional when ERROR_LIMIT is declared. Specifies an error table where rows with formatting errors will be logged when running in single row error isolation mode. You can then examine this error table to see error rows that were not loaded (if any). If the error_table specified already exists, it will be used. If it does not exist, it will be automatically generated. For more information about error tables, see the Greenplum Database Database Administrator Guide.
OUTPUT
Required. Defines the target table and final data column values that are to be loaded into the database.
TABLE
Required. The name of the target table to load into.
MODE
Optional. Defaults to INSERT if not specified. There are three available load modes:
INSERT - Loads data into the target table using the following method: INSERT INTO target_table SELECT * FROM input_data;
UPDATE - Updates the UPDATE_COLUMNS of the target table where the rows have MATCH_COLUMNS attribute values equal to those of the input data, and the optional UPDATE_CONDITION is true.
MERGE - Inserts new rows and updates the UPDATE_COLUMNS of existing rows where MATCH_COLUMNS attribute values are equal to those of the input data, and the optional UPDATE_CONDITION is true. New rows are identified when the MATCH_COLUMNS value in the source data does not have a corresponding value in the existing data of the target table. In those cases, the entire row from the source file is inserted, not only the MATCH and UPDATE columns. If there are multiple new MATCH_COLUMNS values that are the same, only one new row for that value will be inserted. Use UPDATE_CONDITION to filter out the rows to discard.
gpload 77
Greenplum Database Utility Guide 4.2– Chapter 1: Management Utility Reference
MATCH_COLUMNS
Required if MODE is UPDATE or MERGE. Specifies the column(s) to use as the join condition for the update. The attribute value in the specified target column(s) must be equal to that of the corresponding source data column(s) in order for the row to be updated in the target table.
UPDATE_COLUMNS
Required if MODE is UPDATE or MERGE. Specifies the column(s) to update for the rows that meet the MATCH_COLUMNS criteria and the optional UPDATE_CONDITION.
UPDATE_CONDITION
Optional. Specifies a Boolean condition (similar to what you would declare in a WHERE clause) that must be met in order for a row in the target table to be updated (or inserted in the case of a MERGE).
MAPPING
Optional. If a mapping is specified, it overrides the default source-to-target column mapping. The default source-to-target mapping is based on a match of column names as defined in the source COLUMNS section and the column names of the target TABLE. A mapping is specified as either: target_column_name: source_column_name or target_column_name: 'expression' Where expression is any expression that you would specify in the SELECT list of a query, such as a constant value, a column reference, an operator invocation, a function call, and so on.
PRELOAD
Optional. Specifies operations to run prior to the load operation. Right now the only preload operation is TRUNCATE.
TRUNCATE
Optional. If set to true, gpload will remove all rows in the target table prior to loading it.
REUSE_TABLES
Optional. If set to true, gpload will not drop the external table objects and staging table objects it creates. These objects will be reused for future load operations that use the same load specifications. This improves performance of trickle loads (ongoing small loads to the same target table).
SQL
Optional. Defines SQL commands to run before and/or after the load operation. You can specify multiple BEFORE and/or AFTER commands. List commands in the order of desired execution.
gpload 78
Greenplum Database Utility Guide 4.2– Chapter 1: Management Utility Reference
BEFORE
Optional. An SQL command to run before the load operation starts. Enclose commands in quotes.
AFTER
Optional. An SQL command to run after the load operation completes. Enclose commands in quotes.
Notes
If your database object names were created using a double-quoted identifier (delimited identifier), you must specify the delimited name within single quotes in the gpload control file. For example, if you create a table as follows:
CREATE TABLE "MyTable" ("MyColumn" text);
Your YAML-formatted gpload control file would refer to the above table and column names as follows:
- COLUMNS:
- '"MyColumn"': text
OUTPUT:
- TABLE: public.'"MyTable"'
Log File Format
Log files output by gpload have the following format:
timestamp|level|message
Where timestamp takes the form: YYYY-MM-DD HH:MM:SS, level is one of DEBUG, LOG, INFO, ERROR, and message is a normal text message.
Some INFO messages that may be of interest in the log files are (where # corresponds to the actual number of seconds, units of data, or failed rows):
INFO|running time: #.## secondsINFO|transferred #.# kB of #.# kB.INFO|gpload succeeded
INFO|gpload succeeded with warnings
INFO|gpload failed
INFO|1 bad row
INFO|# bad rows
Examples
Run a load job as defined in my_load.yml:gpload -f my_load.yml
Example load control file:
---
gpload 79
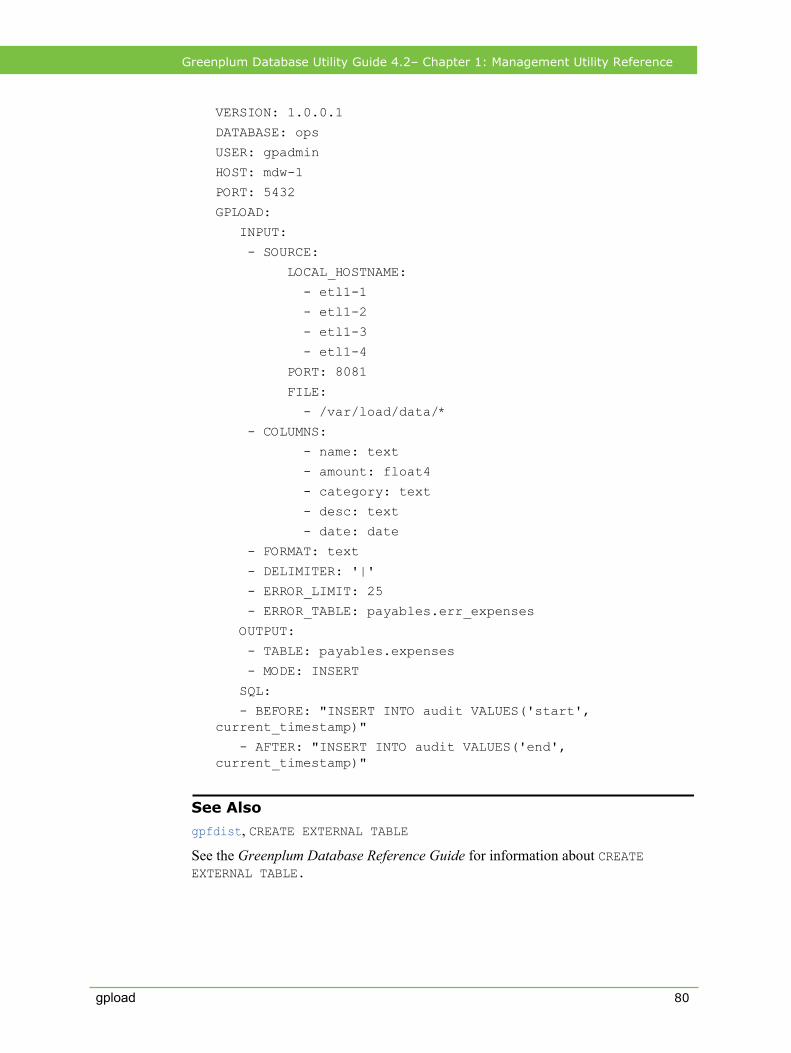
Greenplum Database Utility Guide 4.2– Chapter 1: Management Utility Reference
VERSION: 1.0.0.1
DATABASE: ops
USER: gpadmin
HOST: mdw-1
PORT: 5432
GPLOAD:
INPUT:
- SOURCE:
LOCAL_HOSTNAME:
- etl1-1
- etl1-2
- etl1-3
- etl1-4
PORT: 8081
FILE:
- /var/load/data/*
- COLUMNS:
- name: text
- amount: float4
- category: text
- desc: text
- date: date
- FORMAT: text
- DELIMITER: '|'
- ERROR_LIMIT: 25
- ERROR_TABLE: payables.err_expenses
OUTPUT:
- TABLE: payables.expenses
- MODE: INSERT
SQL:
- BEFORE: "INSERT INTO audit VALUES('start', current_timestamp)"
- AFTER: "INSERT INTO audit VALUES('end', current_timestamp)"
See Also
gpfdist, CREATE EXTERNAL TABLE
See the Greenplum Database Reference Guide for information about CREATE EXTERNAL TABLE.
gpload 80
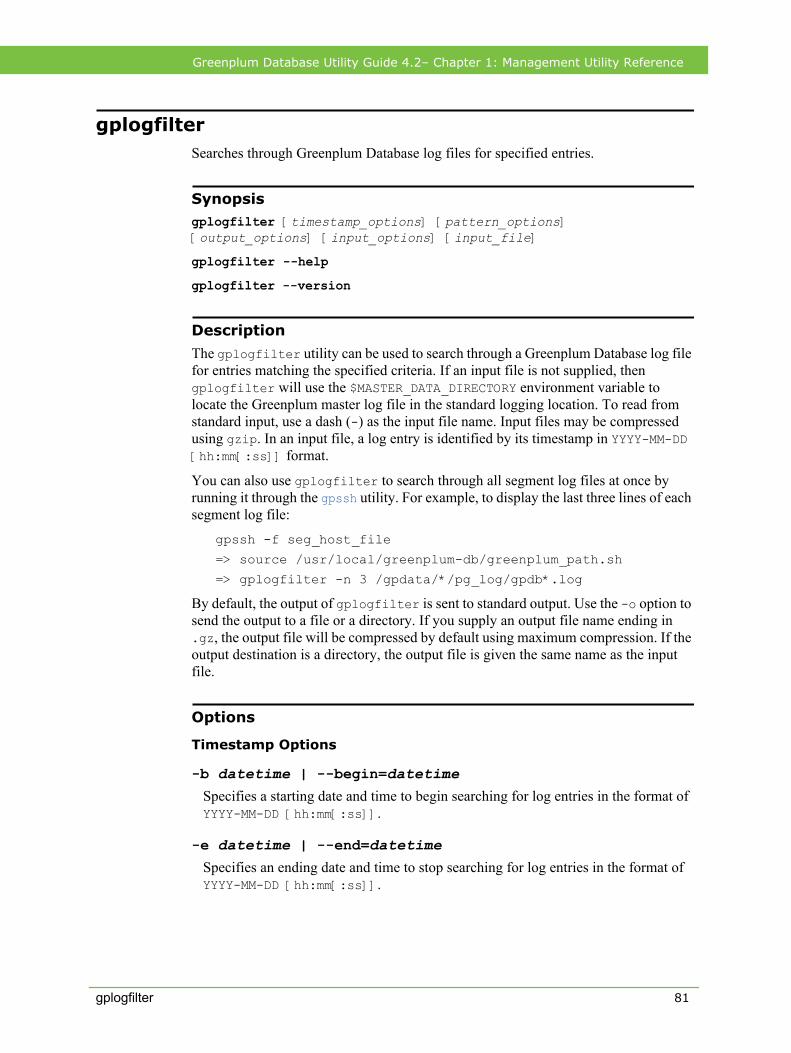
Greenplum Database Utility Guide 4.2– Chapter 1: Management Utility Reference
gplogfilterSearches through Greenplum Database log files for specified entries.
Synopsisgplogfilter [timestamp_options] [pattern_options] [output_options] [input_options] [input_file]
gplogfilter --help
gplogfilter --version
Description
The gplogfilter utility can be used to search through a Greenplum Database log file for entries matching the specified criteria. If an input file is not supplied, then gplogfilter will use the $MASTER_DATA_DIRECTORY environment variable to locate the Greenplum master log file in the standard logging location. To read from standard input, use a dash (-) as the input file name. Input files may be compressed using gzip. In an input file, a log entry is identified by its timestamp in YYYY-MM-DD [hh:mm[:ss]] format.
You can also use gplogfilter to search through all segment log files at once by running it through the gpssh utility. For example, to display the last three lines of each segment log file:
gpssh -f seg_host_file
=> source /usr/local/greenplum-db/greenplum_path.sh
=> gplogfilter -n 3 /gpdata/*/pg_log/gpdb*.log
By default, the output of gplogfilter is sent to standard output. Use the -o option to send the output to a file or a directory. If you supply an output file name ending in .gz, the output file will be compressed by default using maximum compression. If the output destination is a directory, the output file is given the same name as the input file.
Options
Timestamp Options
-b datetime | --begin=datetimeSpecifies a starting date and time to begin searching for log entries in the format of YYYY-MM-DD [hh:mm[:ss]].
-e datetime | --end=datetimeSpecifies an ending date and time to stop searching for log entries in the format of YYYY-MM-DD [hh:mm[:ss]].
gplogfilter 81
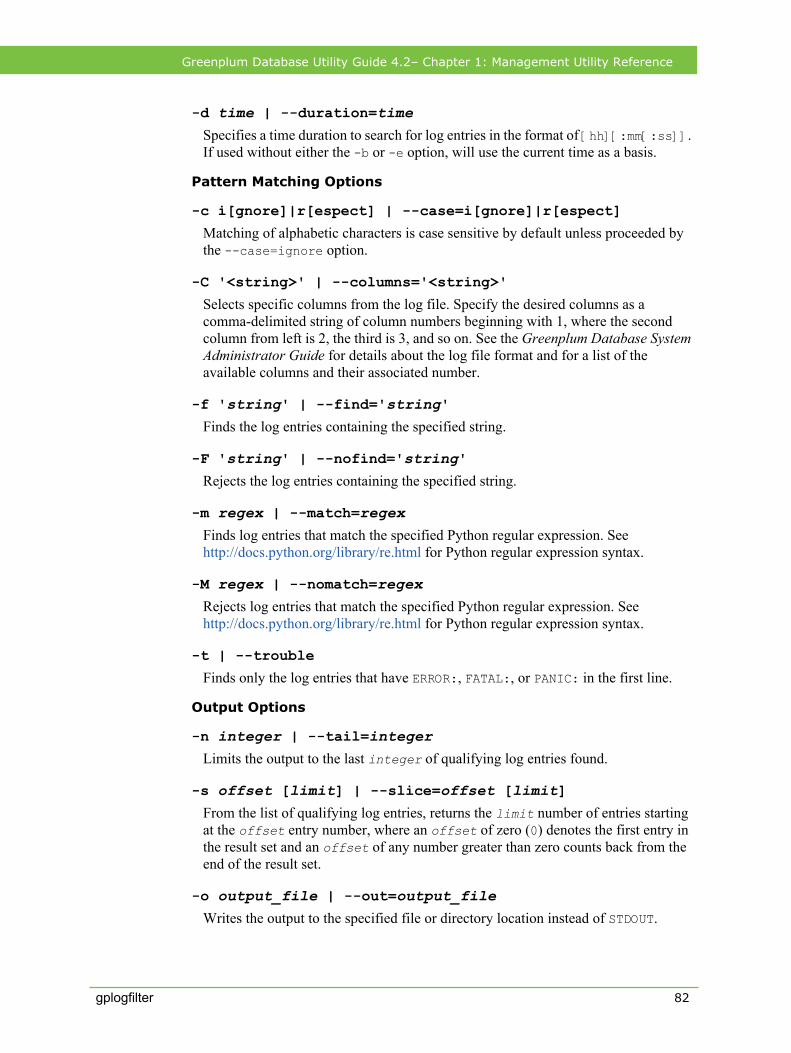
Greenplum Database Utility Guide 4.2– Chapter 1: Management Utility Reference
-d time | --duration=timeSpecifies a time duration to search for log entries in the format of [hh][:mm[:ss]]. If used without either the -b or -e option, will use the current time as a basis.
Pattern Matching Options
-c i[gnore]|r[espect] | --case=i[gnore]|r[espect]
Matching of alphabetic characters is case sensitive by default unless proceeded by the --case=ignore option.
-C '<string>' | --columns='<string>'
Selects specific columns from the log file. Specify the desired columns as a comma-delimited string of column numbers beginning with 1, where the second column from left is 2, the third is 3, and so on. See the Greenplum Database System Administrator Guide for details about the log file format and for a list of the available columns and their associated number.
-f 'string' | --find='string'Finds the log entries containing the specified string.
-F 'string' | --nofind='string'Rejects the log entries containing the specified string.
-m regex | --match=regexFinds log entries that match the specified Python regular expression. See http://docs.python.org/library/re.html for Python regular expression syntax.
-M regex | --nomatch=regexRejects log entries that match the specified Python regular expression. See http://docs.python.org/library/re.html for Python regular expression syntax.
-t | --trouble
Finds only the log entries that have ERROR:, FATAL:, or PANIC: in the first line.
Output Options
-n integer | --tail=integerLimits the output to the last integer of qualifying log entries found.
-s offset [limit] | --slice=offset [limit]From the list of qualifying log entries, returns the limit number of entries starting at the offset entry number, where an offset of zero (0) denotes the first entry in the result set and an offset of any number greater than zero counts back from the end of the result set.
-o output_file | --out=output_fileWrites the output to the specified file or directory location instead of STDOUT.
gplogfilter 82
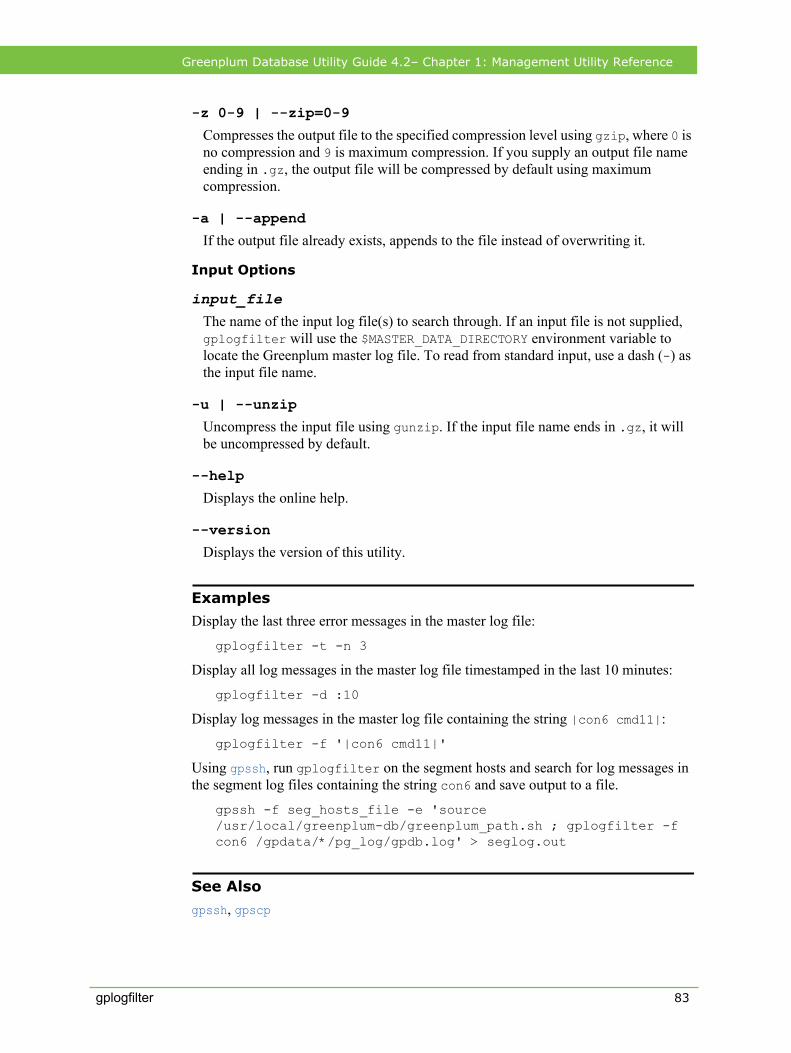
Greenplum Database Utility Guide 4.2– Chapter 1: Management Utility Reference
-z 0-9 | --zip=0-9
Compresses the output file to the specified compression level using gzip, where 0 is no compression and 9 is maximum compression. If you supply an output file name ending in .gz, the output file will be compressed by default using maximum compression.
-a | --append
If the output file already exists, appends to the file instead of overwriting it.
Input Options
input_fileThe name of the input log file(s) to search through. If an input file is not supplied, gplogfilter will use the $MASTER_DATA_DIRECTORY environment variable to locate the Greenplum master log file. To read from standard input, use a dash (-) as the input file name.
-u | --unzip
Uncompress the input file using gunzip. If the input file name ends in .gz, it will be uncompressed by default.
--help
Displays the online help.
--version
Displays the version of this utility.
Examples
Display the last three error messages in the master log file:
gplogfilter -t -n 3
Display all log messages in the master log file timestamped in the last 10 minutes:
gplogfilter -d :10
Display log messages in the master log file containing the string |con6 cmd11|:
gplogfilter -f '|con6 cmd11|'
Using gpssh, run gplogfilter on the segment hosts and search for log messages in the segment log files containing the string con6 and save output to a file.
gpssh -f seg_hosts_file -e 'source /usr/local/greenplum-db/greenplum_path.sh ; gplogfilter -f con6 /gpdata/*/pg_log/gpdb.log' > seglog.out
See Also
gpssh, gpscp
gplogfilter 83
Greenplum Database Utility Guide 4.2– Chapter 1: Management Utility Reference
gpmapreduceRuns Greenplum MapReduce jobs as defined in a YAML specification document.
Synopsisgpmapreduce -f yaml_file [dbname [username]] [-k name=value | --key name=value] [-h hostname | --host hostname] [-p port| --port port] [-U username | --username username] [-W] [-v]
gpmapreduce -V | --version
gpmapreduce -h | --help
gpmapreduce -x | --explain
gpmapreduce -X | --explain-analyze
Prerequisites
The following are required prior to running this program:
• You must have your MapReduce job defined in a YAML file. For information about the Greenplum MapReduce specification, see the Greenplum Database Reference Guide.
• You must be a Greenplum Database superuser to run MapReduce jobs written in untrusted Perl or Python.
• You must be a Greenplum Database superuser to run MapReduce jobs with EXEC and FILE inputs.
• You must be a Greenplum Database superuser to run MapReduce jobs with GPFDIST input unless the server configuration parameter gp_external_grant_privileges is set to on. See the Greenplum Database Reference Guide for more information.
Description
MapReduce is a programming model developed by Google for processing and generating large data sets on an array of commodity servers. Greenplum MapReduce allows programmers who are familiar with the MapReduce paradigm to write map and reduce functions and submit them to the Greenplum Database parallel engine for processing.
In order for Greenplum to be able to process MapReduce functions, the functions need to be defined in a YAML document, which is then passed to the Greenplum MapReduce program, gpmapreduce, for execution by the Greenplum Database parallel engine. The Greenplum system takes care of the details of distributing the input data, executing the program across a set of machines, handling machine failures, and managing the required inter-machine communication.
gpmapreduce 84
Greenplum Database Utility Guide 4.2– Chapter 1: Management Utility Reference
Options
-f yaml_fileRequired. The YAML file that contains the Greenplum MapReduce job definitions. See the Greenplum Database Reference Guide.
-? | --help
Show help, then exit.
-V | --version
Show version information, then exit.
-v | --verbose
Show verbose output.
-x | --explain
Do not run MapReduce jobs, but produce explain plans.
-X | --explain-analyze
Run MapReduce jobs and produce explain-analyze plans.
-k | --key name=valueSets a YAML variable. A value is required. Defaults to “key” if no variable name is specified.
Connection Options
-h host | --host hostSpecifies the host name of the machine on which the Greenplum master database server is running. If not specified, reads from the environment variable PGHOST or defaults to localhost.
-p port | --port portSpecifies the TCP port on which the Greenplum master database server is listening for connections. If not specified, reads from the environment variable PGPORT or defaults to 5432.
-U username | --username usernameThe database role name to connect as. If not specified, reads from the environment variable PGUSER or defaults to the current system user name.
-W | --password
Force a password prompt.
gpmapreduce 85
Greenplum Database Utility Guide 4.2– Chapter 1: Management Utility Reference
Examples
Run a MapReduce job as defined in my_yaml.txt and connect to the database mydatabase:
gpmapreduce -f my_yaml.txt mydatabase
See Also
The Greenplum MapReduce specification in the Greenplum Database Reference Guide.
gpmapreduce 86
Greenplum Database Utility Guide 4.2– Chapter 1: Management Utility Reference
gpmigratorUpgrades an existing Greenplum Database 4.1.x system without mirrors to 4.2.x.
Use gpmigrator_mirror to upgrade a 4.1.x system that has mirrors.
Note: Using gpmigrator on a system with mirrors causes an error.
Synopsisgpmigrator old_GPHOME_path new_GPHOME_path [-d master_data_directory] [-l logfile_directory] [-q] [--debug] [--check-only] [-R]
gpmigrator --version | -v
gpmigrator --help | -h
Prerequisites
The following tasks should be performed prior to executing an upgrade:
• Make sure you are logged in to the master host as the Greenplum Database superuser (gpadmin).
• Install the Greenplum Database 4.2 binaries on all Greenplum hosts.• Copy or preserve any additional folders or files (such as backup folders) that you
have added in the Greenplum data directories or $GPHOME directory. Only files or folders strictly related to Greenplum Database operations are preserved by the migration utility.
• (Optional) Run VACUUM on all databases, and remove old server log files from pg_log in your master and segment data directories. This is not required, but will reduce the size of Greenplum Database files to be backed up and migrated.
• Check for and recover any failed segments in your current Greenplum Database system (gpstate, gprecoverseg).
• (Optional, but highly recommended) Backup your current databases (gpcrondump or ZFS snapshots). If you find any issues when testing your upgraded system, you can restore this backup.
• Remove the standby master from your system configuration (gpinitstandby -r).
• Do a clean shutdown of your current system (gpstop).• Update your environment to source the 4.2 installation.• Inform all database users of the upgrade and lockout time frame. Once the
upgrade is in process, users will not be allowed on the system until the upgrade is complete.
gpmigrator 87
Greenplum Database Utility Guide 4.2– Chapter 1: Management Utility Reference
Description
The gpmigrator utility upgrades an existing Greenplum Database 4.1.x.x system without mirrors to 4.2. This utility updates the system catalog and internal version number, but not the actual software binaries. During the migration process, all client connections to Greenplum Database will be locked out.
Options
old_GPHOME_pathRequired. The absolute path to the current version of Greenplum Database software you want to migrate away from.
new_GPHOME_pathRequired. The absolute path to the new version of Greenplum Database software you want to migrate to.
-d master_data_directoryOptional. The current master host data directory. If not specified, the value set for $MASTER_DATA_DIRECTORY will be used.
-l logfile_directoryThe directory to write the log file. Defaults to ~/gpAdminLogs.
-q (quiet mode)
Run in quiet mode. Command output is not displayed on the screen, but is still written to the log file.
-R (revert)
In the event of an error during upgrade, reverts all changes made by gpmigrator.
--check-only
Runs pre-migrate checks to verify that your database is healthy.
Checks include:
Check catalog health
Check that the Greenplum Database binaries on each segment match those on the master
Check for a minium amount of free disk space
--help | -h
Displays the online help.
--debug
Sets logging level to debug.
gpmigrator 88
Greenplum Database Utility Guide 4.2– Chapter 1: Management Utility Reference
--version | -v
Displays the version of this utility.
Examples
Upgrade to version 4.2 from version 4.1.1.3 (make sure you are using the 4.2 version of gpmigrator):
/usr/local/greenplum-db-4.2.x.x/bin/gpmigrator \ /usr/local/greenplum-db-4.1.1.3 \
/usr/local/greenplum-db-4.2.x.x
See Also
gpmigrator_mirror, gpstop, gpstate, gprecoverseg, gpcrondump
gpmigrator 89
Greenplum Database Utility Guide 4.2– Chapter 1: Management Utility Reference
gpmigrator_mirrorUpgrades an existing Greenplum Database 4.1.x system with mirrors to 4.2.x.
Use gpmigrator to upgrade a 4.1.x system that does not have mirrors.
Note: Using gpmigrator_mirror on a system without mirrors causes an error.
Synopsisgpmigrator_mirror old_GPHOME_path new_GPHOME_path [-d master_data_directory] [-l logfile_directory] [-q] [--debug] [--check-only] [--debug]
gpmigrator_mirror --version | -v
gpmigrator_mirror --help | -h
Prerequisites
The following tasks should be performed prior to executing an upgrade:
• Make sure you are logged in to the master host as the Greenplum Database superuser (gpadmin).
• Install the Greenplum Database 4.2 binaries on all Greenplum hosts.• Copy or preserve any additional folders or files (such as backup folders) that you
have added in the Greenplum data directories or $GPHOME directory. Only files or folders strictly related to Greenplum Database operations are preserved by the migration utility.
• (Optional) Run VACUUM on all databases, and remove old server log files from pg_log in your master and segment data directories. This is not required, but will reduce the size of Greenplum Database files to be backed up and migrated.
• Check for and recover any failed segments in your current Greenplum Database system (gpstate, gprecoverseg).
• (Optional, but highly recommended) Backup your current databases (gpcrondump or ZFS snapshots). If you find any issues when testing your upgraded system, you can restore this backup.
• Remove the standby master from your system configuration (gpinitstandby -r).
• Do a clean shutdown of your current system (gpstop).• Update your environment to source the 4.2 installation.• Inform all database users of the upgrade and lockout time frame. Once the
upgrade is in process, users will not be allowed on the system until the upgrade is complete.
gpmigrator_mirror 90
Greenplum Database Utility Guide 4.2– Chapter 1: Management Utility Reference
Description
The gpmigrator_mirror utility upgrades an existing Greenplum Database 4.1.x.x system with mirrors to 4.2. This utility updates the system catalog and internal version number, but not the actual software binaries. During the migration process, all client connections to Greenplum Database will be locked out.
Options
old_GPHOME_pathRequired. The absolute path to the current version of Greenplum Database software you want to migrate away from.
new_GPHOME_pathRequired. The absolute path to the new version of Greenplum Database software you want to migrate to.
-d master_data_directoryOptional. The current master host data directory. If not specified, the value set for $MASTER_DATA_DIRECTORY will be used.
-l logfile_directoryThe directory to write the log file. Defaults to ~/gpAdminLogs.
-q (quiet mode)
Run in quiet mode. Command output is not displayed on the screen, but is still written to the log file.
--check-only
Runs pre-migrate checks to verify that your database is healthy.
Checks include:
Check catalog health
Check that the Greenplum Database binaries on each segment match those on the master
Check for a minium amount of free disk space
--help | -h
Displays the online help.
--debug
Sets logging level to debug.
--version | -v
Displays the version of this utility.
gpmigrator_mirror 91

Greenplum Database Utility Guide 4.2– Chapter 1: Management Utility Reference
Examples
Upgrade to version 4.2 from version 4.1.1.3 with mirrors (make sure you are using the 4.2 version of gpmigrator_mirror):
/usr/local/greenplum-db-4.2.x.x/bin/gpmigrator_mirror \ /usr/local/greenplum-db-4.1.1.3 \
/usr/local/greenplum-db-4.2.x.x
See Also
gpmigrator, gpstop, gpstate, gprecoverseg, gpcrondump
gpmigrator_mirror 92

Greenplum Database Utility Guide 4.2– Chapter 1: Management Utility Reference
gpmovemirrorsMoves mirror segment instances to new locations.
Synopsisgpmovemirrors -i move_config_file [-d master_data_directory][-l logfile_directory][-B parallel_processes] [-v][-o]
gpmovemirrors -?
gpmovemirrors --version
Description
The gpmovemirrors utility moves mirror segment instances to new locations. You may want to move mirrors to new locations to optimize distribution or data storage.
Before moving segments, the utility verifies that they are mirrors, and that their corresponding primary segments are up and are in synchronizing or resynchronizing mode.
By default, the utility will prompt you for the file system location(s) where it will move the mirror segment data directories.
You must make sure that the user who runs gpmovemirrors (the gpadmin user) has permissions to write to the data directory locations specified. You may want to create these directories on the segment hosts and chown them to the appropriate user before running gpmovemirrors.
Options
-B parallel_processesThe number of mirror segments to move in parallel. If not specified, the utility will start up to 4 parallel processes depending on how many mirror segment instances it needs to move.
-d master_data_directoryThe master data directory. If not specified, the value set for $MASTER_DATA_DIRECTORY will be used.
-i move_config_fileA configuration file containing information about which mirror segments to move, and where to move them.
You must have one mirror segment listed for each primary segment in the system. Each line inside the configuration file has the following format (as per attributes in the gp_segment_configuration, pg_filespace, and pg_filespace_entry catalog tables):
filespaceOrder=[filespace1_fsname[:filespace2_fsname:...]old_address:port:fselocation \
gpmovemirrors 93
Greenplum Database Utility Guide 4.2– Chapter 1: Management Utility Reference
[new_address:port:replication_port:fselocation[:fselocation:...]]
Note that you only need to specify a name for filespaceOrder if your system has multiple filespaces configured. If your system does not have additional filespaces configured besides the default pg_system filespace, this file will only have one location (for the default data directory filespace, pg_system). pg_system does not need to be listed in the filespaceOrder line. It will always be the first fselocation listed after replication_port.
-l logfile_directoryThe directory to write the log file. Defaults to ~/gpAdminLogs.
-o (output sample config file)
Outputs a sample move_config_file for use with the -i option.
-v (verbose)
Sets logging output to verbose.
--version (show utility version)
Displays the version of this utility.
-? (help)
Displays the online help.
Examples
Moves mirrors from an existing Greenplum Database system to a different set of hosts:
$ gpmovemirrors -i move_config_file
Where the move_config_file looks something like this (if you do not have additional filespaces configured besides the default pg_system filespace):filespaceOrder=filespacea sdw1-1:61001:/data/mirrors/database/dbfast22/gp1 sdw2-1:61001:43001:/data/mirrors/database/dbfast222/gp1: /data/mirrors/database/dbfast222fs1
Output a sample move mirrors configuration file to use with gpmovemirrors -i:
$ gpmovemirrors -o /home/gpadmin/move_config_file
gpmovemirrors 94
Greenplum Database Utility Guide 4.2– Chapter 1: Management Utility Reference
gpperfmon_installInstalls the Command Center database (gpperfmon) and optionally enables the data collection agents.
Synopsisgpperfmon_install [--enable --password gpmon_password --port gpdb_port] [--pgpass path_to_file] [--verbose]
gpperfmon_install --help | -h | -?
Description
The gpperfmon_install utility automates the steps required to enable the data collection agents. You must be the Greenplum Database system user (gpadmin) in order to run this utility. If using the --enable option, Greenplum Database must be restarted after the utility completes.
When run without any options, the utility will just create the gpperfmon database (the database used to store system metrics collected by the data collection agents). When run with the --enable option, the utility will also run the following additional tasks necessary to enable the data collection agents:
1. Creates the gpmon superuser role in Greenplum Database. The data collection agents require this role to connect to the database and write their data. The gpmon superuser role uses MD5-encrypted password authentication by default. Use the --password option to set the gpmon superuser’s password. Use the --port option to supply the port of the Greenplum Database master instance.
2. Updates the $MASTER_DATA_DIRECTORY/pg_hba.conf file. The utility will add the following line to the host-based authentication file (pg_hba.conf). This allows the gpmon user to locally connect to any database using MD5-encrypted password authentication: local all gpmon md5
Note: If you are using Greenplum Database version 4.2.1 or higher, you have the option of using SHA-256-encrypted password authentication. You can specify SHA-256 authentication by changing the password_hash_algorithm server parameter. This parameter can be set either system-wide or on a session level. If you have specified SHA-256 authentication, you have to manually edit the pg_hba.conf file after running the gpperfmon_install utility and change the md5 specification to password.
3. Updates the password file (.pgpass). In order to allow the data collection agents to connect as the gpmon role without a password prompt, you must have a password file that has an entry for the gpmon user. The utility adds the following entry to your password file (if the file does not exist, the utility will create it):
gpperfmon_install 95
Greenplum Database Utility Guide 4.2– Chapter 1: Management Utility Reference
*:5432:gpperfmon:gpmon:gpmon_password If your password file is not located in the default location (~/.pgpass), use the --pgpass option to specify the file location.
4. Sets the server configuration parameters for Greenplum Command Center. The following parameters must be enabled in order for the data collection agents to begin collecting data. The utility will set the following parameters in the Greenplum Database postgresql.conf configuration files:gp_enable_gpperfmon=on (in all postgresql.conf files)gpperfmon_port=8888 (in all postgresql.conf files)gp_external_enable_exec=on (in the master postgresql.conf file)
Options
--enable
In addition to creating the gpperfmon database, performs the additional steps required to enable the data collection agents. When --enable is specified the utility will also create and configure the gpmon superuser account and set the Command Center server configuration parameters in the postgresql.conf files.
--password gpmon_passwordRequired if --enable is specified. Sets the password of the gpmon superuser.
--port gpdb_portRequired if --enable is specified. Specifies the connection port of the Greenplum Database master.
--pgpass path_to_fileOptional if --enable is specified. If the password file is not in the default location of ~/.pgpass, specifies the location of the password file.
--verbose
Sets the logging level to verbose.
--help | -h | -?
Displays the online help.
Examples
Create the gpperfmon database only:
$ su - gpadmin
$ gpperfmon_install
Create the gpperfmon database, create the gpmon superuser, and enable the data collection agents:
$ su - gpadmin
$ gpperfmon_install --enable --password p@$$word --port 5432
gpperfmon_install 96

Greenplum Database Utility Guide 4.2– Chapter 1: Management Utility Reference
$ gpstop -r
See Also
gpstop
gpperfmon_install 97
Greenplum Database Utility Guide 4.2– Chapter 1: Management Utility Reference
gppkgInstalls Greenplum Database extensions such as pgcrypto, PL/R, PL/Java, PL/Perl, PostGIS, and MADlib, along with their dependencies, across an entire cluster.
Synopsisgppkg [-i package | -u package | -r name-version | -c] [-d master_data_directory] [-a] [-v]
gppkg --migrate GPHOME_1 GPHOME_2 [-a] [-v]
gppkg [-q | --query] query_option
gppkg -? | --help | -h
gppkg --version
Description
The Greenplum Package Manager (gppkg) utility installs Greenplum Database extensions, along with any dependencies, on all hosts across a cluster. It will also automatically install extensions on new hosts in the case of system expansion and segment recovery.
First, download one or more of the available packages from the EMC Download Center then copy it to the master host. Use the Greenplum Package Manager to install each package using the options described below.
Note: After a major upgrade to Greenplum Database, you must download and install all extensions again.Examples of database extensions and packages software that are delivered using the Greenplum Package Manager are:
• PostGIS• PL/Java• PL/R• PL/Perl• MADlib• Pgcrypto• Greenplum Database gNet Connectivity Software for HadoopNote that Greenplum Package Manager installation files for extension packages may release outside of standard Database release cycles. Therefore, for the latest install and configuration information regarding any supported database package/extension, go to the Support site and download Primus Article 288189 from our knowledge base.
gppkg 98
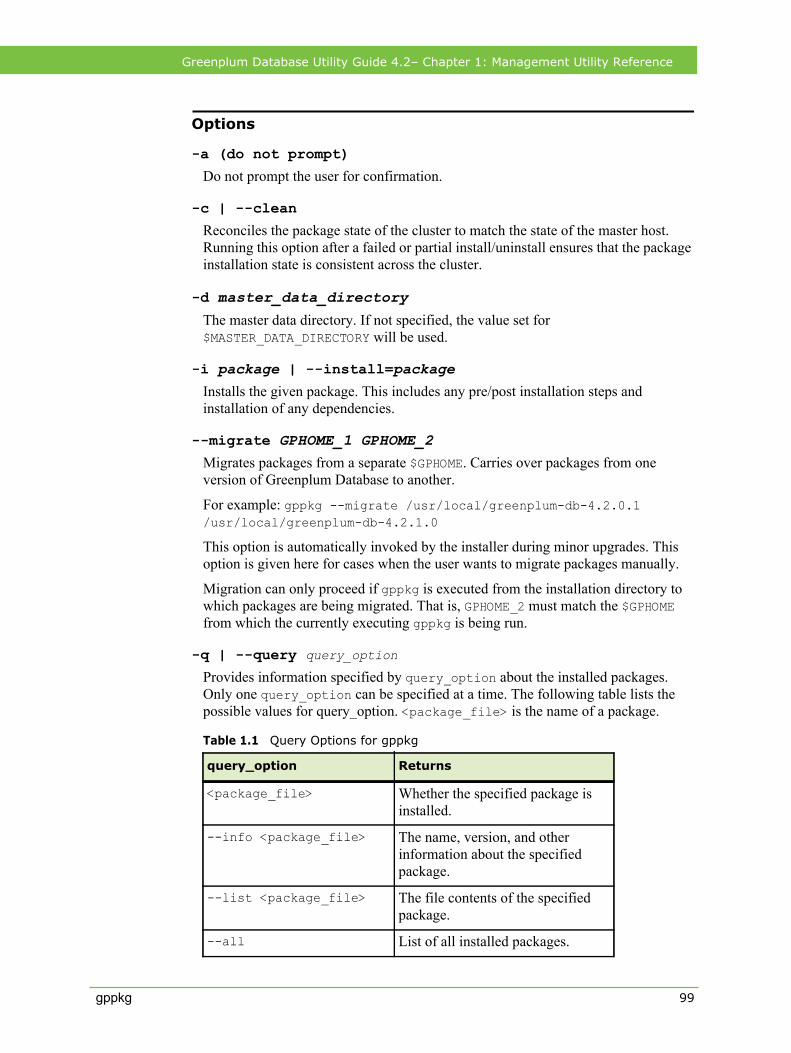
Greenplum Database Utility Guide 4.2– Chapter 1: Management Utility Reference
Options
-a (do not prompt)
Do not prompt the user for confirmation.
-c | --clean
Reconciles the package state of the cluster to match the state of the master host. Running this option after a failed or partial install/uninstall ensures that the package installation state is consistent across the cluster.
-d master_data_directoryThe master data directory. If not specified, the value set for $MASTER_DATA_DIRECTORY will be used.
-i package | --install=packageInstalls the given package. This includes any pre/post installation steps and installation of any dependencies.
--migrate GPHOME_1 GPHOME_2Migrates packages from a separate $GPHOME. Carries over packages from one version of Greenplum Database to another.
For example: gppkg --migrate /usr/local/greenplum-db-4.2.0.1 /usr/local/greenplum-db-4.2.1.0
This option is automatically invoked by the installer during minor upgrades. This option is given here for cases when the user wants to migrate packages manually.
Migration can only proceed if gppkg is executed from the installation directory to which packages are being migrated. That is, GPHOME_2 must match the $GPHOME from which the currently executing gppkg is being run.
-q | --query query_option
Provides information specified by query_option about the installed packages. Only one query_option can be specified at a time. The following table lists the possible values for query_option. <package_file> is the name of a package.
Table 1.1 Query Options for gppkg
query_option Returns
<package_file> Whether the specified package is installed.
--info <package_file> The name, version, and other information about the specified package.
--list <package_file> The file contents of the specified package.
--all List of all installed packages.
gppkg 99
Greenplum Database Utility Guide 4.2– Chapter 1: Management Utility Reference
-r name-version | --remove=name-versionRemoves the specified package.
-u package | --update=packageUpdates the given package.
--version (show utility version)
Displays the version of this utility.
-v | --verbose
Sets the logging level to verbose.
-? | -h | --help
Displays the online help.
gppkg 100
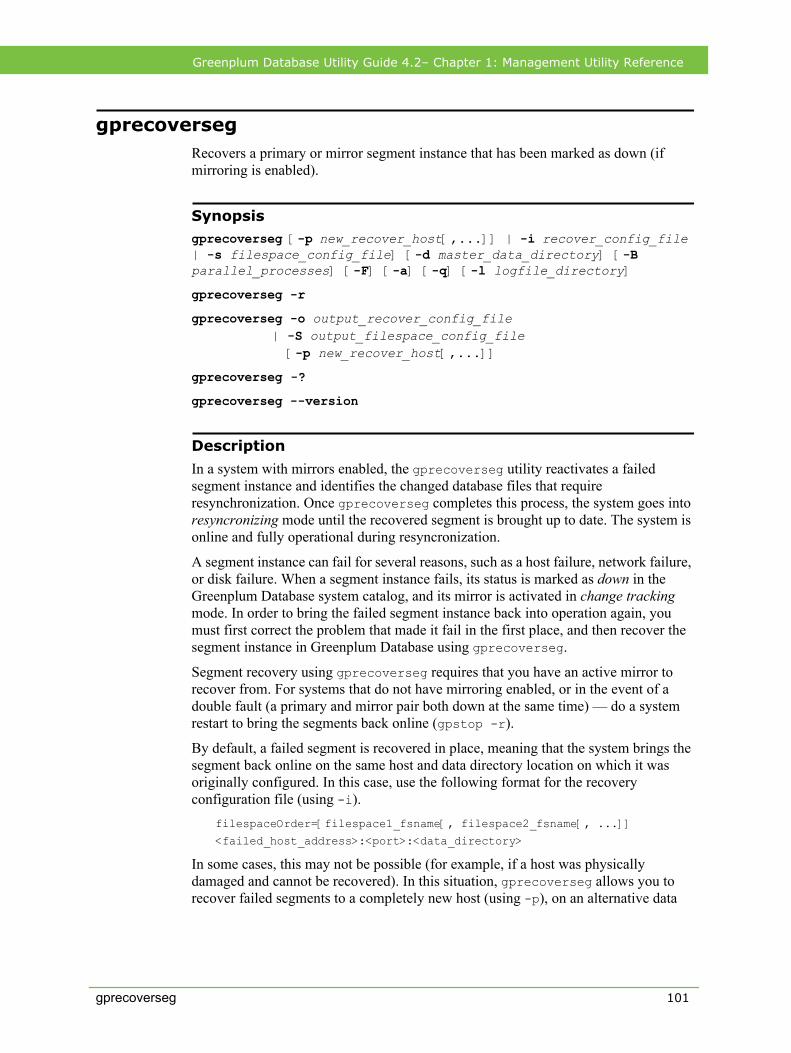
Greenplum Database Utility Guide 4.2– Chapter 1: Management Utility Reference
gprecoversegRecovers a primary or mirror segment instance that has been marked as down (if mirroring is enabled).
Synopsisgprecoverseg [-p new_recover_host[,...]] | -i recover_config_file | -s filespace_config_file] [-d master_data_directory] [-B parallel_processes] [-F] [-a] [-q] [-l logfile_directory]
gprecoverseg -r
gprecoverseg -o output_recover_config_file | -S output_filespace_config_file [-p new_recover_host[,...]]
gprecoverseg -?
gprecoverseg --version
Description
In a system with mirrors enabled, the gprecoverseg utility reactivates a failed segment instance and identifies the changed database files that require resynchronization. Once gprecoverseg completes this process, the system goes into resyncronizing mode until the recovered segment is brought up to date. The system is online and fully operational during resyncronization.
A segment instance can fail for several reasons, such as a host failure, network failure, or disk failure. When a segment instance fails, its status is marked as down in the Greenplum Database system catalog, and its mirror is activated in change tracking mode. In order to bring the failed segment instance back into operation again, you must first correct the problem that made it fail in the first place, and then recover the segment instance in Greenplum Database using gprecoverseg.
Segment recovery using gprecoverseg requires that you have an active mirror to recover from. For systems that do not have mirroring enabled, or in the event of a double fault (a primary and mirror pair both down at the same time) — do a system restart to bring the segments back online (gpstop -r).
By default, a failed segment is recovered in place, meaning that the system brings the segment back online on the same host and data directory location on which it was originally configured. In this case, use the following format for the recovery configuration file (using -i).
filespaceOrder=[filespace1_fsname[, filespace2_fsname[, ...]]
<failed_host_address>:<port>:<data_directory>
In some cases, this may not be possible (for example, if a host was physically damaged and cannot be recovered). In this situation, gprecoverseg allows you to recover failed segments to a completely new host (using -p), on an alternative data
gprecoverseg 101
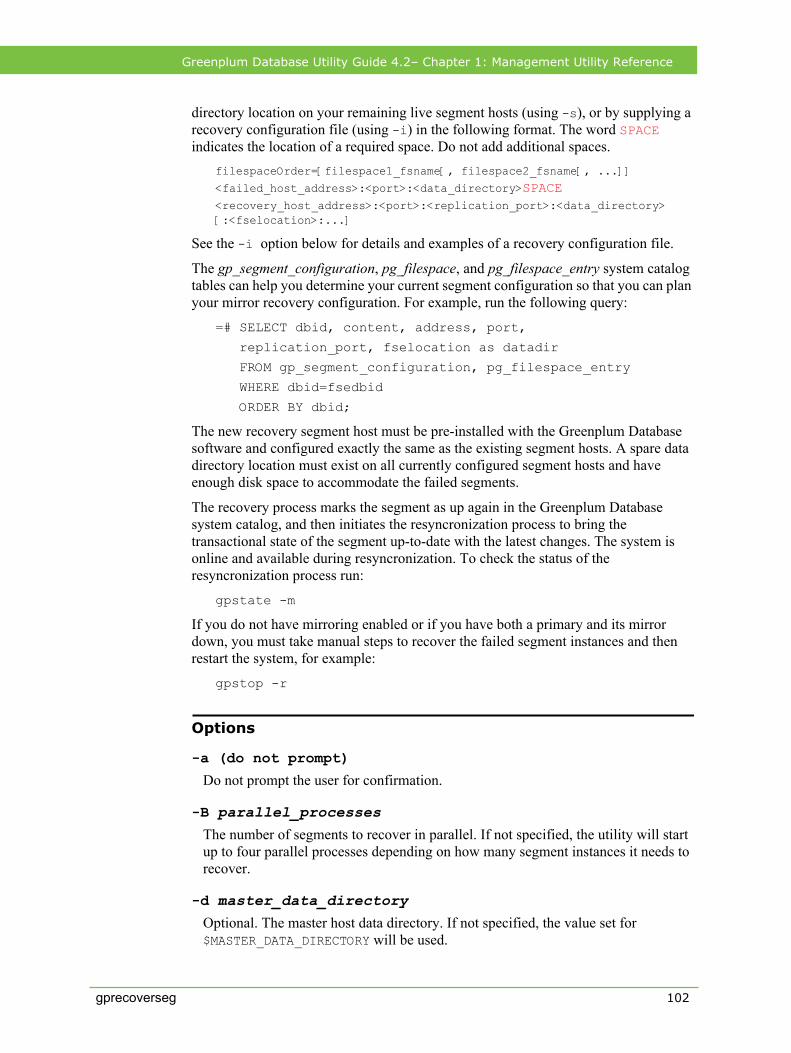
Greenplum Database Utility Guide 4.2– Chapter 1: Management Utility Reference
directory location on your remaining live segment hosts (using -s), or by supplying a recovery configuration file (using -i) in the following format. The word SPACE indicates the location of a required space. Do not add additional spaces.
filespaceOrder=[filespace1_fsname[, filespace2_fsname[, ...]]
<failed_host_address>:<port>:<data_directory>SPACE<recovery_host_address>:<port>:<replication_port>:<data_directory> [:<fselocation>:...]
See the -i option below for details and examples of a recovery configuration file.
The gp_segment_configuration, pg_filespace, and pg_filespace_entry system catalog tables can help you determine your current segment configuration so that you can plan your mirror recovery configuration. For example, run the following query:
=# SELECT dbid, content, address, port,
replication_port, fselocation as datadir
FROM gp_segment_configuration, pg_filespace_entry
WHERE dbid=fsedbid
ORDER BY dbid;
The new recovery segment host must be pre-installed with the Greenplum Database software and configured exactly the same as the existing segment hosts. A spare data directory location must exist on all currently configured segment hosts and have enough disk space to accommodate the failed segments.
The recovery process marks the segment as up again in the Greenplum Database system catalog, and then initiates the resyncronization process to bring the transactional state of the segment up-to-date with the latest changes. The system is online and available during resyncronization. To check the status of the resyncronization process run:
gpstate -m
If you do not have mirroring enabled or if you have both a primary and its mirror down, you must take manual steps to recover the failed segment instances and then restart the system, for example:
gpstop -r
Options
-a (do not prompt)
Do not prompt the user for confirmation.
-B parallel_processesThe number of segments to recover in parallel. If not specified, the utility will start up to four parallel processes depending on how many segment instances it needs to recover.
-d master_data_directoryOptional. The master host data directory. If not specified, the value set for $MASTER_DATA_DIRECTORY will be used.
gprecoverseg 102
Greenplum Database Utility Guide 4.2– Chapter 1: Management Utility Reference
-F (full recovery)
Optional. Perform a full copy of the active segment instance in order to recover the failed segment. The default is to only copy over the incremental changes that occurred while the segment was down.
-i recover_config_fileSpecifies the name of a file with the details about failed segments to recover. Each line in the file is in the following format. The word SPACE indicates the location of a required space. Do not add additional spaces.
filespaceOrder=[filespace1_fsname[, filespace2_fsname[, ...]] <failed_host_address>:<port>:<data_directory>SPACE <recovery_host_address>:<port>:<replication_port>:<data_directory>[:<fselocation>:...]
Comments
Lines beginning with # are treated as comments and ignored.Filespace Order
The first comment line that is not a comment specifies filespace ordering. This line starts with filespaceOrder= and is followed by list of filespace names delimited by a colon. For example:
filespaceOrder=raid1:raid2
The default pg_system filespace should not appear in this list. The list should be left empty on a system with no filespaces other than the default pg_system filespace. For example:
filespaceOrder=
Segments to Recover
Each line after the first specifies a segment to recover. This line can have one of two formats. In the event of in-place recovery, enter one group of colon delimited fields in the line:
failedAddress:failedPort:failedDataDirectory
For recovery to a new location, enter two groups of fields separated by a space in the line. The required space is indicated by SPACE. Do not add additional spaces.
failedAddress:failedPort:failedDataDirectorySPACEnewAddress:newPort:newReplicationPort:newDataDirectory
On a system with additional filespaces, the second group of fields is expected to be followed with a list of the corresponding filespace locations separated by additional colons. For example, on a system with two additional filespaces, enter two additional directories in the second group, as follows. The required space is indicated by SPACE. Do not add additional spaces.
failedAddress:failedPort:failedDataDirectory newAddress:newPort:newReplicationPort:newDataDirectory:location1:location2
gprecoverseg 103
Greenplum Database Utility Guide 4.2– Chapter 1: Management Utility Reference
Examples
In-place recovery of a single mirrorfilespaceOrder=
sdw1-1:50001:/data1/mirror/gpseg16
Recovery of a single mirror to a new hostfilespaceOrder=
sdw1-1:50001:/data1/mirror/gpseg16SPACE sdw4-1:50001:51001:/data1/recover1/gpseg16
Recovery of a single mirror to a new host on a system with an extra filespacefilespaceOrder=fs1
sdw1-1:50001:/data1/mirror/gpseg16SPACE sdw4-1:50001:51001:/data1/recover1/gpseg16:/data1/fs1/gpseg16
Obtaining a Sample File
You can use the -o option to output a sample recovery configuration file to use as a starting point.
-l logfile_directoryThe directory to write the log file. Defaults to ~/gpAdminLogs.
-o output_recover_config_fileSpecifies a file name and location to output a sample recovery configuration file. The output file lists the currently invalid segments and their default recovery location in the format that is required by the -i option. Use together with the -p option to output a sample file for recovering on a different host. This file can be edited to supply alternate recovery locations if needed.
-p new_recover_host[,...]Specifies a spare host outside of the currently configured Greenplum Database array on which to recover invalid segments. In the case of multiple failed segment hosts, you can specify a comma-separated list. The spare host must have the Greenplum Database software installed and configured, and have the same hardware and OS configuration as the current segment hosts (same OS version, locales, gpadmin user account, data directory locations created, ssh keys exchanged, number of network interfaces, network interface naming convention, and so on.).
-q (no screen output)
Run in quiet mode. Command output is not displayed on the screen, but is still written to the log file.
-r (rebalance segments)
After a segment recovery, segment instances may not be returned to the preferred role that they were given at system initialization time. This can leave the system in a potentially unbalanced state, as some segment hosts may have more active segments than is optimal for top system performance. This option rebalances primary and
gprecoverseg 104
Greenplum Database Utility Guide 4.2– Chapter 1: Management Utility Reference
mirror segments by returning them to their preferred roles. All segments must be valid and synchronized before running gprecoverseg -r. If there are any in progress queries, they will be cancelled and rolled back.
-s filespace_config_fileSpecifies the name of a configuration file that contains file system locations on the currently configured segment hosts where you can recover failed segment instances. The filespace configuration file is in the format of:
pg_system=default_fselocation filespace1_name=filespace1_fselocationfilespace2_name=filespace2_fselocation...
If your system does not have additional filespaces configured, this file will only have one location (for the default filespace, pg_system). These file system locations must exist on all segment hosts in the array and have sufficient disk space to accommodate recovered segments.
Note: The -s and -S options are only used when you recover to existing hosts in the cluster. You cannot use these options when you recover to a new host. To recover to a new host, use the -i and -o options.
-S output_filespace_config_fileSpecifies a file name and location to output a sample filespace configuration file in the format that is required by the -s option. This file should be edited to supply the correct alternate filespace locations.
-v (verbose)
Sets logging output to verbose.
--version (version)
Displays the version of this utility.
-? (help)
Displays the online help.
Examples
Recover any failed segment instances in place:
$ gprecoverseg
Rebalance your Greenplum Database system after a recovery by resetting all segments to their preferred role. First check that all segments are up and synchronized.
$ gpstate -m
$ gprecoverseg -r
Recover any failed segment instances to a newly configured spare segment host:
$ gprecoverseg -i recover_config_file
gprecoverseg 105

Greenplum Database Utility Guide 4.2– Chapter 1: Management Utility Reference
Output the default recovery configuration file:
$ gprecoverseg -o /home/gpadmin/recover_config_file
See Also
gpstart, gpstop
gprecoverseg 106
Greenplum Database Utility Guide 4.2– Chapter 1: Management Utility Reference
gp_restoreRestores Greenplum databases that were backed up using gp_dump.
Synopsisgp_restore --gp-k=timestamp_key -d database_name [-i] [-v] [-a | -s] [-c] [-h hostname] [-p port] [-U username] [-W] [--gp-c] [--gp-i] [--gp-d=directoryname] [--gp-r=reportfile] [--gp-l=dbid [, ...]]
gp_restore -? | -h | --help
gp_restore --version
Description
The gp_restore utility recreates the data definitions (schema) and user data in a Greenplum database using the script files created by an gp_dump operation. The use of this utility assumes:
1. You have backup files created by an gp_dump operation.
2. Your Greenplum Database system up and running.
3. Your Greenplum Database system has the exact same number of segment instances (primary and mirror) as the system that was backed up using gp_dump.
4. (optional) The gp_restore utility uses the information in the Greenplum system catalog tables to determine the hosts, ports, and data directories for the segment instances it is restoring. If you want to change any of this information (for example, move the system to a different array of hosts) you must use the gprebuildsystem and gprebuildseg scripts to reconfigure your array before restoring.
5. The databases you are restoring have been created in the system.
6. If you used the options -s (schema only) , -a (data only), --gp-c (compressed), --gp-d (alternate dump file location) when performing the gp_dump operation, you must specify these options when doing the gp_restore as well.
The functionality of gp_restore is analogous to PostgreSQL’s pg_restore utility, which restores a database from files created by the database backup process. It issues the commands necessary to reconstruct the database to the state it was in at the time it was saved.
The functionality of gp_restore is modified to accommodate the distributed nature of a Greenplum database, and to use files created by an gp_dump operation. Keep in mind that a database in Greenplum is actually comprised of several PostgreSQL database instances (the master and all segments), each of which must be restored individually. The gp_restore utility takes care of populating each segment in the system with its own distinct portion of data.
gp_restore 107
Greenplum Database Utility Guide 4.2– Chapter 1: Management Utility Reference
Note: The gp_dump utility creates a dump file in the master data directory named gp_dump_1_<dbid>_<timestamp>_post_data that contains commands to rebuild objects associated with the tables. When the database is restored with gp_restore, first, the schema and data are restored, and then, the dump file is used to rebuilt the other objects associated with the tables.
The gp_restore utility performs the following actions:
On the master host
• Creates the user database schema(s) using the gp_dump_1_<dbid>_<timestamp> SQL file created by gp_dump.
• Creates a log file in the master data directory named gp_restore_status_1_<dbid>_<timestamp>.
• gp_restore launches a gp_restore_agent for each segment instance to be restored. gp_restore_agent processes run on the segment hosts and report status back to the gp_restore process running on the master host.
On the segment hosts
• Restores the user data for each segment instance using the gp_dump_0_<dbid>_<timestamp> files created by gp_dump. Each segment instance on a host (primary and mirror instances) are restored.
• Creates a log file for each segment instance named gp_restore_status_0_<dbid>_<timestamp>.
The 14 digit timestamp is the number that uniquely identifies the backup job to be restored, and is part of the filename for each dump file created by a gp_dump operation. This timestamp must be passed to the gp_restore utility when restoring a Greenplum Database.
Note: The restore status files are stored under the db_dumps/<date> directory.
After the data in the tables is restored, check the report status files to verify that there no errors.
Options
--gp-k=timestamp_keyRequired. The 14 digit timestamp key that uniquely identifies the backup set of data to restore. This timestamp can be found in the gp_dump log file output, as well as at the end of the dump files created by a gp_dump operation. It is of the form YYYYMMDDHHMMSS.
-d database_name | --dbname=dbnameRequired. The name of the database to connect to in order to restore the user data. The database(s) you are restoring must exist, gp_restore does not create the database.
-i | --ignore-version
Ignores a version mismatch between gp_restore and the database server.
gp_restore 108
Greenplum Database Utility Guide 4.2– Chapter 1: Management Utility Reference
-v | --verbose
Specifies verbose mode.
-a | --data-only
Restore only the data, not the schema (data definitions).
-c | --clean
Clean (drop) database objects before recreating them.
-s | --schema-only
Restores only the schema (data definitions), no user data is restored.
-h hostname | --host=hostnameThe host name of the Greenplum master host. If not provided, the value of PGHOST or the local host is used.
-p port | --port=portThe Greenplum master port. If not provided, the value of PGPORT or the port number provided at compile time is used.
-U username | --username=usernameThe database superuser account name, for example gpadmin. If not provided, the value of PGUSER or the current OS user name is used.
-W (force password prompt)
Forces a password prompt. This will happen automatically if the server requires password authentication.
--gp-c (use gunzip)
Use gunzip for inline decompression.
--gp-i (ignore errors)
Specifies that processing should ignore any errors that occur. Use this option to continue restore processing on errors.
--gp-d=directorynameSpecifies the relative or absolute path to backup files on the hosts. If this is a relative path, it is considered to be relative to the data directory. If not specified, defaults to the data directory of each instance being restored. Use this option if you created your backup files in an alternate location when running gp_dump.
--gp-r=reportfileSpecifies the full path name where the restore job report file will be placed on the master host. If not specified, defaults to the master data directory.
gp_restore 109
Greenplum Database Utility Guide 4.2– Chapter 1: Management Utility Reference
--gp-l=dbid [, ...] (restore certain segments)Specifies whether to check for backup files on only the specified active segment instances (followed by a comma-separated list of the segments dbid). The default is to check for backup files on all active segments, restore the active segments, and then syncronize the mirrors.
-? | -h | --help (help)
Displays the online help.
--version (show utility version)
Displays the version of this utility.
Examples
Restore an Greenplum database using backup files created by gp_dump:
gp_restore --gp-k=2005103112453 -d gpdb
Restore a single segment instance only (by noting the dbid of the segment instance):
gp_restore --gp-k=2005103112453 -d gpdb --gp-s=5
See Also
gp_dump, pg_restore, gpdbrestore
gp_restore 110
Greenplum Database Utility Guide 4.2– Chapter 1: Management Utility Reference
gpscpCopies files between multiple hosts at once.
Synopsisgpscp { -f hostfile_gpssh | - h hostname [-h hostname ...] } [-J character] [-v] [[user@]hostname:]file_to_copy [...] [[user@]hostname:]copy_to_path
gpscp -?
gpscp --version
Description
The gpscp utility allows you to copy one or more files from the specified hosts to other specified hosts in one command using SCP (secure copy). For example, you can copy a file from the Greenplum Database master host to all of the segment hosts at the same time.
To specify the hosts involved in the SCP session, use the -f option to specify a file containing a list of host names, or use the -h option to name single host names on the command-line. At least one host name (-h) or a host file (-f) is required. The -J option allows you to specify a single character to substitute for the hostname in the copy from and to destination strings. If -J is not specified, the default substitution character is an equal sign (=). For example, the following command will copy .bashrc from the local host to /home/gpadmin on all hosts named in hostfile_gpssh:
gpscp -f hostfile_gpssh .bashrc =:/home/gpadmin
If a user name is not specified in the host list or with user@ in the file path, gpscp will copy files as the currently logged in user. To determine the currently logged in user, do a whoami command. By default, gpscp goes to $HOME of the session user on the remote hosts after login. To ensure the file is copied to the correct location on the remote hosts, it is recommended that you use absolute paths.
Before using gpscp, you must have a trusted host setup between the hosts involved in the SCP session. You can use the utility gpssh-exkeys to update the known host files and exchange public keys between hosts if you have not done so already.
Options
-f hostfile_gpsshSpecifies the name of a file that contains a list of hosts that will participate in this SCP session. The syntax of the host file is one host per line as follows:
<hostname>
-h hostnameSpecifies a single host name that will participate in this SCP session. You can use the -h option multiple times to specify multiple host names.
gpscp 111
Greenplum Database Utility Guide 4.2– Chapter 1: Management Utility Reference
-J characterThe -J option allows you to specify a single character to substitute for the hostname in the copy from and to destination strings. If -J is not specified, the default substitution character is an equal sign (=).
-v (verbose mode)
Optional. Reports additional messages in addition to the SCP command output.
file_to_copyRequired. The file name (or absolute path) of a file that you want to copy to other hosts (or file locations). This can be either a file on the local host or on another named host.
copy_to_pathRequired. The path where you want the file(s) to be copied on the named hosts. If an absolute path is not used, the file will be copied relative to $HOME of the session user. You can also use the equal sign ‘=’ (or another character that you specify with the -J option) in place of a hostname. This will then substitute in each host name as specified in the supplied host file (-f) or with the -h option.
-? (help)
Displays the online help.
--version
Displays the version of this utility.
Examples
Copy the file named installer.tar to / on all the hosts in the file hostfile_gpssh.
gpscp -f hostfile_gpssh installer.tar =:/
Copy the file named myfuncs.so to the specified location on the hosts named sdw1 and sdw2:
gpscp -h sdw1 -h sdw2 myfuncs.so \
=:/usr/local/greenplum-db/lib
gpscp 112
Greenplum Database Utility Guide 4.2– Chapter 1: Management Utility Reference
gpseginstallInstalls Greenplum Database on segment hosts.
Synopsisgpseginstall -f hostfile [-u gpdb_admin_user] [-p password] [-c u|p|c|s|E|e|l|v]
gpseginstall --help
Description
The gpseginstall utility provides a simple way to quickly install Greenplum Database on segment hosts that you specify in a host list file. The utility does not install or update Greenplum Database on the master host. You can run gpseginstall as root or as a non-root user. gpseginstall does not perform database initialization. See gpinitsystem for more information about initializing Greenplum Database.
When run as root, gpseginstall default actions are to add a system user (default is gpadmin), create a password (default is changeme), and deploy and install Greenplum Database on segment hosts. To do this, gpseginstall locates the current Greenplum Database binaries on the master from the installation path in the current user’s environment variables ($GPHOME). It compresses Greenplum Database software into a tar.gz file and performs an MD5 checksumto verify file integrity.
Then, it copies Greenplum Database to the segment hosts, installs (decompresses) Greenplum Database, and changes the ownership of the Greenplum Database installation to the system user you specify with the -u option. Lastly, it exchanges keys between all Greenplum Database hosts as both root and as the system user you specify with the -u option. gpseginstall also perform a user limit check and verifies the version number of Greenplum Database on all the segments.
If you run gpseginstall as a non-root user, gpseginstall only compresses, copies, and installs Greenplum Database on segment hosts. It can also exchanges keys between Greenplum Database hosts for the current system user, and verifies the version number of Greenplum Database on all the segments.
Options
-c | --commands option_listOptional. This allows you to customize gpseginstall actions. Note that these command options are executed by default if you do not specify the -c option in the gpseginstall syntax.
• u: Adds a system user. (root only)• p: Changes the password for a system user. (root only)• s: Compresses, copies, decompresses (installs) Greenplum Database on all
segments.
gpseginstall 113
Greenplum Database Utility Guide 4.2– Chapter 1: Management Utility Reference
• c: Changes the ownership of the Greenplum Database installation directory on the segment hosts. (root only)
• E: Exchange keys between Greenplum Database master and segment hosts for the root user. (root only)
• e: Exchange keys between Greenplum Database master and segment hosts for the non-root system user.
• l: (Linux only) Checks and modifies the user limits configuration file (/etc/security/limits.conf file) when adding a new user to segment hosts. (root only)
• v: Verifies the version of Greenplum Database running on all segments. gpseginstall checks the version number of the Greenplum Database installation referenced by the $GPHOME environment variable and symbolic link to the installation directory. An error occurs if there is a version number mismatch or the Greenplum Database installation directory cannot be found.
-f | --file hostfileRequired. This specifies the file that lists the segment hosts onto which you want to install Greenplum Database.
The host list file must have one host name per line and includes a host name for each segment host in your Greenplum system. Make sure there are no blank lines or extra spaces. If a host has multiple configured host names, use only one host name per host. For example:
sdw1-1
sdw2-1
sdw3-1
sdw4-1
If available, you can use the same gpssh-exkeys host list file you used to exchange keys between Greenplum Database hosts.
-p | --password passwordOptional. Sets the password for the user you specify with the -u option. The default password is changeme. This option is only available when you run gpsetinstall as root.
Recommended security best practices:
• Always use passwords.• Do not use default passwords.• Change default passwords immediately after installation.
-u | --user userOptional. This specifies the system user. This user is also the Greenplum Database administrative user. This user owns Greenplum Database installation and administers the database. This is also the user under which Greenplum Database is started/initialized. This option is only available when you run gpseginstall as root. The default is gpadmin.
gpseginstall 114

Greenplum Database Utility Guide 4.2– Chapter 1: Management Utility Reference
--help (help)
Displays the online help.
Examples
As root, install a Greenplum Database on all segments, leave the system user as the default (gpadmin) and set the gpadmin password to secret123:
# gpseginstall -f my_host_list_file -p secret123
As a non-root user, compress and copy Greenplum Database binaries to all segments (as gpadmin):
$ gpseginstall -f host_file
As root, add a user (gpadmin2), set the password for the user (secret1234), exchange keys between hosts as the new user, check user limits, and verify version numbers, but do not change ownership of Greenplum binaries, compress/copy/ install Greenplum Database on segments, or exchange keys as root.
$ gpseginstall -f host_file -u gpadmin2 -p secret1234 -c upelv
gpseginstall 115
Greenplum Database Utility Guide 4.2– Chapter 1: Management Utility Reference
gpsnmpdReports on the health and state of a Greenplum Database system through SNMP.
Synopsisgpsnmpd -s -C connect_string [-b] [-g] [-m MIB:...] [-M directory:...]
gpsnmpd -c FILE -C connect_string [-x address:port] [-b] [-g] [-m MIB:...] [-M directory:...]
gpsnmpd -?
gpsnmpd --version
Description
Greenplum’s gpsnmpd agent is an SNMP (Simple Network Management Protocol) daemon that reports on the health and state of a Greenplum Database system by using a set of MIBs (Management Information Bases). MIBs are a collection of objects that describe an SNMP-manageable entity; in this case, a Greenplum Database system. In a typical environment, gpsnmpd is polled by a network monitor and returns information on a Greenplum Database system. It currently supports the generic RDBMS MIB and typically operates on the master host.
gpsnmpd works in conjunction with the SNMP support that (normally) already exists on the Greenplum Database system. gpsnmpd does not replace the system snmpd agent that monitors items such as hardware, processor, memory, and network functions. However, you can run the Greenplum SNMP agent as a stand-alone agent if required.
As a standalone SNMP agent, gpsnmpd listens (on a network socket) for SNMP queries, and requires the same extensive configuration as the system SNMP agent.
Greenplum recommends that you run gpsnmpd as a sub-agent to the system agent. When it starts, the gpsnmpd sub-agent registers itself with the system-level SNMP agent, and communicates to the system agent the parts of the MIB of which it is aware. The system agent communicates with the SNMP client/network monitoring application and forwards requests for particular sections of the MIB to the gpsnmpd sub-agent. Note that the gpsnmpd sub-agent communicates with the system agent through UNIX sockets; it does not listen on network sockets when used as a sub-agent.
Options
-s (sub-agent)
Run gpsnmpd as an AgentX sub-agent to the system snmpd process. You do not need to use the -x option when using this option.
-b (background)
Run gpsnmpd as a background process.
gpsnmpd 116
Greenplum Database Utility Guide 4.2– Chapter 1: Management Utility Reference
-c (configuration file)
Specify the SNMP configuration file to use when starting gpsnmpd as a stand-alone agent. Note that you can specify any configuration file to run gpsnmpd as a stand-alone agent; you do not have to use the /etc/snmp/snmpd.conf file (/etc/sma/snmp/ on Solaris platforms). The configuration file you use must include a value for rocommunity.
-g (use syslog)
Logs gpsnmpd error messages to syslog.
-C (libpq connection string)
The libpq connection string to connect to Greenplum Database. Note that you can run gpsnmpd from a remote system. Depending on your network configuration, the gpsnmpd agent can establish a connection and monitor a remote Greenplum Database database instance. The configuration string can contain the database name, the port number, the username, the password, and other information if required.
Greenplum recommends using the postgres database in the connection string (dbname=postgres).
You do not need to specify the –C option if you create a database role (user id) called root, and add the following line in the pg_hba.conf file:
local postgres root ident
This allows the UNIX user root to connect to the postgres database over the local connection. The root user does not require special permissions. The user and password parameters are only required when starting gpsnmpd as a user other than root.
Note: The connection string can be a conninfo data type. Use conninfo data for this parameter to specify a LDAP connection lookup.
-x (address:port of a network interface)
Specify an IP address for a network interface card on the host system, and specify a port other than the default SNMP port of 161. This enables you to run gpsnmpd without root permissions (you must have root permissions to use ports 1024 and lower).
You do not need to specify this option if you are running gpsnmpd as an AgentX sub-agent (-s).
-m (MIB:...)
Loads one or more MIBs when starting gpsnmpd. Use a colon (:) to separate the MIBs. Enter ALL to load all MIBs. If you do not enter -m in the gpsnmpd command, a default set of MIBs are loaded by default.
gpsnmpd 117
Greenplum Database Utility Guide 4.2– Chapter 1: Management Utility Reference
-M (directory:...)
Loads all MIBs from one or more directories when starting gpsnmpd. Use a colon (:) to separate the each directory. Enter the full path to each directory you specify for this option. If you do not enter -M in the gpsnmpd command, a default set of MIBs are loaded by default.
-? (help)
Displays the online help.
-V
Displays the version of this utility.
Examples
Start gpsnmpd as an agentx subagent:
# gpsnmpd -s -b -m ALL -C "dbname=postgres user=gpadmin \ password=secret"
Start gpsnmpd as a stand-alone agent:
# gpsnmpd -b -c /etc/snmp/snmpd.conf -x \ 192.168.100.12:10161 -M /usr/mibs/mymibs -C \ "dbname=postgres user=gpadmin password=secret"
gpsnmpd 118
Greenplum Database Utility Guide 4.2– Chapter 1: Management Utility Reference
gpsshProvides ssh access to multiple hosts at once.
Synopsisgpssh { -f hostfile_gpssh | - h hostname [-h hostname ...] } [-v] [-e] [bash_command]
gpssh -?
gpssh --version
Description
The gpssh utility allows you to run bash shell commands on multiple hosts at once using SSH (secure shell). You can execute a single command by specifying it on the command-line, or omit the command to enter into an interactive command-line session.
To specify the hosts involved in the SSH session, use the -f option to specify a file containing a list of host names, or use the -h option to name single host names on the command-line. At least one host name (-h) or a host file (-f) is required. Note that the current host is not included in the session by default — to include the local host, you must explicitly declare it in the list of hosts involved in the session.
Before using gpssh, you must have a trusted host setup between the hosts involved in the SSH session. You can use the utility gpssh-exkeys to update the known host files and exchange public keys between hosts if you have not done so already.
If you do not specify a command on the command-line, gpssh will go into interactive mode. At the gpssh command prompt (=>), you can enter a command as you would in a regular bash terminal command-line, and the command will be executed on all hosts involved in the session. To end an interactive session, press CTRL+D on the keyboard or type exit or quit.
If a user name is not specified in the host file, gpssh will execute commands as the currently logged in user. To determine the currently logged in user, do a whoami command. By default, gpssh goes to $HOME of the session user on the remote hosts after login. To ensure commands are executed correctly on all remote hosts, you should always enter absolute paths.
Options
bash_commandA bash shell command to execute on all hosts involved in this session (optionally enclosed in quotes). If not specified, gpssh will start an interactive session.
-e (echo)
Optional. Echoes the commands passed to each host and their resulting output while running in non-interactive mode.
gpssh 119
Greenplum Database Utility Guide 4.2– Chapter 1: Management Utility Reference
-f hostfile_gpsshSpecifies the name of a file that contains a list of hosts that will participate in this SSH session. The host name is required, and you can optionally specify an alternate user name and/or SSH port number per host. The syntax of the host file is one host per line as follows:
[username@]hostname[:ssh_port]
-h hostnameSpecifies a single host name that will participate in this SSH session. You can use the -h option multiple times to specify multiple host names.
-v (verbose mode)
Optional. Reports additional messages in addition to the command output when running in non-interactive mode.
--version
Displays the version of this utility.
-? (help)
Displays the online help.
Examples
Start an interactive group SSH session with all hosts listed in the file hostfile_gpssh:
$ gpssh -f hostfile_gpssh
At the gpssh interactive command prompt, run a shell command on all the hosts involved in this session.
=> ls -a /data/primary/*
Exit an interactive session:
=> exit
=> quit
Start a non-interactive group SSH session with the hosts named dw1 and dw2 and pass a file containing several commands named command_file to gpssh:
$ gpssh -h sdw1 -h sdw2 -v -e < command_file
Execute single commands in non-interactive mode on hosts sdw2 and localhost:$ gpssh -h sdw2 -h localhost -v -e 'ls -a /data/primary/*'
$ gpssh -h sdw2 -h localhost -v -e 'echo $GPHOME'
$ gpssh -h sdw2 -h localhost -v -e 'ls -1 | wc -l'
gpssh 120
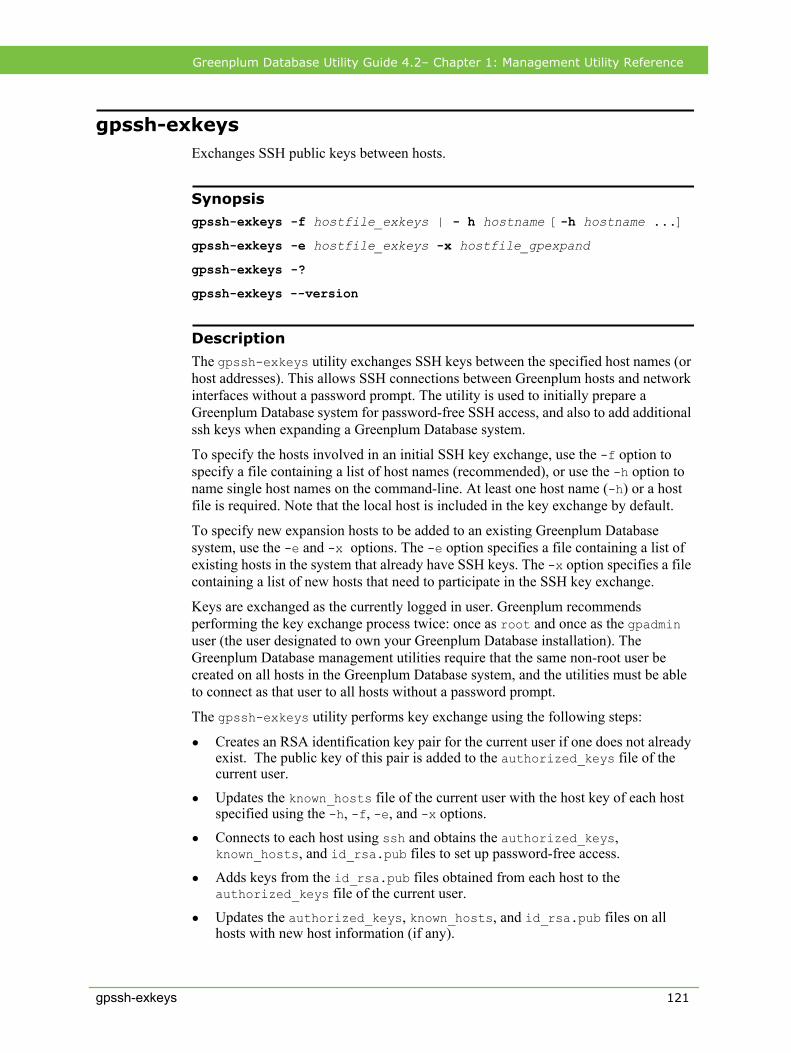
Greenplum Database Utility Guide 4.2– Chapter 1: Management Utility Reference
gpssh-exkeysExchanges SSH public keys between hosts.
Synopsisgpssh-exkeys -f hostfile_exkeys | - h hostname [-h hostname ...]
gpssh-exkeys -e hostfile_exkeys -x hostfile_gpexpand
gpssh-exkeys -?
gpssh-exkeys --version
Description
The gpssh-exkeys utility exchanges SSH keys between the specified host names (or host addresses). This allows SSH connections between Greenplum hosts and network interfaces without a password prompt. The utility is used to initially prepare a Greenplum Database system for password-free SSH access, and also to add additional ssh keys when expanding a Greenplum Database system.
To specify the hosts involved in an initial SSH key exchange, use the -f option to specify a file containing a list of host names (recommended), or use the -h option to name single host names on the command-line. At least one host name (-h) or a host file is required. Note that the local host is included in the key exchange by default.
To specify new expansion hosts to be added to an existing Greenplum Database system, use the -e and -x options. The -e option specifies a file containing a list of existing hosts in the system that already have SSH keys. The -x option specifies a file containing a list of new hosts that need to participate in the SSH key exchange.
Keys are exchanged as the currently logged in user. Greenplum recommends performing the key exchange process twice: once as root and once as the gpadmin user (the user designated to own your Greenplum Database installation). The Greenplum Database management utilities require that the same non-root user be created on all hosts in the Greenplum Database system, and the utilities must be able to connect as that user to all hosts without a password prompt.
The gpssh-exkeys utility performs key exchange using the following steps:
• Creates an RSA identification key pair for the current user if one does not already exist. The public key of this pair is added to the authorized_keys file of the current user.
• Updates the known_hosts file of the current user with the host key of each host specified using the -h, -f, -e, and -x options.
• Connects to each host using ssh and obtains the authorized_keys, known_hosts, and id_rsa.pub files to set up password-free access.
• Adds keys from the id_rsa.pub files obtained from each host to the authorized_keys file of the current user.
• Updates the authorized_keys, known_hosts, and id_rsa.pub files on all hosts with new host information (if any).
gpssh-exkeys 121
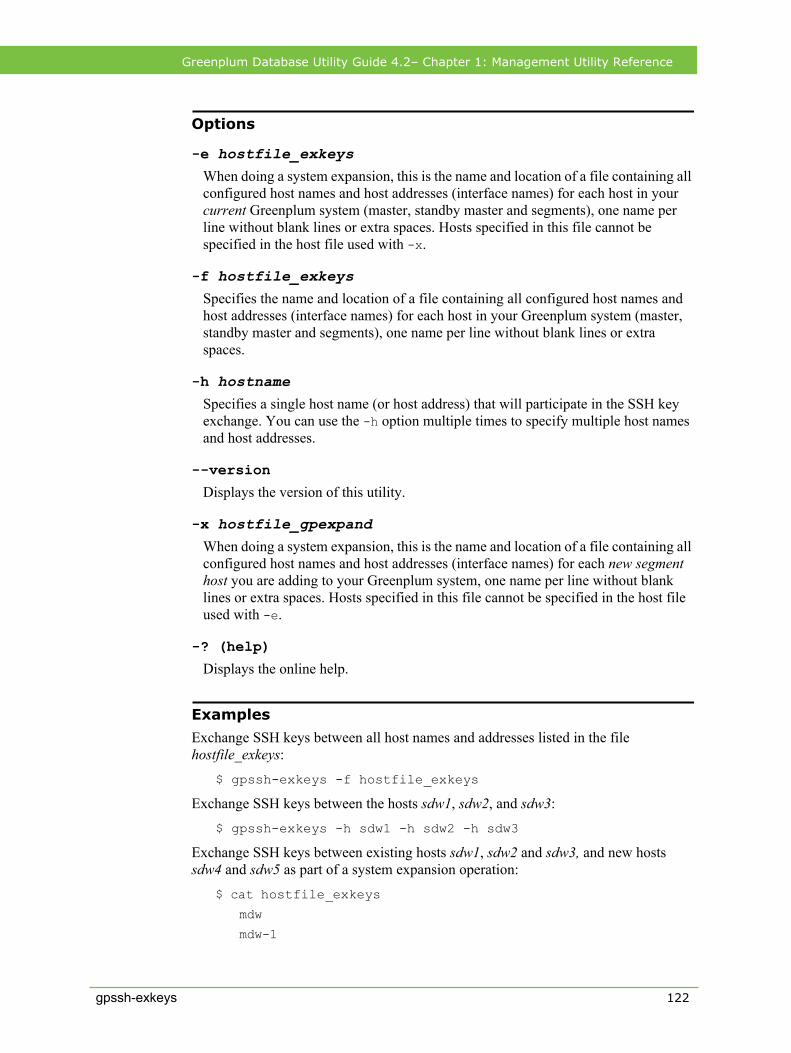
Greenplum Database Utility Guide 4.2– Chapter 1: Management Utility Reference
Options
-e hostfile_exkeysWhen doing a system expansion, this is the name and location of a file containing all configured host names and host addresses (interface names) for each host in your current Greenplum system (master, standby master and segments), one name per line without blank lines or extra spaces. Hosts specified in this file cannot be specified in the host file used with -x.
-f hostfile_exkeysSpecifies the name and location of a file containing all configured host names and host addresses (interface names) for each host in your Greenplum system (master, standby master and segments), one name per line without blank lines or extra spaces.
-h hostnameSpecifies a single host name (or host address) that will participate in the SSH key exchange. You can use the -h option multiple times to specify multiple host names and host addresses.
--version
Displays the version of this utility.
-x hostfile_gpexpandWhen doing a system expansion, this is the name and location of a file containing all configured host names and host addresses (interface names) for each new segment host you are adding to your Greenplum system, one name per line without blank lines or extra spaces. Hosts specified in this file cannot be specified in the host file used with -e.
-? (help)
Displays the online help.
Examples
Exchange SSH keys between all host names and addresses listed in the file hostfile_exkeys:
$ gpssh-exkeys -f hostfile_exkeys
Exchange SSH keys between the hosts sdw1, sdw2, and sdw3:
$ gpssh-exkeys -h sdw1 -h sdw2 -h sdw3
Exchange SSH keys between existing hosts sdw1, sdw2 and sdw3, and new hosts sdw4 and sdw5 as part of a system expansion operation:
$ cat hostfile_exkeys
mdw
mdw-1
gpssh-exkeys 122
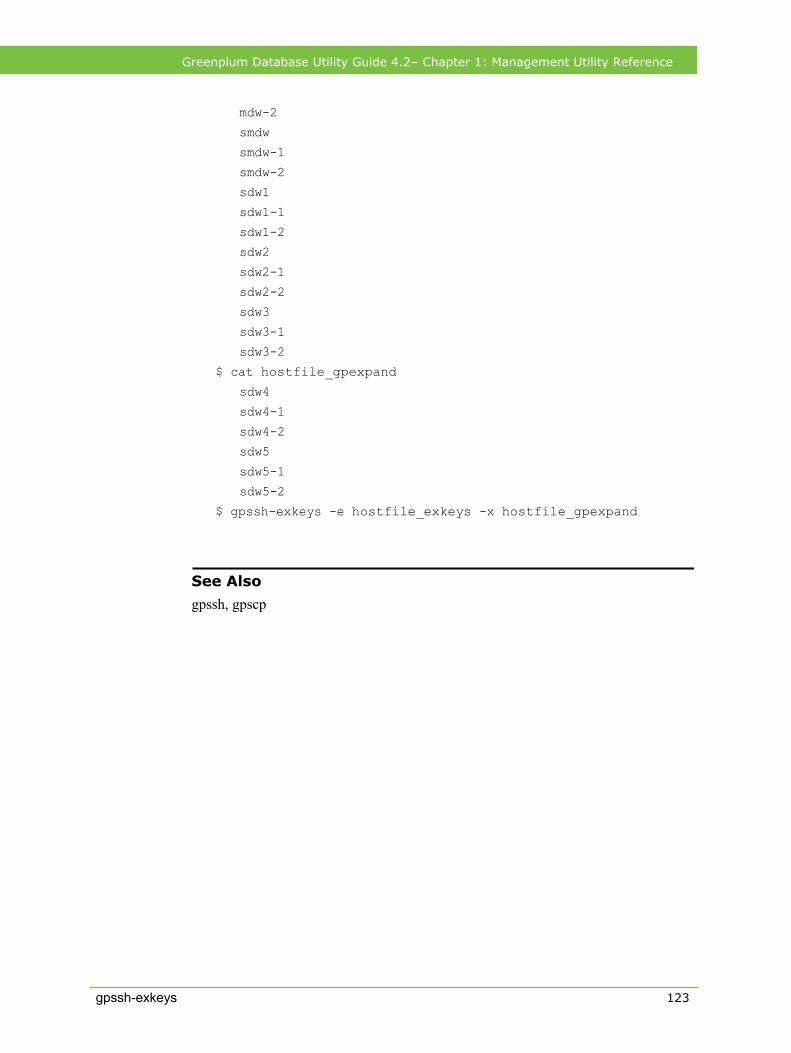
Greenplum Database Utility Guide 4.2– Chapter 1: Management Utility Reference
mdw-2
smdw
smdw-1
smdw-2
sdw1
sdw1-1
sdw1-2
sdw2
sdw2-1
sdw2-2
sdw3
sdw3-1
sdw3-2
$ cat hostfile_gpexpand
sdw4
sdw4-1
sdw4-2
sdw5
sdw5-1
sdw5-2
$ gpssh-exkeys -e hostfile_exkeys -x hostfile_gpexpand
See Also
gpssh, gpscp
gpssh-exkeys 123
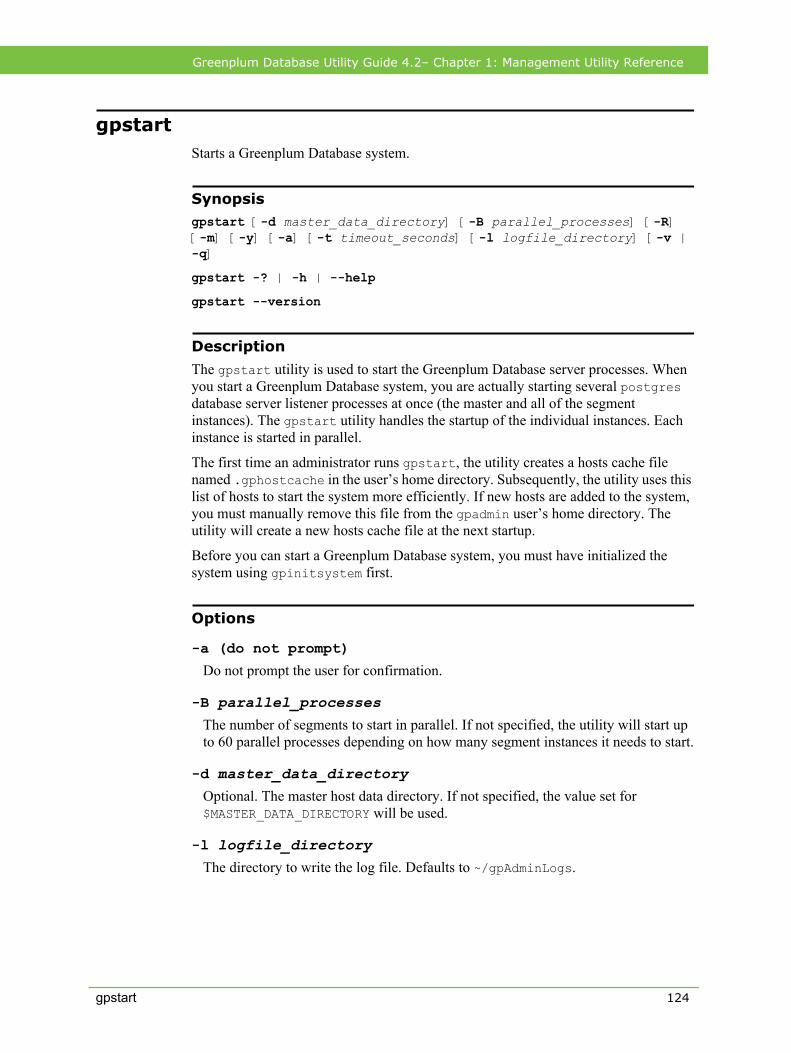
Greenplum Database Utility Guide 4.2– Chapter 1: Management Utility Reference
gpstartStarts a Greenplum Database system.
Synopsisgpstart [-d master_data_directory] [-B parallel_processes] [-R] [-m] [-y] [-a] [-t timeout_seconds] [-l logfile_directory] [-v | -q]
gpstart -? | -h | --help
gpstart --version
Description
The gpstart utility is used to start the Greenplum Database server processes. When you start a Greenplum Database system, you are actually starting several postgres database server listener processes at once (the master and all of the segment instances). The gpstart utility handles the startup of the individual instances. Each instance is started in parallel.
The first time an administrator runs gpstart, the utility creates a hosts cache file named .gphostcache in the user’s home directory. Subsequently, the utility uses this list of hosts to start the system more efficiently. If new hosts are added to the system, you must manually remove this file from the gpadmin user’s home directory. The utility will create a new hosts cache file at the next startup.
Before you can start a Greenplum Database system, you must have initialized the system using gpinitsystem first.
Options
-a (do not prompt)
Do not prompt the user for confirmation.
-B parallel_processesThe number of segments to start in parallel. If not specified, the utility will start up to 60 parallel processes depending on how many segment instances it needs to start.
-d master_data_directoryOptional. The master host data directory. If not specified, the value set for $MASTER_DATA_DIRECTORY will be used.
-l logfile_directoryThe directory to write the log file. Defaults to ~/gpAdminLogs.
gpstart 124
Greenplum Database Utility Guide 4.2– Chapter 1: Management Utility Reference
-m (master only)
Optional. Starts the master instance only, which may be useful for maintenance tasks. This mode only allows connections to the master in utility mode. For example:
PGOPTIONS='-c gp_session_role=utility' psql
-q (no screen output)
Run in quiet mode. Command output is not displayed on the screen, but is still written to the log file.
-R (restricted mode)
Starts Greenplum Database in restricted mode (only database superusers are allowed to connect).
-t timeout_secondsSpecifies a timeout in seconds to wait for a segment instance to start up. If a segment instance was shutdown abnormally (due to power failure or killing its postgres database listener process, for example), it may take longer to start up due to the database recovery and validation process. If not specified, the default timeout is 60 seconds.
-v (verbose output)
Displays detailed status, progress and error messages output by the utility.
-y (do not start standby master)
Optional. Do not start the standby master host. The default is to start the standby master host and synchronization process.
-? | -h | --help (help)
Displays the online help.
--version (show utility version)
Displays the version of this utility.
gpstart 125
Greenplum Database Utility Guide 4.2– Chapter 1: Management Utility Reference
Examples
Start a Greenplum Database system:
gpstart
Start a Greenplum Database system in restricted mode (only allow superuser connections):
gpstart -R
Start the Greenplum master instance only and connect in utility mode:
gpstart -m
PGOPTIONS='-c gp_session_role=utility' psql
Display the online help for the gpstart utility:
gpstart -?
See Also
gpstop
gpstart 126
Greenplum Database Utility Guide 4.2– Chapter 1: Management Utility Reference
gpstateShows the status of a running Greenplum Database system.
Synopsisgpstate [-d master_data_directory] [-B parallel_processes] [-s | -b | -Q | -e] [-m | -c] [-p] [-i] [-f] [-v | -q] [-l log_directory]
gpstate -? | -h | --help
Description
The gpstate utility displays information about a running Greenplum Database instance. There is additional information you may want to know about a Greenplum Database system, since it is comprised of multiple PostgreSQL database instances (segments) spanning multiple machines. The gpstate utility provides additional status information for a Greenplum Database system, such as:
• Which segments are down.• Master and segment configuration information (hosts, data directories, etc.).• The ports used by the system.• A mapping of primary segments to their corresponding mirror segments.
Options
-b (brief status)
Optional. Display a brief summary of the state of the Greenplum Database system. This is the default option.
-B parallel_processesThe number of segments to check in parallel. If not specified, the utility will start up to 60 parallel processes depending on how many segment instances it needs to check.
-c (show primary to mirror mappings)
Optional. Display mapping of primary segments to their corresponding mirror segments.
-d master_data_directoryOptional. The master data directory. If not specified, the value set for $MASTER_DATA_DIRECTORY will be used.
-e (show segments with mirror status issues)
Show details on primary/mirror segment pairs that have potential issues such as 1) the active segment is running in change tracking mode, meaning a segment is down 2) the active segment is in resynchronization mode, meaning it is catching up
gpstate 127
Greenplum Database Utility Guide 4.2– Chapter 1: Management Utility Reference
changes to the mirror 3) a segment is not in its preferred role, for example a segment that was a primary at system initialization time is now acting as a mirror, meaning you may have one or more segment hosts with unbalanced processing load.
-f (show standby master details)
Display details of the standby master host if configured.
-i (show Greenplum Database version)
Display the Greenplum Database software version information for each instance.
-l logfile_directoryThe directory to write the log file. Defaults to ~/gpAdminLogs.
-m (list mirrors)
Optional. List the mirror segment instances in the system, their current role, and synchronization status.
-p (show ports)
List the port numbers used throughout the Greenplum Database system.
-q (no screen output)
Optional. Run in quiet mode. Except for warning messages, command output is not displayed on the screen. However, this information is still written to the log file.
-Q (quick status)
Optional. Checks segment status in the system catalog on the master host. Does not poll the segments for status.
-s (detailed status)
Optional. Displays detailed status information for the Greenplum Database system.
-v (verbose output)
Optional. Displays error messages and outputs detailed status and progress information.
-? | -h | --help (help)
Displays the online help.
Output Field Definitions
The following output fields are reported by gpstate -s for the master:
Table 1.1 gpstate output data for the master
Output Data Description
Master host host name of the master
Master postgres process ID PID of the master database listener process
gpstate 128
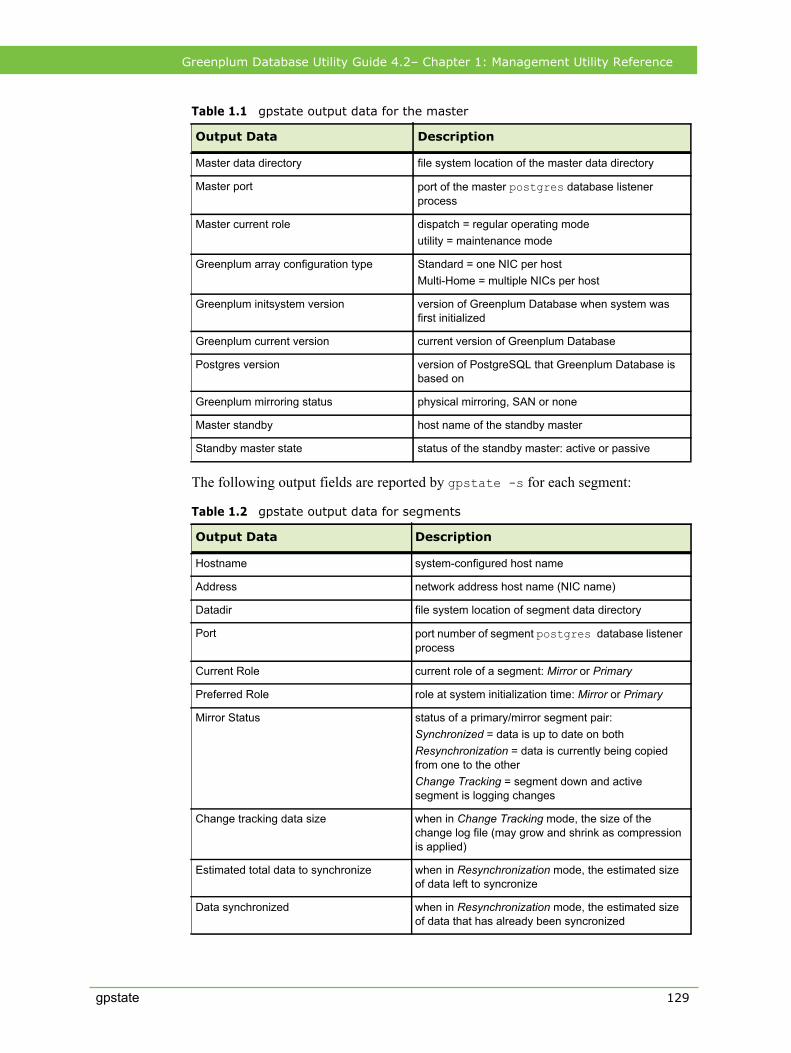
Greenplum Database Utility Guide 4.2– Chapter 1: Management Utility Reference
The following output fields are reported by gpstate -s for each segment:
Master data directory file system location of the master data directory
Master port port of the master postgres database listener process
Master current role dispatch = regular operating modeutility = maintenance mode
Greenplum array configuration type Standard = one NIC per host Multi-Home = multiple NICs per host
Greenplum initsystem version version of Greenplum Database when system was first initialized
Greenplum current version current version of Greenplum Database
Postgres version version of PostgreSQL that Greenplum Database is based on
Greenplum mirroring status physical mirroring, SAN or none
Master standby host name of the standby master
Standby master state status of the standby master: active or passive
Table 1.2 gpstate output data for segments
Output Data Description
Hostname system-configured host name
Address network address host name (NIC name)
Datadir file system location of segment data directory
Port port number of segment postgres database listener process
Current Role current role of a segment: Mirror or Primary
Preferred Role role at system initialization time: Mirror or Primary
Mirror Status status of a primary/mirror segment pair:Synchronized = data is up to date on both Resynchronization = data is currently being copied from one to the otherChange Tracking = segment down and active segment is logging changes
Change tracking data size when in Change Tracking mode, the size of the change log file (may grow and shrink as compression is applied)
Estimated total data to synchronize when in Resynchronization mode, the estimated size of data left to syncronize
Data synchronized when in Resynchronization mode, the estimated size of data that has already been syncronized
Table 1.1 gpstate output data for the master
Output Data Description
gpstate 129
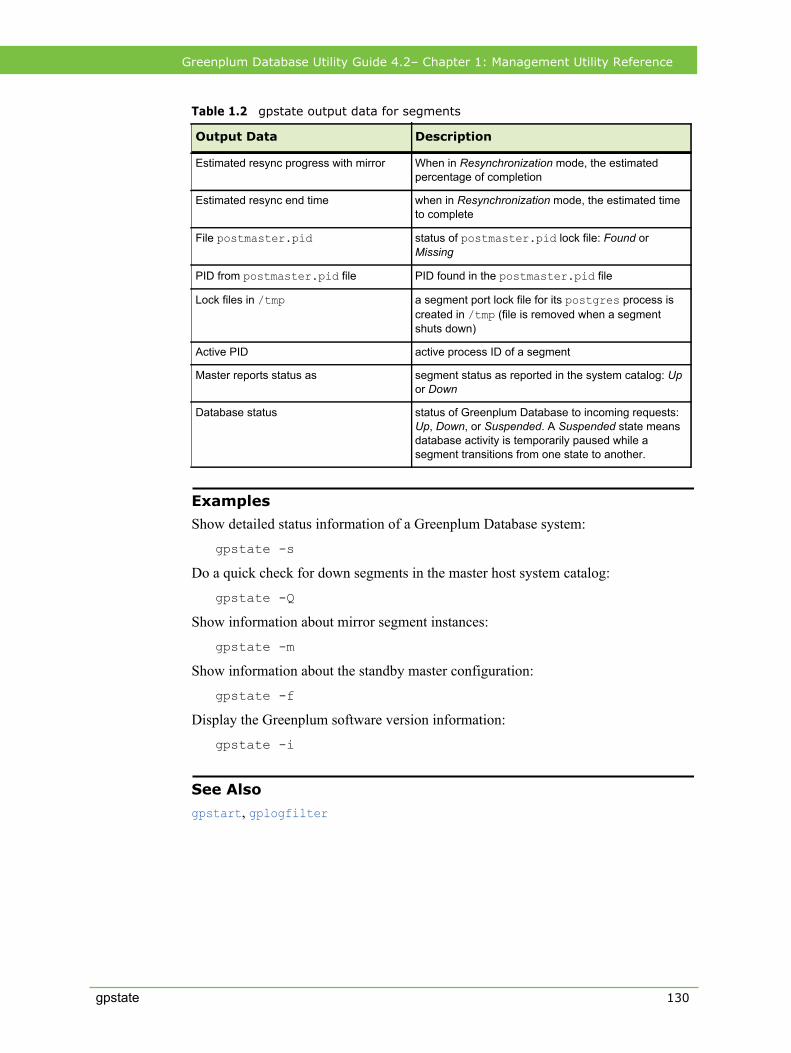
Greenplum Database Utility Guide 4.2– Chapter 1: Management Utility Reference
Examples
Show detailed status information of a Greenplum Database system:
gpstate -s
Do a quick check for down segments in the master host system catalog:
gpstate -Q
Show information about mirror segment instances:
gpstate -m
Show information about the standby master configuration:
gpstate -f
Display the Greenplum software version information:
gpstate -i
See Also
gpstart, gplogfilter
Estimated resync progress with mirror When in Resynchronization mode, the estimated percentage of completion
Estimated resync end time when in Resynchronization mode, the estimated time to complete
File postmaster.pid status of postmaster.pid lock file: Found or Missing
PID from postmaster.pid file PID found in the postmaster.pid file
Lock files in /tmp a segment port lock file for its postgres process is created in /tmp (file is removed when a segment shuts down)
Active PID active process ID of a segment
Master reports status as segment status as reported in the system catalog: Up or Down
Database status status of Greenplum Database to incoming requests: Up, Down, or Suspended. A Suspended state means database activity is temporarily paused while a segment transitions from one state to another.
Table 1.2 gpstate output data for segments
Output Data Description
gpstate 130
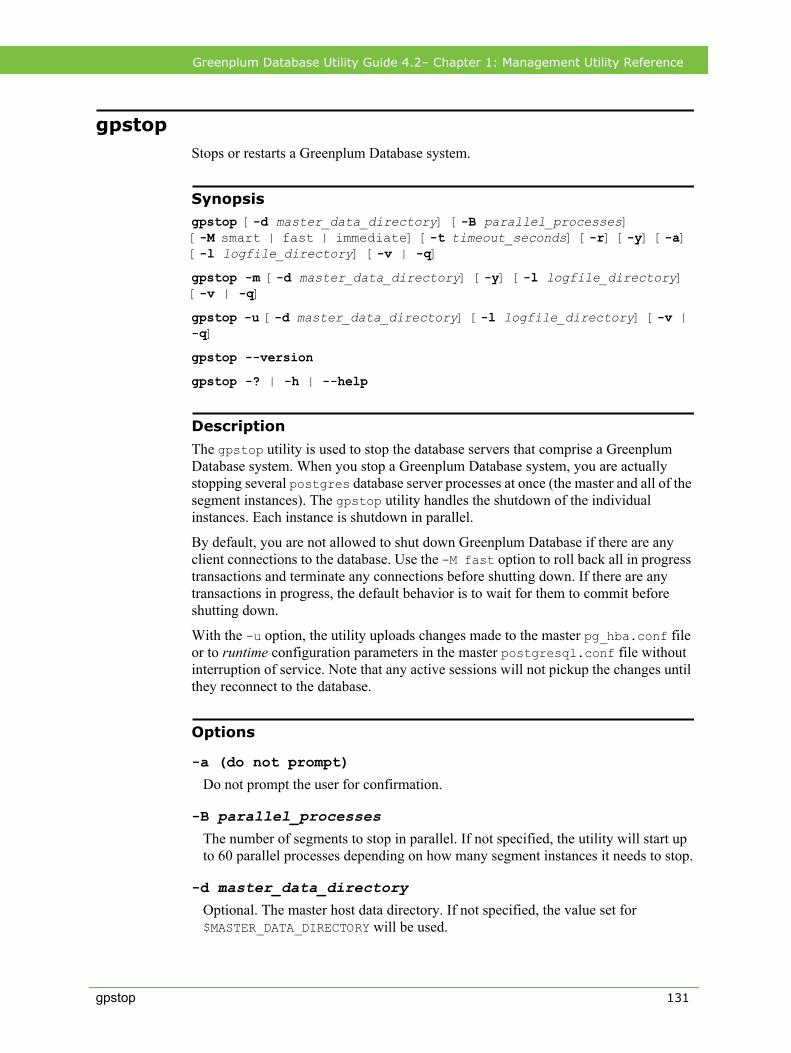
Greenplum Database Utility Guide 4.2– Chapter 1: Management Utility Reference
gpstopStops or restarts a Greenplum Database system.
Synopsisgpstop [-d master_data_directory] [-B parallel_processes] [-M smart | fast | immediate] [-t timeout_seconds] [-r] [-y] [-a] [-l logfile_directory] [-v | -q]
gpstop -m [-d master_data_directory] [-y] [-l logfile_directory] [-v | -q]
gpstop -u [-d master_data_directory] [-l logfile_directory] [-v | -q]
gpstop --version
gpstop -? | -h | --help
Description
The gpstop utility is used to stop the database servers that comprise a Greenplum Database system. When you stop a Greenplum Database system, you are actually stopping several postgres database server processes at once (the master and all of the segment instances). The gpstop utility handles the shutdown of the individual instances. Each instance is shutdown in parallel.
By default, you are not allowed to shut down Greenplum Database if there are any client connections to the database. Use the -M fast option to roll back all in progress transactions and terminate any connections before shutting down. If there are any transactions in progress, the default behavior is to wait for them to commit before shutting down.
With the -u option, the utility uploads changes made to the master pg_hba.conf file or to runtime configuration parameters in the master postgresql.conf file without interruption of service. Note that any active sessions will not pickup the changes until they reconnect to the database.
Options
-a (do not prompt)
Do not prompt the user for confirmation.
-B parallel_processesThe number of segments to stop in parallel. If not specified, the utility will start up to 60 parallel processes depending on how many segment instances it needs to stop.
-d master_data_directoryOptional. The master host data directory. If not specified, the value set for $MASTER_DATA_DIRECTORY will be used.
gpstop 131
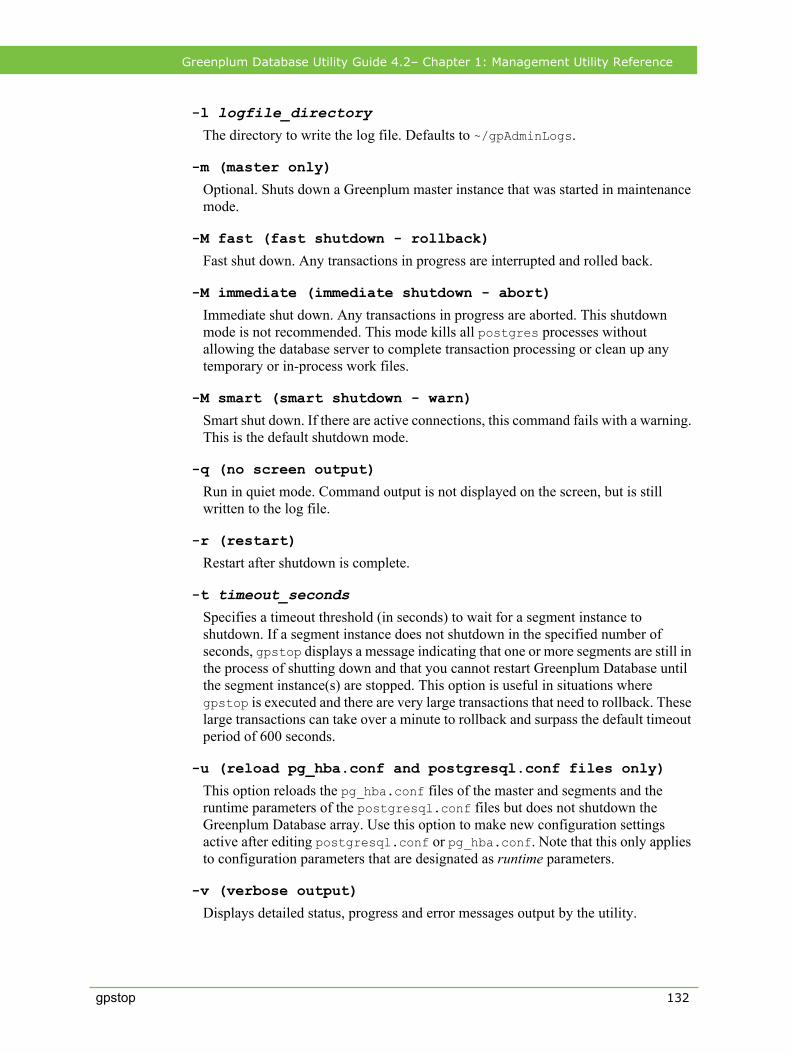
Greenplum Database Utility Guide 4.2– Chapter 1: Management Utility Reference
-l logfile_directoryThe directory to write the log file. Defaults to ~/gpAdminLogs.
-m (master only)
Optional. Shuts down a Greenplum master instance that was started in maintenance mode.
-M fast (fast shutdown - rollback)
Fast shut down. Any transactions in progress are interrupted and rolled back.
-M immediate (immediate shutdown - abort)
Immediate shut down. Any transactions in progress are aborted. This shutdown mode is not recommended. This mode kills all postgres processes without allowing the database server to complete transaction processing or clean up any temporary or in-process work files.
-M smart (smart shutdown - warn)
Smart shut down. If there are active connections, this command fails with a warning. This is the default shutdown mode.
-q (no screen output)
Run in quiet mode. Command output is not displayed on the screen, but is still written to the log file.
-r (restart)
Restart after shutdown is complete.
-t timeout_secondsSpecifies a timeout threshold (in seconds) to wait for a segment instance to shutdown. If a segment instance does not shutdown in the specified number of seconds, gpstop displays a message indicating that one or more segments are still in the process of shutting down and that you cannot restart Greenplum Database until the segment instance(s) are stopped. This option is useful in situations where gpstop is executed and there are very large transactions that need to rollback. These large transactions can take over a minute to rollback and surpass the default timeout period of 600 seconds.
-u (reload pg_hba.conf and postgresql.conf files only)
This option reloads the pg_hba.conf files of the master and segments and the runtime parameters of the postgresql.conf files but does not shutdown the Greenplum Database array. Use this option to make new configuration settings active after editing postgresql.conf or pg_hba.conf. Note that this only applies to configuration parameters that are designated as runtime parameters.
-v (verbose output)
Displays detailed status, progress and error messages output by the utility.
gpstop 132
Greenplum Database Utility Guide 4.2– Chapter 1: Management Utility Reference
--version (show utility version)
Displays the version of this utility.
-y (do not stop standby master)
Do not stop the standby master process. The default is to stop the standby master.
-? | -h | --help (help)
Displays the online help.
Examples
Stop a Greenplum Database system in smart mode:
gpstop
Stop a Greenplum Database system in fast mode:
gpstop -M fast
Stop all segment instances and then restart the system:
gpstop -r
Stop a master instance that was started in maintenance mode:
gpstop -m
Reload the postgresql.conf and pg_hba.conf files after making configuration changes but do not shutdown the Greenplum Database array:
gpstop -u
See Also
gpstart
gpstop 133
gpsys1 134
Greenplum Database Utility Guide 4.2– Chapter 1: Management Utility Reference
gpsys1Displays information about your operating system.
Synopsisgpsys1 [ -a | -m | -p ]
gpsys1 -? | --version
Description
gpsys1 displays the platform and installed memory (in bytes) of the current host. For example:
linux 1073741824
Options
-a (show all)
Shows both platform and memory information for the current host. This is the default.
-m (show memory only)
Shows system memory installed in bytes.
-p (show platform only)
Shows the OS platform. Platform can be linux, darwin or sunos5.
-? (help)
Displays the online help.
--version
Displays the version of this utility.
Examples
Show information about the current host operating system:
gpsys1
See Also
gpcheckperf
135
Greenplum Database Utility Guide 4.2 – Chapter 2: Client Utility Reference
2. Client Utility Reference
This reference describes the command-line client utilities provided with Greenplum Database. Greenplum Database uses the standard PostgreSQL client programs and provides additional client utilities for administering a distributed Greenplum Database DBMS. Greenplum Database client utilities reside in $GPHOME/bin.
The following are the Greenplum Database client utilities.
• clusterdb• createdb• createlang• createuser• dropdb• droplang• dropuser• ecpg• pg_config• pg_dump• pg_dumpall• pg_restore• psql• reindexdb• vacuumdb
Greenplum Database Utility Guide 4.2 – Chapter 2: Client Utility Summary
Client Utility Summary-t table | --table=table-T table | --exclude-table=table-h host | --host host-p port | --port port
clusterdb
Reclusters tables that were previously clustered with CLUSTER.
clusterdb [connection-option...] [-v] [-t table ] [[-d] dbname]
clusterdb [connection-option...] [-a] [-v]
clusterdb --help | --version
-a | --all[-d] dbname | [--dbname] dbname-e | --echo-q | --quiet-t table | --table table-v | --verbose-h host | --host host-p port | --port port-U username | --username username-w | --no-password-W | --password
createdb
Creates a new database.
createdb [connection_option ...] [-D tablespace] [-E encoding] [-O owner] [-T tem-plate] [-e] [dbname ['description']]
createdb --help | --version
dbnamedescription-D tablespace | --tablespace tablespace-e echo-E encoding | --encoding encoding-O owner | --owner owner-T template | --template template-h host | --host host-p port | --port port-U username | --username username-w | --no-password-W | --password
clusterdb 136
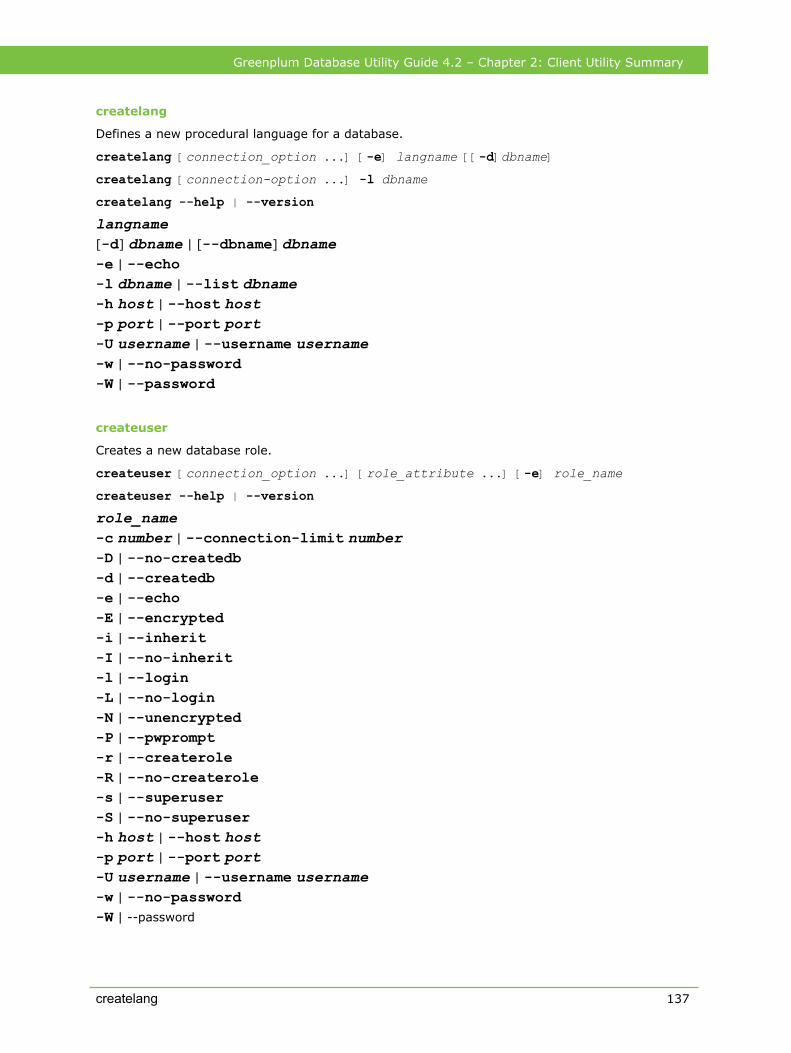
Greenplum Database Utility Guide 4.2 – Chapter 2: Client Utility Summary
createlang
Defines a new procedural language for a database.
createlang [connection_option ...] [-e] langname [[-d]dbname]
createlang [connection-option ...] -l dbname
createlang --help | --version
langname[-d] dbname | [--dbname] dbname-e | --echo-l dbname | --list dbname-h host | --host host-p port | --port port-U username | --username username-w | --no-password-W | --password
createuser
Creates a new database role.
createuser [connection_option ...] [role_attribute ...] [-e] role_name
createuser --help | --version
role_name-c number | --connection-limit number-D | --no-createdb-d | --createdb-e | --echo-E | --encrypted-i | --inherit-I | --no-inherit-l | --login-L | --no-login-N | --unencrypted-P | --pwprompt-r | --createrole-R | --no-createrole-s | --superuser-S | --no-superuser-h host | --host host-p port | --port port-U username | --username username-w | --no-password-W | --password
createlang 137
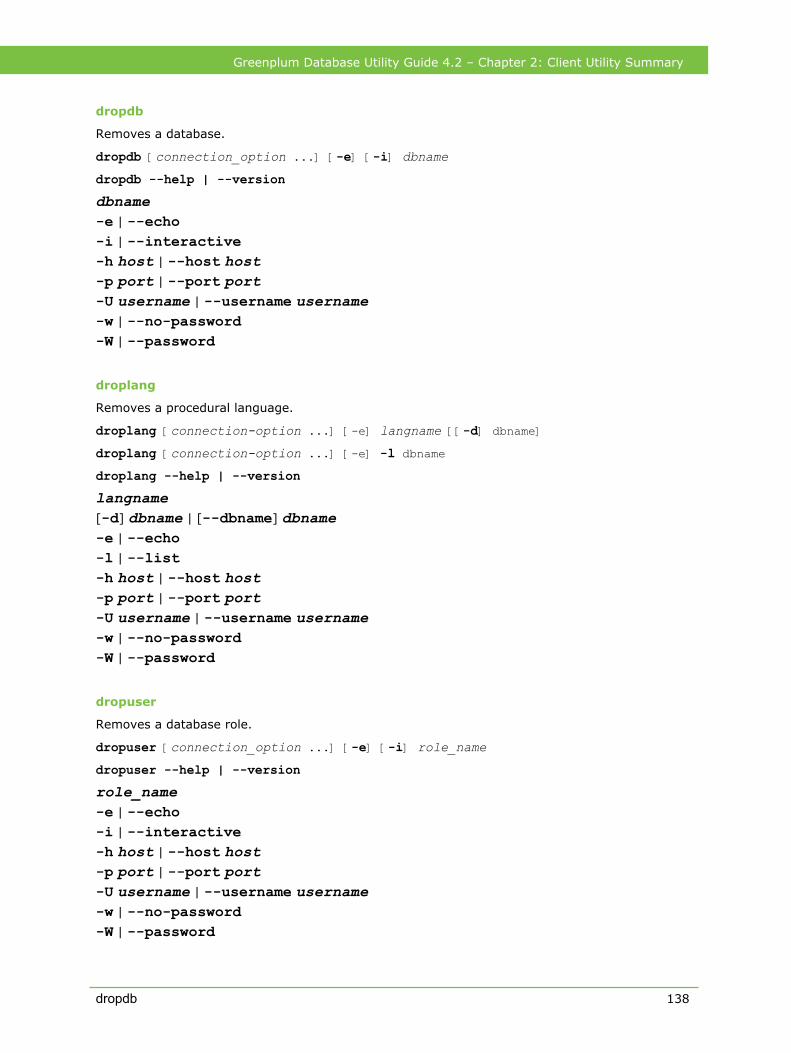
Greenplum Database Utility Guide 4.2 – Chapter 2: Client Utility Summary
dropdb
Removes a database.
dropdb [connection_option ...] [-e] [-i] dbname
dropdb --help | --version
dbname-e | --echo-i | --interactive-h host | --host host-p port | --port port-U username | --username username-w | --no-password-W | --password
droplang
Removes a procedural language.
droplang [connection-option ...] [-e] langname [[-d] dbname]
droplang [connection-option ...] [-e] -l dbname
droplang --help | --version
langname[-d] dbname | [--dbname] dbname-e | --echo-l | --list-h host | --host host-p port | --port port-U username | --username username-w | --no-password-W | --password
dropuser
Removes a database role.
dropuser [connection_option ...] [-e] [-i] role_name
dropuser --help | --version
role_name-e | --echo-i | --interactive-h host | --host host-p port | --port port-U username | --username username-w | --no-password-W | --password
dropdb 138

Greenplum Database Utility Guide 4.2 – Chapter 2: Client Utility Summary
ecpg
Embedded SQL C preprocessor.
ecpg [option ...] file ...
file-c-C mode-D symbol-i-I directory-o filename-r option-t-v--help--version
pg_config
Retrieves information about the installed version of Greenplum Database.
pg_config [option ...]
--bindir--docdir--includedir--pkgincludedir--includedir-server--libdir--pkglibdir--localedir--mandir--sharedir--sysconfdir--pgxs--configure--cc--cppflags--cflags--cflags_sl--ldflags--ldflags_sl--libs--version
ecpg 139
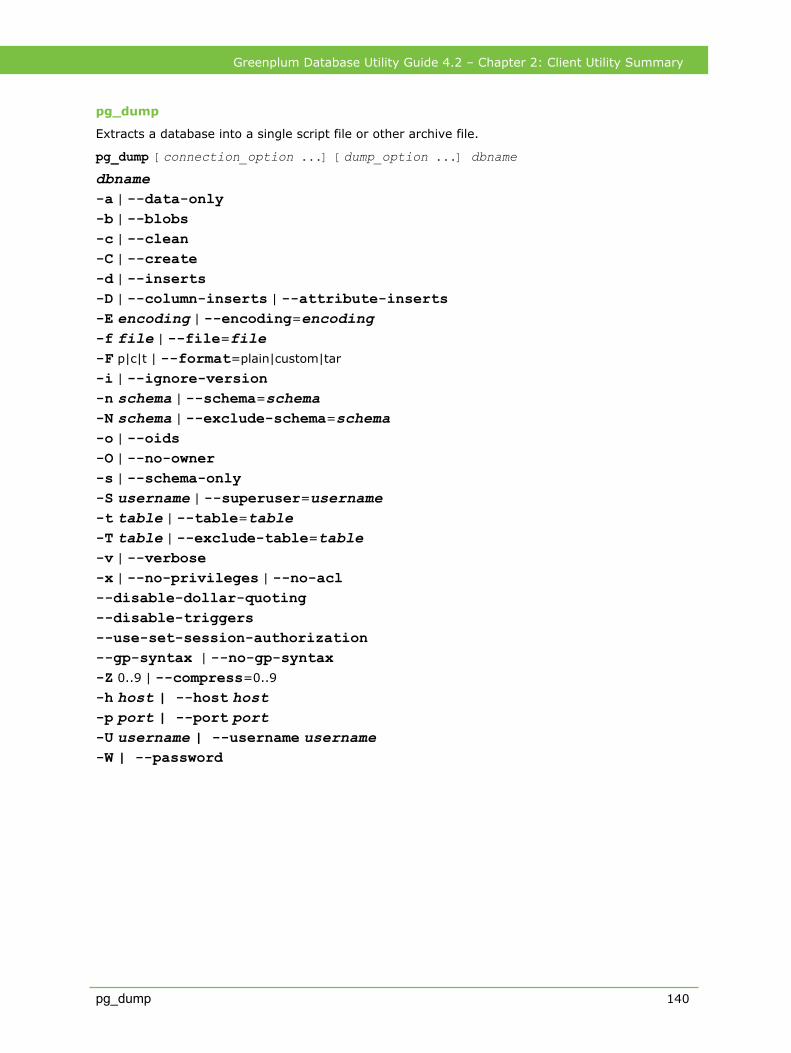
Greenplum Database Utility Guide 4.2 – Chapter 2: Client Utility Summary
pg_dump
Extracts a database into a single script file or other archive file.
pg_dump [connection_option ...] [dump_option ...] dbname
dbname-a | --data-only-b | --blobs-c | --clean-C | --create-d | --inserts-D | --column-inserts | --attribute-inserts-E encoding | --encoding=encoding-f file | --file=file-F p|c|t | --format=plain|custom|tar
-i | --ignore-version-n schema | --schema=schema-N schema | --exclude-schema=schema-o | --oids-O | --no-owner-s | --schema-only-S username | --superuser=username-t table | --table=table-T table | --exclude-table=table-v | --verbose-x | --no-privileges | --no-acl--disable-dollar-quoting--disable-triggers--use-set-session-authorization--gp-syntax | --no-gp-syntax-Z 0..9 | --compress=0..9
-h host | --host host-p port | --port port-U username | --username username-W | --password
pg_dump 140
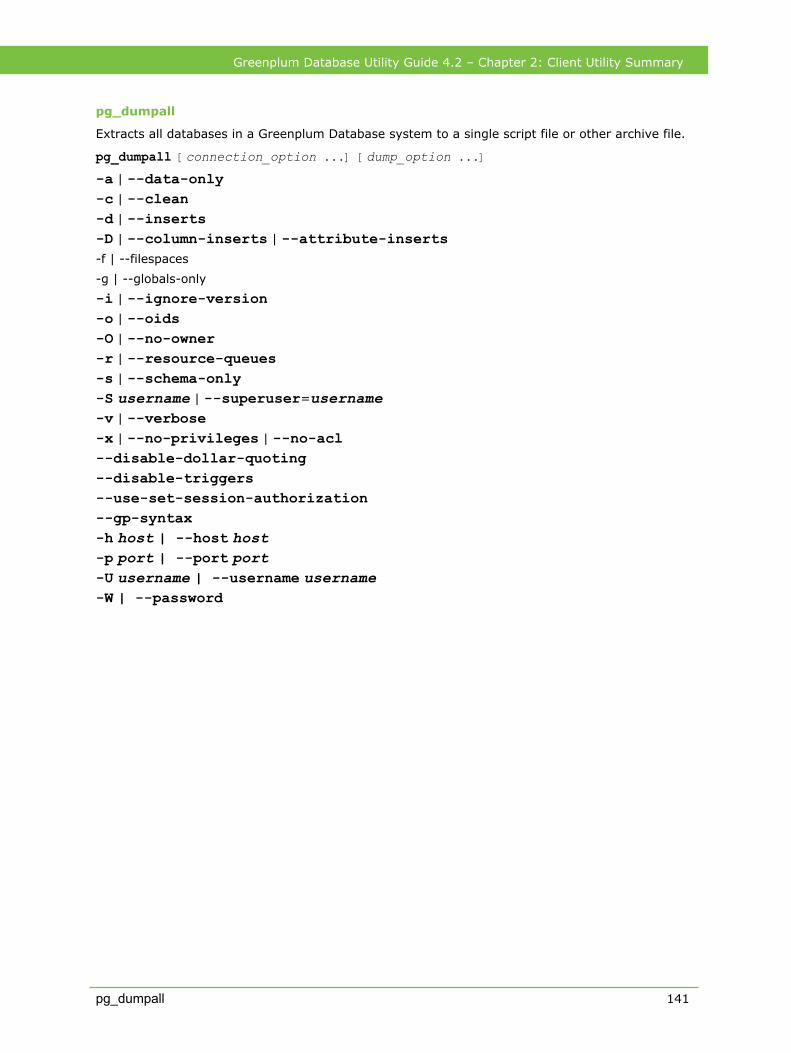
Greenplum Database Utility Guide 4.2 – Chapter 2: Client Utility Summary
pg_dumpall
Extracts all databases in a Greenplum Database system to a single script file or other archive file.
pg_dumpall [connection_option ...] [dump_option ...]
-a | --data-only-c | --clean-d | --inserts-D | --column-inserts | --attribute-inserts-f | --filespaces
-g | --globals-only
-i | --ignore-version-o | --oids-O | --no-owner-r | --resource-queues-s | --schema-only-S username | --superuser=username-v | --verbose-x | --no-privileges | --no-acl--disable-dollar-quoting--disable-triggers--use-set-session-authorization--gp-syntax-h host | --host host-p port | --port port-U username | --username username-W | --password
pg_dumpall 141
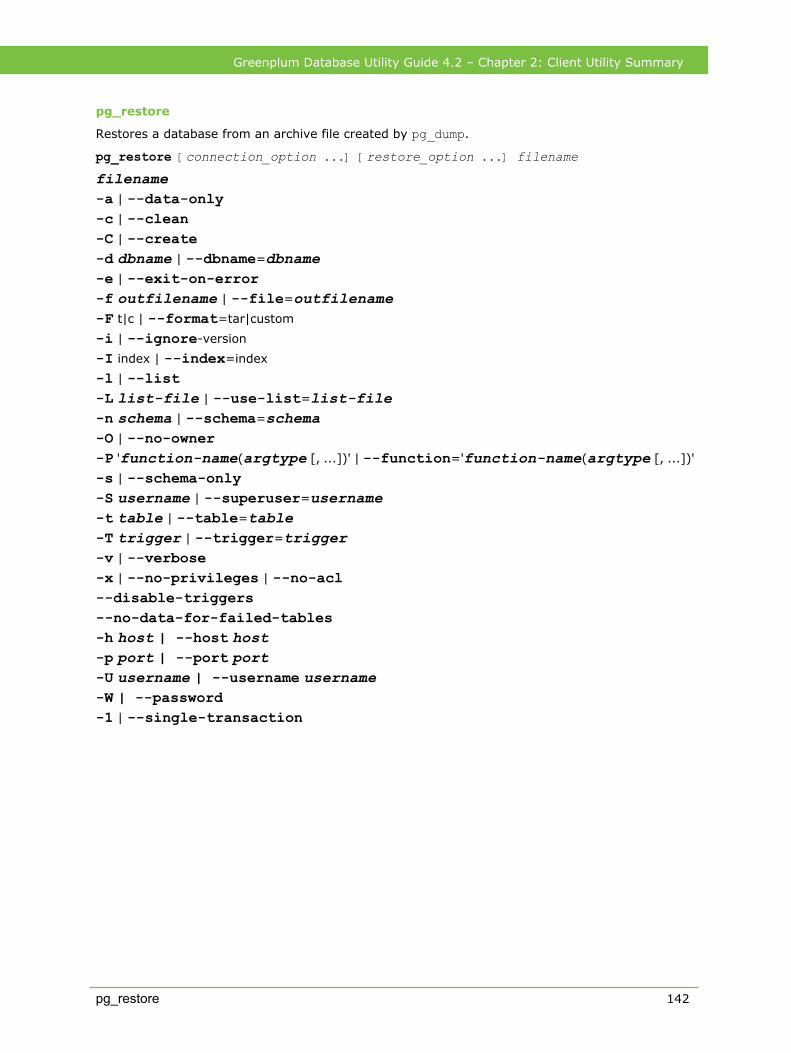
Greenplum Database Utility Guide 4.2 – Chapter 2: Client Utility Summary
pg_restore
Restores a database from an archive file created by pg_dump.
pg_restore [connection_option ...] [restore_option ...] filename
filename-a | --data-only-c | --clean-C | --create-d dbname | --dbname=dbname-e | --exit-on-error-f outfilename | --file=outfilename-F t|c | --format=tar|custom
-i | --ignore-version
-I index | --index=index
-l | --list-L list-file | --use-list=list-file-n schema | --schema=schema-O | --no-owner-P 'function-name(argtype [, ...])' | --function='function-name(argtype [, ...])'
-s | --schema-only-S username | --superuser=username-t table | --table=table-T trigger | --trigger=trigger-v | --verbose-x | --no-privileges | --no-acl--disable-triggers--no-data-for-failed-tables-h host | --host host-p port | --port port-U username | --username username-W | --password-1 | --single-transaction
pg_restore 142
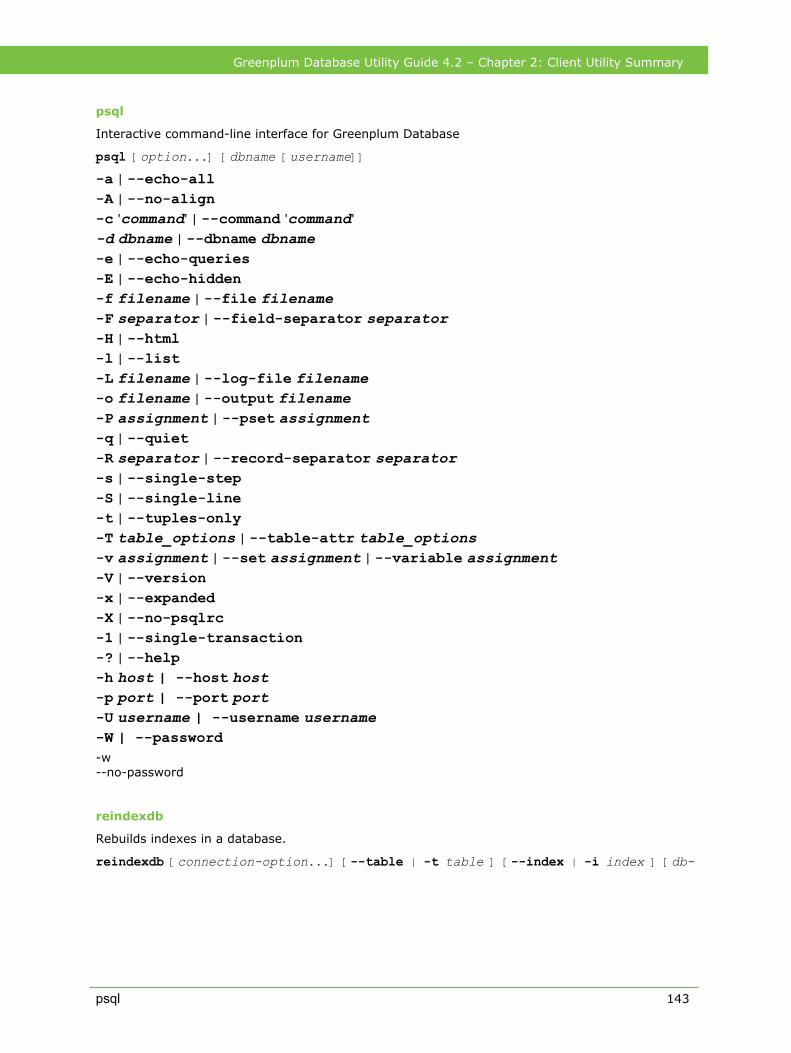
Greenplum Database Utility Guide 4.2 – Chapter 2: Client Utility Summary
psql
Interactive command-line interface for Greenplum Database
psql [option...] [dbname [username]]
-a | --echo-all-A | --no-align-c 'command' | --command 'command'
-d dbname | --dbname dbname-e | --echo-queries-E | --echo-hidden-f filename | --file filename-F separator | --field-separator separator-H | --html-l | --list-L filename | --log-file filename-o filename | --output filename-P assignment | --pset assignment-q | --quiet-R separator | --record-separator separator-s | --single-step-S | --single-line-t | --tuples-only-T table_options | --table-attr table_options-v assignment | --set assignment | --variable assignment-V | --version-x | --expanded-X | --no-psqlrc-1 | --single-transaction-? | --help-h host | --host host-p port | --port port-U username | --username username-W | --password-w --no-password
reindexdb
Rebuilds indexes in a database.
reindexdb [connection-option...] [--table | -t table ] [--index | -i index ] [db-
psql 143
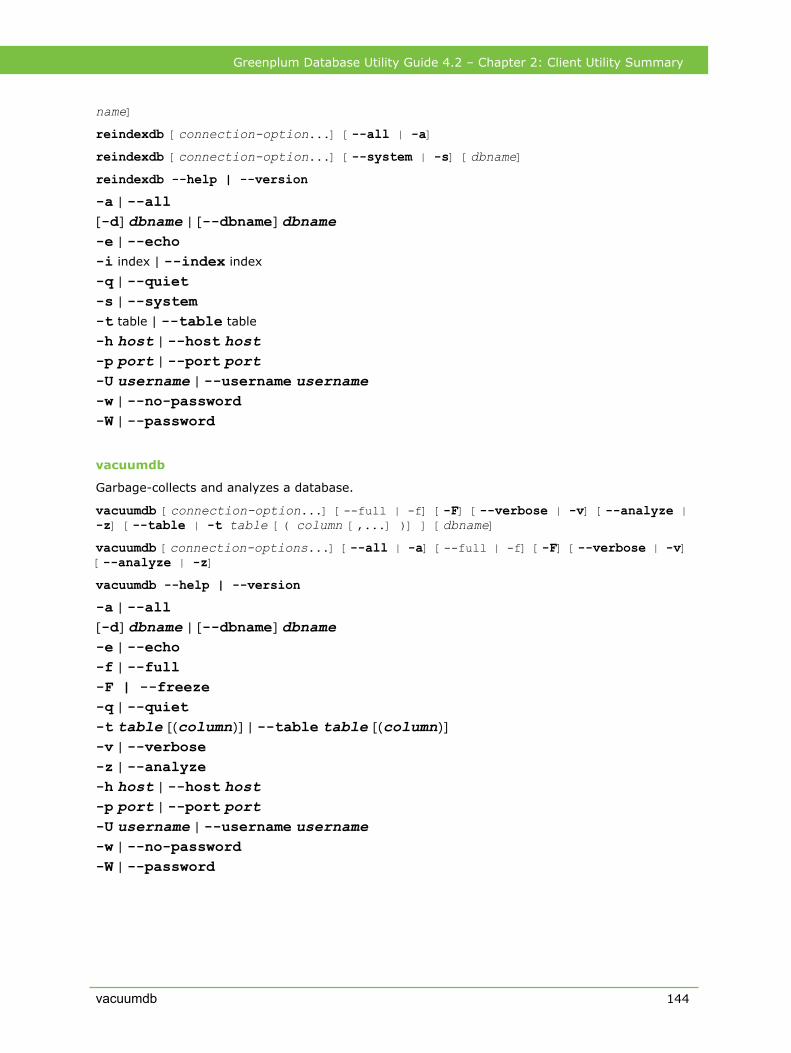
Greenplum Database Utility Guide 4.2 – Chapter 2: Client Utility Summary
name]
reindexdb [connection-option...] [--all | -a]
reindexdb [connection-option...] [--system | -s] [dbname]
reindexdb --help | --version
-a | --all[-d] dbname | [--dbname] dbname-e | --echo-i index | --index index
-q | --quiet-s | --system-t table | --table table
-h host | --host host-p port | --port port-U username | --username username-w | --no-password-W | --password
vacuumdb
Garbage-collects and analyzes a database.
vacuumdb [connection-option...] [--full | -f] [-F] [--verbose | -v] [--analyze | -z] [--table | -t table [( column [,...] )] ] [dbname]
vacuumdb [connection-options...] [--all | -a] [--full | -f] [-F] [--verbose | -v] [--analyze | -z]
vacuumdb --help | --version
-a | --all[-d] dbname | [--dbname] dbname-e | --echo-f | --full-F | --freeze-q | --quiet-t table [(column)] | --table table [(column)]
-v | --verbose-z | --analyze-h host | --host host-p port | --port port-U username | --username username-w | --no-password-W | --password
vacuumdb 144
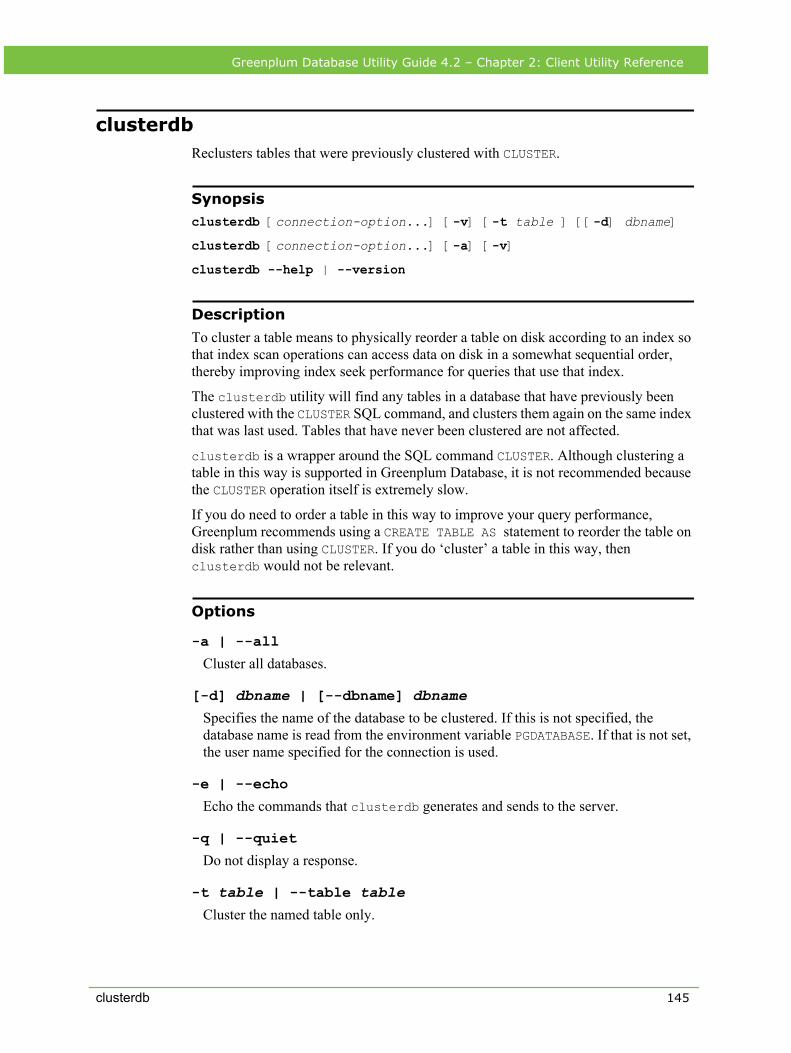
Greenplum Database Utility Guide 4.2 – Chapter 2: Client Utility Reference
clusterdbReclusters tables that were previously clustered with CLUSTER.
Synopsisclusterdb [connection-option...] [-v] [-t table ] [[-d] dbname]
clusterdb [connection-option...] [-a] [-v]
clusterdb --help | --version
Description
To cluster a table means to physically reorder a table on disk according to an index so that index scan operations can access data on disk in a somewhat sequential order, thereby improving index seek performance for queries that use that index.
The clusterdb utility will find any tables in a database that have previously been clustered with the CLUSTER SQL command, and clusters them again on the same index that was last used. Tables that have never been clustered are not affected.
clusterdb is a wrapper around the SQL command CLUSTER. Although clustering a table in this way is supported in Greenplum Database, it is not recommended because the CLUSTER operation itself is extremely slow.
If you do need to order a table in this way to improve your query performance, Greenplum recommends using a CREATE TABLE AS statement to reorder the table on disk rather than using CLUSTER. If you do ‘cluster’ a table in this way, then clusterdb would not be relevant.
Options
-a | --all
Cluster all databases.
[-d] dbname | [--dbname] dbnameSpecifies the name of the database to be clustered. If this is not specified, the database name is read from the environment variable PGDATABASE. If that is not set, the user name specified for the connection is used.
-e | --echo
Echo the commands that clusterdb generates and sends to the server.
-q | --quiet
Do not display a response.
-t table | --table tableCluster the named table only.
clusterdb 145
Greenplum Database Utility Guide 4.2 – Chapter 2: Client Utility Reference
-v | --verbose
Print detailed information during processing.
Connection Options
-h host | --host hostThe host name of the machine on which the Greenplum master database server is running. If not specified, reads from the environment variable PGHOST or defaults to localhost.
-p port | --port portThe TCP port on which the Greenplum master database server is listening for connections. If not specified, reads from the environment variable PGPORT or defaults to 5432.
-U username | --username usernameThe database role name to connect as. If not specified, reads from the environment variable PGUSER or defaults to the current system role name.
-w | --no-password
Never issue a password prompt. If the server requires password authentication and a password is not available by other means such as a .pgpass file, the connection attempt will fail. This option can be useful in batch jobs and scripts where no user is present to enter a password.
-W | --password
Force a password prompt.
Examples
To cluster the database test:clusterdb test
To cluster a single table foo in a database named xyzzy:
clusterdb --table foo xyzzyb
See AlsoThe Greenplum Database Reference Guide entry for CLUSTER
clusterdb 146
Greenplum Database Utility Guide 4.2 – Chapter 2: Client Utility Reference
createdbCreates a new database.
Synopsiscreatedb [connection_option ...] [-D tablespace] [-E encoding] [-O owner] [-T template] [-e] [dbname ['description']]
createdb --help | --version
Description
createdb creates a new database in a Greenplum Database system.
Normally, the database user who executes this command becomes the owner of the new database. However a different owner can be specified via the -O option, if the executing user has appropriate privileges.
createdb is a wrapper around the SQL command CREATE DATABASE.
Options
dbnameThe name of the database to be created. The name must be unique among all other databases in the Greenplum system. If not specified, reads from the environment variable PGDATABASE, then PGUSER or defaults to the current system user.
descriptionA comment to be associated with the newly created database. Descriptions containing white space must be enclosed in quotes.
-D tablespace | --tablespace tablespaceThe default tablespace for the database.
-e echoEcho the commands that createdb generates and sends to the server.
-E encoding | --encoding encodingCharacter set encoding to use in the new database. Specify a string constant (such as 'UTF8'), an integer encoding number, or DEFAULT to use the default encoding. See the Greenplum Database Reference Guide for information about supported character sets.
-O owner | --owner ownerThe name of the database user who will own the new database. Defaults to the user executing this command.
createdb 147
Greenplum Database Utility Guide 4.2 – Chapter 2: Client Utility Reference
-T template | --template templateThe name of the template from which to create the new database. Defaults to template1.
Connection Options
-h host | --host hostThe host name of the machine on which the Greenplum master database server is running. If not specified, reads from the environment variable PGHOST or defaults to localhost.
-p port | --port portThe TCP port on which the Greenplum master database server is listening for connections. If not specified, reads from the environment variable PGPORT or defaults to 5432.
-U username | --username usernameThe database role name to connect as. If not specified, reads from the environment variable PGUSER or defaults to the current system role name.
-w | --no-password
Never issue a password prompt. If the server requires password authentication and a password is not available by other means such as a .pgpass file, the connection attempt will fail. This option can be useful in batch jobs and scripts where no user is present to enter a password.
-W | --password
Force a password prompt.
Examples
To create the database test using the default options:
createdb test
To create the database demo using the Greenplum master on host gpmaster, port 54321, using the LATIN1 encoding scheme:
createdb -p 54321 -h gpmaster -E LATIN1 demo
See AlsoThe Greenplum Database Reference Guide entry for CREATE DATABASE
createdb 148
Greenplum Database Utility Guide 4.2 – Chapter 2: Client Utility Reference
createlangDefines a new procedural language for a database.
Synopsiscreatelang [connection_option ...] [-e] langname [[-d]dbname]
createlang [connection-option ...] -l dbname
createlang --help | --version
Description
The createlang utility adds a new programming language to a database. createlang is a wrapper around the SQL command CREATE LANGUAGE.
The procedural language packages included in the standard Greenplum Database distribution are:
• PL/pgSQL
• PL/Perl
• PL/Python
• PL/Java.
The PL/pgSQL language is registered in all databases by default.
Greenplum Database has a language handler for PL/R, but the PL/R language package is not pre-installed with Greenplum Database. A package is available for PL/Tcl that you can enable. See the Procedural Languages section in the PostgreSQL documentation for more information.
Options
langnameSpecifies the name of the procedural programming language to be defined.
[-d] dbname | [--dbname] dbnameSpecifies to which database the language should be added. The default is to use the PGDATABASE environment variable setting, or the same name as the current system user.
-e | --echo
Echo the commands that createlang generates and sends to the server.
-l dbname | --list dbnameShow a list of already installed languages in the target database.
createlang 149
Greenplum Database Utility Guide 4.2 – Chapter 2: Client Utility Reference
Connection Options
-h host | --host hostThe host name of the machine on which the Greenplum master database server is running. If not specified, reads from the environment variable PGHOST or defaults to localhost.
-p port | --port portThe TCP port on which the Greenplum master database server is listening for connections. If not specified, reads from the environment variable PGPORT or defaults to 5432.
-U username | --username usernameThe database role name to connect as. If not specified, reads from the environment variable PGUSER or defaults to the current system role name.
-w | --no-password
Never issue a password prompt. If the server requires password authentication and a password is not available by other means such as a .pgpass file, the connection attempt will fail. This option can be useful in batch jobs and scripts where no user is present to enter a password.
-W | --password
Force a password prompt.
Examples
To install the language plperl into the database template1:
createlang plperl template1
See Also
The Greenplum Database Reference Guide entries for CREATE LANGUAGE and droplang
createlang 150
Greenplum Database Utility Guide 4.2 – Chapter 2: Client Utility Reference
createuserCreates a new database role.
Synopsiscreateuser [connection_option ...] [role_attribute ...] [-e] role_name
createuser --help | --version
Description
createuser creates a new Greenplum Database role. You must be a superuser or have the CREATEROLE privilege to create new roles. You must connect to the database as a superuser to create new superusers.
Superusers can bypass all access permission checks within the database, so superuser privileges should not be granted lightly.
createuser is a wrapper around the SQL command CREATE ROLE.
Options
role_nameThe name of the role to be created. This name must be different from all existing roles in this Greenplum Database installation.
-c number | --connection-limit numberSet a maximum number of connections for the new role. The default is to set no limit.
-D | --no-createdb
The new role will not be allowed to create databases. This is the default.
-d | --createdb
The new role will be allowed to create databases.
-e | --echo
Echo the commands that createuser generates and sends to the server.
-E | --encrypted
Encrypts the role’s password stored in the database. If not specified, the default password behavior is used.
-i | --inherit
The new role will automatically inherit privileges of roles it is a member of. This is the default.
createuser 151
Greenplum Database Utility Guide 4.2 – Chapter 2: Client Utility Reference
-I | --no-inherit
The new role will not automatically inherit privileges of roles it is a member of.
-l | --login
The new role will be allowed to log in to Greenplum Database. This is the default.
-L | --no-login
The new role will not be allowed to log in (a group-level role).
-N | --unencrypted
Does not encrypt the role’s password stored in the database. If not specified, the default password behavior is used.
-P | --pwprompt
If given, createuser will issue a prompt for the password of the new role. This is not necessary if you do not plan on using password authentication.
-r | --createrole
The new role will be allowed to create new roles (CREATEROLE privilege).
-R | --no-createrole
The new role will not be allowed to create new roles. This is the default.
-s | --superuser
The new role will be a superuser.
-S | --no-superuser
The new role will not be a superuser. This is the default.
Connection Options
-h host | --host hostThe host name of the machine on which the Greenplum master database server is running. If not specified, reads from the environment variable PGHOST or defaults to localhost.
-p port | --port portThe TCP port on which the Greenplum master database server is listening for connections. If not specified, reads from the environment variable PGPORT or defaults to 5432.
-U username | --username usernameThe database role name to connect as. If not specified, reads from the environment variable PGUSER or defaults to the current system role name.
createuser 152
Greenplum Database Utility Guide 4.2 – Chapter 2: Client Utility Reference
-w | --no-password
Never issue a password prompt. If the server requires password authentication and a password is not available by other means such as a .pgpass file, the connection attempt will fail. This option can be useful in batch jobs and scripts where no user is present to enter a password.
-W | --password
Force a password prompt.
Examples
Create a role named joe using the default options:
createuser joe
Shall the new role be a superuser? (y/n) n
Shall the new role be allowed to create databases? (y/n) n
Shall the new role be allowed to create more new roles? (y/n) n
CREATE ROLE
To create the same role joe using connection options and avoiding the prompts and taking a look at the underlying command:
createuser -h masterhost -p 54321 -S -D -R -e joe
CREATE ROLE joe NOSUPERUSER NOCREATEDB NOCREATEROLE INHERIT LOGIN;
CREATE ROLE
To create the role joe as a superuser, and assign a password immediately:
createuser -P -s -e joe
Enter password for new role: admin123
Enter it again: admin123
CREATE ROLE joe PASSWORD 'admin123' SUPERUSER CREATEDB CREATEROLE INHERIT LOGIN;
CREATE ROLE
In the above example, the new password is not actually echoed when typed, but we show what was typed for clarity. However the password will appear in the echoed command, as illustrated if the -e option is used.
See Also
The Greenplum Database Reference Guide entry for CREATE ROLE.
createuser 153
Greenplum Database Utility Guide 4.2 – Chapter 2: Client Utility Reference
dropdbRemoves a database.
Synopsisdropdb [connection_option ...] [-e] [-i] dbname
dropdb --help | --version
Description
dropdb destroys an existing database. The user who executes this command must be a superuser or the owner of the database being dropped.
dropdb is a wrapper around the SQL command DROP DATABASE. See the Greenplum Database Reference Guide for information about DROP DATABASE.
Options
dbnameThe name of the database to be removed.
-e | --echo
Echo the commands that dropdb generates and sends to the server.
-i | --interactive
Issues a verification prompt before doing anything destructive.
Connection Options
-h host | --host hostThe host name of the machine on which the Greenplum master database server is running. If not specified, reads from the environment variable PGHOST or defaults to localhost.
-p port | --port portThe TCP port on which the Greenplum master database server is listening for connections. If not specified, reads from the environment variable PGPORT or defaults to 5432.
-U username | --username usernameThe database role name to connect as. If not specified, reads from the environment variable PGUSER or defaults to the current system role name.
dropdb 154
Greenplum Database Utility Guide 4.2 – Chapter 2: Client Utility Reference
-w | --no-password
Never issue a password prompt. If the server requires password authentication and a password is not available by other means such as a .pgpass file, the connection attempt will fail. This option can be useful in batch jobs and scripts where no user is present to enter a password.
-W | --password
Force a password prompt.
Examples
To destroy the database named demo using default connection parameters:
dropdb demo
To destroy the database named demo using connection options, with verification, and a peek at the underlying command:
dropdb -p 54321 -h masterhost -i -e demo
Database "demo" will be permanently deleted.
Are you sure? (y/n) y
DROP DATABASE "demo"
DROP DATABASE
See Also
The Greenplum Database Reference Guide entry for DROP DATABASE.
dropdb 155
Greenplum Database Utility Guide 4.2 – Chapter 2: Client Utility Reference
droplangRemoves a procedural language.
Synopsisdroplang [connection-option ...] [-e] langname [[-d] dbname]
droplang [connection-option ...] [-e] -l dbname
droplang --help | --version
Description
droplang removes an existing programming language from a database. droplang can drop any procedural language, even those not supplied by the Greenplum Database distribution.
Although programming languages can be removed directly using several SQL commands, it is recommended to use droplang because it performs a number of checks and is much easier to use.
droplang is a wrapper for the SQL command DROP LANGUAGE.
Options
langnameSpecifies the name of the programming language to be removed.
[-d] dbname | [--dbname] dbnameSpecifies from which database the language should be removed. The default is to use the PGDATABASE environment variable setting, or the same name as the current system user.
-e | --echo
Echo the commands that droplang generates and sends to the server.
-l | --list
Show a list of already installed languages in the target database.
Connection Options
-h host | --host hostThe host name of the machine on which the Greenplum master database server is running. If not specified, reads from the environment variable PGHOST or defaults to localhost.
droplang 156

Greenplum Database Utility Guide 4.2 – Chapter 2: Client Utility Reference
-p port | --port portThe TCP port on which the Greenplum master database server is listening for connections. If not specified, reads from the environment variable PGPORT or defaults to 5432.
-U username | --username usernameThe database role name to connect as. If not specified, reads from the environment variable PGUSER or defaults to the current system role name.
-w | --no-password
Never issue a password prompt. If the server requires password authentication and a password is not available by other means such as a .pgpass file, the connection attempt will fail. This option can be useful in batch jobs and scripts where no user is present to enter a password.
-W | --password
Force a password prompt.
Examples
To remove the language pltcl:droplang pltcl mydatabase
See Also
The Greenplum Database Reference Guide entry for DROP LANGUAGE.
droplang 157
Greenplum Database Utility Guide 4.2 – Chapter 2: Client Utility Reference
dropuserRemoves a database role.
Synopsisdropuser [connection_option ...] [-e] [-i] role_name
dropuser --help | --version
Description
dropuser removes an existing role from Greenplum Database. Only superusers and users with the CREATEROLE privilege can remove roles. To remove a superuser role, you must yourself be a superuser.
dropuser is a wrapper around the SQL command DROP ROLE.
Options
role_nameThe name of the role to be removed. You will be prompted for a name if not specified on the command line.
-e | --echo
Echo the commands that dropuser generates and sends to the server.
-i | --interactive
Prompt for confirmation before actually removing the role.
Connection Options
-h host | --host hostThe host name of the machine on which the Greenplum master database server is running. If not specified, reads from the environment variable PGHOST or defaults to localhost.
-p port | --port portThe TCP port on which the Greenplum master database server is listening for connections. If not specified, reads from the environment variable PGPORT or defaults to 5432.
-U username | --username usernameThe database role name to connect as. If not specified, reads from the environment variable PGUSER or defaults to the current system role name.
dropuser 158
Greenplum Database Utility Guide 4.2 – Chapter 2: Client Utility Reference
-w | --no-password
Never issue a password prompt. If the server requires password authentication and a password is not available by other means such as a .pgpass file, the connection attempt will fail. This option can be useful in batch jobs and scripts where no user is present to enter a password.
-W | --password
Force a password prompt.
Examples
To remove the role joe using default connection options:
dropuser joe
DROP ROLE
To remove the role joe using connection options, with verification, and a peek at the underlying command:
dropuser -p 54321 -h masterhost -i -e joe
Role "joe" will be permanently removed.
Are you sure? (y/n) y
DROP ROLE "joe"
DROP ROLE
See Also
The Greenplum Database Reference Guide entry for DROP ROLE.
dropuser 159
Greenplum Database Utility Guide 4.2 – Chapter 2: Client Utility Reference
ecpgEmbedded SQL C preprocessor.
Synopsisecpg [option ...] file ...
Description
ecpg is the embedded SQL preprocessor for C programs. It converts C programs with embedded SQL statements to normal C code by replacing the SQL invocations with special function calls. The output files can then be processed with any C compiler tool chain.
ecpg will convert each input file given on the command line to the corresponding C output file. Input files preferably have the extension .pgc, in which case the extension will be replaced by .c to determine the output file name. If the extension of the input file is not .pgc, then the output file name is computed by appending .c to the full file name. The output file name can also be overridden using the -o option.
This reference page does not describe the embedded SQL language. See the ECPG - Embedded SQL in C chapter of the PostgreSQL documentation for more information.
Options
fileThe file to convert.
-c
Automatically generate certain C code from SQL code. Currently, this works for EXEC SQL TYPE.
-C modeSet a compatibility mode. mode may be INFORMIX or INFORMIX_SE.
-D symbolDefine a C preprocessor symbol.
-i
Parse system include files as well.
-I directorySpecify an additional include path, used to find files included via EXEC SQL INCLUDE. Defaults are . (current directory), /usr/local/include, the Greenplum Database include directory (/usr/local/greenplum-db-4.1.x.x/include), and /usr/include, in that order.
ecpg 160
Greenplum Database Utility Guide 4.2 – Chapter 2: Client Utility Reference
-o filenameSpecifies that ecpg should write all its output to the given filename.
-r optionSelects a run-time behavior. Currently, option can only be no_indicator.
-t
Turn on autocommit of transactions. In this mode, each SQL command is automatically committed unless it is inside an explicit transaction block. In the default mode, commands are committed only when EXEC SQL COMMIT is issued.
-v
Print additional information including the version and the include path.
--help
Show a brief summary of the command usage, then exit.
--version
Output version information, then exit.
Examples
If you have an embedded SQL C source file named prog1.pgc, you can create an executable program using the following sequence of commands:
ecpg prog1.pgc
cc -I/usr/local/pgsql/include -c prog1.c
cc -o prog1 prog1.o -L/usr/local/greenplum-db-4.2.x.x/lib -lecpg
ecpg 161
Greenplum Database Utility Guide 4.2 – Chapter 2: Client Utility Reference
pg_configRetrieves information about the installed version of Greenplum Database.
Synopsispg_config [option ...]
Description
The pg_config utility prints configuration parameters of the currently installed version of Greenplum Database. It is intended, for example, to be used by software packages that want to interface to Greenplum Database to facilitate finding the required header files and libraries. Note that information printed out by pg_config is for the Greenplum Database master only.
If more than one option is given, the information is printed in that order, one item per line. If no options are given, all available information is printed, with labels.
Options
--bindir
Print the location of user executables. Use this, for example, to find the psql program. This is normally also the location where the pg_config program resides.
--docdir
Print the location of documentation files.
--includedir
Print the location of C header files of the client interfaces.
--pkgincludedir
Print the location of other C header files.
--includedir-server
Print the location of C header files for server programming.
--libdir
Print the location of object code libraries.
--pkglibdir
Print the location of dynamically loadable modules, or where the server would search for them. (Other architecture-dependent data files may also be installed in this directory.)
--localedir
Print the location of locale support files.
pg_config 162
Greenplum Database Utility Guide 4.2 – Chapter 2: Client Utility Reference
--mandir
Print the location of manual pages.
--sharedir
Print the location of architecture-independent support files.
--sysconfdir
Print the location of system-wide configuration files.
--pgxs
Print the location of extension makefiles.
--configure
Print the options that were given to the configure script when Greenplum Database was configured for building.
--cc
Print the value of the CC variable that was used for building Greenplum Database. This shows the C compiler used.
--cppflags
Print the value of the CPPFLAGS variable that was used for building Greenplum Database. This shows C compiler switches needed at preprocessing time.
--cflags
Print the value of the CFLAGS variable that was used for building Greenplum Database. This shows C compiler switches.
--cflags_sl
Print the value of the CFLAGS_SL variable that was used for building Greenplum Database. This shows extra C compiler switches used for building shared libraries.
--ldflags
Print the value of the LDFLAGS variable that was used for building Greenplum Database. This shows linker switches.
--ldflags_sl
Print the value of the LDFLAGS_SL variable that was used for building Greenplum Database. This shows linker switches used for building shared libraries.
--libs
Print the value of the LIBS variable that was used for building Greenplum Database. This normally contains -l switches for external libraries linked into Greenplum Database.
--version
Print the version of Greenplum Database.
pg_config 163
Greenplum Database Utility Guide 4.2 – Chapter 2: Client Utility Reference
Examples
To reproduce the build configuration of the current Greenplum Database installation, run the following command:
eval ./configure 'pg_config --configure'
The output of pg_config --configure contains shell quotation marks so arguments with spaces are represented correctly. Therefore, using eval is required for proper results.
pg_config 164
Greenplum Database Utility Guide 4.2 – Chapter 2: Client Utility Reference
pg_dumpExtracts a database into a single script file or other archive file.
Synopsispg_dump [connection_option ...] [dump_option ...] dbname
Description
pg_dump is a standard PostgreSQL utility for backing up a database, and is also supported in Greenplum Database. It creates a single (non-parallel) dump file. For routine backups of Greenplum Database it is better to use Greenplum’s parallel dump utility, gp_dump, for the best performance.
Use pg_dump if you are migrating your data to another database vendor’s system, or to another Greenplum Database system with a different segment configuration (for example, if the system you are migrating to has greater or fewer segment instances). To restore, you must use the corresponding pg_restore utility (if the dump file is in archive format), or you can use a client program such as psql (if the dump file is in plain text format).
Since pg_dump is compatible with regular PostgreSQL, it can be used to migrate data into Greenplum Database. The pg_dump utility in Greenplum Database is very similar to the PostgreSQL pg_dump utility, with the following exceptions and limitations:
• If using pg_dump to backup a Greenplum database, keep in mind that the dump operation can take a long time (several hours) for very large databases. Also, you must make sure you have sufficient disk space to create the dump file.
• If you are migrating data from one Greenplum Database system to another, use the --gp-syntax command-line option to include the DISTRIBUTED BY clause in CREATE TABLE statements. This ensures that Greenplum Database table data is distributed with the correct distribution key columns upon restore.
pg_dump makes consistent backups even if the database is being used concurrently. pg_dump does not block other users accessing the database (readers or writers).
When used with one of the archive file formats and combined with pg_restore, pg_dump provides a flexible archival and transfer mechanism. pg_dump can be used to backup an entire database, then pg_restore can be used to examine the archive and/or select which parts of the database are to be restored. The most flexible output file format is the custom format (-Fc). It allows for selection and reordering of all archived items, and is compressed by default. The tar format (-Ft) is not compressed and it is not possible to reorder data when loading, but it is otherwise quite flexible. It can be manipulated with standard UNIX tools such as tar.
pg_dump 165
Greenplum Database Utility Guide 4.2 – Chapter 2: Client Utility Reference
Options
dbnameSpecifies the name of the database to be dumped. If this is not specified, the environment variable PGDATABASE is used. If that is not set, the user name specified for the connection is used.
Dump Options
-a | --data-only
Dump only the data, not the schema (data definitions). This option is only meaningful for the plain-text format. For the archive formats, you may specify the option when you call pg_restore.
-b | --blobs
Include large objects in the dump. This is the default behavior except when --schema, --table, or --schema-only is specified, so the -b switch is only useful to add large objects to selective dumps.
-c | --clean
Adds commands to the text output file to clean (drop) database objects prior to (the commands for) creating them. Note that objects are not dropped before the dump operation begins, but DROP commands are added to the DDL dump output files so that when you use those files to do a restore, the DROP commands are run prior to the CREATE commands. This option is only meaningful for the plain-text format. For the archive formats, you may specify the option when you call pg_restore.
-C | --create
Begin the output with a command to create the database itself and reconnect to the created database. (With a script of this form, it doesn’t matter which database you connect to before running the script.) This option is only meaningful for the plain-text format. For the archive formats, you may specify the option when you call pg_restore.
-d | --inserts
Dump data as INSERT commands (rather than COPY). This will make restoration very slow; it is mainly useful for making dumps that can be loaded into non-PostgreSQL-based databases. Also, since this option generates a separate command for each row, an error in reloading a row causes only that row to be lost rather than the entire table contents. Note that the restore may fail altogether if you have rearranged column order. The -D option is safe against column order changes, though even slower.
-D | --column-inserts | --attribute-inserts
Dump data as INSERT commands with explicit column names (INSERT INTO table (column, ...) VALUES ...). This will make restoration very slow; it is mainly useful for making dumps that can be loaded into non-PostgreSQL-based
pg_dump 166
Greenplum Database Utility Guide 4.2 – Chapter 2: Client Utility Reference
databases. Also, since this option generates a separate command for each row, an error in reloading a row causes only that row to be lost rather than the entire table contents.
-E encoding | --encoding=encodingCreate the dump in the specified character set encoding. By default, the dump is created in the database encoding. (Another way to get the same result is to set the PGCLIENTENCODING environment variable to the desired dump encoding.)
-f file | --file=fileSend output to the specified file. If this is omitted, the standard output is used.
-F p|c|t | --format=plain|custom|tar
Selects the format of the output. format can be one of the following:
p | plain — Output a plain-text SQL script file (the default).
c | custom — Output a custom archive suitable for input into pg_restore. This is the most flexible format in that it allows reordering of loading data as well as object definitions. This format is also compressed by default.
t | tar — Output a tar archive suitable for input into pg_restore. Using this archive format allows reordering and/or exclusion of database objects at the time the database is restored. It is also possible to limit which data is reloaded at restore time.
-i | --ignore-version
Ignore version mismatch between pg_dump and the database server. pg_dump can dump from servers running previous releases of Greenplum Database (or PostgreSQL), but very old versions may not be supported anymore. Use this option if you need to override the version check.
-n schema | --schema=schemaDump only schemas matching the schema pattern; this selects both the schema itself, and all its contained objects. When this option is not specified, all non-system schemas in the target database will be dumped. Multiple schemas can be selected by writing multiple -n switches. Also, the schema parameter is interpreted as a pattern according to the same rules used by psql’s \d commands, so multiple schemas can also be selected by writing wildcard characters in the pattern. When using wildcards, be careful to quote the pattern if needed to prevent the shell from expanding the wildcards.
Note: When -n is specified, pg_dump makes no attempt to dump any other database objects that the selected schema(s) may depend upon. Therefore, there is no guarantee that the results of a specific-schema dump can be successfully restored by themselves into a clean database.
Note: Non-schema objects such as blobs are not dumped when -n is specified. You can add blobs back to the dump with the --blobs switch.
pg_dump 167
Greenplum Database Utility Guide 4.2 – Chapter 2: Client Utility Reference
-N schema | --exclude-schema=schemaDo not dump any schemas matching the schema pattern. The pattern is interpreted according to the same rules as for -n. -N can be given more than once to exclude schemas matching any of several patterns. When both -n and -N are given, the behavior is to dump just the schemas that match at least one -n switch but no -N switches. If -N appears without -n, then schemas matching -N are excluded from what is otherwise a normal dump.
-o | --oids
Dump object identifiers (OIDs) as part of the data for every table. Use of this option is not recommended for files that are intended to be restored into Greenplum Database.
-O | --no-owner
Do not output commands to set ownership of objects to match the original database. By default, pg_dump issues ALTER OWNER or SET SESSION AUTHORIZATION statements to set ownership of created database objects. These statements will fail when the script is run unless it is started by a superuser (or the same user that owns all of the objects in the script). To make a script that can be restored by any user, but will give that user ownership of all the objects, specify -O. This option is only meaningful for the plain-text format. For the archive formats, you may specify the option when you call pg_restore.
-s | --schema-only
Dump only the object definitions (schema), not data.
-S username | --superuser=usernameSpecify the superuser user name to use when disabling triggers. This is only relevant if --disable-triggers is used. It is better to leave this out, and instead start the resulting script as a superuser.
-t table | --table=tableDump only tables (or views or sequences) matching the table pattern. Specify the table in the format schema.table.
Multiple tables can be selected by writing multiple -t switches. Also, the table parameter is interpreted as a pattern according to the same rules used by psql’s \d commands, so multiple tables can also be selected by writing wildcard characters in the pattern. When using wildcards, be careful to quote the pattern if needed to prevent the shell from expanding the wildcards. The -n and -N switches have no effect when -t is used, because tables selected by -t will be dumped regardless of those switches, and non-table objects will not be dumped.
Note: When -t is specified, pg_dump makes no attempt to dump any other database objects that the selected table(s) may depend upon. Therefore, there is no guarantee that the results of a specific-table dump can be successfully restored by themselves into a clean database.
Note: -t cannot be used to specify a child table partition. To dump a partitioned table, you must specify the parent table name.
pg_dump 168
Greenplum Database Utility Guide 4.2 – Chapter 2: Client Utility Reference
-T table | --exclude-table=tableDo not dump any tables matching the table pattern. The pattern is interpreted according to the same rules as for -t. -T can be given more than once to exclude tables matching any of several patterns. When both -t and -T are given, the behavior is to dump just the tables that match at least one -t switch but no -T switches. If -T appears without -t, then tables matching -T are excluded from what is otherwise a normal dump.
-v | --verbose
Specifies verbose mode. This will cause pg_dump to output detailed object comments and start/stop times to the dump file, and progress messages to standard error.
-x | --no-privileges | --no-acl
Prevent dumping of access privileges (GRANT/REVOKE commands).
--disable-dollar-quoting
This option disables the use of dollar quoting for function bodies, and forces them to be quoted using SQL standard string syntax.
--disable-triggers
This option is only relevant when creating a data-only dump. It instructs pg_dump to include commands to temporarily disable triggers on the target tables while the data is reloaded. Use this if you have triggers on the tables that you do not want to invoke during data reload. The commands emitted for --disable-triggers must be done as superuser. So, you should also specify a superuser name with -S, or preferably be careful to start the resulting script as a superuser. This option is only meaningful for the plain-text format. For the archive formats, you may specify the option when you call pg_restore.
--use-set-session-authorization
Output SQL-standard SET SESSION AUTHORIZATION commands instead of ALTER OWNER commands to determine object ownership. This makes the dump more standards compatible, but depending on the history of the objects in the dump, may not restore properly. A dump using SET SESSION AUTHORIZATION will require superuser privileges to restore correctly, whereas ALTER OWNER requires lesser privileges.
--gp-syntax | --no-gp-syntax
Use --gp-syntax to dump Greenplum Database syntax in the CREATE TABLE statements. This allows the distribution policy (DISTRIBUTED BY or DISTRIBUTED RANDOMLY clauses) of a Greenplum Database table to be dumped, which is useful for restoring into other Greenplum Database systems. The default is to include Greenplum Database syntax when connected to a Greenplum system, and to exclude it when connected to a regular PostgreSQL system.
pg_dump 169
Greenplum Database Utility Guide 4.2 – Chapter 2: Client Utility Reference
-Z 0..9 | --compress=0..9
Specify the compression level to use in archive formats that support compression. Currently only the custom archive format supports compression.
Connection Options
-h host | --host hostThe host name of the machine on which the Greenplum master database server is running. If not specified, reads from the environment variable PGHOST or defaults to localhost.
-p port | --port portThe TCP port on which the Greenplum master database server is listening for connections. If not specified, reads from the environment variable PGPORT or defaults to 5432.
-U username | --username usernameThe database role name to connect as. If not specified, reads from the environment variable PGUSER or defaults to the current system role name.
-W | --password
Force a password prompt.
Notes
When a data-only dump is chosen and the option --disable-triggers is used, pg_dump emits commands to disable triggers on user tables before inserting the data and commands to re-enable them after the data has been inserted. If the restore is stopped in the middle, the system catalogs may be left in the wrong state.
Members of tar archives are limited to a size less than 8 GB. (This is an inherent limitation of the tar file format.) Therefore this format cannot be used if the textual representation of any one table exceeds that size. The total size of a tar archive and any of the other output formats is not limited, except possibly by the operating system.
The dump file produced by pg_dump does not contain the statistics used by the optimizer to make query planning decisions. Therefore, it is wise to run ANALYZE after restoring from a dump file to ensure good performance.
Examples
Dump a database called mydb into a SQL-script file:
pg_dump mydb > db.sql
To reload such a script into a (freshly created) database named newdb:
psql -d newdb -f db.sql
Dump a Greenplum database in tar file format and include distribution policy information:
pg_dump -Ft --gp-syntax mydb > db.tar
pg_dump 170
Greenplum Database Utility Guide 4.2 – Chapter 2: Client Utility Reference
To dump a database into a custom-format archive file:
pg_dump -Fc mydb > db.dump
To reload an archive file into a (freshly created) database named newdb:
pg_restore -d newdb db.dump
To dump a single table named mytab:
pg_dump -t mytab mydb > db.sql
To specify an upper-case or mixed-case name in -t and related switches, you need to double-quote the name; else it will be folded to lower case. But double quotes are special to the shell, so in turn they must be quoted. Thus, to dump a single table with a mixed-case name, you need something like:
pg_dump -t '"MixedCaseName"' mydb > mytab.sql
See Also
gp_dump, pg_dumpall, pg_restore, gp_restore, psql
pg_dump 171
Greenplum Database Utility Guide 4.2 – Chapter 2: Client Utility Reference
pg_dumpallExtracts all databases in a Greenplum Database system to a single script file or other archive file.
Synopsispg_dumpall [connection_option ...] [dump_option ...]
Description
pg_dumpall is a standard PostgreSQL utility for backing up all databases in a Greenplum Database (or PostgreSQL) instance, and is also supported in Greenplum Database. It creates a single (non-parallel) dump file. For routine backups of Greenplum Database it is better to use Greenplum’s parallel dump utility, gp_dump, for the best performance.
pg_dumpall creates a single script file that contains SQL commands that can be used as input to psql to restore the databases. It does this by calling pg_dump for each database. pg_dumpall also dumps global objects that are common to all databases. (pg_dump does not save these objects.) This currently includes information about database users and groups, and access permissions that apply to databases as a whole.
Since pg_dumpall reads tables from all databases you will most likely have to connect as a database superuser in order to produce a complete dump. Also you will need superuser privileges to execute the saved script in order to be allowed to add users and groups, and to create databases.
The SQL script will be written to the standard output. Shell operators should be used to redirect it into a file.
pg_dumpall needs to connect several times to the Greenplum Database master server (once per database). If you use password authentication it is likely to ask for a password each time. It is convenient to have a ~/.pgpass file in such cases.
Options
Dump Options
-a | --data-only
Dump only the data, not the schema (data definitions). This option is only meaningful for the plain-text format. For the archive formats, you may specify the option when you call pg_restore.
-c | --clean
Output commands to clean (drop) database objects prior to (the commands for) creating them. This option is only meaningful for the plain-text format. For the archive formats, you may specify the option when you call pg_restore.
pg_dumpall 172
Greenplum Database Utility Guide 4.2 – Chapter 2: Client Utility Reference
-d | --inserts
Dump data as INSERT commands (rather than COPY). This will make restoration very slow; it is mainly useful for making dumps that can be loaded into non-PostgreSQL-based databases. Also, since this option generates a separate command for each row, an error in reloading a row causes only that row to be lost rather than the entire table contents. Note that the restore may fail altogether if you have rearranged column order. The -D option is safe against column order changes, though even slower.
-D | --column-inserts | --attribute-inserts
Dump data as INSERT commands with explicit column names (INSERT INTO table (column, ...) VALUES ...). This will make restoration very slow; it is mainly useful for making dumps that can be loaded into non-PostgreSQL-based databases. Also, since this option generates a separate command for each row, an error in reloading a row causes only that row to be lost rather than the entire table contents.
-f | --filespaces
Dump filespace definitions.
-g | --globals-only
Dump only global objects (roles and tablespaces), no databases.
-i | --ignore-version
Ignore version mismatch between pg_dump and the database server. pg_dump can dump from servers running previous releases of Greenplum Database (or PostgreSQL), but very old versions may not be supported anymore. Use this option if you need to override the version check.
-o | --oids
Dump object identifiers (OIDs) as part of the data for every table. Use of this option is not recommended for files that are intended to be restored into Greenplum Database.
-O | --no-owner
Do not output commands to set ownership of objects to match the original database. By default, pg_dump issues ALTER OWNER or SET SESSION AUTHORIZATION statements to set ownership of created database objects. These statements will fail when the script is run unless it is started by a superuser (or the same user that owns all of the objects in the script). To make a script that can be restored by any user, but will give that user ownership of all the objects, specify -O. This option is only meaningful for the plain-text format. For the archive formats, you may specify the option when you call pg_restore.
-r | --resource-queues
Dump resource queue definitions.
pg_dumpall 173
Greenplum Database Utility Guide 4.2 – Chapter 2: Client Utility Reference
-s | --schema-only
Dump only the object definitions (schema), not data.
-S username | --superuser=usernameSpecify the superuser user name to use when disabling triggers. This is only relevant if --disable-triggers is used. It is better to leave this out, and instead start the resulting script as a superuser.
-v | --verbose
Specifies verbose mode. This will cause pg_dump to output detailed object comments and start/stop times to the dump file, and progress messages to standard error.
-x | --no-privileges | --no-acl
Prevent dumping of access privileges (GRANT/REVOKE commands).
--disable-dollar-quoting
This option disables the use of dollar quoting for function bodies, and forces them to be quoted using SQL standard string syntax.
--disable-triggers
This option is only relevant when creating a data-only dump. It instructs pg_dumpall to include commands to temporarily disable triggers on the target tables while the data is reloaded. Use this if you have triggers on the tables that you do not want to invoke during data reload. The commands emitted for --disable-triggers must be done as superuser. So, you should also specify a superuser name with -S, or preferably be careful to start the resulting script as a superuser.
--use-set-session-authorization
Output SQL-standard SET SESSION AUTHORIZATION commands instead of ALTER OWNER commands to determine object ownership. This makes the dump more standards compatible, but depending on the history of the objects in the dump, may not restore properly. A dump using SET SESSION AUTHORIZATION will require superuser privileges to restore correctly, whereas ALTER OWNER requires lesser privileges.
--gp-syntax
Output Greenplum Database syntax in the CREATE TABLE statements. This allows the distribution policy (DISTRIBUTED BY or DISTRIBUTED RANDOMLY clauses) of a Greenplum Database table to be dumped, which is useful for restoring into other Greenplum Database systems.
pg_dumpall 174
Greenplum Database Utility Guide 4.2 – Chapter 2: Client Utility Reference
Connection Options
-h host | --host hostThe host name of the machine on which the Greenplum master database server is running. If not specified, reads from the environment variable PGHOST or defaults to localhost.
-p port | --port portThe TCP port on which the Greenplum master database server is listening for connections. If not specified, reads from the environment variable PGPORT or defaults to 5432.
-U username | --username usernameThe database role name to connect as. If not specified, reads from the environment variable PGUSER or defaults to the current system role name.
-W | --password
Force a password prompt.
Notes
Since pg_dumpall calls pg_dump internally, some diagnostic messages will refer to pg_dump.
Once restored, it is wise to run ANALYZE on each database so the query planner has useful statistics. You can also run vacuumdb -a -z to analyze all databases.
pg_dumpall requires all needed tablespace (filespace) directories to exist before the restore or database creation will fail for databases in non-default locations.
Examples
To dump all databases:
pg_dumpall > db.out
To reload this file:
psql template1 -f db.out
To dump only global objects (including filespaces and resource queues):
pg_dumpall -g -f -r
See Also
gp_dump, pg_dump
pg_dumpall 175
Greenplum Database Utility Guide 4.2 – Chapter 2: Client Utility Reference
pg_restoreRestores a database from an archive file created by pg_dump.
Synopsispg_restore [connection_option ...] [restore_option ...] filename
Description
pg_restore is a utility for restoring a database from an archive created by pg_dump in one of the non-plain-text formats. It will issue the commands necessary to reconstruct the database to the state it was in at the time it was saved. The archive files also allow pg_restore to be selective about what is restored, or even to reorder the items prior to being restored.
pg_restore can operate in two modes. If a database name is specified, the archive is restored directly into the database. Otherwise, a script containing the SQL commands necessary to rebuild the database is created and written to a file or standard output. The script output is equivalent to the plain text output format of pg_dump. Some of the options controlling the output are therefore analogous to pg_dump options.
pg_restore cannot restore information that is not present in the archive file. For instance, if the archive was made using the “dump data as INSERT commands” option, pg_restore will not be able to load the data using COPY statements.
Options
filenameSpecifies the location of the archive file to be restored. If not specified, the standard input is used.
-a | --data-only
Restore only the data, not the schema (data definitions).
-c | --clean
Clean (drop) database objects before recreating them.
-C | --create
Create the database before restoring into it. (When this option is used, the database named with -d is used only to issue the initial CREATE DATABASE command. All data is restored into the database name that appears in the archive.)
-d dbname | --dbname=dbnameConnect to this database and restore directly into this database. The default is to use the PGDATABASE environment variable setting, or the same name as the current system user.
pg_restore 176
Greenplum Database Utility Guide 4.2 – Chapter 2: Client Utility Reference
-e | --exit-on-error
Exit if an error is encountered while sending SQL commands to the database. The default is to continue and to display a count of errors at the end of the restoration.
-f outfilename | --file=outfilenameSpecify output file for generated script, or for the listing when used with -l. Default is the standard output.
-F t|c | --format=tar|custom
The format of the archive produced by pg_dump. It is not necessary to specify the format, since pg_restore will determine the format automatically. Format can be either tar or custom.
-i | --ignore-version
Ignore database version checks.
-I index | --index=index
Restore definition of named index only.
-l | --list
List the contents of the archive. The output of this operation can be used with the -L option to restrict and reorder the items that are restored.
-L list-file | --use-list=list-fileRestore elements in the list-file only, and in the order they appear in the file. Lines can be moved and may also be commented out by placing a ; at the start of the line.
-n schema | --schema=schemaRestore only objects that are in the named schema. This can be combined with the -t option to restore just a specific table.
-O | --no-owner
Do not output commands to set ownership of objects to match the original database. By default, pg_restore issues ALTER OWNER or SET SESSION AUTHORIZATION statements to set ownership of created schema elements. These statements will fail unless the initial connection to the database is made by a superuser (or the same user that owns all of the objects in the script). With -O, any user name can be used for the initial connection, and this user will own all the created objects.
-P 'function-name(argtype [, ...])' | --function='function-name(argtype [, ...])'
Restore the named function only. The function name must be enclosed in quotes. Be careful to spell the function name and arguments exactly as they appear in the dump file’s table of contents (as shown by the --list option).
pg_restore 177
Greenplum Database Utility Guide 4.2 – Chapter 2: Client Utility Reference
-s | --schema-only
Restore only the schema (data definitions), not the data (table contents). Sequence current values will not be restored, either. (Do not confuse this with the --schema option, which uses the word schema in a different meaning.)
-S username | --superuser=usernameSpecify the superuser user name to use when disabling triggers. This is only relevant if --disable-triggers is used.
-t table | --table=tableRestore definition and/or data of named table only.
-T trigger | --trigger=triggerRestore named trigger only.
-v | --verbose
Specifies verbose mode.
-x | --no-privileges | --no-acl
Prevent restoration of access privileges (GRANT/REVOKE commands).
--disable-triggers
This option is only relevant when performing a data-only restore. It instructs pg_restore to execute commands to temporarily disable triggers on the target tables while the data is reloaded. Use this if you have triggers on the tables that you do not want to invoke during data reload. The commands emitted for --disable-triggers must be done as superuser. So, you should also specify a superuser name with -S, or preferably run pg_restore as a superuser.
--no-data-for-failed-tables
By default, table data is restored even if the creation command for the table failed (e.g., because it already exists). With this option, data for such a table is skipped. This behavior is useful when the target database may already contain the desired table contents. Specifying this option prevents duplicate or obsolete data from being loaded. This option is effective only when restoring directly into a database, not when producing SQL script output.
Connection Options
-h host | --host hostThe host name of the machine on which the Greenplum master database server is running. If not specified, reads from the environment variable PGHOST or defaults to localhost.
-p port | --port portThe TCP port on which the Greenplum master database server is listening for connections. If not specified, reads from the environment variable PGPORT or defaults to 5432.
pg_restore 178
Greenplum Database Utility Guide 4.2 – Chapter 2: Client Utility Reference
-U username | --username usernameThe database role name to connect as. If not specified, reads from the environment variable PGUSER or defaults to the current system role name.
-W | --password
Force a password prompt.
-1 | --single-transaction
Execute the restore as a single transaction. This ensures that either all the commands complete successfully, or no changes are applied.
Notes
If your installation has any local additions to the template1 database, be careful to load the output of pg_restore into a truly empty database; otherwise you are likely to get errors due to duplicate definitions of the added objects. To make an empty database without any local additions, copy from template0 not template1, for example:
CREATE DATABASE foo WITH TEMPLATE template0;
When restoring data to a pre-existing table and the option --disable-triggers is used, pg_restore emits commands to disable triggers on user tables before inserting the data then emits commands to re-enable them after the data has been inserted. If the restore is stopped in the middle, the system catalogs may be left in the wrong state.
pg_restore will not restore large objects for a single table. If an archive contains large objects, then all large objects will be restored.
See also the pg_dump documentation for details on limitations of pg_dump.
Once restored, it is wise to run ANALYZE on each restored table so the query planner has useful statistics.
Examples
Assume we have dumped a database called mydb into a custom-format dump file:
pg_dump -Fc mydb > db.dump
To drop the database and recreate it from the dump:
dropdb mydb
pg_restore -C -d template1 db.dump
To reload the dump into a new database called newdb. Notice there is no -C, we instead connect directly to the database to be restored into. Also note that we clone the new database from template0 not template1, to ensure it is initially empty:
createdb -T template0 newdb
pg_restore -d newdb db.dump
To reorder database items, it is first necessary to dump the table of contents of the archive:
pg_restore 179
Greenplum Database Utility Guide 4.2 – Chapter 2: Client Utility Reference
pg_restore -l db.dump > db.list
The listing file consists of a header and one line for each item, for example,
; Archive created at Fri Jul 28 22:28:36 2006
; dbname: mydb
; TOC Entries: 74
; Compression: 0
; Dump Version: 1.4-0
; Format: CUSTOM
;
; Selected TOC Entries:
;
2; 145344 TABLE species postgres
3; 145344 ACL species
4; 145359 TABLE nt_header postgres
5; 145359 ACL nt_header
6; 145402 TABLE species_records postgres
7; 145402 ACL species_records
8; 145416 TABLE ss_old postgres
9; 145416 ACL ss_old
10; 145433 TABLE map_resolutions postgres
11; 145433 ACL map_resolutions
12; 145443 TABLE hs_old postgres
13; 145443 ACL hs_old
Semicolons start a comment, and the numbers at the start of lines refer to the internal archive ID assigned to each item. Lines in the file can be commented out, deleted, and reordered. For example,
10; 145433 TABLE map_resolutions postgres
;2; 145344 TABLE species postgres
;4; 145359 TABLE nt_header postgres
6; 145402 TABLE species_records postgres
;8; 145416 TABLE ss_old postgres
Could be used as input to pg_restore and would only restore items 10 and 6, in that order:
pg_restore -L db.list db.dump
See Also
pg_dump, gp_restore, gp_dump
pg_restore 180
Greenplum Database Utility Guide 4.2 – Chapter 2: Client Utility Reference
psqlInteractive command-line interface for Greenplum Database
Synopsispsql [option...] [dbname [username]]
Description
psql is a terminal-based front-end to Greenplum Database. It enables you to type in queries interactively, issue them to Greenplum Database, and see the query results. Alternatively, input can be from a file. In addition, it provides a number of meta-commands and various shell-like features to facilitate writing scripts and automating a wide variety of tasks.
Options
-a | --echo-all
Print all input lines to standard output as they are read. This is more useful for script processing rather than interactive mode.
-A | --no-align
Switches to unaligned output mode. (The default output mode is aligned.)
-c 'command' | --command 'command'Specifies that psql is to execute the specified command string, and then exit. This is useful in shell scripts. command must be either a command string that is completely parseable by the server, or a single backslash command. Thus you cannot mix SQL and psql meta-commands with this option. To achieve that, you could pipe the string into psql, like this: echo '\x \\ SELECT * FROM foo;' | psql. (\\ is the separator meta-command.)
If the command string contains multiple SQL commands, they are processed in a single transaction, unless there are explicit BEGIN/COMMIT commands included in the string to divide it into multiple transactions. This is different from the behavior when the same string is fed to psql’s standard input.
-d dbname | --dbname dbnameSpecifies the name of the database to connect to. This is equivalent to specifying dbname as the first non-option argument on the command line.
If this parameter contains an equals sign, it is treated as a conninfo string; for example you can pass 'dbname=postgres user=username password=mypass' as dbname.
-e | --echo-queries
Copy all SQL commands sent to the server to standard output as well.
psql 181
Greenplum Database Utility Guide 4.2 – Chapter 2: Client Utility Reference
-E | --echo-hidden
Echo the actual queries generated by \d and other backslash commands. You can use this to study psql’s internal operations.
-f filename | --file filenameUse a file as the source of commands instead of reading commands interactively. After the file is processed, psql terminates. If filename is - (hyphen), then standard input is read. Using this option is subtly different from writing psql < filename. In general, both will do what you expect, but using -f enables some nice features such as error messages with line numbers.
-F separator | --field-separator separatorUse the specified separator as the field separator for unaligned output.
-H | --html
Turn on HTML tabular output.
-l | --list
List all available databases, then exit. Other non-connection options are ignored.
-L filename | --log-file filenameWrite all query output into the specified log file, in addition to the normal output destination.
-o filename | --output filenamePut all query output into the specified file.
-P assignment | --pset assignmentAllows you to specify printing options in the style of \pset on the command line. Note that here you have to separate name and value with an equal sign instead of a space. Thus to set the output format to LaTeX, you could write -P format=latex.
-q | --quiet
Specifies that psql should do its work quietly. By default, it prints welcome messages and various informational output. If this option is used, none of this happens. This is useful with the -c option.
-R separator | --record-separator separatorUse separator as the record separator for unaligned output.
-s | --single-step
Run in single-step mode. That means the user is prompted before each command is sent to the server, with the option to cancel execution as well. Use this to debug scripts.
psql 182

Greenplum Database Utility Guide 4.2 – Chapter 2: Client Utility Reference
-S | --single-line
Runs in single-line mode where a new line terminates an SQL command, as a semicolon does.
-t | --tuples-only
Turn off printing of column names and result row count footers, etc. This command is equivalent to \pset tuples_only and is provided for convenience.
-T table_options | --table-attr table_optionsAllows you to specify options to be placed within the HTML table tag. See \pset for details.
-v assignment | --set assignment | --variable assignmentPerform a variable assignment, like the \set internal command. Note that you must separate name and value, if any, by an equal sign on the command line. To unset a variable, leave off the equal sign. To just set a variable without a value, use the equal sign but leave off the value. These assignments are done during a very early stage of start-up, so variables reserved for internal purposes might get overwritten later.
-V | --version
Print the psql version and exit.
-x | --expanded
Turn on the expanded table formatting mode.
-X | --no-psqlrc
Do not read the start-up file (neither the system-wide psqlrc file nor the user’s ~/.psqlrc file).
-1 | --single-transaction
When psql executes a script with the -f option, adding this option wraps BEGIN/COMMIT around the script to execute it as a single transaction. This ensures that either all the commands complete successfully, or no changes are applied.
If the script itself uses BEGIN, COMMIT, or ROLLBACK, this option will not have the desired effects. Also, if the script contains any command that cannot be executed inside a transaction block, specifying this option will cause that command (and hence the whole transaction) to fail.
-? | --help
Show help about psql command line arguments, and exit.
Connection Options
-h host | --host hostThe host name of the machine on which the Greenplum master database server is running. If not specified, reads from the environment variable PGHOST or defaults to localhost.
psql 183
Greenplum Database Utility Guide 4.2 – Chapter 2: Client Utility Reference
-p port | --port portThe TCP port on which the Greenplum master database server is listening for connections. If not specified, reads from the environment variable PGPORT or defaults to 5432.
-U username | --username usernameThe database role name to connect as. If not specified, reads from the environment variable PGUSER or defaults to the current system role name.
-W | --password
Force a password prompt. psql should automatically prompt for a password whenever the server requests password authentication. However, currently password request detection is not totally reliable, hence this option to force a prompt. If no password prompt is issued and the server requires password authentication, the connection attempt will fail.
-w --no-password
Never issue a password prompt. If the server requires password authentication and a password is not available by other means such as a .pgpass file, the connection attempt will fail. This option can be useful in batch jobs and scripts where no user is present to enter a password.
Note: This option remains set for the entire session, and so it affects uses of the meta-command \connect as well as the initial connection attempt.
Exit Status
psql returns 0 to the shell if it finished normally, 1 if a fatal error of its own (out of memory, file not found) occurs, 2 if the connection to the server went bad and the session was not interactive, and 3 if an error occurred in a script and the variable ON_ERROR_STOP was set.
Usage
Connecting To A Database
psql is a client application for Greenplum Database. In order to connect to a database you need to know the name of your target database, the host name and port number of the Greenplum master server and what database user name you want to connect as. psql can be told about those parameters via command line options, namely -d, -h, -p, and -U respectively. If an argument is found that does not belong to any option it will be interpreted as the database name (or the user name, if the database name is already given). Not all these options are required; there are useful defaults. If you omit the host name, psql will connect via a UNIX-domain socket to a master server on the local host, or via TCP/IP to localhost on machines that do not have UNIX-domain sockets. The default master port number is 5432. If you use a different port for the master, you must specify the port. The default database user name is your UNIX user
psql 184

Greenplum Database Utility Guide 4.2 – Chapter 2: Client Utility Reference
name, as is the default database name. Note that you cannot just connect to any database under any user name. Your database administrator should have informed you about your access rights.
When the defaults are not right, you can save yourself some typing by setting any or all of the environment variables PGAPPNAME, PGDATABASE, PGHOST, PGPORT, and PGUSER to appropriate values.
It is also convenient to have a ~/.pgpass file to avoid regularly having to type in passwords. This file should reside in your home directory and contain lines of the following format:
hostname:port:database:username:password
The permissions on .pgpass must disallow any access to world or group (for example: chmod 0600 ~/.pgpass). If the permissions are less strict than this, the file will be ignored. (The file permissions are not currently checked on Microsoft Windows clients, however.)
If the connection could not be made for any reason (insufficient privileges, server is not running, etc.), psql will return an error and terminate.
Entering SQL Commands
In normal operation, psql provides a prompt with the name of the database to which psql is currently connected, followed by the string => for a regular user or =# for a superuser. For example:
testdb=>
testdb=#
At the prompt, the user may type in SQL commands. Ordinarily, input lines are sent to the server when a command-terminating semicolon is reached. An end of line does not terminate a command. Thus commands can be spread over several lines for clarity. If the command was sent and executed without error, the results of the command are displayed on the screen.
Meta-Commands
Anything you enter in psql that begins with an unquoted backslash is a psql meta-command that is processed by psql itself. These commands help make psql more useful for administration or scripting. Meta-commands are more commonly called slash or backslash commands.
The format of a psql command is the backslash, followed immediately by a command verb, then any arguments. The arguments are separated from the command verb and each other by any number of whitespace characters.
To include whitespace into an argument you may quote it with a single quote. To include a single quote into such an argument, use two single quotes. Anything contained in single quotes is furthermore subject to C-like substitutions for \n (new line), \t (tab), \digits (octal), and \xdigits (hexadecimal).
If an unquoted argument begins with a colon (:), it is taken as a psql variable and the value of the variable is used as the argument instead.
psql 185
Greenplum Database Utility Guide 4.2 – Chapter 2: Client Utility Reference
Arguments that are enclosed in backquotes (`) are taken as a command line that is passed to the shell. The output of the command (with any trailing newline removed) is taken as the argument value. The above escape sequences also apply in backquotes.
Some commands take an SQL identifier (such as a table name) as argument. These arguments follow the syntax rules of SQL: Unquoted letters are forced to lowercase, while double quotes (") protect letters from case conversion and allow incorporation of whitespace into the identifier. Within double quotes, paired double quotes reduce to a single double quote in the resulting name. For example, FOO"BAR"BAZ is interpreted as fooBARbaz, and "A weird"" name" becomes A weird" name.
Parsing for arguments stops when another unquoted backslash occurs. This is taken as the beginning of a new meta-command. The special sequence \\ (two backslashes) marks the end of arguments and continues parsing SQL commands, if any. That way SQL and psql commands can be freely mixed on a line. But in any case, the arguments of a meta-command cannot continue beyond the end of the line.
The following meta-commands are defined:
\a
If the current table output format is unaligned, it is switched to aligned. If it is not unaligned, it is set to unaligned. This command is kept for backwards compatibility. See \pset for a more general solution.
\cd [directory]Changes the current working directory. Without argument, changes to the current user’s home directory. To print your current working directory, use \!pwd.
\C [title]Sets the title of any tables being printed as the result of a query or unset any such title. This command is equivalent to \pset title.
\c | \connect [dbname [username] [host] [port]]Establishes a new connection. If the new connection is successfully made, the previous connection is closed. If any of dbname, username, host or port are omitted, the value of that parameter from the previous connection is used. If the connection attempt failed, the previous connection will only be kept if psql is in interactive mode. When executing a non-interactive script, processing will immediately stop with an error. This distinction was chosen as a user convenience against typos, and a safety mechanism that scripts are not accidentally acting on the wrong database.
\conninfo
Displays information about the current connection including the database name, the user name, the type of connection (UNIX domain socket, TCP/IP, etc.), the host, and the port.
\copy {table [(column_list)] | (query)} {from | to} {filename | stdin | stdout | pstdin | pstdout} [with] [binary] [oids] [delimiter [as] 'character'] [null [as] 'string'] [csv [header]
psql 186
Greenplum Database Utility Guide 4.2 – Chapter 2: Client Utility Reference
[quote [as] 'character'] [escape [as] 'character'] [force quote column_list] [force not null column_list]]
Performs a frontend (client) copy. This is an operation that runs an SQL COPY command, but instead of the server reading or writing the specified file, psql reads or writes the file and routes the data between the server and the local file system. This means that file accessibility and privileges are those of the local user, not the server, and no SQL superuser privileges are required.
The syntax of the command is similar to that of the SQL COPY command. Note that, because of this, special parsing rules apply to the \copy command. In particular, the variable substitution rules and backslash escapes do not apply.
\copy ... from stdin | to stdout reads/writes based on the command input and output respectively. All rows are read from the same source that issued the command, continuing until \. is read or the stream reaches EOF. Output is sent to the same place as command output. To read/write from psql’s standard input or output, use pstdin or pstdout. This option is useful for populating tables in-line within a SQL script file.
This operation is not as efficient as the SQL COPY command because all data must pass through the client/server connection.
\copyright
Shows the copyright and distribution terms of PostgreSQL on which Greenplum Database is based.
\d [relation_pattern] | \d+ [relation_pattern] | \dS [relation_pattern]
For each relation (table, external table, view, index, or sequence) matching the relation pattern, show all columns, their types, the tablespace (if not the default) and any special attributes such as NOT NULL or defaults, if any. Associated indexes, constraints, rules, and triggers are also shown, as is the view definition if the relation is a view.
• The command form \d+ is identical, except that more information is displayed: any comments associated with the columns of the table are shown, as is the presence of OIDs in the table.
• The command form \dS is identical, except that system information is displayed as well as user information.
For example, \dt displays user tables, but not system tables; \dtS displays both user and system tables.Both these commands can take the + parameter to display additional information, as in \dt+ and \dtS+.
If \d is used without a pattern argument, it is equivalent to \dtvs which will show a list of all tables, views, and sequences.
\da [aggregate_pattern]Lists all available aggregate functions, together with the data types they operate on. If a pattern is specified, only aggregates whose names match the pattern are shown.
psql 187
Greenplum Database Utility Guide 4.2 – Chapter 2: Client Utility Reference
\db [tablespace_pattern] | \db+ [tablespace_pattern]Lists all available tablespaces and their corresponding filespace locations. If pattern is specified, only tablespaces whose names match the pattern are shown. If + is appended to the command name, each object is listed with its associated permissions.
\dc [conversion_pattern]Lists all available conversions between character-set encodings. If pattern is specified, only conversions whose names match the pattern are listed.
\dC
Lists all available type casts.
\dd [object_pattern]Lists all available objects. If pattern is specified, only matching objects are shown.
\dD [domain_pattern]Lists all available domains. If pattern is specified, only matching domains are shown.
\df [function_pattern] | \df+ [function_pattern ]Lists available functions, together with their argument and return types. If pattern is specified, only functions whose names match the pattern are shown. If the form \df+ is used, additional information about each function, including language and description, is shown. To reduce clutter, \df does not show data type I/O functions. This is implemented by ignoring functions that accept or return type cstring.
\dg [role_pattern]Lists all database roles. If pattern is specified, only those roles whose names match the pattern are listed.
\distPvxS [index | sequence | table | parent table | view | external_table | system_object]
This is not the actual command name: the letters i, s, t, P, v, x, S stand for index, sequence, table, parent table, view, external table, and system table, respectively. You can specify any or all of these letters, in any order, to obtain a listing of all the matching objects. The letter S restricts the listing to system objects; without S, only non-system objects are shown. If + is appended to the command name, each object is listed with its associated description, if any. If a pattern is specified, only objects whose names match the pattern are listed.
\dl
This is an alias for \lo_list, which shows a list of large objects.
psql 188
Greenplum Database Utility Guide 4.2 – Chapter 2: Client Utility Reference
\dn [schema_pattern] | \dn+ [schema_pattern]Lists all available schemas (namespaces). If pattern is specified, only schemas whose names match the pattern are listed. Non-local temporary schemas are suppressed. If + is appended to the command name, each object is listed with its associated permissions and description, if any.
\do [operator_pattern]Lists available operators with their operand and return types. If pattern is specified, only operators whose names match the pattern are listed.
\dp [relation_pattern_to_show_privileges]Produces a list of all available tables, views and sequences with their associated access privileges. If pattern is specified, only tables, views and sequences whose names match the pattern are listed. The GRANT and REVOKE commands are used to set access privileges.
\dT [datatype_pattern] | \dT+ [datatype_pattern]Lists all data types or only those that match pattern. The command form \dT+ shows extra information.
\du [role_pattern]Lists all database roles, or only those that match pattern.
\e | \edit [filename]If a file name is specified, the file is edited; after the editor exits, its content is copied back to the query buffer. If no argument is given, the current query buffer is copied to a temporary file which is then edited in the same fashion. The new query buffer is then re-parsed according to the normal rules of psql, where the whole buffer is treated as a single line. (Thus you cannot make scripts this way. Use \i for that.) This means also that if the query ends with (or rather contains) a semicolon, it is immediately executed. In other cases it will merely wait in the query buffer.
psql searches the environment variables PSQL_EDITOR, EDITOR, and VISUAL (in that order) for an editor to use. If all of them are unset, vi is used on UNIX systems, notepad.exe on Windows systems.
\echo text [ ... ]Prints the arguments to the standard output, separated by one space and followed by a newline. This can be useful to intersperse information in the output of scripts.
If you use the \o command to redirect your query output you may wish to use \qecho instead of this command.
\encoding [encoding]Sets the client character set encoding. Without an argument, this command shows the current encoding.
psql 189
Greenplum Database Utility Guide 4.2 – Chapter 2: Client Utility Reference
\f [field_separator_string]Sets the field separator for unaligned query output. The default is the vertical bar (|). See also \pset for a generic way of setting output options.
\g [{filename | |command }]Sends the current query input buffer to the server and optionally stores the query’s output in a file or pipes the output into a separate UNIX shell executing command. A bare \g is virtually equivalent to a semicolon. A \g with argument is a one-shot alternative to the \o command.
\h | \help [sql_command]Gives syntax help on the specified SQL command. If a command is not specified, then psql will list all the commands for which syntax help is available. Use an asterisk (*) to show syntax help on all SQL commands. To simplify typing, commands that consists of several words do not have to be quoted.
\H
Turns on HTML query output format. If the HTML format is already on, it is switched back to the default aligned text format. This command is for compatibility and convenience, but see \pset about setting other output options.
\i input_filenameReads input from a file and executes it as though it had been typed on the keyboard. If you want to see the lines on the screen as they are read you must set the variable ECHO to all.
\l | \list | \l+ | \list+
List the names, owners, and character set encodings of all the databases in the server. If + is appended to the command name, database descriptions are also displayed.
\lo_export loid filenameReads the large object with OID loid from the database and writes it to filename. Note that this is subtly different from the server function lo_export, which acts with the permissions of the user that the database server runs as and on the server’s file system. Use \lo_list to find out the large object’s OID.
\lo_import large_object_filename [comment]Stores the file into a large object. Optionally, it associates the given comment with the object. Example:
mydb=> \lo_import '/home/gpadmin/pictures/photo.xcf' 'a picture of me'
lo_import 152801
The response indicates that the large object received object ID 152801 which one ought to remember if one wants to access the object ever again. For that reason it is recommended to always associate a human-readable comment with every object.
psql 190
Greenplum Database Utility Guide 4.2 – Chapter 2: Client Utility Reference
Those can then be seen with the \lo_list command. Note that this command is subtly different from the server-side lo_import because it acts as the local user on the local file system, rather than the server’s user and file system.
\lo_list
Shows a list of all large objects currently stored in the database, along with any comments provided for them.
\lo_unlink largeobject_oidDeletes the large object of the specified OID from the database. Use \lo_list to find out the large object’s OID.
\o [ {query_result_filename | |command} ]Saves future query results to a file or pipes them into a UNIX shell command. If no arguments are specified, the query output will be reset to the standard output. Query results include all tables, command responses, and notices obtained from the database server, as well as output of various backslash commands that query the database (such as \d), but not error messages. To intersperse text output in between query results, use \qecho.
\p
Print the current query buffer to the standard output.
\password [username]Changes the password of the specified user (by default, the current user). This command prompts for the new password, encrypts it, and sends it to the server as an ALTER ROLE command. This makes sure that the new password does not appear in cleartext in the command history, the server log, or elsewhere.
\prompt [ text ] name
Prompts the user to set a variable name. Optionally, you can specify a prompt. Enclose prompts longer than one word in single quotes.
By default, \prompt uses the terminal for input and output. However, use the -f command line switch to specify standard input and standard output.
\pset print_option [value]This command sets options affecting the output of query result tables. print_option describes which option is to be set. Adjustable printing options are:
• format – Sets the output format to one of unaligned, aligned, html, latex, troff-ms, or wrapped. First letter abbreviations are allowed. Unaligned writes all columns of a row on a line, separated by the currently active field separator. This is intended to create output that might be intended to be read in by other programs. Aligned mode is the standard, human-readable, nicely formatted text output that is default. The HTML and LaTeX modes put out tables that are intended to be included in documents using the respective mark-up language. They are not complete documents! (This might not be so dramatic in HTML, but in LaTeX you must have a complete document wrapper.)
psql 191
Greenplum Database Utility Guide 4.2 – Chapter 2: Client Utility Reference
The wrapped option sets the output format like the aligned parameter , but wraps wide data values across lines to make the output fit in the target column width. The target width is set with the columns option. To specify the column width and select the wrapped format, use two \pset commands; for example, to set the with to 72 columns and specify wrapped format, use the commands \pset columns 72 and then \pset format wrapped.Note: Since psql does not attempt to wrap column header titles, the wrapped format behaves the same as aligned if the total width needed for column headers exceeds the target.
• border – The second argument must be a number. In general, the higher the number the more borders and lines the tables will have, but this depends on the particular format. In HTML mode, this will translate directly into the border=... attribute, in the others only values 0 (no border), 1 (internal dividing lines), and 2 (table frame) make sense.
• columns – Sets the target width for the wrapped format, and also the width limit for determining whether output is wide enough to require the pager. The default is zero. Zero causes the target width to be controlled by the environment variable COLUMNS, or the detected screen width if COLUMNS is not set. In addition, if columns is zero then the wrapped format affects screen output only. If columns is nonzero then file and pipe output is wrapped to that width as well. After setting the target width, use the command \pset format wrapped to enable the wrapped format.
• expanded | x) – Toggles between regular and expanded format. When expanded format is enabled, query results are displayed in two columns, with the column name on the left and the data on the right. This mode is useful if the data would not fit on the screen in the normal horizontal mode. Expanded mode is supported by all four output formats.
• linestyle [unicode | ascii | old-ascii] – Sets the border line drawing style to one of unicode, ascii, or old-ascii. Unique abbreviations, including one letter, are allowed for the three styles. The default setting is ascii. This option only affects the aligned and wrapped output formats. ascii – uses plain ASCII characters. Newlines in data are shown using a + symbol in the right-hand margin. When the wrapped format wraps data from one line to the next without a newline character, a dot (.) is shown in the right-hand margin of the first line, and again in the left-hand margin of the following line. old-ascii – style uses plain ASCII characters, using the formatting style used in PostgreSQL 8.4 and earlier. Newlines in data are shown using a : symbol in place of the left-hand column separator. When the data is wrapped from one line to the next without a newline character, a ; symbol is used in place of the left-hand column separator. unicode – style uses Unicode box-drawing characters. Newlines in data are shown using a carriage return symbol in the right-hand margin. When the data is wrapped from one line to the next without a newline character, an ellipsis symbol is shown in the right-hand margin of the first line, and again in the left-hand margin of the following line.
psql 192
Greenplum Database Utility Guide 4.2 – Chapter 2: Client Utility Reference
When the border setting is greater than zero, this option also determines the characters with which the border lines are drawn. Plain ASCII characters work everywhere, but Unicode characters look nicer on displays that recognize them.
• null 'string' – The second argument is a string to print whenever a column is null. The default is not to print anything, which can easily be mistaken for an empty string. For example, the command \pset null '(empty)' displays (empty) in null columns.
• fieldsep – Specifies the field separator to be used in unaligned output mode. That way one can create, for example, tab- or comma-separated output, which other programs might prefer. To set a tab as field separator, type \pset fieldsep '\t'. The default field separator is '|' (a vertical bar).
• footer – Toggles the display of the default footer (x rows). • numericlocale – Toggles the display of a locale-aware character to
separate groups of digits to the left of the decimal marker. It also enables a locale-aware decimal marker.
• recordsep – Specifies the record (line) separator to use in unaligned output mode. The default is a newline character.
• title [text] – Sets the table title for any subsequently printed tables. This can be used to give your output descriptive tags. If no argument is given, the title is unset.
• tableattr | T [text] – Allows you to specify any attributes to be placed inside the HTML table tag. This could for example be cellpadding or bgcolor. Note that you probably don’t want to specify border here, as that is already taken care of by \pset border.
• tuples_only | t [no value | on | off]– The \pset tuples_only command by itselt toggles between tuples only and full display. The values on and off set the tuples display, regardless of the current setting. Full display may show extra information such as column headers, titles, and various footers. In tuples only mode, only actual table data is shown The \t command is equivalent to \pset tuples_only and is provided for convenience.
• pager – Controls the use of a pager for query and psql help output. When on, if the environment variable PAGER is set, the output is piped to the specified program. Otherwise a platform-dependent default (such as more) is used. When off, the pager is not used. When on, the pager is used only when appropriate. Pager can also be set to always, which causes the pager to be always used.
\q
Quits the psql program.
\qecho text [ ... ] This command is identical to \echo except that the output will be written to the query output channel, as set by \o.
\r
Resets (clears) the query buffer.
psql 193
Greenplum Database Utility Guide 4.2 – Chapter 2: Client Utility Reference
\s [history_filename]Print or save the command line history to filename. If filename is omitted, the history is written to the standard output.
\set [name [value [ ... ]]]Sets the internal variable name to value or, if more than one value is given, to the concatenation of all of them. If no second argument is given, the variable is just set with no value. To unset a variable, use the \unset command.
Valid variable names can contain characters, digits, and underscores. See “Variables” on page 195. Variable names are case-sensitive.
Although you are welcome to set any variable to anything you want, psql treats several variables as special. They are documented in the section about variables.
This command is totally separate from the SQL command SET.
\t [no value | on | off]The \t command by itself toggles a display of output column name headings and row count footer. The values on and off set the tuples display, regardless of the current setting.This command is equivalent to \pset tuples_only and is provided for convenience.
\T table_optionsAllows you to specify attributes to be placed within the table tag in HTML tabular output mode.
\timing [no value | on | off]The \timing command by itself toggles a display of how long each SQL statement takes, in milliseconds. The values on and off set the time display, regardless of the current setting.
\w {filename | |command}Outputs the current query buffer to a file or pipes it to a UNIX command.
\x
Toggles expanded table formatting mode.
\z [relation_to_show_privileges]Produces a list of all available tables, views and sequences with their associated access privileges. If a pattern is specified, only tables, views and sequences whose names match the pattern are listed. This is an alias for \dp.
\! [command]Escapes to a separate UNIX shell or executes the UNIX command. The arguments are not further interpreted, the shell will see them as is.
\?
Shows help information about the psql backslash commands.
psql 194
Greenplum Database Utility Guide 4.2 – Chapter 2: Client Utility Reference
Patterns
The various \d commands accept a pattern parameter to specify the object name(s) to be displayed. In the simplest case, a pattern is just the exact name of the object. The characters within a pattern are normally folded to lower case, just as in SQL names; for example, \dt FOO will display the table named foo. As in SQL names, placing double quotes around a pattern stops folding to lower case. Should you need to include an actual double quote character in a pattern, write it as a pair of double quotes within a double-quote sequence; again this is in accord with the rules for SQL quoted identifiers. For example, \dt "FOO""BAR" will display the table named FOO"BAR (not foo"bar). Unlike the normal rules for SQL names, you can put double quotes around just part of a pattern, for instance \dt FOO"FOO"BAR will display the table named fooFOObar.
Within a pattern, * matches any sequence of characters (including no characters) and ? matches any single character. (This notation is comparable to UNIX shell file name patterns.) For example, \dt int* displays all tables whose names begin with int. But within double quotes, * and ? lose these special meanings and are just matched literally.
A pattern that contains a dot (.) is interpreted as a schema name pattern followed by an object name pattern. For example, \dt foo*.bar* displays all tables whose table name starts with bar that are in schemas whose schema name starts with foo. When no dot appears, then the pattern matches only objects that are visible in the current schema search path. Again, a dot within double quotes loses its special meaning and is matched literally.
Advanced users can use regular-expression notations. All regular expression special characters work as specified in the PostgreSQL documentation on regular expressions, except for . which is taken as a separator as mentioned above, * which is translated to the regular-expression notation .*, and ? which is translated to .. You can emulate these pattern characters at need by writing ? for ., (R+|) for R*, or (R|) for R?. Remember that the pattern must match the whole name, unlike the usual interpretation of regular expressions; write * at the beginning and/or end if you don’t wish the pattern to be anchored. Note that within double quotes, all regular expression special characters lose their special meanings and are matched literally. Also, the regular expression special characters are matched literally in operator name patterns (such as the argument of \do).
Whenever the pattern parameter is omitted completely, the \d commands display all objects that are visible in the current schema search path – this is equivalent to using the pattern *. To see all objects in the database, use the pattern *.*.
Advanced Features
Variables
psql provides variable substitution features similar to common UNIX command shells. Variables are simply name/value pairs, where the value can be any string of any length. To set variables, use the psql meta-command \set:
testdb=> \set foo bar
psql 195
Greenplum Database Utility Guide 4.2 – Chapter 2: Client Utility Reference
sets the variable foo to the value bar. To retrieve the content of the variable, precede the name with a colon and use it as the argument of any slash command:
testdb=> \echo :foo
bar
Note: The arguments of \set are subject to the same substitution rules as with other commands. Thus you can construct interesting references such as \set :foo 'something' and get ‘soft links’ or ‘variable variables’ of Perl or PHP fame, respectively. Unfortunately, there is no way to do anything useful with these constructs. On the other hand, \set bar :foo is a perfectly valid way to copy a variable.
If you call \set without a second argument, the variable is set, with an empty string as value. To unset (or delete) a variable, use the command \unset.
psql’s internal variable names can consist of letters, numbers, and underscores in any order and any number of them. A number of these variables are treated specially by psql. They indicate certain option settings that can be changed at run time by altering the value of the variable or represent some state of the application. Although you can use these variables for any other purpose, this is not recommended, as the program behavior might behave unexpectedly. By convention, all specially treated variables consist of all upper-case letters (and possibly numbers and underscores). To ensure maximum compatibility in the future, avoid using such variable names for your own purposes. A list of all specially treated variables are as follows:
AUTOCOMMIT
When on (the default), each SQL command is automatically committed upon successful completion. To postpone commit in this mode, you must enter a BEGIN or START TRANSACTION SQL command. When off or unset, SQL commands are not committed until you explicitly issue COMMIT or END. The autocommit-on mode works by issuing an implicit BEGIN for you, just before any command that is not already in a transaction block and is not itself a BEGIN or other transaction-control command, nor a command that cannot be executed inside a transaction block (such as VACUUM).
In autocommit-off mode, you must explicitly abandon any failed transaction by entering ABORT or ROLLBACK. Also keep in mind that if you exit the session without committing, your work will be lost.
The autocommit-on mode is PostgreSQL’s traditional behavior, but autocommit-off is closer to the SQL spec. If you prefer autocommit-off, you may wish to set it in your ~/.psqlrc file.
DBNAME
The name of the database you are currently connected to. This is set every time you connect to a database (including program start-up), but can be unset.
psql 196
Greenplum Database Utility Guide 4.2 – Chapter 2: Client Utility Reference
ECHO
If set to all, all lines entered from the keyboard or from a script are written to the standard output before they are parsed or executed. To select this behavior on program start-up, use the switch -a. If set to queries, psql merely prints all queries as they are sent to the server. The switch for this is -e.
ECHO_HIDDEN
When this variable is set and a backslash command queries the database, the query is first shown. This way you can study the Greenplum Database internals and provide similar functionality in your own programs. (To select this behavior on program start-up, use the switch -E.) If you set the variable to the value noexec, the queries are just shown but are not actually sent to the server and executed.
ENCODING
The current client character set encoding.
FETCH_COUNT
If this variable is set to an integer value > 0, the results of SELECT queries are fetched and displayed in groups of that many rows, rather than the default behavior of collecting the entire result set before display. Therefore only a limited amount of memory is used, regardless of the size of the result set. Settings of 100 to 1000 are commonly used when enabling this feature. Keep in mind that when using this feature, a query may fail after having already displayed some rows.
Although you can use any output format with this feature, the default aligned format tends to look bad because each group of FETCH_COUNT rows will be formatted separately, leading to varying column widths across the row groups. The other output formats work better.
HISTCONTROL
If this variable is set to ignorespace, lines which begin with a space are not entered into the history list. If set to a value of ignoredups, lines matching the previous history line are not entered. A value of ignoreboth combines the two options. If unset, or if set to any other value than those above, all lines read in interactive mode are saved on the history list.
HISTFILE
The file name that will be used to store the history list. The default value is ~/.psql_history. For example, putting
\set HISTFILE ~/.psql_history- :DBNAME
in ~/.psqlrc will cause psql to maintain a separate history for each database.
HISTSIZE
The number of commands to store in the command history. The default value is 500.
HOST
The database server host you are currently connected to. This is set every time you connect to a database (including program start-up), but can be unset.
psql 197
Greenplum Database Utility Guide 4.2 – Chapter 2: Client Utility Reference
IGNOREEOF
If unset, sending an EOF character (usually CTRL+D) to an interactive session of psql will terminate the application. If set to a numeric value, that many EOF characters are ignored before the application terminates. If the variable is set but has no numeric value, the default is 10.
LASTOID
The value of the last affected OID, as returned from an INSERT or lo_insert command. This variable is only guaranteed to be valid until after the result of the next SQL command has been displayed.
ON_ERROR_ROLLBACK
When on, if a statement in a transaction block generates an error, the error is ignored and the transaction continues. When interactive, such errors are only ignored in interactive sessions, and not when reading script files. When off (the default), a statement in a transaction block that generates an error aborts the entire transaction. The on_error_rollback-on mode works by issuing an implicit SAVEPOINT for you, just before each command that is in a transaction block, and rolls back to the savepoint on error.
ON_ERROR_STOP
By default, if non-interactive scripts encounter an error, such as a malformed SQL command or internal meta-command, processing continues. This has been the traditional behavior of psql but it is sometimes not desirable. If this variable is set, script processing will immediately terminate. If the script was called from another script it will terminate in the same fashion. If the outermost script was not called from an interactive psql session but rather using the -f option, psql will return error code 3, to distinguish this case from fatal error conditions (error code 1).
PORT
The database server port to which you are currently connected. This is set every time you connect to a database (including program start-up), but can be unset.
PROMPT1 PROMPT2 PROMPT3
These specify what the prompts psql issues should look like. See “Prompting” on page 200.
QUIET
This variable is equivalent to the command line option -q. It is not very useful in interactive mode.
SINGLELINE
This variable is equivalent to the command line option -S.
SINGLESTEP
This variable is equivalent to the command line option -s.
psql 198
Greenplum Database Utility Guide 4.2 – Chapter 2: Client Utility Reference
USER
The database user you are currently connected as. This is set every time you connect to a database (including program start-up), but can be unset.
VERBOSITY
This variable can be set to the values default, verbose, or terse to control the verbosity of error reports.
SQL Interpolation
An additional useful feature of psql variables is that you can substitute (interpolate) them into regular SQL statements. The syntax for this is again to prepend the variable name with a colon (:).
testdb=> \set foo 'my_table'
testdb=> SELECT * FROM :foo;
would then query the table my_table. The value of the variable is copied literally, so it can even contain unbalanced quotes or backslash commands. You must make sure that it makes sense where you put it. Variable interpolation will not be performed into quoted SQL entities.
A popular application of this facility is to refer to the last inserted OID in subsequent statements to build a foreign key scenario. Another possible use of this mechanism is to copy the contents of a file into a table column. First load the file into a variable and then proceed as above.
testdb=> \set content '''' `cat my_file.txt` ''''
testdb=> INSERT INTO my_table VALUES (:content);
One problem with this approach is that my_file.txt might contain single quotes. These need to be escaped so that they don’t cause a syntax error when the second line is processed. This could be done with the program sed:
testdb=> \set content '''' `sed -e "s/'/''/g" < my_file.txt` ''''
If you are using non-standard-conforming strings then you’ll also need to double backslashes. This is a bit tricky:
testdb=> \set content '''' `sed -e "s/'/''/g" -e 's/\\/\\\\/g' < my_file.txt` ''''
Note the use of different shell quoting conventions so that neither the single quote marks nor the backslashes are special to the shell. Backslashes are still special to sed, however, so we need to double them.
Since colons may legally appear in SQL commands, the following rule applies: the character sequence ":name" is not changed unless "name" is the name of a variable that is currently set. In any case you can escape a colon with a backslash to protect it from substitution. (The colon syntax for variables is standard SQL for embedded query languages, such as ECPG. The colon syntax for array slices and type casts are Greenplum Database extensions, hence the conflict.)
psql 199
Greenplum Database Utility Guide 4.2 – Chapter 2: Client Utility Reference
Prompting
The prompts psql issues can be customized to your preference. The three variables PROMPT1, PROMPT2, and PROMPT3 contain strings and special escape sequences that describe the appearance of the prompt. Prompt 1 is the normal prompt that is issued when psql requests a new command. Prompt 2 is issued when more input is expected during command input because the command was not terminated with a semicolon or a quote was not closed. Prompt 3 is issued when you run an SQL COPY command and you are expected to type in the row values on the terminal.
The value of the selected prompt variable is printed literally, except where a percent sign (%) is encountered. Depending on the next character, certain other text is substituted instead. Defined substitutions are:
%M
The full host name (with domain name) of the database server, or [local] if the connection is over a UNIX domain socket, or [local:/dir/name], if the UNIX domain socket is not at the compiled in default location.
%m
The host name of the database server, truncated at the first dot, or [local] if the connection is over a UNIX domain socket.
%>
The port number at which the database server is listening.
%n
The database session user name. (The expansion of this value might change during a database session as the result of the command SET SESSION AUTHORIZATION.)
%/
The name of the current database.
%~
Like %/, but the output is ~ (tilde) if the database is your default database.
%#
If the session user is a database superuser, then a #, otherwise a >. (The expansion of this value might change during a database session as the result of the command SET SESSION AUTHORIZATION.)
%R
In prompt 1 normally =, but ^ if in single-line mode, and ! if the session is disconnected from the database (which can happen if \connect fails). In prompt 2 the sequence is replaced by -, *, a single quote, a double quote, or a dollar sign, depending on whether psql expects more input because the command wasn’t terminated yet, because you are inside a /* ... */ comment, or because you are inside a quoted or dollar-escaped string. In prompt 3 the sequence doesn’t produce anything.
psql 200
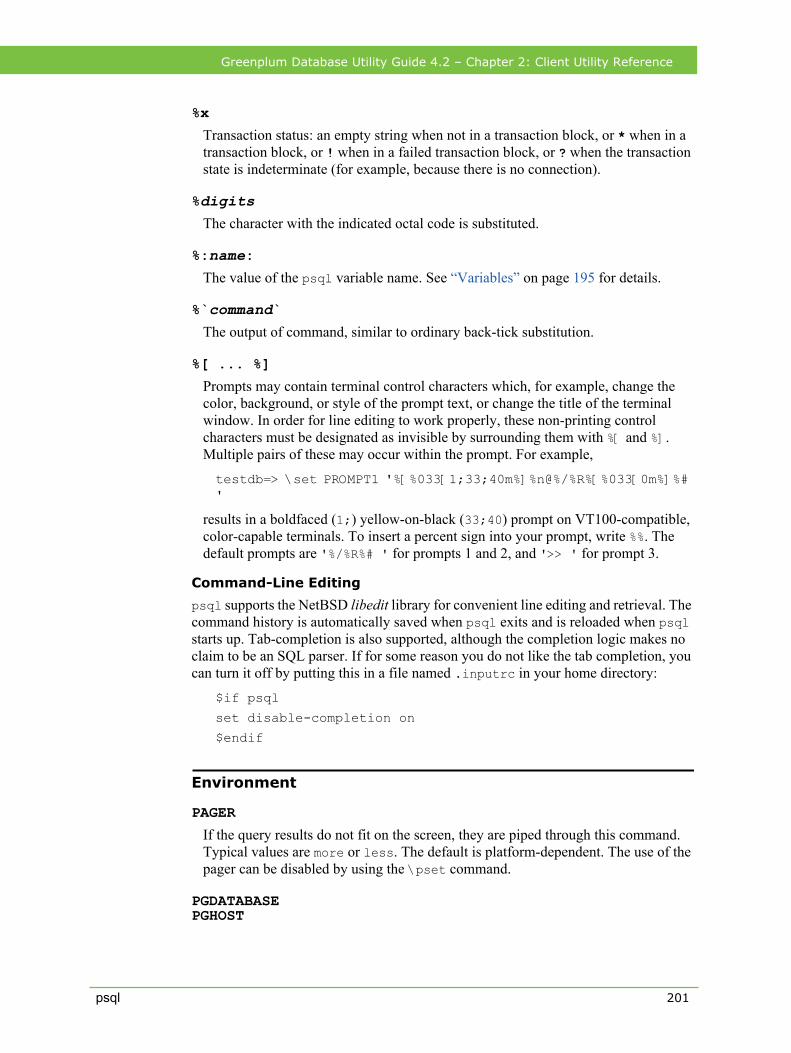
Greenplum Database Utility Guide 4.2 – Chapter 2: Client Utility Reference
%x
Transaction status: an empty string when not in a transaction block, or * when in a transaction block, or ! when in a failed transaction block, or ? when the transaction state is indeterminate (for example, because there is no connection).
%digitsThe character with the indicated octal code is substituted.
%:name:The value of the psql variable name. See “Variables” on page 195 for details.
%`command`The output of command, similar to ordinary back-tick substitution.
%[ ... %]
Prompts may contain terminal control characters which, for example, change the color, background, or style of the prompt text, or change the title of the terminal window. In order for line editing to work properly, these non-printing control characters must be designated as invisible by surrounding them with %[ and %]. Multiple pairs of these may occur within the prompt. For example,
testdb=> \set PROMPT1 '%[%033[1;33;40m%]%n@%/%R%[%033[0m%]%# '
results in a boldfaced (1;) yellow-on-black (33;40) prompt on VT100-compatible, color-capable terminals. To insert a percent sign into your prompt, write %%. The default prompts are '%/%R%# ' for prompts 1 and 2, and '>> ' for prompt 3.
Command-Line Editing
psql supports the NetBSD libedit library for convenient line editing and retrieval. The command history is automatically saved when psql exits and is reloaded when psql starts up. Tab-completion is also supported, although the completion logic makes no claim to be an SQL parser. If for some reason you do not like the tab completion, you can turn it off by putting this in a file named .inputrc in your home directory:
$if psql
set disable-completion on
$endif
Environment
PAGER
If the query results do not fit on the screen, they are piped through this command. Typical values are more or less. The default is platform-dependent. The use of the pager can be disabled by using the \pset command.
PGDATABASE PGHOST
psql 201

Greenplum Database Utility Guide 4.2 – Chapter 2: Client Utility Reference
PGPORT PGUSER
Default connection parameters.
PSQL_EDITOR EDITOR VISUAL
Editor used by the \e command. The variables are examined in the order listed; the first that is set is used.
SHELL
Command executed by the \! command.
TMPDIR
Directory for storing temporary files. The default is /tmp.
Files
Before starting up, psql attempts to read and execute commands from the user’s ~/.psqlrc file.
The command-line history is stored in the file ~/.psql_history.
Notes
psql only works smoothly with servers of the same version. That does not mean other combinations will fail outright, but subtle and not-so-subtle problems might come up. Backslash commands are particularly likely to fail if the server is of a different version.
Notes for Windows users
psql is built as a console application. Since the Windows console windows use a different encoding than the rest of the system, you must take special care when using 8-bit characters within psql. If psql detects a problematic console code page, it will warn you at startup. To change the console code page, two things are necessary:
Set the code page by entering cmd.exe /c chcp 1252. (1252 is a character encoding of the Latin alphabet, used by Microsoft Windows for English and some other Western languages.) If you are using Cygwin, you can put this command in /etc/profile.
Set the console font to Lucida Console, because the raster font does not work with the ANSI code page.
Examples
Start psql in interactive mode:
psql -p 54321 -U sally mydatabase
In psql interactive mode, spread a command over several lines of input. Notice the changing prompt:
psql 202
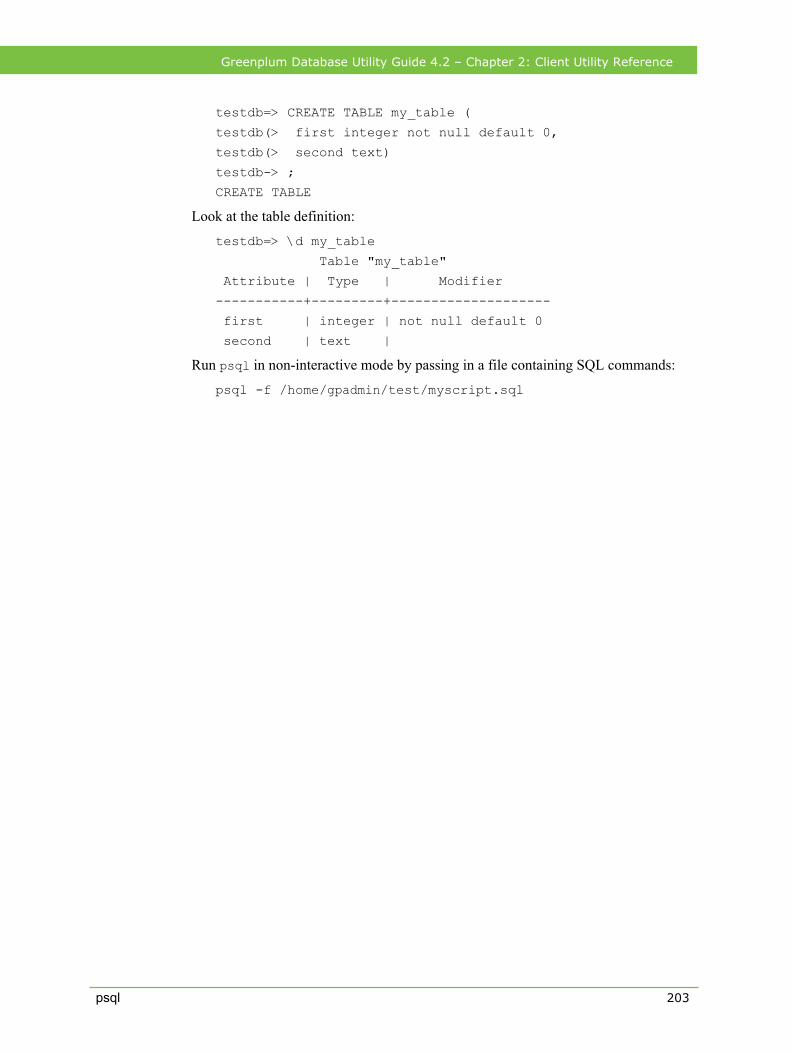
Greenplum Database Utility Guide 4.2 – Chapter 2: Client Utility Reference
testdb=> CREATE TABLE my_table (
testdb(> first integer not null default 0,
testdb(> second text)
testdb-> ;
CREATE TABLE
Look at the table definition:
testdb=> \d my_table
Table "my_table"
Attribute | Type | Modifier
-----------+---------+--------------------
first | integer | not null default 0
second | text |
Run psql in non-interactive mode by passing in a file containing SQL commands:
psql -f /home/gpadmin/test/myscript.sql
psql 203
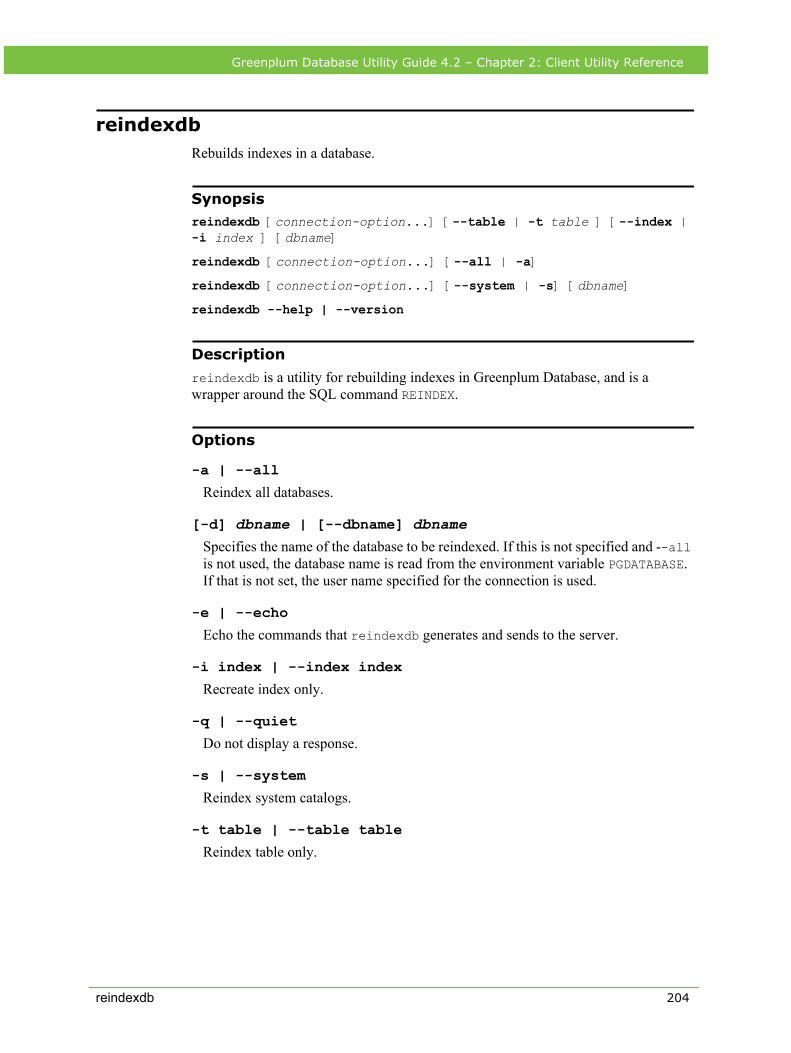
Greenplum Database Utility Guide 4.2 – Chapter 2: Client Utility Reference
reindexdbRebuilds indexes in a database.
Synopsisreindexdb [connection-option...] [--table | -t table ] [--index | -i index ] [dbname]
reindexdb [connection-option...] [--all | -a]
reindexdb [connection-option...] [--system | -s] [dbname]
reindexdb --help | --version
Description
reindexdb is a utility for rebuilding indexes in Greenplum Database, and is a wrapper around the SQL command REINDEX.
Options
-a | --all
Reindex all databases.
[-d] dbname | [--dbname] dbnameSpecifies the name of the database to be reindexed. If this is not specified and --all is not used, the database name is read from the environment variable PGDATABASE. If that is not set, the user name specified for the connection is used.
-e | --echo
Echo the commands that reindexdb generates and sends to the server.
-i index | --index index
Recreate index only.
-q | --quiet
Do not display a response.
-s | --system
Reindex system catalogs.
-t table | --table table
Reindex table only.
reindexdb 204
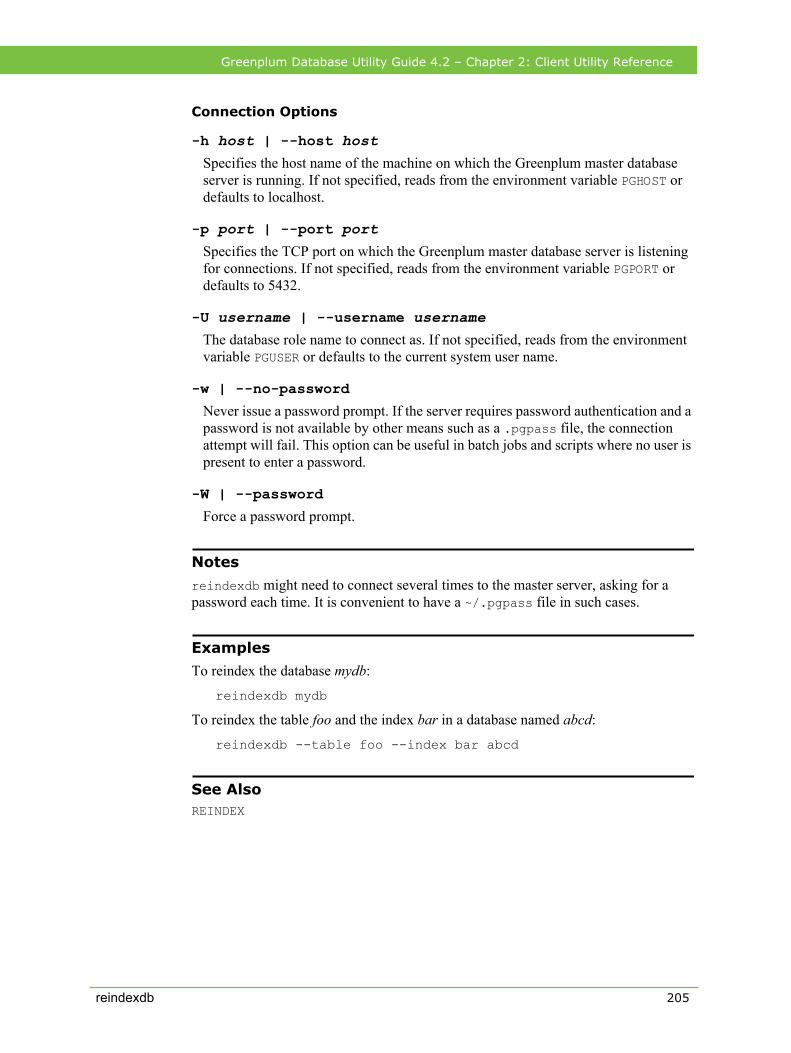
Greenplum Database Utility Guide 4.2 – Chapter 2: Client Utility Reference
Connection Options
-h host | --host hostSpecifies the host name of the machine on which the Greenplum master database server is running. If not specified, reads from the environment variable PGHOST or defaults to localhost.
-p port | --port portSpecifies the TCP port on which the Greenplum master database server is listening for connections. If not specified, reads from the environment variable PGPORT or defaults to 5432.
-U username | --username usernameThe database role name to connect as. If not specified, reads from the environment variable PGUSER or defaults to the current system user name.
-w | --no-password
Never issue a password prompt. If the server requires password authentication and a password is not available by other means such as a .pgpass file, the connection attempt will fail. This option can be useful in batch jobs and scripts where no user is present to enter a password.
-W | --password
Force a password prompt.
Notes
reindexdb might need to connect several times to the master server, asking for a password each time. It is convenient to have a ~/.pgpass file in such cases.
Examples
To reindex the database mydb:
reindexdb mydb
To reindex the table foo and the index bar in a database named abcd:
reindexdb --table foo --index bar abcd
See AlsoREINDEX
reindexdb 205
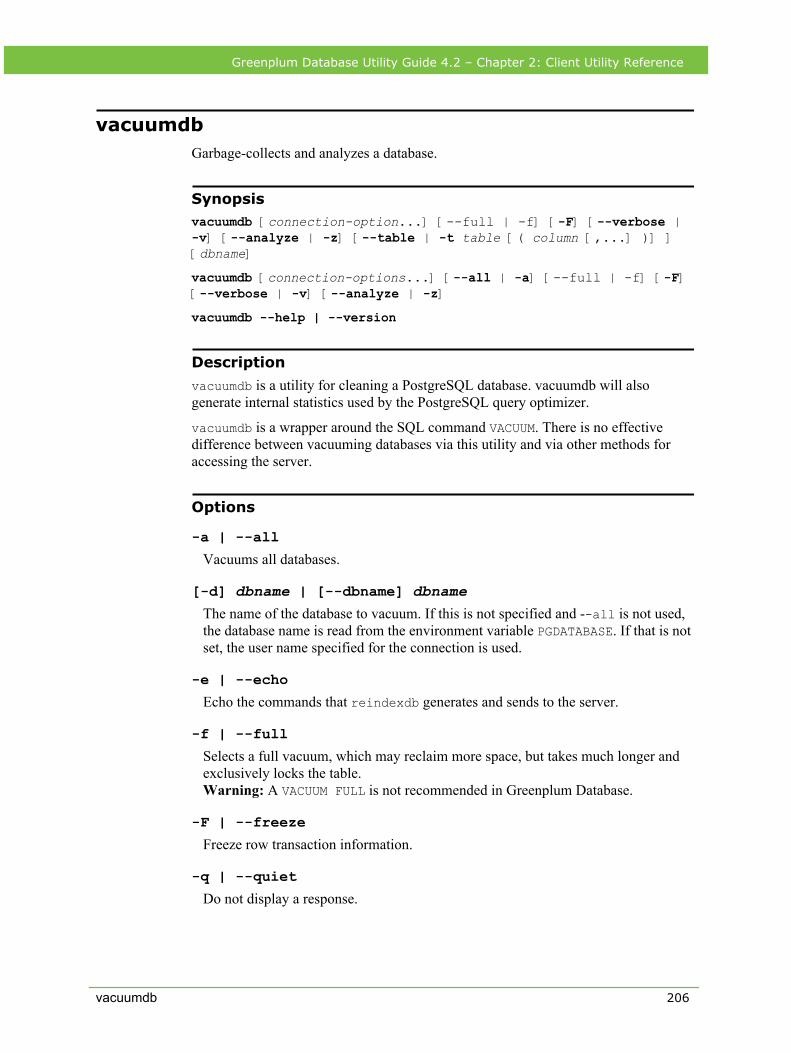
Greenplum Database Utility Guide 4.2 – Chapter 2: Client Utility Reference
vacuumdbGarbage-collects and analyzes a database.
Synopsisvacuumdb [connection-option...] [--full | -f] [-F] [--verbose | -v] [--analyze | -z] [--table | -t table [( column [,...] )] ] [dbname]
vacuumdb [connection-options...] [--all | -a] [--full | -f] [-F] [--verbose | -v] [--analyze | -z]
vacuumdb --help | --version
Description
vacuumdb is a utility for cleaning a PostgreSQL database. vacuumdb will also generate internal statistics used by the PostgreSQL query optimizer.
vacuumdb is a wrapper around the SQL command VACUUM. There is no effective difference between vacuuming databases via this utility and via other methods for accessing the server.
Options
-a | --all
Vacuums all databases.
[-d] dbname | [--dbname] dbnameThe name of the database to vacuum. If this is not specified and --all is not used, the database name is read from the environment variable PGDATABASE. If that is not set, the user name specified for the connection is used.
-e | --echo
Echo the commands that reindexdb generates and sends to the server.
-f | --full
Selects a full vacuum, which may reclaim more space, but takes much longer and exclusively locks the table. Warning: A VACUUM FULL is not recommended in Greenplum Database.
-F | --freeze
Freeze row transaction information.
-q | --quiet
Do not display a response.
vacuumdb 206
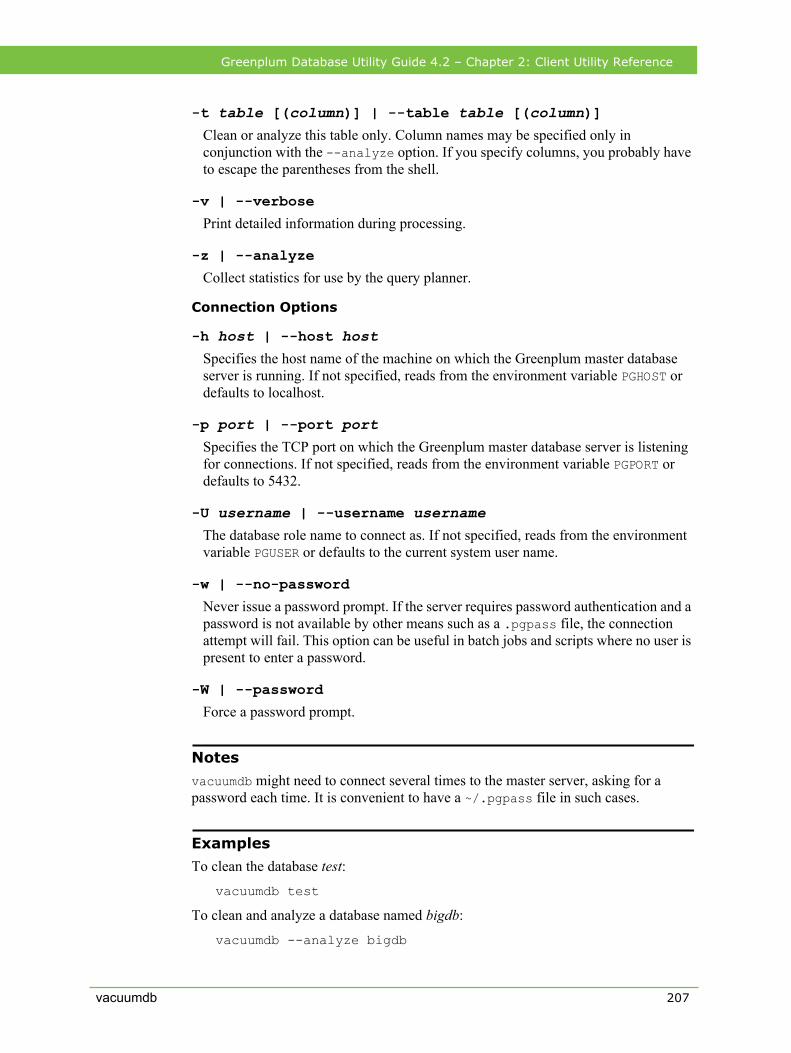
Greenplum Database Utility Guide 4.2 – Chapter 2: Client Utility Reference
-t table [(column)] | --table table [(column)]Clean or analyze this table only. Column names may be specified only in conjunction with the --analyze option. If you specify columns, you probably have to escape the parentheses from the shell.
-v | --verbose
Print detailed information during processing.
-z | --analyze
Collect statistics for use by the query planner.
Connection Options
-h host | --host hostSpecifies the host name of the machine on which the Greenplum master database server is running. If not specified, reads from the environment variable PGHOST or defaults to localhost.
-p port | --port portSpecifies the TCP port on which the Greenplum master database server is listening for connections. If not specified, reads from the environment variable PGPORT or defaults to 5432.
-U username | --username usernameThe database role name to connect as. If not specified, reads from the environment variable PGUSER or defaults to the current system user name.
-w | --no-password
Never issue a password prompt. If the server requires password authentication and a password is not available by other means such as a .pgpass file, the connection attempt will fail. This option can be useful in batch jobs and scripts where no user is present to enter a password.
-W | --password
Force a password prompt.
Notes
vacuumdb might need to connect several times to the master server, asking for a password each time. It is convenient to have a ~/.pgpass file in such cases.
Examples
To clean the database test:vacuumdb test
To clean and analyze a database named bigdb:
vacuumdb --analyze bigdb
vacuumdb 207

Greenplum Database Utility Guide 4.2 – Chapter 2: Client Utility Reference
To clean a single table foo in a database named mydb, and analyze a single column bar of the table. Note the quotes around the table and column names to escape the parentheses from the shell:
vacuumdb --analyze --verbose --table 'foo(bar)' mydb
See AlsoVACUUM, ANALYZE
vacuumdb 208
Greenplum Database Utility Guide 4.2– Chapter 3: Oracle Compatibility Functions
3. Oracle Compatibility Functions
This reference describes the Oracle Compatibility SQL functions in Greenplum Database. These functions target PostgreSQL.
Installing Oracle Compatibility FunctionsBefore using any Oracle Compatibility Functions, run the installation script $GPHOME/share/postgresql/contrib/orafunc.sql once for each database. For example, to install the functions in database testdb, use the command
$ psql –d testdb –f \ $GPHOME/share/postgresql/contrib/orafunc.sql
To uninstall Oracle Compatibility Functions, run the uinstall_orafunc.sql script:
$GPHOME/share/postgresql/contrib/uninstall_orafunc.sql.
The following functions are available by default and do not require running the Oracle Compatibility installer:
• sinh• tanh• cosh• decodeNote: The Oracle Compatibility Functions reside in the oracompat schema. To
access them, prefix the schema name (oracompat) or alter the database search path to include the schema name. For example:ALTER DATABASE db_name SET search_path = $user, public, oracompat;
If you alter the database search path, you must restart the database.
Oracle and Greenplum Implementation DifferencesThere are some differences in the implementation of these compatibility functions in the Greenplum Database from the Oracle implementation. If you use validation scripts, the output may not be exactly the same as in Oracle. Some of the differences are as follows:
• Oracle performs a decimal round off, Greenplum Database does not. 2.00 becomes 2 in Oracle and remains 2.00 in Greenplum Database.
• The provided Oracle Compatibility functions handle implicit type conversions differently. For example, using the decode functiondecode(expression, value, return [,value, return]... [, default])
Oracle Compatibility Functions 209
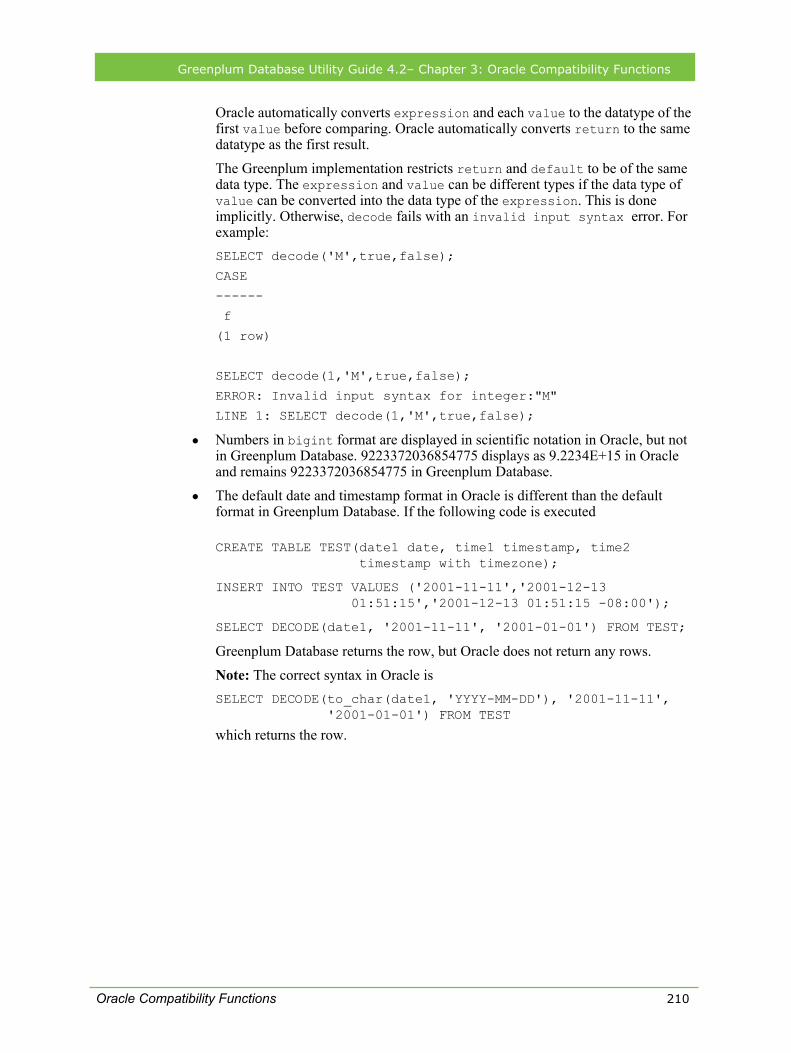
Greenplum Database Utility Guide 4.2– Chapter 3: Oracle Compatibility Functions
Oracle automatically converts expression and each value to the datatype of the first value before comparing. Oracle automatically converts return to the same datatype as the first result. The Greenplum implementation restricts return and default to be of the same data type. The expression and value can be different types if the data type of value can be converted into the data type of the expression. This is done implicitly. Otherwise, decode fails with an invalid input syntax error. For example:SELECT decode('M',true,false);
CASE
------
f
(1 row)
SELECT decode(1,'M',true,false);
ERROR: Invalid input syntax for integer:"M"
LINE 1: SELECT decode(1,'M',true,false);
• Numbers in bigint format are displayed in scientific notation in Oracle, but not in Greenplum Database. 9223372036854775 displays as 9.2234E+15 in Oracle and remains 9223372036854775 in Greenplum Database.
• The default date and timestamp format in Oracle is different than the default format in Greenplum Database. If the following code is executed CREATE TABLE TEST(date1 date, time1 timestamp, time2 timestamp with timezone);
INSERT INTO TEST VALUES ('2001-11-11','2001-12-13 01:51:15','2001-12-13 01:51:15 -08:00');
SELECT DECODE(date1, '2001-11-11', '2001-01-01') FROM TEST;
Greenplum Database returns the row, but Oracle does not return any rows.Note: The correct syntax in Oracle isSELECT DECODE(to_char(date1, 'YYYY-MM-DD'), '2001-11-11', '2001-01-01') FROM TEST
which returns the row.
Oracle Compatibility Functions 210
Greenplum Database Utility Guide 4.2– Chapter 3: Oracle Compatibility Functions
Oracle Compatibility Functions ReferenceThe following are the Oracle Compatibility Functions.
• add_months • nanvl• bitand • next_day• concat • next_day• cosh • nlssort• decode • nvl• dump • nvl2• instr • oracle.substr• last_day • reverse• listagg • round• listagg (2) • sinh• lnnvl • tanh• months_between • trunc
Oracle Compatibility Functions 211
Greenplum Database Utility Guide 4.2– Chapter 3: Oracle Compatibility Functions
add_monthsOracle-compliant function to add a given number of months to a given date.
Synopsisadd_months(date_expression, months_to_add)
Description
This Oracle-compatible function adds months_to_add to a date_expression and returns a DATE.
If the date_expression specifies the last day of the month, or if the resulting month has fewer days than the date_expression, then the returned value is the last day of the resulting month. Otherwise, the returned value has the same day of the month as the date_expression.
Parameters
date_expression
The starting date. This can be any expression that can be implicitly converted to DATE.
months_to_add
The number of months to add to the date_expression. This is an integer or any value that can be implicitly converted to an integer. This parameter can be positive or negative.
ExampleSELECT name, phone, nextcalldate FROM clientdb
WHERE nextcalldate >= add_months(CURRENT_DATE,6);
Returns name, phone, and nextcalldate for all records where nextcalldate is at least six months in the future.
Compatibility
This command is compatible with Oracle syntax and is provided for convenience.
Oracle Compatibility Functions 212
Greenplum Database Utility Guide 4.2– Chapter 3: Oracle Compatibility Functions
bitandOracle-compliant function that computes a logical AND operation on the bits of two non-negative values.
Synopsisbitand(expr1, expr2)
Description
This Oracle-compatible function returns an integer representing an AND operation on the bits of two non-negative values (expr1 and expr2). 1 is returned when the values are the same. 0 is returned when the values are different. Only significant bits are compared. For example, an AND operation on the integers 5 (binary 101) and 1 (binary 001 or 1) compares only the rightmost bit, and results in a value of 1 (binary 1).
The types of expr1 and expr2 are NUMBER, and the result is of type NUMBER. If either argument is NULL, the result is NULL.
The arguments must be in the range -(2(n-1)) .. ((2(n-1))-1). If an argument is out of this range, the result is undefined.
Notes:
• The current implementation of BITAND defines n = 128.• PL/SQL supports an overload of BITAND for which the types of the inputs and of
the result are all BINARY_INTEGER and for which n = 32.
Parameters
expr1
A non-negative integer expression.
expr2
A non-negative integer expression.
ExampleSELECT bitand(expr1, expr2)FROM ClientDB;
Compatibility
This command is compatible with Oracle syntax and is provided for convenience.
Oracle Compatibility Functions 213
Greenplum Database Utility Guide 4.2– Chapter 3: Oracle Compatibility Functions
concatOracle-compliant function to concatenate two strings together.
Synopsisconcat (string1, string2)
Description
This Oracle-compatible function concatenates two strings (string1 and string2) together.
The string returned is in the same character set as string1. Its datatype depends on the datatypes of the arguments.
In concatenations of two different datatypes, the datatype returned is the one that results in a lossless conversion. Therefore, if one of the arguments is a LOB, then the returned value is a LOB. If one of the arguments is a national datatype, then the returned value is a national datatype. For example:
concat(CLOB, NCLOB) returns NCLOB
concat(NCLOB, NCHAR) returns NCLOB
concat(NCLOB, CHAR) returns NCLOB
concat(NCHAR, CLOB) returns NCLOB
This function is equivalent to the concatenation operator (||).
Parameters
string1/string2
The two strings to concatenate together.
Both string1 and string2 can be any of the datatypes CHAR, VARCHAR2, NCHAR, NVARCHAR2, CLOB, or NCLOB.
ExampleSELECT concat(concat(last_name, '''s job category is '), job_id)FROM employees
Returns ‘Smith’s job category is 4B’
Compatibility
This command is compatible with Oracle syntax and is provided for convenience.
Oracle Compatibility Functions 214

Greenplum Database Utility Guide 4.2– Chapter 3: Oracle Compatibility Functions
cosh Oracle-compliant function to return the hyperbolic cosine of a given number.
Synopsiscosh(float8)
Description
This Oracle-compatible function returns the hyperbolic cosine of the floating 8 input number (float8).
Note: This function is available by default and can be accessed without running the Oracle Compatibility installer.
Parameters
float8
The input number.
ExampleSELECT cosh(0.2)
FROM ClientDB;
Returns ‘1.02006675561908’' (hyperbolic cosine of 0.2)
Compatibility
This command is compatible with Oracle syntax and is provided for convenience.
Oracle Compatibility Functions 215
Greenplum Database Utility Guide 4.2– Chapter 3: Oracle Compatibility Functions
decodeOracle-compliant function to transform a data value to a specified return value. This function is a way to implement a set of CASE statements.
Note: decode is converted into a reserved word in Greenplum Database. If you want to use the Postgres two-argument decode function that decodes binary strings previously encoded to ASCII-only representation, you must invoke it by using the full schema-qualified syntax, pg_catalog.decode(), or by enclosing the function name in quotes "decode" ().Note: Greenplum’s implementation of this function transforms decode into case.
This results in the following type of output:gptest=# select decode(a, 1, 'A', 2, 'B', 'C') from decodetest;
case
------
C
A
C
B
C
(5 rows)
This also means that if you deparse your view with decode, you will see case expression instead.
Greenplum recommends you use the case function instead of decode.
Synopsisdecode(expression, value, return [,value, return]... [, default])
Description
The Oracle-compatible function decode searches for a value in an expression. If the value is found, the function returns the specified value.
Note: This function is available by default and can be accessed without running the Oracle Compatibility installer.
Parameters
expression
The expression to search.
value
The value to find in the expression.
Oracle Compatibility Functions 216
Greenplum Database Utility Guide 4.2– Chapter 3: Oracle Compatibility Functions
return
What to return if expression matches value.
default
What to return if expression does not match any of the values.
Only one expression is passed to the function. Multiple value/return pairs can be passed.
The default parameter is optional. If default is not specified and if expression does not match any of the passed value parameters, decode returns null. The Greenplum implementation restricts return and default to be of the same data type. The expression and value can be different types if the data type of value can be converted into the data type of the expression. This is done implicitly. Otherwise, decode fails with an invalid input syntax error.
Examples
In the following code, decode searches for a value for company_id and returns a specified value for that company. If company_id not one of the listed values, the default value Other is returned.
SELECT decode(company_id, 1, 'EMC', 2, 'Greenplum', 'Other')
FROM suppliers;
The following code using CASE statements to produce the same result as the example using decode.
SELECT CASE company_id
WHEN IS NOT DISTINCT FROM 1 THEN 'EMC'
WHEN IS NOT DISTINCT FROM 2 THEN 'Greenplum'
ELSE 'Other'
END
FROM suppliers;
Notes
To assign a range of values to a single return value, either pass an expression for each value in the range, or pass an expression that evaluates identically for all values in the range. For example, if a fiscal year begins on August 1, the quarters are shown in the following table.
Table 3.1 Months and Quarters for Fiscal Year Beginning on August 1
Range (Alpha) Range (Numeric) Quarter
August — October 8 — 10 Q1
November — January 11 — 1 Q2
Oracle Compatibility Functions 217
Greenplum Database Utility Guide 4.2– Chapter 3: Oracle Compatibility Functions
The table contains a numeric field curr_month that holds the numeric value of a month, 1 – 12. There are two ways to use decode to get the quarter.
Method 1 - Include 12 values in the decode functionSELECT decode(curr_month, 1, 'Q2', 2, 'Q3', 3, 'Q3', 4, 'Q3', 5, 'Q4', 6, 'Q4', 7, 'Q4', 8, 'Q1', 9, 'Q1', 10, 'Q1', 11, 'Q2', 12, 'Q2')
FROM suppliers;
Method 2 - Use an expression that defines a unique value to decodeSELECT decode((1+MOD(curr_month+4,12)/3)::int, 1, 'Q1', 2, 'Q2', 3, 'Q3', 4, 'Q4',
FROM suppliers;
Compatibility
This command is compatible with Oracle syntax and is provided for convenience.
See Also
PostgreSQL decode (not compatible with Oracle)
February — April 2 — 4 Q3
May — July 5 — 7 Q4
Table 3.1 Months and Quarters for Fiscal Year Beginning on August 1
Range (Alpha) Range (Numeric) Quarter
Oracle Compatibility Functions 218
Greenplum Database Utility Guide 4.2– Chapter 3: Oracle Compatibility Functions
dumpOracle-compliant function that returns a text value that includes the datatype code,the length in bytes, and the internal representation of the expression.
Synopsisdump(expression [,integer])
Description
This Oracle-compatible function returns a text value that includes the datatype code, the length in bytes, and the internal representation of the expression.
Parameters
expression
Any expression
integer
The number of characters to return
Exampledump('Tech') returns 'Typ=96 Len=4: 84,101,99,104' dump (‘tech’) returns ‘Typ-96 Len=4: 84,101,99,104’ dump('Tech', 10) returns 'Typ=96 Len=4: 84,101,99,104' dump('Tech', 16) returns 'Typ=96 Len=4: 54,65,63,68' dump('Tech', 1016) returns 'Typ=96 Len=4 CharacterSet=US7ASCII: 54,65,63,68' dump('Tech', 1017) returns 'Typ=96 Len=4 CharacterSet=US7ASCII: T,e,c,h'
Compatibility
This command is compatible with Oracle syntax and is provided for convenience.
Oracle Compatibility Functions 219
Greenplum Database Utility Guide 4.2– Chapter 3: Oracle Compatibility Functions
instrOracle-compliant function to return the location of a substring in a string.
Synopsisinstr(string, substring, [position[,occurrence]])
Description
This Oracle-compatible function searches for a substring in a string. If found, it returns an integer indicating the position of the substring in the string, if not found, the function returns 0.
Optionally you can specify that the search starts at a given position in the string, and only return the nth occurrence of the substring in the string.
instr calculates strings using characters as defined by the input character set.
The value returned is of NUMBER datatype.
Parameters
string
The string to search.
substring
The substring to search for in string.
Both string and substring can be any of the datatypes CHAR, VARCHAR2, NCHAR, NVARCHAR2, CLOB, or NCLOB.
position
The position is a nonzero integer in string where the search will start. If not specified, this defaults to 1. If this value is negative, the function counts backwards from the end of string then searches towards to beginning from the resulting position.
occurrence
Occurrence is an integer indicating which occurrence of the substring should be searched for. The value of occurrence must be positive.
Both position and occurrence must be of datatype NUMBER, or any datatype that can be implicitly converted to NUMBER, and must resolve to an integer. The default values of both position and occurrence are 1, meaning that the search begins at the first character of string for the first occurrence of substring. The return value is relative to the beginning of string, regardless of the value of position, and is expressed in characters.
Oracle Compatibility Functions 220
Greenplum Database Utility Guide 4.2– Chapter 3: Oracle Compatibility Functions
ExamplesSELECT instr('Greenplum', 'e')
FROM ClientDB;
Returns 3; the first occurrence of 'e'SELECT instr('Greenplum', 'e',1,2)
FROM ClientDB;
Returns 4; the second occurrence of 'e'
Compatibility
This command is compatible with Oracle syntax and is provided for convenience.
Oracle Compatibility Functions 221
Greenplum Database Utility Guide 4.2– Chapter 3: Oracle Compatibility Functions
last_dayOracle-compliant function to return the last day in a given month.
Synopsislast_day(date_expression)
Description
This Oracle-compatible function returns the last day of the month specified by a date_expression.
The return type is always DATE, regardless of the datatype of date_expression.
Parameters
date_expression
The date value used to calculate the last day of the month. This can be any expression that can be implicitly converted to DATE.
ExampleSELECT name, hiredate, last_day(hiredate) "Option Date"
FROM employees;
Returns the name, hiredate, and last_day of the month of hiredate labeled "Option Date."
Compatibility
This command is compatible with Oracle syntax and is provided for convenience.
Oracle Compatibility Functions 222
Greenplum Database Utility Guide 4.2– Chapter 3: Oracle Compatibility Functions
listaggOracle-compliant function that aggregates text values into a string.
Note: This function is an overloaded function. There are two Oracle-compliant listagg functions, one that takes one argument, the text to be aggregated (see below), and one that takes two arguments, the text to be aggregated and a delimiter (see next page).
Synopsislistagg(text)
Description
This Oracle-compatible function aggregates text values into a string.
Parameters
text
The text value to be aggregated into a string.
ExampleSELECT listagg(t) FROM (VALUES('abc'), ('def')) as l(t)
Returns: abcdef
Compatibility
This command is compatible with Oracle syntax and is provided for convenience.
Oracle Compatibility Functions 223
Greenplum Database Utility Guide 4.2– Chapter 3: Oracle Compatibility Functions
listagg (2)Oracle-compliant function that aggregates text values into a string, separating each by the separator specified in a second argument.
Note: This function is an overloaded function. There are two Oracle-compliant listagg functions, one that takes one argument, the text to be aggregated (see previous page), and one that takes two arguments, the text to be aggregated and a delimiter (see below).
Synopsislistagg(text, separator)
Description
This Oracle-compatible function aggregates text values into a string, separating each by the separator specified in a second argument (separator).
Parameters
text
The text value to be aggregated into a string.
separator
The separator by which to delimit the text values.
ExampleSELECT oracompat.listagg(t, '.') FROM (VALUES('abc'), ('def')) as l(t)
Returns: abc.def
Compatibility
This command is compatible with Oracle syntax and is provided for convenience.
Oracle Compatibility Functions 224
Greenplum Database Utility Guide 4.2– Chapter 3: Oracle Compatibility Functions
lnnvlOracle-compliant function that returns true if the argument is false or NULL, or false.
Synopsislistagg(condition)
Description
This Oracle-compatible function takes as an argument a condition and returns true if the condition is false or NULL and false if the condition is true.
Parameters
condition
Any condition that evaluates to true, false, or null.
ExampleSELECT lnnvl(true)
Returns: false
SELECT lnnvl(NULL)
Returns: true SELECT lnnvl(false)
Returns: true SELECT (3=5)
Returns: true
Compatibility
This command is compatible with Oracle syntax and is provided for convenience.
Oracle Compatibility Functions 225
Greenplum Database Utility Guide 4.2– Chapter 3: Oracle Compatibility Functions
months_between Oracle-compliant function to evaluate the number of months between two given dates.
Synopsismonths_between(date_expression1, date_expression2)
Description
This Oracle-compatible function returns the number of months between date_expression1 and date_expression2.
If date_expression1 is later than date_expression2, then the result is positive.
If date_expression1 is earlier than date_expression2, then the result is negative.
If date_expression1 and date_expression2 are either the same days of the month or both last days of months, then the result is always an integer. Otherwise the function calculates the fractional portion of the month based on a 31-day month.
Parameters
date_expression1, date_expression2
The date values used to calculate the number of months. This can be any expression that can be implicitly converted to DATE.
ExamplesSELECT months_between
(to_date ('2003/07/01', 'yyyy/mm/dd'),
to_date ('2003/03/14', 'yyyy/mm/dd'));
Returns the number of months between July 1, 2003 and March 14, 2014.
SELECT * FROM employees
where months_between(hire_date, leave_date) <12;
Returns the number of months between hire_date and leave_date.
Compatibility
This command is compatible with Oracle syntax and is provided for convenience.
Oracle Compatibility Functions 226
Greenplum Database Utility Guide 4.2– Chapter 3: Oracle Compatibility Functions
nanvlOracle-compliant function to substitute a value for a floating point number when a non-number value is encountered.
Synopsisnanvl(float1, float2)
Description
This Oracle-compatible function evaluates a floating point number (float1) such as BINARY_FLOAT or BINARY_DOUBLE. If it is a non-number (‘not a number’, NaN), the function returns float2. This function is most commonly used to convert non-number values into either NULL or 0.
Parameters
float1
The BINARY_FLOAT or BINARY_NUMBER to evaluate.
float2
The value to return if float1 is not a number.
float1 and float2 can be any numeric datatype or any nonnumeric datatype that can be implicitly converted to a numeric datatype. The function determines the argument with the highest numeric precedence, implicitly converts the remaining arguments to that datatype, and returns that datatype.
ExampleSELECT nanvl(binary1, 0)
FROM MyDB;
Returns 0 if the binary1 field contained a non-number value. Otherwise, it would return the binary1 value.
Compatibility
This command is compatible with Oracle syntax and is provided for convenience.
Oracle Compatibility Functions 227
Greenplum Database Utility Guide 4.2– Chapter 3: Oracle Compatibility Functions
next_dayOracle-compliant function to return the date of the next specified weekday after a date.
This section describes using this function with a string argument; see the following page for details about using this function with an integer argument.
Note: This function is an overloaded function. There are two Oracle-compliant next_day functions, one that takes a date and a day of the week as its arguments (see below), and one that takes a date and an integer as its arguments (see next page).
Synopsisnext_day(date_expression, day_of_the_week)
Description
This Oracle-compatible function returns the first day_of_the_week (Tuesday, Wednesday, etc.) to occur after a date_expression.
The weekday must be specified in English.
The case of the weekday is irrelevant.
The return type is always DATE, regardless of the datatype of date_expression.
Parameters
date_expression
The starting date. This can be any expression that can be implicitly converted to DATE.
day_of_the_week
A string containing the name of a day, in English; for example ‘Tuesday’.
Day_of_the_week is case-insensitive.
ExampleSELECT name, next_day(hiredate,"MONDAY") "Second Week Start"
FROM employees;
Returns the name and the date of the next Monday after hiredate labeled "Second Week Start."
Compatibility
This command is compatible with Oracle syntax and is provided for convenience.
Oracle Compatibility Functions 228
Greenplum Database Utility Guide 4.2– Chapter 3: Oracle Compatibility Functions
next_dayOracle-compliant function to add a given number of days to a date and returns the date of the following day.
Note: This function is an overloaded function. There are two Oracle next_day functions, one that takes a date and a day of the week as its arguments (see previous page), and one that takes a date and an integer as its arguments (see below).
Synopsisnext_day(date_expression, days_to_add)
Description
This Oracle-compatible function adds the number of days_to_add to a date_expression and returns the date of the day after the result.
The return type is always DATE, regardless of the datatype of date_expression.
Parameters
date_expression
The starting date. This can be any expression that can be implicitly converted to DATE.
days_to_add
The number of days to be add to the date_expression. This is an integer or any value that can be implicitly converted to an integer. This parameter can be positive or negative.
ExampleSELECT name, next_day(hiredate,90) "Benefits Eligibility Date"
FROM EMPLOYEES;
Returns the name and the date that is 90 days after hiredate labeled "Benefits Eligibility Date."
Compatibility
This command is compatible with Oracle syntax and is provided for convenience.
Oracle Compatibility Functions 229
Greenplum Database Utility Guide 4.2– Chapter 3: Oracle Compatibility Functions
nlssortOracle-compliant function that sorts data according to a specific collation.
Synopsisnlssort (variable, collation)
Description
This Oracle-compatible function sorts data according to a specific collation.
Parameters
variable
The data to sort.
collation
The collation type by which to sort.
ExampleCREATE TABLE test (name text);
INSERT INTO test VALUES('Anne'), ('anne'), ('Bob'), ('bob');
SELECT * FROM test ORDER BY nlssort(name, 'en_US.UTF-8');
anne
Anne
bob
Bob
SELECT * FROM test ORDER BY nlssort(name, 'C');
Anne
Bob
anne
bob
In the first example, the UTF-8 collation rules are specified. This groups characters together regardless of case. In the second example, ASCII (C) collation is specified. This sorts according to ASCII order. The result is that upper case characters are sorted ahead of lower case ones.
Compatibility
This command is compatible with Oracle syntax and is provided for convenience.
Oracle Compatibility Functions 230
Greenplum Database Utility Guide 4.2– Chapter 3: Oracle Compatibility Functions
nvlOracle-compliant function to substitute a specified value when an expression evaluates to null.
Note: This function is analogous to PostgreSQL coalesce function.
Synopsisnvl(expression_to_evaluate, null_replacement_value)
DescriptionThis Oracle-compatible function evaluates expression_to_evaluate. If it is null, the function returns null_replacement_value; otherwise, it returns expression_to_evaluate.
Parameters
expression_to_evaluate
The expression to evaluate for a null value.
null_replacement_value
The value to return if expression_to_evaluate is null.
Both expression_to_evaluate and null_replacement_value must be the same data type.
ExamplesSELECT nvl(contact_name,’None’)
FROM clients;
SELECT nvl(amount_past_due,0)
FROM txns;
SELECT nvl(nickname, firstname)
FROM contacts;
Compatibility
This command is compatible with Oracle syntax and is provided for convenience.
Oracle Compatibility Functions 231
Greenplum Database Utility Guide 4.2– Chapter 3: Oracle Compatibility Functions
nvl2 Oracle-compliant function that returns alternate values for both null and non-null values.
Synopsisnvl2(expression_to_evaluate, non_null_replacement_value, null_replacement_value)
Description
This Oracle-compatible function evaluates expression_to_evaluate. If it is not null, the function returns non_null_replacement_value; otherwise, it returns null_replacement_value.
Parameters
expression_to_evaluate
The expression to evaluate for a null value.
non_null_replacement_value
The value to return if expression_to_evaluate is not null.
null_replacement_value
The value to return if expression_to_evaluate is null.
Exampleselect nvl2(unit_number,’Multi Unit’,’Single Unit’) from clients;
Compatibility
This command is compatible with Oracle syntax and is provided for convenience.
See Also
nvl
Oracle Compatibility Functions 232
Greenplum Database Utility Guide 4.2– Chapter 3: Oracle Compatibility Functions
oracle.substrThis Oracle-compliant function extracts a portion of a string.
Synopsisoracle.substr(string, [start [,char_count]])
Description
This Oracle-compatible function extract a portion of a string.
If start is 0, it is evaluated as 1.
If start is negative, the starting position is negative, the starting position is start characters moving backwards from the end of string.
If char_count is not passed to the function, all characters from start to the end of string are returned.
If char_count is less than 1, null is returned.
If start or char_count is a number, but not an integer, the values are resolved to integers.
Parameters
string
The string from which to extract.
start
An integer specifying the starting position in the string.
char_count
An integer specifying the number of characters to extract.
Exampleoracle.substr(name,1,15)
Returns the first 15 characters of name.
oracle.substr("Greenplum",-4,4)
Returns "plum."
oracle.substr(name,2)
Returns all characters of name, beginning with the second character.
Oracle Compatibility Functions 233

Greenplum Database Utility Guide 4.2– Chapter 3: Oracle Compatibility Functions
Compatibility
PostgreSQL substr (not compatible with Oracle)
Oracle Compatibility Functions 234
Greenplum Database Utility Guide 4.2– Chapter 3: Oracle Compatibility Functions
reverse Oracle-compliant function to return the input string in reverse order.
Synopsisreverse (string)
Description
This Oracle-compatible function returns the input string (string) in reverse order.
Parameters
string
The input string.
ExampleSELECT reverse(‘gnirts’)
FROM ClientDB;
Returns ‘string’'
Compatibility
This command is compatible with Oracle syntax and is provided for convenience.
Oracle Compatibility Functions 235
Greenplum Database Utility Guide 4.2– Chapter 3: Oracle Compatibility Functions
roundOracle-compliant function to round a date to a specific unit of measure (day, week, etc.).
Note: This function is an overloaded function. It shares the same name with the Postgres round mathematical function that rounds numeric input to the nearest integer or optionally to the nearest x number of decimal places.
Synopsisround (date_time_expression, [unit_of_measure])
Description
This Oracle-compatible function rounds a date_expression to the nearest unit_of_measure (day, week, etc.). If a unit_of_measure is not specified, the date_expression is rounded to the nearest day. It operates according to the rules of the Gregorian calendar.
If the date_time_expression datatype is TIMESTAMP, the value returned is always of datatype TIMESTAMP.
If the date_time_expression datatype is DATE, the value returned is always of datatype DATE.
Parameters
date_time_expression
The date to round. This can be any expression that can be implicitly converted to DATE or TIMESTAMP.
unit_of_measure
The unit of measure to apply for rounding. If not specified, then the date_time_expression is rounded to the nearest day. Valid parameters are:
Table 3.2 Valid Parameters
Unit Valid parameters Rounding Rule
Year SYYYY, YYYY, YEAR, SYEAR, YYY, YY, Y
Rounds up on July 1st
ISO Year IYYY, IY, I
Quarter Q Rounds up on the 16th day of the second month of the quarter
Month MONTH, MON, MM, RM Rounds up on the 16th day of the month
Week WW Same day of the week as the first day of the year
IW IW Same day of the week as the first day of the ISO year
Oracle Compatibility Functions 236
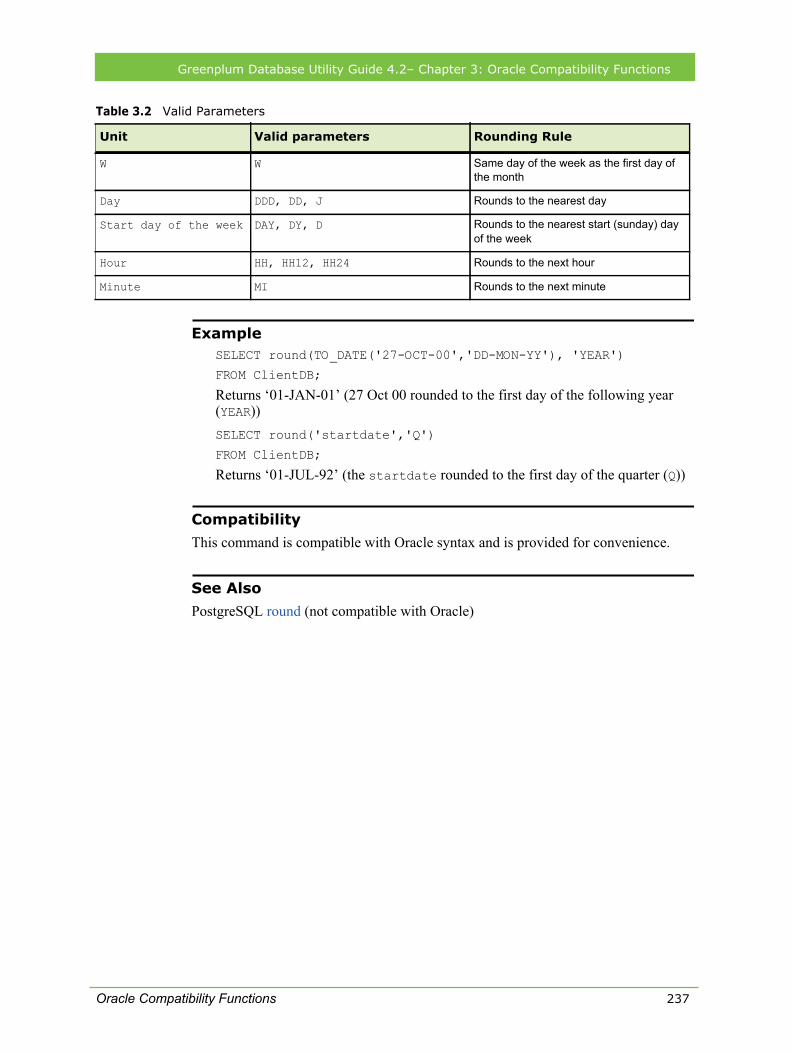
Greenplum Database Utility Guide 4.2– Chapter 3: Oracle Compatibility Functions
ExampleSELECT round(TO_DATE('27-OCT-00','DD-MON-YY'), 'YEAR')
FROM ClientDB;
Returns ‘01-JAN-01’ (27 Oct 00 rounded to the first day of the following year (YEAR))SELECT round('startdate','Q')
FROM ClientDB;
Returns ‘01-JUL-92’ (the startdate rounded to the first day of the quarter (Q))
Compatibility
This command is compatible with Oracle syntax and is provided for convenience.
See Also
PostgreSQL round (not compatible with Oracle)
W W Same day of the week as the first day of the month
Day DDD, DD, J Rounds to the nearest day
Start day of the week DAY, DY, D Rounds to the nearest start (sunday) day of the week
Hour HH, HH12, HH24 Rounds to the next hour
Minute MI Rounds to the next minute
Table 3.2 Valid Parameters
Unit Valid parameters Rounding Rule
Oracle Compatibility Functions 237

Greenplum Database Utility Guide 4.2– Chapter 3: Oracle Compatibility Functions
sinhOracle-compliant function to return the hyperbolic sine of a given number.
Synopsissinh(float8)
Description
This Oracle-compatible function returns the hyperbolic sine of the floating 8 input number (float8).
Note: This function is available by default and can be accessed without running the Oracle Compatibility installer.
Parameters
float8
The input number.
ExampleSELECT sinh(3)
FROM ClientDB;
Returns ‘10.0178749274099’'(hyperbolic sine of 3)
Compatibility
This command is compatible with Oracle syntax and is provided for convenience.
Oracle Compatibility Functions 238
Greenplum Database Utility Guide 4.2– Chapter 3: Oracle Compatibility Functions
tanhOracle-compliant function to return the hyperbolic tangent of a given number.
Synopsistanh(float8)
Description
This Oracle-compatible function returns the hyperbolic tangent of the floating 8 input number (float8).
Note: This function is available by default and can be accessed without running the Oracle Compatibility installer.
Parameters
float8
The input number.
ExampleSELECT tanh(3)
FROM ClientDB;
Returns ‘0.99505475368673’' (hyperbolic tangent of 3)
Compatibility
This command is compatible with Oracle syntax and is provided for convenience.
Oracle Compatibility Functions 239
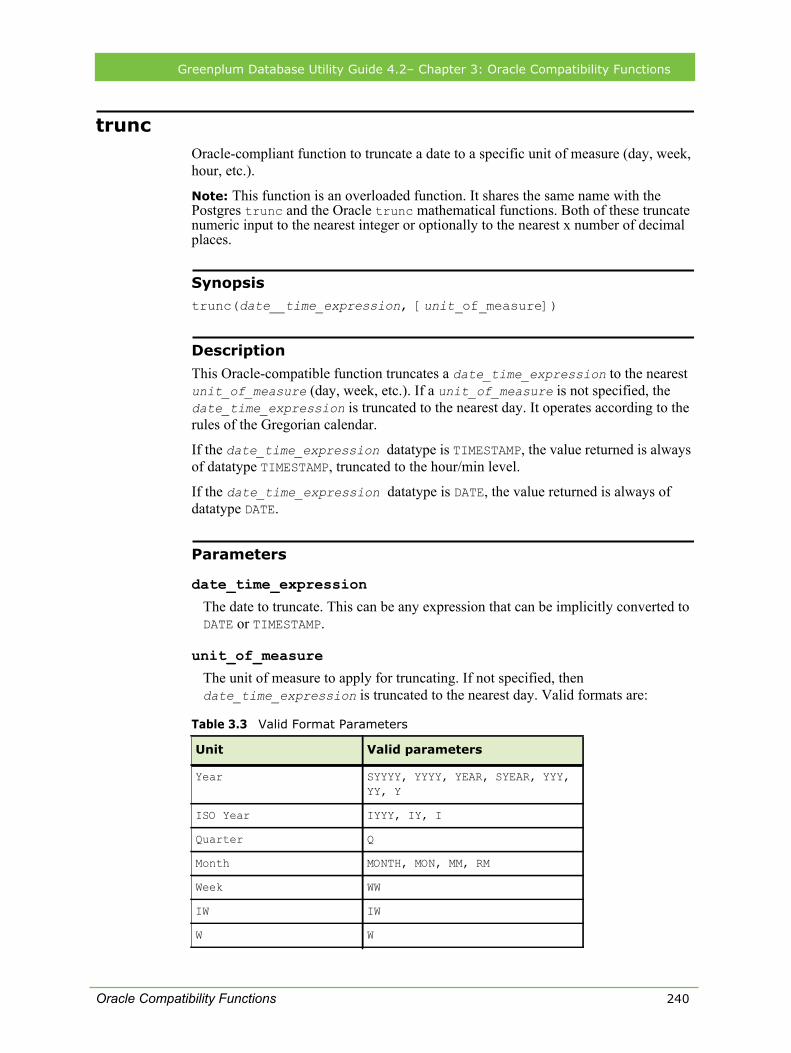
Greenplum Database Utility Guide 4.2– Chapter 3: Oracle Compatibility Functions
truncOracle-compliant function to truncate a date to a specific unit of measure (day, week, hour, etc.).
Note: This function is an overloaded function. It shares the same name with the Postgres trunc and the Oracle trunc mathematical functions. Both of these truncate numeric input to the nearest integer or optionally to the nearest x number of decimal places.
Synopsistrunc(date__time_expression, [unit_of_measure])
Description
This Oracle-compatible function truncates a date_time_expression to the nearest unit_of_measure (day, week, etc.). If a unit_of_measure is not specified, the date_time_expression is truncated to the nearest day. It operates according to the rules of the Gregorian calendar.
If the date_time_expression datatype is TIMESTAMP, the value returned is always of datatype TIMESTAMP, truncated to the hour/min level.
If the date_time_expression datatype is DATE, the value returned is always of datatype DATE.
Parameters
date_time_expression
The date to truncate. This can be any expression that can be implicitly converted to DATE or TIMESTAMP.
unit_of_measure
The unit of measure to apply for truncating. If not specified, then date_time_expression is truncated to the nearest day. Valid formats are:
Table 3.3 Valid Format Parameters
Unit Valid parameters
Year SYYYY, YYYY, YEAR, SYEAR, YYY, YY, Y
ISO Year IYYY, IY, I
Quarter Q
Month MONTH, MON, MM, RM
Week WW
IW IW
W W
Oracle Compatibility Functions 240
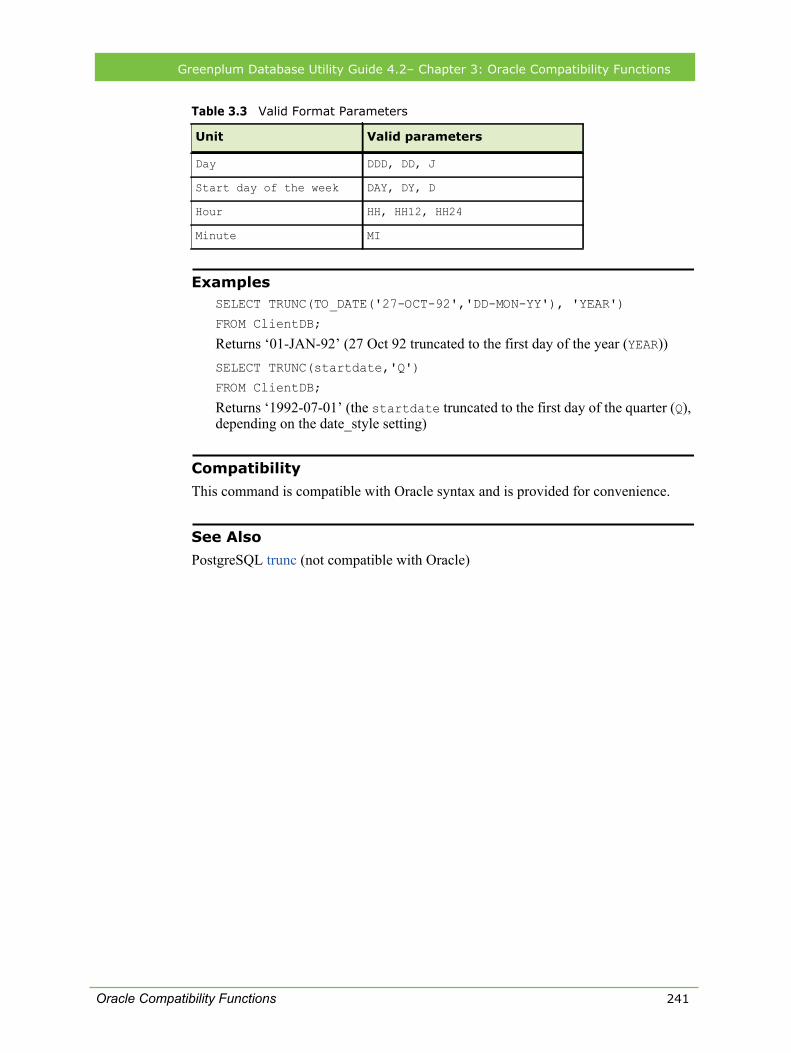
Greenplum Database Utility Guide 4.2– Chapter 3: Oracle Compatibility Functions
ExamplesSELECT TRUNC(TO_DATE('27-OCT-92','DD-MON-YY'), 'YEAR')
FROM ClientDB;
Returns ‘01-JAN-92’ (27 Oct 92 truncated to the first day of the year (YEAR))SELECT TRUNC(startdate,'Q')
FROM ClientDB;
Returns ‘1992-07-01’ (the startdate truncated to the first day of the quarter (Q), depending on the date_style setting)
Compatibility
This command is compatible with Oracle syntax and is provided for convenience.
See Also
PostgreSQL trunc (not compatible with Oracle)
Day DDD, DD, J
Start day of the week DAY, DY, D
Hour HH, HH12, HH24
Minute MI
Table 3.3 Valid Format Parameters
Unit Valid parameters
Oracle Compatibility Functions 241