Embed Size (px)
Citation preview

GUIDE TO PROPOSING, PLANNING AND PARTICIPATING IN FIELD TRIPS AND THE DRAFT SOCIETY GUIDE TO FIELD TRIPS.
WHY HAVE FIELD TRIPS?
Field trips to study mineral occurrences in different locations and collect specimens are one of the most challenging and rewarding aspects for Mineralogical Society members.
Minerals are naturally occurring substances, and their formation, occurrence and associations is one of the most
interesting aspects of their being. There can be no more worthwhile activity than investigating minerals in the outdoors environment in which they occur.
Field trips involve time spent in outdoors activities, exposure to natural hazards, travel risks in time and place, personal exertions, physical hazards of moving across roads, paddocks and outcrops or into pits.
Nevertheless Society members are responsible natural science enthusiasts, neither chronically phobic nor foolhardy.
They are social and keenly interested mineral enthusiasts who enjoy sharing their knowledge and skills.
As a Society; field trips are one of the most engaging, rewarding, risky and expensive activities for most members
The following series of documents drafts were developed in recognition of a need to ‘coach’ new young enthusiastic leaders and to enable and encourage existing members to offer field trip experiences to other Society members.
These documents are part of a system to enable and encourage field trips to study minerals. They are supplements for mature judgement and experience and not just a bureaucratic or administrative burdensome replacement of
wisdom in the field.
HOW DO FIELD TRIPS RELATE TO MINERALOGICAL SOCIETY OBJECTIVES?
To inform and refresh Society members and field trip participant’s knowledge of:
1. How DO Field trips relate to the Objectives of the Mineralogical Society?
2. What is expected on a natural science Field Trips planned and organised by the Mineralogical Society?
The objectives of the Mineralogical Society that may be ‘satisfied’ by undertaking Field trips are as follows:
a. Disseminate knowledge of minerals, their occurrence and associations
b. Establish and maintain a register of mineral species and their occurrences in Western Australia c. Increase knowledge of related fields of earth science d. Keep members abreast of development in mineralogy
e. Promote the conservation of the geologically unique, and the environment in general f. Foster a sense of cooperation and understanding between individuals, institutions, and resource companies
in the field of mineralogy
WHAT about Managing Hazards and Risks on Field Trips?
No activity and certainly no field activity are without hazards and risks. Risk management is about maintaining the essential objectives of approved activities whilst avoiding or minimising the less acceptable impacts. The draft Society Field trip risk management system is NOT about what we can’t do; or the risks
we take; it is about what we CAN DO and how we operate for maximum satisfaction of members and society.

Can we reassure Society members, participants and their families that appropriate care has been taken in planning, preparation and conduct of any fieldtrip?
Principal requirements are to outline in a succinct manner:
A. Society field trip objectives and B. What is expected of Trip Leaders? and
C. What is expected of Members and other Field Trip Participants? A. Field Trip Objectives
• Appreciate Society Objectives in providing a safe and enjoyable experience in a natural environment • Society will support and develop members who would go out of their ‘comfort zone’ and offer to
plan. Lead and conduct outdoors study of mineral occurrences for other Members.
• Society will approve field trip, check hazard identification process and risk management plans • Society is responsible to advertise and accept or decline / reject field trip participants’ applications • Society will maintain public liability and professional insurances
• Society will maintain an Emergency Communication officer who has a continuous external “watching and listening brief” during the field trip to provide assistance and support to Trip Leaders if necessary
B. Trip Leaders can be expected to: • Provide a Duty of Care Responsibility: Looking after themselves and others • Identify hazards and assess risks; implement control actions to eliminate or mitigate their impact
• Communicate these hazards and risks to participants. • Advise participants about the fieldtrip difficulty, duration and the level of “fitness” required when
the field trip is advertised. On accepting field trip participants with any handicaps or limitations, the
fieldtrip plan must take these into account. • Plan and prepare necessary documents for approval by Society Committee • Postpone, change or cancel a field trip if deemed necessary for any reason
• Maintain discipline and warn participants of consequences of continuing behaviours • Approve or decline to permit or refuse changes and/or suggestions as necessary • Terminate any persons continuing participation on trip if they so decide
• Maintain vigilance for changes to conditions and environment and participants • Advise and reinforce awareness of hazards to participants during the trip • Ensure that appropriate safety precautions are exercised during the field trip.
• Make arrangements to access sites and decide on access movements including directions, times and paths
• Provide reasonable assistance in case of emergency
• May direct others to help provide assistance to you • However; Trip Leaders cannot read your mind; if you want/ need something you are expected to ask
C. What is expected of all Field Trip Participants? • To: Undertake A Duty of Care Responsibility: Look after yourself and others • Prepare yourself to effectively cope with a natural outdoors experience in a poorly controlled
environment. • Advise the Society of any medical or physical problems or limitations before starting a field trip • Prepare yourself to engage safely in field trip activities
• Cooperate fully with Trip Leaders and others; and to comply with all road and legal Regulations • Especially to listen, read and follow instructions whenever given by Society Leaders
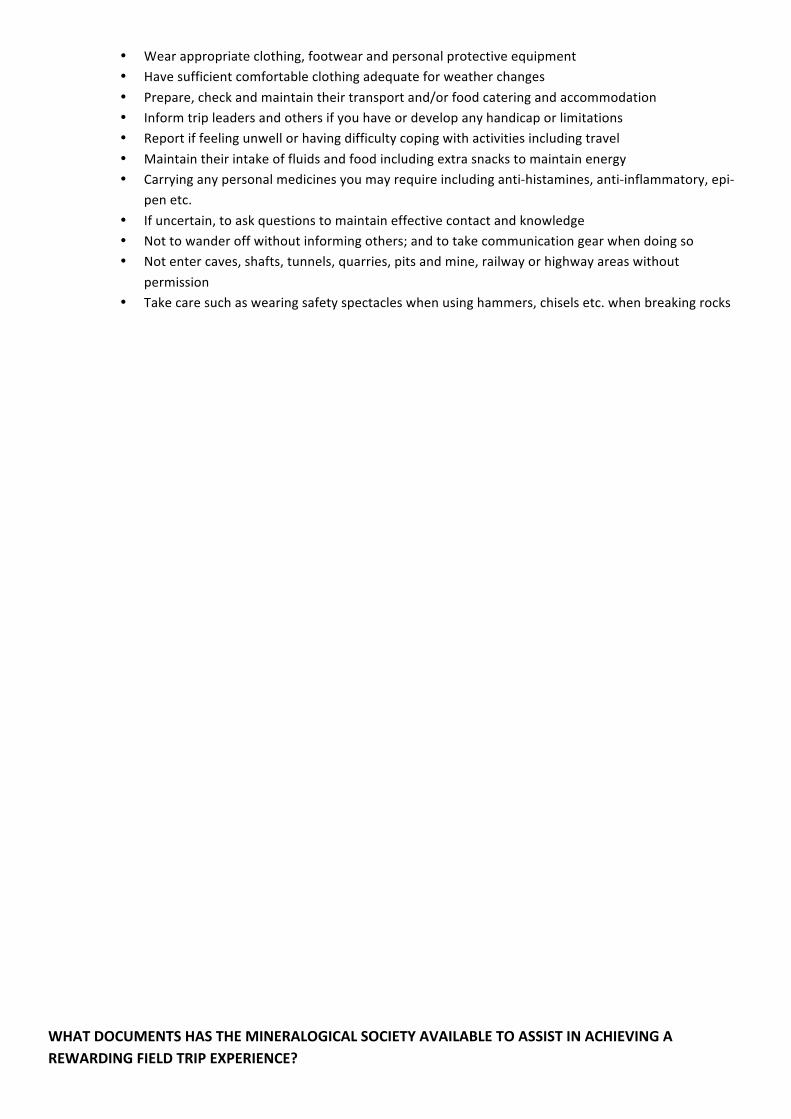
• Wear appropriate clothing, footwear and personal protective equipment • Have sufficient comfortable clothing adequate for weather changes
• Prepare, check and maintain their transport and/or food catering and accommodation • Inform trip leaders and others if you have or develop any handicap or limitations • Report if feeling unwell or having difficulty coping with activities including travel
• Maintain their intake of fluids and food including extra snacks to maintain energy • Carrying any personal medicines you may require including anti-‐histamines, anti-‐inflammatory, epi-‐
pen etc.
• If uncertain, to ask questions to maintain effective contact and knowledge • Not to wander off without informing others; and to take communication gear when doing so • Not enter caves, shafts, tunnels, quarries, pits and mine, railway or highway areas without
permission • Take care such as wearing safety spectacles when using hammers, chisels etc. when breaking rocks
WHAT DOCUMENTS HAS THE MINERALOGICAL SOCIETY AVAILABLE TO ASSIST IN ACHIEVING A REWARDING FIELD TRIP EXPERIENCE?

The following draft documents are a list of administrative “tools” that may be useful to assist the safe and effective proposing, planning and conduct of future field trips.
Title Version Type
1. Field Trips -‐ Society Guide Notes V2.1 Guide notes
2. Field Trips Risk Management System Guide Notes
3. Field Trip Hazard Identification and Risk Management
Assessment Spread sheet Table
4. Field Trip Proposal Work Plan Table
5. Field Trip Leaders Checklist List
6. Field Trip Schedule Template Template
7. Field Trip Site Entry Request Guide Notes Guide Notes
8. Field Trip Mapping Guide Notes Guide Notes
9. Fieldtrip Assembly Point Notice Form Form
10. Field Trip Legislation Compliance Guide Guide Notes
11. Field Trip Leaders Briefings of Participants Guide Notes
12. Field Trip Participants Checklist List
13. Field Trip Participants Contacts List Template Template
14. Field Trip Expressions of Interest to Attend Form Form
15. Participant Personal Medical Information Form Form
16. Participant Declaration Accepting Responsibility Form
17. Participant Waiver and Hold Harmless Agreement Form
18. Participants Recommended Packing Guide List & Guide
Notes
19. Field Trip Convoy Procedures Guide Notes
20. Field Trip Vehicles Guide Notes Form
21. Field Trip Satellite, Radio and Telephone Communication Guide
Guide
Notes
22. Field Trip First Aid Action Plan & Notes Guide Notes
23. Suggestion / Opportunity for Improvement Form Guide Notes
24. Field Trip post trip Evaluation Form Form
25. Field Trip -‐Thank You letter Template Template
Download the following form and email to the Secretary and/or Vice President
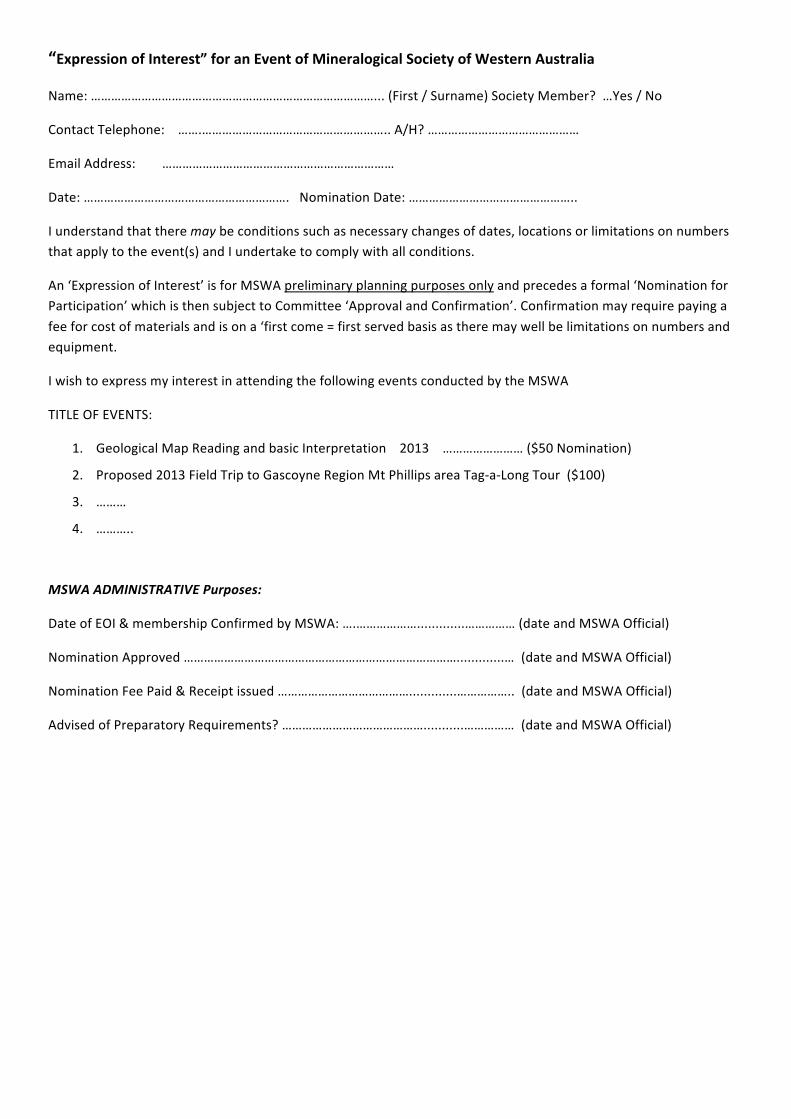
“Expression of Interest” for an Event of Mineralogical Society of Western Australia
Name: …………………………………………………………………………... (First / Surname) Society Member? …Yes / No
Contact Telephone: …….……………………………………………….. A/H? ………………………………………
Email Address: ……………………………………………………………
Date: ……………………………………………………. Nomination Date: …………………………………………..
I understand that there may be conditions such as necessary changes of dates, locations or limitations on numbers that apply to the event(s) and I undertake to comply with all conditions.
An ‘Expression of Interest’ is for MSWA preliminary planning purposes only and precedes a formal ‘Nomination for Participation’ which is then subject to Committee ‘Approval and Confirmation’. Confirmation may require paying a
fee for cost of materials and is on a ‘first come = first served basis as there may well be limitations on numbers and equipment.
I wish to express my interest in attending the following events conducted by the MSWA
TITLE OF EVENTS:
1. Geological Map Reading and basic Interpretation 2013 …………………… ($50 Nomination)
2. Proposed 2013 Field Trip to Gascoyne Region Mt Phillips area Tag-‐a-‐Long Tour ($100)
3. ………
4. ………..
MSWA ADMINISTRATIVE Purposes:
Date of EOI & membership Confirmed by MSWA: ….……………….............…………… (date and MSWA Official)
Nomination Approved ……………………………………………………………………….............… (date and MSWA Official)
Nomination Fee Paid & Receipt issued ………………………………….............…………….. (date and MSWA Official)
Advised of Preparatory Requirements? ……………………………………...........…………… (date and MSWA Official)
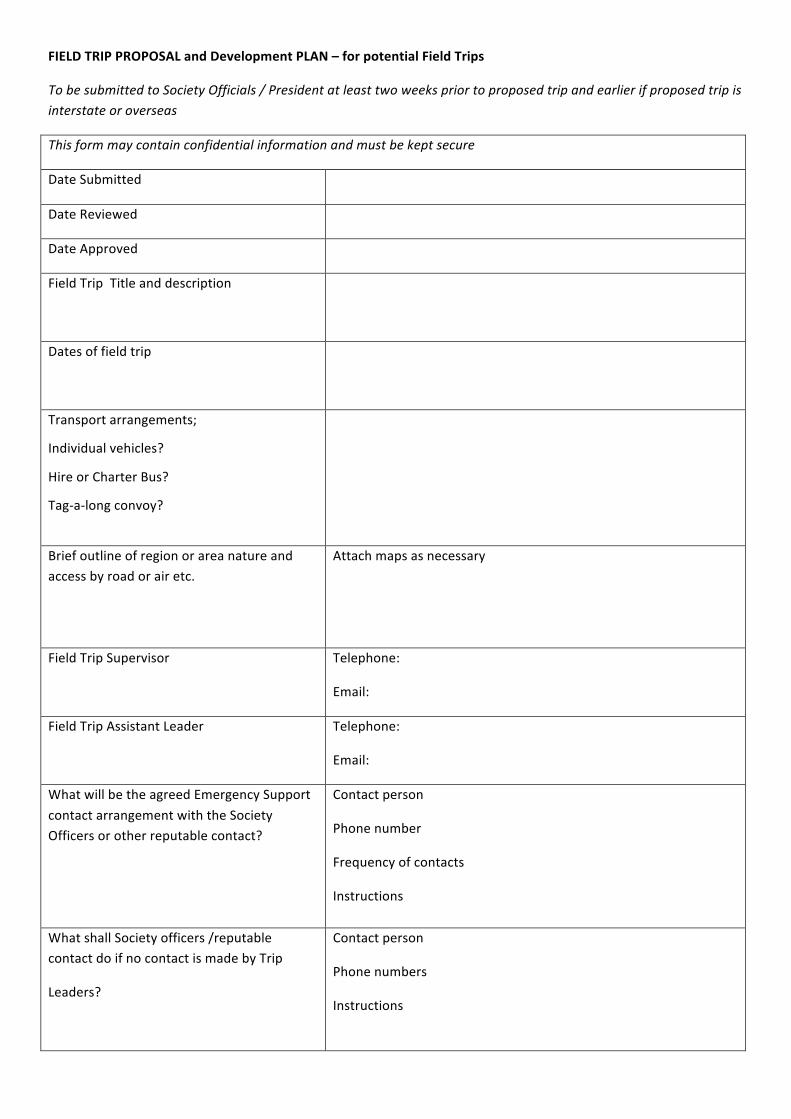
FIELD TRIP PROPOSAL and Development PLAN – for potential Field Trips
To be submitted to Society Officials / President at least two weeks prior to proposed trip and earlier if proposed trip is interstate or overseas
This form may contain confidential information and must be kept secure
Date Submitted
Date Reviewed
Date Approved
Field Trip Title and description
Dates of field trip
Transport arrangements;
Individual vehicles?
Hire or Charter Bus?
Tag-‐a-‐long convoy?
Brief outline of region or area nature and access by road or air etc.
Attach maps as necessary
Field Trip Supervisor Telephone:
Email:
Field Trip Assistant Leader Telephone:
Email:
What will be the agreed Emergency Support
contact arrangement with the Society Officers or other reputable contact?
Contact person
Phone number
Frequency of contacts
Instructions
What shall Society officers /reputable contact do if no contact is made by Trip
Leaders?
Contact person
Phone numbers
Instructions
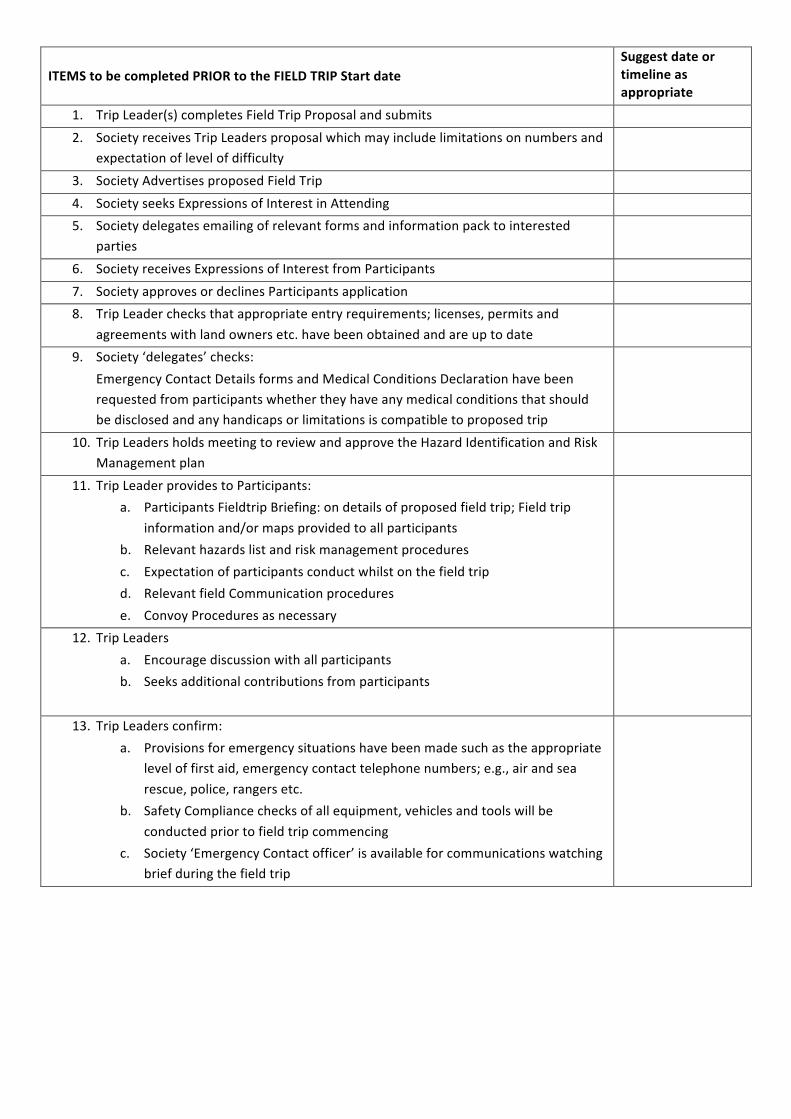
ITEMS to be completed PRIOR to the FIELD TRIP Start date
Suggest date or timeline as appropriate
1. Trip Leader(s) completes Field Trip Proposal and submits
2. Society receives Trip Leaders proposal which may include limitations on numbers and expectation of level of difficulty
3. Society Advertises proposed Field Trip
4. Society seeks Expressions of Interest in Attending
5. Society delegates emailing of relevant forms and information pack to interested parties
6. Society receives Expressions of Interest from Participants
7. Society approves or declines Participants application
8. Trip Leader checks that appropriate entry requirements; licenses, permits and
agreements with land owners etc. have been obtained and are up to date
9. Society ‘delegates’ checks:
Emergency Contact Details forms and Medical Conditions Declaration have been requested from participants whether they have any medical conditions that should be disclosed and any handicaps or limitations is compatible to proposed trip
10. Trip Leaders holds meeting to review and approve the Hazard Identification and Risk Management plan
11. Trip Leader provides to Participants: a. Participants Fieldtrip Briefing: on details of proposed field trip; Field trip
information and/or maps provided to all participants
b. Relevant hazards list and risk management procedures
c. Expectation of participants conduct whilst on the field trip
d. Relevant field Communication procedures
e. Convoy Procedures as necessary
12. Trip Leaders a. Encourage discussion with all participants
b. Seeks additional contributions from participants
13. Trip Leaders confirm:
a. Provisions for emergency situations have been made such as the appropriate level of first aid, emergency contact telephone numbers; e.g., air and sea
rescue, police, rangers etc.
b. Safety Compliance checks of all equipment, vehicles and tools will be
conducted prior to field trip commencing
c. Society ‘Emergency Contact officer’ is available for communications watching brief during the field trip

ITINERARY DETAILS Proposed
DATE/TIMES LOCATION ACCOMMODATION CONTACT DETAILS

DETAILS OF PARTICIPANTS expected to be interested in attending
NAME
Surname; then first name
Contact telephone?
STATUS
Member;
Participant
Guest
PARTICIPANT’S Expression of
Interest FORM ATTACHED?
(Mandatory)
Medical Declaration
FORM ATTACHED?
Yes No Yes N/A
Yes No Yes N/A
Yes No Yes N/A
Yes No Yes N/A
Yes No Yes N/A
Yes No Yes N/a
Yes No Yes N/a
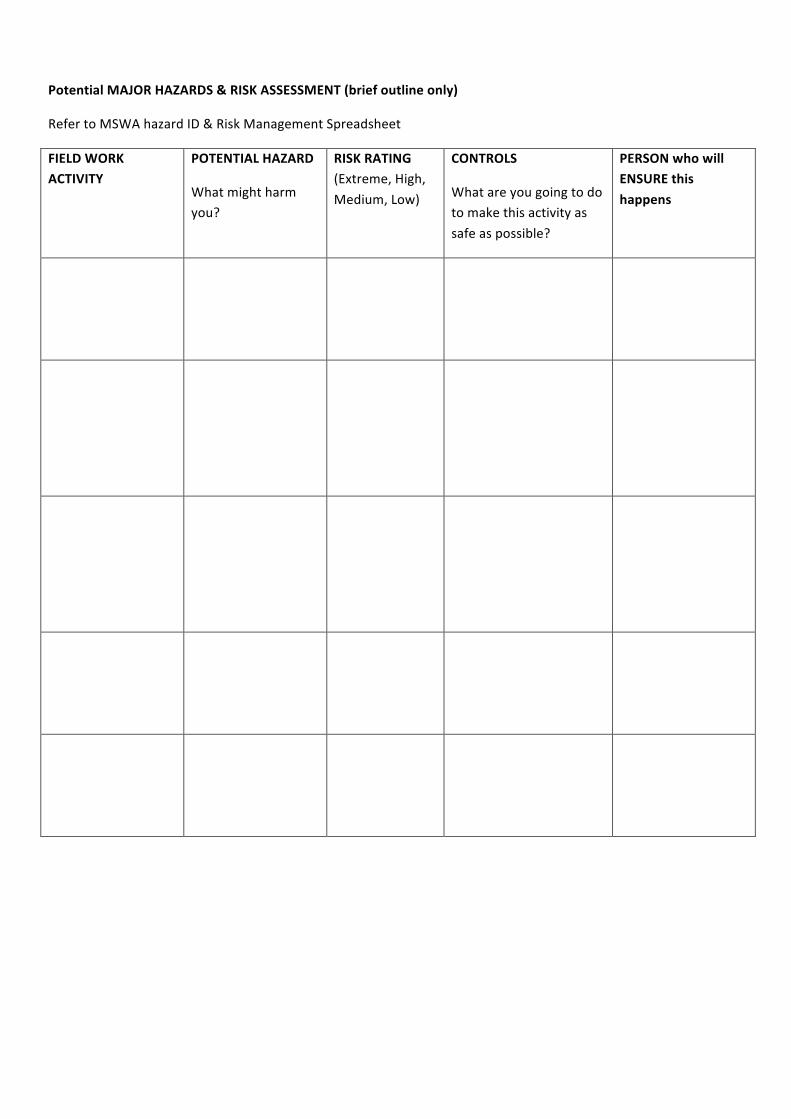
Potential MAJOR HAZARDS & RISK ASSESSMENT (brief outline only)
Refer to MSWA hazard ID & Risk Management Spreadsheet
FIELD WORK ACTIVITY
POTENTIAL HAZARD
What might harm you?
RISK RATING (Extreme, High,
Medium, Low)
CONTROLS
What are you going to do to make this activity as
safe as possible?
PERSON who will ENSURE this
happens

PEOPLE RESPONSIBLE FOR SUBMISSION AND APPROVAL
NAME SIGNATURE DATE
Field Trip Supervisor
Field Trip Assistant Leader
Society Officials(As applicable)
Based upon the information in the
above Field Work Plan I:-‐
� Approve
� Do not approve
� Grant conditional approval
Conditions if relevant
NOTE:-‐
• A copy of this Field Work Plan and associated Field Trip participant forms must be left with the Secretary or Society authorized Emergency Contacts officer.

Field Trip Leaders Briefing of Participants -‐ Guidance Notes
1. Briefing to Participants is mandatory and must be given before departure or at commencement of a field trip activity. Refer to Pre-‐Trip Briefing Checklist attached below
2. “In Field” Briefings and Trip Leaders advice is recommended at both a Morning Meeting ( before activities; travel etc. commence) and End of Day Meetings: Refer In-‐Field Meetings Checklist attached below
3. Participants are encouraged to ask questions; although sometimes questions and the Trip Leaders answers /
responses may not all be made publicly for various reasons such as time; privacy etc. 4. Any participant absent from or missing vital parts of the Pre Trip Briefing including a participants spouse,
mate etc. must sign a “Participant’s Declaration Accepting Responsibility” for following instructions. Refer
to form attached 5. Field Trip Leaders are encouraged to:
a. use repetition of key points to emphasis essential knowledge
b. provide written advice; instructions etc. where possible, as recall by participants may be problematic. c. A white board or plastic covered Notice posted on Trip Leaders vehicle or other designated ‘Muster Point’ point is strongly recommended.
6. Participants Suggestions and/or Complaints may be made to The Trip Leaders preferably in writing. Refer to the “Opportunity for Improvement” form attached
7. Trip Leader may respond to Participants suggestions / complaints after investigation and consideration. It is
recommended practice to acknowledge the suggestion immediately and convey their decision in an appropriate time frame and respectful manner.
8. If a Participant or group of participants decides /acts to contest Field Trip Leaders decision “In-‐Field” the Trip
Leader may then consider asking the participant to leave; desist or may cancel the event at their discretion.
ATTACHMENTS: referred to above
1. Pre-‐Trip Briefing Checklist: briefly follow sequence of What; Why; When; Where; Who; How
What: Title of Field trip – brief activity descriptions -‐ verbs “doing words” like fossicking, collecting
Why: Objectives of activities
How: Travel, activity group or individual +/-‐ Convoy and travel procedures Road maps
When: Day – date – time; duration and start and stop dates/times. Schedule /table
Where: Stop & meet points, directions and distance; map locations and/ or references may include “fall back “or re-‐ group points in case of missing or delayed parties
Who: Names and contact details of Trip leaders, vehicles (make, colour & registrations, mobile and satellite phone numbers, email addresses)
Hazards Expected – use spreadsheet as a guide and or provide summary notes
2. In-‐Field Meetings Checklist and ‘Muster Point’
Strongly Recommend Trip Leaders to arrange a regular and convenient group meeting place (A ‘’Muster Point”) and
time to refresh participant’s knowledge of events and activities. Suggest both morning and evening. Use ‘white board ‘and/or written notes in plastic envelope fastened to Trip Leader’s or suitable vehicle.
Forum to recall previous activities and lessons learnt; hazards avoided etc.
Like the Pre-‐Trip Briefing Checklist: briefly follows a sequence of What; Why; When; Where; Who; How; may include directions, maps, technical descriptions of geological interest; demonstrations, show examples or photos of
specimens etc.
Limit duration of meeting and competing conversations to ensure time efficiency and increase recall.
3. “Participant’s Declaration Accepting Responsibility”
Participant accepts responsibility, in writing, for ensuring personal compliance with laws including road traffic regulations and use and maintenance of vehicles; drug and alcohol use; will comply with Trip Leaders instructions and directions, undertake to advise Trip Leaders of any medical or other situations. Comply with bans on firearms,
explosives; permits, entry and exit requirements
4. “Opportunity for Improvement” Form
Form used to make it easier for Trip Leader to recall and follow-‐up before considering decision options. Form allows participants to make an “anonymous” suggestion
A written Form tends to discourage “persistent nagging” and excessively vexatious verbal diarrhoea
(Field Trip Leaders Briefing of Participants Guide Note V2.0 20120926)

FIELD TRIP MAP GUIDE NOTES
1. Field Trip Leaders must not assume that participants are familiar with or able to locate towns and localities. Highways, Roads and bush tracks are not always well signposted and many participants will not have GPS
navigation units 2. Trip leaders must prepare a suitable map or series of maps to assist with the synoptic view. 3. Points of interest should be added for interstate visitor participants such as fuel and food suppliers;
accommodation contact numbers. 4. Map convention is that north direction will be to the top of the map sheet and that a scale and scale bar will
provide guidance about distances to participants.
5. Maps and images can be cheaply and readily made from many electronic sources such as Google Earth, Whereis, State and Territory Geological Survey Departments; Ozi Explorer
6. “mud maps” can be made that guide participants to selected sites; but it is essential that directions and
distances are clearly interpretable even if distance proportions are distorted 7. Aerial photographs display features that are spherically distorted and need to be corrected before distances
can be accurately conveyed.
8. Stereo pairs of aerial photographs can make features more readily interpreted; and mirror stereoscopes are now affordable for groups.
Field trip Assembly Location Advice Template Form
Day and Date and Time
Tuesday morning: June 12 Aiming for 9am Assembly and to depart by 9.30am in convoy order as advised. UHF transceiver channel 38
MUST Text 0417 908 188 and advise Trip leaders if delayed or aborting trip.
Trip Leader Ted at point and Sweep Tom 0417 908 188 as rear whip
Meeting Point
Assembly Location
Bakers Hill Pie Shop on north, left hand side of Great Eastern Highway, at the foot of a long hill where speed
limit drops to 60 kmph
Bakers Hill is just over 1 hour / 73 km east of Perth, between Midland Junction and Northam however with
rain wet roads and traffic please allow two hours; suggest arrive early, take coffee
Locality Bakers Hill is a very small town so you cannot not miss it – Pie Shop sign is prominent
Destination Mukinbudin ( feldspar quarries – allanite and zircon) estimated distance 120km
Facilities Fuel available; air and water plus coffee, soft-‐drinks and hot food Toilets in Garage open ( key)
Weather
Warnings? Cold front expected with High winds, wet roads and windfall branches
Hazards? Probable heavy traffic in Midland; heavy vehicles may slow travel speeds through small towns of Mundaring,
Sawyers Valley. Road edges very soft, unstable; and occasional poor visibility due to rain and road spray
Possible Flash floods, and drainage water on/over roads – slow entry and lightly apply brakes after passing
through flood waters on roads to ensure braking performance
PLEASE~ Add the list of mobile telephone numbers to your mobile contacts list before you leave

1. Use texting as a backup to ensure messages get through where mobile reception may be problematic Reminder: It is a Traffic offence to use mobile telephone or text whilst driving – Please let your passenger
do it or pull off road.
2. Follow the weather forecast on vehicle radio and or Bureau of Metrology website
3. PREPARE YOUR VEHICLE AND CAMP ACCOMMODATION carefully before you set off:
a. check that your windscreen washer has fluid and detergent additive and wipers are fully operational b. have windscreen demister rag wipers ready and ensure demister controls are functional
c. check all lights and indicators are functional – use your side lights at all times. d. check tyre condition and that pressure is set for highway driving
Drive to conditions; obey all speed limits; particularly pay attention in towns and outskirts as vehicles may be
turning on and off highway Do not tailgate; as roads will be slippery; expect small branches; mud slush and leaves to be on or blown onto road
MSWA Fieldtrip Assembly location Information Form V1.2 20120727
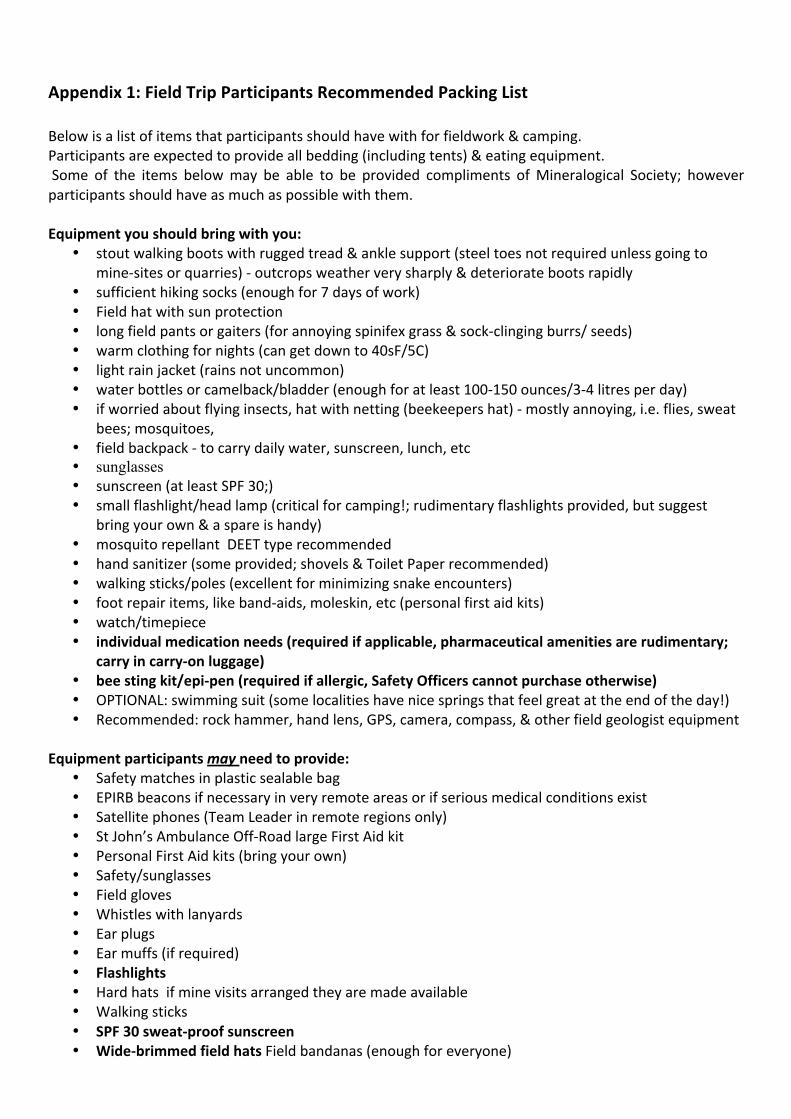
Appendix 1: Field Trip Participants Recommended Packing List
Below is a list of items that participants should have with for fieldwork & camping. Participants are expected to provide all bedding (including tents) & eating equipment. Some of the items below may be able to be provided compliments of Mineralogical Society; however participants should have as much as possible with them. Equipment you should bring with you:
• stout walking boots with rugged tread & ankle support (steel toes not required unless going to mine-‐sites or quarries) -‐ outcrops weather very sharply & deteriorate boots rapidly
• sufficient hiking socks (enough for 7 days of work) • Field hat with sun protection • long field pants or gaiters (for annoying spinifex grass & sock-‐clinging burrs/ seeds) • warm clothing for nights (can get down to 40sF/5C) • light rain jacket (rains not uncommon) • water bottles or camelback/bladder (enough for at least 100-‐150 ounces/3-‐4 litres per day) • if worried about flying insects, hat with netting (beekeepers hat) -‐ mostly annoying, i.e. flies, sweat
bees; mosquitoes, • field backpack -‐ to carry daily water, sunscreen, lunch, etc • sunglasses • sunscreen (at least SPF 30;) • small flashlight/head lamp (critical for camping!; rudimentary flashlights provided, but suggest
bring your own & a spare is handy) • mosquito repellant DEET type recommended • hand sanitizer (some provided; shovels & Toilet Paper recommended) • walking sticks/poles (excellent for minimizing snake encounters) • foot repair items, like band-‐aids, moleskin, etc (personal first aid kits) • watch/timepiece • individual medication needs (required if applicable, pharmaceutical amenities are rudimentary;
carry in carry-‐on luggage) • bee sting kit/epi-‐pen (required if allergic, Safety Officers cannot purchase otherwise) • OPTIONAL: swimming suit (some localities have nice springs that feel great at the end of the day!) • Recommended: rock hammer, hand lens, GPS, camera, compass, & other field geologist equipment
Equipment participants may need to provide:
• Safety matches in plastic sealable bag • EPIRB beacons if necessary in very remote areas or if serious medical conditions exist • Satellite phones (Team Leader in remote regions only) • St John’s Ambulance Off-‐Road large First Aid kit • Personal First Aid kits (bring your own) • Safety/sunglasses • Field gloves • Whistles with lanyards • Ear plugs • Ear muffs (if required) • Flashlights • Hard hats if mine visits arranged they are made available • Walking sticks • SPF 30 sweat-‐proof sunscreen • Wide-‐brimmed field hats Field bandanas (enough for everyone)

• Gatorade powder • Walkie talkies UHF channel advised at Field Trip Briefing • AA batteries (20) • AAA batteries (20) • Hand sanitizer • Insect bite ointment • Assorted band-‐aids • Blister band-‐aids/moleskin (suggest participants bring their own if blister-‐prone) • Medical tape/bandages/flexi-‐wrap • Non-‐adherent pads Neosporin ointment • Field notebooks • Insect repellant
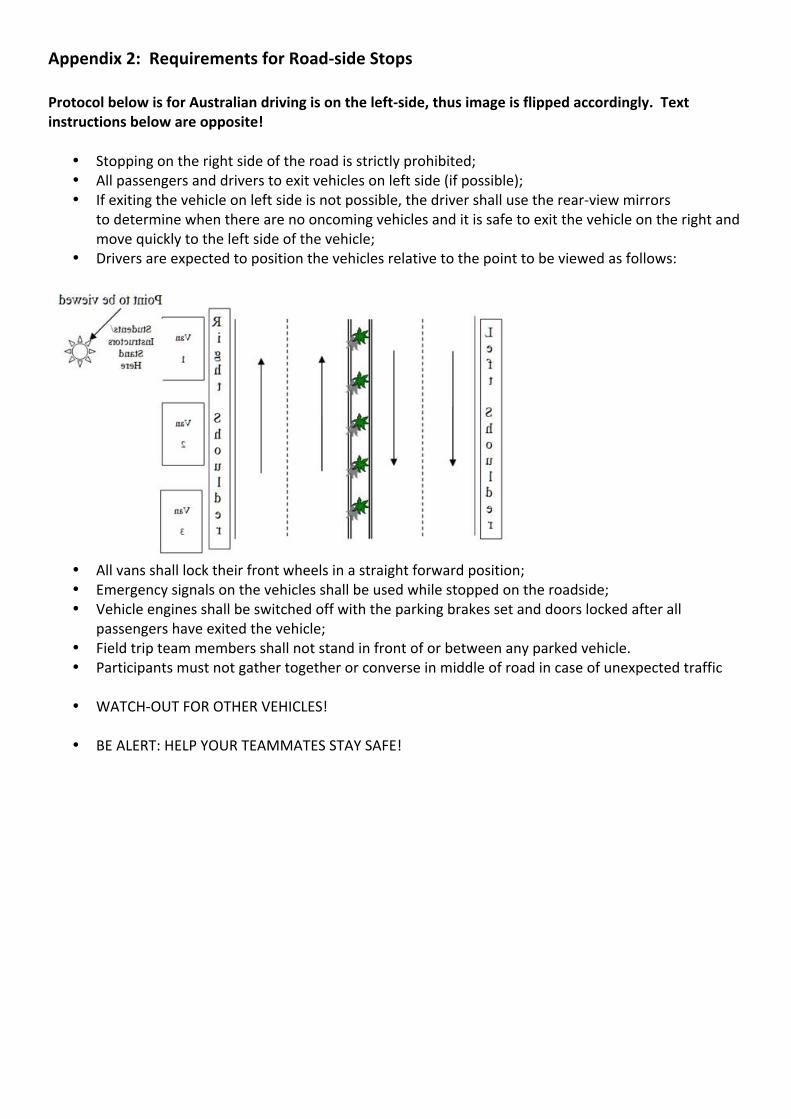
Appendix 2: Requirements for Road-‐side Stops
Protocol below is for Australian driving is on the left-‐side, thus image is flipped accordingly. Text instructions below are opposite!
• Stopping on the right side of the road is strictly prohibited; • All passengers and drivers to exit vehicles on left side (if possible); • If exiting the vehicle on left side is not possible, the driver shall use the rear-‐view mirrors
to determine when there are no oncoming vehicles and it is safe to exit the vehicle on the right and move quickly to the left side of the vehicle; • Drivers are expected to position the vehicles relative to the point to be viewed as follows:
• All vans shall lock their front wheels in a straight forward position; • Emergency signals on the vehicles shall be used while stopped on the roadside; • Vehicle engines shall be switched off with the parking brakes set and doors locked after all
passengers have exited the vehicle; • Field trip team members shall not stand in front of or between any parked vehicle. • Participants must not gather together or converse in middle of road in case of unexpected traffic • WATCH-‐OUT FOR OTHER VEHICLES!
• BE ALERT: HELP YOUR TEAMMATES STAY SAFE!
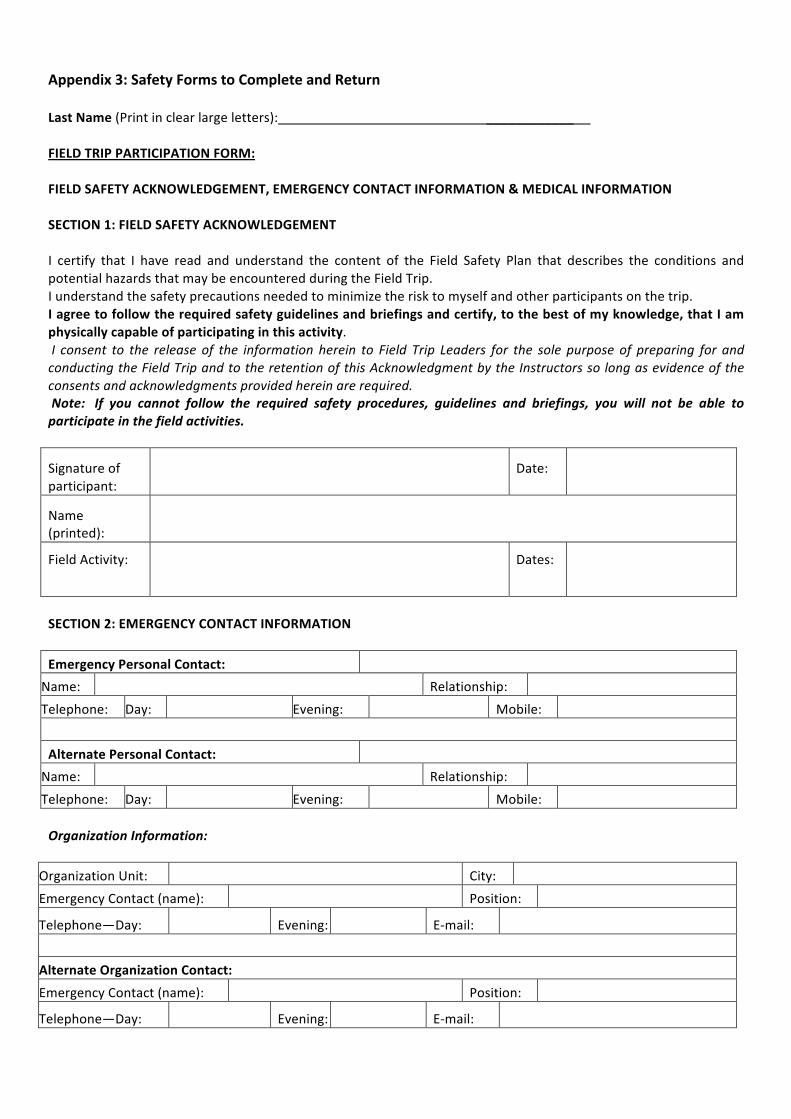
Appendix 3: Safety Forms to Complete and Return Last Name (Print in clear large letters): ____________
FIELD TRIP PARTICIPATION FORM: FIELD SAFETY ACKNOWLEDGEMENT, EMERGENCY CONTACT INFORMATION & MEDICAL INFORMATION SECTION 1: FIELD SAFETY ACKNOWLEDGEMENT I certify that I have read and understand the content of the Field Safety Plan that describes the conditions and potential hazards that may be encountered during the Field Trip. I understand the safety precautions needed to minimize the risk to myself and other participants on the trip. I agree to follow the required safety guidelines and briefings and certify, to the best of my knowledge, that I am physically capable of participating in this activity. I consent to the release of the information herein to Field Trip Leaders for the sole purpose of preparing for and conducting the Field Trip and to the retention of this Acknowledgment by the Instructors so long as evidence of the consents and acknowledgments provided herein are required. Note: If you cannot follow the required safety procedures, guidelines and briefings, you will not be able to participate in the field activities.
Signature of participant:
Date:
Name (printed):
Field Activity:
Dates:
SECTION 2: EMERGENCY CONTACT INFORMATION
Emergency Personal Contact:
Name: Relationship:
Telephone: Day: Evening: Mobile:
Alternate Personal Contact:
Name: Relationship:
Telephone: Day: Evening: Mobile: Organization Information:
Organization Unit: City:
Emergency Contact (name): Position:
Telephone—Day: Evening: E-‐mail:
Alternate Organization Contact:
Emergency Contact (name): Position:
Telephone—Day: Evening: E-‐mail:

SECTION 3: MEDICAL INFORMATION FOR FIELD TRIP LEADERS
The following information may be important for trip leaders in case of an emergency during the field trip.
The information will be kept confidential and this form will be destroyed at the conclusion of the trip.
Please discuss any issues deserving of additional attention directly with the field trip leader.
Medical Conditions
Please describe any medical condition currently requiring special care, medication, or diet that can adversely affect or limit your participation in the activities described in the overview letter. In particular, do you experience?
• limited mobility………………………………………………………………………………………………………………………………………….…..
• limited ability to participate in strenuous physical activities (e.g., mountain hiking)………………………………….….
• limited hearing or sight…………………………………………………………………………………………………………………………..………
• fear of heights………………………………………………………………………………………………………………………………………..………
• any allergies, mild or severe (pollen, bee stings, etc)……………………………………………………………………………………
• asthma……………………………………………………………………………………………………………………………………………………..……
• fainting spells…………………………………………………………………………………………………………………..……………………….……
• bleeding disorders……………………………………………………………………………………………………………………..…………….……
• heart trouble…………………………………………………………………………………………………………………………………………….……
• convulsions/seizures…………………………………………………………………………………………………………………………..…..……
• high blood pressure……………………………………………………………………………………………………………………….………..….
• diabetes…………………………………………………………………………………………………………………………………………………………
• Others………………………………………………………………………………………………………………………………………….…………………
………………………………………………………………………………………………………………………………………………………………………
Comments:
I normally wear/use: Contact Lenses Other (list):

Appendix 4: Safety Briefing Checklist
1) Stay together, look after each other, account for each other 2) Open communication among fieldworkers -‐ don’t be afraid to speak up,
3) Right of Refusal no participant has to do anything they feel uncomfortable with
4) Respect the country, leave things as they are found (e.g. gates) 5) Means/plans of communication
a. satellite phones (team leader only in remote regions)
b. daily call-‐out procedures to Perth contacts
c. long-‐range radios
d. walkie-‐talkies (enough for every fieldworker)
e. whistles
6) Emergencies
a. safety plan (copies at camp & laminated flow chart for everyone)
b. satellite phones, long-‐range radios
c. EPIRBs (personal distress beacons) – activate in urgent life-‐or-‐death emergencies only
d. portable AED (defibrillator) available
e. personal first aid kits & larger FA kit at camp available
f. First Aid/CPR/AED certified – list from Team leaders
7) Heat a. wear a hat and wear sunscreen daily
b. maximize shade when available
c. Communicate with others upon feeling sick, tired, dizzy, or disoriented
d. stay hydrated (at least 100 ounces/3 litres water per day)
e. maintain salts/electrolytes (Gatorade powder provided)
f. water source –vehicles only (e.g. not from springs or untested taps)
8) Snakes a. many species of poisonous snakes here
b. think like a snake! (Colin Morgan, 2008) – be conscious of where snakes might be
c. walk loudly & carefully, watch where you put your feet
d. probing with walking sticks minimize your chances of encounters
9) Insects/other invertebrates a. watch where you place your hands!
b. several poisonous spiders – under rocks & in holes
c. scorpions – under rocks & in holes
d. ticks (both large & very small) – common in grass, check yourself several times daily &
nightly inspection by torchlight of body ‘warm and moist’ places
e. mosquitoes – be aware MVE & Ross River viruses, wear repellant
f. avoid green ants on tree branches
10) Terrain a. avoid standing close to cliff edges or sharp drop offs into creeks

b. Loose rocks – avoid walking above others, if rock dislodged downslope yell “Rock!”
c. field gloves are recommended for hand protection against rocks & plants
d. karstic limestone terrain – watch for sinkholes & sharp weathering
11) Vegetation a. spinifex (harmless but annoying) – gaiters help
b. Caustic Bush – can cause irritation when flowering
c. seeds/burrs plentiful – gaiters minimize sock infiltration
12) Driving a. drivers must be licensed and must comply with road regulations
b. always wear seatbelts
c. diminished visibility from dust
d. free-‐ranging cattle
e. dirt road corrugations (washboard)
13) Eye protection (glasses provided) a. required during hand sampling with rock hammer
b. required during core plugging with hand-‐held drill
14) Hard hats provided (recommended while working next to steep cliff faces)
15) ‘Finding a bush’ – shovels, Toilet Paper, hand sanitizer
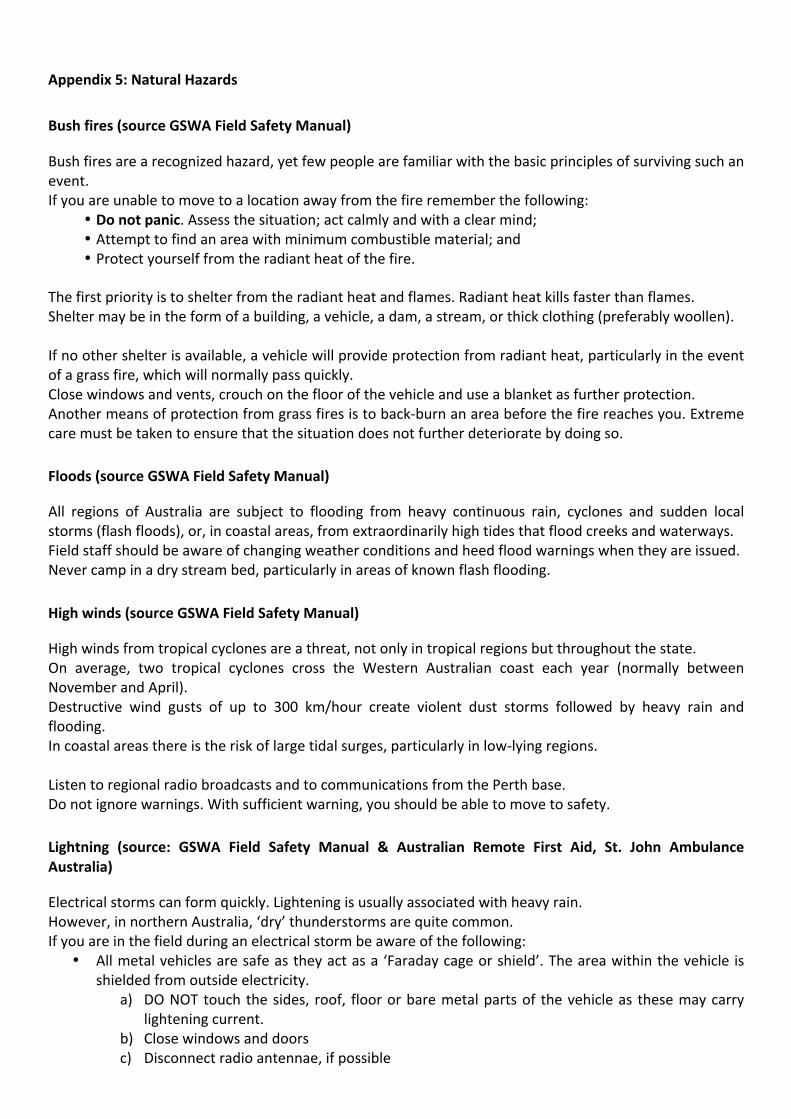
Appendix 5: Natural Hazards
Bush fires (source GSWA Field Safety Manual)
Bush fires are a recognized hazard, yet few people are familiar with the basic principles of surviving such an event. If you are unable to move to a location away from the fire remember the following:
• Do not panic. Assess the situation; act calmly and with a clear mind; • Attempt to find an area with minimum combustible material; and • Protect yourself from the radiant heat of the fire.
The first priority is to shelter from the radiant heat and flames. Radiant heat kills faster than flames. Shelter may be in the form of a building, a vehicle, a dam, a stream, or thick clothing (preferably woollen). If no other shelter is available, a vehicle will provide protection from radiant heat, particularly in the event of a grass fire, which will normally pass quickly. Close windows and vents, crouch on the floor of the vehicle and use a blanket as further protection. Another means of protection from grass fires is to back-‐burn an area before the fire reaches you. Extreme care must be taken to ensure that the situation does not further deteriorate by doing so.
Floods (source GSWA Field Safety Manual)
All regions of Australia are subject to flooding from heavy continuous rain, cyclones and sudden local storms (flash floods), or, in coastal areas, from extraordinarily high tides that flood creeks and waterways. Field staff should be aware of changing weather conditions and heed flood warnings when they are issued. Never camp in a dry stream bed, particularly in areas of known flash flooding.
High winds (source GSWA Field Safety Manual)
High winds from tropical cyclones are a threat, not only in tropical regions but throughout the state. On average, two tropical cyclones cross the Western Australian coast each year (normally between November and April). Destructive wind gusts of up to 300 km/hour create violent dust storms followed by heavy rain and flooding. In coastal areas there is the risk of large tidal surges, particularly in low-‐lying regions. Listen to regional radio broadcasts and to communications from the Perth base. Do not ignore warnings. With sufficient warning, you should be able to move to safety.
Lightning (source: GSWA Field Safety Manual & Australian Remote First Aid, St. John Ambulance Australia)
Electrical storms can form quickly. Lightening is usually associated with heavy rain. However, in northern Australia, ‘dry’ thunderstorms are quite common. If you are in the field during an electrical storm be aware of the following:
• All metal vehicles are safe as they act as a ‘Faraday cage or shield’. The area within the vehicle is shielded from outside electricity.
a) DO NOT touch the sides, roof, floor or bare metal parts of the vehicle as these may carry lightening current.
b) Close windows and doors c) Disconnect radio antennae, if possible

• If there is no shelter available, attempt to find low-‐lying ground, and crouch down with your feet together and hands around your knees.
• Insulate yourself from the ground if possible by crouching on some insulating material such as a rucksack (no steel frame), folded dry clothes or a small loose rock.
• If wearing footwear with metal reinforcing remove. • DO NOT lie down as this greatly increase chances that the ground current will pass through your
body • Remove metal objects from your hair and head covering • If in a group in the open, keep a least 10 metres apart so that if a person is injured, others can
render first aid • Avoid objects which might act as lightening targets such as tall isolated trees, power poles,
overhead wires, wire fences, metal pipes, railway tracks, and other metallic paths which could conduct lightening to you from distance.
• Be aware of flash flood potential • In the bush or a forest avoid taking shelter under tall trees • Seek shelter in low areas under growth of small trees or scrub. • If tall trees cannot be avoided, seek shelter just beyond spread of foliage. • In hilly or mountainous country crouch down on a level or concave area of an open slope, at least 2
metres from any cliff or large rock • The zone of protection from direct lightning strikes at the base of a rock wall 20 metres high is
between 2x20 metres from the cliff. • Ensure your body does not project above the landscape – move off ridges and hill tops • Avoid sheltering in narrow vertical gullies, small holes or caves or overhanging rock • In such locations, the body may act as a bridge for the current path. Deep dry caves are safer, but
insulate yourself from the rock. To be struck by lightning is a rare event. Should such an incident occur allow your wounds to be photographed by Trip Leader. Be aware that lightning almost never kills a person outright and recovery is common. Resuscitation and/or CPR should be carried out immediately.
Wildlife (source: GSWA Field Safety Manual)
It is Mineralogical Society of Western Australia’s policy to respect the total natural environment of Western Australia. Animals, plants and habitats should never be wantonly destroyed. In Australia, wildlife does not present a major threat to field persons on foot (compared to some other parts of the world). However, saltwater crocodiles in the far north of the state are aggressive and should be treated with respect; although they are normally found in saltwater, they are known to venture as far as 200 km upstream. Make sure you camp at least 800 metres from waterways that crocodiles are known to inhabit. Even the smaller Johnson River crocodiles, commonly found in rivers throughout the Kimberley region, should be treated with respect. There are many species of snake in Australia. Although most are non-‐poisonous, some are extremely poisonous, and all should be treated with caution. Many snake-‐bites occur when people attempt to kill the snake. Most snakes will retreat when approached and should be left alone. How to avoid snake bites
• Wear stout footwear and long trousers • Move-‐about slowly and carefully and always use a torch at night
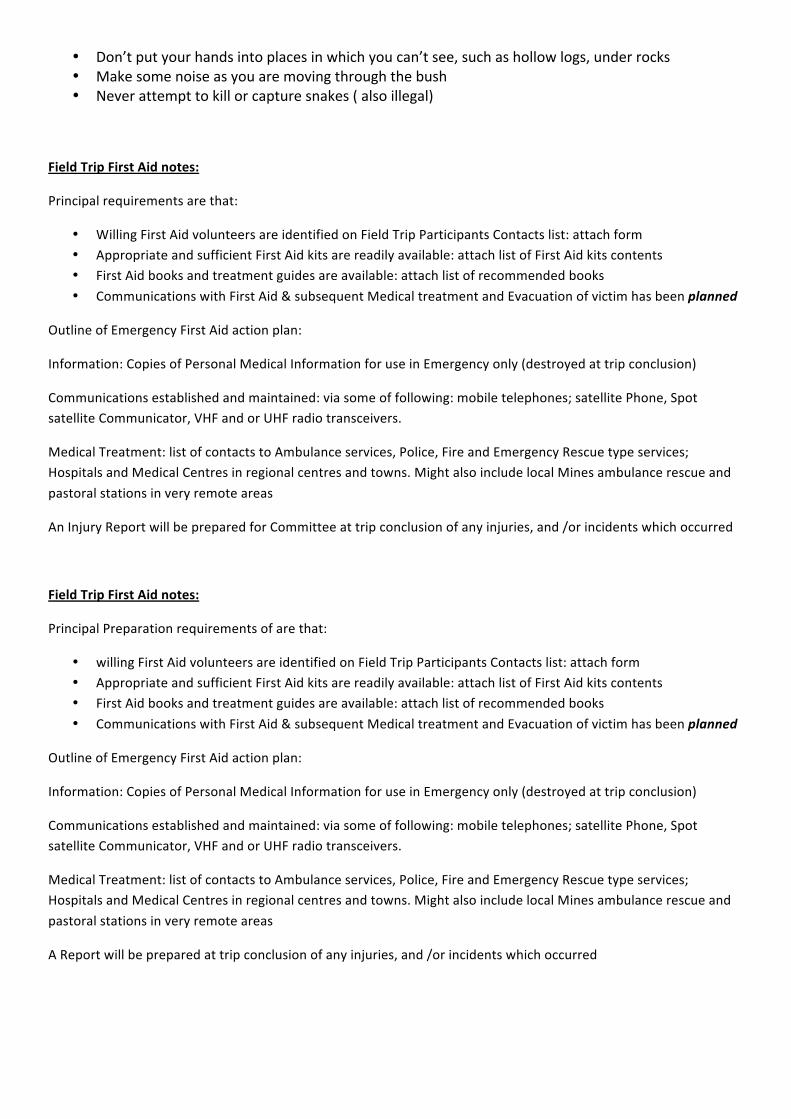
• Don’t put your hands into places in which you can’t see, such as hollow logs, under rocks • Make some noise as you are moving through the bush • Never attempt to kill or capture snakes ( also illegal)
Field Trip First Aid notes:
Principal requirements are that:
• Willing First Aid volunteers are identified on Field Trip Participants Contacts list: attach form • Appropriate and sufficient First Aid kits are readily available: attach list of First Aid kits contents • First Aid books and treatment guides are available: attach list of recommended books
• Communications with First Aid & subsequent Medical treatment and Evacuation of victim has been planned
Outline of Emergency First Aid action plan:
Information: Copies of Personal Medical Information for use in Emergency only (destroyed at trip conclusion)
Communications established and maintained: via some of following: mobile telephones; satellite Phone, Spot satellite Communicator, VHF and or UHF radio transceivers.
Medical Treatment: list of contacts to Ambulance services, Police, Fire and Emergency Rescue type services; Hospitals and Medical Centres in regional centres and towns. Might also include local Mines ambulance rescue and
pastoral stations in very remote areas
An Injury Report will be prepared for Committee at trip conclusion of any injuries, and /or incidents which occurred
Field Trip First Aid notes:
Principal Preparation requirements of are that:
• willing First Aid volunteers are identified on Field Trip Participants Contacts list: attach form • Appropriate and sufficient First Aid kits are readily available: attach list of First Aid kits contents • First Aid books and treatment guides are available: attach list of recommended books
• Communications with First Aid & subsequent Medical treatment and Evacuation of victim has been planned
Outline of Emergency First Aid action plan:
Information: Copies of Personal Medical Information for use in Emergency only (destroyed at trip conclusion)
Communications established and maintained: via some of following: mobile telephones; satellite Phone, Spot satellite Communicator, VHF and or UHF radio transceivers.
Medical Treatment: list of contacts to Ambulance services, Police, Fire and Emergency Rescue type services; Hospitals and Medical Centres in regional centres and towns. Might also include local Mines ambulance rescue and
pastoral stations in very remote areas
A Report will be prepared at trip conclusion of any injuries, and /or incidents which occurred
Contents of Remedial First Aid Action
Will follow sequence of signs and symptoms; Emergency First Aid treatment
a. Sprains b. Fractures c. Shock d. Severe Bleeding e. Head Injuries f. Heat Induced heat exhaustion, heatstroke, Hypothermia g. Sunburn h. Bites and Stings i. Wounds and Scratches j. Eye Injures k. Contingency if Lost or separated from Group l. Hygiene in bush
Appendix 10: St. John’s Ambulance Off-‐Road First Aid Kit Contents
Appendix : Remedial First Aid Action
Source: Geological Survey of Western Australia Field Safety Manual & Australian Remote First Aid, St. John Ambulance Australia
A. Sprains
Signs & Symptoms
• If pain is severe or deformity is present a fracture must be suspected • It can be difficult to tell whether the injury is a fracture, dislocation, sprain or strain. If in doubt,
always manage as a fracture • If a dislocation of a joint is suspected, rest, elevate and apply ice or cold compress to joint • If a collarbone fracture is suspected, support arm on injured side in sling that supports the weight
of the arm with fingers pointing to the opposite shoulder
Emergency First Aid
1. Rest casualty 2. Elevate affected part 3. Sit with ankle resting on pack 4. Remove foot wear and observe injury site 5. Apply ice pack for 15 minutes every 2 hours 6. If ice is not available, immerse part in cold water or apply a cold compress 7. Bandage joint firmly and check regularly to ensure it is not too tight 8. Emergency Services may be needed to evacuate the casualty
B. Fractures
Signs & Symptoms
• Pain at or near site of injury • Difficult or impossible normal movement
• Loss of power • Deformity or abnormal mobility • Tenderness • Swelling • Discoloration and bruising
Note:
• Ongoing observations should include: • Observe casualty for signs of shock • Check limb frequently to ensure swelling has not caused bandages or clothing to become
too tight • Check that bandages holding splint in place have not loosened with time • Pressure area care • hygiene
Emergency First Aid
1. Control any bleeding and cover wounds 2. If possible, manage casualty and support limb in position found 3. If limb extremity is cool, pale or blue, circulation may be reduced 4. Realignment of limb to regain circulation must be considered 5. Ask casualty not to move injured part 6. Immobilize the fracture 7. Until it is necessary to move casualty, limb can be supported by using clothing or
equipment packed on both sides of limb 8. If casualty needs to be moved, use broad bandages to prevent movements at joints
above and below the fracture 9. Support limb, carefully passing bandages under natural hollows 10. Place a padded splint along the injured limb and pad hollows between splint and
contours of limb and secure firmly 11. Check that bandages are not too tight or too loose every 15 minutes 12. Call Emergency Services
C. Shock
WARNING: Shock is progressive – unless recognized and treated early, it could become life threatening.
Signs & Symptoms
• Weak, rapid pulse • Cooling or cold, clammy skin • Rapid breathing
Causes
• Blood loss, burns • Severe diarrhoea/vomiting • Following a heart attack
Enhanced by
• Pain, infection • Broken bones, poisoning

Emergency First Aid
• Lie casualty down with head flat: • Insulate casualty from ground • Reassure casualty • Assess casualty • Follow Danger Response Airway Breathing Circulation (DRABC) • Assess for injuries • If possible manage cause, e.g. stop bleeding • Call emergency services • Manage any other injuries • If no indication of neck injury or broken leg-‐ raise legs above level of chest • Manage wounds or burns • Immobilize fractures • Loosen tight clothing • Cover and keep casualty comfortably warm • Normally do not give anything to eat or drink, but if help is not expected for many hours give small
frequent sips of water • Place in recovery position if casualty has difficulty breathing, is likely to vomit or becomes
unconscious
D. Severe bleeding
• DO NOT apply a tourniquet • If bleeding from a limb does not stop, apply pressure with hand to pressure point • If embedded object in wound, apply pressure either side of wound and place pad around it before
bandaging • If casualty becomes unconscious, follow DRABC • If available wear gloves or wash hands. Dispose of contaminated items-‐double bag and carry out as
rubbish
Emergency First Aid
• Apply pressure to wound • Remove or cult casualty’s clothing to expose wound • Apply direct pressure over wound • Cover wound with sterile or clean dressing • Apply a pad • Raise and support injured part • Lie casualty down • Raise injured part above level of heart • Handle gently if you suspect a fracture • Bandage wound • Bandage pad firmly in place • Apply another dressing or pad if bleeding continues • Check circulation below wound • Call Emergency Services if bleeding persists • Treat for shock

E. Head Injury
Signs & symptoms
• Altered or abnormal response to commands and touch • Wounds to the scalp or face • Blood or clear fluid escaping from nose or ears • Pupils becoming unequal in size • Loss of memory • WARNING: consider the possibility of a spinal injury – stabilize head and neck as soon as possible.
Emergency First Aid
• Monitor breathing and pulse: • if casualty is unconscious, follow DRABC • keep casualty’s airway open with fingers (if face badly injured) • Support head and neck • support casualty’s head and neck during movement in case the spine is injured • Control bleeding • place sterile pad or dressing over wound • apply direct pressure to wound unless you suspect a skull fracture • if blood or fluid comes from the ear, secure a sterile dressing lightly in place and allow to drain • Lie casualty down • place casualty in comfortable position with head and shoulders slightly raised • be prepared to turn casualty onto side if they vomit • clear the airway quickly after vomiting • Call Emergency Services
F. Heat-‐induced Conditions
Signs & Symptoms
• Feeling hot, exhausted and weak • Persistent headache • Thirst and nausea • Giddiness & faintness • Fatigue • Rapid breathing and shortness of breath • Pale, cool, clammy skin • Rapid, week, pulse • Additional symptoms • High body temperature • Flushed skin • Irritability and mental confusion may progress to seizure and unconsciousness
Warning: Heatstroke is potentially fatal condition and requires urgent medical attention
Emergency first aid for Heat exhaustion
1. Lie casualty down 2. move casualty and lie down in a cool place with circulating air 3. Loosen tight clothing 4. remove unnecessary garments 5. Sponge with cool water and fan 6. Give fluids to drink 7. Call Emergency Services if casualty vomits fluids consumed or cannot drink
Emergency first aid for Heatstroke
1. Rest in a cool place 2. Remove excess clothing 3. Apply cold packs or ice to neck, groin and armpits 4. DO NOT apply ice directly to skin 5. If no ice pack available, cover with wet towels and fan to cool 6. Call Emergency Services
Appendix: Urine Color & Dehydration
Dehydration and water replacement
1. During periods of exertion we naturally generate heat leading to a rise in body temperature. A rise in body temperature can be both detrimental to performance but also contribute to fatigue. Our bodies attempt to compensate for this by sweating. When we do not consume enough fluids during periods of exertion to compensate for these sweat losses, dehydration can quickly occur. Also, sweating flushes vital salts from our bodies, so it is important to replenish these salts throughout the day by adding electrolyte supplements (e.g., GatoradeTM powder) to your drinking water.
2. Fluid loss as low as 2% of body weight has been shown to affect stamina.
Many of us do not deal adequately with dehydration, and in fact never fully rehydrate after periods of exertion. This may lead to participants taking part in further field work sessions in a dehydrated state exposing them to a greater risk of injury.
3. In response to dehydration, you will feel thirsty; however, thirst is not a good indication of dehydration. By the time you feel thirsty you are already dehydrated. Knowing how much fluids have been lost is important in rehydrating the body. There are a number of simple measures of dehydration such as a urine color chart that can be used to assess hydration status.
4. Urine Color a. It is normal to produce more urine when a person’s hydration status is high and less urine
when hydration is low. So if sweat losses are high, less urine may be produced despite normal or even increased fluid intakes. Low urine production can cause it to be more concentrated and result in a darker color. Using a Urine Color Chart (see next page) to assess urine concentration can provide a good indicator of hydration status.

Using the chart to assess the color of the first morning urination provides a more accurate reflection of hydration status than at other times during the day. Colors numbered 1 -‐ 3 (clear to light yellow) is the target range to show a balanced hydration status. The darker the urine color (mid to dark yellow e.g., Colors 4 and 5) suggest dehydration, with colors 6-‐8 indicating severe dehydration. Ways to prevent dehydration 1. Be sure to drink plenty of water and use electrolyte supplements (e.g., GatoradeTM powder).
Suggested guidelines are 1 litre of water for every 50kg of body weight daily (minimum) and this amount should be tripled for each period of exercise (hour or so).
2. On a field trip it would be expected to be walking for several hours per day, so an 85kg person would be required to drink up to 5 litres of water per day.
3. Avoid the following beverage types during exercise and heavy work: fruit juices, carbohydrate gels, soda and sports drinks that contain greater than 20 grams of carbohydrates per 8 fl oz serving.
4. Post exercise, avoid consuming caffeine and carbonated beverages until rehydration is complete and limit consumption to avoid setting the stage for dehydration for the next exercise session.
5. Acclimatize to conditions (such as heat, humidity & altitude) and exercise duration time. 6. Clothes should be breathable and allow for proper sweating and evaporation. 7. Clothing such as nylon that can contain sweat needs to be changed regularly. Cotton clothing is
a good alternative. 8. A well balanced diet with plenty of fruits and vegetables will help keep you hydrated.
G. Sunburn
• Prevention is better than cure • Correct clothing is the most important protection from the sun • Serious consideration should be given to wearing shirts which cover the back of the neck, long
pants, hat sunglasses and footwear. • Sunscreen is important to prevent sunburn and should be administered regularly

• All field seminar attendees should be aware of the dangers of ultraviolet radiation. Repeated episodes of sunburn can lead to skin cancer, including melanoma.
• Sunscreen with a sun protection factor (SPF) of 30 is available and should be used liberally on all exposed skin. The SPF rating of 30 means you are protected 30 times longer than if you use no sunscreen.
• Effectiveness is reduced if you are sweating or swimming.
Sun Burn First Aid
• DO NOT apply lotions, ointment or fat to a burn • DO NOT touch the injured areas or burst any blisters • DO NOT remove anything sticking to the burn • Remove casualty from danger • Cool the burnt area • Hold burnt area under cold running water (not iced) until area returns to normal temperature –
may take time for larger burns • Apply cold compresses – useful for burns to face and neck • Remove any constrictions, e.g. jewellery unless sticking to burn • Cover burn • Place sterile non-‐stick dressing, closely woven material over burn, e.g. triangular bandage or
“gladwrap” • Except for small or mild burns, seek medical advice
H. Bites & Stings
Snake-‐bite, severe allergic reaction to a bite or sting
WARNING: for SNAKE BITE
• DO NOT wash venom off the skin • DO NOT cut bitten area or try to suck venom out of wound • DO NOT use a constrictive bandage • DO NOT try to catch the snake
Emergency First Aid
• Follow DRABC • Lie casualty down • Reassure casualty • Apply pressure immobilization bandage: • Apply crepe, elastic or other support bandage firmly-‐ as for sprain • Bandage from just above the fingers or toes up the limb as far as possible • Check circulation in fingers or toes • Immobilize the limb by: • Splinting – as for fracture or • Bandaging arm to body or a leg to other leg • Call emergency services • Keep casualty at rest • If possible ensure casualty does not move • Bring help to casualty

• Continually reassure
In addition to immobilization, for Allergic reaction
• Remove sting if present • Call Emergency Services • If casualty has mediation for allergies, it should be taken immediately
Note: Insect repellent should be used as necessary
For Ticks:
• Kill the tick • Apply insect repellent, kerosene or lighter fluid • Repeat after one minute • When tick is dead brush off, or lever out with tweezers • If head of tick is left behind treat as you would a splinter • Apply cold compress if required to relieve any pain
Wounds & Scratches (avoiding and dealing with infection)
Source: Australian Remote First Aid, St. John Ambulance Australia
• WARNING: DO NOT disturb pads that are controlling bleeding. Removing a pad to inspect a wound may cause further bleeding and/or infection
• Wounds can become infected, particularly in hot humid conditions, within hours. Frequent handling may increase the risk of infection.
Signs & Symptoms
• Pain swelling • Redness around wound • Discharge – may have an offensive odour • Casualty feels unwell, headache, loss of energy, chills and fever
Note
• Washing discharge from wound, applying antiseptic and keeping the wound covered may reduce infection and the need for medical aid.
• If antibiotics are available, and have been described by a doctor, they should be taken as soon as infection is notices, e.g. pain and redness
Emergency First Aid
• When managing wounds in remote areas consider: a. Is the wound bleeding heavily? b. Is it a minor or major wound? c. Can the wound be cleaned effectively? d. Is the wound a serious risk?
• The aim is to stop bleeding quickly • Severe uncontrolled bleeding may cause shock or death.
• Wound management is secondary to controlling bleeding. • To reduce infection from scratches or abrasions, or in small shallow cuts (less than 2cm long
and without exposed fat tissue) follow the steps below: 1. Take precautions:
• Wash your hands • Clean wound thoroughly – with fresh clear water or saline solution • If wound cannot be thoroughly cleaned, apply an antiseptic, e.g. providing iodine
2. Dress the wound • Apply a sterile or clean dry dressing attached firmly, e.g. with tape or bandage • Wash your hands
3. Call Emergency Services if wound is: • Large, deep or penetrating • Painful, red, swollen, possibly discharging, or if casualty is feeling unwell or unable to
rest properly • Small, but with serious consequences, e.g. blister that becomes infected preventing
casualty from walking
J. Eye Injury
WARNING a. DO NOT touch the eye or any contact lens b. DO NOT allow casualty to rub eye c. DO NOT try to remove any object embedded in the eye d. DO NOT apply pressure when bandaging the eye
Emergency First Aid
1. Support casualty’s head a. Keep casualty’s head as still as possible b. Ask casualty to try not to move eyes
2. Flush eye with cool flowing water 3. Place dressing over eye
a. Place a sterile pad or dressing over injured eye b. Ask casualty to hold this in place c. Bandage dressing in place, covering injured eye d. If embedded object in eye, lie casualty on back, place pad around object and bandage in
place 4 Call Emergency Services
K. Contingency plans if lost or separated from group
1. If you become aware that you are separated from your group or that you are lost: a. stop, stay calm, do not continue on-‐ this minimizes search area b. look around or use your map to try to establish where you are c. if you can positively identify where you are and can navigate back to your correct route, do so –
your group members will be looking for you on or near the route 2. If you cannot identify where you are:
a. remain where you are and stay clam – attempt to indicate you position by: b. calling out at frequent intervals and Listening for calls being returned c. blowing a whistle in a series of three d. using a mobile phone or radio – if signal is weak go to high ground e. Using mirror or heliograph
3. If your group cannot find you: a. activate Emergency position Indicating rescue beacon (EPIRB) if available b. establish camp, preferably in an open area visible from the air, or on a high point – this may
not be possible in extreme conditions c. light a fire if safe to do so and make smoke – clear ground 3-‐4 metres radius around fire d. during day, lay out markers on ground – the markers need to be larger than 5 metres to see
from air search e. conserve energy, water and food – shelter from direct sun, wind
4. A group’s response on discovering a member of the party is missing: a. Carry out a short search for no more than 4 to 5 hours, using traverses radiating out from
the last known point of contact. b. Before setting out from this point leave equipment and a note that clearly indicates your
movements and that you will be returning shortly. c. During the search frequent stops should be made at vantage points. d. The surrounding area should be carefully observed for signs of the missing person such as
mirror flashes or smoke from signal fires. e. If you are in a vehicle (the usual search method), the engine should be switched off and the
horn sounded from time to time. f. In some situations, particularly after dark, it may be more appropriate to remain at the last
known point of contact where a signal fire should be kept burning and the vehicle's horn sounded at frequent intervals.
5. If the missing person is not found during the short search period, inform your party emergency contact as soon as possible. They will give further instructions, and may contact the police. In such situations it may be necessary to use the emergency red button on the radio transceiver to contact the RFDS in order to get the message through.
L. Hygiene in Bush
• Hygiene in remote areas can be divided into three basic categories a. Personal hygiene b. Camp craft c. First Aid hygiene
• The major rule of hygiene is WASH YOUR HANDS –the aim is to stop the spread or germs and to stop bodily fluids transferring from one person’s body to another.
• DO NOT share utensils, including water bottles. Always drink from the same mug unless it has been washed thoroughly
• If a water supply comes from an untreated source, such as lake or a river, always boil the water, or use a purification table or a water purifier before drinking
• Try to wash your body each day – fungal infections and chafing do not affect a clean body as much as one that is rarely washed
• Wash and dry face your face, underarms, genital area and feet when you get dressed in the morning – in that order!
• It should take less than 100mL of water and a couple of minutes, but can save you days of pain and discomfort
• Toileting a. Faeces are a potentially infectious substance and must be treated with care.

b. All faeces and paper should be buried -‐ shovel will be part of camp equipment c. Chose a location away from the camp site (but close enough that you can call for assistance,
dig a hole at least 6 inches (~15 cm) deep and fill hole back on completion d. Wash hands afterwards using soap and water if available or disinfectant alcohol based hand
cleaner e. At night, always use a torch to find your way around and carry your EPIRB. This will help you
avoid tripping and encountering local wildlife by accident (e.g. snakes)

Appendix: St. John’s Ambulance Off-‐Road First Aid Kit Contents
1. 3 triangular bandage 110 cm x 100 cm 2. 5 probe disposable 3. 1 conforming bandage 15 cm 4. 1 conforming bandage 5 cm 5. 1 forceps stainless steel fine-‐point 6. 1 Paracetomal tablet (pkt 12) 7. 2 eye pad large 8. 1 saline steri tube 10 ml 9. 1 thermo blanket 10. 1 heavy crepe bandage 10 cm 11. 1 “Emergency First Aid” manual 12. 1 universal dressing 13. 2 combine dressing 9cm x 10 cm 14. 1 stingoes gel 25g 15. 1 UV tripleguard 15+ 100 ml 16. 1 bag medium 17. 1 safety pins (pkt 5) 18. 1 adhesive plastic shapes (pkt 50) 19. 1 conforming bandage 7.5 cm 20. 1 scissors s/s blunt/sharp 21. 1 disposable gloves (bag 2) 22. 1 towels (bag 3) 23. 2 antiseptic steri tube 30 ml 24. 8 swab betadine 25. 3 swab alcohol 26. 4 7.5 cm x 10 cm non adhesive dressing 27. 1 burns dressing small 28. 2 dressing wound 14 29. 1 tape micropore 30. 1 notepad/pencil 31. 1 resus face shield 32. 1 guaze swabs 7.5cm x 7.5 cm x3 33. Cream Rapid Itch Relief cream sachet 1g 12 34. Swab antiseptic wound cleansing 1% cetrimide 12 35. Saline sodium chloride irrigation 30 ml steri tube 3 36. Bandage crepe heavy duty elastic 100 x 4.6 cm ACE 37. Bandage Triangular 110x110x155 cm SJA 38. Mask resuscitation pocket c/w one way valve