Embed Size (px)
Citation preview
Carbonite Safe
Handbook - Mac 1.x
© 2020 Carbonite, Inc. All rights reserved.

© 2020 Carbonite, Inc. All rights reserved. 2
Welcome to CarboniteImportant Things to Know .............................................................................................................................................................4
Carbonite Features .............................................................................................................................................................................5
Setting Up and Installing .................................................................................................................................................................6
Starting a Trial ... .....................................................................................................................................................................................7
Installing Carbonite for the First Time.........................................................................................................................................7
Buying a Subscription ......................................................................................................................................................................10
Subscription Pricing ........ ....................................................................................................................................................................10
Purchasing a Subscription................................................................................................................................................................10
Converting a Trial to a Paid Subscription..................................................................................................................................10
Need Assistance Purchasing?..........................................................................................................................................................10
How to Back Up Files .......................................................................................................................................................................11
Manually Managing Your Backup.................................................................................................................................................11
Adding Selected File(s)/Folder(s) to your Backup....................................................................................................................11
Excluded File Types and Locations...............................................................................................................................................13
How to Remove Files ........................................................................................................................................................................14
Testing a Restore ..............................................................................................................................................................................15
Anytime Anywhere Access ...........................................................................................................................................................17
The Carbonite Preference Pane ........ .........................................................................................................................................19
The Status Tab ... ...................................................................................................................................................................................19
The Backup Tab.....................................................................................................................................................................................20
Automatically Managing Your Backup.............................................................................................................................20
Manually Managing Your Backup.......................................................................................................................................20
The Restore Tab . ...................................................................................................................................................................................21
Your Carbonite Account ................................................................................................................................................................22
Renewing Your Subscription ...... ....................................................................................................................................................23
Renewing Early ....... ....................................................................................................................................................................23
Renewing an Expired Account............................................................................................................................................24
Updating Your Security Information..........................................................................................................................................24
Updating Your Security Questions....................................................................................................................................25
Updating Your Two-Factor Verification Information...............................................................................................25
Troubleshooting Common Issues ....... .........................................................................................................................................27

© 2020 Carbonite, Inc. All rights reserved. 3
Installation Problems ...... ...................................................................................................................................................................27
Computer Name ..... ...................................................................................................................................................................27
Gatekeeper....................................................................................................................................................................................27
Antivirus/Security Software................................................................................................................................................27
Stuck Backup Problems....................................................................................................................................................................27
Backup Status is Stuck at Registering...............................................................................................................................28
Other Stuck Backup Issues.....................................................................................................................................................28
Stuck Restore Problems . ...................................................................................................................................................................29
The Carbonite Knowledge Base ......... .........................................................................................................................................30
Searching the Knowledge Base . ....................................................................................................................................................30

© 2020 Carbonite, Inc. All rights reserved. 4
Important Things to KnowReboot Your Computer at Regular Intervals
If your computer remains on or only rests during sleep mode for long periods of time, it is prudent to completely restart it weekly to ensure that Carbonite’s connection to our servers stays strong.
Default Backup Selections
Carbonite will select Macintosh HD / Users for backup by default if you opt for Carbonite’s recommended backup selections during installation. Files and folders not located within the structure of this directory must be manually selected for backup.
The following types of files are also not backed up automatically and must be manually selected for backup, regardless of location:
• Video Files
• Files over 4 GB in size
Recover Mode and Data Retention
If data is missing, or if you need to restore to another computer, your backup must be placed in Recover Mode, which will suspend backup operations and data retention, thus allowing you to restore. If you move your Carbonite subscription to a different computer and exit Recover Mode without performing a restore of your backup, any unrestored files will be removed from our servers within 30 days if they aren’t otherwise present on the computer.

© 2020 Carbonite, Inc. All rights reserved. 5
Carbonite FeaturesCarbonite offers a number of beneficial features to all of our customers, including:
• Automatic and Continuous Cloud Backup
• Automatically back up your files to our servers and restore them any time you need.
• Easy Controls, Simple Interface
• See the backup status of any file at a glance with our status dot system, and manually add/remove a file from your backup (if you choose to) with a few mouse clicks.
• Security and Privacy
• Files are transferred using 128-bit encryption, so no one else can see your personal data.
• Anytime Anywhere Access
• Access your backed-up files from any internet-connected computer and compatible iOS and Android mobile devices. Anytime, anywhere.
• Free Support from Carbonite Customer Care
• Call, chat, or email Carbonite Customer Care for help with any Carbonite-related issues at no extra charge.

© 2020 Carbonite, Inc. All rights reserved. 6
Setting Up and InstallingSetting up a trial with Carbonite is easy.
1. On the Carbonite.com homepage, click Get started under the Cloud backup for home & small business section.
2. Under the column One Computer from $6/ Month billed annually, select Try it free.
3. Fill out the required information, then click Submit.

© 2020 Carbonite, Inc. All rights reserved. 7
Starting a Trial
That’s it. Your trial account is created. Your web browser will begin downloading the Carbonite installer. Run the file to install Carbonite and begin backing up your system.
You can use the software completely free for 15 days with no catch. If you decide Carbonite is not for you, just uninstall the software. Your trial account will expire and eventually delete itself from our servers.
If you do like Carbonite, you can convert your trial account to a paid subscription and continue your backup normally.
Installing Carbonite for the First Time
You will get to configure the initial settings of your Carbonite software while installing Carbonite for the first time. To install Carbonite, run the Carbonite installer file that downloaded after starting your trial or paid subscription.
You can always download the installer file again for an existing account by logging into account.carbonite.com and clicking Start a Trial (to begin a trial), or Computer options then Reinstall Carbonite (for paid subscriptions).
1. First, click Continue in the installer window, then Continue again in the Terms of Service window.
2. A notification will slide open. Click Agree to agree to the Terms of Service.
3. If you would like to change the internal hard disk that Carbonite will install to, click Change Install Location…. Otherwise, click Install to begin the installation.
• You will have to enter your Mac password (not your Carbonite password) in a popup to proceed.
• A progress bar appears on the screen as the software installs. Allow this to complete.
• After the progress bar fills, the window will disappear, and a new window will appear displaying statuses while Carbonite connects to our servers and establishes your backup.
4. Next, you’ll make your initial backup selections.

© 2020 Carbonite, Inc. All rights reserved. 8
Automatically back up my “users” folder:
• This selects the files and subfolders in your Users folder on your Mac, which is the default location for your data files.
I’ll manually select what to back up later:
• This will begin your backup with nothing selected. You will have to manually select all the files you want to back up.
5. The next few screens describe how Carbonite works. Click Next to proceed through them.
6. On the last screen, choose whether to open the Carbonite Preferences pane after installation by marking or unmarking the checkbox and click Done.
7. If the box was marked, the Carbonite user interface will open in System Preferences.

© 2020 Carbonite, Inc. All rights reserved. 9
The installation is now complete. Carbonite will begin backing up your computer following the settings you chose during the installation.
The initial backup of your computer can take up to several days. This is normal for an initial backup, since you are starting from scratch and everything has to be uploaded. After the initial backup completes, Carbonite will periodically scan your backed-up files for changes and only upload changed files throughout the day. These automatic “maintenance” backups take much less time to complete and will take place in the background while you use your computer normally.
© 2020 Carbonite, Inc. All rights reserved. 10
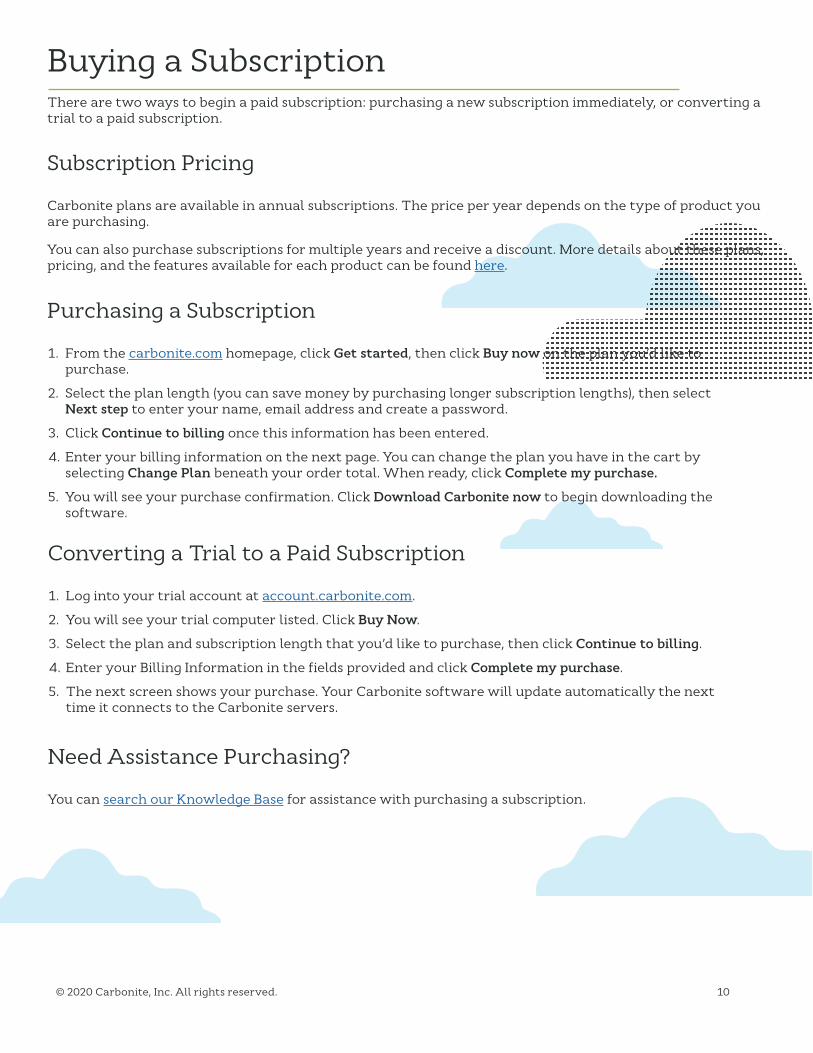
Buying a SubscriptionThere are two ways to begin a paid subscription: purchasing a new subscription immediately, or converting a trial to a paid subscription.
Subscription Pricing
Carbonite plans are available in annual subscriptions. The price per year depends on the type of product you are purchasing.
You can also purchase subscriptions for multiple years and receive a discount. More details about these plans, pricing, and the features available for each product can be found here.
Purchasing a Subscription
1. From the carbonite.com homepage, click Get started, then click Buy now on the plan you’d like to purchase.
2. Select the plan length (you can save money by purchasing longer subscription lengths), then select Next step to enter your name, email address and create a password.
3. Click Continue to billing once this information has been entered.
4. Enter your billing information on the next page. You can change the plan you have in the cart by selecting Change Plan beneath your order total. When ready, click Complete my purchase.
5. You will see your purchase confirmation. Click Download Carbonite now to begin downloading the software.
Converting a Trial to a Paid Subscription
1. Log into your trial account at account.carbonite.com.
2. You will see your trial computer listed. Click Buy Now.
3. Select the plan and subscription length that you’d like to purchase, then click Continue to billing.
4. Enter your Billing Information in the fields provided and click Complete my purchase.
5. The next screen shows your purchase. Your Carbonite software will update automatically the next time it connects to the Carbonite servers.
Need Assistance Purchasing?
You can search our Knowledge Base for assistance with purchasing a subscription.

© 2020 Carbonite, Inc. All rights reserved. 11
How to Back Up FilesIf you installed Carbonite using the Automatically back up my “Users” folder and Desktop selection, documents in those locations will automatically back up periodically throughout the day. You don’t have to do anything extra to back them up.
However, if you didn’t install using the Automatic selections or you would like to add files outside of those locations, you can manually back up files. First make sure that you are set to manually manage your backup.
Manually Managing Your Backup
1. Click the black padlock in the menu bar at the top of the screen, then click Open Carbonite Preferences….
2. Click the Backup tab near the top of the pane.
3. Click the Manually Manage My Backup button in the bottom right corner of the pane.
• If you do not see the button, you are already set to manually manage your backup.
Adding Selected File(s)/Folder(s) to your Backup
1. Click the black padlock in the menu bar at the top of the screen, then click Open Carbonite Preferences….

© 2020 Carbonite, Inc. All rights reserved. 12
2. Click the Backup tab near the top of the pane.
3. Navigate through the folders the same way you would in a normal Finder window.
• Files and folders marked with a green or yellow dot are already selected for backup.
• Files with a red dot are not currently selected for backup.
4. Click a file or folder with a red dot that you would like to add to your backup, then click Back this up.

© 2020 Carbonite, Inc. All rights reserved. 13
Excluded File Types and Locations
There are certain types of files and folder locations that cannot be selected for backup for various reasons. Some examples include:
• Programs
• Programs are installed to a computer’s specific environment. Restoring a program to a different computer will not function properly and may even cause errors, so we exclude them.
• Applications
• On Macs, most applications are actually bundles of constantly changing files. The constant change causes Carbonite to get stuck continually backing them up. Since applications are separate from your data and can be reinstalled in working order by other methods, we exclude them.
• System Files / Information
• These files depend on the hardware and environment. Restoring them to a different computer would likely cause problems. Therefore, we do not back them up.
For full details on file types Carbonite backs up, please click here or search our Knowledge Base.

© 2020 Carbonite, Inc. All rights reserved. 14
How to Remove FilesIf you are currently backing up a file (or folder) that you don’t want in your backup, removing it from the backup is easy.
1. Select the file or folder in the Backup tab of the Carbonite interface, then click Do not back this up.
Deselecting a file this way will make sure that Carbonite no longer backs up the file. Any versions in your backup will be removed within 72 hours (so you do have a little time to change your mind).
If you remove a folder from backup this way, all files within the folder will stop backing up, and their backed up versions will remove themselves from the backup within 72 hours. Furthermore, no future files you save in that folder will be backed up.

© 2020 Carbonite, Inc. All rights reserved. 15
We encourage all users to test the restore process to ensure that the connection between the Carbonite servers and your computer are running properly.
1. Copy a file on your computer, and make sure it is backed up with Carbonite (look for the green status dot).
2. Once the file shows it is backed up, delete it from your computer.
Testing a Restore
3. Click the black padlock in the menu bar at the top of the screen, then click Open Carbonite Preferences….
4. Click the Restore tab near the top of the pane.
5. Navigate to the file that you deleted from your computer in the Carbonite interface. Select it, then click Restore Selected Items.

© 2020 Carbonite, Inc. All rights reserved. 16
6. Click Restore to Original
7. The interface will show a Restore Progress bar. Allow this to complete.
8. When complete, a popup will appear in the top right of the desktop. Click OK.
9. Open Finder and navigate to the location of the file you deleted. You should see it restored there.

© 2020 Carbonite, Inc. All rights reserved. 17
Anytime Anywhere AccessOnce your backup contains files, you can log into your account online and from any internet-connected computer to view your files.
You can also download copies of your files to that computer if you need to use them wherever you are. Keep in mind that any changes you make to those copies remotely won’t be backed up, since the Carbonite software is not actually on this machine.
1. Log into your account at account.carbonite.com.
2. You will see your backed up computer(s) listed. Click the View Files button next to the correct computer.
3. The library folders for your default user profile will display near the middle of the screen. You can click through the folders to browse your backed up files, the same way you would in Finder. In the Computers pane on the left, you can click a different user profile or a different drive letter to begin browsing your backup from there.
4. To select files to download to your computer, mark the checkbox(es) next to them.
• You can select up to 5000 items or 10 GB to download at once.

© 2020 Carbonite, Inc. All rights reserved. 18
5. Then click the Download button.
6. If you selected multiple files, they will be combined in a single .zip file before downloading. Single files will download normally. Click the Save option in your web browser to save the file. You will then be able to open and use the file(s) normally.

© 2020 Carbonite, Inc. All rights reserved. 19
The Carbonite Preference Pane The Carbonite Preferences Pane allows you to pause the backup, restore files, change backup settings, review account details and contact Customer Care.
The Carbonite Preferences Pane can be opened by clicking the black padlock in the menu bar, then clicking Open Carbonite Preferences….
The Status Tab
The preference pane displays the Status tab by default.
• Backup status: Indicates whether your backup is idle (up-to-date and waiting for next backup session), In progress, or in Recover Mode. Information about errors will also be indicated here, if they occur.
• Your backup contains: Displays the number of files backed up and their total size in Gigabytes.
• Awaiting backup: Displays the number of files pending backup and their total size in Gigabytes. Carbonite backs up each changed file once per day – even if it is changed multiple times. As a result, it is not uncommon to have files pending while your backup is idle.
• Use Low-Priority Mode to Conserve Bandwidth: Places Carbonite into Low Priority mode, causing Carbonite to use even less of your Internet bandwidth and enabling you to complete any important tasks.
• Show Carbonite Status Icon in Menu Bar: Displays the Carbonite lock icon in your menu bar in the top right of your screen, next to the date and time.
• Account: Shows the email address associated with this subscription. This can be used to correctly log in to your Carbonite account. You will also see your subscription expiration date here.
• Open My Account: Takes you to the login page of the Carbonite website.
• Backup Is: Allows you to change Carbonite’s status.

© 2020 Carbonite, Inc. All rights reserved. 20
• Enabled: Sets Carbonite to normal backup functions, uploading your selected files to the backup servers.
• Paused: Pauses Carbonite for 24 hours. While paused, no backups or restores take place. After 24 hours pass (or if you enable it again) Carbonite returns to the Enabled state and resumes normal backup procedures.
• Recover Mode: Places Carbonite into Recover Mode until you enable it again. While in this state, no backups take place, and you are given time to restore your files.
• Disabled: This option stops Carbonite completely until you enable it again. While Disabled, Carbonite uses virtually none of your resources.
The Backup Tab
The Backup Tab allows you to check and change the backup status of the individual files on your computer. This will look different depending on whether you are automatically or manually managing your backup.
Automatically Managing Your Backup
If your backup is automatically managed, you can click the + button to add files to the Carbonite will not back up list. This will prevent backups for any file that would normally be backed up. You can also click the Manually Manage My Backup button to switch to manual mode.
Manually Managing Your Backup

© 2020 Carbonite, Inc. All rights reserved. 21
When manually managing your backup, you can navigate the folder windows the same way you would a Finder window. Files and folders will display with one of the following icons:
If you select a file or folder with a green or yellow dot, the button label beneath the file window will read Do not back this up. Clicking it will remove the file or folder from your backup. Remember: removing a folder this way will prevent any new files added to the folder from backing up.
If you select a file or folder with a red dot, the button label will read Back this up. Click it to add the selected file or folder from your backup.
The Restore Tab
The Restore tab is where you get your files back. You have the following options:
• Restore Assistant: Launches the Restore Assistant to walk you through a full restore of your backed up data.
• Get Info…: Launches a Finder window which displays properties and information about the selected file or folder.
• Restore files to: Allows you to choose a restore location for the selected file or folder.
• Restore Selected Item(s): Restores selected file or folder to the specified location.
*Only applies to folders

© 2020 Carbonite, Inc. All rights reserved. 22
Your Carbonite Account Selections and settings for backups and restores are controlled from the computer where Carbonite is installed, but your online Account Dashboard is the control hub for all other aspects of your account. From within your Account Dashboard, you can:
• Reinstall Carbonite
• Transfer Carbonite to another computer
• Remotely access backed up files
• Convert a trial subscription to a full subscription
• Purchase subscriptions for additional computers
• Update your email address, password, security questions and/or security phone
• Update your billing and personal information
• Check your billing history
• Change your automatic billing status
You can log into your account any time after installing Carbonite by navigating to account.carbonite.com in your web browser and entering your login credentials:
If you experience difficulty logging in, click Forgot Email or Forgot Password for assistance.
After your account is established, Carbonite requests some information from you to help it stay secure. We will use this information to identify you as the account owner if you ever need help with account-related problems (like resetting your password).
You’ll be required to fill out some contact information and enter security questions when you log into your online account for the first time. You’re also encouraged to setup Two-Factor Verification for added security.

© 2020 Carbonite, Inc. All rights reserved. 23
Renewing Your Subscription
Carbonite offers one-year, two-year, and three-year subscriptions for Carbonite Safe Basic, Carbonite Safe Plus, and Carbonite Safe Prime.
The easiest method to purchase a subscription is through your Carbonite account. The subscriptions available for purchase depend on how you originally signed up for Carbonite and which subscription you originally purchased for your computer. Alternatively, you can upgrade or downgrade your Carbonite subscription.
Renewing Early
Log into your Carbonite account at account.carbonite.com.
Once logged in, click Computer options, then select Renew Now.
After clicking Renew Now, follow the prompts to complete your purchase. A confirmation page will then be displayed, and you will receive a receipt by email to confirm your purchase.

© 2020 Carbonite, Inc. All rights reserved. 24
Renewing an Expired Account
If your subscription expires before you can renew it, you will have 30 days to do so before your data will be removed from our servers.
Log into your Carbonite account at account.carbonite.com.
Once logged in, click Buy Now or Pay My Bill, then follow the prompts to complete your order.
Updating Your Security Information
You can use your account to update your contact information, password, security phone number, and security questions at any time.
1. Log into your account at account.carbonite.com.
2. Click Personal Information in the menu on the left.
Your current personal information will be displayed on the screen. Click the edit link next to any of the headers to change the related information.

© 2020 Carbonite, Inc. All rights reserved. 25
Updating Your Security Questions
When editing your security questions, your three current questions will show and your answers will be masked. You can change the questions by clicking the dropdown menus and selecting a new question. Your updated answer will not be masked until you click Save.
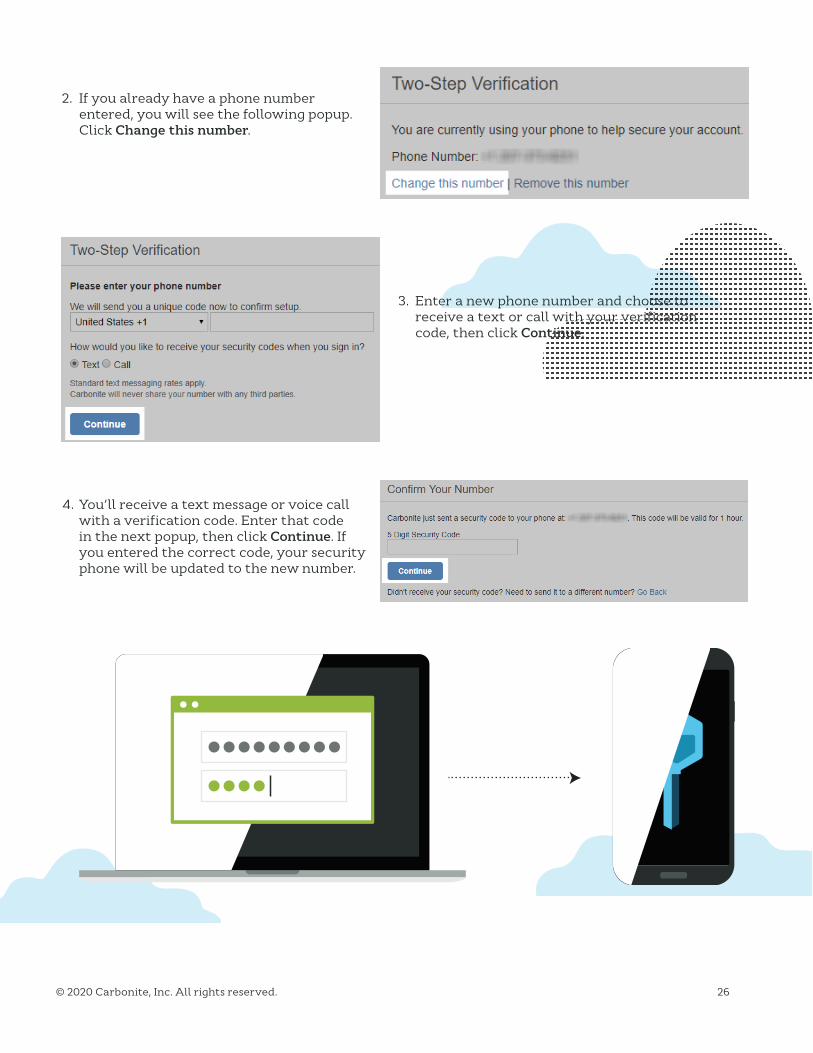
Updating Your Two-Factor Verification Information
When updating your security phone, we will send you a confirmation code to that phone number, either by call or text message (your choice). Enter this code in the next popup to confirm your valid number.
1. Click edit next to Two-Step Verification.
© 2020 Carbonite, Inc. All rights reserved. 26
2. If you already have a phone number entered, you will see the following popup. Click Change this number.
3. Enter a new phone number and choose to receive a text or call with your verification code, then click Continue.
4. You’ll receive a text message or voice call with a verification code. Enter that code in the next popup, then click Continue. If you entered the correct code, your security phone will be updated to the new number.

© 2020 Carbonite, Inc. All rights reserved. 27
Troubleshooting Common IssuesInstallation Problems
There are a couple of settings that need to be in place for an installation to complete correctly. The most common causes for installation problems are either the Computer Name or security software. For detailed step-by-step instructions (including screenshots) to resolve these issues, click here.
Computer Name
In order for Carbonite to install, your computer must have a Computer Name with no special characters or spaces. You can check and adjust your Computer Name in the Sharing section of your Mac’s System Preferences.
Gatekeeper
The latest Mac OS X releases have a new security feature called Gatekeeper that may prevent the installation from running. You’ll see an error that looks like this:
To run the installer, open System Preferences, then open Security & Privacy. Near the bottom of the General tab, click Open Anyway.
Antivirus/Security Software
You may have to configure your security software to allow the following components full access:
• All located in /Macintosh HD/Library/Application Support/Carbonite
• CarboniteDaemon
• CarboniteAlerts
• CarboniteStatus
Stuck Backup Problems
We have identified a few issues that may cause your backups to appear stuck.

© 2020 Carbonite, Inc. All rights reserved. 28
Backup Status is Stuck at Registering
If your user interface appears to be stuck at Registering, this means that the program did not finish installing. To finish the installation manually:
1. Open Finder
2. Navigate to Macintosh HD/Library/Application Support/Carbonite/.
3. Double-click CarboniteAlerts.app.
For screenshots of these instructions, click here.
Other Stuck Backup Issues
If you think your backup appears to be moving slow or is stuck on a file, follow this checklist (in this order) to make sure none of these settings are the issue:
1. Your backup may seem stuck if your internet connection is slow. Check your Internet access speeds to determine whether your connection is fast enough to support data transference. If your connection is too slow, you may need to contact your Internet Service Provider. We also recommend checking the following:
• Ensure your computer does not go to sleep or hibernate. If you’re using a laptop, keep the lid open.
• If possible, switch from a Wi-Fi connection to a wired connection. If you are unable to do so, please ensure that your computer is as close to your wireless router as possible.
• Ensure that you’re keeping your computer powered on and connected to the internet in order to upload as many files as possible.
2. Restart the computer to refresh system resources.
• After restarting, it may take a few minutes for Carbonite to display backup activity.
3. Ensure that Carbonite is allowed through any firewall(s) or Anti-virus software.
4. Ensure that your hard drive is not full or close to being full.
• If your hard drive is full or nearly full, please delete any non-critical data or empty your trash.
5. Power off your modem/router for 60 seconds and power it back on, then attempt another backup.
If none of these items fixed your stuck backup problem, please contact Customer Care for further investigation.

© 2020 Carbonite, Inc. All rights reserved. 29
Stuck Restore Problems
You can check your restore progress from the Carbonite Preference pane. If it seems like your restore is stuck, it’s possible that Carbonite is restoring a single large file. The Carbonite Preference pane displays the status of your restore as both a progress bar and a numerical counter that shows the number of files restored. Large files won’t impact the progress bar or the counter until after they have been completely restored.
If you don’t see progress after a significant amount of time, try closing and reopening the Carbonite Preference pane, ensure that you are connected to the Internet, and adjust your sleep and hibernation settings.
If your restore progress appears to be frozen and you are not able to do anything with the Preference Pane, you may need to force-quit System Preferences to refresh the pane. This may cause the status bar for the restore to reset to 0, but Carbonite will continue to restore only those files which haven’t been restored yet. Files which have been restored will not be restored a second time. You can force-quit a program by pressing Command-Option-ESC on your keyboard.
If none of these fix the issue, please search our Knowledge Base for more assistance.

© 2020 Carbonite, Inc. All rights reserved. 30
The Carbonite Knowledge BaseIf you have a question about Carbonite that isn’t covered in this handbook, our frequently-updated Knowledge Base contains information about every facet of Carbonite.
Carbonite Knowledge Base: https://support.carbonite.com
Searching the Knowledge Base
Our Carbonite Knowledge Base is available for you anytime you need. Simply go to support.carbonite.com, input a search term or question, and click Search.
You’ll be provided with a list of short articles containing step-by-step instructions that you can follow at your own pace. We recommend using the dropdown filter above the Search Results to select the exact product you have (see left). This will hide any articles that don’t apply to the product you’re using.