Embed Size (px)
Citation preview
Developing Management Agents with Microsoft® Identity Server 2003 MA SDK Hand-On-Labs
Hands-On-Labs for
Developing Management Agents with MIntegration Server 2003 Management ADevelopment Kit Microsoft Corporation Published: June 2004
For the latest information, see http://www.microsoft.com/mi
icrosoft Identity gent Software
is
Page 1 of 22
Developing Management Agents with Microsoft® Identity Server 2003 MA SDK Hand-On-Labs
The information contained in this document represents the current view of Microsoft Corporation on the issues discussed as of the date of publication. Because Microsoft must respond to changing market conditions, it should not be interpreted to be a commitment on the part of Microsoft, and Microsoft cannot guarantee the accuracy of any information presented after the date of publication. This document is for informational purposes only. MICROSOFT MAKES NO WARRANTIES, EXPRESS OR IMPLIED, AS TO THE INFORMATION IN THIS DOCUMENT. Complying with all applicable copyright laws is the responsibility of the user. Without limiting the rights under copyright, no part of this document may be reproduced, stored in or introduced into a retrieval system, or transmitted in any form or by any means (electronic, mechanical, photocopying, recording, or otherwise), or for any purpose, without the express written permission of Microsoft Corporation. Microsoft may have patents, patent applications, trademarks, copyrights, or other intellectual property rights covering subject matter in this document. Except as expressly provided in any written license agreement from Microsoft, the furnishing of this document does not give you any license to these patents, trademarks, copyrights, or other intellectual property. The example companies, organizations, products, people and events depicted herein are fictitious. No association with any real company, organization, product, person or event is intended or should be inferred. © 2003 Microsoft Corporation. All rights reserved. Microsoft, Visual Basic, and Visual Studio are either registered trademarks or trademarks of Microsoft Corporation in the United States and/or other countries. The names of actual companies and products mentioned herein may be the trademarks of their respective owners.
Legal Note: The images used in these labs are NOT for distribution.
Page 2 of 22
Developing Management Agents with Microsoft® Identity Server 2003 MA SDK Hand-On-Labs
Contents Contents __________________________________________________________________________ 3 Goals of the Labs ___________________________________________________________________ 4 LAB 1 ____________________________________________________________________________ 5
Scenario: ______________________________________________________________ 5 What will we cover? ___________________________________________________ 7 Audience: _____________________________________________________________ 7 Estimated Time: _______________________________________________________ 7 Prerequisites:__________________________________________________________ 7 Ready to start: ________________________________________________________ 7 Summary_____________________________________________________________ 11
LAB 2 ___________________________________________________________________________ 12 Scenario: _____________________________________________________________ 12 What will we cover? __________________________________________________ 12 Audience: ____________________________________________________________ 12 Estimated Time: ______________________________________________________ 12 Prerequisites:_________________________________________________________ 12 Ready to start: _______________________________________________________ 12 Summary_____________________________________________________________ 15
LAB 3 ___________________________________________________________________________ 16 Scenario: _____________________________________________________________ 16 What will we cover? __________________________________________________ 16 Audience: ____________________________________________________________ 16 Estimated Time: ______________________________________________________ 16 Prerequisites:_________________________________________________________ 16 Ready to start: _______________________________________________________ 16 Summary_____________________________________________________________ 18
LAB 4 ___________________________________________________________________________ 19 Scenario: _____________________________________________________________ 19 What will we cover? __________________________________________________ 19 Audience: ____________________________________________________________ 19 Estimated Time: ______________________________________________________ 19 Prerequisites:_________________________________________________________ 19 Ready to start: _______________________________________________________ 19 Summary_____________________________________________________________ 22
Page 3 of 22
Developing Management Agents with Microsoft® Identity Server 2003 MA SDK Hand-On-Labs
Goals of the Labs
1. Provide a hands-on experience developing a simple management agent using the Microsoft®
Identity Integration Server Management Agent Software Development Kit.
2. Explain the process of developing a management agent using the Management Agent for
Extensible Connectivity.
3. Demonstrate the interfaces for developers to implement connected data source extensions for
the Management Agent for Extensible Connectivity.
4. Demonstrate debugging connected data source extensions.
There are three labs (must be done in this order) which cover the following scenarios:
• LAB1: Create a schema for the management agent you will write, and configure the
management agent. This lab has the greatest detail in its instructions.
• LAB2: Write the management agent extensions that work with the connected directory to import
and export entries. Source code is available in the VPC image.
• LAB3: Debug the management agent to verify that it works as expected.
Page 4 of 22

Developing Management Agents with Microsoft® Identity Server 2003 MA SDK Hand-On-Labs
LAB 1
The Management Agent Software Development Kit features the Management Agent for Extensible
Connectivity. This MA lets you write code that imports from or exports directly to your connected data
source. When running imports, your MA can produce a file of the entries of interest from the target
system. When exporting, you can write directly to the connected data source and use the immediate
confirmation for each entry successfully exported (this is known as call-based export). Alternatively,
you can use this MA to deliver an export file (known as file-based export) to a file share, FTP server,
or directly to a connected data source using a program like LDIFDE or other LDAP import utilities using
credentials you save in the MA configuration.
With the Management Agent for Extensible Connectivity, you write the code that connects to the
system for which you are writing your management agent. In order to create your schema, you will
need to consider the following:
1. Is it possible to produce a file with command line utilities? If so, what file format is available?
Can it be transformed easily into a well-known format like Directory Services Markup Language
(DSML) or LDAP Data Interchange Format (LDIF)?
2. What APIs or utilities will you use to reach your connected data source if you aren’t using a
utility or program? Are they available for use from managed code?
3. What object types are you going to manage?
4. What data types apply to the attributes your will MA handle? The MIIS file formats have
different behaviors. For instance, with LDIF, you can have base 64 encoded binary attributes,
while with Attribute-Value Pair (AVP) you can’t.
5. What file format will you use? Using fixed-width or delimited files require you to create a
schema template that matches the maximum number of values you might have in a multi-
valued attribute, while DSML, LDIF and AVP don’t have the same requirement.
The NextGen MA will read an XML file for import using the DOM. For the NextGen MA, the connected
data source to which we export is the .NET StreamWriter class, which we will use to produce an XML
file using call-based export. This could just as easily have been a web service or some other API.
Scenario: Create the schema for a new management agent that will be developed for sending simple XML to a
connected data source.
The Fabrikam Corporation has an HR system that is part of their MIIS configuration. You have been
asked to build a new management agent that will produce simple XML files for managing identities in
an internally developed application named NextGen, after the division of the company that uses the
application. This scenario includes information from a telephone system that has been extracted to a
file, and information about the groups used to manage which users in NextGen can perform which
operations based on group definitions defined in another system. The data for the groups has also
been extracted to a file.
Page 5 of 22
Developing Management Agents with Microsoft® Identity Server 2003 MA SDK Hand-On-Labs
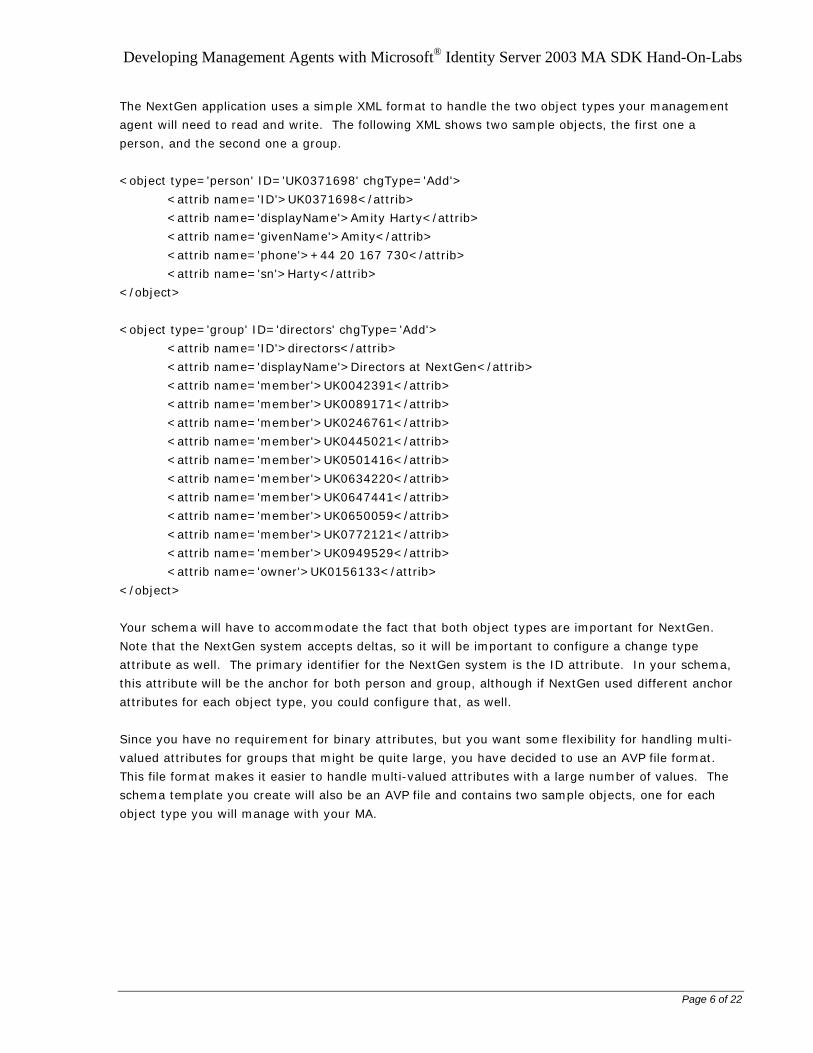
The NextGen application uses a simple XML format to handle the two object types your management
agent will need to read and write. The following XML shows two sample objects, the first one a
person, and the second one a group.
<object type='person' ID='UK0371698' chgType='Add'>
<attrib name='ID'>UK0371698</attrib>
<attrib name='displayName'>Amity Harty</attrib>
<attrib name='givenName'>Amity</attrib>
<attrib name='phone'>+44 20 167 730</attrib>
<attrib name='sn'>Harty</attrib>
</object>
<object type='group' ID='directors' chgType='Add'>
<attrib name='ID'>directors</attrib>
<attrib name='displayName'>Directors at NextGen</attrib>
<attrib name='member'>UK0042391</attrib>
<attrib name='member'>UK0089171</attrib>
<attrib name='member'>UK0246761</attrib>
<attrib name='member'>UK0445021</attrib>
<attrib name='member'>UK0501416</attrib>
<attrib name='member'>UK0634220</attrib>
<attrib name='member'>UK0647441</attrib>
<attrib name='member'>UK0650059</attrib>
<attrib name='member'>UK0772121</attrib>
<attrib name='member'>UK0949529</attrib>
<attrib name='owner'>UK0156133</attrib>
</object>
Your schema will have to accommodate the fact that both object types are important for NextGen.
Note that the NextGen system accepts deltas, so it will be important to configure a change type
attribute as well. The primary identifier for the NextGen system is the ID attribute. In your schema,
this attribute will be the anchor for both person and group, although if NextGen used different anchor
attributes for each object type, you could configure that, as well.
Since you have no requirement for binary attributes, but you want some flexibility for handling multi-
valued attributes for groups that might be quite large, you have decided to use an AVP file format.
This file format makes it easier to handle multi-valued attributes with a large number of values. The
schema template you create will also be an AVP file and contains two sample objects, one for each
object type you will manage with your MA.
Page 6 of 22
Developing Management Agents with Microsoft® Identity Server 2003 MA SDK Hand-On-Labs
What will we cover? This exercise will introduce you to some of the decisions you need to make when starting your MA
development project, demonstrate how to establish the schema for your new management agent, and
provide an introduction to configuring the MA you will be writing in the next lab.
During this LAB you will:
• Learn about the primary component of the MA SDK – the Management Agent for Extensible
Connectivity.
• Examine the existing MIIS configuration and Metaverse objects along with their connectors in
order to understand where you will begin.
• Analyze the schema required in order to develop a management agent for the NextGen system
by reviewing the example XML objects above.
• Create a template AVP file that represents the schema of the internal application for which you
will write your management agent.
Audience: Technical audience already proficient with MIIS 2003 and the concepts of connector space schema,
and how to configure management agents.
Estimated Time: 15 minutes (times given are for expert MIIS/Microsoft Visual Studio® .NET users—if you are
unfamiliar with any part of this, you can expect it to take approximately twice as long as estimated
times).
Prerequisites: • Understanding of MIIS file MA, specifically how multiple object types and deltas are processed.
• Understanding of how to configure MIIS management agents, specifically schema.
Ready to start: In this lab, you will be introduced to the decisions you would have to make if you were developing a
management agent. In order to complete this lab, you must have a good understanding of CS schema
and the principles of the file MA. If you have any questions please consult the LAB proctors.
The MA SDK HOL Virtual PC used in this scenario should be up and running on the PC already.
After you finish the LAB, please DO NOT TURN OFF or Shut Down the PC. When you are done Click
Host+F4 then “Turn off PC and undo changes”.
Page 7 of 22
Developing Management Agents with Microsoft® Identity Server 2003 MA SDK Hand-On-Labs
Keyboard shortcuts while working on the Virtual PC:
• Host Key : Alt (right)
• Enable Full Screen : Host + Enter
• Ctrl + Alt + Del : Host + Del
Note: The Host key is the right Alt key. Please do not change the default on the Virtual PC.
For additional keyboard functions, see the Action menu in MA SDK HOL window or the Virtual PC
Console.
There is a folder named NextGen MA solution on the desktop that contains the solution files for this
lab including a schema template and an MA configuration XML file for the NextGen MA. You can
import the MA configuration if you want to proceed to the next lab and build the part of the MA that
manages objects in the connected data source with a connected data source extension.
Step 1:
Use the following account to login to the system:
User Name : MIIS
Password : password
Note: The Virtual PC may take a while to load. SQL Server 2000, MIIS 2003 and Visual Studio .NET
are included in this Virtual PC image.
Step 2:
Double click on the Identity Manager icon on your desktop. Start by clicking on the Management
Agents view. There are three management agents already configured as follows:
1. Fabrikam HR MA – the source of most of the attributes for the person object type. A
projection rule and MV object deletion rule exist for this MA for the person MV object type.
2. NextGen Phone – the source of telephone number attributes for the person object type. This
MA will perform a join on the employee ID for the person.
3. NextGen Groups – the source of group attributes including member and owner. This MA will
project MV group objects, and join on ID to MV person objects. A group MV object is deleted
when its connector in this connector space is deleted.
Click on the Metaverse Search view, and click the search button. 100 MV objects of type person
have already been projected from the Fabrikam HR MA, and telephone information has been provided
by the connectors in the NextGen Phone connector space. You can confirm this by looking at the
Metaverse Object Properties dialog and looking at the Connectors tab. Close the dialog box and
return to the Management Agents view.
Page 8 of 22
Developing Management Agents with Microsoft® Identity Server 2003 MA SDK Hand-On-Labs
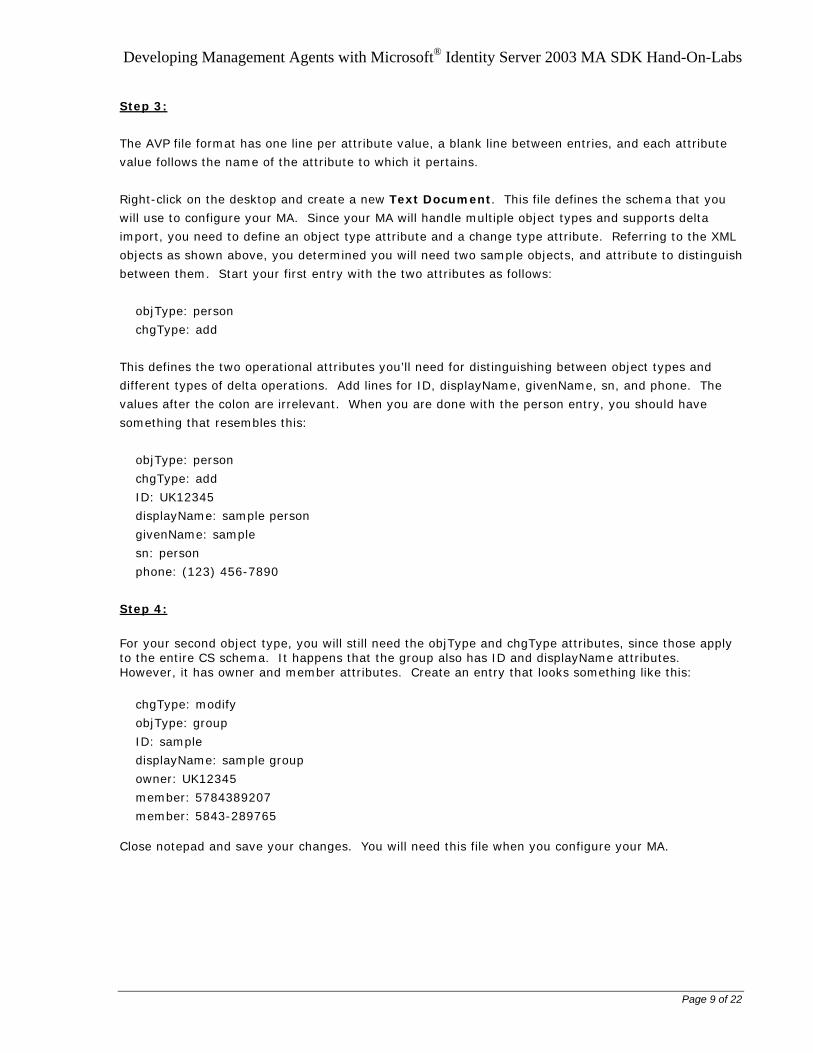
Step 3:
The AVP file format has one line per attribute value, a blank line between entries, and each attribute
value follows the name of the attribute to which it pertains.
Right-click on the desktop and create a new Text Document. This file defines the schema that you
will use to configure your MA. Since your MA will handle multiple object types and supports delta
import, you need to define an object type attribute and a change type attribute. Referring to the XML
objects as shown above, you determined you will need two sample objects, and attribute to distinguish
between them. Start your first entry with the two attributes as follows:
objType: person
chgType: add
This defines the two operational attributes you’ll need for distinguishing between object types and
different types of delta operations. Add lines for ID, displayName, givenName, sn, and phone. The
values after the colon are irrelevant. When you are done with the person entry, you should have
something that resembles this:
objType: person
chgType: add
ID: UK12345
displayName: sample person
givenName: sample
sn: person
phone: (123) 456-7890
Step 4:
For your second object type, you will still need the objType and chgType attributes, since those apply to the entire CS schema. It happens that the group also has ID and displayName attributes. However, it has owner and member attributes. Create an entry that looks something like this:
chgType: modify
objType: group
ID: sample
displayName: sample group
owner: UK12345
member: 5784389207
member: 5843-289765 Close notepad and save your changes. You will need this file when you configure your MA.
Page 9 of 22

Developing Management Agents with Microsoft® Identity Server 2003 MA SDK Hand-On-Labs
Step 5:
Start configuring your new MA: • Create a new MA called NextGen MA (one space between NextGen and MA). • Select Extensible Connectivity from the list of management agent types. • You want your MA to import and export, and you want the export behavior to be call-based. • Type NextGen MACDExtension.dll (one space between NextGen and MA) as the extension
name. • Since the NextGen MA doesn’t need credentials to read and write the file, you can leave the
connection information blank. Go to the next property page. Step 5:
On the Configure Additional Parameters page, you will need to supply three additional parameters to the extension as follows: Parameter name Value path C:\Program Files\Microsoft Identity Integration Server\MaData\NextGen MA fullfile full-in.xml deltafile delta-in.xml Use the Add button to add the parameters to the list: • The path parameter determines where the MA will write its output and look for its input. • The fullfile and deltafile parameters are used for full and delta imports. • If the MA required additional passwords for different types of operations or some other sensitive
connection information, you could use the Encrypted value checkbox on the Parameter dialog box to tell MIIS to display and store the configuration parameter as if it were a password.
• Go to the next property page. Step 6:
Continue configuring the MA: • On the Configure Attributes page, set the ID as the anchor. • Edit the owner and member attributes to set the data type as Reference (DN). • Make sure member is marked Yes in the Multi-valued column. • If you had additional attributes that you wanted to add to your schema but that weren’t in your
template, this is where you would configure them. Once you have created the MA, this property page edits the CS schema.
• Click the Advanced button. • Select objType as the object class attribute. • Select chgType as the attribute in the Define change type attribute group box. The fields
below the name of the attribute set the literals to use for each change type. The file you produce for delta imports will indicate what kind of delta operation is to be performed using these literals. In the next lab, you will see how this information is passed to your extension at run time.
• Click OK on the Advanced dialog box and then go to the next property page.
Page 10 of 22
Developing Management Agents with Microsoft® Identity Server 2003 MA SDK Hand-On-Labs
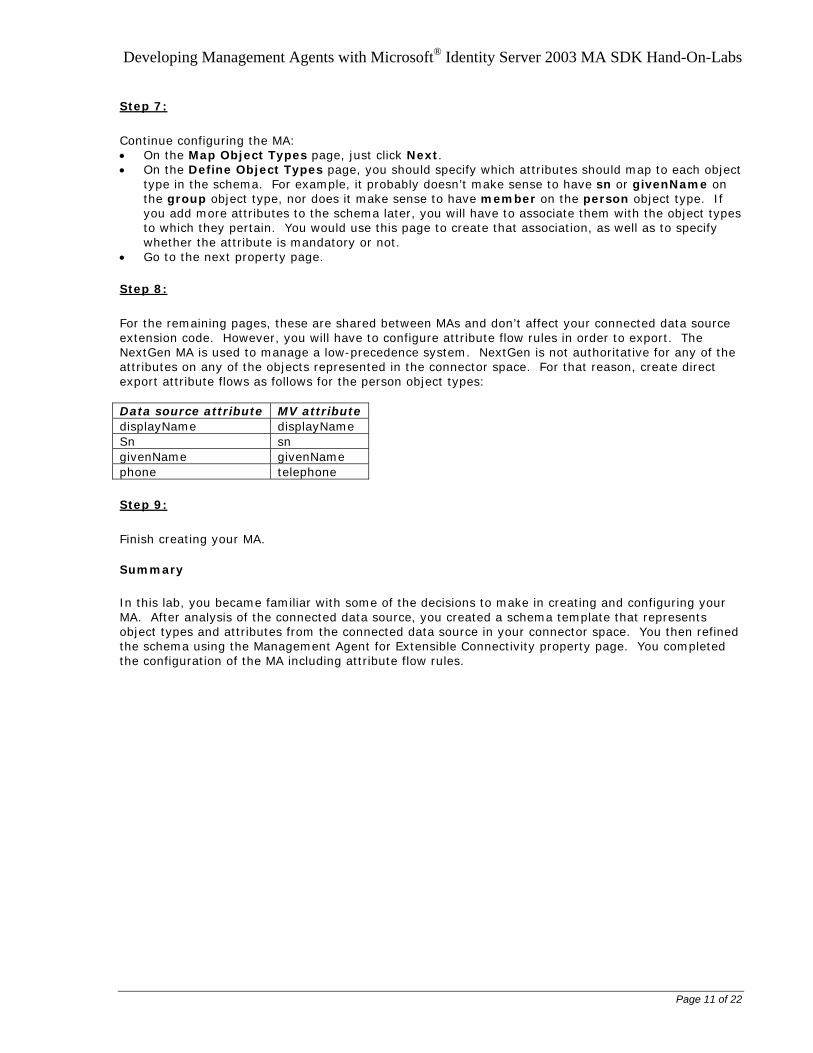
Step 7:
Continue configuring the MA: • On the Map Object Types page, just click Next. • On the Define Object Types page, you should specify which attributes should map to each object
type in the schema. For example, it probably doesn’t make sense to have sn or givenName on the group object type, nor does it make sense to have member on the person object type. If you add more attributes to the schema later, you will have to associate them with the object types to which they pertain. You would use this page to create that association, as well as to specify whether the attribute is mandatory or not.
• Go to the next property page. Step 8:
For the remaining pages, these are shared between MAs and don’t affect your connected data source extension code. However, you will have to configure attribute flow rules in order to export. The NextGen MA is used to manage a low-precedence system. NextGen is not authoritative for any of the attributes on any of the objects represented in the connector space. For that reason, create direct export attribute flows as follows for the person object types: Data source attribute MV attribute displayName displayName Sn sn givenName givenName phone telephone Step 9:
Finish creating your MA.
Summary
In this lab, you became familiar with some of the decisions to make in creating and configuring your MA. After analysis of the connected data source, you created a schema template that represents object types and attributes from the connected data source in your connector space. You then refined the schema using the Management Agent for Extensible Connectivity property page. You completed the configuration of the MA including attribute flow rules.
Page 11 of 22
Developing Management Agents with Microsoft® Identity Server 2003 MA SDK Hand-On-Labs
LAB 2
Scenario: Having configured your management agent’s schema, configuration parameters and other rules, you
will now learn how to generate a Visual Studio .NET solution for your connected data source extension
and use it to build the part of your MA that will talk to your connected data source.
What will we cover? This exercise will demonstrate how to create a connected data source extension. Source code for the
NextGen MA XML file format is
During this LAB you will:
• Use the Identity Manager to create a Visual Studio .NET solution for your MA.
• Copy the Microsoft Visual Basic® .NET source code from a text file into the solution (this is called Approach A) or write the source code to perform the operations required for the MA (this is called Approach B).
• Build the MA using Visual Studio .NET. • Run the MA from the Identity Manager.
Audience: Technical audience proficient with developing rules extensions in Visual Studio .NET and familiar with
the .NET System.IO and System.XML classes.
Estimated Time: Approach A: 10 minutes. Approach B: 30 minutes to 2 hours.
Prerequisites: • Lab1.
• Understanding of how to configure and run MIIS run profiles.
• If using Approach B, in-depth understanding of programmatic file and/or XML document object
model reading and writing.
• For Approach A, ability to read someone else’s code and rapidly gain a high-level understanding of
what it does is good enough.
Ready to start: Please make sure you follow every step. You must be familiar with the Visual Studio .NET development
environment and the MIIS object model in order to understand the content in this lab. If you plan to
write your own MAs, you should look closely at how the sample code uses the MIIS object model to
get schema, configuration and entry data. If you have any questions please consult the LAB proctors.
Page 12 of 22
Developing Management Agents with Microsoft® Identity Server 2003 MA SDK Hand-On-Labs
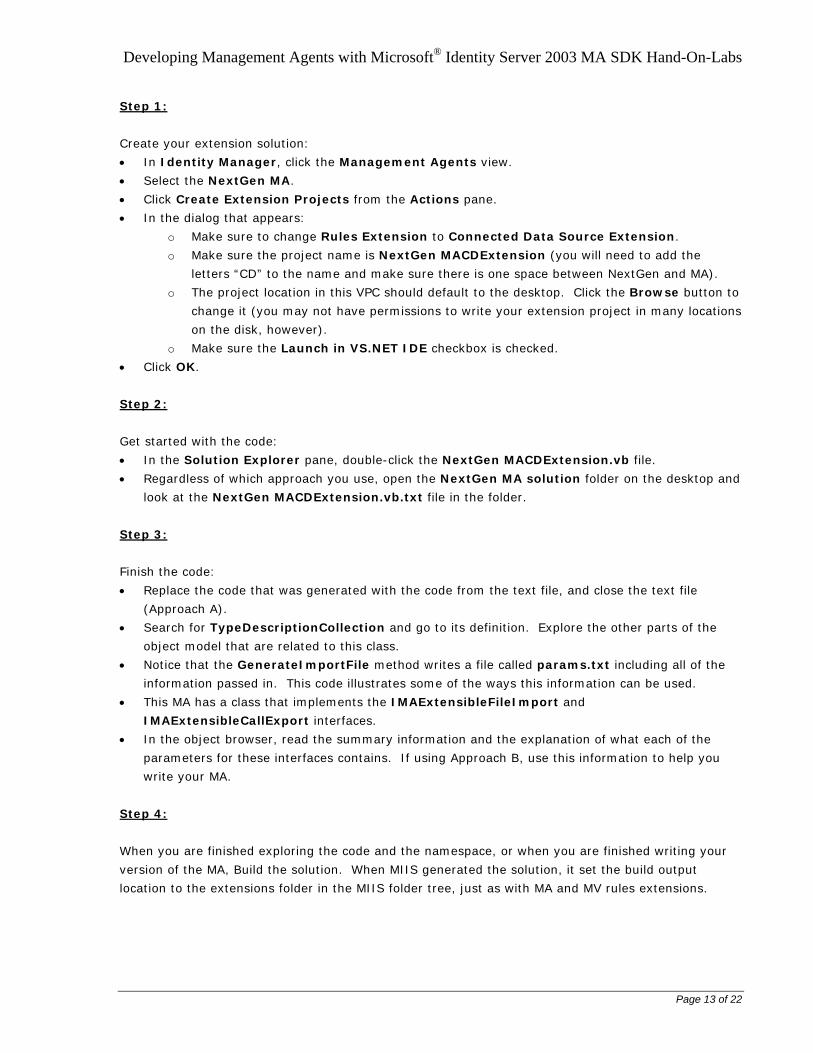
Step 1:
Create your extension solution:
• In Identity Manager, click the Management Agents view.
• Select the NextGen MA.
• Click Create Extension Projects from the Actions pane.
• In the dialog that appears:
o Make sure to change Rules Extension to Connected Data Source Extension.
o Make sure the project name is NextGen MACDExtension (you will need to add the
letters “CD” to the name and make sure there is one space between NextGen and MA).
o The project location in this VPC should default to the desktop. Click the Browse button to
change it (you may not have permissions to write your extension project in many locations
on the disk, however).
o Make sure the Launch in VS.NET IDE checkbox is checked.
• Click OK.
Step 2:
Get started with the code:
• In the Solution Explorer pane, double-click the NextGen MACDExtension.vb file.
• Regardless of which approach you use, open the NextGen MA solution folder on the desktop and
look at the NextGen MACDExtension.vb.txt file in the folder.
Step 3:
Finish the code:
• Replace the code that was generated with the code from the text file, and close the text file
(Approach A).
• Search for TypeDescriptionCollection and go to its definition. Explore the other parts of the
object model that are related to this class.
• Notice that the GenerateImportFile method writes a file called params.txt including all of the
information passed in. This code illustrates some of the ways this information can be used.
• This MA has a class that implements the IMAExtensibleFileImport and
IMAExtensibleCallExport interfaces.
• In the object browser, read the summary information and the explanation of what each of the
parameters for these interfaces contains. If using Approach B, use this information to help you
write your MA.
Step 4:
When you are finished exploring the code and the namespace, or when you are finished writing your
version of the MA, Build the solution. When MIIS generated the solution, it set the build output
location to the extensions folder in the MIIS folder tree, just as with MA and MV rules extensions.
Page 13 of 22

Developing Management Agents with Microsoft® Identity Server 2003 MA SDK Hand-On-Labs
Step 5:
Run your MA:
• Close Visual Studio .NET and return to the Identity Manager.
• Configure run profiles to run full sync and export for the NextGen MA.
• Run the full sync on the NextGen MA. The VPC image comes with a provisioning rules extension
that provisions from the HR MA into the NextGen MA connectorspace (as long as you used that
name for this MA). You should see 100 Provisioning Adds in Outbound Synchronization
statistics.
• Search connector space to see that you have unapplied exports.
• Run the export. You should see 100 Adds in Export Statistics.
• Search connector space again to see that your exports are now Awaiting Export Confirmation,
which means that when each entry was written to the file, it was immediately confirmed, upon
success.
Step 6:
View your results:
• Open a file explorer window and go to C:\Program Files\Microsoft Identity Integration
Server\MaData\NextGen MA where you should see one file called out.xml. Leave this folder
open as you will use it extensively in this step and the next.
• Open the out.xml file and look at the 100 users. Compare the data to the metaverse entries
using the Metaverse Search view.
• Copy this file to delta-in.xml so that you can run an import to confirm your exports. The
NextGen MA expects to confirm its exports by importing from the connected data source. Since
this is just a file in our case, we can accomplish this simply by copying it. In the event this were a
real system, the MA would run an import by connecting to the system and importing the data that
was just written during the previous export. When the data is seen during import, the MIIS sync
engine keeps track of the fact that the export was successful and has been confirmed.
• Configure a run profile to run a Delta Import and Delta Synchronization step (specify a
filename of your choice for the intermediate AVP staging file). Name this profile Delta Import
Delta Sync.
• Run the Delta Import Delta Sync run profile. You will get a warning telling you that you haven’t
yet run a full import. If this MA used a watermark to calculate deltas, we would have wanted to
have run a full import before the delta. In our case it’s ok to start with the delta because we’re
essentially importing the entire connector space, and our MA doesn’t use a watermark, relying
instead on the creation of an XML file that contains only the changes since last time for delta
imports.
• Search the NextGen MA connector space once again to see that your import has confirmed your
exports and that the attribute information now appears on the Properties tab (as opposed to
Awaiting Export Confirmation like last time).
• If you didn’t set the run profile step option to delete the temporary file, open the AVP file your
extension created and view the entries that were imported and confirmed.
Page 14 of 22
Developing Management Agents with Microsoft® Identity Server 2003 MA SDK Hand-On-Labs
Step 7:
Open the params.txt file generated during the delta import run. View the information written to the
file by the code that interpreted the parameters passed to the interface.
Summary
In this lab, you built the connected data source extension for the NextGen MA. Using Identity Manager, you generated the Visual Studio .NET solution, and opened it in the IDE. You browsed the IMAExtensible* interfaces and became familiar with the parameters and structures for providing schema, configuration and entry data to the NextGen MA. You looked at some techniques for using the various classes in the object model to get this information.
Page 15 of 22
Developing Management Agents with Microsoft® Identity Server 2003 MA SDK Hand-On-Labs
LAB 3
Scenario: Add the group management aspect to your configuration by importing group data and exporting it
using your NextGen MA.
What will we cover? This exercise adds group data to the scenario and highlights debugging CD extensions using the Visual
Studio .NET debugger.
Audience: Technical audience proficient with debugging managed code with the Visual Studio .NET IDE.
Estimated Time: 10 minutes.
Prerequisites: • Labs 1 and 2.
• Understanding of how to configure and run MIIS run profiles.
• Knowledge of how to use the debugger in Visual Studio .NET.
Ready to start: Please make sure you follow every step. You should be familiar with how to debug rules extensions
before you attempt this lab. If you have any questions please consult the LAB proctors.
Step 1: View group MA information: • Click Management Agents in Identity Manager. • Look at the properties of the NextGen Groups MA and notice that it has an import attribute flow
from the group owner attribute to the MV group object type’s manager attribute. Step 2: Configure your MA for groups: • Edit the attribute flow for the NextGen MA. • Add export attribute flow to the data source group object type from the MV group object type
follows: Data source attribute MV attribute displayName displayName Member member Owner manager
Page 16 of 22
Developing Management Agents with Microsoft® Identity Server 2003 MA SDK Hand-On-Labs
Step 3: Import groups to MIIS:
• Run the Full Import Full Sync run profile for the NextGen Groups MA. You should see 3
Projections under Inbound Synchronization statistics. These are the 3 groups that NextGen
will use to authorize users for certain operations in the application. The VPC image for this lab has
a provisioning rules extension that provisioned these 3 groups to the connector space for the
NextGen MA.
• View groups in connector space:
o Search connector space using the scope Pending Export and make sure the Add
checkbox is checked. This should find the 3 groups.
o Double-click the admins group and notice the ellipsis (…) for the member attribute in
the New Value column.
Step 3: Prepare to attach the debugger: • Run the MA in the MIIS server process (without this step, you can’t attach the debugger to step
through your rules extension since it won’t be running in a listed process): o Double-click the NextGen MA in the Management Agents view. o Clear the Run this management agent in a separate process checkbox. o Click OK to save your change.
• Open the folder where you created the Visual Studio .NET solution for your CD extension. • Double click the .sln file to open the solution. • On the Debug menu, click Processes… to attach to the miiserver.exe process. • In the Attach to Process dialog, click the checkbox for Common Language Runtime and then
click OK. • Make sure that When debugging is stopped: says Detach from this process, and click Close. • Set a breakpoint in the ExportEntry method by clicking the line where you want to break and
pressing the F9 key. Note: the MIIS user account is not a normal user account and is a member of the Debugger Users and Administrators groups on this server, which is an elevated privilege and should be monitored closely and only granted for the shortest period of time possible. Step 4: Export the groups: • In Identity Manager, click the Management Agents view. • Run the export profile for the NextGen MA. • When the ExportEntry method is called, Visual Studio will stop at your breakpoint and you can
use the F10 key to step through your code. • Hover over variables and parameters in the code to see tooltips that show what their values are. • Select variables to watch, use the Autos pane to inspect the changedAttributes array. Make
sure that member appears indented. • Since member is a multi-valued attribute, you want to watch each value as it is exported. Scroll
down to where you iterate through the values in a multi-valued attribute (approximately line 266 in the provided code, depending how you cut and paste). Press the F9 key to set a breakpoint there, and then F5 to go until that point.
• Step through the loop and watch outputLine as each value is exported. • Use F5 until the end of the run. There are three groups to export, so your breakpoints will each
appear two more times.
Page 17 of 22
Developing Management Agents with Microsoft® Identity Server 2003 MA SDK Hand-On-Labs
Step 4: View results and confirm the export: • In Identity Manager, you should see 3 Adds in Export Statistics. • View the output file out.xml in the MAData folder. • Search connector space and verify that your exports are Awaiting Export Confirmation. • Copy your output file to delta-in.xml and run a delta import to confirm. If you imported the MA
from the solution folder on the desktop, you will have to create a new run profile to do the delta import and delta sync.
Summary
In this lab, you explored the debugging environment and stepped through your code as you exported group information using the NextGen MA. You set an option to detach from the MIIS service instead of stopping it when you decide you want to stop debugging. You set breakpoints, used locals, autos and watch panes to inspect the values of variables and class members. You verified that your multi-valued attribute handling was correct.
Page 18 of 22
Developing Management Agents with Microsoft® Identity Server 2003 MA SDK Hand-On-Labs
LAB 4
Scenario: The NextGen MA will be used at every MIIS installation within Fabrikam. You now have to package
your MA for distribution. With the MA Packager, you can save the MA configuration, install in a special
folder for packaged MAs, and then create as many instances of it as you want. Most importantly, you
can deploy your MA simply to multiple servers in as many scenarios as you need to. You can create
additional join or projection rules, and you can provision into the connector space just as you can with
any other MA. If you need additional attributes, you can edit the schema and add them, or if you no
longer need attributes, you can remove them from the schema. You’ve written your code so that you
can handle any schema.
What will we cover? This exercise demonstrates the MA Packager and how the Identity Manager handles Packaged MAs.
The NextGen MA you have developed will be turned into a template file, and all of the settings you’ve
made can be installed on other MIIS servers. You will see that the UI handles packaged MAs in a way
that is somewhat different from the Management Agent for Extensible Connectivity and preserves the
developer’s choices for various options in the UI.
Audience: Technical.
Estimated Time: 10 minutes.
Prerequisites: • Labs 1 and 2 (you need to have a CD extension and an MA configuration you can save to XML file).
Ready to start: Please make sure you follow every step. If you have any questions please consult the LAB proctors.
Page 19 of 22

Developing Management Agents with Microsoft® Identity Server 2003 MA SDK Hand-On-Labs
Step 1: Save MA configuration: • Click Management Agents in Identity Manager. • Click the NextGen MA and select Export Management Agent from the Actions pane. • Type NextGen MA as the file name, and save the file to the desktop. • Open the MIIS help file. Search for MA Packager. Click the topic named “Mapackager:
Management agent packaging tool.” • Read about the MA customization file. Open notepad and save the following XML: <ma-customization-info> <ma-formatversion>1</ma-formatversion> <ma-companyname>Fabrikam</ma-companyname> <ma-subtype>NextGen</ma-subtype> <ma-listname>NextGen Simple XML</ma-listname> <ma-help-text>With this management agent you can import and export NextGen simple XML identity information</ma-help-text> </ma-customization-info> • Save your customization file as NextGenCust.xml • Open a command prompt. • Navigate to the desktop. • Run the MA Packager from its location in the {MIIS}\bin folder. Consult the help for more
information about the command line options. It’s a good practice to include the MA name, your company name and the format version in your template file. Call your output template file NextGenMA-Fabrikam-1.xml.
Step 2: Install the MA: • Close the Identity Manager. • Copy the NextGenMA-Fabrikam-1.xml file to {MIIS}\UIShell\XMLs\PackagedMAs. The
installation process would typically be handled by a setup program and would copy the required CD extension assembly to the Extensions folder.
Page 20 of 22
Developing Management Agents with Microsoft® Identity Server 2003 MA SDK Hand-On-Labs
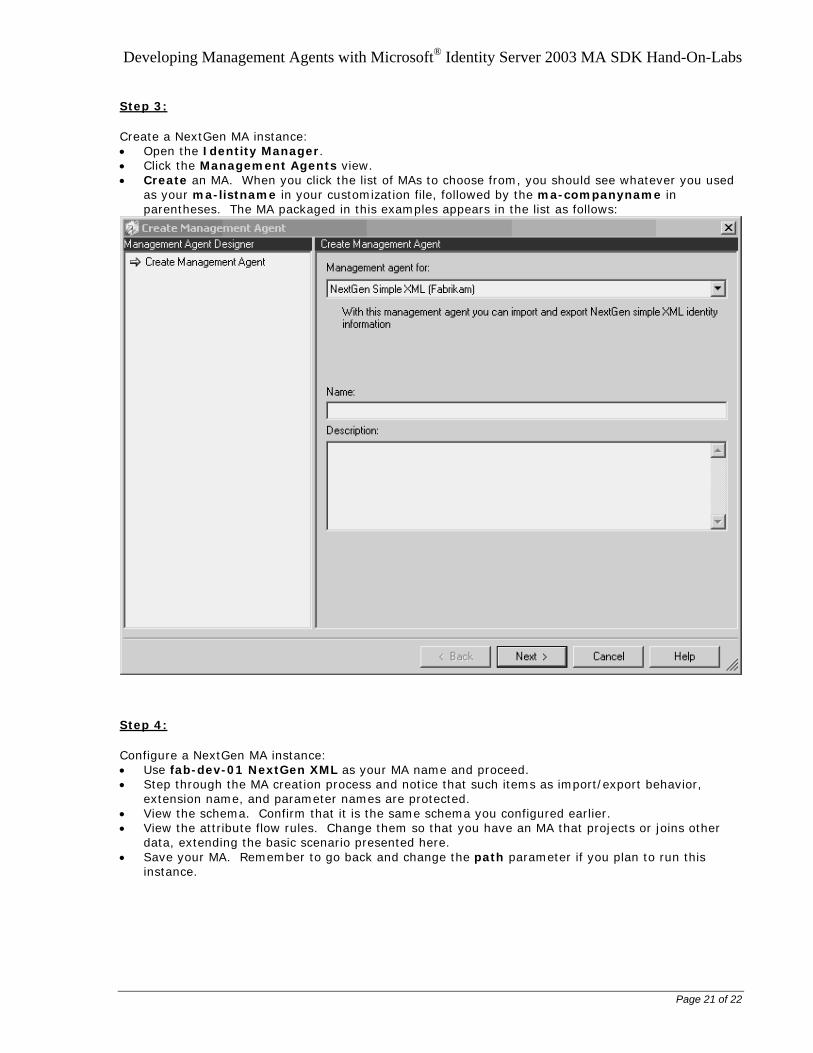
Step 3: Create a NextGen MA instance: • Open the Identity Manager. • Click the Management Agents view. • Create an MA. When you click the list of MAs to choose from, you should see whatever you used
as your ma-listname in your customization file, followed by the ma-companyname in parentheses. The MA packaged in this examples appears in the list as follows:
Step 4: Configure a NextGen MA instance: • Use fab-dev-01 NextGen XML as your MA name and proceed. • Step through the MA creation process and notice that such items as import/export behavior,
extension name, and parameter names are protected. • View the schema. Confirm that it is the same schema you configured earlier. • View the attribute flow rules. Change them so that you have an MA that projects or joins other
data, extending the basic scenario presented here. • Save your MA. Remember to go back and change the path parameter if you plan to run this
instance.
Page 21 of 22
Developing Management Agents with Microsoft® Identity Server 2003 MA SDK Hand-On-Labs
Summary
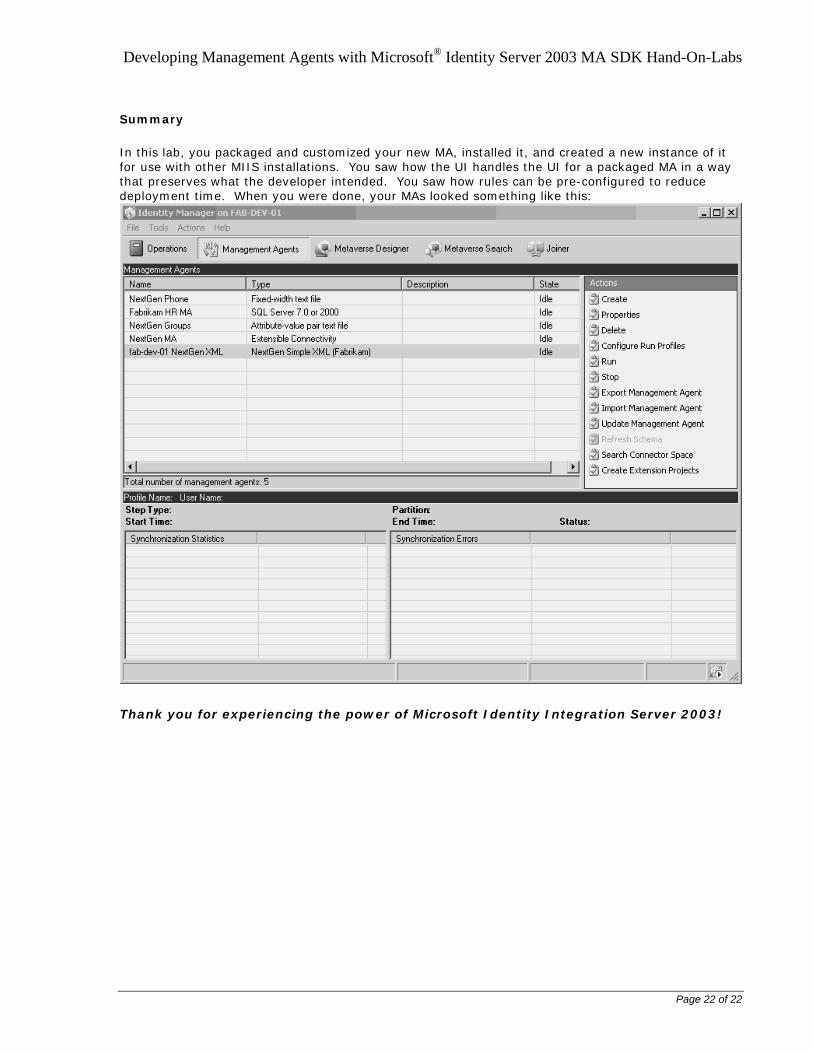
In this lab, you packaged and customized your new MA, installed it, and created a new instance of it for use with other MIIS installations. You saw how the UI handles the UI for a packaged MA in a way that preserves what the developer intended. You saw how rules can be pre-configured to reduce deployment time. When you were done, your MAs looked something like this:
Thank you for experiencing the power of Microsoft Identity Integration Server 2003!
Page 22 of 22