Embed Size (px)
Citation preview
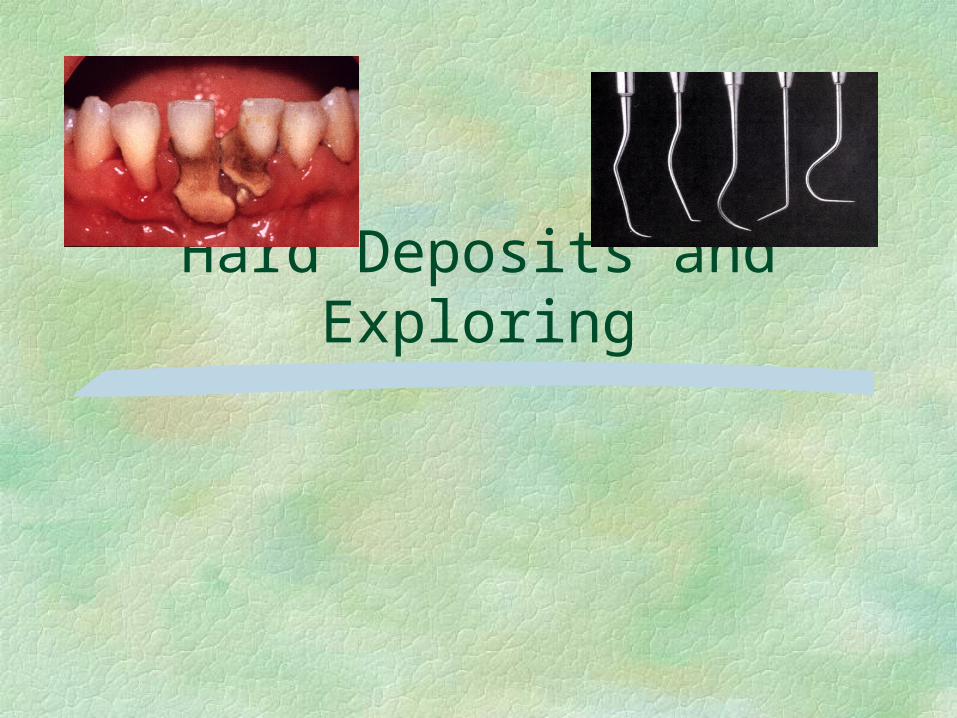
Hard Deposits and Exploring
Hard Deposits and Exploring
Objectives
Describe calculus and name the various surfaces on which it can form.
Describe the similarities and differences between supragingival and subgingival calculus deposits.
Name 3 methods for identification of supragingival calculus and 5 methods for identification of subgingival calculus.
Describe the process of calculus formation.
Compare the hardness of calculus to that of enamel, dentin, cementum, and bone.
Hard Deposits and ExploringObjectives Cont.
Discuss the relationship between calculus and dental disease.
Identify 3 modes for attachment of calculus to a tooth surface.
Describe the composition of calculus. Identify 6 uses of a dental explorer. Describe the design and use of the
#17, #23, and ODU 11/12 explorers. Demonstrate appropriate use of the
#17, #23, and ODU 11/12 explorers on the dentoform.
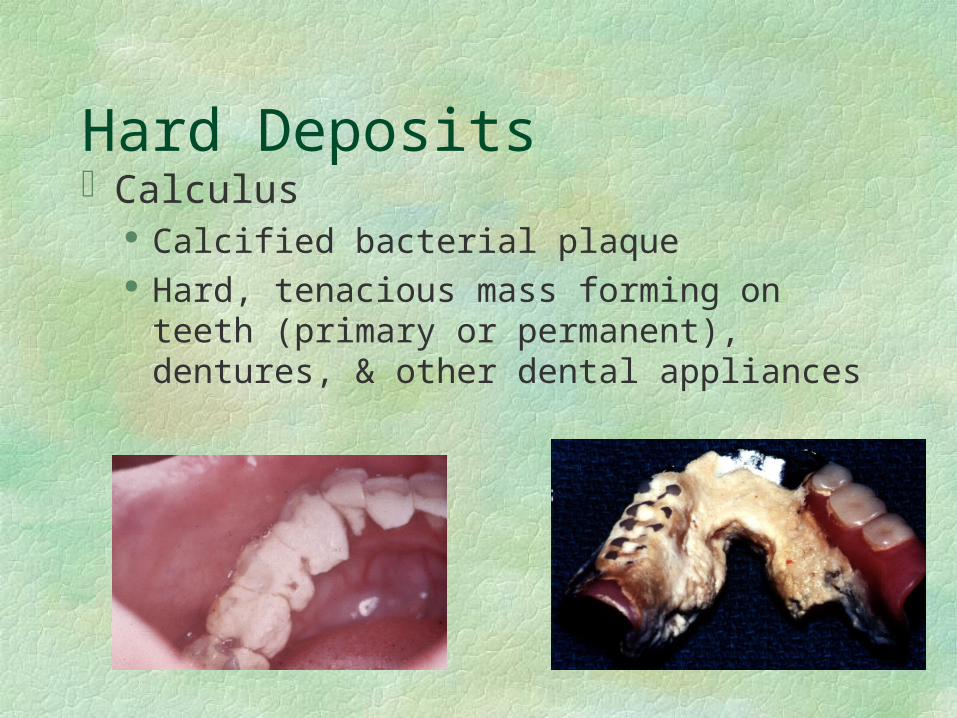
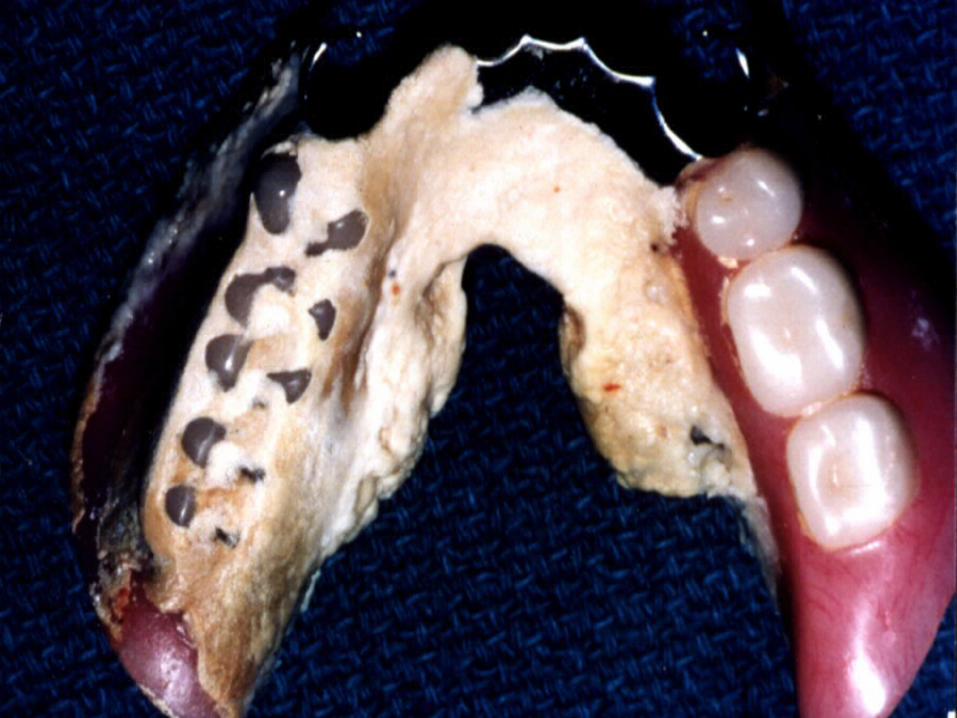
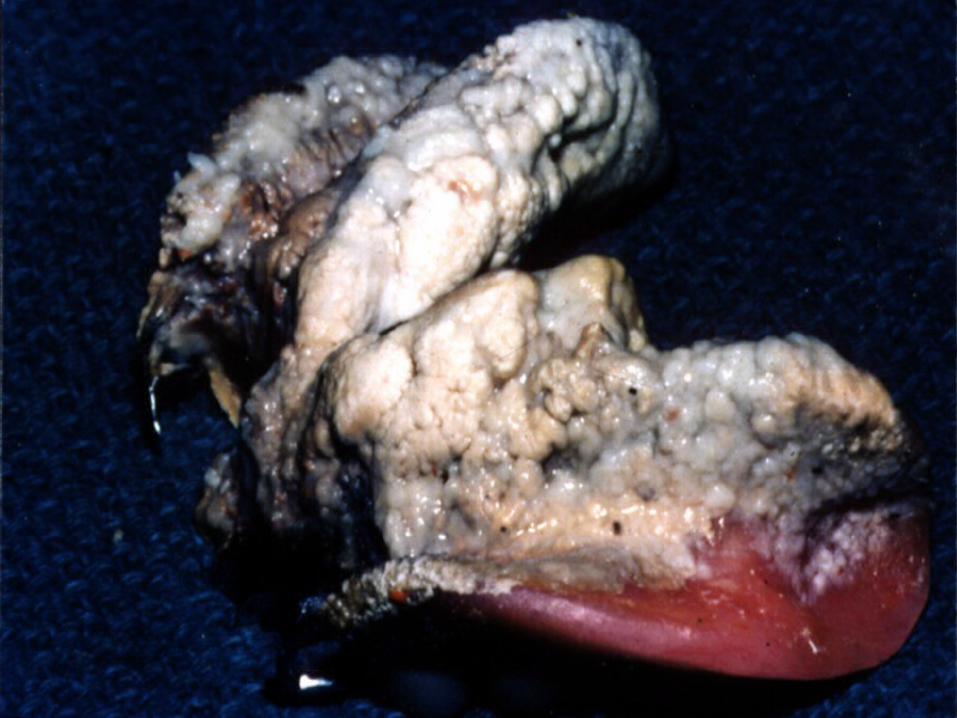
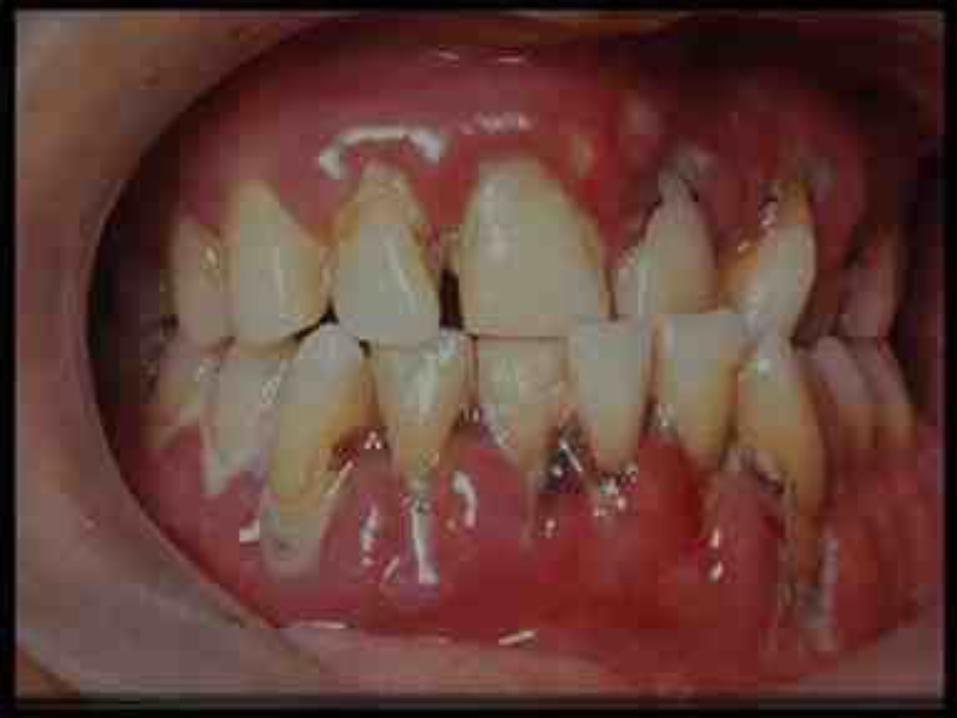
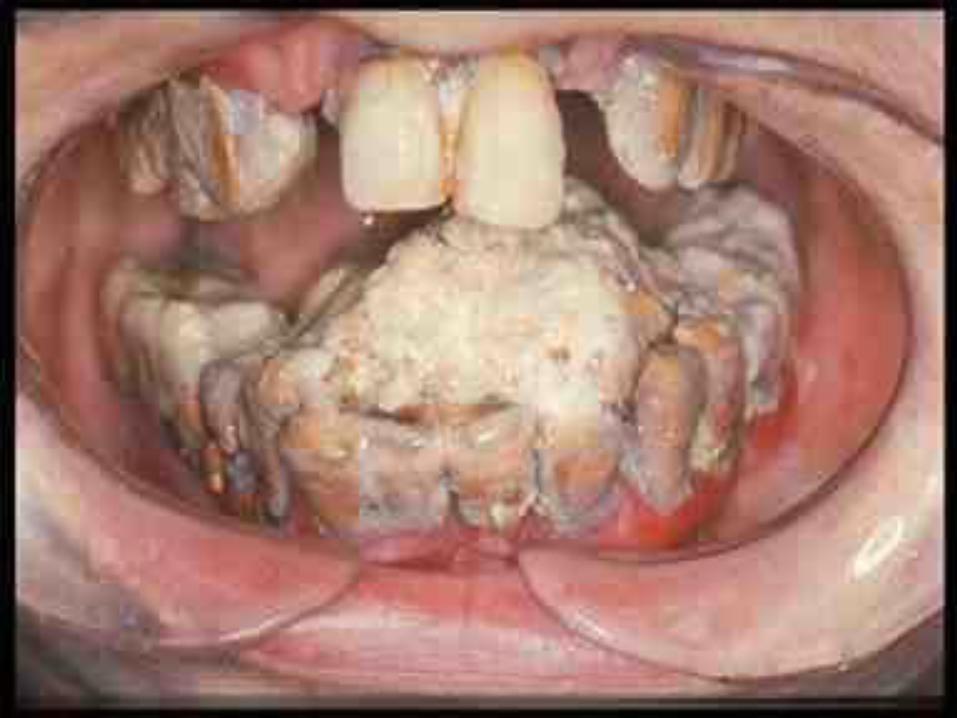
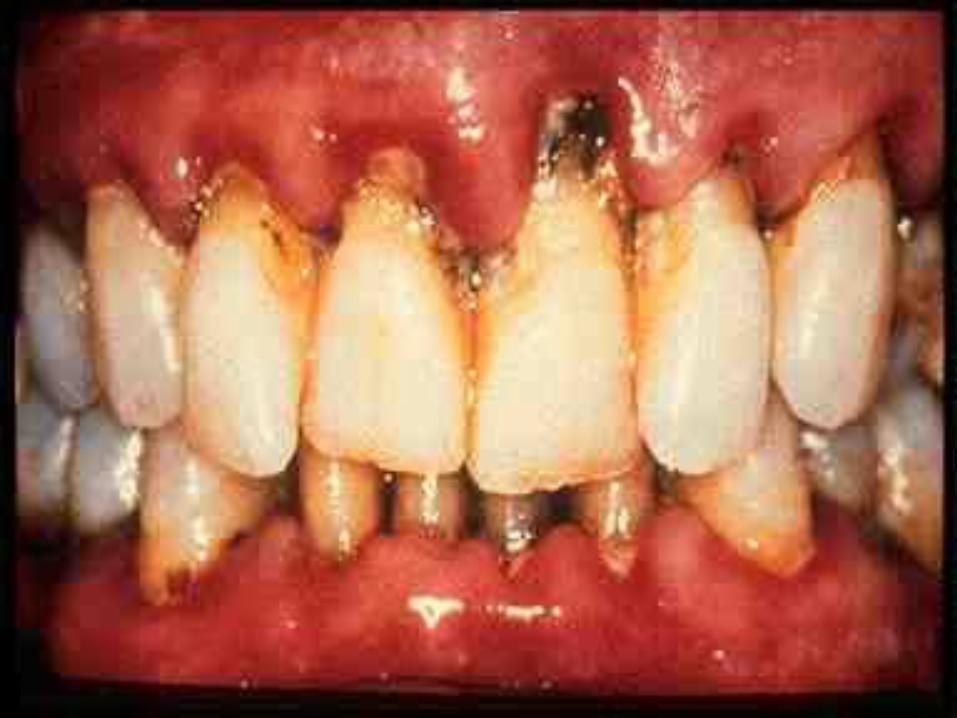
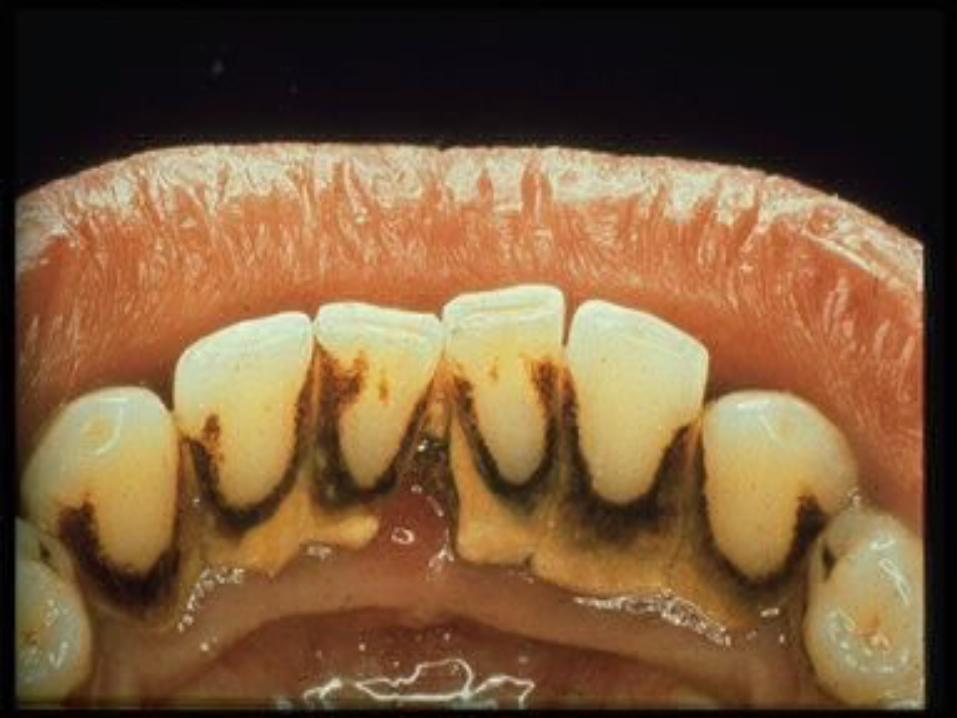
Hard DepositsCalculus
Calcified bacterial plaque Hard, tenacious mass forming on
teeth (primary or permanent), dentures, & other dental appliances
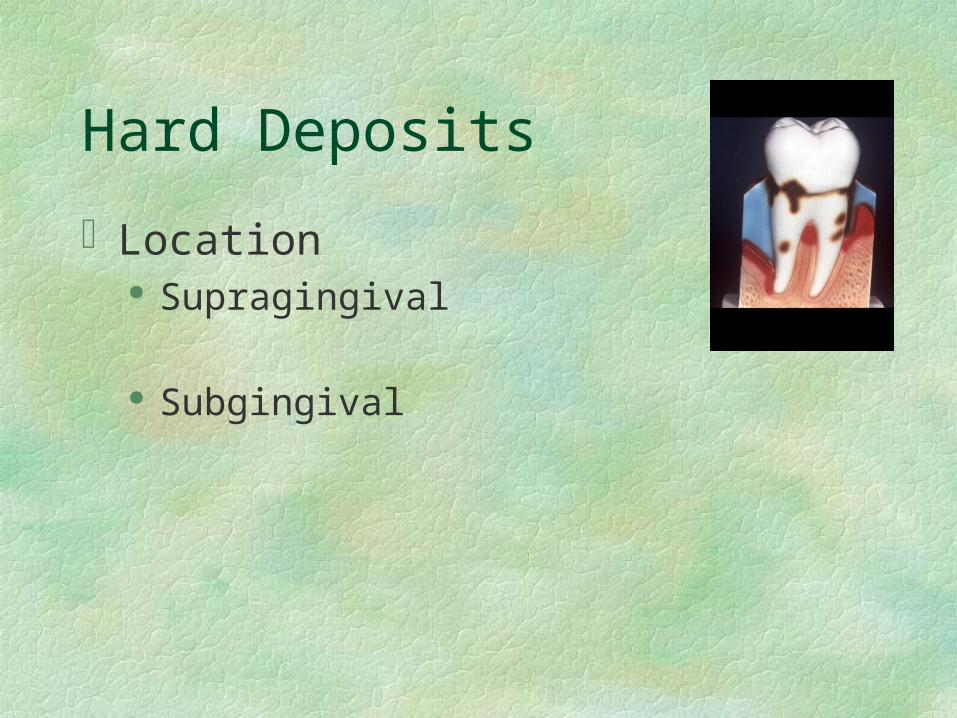
Hard Deposits
Location Supragingival
Subgingival
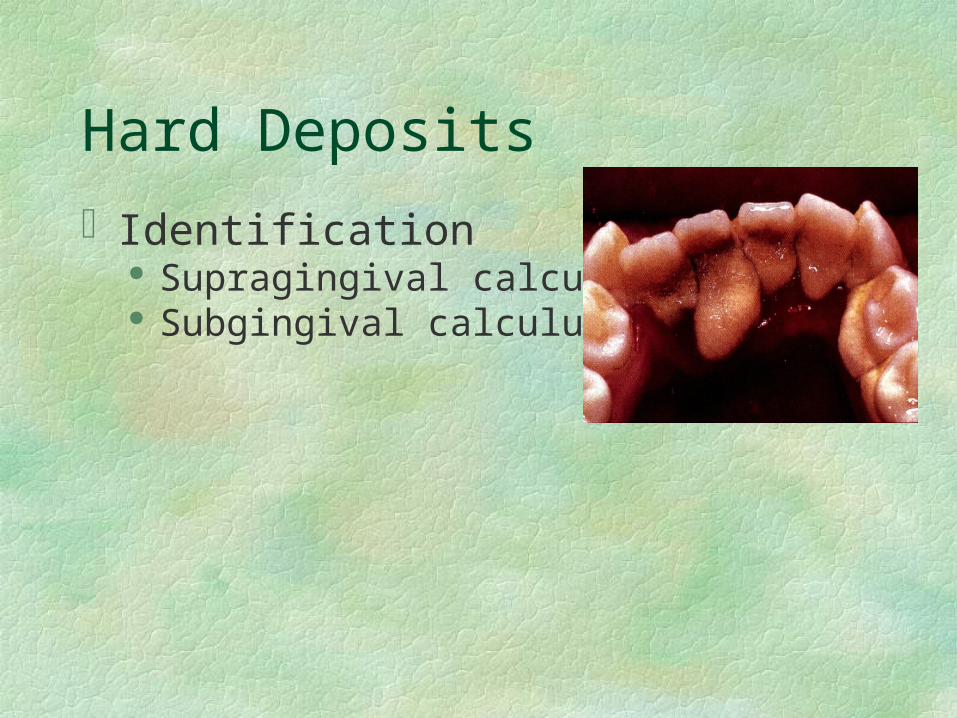
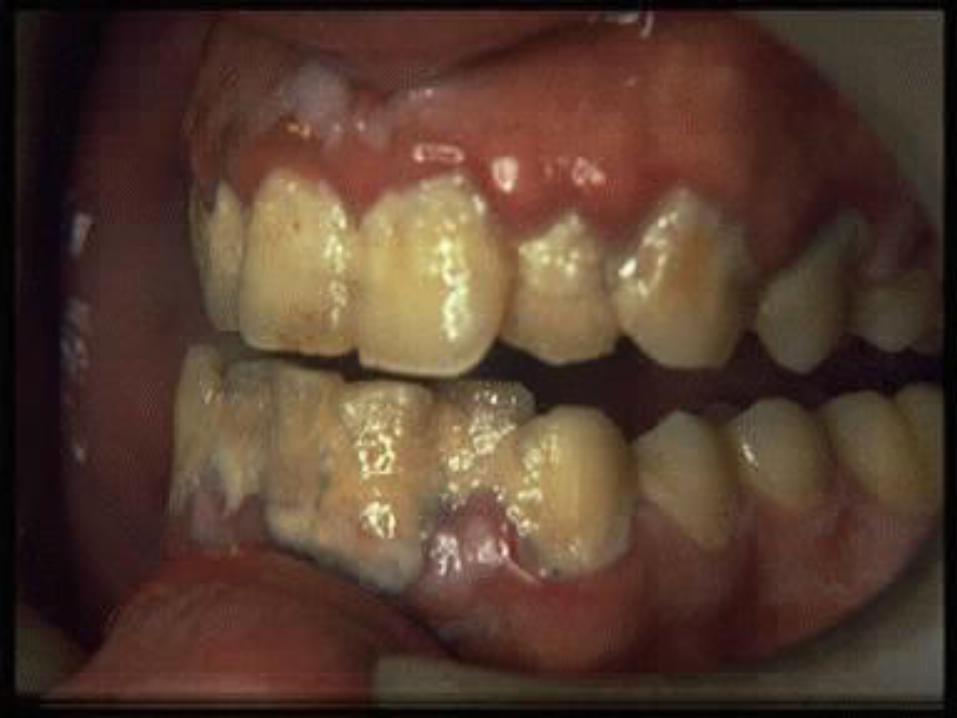
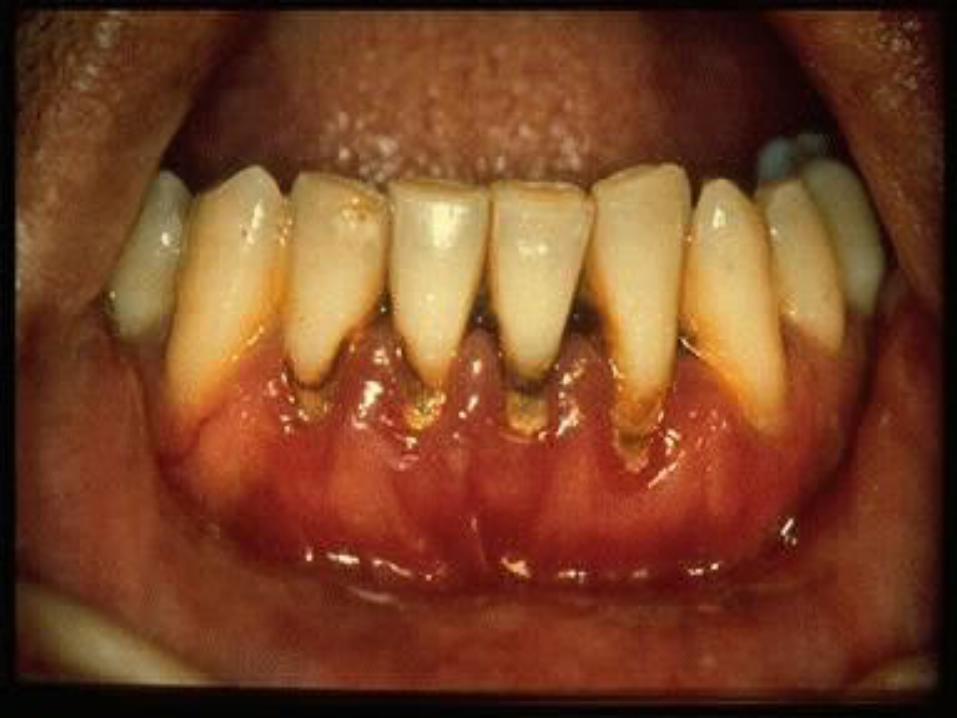
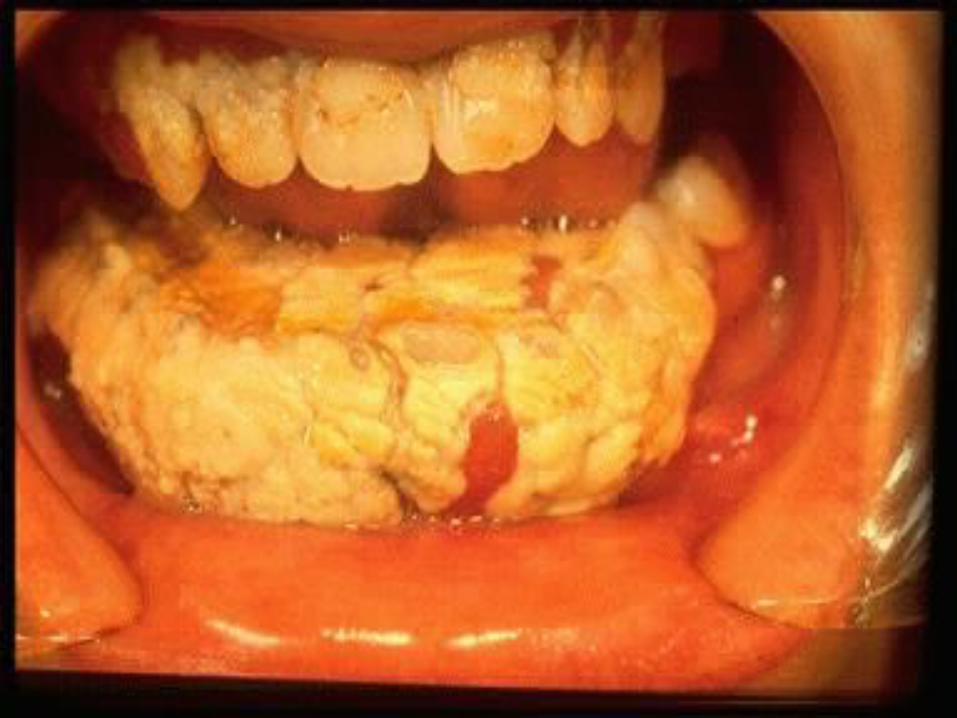
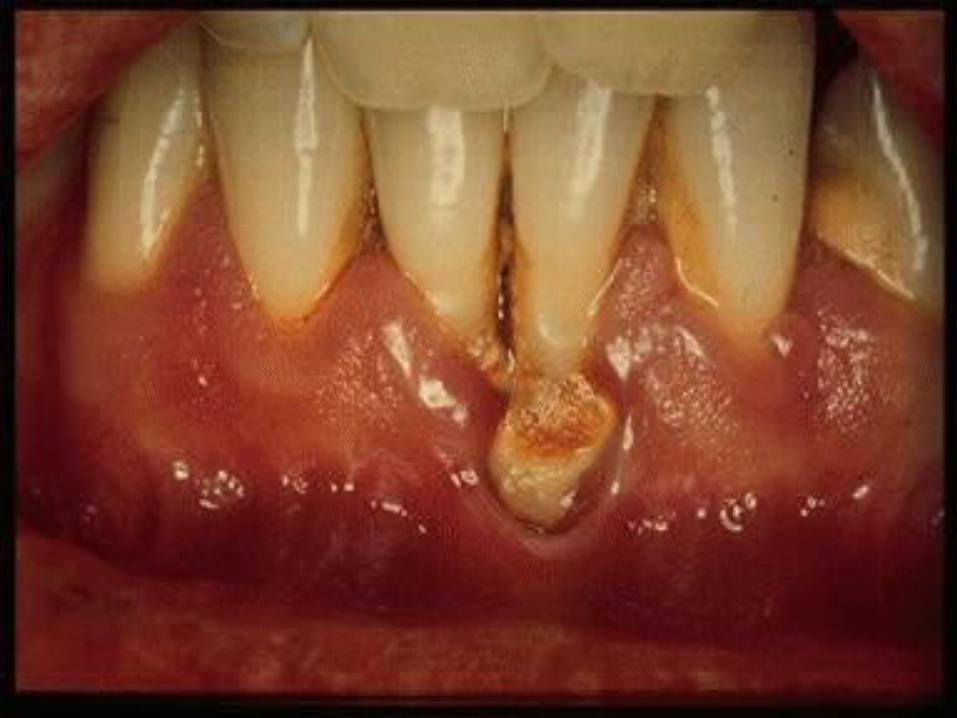
Hard Deposits
Identification Supragingival calculus Subgingival calculus
Hard Deposits
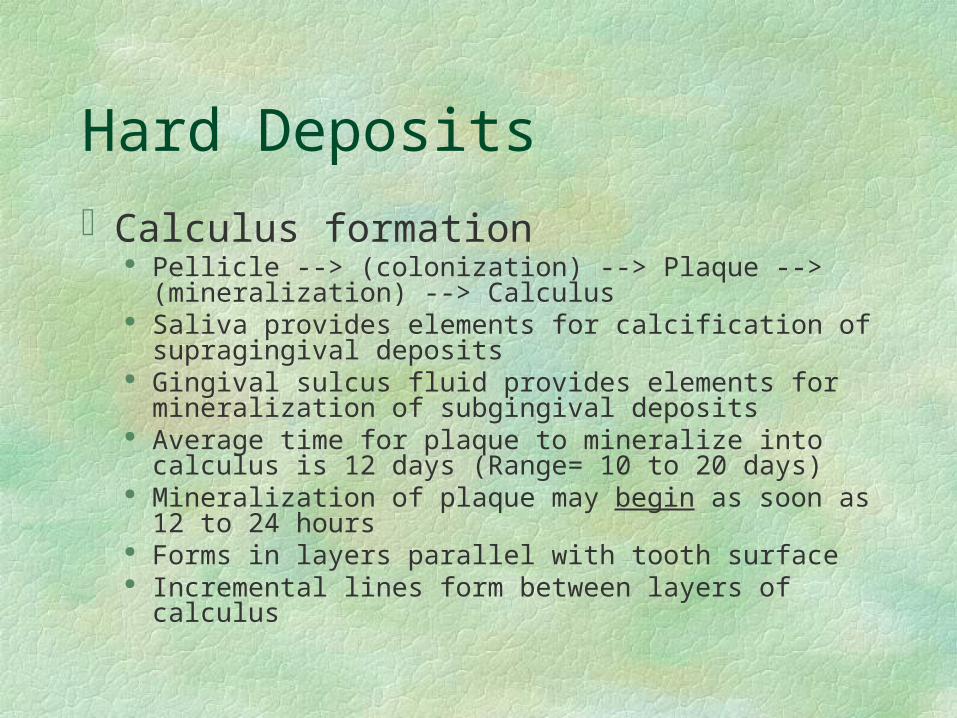
Calculus formation Pellicle --> (colonization) --> Plaque -->
(mineralization) --> Calculus Saliva provides elements for calcification of
supragingival deposits Gingival sulcus fluid provides elements for
mineralization of subgingival deposits Average time for plaque to mineralize into
calculus is 12 days (Range= 10 to 20 days) Mineralization of plaque may begin as soon as 12
to 24 hours Forms in layers parallel with tooth surface Incremental lines form between layers of calculus
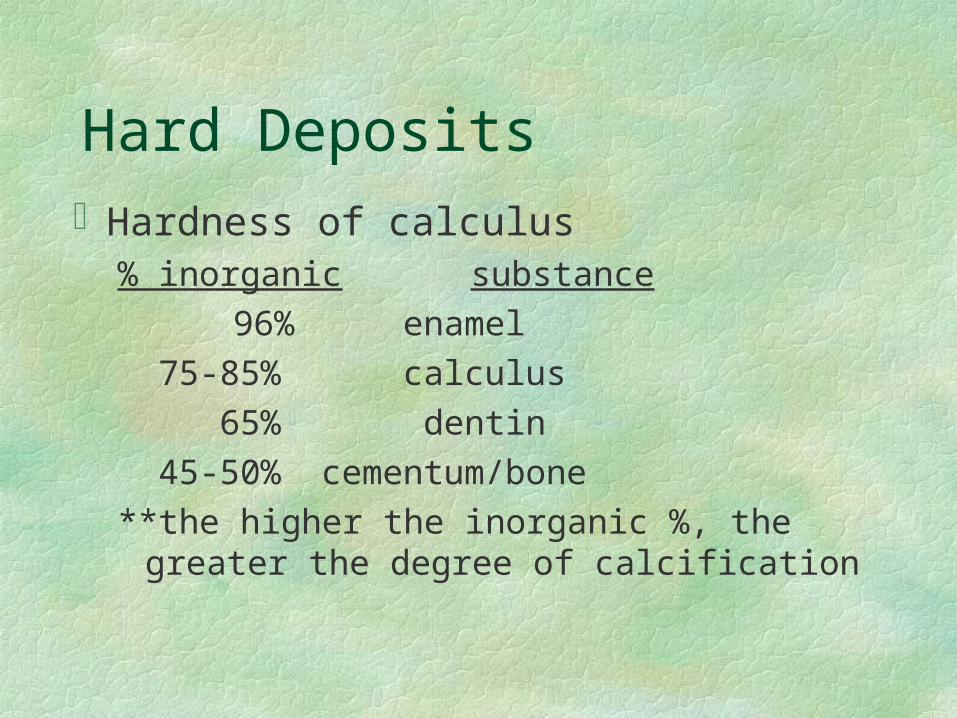
Hardness of calculus% inorganic substance 96% enamel 75-85% calculus 65% dentin 45-50% cementum/bone**the higher the inorganic %, the
greater the degree of calcification
Hard Deposits
Hard Deposits
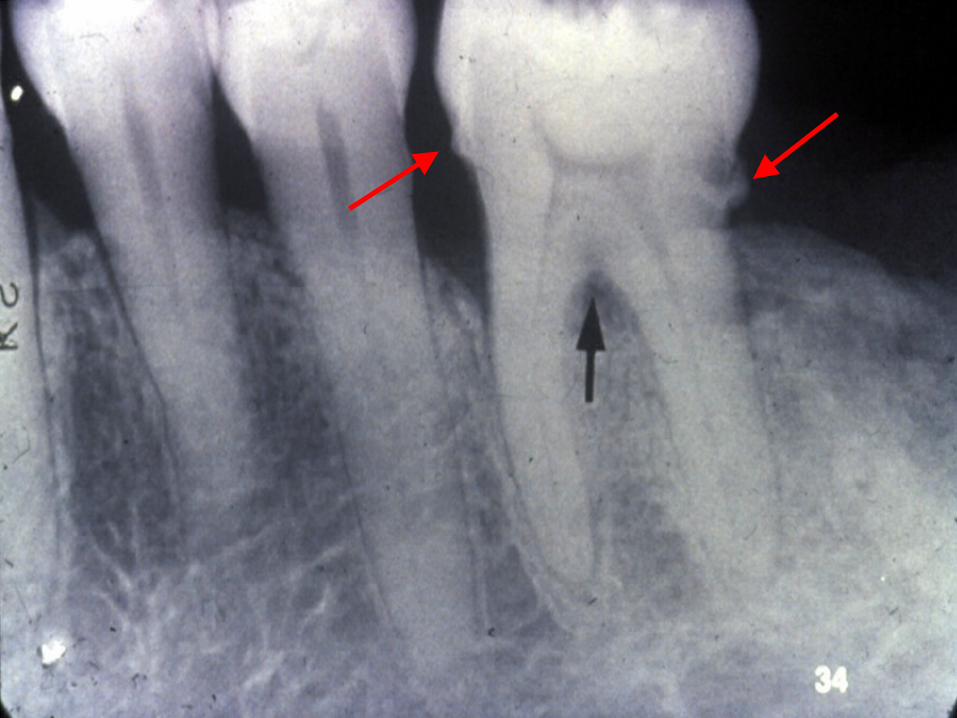
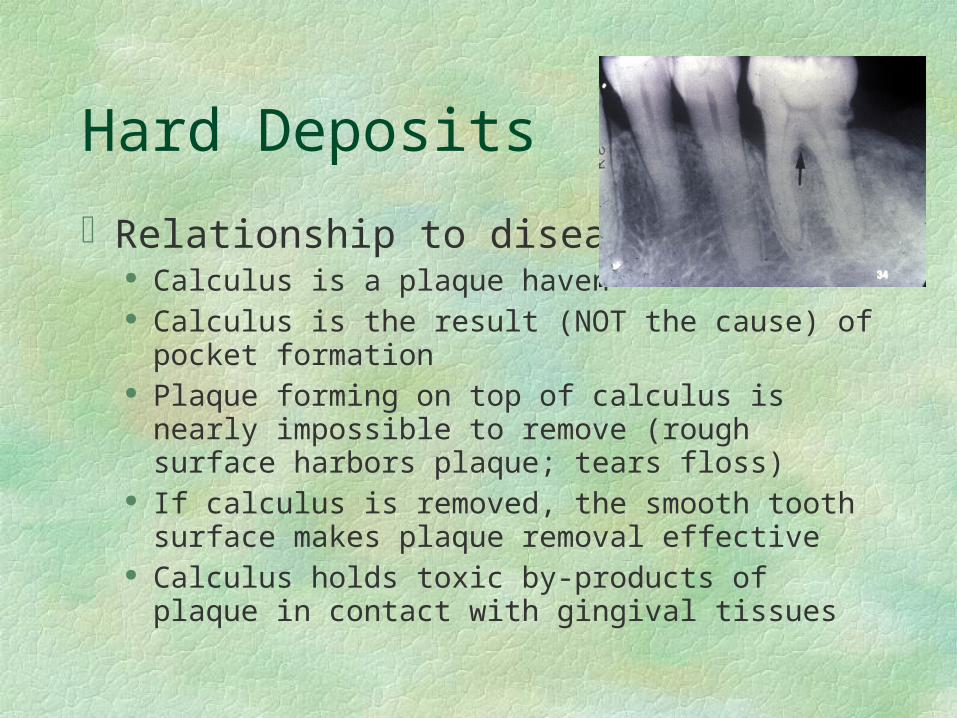
Relationship to disease Calculus is a plaque haven Calculus is the result (NOT the cause) of
pocket formation Plaque forming on top of calculus is nearly
impossible to remove (rough surface harbors plaque; tears floss)
If calculus is removed, the smooth tooth surface makes plaque removal effective
Calculus holds toxic by-products of plaque in contact with gingival tissues
Hard Deposits
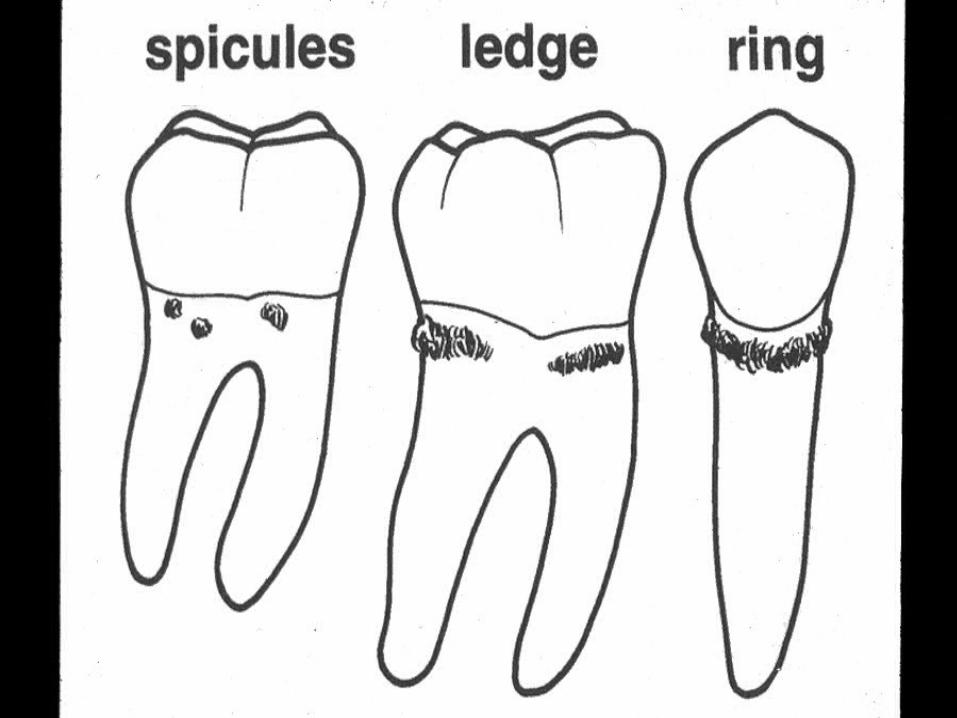
Modes of attachment Acquired pellicle- easily removed
because there is no mechanical interlock Mechanical interlock- locked into
irregularities (rough cementum, caries, enamel cracks). Difficult to remove and difficult to assess when complete
Direct contact between tooth and calculus matrix- difficult to remove
Hard DepositsComposition
Mature calculus• 75-85% inorganic components (calcium,
phosphate, trace elements, fluoride, hydroxyapatite crystals)
• 15-25% water and organic components (microorganisms, desquamated epithelial cells, leukocytes)
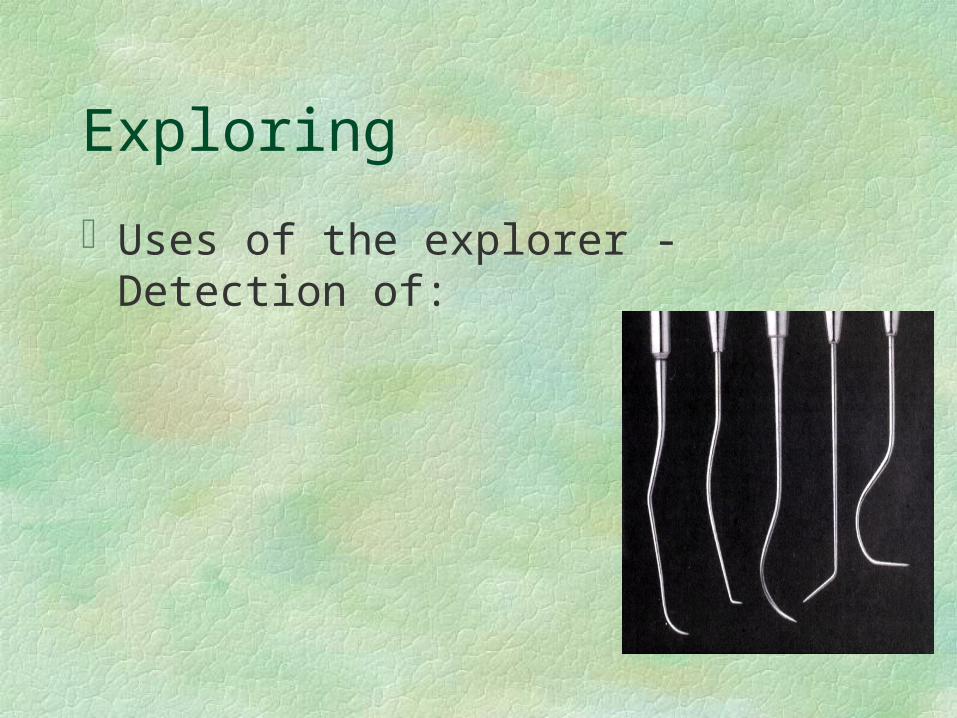
Exploring
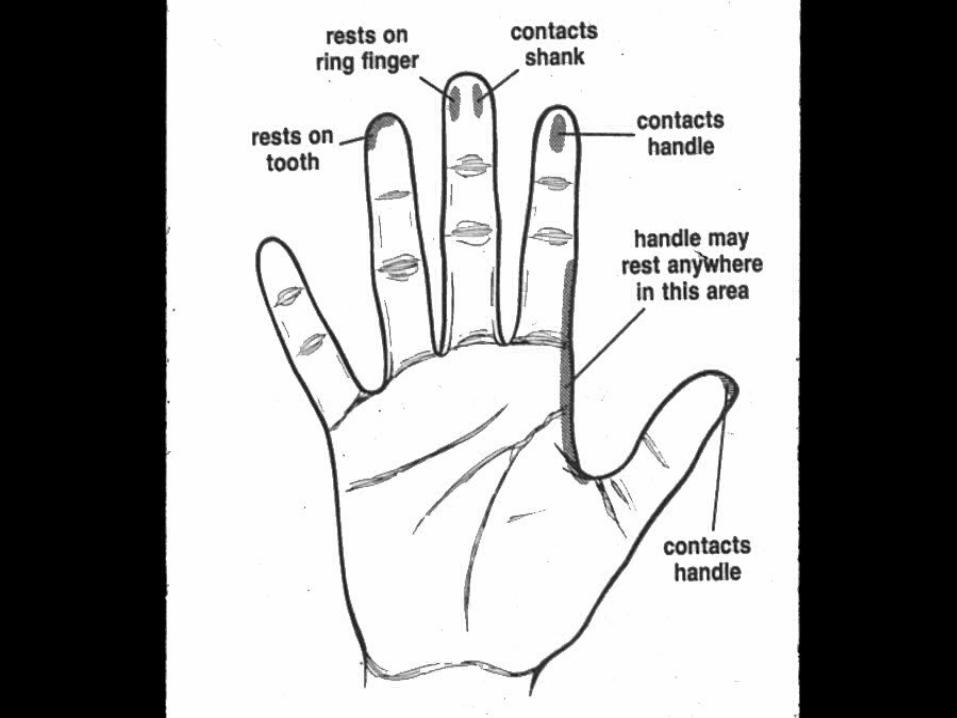
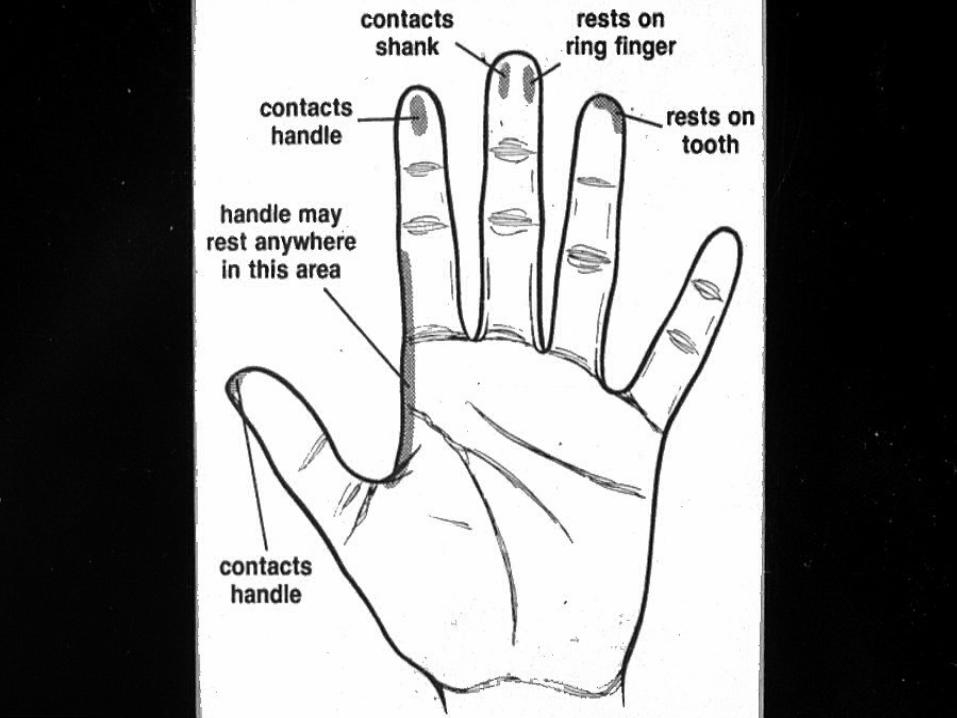
Uses of the explorer - Detection of:
Exploring
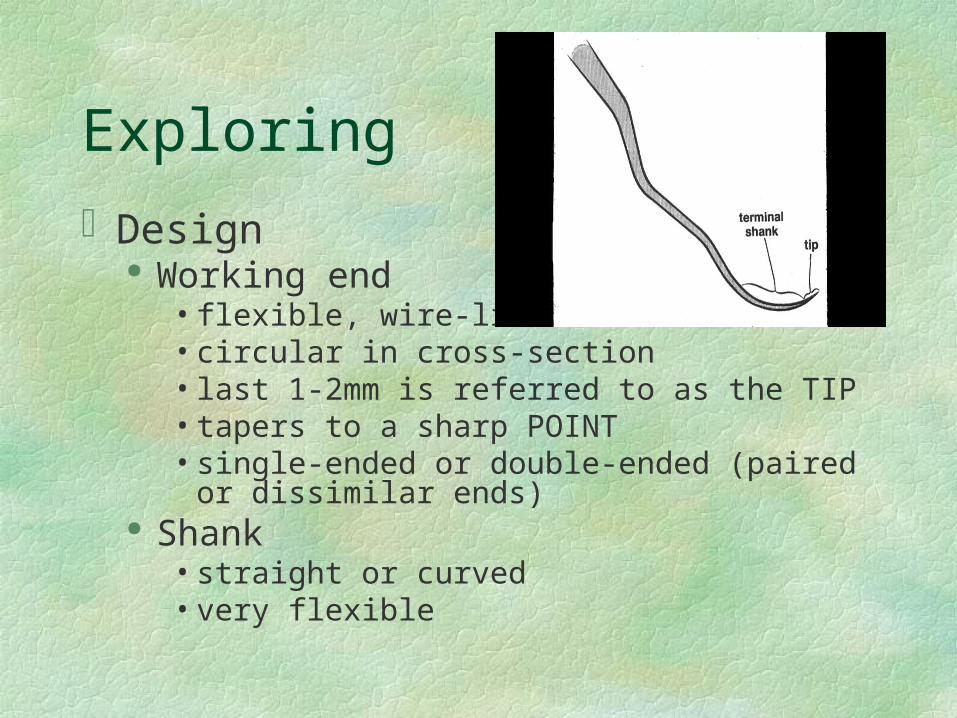
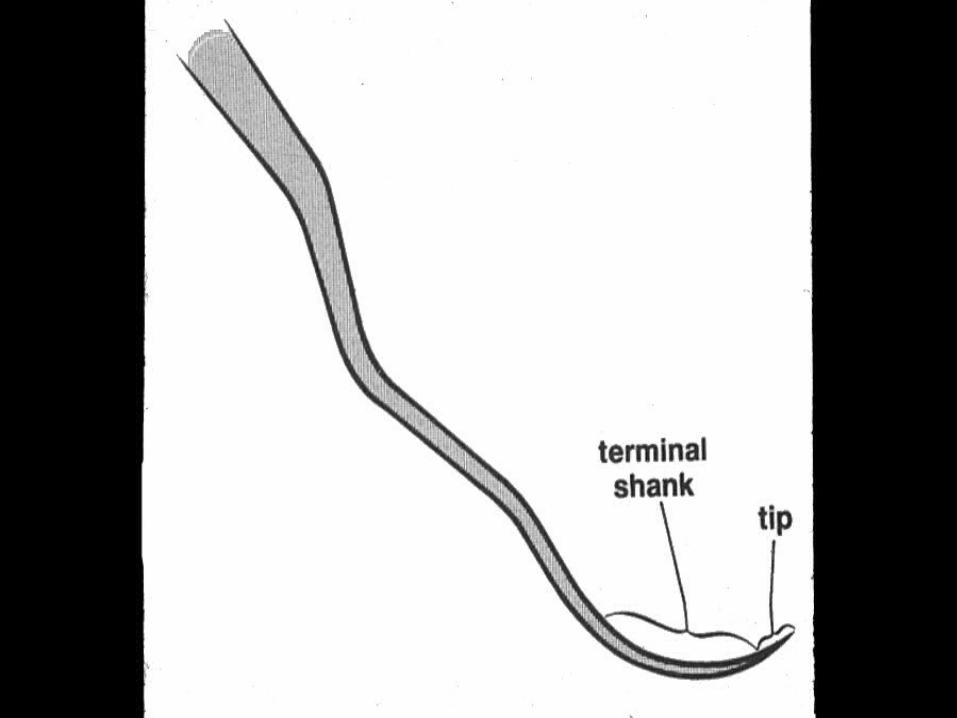
Design Working end
• flexible, wire-like• circular in cross-section• last 1-2mm is referred to as the TIP• tapers to a sharp POINT• single-ended or double-ended (paired or
dissimilar ends) Shank
• straight or curved• very flexible
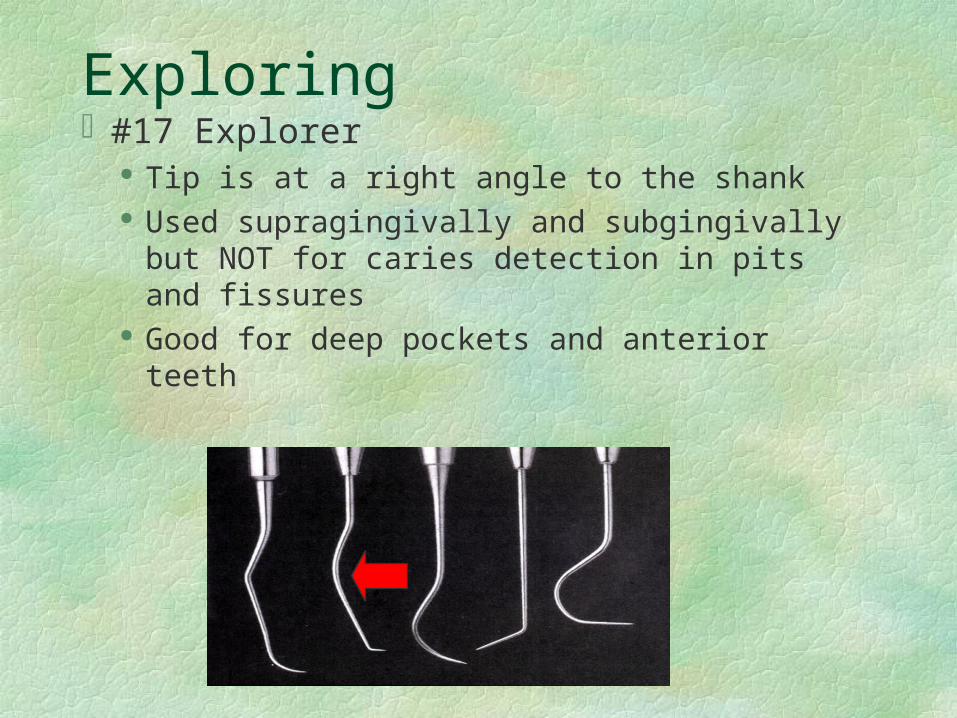
Exploring#17 Explorer
Tip is at a right angle to the shank Used supragingivally and subgingivally
but NOT for caries detection in pits and fissures
Good for deep pockets and anterior teeth
Exploring
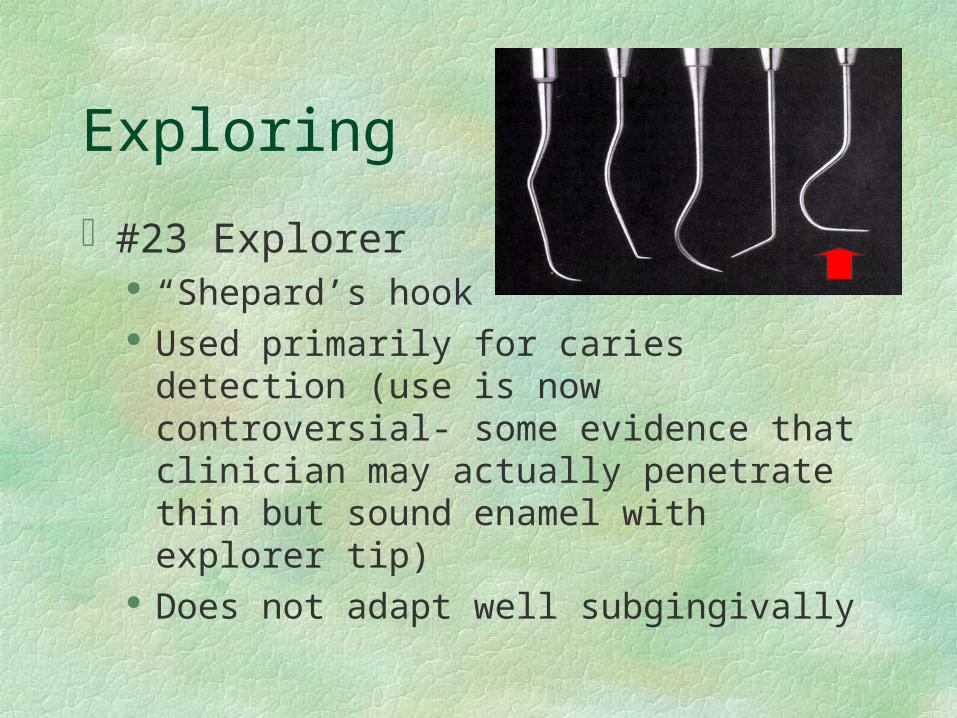
#23 Explorer “Shepard’s hook” Used primarily for caries detection
(use is now controversial- some evidence that clinician may actually penetrate thin but sound enamel with explorer tip)
Does not adapt well subgingivally
Exploring
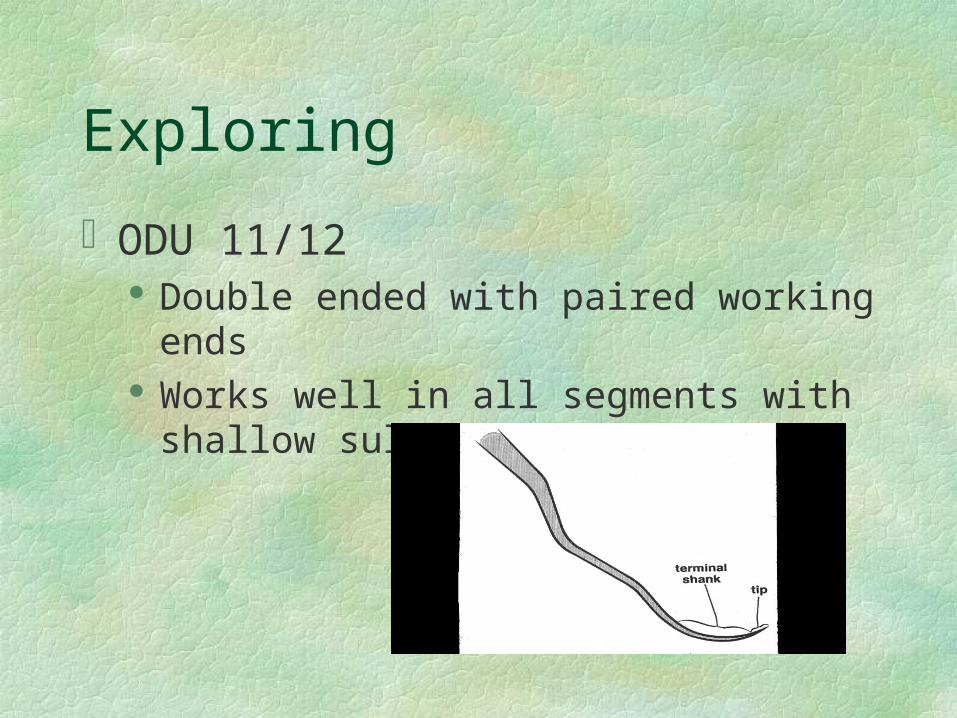
ODU 11/12 Double ended with paired working
ends Works well in all segments with
shallow sulcus depths
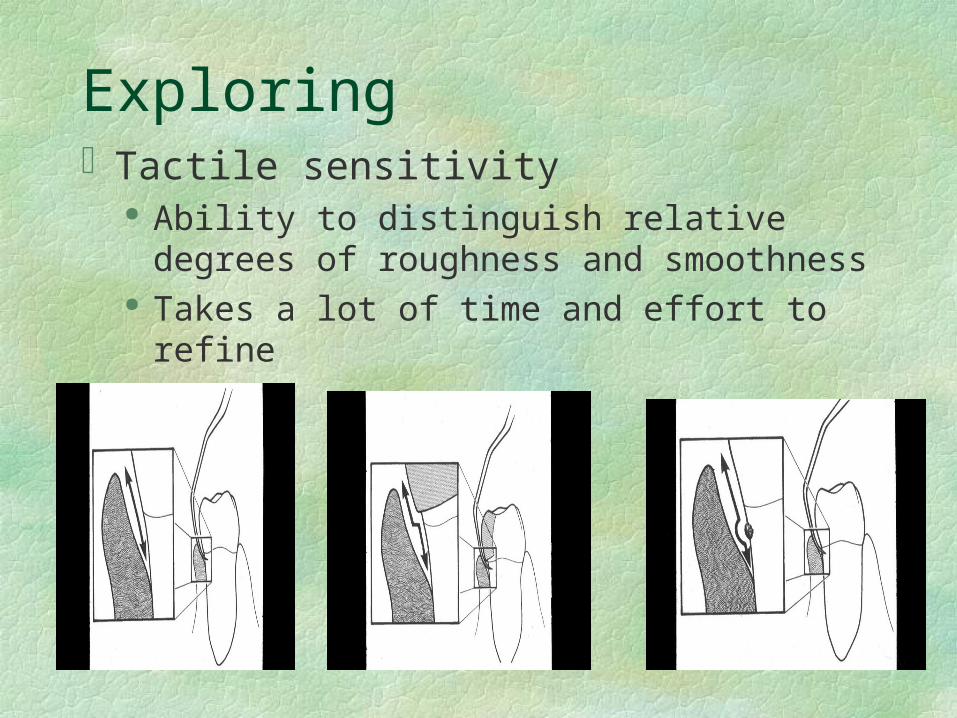
ExploringTactile sensitivity
Ability to distinguish relative degrees of roughness and smoothness
Takes a lot of time and effort to refine
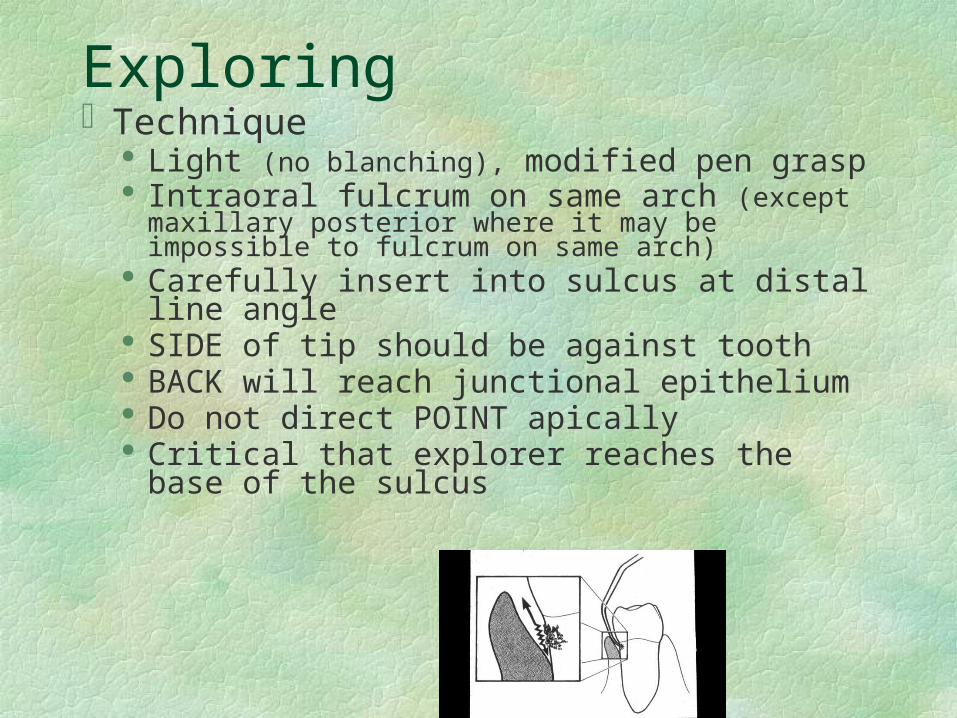
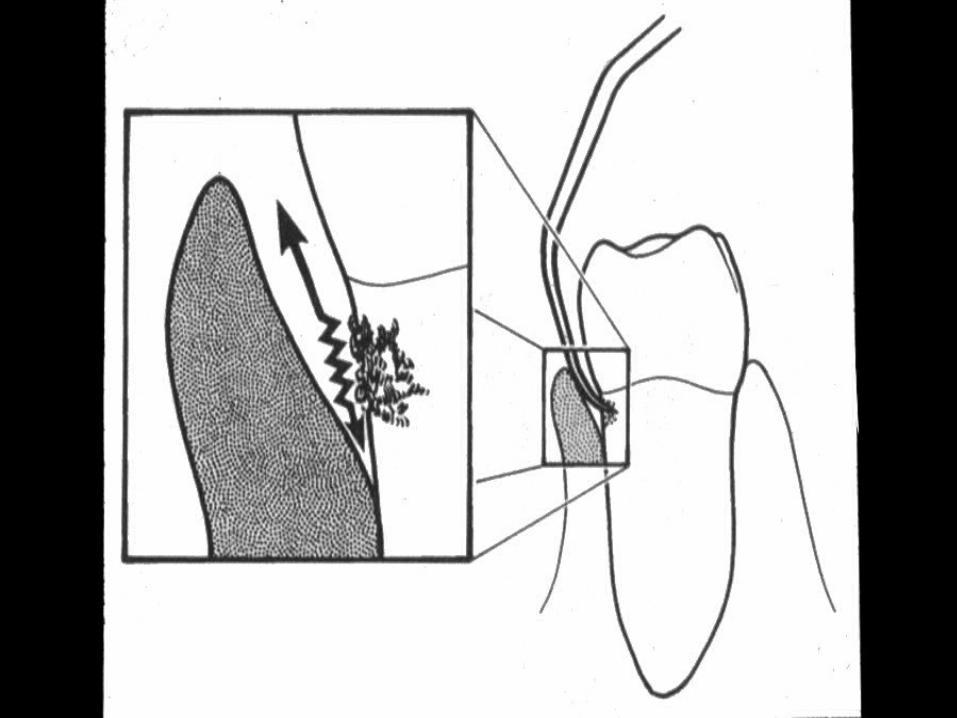
ExploringTechnique
Light (no blanching), modified pen grasp Intraoral fulcrum on same arch (except
maxillary posterior where it may be impossible to fulcrum on same arch)
Carefully insert into sulcus at distal line angle
SIDE of tip should be against tooth BACK will reach junctional epithelium Do not direct POINT apically Critical that explorer reaches the base of
the sulcus
ExploringTechnique (cont.)
Adapt so TIP is flush against the tooth (Adaptation= placement of working end against tooth)
Use an exploratory stroke (feeling) Pull motion from base of sulcus to
marginal gingiva “Bump” over large pieces of calculus;
“drag” over smaller pieces; “fall” into large areas of decay; bump over or fall into defective restorative margins; smooth tooth surface
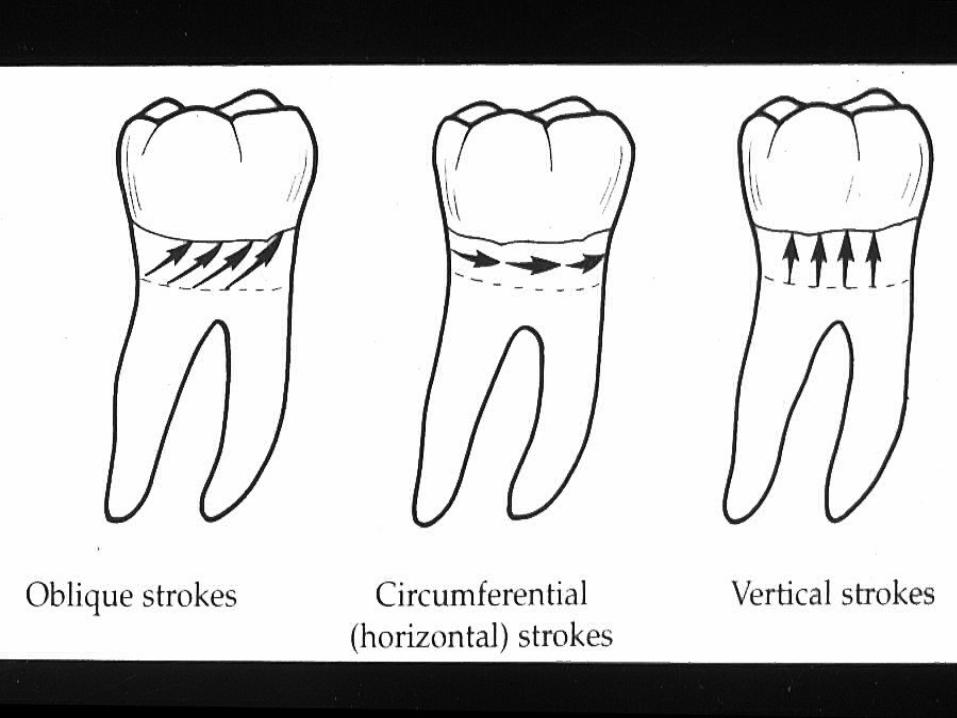
ExploringStroke direction
Vertical and oblique strokes should be used. This directs the explorer at a right angle to the deposit.
Horizontal strokes should be avoided. They may cause the explorer to run parallel to the deposit so it will not be detected. Point is directed toward JE- very dangerous!
Extend strokes at least 1/2 way across the interproximal surfaces.
Roll the explorer in your fingers to maintain adaptation
Use wrist action, NOT finger action

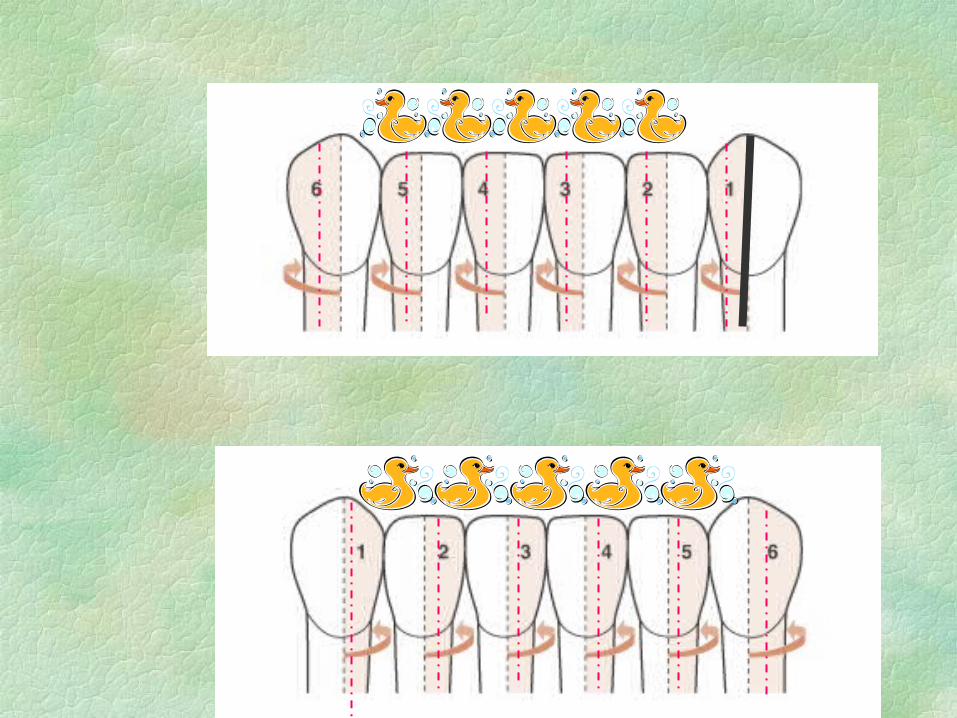
ExploringPracticing exploring techniques
Posterior techniques
The following slides will give you an example of different degrees of calculus build up:


![TEKS describe heterogeneous and homogeneous mixtures.[.6D] explain the similarities and differences between heterogeneous and homogenous mixtures.[.6E]](https://img.pdfslide.net/doc/110x75/56649e835503460f94b84bb5/teks-describe-heterogeneous-and-homogeneous-mixtures6d-explain-the-similarities.jpg)