Embed Size (px)
Citation preview
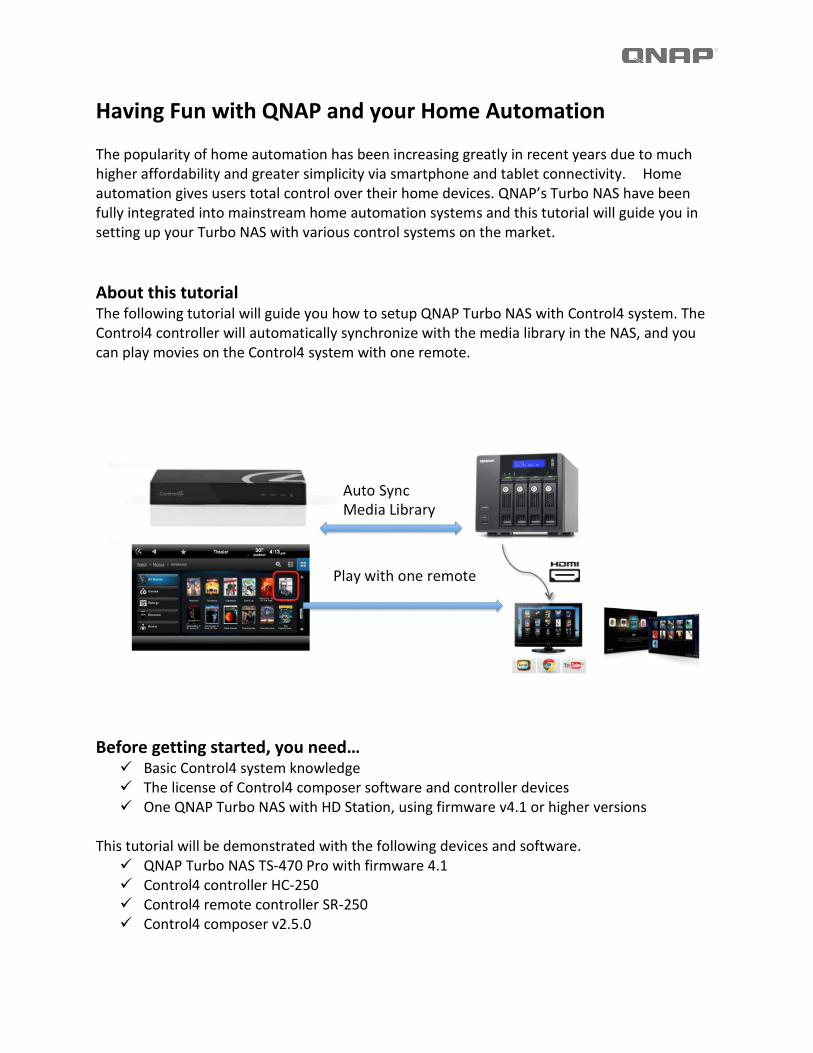
Having Fun with QNAP and your Home Automation The popularity of home automation has been increasing greatly in recent years due to much higher affordability and greater simplicity via smartphone and tablet connectivity. Home automation gives users total control over their home devices. QNAP’s Turbo NAS have been fully integrated into mainstream home automation systems and this tutorial will guide you in setting up your Turbo NAS with various control systems on the market.
About this tutorial The following tutorial will guide you how to setup QNAP Turbo NAS with Control4 system. The Control4 controller will automatically synchronize with the media library in the NAS, and you can play movies on the Control4 system with one remote.
Before getting started, you need…
Basic Control4 system knowledge The license of Control4 composer software and controller devices One QNAP Turbo NAS with HD Station, using firmware v4.1 or higher versions
This tutorial will be demonstrated with the following devices and software.
QNAP Turbo NAS TS-470 Pro with firmware 4.1 Control4 controller HC-250 Control4 remote controller SR-250 Control4 composer v2.5.0
Contents
1. Setup controller HC-250 .............................................................................................................3
2. Enable zigbee server on HC-250 ..................................................................................................5
3. Setup remote controller SR-250 ..................................................................................................7
4. Install the driver in the composer ...............................................................................................8
5. Setup network attached storage............................................................................................... 10
6. Manually scan media content (Optional) .................................................................................. 12
7. Install HD Station & Control4 QPKG .......................................................................................... 13
8. Setup HD station driver in Control4 composer .......................................................................... 15
9. Setup IR mapping and HDMI mapping between TV and devices................................................. 18
10. Enable Media Library on Turbo NAS ..................................................................................... 21
11. Setup XBMC remote access on Turbo NAS ............................................................................ 22
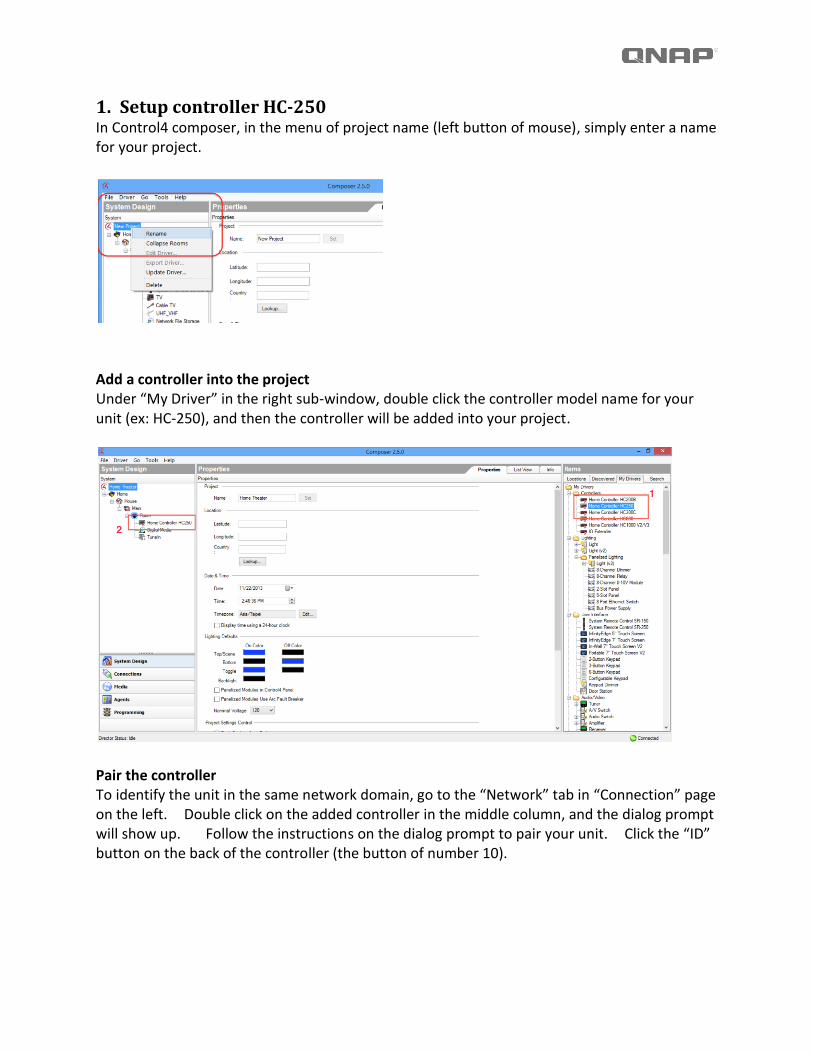
1. Setup controller HC-250 In Control4 composer, in the menu of project name (left button of mouse), simply enter a name for your project.
Add a controller into the project Under “My Driver” in the right sub-window, double click the controller model name for your unit (ex: HC-250), and then the controller will be added into your project.
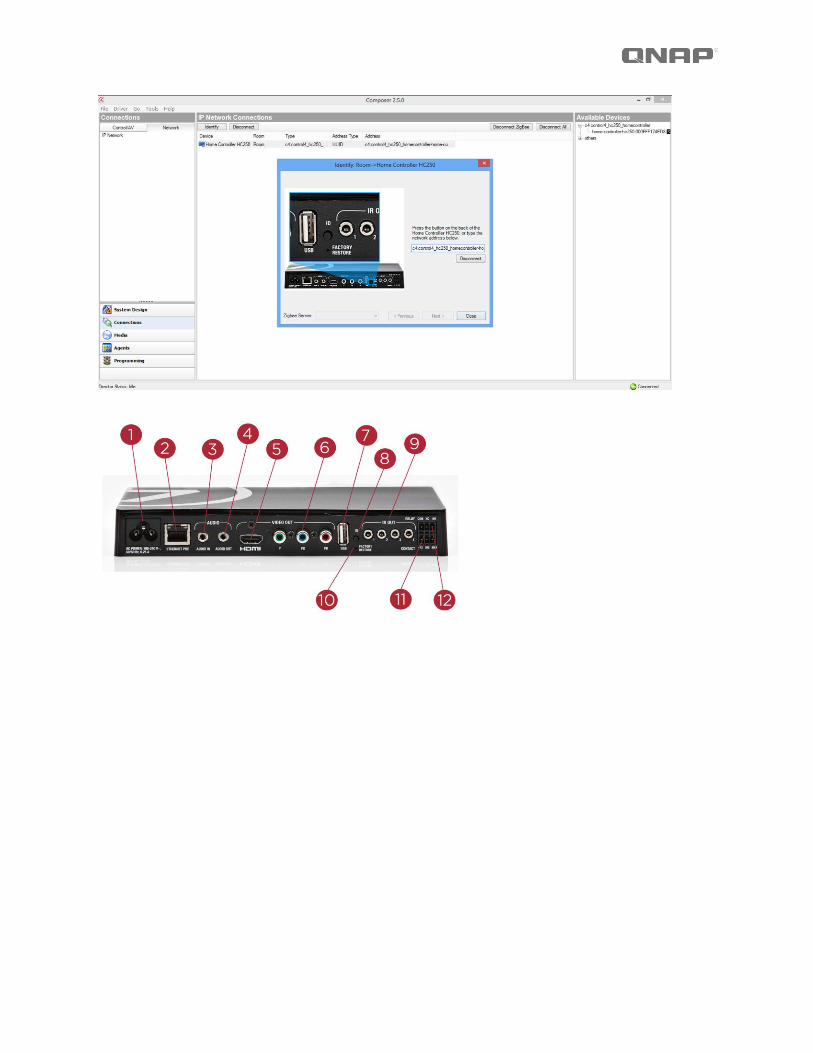
Pair the controller To identify the unit in the same network domain, go to the “Network” tab in “Connection” page on the left. Double click on the added controller in the middle column, and the dialog prompt will show up. Follow the instructions on the dialog prompt to pair your unit. Click the “ID” button on the back of the controller (the button of number 10).
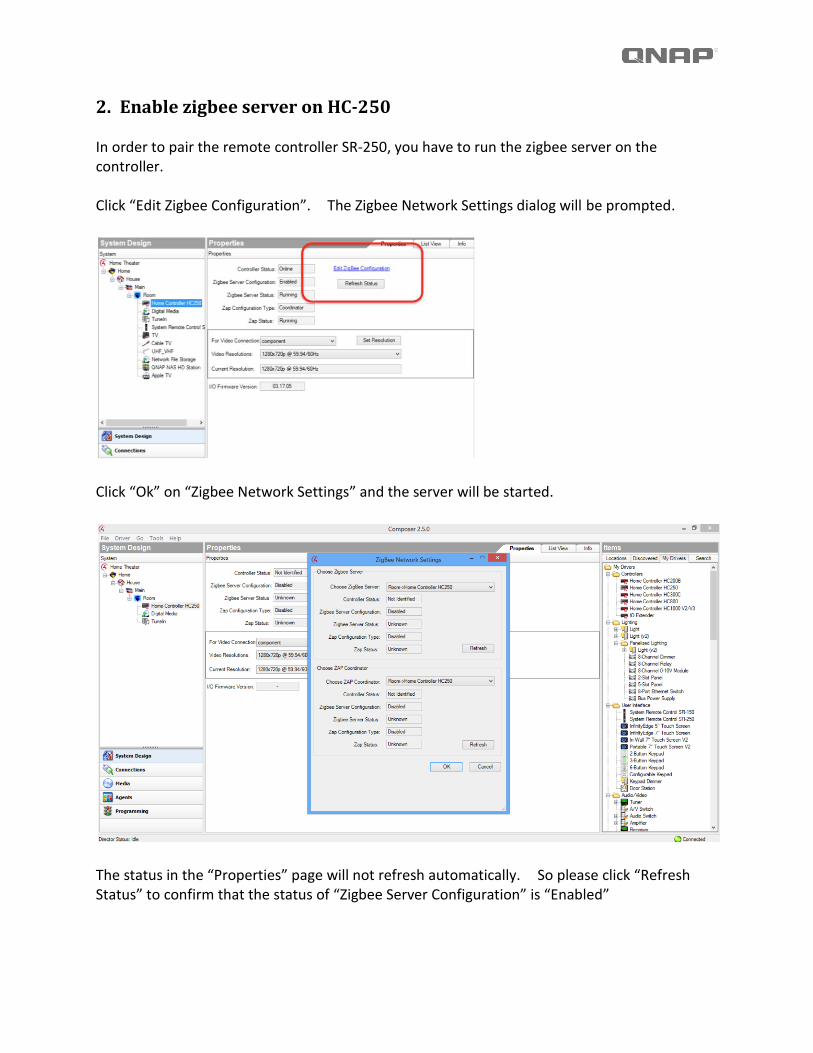
2. Enable zigbee server on HC-250 In order to pair the remote controller SR-250, you have to run the zigbee server on the controller. Click “Edit Zigbee Configuration”. The Zigbee Network Settings dialog will be prompted.
Click “Ok” on “Zigbee Network Settings” and the server will be started.
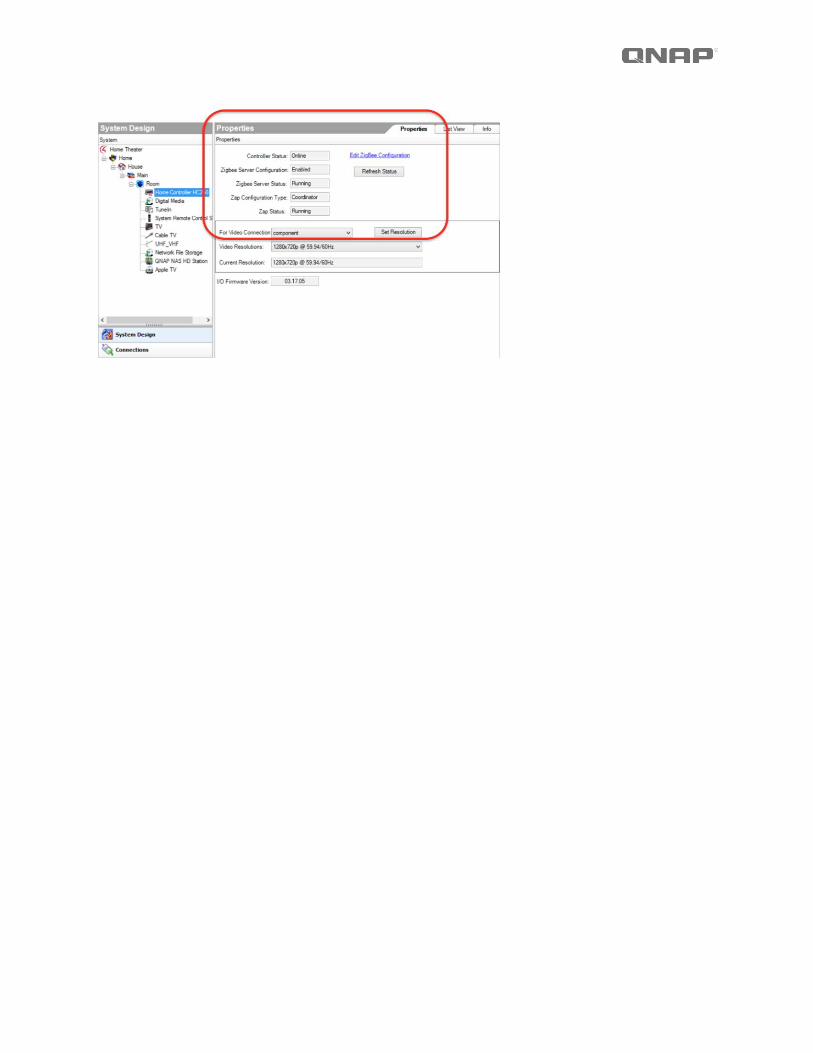
The status in the “Properties” page will not refresh automatically. So please click “Refresh Status” to confirm that the status of “Zigbee Server Configuration” is “Enabled”
3. Setup remote controller SR-250 Please refer the following link to configurate the system remote control SR-250 http://www.control4.com/documentation/Composer_Pro_User_Guide/configure_system_remote_control_v3,_sr-250.htm
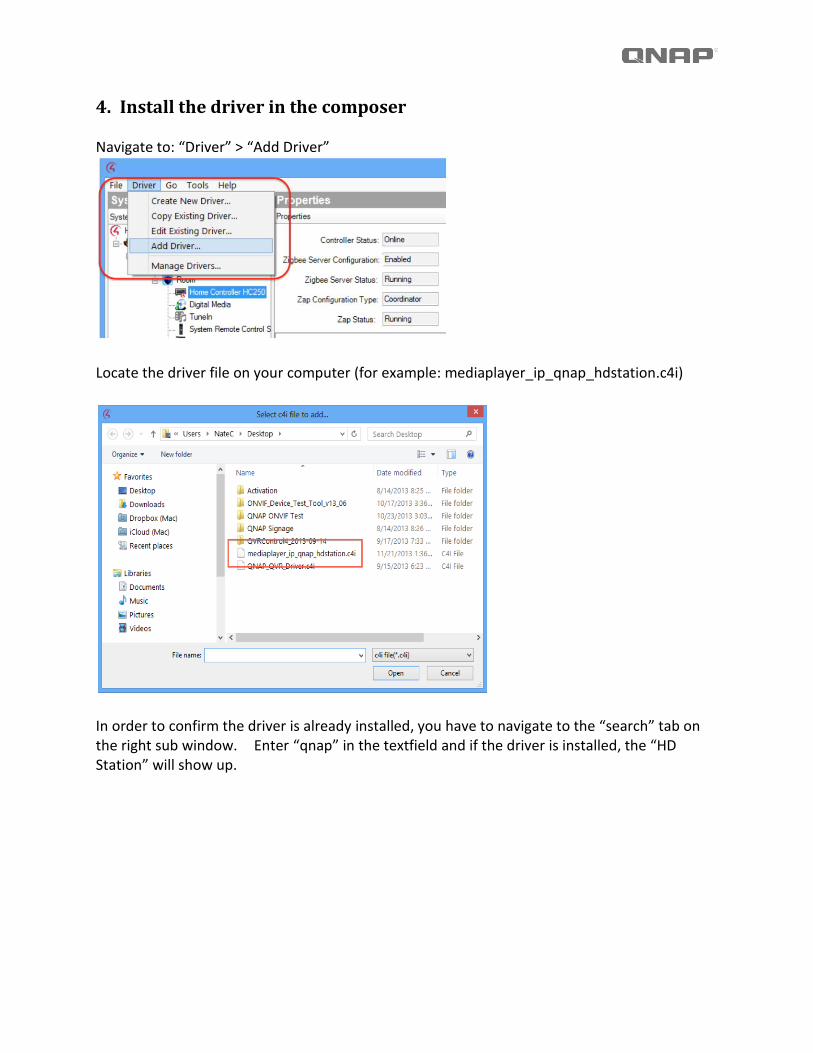
4. Install the driver in the composer Navigate to: “Driver” > “Add Driver”
Locate the driver file on your computer (for example: mediaplayer_ip_qnap_hdstation.c4i)
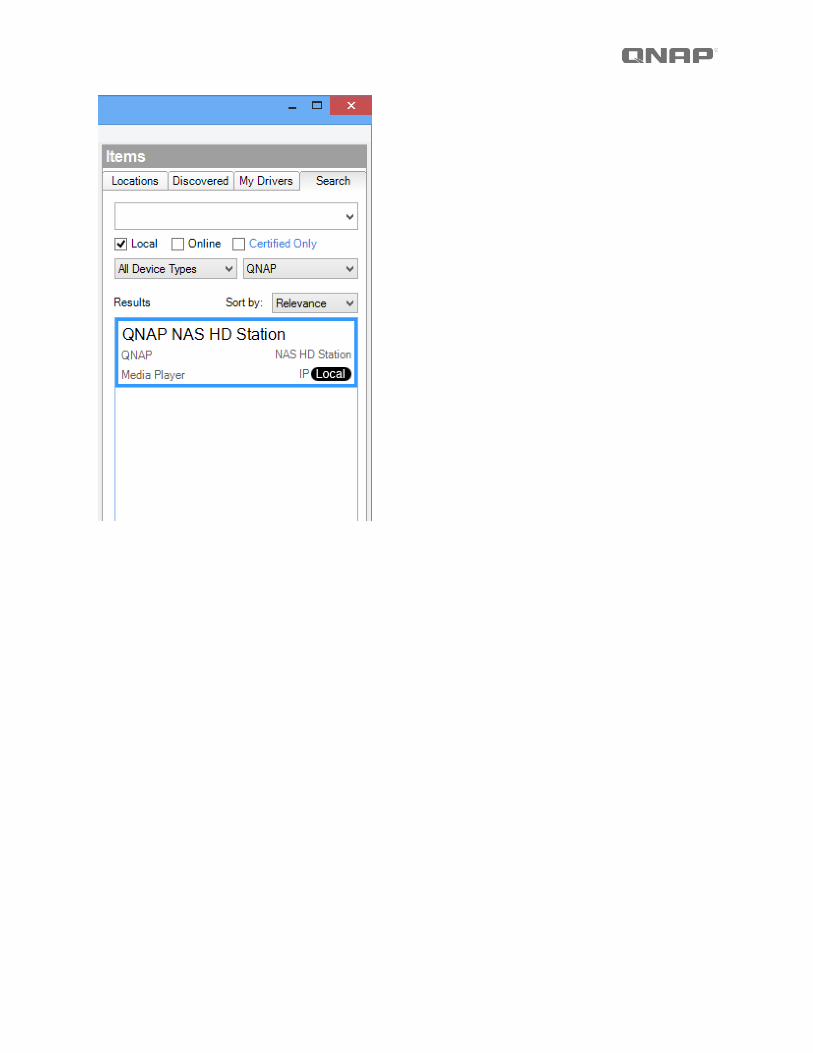
In order to confirm the driver is already installed, you have to navigate to the “search” tab on the right sub window. Enter “qnap” in the textfield and if the driver is installed, the “HD Station” will show up.
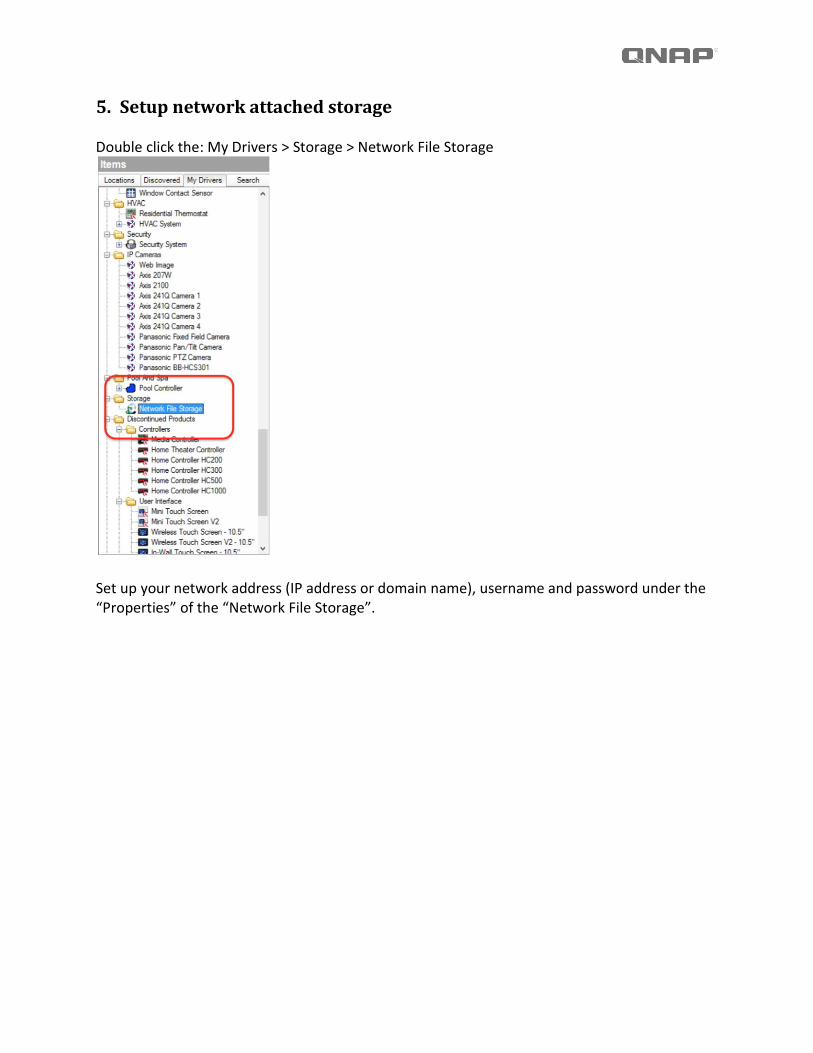
5. Setup network attached storage Double click the: My Drivers > Storage > Network File Storage
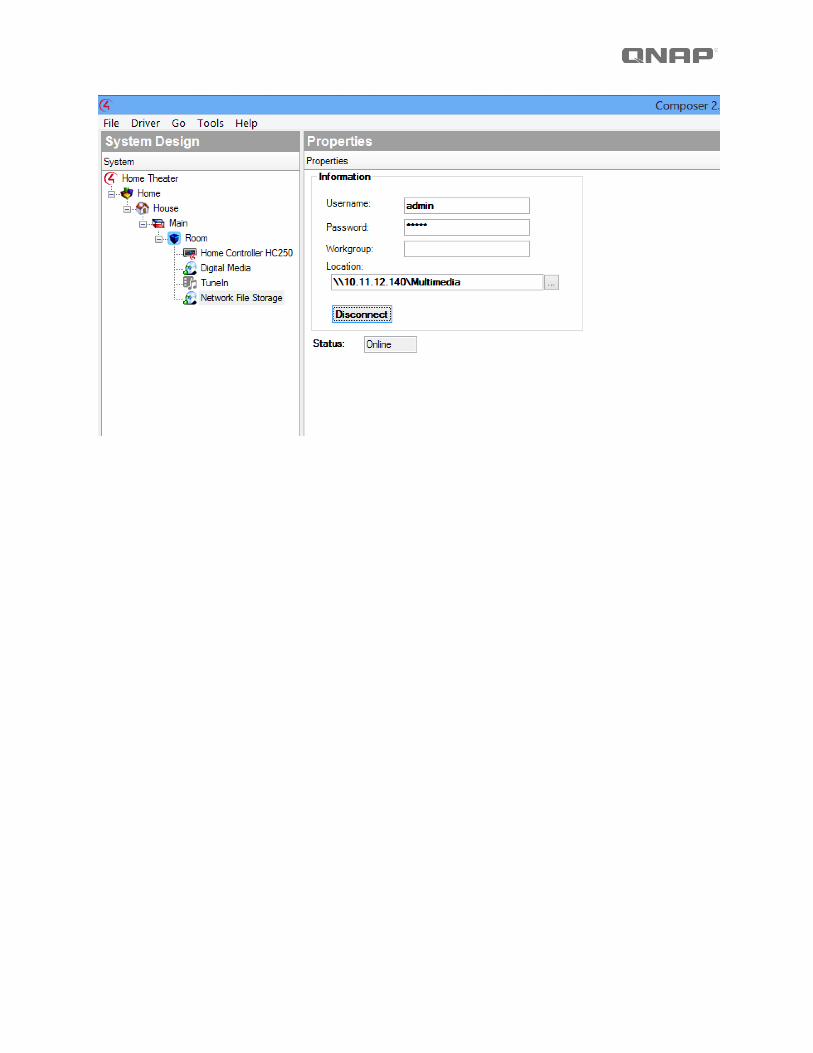
Set up your network address (IP address or domain name), username and password under the “Properties” of the “Network File Storage”.
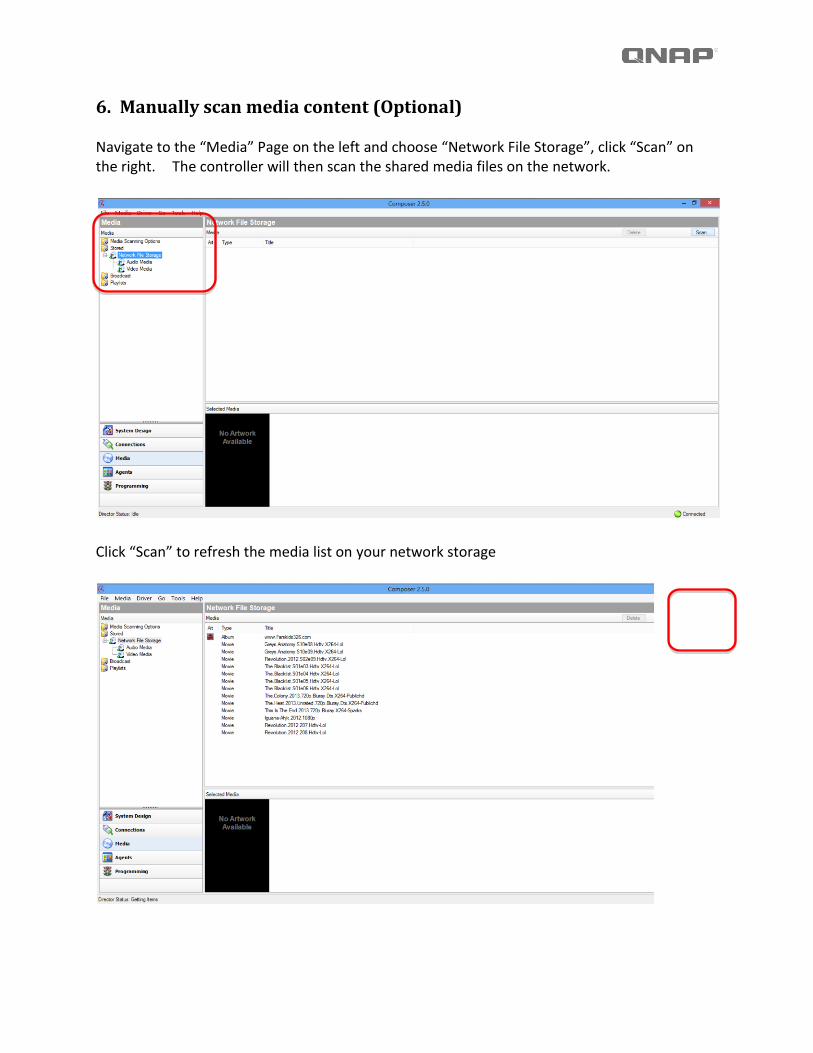
6. Manually scan media content (Optional) Navigate to the “Media” Page on the left and choose “Network File Storage”, click “Scan” on the right. The controller will then scan the shared media files on the network.
Click “Scan” to refresh the media list on your network storage
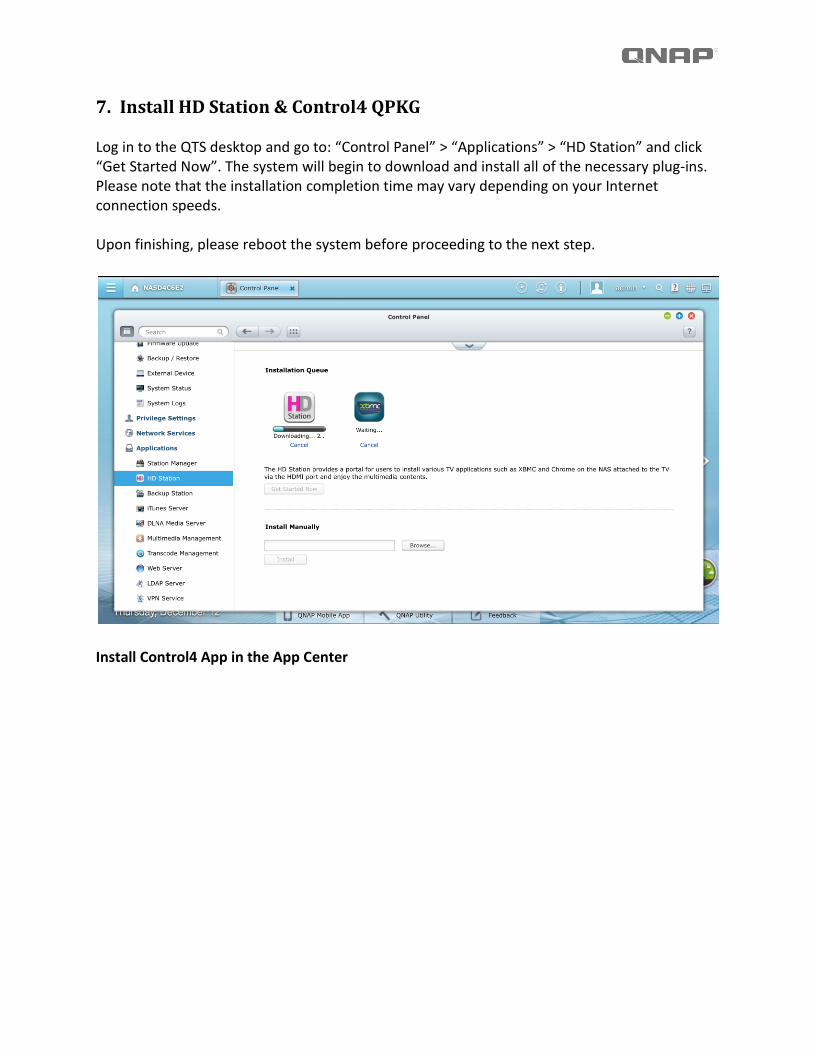
7. Install HD Station & Control4 QPKG Log in to the QTS desktop and go to: “Control Panel” > “Applications” > “HD Station” and click “Get Started Now”. The system will begin to download and install all of the necessary plug-ins. Please note that the installation completion time may vary depending on your Internet connection speeds. Upon finishing, please reboot the system before proceeding to the next step.
Install Control4 App in the App Center
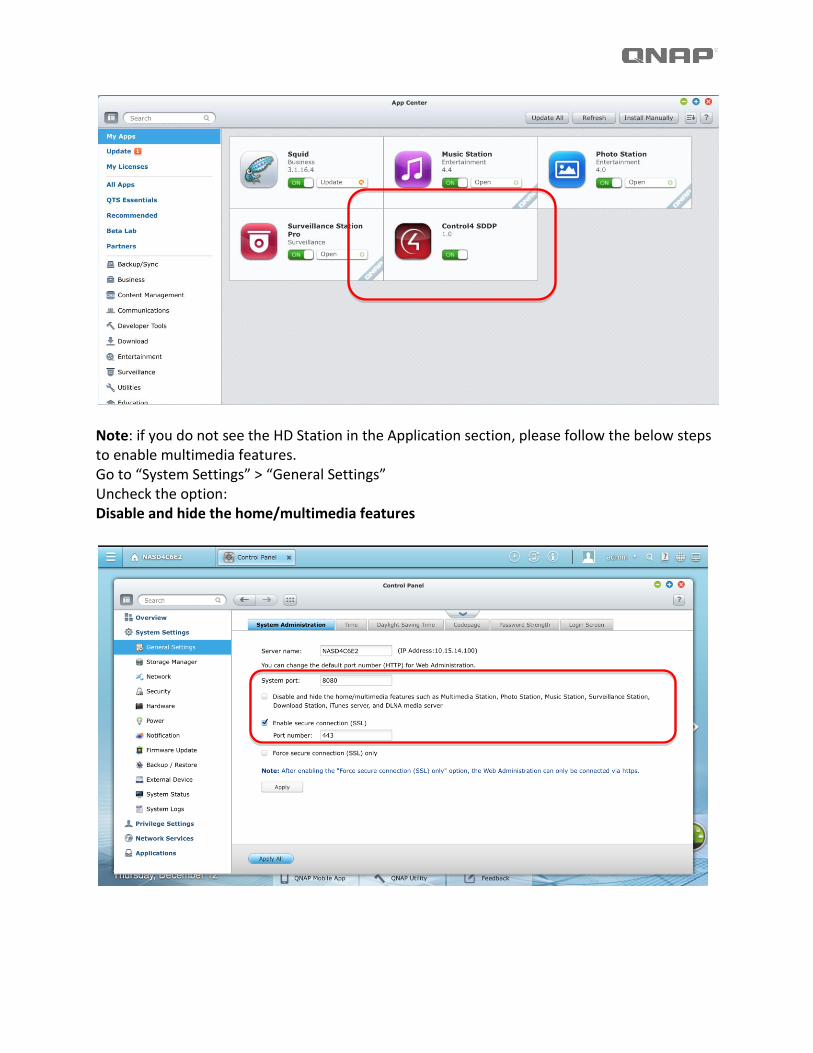
Note: if you do not see the HD Station in the Application section, please follow the below steps to enable multimedia features. Go to “System Settings” > “General Settings” Uncheck the option: Disable and hide the home/multimedia features
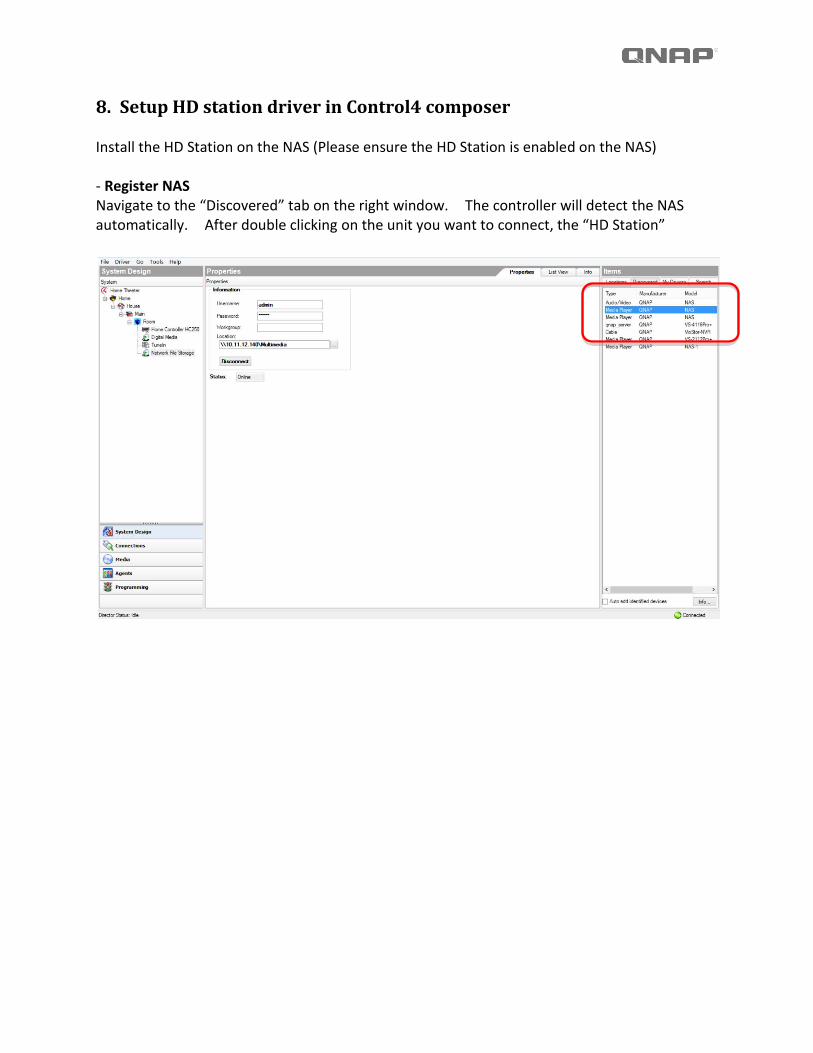
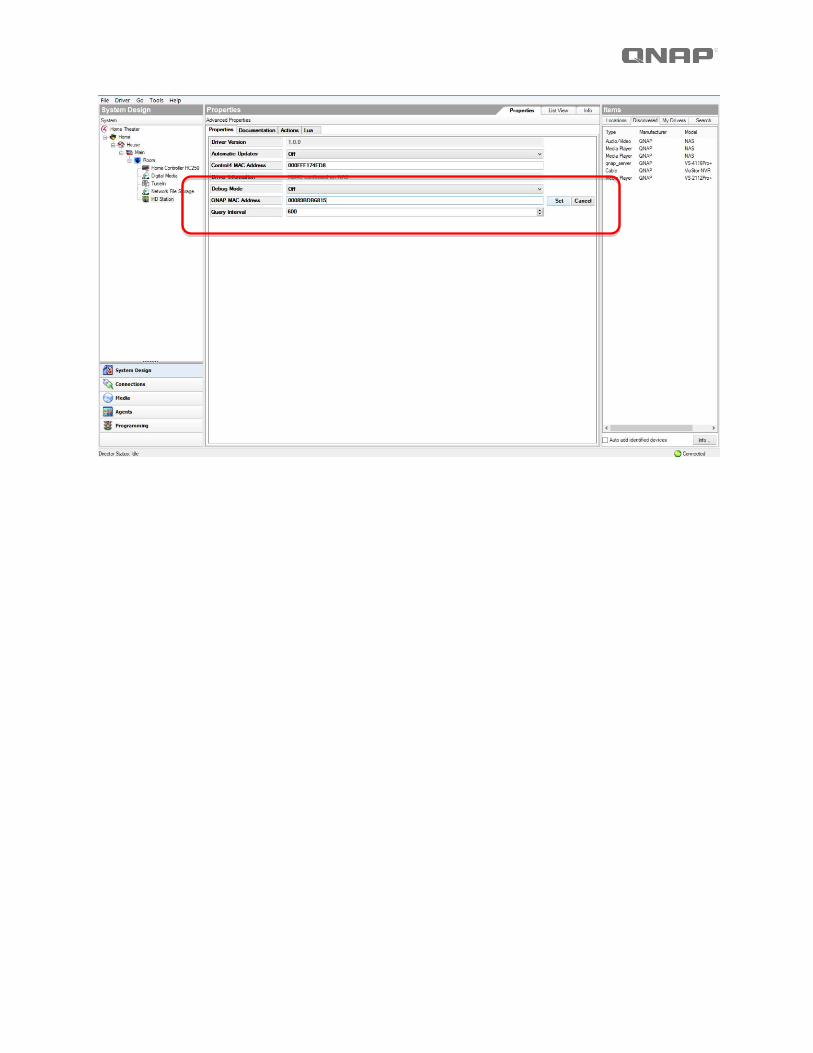
8. Setup HD station driver in Control4 composer Install the HD Station on the NAS (Please ensure the HD Station is enabled on the NAS) - Register NAS Navigate to the “Discovered” tab on the right window. The controller will detect the NAS automatically. After double clicking on the unit you want to connect, the “HD Station”
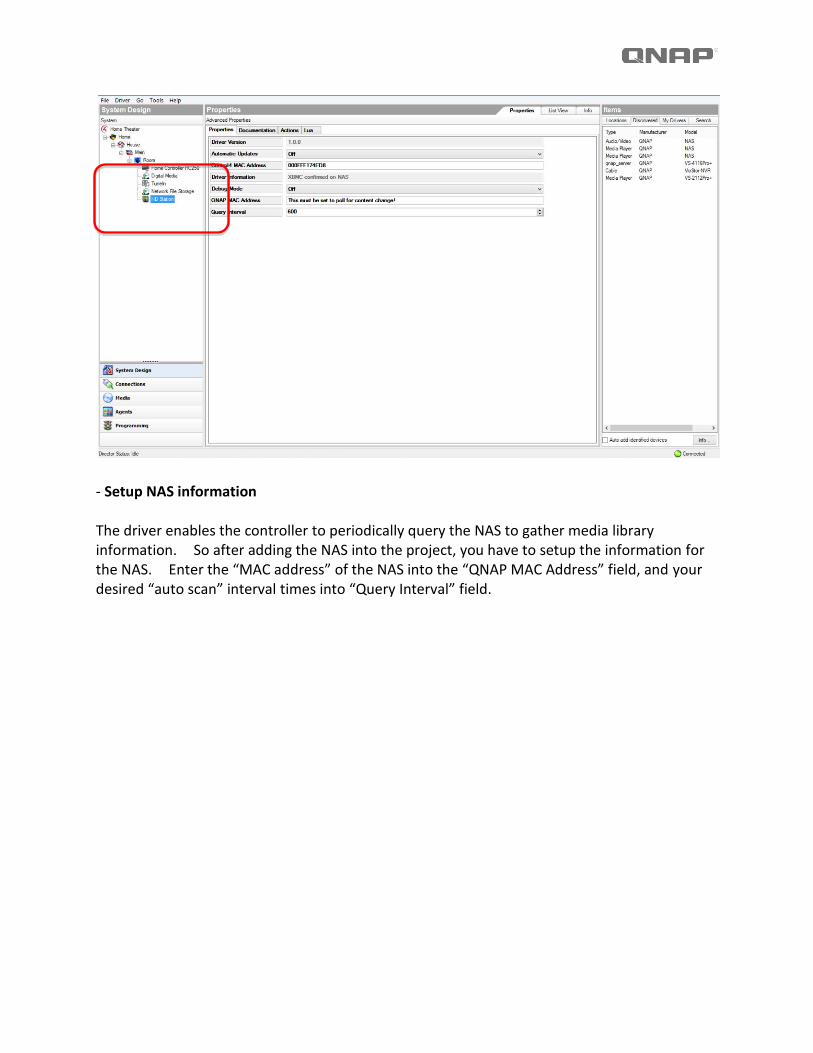
- Setup NAS information The driver enables the controller to periodically query the NAS to gather media library information. So after adding the NAS into the project, you have to setup the information for the NAS. Enter the “MAC address” of the NAS into the “QNAP MAC Address” field, and your desired “auto scan” interval times into “Query Interval” field.
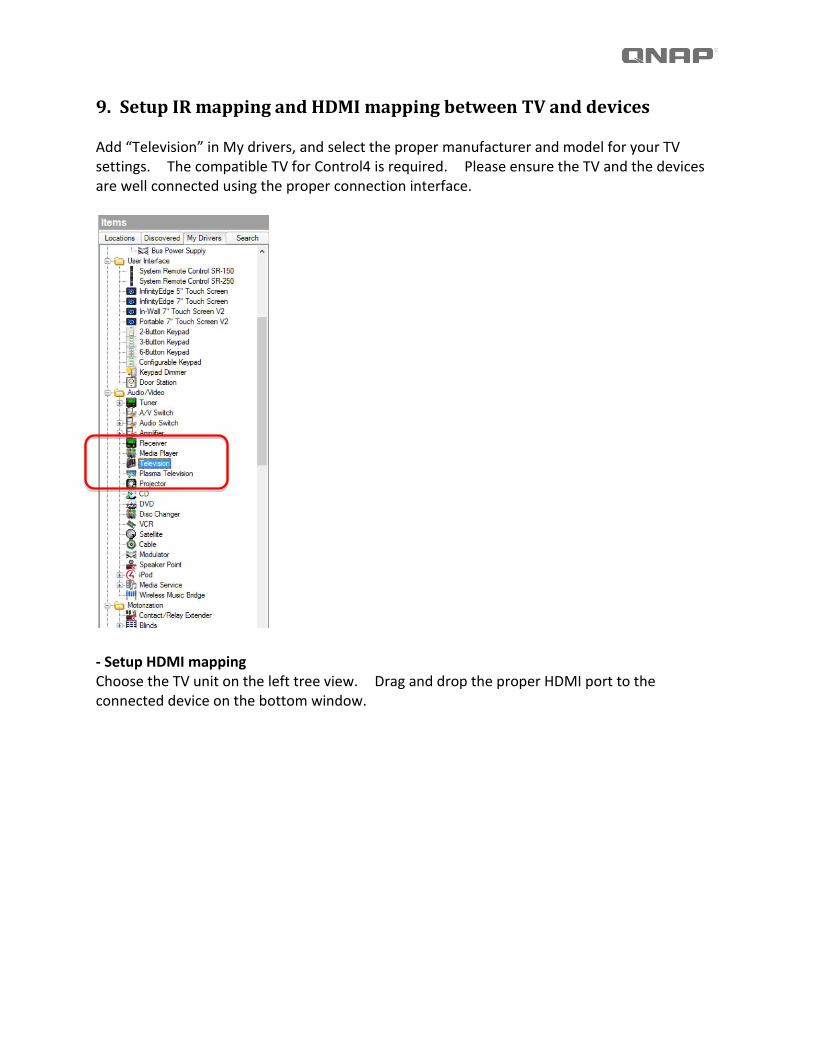
9. Setup IR mapping and HDMI mapping between TV and devices Add “Television” in My drivers, and select the proper manufacturer and model for your TV settings. The compatible TV for Control4 is required. Please ensure the TV and the devices are well connected using the proper connection interface.
- Setup HDMI mapping Choose the TV unit on the left tree view. Drag and drop the proper HDMI port to the connected device on the bottom window.
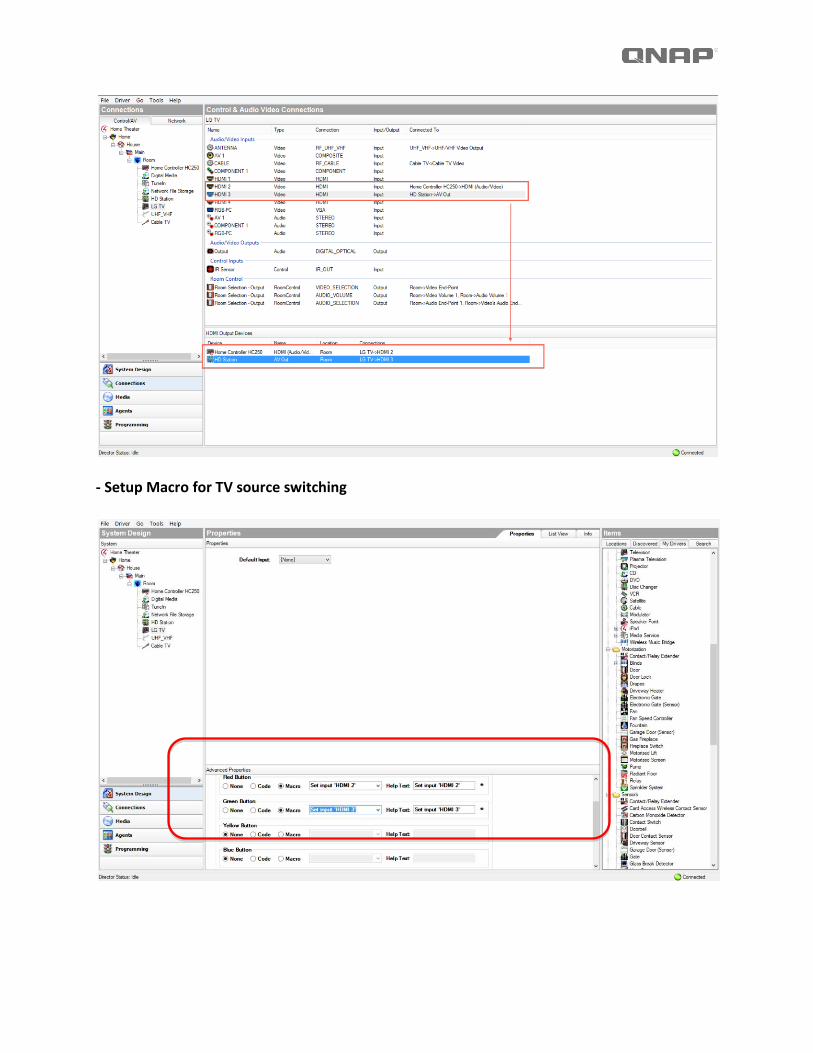
- Setup Macro for TV source switching

Just like setting HDMI mapping, drag the IR sensor from TV connections to the proper IR out port in the bottom window.
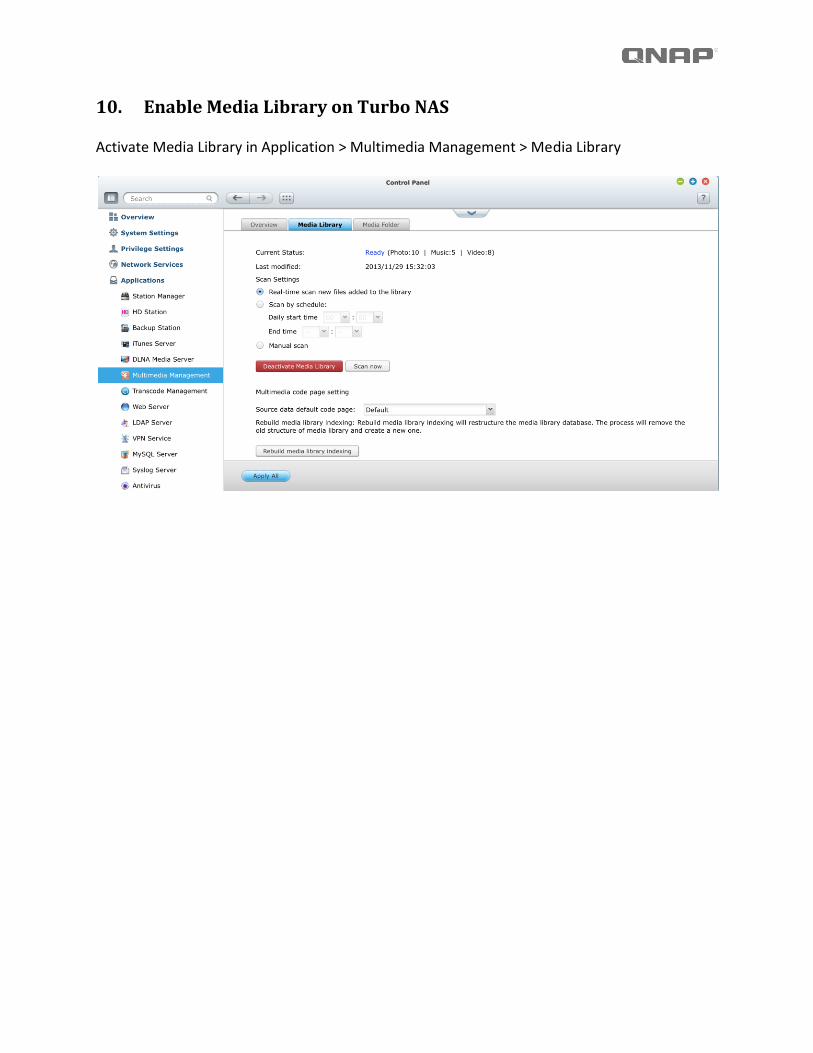
10. Enable Media Library on Turbo NAS Activate Media Library in Application > Multimedia Management > Media Library
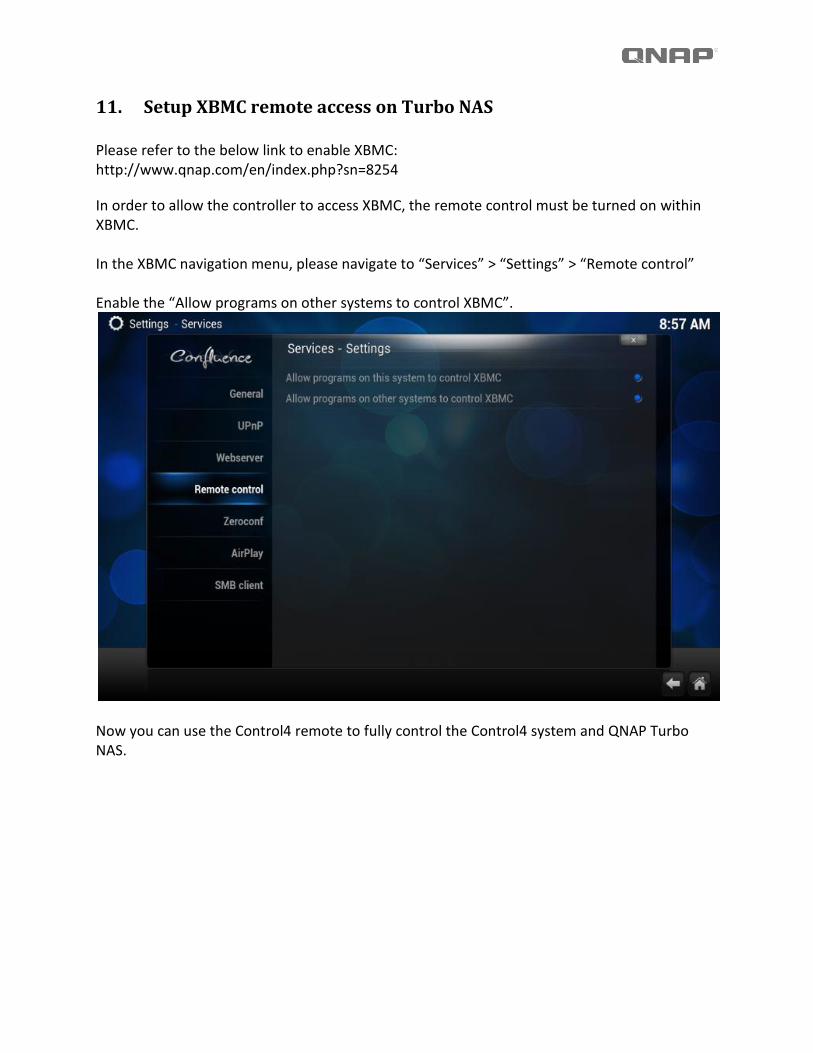
11. Setup XBMC remote access on Turbo NAS Please refer to the below link to enable XBMC: http://www.qnap.com/en/index.php?sn=8254
In order to allow the controller to access XBMC, the remote control must be turned on within XBMC. In the XBMC navigation menu, please navigate to “Services” > “Settings” > “Remote control” Enable the “Allow programs on other systems to control XBMC”.
Now you can use the Control4 remote to fully control the Control4 system and QNAP Turbo NAS.