Embed Size (px)
Citation preview

Please read this manual carefully prior to using your new system. Please keep this manual accessible for future use.
High Quality Starter and Alarm Systems
We sincerely appreciate you purchasing our vehicle starter and alarm systems. Our starter and alarm systems are produced with strict quality control and international standards, and includes a series of test including; extreme temperature, shocks, vibration and dropping. As a result, we are certain that you will be completely satisfied with our products.

LED
[Remote Outside Name]
Color LCD Displays
Button I
Button II
Button III
Button IV
Hook
Charger Connector
Window
▶Start Button( only)
[Accessories]
▶Computer USB Connector
▶Cigar Jack Connetor
▶ LF Module
▶ Remote Case ▶ Hand Strap
▶Antenna Module

※Please take these safety precautions.
1. Please read our Limited Warranty and Disclaimerinformation located at the back of this manual prior tousing.
2. It is not recommended installing this systen into aconvertible vehicle with a manual transmission.
3. We are not responsible for any injury or other liabilityresulting from the wrongful use of this system
4. When using remote start, place the gear in the Parkedor Neutral position, and set the Emergency brake orFoot brake
5. In manual transmission vehicles; Do Not remote startin any position other than Neutral. We are notresponsible for any damages or consequenceresulting from this.
6. The transmitting (TX) and receiving (RX) variesdepends on the radio signal environment. Range andresponse time will vary.
7. In the unlikely event of a defective product, do notopen, repair or modify the system. Ask the seller forrepair or replacement.
8. We shall not be responsible for any theft or damage toyour vehicle, since this is a subsidiary and convenientsystem only.
9. Please note that some functions described in thismanual are optional functions and may not beavailable on this model.
Safety Information

GreetingRemote Outside NameSafety InformationLCD Displays …………………………………………………… 6Remote Button Functions …………………………………… 8
1. Lock/Unlock (Arm/Disarm) ……………………………… 91-1 Door Lock (Arm) …………………………………………… 91-2 Door Unlock (Disarm) ……………………………………… 9
2. Passive …………………………………………………… 102-1 Auto Arming ………………………………………………… 102-2 Manual Arming …………………………………………… 11
3. Remote Start ……………………………………………… 113-3 Emergency Brake (Option Setting) ……………………… 123-4 Preventing Remote Start for your safety ………………… 123-5 Diagnosing Problems with auto start……………………… 12
4. Start Button (E7III-B only) ……………………………………… 134-1 Ignition ON ………………………………………………… 134-2 Ignition OFF ………………………………………………… 134-3 OFF↔ACC↔ON↔OFF ………………………………… 14
5. Trunk Open ……………………………………………… 155-1 Trunk Open ………………………………………………… 155-2 Trunk Sensing (Option Setting) …………………………… 15
6. Query Function …………………………………………… 157. Panic mode ……………………………………………… 168. Mute ……………………………………………………… 169. Valet ……………………………………………………… 1710. Driving Door Lock(Ignition Lock) ……………………… 1811. Hold ……………………………………………………… 1812. Shock senser by-pass ………………………………… 1813. Smart Door ……………………………………………… 1914. Reserve Time Change ………………………………… 2015. Turbo …………………………………………………… 20
CONTENTS

16. Power (On/Off) ………………………………………… 2117. Vibration (On/Off) ……………………………………… 2218. Second Car Function …………………………………… 2219. Real Time Remote Paging Functions ………………… 22
19-1 Owner Call Mode ………………………………………… 2319-2 Shock Sensing Report Mode …………………………… 2319-3 Theft report mode ……………………………………… 24
20. Auxiliary Output(Optional Installation) ………………… 2420-1 Aux1 ……………………………………………………… 2420-2 Aux2 ……………………………………………………… 24
21. Other Remote Functions ON/OFF Mode ……………… 2522-1 Current Time Change …………………………………… 2522-2 Reserved Time Change ………………………………… 25
22. Adjusting the sensitivity of shock sensor ……………… 2623. Reservation Mode(Manual Transmission Vehicle) …… 26
23-1 What is "Reservation mode"? …………………………… 2623-2 Automatic Reservation Mode(Default Setting) ………… 2724-3 Manual Reservation Mode(Option setting) …………… 28
24. Easy Door Lock(Optional) ……………………………… 2824-2 How to input the 4 digit password ……………………… 2824-3 Door Lock/Unlock ………………………………………… 2924-4 LED Display ……………………………………………… 29
25. Option Mode 2 ………………………………………… 3026. Car battery voltage check ……………………………… 3127. Parking timer check …………………………………… 3128. Charging time alert ……………………………………… 3129. To check charging statue from the remote …………… 3230. Reset …………………………………………………… 32

6 / USER'S GUIDE
[LCD displays]
CAUTIONUse of this system is for car start and alarm purpose only.Since this system is a precise instrument that is fragi le and susceptible to damage from external shock, do not drop the unit, and keep it away from children. Do not keep the remote near excessive humidity or water, as it is not water proof.
LCD Icon LCD Function
Transmitted
Transmitting
Reservation mode (Manual transmission only)
Door Lock (Arm)
Door Unlock (Disarm)
Panic Mode
Vibration On/Off
Trunk open

USER'S GUIDE / 7
LCD Icon LCD Function
Parking Light
Door open
Shock OFF
Timer
Remote Start
Valet
Passive
Turbo
Clock
Owner call mode is set
Someone calling car owner
Driving door lock(Ignition Lock)
Battery Meter
Shock
N/A
Second Car
Smart Door

8 / USER'S GUIDE
( + )
( + ) -
2 Way
I
II
ⅢIV
I -
Ⅱ-
Ⅲ-
IV-
I+ II
I + III
I + IV
II + III
II + IV
III + IV
(I+ II) -
(I + III) -
(I + IV) -
(II + III) - -
(II + IV) -
(III + IV) -
(I + II) - -
(I + III) - -
Press(sec)
0.5
0.5
0.5
0.5
0.5
2
2
2
2
0.5
0.5
0.5
0.5
0.5
0.5
2
2
2
2
2
2
5
5
Function
Door Lock(Arm)
Door Unlock(Disarm)
AUX1
AUX2
Query Function
Panic Mode
Remote Start ON/OFF
Trunk Open
Vibration ON/OFF
Mute ON/OFF
Valet ON/OFF
Driving Door Lock
Passive ON/OFF
Button Hold ON/OFF
Shock Sensor ON/OFF
Current Time Change
Reserve time Change
Option Mode
Smart Door ON/OFF
Reservation Start
Turbo ON/OFF
Animation
Second car
--
--
+
+
++
+
-
1 Way

USER'S GUIDE / 9
* 0.5 sec. : Press the button for 0.5 second.* 2 seconds(-) : Press the button for 2 seconds till it operates
at your vehicle* + : Press 2 buttons simultaneously.
1. Lock/Unlock (Arm/Disarm)
1-1 Door Lock(Arm)
:Once, :Once ( Only)
You can lock and arm your vehicle by pressing button I for 0.5 second. The siren chirps and the parking lights flash once each and Red LED on the remote is turned on. Also, the sidemirror is being folded.(Optional installation)
NoteThe remote chirps 7 times, and blinks icon on the remote to warn that the battery of your vehicle discharges, if you lock the doors while the tail lights are turned on during arming.
1-2 Door Unlock (Disarm)

10/ USER'S GUIDE
:Twice, :Twice
You can open and disarm your vehicle by pressing button I for 0.5 second.The siren chirps and the parking light flash twice each and Green LED is turned on. Also, the sidemirror is being u n f o l d e d ( O p t i o n a l installation).The numbers of remote
chirps and parking light flashes indicate the status of your vehicle while parking (Alarm models only).- Two chirps and two parking light flashes indicates there
were no problems while parking.- Four chirps and four parking light flashes on the remote
indicates there has been an alarm during the arming stage.
2. Passive2-1 Auto Arming
① You can act ivate thisfunction by pressing button(II+III) simultaneously for0.5 second. Then, Icon
appears on the LCD and this system rearmsautomatically.
② The doors lock and rearm30 seconds after the engines

USER'S GUIDE /11
is turned off and the doors are closed.
③ During auto start mode, The doors lock and rearm 30seconds after the doors are closed.
During Valet mode, auto arming mode is not activated.
2-2 Manual Arming
The Icon disappears on LCD and doors are locked and unlocked by remote only, if you press button (II+III) simultaneously for 0.5 second.The doors automatically lock and arm, if you don't open the doors more than 1 minute after you disarm by remote.
3. Remote Start
3-1
:Once, :Once
Press and hold button II, for 2 seconds, the remote chirps and the parking lights flash once each.If it fai ls , the system automatically repeats remote start a maximum of 3 times.When the vehicle starts, appears on the transmitter and the remaining engine running time is displayed on
the remote.The default setting of the engine running time is 15 minutes. You can change it to 25 minutes by using optional

12/ USER'S GUIDE
settings. 3- 2
Open the door, insert the key, and turn it to ON position after remote start, If you want to stop the auto starting, press the foot brake.
3-3 Emergency Brake(Option setting)
Manual transmission vehicles need Reservation mode to remote start, in this case, the emergency brake must be ON.
3-4 Preventing Remote Start for your safety
The following cases prevent your vehicle from auto starting for your safety.① If trunk is open② If hood is open (Exept for E7III-B)③ If emergency brake is off (for manual transmission
vehicles only) ④ If panic mode is activated ⑤ If valet mode is activated (Refer to ‘Valet’)
3-5 Diagnose problems with auto start
If there is a problem in auto start, you will hear 3 chirps and the cause for the error will be indicated by the number of chirps and the parking lights flash within 3 seconds, when you try the remote start (Refer to the table).
Vehicle RemoteNumber of
chirps or Parklight Flash
Cause of error Reasonof fail
1 Engine on Start

USER'S GUIDE /13
2 Key On Start
3 Door open Door
4 Trunk open Trunk
5 Foot brake on Foot brake
6 Hood open (Exept for E7III-B) Hood
7 Reservation Off (Manual transmission) Reservation
8 Emergency brake Off (Manual transmission) Brake
4. Start Button ( Only)
Push button Ignition ON/OFF
4-1 Ignition ON
While pressing the foot brake on, press start button for 1 secound. Also, the parking brake (Auto transmission) or the emergency brake (manual transmission) should be on at this stage. You will see the engine get started and on the button, it has the red colored
light on (Stop).Once you release the parking brake (Auto transmission) or emergency brake (manual transmission) to drive, the red colored light is off.
4-2 Ignition OFF

14/ USER'S GUIDE
① While pressing the foot brake on,press start button for 1 secound.Also, the parking brake (Autotransmission) or the emergencybrake (manual transmission)should be on at this stage. you will see the engine is off and thebutton gets the light on (Start).
② In case you are not able to stop the engine due to theproblem from the parking brake (Auto transmision) orthe emergency brake (manual transmission), press start button for 4 seconds while pressing the foot brake on.Then the engine will stop.
NoteWhen the parking brake (Auto transmission) or the emergency brake (Manual transmission) is broken, check whethen the red colored light is on (Stop). And then press the start button for about 4 seconds (while foot brake on) to start, until you confirm the engine is running. If you want to stop the engine while you are outside of your vehicle, 1) check the red colored light is on ‘stop’, 2) open the doorand press the button II for 2 seconds.
4-3 OFF → ACC → ON → OFF
① ACC : While not pressing the foot brake on, press thestart button on time, the button gets the light on ACC,which enables you use the air-conditioning and caraudio etc.
② ON : If you press one more while not pressing the footbrake on, the button gets the light on OFF.
USER'S GUIDE /15
③ To stop the engine by force : If you are not able to stop the engine by pressing button, please open and closethe car door 7times during 12 seconds. Then theengine will stop.
5. Trunk Open
:2회, :2회
5-1 Trunk Open
Press and hold button III for 2 seconds to open the trunk. Parking lights will flash twice and the siren will chirp twice.
5-2 Trunk sensing (option setting)
While your trunk is open, you cannot lock the doors (or arm
the vehicle.
6. Query Function
Query function allows you to check the statues of yourvehicle including car battery voltage, car temperature andparking timer (it indicates how many minutes and hourshave passed after the system is armed). By pressing button IV for 0.5 second, it shows the parking timer and theneither car temperature or car battery voltage (the other one appears as the same button job is repeated).

16/ USER'S GUIDE
Response
Status Remote Siren from the vehicle
Engine Running, Armed Be, bip Be×4 Chirp×3
Enging is Not Running, Armed Bip Be×4 Chirp
Enging is running, Disarmed Be, bip×2 Be×4 Chirp×4
Engine is not running, Disarmed Bip×2 Be×4 Chirp×2
The icon and chirping sounds indicates the statues. If you are within transmitting distance to receive the signal for shock, theft and easy call function, you will receive the response shown on the table.
7. Panic Mode
Press and hold button I for 2 seconds to activate this mode.Your vehicle will lock the doors if unlocked, the siren willactivate, and the parking lights will flash for 90 seconds.This function is used for warning under emergencysituations, when you feel you are in danger.Press and hold button I for 2 seconds to deactivate.
8. Mute
Press button (I+II) simultaneously for 0.5 second to enter thismode, and then all the Icons displayed on LCD disappear and the siren does not operate.The siren, however, operates in other modes ((example)Panic, Shock, Theft) even in Valet mode.

USER'S GUIDE /17
In this mode, Siren does not operate during arming and disarming only.If you press button (I+II) simultaneously for 0.5 second again, all the Icons will appear again with siren operate.
9. Valet
P r e s s b u t t o n ( I + I I I ) simultaneously for 0.5 second to enter this mode.The 2 features operating in valet mode are Door lock / unlock by pressing button I and Quer y funct ion by pressing button IV. (All the other functions do not operate
temporarily.)Valet mode is useful when loaning your vehicle or having it serviced (example, car wash, parking lot and auto repair shop).Press button (I+III) simultaneously for 0.5 second again to exit.
NoteIf you want to use this mode manually, insert the key into the ignition and rotate it(press the start button in model) 4 times between ON & OFF for 4 times within 10 seconds.
18/ USER'S GUIDE
10. Driving Door Lock (Ignition Lock)
P r e s s b u t t o n ( I + I V ) simultaneously for 0.5 second to enter this mode.Then, this mode operates with display of Icon on LCD.This programmable option enables your vehicle to automatically lock the doors in 30 seconds after the vehicle
has been started with a key while all the doors are closed.On the contrary, the vehicle will automatically unlock the doors upon pulling the key out from the ignition.Please press button (I+IV) simultaneously for 0.5 second again to exit.
11. Hold
P r e s s b u t t o n ( I I + V ) simultaneously for 0.5 secound to lock all the buttons. Then
appearing on LCD, indicates button-pressing became inactive. To make it active again, press (II+V) one more.
12. Shock sensor by-pass
12-1

USER'S GUIDE /19
P r e s s b u t t o n ( I I I + I V ) simultaneously for 0.5 second to deactivate the shock sensor.You can find the Icon on LCD to confirm this mode.This function can be used, when you do not want it.example) when you sleep in the vehicle, when baby sleeps
in the vehicle, when you let your pet stay in the vehicle.
12-2
Press button (III+IV) simultaneously for 0.5 second again to activate shock sensor.The Icon on LCD disappears to confirm this.If your vehicle is shocked while your vehicle is armed and the engine is turned off, your vehicle chirps and sends signal to your remote with the blinking icon on LCD.
13. Smart Door
Press button II+III for 2 seconds, then icon appers on the LCD to cancell it, press II+III for 2 seconds once again. The doors are unlocked when the car owner with the remote approaches the vehicle and locks the vehicle after 10 seconds when the car owner
20/ USER'S GUIDE
with the remote is far enough away from the vehicle. * This function is unavailable when the door is open or the
vehicle is running.
14. Reserve Time Change
Press button (I+III) for 2 seconds and then timer flashes.Press button I for 0.5 second to increase “hour” and press it continually to increase “hour” continually.Press button II for 0.5 second to increase “minute” and press it continually to increase
“minute” continually.If you press button (I+III) for 2 seconds again after setting the timer, the display of timer does not flash to inform you that setting is complete and it displays the current time again.In case that you do not press any button for 20 seconds, it automatically displays the current time.
15. Turbo
15-1 ( Model)
Press (III+IV) for 2 seconds, then the icon blinks. In this mode, engine continues to run for a selected time of 30 seconds or 2 minutes (you can change the setting in Option menu).

USER'S GUIDE /21
This is very useful for turbo charged vehicles to cool down the mechanical components after driving.
15-2 ( Model)
Press (III+IV) for 2 seconds, then the icon blinks. In this mode, engine continues to run
for a selected time of 30 seconds or 2 minutes (you can change the setting in Option menu). ① Please follow the step on the remote as above.② While the engine is running, activate the parking brake
(auto transmission) or the emergency brake (manual transmission)
③ While pressing the foot brake on, press start button for 1 secound and then release. The remote chirps and the parking lights flash once each.
④ The engine keeps running and the start button’s LED rotates diagonally.
⑤ Open the door and close⑥ The engine additionally runs for 30 seconds (or 2
minutes, changed in option)Note
If you want immediate stop afer drive such as in gas station, please press the food brake on and press start button for 4 seconds. The engine will stop immediatley.
16. Power (On/Off)

22/ USER'S GUIDE
When remote is not in use for a long time, press button IV for 5 seconds to turn it off. To turn back on, press button IV for 5 seconds once again.
17. Vibration (On/Off)
Press button IV for 2 secounds(Vibration on), and press button IV for 2 seconds again to turn it off.
18. Second Car Function
Second car function is used to operate two vehicles with Easycar remote car starter or alarm system with one remote. You must register a remote in both vehicles to function. ① Press and hold button(II+III)
for 5 seconds. The icon appers on the remote to operate.
② To deactivate, press and hold button(II+III) for 5 seconds once again.
19. Real Time Remote Paging Functions
Owner Call, Theft report and Shock Sensing report

USER'S GUIDE /23
whenever one of these is triggered, it is reported to the remote with beeps and flashing icons on LCD.In particular, Theft is reported with continuous beeps and with one of the icons such as door,trunk and hood in consideration that you didn't hear the beeps.
19-1 Owner Call Mode
This mode allows other people to call you by knocking 2 times on
the front window of the vehicle.You can recognize this call through Icon on your remote with 4 times of bell sound.If you press button IV for 0.5 second to confirm it, your
vehicle flashes the parking lights once.
19-2 Shock Sensing Report Mode
This function reports to your remote that your shock sensor on the vehicle has been triggered during the arming mode. When the shock sensor is triggered, your remote makes warning sounds until you press button I to stop the warning.
24/ USER'S GUIDE
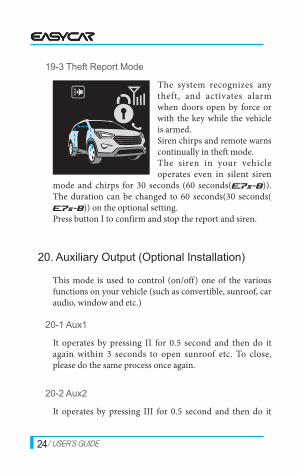
19-3 Theft Report Mode
The system recognizes any theft, and activates alarm when doors open by force or with the key while the vehicle is armed. Siren chirps and remote warns continually in theft mode.The siren in your vehicle operates even in silent siren
mode and chirps for 30 seconds (60 seconds( )). The duration can be changed to 60 seconds(30 seconds(
)) on the optional setting.Press button I to confirm and stop the report and siren.
20. Auxiliary Output (Optional Installation)
This mode is used to control (on/off) one of the various functions on your vehicle (such as convertible, sunroof, car audio, window and etc.)
20-1 Aux1
It operates by pressing II for 0.5 second and then do it again within 3 seconds to open sunroof etc. To close, please do the same process once again.
20-2 Aux2
It operates by pressing III for 0.5 second and then do it

USER'S GUIDE /25
again within 3 seconds to open sunroof etc. To close, please do the same process once again.
21. Other Remote Functions ON/OFF mode
21-1 Current time Change
Press button (I+II) for 2 seconds and then current time flashes.Press button I for 0.5 second to increase “hour” and press it continually to increase “hour” continually.Press button II for 0.5 second to increase “minute” and press to cancel the setting, press button IV for 0.5 second.If you press button (I+II) for 2 seconds again after setting the current time, the display of current time does not flash to inform you that setting is complete.In case that you do not press any button for 10 seconds, it automatically displays the current time.
21-2 Reserved Time Change
Press button (I+III) for 2 seconds and then timer flashes.Press button I for 0.5 second to increase “hour” and press it continually to increase “hour” continually.Press button II for 0.5 second to increase “minute” and press it continually to increase “minute” continually.If you press button (I+III) for 2 seconds again after setting the timer, the display of timer does not flash to inform you that setting is complete and it displays the current time again.In case that you do not press any button for 10 seconds, it automatically displays the current time.
26/ USER'S GUIDE
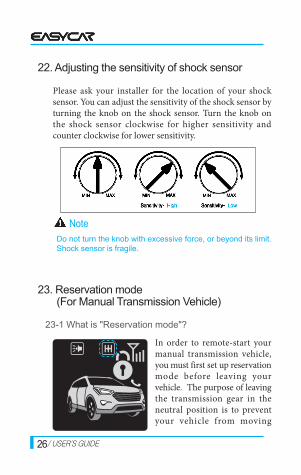
22. Adjusting the sensitivity of shock sensor
Please ask your installer for the location of your shock sensor. You can adjust the sensitivity of the shock sensor by turning the knob on the shock sensor. Turn the knob on the shock sensor clockwise for higher sensitivity and counter clockwise for lower sensitivity.
NoteDo not turn the knob with excessive force, or beyond its limit. Shock sensor is fragile.
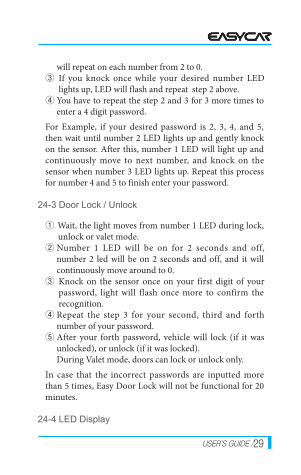
23. Reservation mode (For Manual Transmission Vehicle)
23-1 What is "Reservation mode"?
In order to remote-start your manual transmission vehicle, you must first set up reservation mode before leaving your vehicle. The purpose of leaving the transmission gear in the neutral position is to prevent your vehicle from moving

USER'S GUIDE /27
forward while remote starting. You should set reservation mode each time you turn off your vehicle.
1) Important requirements to activate Reservation mode :① The transmission must be in neutral position② All doors must be closed③ Do not set the reservation mode with passengers or pets
inside the vehicle2) Remote Start does not operate without setting
Reservation mode. If you press and hold button II to remote start your vehicle without setting the Reservation mode, remote chirps 3 times and parking lights flash 3 times. Parking lights will flash 7 times more to let you know that it failed to remote start.
NoteRESERVATION MODE IS NECESSARY FOR YOUR OWN SAFETY.
23-2 Automatic Reservation Mode (Default Setting) ( )
How to set Automatic Reservation mode: ① Place the transmission in neutral position before you
turn the engine off② Activate emergency brake③ Press the start button for 1 secound, the engine will
keep running. Also the start button’s LED rotates diagonally.
④ Exit the vehicle and close all doors⑤ The engine will automatically turn off and reservation
mode is completedThe reservation mode is, however, cancelled if doors are

28/ USER'S GUIDE
open or valet mode is activated. Once cancelled, you have to start your vehicle with the manual key and repeat the step 1 to 5 to restore the Reservation mode.
23-3 Manual Reservation Mode (Optional setting)
Please follow the steps ①~② at 24-2, press the button II for 2 seconds, open and close the door. The next step is same as the rest of 24-2.
24. Easy Door Lock (option)
24-1
The door can be locked or unlocked without remote or the vehicle key. If the 4 digit password is inputted, it arms or disarms the vehicle.10 blue LEDs display various functions: such as arming, disarming, valet mode, and
emergency status. If anyone knocks twice on the LEDs on the windshield, remote receives the call signal (optional Owner call mode).
24-2 How to input the 4 digit password
① Turn the engine off, and place the car key to the ONposition. Open the door and wait until the light movesfrom number 1 LED.
② Number 1 LED will be on for 2 seconds and OFF, and it
USER'S GUIDE /29
will repeat on each number from 2 to 0.③ If you knock once while your desired number LED
lights up, LED will flash and repeat step 2 above.④ You have to repeat the step 2 and 3 for 3 more times to
enter a 4 digit password.
For Example, if your desired password is 2, 3, 4, and 5, then wait until number 2 LED lights up and gently knock on the sensor. After this, number 1 LED will light up and continuously move to next number, and knock on the sensor when number 3 LED lights up. Repeat this process for number 4 and 5 to finish enter your password.
24-3 Door Lock / Unlock
① Wait, the light moves from number 1 LED during lock, unlock or valet mode.
② Number 1 LED will be on for 2 seconds and off, number 2 led will be on 2 seconds and off, and it will continuously move around to 0.
③ Knock on the sensor once on your first digit of your password, light will flash once more to confirm the recognition.
④ Repeat the step 3 for your second, third and forth number of your password.
⑤ After your forth password, vehicle will lock (if it was unlocked), or unlock (if it was locked). During Valet mode, doors can lock or unlock only.
In case that the incorrect passwords are inputted more than 5 times, Easy Door Lock will not be functional for 20 minutes.
24-4 LED Display

30/ USER'S GUIDE
① During Arming: From (9) to(3), the 5 LEDs will sequentially flash five times left to right, and right to left (9-0-1-2-3-2-1-0-9-0). After that, LEDs will be onfor 2 seconds each from number 1 to 0, and you can enter yourpassword, while each LED is on for 2 seconds.
② If alarm was triggered during the arming mode, LEDwill flash rapidly in sequence above after the sirenduration.
③ During the siren duration, all LED will f lashsimultaneously
④ During disarming: (0) Led will flash five times every 3seconds.
⑤ During Valet mode: (0) Led flashes every 10 second.
25. Option Mode 2
You can make option change easily by looking at icons ondisplay.
Button I Option Button II Icon
0 Start Time 15 mins ↔ 25 mins
1 Turbo Time 30 sec ↔ 2mins
2 Siren Dunation 30 sec ↔ 60 sec
3 Preheating Time 4 ↔ 7 ↔ 10 ↔ 15

USER'S GUIDE /31
1) When you press the button I+III for 2 seconds, thesiren chirps and the parking lights flash once each.
2) Please press the button I for 0.5 second to move toanother option
3) Please press the button for II for 0.5 second to changethe option setting
4) Please press the button for III for 2 seconds to save thechange. The siren chirps and the parking lights flashonce each if the change is saved safely.
26. Car battery voltage check
Please press the button IV for 0.5 second to check carbattery voltage. It appears every other time after inside car temperature.
27. Parking timer check
If you press the button IV for 0.5 second, parking timer(hour, minutes) appears first before car temperature, carbattery voltage. it indicates how many minute and hourshas passed after the system is armed.
28. Charging time alert
Normal working

32/ USER'S GUIDE
The display is 50% dimmer
Button vibration not available
Button vibration not available
· No reception from car. Transmitting fromremote is okay
·The display is 75% dimmer ·Battery shortage warning
29. To check charging statue from the remote
Being charged : Red LEDFinished : Blue LED
30. Reset
Press the reset hole with sharp needle for 0.5 second when the remote shows some problem.
RESET

1095 Budapest, Mester utca 34.Tel.: *218-5542, 215-9771, 215-7550, 216-7017, 216-7018 Fax: 218-5542
Mobil: 30 940-1970, 20 949-2688
1141 Budapest, Fogarasi út 77.Tel.: *220-7940, 220-7814, 220-7959,220-8881, 364-3428 Fax: 220-7940
E-mail: [email protected] Web: www.delton.hu
www.delton.huMobil: 30 531-5454, 30 939-9989
USER'S GUIDE /33