Embed Size (px)
Citation preview
HomeCanning
THOMAS ONSDORFF
AGNES M. KOLSHORN
Federal Cooperative Extension ServiceOregon State College
Corvallis
Extension Bulletin 742 December 1953
Cooperative Extension Work in Agriculture and Home Economics, F. E. Price, director.Oregon State College and the United States Department of Agriculture cooperating.Printed and distributed in furtherance of Acts of Congress of May 8 and June 30, 1914.
Table of ContentsPage
Fundamentals of Canning 3
Methods of Canning 6
Containers 7
Processing Equipment 12
Storage Problems 16
Detecting Spoilage 18
Common Difficulties in Canning 19
Canning Fruits and Tomatoes 20
Canning Vegetables 30
Canning Meat 37
Canning Poultry 39
Canning Fish 41
Processing in Tin Cans 44
Publications Available on Subjects Related to Home FoodPreservation 48
Index 49
Home CanningTHOMAS ONSDORFF
andAGNES M. KOLSHORN*
MIOMECANNING makes possible a variety of delicious, whole-
some foods in the diet and reduces the cost of good living. Homecanning wisely may be litnited to those foods that cannot be preservedsuccessfully by less costly or less laborious methods. Winter gardens,winter storage, and preservation by freezing involve less labor thancanning. Salting, curing, and drying usually are less expensivemethods of preservation.
In addition to the cash saving there is the important point thathome-canned foods are at hand and ready for use at any time. And,there is a fine sense of pride in using and serving home-canned foods.
Goals of the home canning program are :Safety for useFreedom from spoilageRetention of food valuesPalatability and attractivenessAmount and choice of foods carefully planned so that thefamily is assured enough for a year-round supplyA well-balanced selection for good nutrition.
Fundamentals of CanningApplication of adequate heat
In the air, water, and soil and on food and equipment aremicroscopic organisms that cause food to spoil. They must be de-stroyed by heat. Every particle of food within the jar or can mustbe brought to a sufficiently high temperature and held at that tempera-ture a sufficiently long time to destroy the bacteria and other or-ganisms that cause spoilage. Processing is the term applied to thisheating of food that brings about sterilization or conditions thatprevent the growth of organisms. Incomplete processing is a commoncause of spoilage of canned goods.
Almost all fruits, and tomatoes at good eating ripeness, containmany fruit acids. These acids are important in human nutrition andserve a very important function in home canning. When food con-tains acid, the microorganisms (yeast, molds, and bacteria) which
*Mr. Onsdorff is Associate Professor of Food Technology, Miss Kolshorn is ExtensionNutrition Specialist, Oregon State College. This bulletin is revised from and is to super-sede Extension Bulletin 689, now out of print.
EXTENSION BULLETIN 742
are on the food are destroyed easily at or near the temperatureof boiling water in a relatively short time Fruits and tomatoes arecanned easily and require no equipment other than what may befound in many home kitchens.
Nonacid and low-acid foods, such as meat, fish, poultry, and allvegetables except tomatoes, are canned safely only in a pressure can-ner. Many of the microorganisms which these foods may carry areexceedingly resistant to heat. The same organisms, if they were beingprocessed in jars with the acids of fruits or tomatoes, would bedestroyed easily. It is almost impossible to destroy, by any othermeans than pressure cooking or canning, the deadly bacterium ofclostridium botulinum, which is found in the soil of many states andover much of Oregon. A temperature of 240° F. (10 pounds steampressure) or higher is required to process these foods safely in areasonable time. The only way to get such temperatures is by useof a pressure canner.
Airtight sealJars must be sealed so tightly after processing that air, which
carries microorganisms, cannot enter. Lack of airtight seal is veryfrequently the cause of spoilage in jars and cans. Never open jarsafter processing to add more food or liquid.
CleanlinessCleanliness is one of the basic rules of successful canning-
everywhereevery time.Poor quality, old, or unclean food requires much longer proces-
sing than does good, fresh clean food. Processes given in thisbulletin are for good, fresh, clean food handled in a clean manner.In each case there is included a reasonable margin of safety forthose cases where conditions may not be ideal. These processing timesshould be followed carefully. Under no circumstances may the pro-cess for vegetables, meat, fish, or poultry be reduced.
Proper variety and maturity of produceMuch of the quality of canned foods will depend on the quality
of the raw produce used Often, certain varieties are far superior ina few ways, or in every way, to all other varieties for canning. Thiswill reflect in texture, color, and flavor or even in number of jarsfrom a given quantity. Every canner should learn from local un-prejudiced authorities, or from his own test packs, which are thebest varieties for canning. Why not insist on getting such bestvarieties ? Commonly offered market varieties often are inferior forcanning.
HOME CANNING
Maturity is important too. Flavor must be developed fully.Texture of the finished product may improve as the fruit or vegetableadvances in maturity up to a certain point, after which it may de-crease rapidly. Market fruits often are too immature for best canning.Vegetables on the market are often too mature.
Promptness in preserving fresh produce
The importance of freshness of fruits, vegetables, fish, and somemeats for canning cannot be overemphasized. Holding the producefor even a few hours at ordinary temperature may make appreciablechanges in the quality of the canned food. Corn, for example, willlose about half its sugar in 12 hours at room temperature. Flavor,too, disappears or changes rapidly. Some valuable nutritive qualitiesalso are lost.
To preserve food value, can foods very soon after they areharvested. Handle them in small lots at a time and proceed rapidlywith every step of the canning process. Keep food cool and venti-lated before canning. Precook vegetables for a short time and packwhile hot. Process in the containers rather than in the open kettle.Expose them as little as possible to the air, especially after peelingor cutting.
Use the liquid in which they were precooked to fill the con-tainer. Use this liquid when the can or jar is opened; it is goodfood. Eliminate as much air as possible from jar or can by thrustingknife blade down inside.
Besides the quality loss there is another serious problem thatcomes from delay in canning. This is what is known as "incipientspoilage." Spoilage organisms causing decay, fermentation, flavor,and other changes are always at hand and at work reducing thegwodness or actually spoiling the food which is to be preserved bycanning. Once these foods have been disturbed in nature by ourshelling, peeling, cutting, blanching, or otherwise preparing themthey are ready for the rapid development of many types of spoilageorganisms.
The type of spoilage resulting from delay during preparationis probably most often noticed in such foods as corn and peas.Unless they are handled very fast or kept very cold they quicklymay begin to smell sour. This is caused by the development of tre-mendous numbers of microorganisms. These large numbers ofspoilage organisms make the product extremely difficult to sterilize,and even if processed long enough to stop further apparent spoilage,it would be of very poor quality after canning. Remember, be cleanand work fast.
EXTENSION BULLETIN 742
Use of preservativesUse of so-called "canning powders" or food preservatives of any
kind in canning definitely is not a good practice. Their use is notrecommended under any condition. They may cause definite digestiveor other disturbances to the persons who eat foods processed withthem. They do not in any way improve the food and they are notneeded. Methods in this bulletin will provide excellent safe cannedfoods.
Acidifying canned foodsSometimes acids, notably vinegar and citric acid or lemon juice,
are added to foods during canning.No acids of any kind should be added to produce in order to
reduce the processing time. Acids, however, often are added to im-prove the flavor of fruits beneficially. They do have a tendency tofix and brighten the color of red and blue fruits.
Increasing the acidity of any food to be canned makes it possibleto kill the microorganisms which may cause spoilage of that foodwith lower temperature or in shorter processing time The processingtimes given in this bulletin for each food are based on normal con-ditions of that food. Sometimes the addition of acids to nonacid orlow-acid foods such as vegetables, meat, and fish are intended tomake them so acid that they can be processed by boiling water bathmethods. Enough acid to be effective would completely change thenature of the food.
This is not a practical method and definitely is not recommended.It would be impossible to always know the exact strength of the acidused and the exact amount needed. It is better to leave this procedureto the chemist.
Pickles, relishes, sauerkraut, and similar foods which are malewith added vinegar or by the lactic acid which develops in themduring their making are an entirely different matter. In these casesthe acid content is so great that it is the actual preservative undersuitable conditions.
Methods of Canning
For fruits and tomatoes hot or cold pack filling and processingby hot water bath method is recommended.
Pressure canner method is a must for all nonacid or low-acidfoods. Pressure sauce pans are not recommended for these foods.See page 15.
Open kettle methods are not recommended. They do not produceas good quality canned foods and are very subject to spoilage be-cause spoilage organisms enter the jar while it is being filled.
Steamer type canning equipment and oven canning are notrecommended for canning any food products. They are much toouncertain and often dangerous.
Tin canning (see pages 10 and 44) can be recommended if goodequipment is available and if the operator will become thoroughlyfamiliar with the details of adjustment and operation of the tin cansealer.
ContainersKnow your jars and cans and how to seal them. The two main
types of jar tops or closures are handled by opposite methods, asfollows
The closure with a separate rubber ring seals when the topis screwed or clamped down tightly. Since glass jars mightbreak if sealed before processing, the lid with this type ofclosure is screwed down only partly before processing. Itis screwed down completely after processing. In the case ofjars with a rubber ring and 2 wire bails, the smaller bail isleft up before processing and is pushed down after pro-cessing.
The other main type of closure is called the self-sealing.It has a metal lid edged with a sealing compound, and is heldin place by a metal screw band. cap or clamp. This type ofclosure seals as it cools after processing. Screw the bandfirmly tight or apply the clamp before processing. Do nottighten after processing. Discs with sealing compound shouldbe used only once.
The term "mason" refers to any jar with threads at the topthat is closed by screwing down a cap or band.
Each of these types of jars is available in several sizes fromhalf pint to half gallon. Some of them are also available in wide-mouth style.
Jars with separate rubber rings
Test jar for leakage before using by enclosing hot water, sealing,and inverting. Using 2 rubbers on a jar is not recommended. Thereare three types of jar which require separate rubber rings.
HOME CANNING

Rubber
Shoulder seal jar with porcelain lined cap (Figure 1),usually of zinc, has a rubber ring thatfits shoulder and seals at the shoulder.Some of these jars have a broad, flattop edge and can be sealed also at thetop of the jar, with self-seal type lids.Some have a narrow, rounded top edgewhich will not seal except with thetype of closure that seals at theshoulder. Lids that are bent slightlyoften may be bent back into shape byplacing on the jar without rubber andpressing down with pliers. This jarshould be opened by pulling out the
rubber with pliers, or inverting the jar in warm water to loosen thelid. Do not pry up the lid and dent the edge.
Before processing, fit rubber down smoothly on shoulder ofempty jar without unnecessary stretching. Pack jar, then screw capdown firmly and turn it back 1 inch, to allow release of any pressure.
After processing, complete the seal by screwing the cap downtightly as soon as you take the jar from the canner.
Wire bail type jar (Figure 2), has same size rubberring as standard mason, but the ringfits the ledge near the top of the jar.It has a glass lid held in place by 2wire bails, one fitting in a groove inthe lid. If the lid is too loose or tootight, remove the larger bail and bendit down or up in the middle untiladjusted for a firmly tight seal.
Wire boil
Before processing, fit rubber ring onthe ledge of the empty jar. Pack jar, Cl
apply lid, push long bail into the Figure 2.
groove on the top of the lid, and leave Wire bail type jarthe short wire bail up in a looseposition.
After processing, complete the seal by pushing the short baitdown against the jar as soon as you take it from the canner.
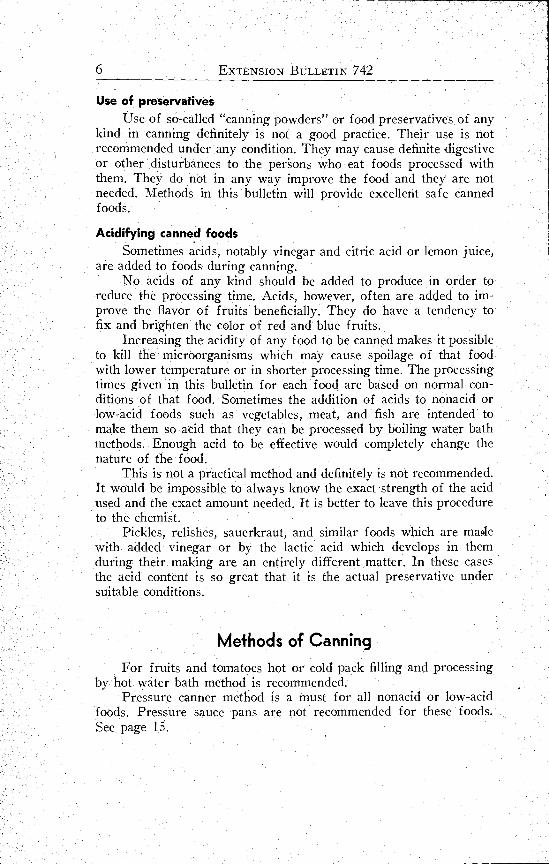
Three-piece glass-top closure (Figure 3), has a specialrubber ring of a smaller size than the standard mason and seals atthe top of the jar, which has a flat, smooth, broad surface for theglass lid. There is a metal screw band to fit standard mason jar.
Figure 1.
Shoulder seal jar
EXTENSION BULLETIN 742
Gloss lid
44=mr. RubberSeals here
HOME CANNING
It is safe to use this glass lid only onjars with flat, broad top edge. Usethe screw band only with glass lids,as it is too deep to produce a sealwith metal lids. Do not use the screwband made for self-seal jar (Figure4) ; these bands are too shallow.
Before processing, pack jar, fit rub-ber ring onto glass lid and place lidon jar, rubber side down. Screw metalband down tight, then, using yourthumb as a guide, turn band back al-most a quarter turn. Caution: If bandis not turned back far enough the jarmay become sealed and may break or explode.
Self-seal jarsSelf-seal jar
metal lid edged withjar when it starts toshallow metal screw
Figure 4.
Self .seal
Metalscrew bond
Metal lid withSealingcompound
Seals here
Glass lid
el=fg-- RubberSeats here
1!
Figure 3.
Three-piece glass-topclosure
After processing, screw the metal band down tight to completethe seal as soon as you take the jar from the canner.
Rubber ringsUse only high-quality rings to assure good seals on jars. Wash
all rings in hot, soapy water and rinse well, or follow manufacturers'directions.
Place scalded, hot, wet rings on jar before filling jar.Be sure to wipe the upper sealing surface of the ring after
filling the jar and before placing the lid.
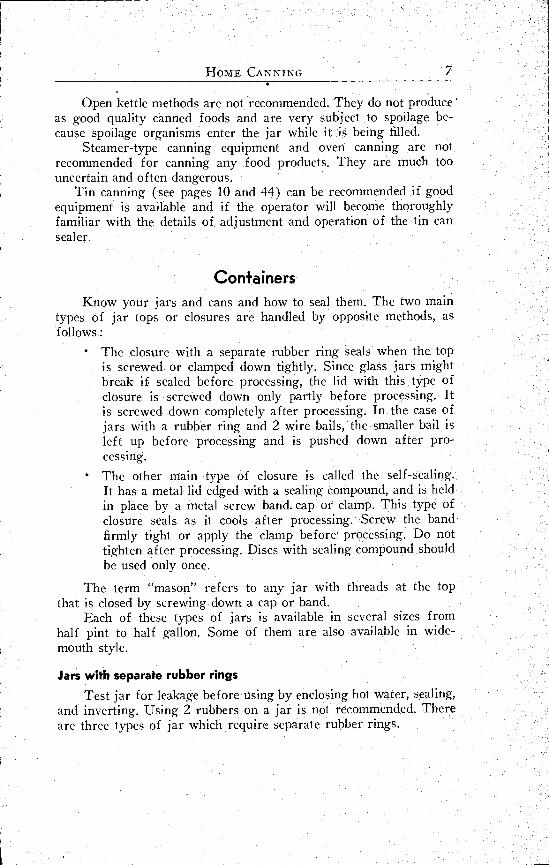
with metal screw band (Figure 4), has asealing compound. It seals at top of edge ofcool after processing. Lid is held in place byband that fits standard mason jars. Seal is
assured only when lid is used onmason jars with flat, smooth, com-paratively broad top edge. Screw bandis too shallow to produce a seal whenused over glass lids.
Before processing, pack jars withproduce, wipe top of jar free of seeds,pulp, or grease. Place scalded metallid on jar with sealing compound nextto the glass and screw band tight withthe handsnot with a wrench.
Metal,
screw bond
10 EXTENSION BULLETIN 742
After processing, leave the jar as it is. Do not tighten screwband. To do so may disturb the softened sealing material and mayprevent a seal. This jar seals itself. (Occasionally, the screw bandmay become loose. If so, hold the lid firmly in place and carefullyturn the band down slightly.) After 24 hours remove the screw bandif you can without forcing If it sticks, cover for a few minutes witha hot, damp cloth. Removing screw band allows seal to be tested andprevents deterioration of band for re-use. Scrub inside of band withbrush and dry thoroughly to prevent rust.
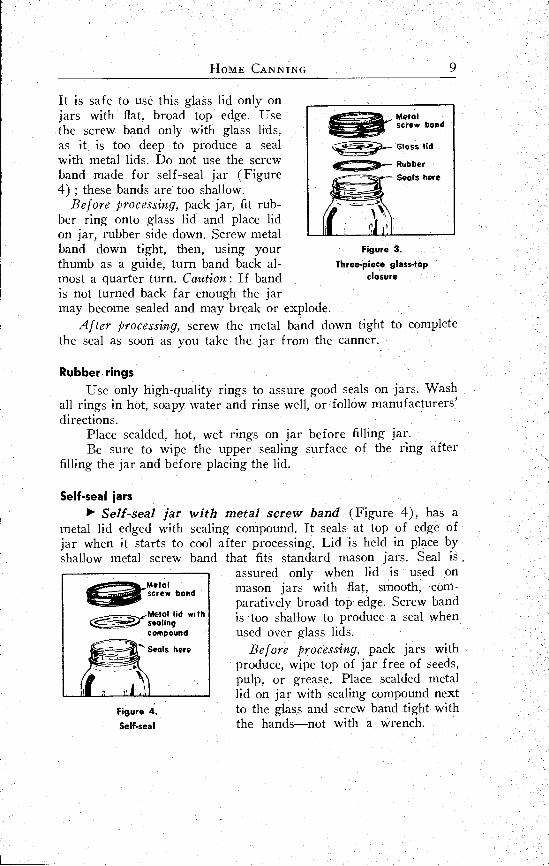
Self-seal jar with special metal lid (Figure 5), edged withsealing compound, held in place withmetal clamp. It seals at top edge of jar ..Metal clomp
when it starts to cool. The lid is heldin place by 1 metal clamp and can beused only on this jar for which it is compcmad
made. Jar can be used only with thisspecial lid. Lid can be used only once.
Before processing, pack jar, wipesealing surface and set scalded lid onjar, being careful that it fits and islevel. Place 1 clamp over center of lid.
,
It should snap into place. If clamp istoo loose, bend enough to hold capfirmly on jar.
After processing, leave the jar as it is The jar seals itself.After 24 hours, remove metal clamp.
Coffee or other commercial jarsThese may be used only for such products as pickles, preserves,
and relishes. Do not use in pressure canner or hot water bath. Theglass was not designed for such use.
Top edges of these jars are usually narrow and rounded andseal cannot be assured. Many of the commercial jars are made formachine vacuum sealing and an airtight seal may be difficult orimpossible by home methods. They are made in a large number ofsizes of tops and some may seem to be sealed when they are not.
sealingMetal lie wit
Figure 5.
Self-seal
.4----Seals he,*
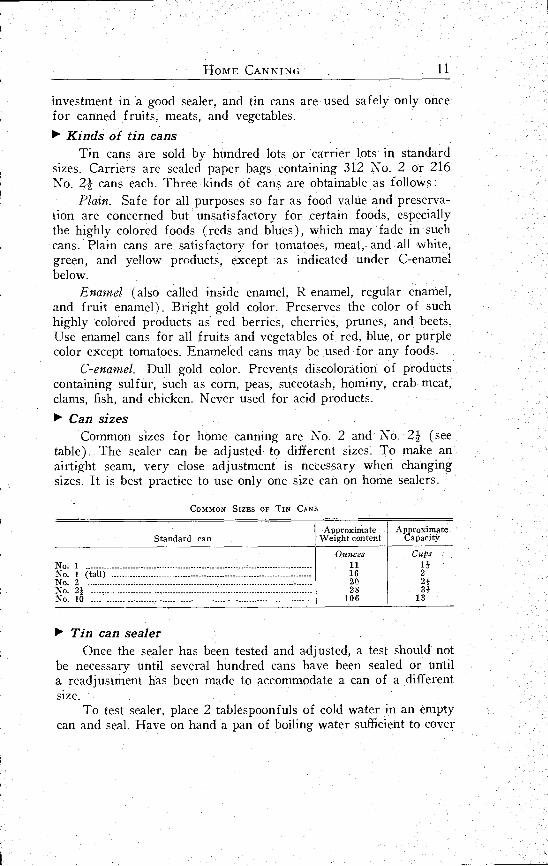
Tin cans
Tin cans have several advantages over other types of containers.The first cost is lower, the tin permits foods to be heated and cooledquickly, producing better flavor, color, and texture, and there is noloss from breakage. On the other hand, canning in tin necessitates
Standard can
investment in a good sealer, and tin cans are used safely only oncefor canned fruits, meats, and vegetables.
Kinds of tin cansTin cans are sold by hundred lots or carrier lots in standard
sizes. Carriers are sealed paper bags containing 312 No 2 or 216No. 21 cans each. Three kinds of cans are obtainable as follows :
Plain. Safe for all purposes so far as food value and preserva-tion are concerned but unsatisfactory for certain foods, especiallythe highly colored foods (reds and blues), which may fade in suchcans. Plain cans are satisfactory for tomatoes, meat, and all white,green, and yellow products, except as indicated under C-enamelbelow.
Enamel (also called inside enamel, R-enamel, regular enamel,and fruit enamel). Bright gold color. Preserves the color of suchhighly colored products as red berries, cherries, prunes, and beets.Use enamel cans for all fruits and vegetables of red, blue, or purplecolor except tomatoes. Enameled cans may be used for any foods.
C-enamel. Dull gold color. Prevents discoloration of productscontaining sulfur, such as corn, peas, succotash, hominy, crab meat,clams, fish, and chicken. Never used for acid products.
Can sizesCommon sizes for home canning are No. 2 and No. 2i (see
table). The sealer can be adjusted to different sizes. To make anairtight seam, very close adjustment is necessary when changingsizes. It is best practice to use only one size can on home sealers.
COMMON SIZES OF TIN CANS
Approximate ApproximateWeight content Capacity
Ounces Cups
Tin can sealerOnce the sealer has been tested and adjusted, a test should not
be necessary until several hundred cans have been sealed or untila readjustment has been made to accommodate a can of a differentsize.
To test sealer, place 2 tablespoonfuls of cold water in an emptycan and seal. Have on hand a pan of boiling water sufficient to cover
No. 1 11 1+No. 1 (tall) 16 2No. 2 20 2+No. 21 28 3+No. 10 106 13
12 EXTENSION BULLETIN 742
the can. Reduce heat to stop boiling and immerse the can until itis entirely covered by the near boiling water. This heats the waterin the can and creates pressure within the can Can ends will bulge.Keep the can under the surface for 5 minutes and if by that timeno bubbles arise from the can seam, the can has been sealed air tight.More accurate tests are used in canning factories.
If bubbles arise from the can the seam is not tight enough, andone or both of the seaming rolls need adjusting. Leaks are most likelyto be at the side seam. Usually the second roll needs adjusting. Toadjust, follow manufacturer's directions, or better yet take to a can-nery mechanic who understands can sealers.
Processing EquipmentThe use of oven or steamer equipment for canning is not recom-
mended. Heat distribution is uncertain and spoilage may result. Ovencanning has caused serious accidents to persons and property byviolent breakage.
Water bath kettleA boiling water bath kettle or other tall kettle with rack in
the bottom is used for canning fruits and tomatoes. Any flat-bottomed, clean vessel of sufficient depth with a good tight lid maybe used for a boiling water bath canner. Depth of the vessel shouldbe at least 8 inches for pint jars and 10 inches for quart jars, sothat water may come 1 inch or more over the tops of the jars. Arack with level surface is needed. It may be made of woven wire,wooden slats, or perforated metal. Coarse wire screen obtainable athardware stores is suitable. Wooden racks should be weighted toprevent upsetting jars. If pressure canner is used as a boiling waterbath be sure that petcock or bleeder is wide open and lid is set onloosely.
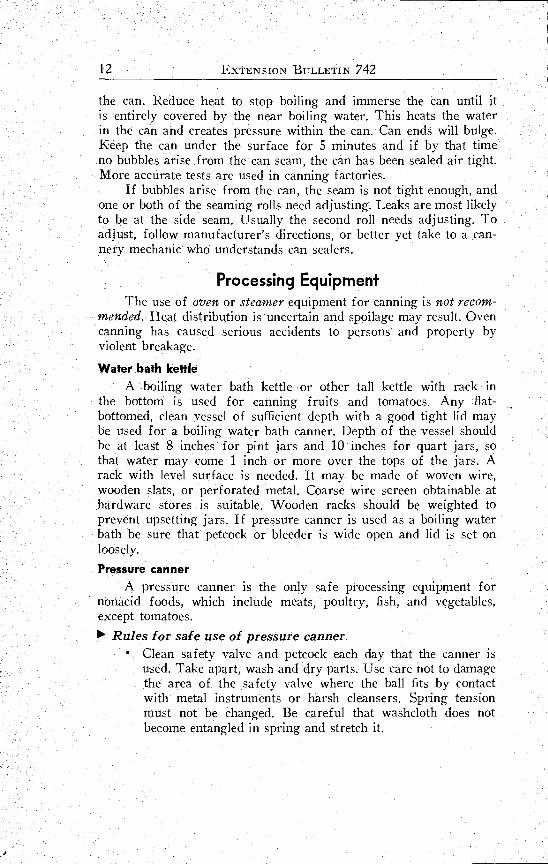
Pressure cannerA pressure canner is the only safe processing equipment for
nonacid foods, which include meats, poultry, fish, and vegetables,except tomatoes.
Rules for safe use of pressure cannerClean safety valve and petcock each day that the canner isused. Take apart, wash and dry parts. Use care not to damagethe area of the safety valve where the ball fits by contactwith metal instruments or harsh cleansers. Spring tensionmust not be changed. Be careful that washcloth does notbecome entangled in spring and stretch it.

HOME CANNING 13
Have 2 to 3, inches of water in bottom of canner each timebefore using, so that it will not boil dry and cause damage.If using canner with weight type of gauge use 3 quarts ofwater for 10 pounds pressure, and 4 quarts of water for15 pounds pressure. Weight type gauges emit steam con-tinuously and require more water.At end of processing time be sure to allow pressure to returnto zero before opening canner.
Care of pressure cannerThe pressure gauge should be tested each year for accuracy,
also when first purchased and if dropped or out of order. Safetyvalves should be tested and repaired or replaced if inaccurate. (SeeCounty Extension Agent for instructions about gauge testing.) Re-move gauge and safety valve with wrench. Do not remove in anyother way. When replacing, plumber's paste may be used on threadsto assure a tight seal.
If the canner leaks steam at the edge of the lid, and the cannerhas a sealing ring or gasket, probably the gasket needs to be stretchedand turned over. Remove gasket and stretch gently. Turn it upsidedown and replace carefully. If stretched too much to fit, it willusually fit all right the next day. After replacing the sealing ring,press it with the fingers to a normal position. When putting lid onthe canner the next time, press the lid down firmly with the hand.
New gaskets are obtainable from manufacturer of canner andfrom many local dealers for a small charge. To avoid delay, keep aspare on hand.
A rack supplied with canner is necessary in the bottom of thecanner. A piece of heavy hardware cloth can be used.
Wash and dry the canner after using, but do not place lid inwater. Avoid getting water or grease into the pressure gauge. Besure that the edges of the lid and the canner are clean at all times,in order to assure a steam-tight seal. Avoid striking rim of cannerwith any hard instrument. Clean the safety valve and petcock eachday after using. If openings are not clean, clean with toothpick.
To remove discoloration from canner, add water up to line ofdiscoloration. Add 1 tablespoon cream of tartar per quart. Raisepressure to 15 pounds and remove from heat. Let stand overnight.Empty next morning and scour with a good cleaner that does notcontain alkali, potash, or lye. Acid fruit material like rhubarb trim-mings will clean canner.
The best way to store canner is to wrap lid in heavy paper andstore it on canner upside down. This paper will keep anything from
14 EXTENSION BULLETIN 742
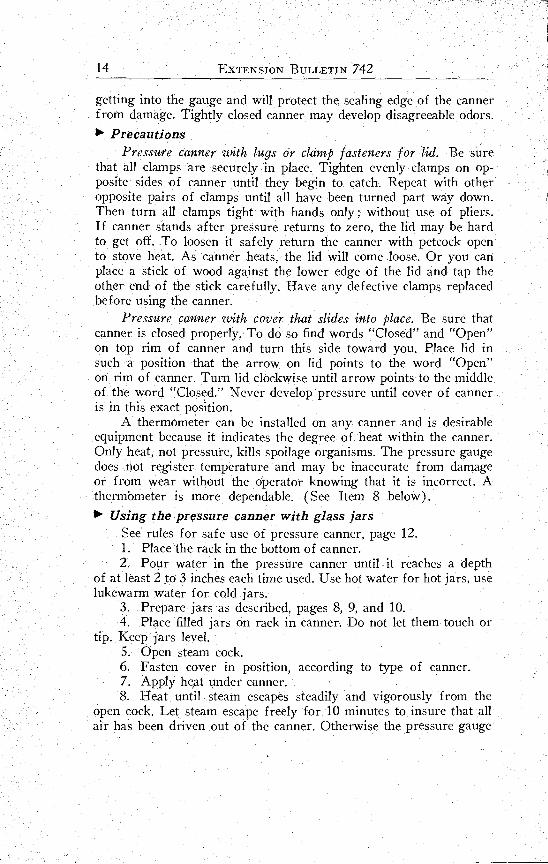
getting into the gauge and will protect the sealing edge of the cannerfrom damage. Tightly closed canner may develop disagreeable odors.Po Precautions
Pressure canner with lugs or clamp fasteners for lid. Be surethat all clamps are securely in place. Tighten evenly clamps on op-posite sides of canner until they begin to catch. Repeat with otheropposite pairs of clamps until all have been turned part way down.Then turn all clamps tight with hands only, without use of pliers.If canner stands after pressure returns to zero, the lid may be hardto get off. To loosen it safely return the canner with petcock opento stove heat. As canner heats, the lid will come loose. Or you canplace a stick of wood against the lower edge of the lid and tap theother end of the stick carefully. Have any defective clamps replacedbefore using the canner.
Pressure canner with cover that slides into place. Be sure thatcanner is closed properly. To do so find words "Closed" and "Open"on top rim of canner and turn this side toward you. Place lid insuch a position that the arrow on lid points to the word "Open"on rim of canner. Turn lid clockwise until arrow points to the middleof the word "Closed." Never develop pressure until cover of canneris in this exact position.
A thermometer can be installed on any canner and is desirableequipment because it indicates the degree of heat within the canner.Only heat, not pressure, kills spoilage organisms. The pressure gaugedoes not register temperature and may be inaccurate from damageor from wear without the operator knowing that it is incorrect. Athermometer is more dependable. (See Item 8 below).
Using the pressure canner with glass jarsSee rules for safe use of pressure canner, page 12.
Place the rack in the bottom of canner.Pour water in the pressure canner until it reaches a depth
of at least 2 to 3 inches each time used Use hot water for hot jars, uselukewarm water for cold jars.
Prepare jars as described, pages 8, 9, and 10.Place filled jars on rack in canner. Do not let them touch or
tip. Keep jars level.Open steam cock.Fasten cover in position, according to type of canner.Apply heat under canner.Heat until steam escapes steadily and vigorously from the
open cock. Let steam escape freely for 10 minutes to insure that allair has been driven out of the canner. Otherwise the pressure gauge
HOME CANNING
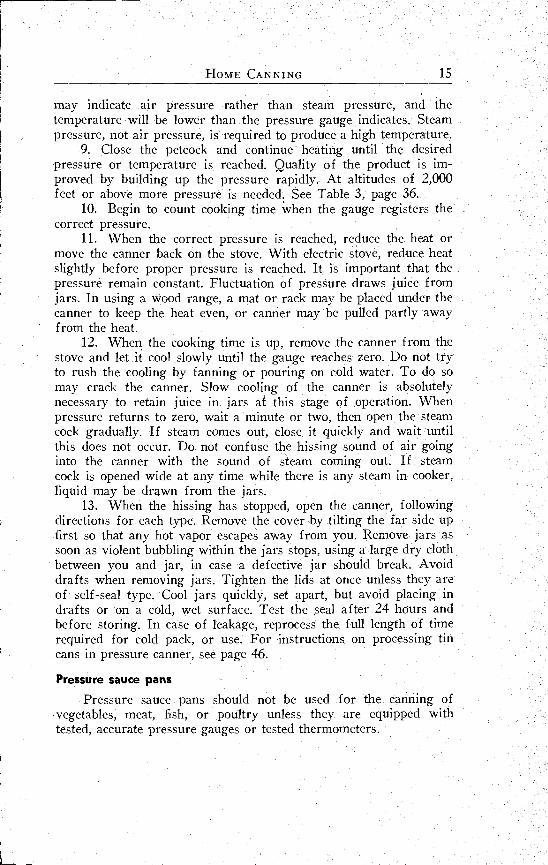
may indicate air pressure rather than steam pressure, and thetemperature will be lower than the pressure gauge indicates. Steampressure, not air pressure, is required to produce a high temperature.
Close the petcock and continue heating until the desiredpressure or temperature is reached. Quality of the product is im-proved by building up the pressure rapidly. At altitudes of 2,000feet or above more pressure is needed See Table 3, page 36.
Begin to count cooking time when the gauge registers thecorrect pressure.
When the correct pressure is reached, reduce the heat ormove the canner back on the stove. With electric stove, reduce heatslightly before proper pressure is reached. It is important that thepressure remain constant. Fluctuation of pressure draws juice fromjars. In using a wood range, a mat or rack may be placed under thecanner to keep the heat even, or canner may be pulled partly awayfrom the heat.
When the cooking time is up, remove the canner from thestove and let it cool slowly until the gauge reaches zero. Do not tryto rush the cooling by fanning or pouring on cold water. To do somay crack the canner. Slow cooling of the canner is absolutelynecessary to retain juice in jars at this stage of operation. Whenpressure returns to zero, wait a minute or two then open the steamcock gradually. If steam comes out, dose it quickly and wait untilthis does not occur. Do not confuse the hissing sound of air goinginto the canner with the sound of steam coming out. If steamcock is opened wide at any time while there is any steam in cooker,liquid may be drawn from the jars.
When the hissing has stopped, open the canner, followingdirections for each type. Remove the cover by tilting the far side upfirst so that any hot vapor escapes away from you. Remove jars assoon as violent bubbling within the jars stops, using a large dry clothbetween you and jar, in case a defective jar should break. Avoiddrafts when removing jars. Tighten the lids at once unless they areof self-seal type. Cool jars quickly, set apart, but avoid placing indrafts or on a cold, wet surface. Test the seal after 24 hours andbefore storing. In case of leakage, reprocess the full length of timerequired for cold pack, or use For instructions on processing tincans in pressure canner, see page 46.
Pressure sauce pans
Pressure sauce pans should not be used for the canning of.vegetables, meat, fish, or poultry unless they are equipped withtested, accurate pressure gauges or tested thermometers.
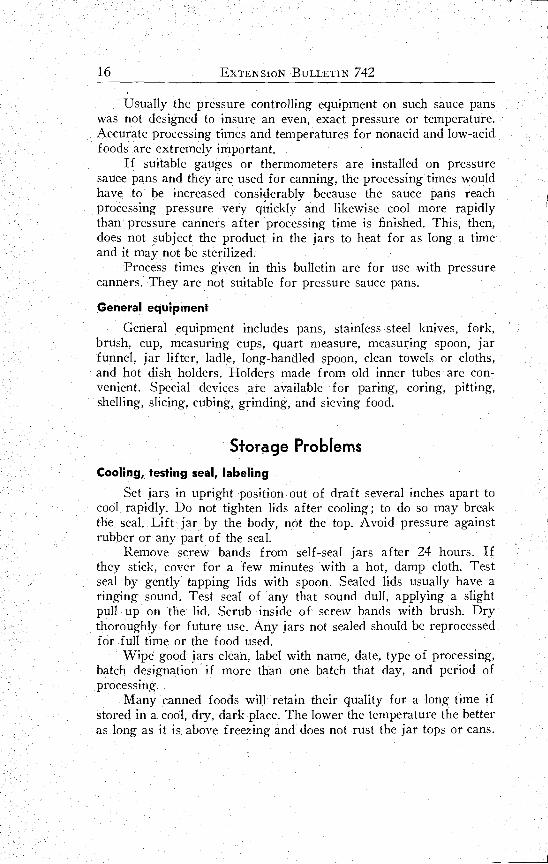
Usually the pressure controlling equipment on such sauce panswas not designed to insure an even, exact pressure or temperature.Accurate processing times and temperatures for nonacid and low-acidfoods are extremely important.
If suitable gauges or thermometers are installed on pressuresauce pans and they are used for canning, the processing times wouldhave to be increased considerably because the sauce pans reachprocessing pressure very quickly and likewise cool more rapidlythan pressure canners after processing time is finished. This, then,does not subject the product in the jars to heat for as long a timeand it may not be sterilized.
Process times given in this bulletin are for use with pressurecanners. They are not suitable for pressure sauce pans.
General equipment
General equipment includes pans, stainless-steel knives, fork,brush, cup, measuring cups, quart measure, measuring spoon, jarfunnel, jar lifter, ladle, long-handled spoon, clean towels or cloths,and hot dish holders. Holders made from old inner tubes are con-venient. Special devices are available for paring, coring, pitting,shelling, slicing, cubing, grinding, and sieving food.
Storage Problems
Cooling, testing seal, labeling
Set jars in upright position out of draft several inches apart tocool rapidly. Do not tighten lids after cooling ; to do so may breakthe seal. Lift jar by the body, not the top. Avoid pressure againstrubber or any part of the seal.
Remove screw bands from self-seal jars after 24 hours. Ifthey stick, cover for a few minutes with a hot, damp cloth. Testseal by gently tapping lids with spoon. Sealed lids usually have aringing sound. Test seal of any that sound dull, applying a slightpull up on the lid. Scrub inside of screw bands with brush. Drythoroughly for future use. Any jars not sealed should be reprocessedfor full time or the food used.
Wipe good jars clean, label with name, date, type of processing,batch designation if more than one batch that day, and period ofprocessing.
Many canned foods will retain their quality for a long time ifstored in a cool, dry, dark place. The lower the temperature the betteras long as it is above freezing and does not rust the jar tops or cans.
16 EXTENSION BULLETIN 742
HOME CANNING 17
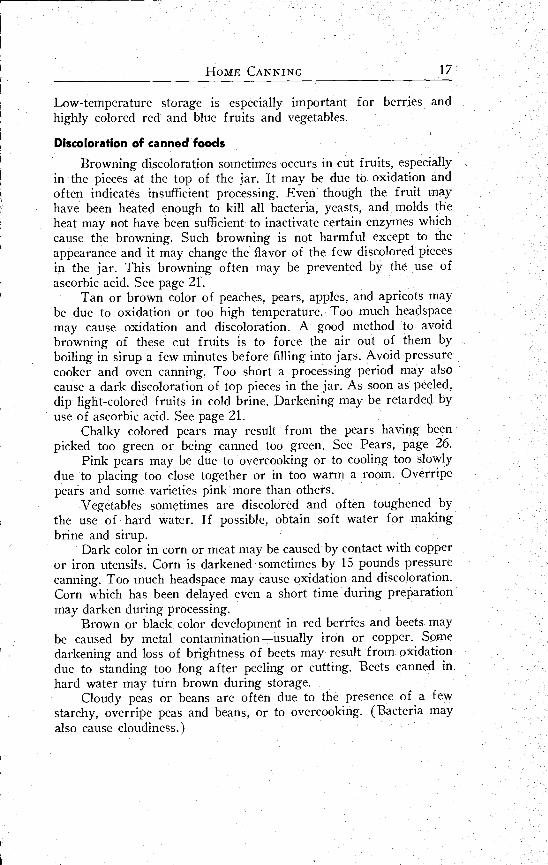
Low-temperature storage is especially important for berries andhighly colored red and blue fruits and vegetables.
Discoloration of canned foods
Browning discoloration sometimes occurs in cut fruits, especiallyin the pieces at the top of the jar. It may be due to oxidation andoften indicates insufficient processing. Even though the fruit mayhave been heated enough to kill all bacteria, yeasts, and molds theheat may not have been sufficient to inactivate certain enzymes whichcause the browning. Such browning is not harmful except to theappearance and it may change the flavor of the few discolored piecesin the jar. This browning often may be prevented by the use ofascorbic acid. See page 21.
Tan or brown color of peaches, pears, apples, and apricots maybe due to oxidation or too high temperature. Too much headspacemay cause oxidation and discoloration. A good method to avoidbrowning of these cut fruits is to force the air out of them byboiling in sirup a few minutes before filling into jars. Avoid pressurecooker and oven canning. Too short a processing period may alsocause a dark discoloration of top pieces in the jar. As soon as peeled,dip light-colored fruits in cold brine. Darkening may be retarded byuse of ascorbic acid. See page 21.
Chalky colored pears may result from the pears having beenpicked too green or being canned too green. See Pears, page 26.
Pink pears may be due to overcooking or to cooling too slowlydue to placing too close together or in too warm a room. Overripepears and some varieties pink more than others.
Vegetables sometimes are discolored and often toughened bythe use of hard water. If possible, obtain soft water for makingbrine and sirup.
Dark color in corn or meat may be caused by contact with copperor iron utensils. Corn is darkened sometimes by 15 pounds pressurecanning. Too much headspace may cause oxidation and discoloration.Corn which has been delayed even a short time during preparationmay darken during processing.
Brown or black color development in red berries and beets maybe caused by metal contaminationusually iron or copper. Somedarkening and loss of brightness of beets may result from oxidationdue to standing too long after peeling or cutting. Beets canned inhard water may turn brown during storage.
Cloudy peas or beans are often due to the presence of a fewstarchy, overripe peas and beans, or to overcooking. (Bacteria mayalso cause cloudiness.)
18 EXTENSION BULLETIN 742
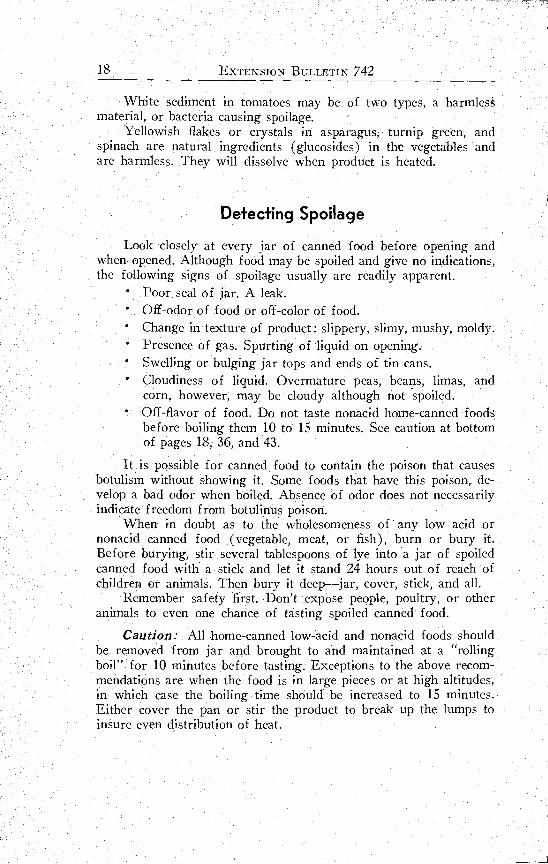
White sediment in tomatoes may be of two types, a harmlesSmaterial, or bacteria causing spoilage.
Yellowish flakes or crystals in asparagus, turnip green, andspinach are natural ingredients (glucosides) in the vegetables andare harmless. They will dissolve when product is heated.
Detecting Spoilage
Look closely at every jar of canned food before opening andwhen opened. Although food may be spoiled and give no indications,the following signs of spoilage usually are readily apparent.
Poor seal of jar. A leak.Off-odor of food or off-color of food.Change in texture of product : slippery, slimy, mushy, moldy.Presence of gas. Spurting of liquid on opening.Swelling or bulging jar tops and ends of tin cans.Cloudiness of liquid. Overmature peas, beans, limas, andcorn, however, may be cloudy although not spoiled.Off-flavor of food. Do not taste nonacid home-canned foodsbefore boiling them 10 to 15 minutes. See caution at bottomof pages 18, 36, and 43.
It is possible for canned food to contain the poison that causesbotulism without showing it. Some foods that have this poison, de-velop a bad odor when boiled. Absence of odor does not necessarilyindicate freedom from botulinus poison.
When in doubt as to the wholesomeness of any low acid ornonacid canned food (vegetable, meat, or fish), burn or bury itBefore burying, stir several tablespoons of lye into a jar of spoiledcanned food with a stick and let it stand 24 hours out of reach ofchildren or animals. Then bury it deepjar, cover, stick, and all
Remember safety first. Don't expose people, poultry, or otheranimals to even one chance of tasting spoiled canned food.
Caution: All home-canned low-acid and nonacid foods shouldbe removed from jar and brought to and maintained at a "rollingboil" for 10 minutes before tasting. Exceptions to the above recom-mendations are when the food is in large pieces or at high altitudes,in which case the boiling time should be increased to 15 minutes.Either cover the pan or stir the product to break up the lumps toinsure even distribution of heat.
HOME CANNING 19
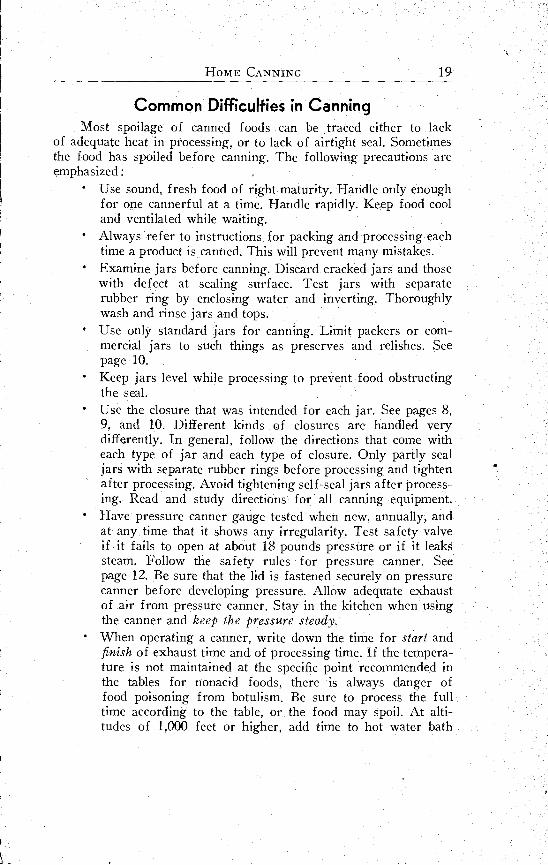
Common Difficulties in CanningMost spoilage of canned foods can be traced either to lack
of adequate heat in processing, or to lack of airtight seal. Sometimesthe food has spoiled before canning. The following precautions areemphasized :
Use sound, fresh food of right maturity. Handle only enoughfor one cannerful at a time. Handle rapidly, Keep food cooland ventilated while waiting.Always refer to instructions for packing and processing eachtime a product is canned. This will prevent many mistakes.Examine jars before canning. Discard cracked jars and thosewith defect at sealing surface. Test jars with separaterubber ring by enclosing water and inverting. Thoroughlywash and rinse jars and tops.Use only standard jars for canning. Limit packers or com-mercial jars to such things as preserves and relishes. Seepage 10.Keep jars level while processing to prevent food obstructingthe seal.Use the closure that was intended for each jar. See pages 8,9, and 10. Different kinds of closures are handled verydifferently. In general, follow the directions that come witheach type of jar and each type of closure. Only partly sealjars with separate rubber rings before processing and tightenafter processing. Avoid tightening self-seal jars after process-ing. Read and study directions for all canning equipment.Have pressure canner gauge tested when new, annually, andat any time that it shows any irregularity. Test safety valveif it fails to open at about 18 pounds pressure or if it leakssteam. Follow the safety rules for pressure canner. Seepage 12. Be sure that the lid is fastened securely on pressurecanner before developing pressure. Allow adequate exhaustof air from pressure canner. Stay in the kitchen when usingthe canner and keep the pressure steady.When operating a canner, write down the time for start andfinish of exhaust time and of processing time. If the tempera-ture is not maintained at the specific point recommended inthe tables for nonacid foods, there is always danger offood poisoning from botulism. Be sure to process the fulltime according to the table, or the food may spoil. At alti-tudes of 1,000 feet or higher, add time to hot water bath
20 EXTENSION BULLETIN 742
Sirup for canning fruitsSirup for canning may be made from either cane or beet sugar.
They have equal value in every way.Sugar is not necessary to keep canned fruit from spoiling. It
does not, in the quantities used, assist nor retard the growth ofspoilage microorganisms in fruit canning.
Unsweetened fruit may be canned the same as sweetened fruitby either the hot pack or cold pack method. Boiling water or heatedfruit juice may be added to the packed jars or the fruit may beheated slowly to form its own juice. Such fruit may be sweetenedto taste when served but it is not as satisfactory as when canned withsugar or sirup. Fruit canned without sugar often does not retainits shape well. The color is not as bright and natural and may fade.The flavor loss may be considerable. Even though the same amountof sugar as would have been used in canning is added later whenthe fruit is served, the fruit will not be as good in any way.
If a reasonable part, perhaps half, of the sugar is added whenthe fruit is canned, then the color and fruit flavor will be well re-tained and more sugar may be added when the fruit is served ifdesired.
schedules. At altitudes of 2,000 feet and higher, add pressureto pressure canner schedules. See footnotes, pages 29, 36, and43.
Use pint jars for most nonacid foods in order ' to assureadequate heat penetration. Use a loose, wet pack for vege-tables to help heat penetration.Leave adequate headspace recommended for each productso the food will not boil onto the sealing surfaces. Cleansealing surfaces well before closing jars.Do not open jars after processing to fill them more com-pletely. Avoid tightening lids after jars are cool. Cool jars inupright position. See page 16.Losses can often be prevented if the seals of jars are tested24 hours after canning.Know the operation and adjustment of tin can sealers ifthey are to be used. Test the seams frequently for airtightseal.
Canning Fruits and TomatoesFor equipment, see pages 12 and 16. Timetable for different
fruits is given on page 29. For canning in tin, see pages 44, 45 and 47.
Strength of sirup to be used on a particular fruit may vary ac-cording to variety and maturity of fruit or according to tastepreference. Suggested strengths of sirup for various fruits are givenin Table 2, page 29.
Too much sugar or too heavy a sirup will draw juice fromthe fruit causing more shrinkage and more floating in the jar.
Honey may replace half of the sugar but may impart a stronghoney flavor. This will depend somewhat on the quality of thehoney. Corn sirup or corn sugar (dextrose) may be used to replaceone-third of the sugar (one-fifth in jams and jellies). Avoid brownsugar and sirups with strong flavors.
Each quart jar of fruit will require about 1 cup of sirup.Amount will vary with tightness of pack.
Process jars of fruit packed without sugar for the same lengthof time as given for fruit packed in sirup. Refer to Table 2, page 29.
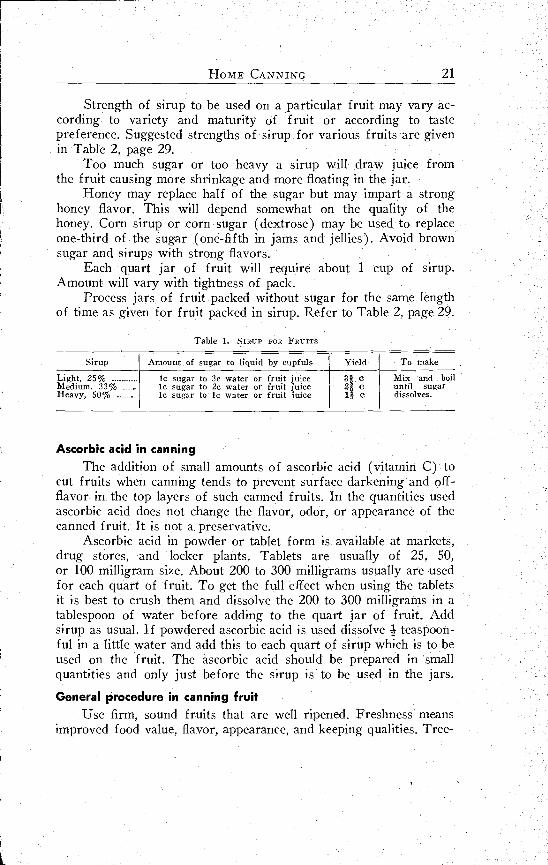
Table I. SIRUP FOR FRUITS
Ascorbic acid in canningThe addition of small amounts of ascorbic acid (vitamin C) to
cut fruits when canning tends to prevent surface darkening and off-flavor in the top layers of such canned fruits. In the quantities usedascorbic acid does not change the flavor, odor, or appearance of thecanned fruit. It is not a preservative.
Ascorbic acid in powder or tablet form is available at markets,drug stores, and locker plants. Tablets are usually of 25, 50,or 100 milligram size. About 200 to 300 milligrams usually are usedfor each quart of fruit. To get the full effect when using the tabletsit is best to crush them and dissolve the 200 to 300 milligrams in atablespoon of water before adding to the quart jar of fruit. Addsirup as usual. If powdered ascorbic acid is used dissolve 4- teaspoon-ful in a little water and add this to each quart of sirup which is to beused on the fruit. The ascorbic acid should be prepared in smallquantities and only just before the sirup is to be used in the jars.
General procedure in canning fruitUse firm, sound fruits that are well ripened. Freshness means
improved food value, flavor, appearance, and keeping qualities. Tree-
Sirup Amount of sugar to liquid by cupfuls Yield To make
Light, 25% lc sugar to 3c water or fruit juice 3i c Mix and boilMedium, 33% lc sugar to 2c water or fruit juice 21 c until sugarHeavy, 50% lc sugar to lc water or fruit juice C dissolves.

22 EXTENSION BULLETIN 742
ripened peaches and box-ripened pears are best. To prevent crushingsoft fruits such as berries, gather in shallow containers. Soft butsound fruit may be used for juice or jam.
Most fruit should be washed carefully. Prepare as for thetable. Fruits that are peeled, such as pears, apples, and peaches, maybe dipped in a weak salt solution after peeling to prevent discolora-tion at this stage. Use approximately 2 level tablespoons of salt to1 gallon of cold water. Addition of 2 tablespoons of vinegar to thiswater may further aid in color retention. Rinse in cold water beforecanning if desired. Rinse may be omitted. See directions on use ofascorbic acid, page 21.
Fruits that shrink a great deal in the jar, such as apples andapricots, may be precooked about 5 minutes in sirup, packed hot,and processed in boiling water bath for a shorter period. Precookingin sirup is effective in preventing browning of pears, peaches, apples,and other cut fruits. Each quart jar of fruit requires about 1 cup ofsirup. Amount will vary with tightness of pack.
Some fruits when heated yield enough juice of their own with-out adding liquid. Adding sugar before heating will draw out juice.Adding sirup made with water produces a milder flavor.
Tin cans of fruit should be sealed immediately after fillingif they are very hot. Otherwise as in the case of cold pack, exhaustthem in boiling water until too hot to handle with bare hands orpreferably until center temperature reaches 160° F. or more beforesealing. See pages 44 and 45.
Open kettle method
By the open kettle method, the food is cooked in an ordinarykitchen kettle, then packed while boiling hot into sterilized jars, orcans, and sealed with hot scalded lids. No other processing is done.Bacteria, molds, and yeasts can get into the jars or cans while theyare being filled and may cause spoilage. For this reason it is recom-mended that the open kettle method be used only for such productsas jams, jellies, preserves, and pickles.
Hot water bath method
By this method food is cooked in the jars while the jars areimmersed in boiling water.
Cooking in the jars results in less contact with air and con-serves vitamins better than the open kettle method. This method alsoresults in less spoilage. Products tend to be more firm, more palatable,and more attractive by the boiling water bath method.
HOME CANNING 23
Fill boiling water bath cooker with enough water to come1 inch over tops of jars or cans. Start heating so that water will beboiling when jars are packed.
Before they are needed, wash jars and lids thoroughly inclean, soapy water and rinse well. If jars have rubber rings, prepareas described on page 9 and attach them. Let jars lie on a rackin hot water so that they will be hot when packed.
Prepare sirup according to Table 1, page 21.Place fresh or precooked fruit in jar. Jar may be jolted
gently on a wooden surface or the palm of the hand to help make afull but not tight pack. Avoid mashing fruit. Fill jars withfruit. Pour boiling hot sirup over fruit. Allow headspace for sirupfor each jar as stated under directions for that fruit, pages 23 to28. Allow I-inch headspace in tin cans. Run knife inside walls ofjar to release air. Remove any particles from sealing surface of jar.
Place hot lids on jars. If self-seal type, screw lids down tight.If wire-bail type, snap the larger bail into place and leave thesmaller bail up, to seal jar partly. If using screw top with separaterubber ring, screw lid down, then back one-fourth turn to seal jarpartly. Process promptly.
Lower hot jars quickly into boiling hot water with jar lifteror rack. Jars should not touch each other and rack underneath shouldraise them off the bottom. Add boiling water if necessary to bringwater level to 1 inch or more above tops of jars. Cover cooker. Recordtime when water comes to a rolling boil again.
Keep water boiling actively for required period, countingfrom time water boils again. Add boiling water if needed to keepjar tops covered. Add time for altitude for 1,000 feet and more(See Table 2, page 29).
Remove jars from hot water bath at end or processing periodand seal unless self-seal type. Avoid draft when removing jars.
Cool jars quickly, set apart, but avoid placing in draft oron a cold wet surface.
After 24 hours, test the seal before storing jars. If jarsare not sealed properly, the products may be recanned by reprocessingthe full length of time required for cold pack or they may be used.
ApplesWash, pare, and core apples. Cut in pieces not more than 1
inch thick. To keep fruit from darkening, drop it immediately afterpeeling into cold water containing 2 tablespoons salt per gallon.Drain, then boil 5 minutes in medium sirup. Pack hot fruit into jarsto inch of top. Ascorbic acid may protect color (see page 21).
24 EXTENSION BULLETIN 742
Cover with hot sirup, leaving inch space at top of jar. Adjustjar lids. Process in boiling water bath 10 minutes. In plain tin cans,pack hot fruit to / inch from top. Fill to 1 inch from top with hotsirup. If contents are very hot tin cans may be sealed immediately.Otherwise, exhaust. (See 4, page 45.) Seal cans and process inboiling water bath 10 minutes.
Applesauce
Make applesauce, sweetened or unsweetened. Heat to boiling,stirring to keep it from sticking to the pan. Pack hot to 1 inch fromtop of jar. Adjust lid. Process 10 minutes in boiling water bath.
Baked apples
Bake as for serving. Pack hot. Fill jar to 1 inch of top withlight sirup. Seal cans while very hot. Process 10 minutes in boilingwater bath.
ApricotsFollow preparation method for cold pack peaches. Peeling may
be omitted. Process as in Table 2, page 29.
Berries, soft: red raspberries and othersSort, wash, and drain. Pack raw to top of jars. Shake or jolt
jar for a fuller pack. Avoid mashing. Add boiling medium or heavysirup to 1 inch from top of jar or to 1 inch from top of enameledcan Place packed jars directly into boiling water. Process glass jarsin boiling water bath 15 minutes. Exhaust tin cans (see 4, page 45),seal and process as on page 29.
Berries, firm: blueberries, blackberries, gooseberries, loganberries
Cold pack. Sort, stem, wash, and drain. Fill jars to inchfrom top. Shake or jolt for a fuller pack. Add boiling medium orheavy sirup to 1 inch from the top of the jar or 1 inch from top ofenameled can. Place packed jars directly into boiling water. Processin boiling water bath 15 minutes for pints, 20 minutes for quarts.The hot pack produces fuller jars than cold pack. Exhaust cans (see4, page 45), seal and process as on page 29.
Hot pack with dry sugar. Sort, stem, wash, and drain.Add cup sugar per quart, more for gooseberries if desired. Bringto a boil. Shake pan or stir gently to prevent sticking. Pack hot intohot jars, adding juice to / inch from top of jar or to 1 inch from topof can. Seal tin cans while very hot. Process jars or tin cans in boilingwater bath 10 minutes.
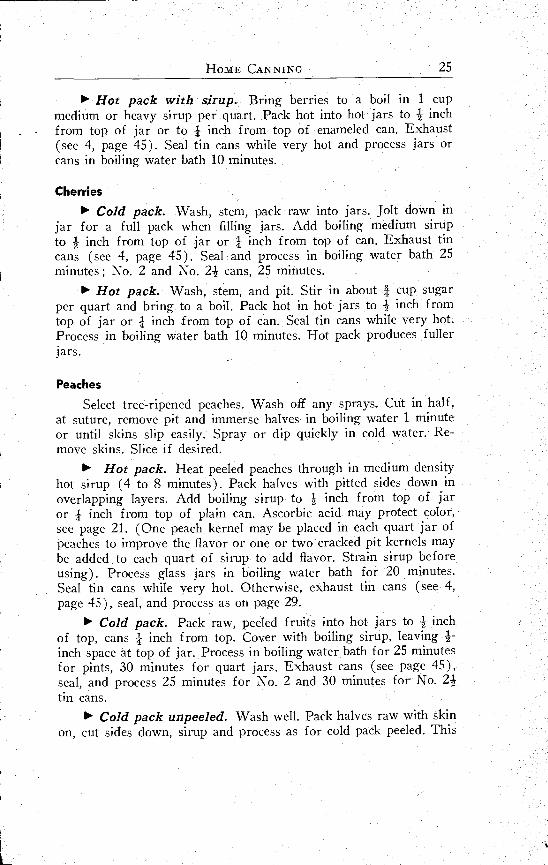
Hot pack with sirup. Bring berries to a boil in 1 cupmedium or heavy sirup per quart. Pack hot into hot jars to -1 inchfrom top of jar or to inch from top of enameled can. Exhaust(see 4, page 45). Seal tin cans while very hot and process jars orcans in boiling water bath 10 minutes.
Cherries
Cold pack. Wash, stem, pack raw into jars. Jolt down injar for a full pack when filling jars. Add boiling medium sirupto 1 inch from top of jar or i inch from top of can. Exhaust tincans (see 4, page 45). Seal and process in boiling water bath 25minutes ; No. 2 and No. 21 cans, 25 minutes.
Hot pack. Wash, stem, and pit. Stir in about cup sugarper quart and bring to a boil. Pack hot in hot jars to inch fromtop of jar or + inch from top of can. Seal tin cans while very hot.Process in boiling water bath 10 minutes. Hot pack produces fullerjars.
Peaches
Select tree-ripened peaches. Wash off any sprays. Cut in half,at suture, remove pit and immerse halves in boiling water 1 minuteor until skins slip easily. Spray or dip quickly in cold water. Re-move skins. Slice if desired.
Hot pack. Heat peeled peaches through in medium densityhot sirup (4 to 8 minutes). Pack halves with pitted sides down inoverlapping layers. Add boiling sirup to 1 inch from top of jaror inch from top of plain can. Ascorbic acid may protect color,see page 21. (One peach kernel may be placed in each quart jar ofpeaches to improve the flavor or one or two cracked pit kernels maybe added to each quart of sirup to add flavor. Strain sirup beforeusing). Process glass jars in boiling water bath for 20 minutes.Seal tin cans while very hot. Otherwise, exhaust tin cans (see 4,page 45), seal, and process as on page 29.
Cold pack. Pack raw, peeled fruits into hot jars to -1 inchof top, cans inch from top. Cover with boiling sirup, leaving 4-inch space at top of jar. Process in boiling water bath for 25 minutesfor pints, 30 minutes for quart jars. Exhaust cans (see page 45),seal, and process 25 minutes for No. 2 and 30 minutes for No. 21tin cans.
Cold pack unpeeled. Wash well. Pack halves raw with skinon, cut sides down, sirup and process as for cold pack peeled. This
HOME CANNING 25
26 EXTENSION BULLETIN 742
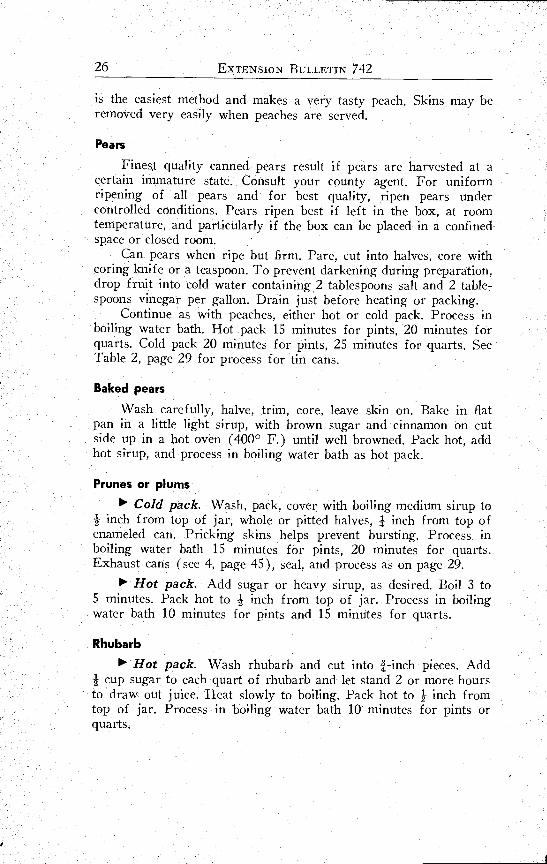
is the easiest method and makes a very tasty peach. Skins may beremoved very easily when peaches are served.
Pears
Fines,t quality canned pears result if pears are harvested at acertain immature state. Consult your county agent. For uniformripening of all pears and for best quality, ripen pears undercontrolled conditions. Pears ripen best if left in the box, at roomtemperature, and particularly if the box can be placed in a confinedspace or closed room.
Can pears when ripe but firm. Pare, cut into halves, core withcoring knife or a teaspoon. To prevent darkening during preparation,drop fruit into cold water containing 2 tablespoons salt and 2 table-spoons vinegar per gallon. Drain just before heating or packing.
Continue as with peaches, either hot or cold pack. Process inboiling water bath. Hot pack 15 minutes for pints, 20 minutes forquarts. Cold pack 20 minutes for pints, 25 minutes for quarts. SeeTable 2, page 29 for process for tin cans.
Baked pears
Wash carefully, halve, trim, core, leave skin on. Bake in flatpan in a little light sirup, with brown sugar and cinnamon on cutside up in a hot oven (400° F.) until well browned. Pack hot, addhot sirup, and process in boiling water bath as hot pack.
Prunes or plums
Cold pack. Wash, pack, cover with boiling medium sirup to-I inch from top of jar, whole or pitted halves, inch from top ofenameled can. Pricking skins helps prevent bursting. Process inboiling water bath 15 minutes for pints, 20 minutes for quarts.Exhaust cans (see 4, page 45), seal, and process as on page 29.
lo Hot pack. Add sugar or heavy sirup, as desired. Boil 3 to5 minutes. Pack hot to inch from top of jar. Process in boilingwater bath 10 minutes for pints and 15 minutes for quarts.
Rhubarb
Hot pack. Wash rhubarb and cut into 1-inch pieces. Addcup sugar to each quart of rhubarb and let stand 2 or more hours
to draw out juice. Heat slowly to boiling. Pack hot to inch fromtop of jar. Process in boiling water bath 10 minutes for pints orquarts.
HOME CANNING 27
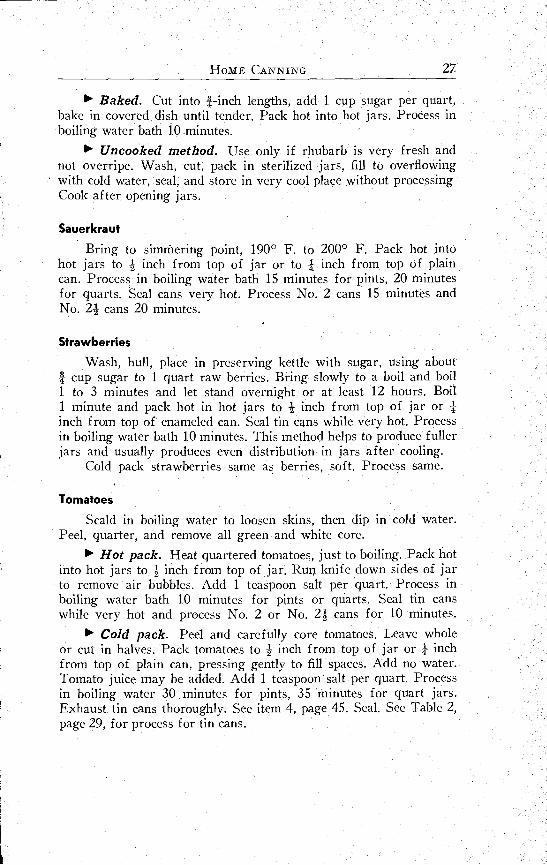
Baked. Cut into 1-inch lengths, add 1 cup sugar per quart,bake in covered dish until tender. Pack hot into hot jars. Process inboiling water bath 10 minutes.
Uncooked method. Use only if rhubarb is very fresh andnot overripe. Wash, cut, pack in sterilized jars, fill to overflowingwith cold water, seal, and store in very cool place without processingCook after opening jars.
Sauerkraut
Bring to simthering point, 190° F. to 200° F. Pack hot intohot jars to 1 inch from top of jar or to 1 inch from top of plaincan. Process in boiling water bath 15 minutes for pints, 20 minutesfor quarts. Seal cans very hot. Process No. 2 cans 15 minutes andNo. 21 cans 20 minutes.
Strawberries
Wash, hull, place in preserving kettle with sugar, using about4 cup sugar to 1 quart raw berries. Bring slowly to a boil and boil1 to 3 minutes and let stand overnight or at least 12 hours. Boil1 minute and pack hot in hot jars to inch from top of jar or 1inch from top of enameled can. Seal tin cans while very hot. Processin boiling water bath 10 minutes. This method helps to produce fullerjars and usually produces even distribution in jars after cooling.
Cold pack strawberries same as berries, soft. Process same.
Tomatoes
Scald in boiling water to loosen skins, then dip in cold water.Peel, quarter, and remove all green and white core.
Hot pack. Heat quartered tomatoes, just to boiling. Pack hotinto hot jars to inch from top of jar. Run knife down sides of jarto remove air bubbles. Add 1 teaspoon salt per quart. Process inboiling water bath 10 minutes for pints or quarts. Seal tin canswhile very hot and process No. 2 or No. 21 cans for 10 minutes.
Cold pack. Peel and carefully core tomatoes. Leave wholeor cut in halves. Pack tomatoes to 1 inch from top of jar or / inchfrom top of plain can, pressing gently to fill spaces. Add no water.Tomato juice may be added. Add 1 teaspoon salt per quart. Processin boiling water 30 minutes for pints, 35 minutes for quart jars.Exhaust tin cans thoroughly. See item 4, page 45. Seal. See Table 2,page 29, for process for tin cans.

28 EXTENSION BULLETIN 742
Tomato juice
Work with small quantities at a time to save food value. Washand cut tomatoes and simmer until softened. Do not boil. Avoid useof copper, brass, zinc, and iron utensils. Sieve quickly to avoid undueexposure to air and consequent reduction of vitamin content. Reheatat once to boiling point. Immediately fill hot jars or bottles toI inch from top. Add to 1 teaspoon salt per quart. Process inboiling water bath 15 minutes. Seal cans at once and process 15minutes.
Fruit juices
For detailed procedure see "Home Processing of Fruit andVegetable Juices," Oregon Agricultural Experiment Station Bulletin515, June 1952.
Wash fruit, crush, heat slowly to simmering point, about 190°F. to 200° F. Strain through thick, clean cloth, add I cup sugar toeach quart fruit juice, bring to simmering point but do not boil.Pour hot juice into containers to inch from the top of jar or 1inch from top of enameled can. Avoid all contact with iron, copper,zinc, or brass. Seal. Process jars or tin cans in hot water bath atsimmering point for 20 minutes.
Before using berry juice, a good general rule is first to diluteit from to with cold water and add sugar and lemon juice to taste.Use 1 part of loganberry juice to 4 or 6 parts of cold water and addsugar and lemon juice to taste.
Fruit purees
Fruit purees consist of fruit juice plus small particles of thefruit which have been forced through a sieve or similar device.Proceed as described for tomato juice except add enough water atfirst heating to prevent fruit from sticking to pan. Avoid all contactwith iron, copper, zinc, or brass. Fill hot containers with hot fruitpuree and process in boiling water bath for 20 minutes.
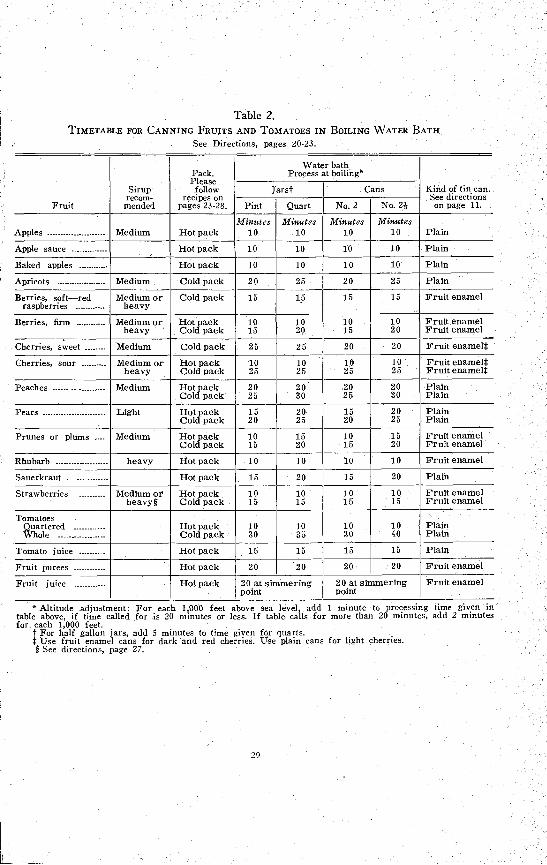
Table 2.TIMETABLE FOR CANNING FRUITS AND TOMATOES IN BOILING WATER BATH
See Directions, pages 20-23.
* Altitude adjustment: For each 1,000 feet above sea level, add 1 minute to processing time given intable above, if time called for is 20 minutes or less. If table calls for more than 20 minutes, add 2 minutesfor each 1,000 feet.
f For half gallon jars, add 5 minutes to time given for quarts.Use fruit enamel cans for dark and red cherries. Use plain cans for light cherries.
§ See directions, page 27.
29
Siruprecom-
Pack.Please
followrecipes on
Water bathProcess at boiling
Kind of tin can.See directions
Jarst Cans
Pint Quart No. 2 No. 2iFruit mended pages 23-28. on page 11.
Minutes Minutes Minutes MinutesApples Medium Hot pack 10 10 10 10 Plain
Apple sauce Hot pack 10 10 10 10 Plain
Baked apples Hot pack 10 10 10 10 Plain
Apricots Medium Cold pack 20 25 20 25 Plain
Berries, softredraspberries
Medium orheavy
Cold pack 15 15 15 15 Fruit enamel
Berries, firm Medium or Hot pack 10 10 10 10 Fruit enamelheavy Cold pack 15 20 15 20 Fruit enamel
Cherries, sweet Medium Cold pack 25 25 20 20 Fruit enamel*
Cherries, sour Medium or Hot pack 10 10 10 10 Fruit enamel*heavy Cold pack 25 25 25 25 Fruit enamel*
Peaches Medium Hot pack 20 20 20 20 PlainCold pack 25 30 25 30 Plain
Pears Light Hot pack 15 20 15 20 PlainCold pack 20 25 20 25 Plain
Prunes or plums Medium Hot pack 10 15 10 15 Fruit enamelCold pack 15 20 16 20 Fruit enamel
Rhubarb heavy Hot pack 10 10 10 10 Fruit enamel
Sauerkraut Hot pack 15 20 15 20 Plain
Strawberries Medium or Hot pack 10 10 10 10 Fruit enamelheavy § Cold pack 15 15 15 15 Fruit enamel
TomatoesQuartered Hot pack 10 10 10 10 PlainWhole Cold pack 30 35 30 40 Plain
Tomato juice Hot pack 15 15 15 15 Plain
Fruit purees Hot pack 20 20 20 20 Fruit enamel
Fruit juice Hot pack 20 at simmeringpoint
20 at simmeringpoint
Fruit enamel
30 EXTENSION BULLETIN 742
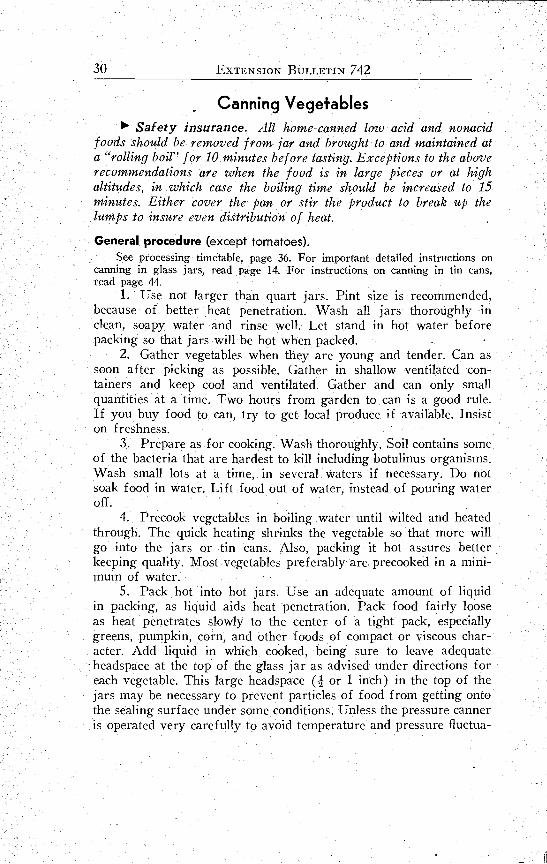
Canning VegetablesSafety insurance. All home cannedlow acid and nonacid
foods should be removed from far and brought to and maintained ata "rolling boil" for 10 minutes before tasting. Exceptions to the aboverecommendations are when the food is in large pieces or at highaltitudes, in which case the boiling time should be increased to 15minutes. Either cover the pan or stir the product to break up thelumps to insure even distribution of heat.
General procedure (except tomatoes).See processing timetable, page 36. For important detailed instructions on
canning in glass jars, read page 14. For instructions on canning in tin cans,read page 44
Use not larger than quart jars. Pint size is recommended,because of better heat penetration. Wash all jars thoroughly inclean, soapy water and rinse well Let stand in hot water beforepacking so that jars will be hot when packed.
Gather vegetables when they are young and tender. Can assoon after picking as possible. Gather in shallow ventilated con-tainers and keep cool and ventilated. Gather and can only smallquantities at a time. Two hours from garden to can is a good rule.If you buy food to can, try to get local produce if available. Insiston freshness.
Prepare as for cooking. Wash thoroughly. Soil contains someof the bacteria that are hardest to kill including botulinus organisms.Wash small lots at a time, in several waters if necessary. Do notsoak food in water. Lift food out of water, instead of pouring wateroff.
Precook vegetables in boiling water until wilted and heatedthrough. The quick heating shrinks the vegetable so that more willgo into the jars or tin cans. Also packing it hot assures betterkeeping quality. Most vegetables preferably are precooked in a mini-mum of water.
Pack hot into hot jars. Use an adequate amount of liquidin packing, as liquid aids heat penetration. Pack food fairly looseas heat penetrates slowly to the center of a tight pack, especiallygreens, pumpkin, corn, and other foods of compact or viscous char-acter. Add liquid in which cooked, being sure to leave adequateheadspace at the top of the glass jar as advised under directions foreach vegetable. This large headspace (i or 1 inch) in the top of thejars may be necessary to prevent particles of food from getting ontothe sealing surface under some conditions. Unless the pressure canneris operated very carefully to avoid temperature and pressure fluctua-
HOME CANNING 31
bons the food may boil vigorously in the jar during sudden loweringof the pressure. If the jars were filled to the top, food would bemore apt to get on the sealing surfaces and this might prevent sealing.Tin cans may be filled to within inch of the top of the can.
Add 4- teaspoon salt per pint. Remove any particles from thesealing surface of the jar with a clean cloth.
The addition of small quantities of acid, such as vinegar orlemon juice, to a nonacid food, such as vegetable or meat, does notchange the acidity enough to prevent the growth of dangerous bac-teria. For additional details on acidifying canned food see page 6.
If self-seal lids are used, screw down firmly tight. If usingjars with separate rubber bands, partly seal jars. See directions foreach type jar, pages 8, 9, and 10. For cans, see page 44.
Process in pressure canner. See directions, page 14, andTimetable 3, page 36. For cans see page 46.
At end of processing period, remove jars and seal, unlessof self-seal type. See directions, page 15, for removing jars fromcanner.
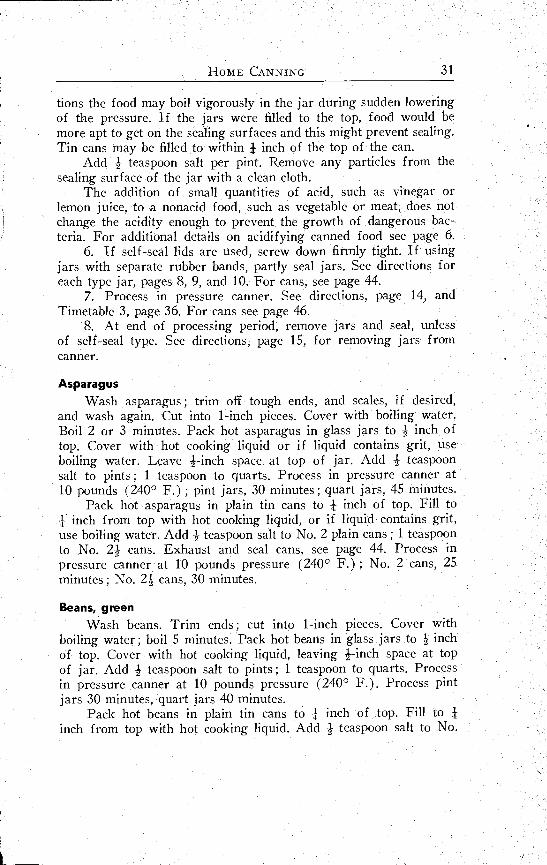
AsparagusWash asparagus ; trim off tough ends, and scales, if desired,
and wash again. Cut into 1-inch pieces. Cover with boiling water.Boil 2 or 3 minutes. Pack hot asparagus in glass jars to 1 inch oftop. Cover with hot cooking liquid or if liquid contains grit, useboiling water. Leave 1-inch space at top of jar. Add 1 teaspoonsalt to pints ; 1 teaspoon to quarts. Process in pressure canner at10 pounds (240° F.) ; pint jars, 30 minutes ; quart jars, 45 minutes.
Pack hot asparagus in plain tin cans to 1 inch of top. Fill to1 inch from top with hot cooking liquid, or if liquid contains grit,use boiling water. Add 1 teaspoon salt to No. 2 plain cans ; 1 teaspoonto No. 21 cans. Exhaust and seal cans, see page 44. Process inpressure canner at 10 pounds pressure (240° F.) ; No. 2 cans, 25minutes ; No. 21 cans, 30 minutes.
Beans, greenWash beans. Trim ends ; cut into 1-inch pieces. Cover with
boiling water ; boil 5 minutes. Pack hot beans in glass jars to inchof top. Cover with hot cooking liquid, leaving 1-inch space at topof jar. Add 4 teaspoon salt to pints ; 1 teaspoon to quarts. Processin pressure canner at 10 pounds pressure (240° F.). Process pintjars 30 minutes, quart jars 40 minutes.
Pack hot beans in plain tin cans to 1 inch of top. Fill to 1inch from top with hot cooking liquid. Add 1 teaspoon salt to No.
EXTENSION BULLETIN 742
2 cans ; 1 teaspoon to No. 21 cans. Seal cans at once if very hot.Otherwise, exhaust and seal cans, see page 44. Process in pressurecanner at 10 pounds pressure (240° F.) ; No. 2 cans, 25 minutes ;No. 24- cans, 30 minutes.
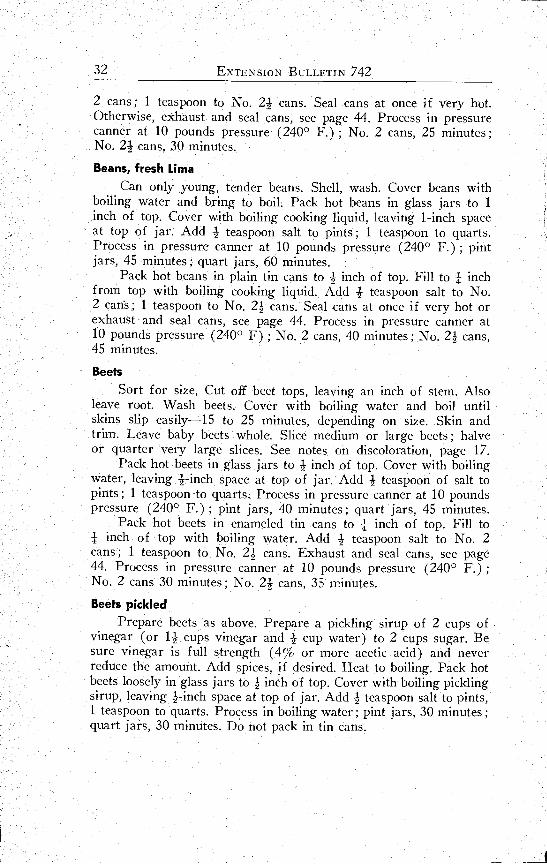
Beans, fresh Lima
Can only young, tender beans. Shell, wash. Cover beans withboiling water and bring to boil. Pack hot beans in glass jars to 1inch of top. Cover with boiling cooking liquid, leaving 1-inch spaceat top of jar. Add teaspoon salt to pints ; 1 teaspoon to quarts.Process in pressure canner at 10 pounds pressure (240° F.) ; pintjars, 45 minutes ; quart jars, 60 minutes.
Pack hot beans in plain tin cans to 1 inch of top. Fill to 1 inchfrom top with boiling cooking liquid. Add 1 teaspoon salt to No2 can's ; 1 teaspoon to No. 21 cans. Seal cans at once if very hot orexhaust and seal cans, see page 44. Process in pressure canner at10 pounds pressure (240° F) ; No. 2 cans, 40 minutes ; No. 21 cans,45 minutes.
Beets
Sort for size, Cut off beet tops, leaving an inch of stem. Alsoleave root. Wash beets. Cover with boiling water and boil untilskins slip easily-15 to 25 minutes, depending on size. Skin andtrim. Leave baby beets whole. Slice medium or large beets ; halveor quarter very large slices. See notes on discoloration, page 17.
Pack hot beets in glass jars to 1 inch of top. Cover with boilingwater, leaving 4-inch space at top of jar. Add teaspoon of salt topints ; 1 teaspoon to quarts. Process in pressure canner at 10 poundspressure (240° F.) ; pint jars, 40 minutes ; quart jars, 45 minutes.
Pack hot beets in enameled tin cans to 1 inch of top. Fill to1 inch of top with boiling water. Add 1 teaspoon salt to No. 2cans ; 1 teaspoon to No. 21 cans. Exhaust and seal cans, see page44. Process in pressure canner at 10 pounds pressure (240° F.) ;No 2 cans 30 minutes ; No 21 cans, 35 minutes.
Beets pickled
Prepare beets as above. Prepare a pickling sirup of 2 cups ofvinegar (or 11 cups vinegar and 1 cup water) to 2 cups sugar. Besure vinegar is full strength (4% or more acetic acid) and neverreduce the amount. Add spices, if desired. Heat to boiling. Pack hotbeets loosely in glass jars to 1 inch of top. Cover with boiling picklingsirup, leaving finch space at top of jar. Add 1 teaspoon salt to pints,1 teaspoon to quarts. Process in boiling water ; pint jars, 30 minutes ;quart jars, 30 minutes. Do not pack in tin cans.
HOME CANNING 33
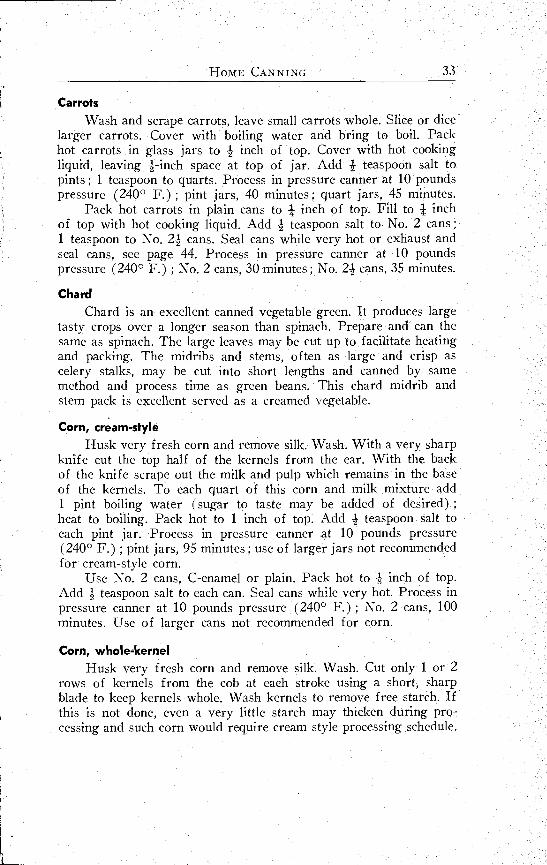
Carrots
Wash and scrape carrots, leave small carrots whole. Slice or dicelarger carrots. Cover with boiling water and bring to boil. Packhot carrots in glass jars to + inch of top. Cover with hot cookingliquid, leaving finch space at top of jar. Add -/ teaspoon salt topints ; 1 teaspoon to quarts. Process in pressure canner at 10 poundspressure (240° F.) ; pint jars, 40 minutes ; quart jars, 45 minutes.
Pack hot carrots in plain cans to inch of top. Fill to inchof top with hot cooking liquid. Add -1 teaspoon salt to No. 2 cans ;1 teaspoon to No. 2-1 cans. Seal cans while very hot or exhaust andseal cans, see page 44. Process in pressure canner at 10 poundspressure (240° F.) ; No. 2 cans, 30 minutes ; No. 21 cans, 35 minutes.
ChardChard is an excellent canned vegetable green. It produces large
tasty crops over a longer season than spinach. Prepare and can thesame as spinach. The large leaves may be cut up to facilitate heatingand packing. The midribs and stems, often as large and crisp ascelery stalks, may be cut into short lengths and canned by samemethod and process time as green beans. This chard midrib andstem pack is excellent served as a creamed vegetable.
Corn, cream-styleHusk very fresh corn and remove silk. Wash. With a very sharp
knife cut the top half of the kernels from the ear. With the backof the knife scrape out the milk and pulp which remains in the baseof the kernels. To each quart of this corn and milk mixture add1 pint boiling water (sugar to taste may be added of desired) ;heat to boiling. Pack hot to 1 inch of top. Add teaspoon salt toeach pint jar. Process in pressure canner at 10 pounds pressure(240° F.) ; pint jars, 95 minutes ; use of larger jars not recommendedfor cream-style corn.
Use No. 2 cans, C-enamel or plain. Pack hot to .1 inch of top.Add teaspoon salt to each can. Seal cans while very hot. Process inpressure canner at 10 pounds pressure (240° F.) ; No. 2 cans, 100minutes. Use of larger cans not recommended for corn.
Corn, whole-kernelHusk very fresh corn and remove silk. Wash. Cut only 1 or 2
rows of kernels from the cob at each stroke using a short, sharpblade to keep kernels whole. Wash kernels to remove free starch. Ifthis is not done, even a very little starch may thicken during pro-cessing and such corn would require cream style processing schedule.
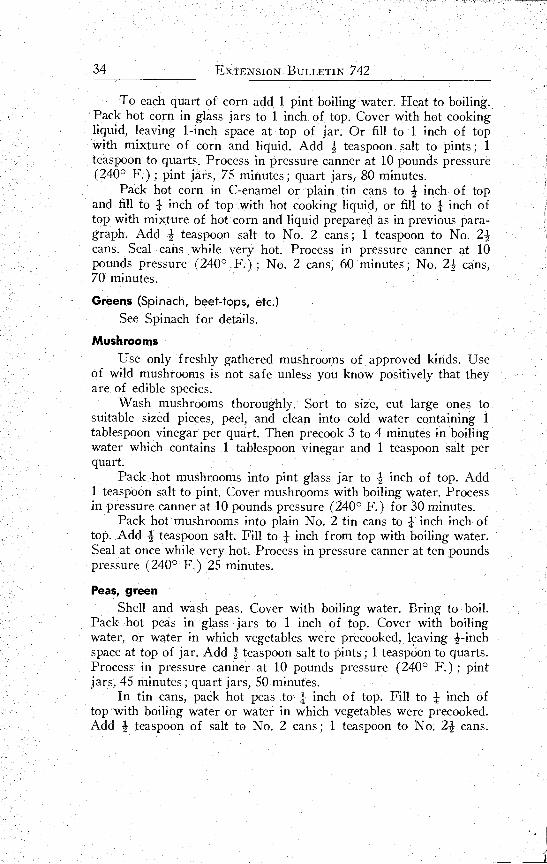
To each quart of corn add 1 pint boiling water. Heat to boiling.Pack hot corn in glass jars to 1 inch of top. Cover with hot cookingliquid, leaving 1-inch space at top of jar. Or fill to 1 inch of topwith mixture of corn and liquid. Add A teaspoon salt to pints ; 1
teaspoon to quarts. Process in pressure canner at 10 pounds pressure(240° F.) ; pint jars, 75 minutes ; quart jars, 80 minutes.
Pack hot corn in &enamel or plain tin cans to j inch of topand fill to inch of top with hot cooking liquid, or fill to 1 inch oftop with mixture of hot corn and liquid prepared as in previous para-graph. Add A teaspoon salt to No. 2 cans ; 1 teaspoon to No. 21cans. Seal cans while very hot. Process in pressure canner at 10pounds pressure (240° F.) ; No 2 cans, 60 minutes ; No 24- cans,70 minutes.
Greens (Spinach, beet-tops, etc.)See Spinach for details.
MushroomsUse only freshly gathered mushrooms of approved kinds. Use
of wild mushrooms is not safe unless you know positively that theyare of edible species.
Wash mushrooms thoroughly. Sort to size, cut large ones tosuitable sized pieces, peel, and clean into cold water containing 1tablespoon vinegar per quart. Then precook 3 to 4 minutes in boilingwater which contains 1 tablespoon vinegar and 1 teaspoon salt perquart.
Pack hot mushrooms into pint glass jar to inch of top. Add1 teaspoon salt to pint. Cover mushrooms with boiling water. Processin pressure canner at 10 pounds pressure (240° F.) for 30 minutes.
Pack hot mushrooms into plain No. 2 tin cans to inch inch oftop. Add teaspoon salt. Fill to 1 inch from top with boiling water.Seal at once while very hot. Process in pressure canner at ten poundspressure (240° F.) 25 minutes.
Peas, green
Shell and wash peas. Cover with boiling water. Bring to boil.Pack hot peas in glass jars to 1 inch of top. Cover with boilingwater, or water in which vegetables were precooked, leaving A-inchspace at top of jar. Add A teaspoon salt to pints ; 1 teaspoon to quarts.Process in pressure canner at 10 pounds pressure (240° F.) ; pintjars, 45 minutes ; quart jars, 50 minutes.
In tin cans, pack hot peas to I inch of top. Fill to inch oftop with boiling water or water in which vegetables were precooked.Add A teaspoon of salt to No. 2 cans ; 1 teaspoon to No. 2A cans.
HOME CANNING
Seal at once while very hot. Process at 10 pounds pressure (240° F.) ;
No. 2 cans, 35 minutes ; No. 21 cans, 40 minutes.
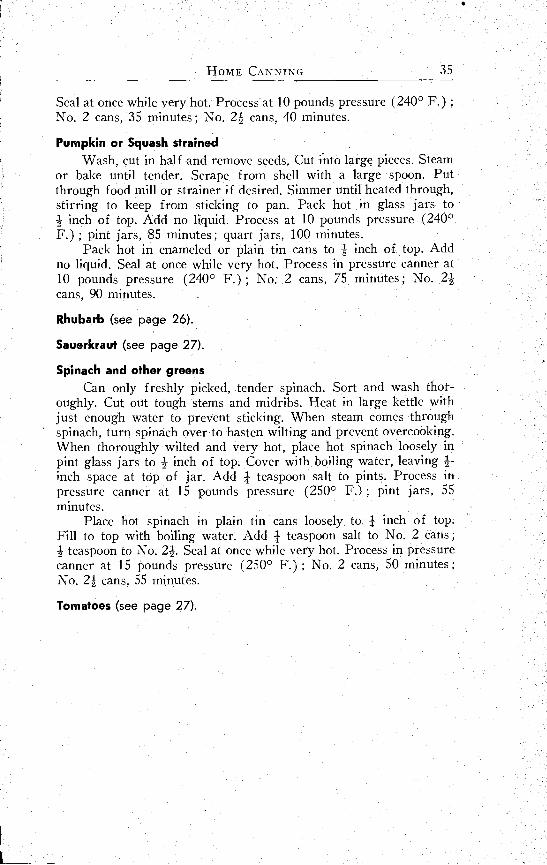
Pumpkin or Squash strainedWash, cut in half and remove seeds. Cut into large pieces. Steam
or bake until tender. Scrape from shell with a large spoon. Putthrough food mill or strainer if desired. Simmer until heated through,stirring to keep from sticking to pan. Pack hot in glass jars to1 inch of top. Add no liquid. Process at 10 pounds pressure (240°
F.) ; pint jars, 85 minutes ; quart jars, 100 minutes.Pack hot in enameled or plain tin cans to inch of top. Add
no liquid. Seal at once while very hot. Process in pressure canner at10 pounds pressure (240° F.) ; No. 2 cans, 75 minutes ; No. 21
cans, 90 minutes.
Rhubarb (see page 26).
Sauerkraut (see page 27).
Spinach and other greensCan only freshly picked, tender spinach. Sort and wash thot.-
oughly. Cut out tough stems and midribs. Heat in large kettle withjust enough water to prevent sticking. When steam comes throughspinach, turn spinach over to hasten wilting and prevent overcooking.When thoroughly wilted and very hot, place hot spinach loosely inpint glass jars to 1 inch of top. Cover with boiling water, leaving 1-inch space at top of jar. Add / teaspoon salt to pints. Process inpressure canner at 15 pounds pressure (250° F.) ; pint jars, 55minutes.
Place hot spinach in plain tin cans loosely to 1 inch of top.Fill to top with boiling water. Add / teaspoon salt to No. 2 cans ;
teaspoon to No. 21. Seal at once while very hot. Process in pressurecanner at 15 pounds pressure (250° F.) ; No. 2 cans, 50 minutes ;No. 21 cans, 55 minutes.
Tomatoes (see page 27).
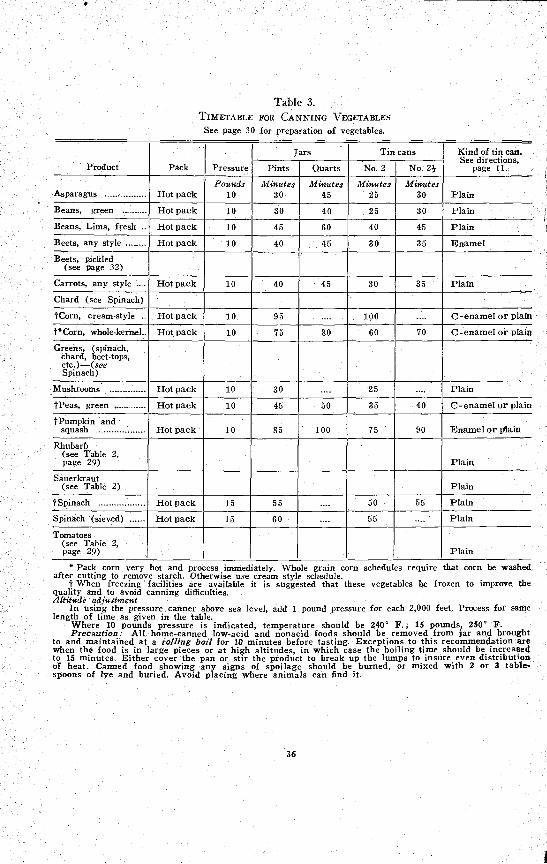
Table 3.TIMETABLE FOR CANNING VEGETABLES
See page 30 for preparation of vegetables.
* Pack corn very hot and process immediately. Whole grain corn schedules require that corn be washedafter cutting to remove starch. Otherwise use cream sty e schedule.
t When freezing facilities are available it is suggested that these vegetables be frozen to improve thequality and to avoid canning difficulties.Altitude adjustment
In using the pressure canner above sea level, add 1 pound pressure for each 2,000 feet, Process for samelength of time as given in the table.
Where 10 pounds pressure is indicated temperature should be 240° F. ; 15 pounds, 250° F.Precaution: All home-canned low-acid and nonacid foods should be removed from jar and brought
to and maintained at a rolling boil for 10 minutes before tasting. Exceptions to this recommendation arewhen the food is in large pieces or at high altitudes, in which case the boiling time should be increasedto 15 minutes. Either cover the pan or stir the product to break up the lumps to insure even distributionof heat. Canned food showing any signs of spoilage should be burned, or mixed with 2 or 3 table-spoons of lye and buried. Avoid placing where animals can find it.
36
Product Pack Pressure
Jars Tin cans Kind of tin can.See directions,
page 11.Pints Quarts No. 2 No. 21
Asparagus Hot packPounds
10Minutes
30Minutes
45Minutes
25Minutes
30 PlainBeans, green Hot pack 10 30 40 25 30 PlainBeans, Lima, fresh Hot pack 10 45 60 40 45 PlainBeets, any style Hot pack 10 40 45 30 35 Enamel
Beets, pickled(see page 32)
Carrots, any style . Hot pack 10 40 45 30 35 Plain
Chard (see Spinach)
'Worn, cream-style Hot pack 10 95 .... 100 .... C-enamel or plain
i**Corn, whole-kernel_ Hot pack 10 75 80 60 70 C-enamel or plainGreens, (spinach,
chard, beet-tops,etc.)(seeSpinach)
Mushrooms Hot pack 10 30 .... 25 .... Plain
tPeas, green .- - Ho pack 10 45 50 35 40 C-enamel or plain
t Pumpkin andsquash Hot pack 10 85 100 75 90 Enamel or plain
Rhubarb(see Table 2,page 29) Plain
Sauerkraut(see Table 2) Plain
t Spinach Hot pack 15 55 .... 50 55 Plain
Spinach (sieved) Hot pack 15 60 .... 55 .... Plain
Tomatoes(see Table 2,page 29) Plain
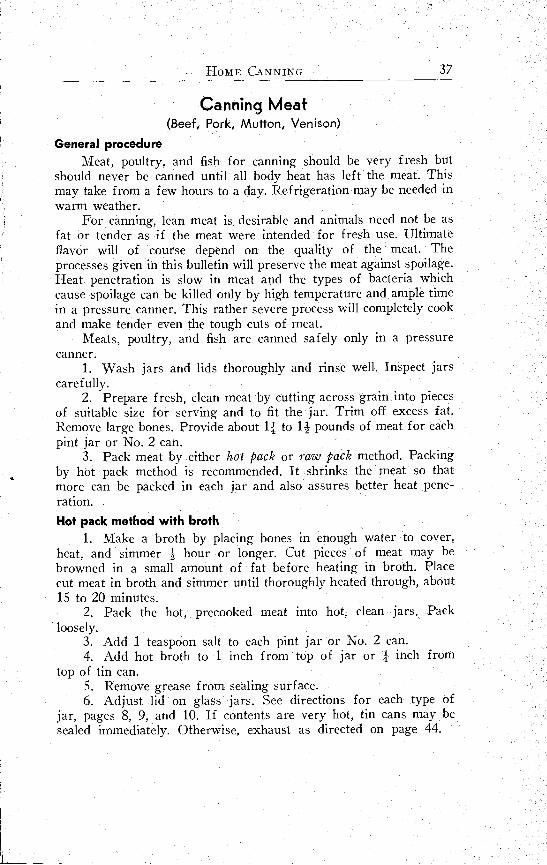
Canning Meat(Beef, Pork, Mutton, Venison)
General procedureMeat, poultry, and fish for canning should be very fresh but
should never be canned until all body heat has left the meat. Thismay take from a few hours to a day. Ref rigeration may be needed inwarm weather.
For canning, lean meat is desirable and animals need not be asfat or tender as if the meat were intended for fresh use. Ultimateflavor will of course depend on the quality of the meat. Theprocesses given in this bulletin will preserve the meat against spoilage.Heat penetration is slow in meat and the types of bacteria whichcause spoilage can be killed only by high temperature and ample timein a pressure canner. This rather severe process will completely cookand make tender even the tough cuts of meat.
Meats, poultry, and fish are canned safely only in a pressurecanner.
Wash jars and lids thoroughly and rinse well. Inspect jarscarefully.
Prepare fresh, clean meat by cutting across grain into piecesof suitable size for serving and to fit the jar. Trim off excess fat.Remove large bones. Provide about l to 14 pounds of meat for eachpint jar or No. 2 can.
Pack meat by either hot pack or raw pack method. Packingby hot pack method is recommended. It shrinks the meat so thatmore can be packed in each jar and also assures better heat pene-ration.Hot pack method with broth
Make a broth by placing bones in enough water to cover,heat, and simmer hour or longer. Cut pieces of meat may bebrowned in a small amount of fat before heating in broth. Placecut meat in broth and simmer until thoroughly heated through, about15 to 20 minutes.
Pack the hot, precooked meat into hot, clean jars. Packloosely.
Add 1 teaspoon salt to each pint jar or No. 2 can.Add hot broth to 1 inch from top of jar or inch from
top of tin can.Remove grease from sealing surface.Adjust lid on glass jars. See directions for each type of
jar, pages 8, 9, and 10. If contents are very hot, tin cans may besealed immediately. Otherwise, exhaust as directed on page 44.
HOME CANNING 37
38 EXTENSION BULLETIN 742
7. Place hot jars at once into hot pressure canner. Followpressure canner directions, page 14 for glass jars or page 46 fortin cans. Follow processing timetable, page 43.
Hot pack method with roasted, broiled, or fried meat
This method produces much more tasty and better lookingfinished meat than the broth method.
Cut meat across grain into suitable size pieces or grind it.Meat should be cooked enough to brown it, develop flavor,
and heat it throughout. The meat may be made into cakes or sausageand fried. Season if desired. Avoid flour or crumb coatings andthickened gravy. Such thickeners may seriously reduce the rate ofheat penetration in the jar or can.
Pack while hot into jars to within 1 inch of top or inchfrom top of tin can.
Add 1 teaspoon salt to each pint jar or No 2 canAdd some of the pan drippings to each of the jars for
flavor. The drippings may be extended with water but in no caseshould they fill the jar above 1 inch from the top. It is not necessaryto add liquid to the jars to insure heat penetration and sterilization.Tin cans should be filled with liquid to within inch of top.
Remove grease from sealing surface of jar.Adjust lid on glass jars. See directions for each type of
jar, pages 8, 9, and 10. If contents are very hot, tin cans may besealed immediately. Otherwise, exhaust as directed in 4, page 45.
Place hot jars at once into hot pressure canner. Followpressure canner directions, page 14, for glass jars or page 46 for tincans. Follow processing timetable, page 43.
Raw pack method
This method takes less time to pack and is simple.Place cut pieces of meat of suitable size moderately tight
into clean jars to within 1 inch of top of jar or 1 inch of top oftin can Meat will make its own juice. Do not add liquid.
Add 1 teaspoon salt to pint jars or No. 2 cans.Remove any grease from sealing surface.Adjust lid on glass jars. See directions for each type jar,
pages 8, 9, and 10. Tin cans should be exhausted and sealed. Seedirections, page 44.
Place jars in warm water in pressure canner. Follow pres-sure canner directions, page 14, for glass jars and page 46 for tincans. Follow processing timetable, page 43.

HOME CANNING 39
Canning Poultry
Chicken
Large hens are best for canning. They have better flavorand have a much higher percentage of flesh to waste.
Wash jars and lids thoroughly and rinse well. Inspect jarscarefully
Kill chickens, preferably several hours before drawing. Re-move feathers. Cool thoroughly. Singe. Scrub thoroughly and rinsewell.
Draw and leave whole or cut as suggested in the followingmethods.
Directions are given for three ways of canning chicken:Hot pack with bones, raw pack with bones, and boned cooked chicken.
Can the gibletsheart, gizzard, and liverin jars separatelyfrom the other chicken meat or use them fresh. The strong flavorof these pieces may be undesirable in the jars with the meat. Becauseof flavor, livers are often canned alone. Process same as chicken.
Hot pack with bonesThe partially cooked and seasoned chicken is packed in jars.
The chicken may be roasted whole or after cutting, or it may bestewed or fried or otherwise prepared.
Remove bone from breast, back, and shoulders. Leave otherbones in the meat.
Pack the chicken loosely into jars. First place a drumstickinto the jar. Then add a thigh, two wings with elbows fitted together,and the neck in the center of the jar. Fill the jar to within 1 inchof the top (/ inch for cans) with remaining pieces except giblets.Depending on the size of chicken and size of jars used this pro-cedure or selection will have to be varied somewhat.
Add 1 teaspoon salt to each pint jar or No. 2 can.Pan drippings may be added, but not closer than 1 inch from
top of jar. It is not necessary to add liquids to the jar to insure heatpenetration and sterilization. Cans should be filled with liquid towithin I inch of top.
Carefully remove grease from sealing surface.Adjust lid on glass jars. See directions for each type jar on
pages 8, 9, and 10. If contents are very hot, tin cans may be sealedimmediately. Otherwise, exhaust as directed on page 44.
Place jar at once into hot pressure canner. Follow pressurecanner directions, page 14, for glass jars, or page 46 for tin cans.Follow processing timetable, page 43.
40 EXTENSION BULLETIN 742
Raw pack with bonesCut chicken in usual size pieces. Remove bone from breast,
back, and shoulders. Leave other bones in the meat,Place pieces of raw chicken into the jars in the same manner
as given under "Hot pack with bones."Add 1 teaspoon salt to each pint jar or No. 2 can.It is not necessary to add liquid. Raw chicken will make
juice at it cooks.Carefully remove grease from sealing surface.Adjust lid on glass jars. See directions for each type jar
on pages 8, 9, and 10. Tin cans should be exhausted and sealed. Seedirections on page 44.
Place jars at once into warm pressure canner. Follow pres-sure canner directions, page 14, for glass jars, or page 16 for tin cans.Follow processing timetable, page 43.
Chicken boned (for sandwiches and salads)Prepare chickens as in general procedure, page 39.Cook the chicken until meat can be separated readily from
the bones. This may be done by roasting or cooking in a minimumof water. A good method is to cook the chicken (whole or in pieces)in steam in a pressure canner. To precook the chicken in the pressurecanner, place a rack in the bottom. Use enough water to prevent thecooker from boiling dry. The lid need not be fastened down. Chickenjuices and fat going into this water make an excellent broth usefulfor packing the chicken or for soups or gravies. A quick method isto precook the chicken at 5 or 10 pounds pressure for 30 minutes ormore.
Separate the chicken flesh from the bones.Pack the meat into clean jars to within 1 inch from top of
jar or inch for tin cans. Meat can be packed hot, or cooled andsliced or minced before packing.
Add 1 teaspoon salt to each pint jar or No. 2 can.Add broth to cover chicken pieces but be sure to leave 1
inch headspace at top of jar ; I inch in cans.Carefully remove any grease from the sealing surface.Adjust lid on glass jars. See directions for each type jar
on pages 8, 9, and 10. Exhaust and seal tin cans. See directions onpage 44.
Follow pressure canner directions, page 14, for glass jarsor page 46 for tin cans.Turkey
Turkey may be canned the same as chicken. It is most satis-factory, however, if canned boned after cooking, as for chickenabove. Process same as for chicken of same style pack.
Rabbits
Prepare and can same as any method for chicken. Process sameas for chicken.
Canning Fish*
"Doesn't everyone hope that at some time their catch of sportfish will be in abundance for canning?" Many fish products can becanned economically at home. Home-canned fish can be of excellentquality. Can only very fresh fish. Each kind of fish is at its bestfor canning during a certain season. Obtain fish for canning at thatseason if possible. Pressure canner is the only method recommendedfor canning fish.
Salmon
Prepare jars and lids by washing thoroughly and rinsingwell. Inspect jars carefully.
Dress salmon by removing head, tail, fins, scales, and entrails.It is not necessary but preferable to scale salmon. Scales may beremoved by scraping with a tail to head direction. A light scald willloosen them quickly. Further scalding makes skinning easy but thisis not recommended because the skin is good food and there is muchof the natural fat just under the skin.
Cut salmon into lengths each 1 inch shorter than the jarsto be packed. Cut pieces 1 inch shorter than the depth of the cans tobe packed.
Split these thick slices lengthwise parallel to the backboneinto pieces of such size as may be conveniently packed into thejars. Since tin can sides are straight, the salmon often may be cutinto solid chunks that will just tightly fit the cans and leave 1-inchheadspace at top of can.
Pack raw fish into jars, fitting pieces tightly and leaving1 inch of headspace at top of jar or 1 inch at top of tin can.
Add 1 teaspoon salt to pint jar or No. 2 can.If salmon is late season or not fat, it may be improved by
the addition of two tablespoonfuls of edible oil to a pint jar orNo. 2 can. Or add a piece of the fat meat from the belly or fromnear the neck of the salmon.
Adjust lid of glass jars. See directions for each type of jaron page 8. Tin cans must be exhausted and sealed. See directionson page 44.
* Material for this section was compiled largely from Oregon Agricultural ExperimentStation Circular 164, Preservation of Seafoods by Edward W. Harvey,
42 EXTENSION BULLETIN 742
9. Place jars at once into warm water in pressure canner.Follow pressure canner directions on page 14 for glass jars orpage 46 for tin cans. Follow processing timetable, page 43. Steelhead Salmon (trout) requires one-fourth longer cooking time forsoftening the bones to make them edible.
Tuna (Albacore)
Either fresh or frozen tuna are suitable for canning. If frozenones are used ample time should be allowed for them to thaw beforedressing. Blood in tuna detracts much from the appearance of thecanned product. All tuna should have their throats cut and be thor-oughly bled when caught.
Tuna ordinarily are canned quite differently than most otherkinds of fish. They are precooked to remove most of the natural bodyoil which tends to be bitter. This is because few people are familiarwith the very different flavor of tuna oil. They expect home-cannedtuna to taste the same as the commercially canned product. After theprecooking and removal of oil, the tuna is cleaned and packed.Suitable oil or oil and water or water is added to supply flavor andimprove the texture, which otherwise would be very firm and dry.
Tuna may be canned in chunks raw just as salmon is canned.While this method provides safe and nutritious food, it does notmake an attractive pack. Many persons might be surprised at theunusual, rich flavor of such tuna packs.
Dress tuna for canning by removing gills and viscera orentrails. Head may be removed or left on until after precooking,Wash well in cold water. Allow all blood to drain.
Place the tuna (cut in half if ,necessary) belly down ona rack or screen which will hold it an inch or more off the bottomof a large baking pan.
Bake the tuna in a low temperature oven (225° to 250° F.)for 2i to 4 hours, depending on the size of the fish, until cookedthrough.
Allow to cool to room temperature. It is desirable to allow itto stand overnight to cool and firm well.
Clean fish by peeling off the skin and lightly scraping surfaceto remove blood vessels and any discolored flesh.
Separate the tuna into its natural four quarters lengthwise.First separate it vertically from back to belly. Remove backbone andall other bones thus made available. Each of the halves thus formedwill divide again along the lines of bones and fin bases which may beremoved readily.
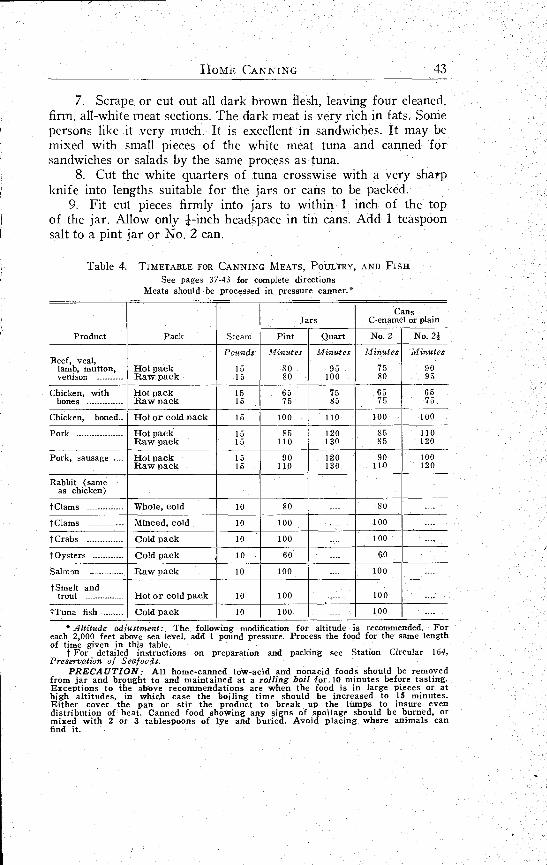
Scrape or cut out all dark brown flesh, leaving four cleaned,firm, all white meat sections. The dark meat is very rich in fats. Somepersons like it very much. It is excellent in sandwiches. It may bemixed with small pieces of the white meat tuna and canned forsandwiches or salads by the same process as tuna.
Cut the white quarters of tuna crosswise with a very sharpknife into lengths suitable for the jars or cans to be packed.
Fit cut pieces firmly into jars to within 1 inch of the topof the jar. Allow only 1-inch headspace in tin cans. Add 1 teaspoonsalt to a pint jar or No. 2 can.
Table 4. TIMETABLE FOR CANNING MEATS, POULTRY, AND FISHSee pages 37-43 for complete directions
Meats should be processed in pressure canner.*
* Altitude adjustment: The following modification for altitude is recommended. Foreach 2,000 feet above sea level, add 1 pound pressure. Process the food for the same lengthof time given in this table.
For detailed instructions on preparation and packing see Station Circular 164,Preservation of Seafoods.
PRECAUTION: All home-canned low-acid and nonacid foods should be removedfrom jar and brought to and maintained at a rolling boil for.10 minutes before tasting.Exceptions to the above recommendations are when the food is in large pieces or athigh altitudes, in which case the boiling time should be increased to 15 minutes.Either cover the pan or stir the product to break up the lumps to insure evendistribution of heat. Canned food showing any signs of spoilage should be burned, ormixed with 2 or 3 tablespoons of lye and buried. Avoid placing where animals canfind it.
JarsCans
C-enamel or plain
Product Pack Steam Pint Quart No. 2 No. 2i
Pounds Minutes Minutes Minutes MinutesBeef, veal,
lamb, mutton,venison
Hot packRaw pack
1515
8080
95100
7580
9095
Chicken, with Hot pack 15 65 75 65 65bones Raw pack 15 75 85 75 75
Chicken, boned Hot or cold pack 15 100 110 100 100
Pork Hot pack 15 85 120 85 110Raw pack 15 110 130 85 120
Pork, sausage .... Hot pack 15 90 120 90 100Raw pack 15 110 130 110 120
Rabbit (sameas chicken)
tClams Whole, cold 10 80 80
t Clams Minced, cold 10 100 100
t Crabs Cold pack 10 100 .. 100
I' Oysters Cold pack 10 60 .... 60
Salmon Raw pack 10 100 100 .
t Smelt andtrout Hot or cold pack 10 100 100 . .
tTuna fish ... . . Cold pack 10 100 100
EXTENSION BULLETIN 742
Add 5 to 6 tablespoons of cottonseed, soy, olive, or otheredible oil to each pint jar or No 2 can Water or half and half oiland water may be used Many people prefer this combination.
Remove any oil or fish material from sealing surface.Adjust lids on glass jars. See directions for each type jar
on pages 8, 9, and 10. Tin cans should be exhausted and sealed.See directions, page 45.
Place jars at once into warm water in pressure canner.Follow pressure canner directions, page 14, for glass jars or page46 for tin cans. Follow processing timetable, page 43.
Smelt and troutThese are soft fish and will be softened further by the canning
process.Clean and wash the fish well. They may be packed whole or
cut up. They may be browned in fat.Fill jars to not nearer than 1 inch of top, and cans to I
inch of top.Add 1 teaspoon salt to each pint jar or No. 2 can.Diluted pan drippings may be added for flavor. If liquid
is added, do not fill liquid closer than 1 inch from top of jar.Adjust lid on glass jars. See directions for each type jar
on pages 8, 9, and 10. Tin cans should be exhausted and sealed. Seedirections on page 45.
Place jars at once into warm water in pressure canner.Follow pressure canner directions, page 14, for glass jars or page46 for tin cans. Follow processing timetable, page 43.
Processing in Tin CansExamining and marking cans
Examine cans carefully for any defects. Carefully straightenany cans that have dented rims. Discard cans that have sideseams which have separated at the solder.Mark cans with China marking pencil, tin can ink, or a sharpinstrument. Mark with name of product, date, method, pro-cessing batch number, and any other pertinent information.
Filling, exhausting, and sealing tin cansPack by either hot or cold method according to directions given
below. Fruits, tomatoes, meat, and fish may be packed either hot orcold. When cans are filled cold they must be heated (exhausted)before sealing. See directions for exhausting, item 4 on next page.
HOME CANNING 45
Cold packFill the cans with prepared food. Avoid tight, solid pack.
Room for plenty of sirup or brine assures thorough heat penetrationand sterilization. Tomato juice may be added to tomatoes.
Add salt as directed for meat and fish.For fruits, add boiling sirup, of correct density, to within
i inch of top of can. Liquids may be added to meat or fish as directedfor each product.
Exhaust or preheat the can. To exhaust, heat the filled canson a screen or grid in a pan of boiling water reaching to within 1to 1 inches of the top of the cans, until the temperature at the centerof the cans reaches 160° F. or more For fruits this may take 10 to15 minutes. For dense, colk products it may take 20 to 40 minutes.Keep the exhaust pan covered. Avoid water boiling into cans. Thepurpose of this exhausting is to expand the contents of the can sothat the expansion during processing after sealing will not be suffi-cient to strain the seams or buckle the ends of the cans ; also to expelthe air from the product, and to prevent corrosion of the inside of thecans.
When the cans are exhausted sufficiently, seal them promptlyon the tin can sealer. Follow manufacturer's directions carefully foreach type of sealer. This is a very important operation and mustbe done exactly right.
Process immediately after sealing. Process all meats and fishin a pressure canner. Process fruits in hot water bath, (see pages 22and 47). See Timetables 2, page 29, and 4, page 43. Operate pressurecanner as directed in section "Processing tin cans in a pressurecanner."
Hot packPack all nonacid vegetables boiling hot. Pack precooked
meat hot. Fill cans to within inch of the top of the can.Add salt as directed for each product.Add boiling water in which vegetables or meats were cooked
to within I inch of the top of the can. Headspace should not exceedinch. Excess headspace in cans may cause darkening of some foods.
It may cause corrosion of the cans and will cause loss of some nu-tritive values in vegetables.
If contents are very hot, tin cans may be sealed immediately.Otherwise, exhaust as directed in 4, page 45. Follow directionsprovided by the manufacturer of the tin can sealer carefully. Thisis very important.
Process cans at once as directed in paragraphs on next page.
46 EXTENSION BULLETIN 742
Processing tin cans in pressure canner
Before using a pressure canner for processing tin cans, referto and become thoroughly familiar with directions for using a pres-sure canner, and care of pressure canner, pages 13 and 14.
When a batch of cans is sealed place them immediately intothe pressure canner which has 2 to 3 inches of boiling water in it
Heat penetration to center of cans is aided by placing the cansin such a position that layers of food within the cans are vertical.Tin cans of spinach are best laid on their sides. Such vertical packsas asparagus stalks process best if the cans are upright.
Place the cover on the canner. Follow directions for eachmake of canner. Refer to page 14.
Heat rapidly until steam escapts steadily from the openpetcock. Let steam escape freely for ten minutes to insure that all theair has been driven out of the canner. Otherwise the pressure gaugemay indicate air pressure, not steam pressure, within the canner andthe temperature will be lower than the pressure gauge indicates.Steam pressure, not air pressure, is required to produce the necessaryhigh sterilization temperature.
Close the petcock and continue heating until the desired pres-sure or temperature is reached. Quality of the product is improvedby bringing up the pressure quickly. At altitudes of 2,000 feet orabove, more pressure is needed. See Table 3, page 36, and Table 4,page 43.
Begin to count cooking time when the gauge registers thecorrect pressure. Write down this time and the time when the processis to finish. Process at the necessary pressure and temperature forthe required length of time. (See Tables 3 and 4, pages 36 and 43).
When the cooking time is up, open the steam cock wideexcept under the following conditions when a sudden release ofpressure might result in buckling of the cans : (1) When pumpkin,corn, spinach or other greens are being cooked. (2) If cans arelarger than No 2. Under the conditions indicated, lower the pres-sure gradually.
When the gauge indicates zero, open the cooker and removethe cans. Watch for leakage from poor seams.
Cool the cans completely and quickly by placing them undercold running water.
Observe cans for at least 2 weeks to see if bulges or leaksappear. If any spoilage develops, examine all the cans that wereprocessed in the same batch.
Check label information and store in the coolest place avail-
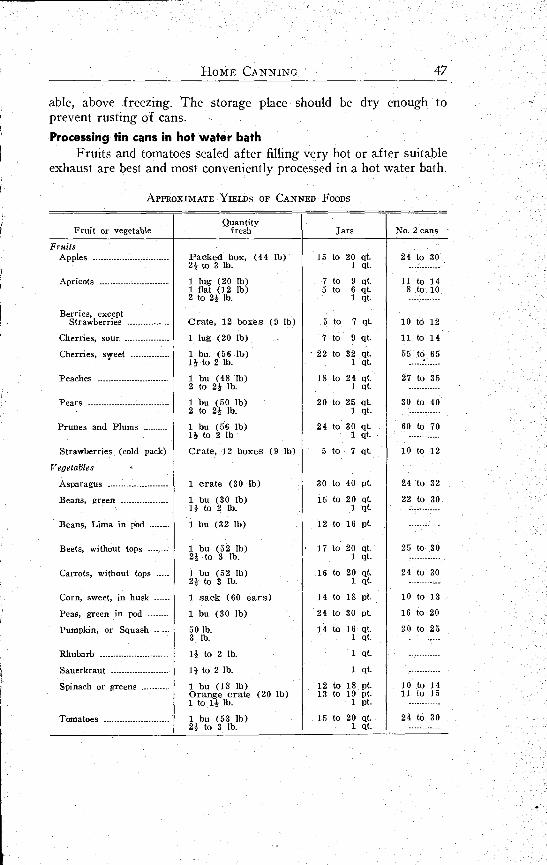
able, above freezing. The storage place should be dry enough toprevent rusting of cans.Processing tin cans in hot water bath
Fruits and tomatoes sealed after filling very hot or after suitableexhaust are best and most conveniently processed in a hot water bath.
APPROXIMATE YIELDS OF CANNED FOODS
Fruit or vegetableQuantity
fresh Jars No. 2 cans
FruitsApples Packed box, (44 lb) 15 to 20 qt. 24 to 30
21 to 3 lb. 1 qt.
Apricots 1 lug (20 lb) 7 to 9 qt. 11 to 141 flat (12 lb) 5 to 6 qt. 8 to 102 to 21 lb. 1 qt.
Berries, exceptStrawberries Crate, 12 boxes (9 lb) 5 to 7 qt. 10 to 12
Cherries, sour 1 lug (20 lb) 7 to 9 qt. 11 to 14Cherries, syeet 1 bu. (56 lb) ' 22 to 32 qt. 55 to 65
1/ to 2 lb. 1 qt.
Peaches 1 bu (48 lb) 18 to 24 qt. 27 to 352 to 2* lb. 1 qt.
Pears 1 bu (50 lb) 20 to 25 qt. 30 to 402 to 21 lb. 1 qt.
Prunes and Plums 1 bu (56 lb) 24 to 30 qt. 60 to 7011 to 2 lb 1 qt.
Strawberries (cold pack) Crate, 12 boxes (9 lb) 5 to 7 qt. 10 to 12
Vegetables
Asparagus 1 crate (30 lb) 30 to 40 pt. 24 to 32
Beans, green 1 bu (30 lb) 15 to 20 qt. 22 to 301/ to 2 lb. 1 qt.
Beans, Lima in pod 1 bu (32 lb) 12 to 16 pt.
Beets, without tops 1 bu (52 lb) 17 to 20 qt. 25 to 3021 to 3 lb. 1 qt.
Carrots, without tops 1 bu (52 lb) 16 to 20 qt. 24 to 302/ to 3 lb. 1 qt.
Corn, sweet, in husk 1 sack (60 ears) 14 to 18 pt. 10 to 13
Peas, green in pod 1 bu (30 lb) 24 to 30 pt. 16 to 20
Pumpkin, or Squash 50 lb. 14 to 16 qt. 20 to 253 lb. 1 qt.
Rhubarb 11 to 2 lb. 1 qt.
Sauerkraut 11- to 2 lb. 1 qt.
Spinach or greens 1 bu (18 lb) 12 to 18 pt. 10 to 14Orange crate (20 lb) 13 to 19 pt. 11 to 151 to 11 lb. 1 pt.
Tomatoes 1 bu (53 lb) 15 to 20 qt. 24 to 3021 to 3 lb. 1 qt.
HOME CANNING 47
48 EXTENSION BULLETIN 742
Cans are processed easily and rapidly this way because sealing iscomplete and safe, cans will not break, and they heat rapidly,
Processing times given are such that cooling may be done incold water in a short time This quick removal of heat often makespossible considerably firmer, brighter coloredfruits than those cannedin glass jars.
Publications Available on Subjects Related toHome Food Preservation
Oregon State College PublicationsThe Freezing Preservation of Fruits and VegetablesExtension Bulletin 688Home Curing of Meats and FishExtension Bulletin 731Home Fruit and Vegetable DehydrationStation Circular 423Home Preservation of EggsHE 3-301The Preservation of SeafoodsStation Circular 164Vegetable StorageExtension Bulletin 601Farm and Home Vegetable GardenExtension Bulletin 614Growing Fall and Early Winter VegetablesExtension Bulletin 594Vegetable Garden Insect-Pest ControlExtension Bulletin 676Freezing Eggs at HomeHE 3-304Freezing Meat, Poultry, Fish, and GameExtension Bulletin 732Home Processing of Fruit and Vegetable JuicesStation Bulletin 515Home Preparation of Maraschino CherriesStation Bulletin 497
U. S. Department of Agriculture PublicationsBeef on the Farm, Slaughtering, Cutting and CuringFarmers Bulletin 1415Drying Food for Victory MealsFarmers' Bulletin 1918Homemade Jellies, Jams and PreservesFarmers' Bulletin 1800Home Storage of VegetablesFarmers' Bulletin 1939Lamb and Mutton on the FarmFarmers' Bulletin 1807Making and Storing Butter for Home UseFB 1979Making Fermented PicklesFarmers ' Bulletin 1438Pickle and Relish RecipesUSDA Leaflet 269Pork on the FarmFarmers' Bulletin 1186Preservation of Vegetables by Salting and BriningFarmers' Bulletin 1932Pressure Canners Use and CareHome and Garden Bulletin 30
These publications and other available bulletins on agriculture and homeeconomics subjects can be obtained free of charge while they last from yourCounty Extension Agent or by writing to the Extension Service, Oregon StateCollege, Corvallis, Oregon.
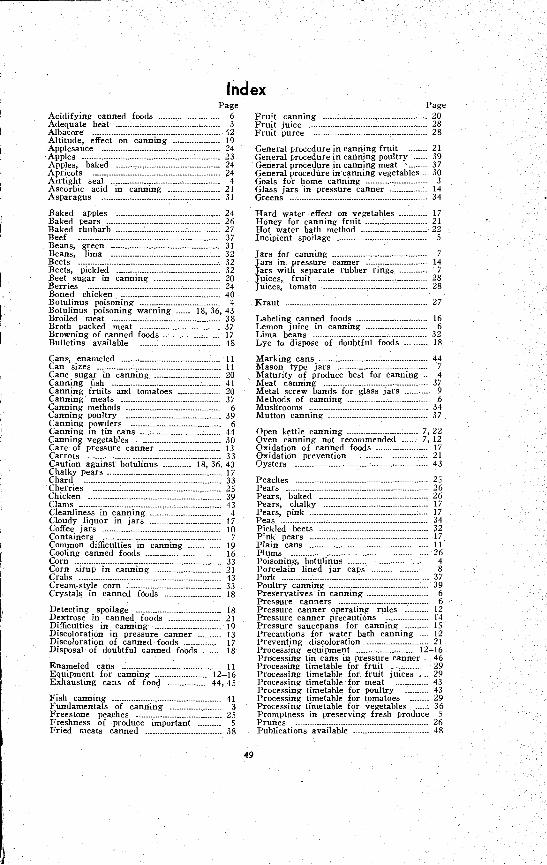
Baked apples 24Baked pears 26Baked rhubarb . 27Beef 37Beans, gree 31Beans, lim . 32Beets----------------------------------32Beets, pickle 32Beet sugar in cann 20Berries 24Boned chicken 40Botulinus poisoning ----------------------------4BotuIinus poisoning a nin . . , 43Broiled meat 38Broth packed meatBrowning of canned - 17Bulletins available 48
Cans, enameled 11Can sizes 11Cane sugar in cann 20Canning fish 41Canning fruits and torn. 20Canning meats 37Canning method- 6Canning poultry 39Canning powder- 6Canning in tin cans ------------------------44Canning vegetables 30Care of pressure canne 13Carrots 33Caution aga -: .::lin :- .. . , 43Chalky pear- 17Chard . 33Cherries . 25Chicken 39Clams 43Cleanliness in canning 4Cloudy liquor in jars 17Coffee jars 10Containers . 7Common difficulties . anti-- ----------19Cooling canned foo 16Corn ----------------------------- 33Corn sirup ' 21Crabs .. 43Cream-style 33Crystals in canned foods .. . 18
Detecting spoilage 18Dextrose in canned foodsDifficulties in canning 19Discoloration in pressure cann. 13Discoloration of canned foods 17Disposal of doubtful canned fo 18
Enameled cansEquipment for canning 16Exhausting cans of food . - , 45
Fish canning 41Fundamentals of canni ------------3Freestone peaches ------------------------25Freshness of produce -Fried meats canned 38
Index'age Page
6 Fruit canning 203 Fruit juice . 28
42 Fruit puree 2819
General procedure in canning fruit 2123 General procedure in canning poultr:. 3924 General procedure in canning meat 3724 General procedure in canning vegeta 30
4 Goals for home canning 321 Glass jars in pressure canner 1431 Greens 34
49
Hard water effect on vege . - .. .... 17Honey for canning fruit 21Hot water bath method . 22Incipient spoilage 5
Jars for canning 7Jars in pressure c . 14Jars with sepa 'Juices, fruit .Juices, tomato
Kraut .. . 27
Labelin. .ods 16Lemon juice in canning 6Lima beans 32Lye to dispose of doubtful 18
Marking cansMason type jarsMaturity of produ ..Meat canningMetal screw bands for glass jarsMethods of ca.MushroomsMutton cannin.
Open kettle canning 7, 22Oven canning not recomm. . 7, 12Oxidation of canned foods 17Oxidation prevention 21
2
Oysters
4PeachesPears 63Pears, bak 26Pears, cha .-Pears, pink . 17Peas 34Pickled be 32Pink pears ----------------------------------17Plain cans 11Plums 26Poisoning, 'Porcelain lined jaPorkPoultry canning .Preservatives in canning .... . . ....Pressure cannersPressure canner operating -- -
Pressure canner precautions ........ ...Pressure saucepans for canning 15Precautions for water bath canni .. 12Preventing discoloration 21Processing equipment .2-16Processing tin cans in pressure -: . - .. 46Processing timetable for fruit ... ........ .. 29Processing timetable for fruit juic - .... 29Processing timetable for meat 43Processing timetable for poultry 43Processing timetable for tomatoes 29Processing timetable for vegetables 36Promptness in preserving fresh produce 5Prunes 26Publications av le 48
Acidifying cann:: food-Adequate heatAlbacoreAltitude, effectApplesauce .............. .............. ......ApplesApples, baked ........ - ......ApricotsAirtight sealAscorbic acid in canning ..Asparagus
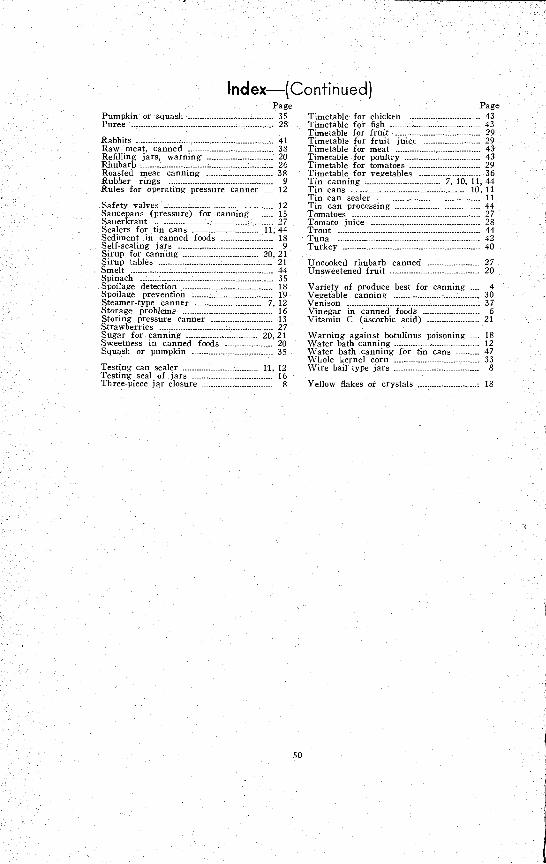
Index(Continued)Page Page
Pumpkin tt squash . 35 Timetable for chicken 43Puree . 28 Timetable for fish 43
Timetable for fruit .?9Rabbits 41 Timetable for fruit jtm :Raw meat, canned 38 Timetable for meatRefilling jars, war n .1. . 20 Timetable for poultry -13Rhubarb . 26 Timetable for tomatoes 29Roasted meat c. : n,, . 38 Timetable for vegetabb - 36Rubber rings 9 Tin canning . :. I". 11,44Rules for operating pressure canner .... 12 Tin cans 1
Tin can sealer10, 111
Safety valves 12 Tin can proce- 44Saucepans (pressure) 15 Tomato: - 27Sauerkraut . 27 Tomato in-t 28Sealers for tin cans . i :, 44 Trout __ 44Sediment in cal. m d :old. . 18 Tuna 4 ,Self-sealing jar: 9 Turkey -0Sirup for cannin .: . ':,, 21Sirup tables 21 Uncook, .1 rtul,i It c,,,. ,Smelt , 44 Unsweetened fruit 20Spinach 35Spoilage Coectio. 18 Variety of produce best for canni 4Spoilage :trtventmn . . 19 Vegetable canning 30Steamer-type canner 7, 12 Venison 37Storage problems . . 16 Vinegar in canned foods 6Storing pressure ca i Inc! . 13 Vitamin C (ascorbic acid) 21Strawberries . 27Sugar for canning '1, 21 Warning against botulinus HP-.1in 1 . _ _. 18Sweetness in calm...! -..,,, -. --------20 Water bath canning 12Squash or pumpkin 35 Water bath canning Iii I . V; :I. 17
Whole kernel corn .43Testing can sealer ;1, 12 Wire bail type jars k
Testing seal of jars . 16Three-piece jar closure ------------8 Yellow flakes or crystals 18
50


![[PPT]Canning - National Center for Home Food Preservationnchfp.uga.edu/multimedia/slide_shows/CanLowAcid_web08.ppt · Web viewPressure Canning & Canning Low-Acid Foods at Home This](https://img.pdfslide.net/doc/110x75/5ad21b467f8b9a0f198c0c9c/pptcanning-national-center-for-home-food-viewpressure-canning-canning-low-acid.jpg)


![Canning Tomatoes and Tomato Products - [email protected] Home](https://img.pdfslide.net/doc/110x75/613d2ed7736caf36b75a4ce5/canning-tomatoes-and-tomato-products-emailprotected-home.jpg)