Embed Size (px)
Citation preview

s
SPO – Systems support
HONEYWELL PC42t User Guide SPO-NA-EN-316, V1.0

© IZUM, 2018 COBISS, COMARC, COBIB, COLIB, IZUM are registered trademarks owned by IZUM.

© IZUM, 6. 3. 2018, SPO-NA-EN-316, V1.0 i
CONTENTS
1 Introduction.......................................................................................................... 1
2 Setting up the Honeywell PC42t printer .............................................................. 1 2.1 List of equipment ............................................................................................................. 1 2.2 Printer description ............................................................................................................ 1 2.3 Getting the printer ready .................................................................................................. 3
2.3.1 Inserting the label roll ........................................................................................... 3 2.3.2 Inserting the ribbon ............................................................................................... 4 2.3.3 Print button and Status LED ................................................................................. 5 2.3.4 Connecting the printer to a PC and installing the driver ...................................... 6 2.3.5 Connecting the printer to your network ................................................................ 6
3 Print settings (COBISS3) .................................................................................... 8
4 Setting logical destinations in COBISS3 ........................................................... 11
Figures
Figure 1: Honeywell PC42t front panel .......................................................................................... 2 Figure 2: Rear panel ........................................................................................................................ 2 Figure 3: Printer's web interface ..................................................................................................... 7 Figure 4: PrintSet software .............................................................................................................. 8 Figure 5: Label format settings (New: USER (60.0 mm x 40.0 mm)) ............................................ 8 Figure 6: Printout position settings ("Horizontal Offset", "Vertical Offset") ................................. 9 Figure 7: Print settings (Graphics, "Dithering") .............................................................................. 9 Figure 8: Media settings ("Print Method": Thermal Transfer) ...................................................... 10 Figure 9: Setting print options ("Darkness", "Speed Settings") .................................................... 10 Figure 10: Seagull driver ............................................................................................................... 11 Figure 11: COBISS3 user interface ............................................................................................... 11 Figure 12: Local destinations editor .............................................................................................. 12 Figure 13: Setting local destinations ............................................................................................. 12 Figure 14: Detailed settings ........................................................................................................... 13 Figure 15: Refreshing settings in the COBISS3 user interface ..................................................... 13


SPO HONEYWELL PC42t User Guide
© IZUM, 6. 3. 2018, SPO-NA-EN-316, V1.0 1/13
1 Introduction
This document describes the use of the printer when working in the COBISS system (setting up and connecting the printer, maintaining the printer – changing the paper and the ribbon, etc.).
2 Setting up the Honeywell PC42t printer
2.1 List of equipment
Basic equipment:
printer (black),
CD containing software, drivers and user guide,
USB cable (or different cable)
AC adapter
power cord (220V),
ribbon core.
2.2 Printer description
The printer is designed to print up to 1000 labels a day. It has the following features:
printing resolution of 203 dpi (8 dots/mm),
print speeds from 2 to 4 ips (from 50 to 100 mm/s)
USB host port for connecting external devices,
ports: USB, Ethernet, serial,
print width up to 110 mm,
languages: Direct Protocol (DP), ZSim (ZPL-II), ESim (EPL),
memory: 64 MB flash, 64 MB SDRAM.
HONEYWELL PC42t User Guide SPO
2/13 © IZUM, 6. 3. 2018, SPO-NA-EN-316, V1.0
Figure 1: Honeywell PC42t front panel
Legend (Figure 1):
1 – Media window for checking labels and ribbon 2 – Print button for moving the label roll or cancelling the operation 3 – Latch (on both sides) for opening the printer 4 – Power button 5 – Status LED
Figure 2: Rear panel
1 5
2
4
3
6
5
1 2 3 4

SPO HONEYWELL PC42t User Guide
© IZUM, 6. 3. 2018, SPO-NA-EN-316, V1.0 3/13
Legend (Figure 2):
1 – Ethernet port 2 – Serial port (RS232) 3 – USB device port 4 – USB host port for external devices (NOT intended to use for connecting with the PC) 5 – Power port 6 – External media feed slot (for wider label rolls)
2.3 Getting the printer ready
2.3.1 Inserting the label roll
1. Open the printer cover and insert the holder into the label roll. Then, insert the holder into the compartment. Raise the ribbon mechanism. Feed the label roll through the side guides behind the sensor.
2. When inserting the label roll, check the positioning of the label sensor in front of the guides. For printing labels, it should be aligned with the left triangle, as pictured.
3. If you do not need to insert the ribbon, close the mechanism. Push on the mechanism from above until it clicks into place.

HONEYWELL PC42t User Guide SPO
4/13 © IZUM, 6. 3. 2018, SPO-NA-EN-316, V1.0
2.3.2 Inserting the ribbon
1. Open the printer cover and insert one plastic adapter into an empty ribbon takeup core and the other one into the ribbon core. Place both between the holders, as pictured below.
2. Raise the ribbon mechanism and feed the ribbon through the opening and on the outer side onto the empty core. Attach the beginning of the ribbon to the empty core and turn the slack wheel until you get to the black part.
3. Close the ribbon mechanism. Push on it from above until it clicks into place.
SPO HONEYWELL PC42t User Guide
© IZUM, 6. 3. 2018, SPO-NA-EN-316, V1.0 5/13
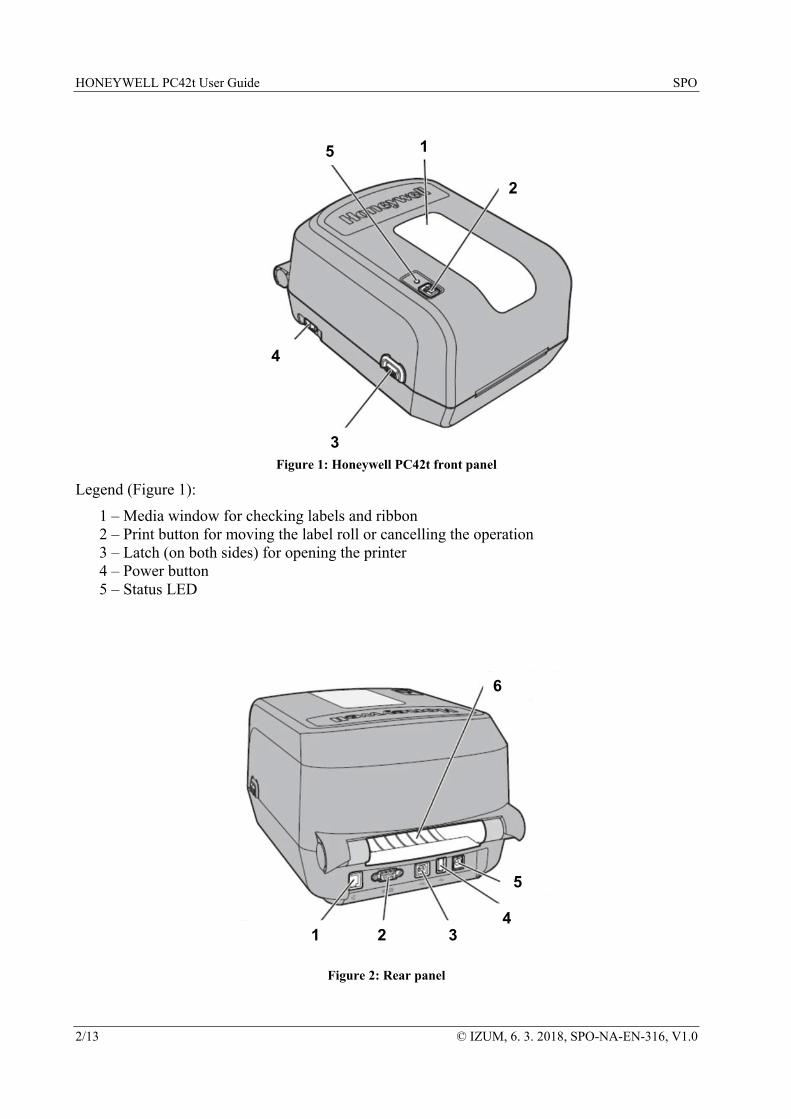
2.3.3 Print button and Status LED
How to use the Print button
Action Procedure Description media calibration If the printer is on, press and hold the
button for two (2) seconds to start the calibration process.
The printer prints out several labels and sets the height of the label.
move forward Press and release the button. If the printer is idle, pressing the button will move the ribbon one label forward.
pause Press and release the button. If you press the button while printing, the printing will pause.
cancel pause Press and release the button. If printing is paused, pressing the button will resume printing.
cancel print Press and hold the button for three (3) seconds.
If printing is paused, the commenced printing is cancelled and the data is deleted from the printer. The printer then returns into idle mode.
Status LED
LED state turned off The printer is turned off.
green The printer is in idle mode and ready to print.
green – blinking since activation
The LED blinking green since the printer was turned on indicates a problem with internal memory.
green – blinking The printer is starting up. The printer is paused. If you press the Print button, the printing will resume. If you hold the button for three (3) seconds, the printing will be cancelled and deleted.
green – fast blinking The printer is receiving data.
orange The printhead is too hot to print.
orange – blinking The printer is upgrading its firmware from an inserted USB flash drive. Remove the USB flash drive when the Status LED turns solid green.
red – blinking The printer is in Error mode. The printer may be out of ribbon, or if the ribbon is inserted, the printing configuration may be incorrect, or the printer may have run out of labels. After you have fixed the error, press the Print button to resume printing.
red and green – alternating
The printer is severely defected. It needs to be checked by an authorised repairer.
HONEYWELL PC42t User Guide SPO
6/13 © IZUM, 6. 3. 2018, SPO-NA-EN-316, V1.0
2.3.4 Connecting the printer to a PC and installing the driver
The printer driver is included on the CD that you received with the printer.
If you do not have access to the CD, you can get the driver:
on the manufacturer's webpage at: https://aidc.honeywell.com/en-GB/Pages/Product.aspx?category=printers&cat=HSM&pid=pc42 (under Software, click the InterDriver 7.4.3 M-3)
Connect the printer to a PC with either the USB cable or the serial cable. The USB cable is part of the basic equipment, whereas the serial cable must be ordered separately.
2.3.5 Connecting the printer to your network
The printer also has an Ethernet port. Connect it to the local network using an appropriate cable (Cat. 5e or newer, not included). To set up network printing, you must configure the printer's network interface using one of the two methods:
1. Use the printer's built-in web interface.
2. Use the PrintSet software, which is included on the CD that you received with the printer. Run the program and start the configuration process. For help, see the PrintSet online help.
Printer's web interface (Figure 3)
Enter the printer's IP address into the browser's address bar and log in with the default username itadmin and default password pass:
The Configure tab displays all printer settings.
The left-hand side of the window contains the following menus:
Configuration Summary (current printer settings),
Communications (serial port settings),
Printing (media, print quality and other settings),
System Settings (service, general settings, messages).

SPO HONEYWELL PC42t User Guide
© IZUM, 6. 3. 2018, SPO-NA-EN-316, V1.0 7/13
Figure 3: Printer's web interface
PrintSet software (Figure 4)
The PrintSet software is used for printer configuration. For help, see the PrintSet online help. The software requires Windows XP or a newer version of Windows. Follow these steps:
1. Install the PrintSet software from the CD you received with the printer.
2. Connect the printer to the PC using a serial or USB connection, or connect it to the local network.
3. Launch the installed Honeywell PrintSet 5 application and start configuring the printer parameters.

HONEYWELL PC42t User Guide SPO
8/13 © IZUM, 6. 3. 2018, SPO-NA-EN-316, V1.0
Figure 4: PrintSet software
3 Print settings (COBISS3)
When the printer driver is installed, you must update the settings on the Honeywell PC42t printer before you can print labels. Go to the Control panel and select Devices and Printers. You will see a list of all available printers. Select and right-click the Honeywell PC42t printer. In additional settings, go to Printing references. On the first tab (Page Setup), set the label format by clicking New and entering the appropriate label format (e.g. USER (60.0 mm x 40.0 mm)), which you then set as the default format (Figure 5).
Figure 5: Label format settings (New: USER (60.0 mm x 40.0 mm))
SPO HONEYWELL PC42t User Guide
© IZUM, 6. 3. 2018, SPO-NA-EN-316, V1.0 9/13
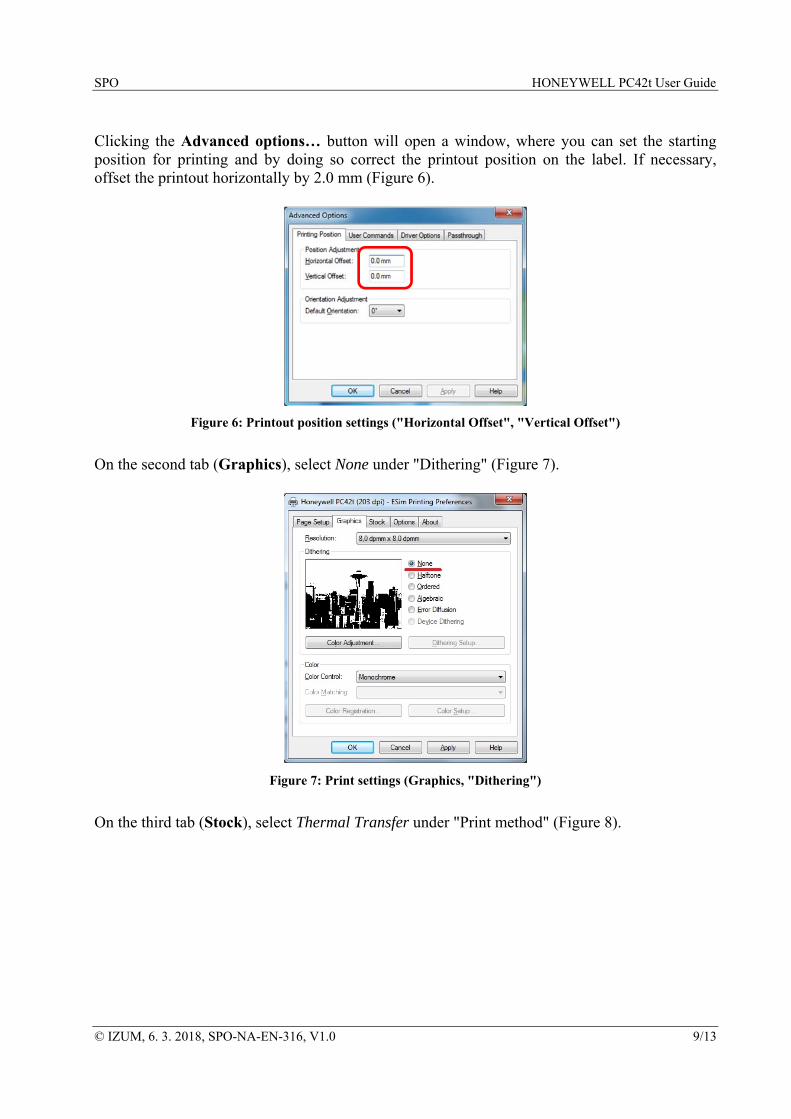
Clicking the Advanced options… button will open a window, where you can set the starting position for printing and by doing so correct the printout position on the label. If necessary, offset the printout horizontally by 2.0 mm (Figure 6).
Figure 6: Printout position settings ("Horizontal Offset", "Vertical Offset")
On the second tab (Graphics), select None under "Dithering" (Figure 7).
Figure 7: Print settings (Graphics, "Dithering")
On the third tab (Stock), select Thermal Transfer under "Print method" (Figure 8).

HONEYWELL PC42t User Guide SPO
10/13 © IZUM, 6. 3. 2018, SPO-NA-EN-316, V1.0
Figure 8: Media settings ("Print Method": Thermal Transfer)
On the fourth tab (Options), you can set a higher printhead temperature under "Darkness" if the printout on the label is too bright, and higher print speed under "Speed Settings" (Figure 9).
Figure 9: Setting print options ("Darkness", "Speed Settings")
The Seagull driver is used (Figure 10).

SPO HONEYWELL PC42t User Guide
© IZUM, 6. 3. 2018, SPO-NA-EN-316, V1.0 11/13
Figure 10: Seagull driver
4 Setting logical destinations in COBISS3
In COBISS3, select a printer for printing labels for the material in logical destinations. Select System/Settings/Logical destinations (Figure 11).
Figure 11: COBISS3 user interface

HONEYWELL PC42t User Guide SPO
12/13 © IZUM, 6. 3. 2018, SPO-NA-EN-316, V1.0
A new Local destinations editor window will open in which you will select Label – material: [default local printer] and click Edit (Figure 12).
Figure 12: Local destinations editor
The User destinations window will open in which you will click Add printer. In the new window select Honeywell PC42t from the drop down list which you intend to use to print labels for the material (Figure 13).
Figure 13: Setting local destinations
Once you select the printer, click the Details button to check if these detailed settings are correct for this type of printer (Figure 14):

SPO HONEYWELL PC42t User Guide
© IZUM, 6. 3. 2018, SPO-NA-EN-316, V1.0 13/13
Figure 14: Detailed settings
When all settings are set, click the OK button to confirm each choice. At the end, in the System menu, select Refresh settings (Figure 15). If this option is not available, refresh the newly configured settings by first logging out and then logging in to the COBISS3 software.
Figure 15: Refreshing settings in the COBISS3 user interface
Now, you can start printing labels for the material.


![Autdev Interface [Autorship + Webdevelopment + Interface]](https://img.pdfslide.net/doc/110x75/568bd8ee1a28ab2034a52641/autdev-interface-autorship-webdevelopment-interface.jpg)