Embed Size (px)
Citation preview
How to Make a Dog with Magnetic Bone www.kitronik.co.uk
How to Make a Dog with a Magnetic Bone
Description
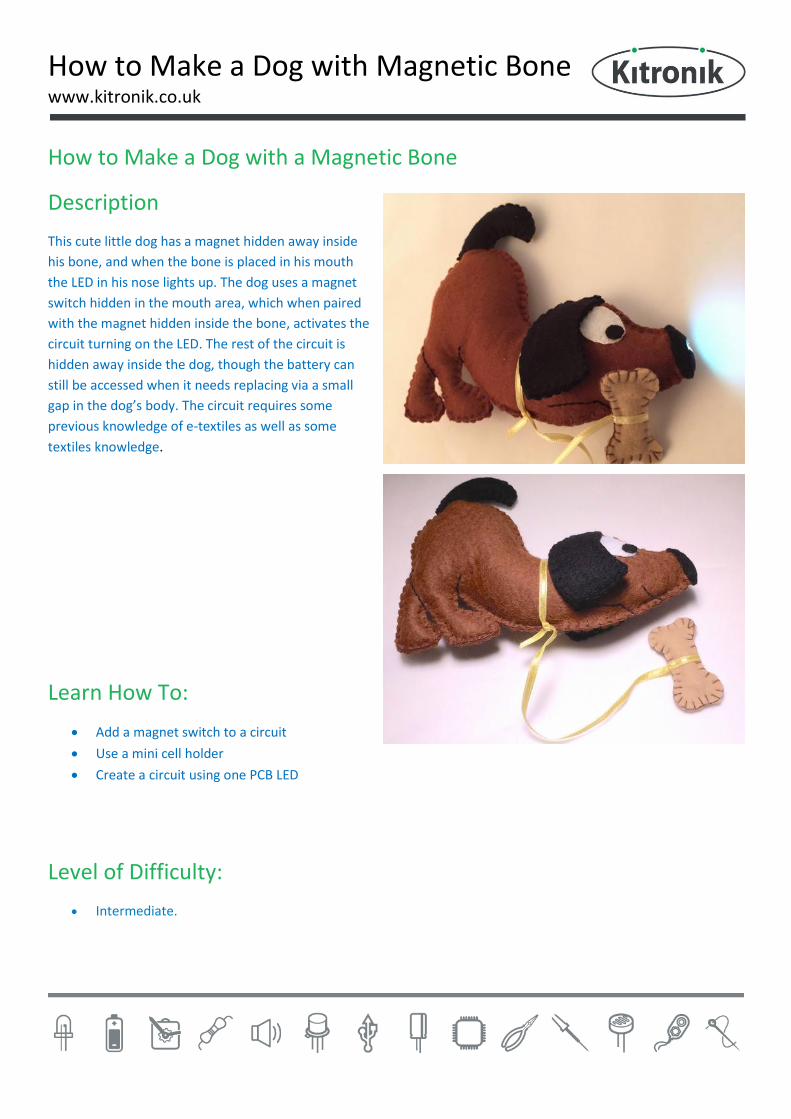
This cute little dog has a magnet hidden away inside
his bone, and when the bone is placed in his mouth
the LED in his nose lights up. The dog uses a magnet
switch hidden in the mouth area, which when paired
with the magnet hidden inside the bone, activates the
circuit turning on the LED. The rest of the circuit is
hidden away inside the dog, though the battery can
still be accessed when it needs replacing via a small
gap in the dog’s body. The circuit requires some
previous knowledge of e-textiles as well as some
textiles knowledge.
Learn How To:
Add a magnet switch to a circuit
Use a mini cell holder
Create a circuit using one PCB LED
Level of Difficulty:
Intermediate.

How to Make a Dog with Magnetic Bone www.kitronik.co.uk
Parts List
Miniature cell holder & cell
White PCB LED
Electro Fashion magnetic switch
Conductive thread
Brown felt fabric 16cm x 45cm
Small pieces of black, white and
beige felt fabric
30cm ribbon (0.5cm wide)
Stuffing
Stranded embroidery thread to
match felt fabric.
You will also need the following equipment:
Round nosed pliers. Fabric to match the ears if you want to cover up the circuit. Paper template.
Step-by-step guide to making the Dog
Step One
Start to stitch the e-textiles circuit on the inner layer of the
body fabric. Use conductive thread to over-sew the negative
side of the cell holder into the position marked on the
pattern template. Note that the open side of the cell holder
is facing the bottom edge of the fabric.

How to Make a Dog with Magnetic Bone www.kitronik.co.uk
Step Two
Use small running stitches to get to the position of the
magnet switch (see pattern template) and over-sew one
side into position (it doesn’t matter which way round the
magnet switch goes).
Step Three
Using a new piece of conductive thread over-sew the
second side of the magnet switch onto the fabric. Use small
running stitches to get to the position of the LED on the
edge of the fabric and over-sew the negative side of the LED
into position (see pattern template).
Step Four
Using a new piece of conductive thread, over-sew the
positive side of the LED into position. Stitch small running
stitches from the LED to the positive side of the cell holder
and over-sew it into position. The remaining positive and
negative holes on the cell holder are not used in this circuit
and can be held in position using ordering sewing thread.

How to Make a Dog with Magnetic Bone www.kitronik.co.uk
Step Five
The e-textiles circuit is now complete. Insert the cell into the
cell holder with the positive side facing upwards. Place the
magnet onto the switch to check the circuit works.
Step Six
Attach the eyes & tail to the main body of the front and back
of the dog using the embroidery thread. Any stitch can be
used to do this. In the photo a cross-stitch has been used to
hold the centre of the eye in place, and a blanket stitch has
been used for all other areas. Two strands of stranded
embroidery thread have been used. Use a running stitch to
create the body markings on the dog using the pattern
template as a guide.
Step Seven
Sandwich the inner fabric layer with the circuit attached
between the back and front pieces of the dog. If necessary trim
the layers so they match exactly.

How to Make a Dog with Magnetic Bone www.kitronik.co.uk
Step Eight
Use the stranded embroidery thread to stitch the layers of
the dog together starting at the hole on the bottom edge
of the dog and stitching the legs first. Any stitch can be
used. The stitch used in the photos is a blanket stitch.
Step Nine
When you reach the top of the back leg stop stitching and
stuff the legs, as they will be harder to reach when the body
is stitched together. You may need to use a thin pointed
object to help you reach the tips of the legs.
Step Ten
Continue stitching around the dog until you get to the end
of the nose where the LED is. The back and front fabrics are
slightly smaller than the inner fabric the circuit is stitched
onto so the LED should sit beyond the 2 layers of fabric.
Position the inner layer of fabric so the LED sits flat against
the nose.

How to Make a Dog with Magnetic Bone www.kitronik.co.uk
Step Eleven
Continue stitching the layers of the dog together from the other side of the LED to the position of the cell holder.
Leave a few centimetres of fabric open by the cell holder to allow you to stuff the dog. To close the hole stitch 2 of
the layers of fabric together. Stitch the edge of the single layer of fabric covering the cell holder to make it match the
rest of the dog. This single layer of fabric is where the battery will be accessed so the gap needs to be big enough to
get your fingers in.
Step Twelve
Cut a small, square hole in the nose fabric, as
shown on the pattern template. Slide the hole
over the LED. Stitch the nose into shape
covering the LED.

How to Make a Dog with Magnetic Bone www.kitronik.co.uk
Step Thirteen
Stitch 2 layers of the ear fabrics together closing all
sides.
Step Fourteen
Position the curved section of the ears on either side of
the head and stitch into the position indicated on the
pattern template.
Step Fifteen
Stitch the 2 layers of the bone together leaving a gap
along the centre of the fabric. Slide the magnet into the
hole along with a small amount of stuffing to pad the
bone. Stitch the hole closed.

How to Make a Dog with Magnetic Bone www.kitronik.co.uk
Step Sixteen
Attach the ribbon around the bone and around the dog’s neck. When the magnet in the bone is placed onto the
mouth area where the magnet switch is the LED will light up.