Embed Size (px)
Citation preview
Sakai @ UNC
© 2009 The Sakai Foundation Creative Commons Attribution-Noncommercial-Share Alike 3.0 United States License
How to Migrate Content from Backboard to Sakai This document explains how to :
A) Create an Export zip file with the Blackboard content you wish to migrate to Sakai
B) Upload the Bb Export zip file into your Sakai site using the Migrate Content tool
C) Create a direct link from the Sakai site menu to the Bb Content folder
1. Rename the Bb Content folder:
2. Create a direct link from the site menu to the Bb Content folder
A) Create an Export zip file with the Blackboard content you wish to migrate to Sakai
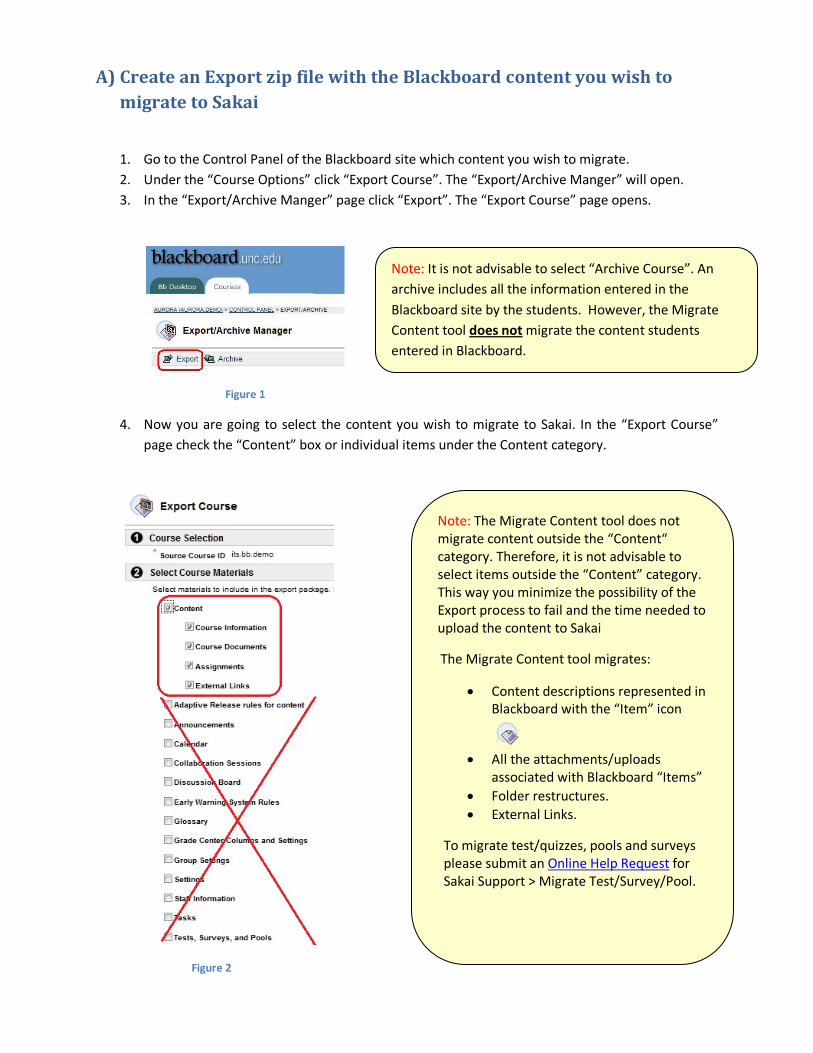
1. Go to the Control Panel of the Blackboard site which content you wish to migrate. 2. Under the “Course Options” click “Export Course”. The “Export/Archive Manger” will open. 3. In the “Export/Archive Manger” page click “Export”. The “Export Course” page opens.
4. Now you are going to select the content you wish to migrate to Sakai. In the “Export Course” page check the “Content” box or individual items under the Content category.
Figure 2
Note: It is not advisable to select “Archive Course”. An archive includes all the information entered in the Blackboard site by the students. However, the Migrate Content tool does not migrate the content students entered in Blackboard.
Note: The Migrate Content tool does not migrate content outside the “Content“ category. Therefore, it is not advisable to select items outside the “Content” category. This way you minimize the possibility of the Export process to fail and the time needed to upload the content to Sakai
The Migrate Content tool migrates:
• Content descriptions represented in Blackboard with the “Item” icon
• All the attachments/uploads
associated with Blackboard “Items” • Folder restructures. • External Links.
To migrate test/quizzes, pools and surveys please submit an Online Help Request for Sakai Support > Migrate Test/Survey/Pool.
Figure 1
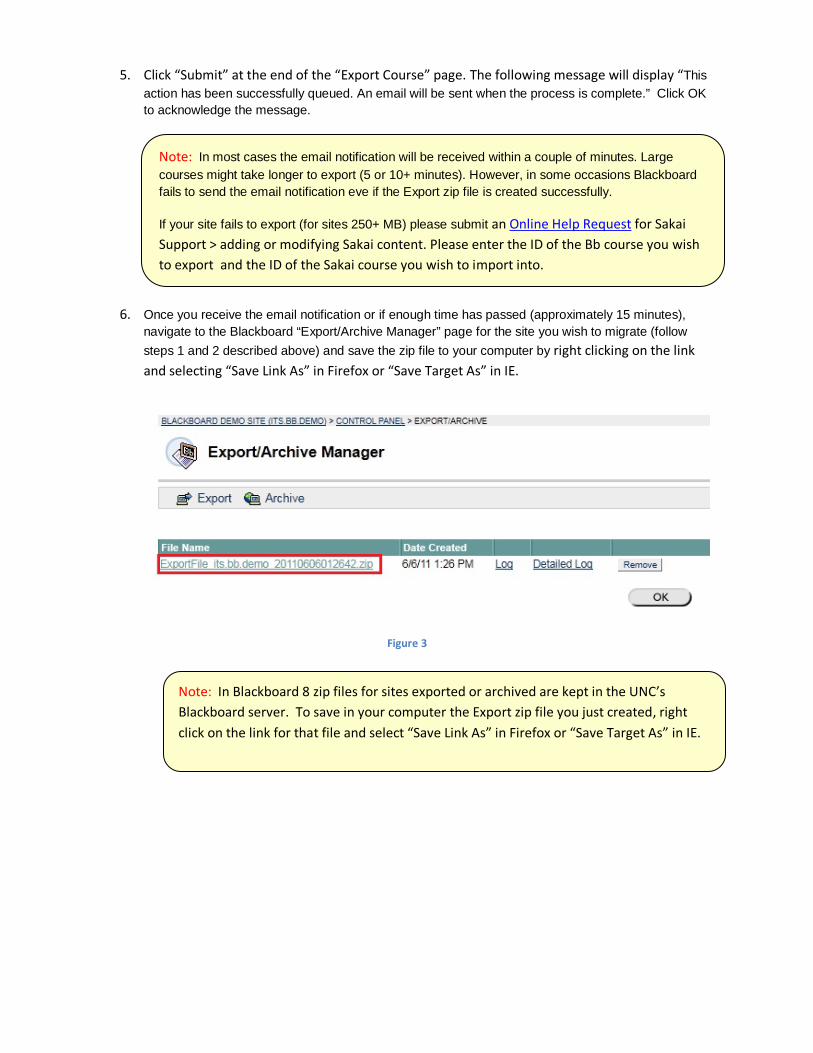
5. Click “Submit” at the end of the “Export Course” page. The following message will display “This action has been successfully queued. An email will be sent when the process is complete.” Click OK to acknowledge the message.
6. Once you receive the email notification or if enough time has passed (approximately 15 minutes), navigate to the Blackboard “Export/Archive Manager” page for the site you wish to migrate (follow steps 1 and 2 described above) and save the zip file to your computer by right clicking on the link and selecting “Save Link As” in Firefox or “Save Target As” in IE.
Figure 3
Note: In Blackboard 8 zip files for sites exported or archived are kept in the UNC’s Blackboard server. To save in your computer the Export zip file you just created, right click on the link for that file and select “Save Link As” in Firefox or “Save Target As” in IE.
Note: In most cases the email notification will be received within a couple of minutes. Large courses might take longer to export (5 or 10+ minutes). However, in some occasions Blackboard fails to send the email notification eve if the Export zip file is created successfully.
If your site fails to export (for sites 250+ MB) please submit an Online Help Request for Sakai Support > adding or modifying Sakai content. Please enter the ID of the Bb course you wish to export and the ID of the Sakai course you wish to import into.
B) Upload the Bb Export zip file into your Sakai site using the Migrate Content tool
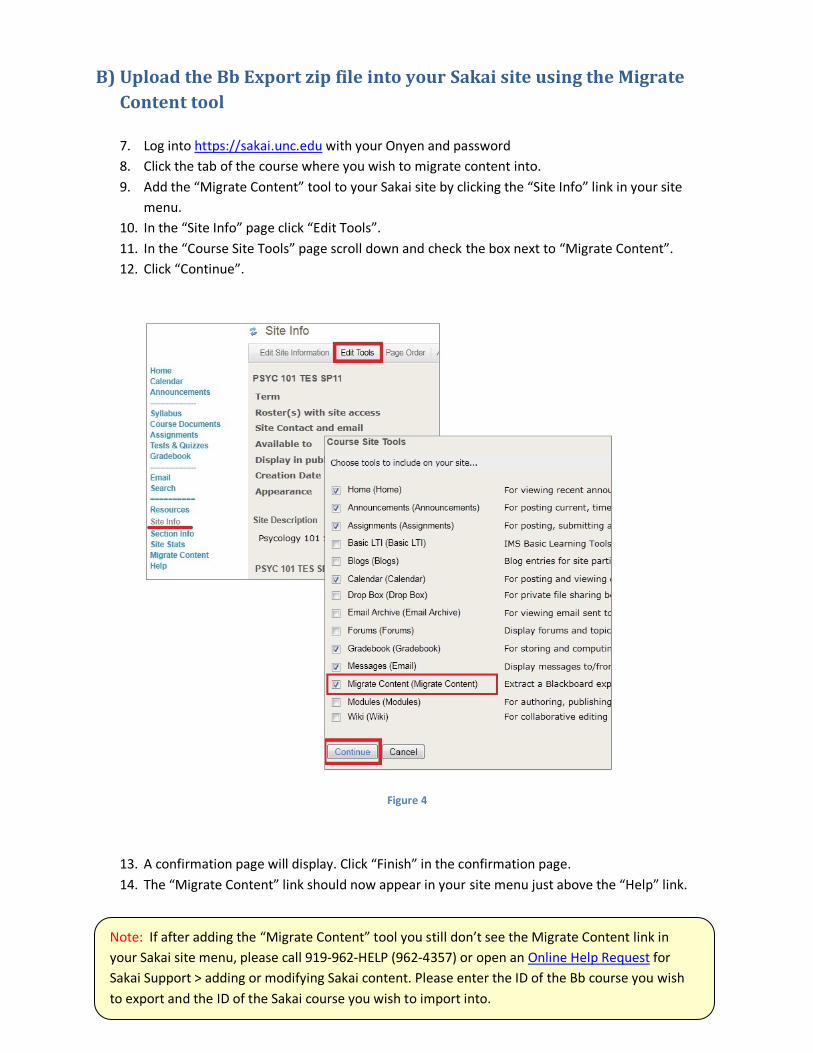
7. Log into https://sakai.unc.edu with your Onyen and password 8. Click the tab of the course where you wish to migrate content into. 9. Add the “Migrate Content” tool to your Sakai site by clicking the “Site Info” link in your site
menu. 10. In the “Site Info” page click “Edit Tools”. 11. In the “Course Site Tools” page scroll down and check the box next to “Migrate Content”. 12. Click “Continue”.
Figure 4
13. A confirmation page will display. Click “Finish” in the confirmation page. 14. The “Migrate Content” link should now appear in your site menu just above the “Help” link.
Note: If after adding the “Migrate Content” tool you still don’t see the Migrate Content link in your Sakai site menu, please call 919-962-HELP (962-4357) or open an Online Help Request for Sakai Support > adding or modifying Sakai content. Please enter the ID of the Bb course you wish to export and the ID of the Sakai course you wish to import into.
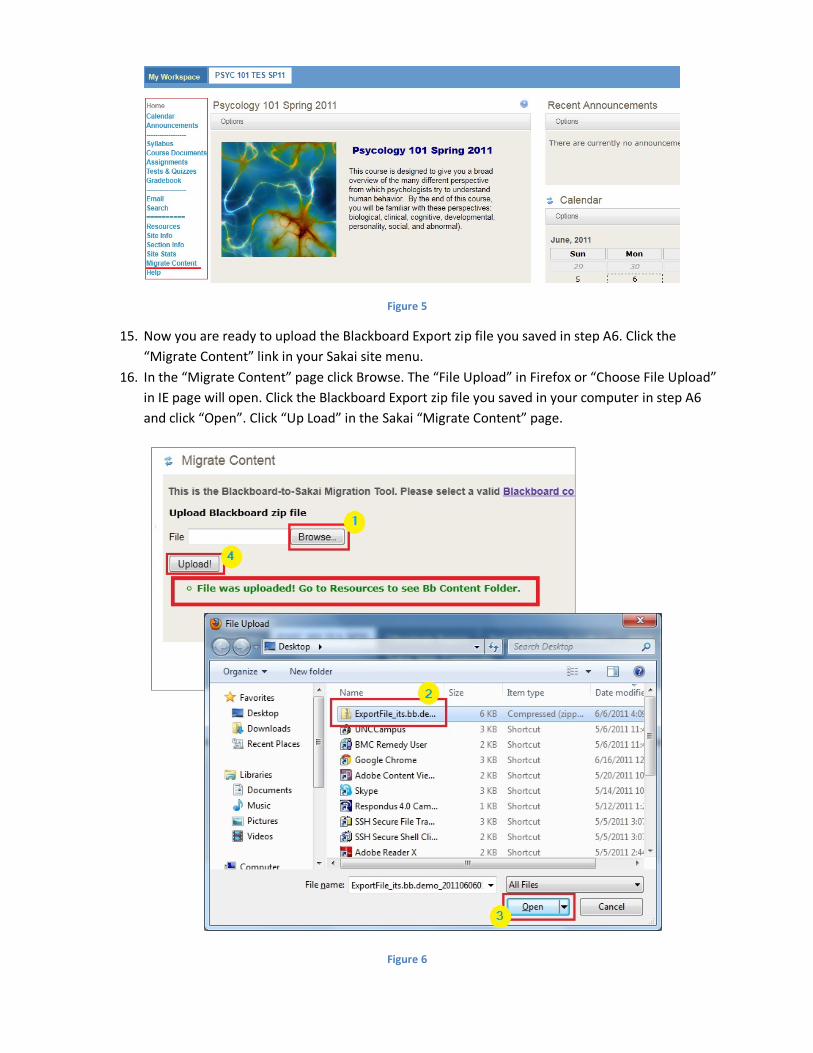
Figure 5
15. Now you are ready to upload the Blackboard Export zip file you saved in step A6. Click the “Migrate Content” link in your Sakai site menu.
16. In the “Migrate Content” page click Browse. The “File Upload” in Firefox or “Choose File Upload” in IE page will open. Click the Blackboard Export zip file you saved in your computer in step A6 and click “Open”. Click “Up Load” in the Sakai “Migrate Content” page.
Figure 6
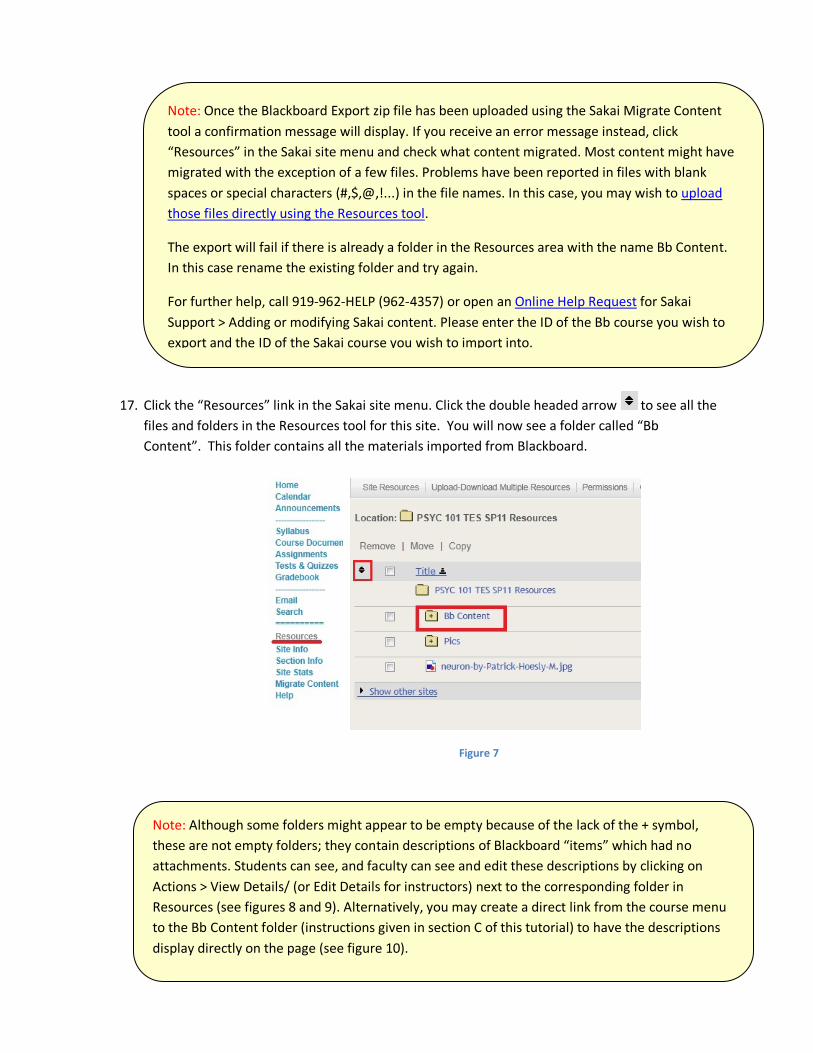
17. Click the “Resources” link in the Sakai site menu. Click the double headed arrow to see all the files and folders in the Resources tool for this site. You will now see a folder called “Bb Content”. This folder contains all the materials imported from Blackboard.
Figure 7
Note: Once the Blackboard Export zip file has been uploaded using the Sakai Migrate Content tool a confirmation message will display. If you receive an error message instead, click “Resources” in the Sakai site menu and check what content migrated. Most content might have migrated with the exception of a few files. Problems have been reported in files with blank spaces or special characters (#,$,@,!...) in the file names. In this case, you may wish to upload those files directly using the Resources tool.
The export will fail if there is already a folder in the Resources area with the name Bb Content. In this case rename the existing folder and try again.
For further help, call 919-962-HELP (962-4357) or open an Online Help Request for Sakai Support > Adding or modifying Sakai content. Please enter the ID of the Bb course you wish to export and the ID of the Sakai course you wish to import into.
Note: Although some folders might appear to be empty because of the lack of the + symbol, these are not empty folders; they contain descriptions of Blackboard “items” which had no attachments. Students can see, and faculty can see and edit these descriptions by clicking on Actions > View Details/ (or Edit Details for instructors) next to the corresponding folder in Resources (see figures 8 and 9). Alternatively, you may create a direct link from the course menu to the Bb Content folder (instructions given in section C of this tutorial) to have the descriptions display directly on the page (see figure 10).
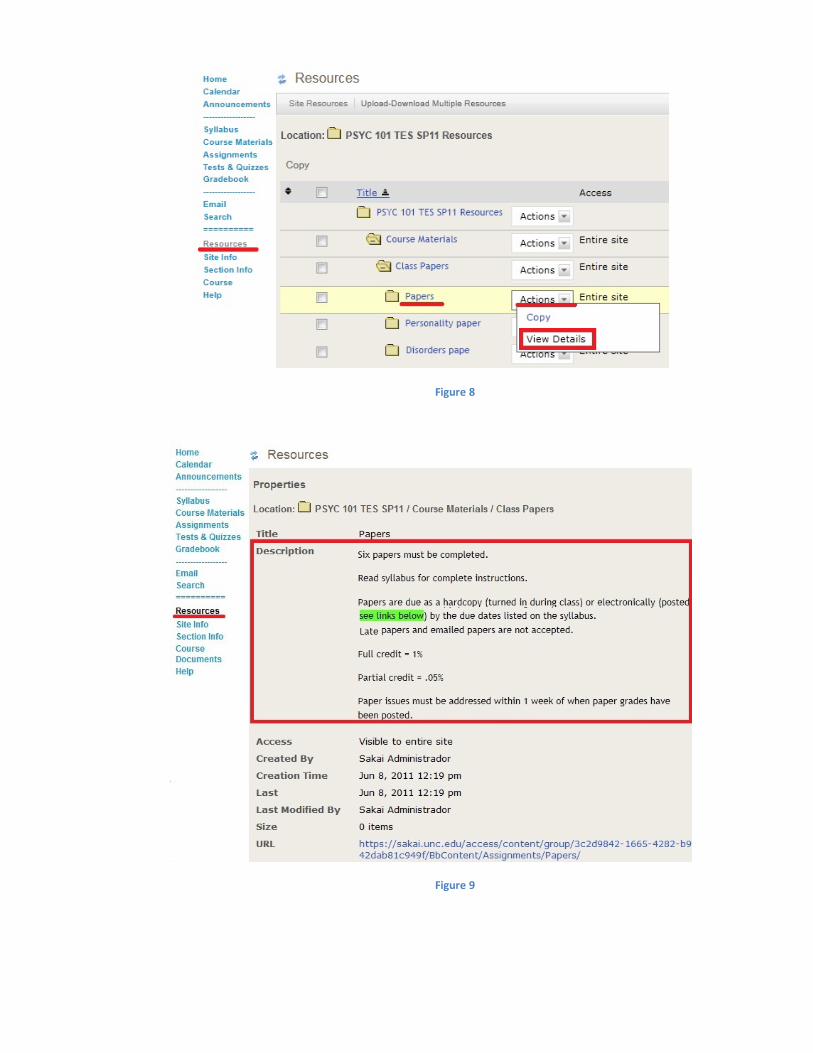
Figure 8
Figure 9
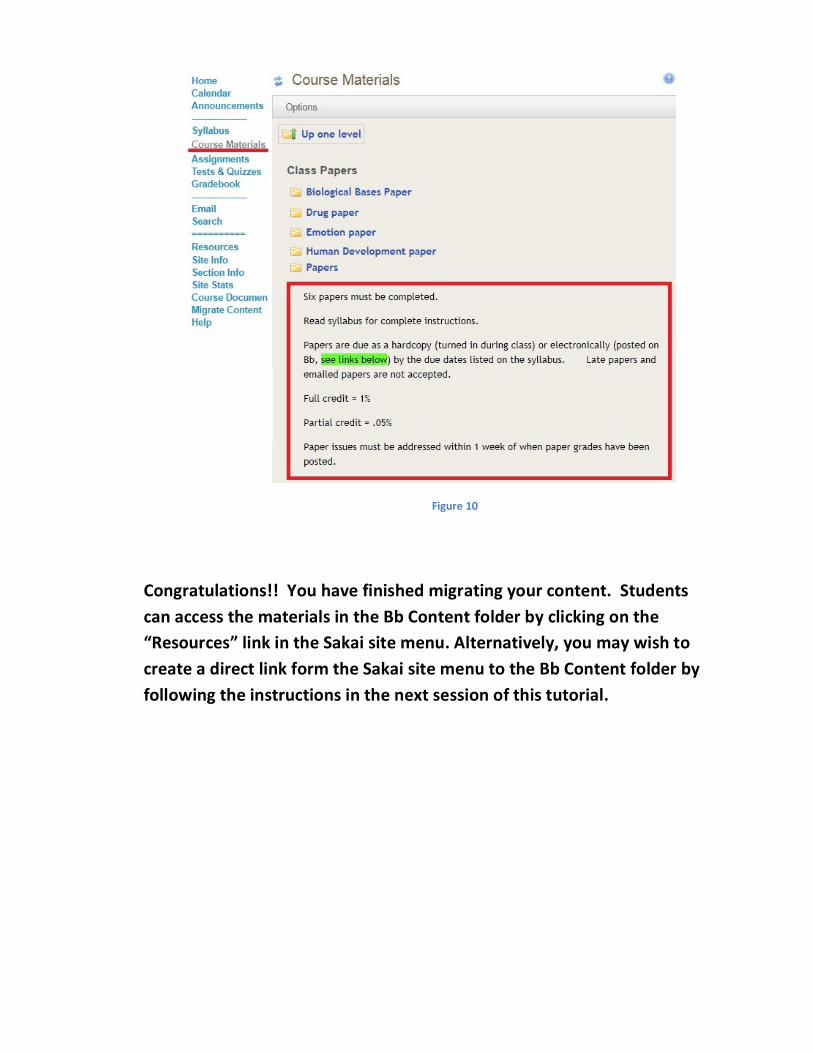
Figure 10
Congratulations!! You have finished migrating your content. Students can access the materials in the Bb Content folder by clicking on the “Resources” link in the Sakai site menu. Alternatively, you may wish to create a direct link form the Sakai site menu to the Bb Content folder by following the instructions in the next session of this tutorial.
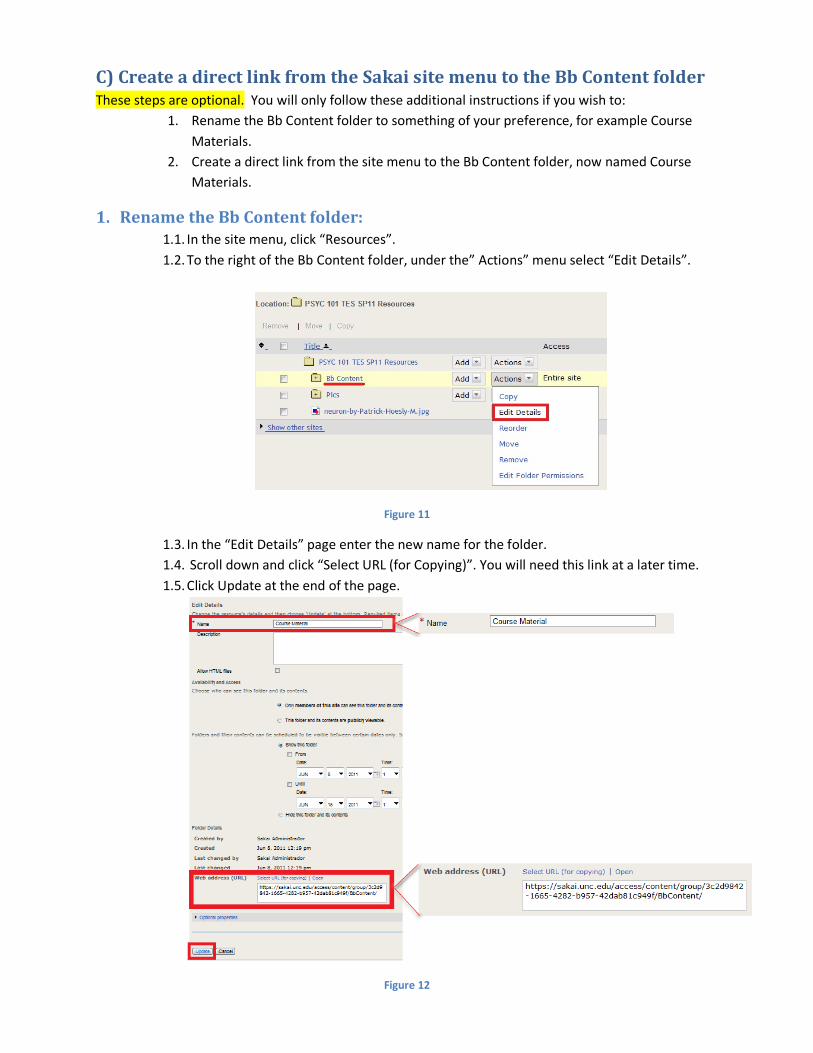
C) Create a direct link from the Sakai site menu to the Bb Content folder These steps are optional. You will only follow these additional instructions if you wish to:
1. Rename the Bb Content folder to something of your preference, for example Course Materials.
2. Create a direct link from the site menu to the Bb Content folder, now named Course Materials.
1. Rename the Bb Content folder: 1.1. In the site menu, click “Resources”. 1.2. To the right of the Bb Content folder, under the” Actions” menu select “Edit Details”.
Figure 11
1.3. In the “Edit Details” page enter the new name for the folder. 1.4. Scroll down and click “Select URL (for Copying)”. You will need this link at a later time. 1.5. Click Update at the end of the page.
Figure 12
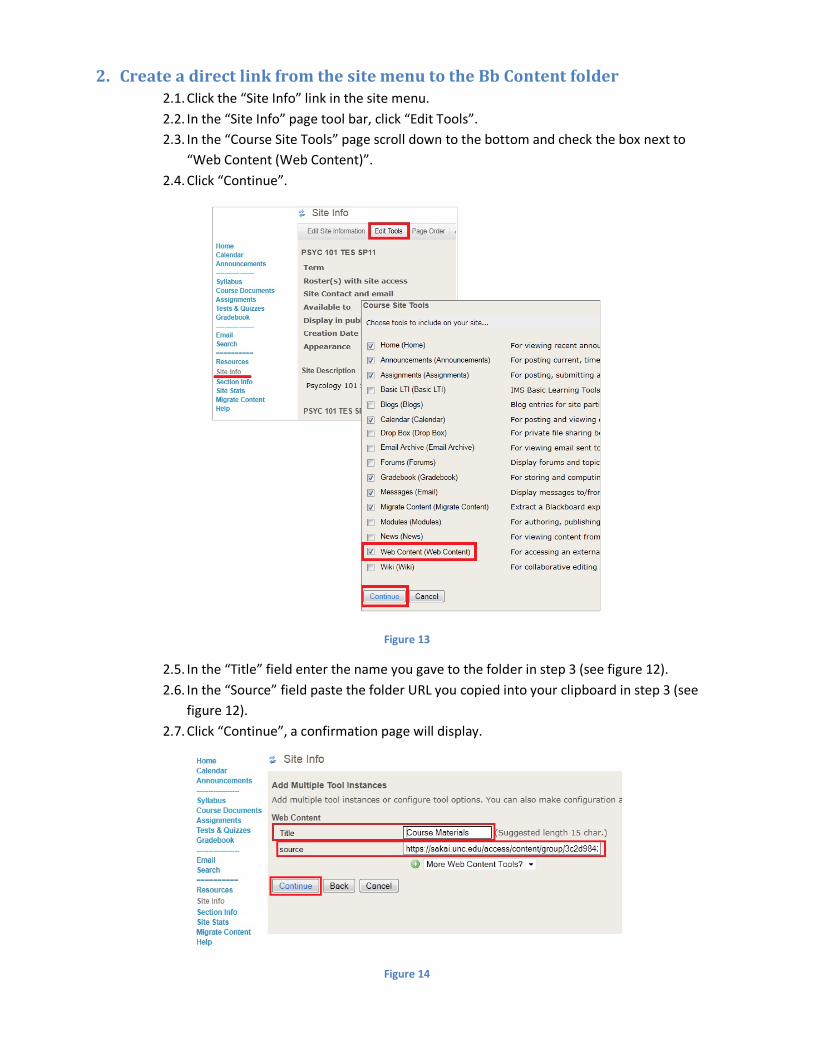
2. Create a direct link from the site menu to the Bb Content folder 2.1. Click the “Site Info” link in the site menu. 2.2. In the “Site Info” page tool bar, click “Edit Tools”. 2.3. In the “Course Site Tools” page scroll down to the bottom and check the box next to
“Web Content (Web Content)”. 2.4. Click “Continue”.
Figure 13
2.5. In the “Title” field enter the name you gave to the folder in step 3 (see figure 12). 2.6. In the “Source” field paste the folder URL you copied into your clipboard in step 3 (see
figure 12). 2.7. Click “Continue”, a confirmation page will display.
Figure 14
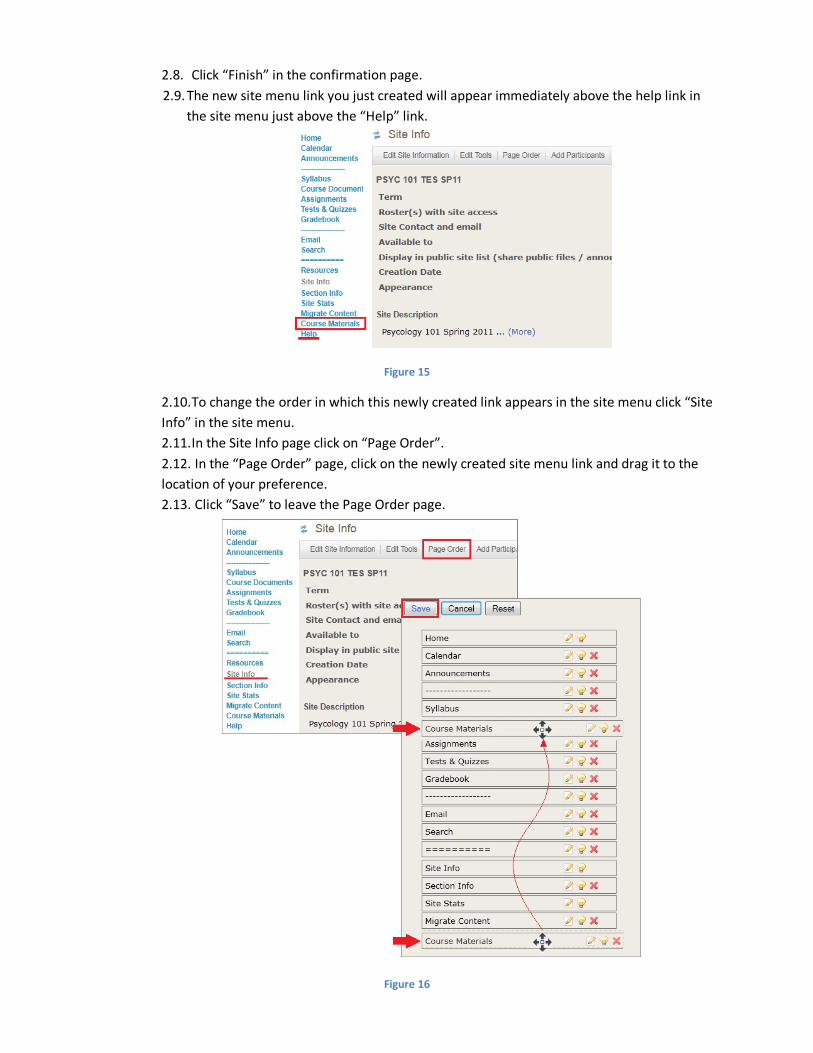
2.8. Click “Finish” in the confirmation page. 2.9. The new site menu link you just created will appear immediately above the help link in
the site menu just above the “Help” link.
Figure 15
2.10. To change the order in which this newly created link appears in the site menu click “Site Info” in the site menu. 2.11. In the Site Info page click on “Page Order”. 2.12. In the “Page Order” page, click on the newly created site menu link and drag it to the location of your preference. 2.13. Click “Save” to leave the Page Order page.
Figure 16
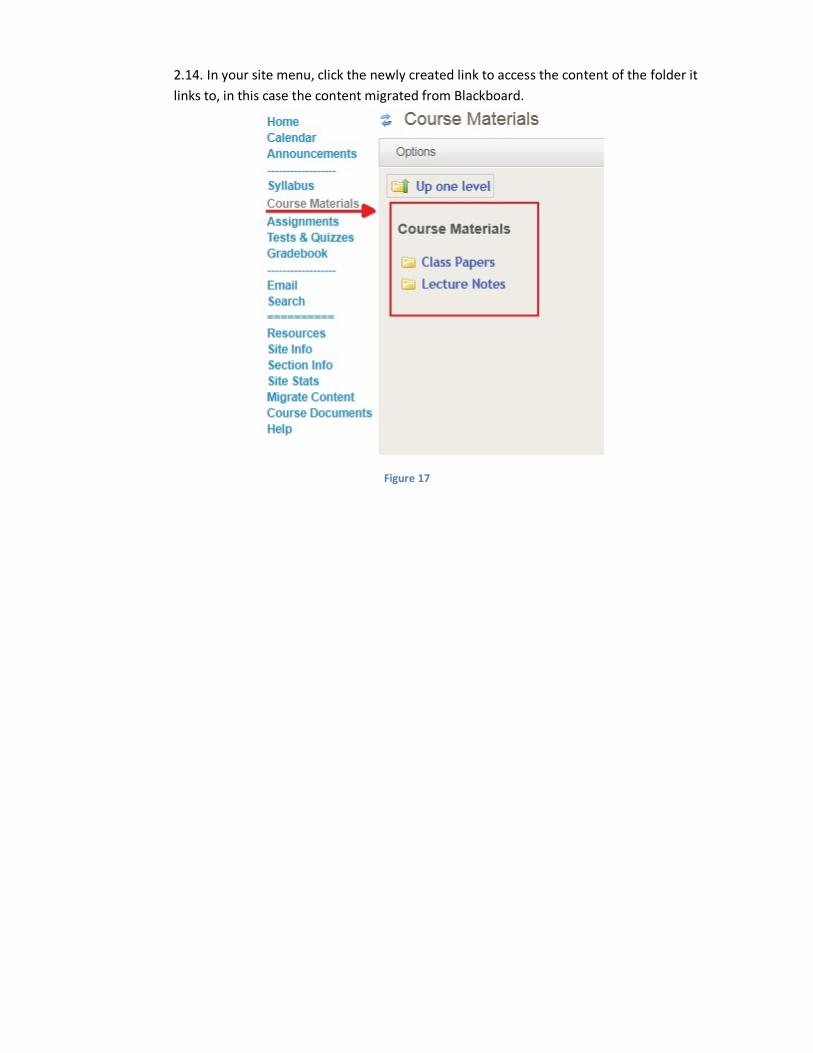
2.14. In your site menu, click the newly created link to access the content of the folder it links to, in this case the content migrated from Blackboard.
Figure 17