Embed Size (px)
Citation preview
HOW TO PHOTOGRAPH RURAL AREAS WITH STYLE // © PHOTZY.COM 1
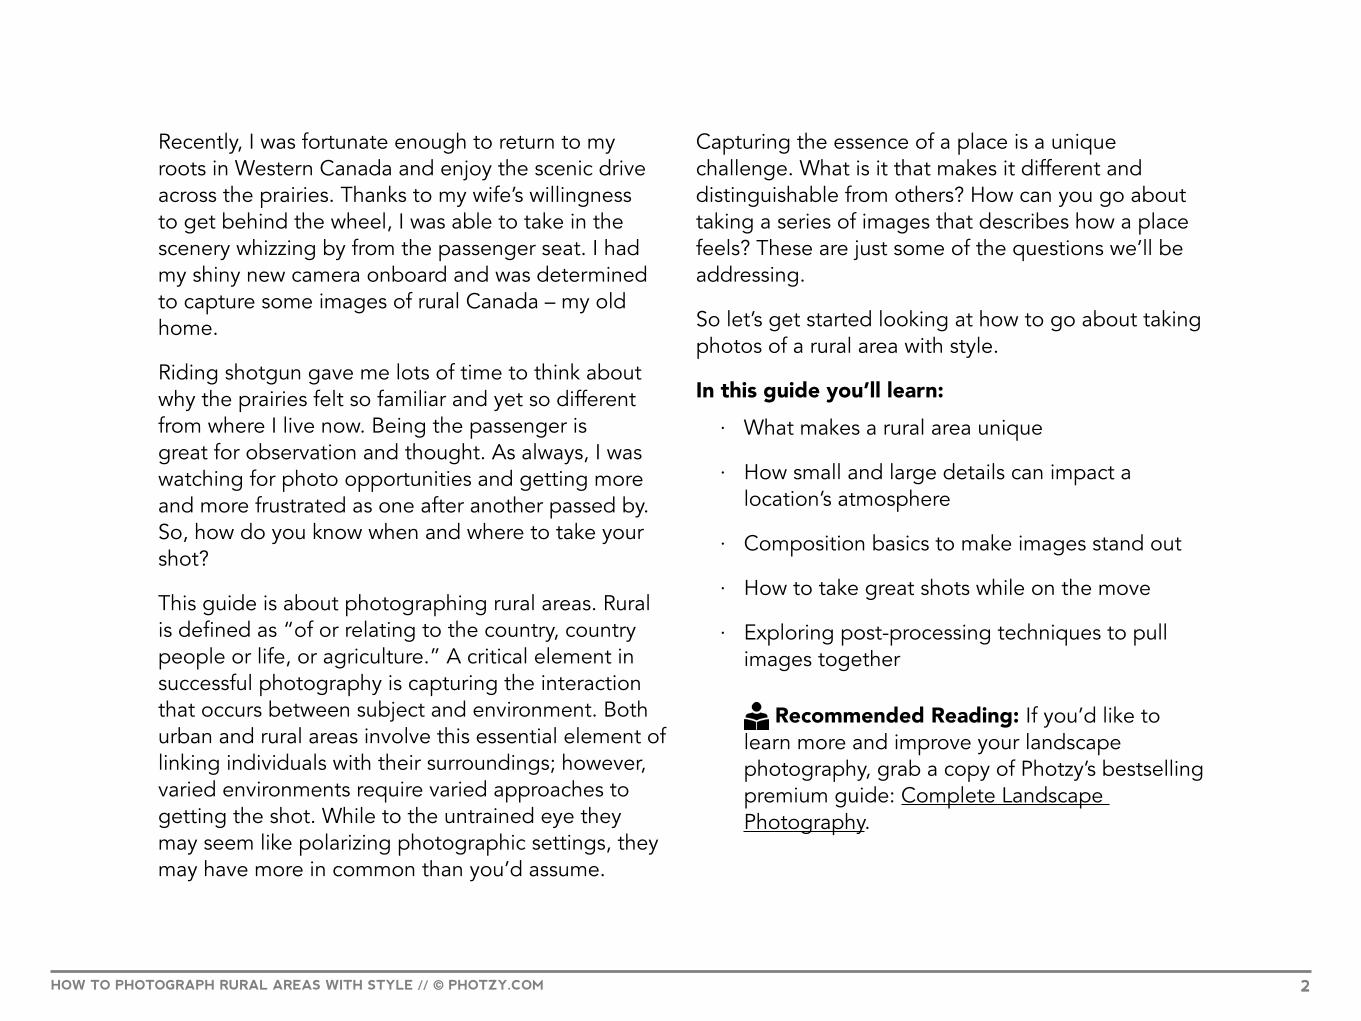
HOW TO PHOTOGRAPH RURAL AREAS WITH STYLE
Quick GuideWritten by Rob Eyers
Photzy
HOW TO PHOTOGRAPH RURAL AREAS WITH STYLE // © PHOTZY.COM 2
Recently, I was fortunate enough to return to my roots in Western Canada and enjoy the scenic drive across the prairies. Thanks to my wife’s willingness to get behind the wheel, I was able to take in the scenery whizzing by from the passenger seat. I had my shiny new camera onboard and was determined to capture some images of rural Canada – my old home.
Riding shotgun gave me lots of time to think about why the prairies felt so familiar and yet so different from where I live now. Being the passenger is great for observation and thought. As always, I was watching for photo opportunities and getting more and more frustrated as one after another passed by. So, how do you know when and where to take your shot?
This guide is about photographing rural areas. Rural is defined as “of or relating to the country, country people or life, or agriculture.” A critical element in successful photography is capturing the interaction that occurs between subject and environment. Both urban and rural areas involve this essential element of linking individuals with their surroundings; however, varied environments require varied approaches to getting the shot. While to the untrained eye they may seem like polarizing photographic settings, they may have more in common than you’d assume.
Capturing the essence of a place is a unique challenge. What is it that makes it different and distinguishable from others? How can you go about taking a series of images that describes how a place feels? These are just some of the questions we’ll be addressing.
So let’s get started looking at how to go about taking photos of a rural area with style.
In this guide you’ll learn:
· What makes a rural area unique
· How small and large details can impact a location’s atmosphere
· Composition basics to make images stand out
· How to take great shots while on the move
· Exploring post-processing techniques to pull images together
Recommended Reading: If you’d like to learn more and improve your landscape photography, grab a copy of Photzy’s bestselling premium guide: Complete Landscape Photography.
HOW TO PHOTOGRAPH RURAL AREAS WITH STYLE // © PHOTZY.COM 3
WHAT’S DIFFERENT ABOUT PHOTOGRAPHING
RURAL AREAS?
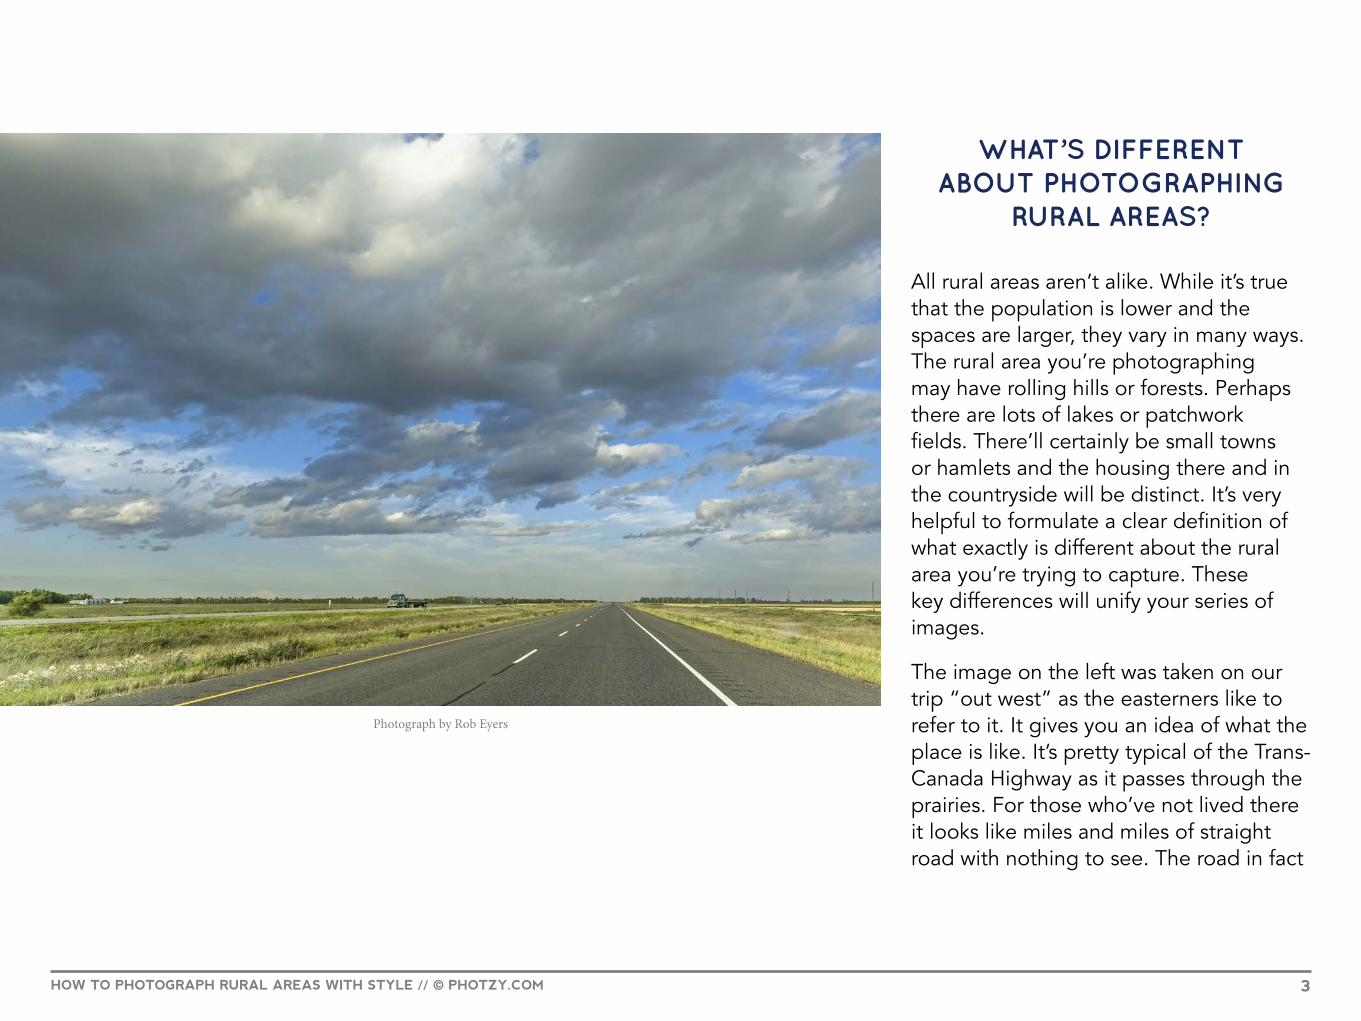
All rural areas aren’t alike. While it’s true that the population is lower and the spaces are larger, they vary in many ways. The rural area you’re photographing may have rolling hills or forests. Perhaps there are lots of lakes or patchwork fields. There’ll certainly be small towns or hamlets and the housing there and in the countryside will be distinct. It’s very helpful to formulate a clear definition of what exactly is different about the rural area you’re trying to capture. These key differences will unify your series of images.
The image on the left was taken on our trip “out west” as the easterners like to refer to it. It gives you an idea of what the place is like. It’s pretty typical of the Trans-Canada Highway as it passes through the prairies. For those who’ve not lived there it looks like miles and miles of straight road with nothing to see. The road in fact
Photograph by Rob Eyers
HOW TO PHOTOGRAPH RURAL AREAS WITH STYLE // © PHOTZY.COM 4
does go in a straight line for what seems like forever. But is there really nothing to see, as many would like you to believe?
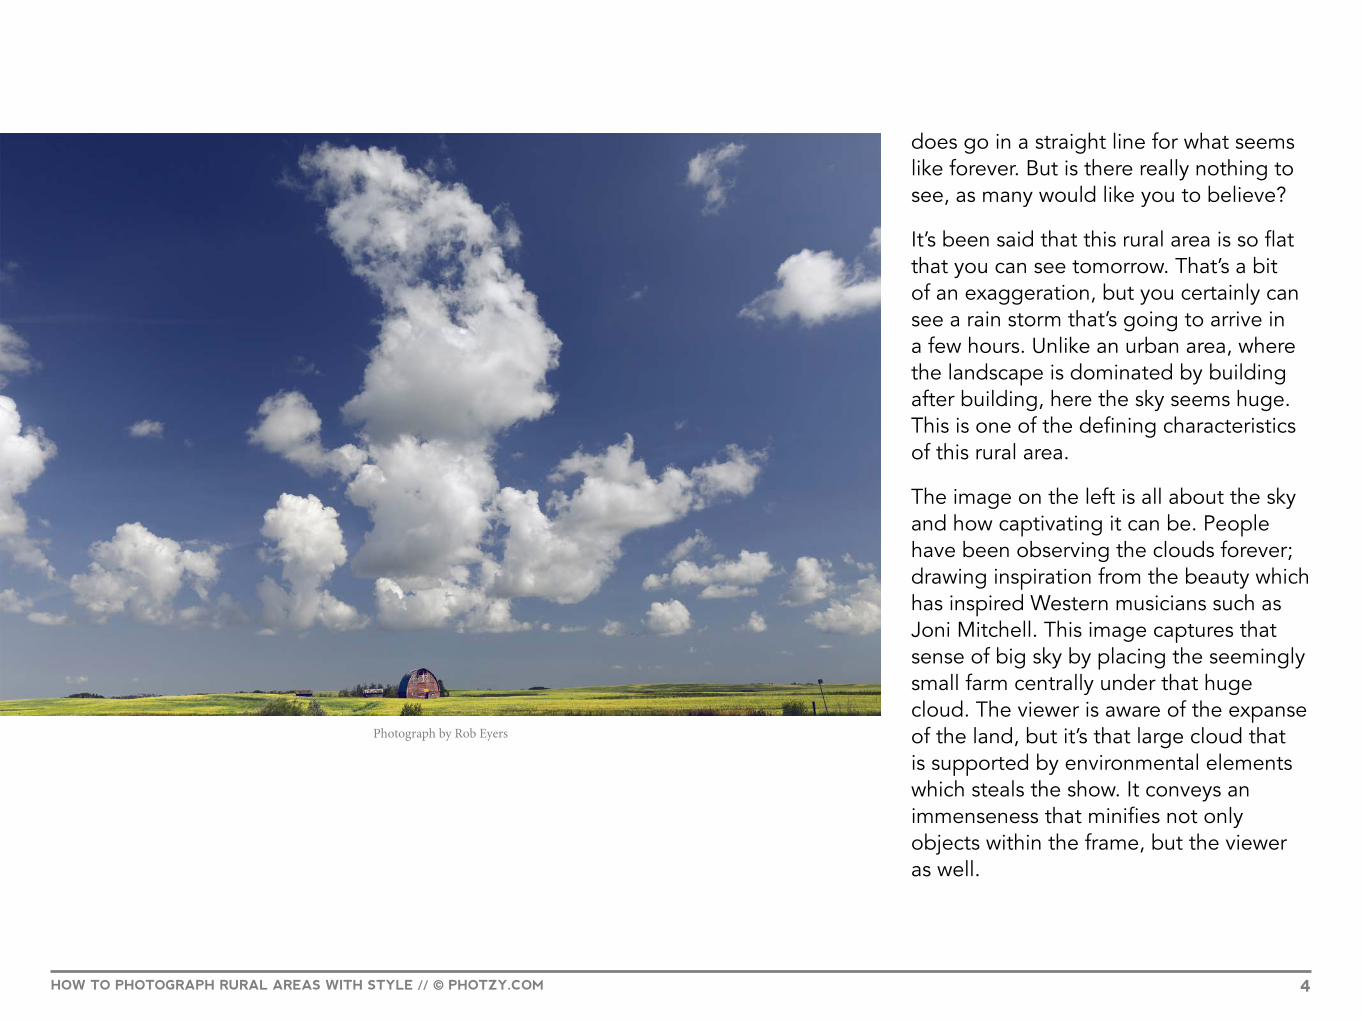
It’s been said that this rural area is so flat that you can see tomorrow. That’s a bit of an exaggeration, but you certainly can see a rain storm that’s going to arrive in a few hours. Unlike an urban area, where the landscape is dominated by building after building, here the sky seems huge. This is one of the defining characteristics of this rural area.
The image on the left is all about the sky and how captivating it can be. People have been observing the clouds forever; drawing inspiration from the beauty which has inspired Western musicians such as Joni Mitchell. This image captures that sense of big sky by placing the seemingly small farm centrally under that huge cloud. The viewer is aware of the expanse of the land, but it’s that large cloud that is supported by environmental elements which steals the show. It conveys an immenseness that minifies not only objects within the frame, but the viewer as well.
Photograph by Rob Eyers

HOW TO PHOTOGRAPH RURAL AREAS WITH STYLE // © PHOTZY.COM 5
In the image on the left the farmer’s field is more prominent, but again it’s the sky that’s the star. The viewer is given a sense of the vast openness of the land in a simple composition. Like the image on the previous page, the clouds are once again the focal point and that ‘big sky’ feel is there.
Key Lesson: Capturing the overall impression of the rural area you’re photographing is as important as any individual item or subject you may take an image of. Maintaining that sense of place is important when capturing other subject matter if you want a cohesive rural collection.
Photograph by Rob Eyers
HOW TO PHOTOGRAPH RURAL AREAS WITH STYLE // © PHOTZY.COM 6
UNIQUE ELEMENTS OF RURAL PHOTOGRAPHY
Let’s talk about other unique elements of rural photography which can enhance your pictures.
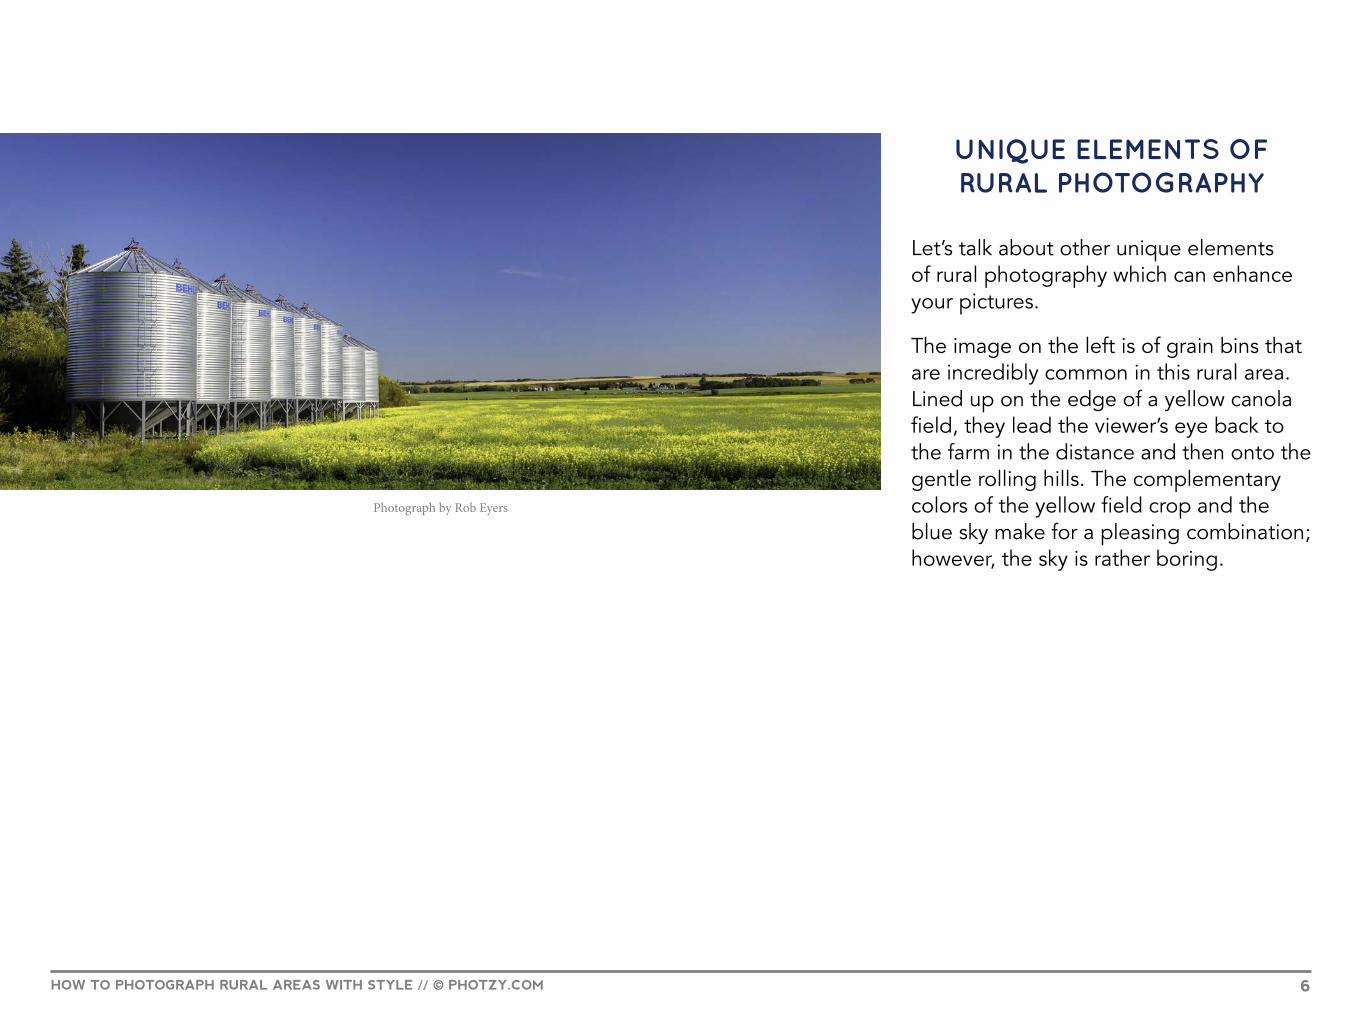
The image on the left is of grain bins that are incredibly common in this rural area. Lined up on the edge of a yellow canola field, they lead the viewer’s eye back to the farm in the distance and then onto the gentle rolling hills. The complementary colors of the yellow field crop and the blue sky make for a pleasing combination; however, the sky is rather boring.
Photograph by Rob Eyers
HOW TO PHOTOGRAPH RURAL AREAS WITH STYLE // © PHOTZY.COM 7
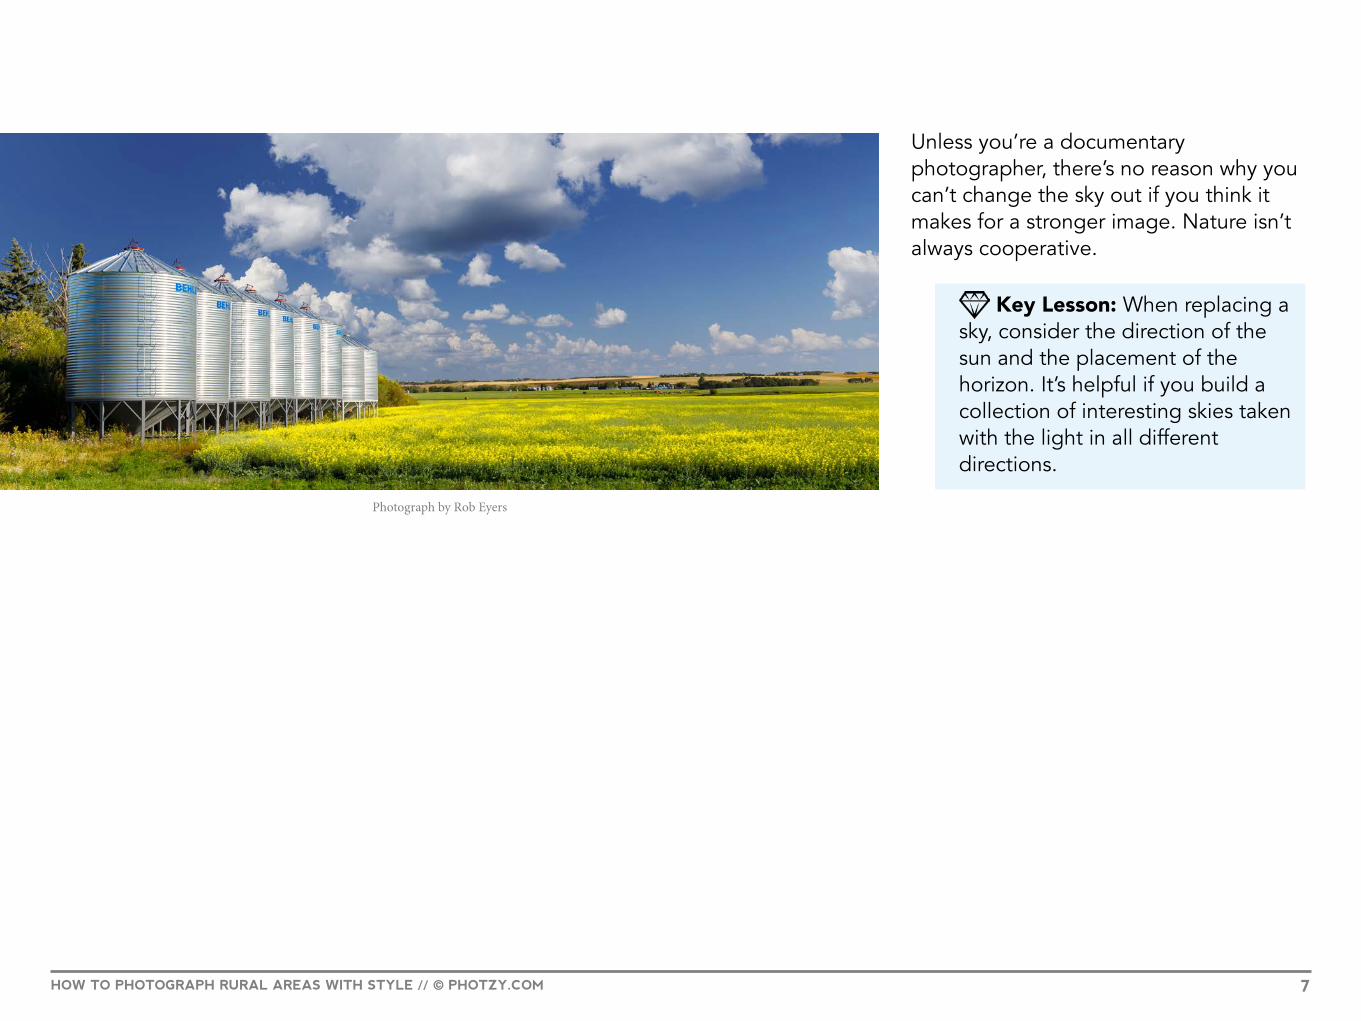
Unless you’re a documentary photographer, there’s no reason why you can’t change the sky out if you think it makes for a stronger image. Nature isn’t always cooperative.
Key Lesson: When replacing a sky, consider the direction of the sun and the placement of the horizon. It’s helpful if you build a collection of interesting skies taken with the light in all different directions.
Photograph by Rob Eyers
HOW TO PHOTOGRAPH RURAL AREAS WITH STYLE // © PHOTZY.COM 8
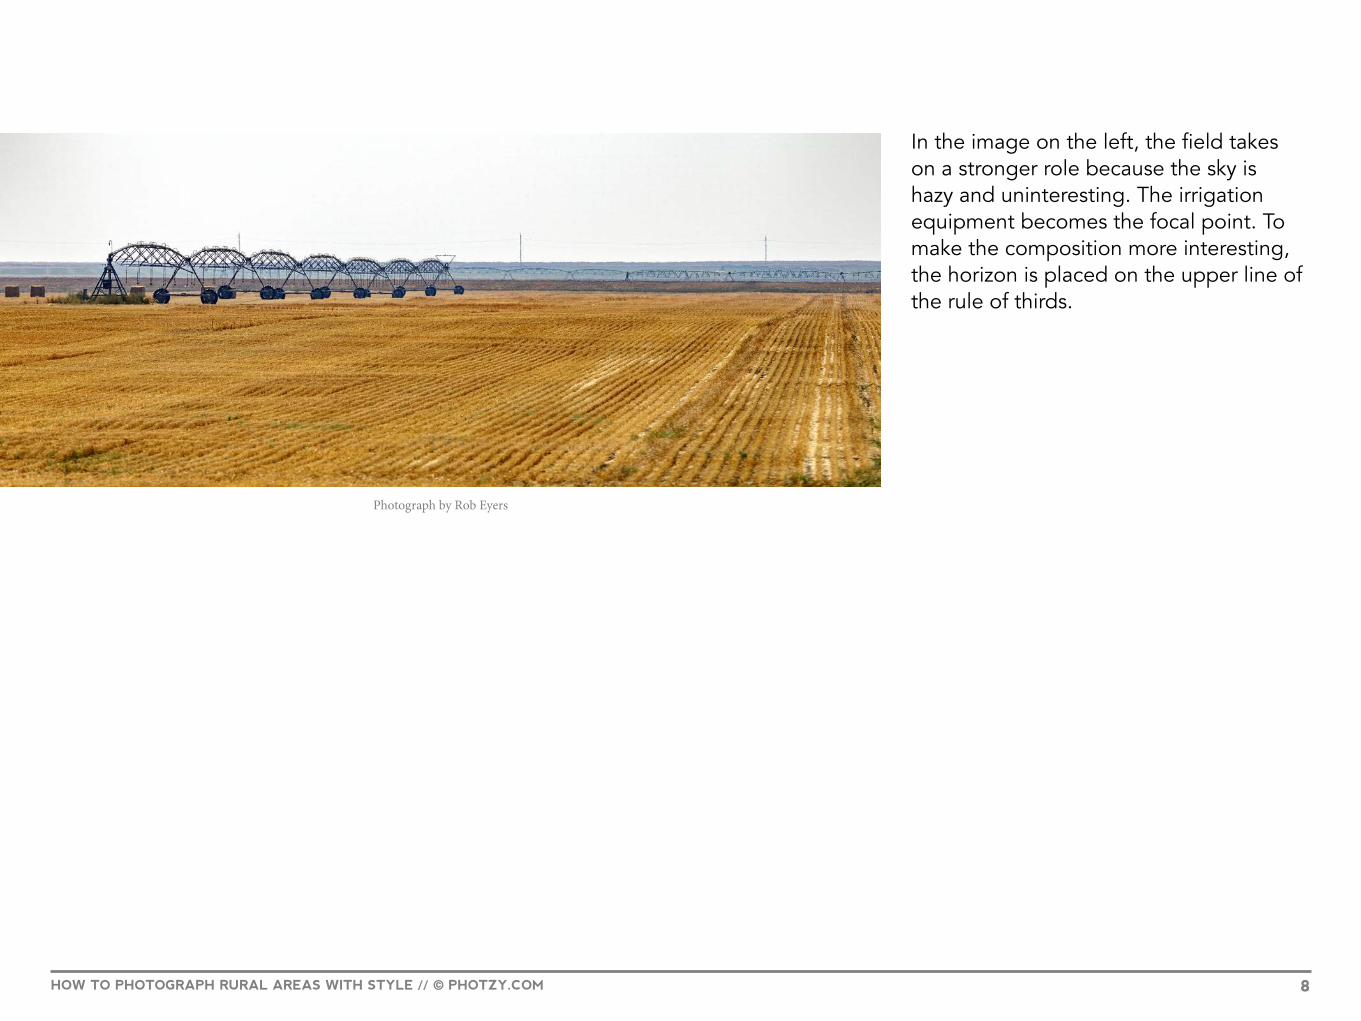
In the image on the left, the field takes on a stronger role because the sky is hazy and uninteresting. The irrigation equipment becomes the focal point. To make the composition more interesting, the horizon is placed on the upper line of the rule of thirds.
Photograph by Rob Eyers
HOW TO PHOTOGRAPH RURAL AREAS WITH STYLE // © PHOTZY.COM 9
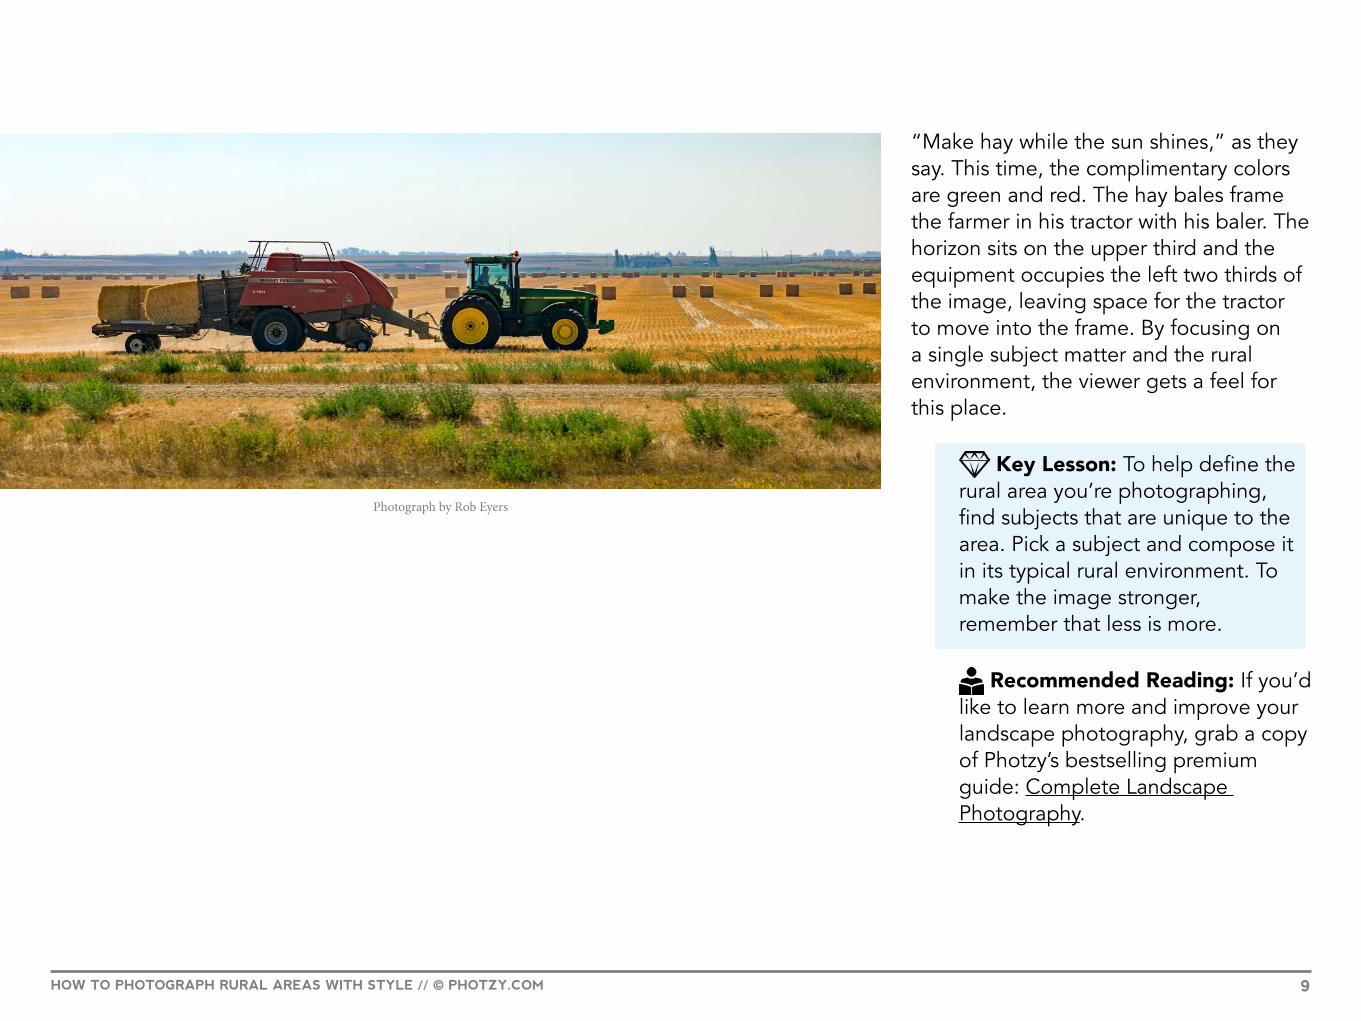
“Make hay while the sun shines,” as they say. This time, the complimentary colors are green and red. The hay bales frame the farmer in his tractor with his baler. The horizon sits on the upper third and the equipment occupies the left two thirds of the image, leaving space for the tractor to move into the frame. By focusing on a single subject matter and the rural environment, the viewer gets a feel for this place.
Key Lesson: To help define the rural area you’re photographing, find subjects that are unique to the area. Pick a subject and compose it in its typical rural environment. To make the image stronger, remember that less is more.
Recommended Reading: If you’d like to learn more and improve your landscape photography, grab a copy of Photzy’s bestselling premium guide: Complete Landscape Photography.
Photograph by Rob Eyers
HOW TO PHOTOGRAPH RURAL AREAS WITH STYLE // © PHOTZY.COM 10
SHOOTING FROM A MOVING VEHICLE
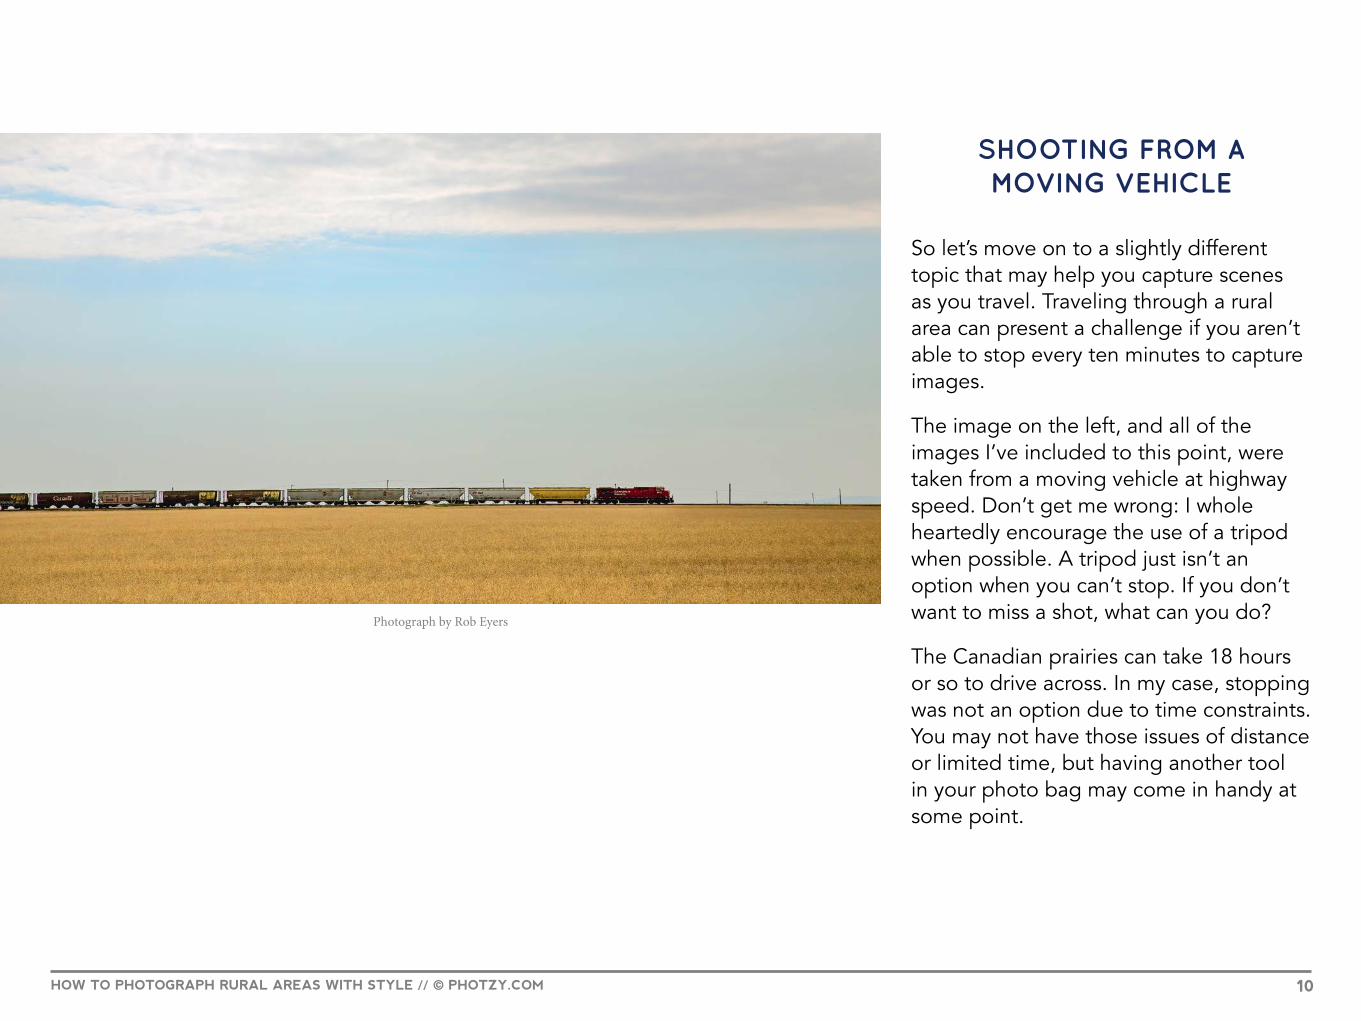
So let’s move on to a slightly different topic that may help you capture scenes as you travel. Traveling through a rural area can present a challenge if you aren’t able to stop every ten minutes to capture images.
The image on the left, and all of the images I’ve included to this point, were taken from a moving vehicle at highway speed. Don’t get me wrong: I whole heartedly encourage the use of a tripod when possible. A tripod just isn’t an option when you can’t stop. If you don’t want to miss a shot, what can you do?
The Canadian prairies can take 18 hours or so to drive across. In my case, stopping was not an option due to time constraints. You may not have those issues of distance or limited time, but having another tool in your photo bag may come in handy at some point.
Photograph by Rob Eyers
HOW TO PHOTOGRAPH RURAL AREAS WITH STYLE // © PHOTZY.COM 11
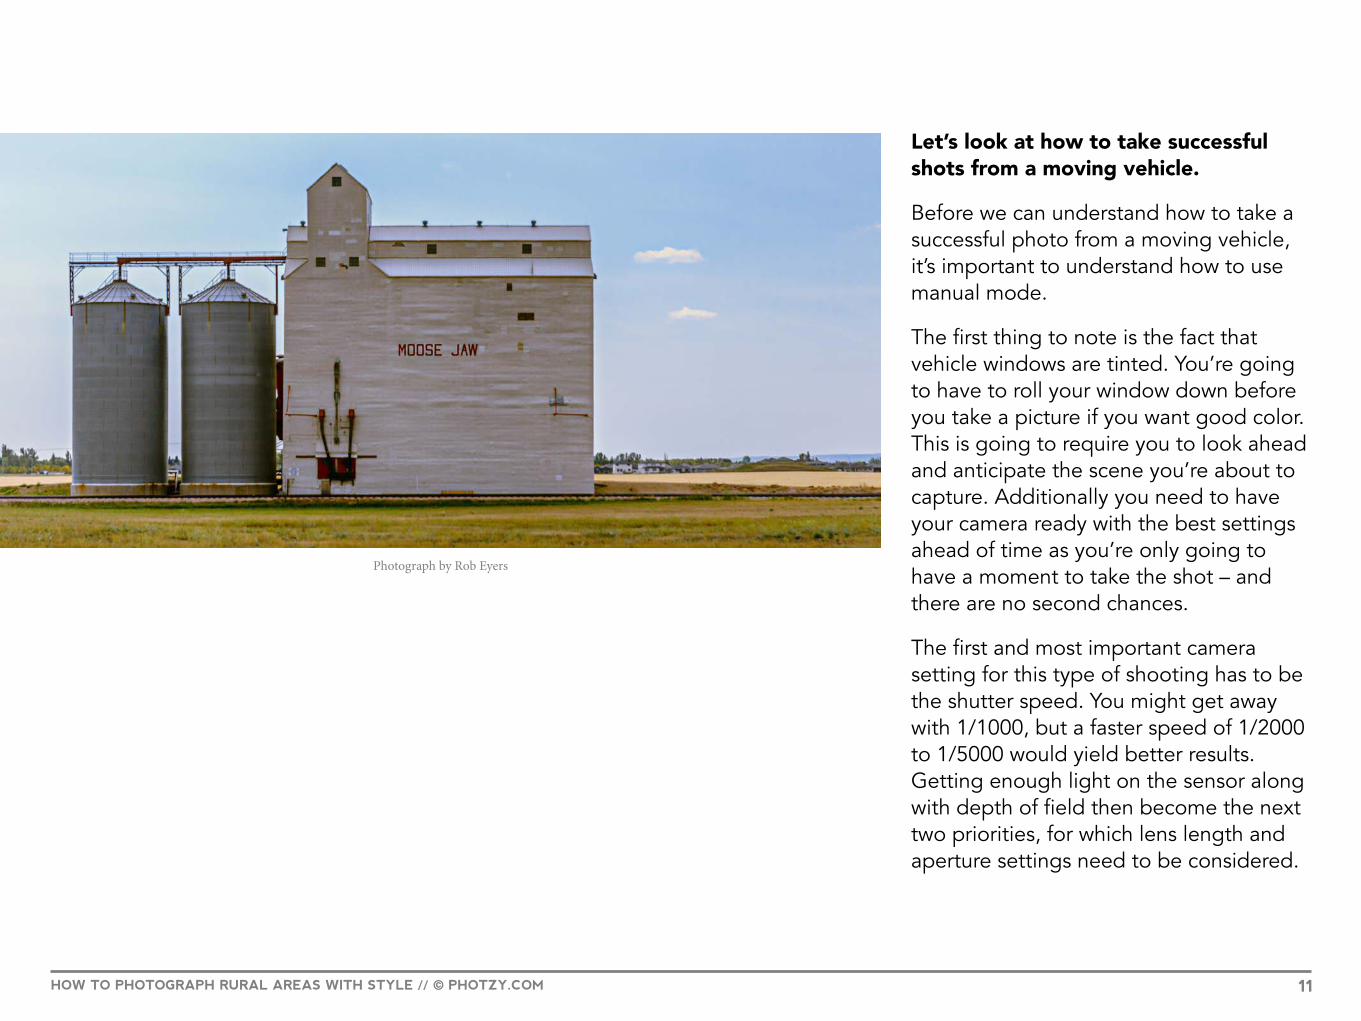
Let’s look at how to take successful shots from a moving vehicle.
Before we can understand how to take a successful photo from a moving vehicle, it’s important to understand how to use manual mode.
The first thing to note is the fact that vehicle windows are tinted. You’re going to have to roll your window down before you take a picture if you want good color. This is going to require you to look ahead and anticipate the scene you’re about to capture. Additionally you need to have your camera ready with the best settings ahead of time as you’re only going to have a moment to take the shot – and there are no second chances.
The first and most important camera setting for this type of shooting has to be the shutter speed. You might get away with 1/1000, but a faster speed of 1/2000 to 1/5000 would yield better results. Getting enough light on the sensor along with depth of field then become the next two priorities, for which lens length and aperture settings need to be considered.
Photograph by Rob Eyers

HOW TO PHOTOGRAPH RURAL AREAS WITH STYLE // © PHOTZY.COM 12
Depth of field is the distance between the closest object that is in focus to the object that is the farthest away and still acceptably in focus. This is commonly referred to as DOF.
Most landscape photographers will use f/8 to f/16 in order to achieve a deep DOF. In this type of shooting it will be too light restricting, which will force the use of a much higher ISO. The higher the ISO, the more noise there is going to be in your image. So what should you do?
Using a wider aperture like f/5.6 lets in more light but narrows your DOF. However, using a shorter lens will increase your DOF. A check of any online DOF calculator shows that as the lens gets shorter, the depth of field increases. Using a 24mm lens set to f/5.6, for example, gives a DOF from 7 feet to infinity when focusing on something 20 feet away (a crop sensor camera will have a DOF from about 9 feet to infinity). The wider aperture lets in more light, which helps with shutter speed, and the shorter lens helps with DOF.
Another piece of the puzzle is how to focus when there’s only a very short amount of time. Back button focus is perfect for this type of photography. Back button focus removes the focus function from the shutter and places it on a button on the back of the camera. Using back button focus, with the previous example of DOF, it’s easy to pre-focus on anything 20 feet away and be ready to shoot. Waiting for the camera to focus before shutter release is alleviated, unlike having the focus on the shutter. Check out how to set up back button focus on your camera and give it a try. It takes getting used to, but it can be very useful for this type of shooting.
Key Lesson: Using a shorter lens and a wider aperture will give you a greater DOF with more light, allowing for a lower ISO. Focusing ahead of time means you can release the shutter without having to wait for the camera to focus.
HOW TO PHOTOGRAPH RURAL AREAS WITH STYLE // © PHOTZY.COM 13
Photograph by Rob Eyers
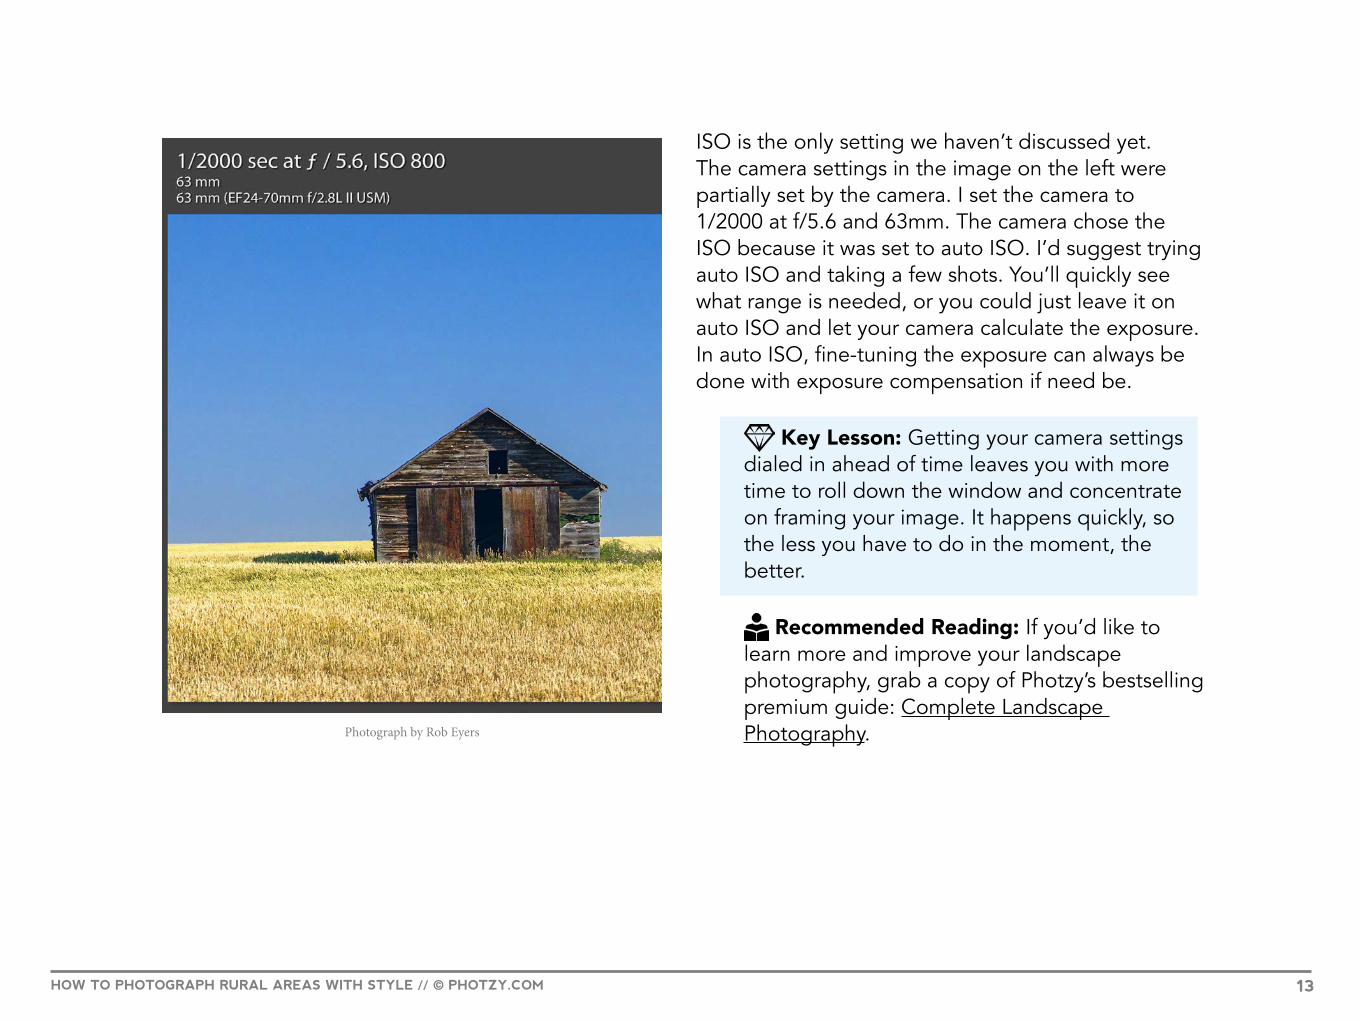
ISO is the only setting we haven’t discussed yet. The camera settings in the image on the left were partially set by the camera. I set the camera to 1/2000 at f/5.6 and 63mm. The camera chose the ISO because it was set to auto ISO. I’d suggest trying auto ISO and taking a few shots. You’ll quickly see what range is needed, or you could just leave it on auto ISO and let your camera calculate the exposure. In auto ISO, fine-tuning the exposure can always be done with exposure compensation if need be.
Key Lesson: Getting your camera settings dialed in ahead of time leaves you with more time to roll down the window and concentrate on framing your image. It happens quickly, so the less you have to do in the moment, the better.
Recommended Reading: If you’d like to learn more and improve your landscape photography, grab a copy of Photzy’s bestselling premium guide: Complete Landscape Photography.
HOW TO PHOTOGRAPH RURAL AREAS WITH STYLE // © PHOTZY.COM 14
FINAL
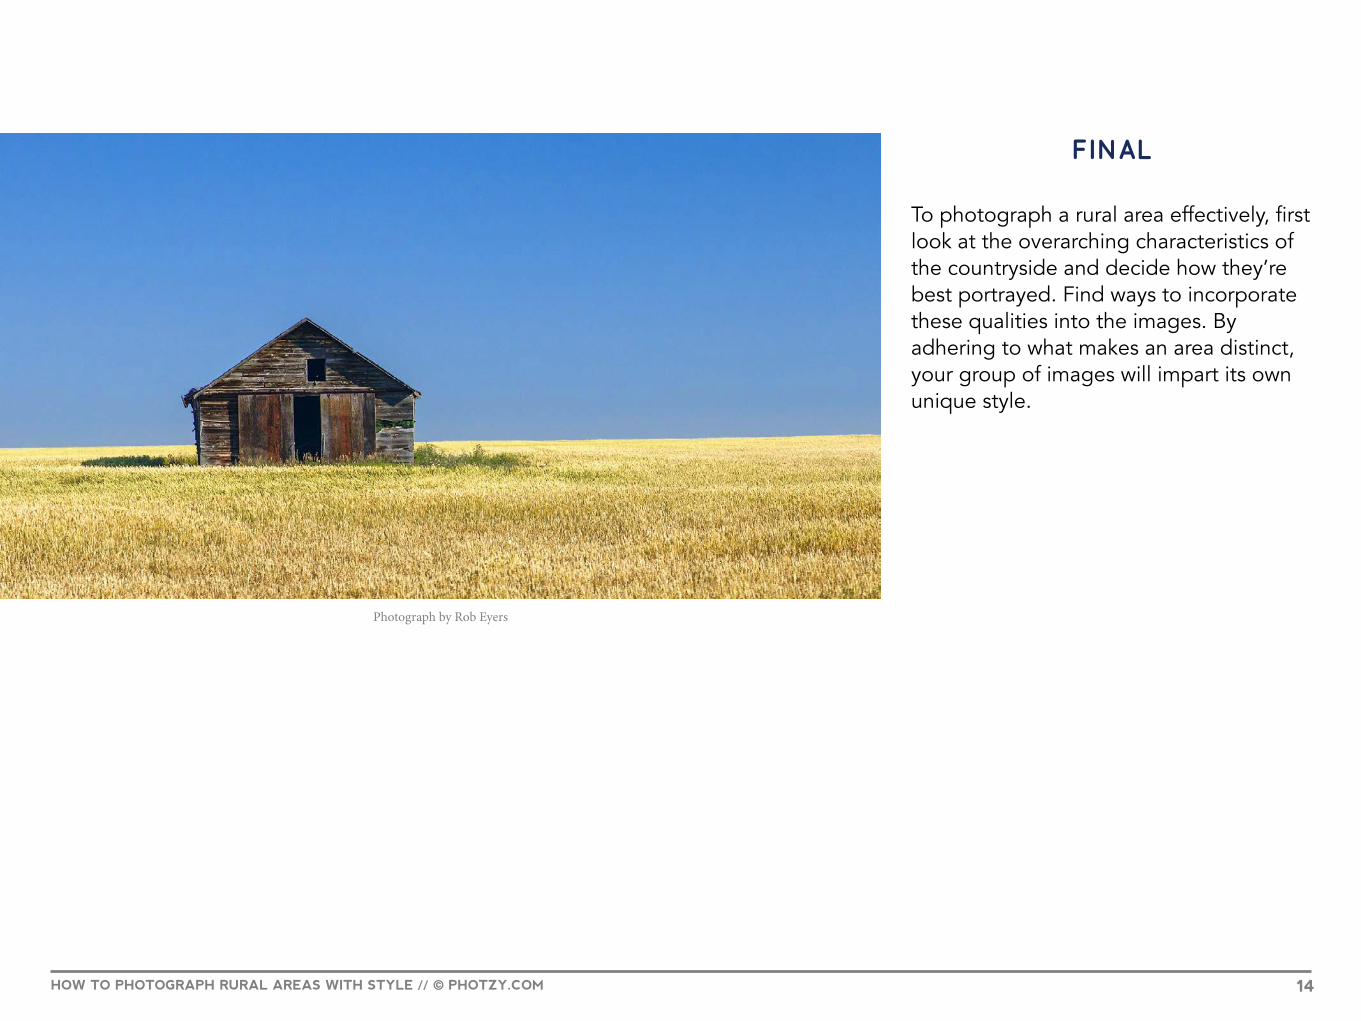
To photograph a rural area effectively, first look at the overarching characteristics of the countryside and decide how they’re best portrayed. Find ways to incorporate these qualities into the images. By adhering to what makes an area distinct, your group of images will impart its own unique style.
Photograph by Rob Eyers

HOW TO PHOTOGRAPH RURAL AREAS WITH STYLE // © PHOTZY.COM
Self-Check Quiz:
1) What’s the difference between urban and rural?
2) What are three things that make a rural area distinct?
3) What unique characteristics does your rural area have?
4) What’s the single most important camera setting for taking images from a moving vehicle?
5) Why use a shorter lens while shooting from a moving vehicle?
6) How can you unify a group of images of a rural area?
15
16
IF YOU’D LIKE TO CONTINUE LEARNING AND IMPROVING
YOUR PHOTOGRAPHY PLEASE VISIT PHOTZY.COM
Congratulations! You’ve completed this Photzy guide!
If you liked this photography tutorial, check out this premium guide to help you transform your landscape snapshots into
beautiful scenic works of art: The Complete Landscape Photography Guide.
ABOUT THE AUTHOR
Rob Eyers is a retired Canadian business owner and musician. These days, photography, music, and travel keep him busy. His interest in photography began in the 1960s. Rob is certified by the Imaging Science Foundation and as such, he is highly interested in color accuracy for both video and photo processing.
Flickr: https://www.flickr.com/photos/rob_eyers/Instagram: https://www.instagram.com/robeyers/Facebook: https://www.facebook.com/rob.eyers