Embed Size (px)
Citation preview
How to Set Up Your Rick’s Bead Loom (TL2862)
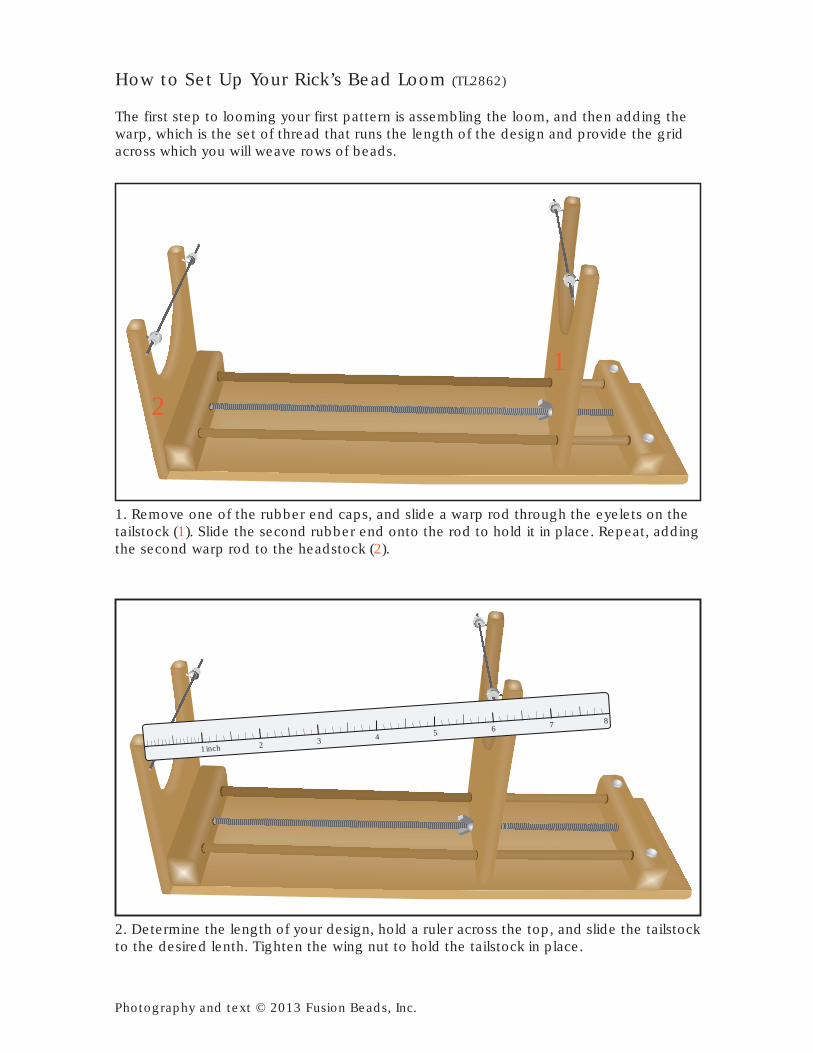
The first step to looming your first pattern is assembling the loom, and then adding thewarp, which is the set of thread that runs the length of the design and provide the gridacross which you will weave rows of beads.
1. Remove one of the rubber end caps, and slide a warp rod through the eyelets on thetailstock (1). Slide the second rubber end onto the rod to hold it in place. Repeat, addingthe second warp rod to the headstock (2).
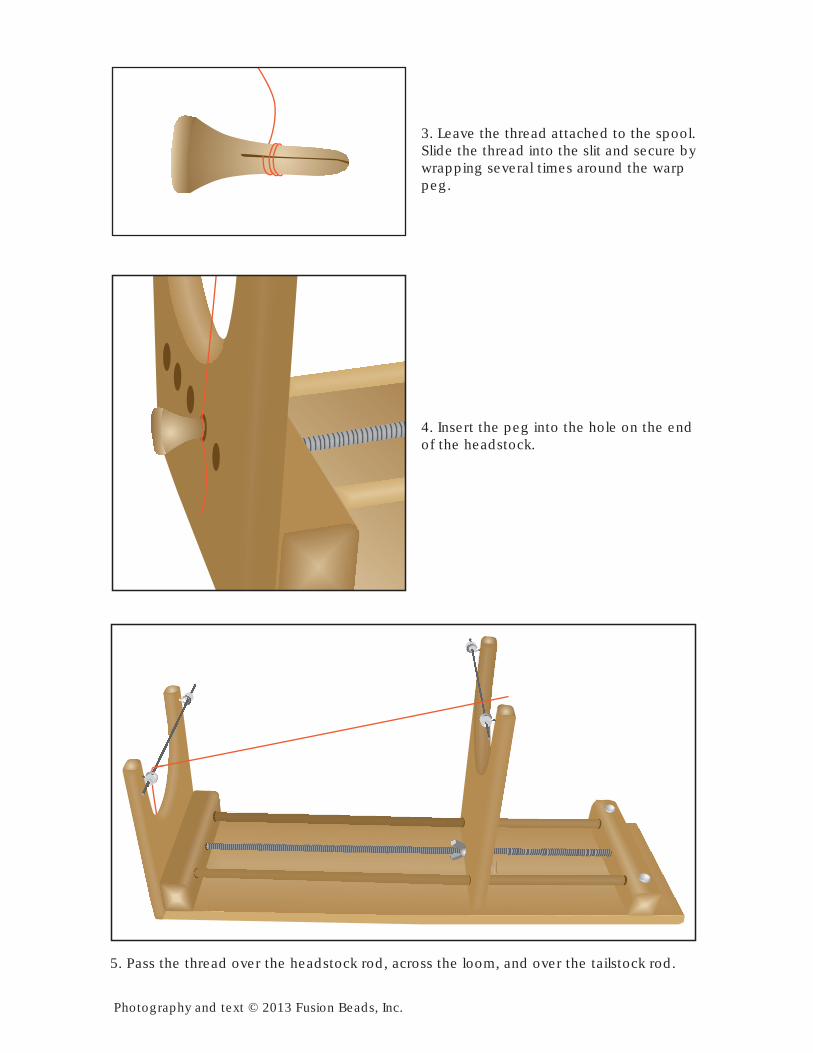
2. Determine the length of your design, hold a ruler across the top, and slide the tailstockto the desired lenth. Tighten the wing nut to hold the tailstock in place.
1
2
1 inch 2 3 4 5 6 7 8
Photography and text © 2013 Fusion Beads, Inc.
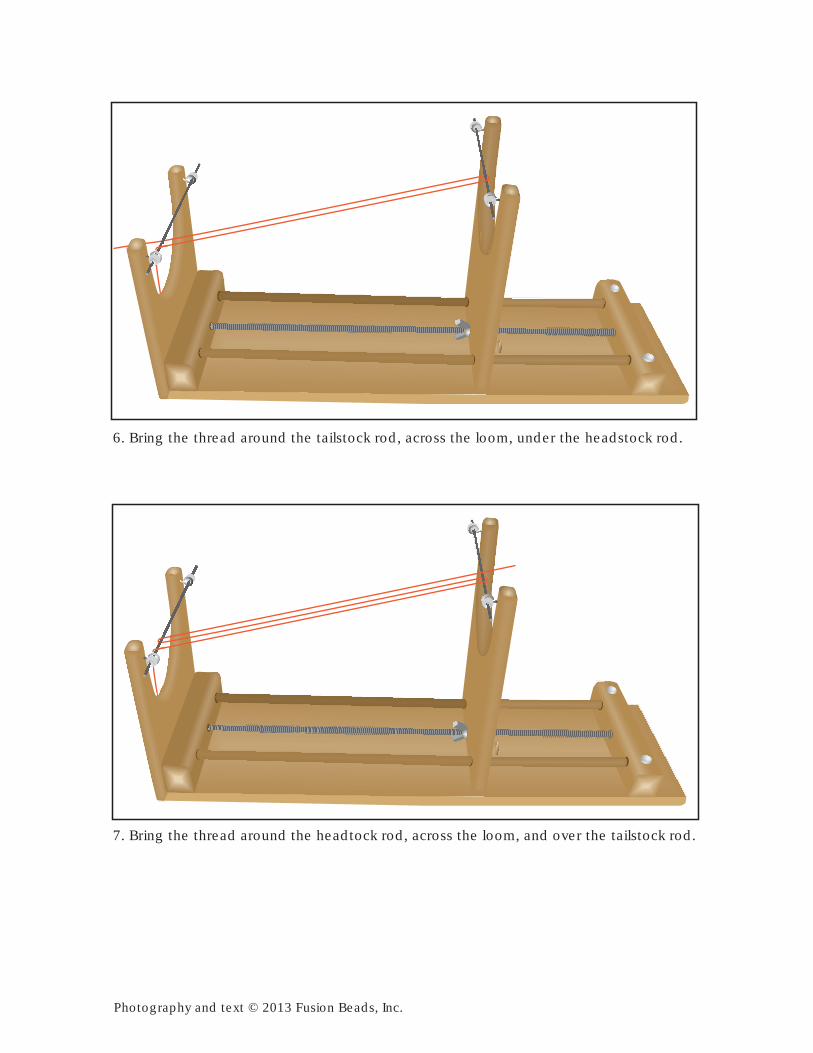
3. Leave the thread attached to the spool.Slide the thread into the slit and secure bywrapping several times around the warppeg.
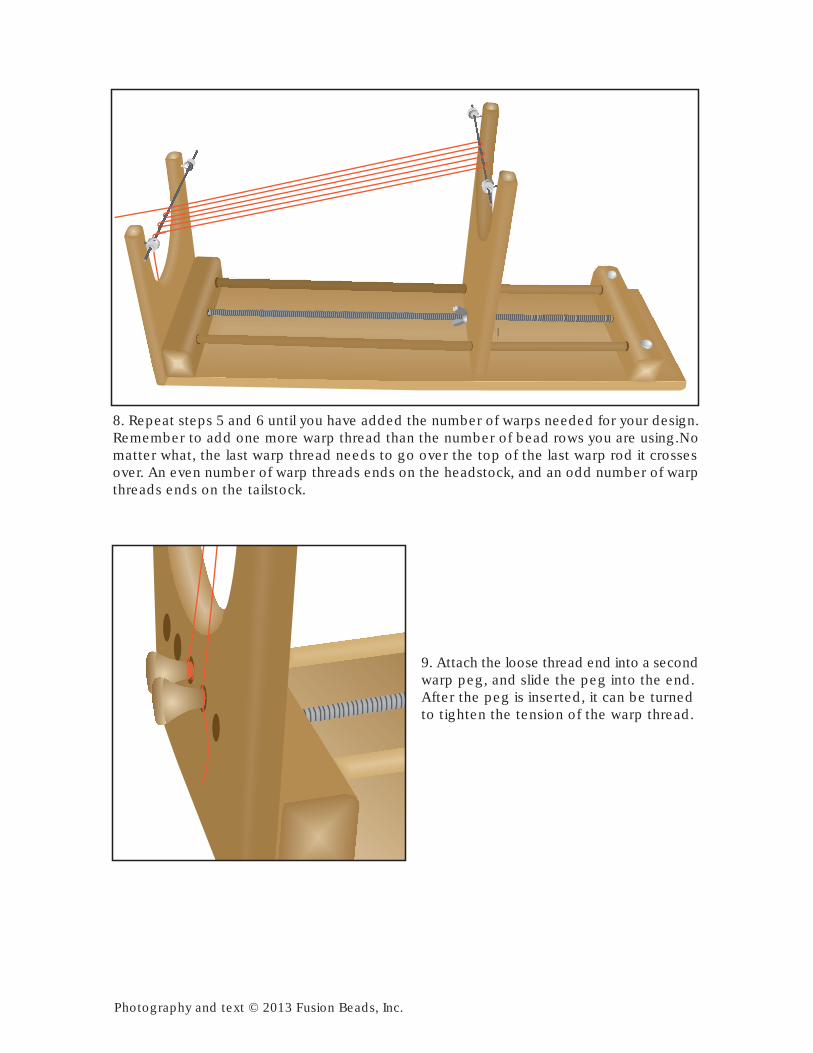
4. Insert the peg into the hole on the endof the headstock.
5. Pass the thread over the headstock rod, across the loom, and over the tailstock rod.
Photography and text © 2013 Fusion Beads, Inc.
6. Bring the thread around the tailstock rod, across the loom, under the headstock rod.
7. Bring the thread around the headtock rod, across the loom, and over the tailstock rod.
Photography and text © 2013 Fusion Beads, Inc.
8. Repeat steps 5 and 6 until you have added the number of warps needed for your design.Remember to add one more warp thread than the number of bead rows you are using.Nomatter what, the last warp thread needs to go over the top of the last warp rod it crossesover. An even number of warp threads ends on the headstock, and an odd number of warpthreads ends on the tailstock.
9. Attach the loose thread end into a secondwarp peg, and slide the peg into the end.After the peg is inserted, it can be turnedto tighten the tension of the warp thread.
Photography and text © 2013 Fusion Beads, Inc.

10. Your Rick’s Loom is now ready for weaving!
11.To create upper and lower warp threads, insert the warp separator card in between thewarp threads. If you lose the warp card, use half of a playing card. Slide the card up againstthe warp bar on the tailstock.
Photography and text © 2013 Fusion Beads, Inc.

12. Cut a 3-foot length of thread, insert theend into a warp peg, and slide the warppeg into one of the holes in the headstock.This thread is your weft thread.
13. Thread the needle, and bring the threadup over the warp bar. Pull the weft threadunderneath all of the warp threads fromleft to right.
14. String five beads, push them up frombeneath, and postion each bead betweentwo warp threads.
Photography and text © 2013 Fusion Beads, Inc.
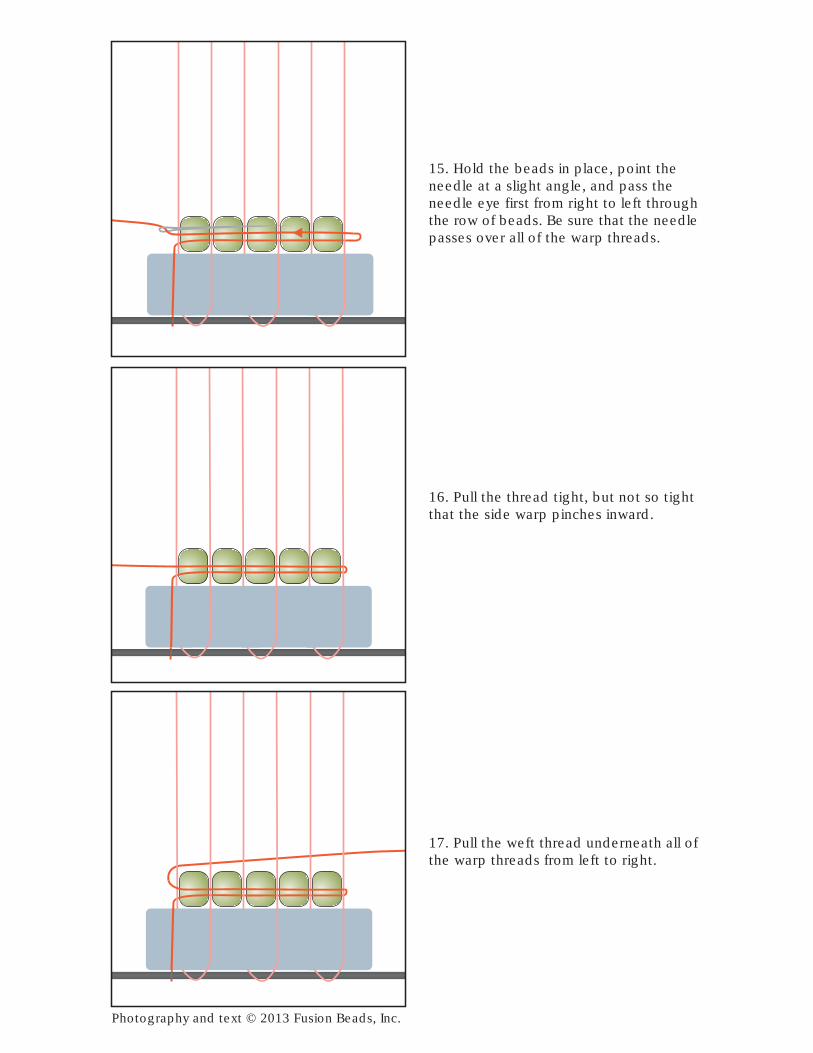
15. Hold the beads in place, point theneedle at a slight angle, and pass theneedle eye first from right to left throughthe row of beads. Be sure that the needlepasses over all of the warp threads.
16. Pull the thread tight, but not so tightthat the side warp pinches inward.
17. Pull the weft thread underneath all ofthe warp threads from left to right.
Photography and text © 2013 Fusion Beads, Inc.

18. String five beads, and position thembetween the warp threads.
19. Hold the beads in place, point theneedle at a slight angle, and pass theneedle eye first from right to left throughthe row of beads. Be sure that the needlepasses over all of the warp threads.
20. Remove the warp card, and push therows snug against the warp bar.
Photography and text © 2013 Fusion Beads, Inc.
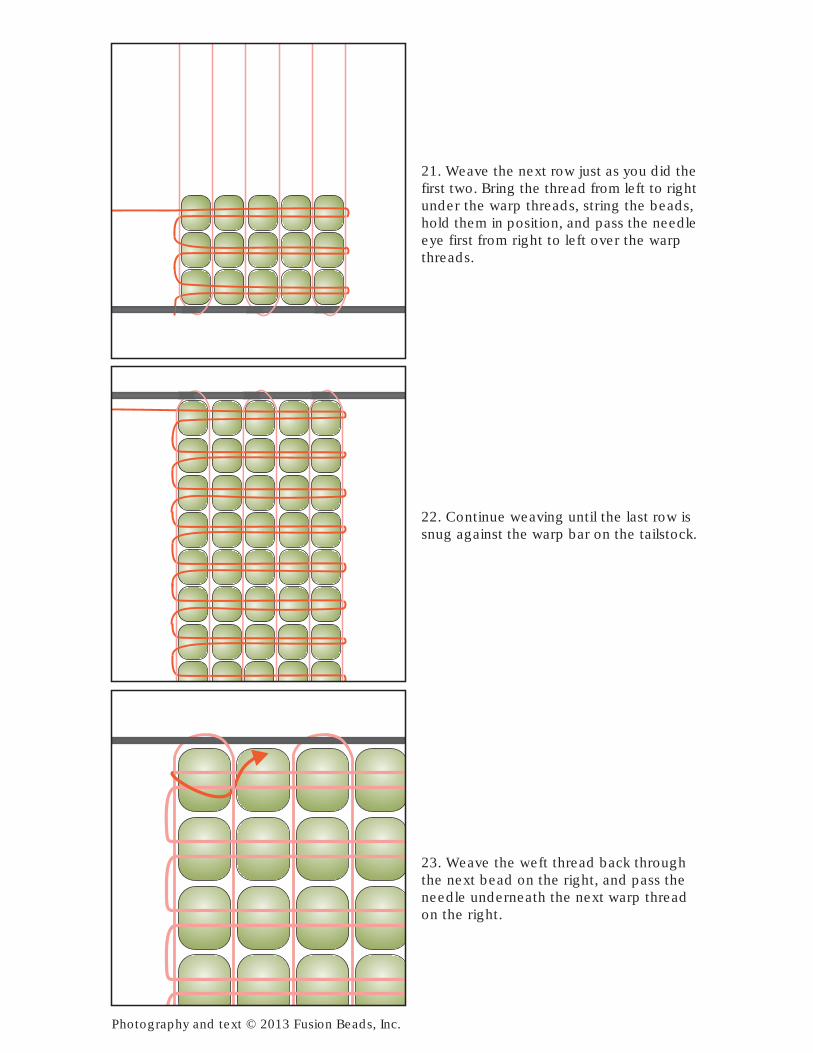
21. Weave the next row just as you did thefirst two. Bring the thread from left to rightunder the warp threads, string the beads,hold them in position, and pass the needleeye first from right to left over the warpthreads.
22. Continue weaving until the last row issnug against the warp bar on the tailstock.
23. Weave the weft thread back throughthe next bead on the right, and pass theneedle underneath the next warp threadon the right.
Photography and text © 2013 Fusion Beads, Inc.
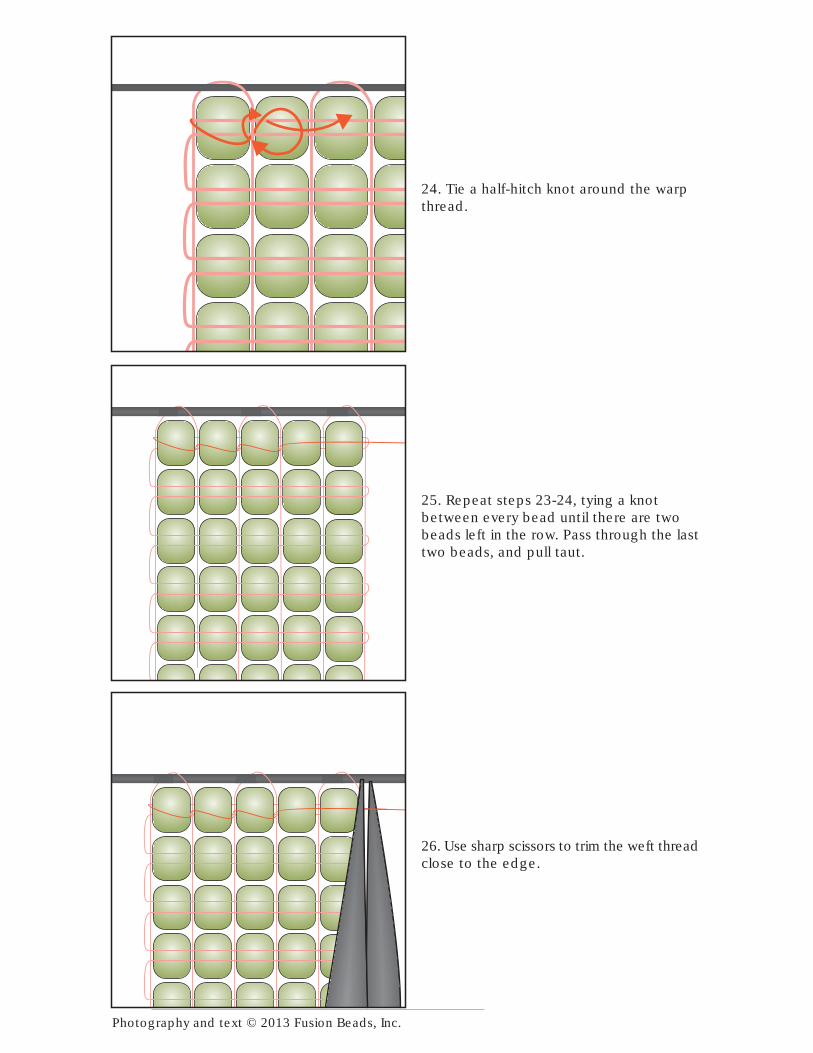
24. Tie a half-hitch knot around the warpthread.
25. Repeat steps 23-24, tying a knotbetween every bead until there are twobeads left in the row. Pass through the lasttwo beads, and pull taut.
26. Use sharp scissors to trim the weft threadclose to the edge.
Photography and text © 2013 Fusion Beads, Inc.
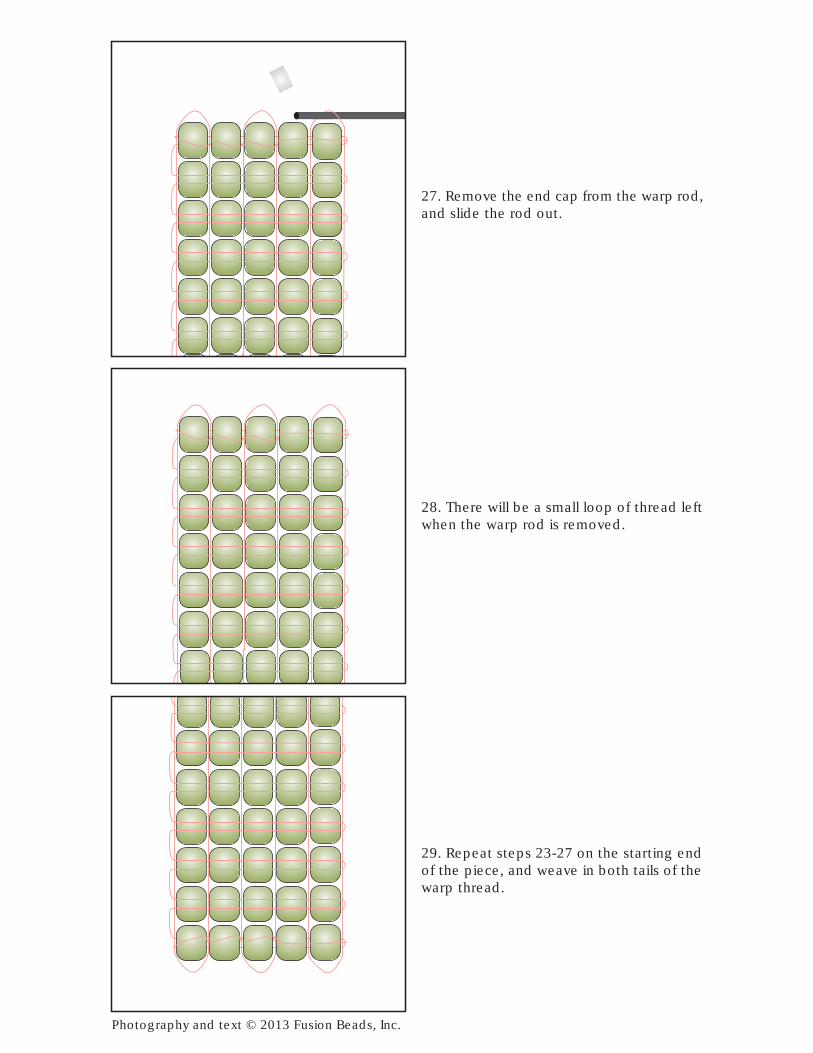
27. Remove the end cap from the warp rod,and slide the rod out.
28. There will be a small loop of thread leftwhen the warp rod is removed.
29. Repeat steps 23-27 on the starting endof the piece, and weave in both tails of thewarp thread.
Photography and text © 2013 Fusion Beads, Inc.
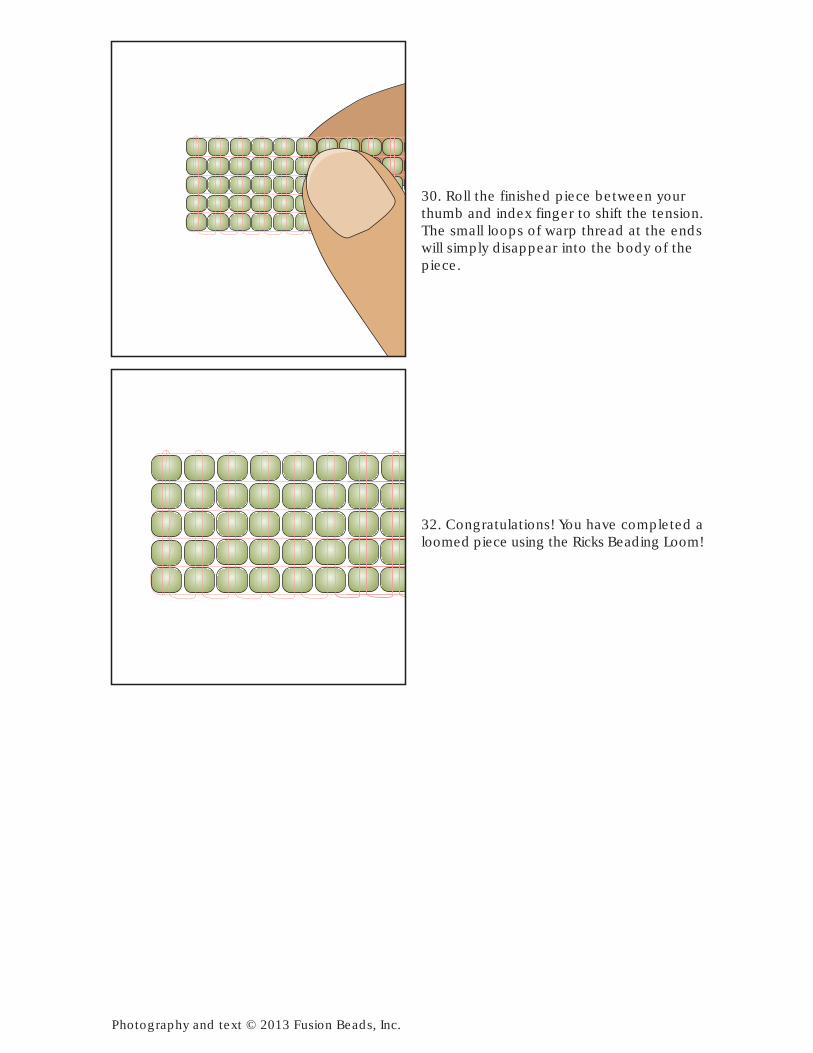
30. Roll the finished piece between yourthumb and index finger to shift the tension.The small loops of warp thread at the endswill simply disappear into the body of thepiece.
32. Congratulations! You have completed aloomed piece using the Ricks Beading Loom!
Photography and text © 2013 Fusion Beads, Inc.