Embed Size (px)
Citation preview

How to Setup and Score a TournamentHow to Setup and
Score a TournamentMay 2018

What’s new for 2018As the rules change, the programmers must adjust the scoring program as well. Feedback from scorers also assist in providing ways to make the program better as well. To receive the newsletter when changes occur, please e-mail Jeff Clark ([email protected]) to get on the distribution list. The major list of changes through May 2018 are the following:
• Changes in the registration template now include skier membership expiration date and all officials ratings for all events
• ZBS is allowed in all Classes of tournaments below maximum speed AND in ALL Class C tournaments above maximum speeds. If skiers want their scores that are performed above maximum speed to go onto the IWWF ranking list in a Class L or R tournament, they may choose to ski at those speeds if the international codes of S,4 or L3,4, are used. They may otherwise elect to ski their regular division with a speed above division maximum but be scored at the division maximum speed.
What’s new for 2018• Popup Reminder At Start Of A Event Group And Round To Add Officials. While
this was added for the ELR class event groups/age divisions it is also suggested to be performed at Class C tournaments as well. This step supports the accuracy of the Slalom Detail Report.
• New Slalom Detail Report for Tech Controllers lists all of the details for all of the slalom passes in the tournament. This report is required when the TC’s send in with their tournament reports.
• Tournament Setup screen setup change now incorporates the sanction edit code. This will allow for a direct link to USA Waterski when adding a skier to your tournament.
• Level 10 rated skiers. Once a skier achieves this rating it is mandated they complete in their elite division for the remainder of the ski year. All scorers/registrars should double check to make sure the skiers are in the correct division.
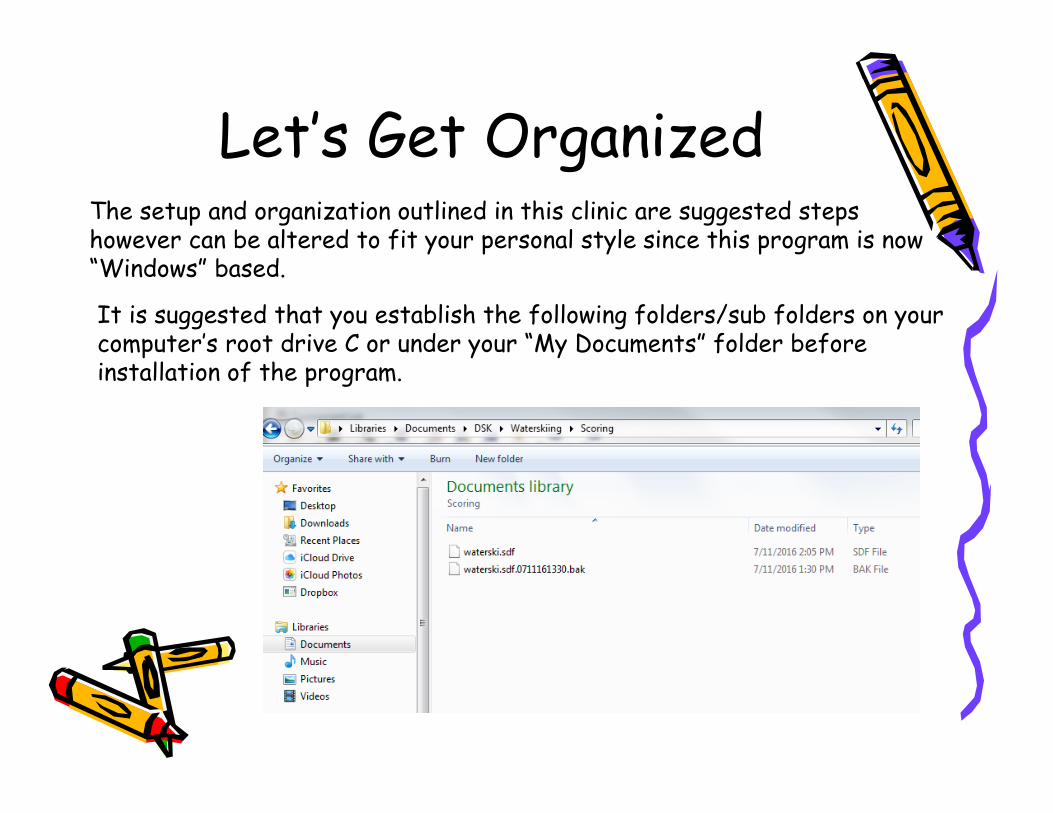
Let’s Get OrganizedThe setup and organization outlined in this clinic are suggested steps however can be altered to fit your personal style since this program is now “Windows” based.
It is suggested that you establish the following folders/sub folders on your computer’s root drive C or under your “My Documents” folder before installation of the program.
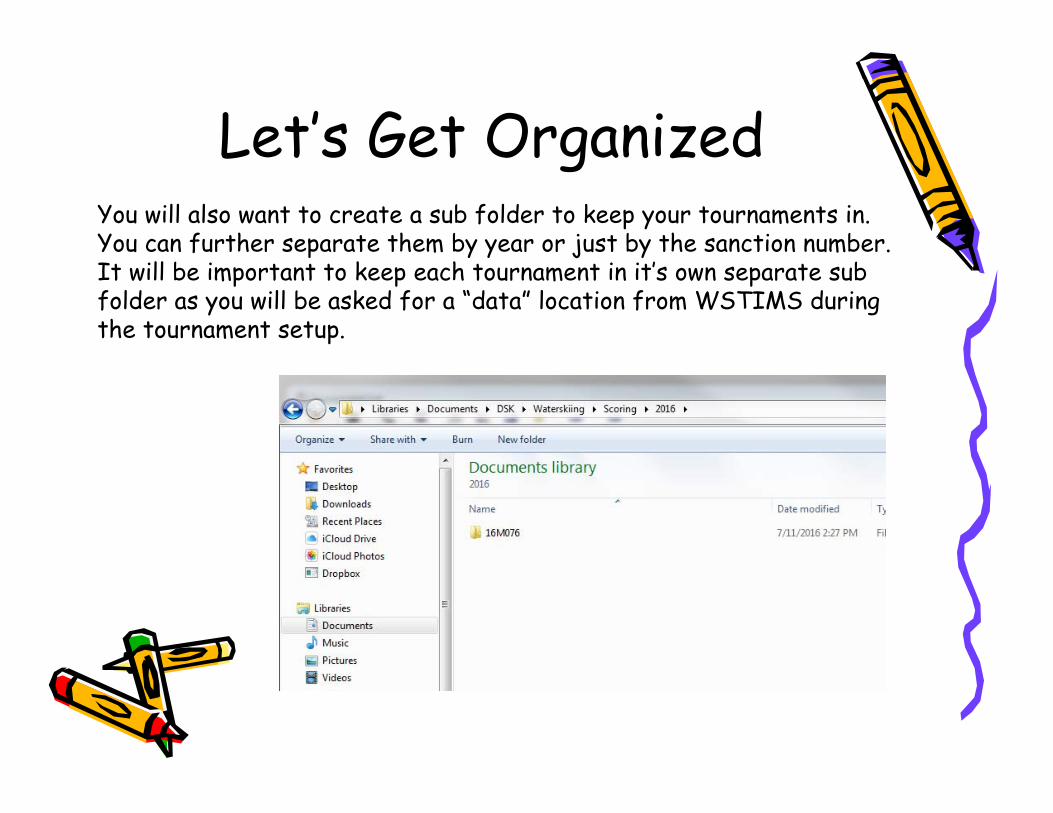
Let’s Get OrganizedYou will also want to create a sub folder to keep your tournaments in. You can further separate them by year or just by the sanction number. It will be important to keep each tournament in it’s own separate sub folder as you will be asked for a “data” location from WSTIMS during the tournament setup.
SetupSetup
AWSA Tournaments
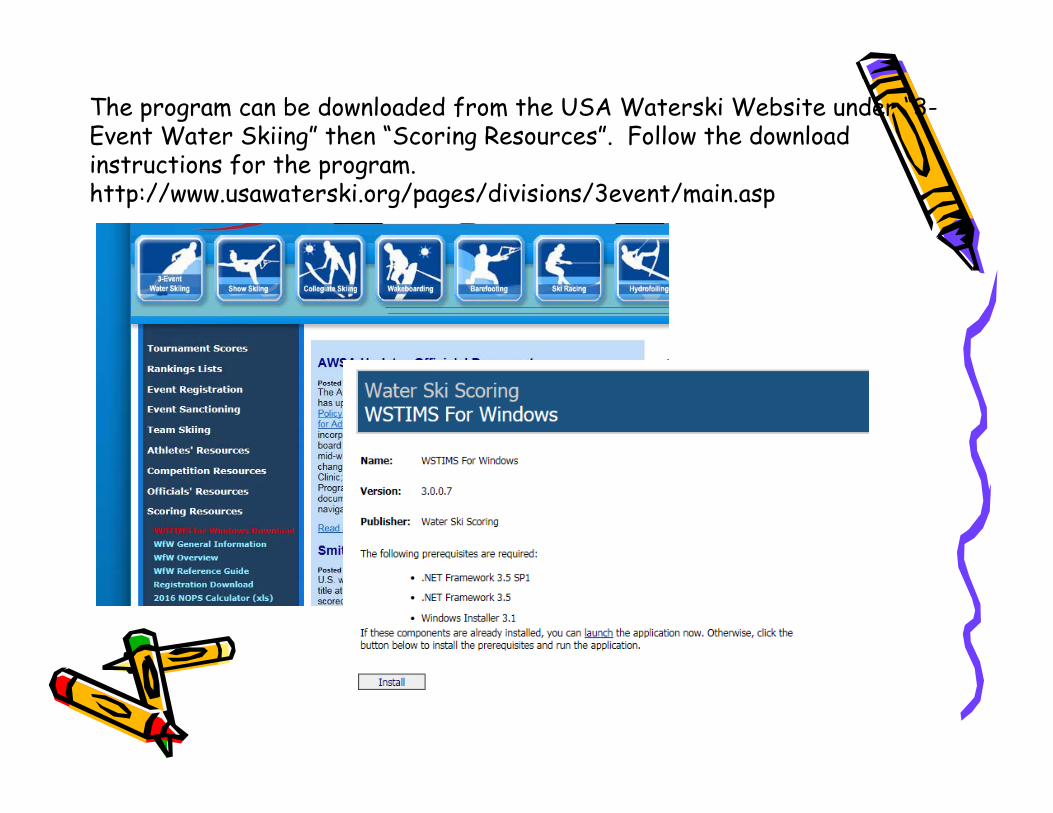
The program can be downloaded from the USA Waterski Website under “3-Event Water Skiing” then “Scoring Resources”. Follow the download instructions for the program.http://www.usawaterski.org/pages/divisions/3event/main.asp
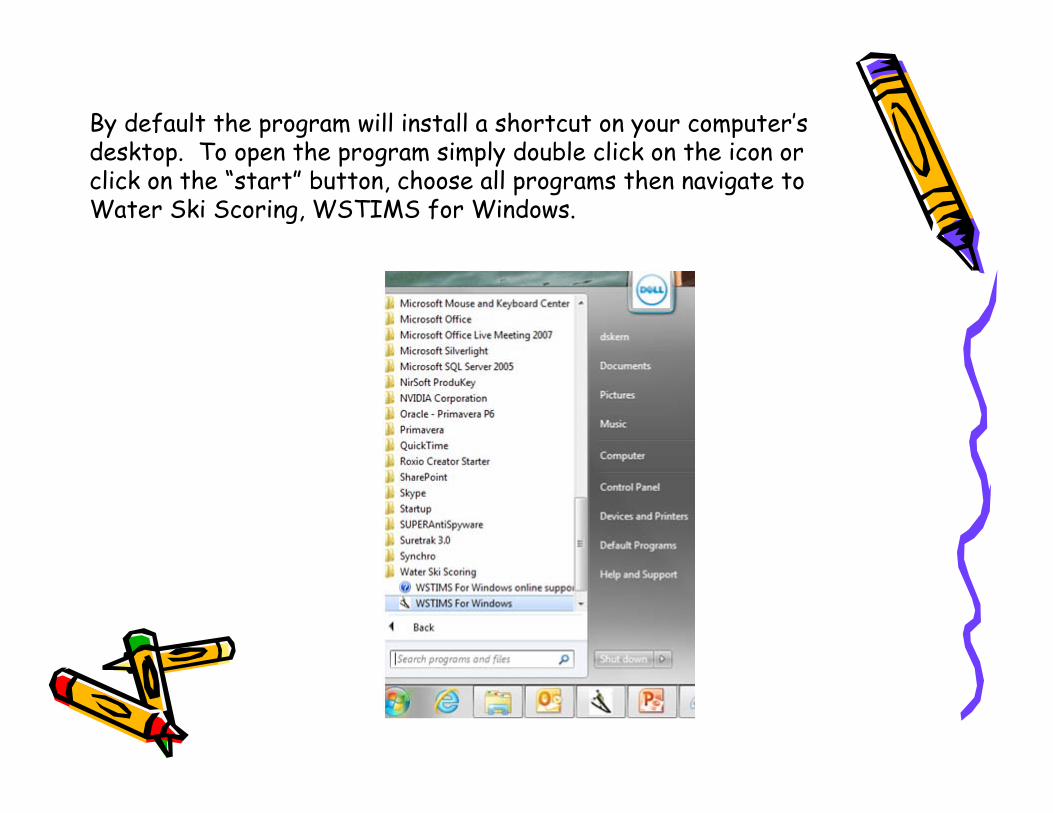
By default the program will install a shortcut on your computer’s desktop. To open the program simply double click on the icon or click on the “start” button, choose all programs then navigate to Water Ski Scoring, WSTIMS for Windows.
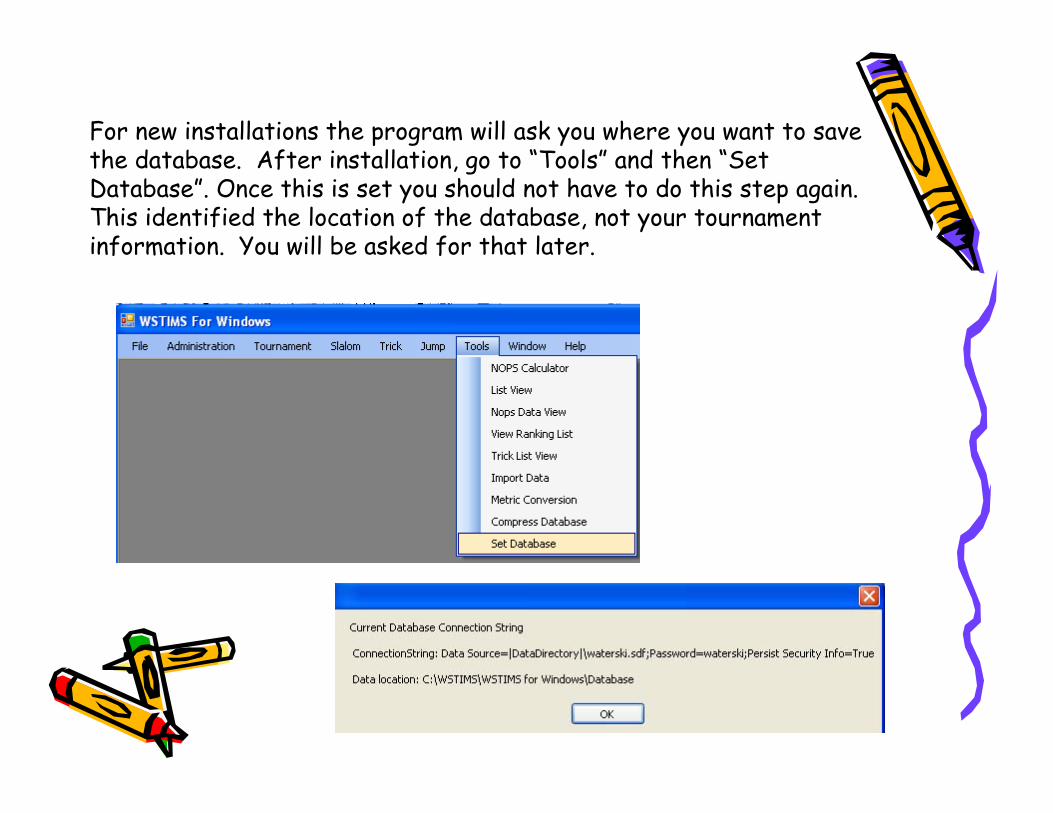
For new installations the program will ask you where you want to save the database. After installation, go to “Tools” and then “Set Database”. Once this is set you should not have to do this step again. This identified the location of the database, not your tournament information. You will be asked for that later.

Next you will need to obtain your registration template from the USA Waterski website. The following is a shortcut to get you directly to the template. http://www.usawaterski.org/admin/login.aspUsername is your sanction ID and password is the edit code
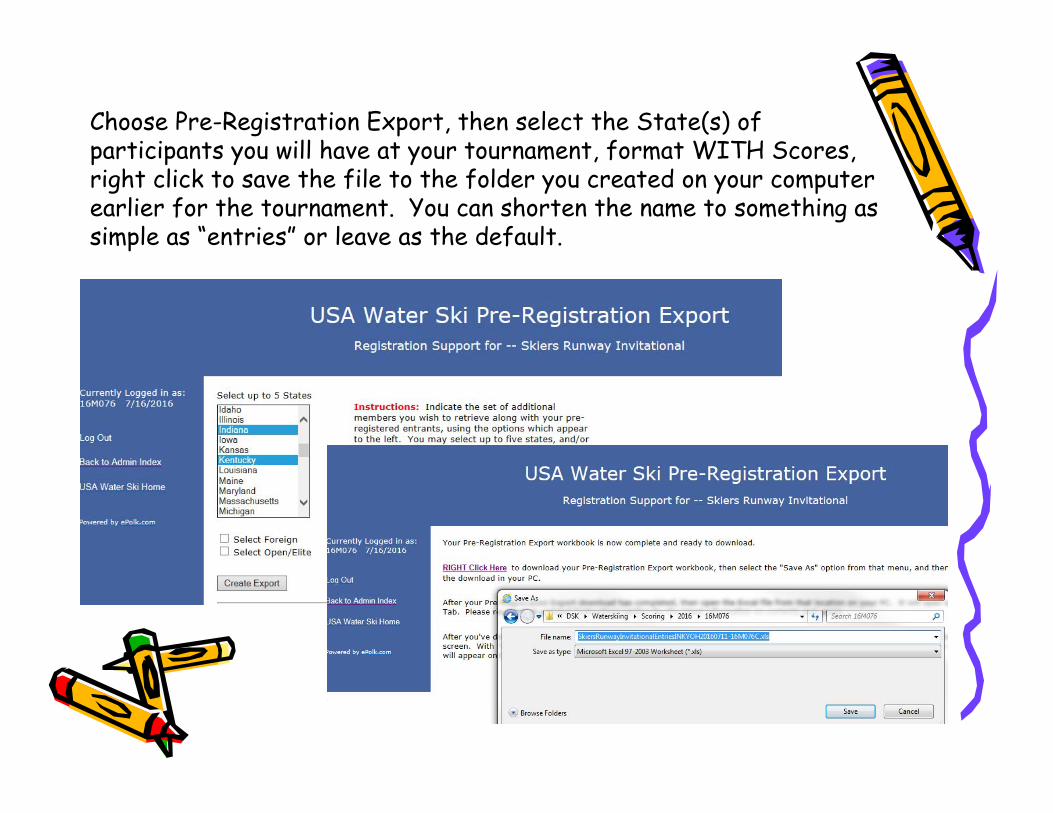
Choose Pre-Registration Export, then select the State(s) of participants you will have at your tournament, format WITH Scores, right click to save the file to the folder you created on your computer earlier for the tournament. You can shorten the name to something as simple as “entries” or leave as the default.
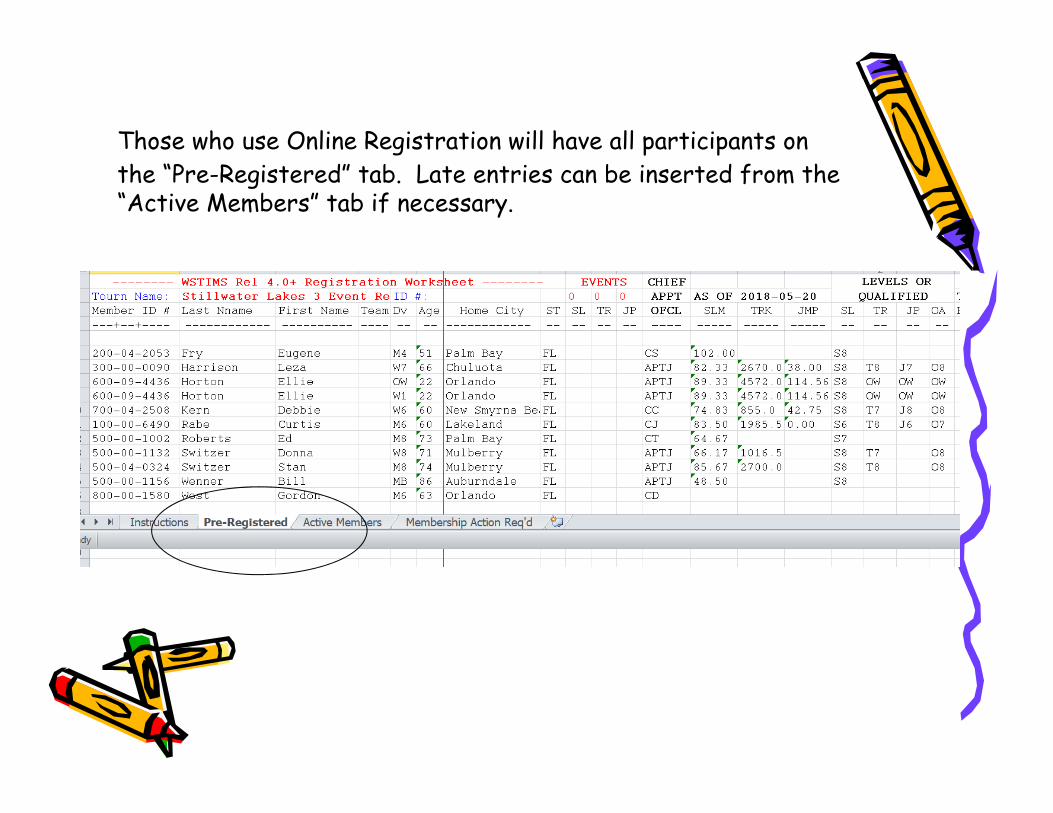
Those who use Online Registration will have all participants on the “Pre-Registered” tab. Late entries can be inserted from the “Active Members” tab if necessary.

By default the registration template identifies your sanctioned officials and if using “Online Registration”, the events that the skiers have chosen to ski in. This saves the scorer quite a few steps in preparing WSTIMs for scoring. For non-skiing officials you will need to put “OF” in place of the skiers division in column I, J or K. Only one column is required for the official’s name to be included during the WSTIM’s import.
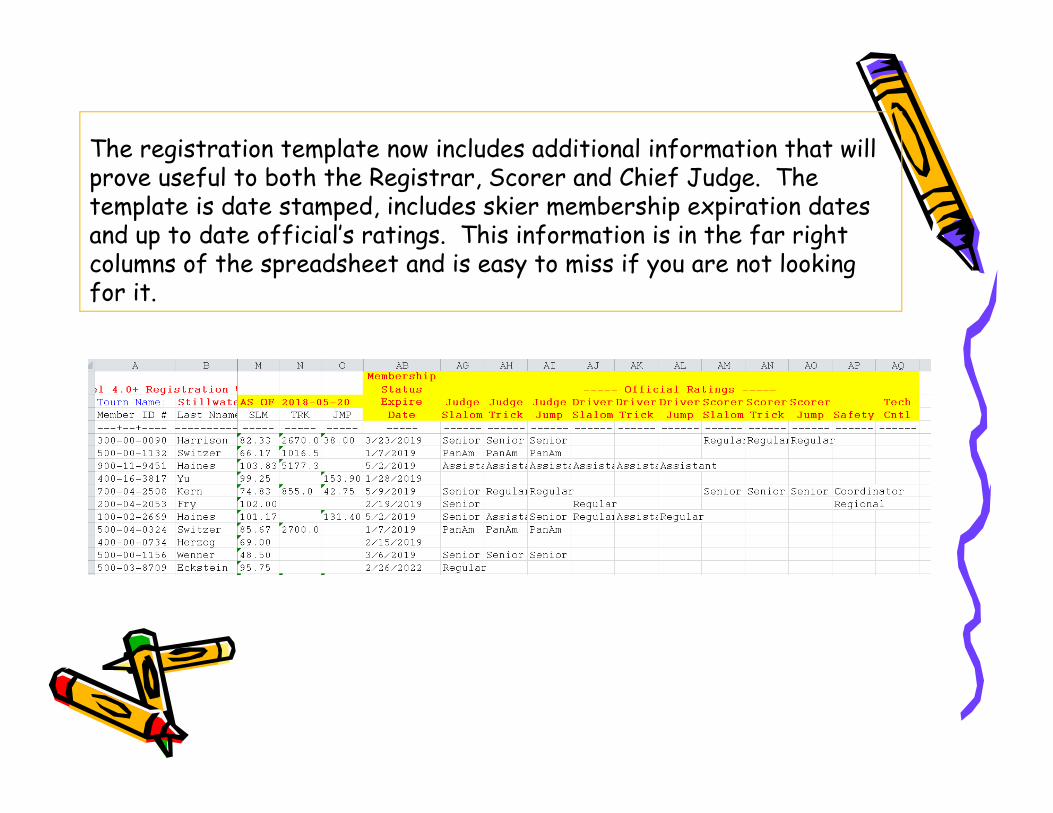
The registration template now includes additional information that will prove useful to both the Registrar, Scorer and Chief Judge. The template is date stamped, includes skier membership expiration dates and up to date official’s ratings. This information is in the far right columns of the spreadsheet and is easy to miss if you are not looking for it.
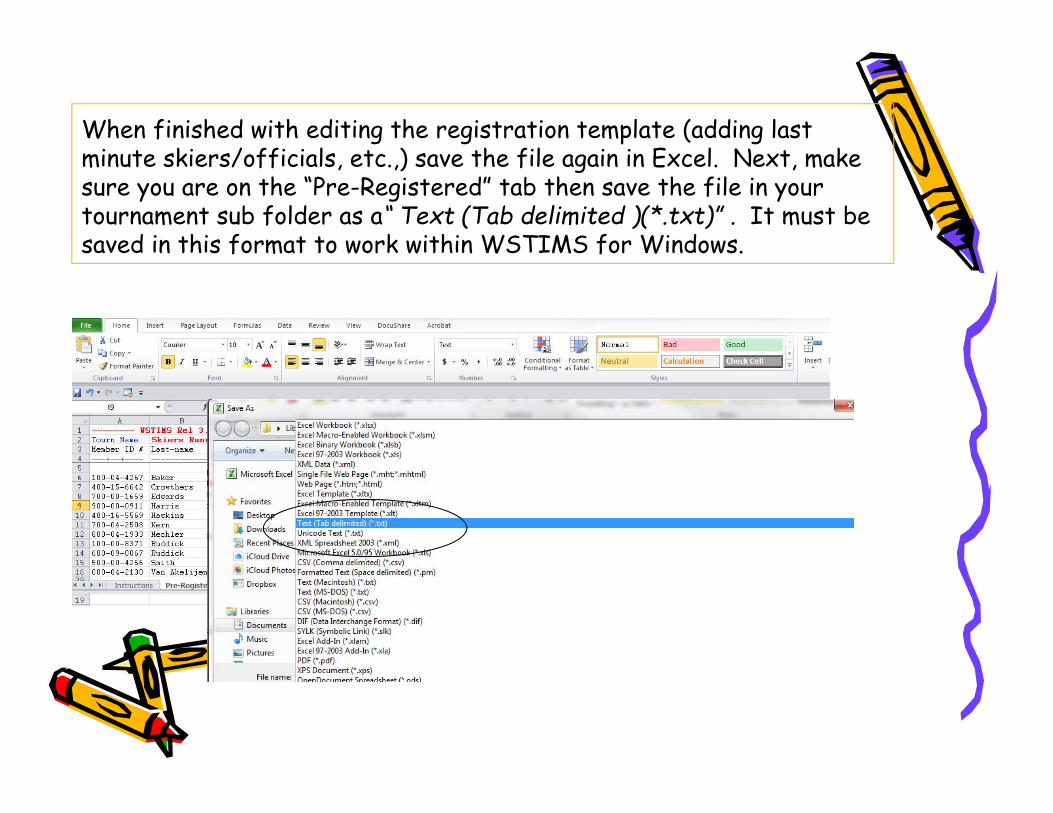
When finished with editing the registration template (adding last minute skiers/officials, etc.,) save the file again in Excel. Next, make sure you are on the “Pre-Registered” tab then save the file in your tournament sub folder as a“ Text (Tab delimited )(*.txt)” . It must be saved in this format to work within WSTIMS for Windows.

As you are saving an excel file as a “text” file you will get the following messages. Simply say OK, then Yes to properly save the file. When closing the file “don’t save” as you will have already saved it to your tournament file location. This .txt file will be what is imported to WSTIMs.
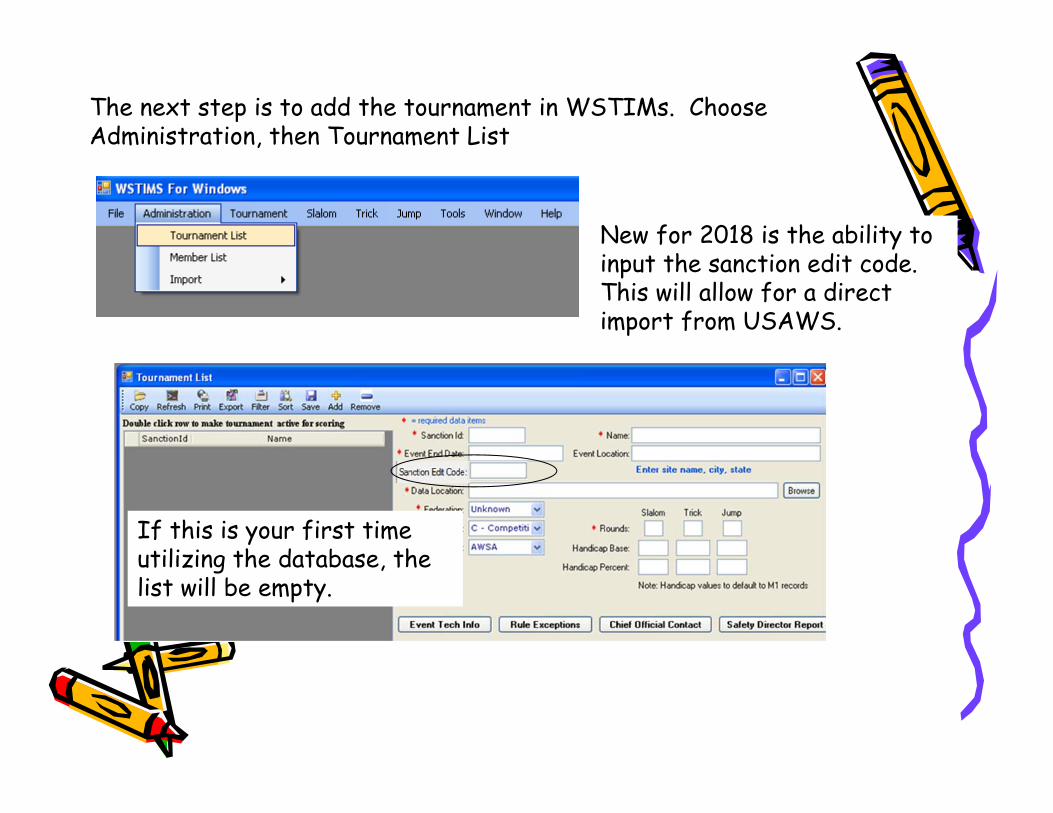
The next step is to add the tournament in WSTIMs. Choose Administration, then Tournament List
If this is your first time utilizing the database, the list will be empty.
New for 2018 is the ability to input the sanction edit code. This will allow for a direct import from USAWS.
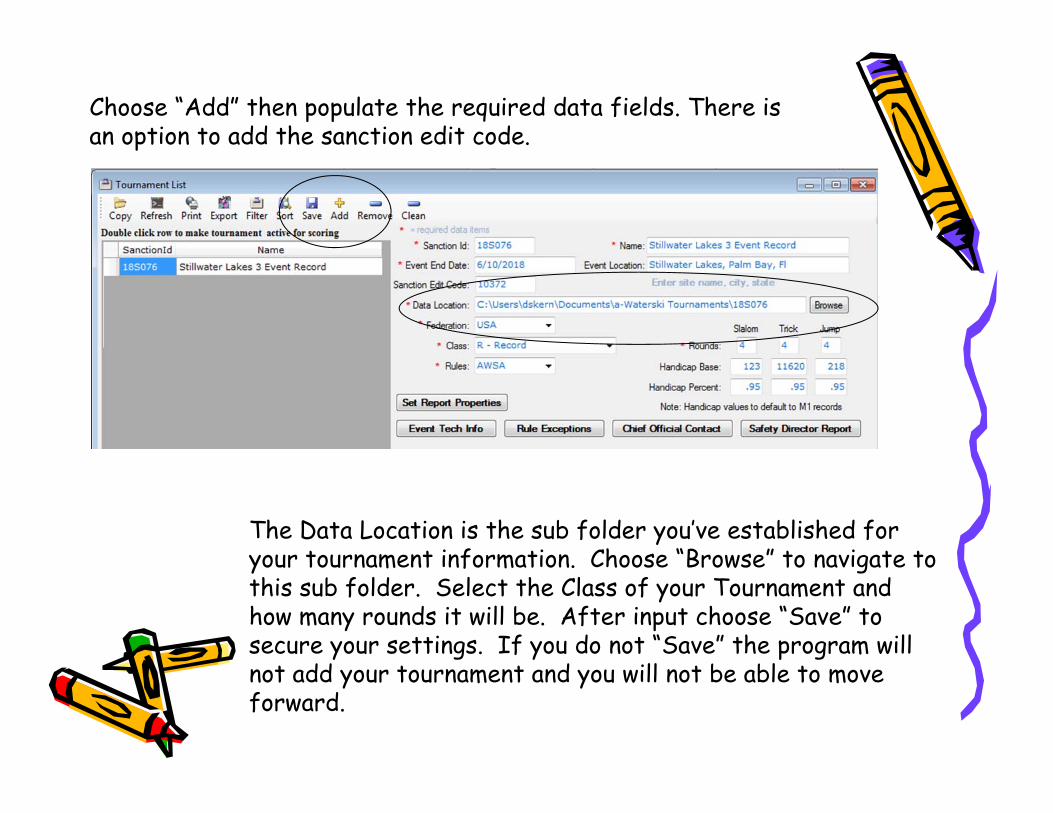
Choose “Add” then populate the required data fields. There is an option to add the sanction edit code.
The Data Location is the sub folder you’ve established for your tournament information. Choose “Browse” to navigate to this sub folder. Select the Class of your Tournament and how many rounds it will be. After input choose “Save” to secure your settings. If you do not “Save” the program will not add your tournament and you will not be able to move forward.
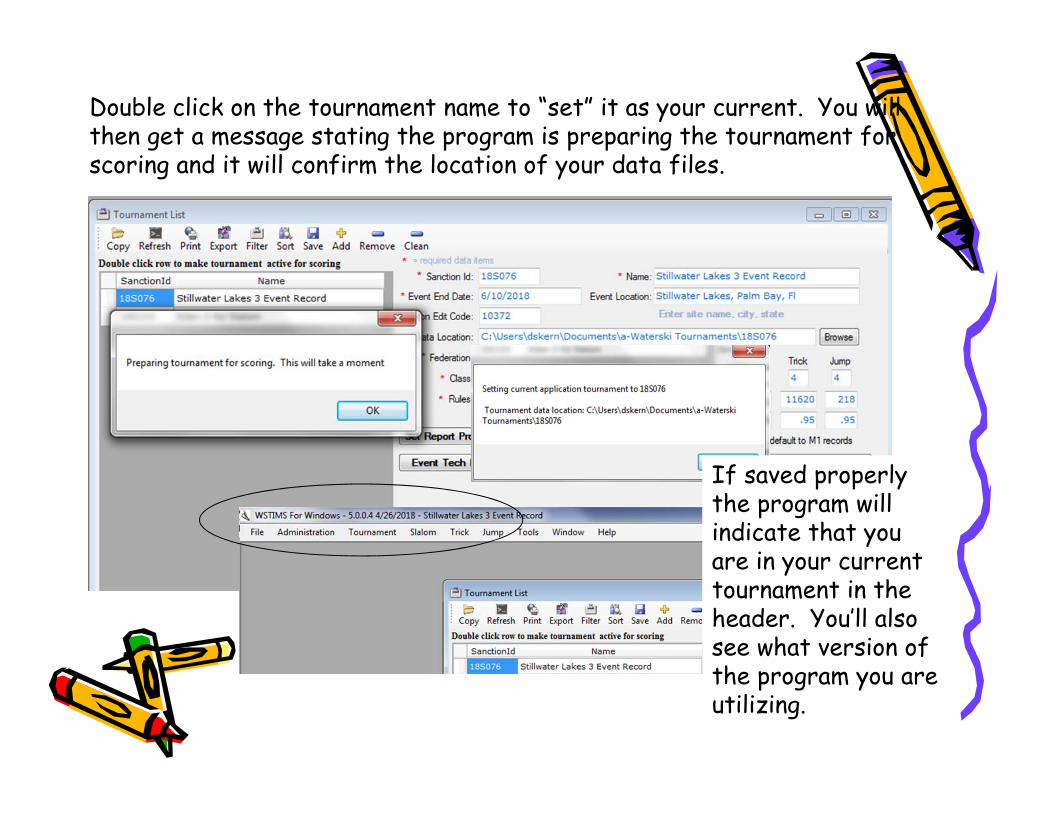
Double click on the tournament name to “set” it as your current. You will then get a message stating the program is preparing the tournament for scoring and it will confirm the location of your data files.
If saved properly the program will indicate that you are in your current tournament in the header. You’ll also see what version of the program you are utilizing.
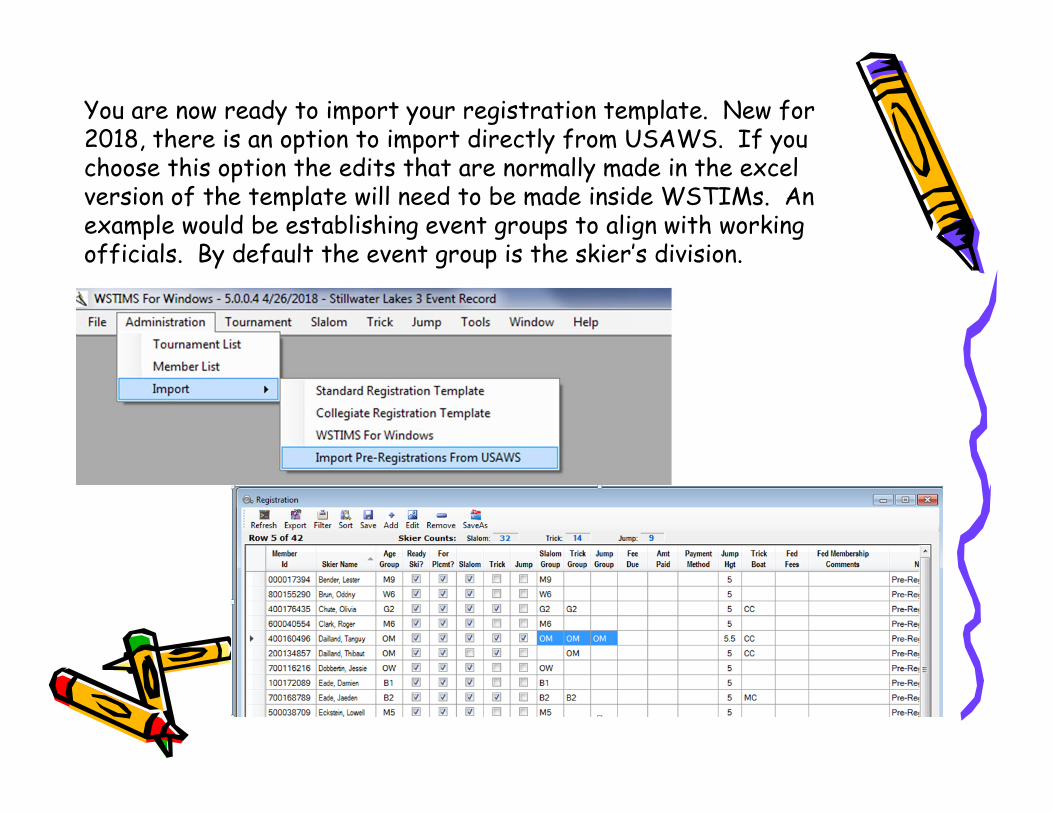
You are now ready to import your registration template. New for 2018, there is an option to import directly from USAWS. If you choose this option the edits that are normally made in the excel version of the template will need to be made inside WSTIMs. An example would be establishing event groups to align with working officials. By default the event group is the skier’s division.
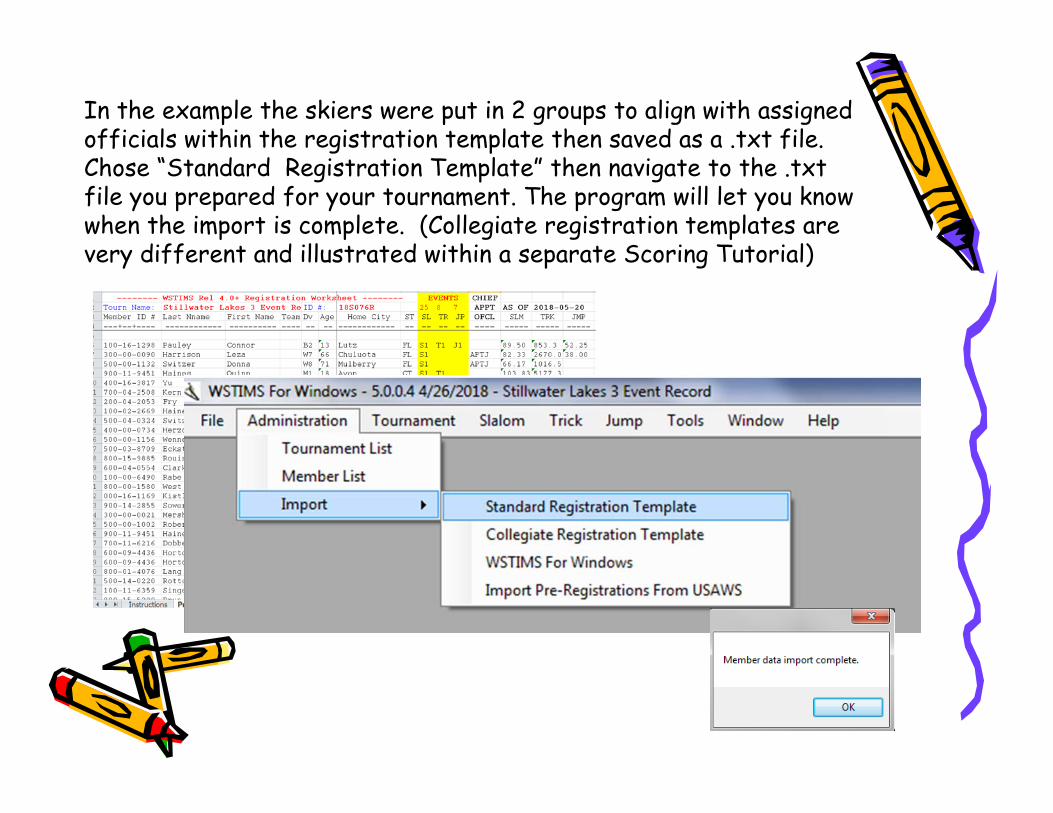
In the example the skiers were put in 2 groups to align with assigned officials within the registration template then saved as a .txt file. Chose “Standard Registration Template” then navigate to the .txt file you prepared for your tournament. The program will let you know when the import is complete. (Collegiate registration templates are very different and illustrated within a separate Scoring Tutorial)
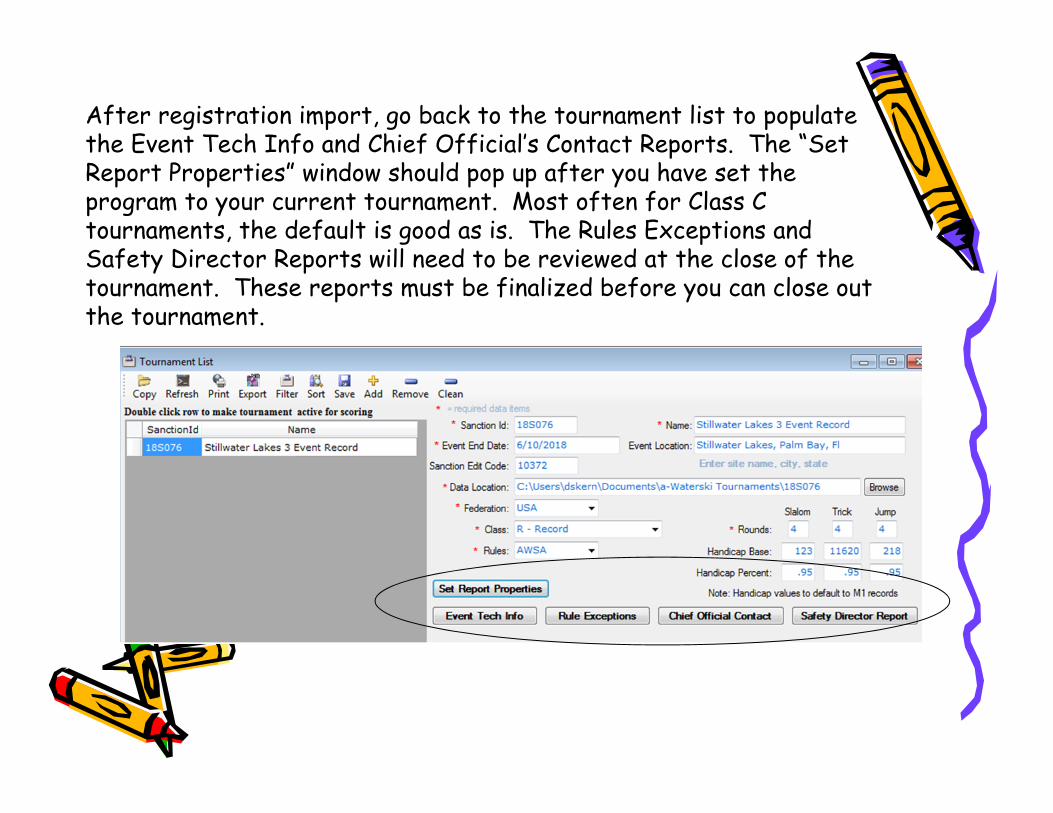
After registration import, go back to the tournament list to populate the Event Tech Info and Chief Official’s Contact Reports. The “Set Report Properties” window should pop up after you have set the program to your current tournament. Most often for Class C tournaments, the default is good as is. The Rules Exceptions and Safety Director Reports will need to be reviewed at the close of the tournament. These reports must be finalized before you can close out the tournament.
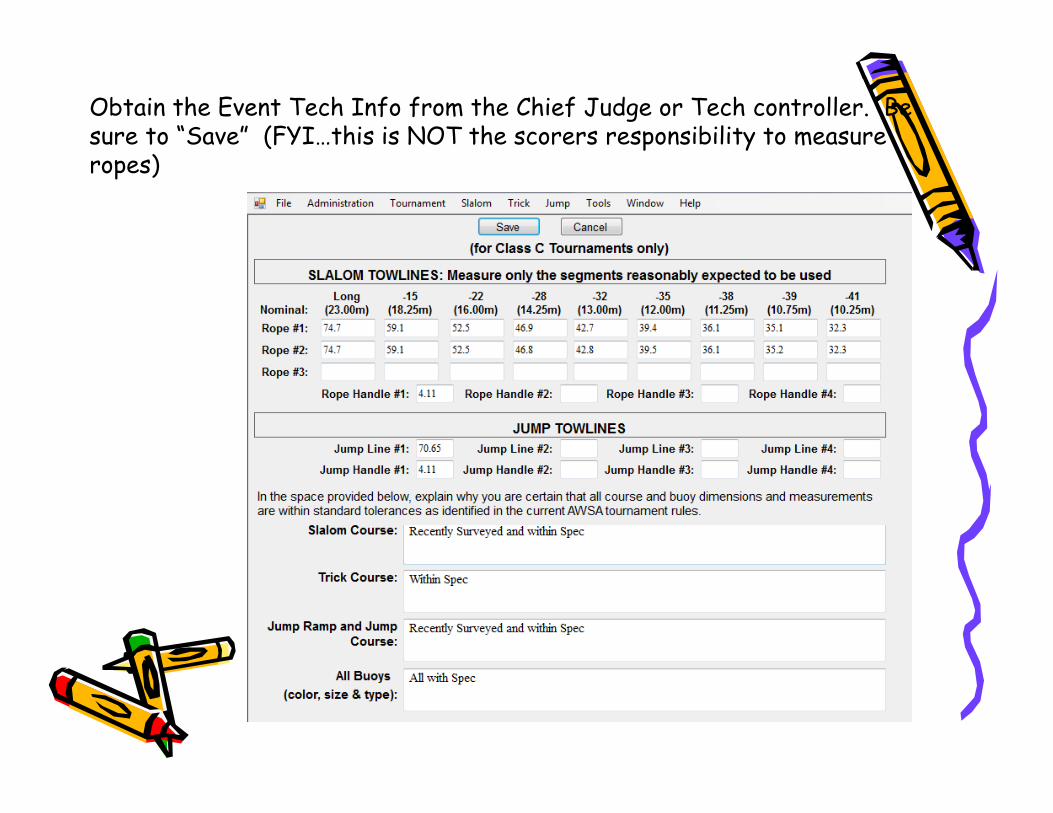
Obtain the Event Tech Info from the Chief Judge or Tech controller. Be sure to “Save” (FYI…this is NOT the scorers responsibility to measure ropes)
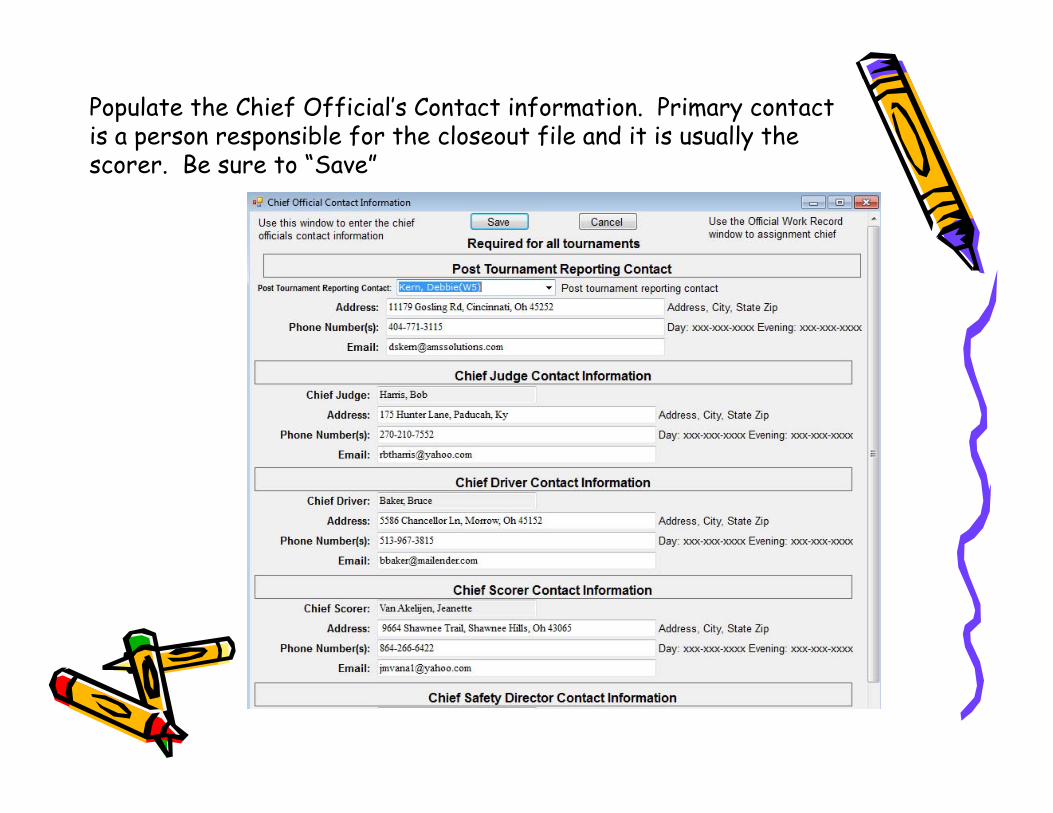
Populate the Chief Official’s Contact information. Primary contact is a person responsible for the closeout file and it is usually the scorer. Be sure to “Save”
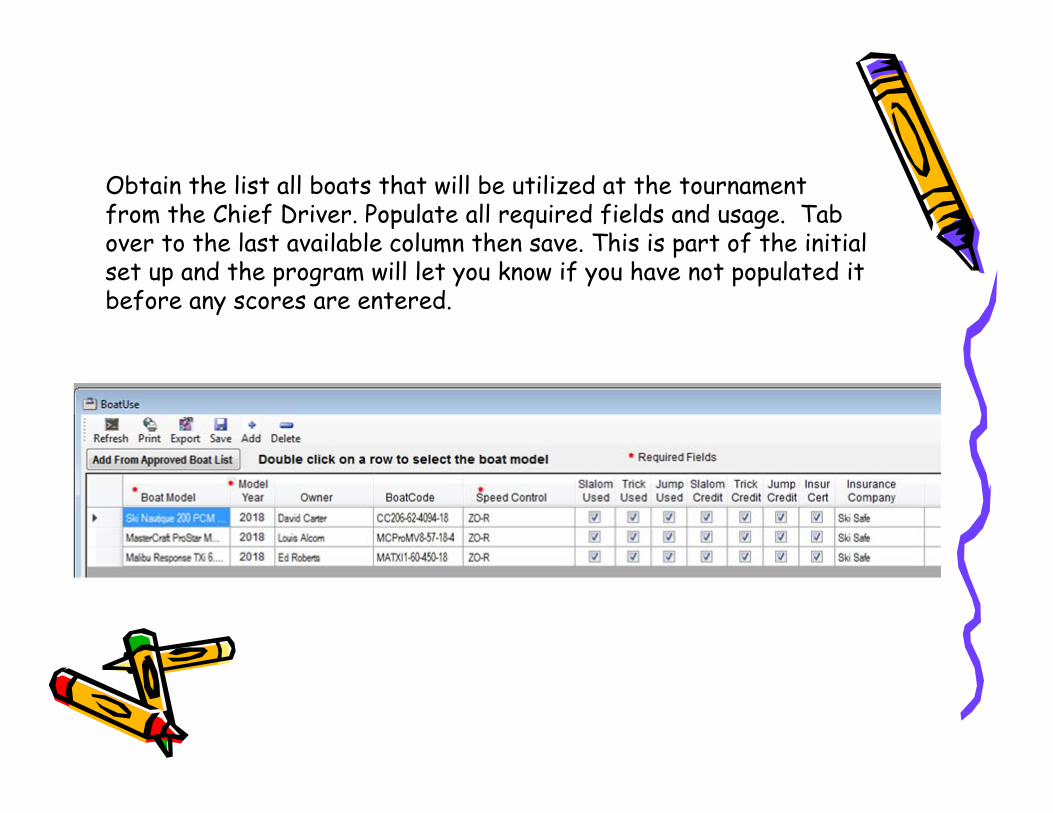
Obtain the list all boats that will be utilized at the tournament from the Chief Driver. Populate all required fields and usage. Tab over to the last available column then save. This is part of the initial set up and the program will let you know if you have not populated it before any scores are entered.
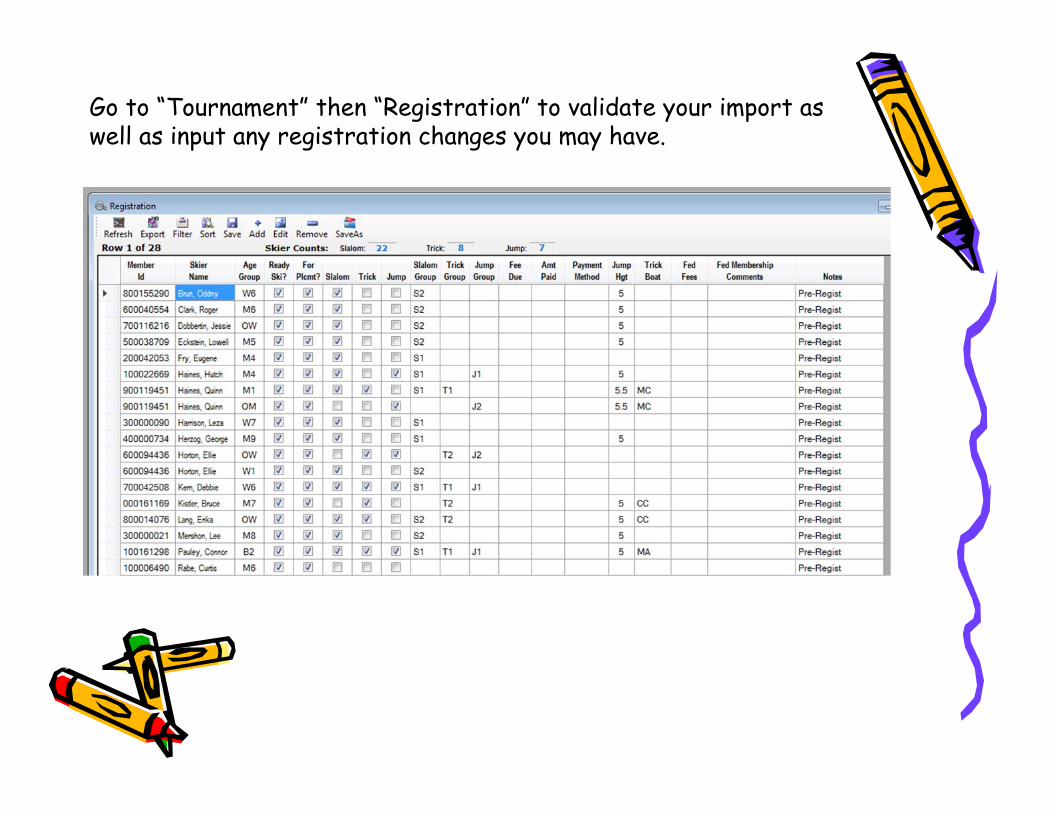
Go to “Tournament” then “Registration” to validate your import as well as input any registration changes you may have.
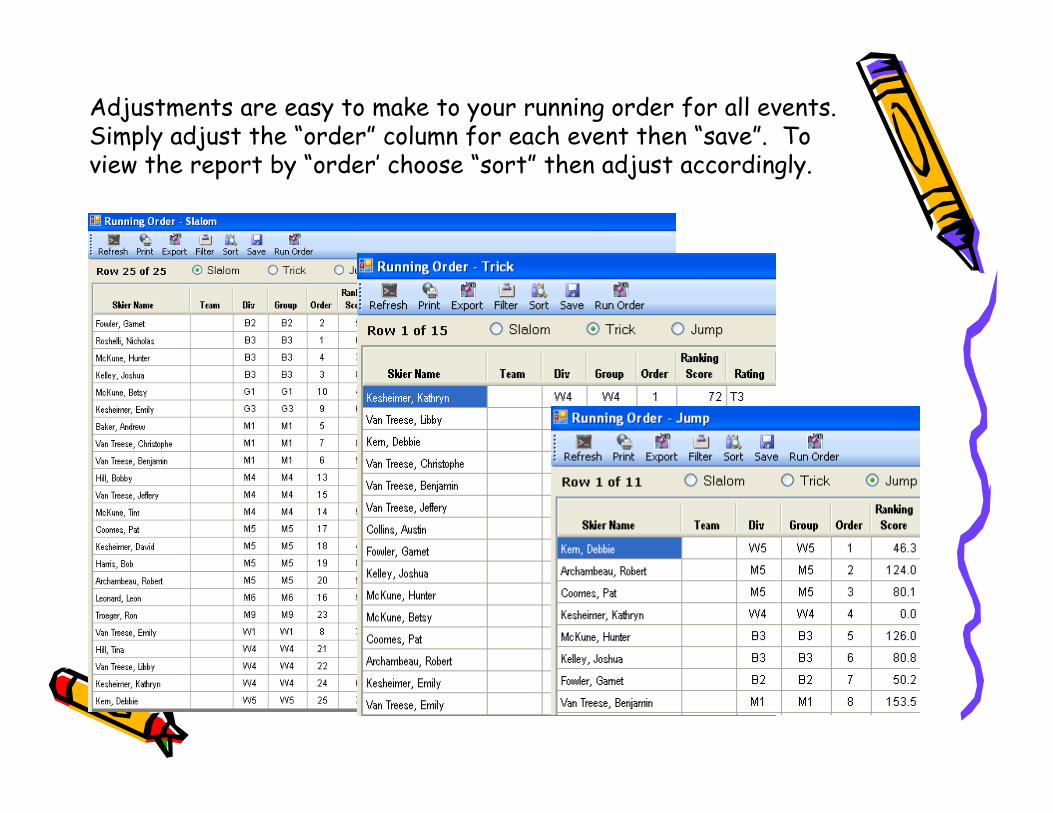
Adjustments are easy to make to your running order for all events. Simply adjust the “order” column for each event then “save”. To view the report by “order’ choose “sort” then adjust accordingly.
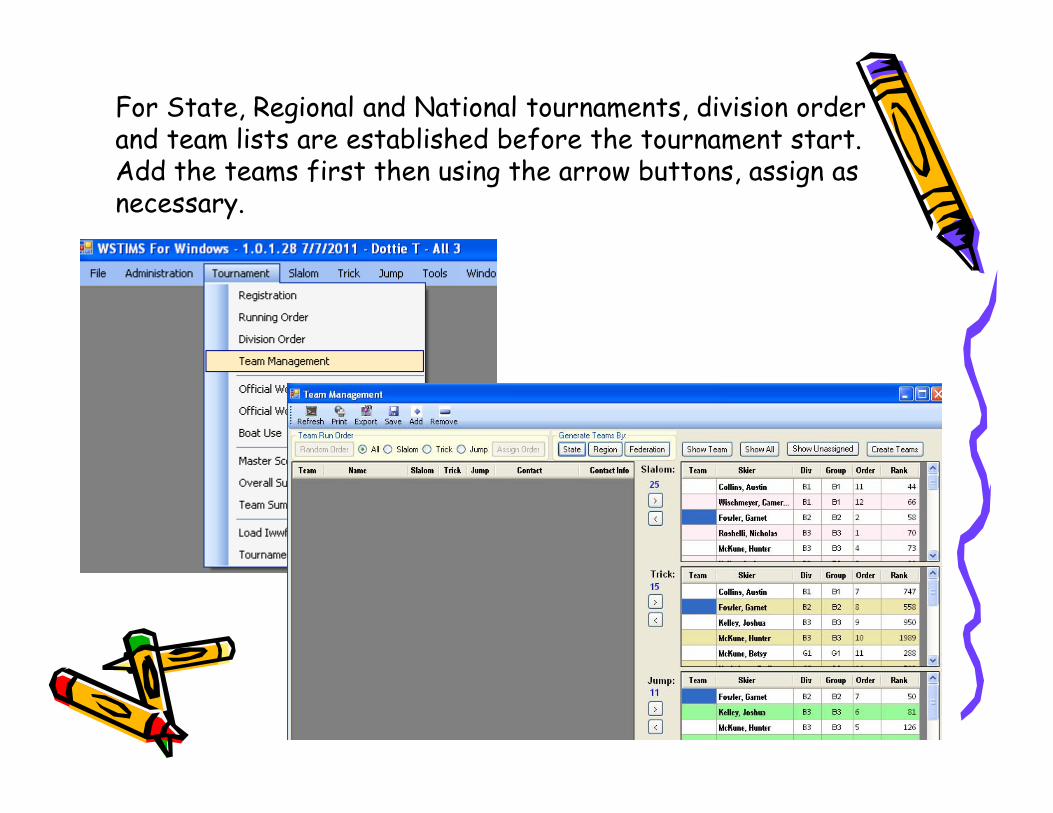
For State, Regional and National tournaments, division order and team lists are established before the tournament start. Add the teams first then using the arrow buttons, assign as necessary.
ScoringScoring
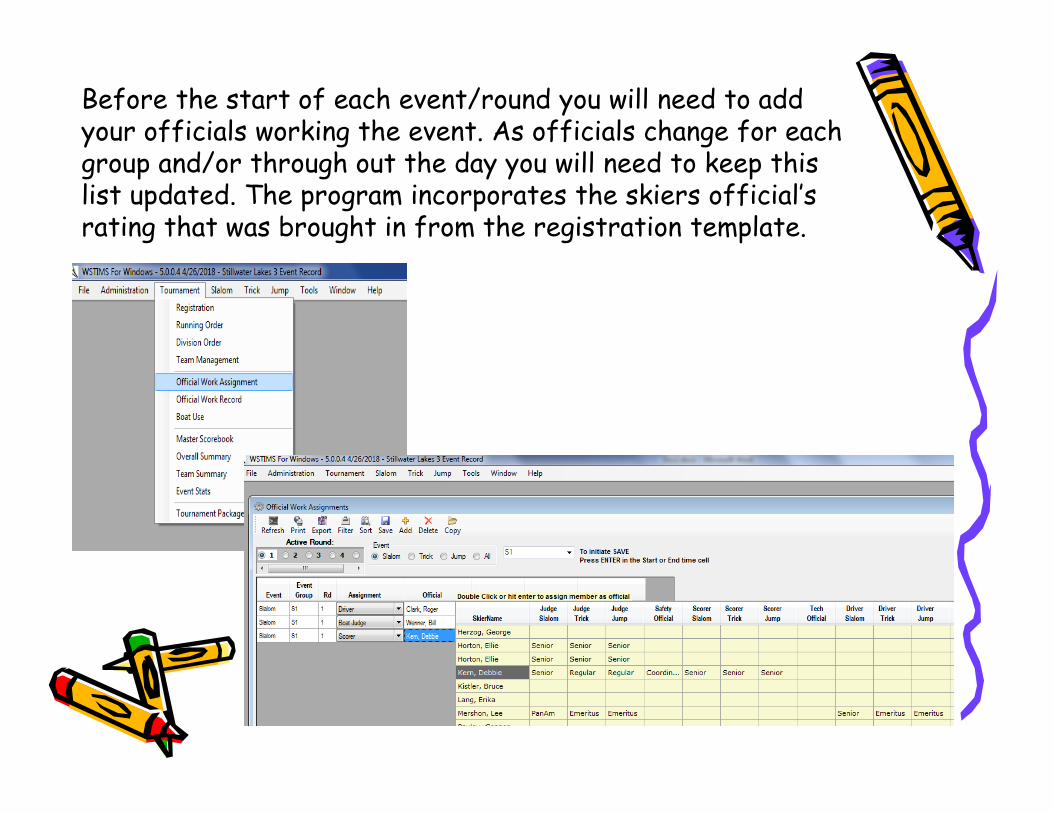
Before the start of each event/round you will need to add your officials working the event. As officials change for each group and/or through out the day you will need to keep this list updated. The program incorporates the skiers official’s rating that was brought in from the registration template.

For scoring slalom, choose “Slalom” then “Score Entry”. Choose the event group and then “refresh” from the top menu to view your participants.
Choose your skier, the starting speed and line length, then “Add Pass” to start scoring.
From the pull down menu, select the boathat will be utilized for the group.
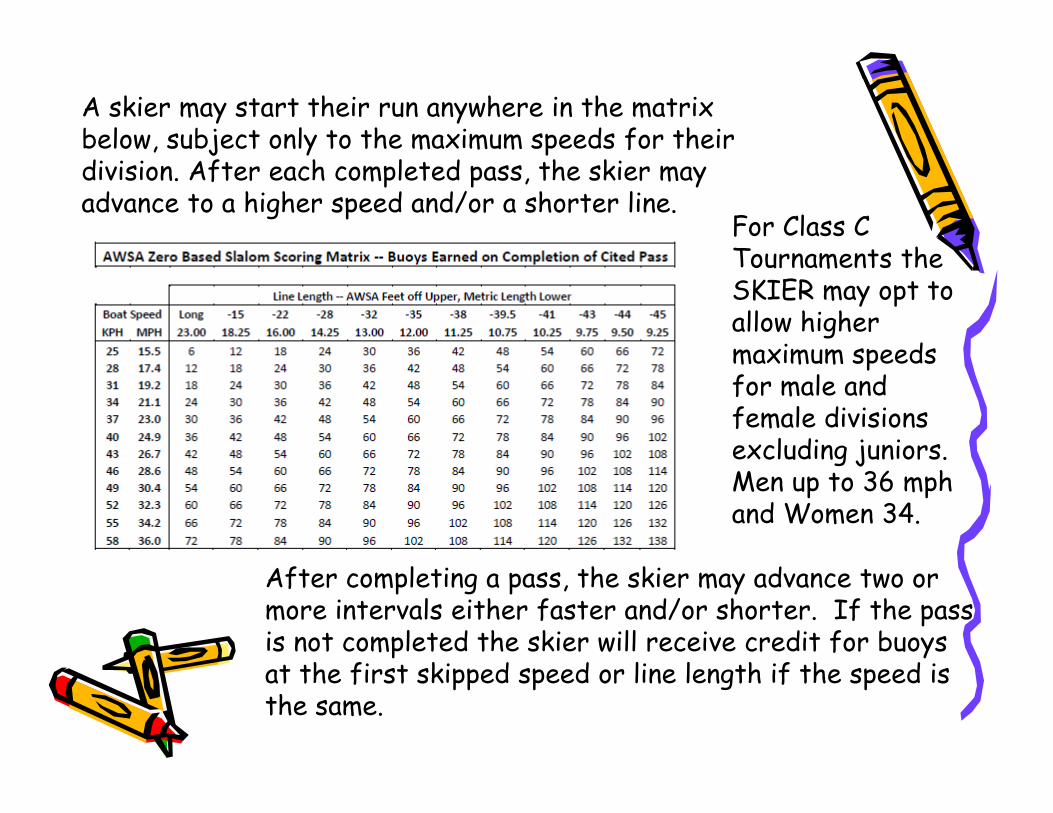
A skier may start their run anywhere in the matrix below, subject only to the maximum speeds for their division. After each completed pass, the skier may advance to a higher speed and/or a shorter line.
After completing a pass, the skier may advance two or more intervals either faster and/or shorter. If the pass is not completed the skier will receive credit for buoys at the first skipped speed or line length if the speed is the same.
For Class C Tournaments the SKIER may opt to allow higher maximum speeds for male and female divisions excluding juniors. Men up to 36 mph and Women 34.
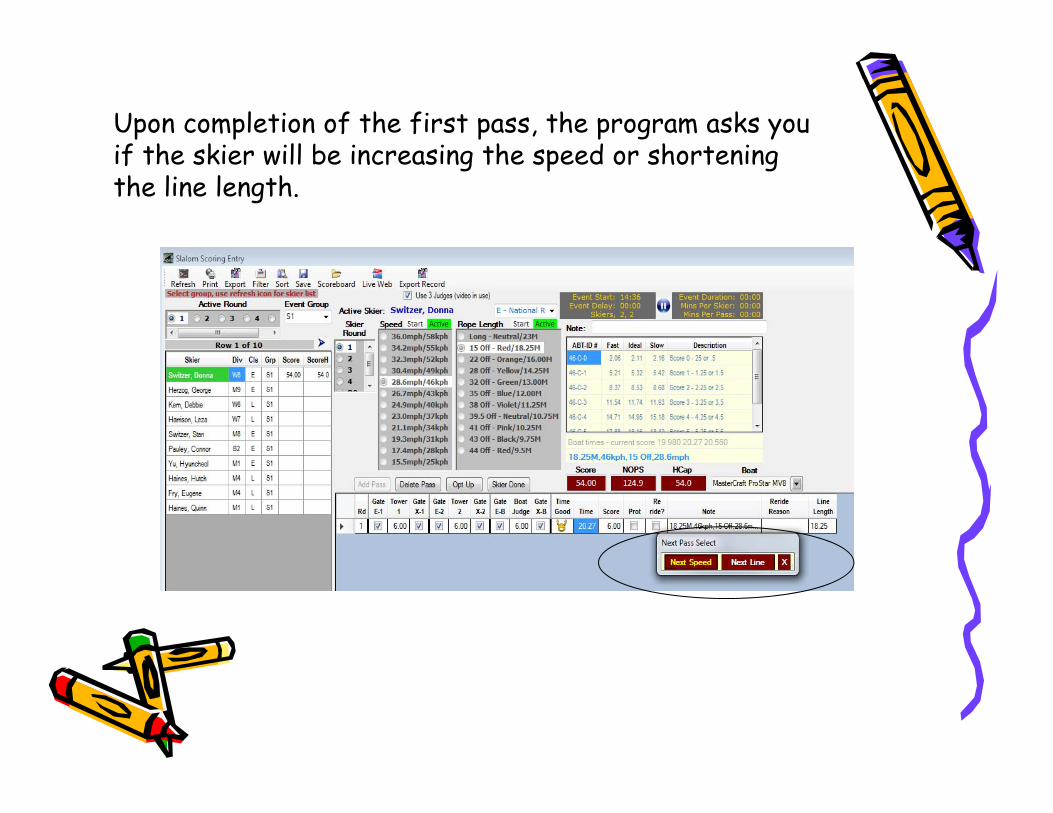
Upon completion of the first pass, the program asks you if the skier will be increasing the speed or shortening the line length.
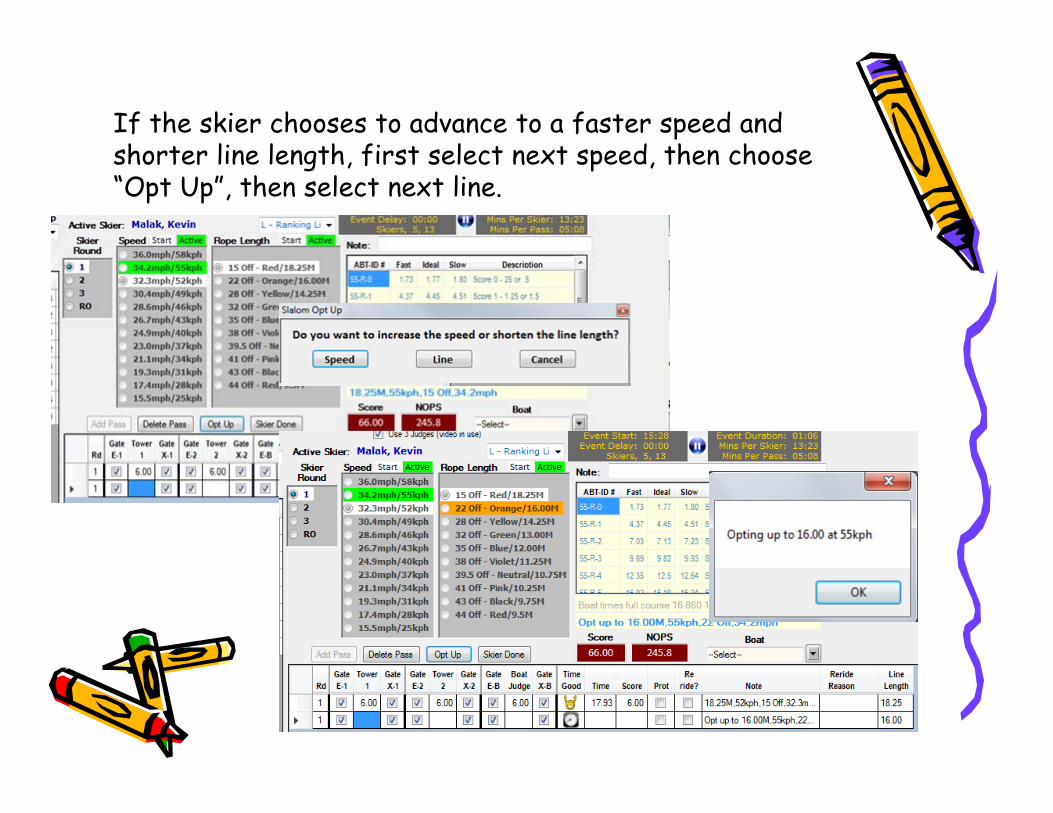
If the skier chooses to advance to a faster speed and shorter line length, first select next speed, then choose “Opt Up”, then select next line.
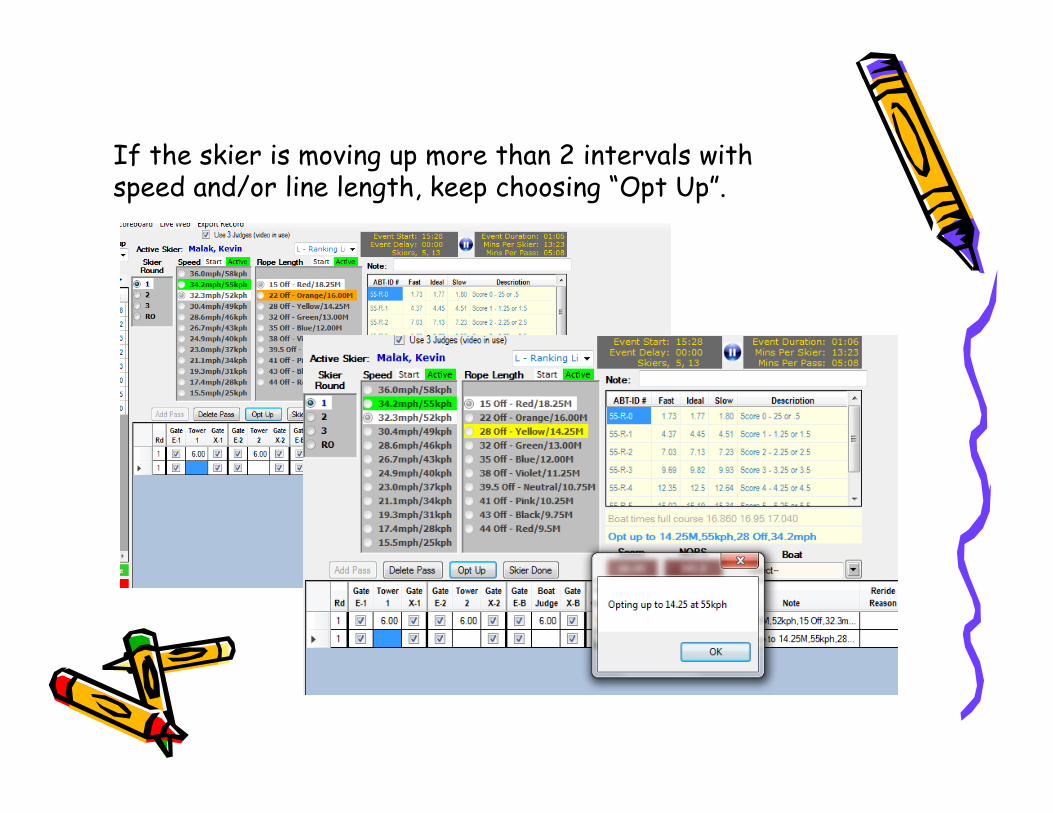
If the skier is moving up more than 2 intervals with speed and/or line length, keep choosing “Opt Up”.
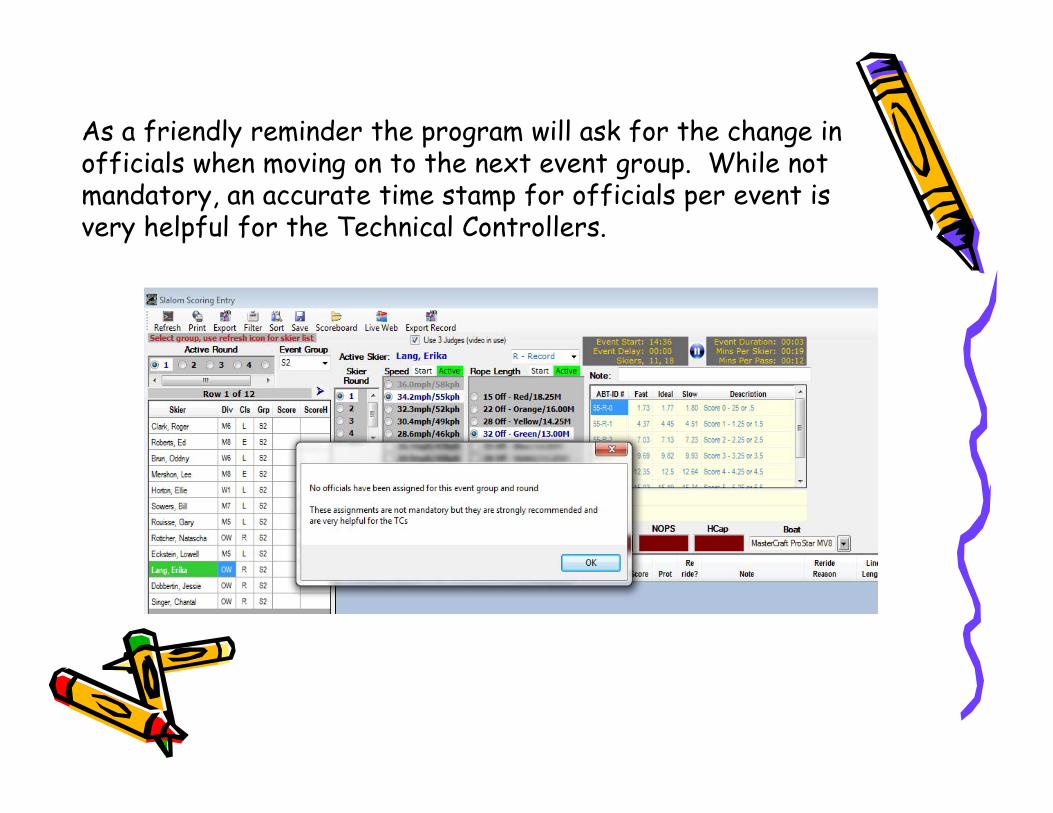
As a friendly reminder the program will ask for the change in officials when moving on to the next event group. While not mandatory, an accurate time stamp for officials per event is very helpful for the Technical Controllers.
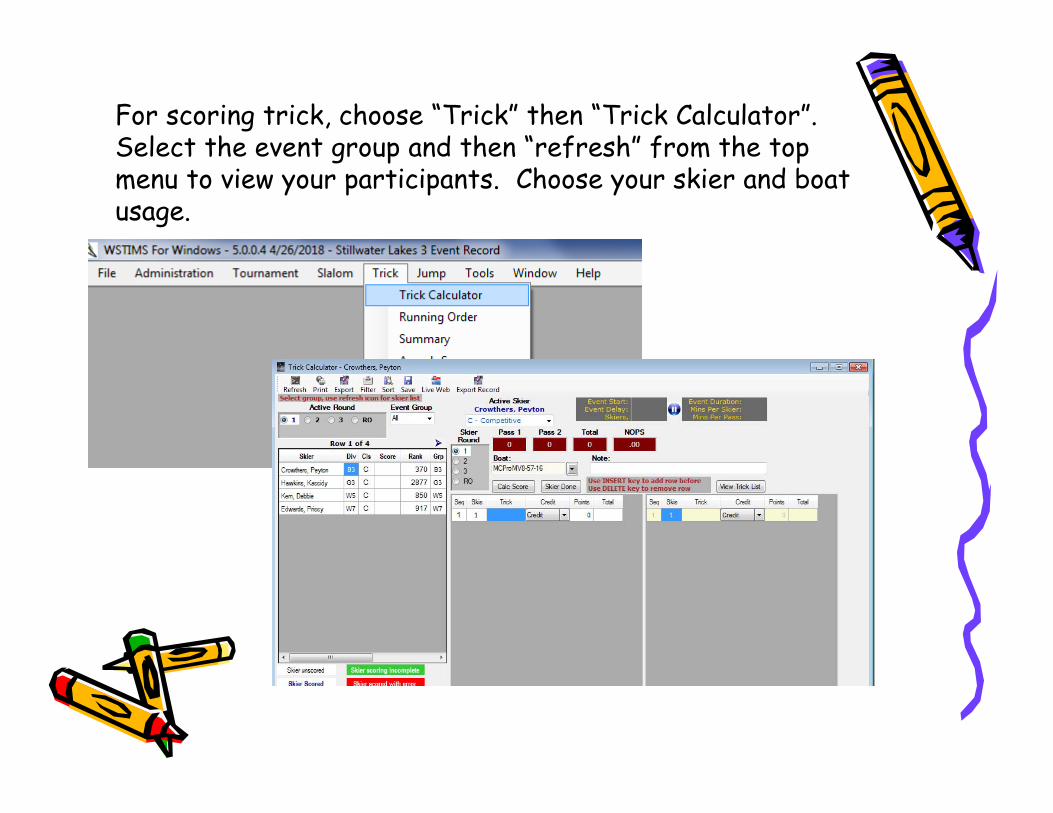
For scoring trick, choose “Trick” then “Trick Calculator”. Select the event group and then “refresh” from the top menu to view your participants. Choose your skier and boat usage.
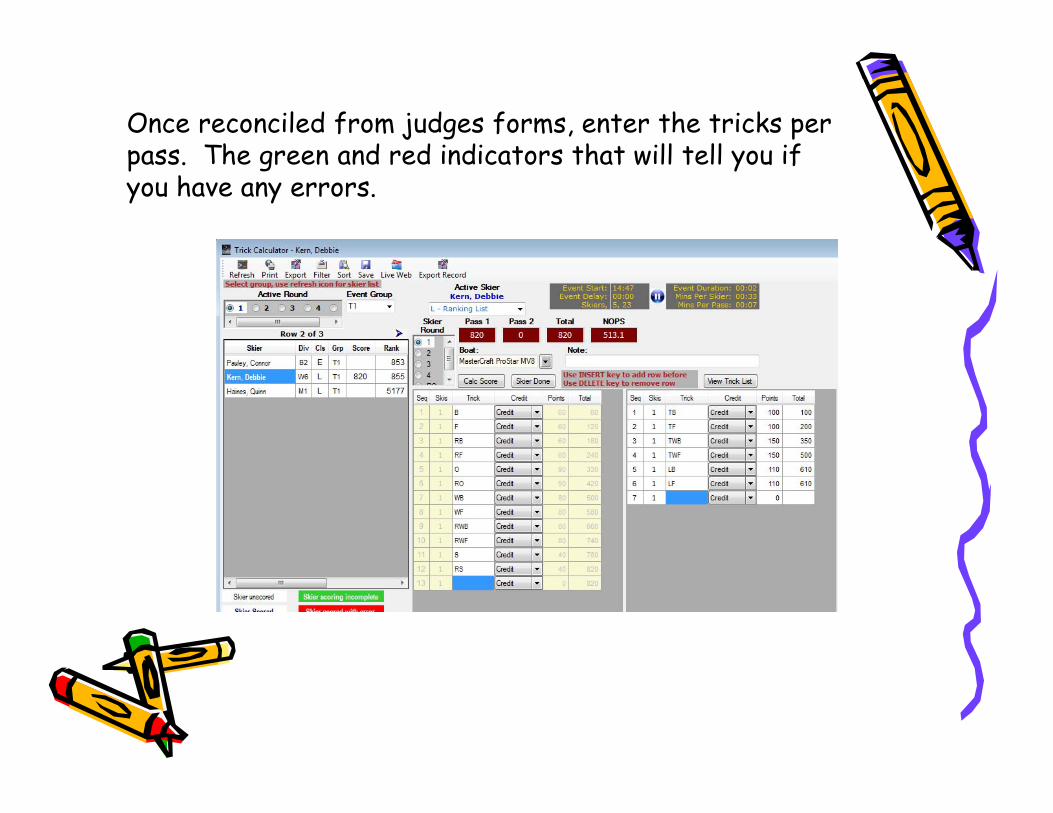
Once reconciled from judges forms, enter the tricks per pass. The green and red indicators that will tell you if you have any errors.
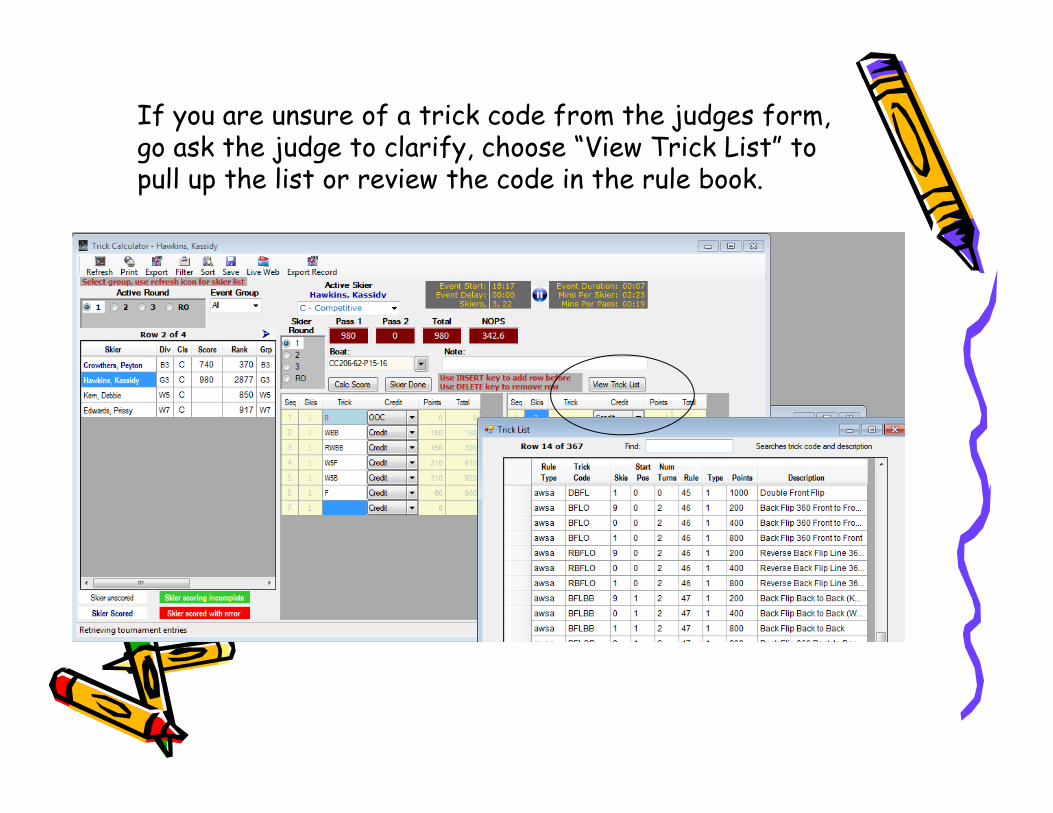
If you are unsure of a trick code from the judges form, go ask the judge to clarify, choose “View Trick List” to pull up the list or review the code in the rule book.
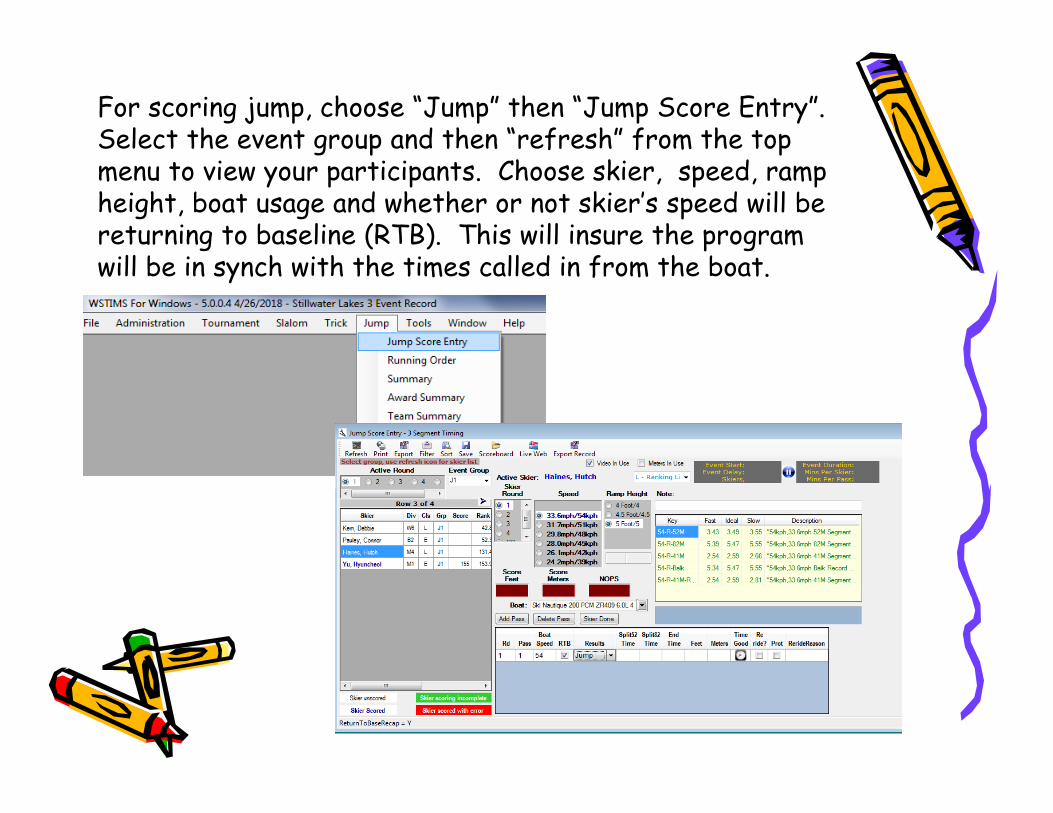
For scoring jump, choose “Jump” then “Jump Score Entry”. Select the event group and then “refresh” from the top menu to view your participants. Choose skier, speed, ramp height, boat usage and whether or not skier’s speed will be returning to baseline (RTB). This will insure the program will be in synch with the times called in from the boat.
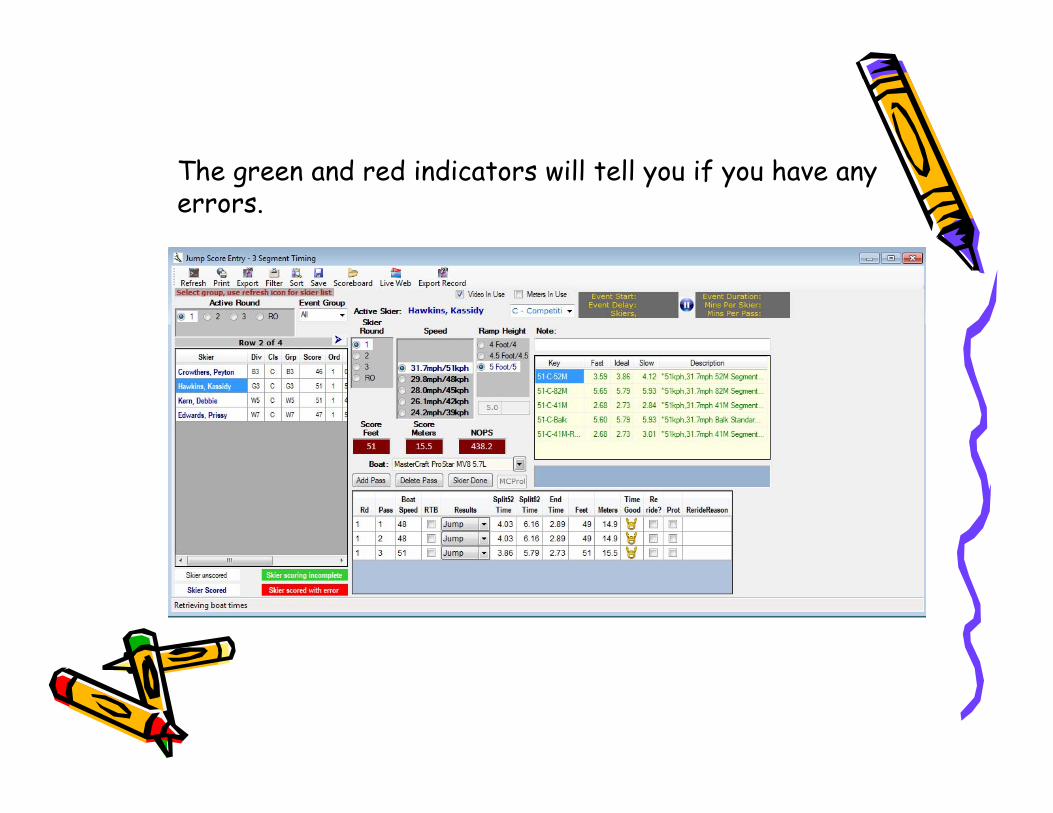
The green and red indicators will tell you if you have any errors.

Importing / ExportingScoring Data
Importing / ExportingScoring Data
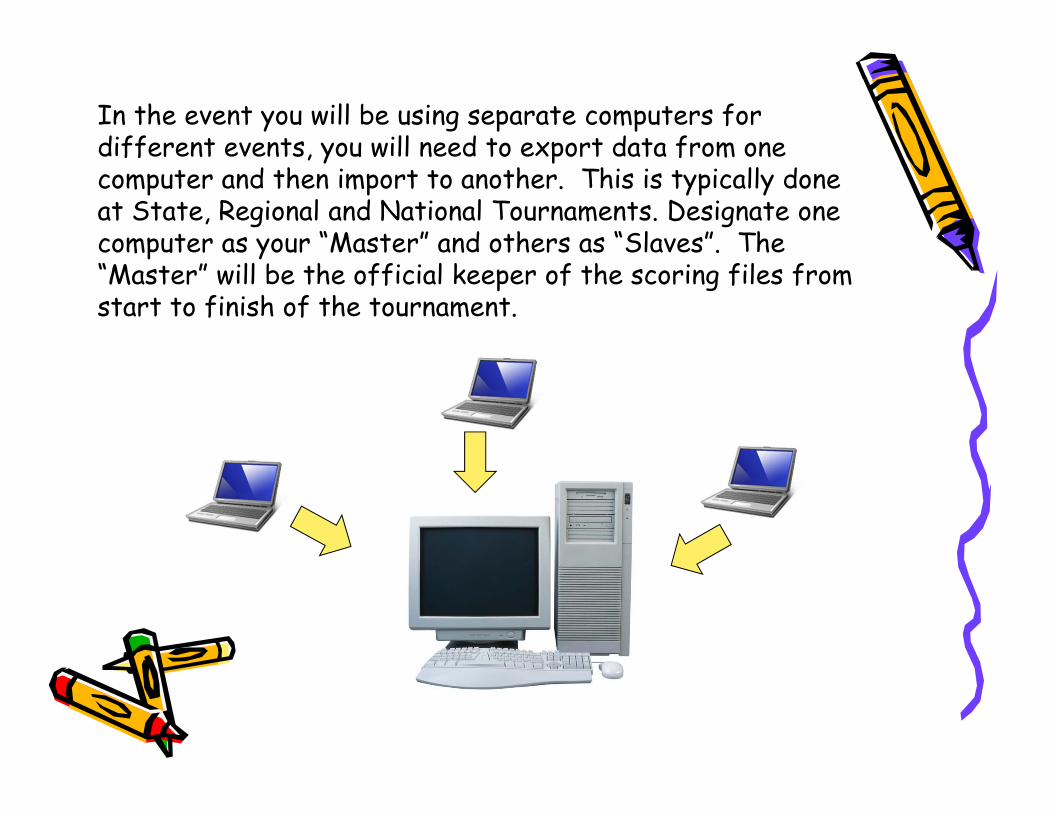
In the event you will be using separate computers for different events, you will need to export data from one computer and then import to another. This is typically done at State, Regional and National Tournaments. Designate one computer as your “Master” and others as “Slaves”. The “Master” will be the official keeper of the scoring files from start to finish of the tournament.
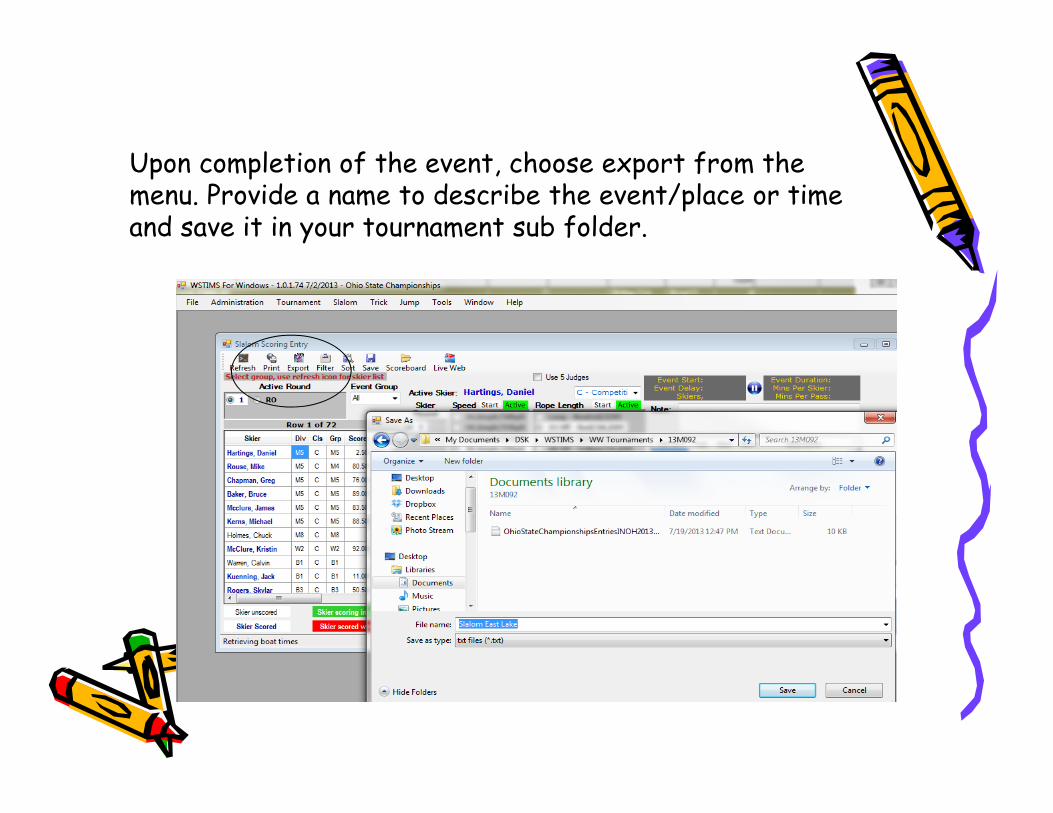
Upon completion of the event, choose export from the menu. Provide a name to describe the event/place or time and save it in your tournament sub folder.
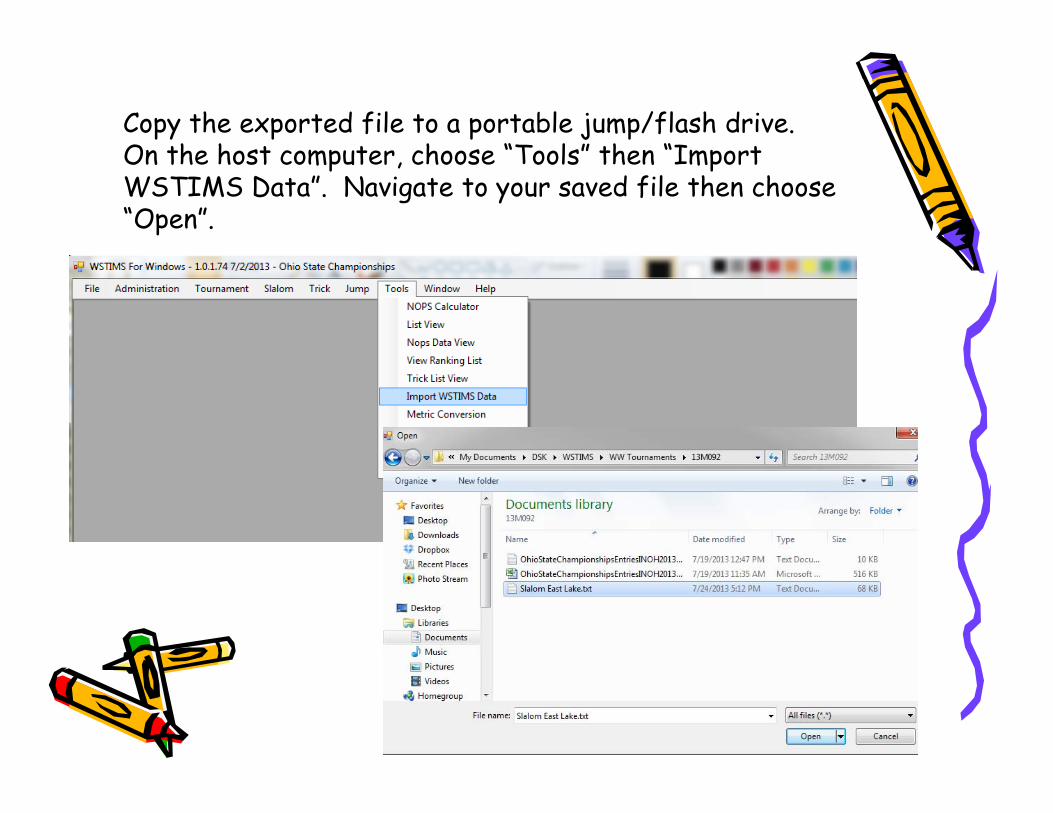
Copy the exported file to a portable jump/flash drive. On the host computer, choose “Tools” then “Import WSTIMS Data”. Navigate to your saved file then choose “Open”.
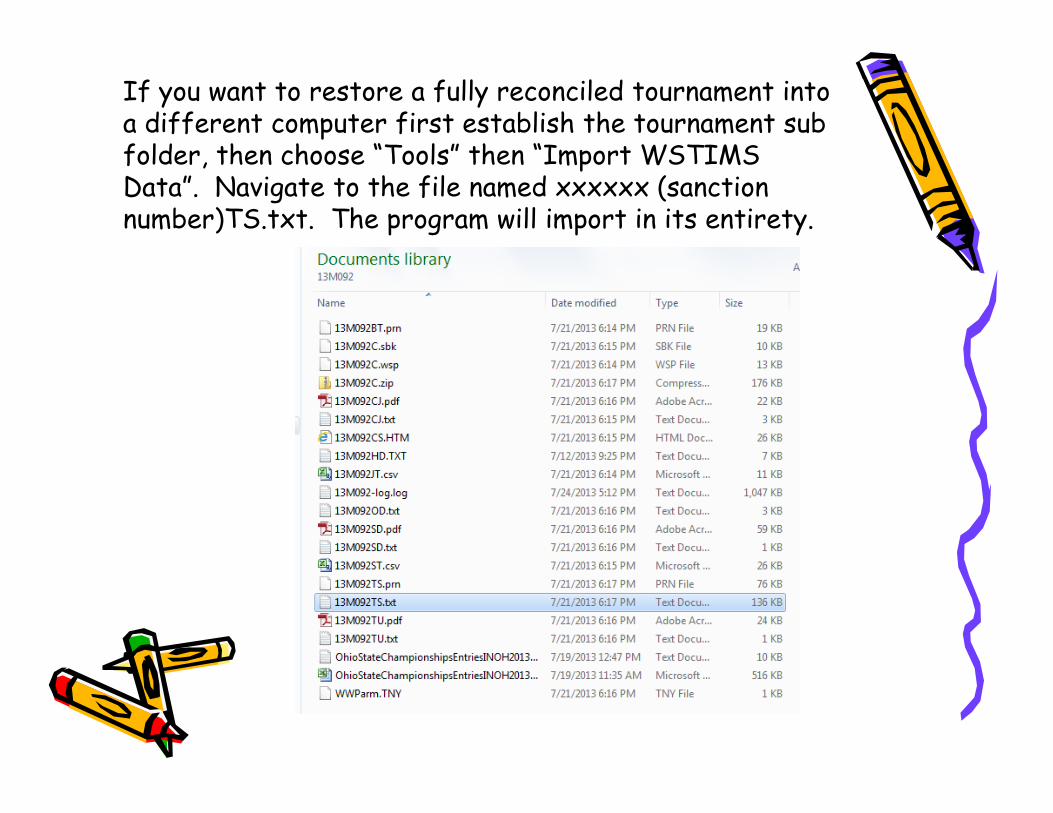
If you want to restore a fully reconciled tournament into a different computer first establish the tournament sub folder, then choose “Tools” then “Import WSTIMS Data”. Navigate to the file named xxxxxx (sanction number)TS.txt. The program will import in its entirety.

Tournament Closeout
Tournament Closeout

Go back to the Tournament List then open the Safety Director Report. The tournament information has now been updated on page 1 however, the Safety Director will need to review then answer the questions on page 2. This will need to be done before closing out the tournament otherwise you will get an error.
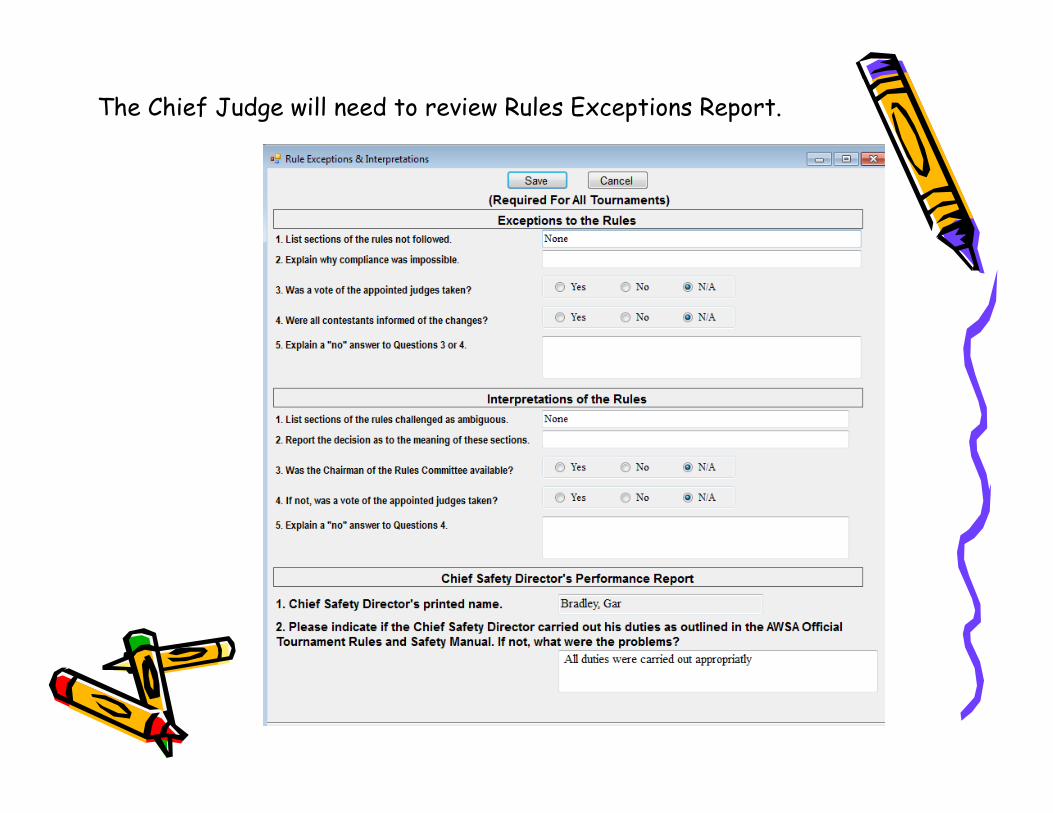
The Chief Judge will need to review Rules Exceptions Report.
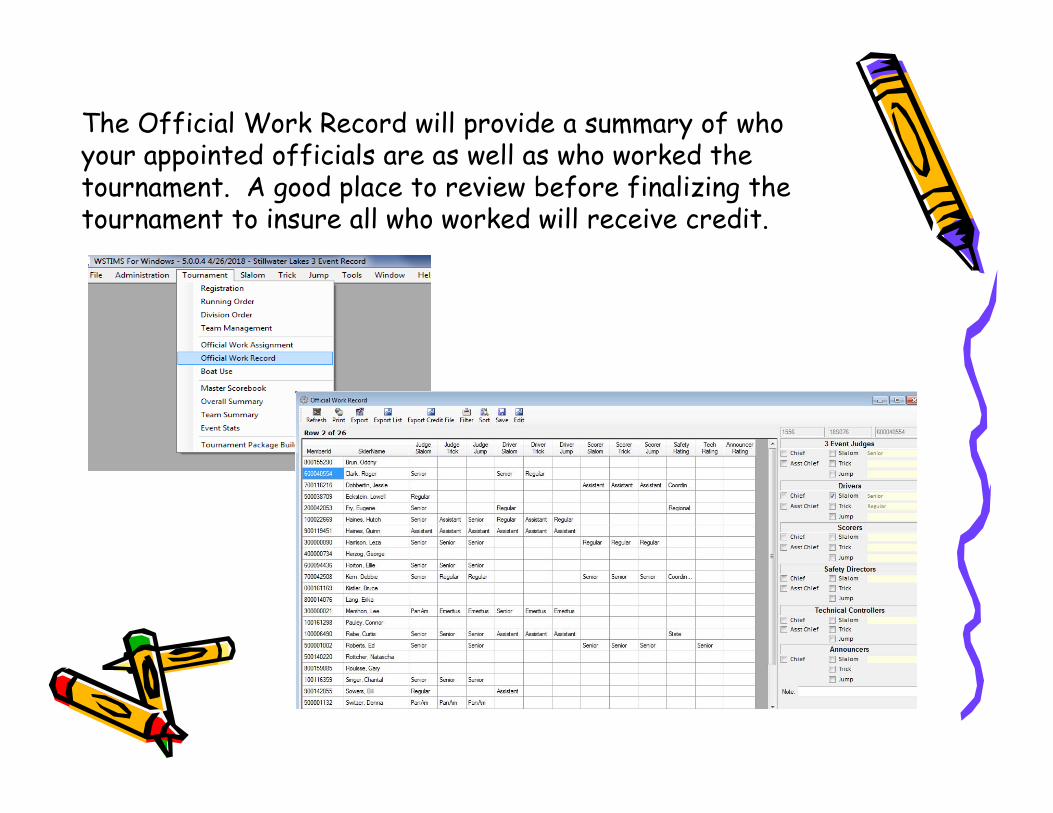
The Official Work Record will provide a summary of who your appointed officials are as well as who worked the tournament. A good place to review before finalizing the tournament to insure all who worked will receive credit.
For Class E, L, and R tournaments, the Technical Controller will provide the Chief Scorer a file from their Emmanuel Lion Homologation Program to be included with the Tournament Package Build. The file name will be the sanction number with the extension HD.txt. In the event the TC is using an older system they may have 2 files, one representing the survey the other the homologation report.
Simply place this file(s) in your tournament directory and it will be included with all files that are compressed for submittal to your Regional Seeding Representative.
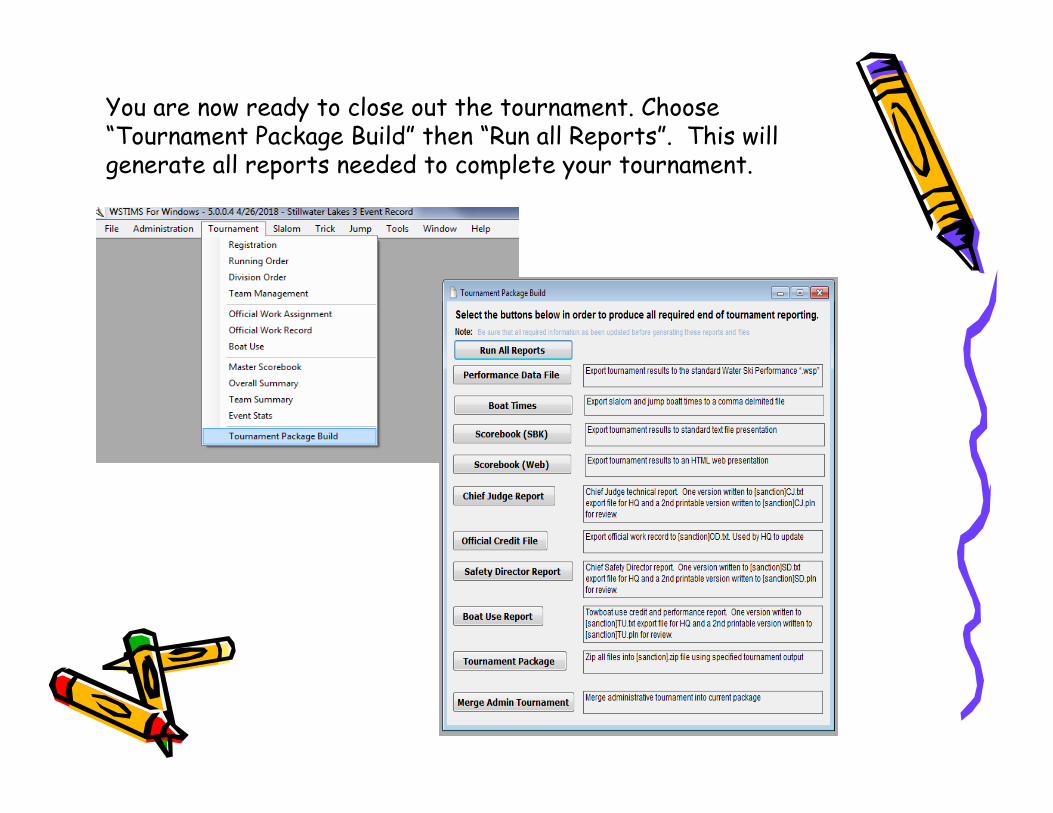
You are now ready to close out the tournament. Choose “Tournament Package Build” then “Run all Reports”. This will generate all reports needed to complete your tournament.
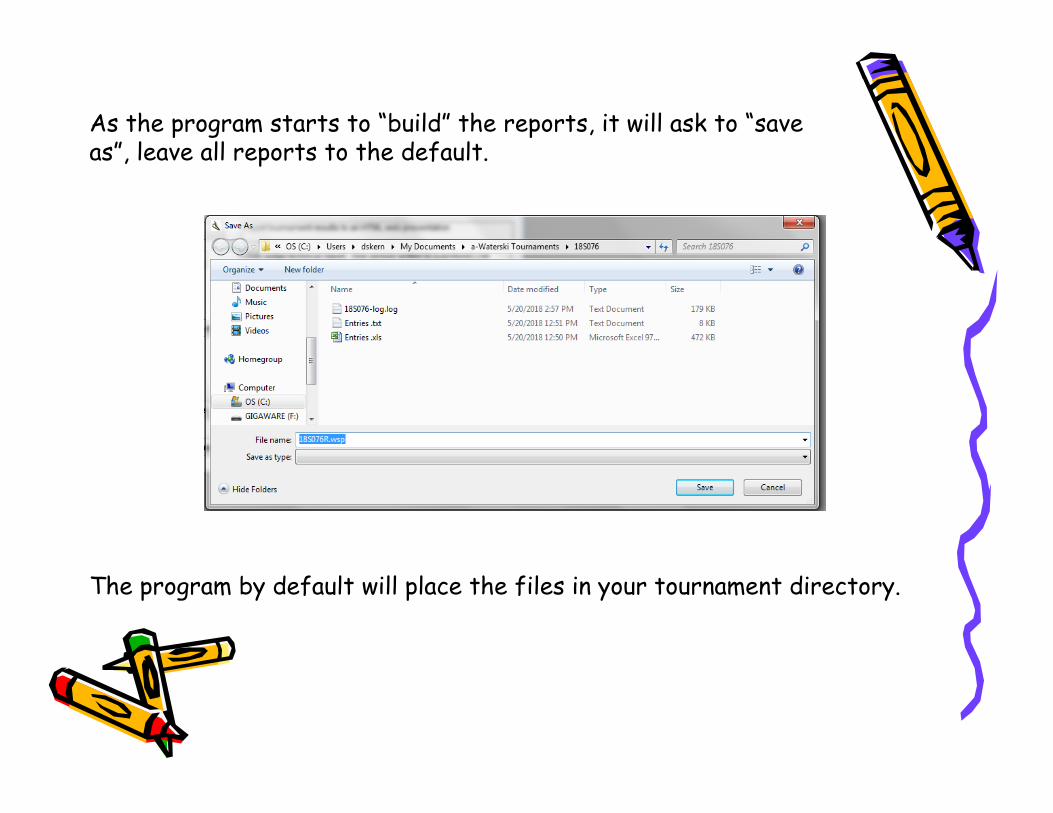
As the program starts to “build” the reports, it will ask to “save as”, leave all reports to the default.
The program by default will place the files in your tournament directory.
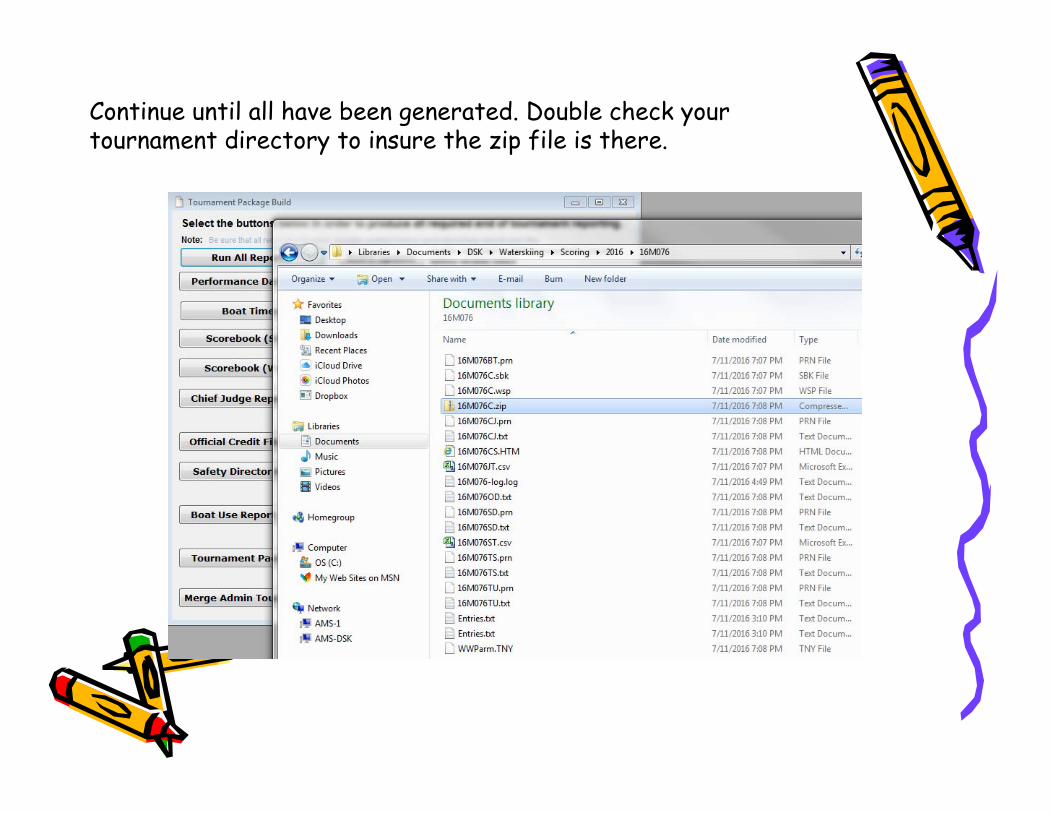
Continue until all have been generated. Double check your tournament directory to insure the zip file is there.

The following reports are generated in the zip file and are required for tournament closeout.

Good Luck and Have Fun!
Good Luck and Have Fun!