Embed Size (px)
Citation preview
How to Use Chrome Remote Desktop
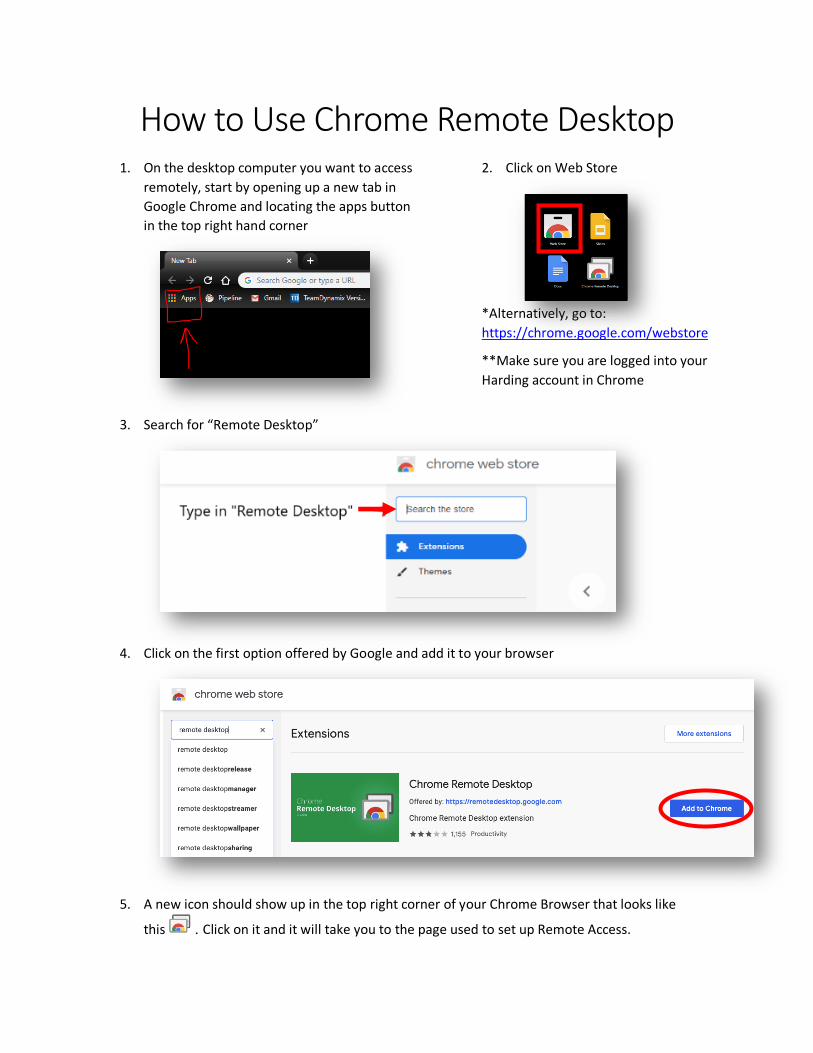
1. On the desktop computer you want to access remotely, start by opening up a new tab in Google Chrome and locating the apps button in the top right hand corner
2. Click on Web Store
*Alternatively, go to: https://chrome.google.com/webstore
**Make sure you are logged into your Harding account in Chrome
3. Search for “Remote Desktop”
4. Click on the first option offered by Google and add it to your browser
5. A new icon should show up in the top right corner of your Chrome Browser that looks like
this . Click on it and it will take you to the page used to set up Remote Access.
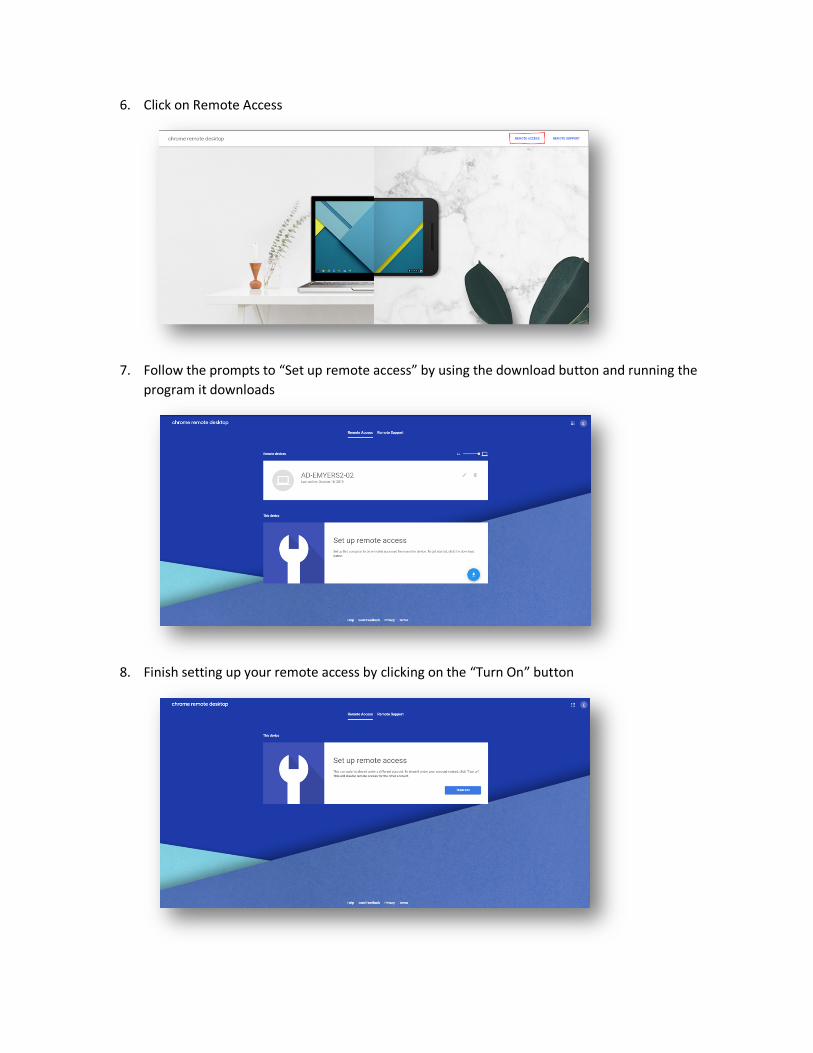
6. Click on Remote Access
7. Follow the prompts to “Set up remote access” by using the download button and running the
program it downloads
8. Finish setting up your remote access by clicking on the “Turn On” button

9. Leave the default name provided--this does not affect your ability to connect
10. Set your pin for remote access. PLEASE NOTE: We CANNOT reset this password so please write
it down in your phone, on paper, and multiple places.
11. After a brief loading period, you should see your computer listed as “Online”.
AD-EXAMPLECOMPUTER-01

Remote Computer Operation Now we are going to switch over to your personal laptop or school issued laptop/chromebook and follow the original steps to make for sure the Chrome Remote Desktop extension shows up in the top right corner
1. In Chrome, click on the button on your laptop/chromebook and make for sure you are signed in to your Harding account via google.
2. Then you will see an your work computer listed as a remote device. Click on it to start your remote connection
3. Enter the PIN you created earlier to connect to your computer 4.
AD-EXAMPLEUSER-MAC.harding.edu
AD-EXAMPLECOMPUTER-01
AD-EXAMPLEUSER-MAC.harding.edu
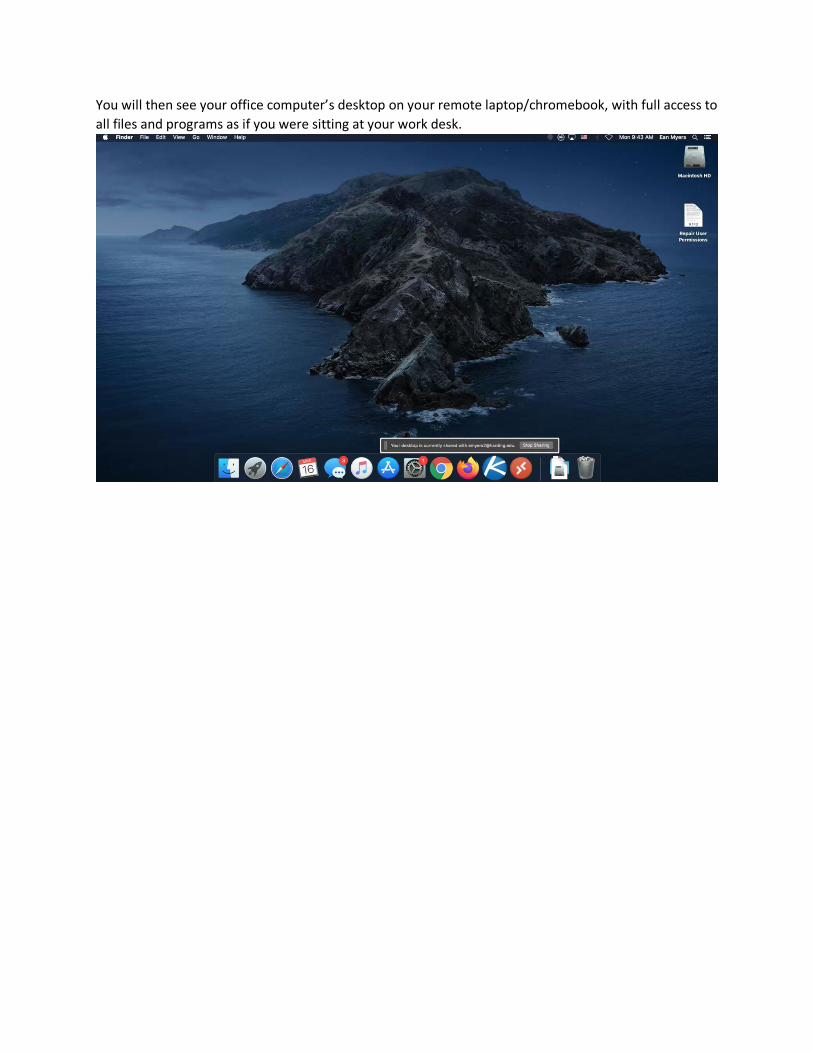
You will then see your office computer’s desktop on your remote laptop/chromebook, with full access to all files and programs as if you were sitting at your work desk.

There is a menu button on the right side that has several options for things like switching to full-screen mode for better visibility, or selecting a single monitor to use at a time. When finished, you can click on the “Disconnect” button at the top to end your remote session.