Embed Size (px)
Citation preview

HP TCP/IP Services for OpenVMS Guide to SSH
HP TCP/IP Services for OpenVMS Version 5.4
This is a new manual.
Manufacturing Part Number: AA-RVBUA-TE
September 2003
© Copyright 2003 Hewlett-Packard Development Company, L.P.

Legal NoticeUNIX® is a registered trademark of The Open Group.
The information contained herein is subject to change without notice. The only warranties for HP products and services are set forth in the express warranty statements accompanying such products and services. Nothing herein should be construed as constituting an additional warranty. HP shall not be liable for technical or editorial errors or omissions contained herein.
Proprietary computer software. Valid license from HP required for possession, use or copying. Consistent with FAR 12.211 and 12.212, Commercial Computer Software, Computer Software Documentation, and Technical Data for Commercial Items are licensed to the U.S. Government under vendor's standard commercial license.
The HP OpenVMS documentation set is available on CD-ROM.
ZK6670
2
Contents
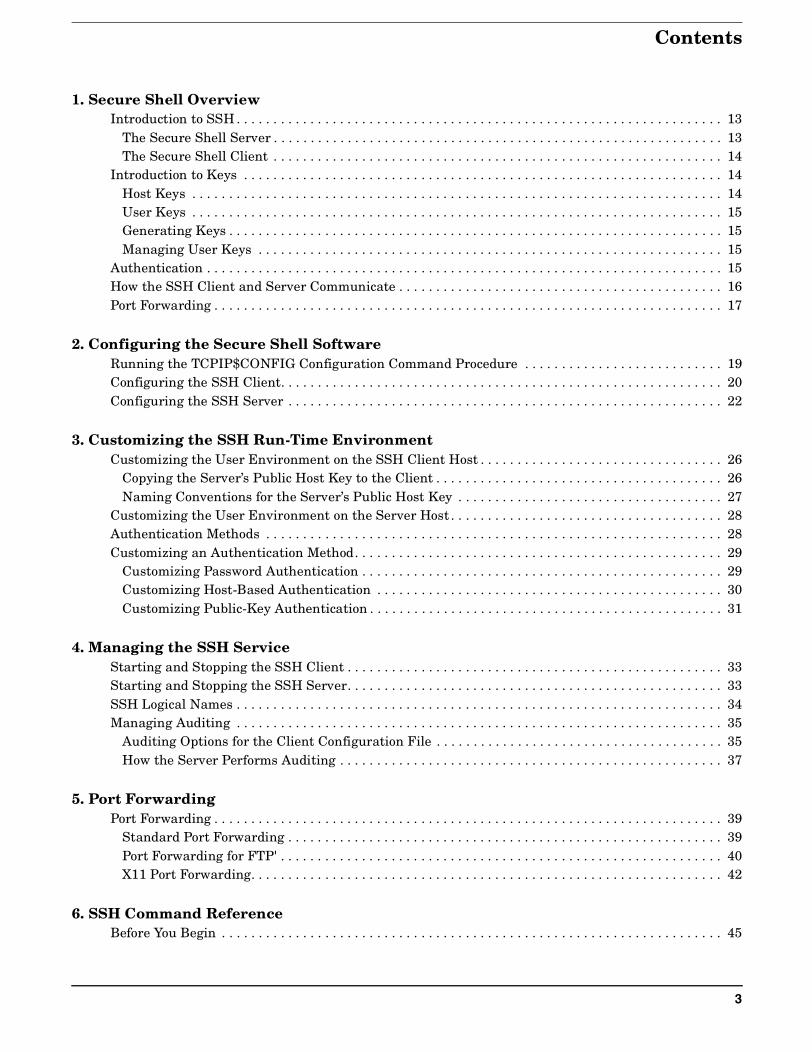
1. Secure Shell OverviewIntroduction to SSH . . . . . . . . . . . . . . . . . . . . . . . . . . . . . . . . . . . . . . . . . . . . . . . . . . . . . . . . . . . . . . . . . . 13
The Secure Shell Server . . . . . . . . . . . . . . . . . . . . . . . . . . . . . . . . . . . . . . . . . . . . . . . . . . . . . . . . . . . . . 13The Secure Shell Client . . . . . . . . . . . . . . . . . . . . . . . . . . . . . . . . . . . . . . . . . . . . . . . . . . . . . . . . . . . . . 14
Introduction to Keys . . . . . . . . . . . . . . . . . . . . . . . . . . . . . . . . . . . . . . . . . . . . . . . . . . . . . . . . . . . . . . . . . 14Host Keys . . . . . . . . . . . . . . . . . . . . . . . . . . . . . . . . . . . . . . . . . . . . . . . . . . . . . . . . . . . . . . . . . . . . . . . . 14User Keys . . . . . . . . . . . . . . . . . . . . . . . . . . . . . . . . . . . . . . . . . . . . . . . . . . . . . . . . . . . . . . . . . . . . . . . . 15Generating Keys . . . . . . . . . . . . . . . . . . . . . . . . . . . . . . . . . . . . . . . . . . . . . . . . . . . . . . . . . . . . . . . . . . . 15Managing User Keys . . . . . . . . . . . . . . . . . . . . . . . . . . . . . . . . . . . . . . . . . . . . . . . . . . . . . . . . . . . . . . . 15
Authentication . . . . . . . . . . . . . . . . . . . . . . . . . . . . . . . . . . . . . . . . . . . . . . . . . . . . . . . . . . . . . . . . . . . . . . 15How the SSH Client and Server Communicate . . . . . . . . . . . . . . . . . . . . . . . . . . . . . . . . . . . . . . . . . . . . 16Port Forwarding . . . . . . . . . . . . . . . . . . . . . . . . . . . . . . . . . . . . . . . . . . . . . . . . . . . . . . . . . . . . . . . . . . . . . 17
2. Configuring the Secure Shell SoftwareRunning the TCPIP$CONFIG Configuration Command Procedure . . . . . . . . . . . . . . . . . . . . . . . . . . . 19Configuring the SSH Client. . . . . . . . . . . . . . . . . . . . . . . . . . . . . . . . . . . . . . . . . . . . . . . . . . . . . . . . . . . . 20Configuring the SSH Server . . . . . . . . . . . . . . . . . . . . . . . . . . . . . . . . . . . . . . . . . . . . . . . . . . . . . . . . . . . 22
3. Customizing the SSH Run-Time EnvironmentCustomizing the User Environment on the SSH Client Host . . . . . . . . . . . . . . . . . . . . . . . . . . . . . . . . . 26
Copying the Server’s Public Host Key to the Client . . . . . . . . . . . . . . . . . . . . . . . . . . . . . . . . . . . . . . . 26Naming Conventions for the Server’s Public Host Key . . . . . . . . . . . . . . . . . . . . . . . . . . . . . . . . . . . . 27
Customizing the User Environment on the Server Host . . . . . . . . . . . . . . . . . . . . . . . . . . . . . . . . . . . . . 28Authentication Methods . . . . . . . . . . . . . . . . . . . . . . . . . . . . . . . . . . . . . . . . . . . . . . . . . . . . . . . . . . . . . . 28Customizing an Authentication Method. . . . . . . . . . . . . . . . . . . . . . . . . . . . . . . . . . . . . . . . . . . . . . . . . . 29
Customizing Password Authentication . . . . . . . . . . . . . . . . . . . . . . . . . . . . . . . . . . . . . . . . . . . . . . . . . 29Customizing Host-Based Authentication . . . . . . . . . . . . . . . . . . . . . . . . . . . . . . . . . . . . . . . . . . . . . . . 30Customizing Public-Key Authentication . . . . . . . . . . . . . . . . . . . . . . . . . . . . . . . . . . . . . . . . . . . . . . . . 31
4. Managing the SSH ServiceStarting and Stopping the SSH Client . . . . . . . . . . . . . . . . . . . . . . . . . . . . . . . . . . . . . . . . . . . . . . . . . . . 33Starting and Stopping the SSH Server. . . . . . . . . . . . . . . . . . . . . . . . . . . . . . . . . . . . . . . . . . . . . . . . . . . 33SSH Logical Names . . . . . . . . . . . . . . . . . . . . . . . . . . . . . . . . . . . . . . . . . . . . . . . . . . . . . . . . . . . . . . . . . . 34Managing Auditing . . . . . . . . . . . . . . . . . . . . . . . . . . . . . . . . . . . . . . . . . . . . . . . . . . . . . . . . . . . . . . . . . . 35
Auditing Options for the Client Configuration File . . . . . . . . . . . . . . . . . . . . . . . . . . . . . . . . . . . . . . . 35How the Server Performs Auditing . . . . . . . . . . . . . . . . . . . . . . . . . . . . . . . . . . . . . . . . . . . . . . . . . . . . 37
5. Port ForwardingPort Forwarding . . . . . . . . . . . . . . . . . . . . . . . . . . . . . . . . . . . . . . . . . . . . . . . . . . . . . . . . . . . . . . . . . . . . . 39
Standard Port Forwarding . . . . . . . . . . . . . . . . . . . . . . . . . . . . . . . . . . . . . . . . . . . . . . . . . . . . . . . . . . . 39Port Forwarding for FTP' . . . . . . . . . . . . . . . . . . . . . . . . . . . . . . . . . . . . . . . . . . . . . . . . . . . . . . . . . . . . 40X11 Port Forwarding. . . . . . . . . . . . . . . . . . . . . . . . . . . . . . . . . . . . . . . . . . . . . . . . . . . . . . . . . . . . . . . . 42
6. SSH Command ReferenceBefore You Begin . . . . . . . . . . . . . . . . . . . . . . . . . . . . . . . . . . . . . . . . . . . . . . . . . . . . . . . . . . . . . . . . . . . . 45
3

Contents
Copying Files . . . . . . . . . . . . . . . . . . . . . . . . . . . . . . . . . . . . . . . . . . . . . . . . . . . . . . . . . . . . . . . . . . . . . . . 45Using the SCP Command. . . . . . . . . . . . . . . . . . . . . . . . . . . . . . . . . . . . . . . . . . . . . . . . . . . . . . . . . . . . 45Using the SFTP Command. . . . . . . . . . . . . . . . . . . . . . . . . . . . . . . . . . . . . . . . . . . . . . . . . . . . . . . . . . . 47
Remote Login and Command Execution with the SSH Command . . . . . . . . . . . . . . . . . . . . . . . . . . . . . 48Command Synopsis. . . . . . . . . . . . . . . . . . . . . . . . . . . . . . . . . . . . . . . . . . . . . . . . . . . . . . . . . . . . . . . . . 48Parameters . . . . . . . . . . . . . . . . . . . . . . . . . . . . . . . . . . . . . . . . . . . . . . . . . . . . . . . . . . . . . . . . . . . . . . . 48Example. . . . . . . . . . . . . . . . . . . . . . . . . . . . . . . . . . . . . . . . . . . . . . . . . . . . . . . . . . . . . . . . . . . . . . . . . . 50
Using the SSH_KEYGEN Utility . . . . . . . . . . . . . . . . . . . . . . . . . . . . . . . . . . . . . . . . . . . . . . . . . . . . . . . 50Command Synopsis. . . . . . . . . . . . . . . . . . . . . . . . . . . . . . . . . . . . . . . . . . . . . . . . . . . . . . . . . . . . . . . . . 50Parameters . . . . . . . . . . . . . . . . . . . . . . . . . . . . . . . . . . . . . . . . . . . . . . . . . . . . . . . . . . . . . . . . . . . . . . . 51
Using the SSH_ADD Utility . . . . . . . . . . . . . . . . . . . . . . . . . . . . . . . . . . . . . . . . . . . . . . . . . . . . . . . . . . . 51Command Synopsis. . . . . . . . . . . . . . . . . . . . . . . . . . . . . . . . . . . . . . . . . . . . . . . . . . . . . . . . . . . . . . . . . 52Parameters . . . . . . . . . . . . . . . . . . . . . . . . . . . . . . . . . . . . . . . . . . . . . . . . . . . . . . . . . . . . . . . . . . . . . . . 52Options . . . . . . . . . . . . . . . . . . . . . . . . . . . . . . . . . . . . . . . . . . . . . . . . . . . . . . . . . . . . . . . . . . . . . . . . . . 52Description . . . . . . . . . . . . . . . . . . . . . . . . . . . . . . . . . . . . . . . . . . . . . . . . . . . . . . . . . . . . . . . . . . . . . . . 52Return Status . . . . . . . . . . . . . . . . . . . . . . . . . . . . . . . . . . . . . . . . . . . . . . . . . . . . . . . . . . . . . . . . . . . . . 52Example. . . . . . . . . . . . . . . . . . . . . . . . . . . . . . . . . . . . . . . . . . . . . . . . . . . . . . . . . . . . . . . . . . . . . . . . . . 52
Using the SSH_AGENT Utility. . . . . . . . . . . . . . . . . . . . . . . . . . . . . . . . . . . . . . . . . . . . . . . . . . . . . . . . . 53Command Synopsis. . . . . . . . . . . . . . . . . . . . . . . . . . . . . . . . . . . . . . . . . . . . . . . . . . . . . . . . . . . . . . . . . 53Examples . . . . . . . . . . . . . . . . . . . . . . . . . . . . . . . . . . . . . . . . . . . . . . . . . . . . . . . . . . . . . . . . . . . . . . . . . 53
7. Solving OpenVMS SSH Login Problems
A. SSH Directories and FilesClient Directories and Files. . . . . . . . . . . . . . . . . . . . . . . . . . . . . . . . . . . . . . . . . . . . . . . . . . . . . . . . . . . . 57Server Directories and Files . . . . . . . . . . . . . . . . . . . . . . . . . . . . . . . . . . . . . . . . . . . . . . . . . . . . . . . . . . . 58
B. SSH Client and Server Configuration FilesClient Configuration File . . . . . . . . . . . . . . . . . . . . . . . . . . . . . . . . . . . . . . . . . . . . . . . . . . . . . . . . . . . . . . 61Server Configuration File . . . . . . . . . . . . . . . . . . . . . . . . . . . . . . . . . . . . . . . . . . . . . . . . . . . . . . . . . . . . . 63
Index . . . . . . . . . . . . . . . . . . . . . . . . . . . . . . . . . . . . . . . . . . . . . . . . . . . . . . . . . . . . . . . . . . . . . . . 67
4

Tables
Table 2-1. Files and Directories Created During SSH Configuration . . . . . . . . . . . . . . . . . . . . . . . . 20Table 4-1. Logical Names. . . . . . . . . . . . . . . . . . . . . . . . . . . . . . . . . . . . . . . . . . . . . . . . . . . . . . . . . . . 34Table 6-1. SCP Command Options . . . . . . . . . . . . . . . . . . . . . . . . . . . . . . . . . . . . . . . . . . . . . . . . . . . 46Table 6-2. SFTP Command Options . . . . . . . . . . . . . . . . . . . . . . . . . . . . . . . . . . . . . . . . . . . . . . . . . . 47Table 6-3. SSH Command Options . . . . . . . . . . . . . . . . . . . . . . . . . . . . . . . . . . . . . . . . . . . . . . . . . . . 48Table 6-4. SSH_KEYGEN Command Options . . . . . . . . . . . . . . . . . . . . . . . . . . . . . . . . . . . . . . . . . . 51Table 6-5. SSH_ADD Command Options . . . . . . . . . . . . . . . . . . . . . . . . . . . . . . . . . . . . . . . . . . . . . . 52
5

Tables
6

Figures
7

Figures
8
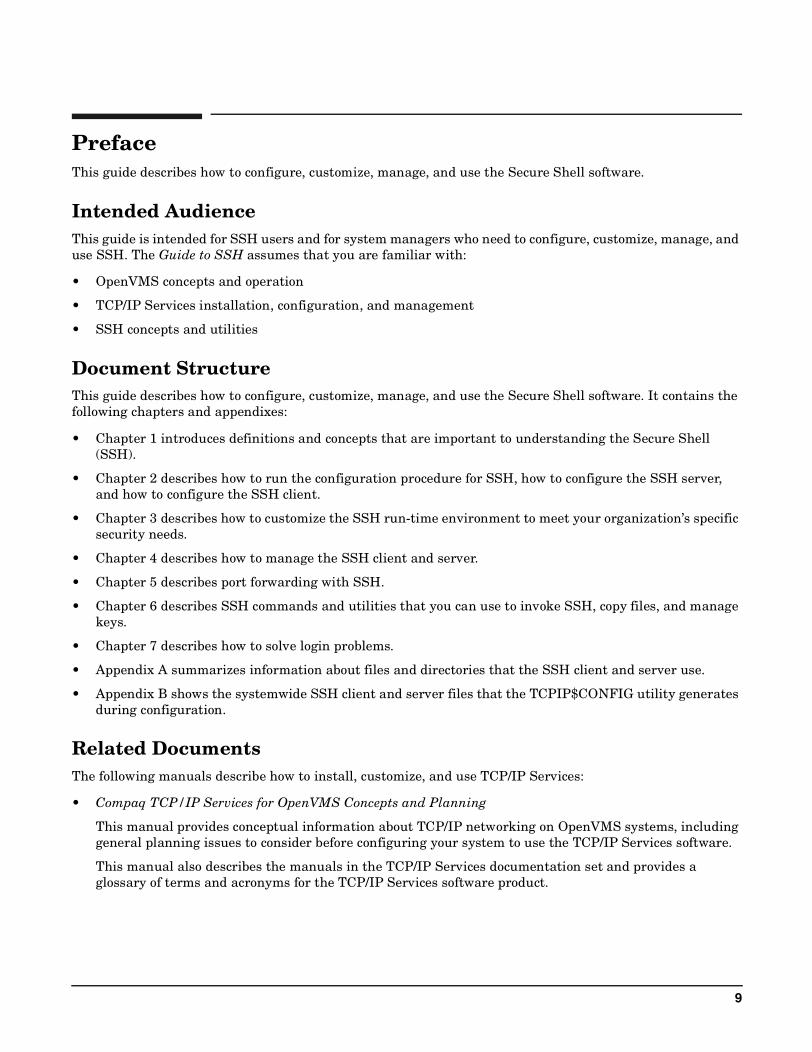
Preface This guide describes how to configure, customize, manage, and use the Secure Shell software.
Intended AudienceThis guide is intended for SSH users and for system managers who need to configure, customize, manage, and use SSH. The Guide to SSH assumes that you are familiar with:
• OpenVMS concepts and operation
• TCP/IP Services installation, configuration, and management
• SSH concepts and utilities
Document StructureThis guide describes how to configure, customize, manage, and use the Secure Shell software. It contains the following chapters and appendixes:
• Chapter 1 introduces definitions and concepts that are important to understanding the Secure Shell (SSH).
• Chapter 2 describes how to run the configuration procedure for SSH, how to configure the SSH server, and how to configure the SSH client.
• Chapter 3 describes how to customize the SSH run-time environment to meet your organization’s specific security needs.
• Chapter 4 describes how to manage the SSH client and server.
• Chapter 5 describes port forwarding with SSH.
• Chapter 6 describes SSH commands and utilities that you can use to invoke SSH, copy files, and manage keys.
• Chapter 7 describes how to solve login problems.
• Appendix A summarizes information about files and directories that the SSH client and server use.
• Appendix B shows the systemwide SSH client and server files that the TCPIP$CONFIG utility generates during configuration.
Related DocumentsThe following manuals describe how to install, customize, and use TCP/IP Services:
• Compaq TCP/IP Services for OpenVMS Concepts and Planning
This manual provides conceptual information about TCP/IP networking on OpenVMS systems, including general planning issues to consider before configuring your system to use the TCP/IP Services software.
This manual also describes the manuals in the TCP/IP Services documentation set and provides a glossary of terms and acronyms for the TCP/IP Services software product.
9

• HP TCP/IP Services for OpenVMS Release Notes
The release notes provide version-specifiec information that supersedes the information in the documentation set. The features, restrictions, and corrections in this version of the software are described in the release notes. Always read the release notes before installing the software.
• HP TCP/IP Services for OpenVMS Installation and Configuration
This manual explains how to install and configure TCP/IP Services.
• HP TCP/IP Services for OpenVMS User’s Guide
This manual describes how to use the applications available with TCP/IP Services such as remote file operations, email, TELNET, TN3270, and network printing.
• HP TCP/IP Services for OpenVMS Management
This manuals describes how to configure and manage the TCP/IP Services product.
• HP TCP/IP Services for OpenVMS Management Command Reference
This manual describes TCP/IP Services management commands.
• HP TCP/IP Services for OpenVMS Management Command Quick Reference Card
This reference card lists the TCP/IP management commands by component and describes the purpose of each command.
• HP TCP/IP Services for OpenVMS UNIX Command Equivalents Card
This reference card contains information about commonly performed network management tasks and their corresponding TCP/IP management and UNIX command formats.
• Compaq TCP/IP Services for OpenVMS ONC RPC Programming
This manuals presents an overview of high-level programming using open network computing remote procedure calls (ONC RPCs). This manual also describes the RPC programming interface and how to use the RCPGEN protocol compiler to create applications.
• HP TCP/IP Services for OpenVMS Guide to SSH
This manual describes how to configure, set up, use, and manage the SSH for OpenVMS software.
• Compaq TCP/IP Services for OpenVMS Sockets API and System Services Programming
This manual describes how to use the Sockets API and OpenVMS system services to develop network applications.
• Compaq TCP/IP Services for OpenVMS SNMP Programming and Reference
This manual describes the Simple Network Management Protocol (SNMP) and the SNMP application programming environment (eSNMP). It describes the subagents provided with TCP/IP Services, utilities provided for managing subagents, and how to build your own subagents.
• HP TCP/IP Services for OpenVMS Tuning and Troubleshooting
This manual provides information about how to isolate the causes of network problems and how to tune the TCP/IP Services software for the best performance.
• HP TCP/IP Services for OpenVMS Guide to IPv6
This manual describes the IPv6 environment, the roles of systems in this environment, the types and function of the different IPv6 addresses, and how to configure TCP/IP Services to access the IPv6 network.
10

For additional information about HP OpenVMS products and services, see the following World Wide Web address:
http://www.hp.com/go/openvms
For a comprehensive overview of SSH, refer to the book:
SSH, The Secure Shell: The Definitive Guide by Daniel J. Barrett, Richard Silverman
O’Reilly and Associates. January 2001.
Reader's CommentsHP welcomes your comments on this manual.
Please send comments to either of the following addresses::
Internet: [email protected]
Postal Mail: Hewlett-Packard Company OSSG Documentation GroupZKO3-4/U08110 Spit Brook RoadNashua, NH 03062-2698
How to Order Additional DocumentationFor information about how to order additional documentation, visit the following World Wide Web address :
http://www.hp.com/go/openvms
ConventionsThe name TCP/IP Services means both:
• HP TCP/IP Services for OpenVMS Alpha
• HP TCP/IP Services for OpenVMS VAX
Also, please note that all IP addresses are fictitious.
The following conventions may be used in this manual:
Convention Meaning
Ctrl/x A sequence such as Ctrl/x indicates that you must hold down the key labeled Ctrl while you press another key or a pointing device button.
PF1 x A sequence such as PF1 x indicates that you must first press and release the key labeled PF1 and then press and release another key (x) or a pointing device button.
Return In examples, a key name in bold indicates that you press that key.
… A horizontal ellipsis in examples indicates one of the following possibilities:− Additional optional arguments in a statement have been omitted.− The preceding item or items can be repeated one or more times.− Additional parameters, values, or other information can be entered.
11

.
.
.
A vertical ellipsis indicates the omission of items from a code example or command format; the items are omitted because they are not important to the topic being discussed.
( ) In command format descriptions, parentheses indicate that you must enclose choices in parentheses if you specify more than one.
[ ] In command format descriptions, brackets indicate optional choices. You can choose one or more items or no items. Do not type the brackets on the command line. However, you must include the brackets in the syntax for OpenVMS directory specifications and for a substring specification in an assignment statement.
| In command format descriptions, vertical bars separate choices within brackets or braces. Within brackets, the choices are optional; within braces, at least one choice is required. Do not type the vertical bars on the command line.
{ } In command format descriptions, braces indicate required choices; you must choose at least one of the items listed. Do not type the braces on the command line.
bold type Bold type represents the introduction of a new term. It also represents the name of an argument, an attribute, or a reason.
italic type Italic type indicates important information, complete titles of manuals, or variables. Variables include information that varies in system output (Internal error number), in command lines (/PRODUCER=name), and in command parameters in text (where (dd) represents the predefined par code for the device type).
UPPERCASE TYPE Uppercase type indicates a command, the name of a routine, the name of a file, or the abbreviation for a system privilege.
Example This typeface indicates code examples, command examples, and interactive screen displays. In text, this type also identifies URLs, UNIX command and pathnames, PC-based commands and folders, and certain elements of the C programming language.
– A hyphen at the end of a command format description, command line, or code line indicates that the command or statement continues on the following line.
numbers All numbers in text are assumed to be decimal unless otherwise noted. Nondecimal radixes—binary, octal, or hexadecimal—are explicitly indicated.
Convention Meaning
12
Secure Shell OverviewIntroduction to SSH
1 Secure Shell Overview
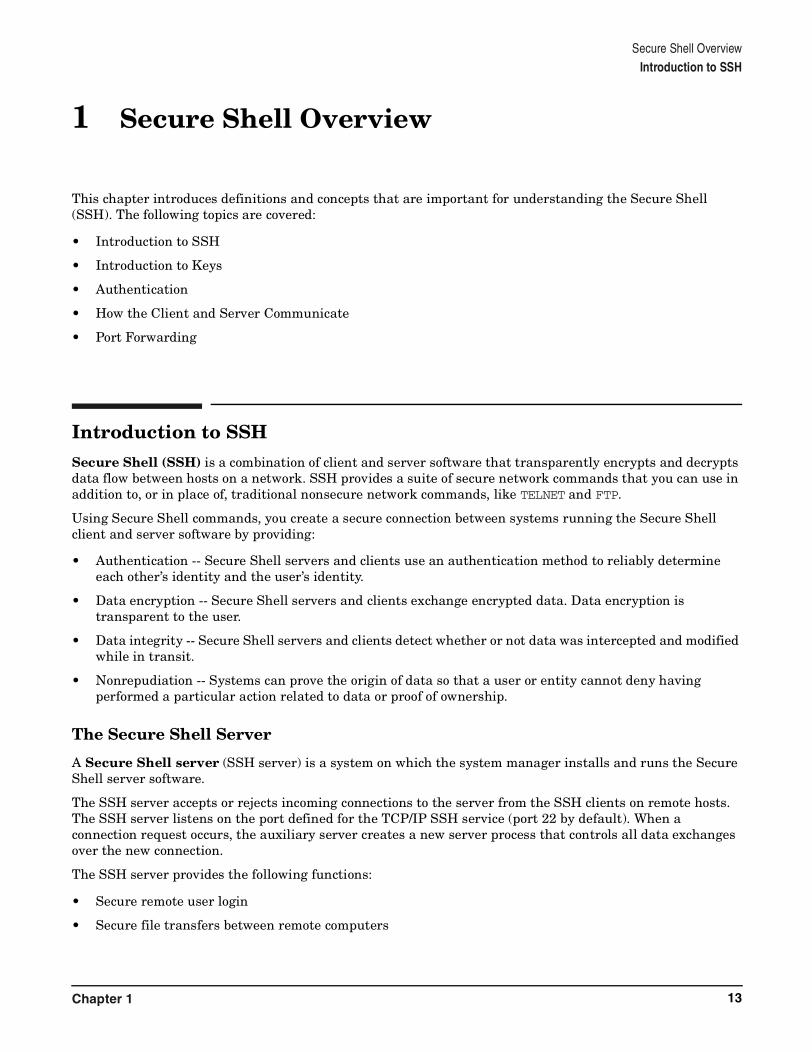
This chapter introduces definitions and concepts that are important for understanding the Secure Shell (SSH). The following topics are covered:
• Introduction to SSH
• Introduction to Keys
• Authentication
• How the Client and Server Communicate
• Port Forwarding
Introduction to SSHSecure Shell (SSH) is a combination of client and server software that transparently encrypts and decrypts data flow between hosts on a network. SSH provides a suite of secure network commands that you can use in addition to, or in place of, traditional nonsecure network commands, like TELNET and FTP.
Using Secure Shell commands, you create a secure connection between systems running the Secure Shell client and server software by providing:
• Authentication -- Secure Shell servers and clients use an authentication method to reliably determine each other’s identity and the user’s identity.
• Data encryption -- Secure Shell servers and clients exchange encrypted data. Data encryption is transparent to the user.
• Data integrity -- Secure Shell servers and clients detect whether or not data was intercepted and modified while in transit.
• Nonrepudiation -- Systems can prove the origin of data so that a user or entity cannot deny having performed a particular action related to data or proof of ownership.
The Secure Shell Server
A Secure Shell server (SSH server) is a system on which the system manager installs and runs the Secure Shell server software.
The SSH server accepts or rejects incoming connections to the server from the SSH clients on remote hosts. The SSH server listens on the port defined for the TCP/IP SSH service (port 22 by default). When a connection request occurs, the auxiliary server creates a new server process that controls all data exchanges over the new connection.
The SSH server provides the following functions:
• Secure remote user login
• Secure file transfers between remote computers
Chapter 1 13

Secure Shell OverviewIntroduction to Keys
• Remote command execution
For all of these functions, the entire login and data transfer sessions, including user identification information, are secured through user authentication, data encryption, and data integrity.
The Secure Shell Client
A Secure Shell client is a system on which the system manager installs the Secure Shell client software. Throughout this guide, the Secure Shell client is referred to as the SSH client.
SSH commands can invoke several SSH utilities:
• The SCP and SFTP commands copy files to and from an SSH server.
• The SSH command logs in to a remote server and to provide remote command execution.
• The SSH key management utilities generate public/private key pairs and manipulate keys.
These commands and utilities are described in Chapter 5.
NOTE SSH for OpenVMS software is based on SSH2 software from SSH Communication Security version 2.4.1. In the OpenVMS implementation, the commands SSH, SCP, and SFTP mean the same as SSH2, SCP2, and SFTP2. You can use either set of commands with SSH for OpenVMS.
Introduction to KeysSSH uses public-key cryptography to verify the identity of hosts as well as the identity of individual users. Public-key cryptography uses a pair of mathematically related keys. One key is public and is distributed to anyone who wants it; the other key is private and is known only to the owner. When a message is encrypted with a public key, it can be decrypted using only the private key.
Host Keys
The SSH host public and private keys are asymmetric keys that distinguish and identify hosts. When the SSH client is establishing a connection with the SSH server, the keys are used in two places:
• The server host provides its public key to connecting clients so that they can verify the identity of the server.
• The client host provides its public key to the server to allow a server host to verify the identity of the client host during host-based authentication.
Host keys are created either during TCP/IP configuration by the TCPIP$CONFIG.COM command procedure or manually by a system manager.
NOTE OpenVMS SSH is configured with a single SSH service listening port (22) and a single host key. All incarnations of the SSH server process use the same host key.
Chapter 114

Secure Shell OverviewAuthentication
User Keys
Public key authentication requires that a user have a pair of keys consisting of a public key and a private key. The public key is published and distributed, or copied, to all the SSH servers with which the user communicates. The private key is kept on the local SSH client and is never be revealed to anyone except the key’s owner.
As a user, your private and public keys are not the same as the server’s private host key and public host key. The user’s keys are used during public-key authentication, as described in Chapter 3. They require that a user have personal public and private keys. The user creates the public-private key pair by using the key generation utility.
Generating Keys
Key are generated by using the SSH_KEYGEN utility, as described in Chapter 5. SSH_KEYGEN generates both user’s keys and host keys. For each key, the SSH_KEYGEN utility generates a pair of files: one with a public key and one with a private key. These files are used by cryptographic algorithms.
Managing User Keys
A user might need several keys, even hundreds of keys. For example, you may use one for each remote server to which you connect, or one for each account on a remote server. The following utilities are available to help manage multiple keys:
• SSH_AGENT
• SSH_ADD
For more information about these utilities, see Chapter 5.
AuthenticationAuthentication means verifying the identity of someone or something. Every SSH connection involves two types of authentication:
• Server authentication
For server authentication, the client verifies the identity of the SSH server. The SSH server authentication process uses the server’s host public key to ensure that the SSH server is not an imposter.
• User authentication
For user authentication, the server verifies the identity of the user requesting access. The user authentication process uses the system-specific user authentication method to verify the user’s identity.
You can choose from three user authentication methods: password, host based, and public key. All of these methods require configuration of both the client and the server systems. For more information about these methods, see Chapter 3.
Chapter 1 15

Secure Shell OverviewHow the SSH Client and Server Communicate
How the SSH Client and Server CommunicateThis section provides a brief overview of the client and server communication process. For a detailed description, refer to the book recommended in the Preface.
After the system manager installs and configures the SSH software on all client and server hosts, the system manager (and perhaps the user) customizes authentication methods on the clients and server, creates and distributes key files, and uses TCP/IP commands to start the SSH client and server.
During SSH client and server configuration, two configuration files are installed: a client configuration file, which is read by an SSH client process when the SSH command is invoked, and the server configuration file, which is read by an SSH server process when a connection request arrives from an SSH client. All configuration files are ASCII text files and have either STREAM_LF format (for example, if copied directly from a UNIX® system), or variable-length format (if created with the TCPIP$CONFIG.COM command procedure or with a text editor). Appendix B shows the SSH client and server configuration files.
When the TCP/IP auxiliary server (inetd) starts on an SSH server host, it creates a listening socket for SSH. The server is now ready to accept a remote connection request. When you execute an SSH command on a remote client host, the SSH client is initiated. The client reads the configuration file and initiates a TCP connection to a server host using the specified destination port. On an SSH server host, inetd creates a copy of the server process, which reads the server’s configuration file.
To establish a secure connection:
1. The SSH client and server exchange information about supported protocol versions. This enables different implementations to overcome incompatibilities.
2. The SSH server initiates a host public key exchange with the client to prove its identity. Each server host has a public and private key pair, which is created during the SSH server configuration. This pair uniquely identifies the server host. The first time an SSH client connects to a server, SSH prompts the user to accept a copy of the server's public host key with the following message:
Host key not found from the list of known hosts.
Are you sure you want to continue connecting (yes/no)
(Note that the user response is case sensitive. Be sure to enter the response in lowercase letters.)
3. If the user response is yes, SSH copies the server's public host key to the SSH client host. The client host uses this public host key to authenticate the SSH server on subsequent connections.
4. If during subsequent connection attempts the SSH client detects that the SSH server’s host key differs from the one stored on the client, the following message is displayed:
WARNING: HOST IDENTIFICATION HAS CHANGED!...
The message continues with text that warns of a possible “man-in-the-middle” attack. Although this message may not mean that data has been compromised (the host key may have been legitimately changed), the user should copy the server’s new key or contact the system manager.
5. The SSH client and server negotiate session parameters by exchanging information about supported parameters, including authentication methods, hash functions, and data compression methods.
6. The SSH client and server develop a shared (symmetric) session key to encrypt data using a key exchange method. When both the client and server know the secret data encryption key, a secure connection is established and the client and server can exchange data securely. The session key expires when the session ends.
Chapter 116

Secure Shell OverviewPort Forwarding
7. After the SSH client and server authenticate each other, the session is ready to authenticate the user by applying one or more of the authentication methods. Then SSH verifies the user's identity. The user or the system manager on the client, and the system manager on the server coordinate authentication methods by modifying information in the client and server configuration files.
8. The SSH server checks the user's identity. The user must have a valid user account and home directory on the server. If the server fails to authenticate the user, the server refuses the connection.
9. After SSH authenticates the user’s identity, the actual secure data transfer between client and server occurs.
10. The SSH server runs in a loop, accepting messages from the client, performing required actions, and returning reply messages to the client.
11. When the user closes the connection, the server process terminates. The auxiliary server continues to listen for new SSH connection requests.
Port ForwardingPort forwarding means encapsulating any TCP-based communication between the client and the server programs within an SSH session. This feature allows any TCP-based application or service to take advantage of all the benefits of SSH. SSH allows you to establish a “secure tunnel” between two hosts. After you have set up a secure tunnel, the participating applications operate transparently. For example, when you forward a regular TELNET connection through SSH, all information, including your user name, password, and actual data, are automatically encrypted and checked for integrity.
SSH port forwarding includes additional features for encrypting the X protocol (for X Window Systems). Using SSH, you can invoke X programs on a remote machine and have them appear on your local display. In this case, all X-protocol data is secured. For more information, see Chapter 5.
Chapter 1 17

Secure Shell OverviewPort Forwarding
Chapter 118

Configuring the Secure Shell SoftwareRunning the TCPIP$CONFIG Configuration Command Procedure
2 Configuring the Secure Shell Software
After you install the TCP/IP Services software, as described in the HP TCP/IP Services for OpenVMS Installation and Configuration manual, you must configure the SSH server and client using the menu-driven TCPIP$CONFIG.COM command procedure.
This chapter covers the following topics:
• Running the TCPIP$CONFIG Configuration Command Procedure
• Configuring the SSH Server
• Configuring the SSH Client
Running the TCPIP$CONFIG Configuration Command ProcedureAfter TCP/IP installation is complete, the SSH service must be configured using the TCP/IP configuration command procedure, TCPIP$CONFIG.COM. The configuration creates the systemwide SSH environment by setting up various components of SSH, such as configuration files and host keys.
Once you have completed the client and server configuration using TCPIP$CONFIG, you can customize the configuration with parameters to meet the needs of your specific run-time environment. For more information about customizing your run-time environment, see Chapter 3.
To run the configuration command procedure, follow these steps:
1. Invoke the TCPIP$CONFIG configuration command procedure. For general configuration procedures, refer to the HP TCP/IP Services for OpenVMS Installation and Configuration manual. The main Configuration menu is displayed:
HP TCP/IP Services for OpenVMS Configuration Menu
Configuration options:1 - Core environment2 - Client components3 - Server components4 - Optional components
5 - Shutdown HP TCP/IP Services for OpenVMS6 - Startup HP TCP/IP Services for OpenVMS7 - Run testsA - Configure options 1 - 4
[E] - Exit configuration procedure
Enter configuration option:
2. Choose option 3 (Server components) to configure the SSH server and option 2 (client components) to configure the SSH client. For details, see the sections “Configuring the SSH Client” on page 20 and “Configuring the SSH Server” on page 22.
During the configuration procedure, TCPIP$CONFIG creates the systemwide environment necessary to run the SSH client and server. TCPIP$CONFIG does the following:
Chapter 2 19
Configuring the Secure Shell SoftwareConfiguring the SSH Client
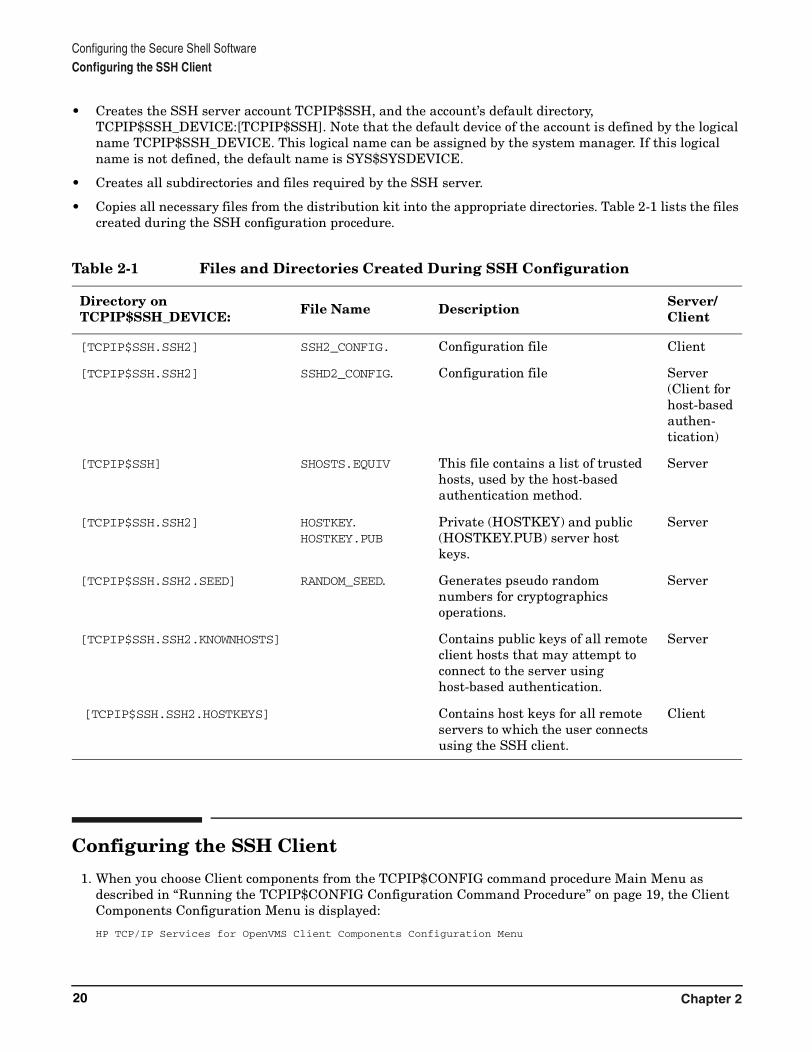
• Creates the SSH server account TCPIP$SSH, and the account’s default directory, TCPIP$SSH_DEVICE:[TCPIP$SSH]. Note that the default device of the account is defined by the logical name TCPIP$SSH_DEVICE. This logical name can be assigned by the system manager. If this logical name is not defined, the default name is SYS$SYSDEVICE.
• Creates all subdirectories and files required by the SSH server.
• Copies all necessary files from the distribution kit into the appropriate directories. Table 2-1 lists the files created during the SSH configuration procedure.
Configuring the SSH Client
1. When you choose Client components from the TCPIP$CONFIG command procedure Main Menu as described in “Running the TCPIP$CONFIG Configuration Command Procedure” on page 19, the Client Components Configuration Menu is displayed:
HP TCP/IP Services for OpenVMS Client Components Configuration Menu
Table 2-1 Files and Directories Created During SSH Configuration
Directory on TCPIP$SSH_DEVICE: File Name Description Server/
Client
[TCPIP$SSH.SSH2] SSH2_CONFIG. Configuration file Client
[TCPIP$SSH.SSH2] SSHD2_CONFIG. Configuration file Server (Client for host-based authen- tication)
[TCPIP$SSH] SHOSTS.EQUIV This file contains a list of trusted hosts, used by the host-based authentication method.
Server
[TCPIP$SSH.SSH2] HOSTKEY. HOSTKEY.PUB
Private (HOSTKEY) and public (HOSTKEY.PUB) server host keys.
Server
[TCPIP$SSH.SSH2.SEED] RANDOM_SEED. Generates pseudo random numbers for cryptographics operations.
Server
[TCPIP$SSH.SSH2.KNOWNHOSTS] Contains public keys of all remote client hosts that may attempt to connect to the server using host-based authentication.
Server
[TCPIP$SSH.SSH2.HOSTKEYS] Contains host keys for all remote servers to which the user connects using the SSH client.
Client
Chapter 220
Configuring the Secure Shell SoftwareConfiguring the SSH Client
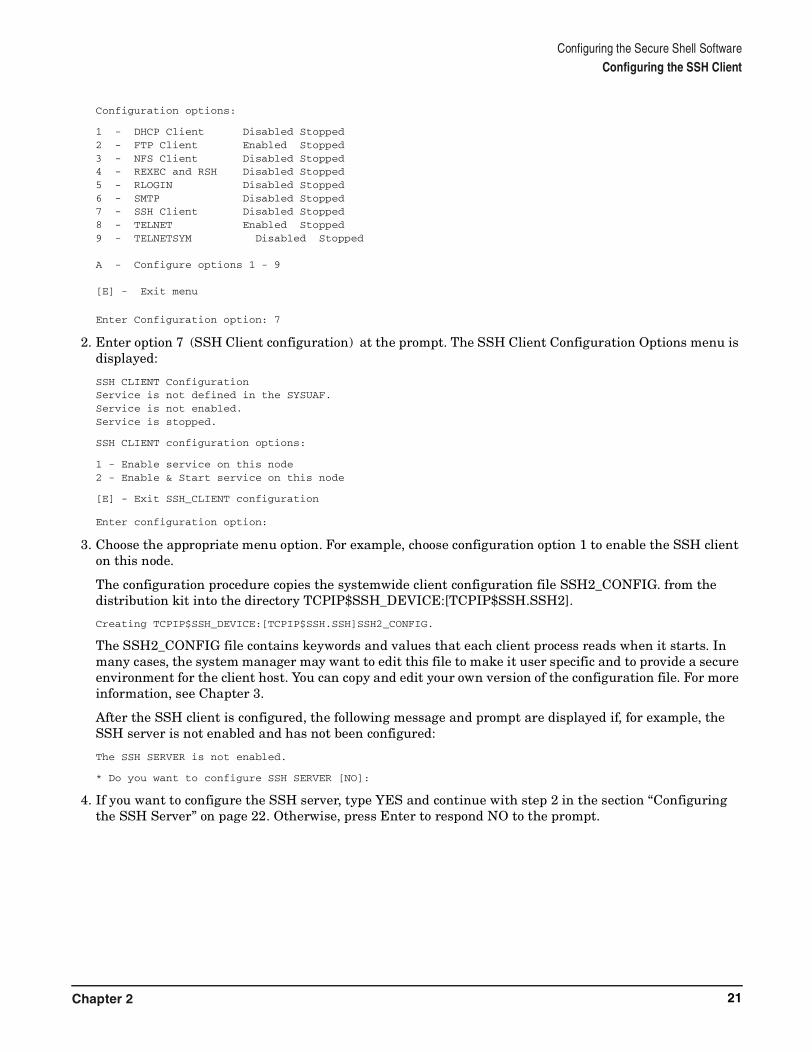
Configuration options:
1 - DHCP Client Disabled Stopped2 - FTP Client Enabled Stopped3 - NFS Client Disabled Stopped4 - REXEC and RSH Disabled Stopped5 - RLOGIN Disabled Stopped6 - SMTP Disabled Stopped7 - SSH Client Disabled Stopped8 - TELNET Enabled Stopped9 - TELNETSYM Disabled Stopped
A - Configure options 1 - 9
[E] - Exit menu
Enter Configuration option: 7
2. Enter option 7 (SSH Client configuration) at the prompt. The SSH Client Configuration Options menu is displayed:
SSH CLIENT ConfigurationService is not defined in the SYSUAF.Service is not enabled.Service is stopped.
SSH CLIENT configuration options:
1 - Enable service on this node2 - Enable & Start service on this node
[E] - Exit SSH_CLIENT configuration
Enter configuration option:
3. Choose the appropriate menu option. For example, choose configuration option 1 to enable the SSH client on this node.
The configuration procedure copies the systemwide client configuration file SSH2_CONFIG. from the distribution kit into the directory TCPIP$SSH_DEVICE:[TCPIP$SSH.SSH2].
Creating TCPIP$SSH_DEVICE:[TCPIP$SSH.SSH]SSH2_CONFIG.
The SSH2_CONFIG file contains keywords and values that each client process reads when it starts. In many cases, the system manager may want to edit this file to make it user specific and to provide a secure environment for the client host. You can copy and edit your own version of the configuration file. For more information, see Chapter 3.
After the SSH client is configured, the following message and prompt are displayed if, for example, the SSH server is not enabled and has not been configured:
The SSH SERVER is not enabled.
* Do you want to configure SSH SERVER [NO]:
4. If you want to configure the SSH server, type YES and continue with step 2 in the section “Configuring the SSH Server” on page 22. Otherwise, press Enter to respond NO to the prompt.
Chapter 2 21
Configuring the Secure Shell SoftwareConfiguring the SSH Server
Configuring the SSH Server
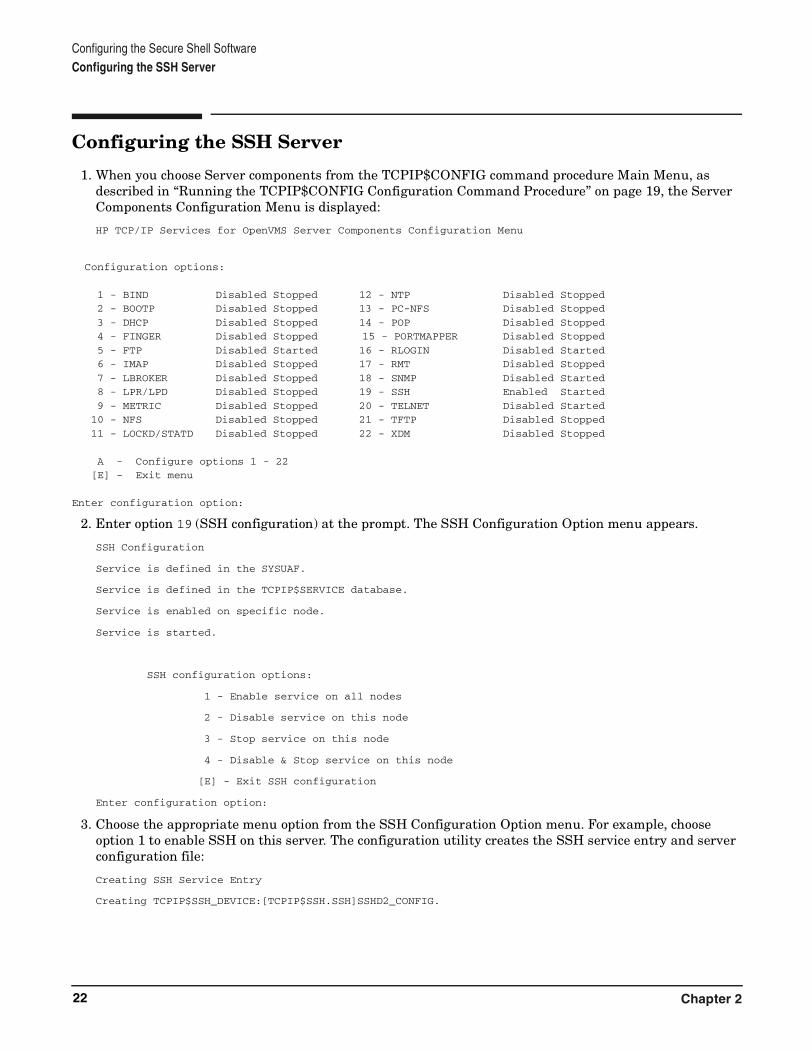
1. When you choose Server components from the TCPIP$CONFIG command procedure Main Menu, as described in “Running the TCPIP$CONFIG Configuration Command Procedure” on page 19, the Server Components Configuration Menu is displayed:
HP TCP/IP Services for OpenVMS Server Components Configuration Menu
Configuration options:
1 - BIND Disabled Stopped 12 - NTP Disabled Stopped 2 - BOOTP Disabled Stopped 13 - PC-NFS Disabled Stopped
3 - DHCP Disabled Stopped 14 - POP Disabled Stopped 4 - FINGER Disabled Stopped 15 - PORTMAPPER Disabled Stopped
5 - FTP Disabled Started 16 - RLOGIN Disabled Started 6 - IMAP Disabled Stopped 17 - RMT Disabled Stopped
7 - LBROKER Disabled Stopped 18 - SNMP Disabled Started 8 - LPR/LPD Disabled Stopped 19 - SSH Enabled Started
9 - METRIC Disabled Stopped 20 - TELNET Disabled Started 10 - NFS Disabled Stopped 21 - TFTP Disabled Stopped
11 - LOCKD/STATD Disabled Stopped 22 - XDM Disabled Stopped
A - Configure options 1 - 22 [E] - Exit menu
Enter configuration option:
2. Enter option 19 (SSH configuration) at the prompt. The SSH Configuration Option menu appears.
SSH Configuration
Service is defined in the SYSUAF.
Service is defined in the TCPIP$SERVICE database.
Service is enabled on specific node.
Service is started.
SSH configuration options:
1 - Enable service on all nodes
2 - Disable service on this node
3 - Stop service on this node
4 - Disable & Stop service on this node
[E] - Exit SSH configuration
Enter configuration option:
3. Choose the appropriate menu option from the SSH Configuration Option menu. For example, choose option 1 to enable SSH on this server. The configuration utility creates the SSH service entry and server configuration file:
Creating SSH Service Entry
Creating TCPIP$SSH_DEVICE:[TCPIP$SSH.SSH]SSHD2_CONFIG.
Chapter 222
Configuring the Secure Shell SoftwareConfiguring the SSH Server
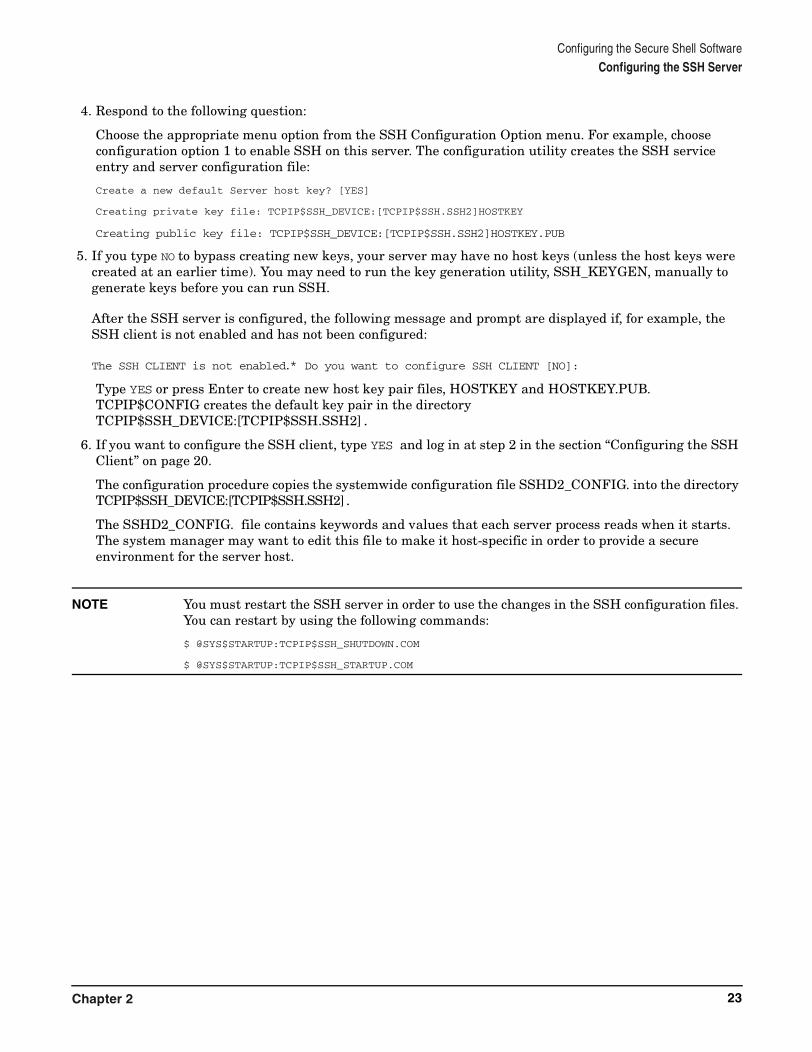
4. Respond to the following question:
Choose the appropriate menu option from the SSH Configuration Option menu. For example, choose configuration option 1 to enable SSH on this server. The configuration utility creates the SSH service entry and server configuration file:
Create a new default Server host key? [YES]
Creating private key file: TCPIP$SSH_DEVICE:[TCPIP$SSH.SSH2]HOSTKEY
Creating public key file: TCPIP$SSH_DEVICE:[TCPIP$SSH.SSH2]HOSTKEY.PUB
5. If you type NO to bypass creating new keys, your server may have no host keys (unless the host keys were created at an earlier time). You may need to run the key generation utility, SSH_KEYGEN, manually to generate keys before you can run SSH.
After the SSH server is configured, the following message and prompt are displayed if, for example, the SSH client is not enabled and has not been configured:
The SSH CLIENT is not enabled.* Do you want to configure SSH CLIENT [NO]:
Type YES or press Enter to create new host key pair files, HOSTKEY and HOSTKEY.PUB. TCPIP$CONFIG creates the default key pair in the directory TCPIP$SSH_DEVICE:[TCPIP$SSH.SSH2].
6. If you want to configure the SSH client, type YES and log in at step 2 in the section “Configuring the SSH Client” on page 20.
The configuration procedure copies the systemwide configuration file SSHD2_CONFIG. into the directory TCPIP$SSH_DEVICE:[TCPIP$SSH.SSH2].
The SSHD2_CONFIG. file contains keywords and values that each server process reads when it starts. The system manager may want to edit this file to make it host-specific in order to provide a secure environment for the server host.
NOTE You must restart the SSH server in order to use the changes in the SSH configuration files. You can restart by using the following commands:
$ @SYS$STARTUP:TCPIP$SSH_SHUTDOWN.COM
$ @SYS$STARTUP:TCPIP$SSH_STARTUP.COM
Chapter 2 23

Configuring the Secure Shell SoftwareConfiguring the SSH Server
Chapter 224

Customizing the SSH Run-Time Environment
3 Customizing the SSH Run-Time Environment
This chapter describes how to customize the SSH run-time environment to meet your organization’s specific security needs and discusses the following topics:
• Customizing the User Environment on the SSH Client Host
• Customizing the User Environment on the SSH Server Host
• Authentication
• Customizing an Authenication Method
When the TCP/IP configuration procedure is completed, all required systemwide SSH configuration parameters are established. The host is now prepared to become an SSH server by accepting remote connections, and the SSH client is ready to execute SSH commands. Different environments may have specific security requirements that can be achieved by exercising control over SSH run-time parameters on two levels:
• A systemwide setup, which is typically the system manager’s responsibility and applies to running instances of the client and server processes.
• A user-specific setup, which is typicallythe responsibility of the account owner, from whose account the SSH connections are made on the client host or to which an SSH connection will be requested on the server host.
An important component of the SSH run-time environment is the [.SSH2] subdirectory, created either by the user or automatically by the SSH software, in the user’s login directory (as specified by SYS$LOGIN). SSH uses this subdirectory to store multiple files needed for SSH to function. For example, if SYS$LOGIN is translated into DKA0:[username], then this special subdirectory would be DKA0:[username.SSH2]. Throughout this manual, this directory is referred to as the [username.SSH2] directory.
Chapter 3 25

Customizing the SSH Run-Time EnvironmentCustomizing the User Environment on the SSH Client Host
Customizing the User Environment on the SSH Client HostDuring configuration, the SSH2_CONFIG. file is copied to TCPIP$SSH_DEVICE:[TCPIP$SSH.SSH2]. When the user invokes the SSH command, the SSH client process reads the file and creates the run-time version of the configuration parameters. If you want a different set of parameters (user specific), then you need to create your own version of the configuration file in the user SSH directory.
The SSH client loads this file and modifies the run-time version of the parameters accordingly. You can copy this file from a UNIX or an OpenVMS system and then edit it, or create a new file. The file can be in either STREAM_LF or variable-length format.
Copying the Server’s Public Host Key to the Client
Any connection request from a client to an SSH server requires that the client obtain the server’s public key. There are several ways to copy the server’s public key to the client:
• During SSH server configuration, the TCPIP$CONFIG configuration procedure creates the systemwide directory TCPIP$SSH_DEVICE:[TCPIP$SSH.SSH2.HOSTKEYS]. You can copy into this directory the host keys of all the remote servers to which you will connect from the client host.
On a connection request, the SSH client checks this directory for the appropriate server’s host key and proceeds with authentication if the key is found.
• If your SSH client host does not have keys from remote servers in the systemwide directory, you can copy the keys manually:
1. Create the subdirectory [.HOSTKEYS] in the user’s SSH directory.
2. Copy the server’s public key to this directory using the COPY/FTP command.
NOTE If you copy the keys, they must be in STREAM_LF record format and have proper access privileges, for example S:RWED,O:RWED,G:RE,W:R.
The key-generation utility creates all key files in STREAM_LF format. When the SSH server transfers the server’s host key file to a client host, the resulting file is formatted correctly.
However, setting up the SSH environment sometimes requires that you manually copy public key files (whether host or user) between the SSH client and server hosts. For example, when using public-key authentication, the key file must be copied to an OpenVMS system. In these cases, FTP, for example, may create a variable-length record file. If this occurs, the user or system manager must convert this file to STREAM_LF format using the OpenVMS Convert utility. Failure to convert the file will cause key-processing errors.
On a connection request, the SSH client checks this directory for the appropriate server’s host key and proceeds with authentication if the key is found.
• If the file is not found in either the systemwide or account-specific [.HOSTKEYS] directory, the first time you attempt to connect from your client to a remote SSH server, you are prompted to accept a copy of the server’s public host key:
You can control this behavior using the StrictHostKeyChecking option in the client configuration file. This option accepts three possible values:
Chapter 326

Customizing the SSH Run-Time EnvironmentCustomizing the User Environment on the SSH Client Host
• yes -- Causes authentication to fail if the file is not found.
• no -- Causes the SSH client to create the [SSH2.HOSTKEYS] subdirectory (if it does not exist), and copies the SSH server’s public key file into this subdirectory automatically.
• ask -- Causes the SSH server to prompt the user for a copy of the server’s public host key. For example:
Host key not found from database.Key fingerprint:xikan-rokyr-miduc-zofut-nysig-ciryt-pyroc-fegil-zadyb-cokel-loxexYou can get a public key’s fingerprint by running$ ssh_keygen “-F” publickey.pub on the keyfile.Are you sure you want to continue connecting (yes/no)?
If you respond yes, the SSH client automatically creates the subdirectory SYS$LOGIN:[SSH2.HOSTKEYS] (if it does not exist) and copies the server’s public key into this directory.
If you do not specify the StrictHostKeyChecking option, the default is ask.
Naming Conventions for the Server’s Public Host Key
The server’s public and host private key pair files by default are HOSTKEY and HOSTKEY.PUB. When you copy these these files manually, you must rename them following the proper naming conventions. (When SSH copies the files, the proper file name is assigned automatically.) The name of the remote SSH server’s public key on the client host must be in the following format:
KEY_port_hostname.PUB
The port is typically 22. The hostname is the name of the remote SSH server. For example, when you copy the public key from the remote SSH server MYSERVER to the client host, the key name becomes: KEY_22_MYSERVER.PUB. If the remote server’s name uses dot notation in its name (for example, MYSERVER.MYLAB.COM), SSH replaces the dots with underscores (for example, KEY_22_MYSERVER_MYLAB_COM.PUB).
Note that hostname corresponds to the form of the SSH server name to which the SSH client connects, with underscores replacing dots if a qualified host name is used. For example, you connect to a server using the following command:
$ SSH [email protected]
This command copies the remote SSH server’s public key file HOSTKEY.PUB into a local directory as a file named KEY_22_MYSERVER_MYLAB_COM.PUB. Note that underscores replace the dots in the destination file.
If you copy these files manually, be sure to name the key files using this format. For example, if the server name is MYSERVER.MYLAB.COM, copy its HOSTKEY.PUB file to KEY_22_MYSERVER_MYLAB_COM.PUB in the appropriate directory.
Chapter 3 27

Customizing the SSH Run-Time EnvironmentCustomizing the User Environment on the Server Host
Customizing the User Environment on the Server HostDuring configuration, the SSHD2_CONFIG. file is copied to TCPIP$SSH_DEVICE:[TCPIP$SSH.SSH2]. When the connection attempt is made from a remote client, the SSH server reads the file and creates the run-time version of the configuration parameters. If you want a different set of parameters, you must create your own version of the configuration file in your SSH subdirectory.
The SSH server loads this file and modifies the run-time version of the parameters accordingly. You can copy this file from a UNIX or OpenVMS system and edit it, or you can create a new file. The file can be in either Stream_LF or variable-length format.
Create an SSH subdirectory in your user directory by entering the following commands:
$ SET DEFAULT SYS$LOGIN
$ CREATE/DIR [.SSH]
Authentication MethodsBefore you can connect to a remote SSH server, you must choose one or more of the three supported authentication methods introduced in Chapter 1. You configure the SSH client by specifying the authentication methods you choose. In addition, the SSH server, which the system manager configures, determines which authentication methods it will use before it can make a connection. Therefore, each of these methods requires configuration on both the SSH client and server.
After the SSH client makes a connection request to a remote SSH server, the server sends the client its permitted authentication methods. As with password and host-based authentication, the SSH server may require the client to pass multiple authentication tests before connecting.
The following SSH authentication methods are available:
• Password authentication. This method requires that you supply a password to the client, which transmits the password encrypted to the server over the network. Then the SSH server performs authorization, verifying the supplied password using the OpenVMS native password-authentication mechanism.
• Host-based authentication. This method allows you to avoid specifying any secret information about the SSH client. Host-based authentication method trusts the relationships between hosts and does not require you to prove your identity.
The SSH server host authenticates by verifying the following:
— The identity of the client host using the client's host public key file, which the system manager maintains in the known hosts database. The directory [TCPIP$SSH.SSH2.KNOWNHOSTS] contains public keys for all client hosts that use the host-based authentication method to connect to the server.
— That the client host belongs to the trusted hosts list, which the system manager maintains on the server. This list of trusted hosts enables you to log in to the server without proving your identity.
— Optionally, you can restrict users to only certain user names on the client host.
Chapter 328

Customizing the SSH Run-Time EnvironmentCustomizing an Authentication Method
• If any of these checks fail, the connection is refused. An advantage of this method is that it does not require the client to type a password or passphrases or to generate, distribute, and maintain keys. This is convenient for batch processing. One disadvantage, however, is a reliance on the identification of the host.
This method requires that the server manager maintain two pieces of information:
1. The knownhost database, which contains the public key files of remote hosts.
2. A trusted hosts file, which lists the trusted hosts (and, optionally, the user names).
• Public-key authentication. This method uses public-key cryptography to verify the client's identity and requires two pieces of data: your private-public key pair, and, optionally, a passphrase to encode this key for saving it in a file. This method is flexible because it allows additional control over authorization by providing multiple keys and by applying restrictions to each key.
Public-key authentication requires management actions on both ends of an SSH connection: both the user on the client host and the system manager on the server host must create and maintain keys on the client, copy public keys from the client to the server hosts, and remember passphrases.
Customizing an Authentication MethodThe type of authentication that the SSH client uses is specified by assigning values to the AllowedAuthentications keyword in the client configuration file SSH2_CONFIG. The client tries user authentication methods in the order in which they are listed for the AllowedAuthentications keyword. For example, if hostbased is listed first, the SSH server tries hostbased authentication first.
On the SSH server host, the order in which the authentication methods are listed is not important. On the SSH client, the order is the defining factor. For example, the client lists the following:
AllowedAuthentications hostbased,publickey,password
In this case, the server tries each method in turn (first host based, then public key, then password) and uses the first successful authentication.
If the AllowedAuthentications keyword is missing or has no entries, the server tries the public-key authentication method first, and then the password authentication method. In this case, host-based authentication is not tried.
Customizing Password Authentication
Password authentication requires only that you set parameters in the SSH client host and server host configuration files. No additional files are required. Password authentication is the default.
Customizing Password Authentication on the Client
Set the value of the AllowedAuthentications keyword to include the word password (or omit the line). For example:
AllowedAuthentications password
Chapter 3 29
Customizing the SSH Run-Time EnvironmentCustomizing an Authentication Method
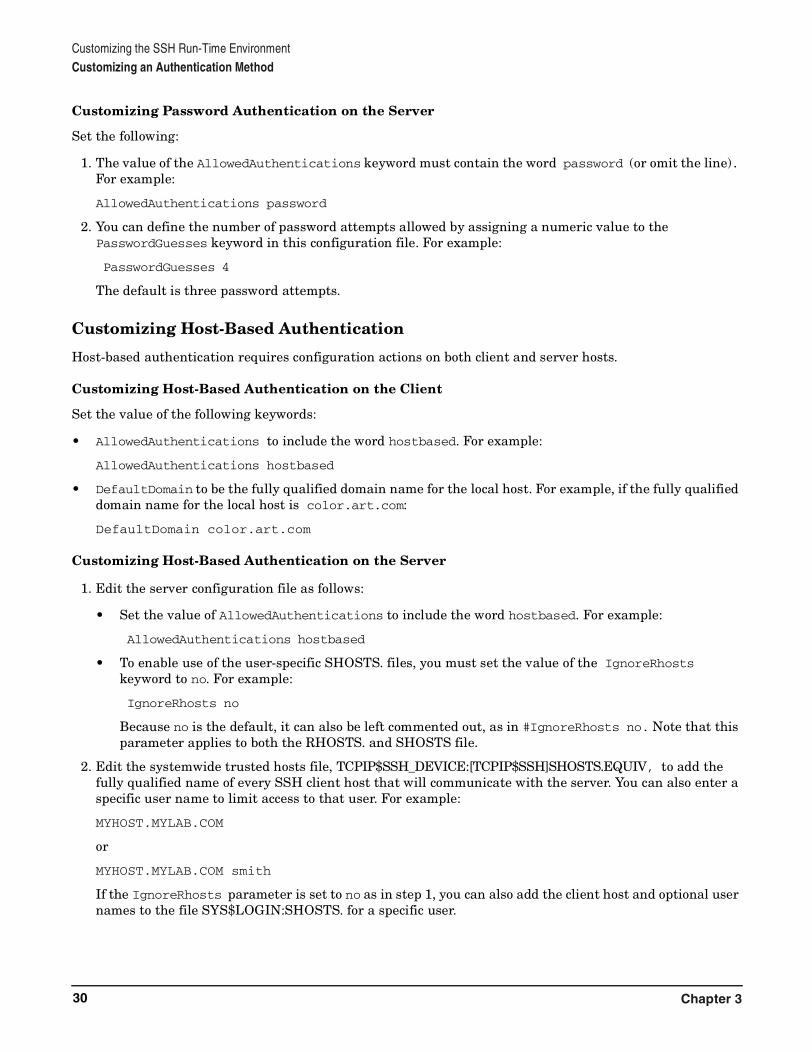
Customizing Password Authentication on the Server
Set the following:
1. The value of the AllowedAuthentications keyword must contain the word password (or omit the line). For example:
AllowedAuthentications password
2. You can define the number of password attempts allowed by assigning a numeric value to the PasswordGuesses keyword in this configuration file. For example:
PasswordGuesses 4
The default is three password attempts.
Customizing Host-Based Authentication
Host-based authentication requires configuration actions on both client and server hosts.
Customizing Host-Based Authentication on the Client
Set the value of the following keywords:
• AllowedAuthentications to include the word hostbased. For example:
AllowedAuthentications hostbased
• DefaultDomain to be the fully qualified domain name for the local host. For example, if the fully qualified domain name for the local host is color.art.com:
DefaultDomain color.art.com
Customizing Host-Based Authentication on the Server
1. Edit the server configuration file as follows:
• Set the value of AllowedAuthentications to include the word hostbased. For example:
AllowedAuthentications hostbased
• To enable use of the user-specific SHOSTS. files, you must set the value of the IgnoreRhosts keyword to no. For example:
IgnoreRhosts no
Because no is the default, it can also be left commented out, as in #IgnoreRhosts no. Note that this parameter applies to both the RHOSTS. and SHOSTS file.
2. Edit the systemwide trusted hosts file, TCPIP$SSH_DEVICE:[TCPIP$SSH]SHOSTS.EQUIV, to add the fully qualified name of every SSH client host that will communicate with the server. You can also enter a specific user name to limit access to that user. For example:
MYHOST.MYLAB.COM
or
MYHOST.MYLAB.COM smith
If the IgnoreRhosts parameter is set to no as in step 1, you can also add the client host and optional user names to the file SYS$LOGIN:SHOSTS. for a specific user.
Chapter 330

Customizing the SSH Run-Time EnvironmentCustomizing an Authentication Method
If user names are used, those associated with OpenVMS client hosts must be in lowercase; those associated wih UNIX client hosts must match the account name case as it exists on the UNIX host.
3. In host-based authentication, the client and server hosts authenticate each other. Therefore, the server host must have the client's host public key. Copy the client's host public-key file, CLIENTHOST::TCPIP$SSH_DEVICE:[TCPIP$SSH.SSH2]HOSTKEY.PUB, to the server directory SERVERHOST::TCPIP$SSH_DEVICE:[TCPIP$SSH.SSH2.KNOWNHOSTS], naming the key file name, using the format fully-qualified-hostname_ssh-dss.pub. For example, if the host name is green and its domain name is color.art.com, copy it as follows:
$COPY SYS$LOGIN:[SSH2.KNOWNHOSTS]green_color_art_com_ssh-dss.pub -_$ SERVERHOST::TCPIP$SSH_DEVICE:[TCPIP$SSH.SSH2.KNOWNHOSTS]- _$ green_color_art_com_ssh-dss.pub/PROTECTION=(W=RE)
4. If you want your own version of the host public key files (in addition to the systemwide file specified in step 3), copy the file into your [username.SSH2.KNOWNHOSTS] directory. If the same file exists in both directories, the SSH server uses the user-specific key-name file in your user directory.
Customizing Public-Key Authentication
Public-key authentication requires the following configuration actions on both sides of the connection: client and server hosts.
1. Create public/private key pairs on the client host. For more information, see the section “Customizing Public-Key Authentication on the Client” on page 31.
2. Install your public key in your accounts on all server hosts to which you want to connect. Your user account on each server host might have many public keys for accessing it in different ways.
To install keys, you need two files:
• On the client host, you need the file[username.SSH2]IDENTIFICATION, which identifies your private-key file.
• On the server host, you need the file [username.SSH2]AUTHORIZATION, which contains information about all public keys (the names of the corresponding files) that can be used by remote clients to identify themselves to the server.
Both are ASCII text files that contain keywords and assigned values. These files are parsed by the client and the server, allowing each server host to identify the public key of the user who is connecting to the server. The following two sections describe the steps you should perform.
Customizing Public-Key Authentication on the Client
1. Edit the client configuration file by setting the value of the AllowedAuthentications keyword to include word publickey. For example:
AllowedAuthentications publickey, password
2. Create the subdirectory [username.SSH2], if one does not exist.
3. From the user account, run the SSH_KEYGEN utility, as described in Chapter 5 . This action creates the public private key files:
• [username.SSH2]ID_DSA_1024_A. contains your private key, which you must protect so that only you can access it. To protect the file, use the DCL command SET FILE/PROTECTION. For example:
$ SET FILE/PROTECTION=(S,W,G,O:RW) ID_DSA_1024_A.
• [username.SSH2]ID_DSA_1024_A.PUB contains your public key, which you can copy to other hosts. Ensure that this file is available for world read access.
Chapter 3 31

Customizing the SSH Run-Time EnvironmentCustomizing an Authentication Method
These file names are generated by default if you do not specify a file name with the SSH_KEYGEN utility. This default name includes identification of the default key generation algorithm, which is usually DSA (Digital Signature Algorithm) or RSA (Rivest, Shamir, and Adleman). Note that DSA is the default on OpenVMS; RSA is an option.
The SSH_KEYGEN command allows specification of a custom key name (and, optionally, suppression of the passphrase with the -P flag). Also, you can rename these files for convenience. For example, if multiple keys are necessary, the public key to be used with a particular SSH server host can be renamed to file names in the format: username-serverhostname.PUB (public key) and username-serverhostname. (private key). Using this convention makes it easier to copy designated public key files to the appropriate server hosts.
The examples in step 4 assume that the public and private key files have been either generated as or renamed to the file MEUSER-MYHOST_MYDOMAIN_COM.*.
4. Create a file called [username.SSH2]IDENTIFICATION. and add a line that identifies the name of your private key. For example, if this key file name were used:
MEUSER-MYHOST_MYDOMAIN_COM.
This line would be added:
IdKey MEUSER-MYHOST_MYDOMAIN_COM
Customizing Public-Key Authentication on the Server
1. Set the value of the AllowedAuthentications keyword in the server configuration file to include the word publickey. For example:
AllowedAuthentications publickey
2. Create the subdirectory [username.SSH2] (if one does not exist).
3. Create the file [username.SSH2]AUTHORIZATION.
4. Add entries in the [username.SSH2]AUTHORIZATION file as necessary. Each entry is a single line that identifies the user’s client public key file name. The format of the entry is: KEY username-hostname.PUB
For example, if the user’s public key file name is:
MEUSER-MYHOST_MYDOMAIN_COM.
Add this line to the AUTHORIZATION file:
KEY MEUSER-MYHOST_MYDOMAIN_COM.PUB
5. To authenticate you as the user, the server host must access the public key file, which you created on the client host. For more information about public keys on the client, see “Customizing Public-Key Authentication on the Client” on page 31. Copy this file to your account directory on the server host [username.SSH2] as username-hostname.PUB. Note that the file name must be the same as the one listed on the line with the keyword KEY.
Chapter 332

Managing the SSH ServiceStarting and Stopping the SSH Client
4 Managing the SSH Service
This chapter describes the following topics:
• Starting and Stopping the SSH Client
• Starting and Stopping the SSH Server
• Logical Names
• Managing Auditing
Starting and Stopping the SSH ClientTo start the SSH client, enter this command:
$ @SYS$STARTUP:TCPIP$SSH_CLIENT_STARTUP.COM
To stop the SSH client, enter this command:
$ @SYS$STARTUP:TCPIP$SSH_CLIENT_SHUTDOWN.COM
You can also start and stop the SSH client from TCPIP$CONFIG.
Starting and Stopping the SSH ServerTo start the SSH server, enter this command:
$ @SYS$STARTUP:TCPIP$SSH_STARTUP.COM
To stop the server, enter this command:
$ @SYS$STARTUP:TCPIP$SSH_SHUTDOWN.COM
If the Enable service option (1) is chosen from the menu during SSH service configuration, as shown in the SSH Configuration menu, the SSH server will restart when TCP/IP Services is restarted.
Chapter 4 33

Managing the SSH ServiceSSH Logical Names
SSH Configuration
Service is not defined in the SYSUAF.
Service is defined in the TCPIP$SERVICE database.
Service is not enabled.
Service is stopped.
SSH configuration options:
1 - Enable service on this node
[E] - Exit SSH configuration
Enter configuration option: 1
You can also start and stop the SSH server from TCPIP$CONFIG.
SSH Logical NamesThe logical names described in Table 4–1 can be used to modify the behavior of the SSH service.
Table 4-1 Logical Names
Name Function
TCPIP$SSH_DEVICE Defines the device on which the SSH client default directory is located. If you do not define this logical, the default is SYS$SYSDEVICE.
TCPIP$SSH_HOME Defines the OpenVMS equivalent of the /etc directory on UNIX systems. Used internally by SSH software. Translates to:TCPIP$SSH_DEVICE:[TCPIP$SSH].
TCPIP$SSH_AGENT_PORT Defines the port on which an SSH authentication agent listens for connections from clients. Used internally by SSH software, and defined only in the job table for a process and its subprocesses.
TCPIP$SSH_CLIENT_PORT Defines the port on which a client of an SSH authentication agent communicates with the agent. Used internally by SSH software, and defined only in the job table for a process and its subprocesses.
Chapter 434

Managing the SSH ServiceManaging Auditing
Managing AuditingYou can included the following options in the configuration files to control auditing functions.
NOTE The default settings are used for options that do not appear in the configuration file.
Auditing Options for the Client Configuration File
NumberOfPasswordVerificationPrompts
Allowed values: An integer greater than 0Default: 3Description: Specifies the number of times the client user is allowed to fail verification of the new password when forced to change it on login. Applies to OpenVMS-to-OpenVMS connections only.
PubkeyPassphraseGuesses
Allowed values: An integer greater than 0Default: 3Description: Specifies the number of guesses the client user is allowed for the passphrase associated with public/private key pair. Used for public key authentication method only. The value of this option affects connections to servers on all platforms, including those on non-OpenVMS systems that may have problems associated with passphrase entry.When the value is different on an OpenVMS client and the associated OpenVMS server, the lower value takes precedence.Each prompt for passphrase is of the following format:Passphrase for key "ssh2/KAREN-SELFDBOB_SQA_UCX_ABC_ACME_COM"with comment "1024-bit dsa, [email protected],Wed May 21 2003 12:42:14":
If the user enters an incorrect passphrase, the prompt appears the number of times specified for the PubkeyPassphraseGuesses option.
NumberOfHostkeyCopyPrompts
Allowed values: an integer greater than 0Default: 3Description: Specifies the number of times the client user gets prompted to answer yes or no when asked about continuing to start an SSH session, if there is no host key and the value of StrictHostKeyChecking is ask.
Auditing Options for the Server Configuration File
LogfailAuthentications
Allowed values: password, hostbased, all, noneDefault: passwordDescription: Specifies the authentication methods for which the SYSUAF login failure count is updated for the user.The following command displays the number of login failures: MCR AUTHORIZE SHOW username
IntrusionAuthentications
Allowed values: password, hostbased, all, noneDefault: password
Chapter 4 35

Managing the SSH ServiceManaging Auditing
Description: Specifies the methods for which the server intrusion database is updated for the user in case of login failure.Displays the contents of the intrusion database: SHOW INTRUSION
IntrusionIdentSsh
Default: publickey, password, hostbasedDescription: For entries in the intrusion database, this option controls whether the string SSH_ is included in the text of the intrusion Source (as displayed by the SHOW INTRUSION command). The value of this option is ignored if IntrusionAuthentications is not active for the specified method.Displays contents of intrusion database: SHOW INTRUSION
IntrusionIdentMethod
Allowed values: password, hostbased, all, noneDefault: publickey, password, hostbasedDescription: For entries in the intrusion database, this option controls whether the authentication method is included in the text of the intrusion Source (as displayed by the SHOW INTRUSION command). The value of this option is ignored if either IntrusionAuthentications or IntrusionIdentSsh is not active for the specified method.Displays the contents of the intrusion database: SHOW INTRUSION
AccountingAuthentications
Allowed values: password, hostbased, all, noneDefault: publickey, password, hostbasedDescription: Specifies the authentication methods for which accounting data is updated.Displays contents of intrusion database: ACCOUNTING
AllowNonvmsLoginWithExpiredPw
Allowed values: yes, noDefault: noDescription: Controls behavior when a non-OpenVMS client attempts to establish an SSH connection to an OpenVMS server account with an expired password. The password change option is implemented for OpenVMS-to-OpenVMS connections only. The value yes allows clients to connect with a warning message and sets the pwd_expired flag in the user’s SYSUAF record. The value no rejects the login.
UserLoginLimit
Allowed values: integers from -1 to 8192Default: -1Description: Controls the number of times individual users can be logged in. If the value is -1, the systemwide limit on interactive logins (SYSGEN parameter IJOBLIM) applies. If the value is greater than zero, the number specifies the maximum number of times that an individual user can log in. -1 = no limit on specific users0 = disable all users1 - 8192 = number of logins permitted for individual usersDisplays details on login processes for USER: SHOW USER /FULL /NODE=serverhost
PubkeyPassphraseGuesses
Allowed values: Integers greater than 0Default: 3Description: Specifies the number of times the client user is allowed to attempt to enter the passphrase associated with public/private key pair. Used for public key authentication method only. In the server configuration file, this value affects all clients, including those on OpenVMS systems.When the value is different on an OpenVMS client and the associated OpenVMS server, the lower value takes precedence.Each prompt for passphrase is of the following format:Passphrase for key "ssh2/KAREN-SELFDBOB_SQA_UCX_ABC_ACME_COM"
Chapter 436

Managing the SSH ServiceManaging Auditing
with comment "1024-bit dsa, [email protected],Wed May 21 2003 12:42:14":
How the Server Performs Auditing
When auditing is enabled for the specified authentication method, the SSH server performs the following functions depending on the type of login and whether the login attempt is successful.
When an interactive login is successful:
• The login failure count is set to 0.
• The last interactive login date is updated to the current date and time.
• If the user’s password has expired but the user is not forced to change it before logging in, a warning message is displayed and the pwd_expired flag is set in the user’s SYSUAF record.
• If the AccountingAuthentications keyword includes the current authentication method, the accounting data is updated.
When a remote command execution is successful, no updates are made to the user’s SYSUAF record. Thus:
• The login failure count is not changed.
• The last noninteractive login date is not updated.
• If the user’s password has expired but the user is not forced to change it before logging in, a warning message is displayed and the pwd_expired flag in the user’s SYSUAF record is not set.
When the login or remote command execution fails:
• The login failure count in the user’s SYSUAF record is incremented.
• If the IntrusionAuthentications keyword includes the current authentication method, the intrusion database is updated with text controlled by the IntrusionIdentSsh and IntrusionIdentMethod keywords in the server configuration file.
• If the AccountingAuthentications keyword includes the current authentication method, the accounting data is updated.
Chapter 4 37

Managing the SSH ServiceManaging Auditing
Chapter 438
Port ForwardingPort Forwarding
5 Port Forwarding
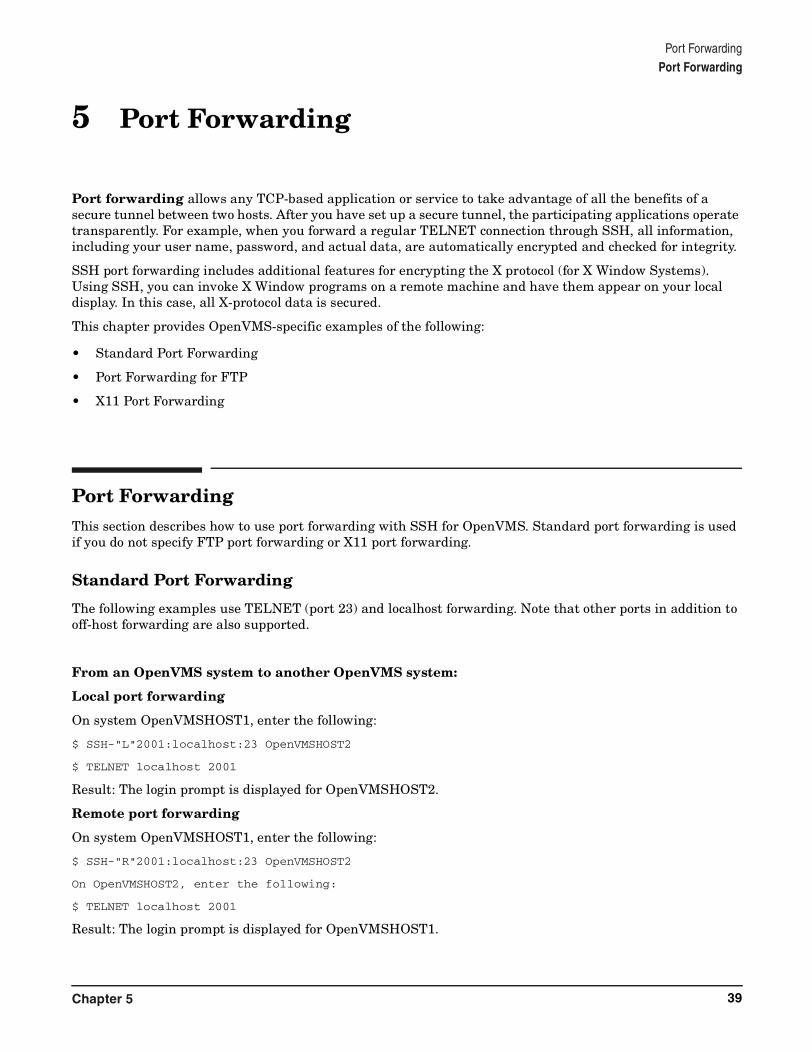
Port forwarding allows any TCP-based application or service to take advantage of all the benefits of a secure tunnel between two hosts. After you have set up a secure tunnel, the participating applications operate transparently. For example, when you forward a regular TELNET connection through SSH, all information, including your user name, password, and actual data, are automatically encrypted and checked for integrity.
SSH port forwarding includes additional features for encrypting the X protocol (for X Window Systems). Using SSH, you can invoke X Window programs on a remote machine and have them appear on your local display. In this case, all X-protocol data is secured.
This chapter provides OpenVMS-specific examples of the following:
• Standard Port Forwarding
• Port Forwarding for FTP
• X11 Port Forwarding
Port ForwardingThis section describes how to use port forwarding with SSH for OpenVMS. Standard port forwarding is used if you do not specify FTP port forwarding or X11 port forwarding.
Standard Port Forwarding
The following examples use TELNET (port 23) and localhost forwarding. Note that other ports in addition to off-host forwarding are also supported.
From an OpenVMS system to another OpenVMS system:
Local port forwarding
On system OpenVMSHOST1, enter the following:
$ SSH-"L"2001:localhost:23 OpenVMSHOST2
$ TELNET localhost 2001
Result: The login prompt is displayed for OpenVMSHOST2.
Remote port forwarding
On system OpenVMSHOST1, enter the following:
$ SSH-"R"2001:localhost:23 OpenVMSHOST2
On OpenVMSHOST2, enter the following:
$ TELNET localhost 2001
Result: The login prompt is displayed for OpenVMSHOST1.
Chapter 5 39

Port ForwardingPort Forwarding
From an SSH for OpenVMS client to a non-SSH for OpenVMS server:
Local port forwarding
On system OpenVMSHOST1, enter the following:
$ SSH -"L"2001:localhost:23 NONVMSHOST
$ TELNET localhost 2001
Result: The login prompt is displayed for NONVMSHOST.
Remote port forwarding
On system OpenVMSHOST1, enter the following command:
$ SSH -"R"2001:localhost:23 NONVMSHOST
On the system NONVMSHOST, enter the following command:
# TELNET localhost 2001
Result: The login prompt is displayed for OpenVMSHOST1.
From a non-SSH for OpenVMS client to an SSH for OpenVMS server:
Local port forwarding
On system NONOPENVMS, enter the following commands:
# SSH -L2001:localhost:23 OpenVMSHOST1
# TELNET localhost 2001
Result: The login prompt is displayed for OpenVMSHOST1.
Remote port forwarding
On system NONOPENVMS, enter the following command:
# SSH -R2001:localhost:23 OpenVMShost1
On system OpenVMSHOST1, enter the following command:
$ TELNET localhost 2001
Result: The login prompt is displayed for OpenVMSHOST1.
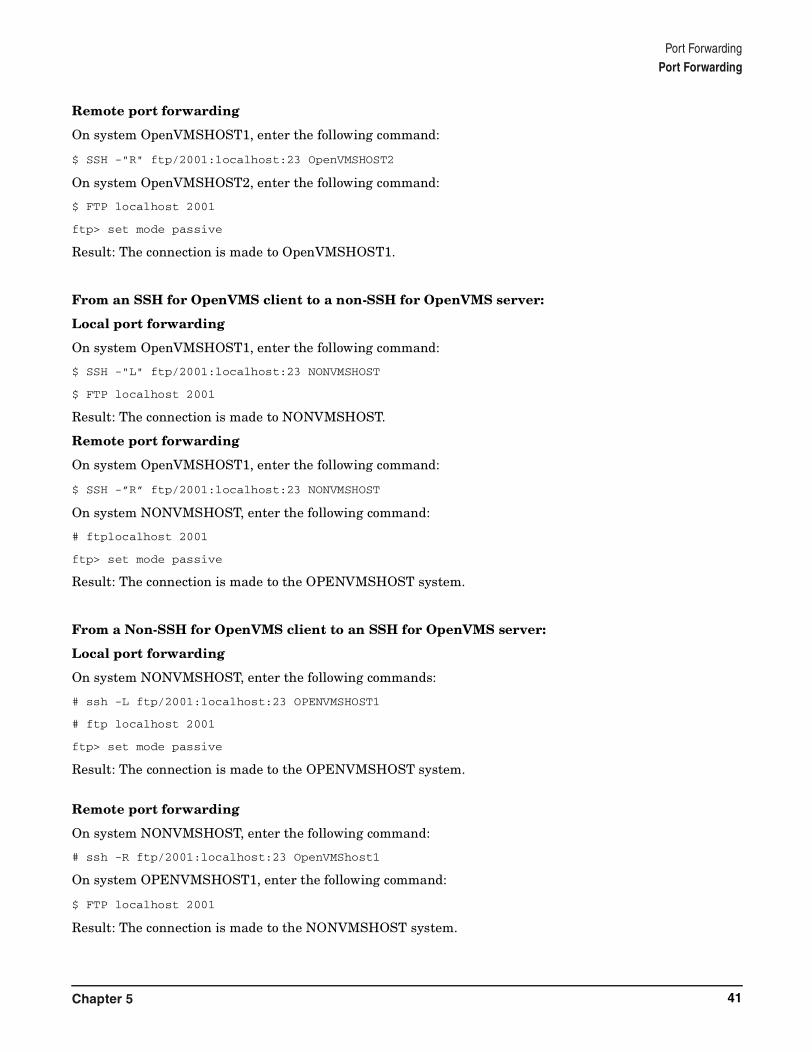
Port Forwarding for FTP'
Local and remote port forwarding are specified using the -"L" and -"R" options, as shown in the examples for Standard Port Forwarding. You must also specify the FTP protocol and set the connection to passive mode, when connecting to an OpenVMS FTP server, as shown in the following examples.
From an OpenVMS system to another OpenVMS system:
Local FTP port forwarding
On system OpenVMSHOST1, enter the following commands:
$ SSH -"L" ftp/2001:localhost:23 OpenVMSHOST2
$ FTP localhost 2001
ftp> set mode passive
Result: A secure FTP connection is established.
Chapter 540
Port ForwardingPort Forwarding
Remote port forwarding
On system OpenVMSHOST1, enter the following command:
$ SSH -"R" ftp/2001:localhost:23 OpenVMSHOST2
On system OpenVMSHOST2, enter the following command:
$ FTP localhost 2001
ftp> set mode passive
Result: The connection is made to OpenVMSHOST1.
From an SSH for OpenVMS client to a non-SSH for OpenVMS server:
Local port forwarding
On system OpenVMSHOST1, enter the following command:
$ SSH -"L" ftp/2001:localhost:23 NONVMSHOST
$ FTP localhost 2001
Result: The connection is made to NONVMSHOST.
Remote port forwarding
On system OpenVMSHOST1, enter the following command:
$ SSH -”R” ftp/2001:localhost:23 NONVMSHOST
On system NONVMSHOST, enter the following command:
# ftplocalhost 2001
ftp> set mode passive
Result: The connection is made to the OPENVMSHOST system.
From a Non-SSH for OpenVMS client to an SSH for OpenVMS server:
Local port forwarding
On system NONVMSHOST, enter the following commands:
# ssh -L ftp/2001:localhost:23 OPENVMSHOST1
# ftp localhost 2001
ftp> set mode passive
Result: The connection is made to the OPENVMSHOST system.
Remote port forwarding
On system NONVMSHOST, enter the following command:
# ssh -R ftp/2001:localhost:23 OpenVMShost1
On system OPENVMSHOST1, enter the following command:
$ FTP localhost 2001
Result: The connection is made to the NONVMSHOST system.
Chapter 5 41

Port ForwardingPort Forwarding
X11 Port Forwarding
SSH for OpenVMS does not support the standard SSH mechanism for implementing X11 port forwarding (using the -x or +x SSH command-line options, or the ForwardX11 keyword in the client configuration file. This section explains how to achieve the same functionality with supported commands.
The following examples use standard SSH port forwarding and a well-known X11 port (6000). The clock program is used in these examples.
Enabling Access to the X11 Server
X11 access to an OpenVMS X11 server requires enabling access to the X11 client. On HP DECwindows Motif for OpenVMS Systems, this can be done through the Style Manager/security option.
1. Add the appropriate values for node and user name, and the value tcpip as the transport. Details of how to enable access on other platforms may differ.
2. To direct output to the forwarded X11 server port, enter the following command:
$ SET DISPLAY/CREATE/NODE=localhost/SERVER=3/TRANSPORT=tcpip
The /SERVER qualifier allows you to specify an X11 port other than the default of 6000. The value 3, as specified in this example, maps to port number 6003. For more details about the SET DISPLAY command, see the HP OpenVMS DCL Dictionary.
To terminate the display, exit the X11 client application, log out of the SSH session, and enter the following command:
$ SET DISPLAY /DELETE
X11 Port Forwarding Examples
From an OpenVMS system to an OpenVMS system:
Local port forwarding
On system OpenVMSHOST2, enable access by the X11 client.
On system OpenVMSHOST1, enter the following commands:
$ SSH -"L"6003:localhost:6000 OpenVMSHOST2
$ MCR DECW$CLOCK
Result: The clock is displayed for the OPENVMSHOST2 system.
Remote port forwarding
On system OpenVMSHOST1, enable access by the X11 client and then enter the following command:
$ SSH -"R"6003:localhost:6000 OpenVMSHOST2
On system OpenVMSHOST2, direct output to the forwarded X11 server port and then enter the following command:
$ MCR DECW$CLOCK
Result: The clock is displayed for the OPENVMSHOST1 system.
Chapter 542

Port ForwardingPort Forwarding
From an SSH for OpenVMS client to a non-SSH for OpenVMS server:
Local port forwarding
On system NONVMSHOST, enable access by the X11 client.
On system VMSHOST1, direct output to the forwarded X11 server port and enter the following commands:
$ SSH -"L"6003:localhost:6000 NONVMSHOST
$ MCR DECW$CLOCK
Result: The clock is displayed for the NONVMSHOST system.
Remote port forwarding
On the OpenVMSHOST1 system, enable access bythe X11 client and enter the following command:
$ SSH -"R"6003:localhost:6000 NONVMSHOST
On system NONVMSHOST, direct output to the forwarded X11 server port and enter the following command:
# xclock &
Result: The clock is displayed for the OPENVMSHOST1 system
From a non-SSH for OpenVMS client to an SSH for OpenVMS server:
Local port forwarding
On system OPENVMSHOST1, enable access by the X11 client.
On system NONVMSHOST, enable access to the forwarded X11 server port and enter the following commands:
# ssh -L6003:localhost:6000 OPENVMSHOST1
# xclock &
Result: The clock is displayed for the OPENVMSHOST1 system.
Remote port forwarding
On system NONVMSHOST, enable access to the X11 client and enter the following command:
# ssh -R6003:localhost:6000 OPENVMSHOST1
On system OPENVMSHOST1, enable access to the forwarded X11 server port and enter the following command:
$ MCR DECW$CLOCK
Result: The clock is displayed for the NONVMSHOST system.
Chapter 5 43

Port ForwardingPort Forwarding
Chapter 544

SSH Command ReferenceBefore You Begin
6 SSH Command Reference
This chapter describes SSH commands that you can use to invoke SSH, copy or transfer files, and manage keys.
Before You BeginTo use SSH client utilities at the DCL prompt, run the TCPIP$DEFINE_COMMANDS.COM command procedure. Enter the following command:
$ @SYS$MANAGER:TCPIP$DEFINE_COMMANDS.COM
NOTE When you specify uppercase options, enclose them in quotation marks, for example, “-D”.
Copying FilesYou can use the following Secure Shell commands to copy files between clients and servers:
• SCP (or SCP2)
• SFTP (or SFTP2)
Using the SCP Command
The SCP command securely copies files between a Secure Shell client and server. This command is intended as a secure replacement for the rcp command. When the user enters the SCP command, the client establishes an SSH session. If authentication succeeds and the user's identity has been accepted by the server, the server executes the command. All communication is automatically encrypted. The session terminates when the command completes. The SCP command does not require special privileges.
Command Synopsis
SCP [-D debug_level] [-d] [-q] [-Q] [-p] [-u] [-v] [-h] [-r] [-k] [-B] [-a] [-v] [-1]
[-c cipher] [-S ssh-path] [-P ssh-port] [-o ssh-option] [-b] [-N] [-V] [-h]
source-name destination-name
Parameters
source-name specifies the file to be copied.
destination-name specified the location and file name for the copied file.
Chapter 6 45

SSH Command ReferenceCopying Files
The general format for the source and destination name is user@host#port:[directory]file-name. You can copy files or entire directories.
Options
You can use the options in Table 6-1 with the SCP command.
Table 6-1 SCP Command Options
Option Description
-D debug-level Displays debug information to SYS$OUTPUT. The debug-level is a number between 0 and 99, where 99 specifies that all debug information should be displayed.
-d Makes sure that the destination-name parameter is a directory. If not, the SCP command exits with an error message.
-q Makes SCP quiet (only fatal errors are displayed).
-Q Suppresses the progress indicator.
-p Preserves file attributes and timestamps.
-u Removes source files after copying.
-k Replaces files of the same name at the destination. This option applies to SSH for OpenVMS servers only.
-B Sets batch mode on.
-r Recurses subdirectories.
-a Transfers files in ASCII mode.
-v Displays information in verbose mode. This is equal to specifying the -D 2 option.
-c cipher Specifies the encryption algorithm to use. See the ciphers keyword in the client configuration file for more information (Appendix B). Each -c option can specify only one cipher; multiple -c options are allowed.
-S ssh-path Specifies an alternate location for the SSH server executable file.
-P ssh-port Tells SCP which port the SSH server listens on.
-o ssh-option Specifies client configuration options that override any options specified in the client configuration file (see Appendix B).
-b Defines the maximum buffer size for one request (default is 2048 bytes).
-N Defines the maximum buffer size of concurrent requests (default is 10).
-V Displays the version of SSH.
-h Displays information about using the SCP utility.
Chapter 646

SSH Command ReferenceCopying Files
Example
The following example shows how to copy files from a local system FILE.TXT to a remote system (VMSHOST) and into the directory [MYDIR].
$ SCP FILE.TXT KATHY@VMSHOST:DSK0:[MYDIR]
The following example shows how to copy FILE.TXT from a remote system (VMSHOST) to a local system and renaming it to LOCAL_FILE.TXT:
$ SCP KATHY@VMSHOST:DSK0:[MYDIR]FILE.TXT LOCAL_FILE.TXT
Using the SFTP Command
You can use the SFTP command on a client to copy files to and from a server. Some SFTP commands and syntax are similar to those for the FTP command, but SFTP does not use the FTP server or the FTP client for its connections. The SFTP command runs with normal user privileges.
Command Synopsis
SFTP [-D ] [-b batchfile] [-S path][-h][-v] [-P ssh-port] user@host
For more details about SFTP commands, enter help or help topic at the sftp> prompt. For example, to find more information about the open command, enter the following command:
sftp> help open
Parameters
The user@host parameter specifies the user name and host name of the destination for the file transfer.
Options
You can use the options in Table 6-2 with the SFTP command.
Example
• The following example shows how to invoke SFTP. Enter SFTP commands at the sftp> prompt. For a list of SFTP commands, enter the help command at the sftp> prompt.
$ SFTP
sftp>
Table 6-2 SFTP Command Options
Option Description
-D debug-level Displays debug information. The debug-level value is a number between 0 and 99, where 99 specifies that all debug information should be displayed.
-b batchfile Reads commands from a file instead of from SYS$INPUT.
-S ssh-path Specifies an alternate location for the SSH server executable file.
-h Displays information about how to use the SFTP utility.
-V Displays the version of SSH.
-P Tells SFTP on which port the SSH server is listening.
Chapter 6 47

SSH Command ReferenceRemote Login and Command Execution with the SSH Command
Remote Login and Command Execution with the SSH CommandThe SSH command creates a secure network connection for remote login and remote command execution. This command is intended as a secure replacement for the RLOGIN and RSH commands. When the user enters the SSH command, the SSH client establishes a session with the server and proves the user's identity to the server using a chosen authentication method, as described in Chapter 3. When the user's identity has been accepted by the SSH server, all communication with the remote SSH server is automatically encrypted.
On the client, you can use the SSH command to securely log in remotely and execute remote commands.
Command Synopsis
SSH [-l login_name] [-i file] [-F file] [-v][-d debug-level] [-V] [-q] [-e char] [-c cipher] [-m MAC][-p port] [+C] [-C] [-h] [username@]host[#port] [command]
Parameters
The username@host#port parameter specifies the user name, the remote host, and the port on the remote host to which to make a connection. The command parameter specifies one or more commands to be executed on the remote host.
Options
You can use the options in Table 6-3 with the SSH command.
Table 6-3 SSH Command Options
Options Description
-l login_name Specifies the user for login to the remote system (same as login_name@host).
-i file Specifies the identity file for public-key authentication. This option takes the file name as a parameter. It is assumed that the file resides in the user’s [.SSH2] directory. This option can also be specified in the configuration file.
-F file Specifies an alternative client host configuration file instead of the default file. The specified file name must include the directory where the file resides. For example: [.SSH2]MY_SSH2_CONFIG. Information from this file supersedes information from TCPIP$SSH_DEVICE:[TCPIP$SSH]SSH2_CONFIG. and the user’s [.SSH2]SSH2_CONFIG. file.
-v Enables verbose mode. Displays verbose debugging messages. Equivalent to the -d2 option. This option can also be specified in the client’s configuration file.
-d debug-level Displays debug information. The debug-level value is a number from 0 to 99, where 99 specifies that all debug information or a comma-separated list of assignments should be displayed.
-q Disables warning messages. This option can also be specified in the client’s configuration file.
Chapter 648

SSH Command ReferenceRemote Login and Command Execution with the SSH Command
-V Displays the version of SSH.
-c cipher Specifies the encryption algorithm to use. For more information, see the cipher keyword in the SSH2_CONFIG. configuration file. A single -c option can specify only one cipher. Multiple -c options are allowed.
-m mac Specifies the MAC (Message Authentication Code) algorithm. For more information, see the MAC keyword in the SSH2_CONFIG. configuration file. Each -m option can have only one MAC; multiple -m options are allowed.
-p port Specifies the port to connect to on the remote system. This option can also be specified in the client’s configuration file.
+C Enables compression.
-C Disables compression (default).
-o option Specifies an option in the format used in the SSH2_CONFIG. configuration file. This is useful for specifying an option for which there is no command-line option. Comment lines are not accepted with this option.
-L [protocol/] port:host:hostport Specifies that the given port on the local (client) system is to be forwarded to the specified host and port on the remote system. This allocates a socket to listen to the port on the local system. Whenever a connection is made to this port, the connection is forwarded over the secure channel, and a connection is made to the specified host on the specified port from the remote system.Only privileged user accounts can forward privileged ports. The protocol enables the forwarding for the specified protocol. The protocols implemented are TCP and FTP; the default is no specific processing.Temporary forwardings are created for the FTP data channel, effectively securing the whole FTP session. This option can also be specified in the client configuration file (see Appendix B). FTP data channel forwarding works in passive mode only. Be sure to set passive mode for FTP data channel connections (see Chapter 7).
Table 6-3 SSH Command Options (Continued)
Options Description
Chapter 6 49

SSH Command ReferenceUsing the SSH_KEYGEN Utility
To execute remote commands, enter the SSH command in this format:
SSH [options] server_name [command]
When a user successfully logs in, the SSH server process does the following:
• Runs with the user's privileges.
• Sets up a user environment.
• Sets default to the user's home directory.
• Executes the requested command.
Example
The following example shows how to execute the SHOW SYSTEM command on the remote host VMSHOST.
$ SSH VMSHOST SHOW SYSTEM
Using the SSH_KEYGEN Utility
SSH_KEYGEN is the key-pair generation utility that generates and manages authentication keys for SSH. Users who need to use SSH with public-key authentication can run this utility to create authentication keys. The system administrator can also use this utility to generate host keys.
Command Synopsis
SSH_KEYGEN [-b key-number] [-t key_algorithm] [-c comment_string] [-e file] [-p passphrase] [-P ] [-h ] [-q] [-1 file] [-i file] [-D file] [-B number] [-V] [-r file] [-F file] [key1 key2...]
-R [protocol/] port:host:hostport Specifies that the given port on the remote (server) system is to be forwarded to the specified host and port on the local system. This allocates a socket to listen to the port on the remote system. Whenever a connection is made to this port, the connection is forwarded over the secure channel, and a connection is made to the specified host and port from the local system.Only privileged user accounts can forward privileged ports on the remote system. The protocol argument enables protocol-specific forwarding. The protocols implemented are TCP and FTP; the default is no specific processing.Temporary forwardings are created for FTP data channel, effectively securing the whole FTP session.This option can also be specified in the client’s configuration file (see Appendix B).The FTP data channel forwarding works in passive mode. Be sure to set passive mode for FTP data channel connections (see Chapter 7).
-h Displays information about using the SSH utility.
Table 6-3 SSH Command Options (Continued)
Options Description
Chapter 650

SSH Command ReferenceUsing the SSH_ADD Utility
Parameters
The [key1 key2...] parameter specifies the name of one or more keys to generate.
Options
You can use the options listed in Table 6-4 with the SSH_KEYGEN command.
Using the SSH_ADD UtilityThe SSH_ADD utility adds private keys into the authentication agent. The authentication agent must have been started, usually with the SSH_AGENT utility, and must be running in a subprocess of the current process.
If a private key requires a passphrase, the SSH_ADD utility prompts you to enter it. Passphrases never go over the network.
For SSH_ADD to process a key, both the private and public key files must be present in the same directory. On OpenVMS, a public key file name must have the file extension .PUB (for example, MYKEY.PUB). A private key file name has no file extension (for example, MYKEY.).
Table 6-4 SSH_KEYGEN Command Options
Options Description
-b key-number Number of the key, in bits. The default is 2048.
-t key-algorithm Specifies the algorithm used to generate the keys. Specify either DSA or RSA.
-c comment-string Specifies the key's comment string.
-e file Edits the comment/passphrase of the key.
-p passphrase Specifies the passphrase used to protect the key.
-P Specifies that the key will be saved with an empty passphrase.
-h | -? Displays a short summary of SSH_KEYGEN options.
-q Hides the progress indicator.
-D file Derives the public key from the private key file.
-1 Converts an SSH1 key.
- i file Loads and displays information on a file.
-B number The number base for displaying key information. The default is 10.
-V Displays the version string and exits.
-r file Randomizes data from a file to a random pool.
-F file Dumps the fingerprint (a unique identifier) of the key file.
Chapter 6 51

SSH Command ReferenceUsing the SSH_ADD Utility
Command Synopsis
SSH_ADD [-l] [-d] [-D] [-L] [-U] [files...]
Parameters
The files... parameter specifies one or more public or private key files to load. If you do not specify any key files, SSH_ADD reads the client configuration file (SSH2_CONFIG.) and the IDENTIFICATION. file. If these files do not exist, SSH_ADD exits with an error message. SSH_ADD adds the keys listed in the IDENTIFICATION. file. The utility then adds any private key files it finds in the user’s SSH directory. Note that any file names in the SSH directory that begin with the letters “id” and that do not have the file extension .PUB are assumed to be key files. For example, a file named id_22.txt will cause SSH_ADD to fail.
Options
You can use the options in Table 6-5 with the SSH_ADD command.
Description
SSH_ADD attempts to load the identities from the specified key files.
Return Status
SSH_ADD returns one of the following exit codes in the case of an error.
TCPIP$_SSH_ADD2_EXIT_NOAGENT -- No connection could be made to the authentication agent. Presumably there is no authentication agent active in the execution environment of the SSH_ADD utility.TCPIP$_SSH_ADD2_EXIT_BADPASS -- The user did not supply a required passphrase.TCPIP$_SSH_ADD2_EXIT_NOFILE -- An identity file could not be found, was unreadable, or was in the wrong format.TCPIP$_SSH_ADD2_EXIT_NOIDENTITY -- The agent does not have the requested identity.TCPIP$_SSH_ADD2_EXIT_ERROR -- An unspecified error has occurred.
Example
• In the following example, the SSH_AGENT is not running:
Table 6-5 SSH_ADD Command Options
Options Description
-l Lists all identities currently represented by the agent.
-d Removes the identity from the agent.
-D Deletes all identities from the agent.
-L Temporarily locks the agent with a password.
-U Unlocks the locked agent. The password given when the agent was locked must be used to unlock.
Chapter 652

SSH Command ReferenceUsing the SSH_AGENT Utility
$ SSH_ADDFailed to connect to authentication agent -- agent not running?%TCPIP-E-SSH_ADD2_EXIT_N, no connection could be made to the authentication agent
• In the following example, SSH_ADD adds the keys it finds in the IDENTIFICATION. file:
$ SSH_ADDUnable to open ssh2/ssh2_configUnable to open ssh2/identificationAdding identity: ssh2/id_dsa_1024_a.pubNeed passphrase for "ssh2/id_dsa_1024_a." (1024-bit dsa, [email protected], Mon Aug 11 2003 15:39:46). Enter passphrase:
Using the SSH_AGENT UtilityThe SSH_AGENT utility starts the SSH authentication agent to use an SSH client that is configured to use public-key user authentication. Because the authentication agent holds private keys in memory, the user does not need to enter a passphrase if one exists for the key being used. As long as the agent is running, all key-related operations are directed to the agent.
On startup, the agent does not hold any private keys. Keys are added by using the SSH_ADD command. Several identities can be stored in the agent, and the agent can use any of these identities automatically. The command SSH_ADD -l displays the identities currently held by the agent.
When the SSH agent starts up, it assigns the logical name TCPIP$SSH_AGENT_PORT in the process job table, which is shared by a process and its subprocesses. Client programs use this value to start communication with the agent, in turn assigning the logical name TCPIP$SSH_CLIENT_PORT. The agent uses the latter logical name to check that the client is a valid user on the same job (that is, in the parent of the agent subprocess).
The agent terminates when the user logs out or stops the agent.
Command Synopsis
SSH_AGENT
Examples
• The following example shows a normal agent startup and displays the value of the TCPIP$SSH_AGENT_PORT logical name:
$ ssh_agent
%DCL-S-SPAWNED, process USER01_67 spawned
$ show user/full USER01
OpenVMS User Processes at 12-AUG-2003 13:49:36.29
Total number of users = 1, number of processes = 2
Username Process Name PID Terminal
USER01 USER01 00000B53 RTA1: (SYS01::USER01)
Chapter 6 53

SSH Command ReferenceUsing the SSH_AGENT Utility
USER01 USER01_67 00000EB8 (subprocess of 00000B53)
$ show logical TCPIP$SSH_AGENT_PORT
"TCPIP$SSH_AGENT_PORT" = "49198" (LNM$JOB_81425DC0)
• The following example shows an attempt to start a second agent within the same parent process.
$ ssh_agent
%DCL-S-SPAWNED, process USER01_253 spawned
$
Agent already running on port: 49198.
Cannot start agent
%TCPIP-F-SSH_FATAL, non-specific fatal error condition
• The following example shows the message displayed when a client not in the current user's job attempts to connect to the user’s agent subprocess:
$
Possible security attack.
Actual socket port of client: 49202 did not match value of logical name
TCPIP$SSH_CLIENT_PORT: ""
Chapter 654
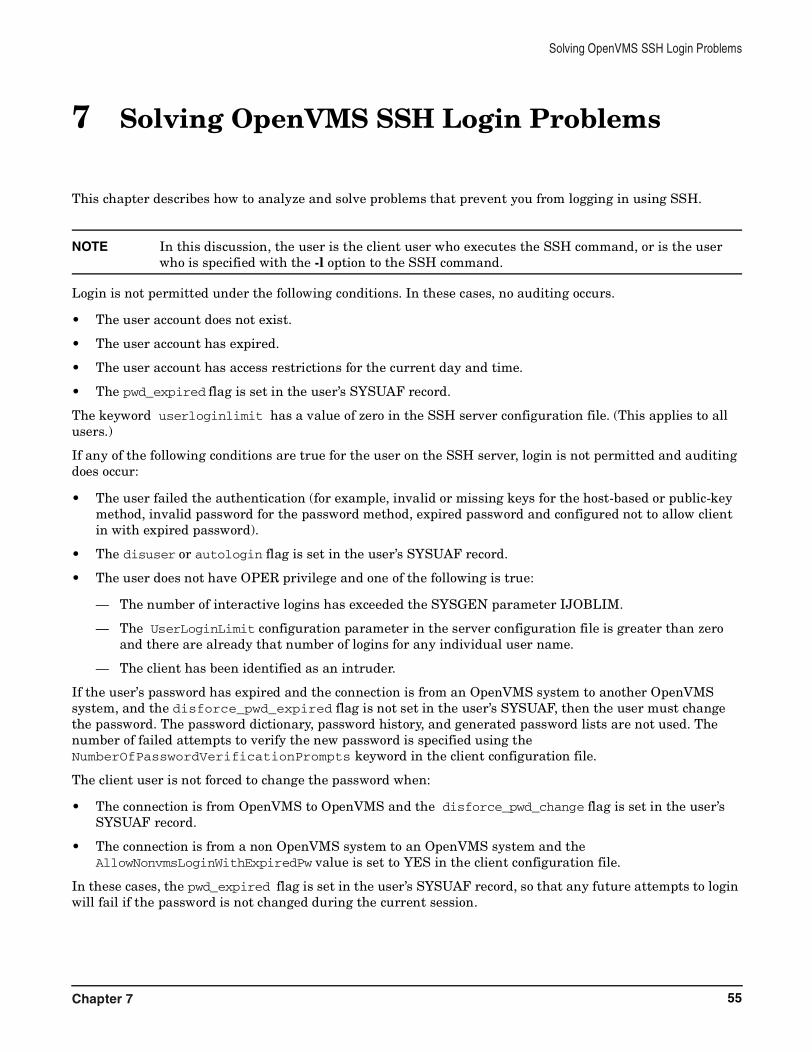
Solving OpenVMS SSH Login Problems
7 Solving OpenVMS SSH Login Problems
This chapter describes how to analyze and solve problems that prevent you from logging in using SSH.
NOTE In this discussion, the user is the client user who executes the SSH command, or is the user who is specified with the -l option to the SSH command.
Login is not permitted under the following conditions. In these cases, no auditing occurs.
• The user account does not exist.
• The user account has expired.
• The user account has access restrictions for the current day and time.
• The pwd_expired flag is set in the user’s SYSUAF record.
The keyword userloginlimit has a value of zero in the SSH server configuration file. (This applies to all users.)
If any of the following conditions are true for the user on the SSH server, login is not permitted and auditing does occur:
• The user failed the authentication (for example, invalid or missing keys for the host-based or public-key method, invalid password for the password method, expired password and configured not to allow client in with expired password).
• The disuser or autologin flag is set in the user’s SYSUAF record.
• The user does not have OPER privilege and one of the following is true:
— The number of interactive logins has exceeded the SYSGEN parameter IJOBLIM.
— The UserLoginLimit configuration parameter in the server configuration file is greater than zero and there are already that number of logins for any individual user name.
— The client has been identified as an intruder.
If the user’s password has expired and the connection is from an OpenVMS system to another OpenVMS system, and the disforce_pwd_expired flag is not set in the user’s SYSUAF, then the user must change the password. The password dictionary, password history, and generated password lists are not used. The number of failed attempts to verify the new password is specified using the NumberOfPasswordVerificationPrompts keyword in the client configuration file.
The client user is not forced to change the password when:
• The connection is from OpenVMS to OpenVMS and the disforce_pwd_change flag is set in the user’s SYSUAF record.
• The connection is from a non OpenVMS system to an OpenVMS system and the AllowNonvmsLoginWithExpiredPw value is set to YES in the client configuration file.
In these cases, the pwd_expired flag is set in the user’s SYSUAF record, so that any future attempts to login will fail if the password is not changed during the current session.
Chapter 7 55
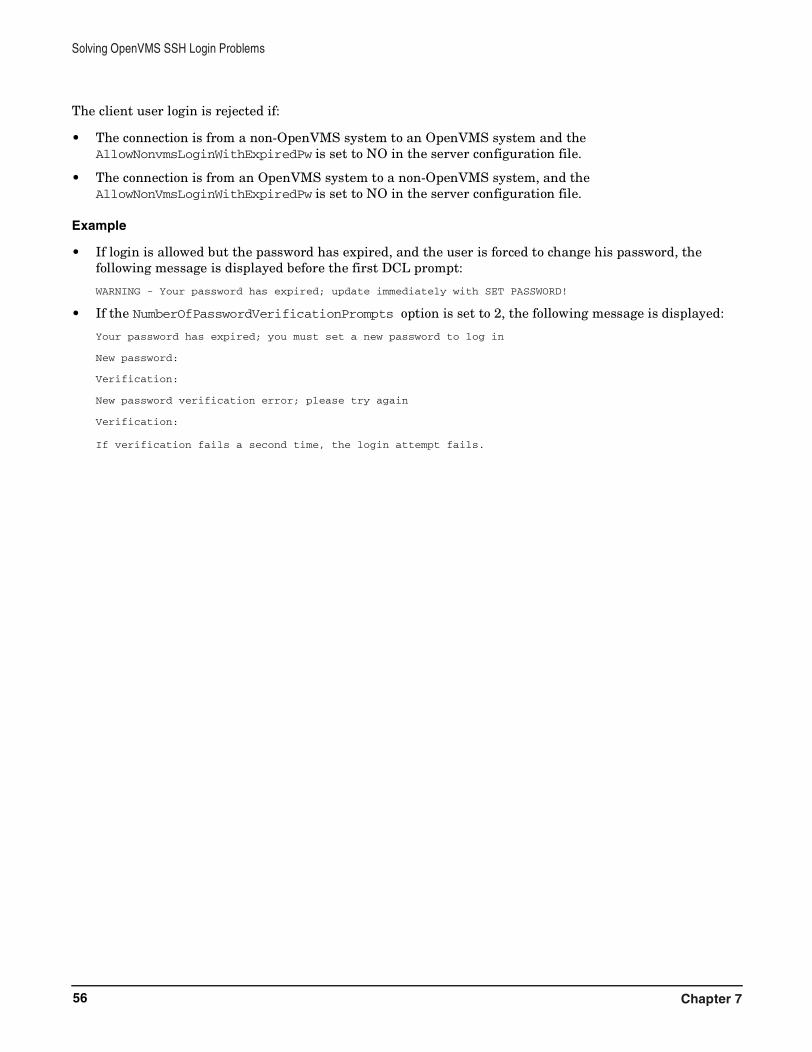
Solving OpenVMS SSH Login Problems
The client user login is rejected if:
• The connection is from a non-OpenVMS system to an OpenVMS system and the AllowNonvmsLoginWithExpiredPw is set to NO in the server configuration file.
• The connection is from an OpenVMS system to a non-OpenVMS system, and the AllowNonVmsLoginWithExpiredPw is set to NO in the server configuration file.
Example
• If login is allowed but the password has expired, and the user is forced to change his password, the following message is displayed before the first DCL prompt:
WARNING - Your password has expired; update immediately with SET PASSWORD!
• If the NumberOfPasswordVerificationPrompts option is set to 2, the following message is displayed:
Your password has expired; you must set a new password to log in
New password:
Verification:
New password verification error; please try again
Verification:
If verification fails a second time, the login attempt fails.
Chapter 756

SSH Directories and FilesClient Directories and Files
A SSH Directories and Files
This appendix summarizes information about files and directories that the SSH client and server use. Text files can use either STREAM_LF format or variable-length format.
Client Directories and FilesTCPIP$SSH_DEVICE:[TCPIP$SSH]
Function: Default directory of the TCPIP$SSH account
Creation: During SSH client configuration
Scope: Systemwide
Use: By running instances of the client processes
TCPIP$SSH_DEVICE:[TCPIP$SSH.SSH2]
Function: Contains multiple SSH files and subdirectories
Creation: During SSH client configuration
Scope: Systemwide
Use: By running instances of the client processes
TCPIP$SSH_DEVICE:[TCPIP$SSH.SSH2]SSH2_CONFIG.
Function: Client configuration file
Creation: During SSH client configuration, by extracting a template file from the TCP/IP kit. The system manager edits this file as necessary.
Scope: Systemwide
Use: Read by a starting client process
TCPIP$SSH_DEVICE:[TCPIP$SSH.SSH2.HOSTKEYS]
Function: Contains public host keys of all remote servers that users will connect to using SSH.
Creation: Empty during SSH client configuration, the system manager copies the files to this directory from all servers before initiating connections. (Note that this is not required. If the server’s public host key file is not in TCPIP$SSH_DEVICE:[TCPIP$SSH.SSH2.HOSTKEYS] when the connection initiated, it is automatically copied to the user specific directory SYS$LOGIN:[SSH2.HOSTKEYS] on the client.)
Scope: Systemwide
Use: For host authentication purposes; the client searches files in this directory for the server’s key before it searches the user-specific directory.
SYS$LOGIN:[SSH2]
Function: Contains multiple SSH files and subdirectories
Appendix A 57

SSH Directories and FilesServer Directories and Files
Creation: Either manually by the user, or automatically by running the client
Scope: User specific
Use: By running the client.
SYS$LOGIN:[SSH2]SSH2_CONFIG.
Function: Client configuration file.
Creation: By the user, if necessary
Scope: User specific
Use: By a starting client process (if one exists) in lieu of the systemwide configuration file.
SYS$LOGIN:[SSH2]IDENTIFICATION.
Function: Contains the identification of a user.
Creation: By the user when using public-key authentication
Scope: User specific
Use: To identify a user for public-key authentication
SYS$LOGIN:[SSH2.HOSTKEYS]
Function: Contains the public keys of the server hosts to which the client will connect.
Creation: By the user, if necessary. Files are copied here from a server, either automatically when a connection is requested, or manually before initiating a connection.
Scope: User specific
Use: For host authentication purposes. First, the client tries to locate the remote host key in this directory. If it is not found, the systemwide directory is used.
Server Directories and FilesTCPIP$SSH_DEVICE:[TCPIP$SSH]
Function: Default directory of TCPIP$SSH account
Creation: During SSH server configuration
Scope: Systemwide
Use: By running instances of the server processes
TCPIP$SSH_DEVICE:[TCPIP$SSH.SSH2]
Function: Contains multiple SSH files and subdirectories.
Creation: During SSH server configuration
Scope: Systemwide
Use: By running instances of the server processes
TCPIP$SSH_DEVICE:[TCPIP$SSH.SSH2]SSHD2_CONFIG.
Function: Server configuration file
Appendix A58
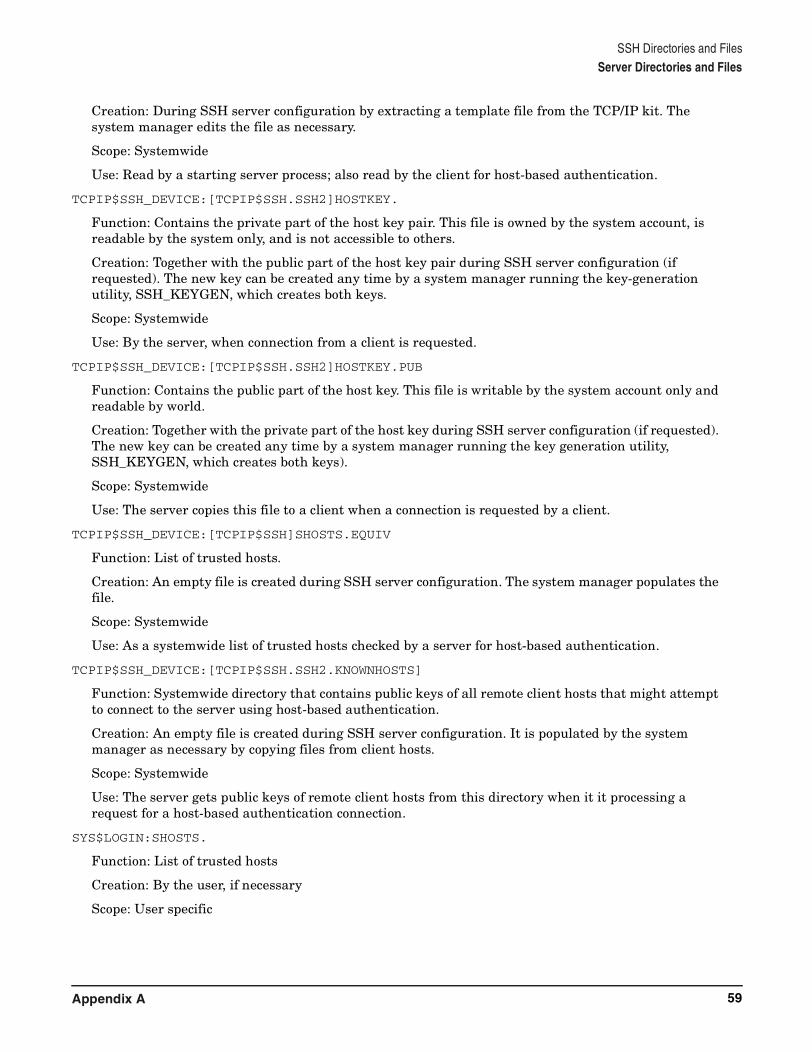
SSH Directories and FilesServer Directories and Files
Creation: During SSH server configuration by extracting a template file from the TCP/IP kit. The system manager edits the file as necessary.
Scope: Systemwide
Use: Read by a starting server process; also read by the client for host-based authentication.
TCPIP$SSH_DEVICE:[TCPIP$SSH.SSH2]HOSTKEY.
Function: Contains the private part of the host key pair. This file is owned by the system account, is readable by the system only, and is not accessible to others.
Creation: Together with the public part of the host key pair during SSH server configuration (if requested). The new key can be created any time by a system manager running the key-generation utility, SSH_KEYGEN, which creates both keys.
Scope: Systemwide
Use: By the server, when connection from a client is requested.
TCPIP$SSH_DEVICE:[TCPIP$SSH.SSH2]HOSTKEY.PUB
Function: Contains the public part of the host key. This file is writable by the system account only and readable by world.
Creation: Together with the private part of the host key during SSH server configuration (if requested). The new key can be created any time by a system manager running the key generation utility, SSH_KEYGEN, which creates both keys).
Scope: Systemwide
Use: The server copies this file to a client when a connection is requested by a client.
TCPIP$SSH_DEVICE:[TCPIP$SSH]SHOSTS.EQUIV
Function: List of trusted hosts.
Creation: An empty file is created during SSH server configuration. The system manager populates the file.
Scope: Systemwide
Use: As a systemwide list of trusted hosts checked by a server for host-based authentication.
TCPIP$SSH_DEVICE:[TCPIP$SSH.SSH2.KNOWNHOSTS]
Function: Systemwide directory that contains public keys of all remote client hosts that might attempt to connect to the server using host-based authentication.
Creation: An empty file is created during SSH server configuration. It is populated by the system manager as necessary by copying files from client hosts.
Scope: Systemwide
Use: The server gets public keys of remote client hosts from this directory when it it processing a request for a host-based authentication connection.
SYS$LOGIN:SHOSTS.
Function: List of trusted hosts
Creation: By the user, if necessary
Scope: User specific
Appendix A 59

SSH Directories and FilesServer Directories and Files
Use: As a user-specific list of trusted hosts, checked by the server for host-based authentication. The server checks this list after it checks the systemwide SHOSTS.EQUIV, enabling the user to add hosts to the systemwide list.
SYS$LOGIN:[SSH2]
Function: Contains multiple SSH files and subdirectories.
Creation: By the user, if necessary
Scope: User specific
Use: By running the server
SYS$LOGIN:[SSH2.KNOWNHOSTS]
Function: A user-specific directory that contains public keys of all remote client hosts that might try to connect to the server using host-based authentication.
Creation: By the user, if necessary. The user populates the directory by copying files from client hosts.
Scope: User specific
Use: The server gets public keys of remote client hosts from this directory when it is processing a request for a host-based authentication connection. The file from this directory is used if another file with the same name exists in the systemwide directory.
SYS$SYSLOGIN:[SSH2]AUTHORIZATION
Function: Contains information that allows the server to identify the user for public-key authentication.
Creation: By the user, if necessary. The user populates this file by copying files from the client hosts.
Scope: User specific
Use: The server uses the information in this file to identify the user.
Appendix A60

SSH Client and Server Configuration FilesClient Configuration File
B SSH Client and Server Configuration Files
This appendix lists the systemwide SSH client and server files that the TCPIP$CONFIG configuration procedure creates during SSH configuration, as described in Chapter 2.
Client Configuration File
#
# File name: SSH2_CONFIG.
# Product: HP TCP/IP Services for OpenVMS
# Version: V5.4-00
#
# © Copyright 1976, 2003 Hewlett-Packard Development Company, L.P. #
#
# ssh2 client configuration information
#
# Note: "*" is used for all hosts, but you can use other hosts as well. #
*:
#
# HP Tru64 UNIX specific
# Secure the r* utilities (no, yes)
#
# EnforceSecureRutils no
## General
AuthenticationSuccessMsg yes
# BatchMode yes
# Compression yes
# DontReadStdin no
# EscapeChar ~
# ForcePTTYAllocation yes
# GoBackground yes
# PasswordPrompt "%U@%H's password: "
PasswordPrompt "%U's password: "
# QuietMode yes
VerboseMode no
## Network
Port 22
NoDelay no
Appendix B 61
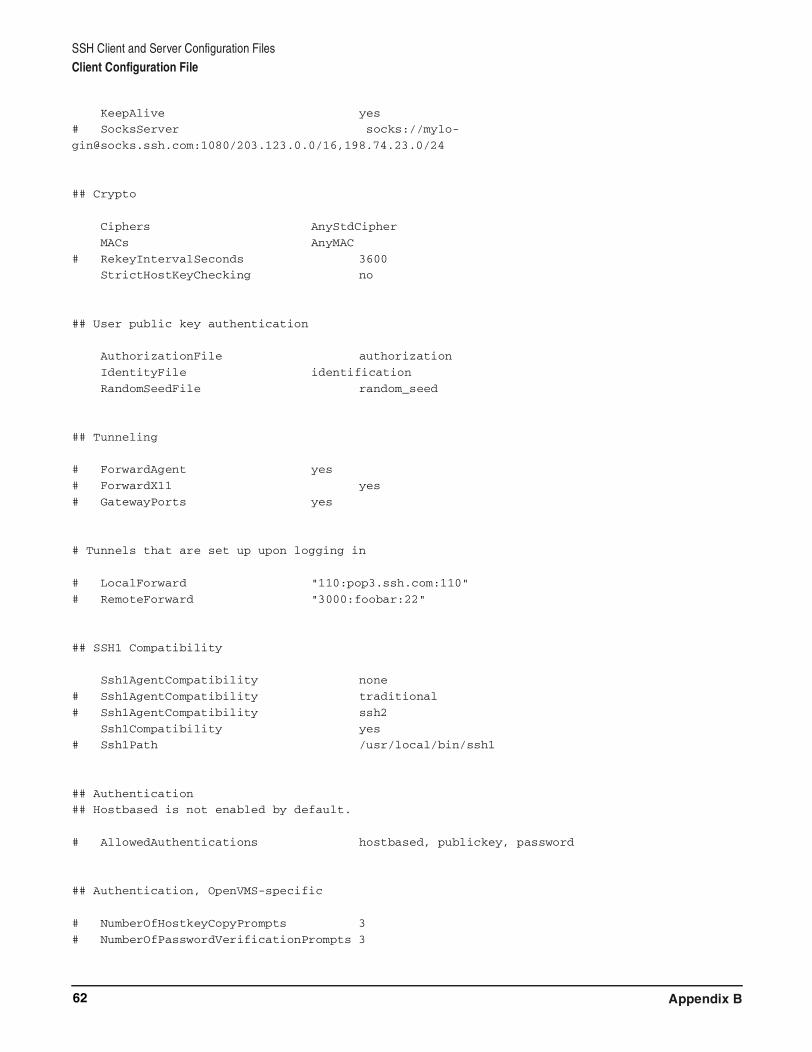
SSH Client and Server Configuration FilesClient Configuration File
KeepAlive yes
# SocksServer socks://mylo-
[email protected]:1080/203.123.0.0/16,198.74.23.0/24
## Crypto
Ciphers AnyStdCipher
MACs AnyMAC
# RekeyIntervalSeconds 3600
StrictHostKeyChecking no
## User public key authentication
AuthorizationFile authorization
IdentityFile identification
RandomSeedFile random_seed
## Tunneling
# ForwardAgent yes
# ForwardX11 yes
# GatewayPorts yes
# Tunnels that are set up upon logging in
# LocalForward "110:pop3.ssh.com:110"
# RemoteForward "3000:foobar:22"
## SSH1 Compatibility
Ssh1AgentCompatibility none
# Ssh1AgentCompatibility traditional
# Ssh1AgentCompatibility ssh2
Ssh1Compatibility yes
# Ssh1Path /usr/local/bin/ssh1
## Authentication
## Hostbased is not enabled by default.
# AllowedAuthentications hostbased, publickey, password
## Authentication, OpenVMS-specific
# NumberOfHostkeyCopyPrompts 3
# NumberOfPasswordVerificationPrompts 3
Appendix B62
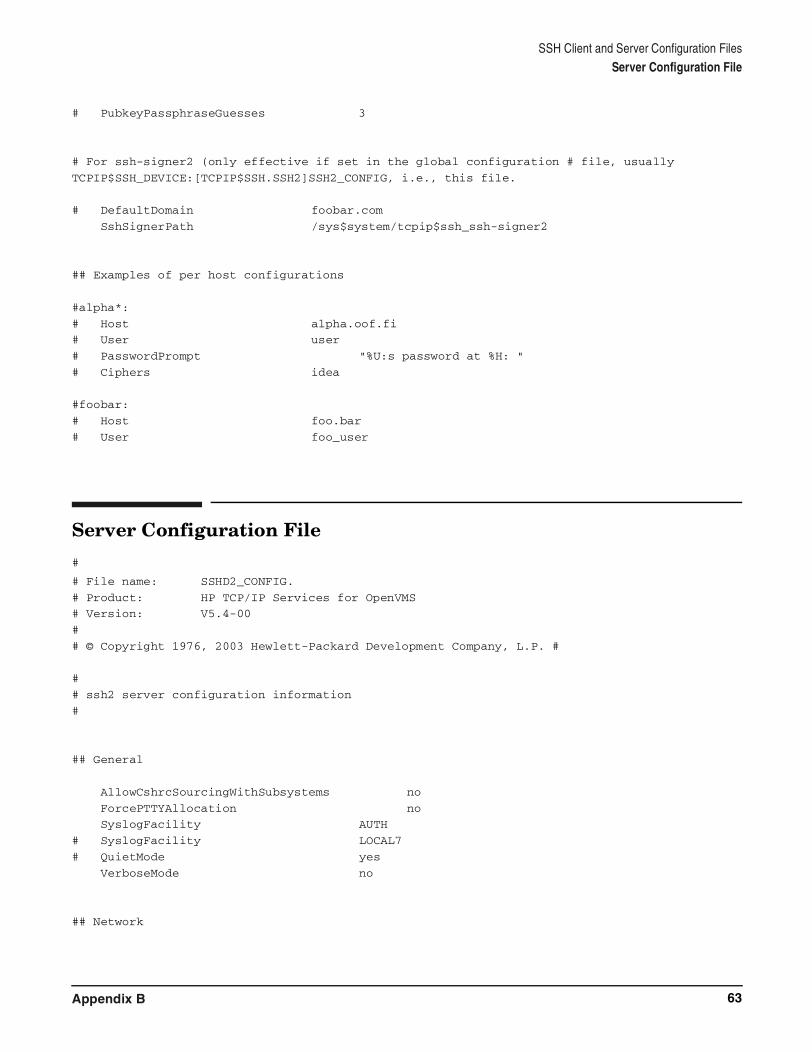
SSH Client and Server Configuration FilesServer Configuration File
# PubkeyPassphraseGuesses 3
# For ssh-signer2 (only effective if set in the global configuration # file, usually
TCPIP$SSH_DEVICE:[TCPIP$SSH.SSH2]SSH2_CONFIG, i.e., this file.
# DefaultDomain foobar.com
SshSignerPath /sys$system/tcpip$ssh_ssh-signer2
## Examples of per host configurations
#alpha*:
# Host alpha.oof.fi
# User user
# PasswordPrompt "%U:s password at %H: "
# Ciphers idea
#foobar:
# Host foo.bar
# User foo_user
Server Configuration File
#
# File name: SSHD2_CONFIG.
# Product: HP TCP/IP Services for OpenVMS
# Version: V5.4-00
#
# © Copyright 1976, 2003 Hewlett-Packard Development Company, L.P. #
#
# ssh2 server configuration information
#
## General
AllowCshrcSourcingWithSubsystems no
ForcePTTYAllocation no
SyslogFacility AUTH
# SyslogFacility LOCAL7
# QuietMode yes
VerboseMode no
## Network
Appendix B 63
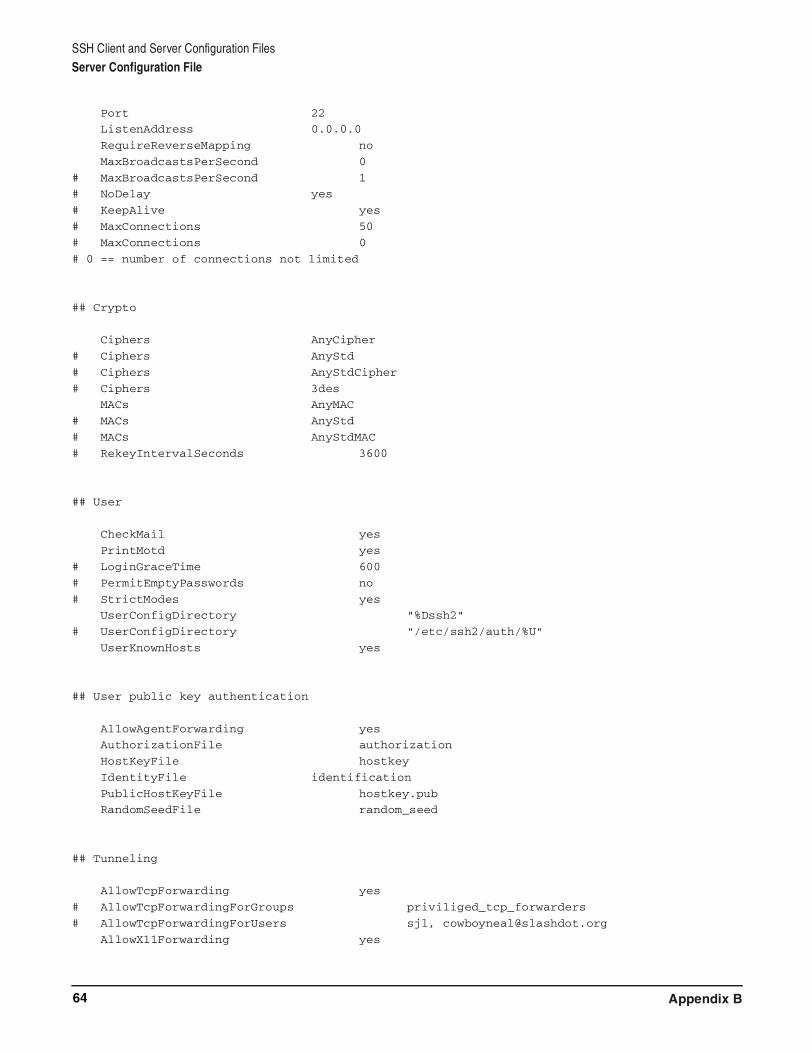
SSH Client and Server Configuration FilesServer Configuration File
Port 22
ListenAddress 0.0.0.0
RequireReverseMapping no
MaxBroadcastsPerSecond 0
# MaxBroadcastsPerSecond 1
# NoDelay yes
# KeepAlive yes
# MaxConnections 50
# MaxConnections 0
# 0 == number of connections not limited
## Crypto
Ciphers AnyCipher
# Ciphers AnyStd
# Ciphers AnyStdCipher
# Ciphers 3des
MACs AnyMAC
# MACs AnyStd
# MACs AnyStdMAC
# RekeyIntervalSeconds 3600
## User
CheckMail yes
PrintMotd yes
# LoginGraceTime 600
# PermitEmptyPasswords no
# StrictModes yes
UserConfigDirectory "%Dssh2"
# UserConfigDirectory "/etc/ssh2/auth/%U"
UserKnownHosts yes
## User public key authentication
AllowAgentForwarding yes
AuthorizationFile authorization
HostKeyFile hostkey
IdentityFile identification
PublicHostKeyFile hostkey.pub
RandomSeedFile random_seed
## Tunneling
AllowTcpForwarding yes
# AllowTcpForwardingForGroups priviliged_tcp_forwarders
# AllowTcpForwardingForUsers sjl, [email protected]
AllowX11Forwarding yes
Appendix B64

SSH Client and Server Configuration FilesServer Configuration File
# DenyTcpForwardingForGroups coming_from_outside
# DenyTcpForwardingForUsers "2[:isdigit:]*4, peelo"
## Authentication
## Hostbased and PAM are not enabled by default.
# AllowedAuthentications publickey
# AllowedAuthentications publickey,[email protected]
# AllowedAuthentications hostbased,publickey,password
# BannerMessageFile /etc/ssh2/ssh_banner_message
# BannerMessageFile /etc/issue.net
PasswordGuesses 3
# RequiredAuthentications publickey,password
# SshPAMClientPath ssh-pam-client
## Host restrictions
AllowHosts localhost, *
# AllowSHosts trusted.host.org
# DenyHosts evil.org, aol.com
# DenySHosts not.quite.trusted.org
# IgnoreRhosts no
# IgnoreRootRHosts no
# (the above, if not set, is defaulted to the value of IgnoreRHosts)
## User restrictions
# AllowGroups staff,users
# AllowUsers "sj*,s[:isdigit:]##,s(jl|amza)"
# DenyUsers skuuppa,warezdude,31373
# DenyUsers [email protected]
# DenyGroups guest
# PermitRootLogin nopwd
PermitRootLogin yes
## SSH1 compatibility
# Ssh1Compatibility
# Sshd1Path
## Chrooted environment
# ChRootGroups guest
# ChRootUsers ftp, guest
## subsystem definitions
Appendix B 65

SSH Client and Server Configuration FilesServer Configuration File
subsystem-sftp /sys$system/tcpip$ssh_sftp-server2
## OpenVMS auditing and access control
# AllowVmsLoginWithExpiredPw yes
# AllowNonvmsLoginWithExpiredPw no
# UserLoginLimit -1
# AccountingAuthentications pubkey,password,hostbased
# IntrusionAuthentications password
# IntrusionIdentMethod pubkey,password,hostbased
# IntrusionIdentSsh pubkey,password,hostbased
# LogfailAuthentications password
# PubkeyPassphraseGuesses 3
Appendix B66
Index
AAllowed Authentications, 29Authentication, 15
customizing host-based, 30customizing password, 29customizing public-key, 31host-based, 15password, 28public-key, 29
Authentication methods, 28customizing, 29
CClient
configuring, 20customizing the user environment, 26how client and server communicate, 16starting and stopping, 33
Client Components Configuration Menu, 20Commands
and utilities, 14Configuration file
creating your own, 26Configuration files, 16Configuring the SSH client, 20Configuring the SSH server, 22Copying files
to and from an SSH server, 14Copying the server’s public key to the client, 26Cryptographic algorithms, 15Customizing an authentication method, 29Customizing the user environment on the client
host., 26Customizing the user environment on the server
host, 28
GGenerating keys, 15, 50
HHost-based authentication, 15HOSTKEY.PUB file, 20, 27
KKeys
agent, 53generating, 15, 50host, 14managing user’s, 15overview, 14private, 15public, 15
copying the server’s, 26public host
naming conventions for the server’s, 27user, 15
Known hosts database, 28
LLogical names, 34
MMain Configuration menu, 19
PPassword authentication, 15Port forwarding, 17, 39Private key, 15Public key, 15Public key authentication, 15
RRANDOM_SEED file, 20Remote command execution, 48Remote login, 48
SSCP command, 14, 45Secure Shell (SSH)
client, 14client definition, 14how client and server communicate, 16overview, 13server, 13server definition, 13
Secure tunnel, 17, 39Server
configuring, 22how client and server communicate, 16starting and stopping, 33
Server Components Configuration Menu, 22SFTP command, 14, 47SHOSTS.EQUIV file, 20SSH command, 48SSH_ADD command, 51SSH_ADD utility, 15SSH_AGENT utility, 15SSH_KEYGEN command, 50SSH_KEYGEN utility, 15SSH2_CONFIG file, 20SSHD2_CONFIG file, 20, 28Starting and stopping the SSH client, 33Starting and stopping the SSH server, 33STREAM_LF format, 16, 26SYS$SYSDEVICE, 20
TTCPIP$CONFIG.COM command procedure, 14, 16,
19TCPIP$DEFINE_COMMAND procedure, 45TELNET, 17, 39
UUser environment
customizingon the SSH client host, 26
customizing on the server host, 28
67

Index
Utilitiesand commands, 14SSH_ADD, 15SSH_AGENT, 15SSH_KEYGEN, 15
VVariable-length format, 16, 26
XX Window systems, 17, 39
68