Embed Size (px)
Citation preview

HTMLForms
Today’s Lecture
• We will try to understand the utility of forms on Web pages
• We will find out about the various components that are used in a form
• We will become able to build a simple, interactive form

Focus of the last lecture was on HTML Lists & Tables
• We learnt how to extend our Web pages by adding a few more tags
• Specifically, we discussed various types of lists that can be added to a Web page – un-ordered, ordered and definition lists
• And also, about tables: about various tags used in a table and their associated attributes

Interactive Forms (1)
• Without forms, a Web site is “read-only” – it just provides information to the user
• Forms enable the user to provide information to the Web site. For example, the user can:
– Perform searches on Web site– Give comments– Ask for info that is not available on the Website– Place order for goods and services

Interactive Forms (2)
• Can be simple or very complex
• Can fill a whole page or just a single line
• Can contain a single element or many
• Are always placed between the <BODY> and </BODY> tags of a Web page

Interactive Forms (3)
• Are GUI-based
• May contain:– Text fields– Check boxes– Buttons– Radio buttons– Scrollable lists

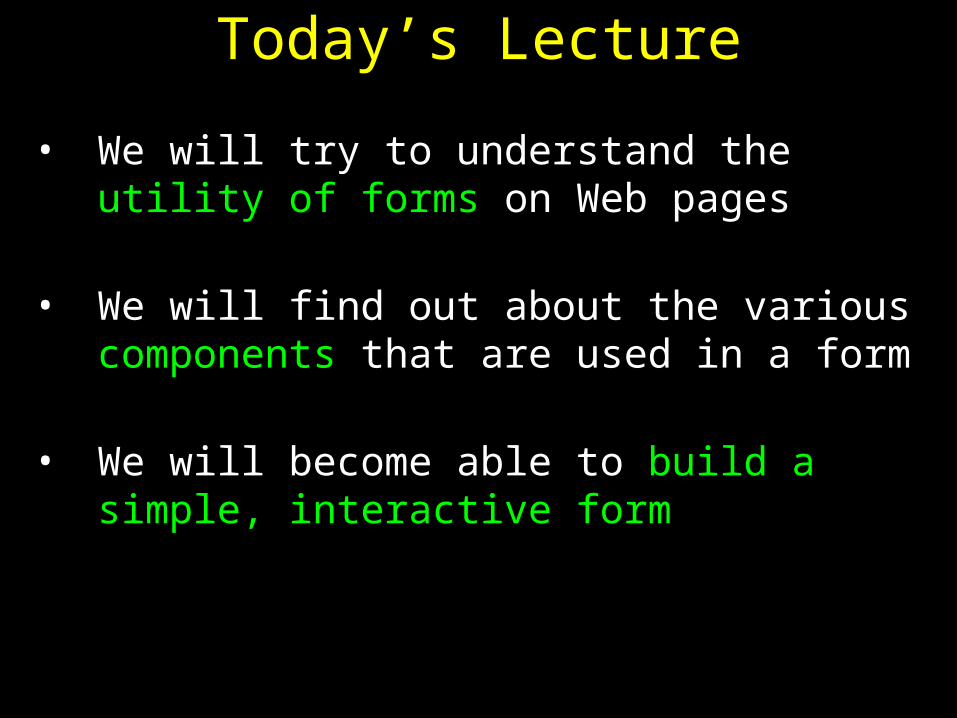
Exampleof a simple, interactiveform

Code for that Example<HTML>
<HEAD>
<TITLE>Send Email to me</TITLE>
</HEAD>
<BODY>
<H1>Send Email to me</H1>
Code for the instructions
Code for the form
</BODY>
</HTML>

Exampleof a simple, interactiveform

Code for the Instructions
<P>To send an eMail message to me:</P>
<OL>
<LI>Type your eMail address in the "From" field</LI>
<LI>Type a short message in the "Message" field</LI>
<LI>Press the "Send eMail to me" button</LI>
</OL>

Exampleof a simple, interactiveform

Code for the Form
<FORM name="sendEmail" method="post" action="sendMailScriptURL">
Elements of the form
</FORM>

<FORM name="sendEmail" method="post" action="sendMailScriptURL">
Elements of the form
</FORM>
name: Name given to the form
method: Forms can be submitted through two alternate methods – GET & POST
action: Specifies the URL that is accessed when the form is being submitted

Server-Side Scripts
• Programs that reside on Web servers
• Receive info that a user enters in a form
• Process that info and take appropriate action
• Examples:– CGI scripts on Unix servers– ASP scripts on Windows servers

Exampleof a simple, interactiveform

Elements of the Form (1)
<P>From: <INPUT type="text" name=“sender" size="50"></P>
<P>Message: <INPUT type="text" name="message" size="50"></P>

Exampleof a simple, interactiveform

Elements of the Form (2)
<P><INPUT type="hidden" name="receiver" value=“[email protected]"></P>
<P><INPUT type="hidden" name=“subject” value=“eMail from the form”></P>
<P><INPUT type="submit“ name="sendEmail" value="Send eMail to me"></P>

Exampleof a simple, interactiveform


<TEXTAREA
name=“message”
cols=“38”
rows=“6”
>
</TEXTAREA>

<FORM name="sendEmail" method="post" action=“sendMailScriptURL"> <table><tr> <td>From: </td> <td><INPUT type="text" name="sender" size="50"></td> </tr><tr> <td>To: </td> <td><INPUT type="text" name="receiver" size="50"></td> </tr><tr> <td>Subject: </td> <td><INPUT type="text" name="subject" size="50"></td> </tr><tr> <td valign="top">Message: </td> <td><TEXTAREA name="message" cols="38"rows="6"> </TEXTAREA></td> </tr><tr> <td colspan="2" align="right"> <INPUT type="submit" name="sendEmail" value="Send eMail"> </td> </tr></table></FORM>


<INPUTtype=“text”
name=“sender”size=“50”value=“your eMail address goes here”
>

Review of the Tags Used in Forms

<FORM
name=“nameOfTheForm”
method=“get” or “post”
action=“URL”
>
Elements of the form
</FORM>

Single-Line Text Input Field
<INPUTtype=“text”name=“fieldName”size=“widthInCharacters”maxlength=“limitInCharacters”value=“initialDefaultValue”
>

Hidden Input
<INPUTtype=“hidden” name=“fieldName”value=“value”
>

Submit Button Input
<INPUTtype=“submit” name=“buttonName”value=“displayedText”
>

Multi-Line Text Input Area
<TEXTAREAname=“areaName”cols=“widthInCharacters”rows=“numberOfLines”
>
initial default value
</TEXTAREA>

This was a review of the new tags (and associated attributes) that we have used in today’s examples
There are many more tags that can be used in a form
Let us take a look at a few

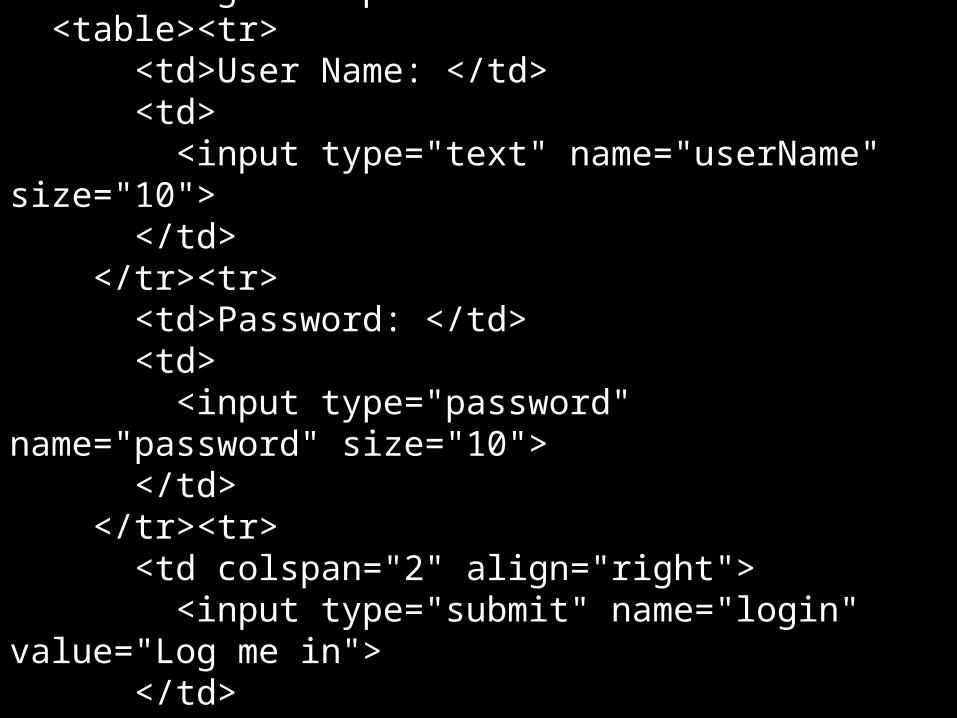
<form name="login" method="post" action="loginScript"> <table><tr> <td>User Name: </td> <td> <input type="text" name="userName" size="10"> </td> </tr><tr> <td>Password: </td> <td> <input type="password" name="password" size="10"> </td> </tr><tr> <td colspan="2" align="right"> <input type="submit" name="login" value="Log me in"> </td> </tr></table></form>

Password Input Field
<INPUTtype=“password”name=“fieldName”size=“widthInCharacters”maxlength=“limitInCharacters”value=“initialDefaultValue”
>


<form name="login" method="post" action="loginScript"> <table><tr> <td>User Name: </td> <td> <input type="text" name="userName" size="10"> </td> </tr><tr> <td>Password: </td> <td> <input type="password" name="password" size="10"> </td> </tr><tr> <td colspan="2"> <input type="checkbox" name="remember" value="remember"> Remember my user name and password<br> </td>
</tr><tr> <td colspan="2"> <input type="submit" name="login" value="Log me in"> </td> </tr></table></form>

Checkbox Input Element
<INPUTtype=“checkbox”
name=“checkboxName”
checked
value=“checkedValue”>

Office

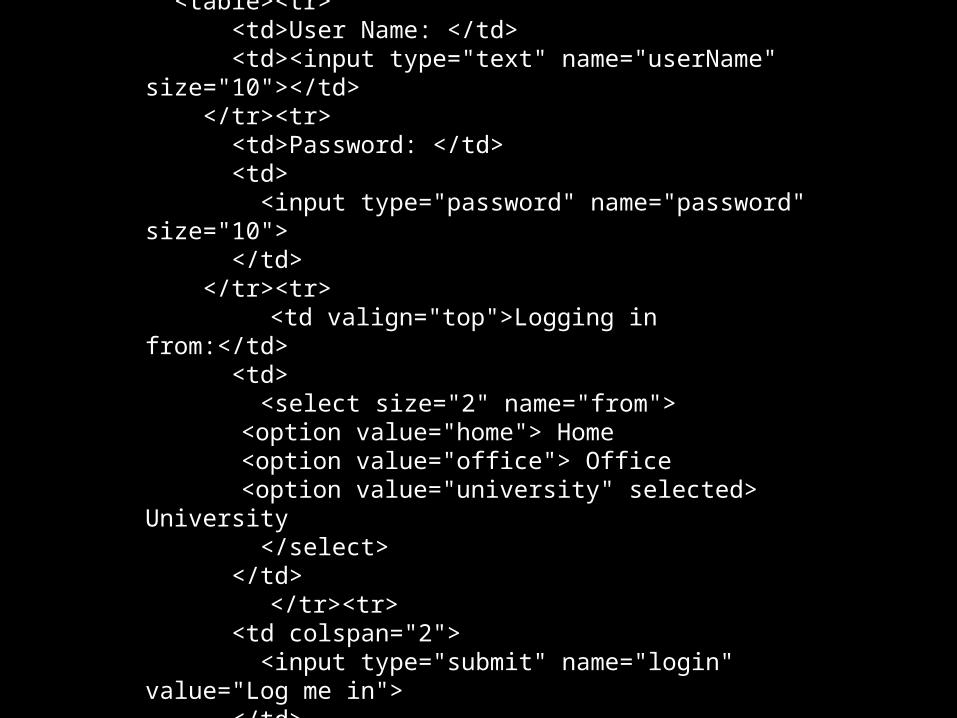
<form name="login" method="post" action="loginScript"> <table><tr> <td>User Name: </td> <td> <input type="text" name="userName" size="10"> </td> </tr><tr> <td>Password: </td> <td> <input type="password" name="password" size="10"> </td> </tr><tr> <td valign="top">Logging in from:</td> <td> <input type="radio" name="from" value="home"> Home<br> <input type="radio" name="from" value="office"> Home<br> <input type="radio" name="from" value="university" checked> University </td>
</tr><tr> <td colspan="2" align="right"> <input type="submit" name="login" value="Log me in"> </td> </tr></table></form>

Radio Button Input Element
<INPUTtype=“radio”
name=“radioButtonName”
checked
value=“selectedValue”>

What is the difference between checkboxes and radio buttons?

<form name="login" method="post" action="loginScript"> <table><tr> <td>User Name: </td> <td><input type="text" name="userName" size="10"></td> </tr><tr> <td>Password: </td> <td> <input type="password" name="password" size="10"> </td> </tr><tr>
<td valign="top">Logging in from:</td> <td> <select size="2" name="from">
<option value="home"> Home<option value="office"> Office<option value="university" selected> University
</select> </td>
</tr><tr> <td colspan="2"> <input type="submit" name="login" value="Log me in"> </td> </tr></table></form>
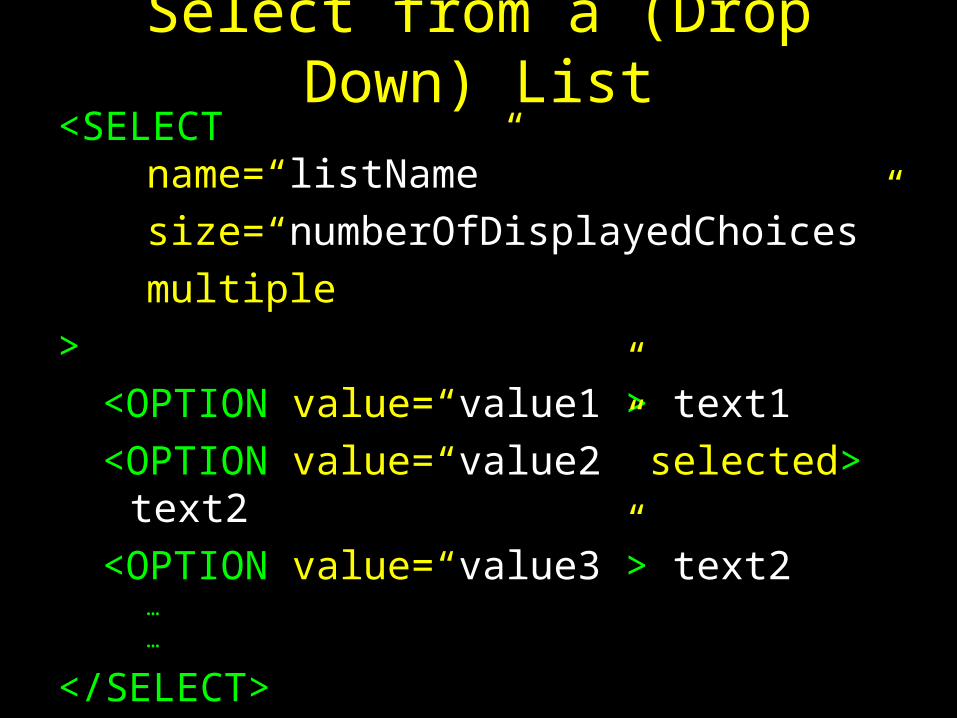
Select from a (Drop Down) List<SELECT
name=“listName”
size=“numberOfDisplayedChoices”
multiple
>
<OPTION value=“value1”> text1
<OPTION value=“value2” selected> text2
<OPTION value=“value3”> text2…
…
</SELECT>


<formname=“uploadForm”method=“post”action=“uploadScript”
<inputtype=“file”name=“uploadFile”enctype=“multipart/form-data”
> <input
type=“submit”name=“submit”value=“Upload”
></form>

File Upload Input Element
<INPUTtype=“file”
name=“buttonName”
value=“nameOfSelectedFile”
enctype=“fileEncodingType”>

Reset Button Input Element(Resets the contents of a form to default values)
<INPUTtype=“reset”
value=“displayedText”>


Today’s Lecture was the …
• We looked at the utility of forms on Web pages
• We found out about the various components that are used in a form
• We became able to build a simple, interactive form