Embed Size (px)
Citation preview
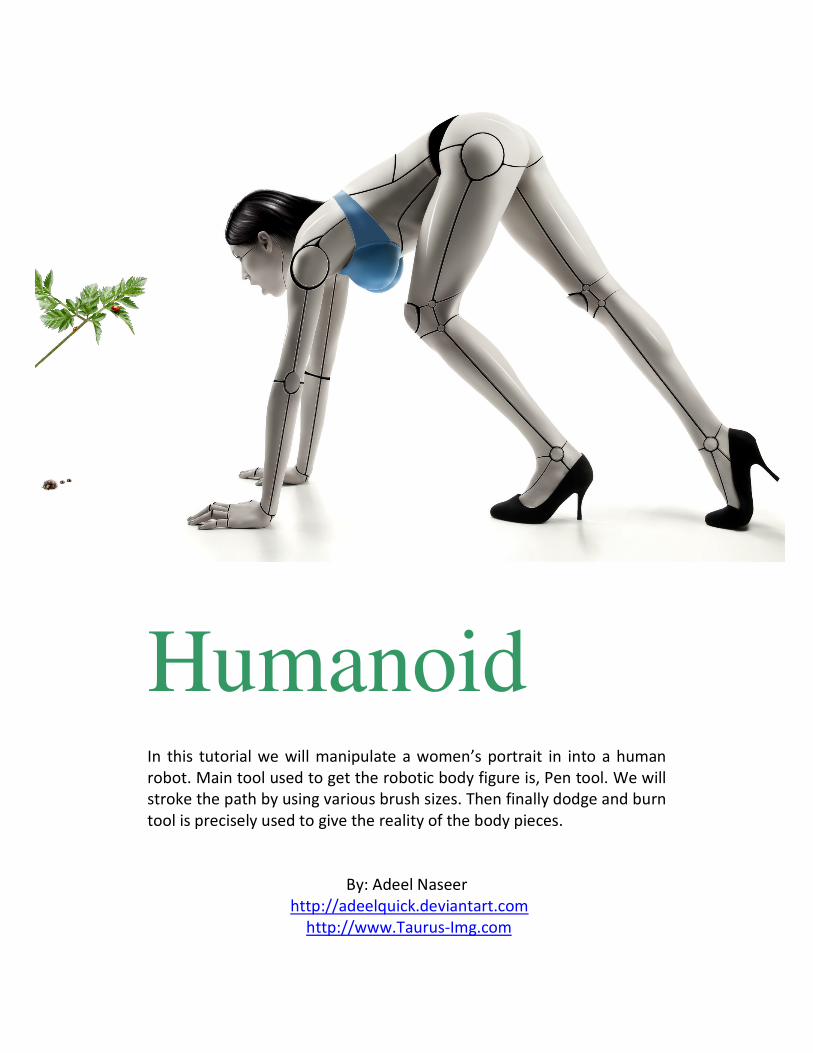
Humanoid
In this tutorial we will manipulate a women’s portrait in into a human
robot. Main tool used to get the robotic body figure is, Pen tool. We will
stroke the path by using various brush sizes. Then finally dodge and burn
tool is precisely used to give the reality of the body pieces.
By: Adeel Naseer
http://adeelquick.deviantart.com
http://www.Taurus-Img.com
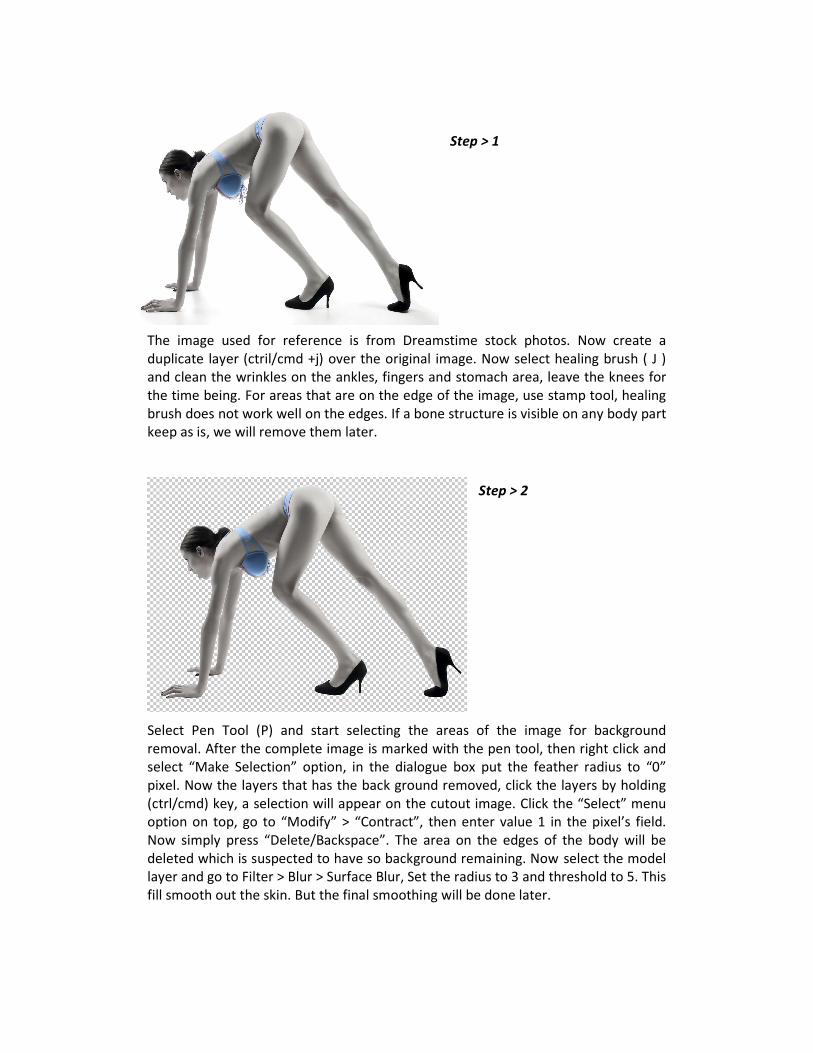
Step > 1
The image used for reference is from Dreamstime stock photos. Now create a
duplicate layer (ctril/cmd +j) over the original image. Now select healing brush ( J )
and clean the wrinkles on the ankles, fingers and stomach area, leave the knees for
the time being. For areas that are on the edge of the image, use stamp tool, healing
brush does not work well on the edges. If a bone structure is visible on any body part
keep as is, we will remove them later.
Step > 2
Select Pen Tool (P) and start selecting the areas of the image for background
removal. After the complete image is marked with the pen tool, then right click and
select “Make Selection” option, in the dialogue box put the feather radius to “0”
pixel. Now the layers that has the back ground removed, click the layers by holding
(ctrl/cmd) key, a selection will appear on the cutout image. Click the “Select” menu
option on top, go to “Modify” > “Contract”, then enter value 1 in the pixel’s field.
Now simply press “Delete/Backspace”. The area on the edges of the body will be
deleted which is suspected to have so background remaining. Now select the model
layer and go to Filter > Blur > Surface Blur, Set the radius to 3 and threshold to 5. This
fill smooth out the skin. But the final smoothing will be done later.
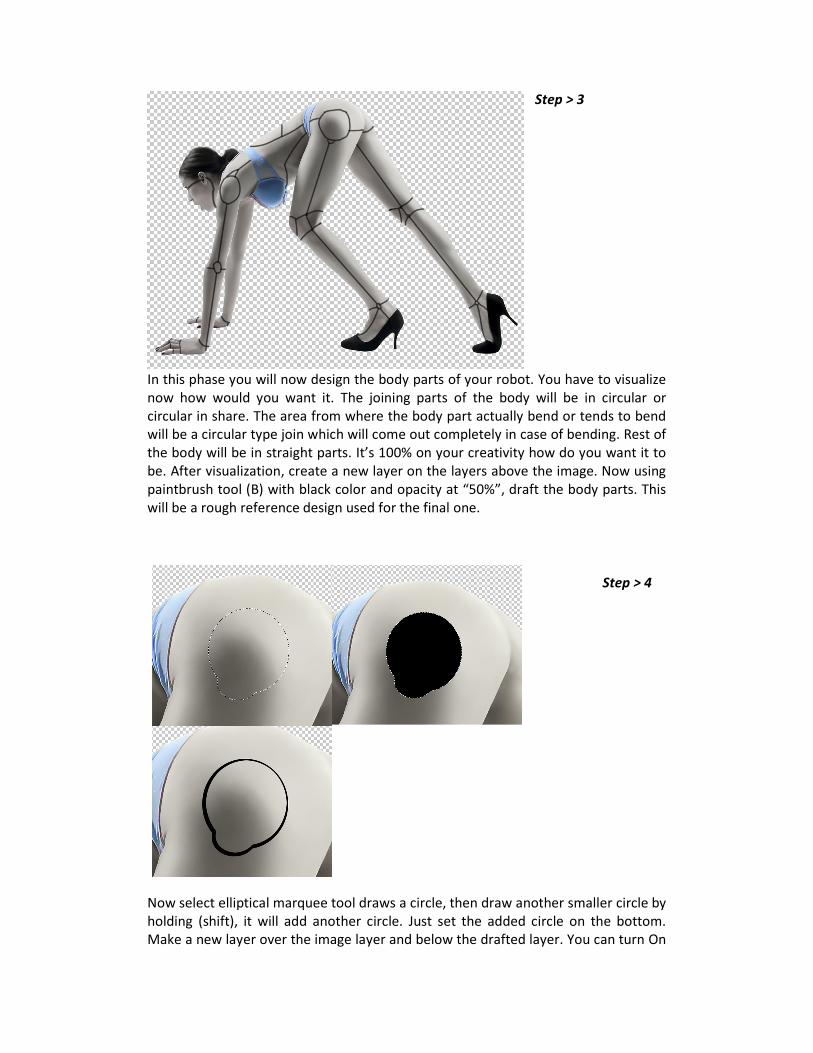
Step > 3
In this phase you will now design the body parts of your robot. You have to visualize
now how would you want it. The joining parts of the body will be in circular or
circular in share. The area from where the body part actually bend or tends to bend
will be a circular type join which will come out completely in case of bending. Rest of
the body will be in straight parts. It’s 100% on your creativity how do you want it to
be. After visualization, create a new layer on the layers above the image. Now using
paintbrush tool (B) with black color and opacity at “50%”, draft the body parts. This
will be a rough reference design used for the final one.
Step > 4
Now select elliptical marquee tool draws a circle, then draw another smaller circle by
holding (shift), it will add another circle. Just set the added circle on the bottom.
Make a new layer over the image layer and below the drafted layer. You can turn On
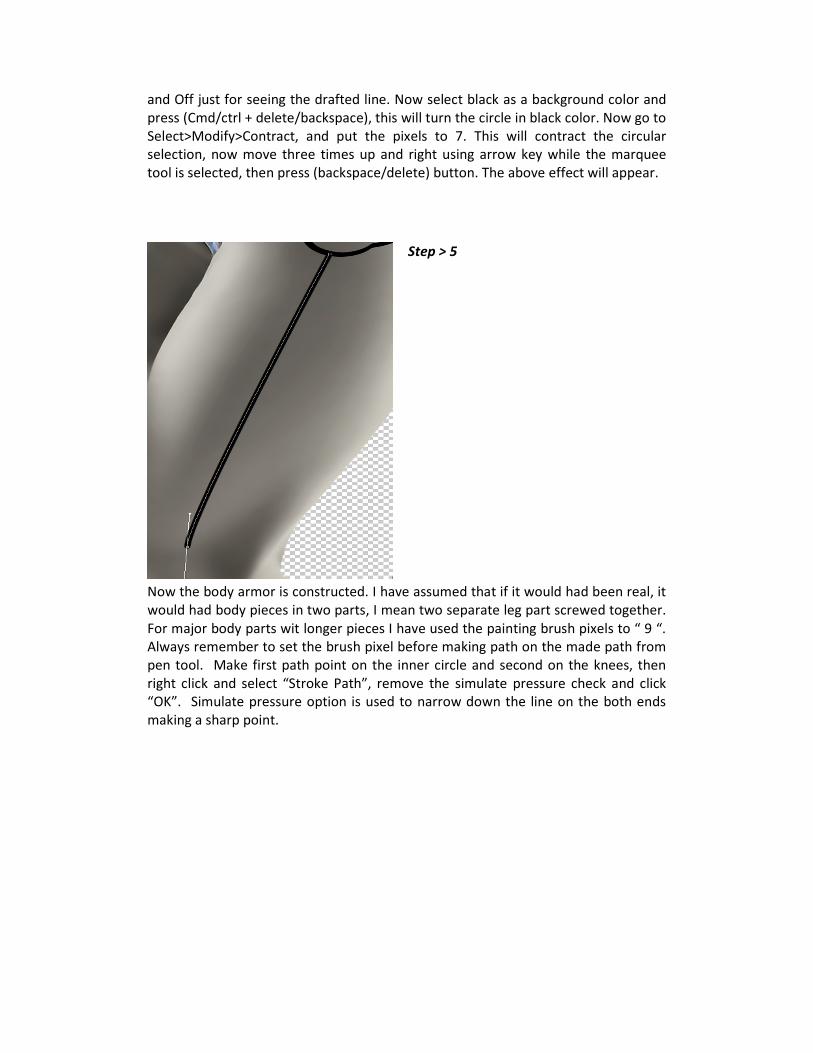
and Off just for seeing the drafted line. Now select black as a background color and
press (Cmd/ctrl + delete/backspace), this will turn the circle in black color. Now go to
Select>Modify>Contract, and put the pixels to 7. This will contract the circular
selection, now move three times up and right using arrow key while the marquee
tool is selected, then press (backspace/delete) button. The above effect will appear.
Step > 5
Now the body armor is constructed. I have assumed that if it would had been real, it
would had body pieces in two parts, I mean two separate leg part screwed together.
For major body parts wit longer pieces I have used the painting brush pixels to “ 9 “.
Always remember to set the brush pixel before making path on the made path from
pen tool. Make first path point on the inner circle and second on the knees, then
right click and select “Stroke Path”, remove the simulate pressure check and click
“OK”. Simulate pressure option is used to narrow down the line on the both ends
making a sharp point.
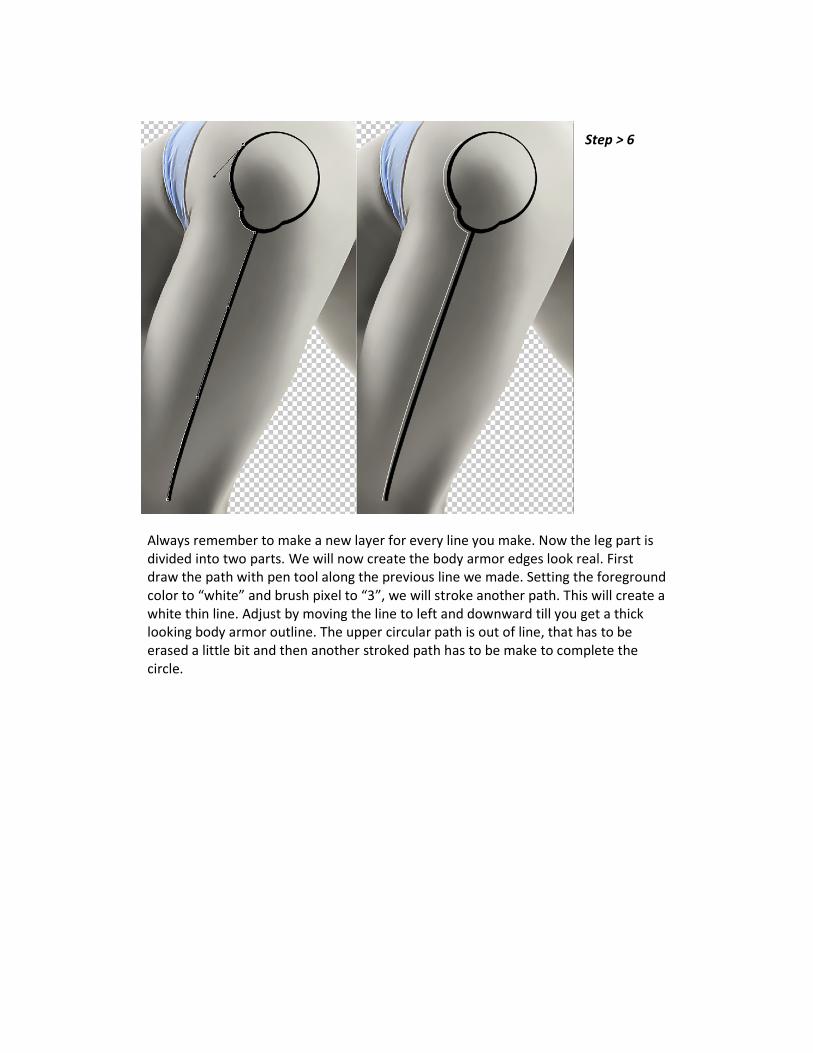
Step > 6
Always remember to make a new layer for every line you make. Now the leg part is
divided into two parts. We will now create the body armor edges look real. First
draw the path with pen tool along the previous line we made. Setting the foreground
color to “white” and brush pixel to “3”, we will stroke another path. This will create a
white thin line. Adjust by moving the line to left and downward till you get a thick
looking body armor outline. The upper circular path is out of line, that has to be
erased a little bit and then another stroked path has to be make to complete the
circle.
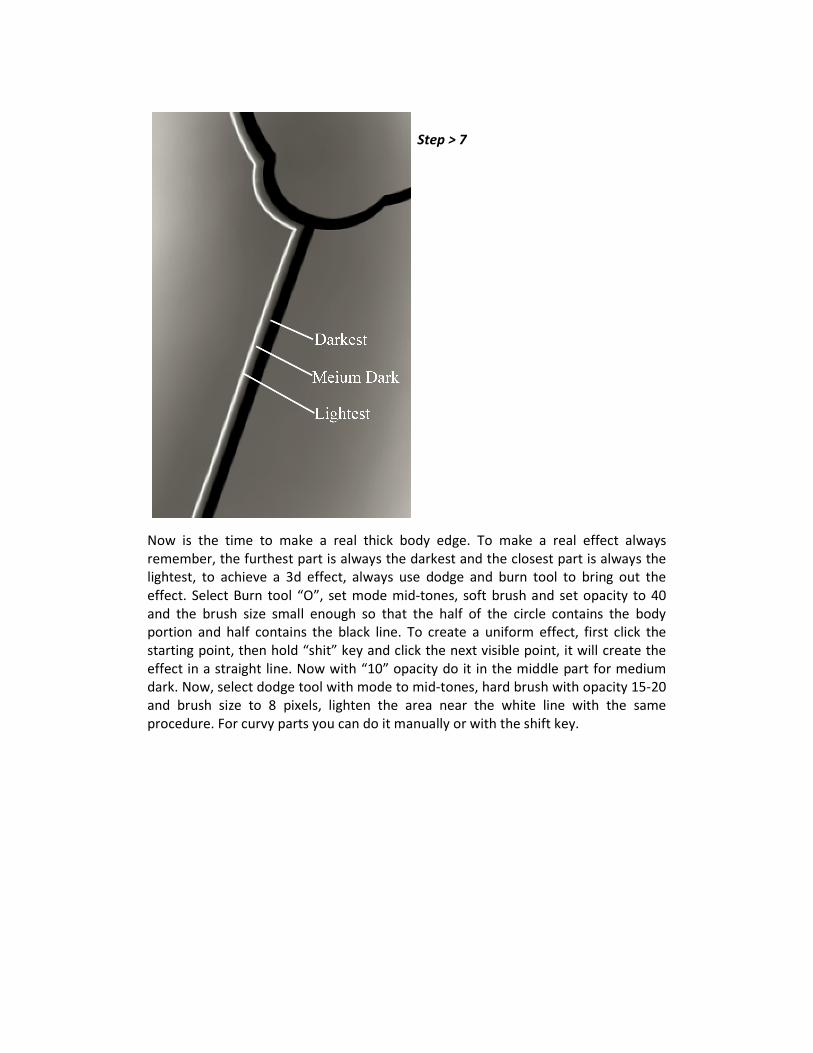
Step > 7
Now is the time to make a real thick body edge. To make a real effect always
remember, the furthest part is always the darkest and the closest part is always the
lightest, to achieve a 3d effect, always use dodge and burn tool to bring out the
effect. Select Burn tool “O”, set mode mid-tones, soft brush and set opacity to 40
and the brush size small enough so that the half of the circle contains the body
portion and half contains the black line. To create a uniform effect, first click the
starting point, then hold “shit” key and click the next visible point, it will create the
effect in a straight line. Now with “10” opacity do it in the middle part for medium
dark. Now, select dodge tool with mode to mid-tones, hard brush with opacity 15-20
and brush size to 8 pixels, lighten the area near the white line with the same
procedure. For curvy parts you can do it manually or with the shift key.
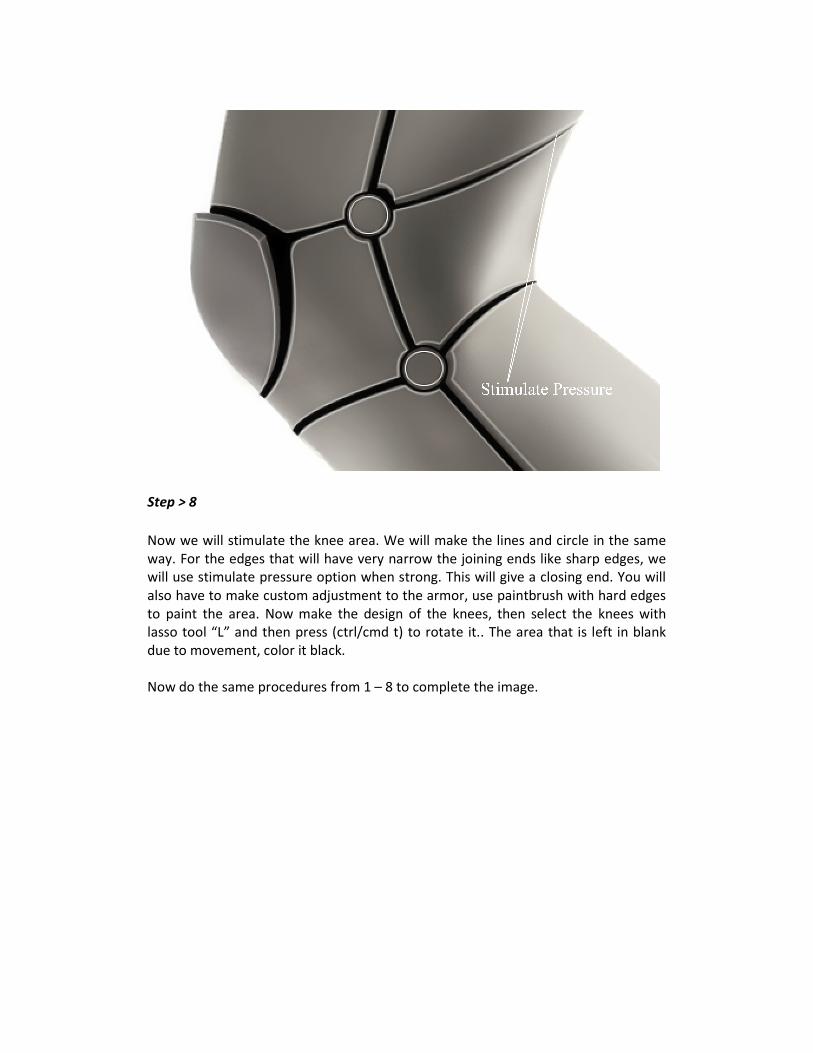
Step > 8
Now we will stimulate the knee area. We will make the lines and circle in the same
way. For the edges that will have very narrow the joining ends like sharp edges, we
will use stimulate pressure option when strong. This will give a closing end. You will
also have to make custom adjustment to the armor, use paintbrush with hard edges
to paint the area. Now make the design of the knees, then select the knees with
lasso tool “L” and then press (ctrl/cmd t) to rotate it.. The area that is left in blank
due to movement, color it black.
Now do the same procedures from 1 – 8 to complete the image.
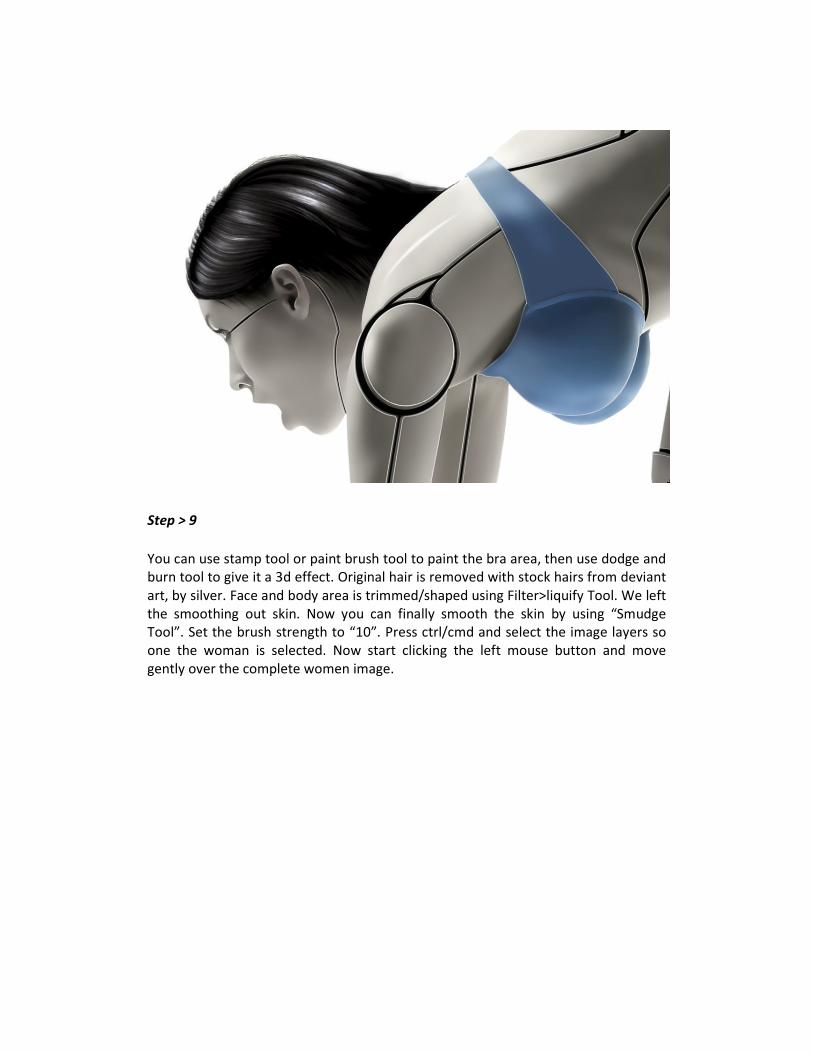
Step > 9
You can use stamp tool or paint brush tool to paint the bra area, then use dodge and
burn tool to give it a 3d effect. Original hair is removed with stock hairs from deviant
art, by silver. Face and body area is trimmed/shaped using Filter>liquify Tool. We left
the smoothing out skin. Now you can finally smooth the skin by using “Smudge
Tool”. Set the brush strength to “10”. Press ctrl/cmd and select the image layers so
one the woman is selected. Now start clicking the left mouse button and move
gently over the complete women image.
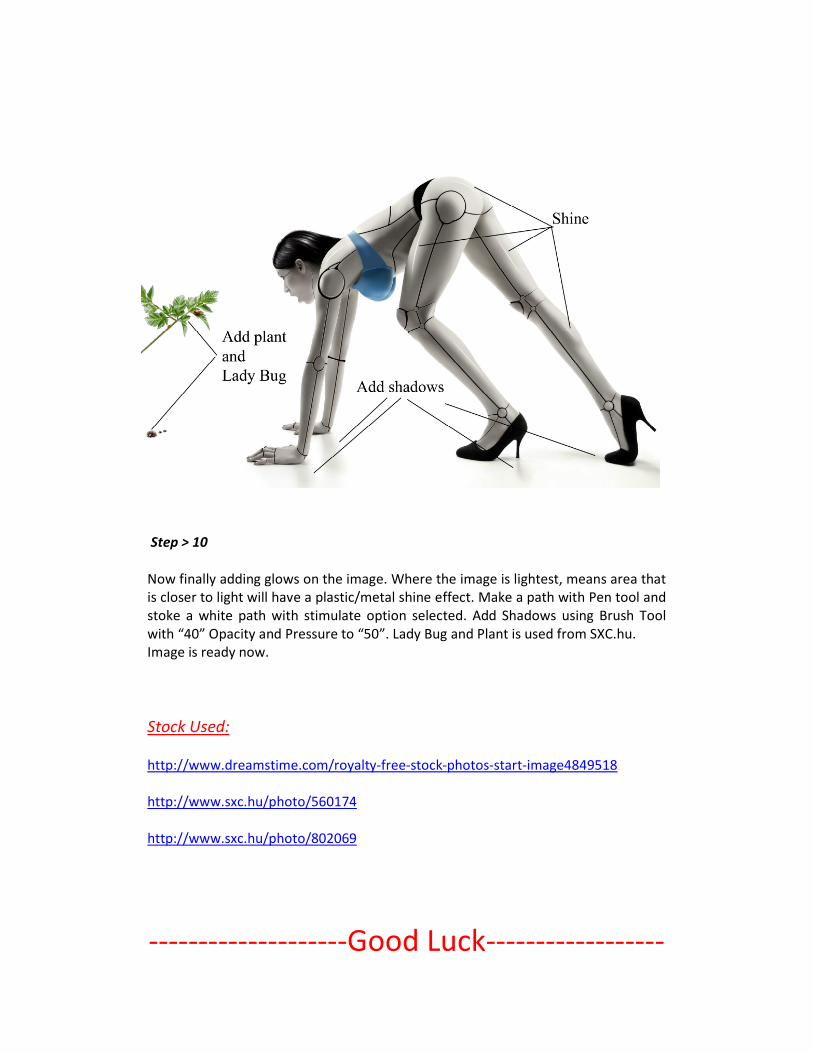
Step > 10
Now finally adding glows on the image. Where the image is lightest, means area that
is closer to light will have a plastic/metal shine effect. Make a path with Pen tool and
stoke a white path with stimulate option selected. Add Shadows using Brush Tool
with “40” Opacity and Pressure to “50”. Lady Bug and Plant is used from SXC.hu.
Image is ready now.
Stock Used:
http://www.dreamstime.com/royalty-free-stock-photos-start-image4849518
http://www.sxc.hu/photo/560174
http://www.sxc.hu/photo/802069
--------------------Good Luck------------------