Embed Size (px)
Citation preview
Find out how toENTICE MEMBERS WITHA NEGATIVE BALANCETO USE A CARD!
Volume 10: Overpaid Credit Cards
Simple DIYInstructions
Inside!
DON’T HAVE THE TIMEOR MANPOWER? can do it for you!
© 2
014
CU*A
nsw
ers W
eb S
ervi
ces
~col
lat/
man
agm
ent_
serv
ices
/Bui
ldin
g_th
e_Fa
ctor
y_Co
vers
I WANT MY CREDIT CARDSTO BE USED
1 CU*Answers Management Services
Vol. 10: Negative Balance (Overpaid) Loans
This document and the following volumes are intended to give a you and your credit union a complete
road map to execute a marketing campaign. Using the tools available, this road map will allow you to
market to your members with overpaid credit cards to get them using their cards. This road map will
take you from the very beginning of developing the campaign and targeting data, all the way through to
the end of the process and the evaluation of the campaign. You will discover within, all the steps
necessary to create the campaign, the steps to follow through to the end using the referenced CU*BASE
options to mine the data and track the sales success.
What is the Campaign?
Contact individuals with overpaid credit card loan balance to entice them to use their credit balance on
their account. Why should you do this? Based on Regulation Z you are required to return any balance
over $1 within a certain timeframe. Why not avoid returning the funds and generate some interchange
income for your credit union at the same time!?
You can use the report/file listed below to generate a list of members with a balance to call to get them
to use their card prior to the date you are required to refund the credit balance. As an example, let’s say
your marketing strategy is to offer a gift card to members who eliminate their credit balance by using
their cards. The gift card will be explained below.
How Do I Find the Target Group?
This campaign can be started by using the Negative Balance (Overpaid) Open Credit Loans option in the
Reports (E) (MNRPTE) menu.
This report was designed specifically to show online credit cards that have been overpaid. This report
should be pulled by CU personnel at least once a week to see if any of your credit card accounts are
approching the timeline when you are required to return any credit balance back to them.

Vol. 10: Negative Balance (Overpaid) Loans 2
Entering the Selection Criteria
The selection is completed behind the scenes. It looks for an actual balance less than zero to populate
on the report. There is an export report to file option that will allow you to export the data for use with
Member Connect or CU*BASE Report Builder (Query).
Generating the List for Member Connect
Once you select the Export button. Select to export the selection of accounts for Member Connect.
Enter a file name; this will create a database file in your QUERYxx library.
Once you select Accounts for Member Connect a box will appear for you to create a file name where
your selection information is stored.
Note: Selecting to Export the record for Query will create a database file with the information seen on
the screen and all records will be included. Selecting to Export to Member Connect will create a file that
includes only Account Base and will eliminate any duplicate records (preventing you from calling the
same member twice for a single campaign.
What Do I Do with the List?
Once you’ve created your database file, you will want to use
the Member Connect tools on the Marketing Functions
(MNMRKT) menu. From here, you will have a variety of
options depending on the resources available to you, and the
method you choose to use to market to these individuals.
Start by entering your newly created file in the File name
field.
3 CU*Answers Management Services
Sending an Electronic Communication
1. Enter the name of the database file created in the previous step. (This must have been stored in
your credit union's QUERYxx library.)
2. Click the “Online banking and/or email message” button and press enter to continue.
3. Here you have several creation/selection options:
If you have performed this campaign before and have already saved a message for this
campaign, select the message and select the Send button. Go to Step 8.
OR
If this is the first time you are performing this particular campaign, select Create (F6).
4. Enter a two-digit Message type ’CC’ (this is your choice); this must be a letter and a number or
two numbers—two letters are reserved for messages from the Master Message Library.
5. Enter the Message subject. As an example for this campaign, enter “Be Rewarded
for Spending!” This text will appear in the subject line when the message is sent
as an email message. Enter to continue.
6. Now you are on Member Connect Message Maintenance screen. Here you can
enter or edit the text of the message. Here is an example for this campaign:
We have noticed that you’ve overpaid your credit card! While we appreciate your
commitment to on time payments, we are contacting you to ask that you to use your credit
card to bring your account to a zero balance. Per government regulation, we will be required
to transfer the funds to your savings account on __ /__ /__. Since we want you to reap the
benefits of using your available credit, if you bring us 5 receipts to verify that you’ve spent
your credit balance, we will reward you with a $10.00 Visa gift card!
7. Select Save Changes.
8. Now you are ready to send the email or It's Me 247 online banking message. Select the message
and click the Send option.
IMPORTANT: All email messages will have the Signature Line message (SL message) text
automatically appended to them. Editing the Signature Line or (SL message) is similar to
editing a message. SEE ALSO: Editing the Signature Line (or SL Message).
TIP: In your Signature Line, you may want to include text explaining how a member can
“opt out” of receiving future marketing email messages. This can be done by having
them “opt out” using the two options on the Info Center|Contact Preferences page
in It’s Me 247.
9. Select to send the message via Priority. This will send the message to members with email
addresses first, and then to members with online banking accounts without email addresses. Set
a comment purge date one month out from the current date.
10. Click Send (F5).
NOTE: Online banking messages will only be sent to members who have already logged
into online banking.
11. Press Enter to confirm your sending.
Vol. 10: Negative Balance (Overpaid) Loans 4
Creating a Call Campaign
Prior to initiating a call campaign, you will need to ensure that the proper cross sales configurations
have been set up.
Configuring Cross Sales
In order to use the Member Connect tool to create a sales tracker for a telemarketing campaign, you
must first complete the following steps:
1. Create a Cross Sales Tracking Need Group for the campaign
2. Set up the tasks associated with the Need Group
These can be configured in Configure Cross Selling Tools on the Member Tracker Tools (MNTRAK) menu.
Check out the Cross-Selling Credit Union Services & Next Suggested Product booklet for more
information.
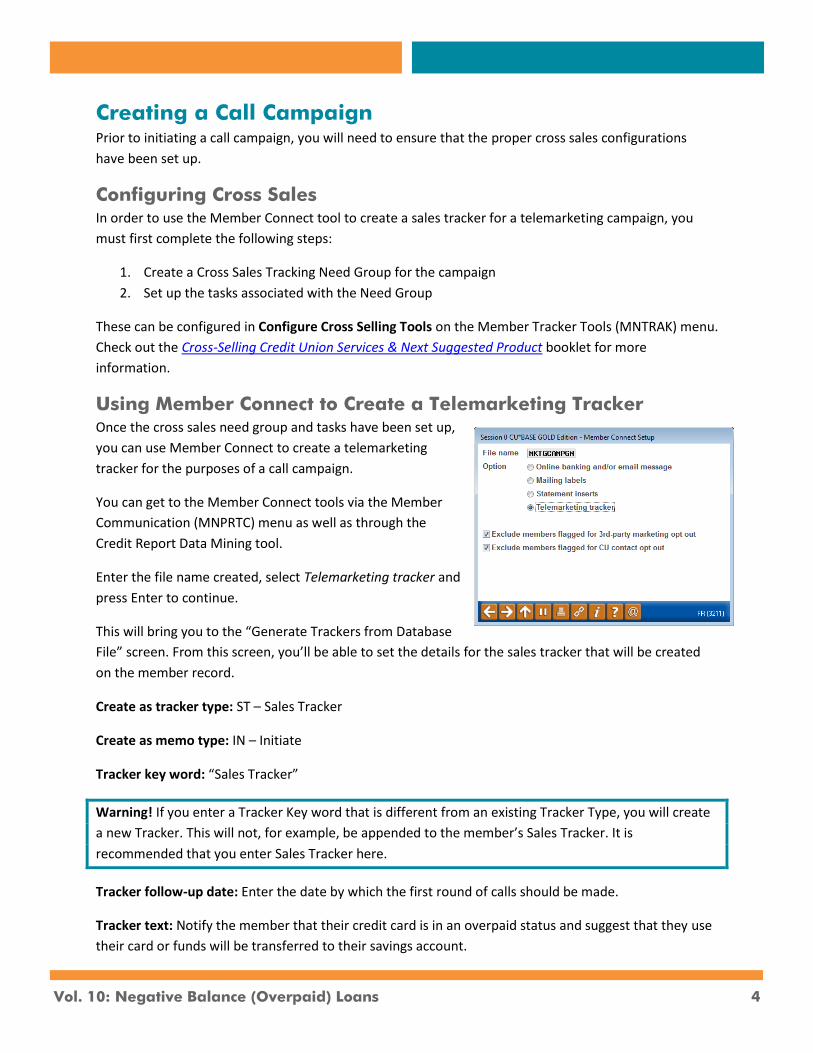
Using Member Connect to Create a Telemarketing Tracker
Once the cross sales need group and tasks have been set up,
you can use Member Connect to create a telemarketing
tracker for the purposes of a call campaign.
You can get to the Member Connect tools via the Member
Communication (MNPRTC) menu as well as through the
Credit Report Data Mining tool.
Enter the file name created, select Telemarketing tracker and
press Enter to continue.
This will bring you to the “Generate Trackers from Database
File” screen. From this screen, you’ll be able to set the details for the sales tracker that will be created
on the member record.
Create as tracker type: ST – Sales Tracker
Create as memo type: IN – Initiate
Tracker key word: “Sales Tracker”
Warning! If you enter a Tracker Key word that is different from an existing Tracker Type, you will create
a new Tracker. This will not, for example, be appended to the member’s Sales Tracker. It is
recommended that you enter Sales Tracker here.
Tracker follow-up date: Enter the date by which the first round of calls should be made.
Tracker text: Notify the member that their credit card is in an overpaid status and suggest that they use
their card or funds will be transferred to their savings account.

5 CU*Answers Management Services
Tip: Cross sales tasks can be configured with tips, which could include the call script.
Assign telemarketer ID: Enter the ID of the individual who will be making the calls.
Tip: Too many records for one person? Assign the follow-ups to a generic employee ID that multiple
people can work off.
Assign cross sales need group: ____
Assign cross sales task #: ____
Once the information has been entered on this screen, you will go to a final confirmation screen that will
also print a report of the members for which a new tracker was created. They are now ready to be
worked!
Working the Cross Sales and Completing the Call
Once the trackers have been created, calls can be initiated either from Work Follow-ups or from the
Cross Sales screen for that member. (You can use the report that was generated when creating the
trackers to go through the list.)
In “Work With Follow-ups” select a record and click on Cross Sales. Here you will see the Cross Sales task
that was set-up and that can be worked.
Once the call has been made, record the conversation based on the results of the call.
Call Script
Hello Mr./Mrs. ___________. I see that you have overpaid your credit card loan. We are contacting you
to you ask you to use your credit card to bring your account to a zero balance. Otherwise, per
government regulation, we will be required to transfer the overpaid amount to your savings account on
__ /__ /__. Since we want you to reap the benefits of using your available credit, if you bring your
account back to a positive balance we will reward you with a $10.00 gift card!
Sending a Mailing or Selective Statement Insert
To market to the member via a mailing, you have the option of either creating mailing labels or to create
a file for selective statement inserts.
Vol. 10: Negative Balance (Overpaid) Loans 6
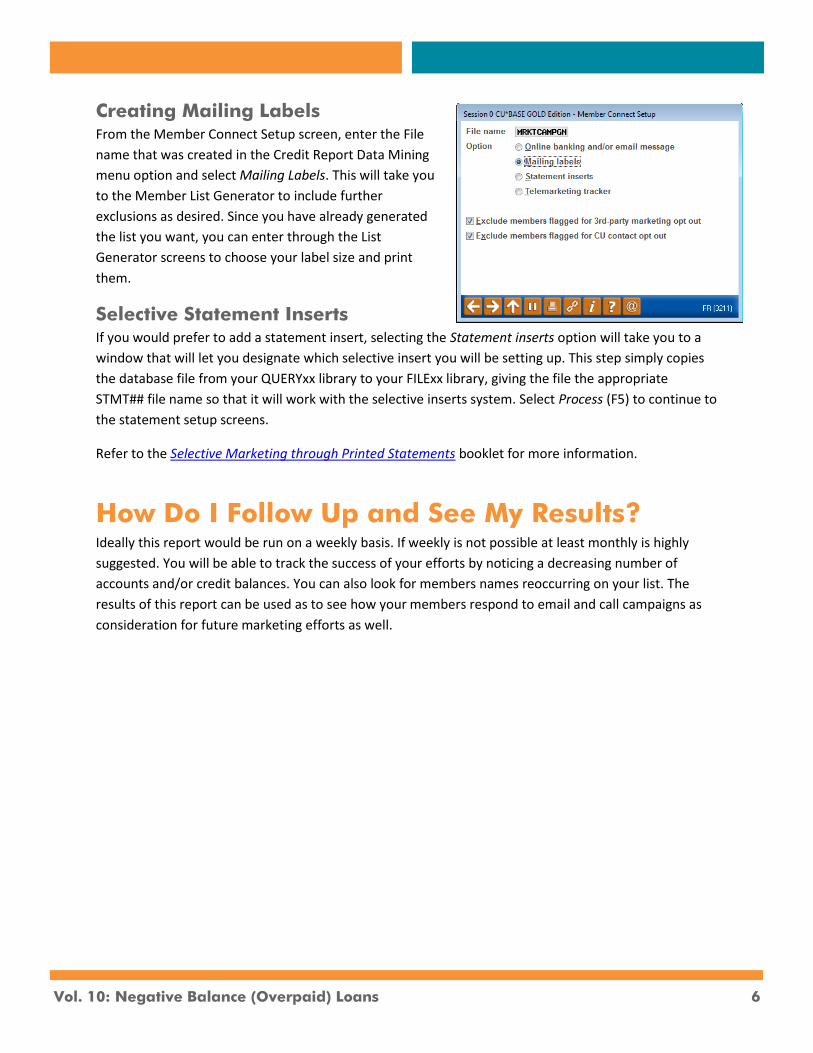
Creating Mailing Labels
From the Member Connect Setup screen, enter the File
name that was created in the Credit Report Data Mining
menu option and select Mailing Labels. This will take you
to the Member List Generator to include further
exclusions as desired. Since you have already generated
the list you want, you can enter through the List
Generator screens to choose your label size and print
them.
Selective Statement Inserts
If you would prefer to add a statement insert, selecting the Statement inserts option will take you to a
window that will let you designate which selective insert you will be setting up. This step simply copies
the database file from your QUERYxx library to your FILExx library, giving the file the appropriate
STMT## file name so that it will work with the selective inserts system. Select Process (F5) to continue to
the statement setup screens.
Refer to the Selective Marketing through Printed Statements booklet for more information.
How Do I Follow Up and See My Results?
Ideally this report would be run on a weekly basis. If weekly is not possible at least monthly is highly
suggested. You will be able to track the success of your efforts by noticing a decreasing number of
accounts and/or credit balances. You can also look for members names reoccurring on your list. The
results of this report can be used as to see how your members respond to email and call campaigns as
consideration for future marketing efforts as well.
7 CU*Answers Management Services
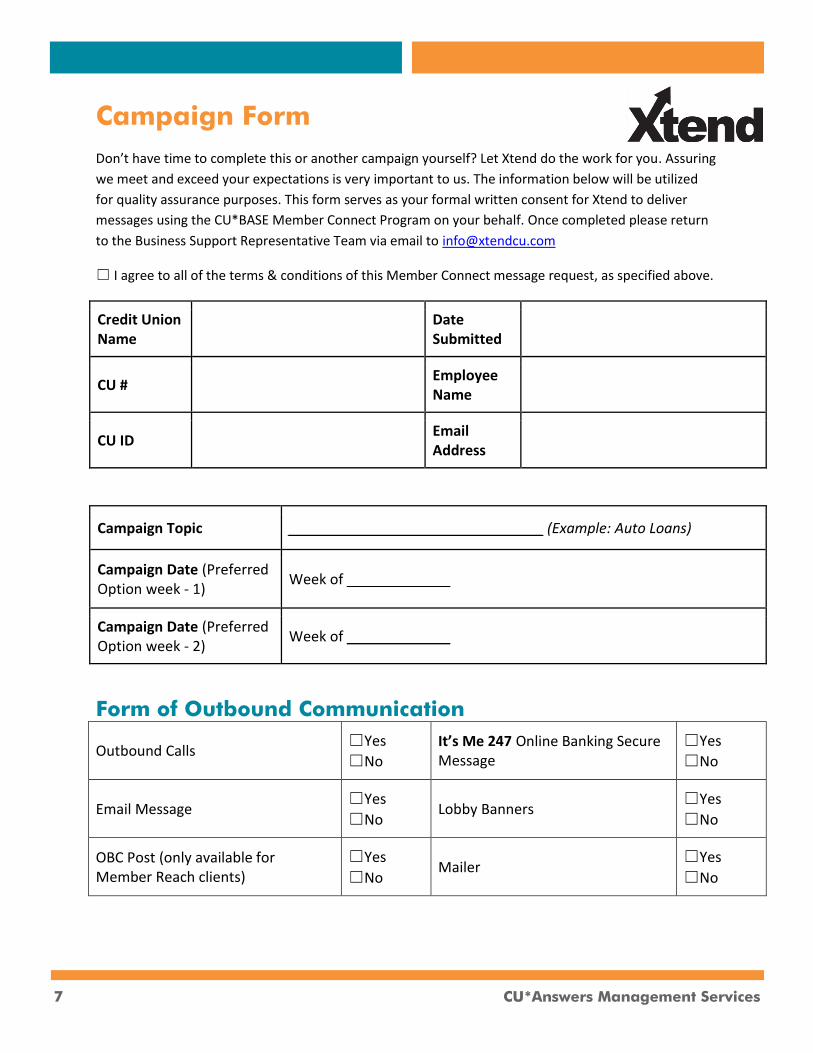
Campaign Form
Don’t have time to complete this or another campaign yourself? Let Xtend do the work for you. Assuring
we meet and exceed your expectations is very important to us. The information below will be utilized
for quality assurance purposes. This form serves as your formal written consent for Xtend to deliver
messages using the CU*BASE Member Connect Program on your behalf. Once completed please return
to the Business Support Representative Team via email to [email protected]
☐ I agree to all of the terms & conditions of this Member Connect message request, as specified above.
Credit Union Name
Date Submitted
CU # Employee Name
CU ID Email Address
Campaign Topic ________________________________ (Example: Auto Loans)
Campaign Date (Preferred Option week - 1)
Week of _____________
Campaign Date (Preferred Option week - 2)
Week of _____________
Form of Outbound Communication
Outbound Calls ☐Yes
☐No
It’s Me 247 Online Banking Secure Message
☐Yes
☐No
Email Message ☐Yes
☐No Lobby Banners
☐Yes
☐No
OBC Post (only available for Member Reach clients)
☐Yes
☐No Mailer
☐Yes
☐No


CU*Answers Management Services 6000 28th Street SE Grand Rapids, MI 49546 (800) 327-3478 www.cuanswers.com
Discover More!