Embed Size (px)
Citation preview

06 October 2008
IDOL AdministrationVersion 7.4
User Guide

NoticeThis document is a proprietary product of Autonomy and is protected by copyright laws and international treaty. Information in this manual is subject to change without notice and does not represent a commitment on the part of Autonomy. While reasonable efforts have been made to ensure the accuracy of the information contained herein, Autonomy assumes no liability for errors or omissions. No liability is assumed for direct, incidental, or consequential damages resulting from the use of the information contained in this document.
The copyrighted software that accompanies this document is licensed to the End User for use only in strict accordance with the End User License Agreement, which the Licensee should read carefully before commencing use of the software. No part of this publication may be reproduced, transmitted, stored in a retrieval system, nor translated into any human or computer language, in any form or by any means, electronic, mechanical, magnetic, optical, chemical, manual or otherwise, without the prior written permission of the copyright owner.
This document may use fictitious names for purposes of demonstration; references to actual persons, companies, or organizations is strictly coincidental.
Trademarks and CopyrightsCopyright 2008 Autonomy Corporation plc and all its affiliates. All rights reserved. Autonomy AnswerTM, Autonomy Service DashboardTM, Autonomy Desktop SuiteTM, DAHTM, DIHTM, DiSHTM, DLCMTM, DLHTM, DOHTM, Enterprise AWETM, IASTM, IDOLTM, IDOL serverTM, IDOLmeTM, IDOL DesktopTM, Portal-in-a-BoxTM, RetinaTM, ACI APITM, Active KnowledgeTM, Active SDKTM, ActiveServerTM, AutoIndexerTM, Autonomy LiteTM, Autonomy Offline CD PublisherTM, Autonomy POD for Siebel eBusiness ApplicationsTM, Document Management ServerTM, Import ModuleTM, SpeechPluginTM, VoiceSuiteTM, Autonomy Fetch for Siebel eBusiness ApplicationsTM, Documentum FetchTM, eRoom FetchTM, Exchange FetchTM, FatWire FetchTM, FileNet FetchTM, FileNet P8 FetchTM, File System FetchTM, FTP FetchTM, HTTP FetchTM, HummingbirdDM FetchTM, IBM Content Manager FetchTM, IBM Workplace FetchTM, iManage FetchTM, KVS FetchTM, Moreover FetchTM, NNTP FetchTM, Notes FetchTM, ODBC FetchTM, Omni Fetch SDKTM, OpenText FetchTM, Oracle FetchTM, PCDocs FetchTM, POP3 FetchTM, SAP FetchTM, Schlumberger FetchTM, SharePoint FetchTM, Stellent FetchTM, VirageTM, VidoeLoggerTM, AudioLoggerTM, SmartencodeTM, Virage ControlCenterTM, VS ArchiveTM, VS Broadcast MonitoringTM, VerityTM, CardiffTM, the Verity logo, the LiquidPDF logo, KeyViewTM, UltraseekTM, Knowledge OrganizerTM, TOPICTM, Verity Portal OneTM, Verity ProfilerTM, LiquidOfficeTM, LiquidPDFTM, Connect AgentTM, HTML+FormsTM, MediClaimTM, PDF+FormsTM, TeleFormTM, Tri-CRTM, RecoFlexTM, AutoMerge PublisherTM, TrueAddressTM, and VersiFormTM are trademarks of the Autonomy group of companies.
Microsoft is a registered trademark, and MS-DOS, Windows, Windows 95, Windows NT, SharePoint, and other Microsoft products referenced herein are trademarks of Microsoft Corporation.
UNIX is a registered trademark of The Open Group.
AvantGo is a trademark of AvantGo, Inc.
Epicentric Foundation Server is a trademark of Epicentric, Inc.
Documentum and eRoom are trademarks of Documentum, a division of EMC Corp.
FileNet is a trademark of FileNet Corporation.
Lotus Notes is a trademark of Lotus Development Corporation.
mySAP Enterprise Portal is a trademark of SAP AG.
Oracle is a trademark of Oracle Corporation.
Stellent is a trademark of Stellent, Inc.
All other trademarks are the property of their respective owners.
Notice to Government End UsersIf this product is acquired under the terms of a DoD contract: Use, duplication, or disclosure by the Government is subject to restrictions as set forth in subparagraph (c)(1)(ii) of 252.227-7013. Civilian agency contract: Use, reproduction or disclosure is subject to 52.227-19 (a) through (d) and restrictions set forth in the accompanying end user agreement. Unpublished-rights reserved under the copyright laws of the United States. Autonomy, Inc., Autonomy, Inc., 2880 San Tomas Expressway, Suite 130 Santa Clara, CA, 95051, US.
6.10.08
Copyright Notice

3
Contents
Preface ................................................................................................................................ 9
About This Book........................................................................................................................ 9Version ............................................................................................................................... 9Organization of This Book ................................................................................................ 10Stylistic Conventions ........................................................................................................ 11
Related Documentation........................................................................................................... 13Support and Contact Information ............................................................................................ 13
Download the Latest Documentation ............................................................................... 13Autonomy Technical Support ........................................................................................... 14Contact Autonomy............................................................................................................ 15
PART I GET STARTED
1 Introduction to IDOL ...................................................................................................... 19
Autonomy Infrastructure.......................................................................................................... 20Introduction to IDOL Administration ........................................................................................ 23
IDOL Administration Terminology .................................................................................... 24IDOL Administration Sample Workflow ............................................................................ 24Naming Conventions ........................................................................................................ 25
PART II IDOL ADMINISTRATION INTERFACES
2 Install IDOL Administration Interfaces .................................................................... 29
System Requirements............................................................................................................. 30Basic Requirements ......................................................................................................... 30Supported Platforms......................................................................................................... 30Hardware Specifications................................................................................................... 30
Install an Administrative Hub................................................................................................... 31Launch IDOL Dashboard Web Interface ................................................................................. 46

Contents
4 IDOL Administration 7.4 User Guide
Install an Administrative Node from the Dashboard Web Interface......................................... 47Install IDOL Dashboard ........................................................................................................... 59Licenses .................................................................................................................................. 60
3 IDOL Dashboard Interface ........................................................................................... 61
Navigate the IDOL Dashboard Interface ................................................................................. 62Change the Layout ........................................................................................................... 63Reset the Window Layout................................................................................................. 63Minimize Windows............................................................................................................ 64Maximize Windows........................................................................................................... 65Close Windows................................................................................................................. 65Undock and Dock Windows.............................................................................................. 65About the Canvas ............................................................................................................. 65
Toolbars and Menus................................................................................................................ 66Process Control Toolbar ................................................................................................... 66
List of IDOL Dashboard Windows ........................................................................................... 67Conceptual Node Binding ................................................................................................ 67Administrative Node Explorer .......................................................................................... 67Aspect Editor .................................................................................................................... 68Available Networks ........................................................................................................... 69Available Network Summary............................................................................................. 70Conceptual Node Binding Editor ..................................................................................... 71Configuration Aspect Explorer .......................................................................................... 71Configuration Viewer ........................................................................................................ 72Edit Configuration Template ............................................................................................ 72Edit Field Processing ....................................................................................................... 73Entity Definition Explorer .................................................................................................. 75Entity Explorer .................................................................................................................. 76Field Mapper..................................................................................................................... 77Index Task Editor.............................................................................................................. 77Job Chaining Detail........................................................................................................... 78Job Chaining Editor .......................................................................................................... 79Job Chaining Explorer ...................................................................................................... 79Lookup Service................................................................................................................. 80Network Editor .................................................................................................................. 81Network Project Monitor ................................................................................................... 82

Contents
IDOL Administration 7.4 User Guide 5
Network Service Explorer................................................................................................. 83Palette .............................................................................................................................. 83Plugins.............................................................................................................................. 84Properties ......................................................................................................................... 85Repository and Releases ................................................................................................. 87Service Information .......................................................................................................... 88Topology Overview........................................................................................................... 89
Manage Projects ..................................................................................................................... 89Check in a Project ............................................................................................................ 89Checkpoints...................................................................................................................... 90Check Out a Project ......................................................................................................... 90Undo a Check Out............................................................................................................ 91Delete a Project................................................................................................................ 91Close a Project ................................................................................................................. 91
Connect to a Different Network ............................................................................................... 92View Help ................................................................................................................................ 93
4 IDOL Dashboard Web Interface ................................................................................. 95
Launch IDOL Dashboard Web Interface ................................................................................. 95IDOL Dashboard Web Interface Home Page ................................................................... 96
Log on to Security-Enabled IDOL Administration.................................................................... 97IDOL Dashboard Web Interface Tasks ................................................................................... 98
PART III PROJECT PLANNING AND DEPLOYMENT
5 Plan and Design an IDOL Network.......................................................................... 101
Sample Workflow: Creating a Network Topology.................................................................. 101IDOL Service Entities ............................................................................................................ 104Create a Network Topology .................................................................................................. 106
Add Service Entities ....................................................................................................... 106Establish Entity Relationships ........................................................................................ 107
Scenarios for Design Consideration...................................................................................... 108Scenario 1: Simple ......................................................................................................... 108Scenario 2: High Availability Requirement ..................................................................... 109

Contents
6 IDOL Administration 7.4 User Guide
6 Configure Service Entities .......................................................................................... 111
Configure an Entity’s Basic Properties .................................................................................. 111Rename Service Entities ................................................................................................ 112Change the Number of Service Entity Instances ............................................................ 112Rename Entity Instances................................................................................................ 113
About Configuration Aspects ................................................................................................. 114Shared Scope and Service Scope Configuration Aspects.............................................. 115Change the Scope of a Configuration Aspect................................................................. 115
Configure Parameter Values ................................................................................................. 116Find a Parameter in the List............................................................................................ 117
Service Entity-Specific Configuration .................................................................................... 118Configure File System Connectors ................................................................................. 118Configure HTTP Connectors .......................................................................................... 119Configure Notes Connectors ........................................................................................ 120Configure Distributed IDOL Server ................................................................................. 123
Create Field Processing Profiles ........................................................................................... 123Modify Field Processing.................................................................................................. 124Configure Index Tasks.................................................................................................... 125Configure Logical Databases.......................................................................................... 128
Field Processing .................................................................................................................... 128Merge Parameter Values....................................................................................................... 129
Change Configuration Aspect Scope From Service to Shared....................................... 130Edit a Service’s Configuration File......................................................................................... 131Additional Configuration Resources ...................................................................................... 131
7 Deploy a Project ............................................................................................................ 133
Bind Services to Nodes ......................................................................................................... 133Create Conceptual Nodes .............................................................................................. 134Bind Services to Conceptual Nodes ............................................................................... 134Unbind Services from Conceptual Nodes....................................................................... 135Delete Conceptual Nodes............................................................................................... 135
Bind Conceptual Nodes to Admin Nodes .............................................................................. 136Deploy a Project .................................................................................................................... 137

Contents
IDOL Administration 7.4 User Guide 7
PART IV SERVICE MANAGEMENT
8 Set up Logon Security ................................................................................................ 143
Enable Logon Security .......................................................................................................... 143Set Up a Windows Logon Module .................................................................................. 144Set Up an LDAP Logon Module ..................................................................................... 145Set up an NIS Logon Module ......................................................................................... 146Add a New User ............................................................................................................. 148Edit a User’s Properties.................................................................................................. 149Delete a User ................................................................................................................. 150
Disable the Current Logon Module ....................................................................................... 150
9 Service Administration and Monitoring ................................................................ 151
View an Administrative Node’s Properties ............................................................................ 151Administer Services Using IDOL Dashboard ........................................................................ 153
Start and Stop Services.................................................................................................. 154View a Service’s Log Files ............................................................................................. 155Network-Level Component Log Files ............................................................................. 156View or Edit Configuration Files ..................................................................................... 159Add or Remove Service Entities..................................................................................... 160
About Jobs and Job Scheduling ........................................................................................... 161Create Connector Jobs .................................................................................................. 161Create User-Defined Jobs.............................................................................................. 162Set up a Job Chain......................................................................................................... 164Schedule Jobs................................................................................................................ 164View Job Chain Summaries ........................................................................................... 165
10 Network Statistics ........................................................................................................ 167
Use Historical Statistics......................................................................................................... 167Launch a Statistics Request.................................................................................................. 168Add New Meters to the Historical Statistics Options ............................................................. 171
View Available Meters .................................................................................................... 171Add a Single Meter......................................................................................................... 172Add All Available Meters ................................................................................................ 173

Contents
8 IDOL Administration 7.4 User Guide
11 Manage Updates ........................................................................................................... 175
Manage IDOL Dashboard Plugins......................................................................................... 175View Installed Plugins..................................................................................................... 175Install Plugins.................................................................................................................. 176Deactivate a Plugin ........................................................................................................ 177Activate a Plugin ............................................................................................................. 179Uninstall a Plugin ............................................................................................................ 180Check for Plugin Updates Automatically ........................................................................ 180Delete an Update Center ................................................................................................ 182
Update License Keys............................................................................................................. 182Manage IDOL Component Releases..................................................................................... 183
APPENDIXES
A Advanced Configuration ............................................................................................ 187
Modify Service Definitions ..................................................................................................... 187Import Service Definitions............................................................................................... 189Add Configuration Aspects to Service Definitions .......................................................... 189Create New Parameters ................................................................................................. 190
Install Notes Connector into IDOL Dashboard ...................................................................... 191
B Non-Project Services................................................................................................... 193
Add Local Services................................................................................................................ 193Link to Pre-Existing Services................................................................................................. 194

9
Preface
This guide is for both new and experienced IDOL Administration users and administrators. It is intended for readers who are familiar with enterprise software administration and responsible for installing, designing, configuring, and/or administering IDOL networks using IDOL Dashboard Web Interface and IDOL Dashboard.
This preface contains the following sections:
About This Book
Related Documentation
Support and Contact Information
About This Book
This section briefly describes the organization of this book and the stylistic conventions it uses.
VersionThe information in this book is current as of IDOL Administration version 7.4. The content was last modified 06 October 2008. Corrections or updates to this information may be available through the Autonomy Support site; see “Support and Contact Information” on page 13.

Preface About This Book
10 IDOL Administration 7.4 User Guide
Organization of This BookThis book includes the following parts, chapters, and appendixes:
Part 1:
Chapter 1, “Introduction to IDOL”
This chapter gives a high level overview of IDOL, IDOL Administration and a sample workflow using IDOL Administration.
Part 2:
Chapter 2, “Install IDOL Administration Interfaces”
This chapter describes the installation of IDOL Administration interfaces.
Chapter 3, “IDOL Dashboard Interface”
This chapter describes the concepts of IDOL Dashboard interface, which is the main interface used for the implementation and administration of IDOL networks.
Chapter 4, “IDOL Dashboard Web Interface”
This chapter introduces the IDOL Dashboard Web Interface, which is a supporting interface for IDOL Administration.
Part 3:
Chapter 5, “Plan and Design an IDOL Network”
This chapter gives conceptual information to help you design an IDOL network, along with a sample workflow for creating a network.
Chapter 6, “Configure Service Entities”
This chapter describes how to configure IDOL services.
Chapter 7, “Deploy a Project”
This chapter describes how to deploy a project to a network.
Part 4:
Chapter 8, “Set up Logon Security”
This chapter describes how to set up logon security for IDOL Administration.

Preface About This Book
IDOL Administration 7.4 User Guide 11
Chapter 9, “Service Administration and Monitoring”
This chapter describes how to monitor and maintain the IDOL network, such as starting and stopping services, and creating and maintaining job schedules.
Chapter 10, “Network Statistics”
This chapter describes how to view statistical data for your IDOL Administration network.
Chapter 11, “Manage Updates”
This chapter describes how to install the latest IDOL component releases, update license keys and install new plugins.
Appendixes:
Appendix A, “Advanced Configuration”
This appendix describes several advanced configuration procedures for IDOL Dashboard.
Appendix B, “Non-Project Services”
This appendix describes how to create and link to services after deployment.
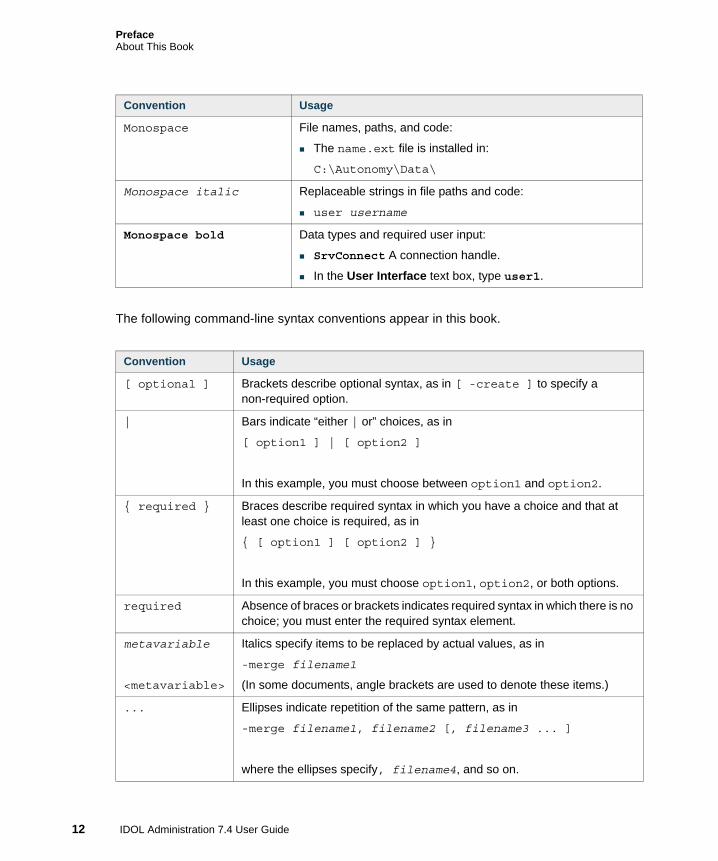
Stylistic ConventionsThe following stylistic conventions appear in this book.
Convention Usage
Plain Narrative text.
Bold User-interface elements in narrative text:
Click Cancel to halt the operation.
Italics Book titles and new terms:
For more information, see the IDOL Server Administration Guide.
An action command is a request, such as a query or indexing instruction, sent to IDOL Server.
Preface About This Book
12 IDOL Administration 7.4 User Guide
The following command-line syntax conventions appear in this book.
Monospace File names, paths, and code:
The name.ext file is installed in:
C:\Autonomy\Data\
Monospace italic Replaceable strings in file paths and code:
user username
Monospace bold Data types and required user input:
SrvConnect A connection handle.
In the User Interface text box, type user1.
Convention Usage
[ optional ] Brackets describe optional syntax, as in [ -create ] to specify a non-required option.
| Bars indicate “either | or” choices, as in
[ option1 ] | [ option2 ]
In this example, you must choose between option1 and option2.
{ required } Braces describe required syntax in which you have a choice and that at least one choice is required, as in
{ [ option1 ] [ option2 ] }
In this example, you must choose option1, option2, or both options.
required Absence of braces or brackets indicates required syntax in which there is no choice; you must enter the required syntax element.
metavariable
<metavariable>
Italics specify items to be replaced by actual values, as in
-merge filename1
(In some documents, angle brackets are used to denote these items.)
... Ellipses indicate repetition of the same pattern, as in
-merge filename1, filename2 [, filename3 ... ]
where the ellipses specify, filename4, and so on.
Convention Usage

Preface Related Documentation
IDOL Administration 7.4 User Guide 13
Use of punctuation—such as single and double quotes, commas, periods—indicates actual syntax; it is not part of the syntax definition.
Related Documentation
The following documents provide more details on the configuration of IDOL components:
IDOL Server Administration Guide
File System Connector Administration Guide
HTTP Connector Administration Guide
Notes Connector Administration Guide
Support and Contact Information
Read this section if you want to contact Autonomy, request technical support, or obtain product documentation.
Download the Latest DocumentationYou can retrieve the latest available product documentation from Autonomy’s Knowledge Base on the Customer Support site.
To download the latest document revisions1. Enter this URL in your Web browser's address field:
https://customers.autonomy.com
2. Access to the contents of the Customer Support site requires a user name and password. To obtain a user name and password, follow the sign-up instructions on the home page.
3. Click Log In and enter your email address and password. Click Sign in.

Preface Support and Contact Information
14 IDOL Administration 7.4 User Guide
4. Click Knowledge Base.
5. Enter query text or select a category to filter your search for documentation.
The most recently added documents are displayed at the top of the results list.
The version number associated with a document (for example, version 7.4) is the product version that the document describes. If a document has a revision number (for example, Revision 5), the document has been revised since it was first released with the specified product version. The Knowledge Base contains the latest available revision of any document.
Autonomy Technical SupportAutonomy Technical Support exists to provide you with prompt and accurate resolutions to difficulties related to using Autonomy software products. You can contact Technical Support using any of the following methods.
Call or email the support group at the location that is nearest to you:
Access the Customer Support site, at
https://customers.autonomy.com
Access to the contents of the Customer Support site requires a user name and password. To obtain a user name and password, follow the sign-up instructions on the home page.
Europe and Worldwide North and South America
Telephone: 00 800 4837 4890 (UK, Germany, Spain,
Netherlands, France)+44 (0) 800 0 282 858 (UK only)
Hours: 09:00 to 17:00 (GMT+1)Email: [email protected]
Telephone: 1 877 333 7744 1 (403) 294 1107 (Canada direct)
Hours: 07:00 to 18:00 MST (GMT-7)Email: [email protected]

Preface Support and Contact Information
IDOL Administration 7.4 User Guide 15
Contact AutonomyContact the location that is nearest to you for general information about Autonomy:
Europe and Worldwide North and South America
Autonomy Corporation plcCambridge Business ParkCowley Road, Cambridge, CB4 0WZ, UK
Telephone: +44 (0) 1223 448 000Fax: +44 (0) 1223 448 001
General information email:[email protected]
Autonomy, Inc.One Market Plaza, Spear Tower, Suite 1900San Francisco, CA. 94105, US
Telephone: 1 (415) 243 9955Fax: 1 (415) 243 9984
General information email: [email protected]

Preface Support and Contact Information
16 IDOL Administration 7.4 User Guide

I Get Started
This section is an introduction to Autonomy infrastructure and IDOL Administration.
Chapter 1: Introduction to IDOL


19
1 Introduction to IDOL
The modern business enterprise is increasingly reliant on the efficient processing of unstructured information, which analysts estimate is doubling every three months. This content of unstructured information, whether it is in the form of e-mails, Web pages or word processing documents, forms a critical link in virtually every process across a wide range of business operations.
Autonomy’s Intelligent Data Operating Layer (IDOL™) is a platform for understanding the meaning and significance of information. Using this off-the-shelf solution, organizations can quickly process digital information automatically and communicate with multiple applications without the need for manual processing or metadata.
Autonomy Infrastructure
Introduction to IDOL Administration
IDOL Administration Sample Workflow

1 Introduction to IDOLAutonomy Infrastructure
20 IDOL Administration 7.4 User Guide
Autonomy Infrastructure
To conduct business successfully, you need to access many types of information, including:
Figure 1-1 Types of business information
In the past, companies could only make use of 20% of the information that was relevant to them. To deal with this information they used keyword search engines, tagging schemes, collaborative filtering or linguistic methods. These methods were not only costly and inefficient but also non-scalable, inaccurate and removed the focus from core business.
80% of relevant information could not be used.
Autonomy's software infrastructure allows you to use 100% of the information that is relevant to you. It automates all the business processes that formerly had to be dealt with manually.
1 Introduction to IDOLAutonomy Infrastructure
IDOL Administration 7.4 User Guide 21
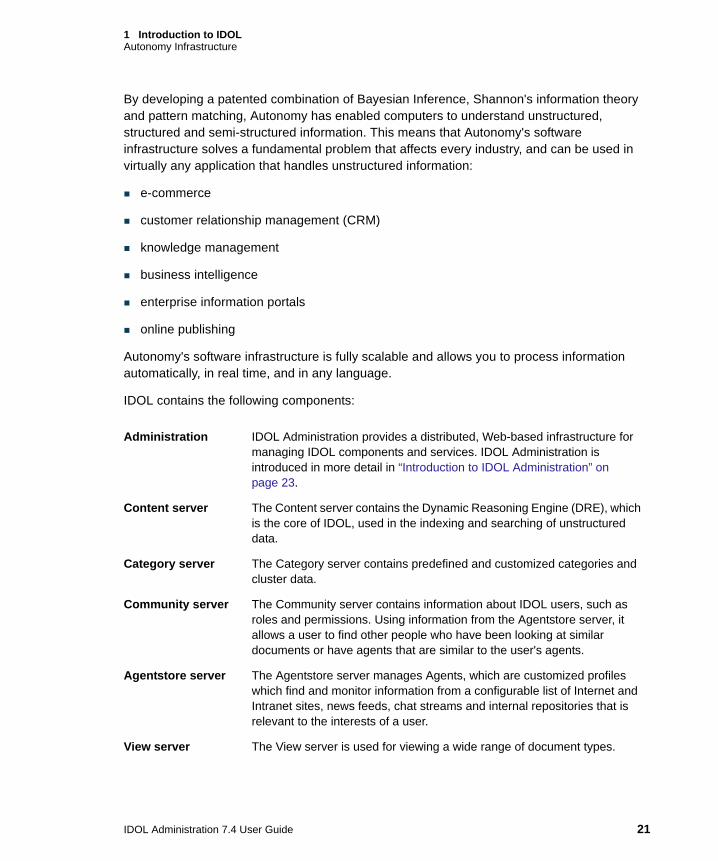
By developing a patented combination of Bayesian Inference, Shannon's information theory and pattern matching, Autonomy has enabled computers to understand unstructured, structured and semi-structured information. This means that Autonomy's software infrastructure solves a fundamental problem that affects every industry, and can be used in virtually any application that handles unstructured information:
e-commerce
customer relationship management (CRM)
knowledge management
business intelligence
enterprise information portals
online publishing
Autonomy's software infrastructure is fully scalable and allows you to process information automatically, in real time, and in any language.
IDOL contains the following components:
Administration IDOL Administration provides a distributed, Web-based infrastructure for managing IDOL components and services. IDOL Administration is introduced in more detail in “Introduction to IDOL Administration” on page 23.
Content server The Content server contains the Dynamic Reasoning Engine (DRE), which is the core of IDOL, used in the indexing and searching of unstructured data.
Category server The Category server contains predefined and customized categories and cluster data.
Community server The Community server contains information about IDOL users, such as roles and permissions. Using information from the Agentstore server, it allows a user to find other people who have been looking at similar documents or have agents that are similar to the user's agents.
Agentstore server The Agentstore server manages Agents, which are customized profiles which find and monitor information from a configurable list of Internet and Intranet sites, news feeds, chat streams and internal repositories that is relevant to the interests of a user.
View server The View server is used for viewing a wide range of document types.

1 Introduction to IDOLAutonomy Infrastructure
22 IDOL Administration 7.4 User Guide
Index Tasks Users employ Index Tasks to configure and customize tasks for IDOL server to perform on data before it is indexed.
IDOL server The IDOL server is the central repository where indexed data is held. IDOL server also includes Community, Category, Content, Agentstore, Index Tasks, IDOL Proxy and View.
Connectors Connectors enable automatic content aggregation from any type of local or remote repository (for example, a database, a Web site, a real-time telephone conversation, and so on), forming a unified solution across all information assets within the organization.
Interfaces Portlets are windows that can be set up in Autonomy's Portal-in-a-Box or third party portals. Each portlet contains an application that allows the portals' end users to benefit from a variety of IDOL server functionality.
Retina™, is an easy-to-use Web interface application that provides a full scale of retrieval methods that adjust to the individual user’s proficiency.
Autonomy Desktop Suite™ brings the power of Autonomy to every desktop. Conducting a real-time analysis of the ideas involved in the content of any opened desktop application, Desktop Suite’s ActiveKnowledge or Active Windows Extensions module provides real-time links to relevant internal and external information without needlessly diverting the user from his/her work to perform a long search or retrieval operation.
Distributed Systems Autonomy’s distribution solutions facilitate linear scaling of systems through faster command execution and reduction of processing time.
DAH™ (Distributed Action Handler) enables the distribution of ACI (Autonomy Content Infrastructure) action commands to multiple Autonomy IDOL servers, providing failover and load balancing.
DIH™ (Distributed Index Handler) enables distributed indexing of documents into multiple Autonomy IDOL servers, providing failover and load balancing.
Distributed IDOL Server is an IDOL package that includes DAH and DIH and all the IDOL Server components, except Content.
Product Orientated Drop-in Solutions
Autonomy’s Product Orientated Drop-in Solutions (PODS) allow Autonomy solutions to be easily integrated with third-party applications and solution providers. PODS enable organizations to make their existing applications compatible with IDOL with minimal configuration and administration requirements. Making IDOL server a part of any solution delivers the direct benefits of content automation and the ability to perform a vast range of IDOL server operations, regardless of file format or location.

1 Introduction to IDOLIntroduction to IDOL Administration
IDOL Administration 7.4 User Guide 23
Introduction to IDOL Administration
This guide will focus on the installation and operation of IDOL Administration, which provides a distributed, Web-based infrastructure for managing IDOL components and services, including IDOL server.
IDOL Administration contains the following components:
Together, these components establish the IDOL Administrative Network.
IDOL Dashboard This is a central design and configuration interface that allows for network design planning, service configuration, deployment, and maintenance of services, releases, licenses and metrics for all IDOL resources in a network.
Administrative Nodes (or Nodes)
Each Node communicates between the Hub and the IDOL services that reside on the host, such as IDOL server, DIH, DAH, and so on.
Administrative Hub (or Hub)
The Hub is typically the first installation of an Administrative Node. It is essentially a Node that has extra centralized functions. The Hub communicates between the administration clients and the IDOL services on various hosts. It also maintains service installations that can be downloaded and installed by Administrative Nodes.
IDOL Dashboard Web Interface
A client of the Hub, the IDOL Dashboard Web Interface provides a browser-based interface that administrators use to install Nodes and view component and service summaries.
Note that the current IDOL Dashboard is distinct from the Autonomy Service Dashboard.
Repository The Repository contains binaries for all IDOL components, the Node installer, and the Dashboard Console.
1 Introduction to IDOLIntroduction to IDOL Administration
24 IDOL Administration 7.4 User Guide
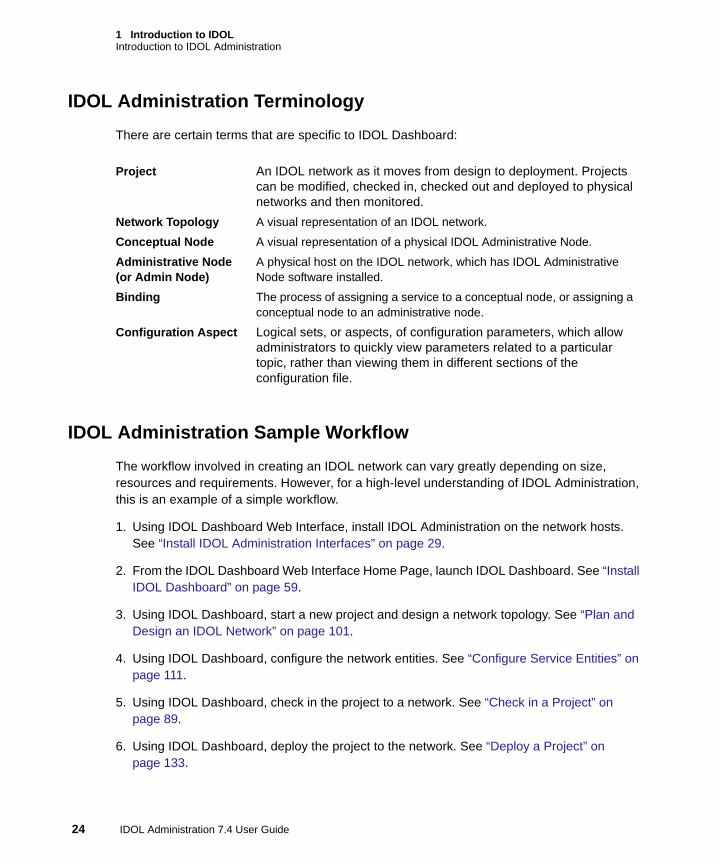
IDOL Administration TerminologyThere are certain terms that are specific to IDOL Dashboard:
IDOL Administration Sample WorkflowThe workflow involved in creating an IDOL network can vary greatly depending on size, resources and requirements. However, for a high-level understanding of IDOL Administration, this is an example of a simple workflow.
1. Using IDOL Dashboard Web Interface, install IDOL Administration on the network hosts. See “Install IDOL Administration Interfaces” on page 29.
2. From the IDOL Dashboard Web Interface Home Page, launch IDOL Dashboard. See “Install IDOL Dashboard” on page 59.
3. Using IDOL Dashboard, start a new project and design a network topology. See “Plan and Design an IDOL Network” on page 101.
4. Using IDOL Dashboard, configure the network entities. See “Configure Service Entities” on page 111.
5. Using IDOL Dashboard, check in the project to a network. See “Check in a Project” on page 89.
6. Using IDOL Dashboard, deploy the project to the network. See “Deploy a Project” on page 133.
Project An IDOL network as it moves from design to deployment. Projects can be modified, checked in, checked out and deployed to physical networks and then monitored.
Network Topology A visual representation of an IDOL network.
Conceptual Node A visual representation of a physical IDOL Administrative Node.
Administrative Node (or Admin Node)
A physical host on the IDOL network, which has IDOL Administrative Node software installed.
Binding The process of assigning a service to a conceptual node, or assigning a conceptual node to an administrative node.
Configuration Aspect Logical sets, or aspects, of configuration parameters, which allow administrators to quickly view parameters related to a particular topic, rather than viewing them in different sections of the configuration file.

1 Introduction to IDOLIntroduction to IDOL Administration
IDOL Administration 7.4 User Guide 25
7. Using IDOL Dashboard, monitor jobs and statistics. See “Network Statistics” on page 167.
8. Using IDOL Dashboard, add new releases as required. See “Manage Updates” on page 175.
For examples of network topologies, see “Scenarios for Design Consideration” on page 108.
Naming ConventionsUsing the Windows platform, avoid naming projects, service entities, or service entity instances the following (case insensitive):
These names are reserved device names and are invalid for projects or entities.
CON PRN AUX NUL
COM1 COM2 COM3 COM4
COM5 COM6 COM7 COM8
COM9 LPT1 LPT2 LPT3
LPT4 LPT5 LPT6 LPT7
LPT8 LPT9

1 Introduction to IDOLIntroduction to IDOL Administration
26 IDOL Administration 7.4 User Guide
27
II IDOL Administration Interfaces
IDOL Administration uses two user interfaces. This section introduces the installation and navigation of IDOL Dashboard and IDOL Dashboard Web Interface.
Chapter 2: Install IDOL Administration Interfaces
Chapter 3: IDOL Dashboard Interface
Chapter 4: IDOL Dashboard Web Interface

28

29
2 Install IDOL Administration Interfaces
IDOL Administration uses two interfaces, typically installed in this order: IDOL Dashboard Web Interface and IDOL Dashboard.
IDOL Dashboard allows you to design a conceptual network, independent of a physical network. When the project is ready for deployment, you must install IDOL Administrative Nodes onto network hosts; IDOL Dashboard will recognize and install configured services onto them.
System Requirements
Install an Administrative Hub
Launch IDOL Dashboard Web Interface
Install an Administrative Node from the Dashboard Web Interface
Install IDOL Dashboard
Licenses

2 Install IDOL Administration InterfacesSystem Requirements
30 IDOL Administration 7.4 User Guide
System Requirements
IDOL Administration should be installed by a system administrator.
Basic RequirementsEach Hub and Node, as well as any client running the IDOL Dashboard, must have Java 5 (JRE 1.5) or later installed. You have the option of installing it during the Hub installation, but must manually install it on any Administrative Node or client without a Hub. You can download Java/JRE from:
http://java.sun.com
Supported PlatformsIDOL runs on a variety of Windows and UNIX platforms. For a list of currently supported platforms, refer to the IDOL Release Notes.
Hardware SpecificationsThe following minimum and recommended hardware specifications are recommended for machines running IDOL server and other IDOL services.
Minimum Specifications1 GB RAM
30 GB disk
1.5 GHz CPU
Recommended Specificationsa dedicated SCSI disk
4 GB RAM
2 Install IDOL Administration InterfacesInstall an Administrative Hub
IDOL Administration 7.4 User Guide 31
100 GB disk
a minimum of two dedicated CPUs - XEON 3 GHz or above
Install an Administrative Hub
The first installation of an administration node is called the Administrative Hub, which, by default, includes the IDOL Dashboard Web Interface client and the repository of installers for all services. Other hosts can access the Hub via Web browser (or shared network path, for non-Windows based operating systems) to install the Administrative Node.
Note A new user must install the base version of IDOL Administration (currently 7.4) and then update components as required with component packages available on Automater (http://automater.automony.com). For more information, see “Manage Updates” on page 175.
The Administrative Node installer program installs the following components on a host:
Administrative Hub
IDOL Dashboard Web Interface
Repository
To run the Administrative Node installer program1. Double-click the appropriate installer package:
idoladmin_VersionNumber_WINDOWS.exe for Windows
idoladmin_VersionNumber_SOLARIS.bin for Solaris
idoladmin_VersionNumber_LINUX.bin for Linux
idoladmin_VersionNumber_AIX.bin for AIX
idoladmin_VersionNumber_HPUX.bin for HP-UX
Note This section demonstrates the installer sequence for a Windows installation. Installations for other platforms require the same input from the user.

2 Install IDOL Administration InterfacesInstall an Administrative Hub
32 IDOL Administration 7.4 User Guide
The Welcome dialog box appears.
Figure 2-1 Hub Installation—Welcome
2. Read the text and click Next.

2 Install IDOL Administration InterfacesInstall an Administrative Hub
IDOL Administration 7.4 User Guide 33
The Ensure Windows Administrative Privileges dialog box appears.
Figure 2-2 Hub Installation—Ensure Windows Administrative Privileges
3. If you have administrative privileges, click Next. If not, click Cancel and arrange to have a system administrator perform the installation.

2 Install IDOL Administration InterfacesInstall an Administrative Hub
34 IDOL Administration 7.4 User Guide
The License Agreement dialog box appears.
Figure 2-3 Hub Installation—License Agreement
4. Read the license agreement and select I accept the terms of the License Agreement
5. Click Next.

2 Install IDOL Administration InterfacesInstall an Administrative Hub
IDOL Administration 7.4 User Guide 35
The License Key File dialog box appears.
Figure 2-4 Hub Installation—License Key File
6. Enter a path or click Choose and navigate to the location of your Autonomy license key file (licensekey.dat), that you obtained when you purchased IDOL. For more information on license keys, see “Licenses” on page 60.
7. Click Next.

2 Install IDOL Administration InterfacesInstall an Administrative Hub
36 IDOL Administration 7.4 User Guide
The License Server Configuration dialog box appears.
Figure 2-5 Hub Installation—License Server Configuration
8. Enter the License Server host and port information. This is information you supplied to Autonomy Customer Support when you requested your license key.
Note Enter either an IP address or a fully qualified host name in the License Server Host field.
2 Install IDOL Administration InterfacesInstall an Administrative Hub
IDOL Administration 7.4 User Guide 37
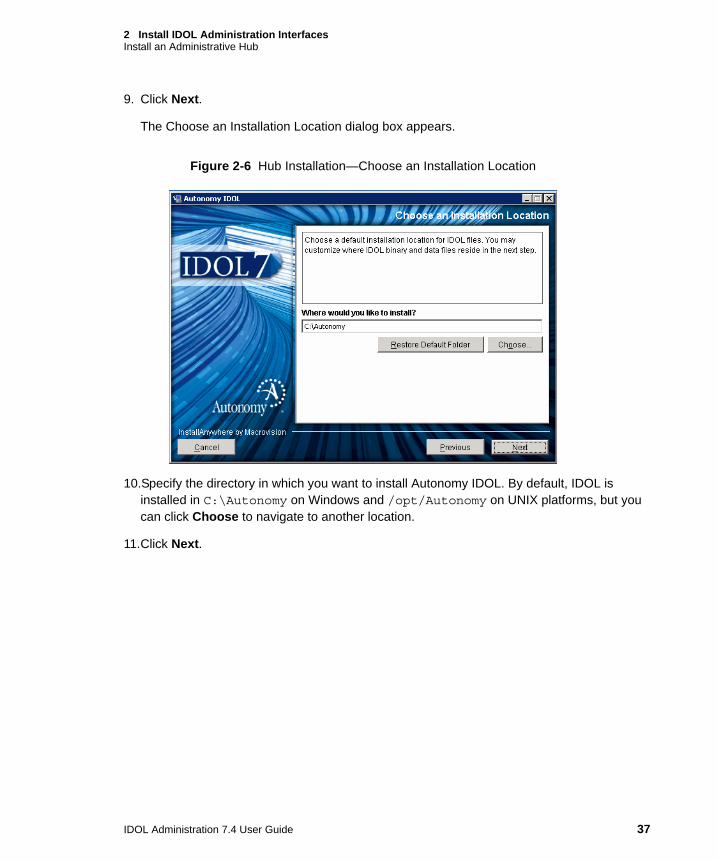
9. Click Next.
The Choose an Installation Location dialog box appears.
Figure 2-6 Hub Installation—Choose an Installation Location
10.Specify the directory in which you want to install Autonomy IDOL. By default, IDOL is installed in C:\Autonomy on Windows and /opt/Autonomy on UNIX platforms, but you can click Choose to navigate to another location.
11.Click Next.

2 Install IDOL Administration InterfacesInstall an Administrative Hub
38 IDOL Administration 7.4 User Guide
The Customize IDOL Installation Locations dialog box appears.
Figure 2-7 Hub Installation—Customize IDOL Installation Locations
12.Specify a custom directory for IDOL binary files and data files for this host. By default, these are installed in C:\Autonomy on Windows and /opt/Autonomy on UNIX platforms.

2 Install IDOL Administration InterfacesInstall an Administrative Hub
IDOL Administration 7.4 User Guide 39
The Choose a Java Virtual Machine dialog box appears.
Figure 2-8 Hub Installation—Choose a Java Virtual Machine
13.IDOL Administration requires Java 5 or greater. If the installer has detected applicable JVM instances on the host, you can click Choose a Java JVM already installed on this system and select one from the list.
To scan your computer for a JVM that was not automatically detected, click Search for Others.
If there is not a suitable JVM listed, you can point the installer to a different one by selecting Choose Another.
14.Click Next.

2 Install IDOL Administration InterfacesInstall an Administrative Hub
40 IDOL Administration 7.4 User Guide
The Administrative Hub Configuration dialog box appears.
Figure 2-9 Hub Installation—Administrative Hub Configuration
15.In the Administrative Network field, enter the root namespace for IDOL components in the administration network. The Administrative Hub’s sub-components are located using this namespace. Each Administrative Node’s namespace is this root namespace appended with the Hub or Node name (for example, IDOL.DOCTEST.IDOLServer1), and thus each Administrative Node’s sub-components are located using the Node’s namespace. The Administrative Network entry must not conflict with Java's namespace (for example, java.lang, java.util.logging, and so on).
In the Administrative Hub Name field, enter a name for the Administrative Hub.
In the Host Name field, enter the name or IP of the host.
16.Click Next.

2 Install IDOL Administration InterfacesInstall an Administrative Hub
IDOL Administration 7.4 User Guide 41
The Administrative Hub Access dialog box appears.
Figure 2-10 Hub Installation—Administrative Hub Access
Enter a Hub Access User Name and Password. Then, enter the password again to confirm it. The default user name is admin, but you can use a different value if you prefer.
You need the Hub’s host name to access the Hub from other network locations, and you must remember the user name and password because they are required when you install Administrative Nodes on other hosts.
17.Click Next.
2 Install IDOL Administration InterfacesInstall an Administrative Hub
42 IDOL Administration 7.4 User Guide
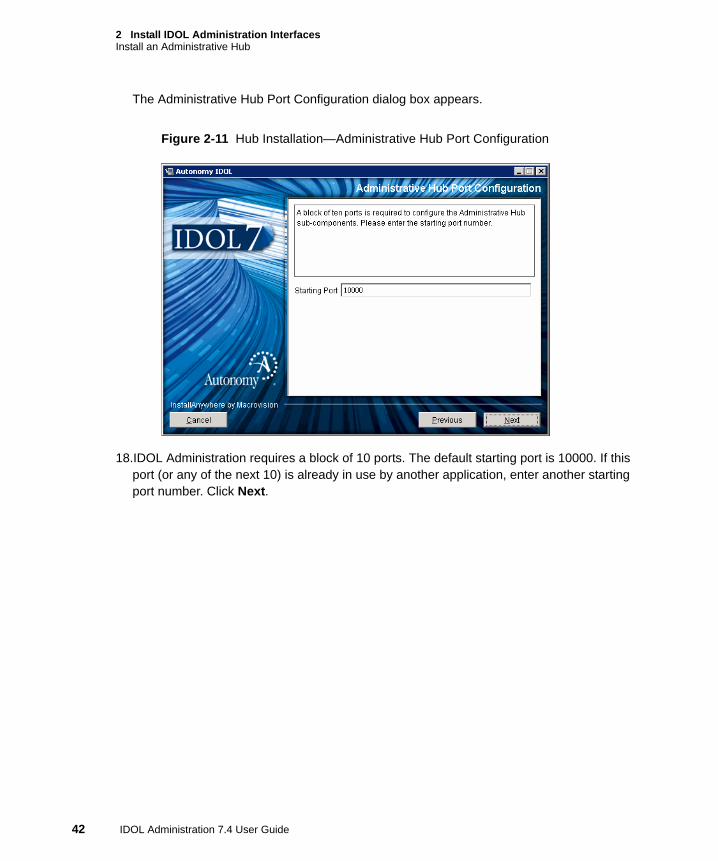
The Administrative Hub Port Configuration dialog box appears.
Figure 2-11 Hub Installation—Administrative Hub Port Configuration
18.IDOL Administration requires a block of 10 ports. The default starting port is 10000. If this port (or any of the next 10) is already in use by another application, enter another starting port number. Click Next.

2 Install IDOL Administration InterfacesInstall an Administrative Hub
IDOL Administration 7.4 User Guide 43
The Pre-Installation Summary dialog box appears.
Figure 2-12 Hub Installation—Pre-Installation Summary
19.Check the values you have entered, then click Install.
If you want to abort the installation process, click Cancel.

2 Install IDOL Administration InterfacesInstall an Administrative Hub
44 IDOL Administration 7.4 User Guide
Following successful installation of Autonomy IDOL, the Install Complete dialog box appears.
Figure 2-13 Hub Installation—Install Complete
20.Click Next.
The IDOL installation is complete.

2 Install IDOL Administration InterfacesInstall an Administrative Hub
IDOL Administration 7.4 User Guide 45
The Launch IDOL Dashboard dialog box appears. This launches the IDOL Dashboard Web Interface.
Figure 2-14 Hub Installation—Launch IDOL Dashboard (Web Interface)
You must launch the Dashboard Web Interface if you want to install IDOL services on the host. By default, Launch IDOL Dashboard is selected in this dialog box.
21.Click Done to close the installer and launch the IDOL Dashboard Web Interface.
If you do not want to launch the Dashboard Web Interface at this time, clear the check box, and click Done.

2 Install IDOL Administration InterfacesLaunch IDOL Dashboard Web Interface
46 IDOL Administration 7.4 User Guide
Launch IDOL Dashboard Web Interface
There are two ways to launch IDOL Dashboard Web Interface normally after the Hub has been installed:
From the Windows Start menu on the Administrative Hub.
Select Start > Programs > Autonomy > VersionNumber > NetworkName > IDOL Administrative Dashboard.
From a browser on the Administrative Hub or any other machine in your network, open a browser and enter the following URL:
http://HubHostName:10000/dashboard
where HubHostName is the machine name or IP address of the host on which you installed the Administrative Hub.
For example, if your Hub is installed on the host pinetree, the typical URL is
http://pinetree:10000/dashboard

2 Install IDOL Administration InterfacesInstall an Administrative Node from the Dashboard Web Interface
IDOL Administration 7.4 User Guide 47
Figure 2-15 IDOL Dashboard Web Interface Home Page
In the example shown above, the Administrative Hub was installed on the host pinetree. Notice that pinetree is included in the Administrative Nodes list in the left pane.
Install an Administrative Node from the Dashboard Web Interface
IDOL Dashboard deploys projects to pre-existing administrative nodes. Thus, before you can deploy a project, all administrative nodes must be physically installed. From the IDOL Dashboard Web Interface, you can install an Administrative Node on any host in your network.
Before installing an Administrative Node, note the following:
On a host without a Hub installed, make sure JRE1.5.0_6 or later is installed.
On any host, including the Hub, make sure you know the Hub access user name and password.

2 Install IDOL Administration InterfacesInstall an Administrative Node from the Dashboard Web Interface
48 IDOL Administration 7.4 User Guide
To install an Administrative Node from the Dashboard Web Interface1. From the host on which you want to install the Node, launch a browser and connect to the
Hub’s IDOL Dashboard Web Interface. For details, see “Launch IDOL Dashboard Web Interface” on page 46.
2. On the Dashboard Web Interface Home Page, click Install an Administrative Node.
The Welcome dialog box appears.
Figure 2-16 Node Installation—Welcome
3. Read the text and click Next.

2 Install IDOL Administration InterfacesInstall an Administrative Node from the Dashboard Web Interface
IDOL Administration 7.4 User Guide 49
The Ensure Windows Administrative Privileges dialog box appears.
Figure 2-17 Node Installation—Ensure Windows Administrative Privileges
4. If you have administrative privileges on the current host and also know the Hub access user name and password, click Next. If not, click Cancel and arrange to have a system administrator perform the installation.

2 Install IDOL Administration InterfacesInstall an Administrative Node from the Dashboard Web Interface
50 IDOL Administration 7.4 User Guide
The Choose an Installation Location dialog box appears.
Figure 2-18 Node Installation—Choose an Installation Location
5. Specify the directory on the current host in which you want to install Autonomy IDOL Administrative Node. By default, it is installed in C:\Autonomy on Windows and /opt/Autonomy on UNIX platforms, but you can click Choose to navigate to another location. Click Next.

2 Install IDOL Administration InterfacesInstall an Administrative Node from the Dashboard Web Interface
IDOL Administration 7.4 User Guide 51
The Customize IDOL Installation Locations dialog box appears.
Figure 2-19 Node Installation—Customize IDOL Installation Locations
6. Specify a custom directory for IDOL binary files and data files for this host. By default, these are installed in C:\Autonomy on Windows and /opt/Autonomy on UNIX platforms.

2 Install IDOL Administration InterfacesInstall an Administrative Node from the Dashboard Web Interface
52 IDOL Administration 7.4 User Guide
The Administrative Hub Information dialog box appears.
Figure 2-20 Node Installation—Administrative Hub Information
7. Enter the Hub Access User Name and Hub Access Password. If you do not know what these are, contact your Autonomy representative.

2 Install IDOL Administration InterfacesInstall an Administrative Node from the Dashboard Web Interface
IDOL Administration 7.4 User Guide 53
The Choose a Virtual Java Machine dialog box appears.
Figure 2-21 Node Installation—Choose a Virtual Java Machine
8. If the installer has detected applicable JVM instances on the host, you can select one from the list. To scan your computer for a JVM that was not automatically detected, click Search for Others. If there is not a suitable JVM listed, you can point the installer to a different one by clicking Choose Another.
9. Click Next.

2 Install IDOL Administration InterfacesInstall an Administrative Node from the Dashboard Web Interface
54 IDOL Administration 7.4 User Guide
The Administrative Hub Information dialog box appears.
Figure 2-22 Node Installation—Administrative Hub Information
10.In the Hub Host Name field, enter the name or IP of the Hub (if you are installing an Administrative Node on the Hub) or the current host (if you are installing an Administrative Node on a different machine). Enter the Hub access user name and password. Then, enter the password again to confirm it.
11.Click Next.

2 Install IDOL Administration InterfacesInstall an Administrative Node from the Dashboard Web Interface
IDOL Administration 7.4 User Guide 55
The Administrative Node Configuration dialog box appears.
Figure 2-23 Node Installation—Administrative Node Configuration
12.Enter the Administrative node name and the name or IP address of the host on which the Administrative node is installed.

2 Install IDOL Administration InterfacesInstall an Administrative Node from the Dashboard Web Interface
56 IDOL Administration 7.4 User Guide
The Administrative Node Port Configuration dialog box appears.
Figure 2-24 Node Installation—Administrative Node Port Configuration
13.The Administrative Node requires a block of 10 ports. The default starting port is 10000. If another node is detected, the default automatically adds 10 to avoid conflicts. If you know this port (or any of the next 10) is already in use by another application, enter another starting port number. Click Next.

2 Install IDOL Administration InterfacesInstall an Administrative Node from the Dashboard Web Interface
IDOL Administration 7.4 User Guide 57
The Pre-Installation Summary dialog box appears.
Figure 2-25 Node Installation—Pre-Installation Summary
14.Check the values you have entered, then click Install.
The progress of the installation process is indicated. If you want to abort the installation process, click Cancel.

2 Install IDOL Administration InterfacesInstall an Administrative Node from the Dashboard Web Interface
58 IDOL Administration 7.4 User Guide
Following successful installation of the Administrative Node, the Install Complete dialog box appears.
Figure 2-26 Node Installation—Install Complete
15.Click Done.
The Administrative Node installation is complete.
To launch IDOL Dashboard Web Interface, see “Launch IDOL Dashboard Web Interface” on page 95.
2 Install IDOL Administration InterfacesInstall IDOL Dashboard
IDOL Administration 7.4 User Guide 59
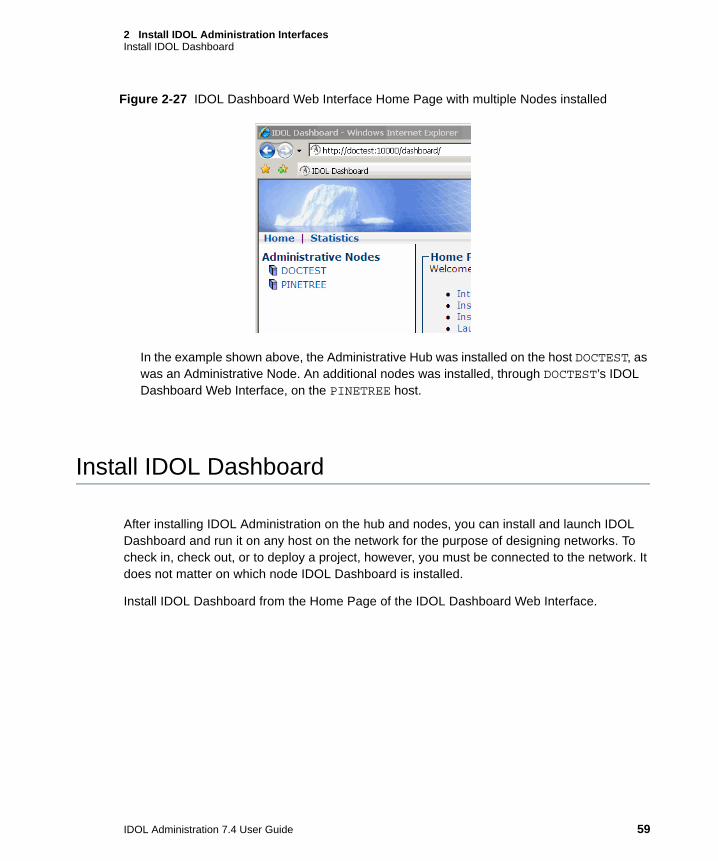
Figure 2-27 IDOL Dashboard Web Interface Home Page with multiple Nodes installed
In the example shown above, the Administrative Hub was installed on the host DOCTEST, as was an Administrative Node. An additional nodes was installed, through DOCTEST’s IDOL Dashboard Web Interface, on the PINETREE host.
Install IDOL Dashboard
After installing IDOL Administration on the hub and nodes, you can install and launch IDOL Dashboard and run it on any host on the network for the purpose of designing networks. To check in, check out, or to deploy a project, however, you must be connected to the network. It does not matter on which node IDOL Dashboard is installed.
Install IDOL Dashboard from the Home Page of the IDOL Dashboard Web Interface.

2 Install IDOL Administration InterfacesLicenses
60 IDOL Administration 7.4 User Guide
Figure 2-28 IDOL Dashboard Web Interface Home Page—Download IDOL Dashboard
1. Click Download the IDOL Dashboard.
You are prompted to download a zip file.
2. Unpack the zip file.
3. Double-click idolconsole.exe, in the bin folder. IDOL Dashboard opens.
For information about the interface and how to use IDOL Dashboard, see “Navigate the IDOL Dashboard Interface” on page 62.
Licenses
Each instance of an IDOL Administrative Hub requires its own license file.
To obtain a license, contact Autonomy Support and request a license key file for your specific installation. When you receive this file from Autonomy Support, save it to your hard drive and remember where it is located. You need this information to complete an Administrative Hub installation. See “Install an Administrative Hub” on page 31.
Note that you can revoke licenses at any time if, for example, you want to reallocate them to different users or if you want to change a user’s IP address.
For more information about updating license keys, see “Manage IDOL Component Releases” on page 183.

61
3 IDOL Dashboard Interface
This chapter focuses on basic concepts and descriptions for the IDOL Dashboard interface used in the design, configuration and deployment of IDOL networks.
Navigate the IDOL Dashboard Interface
Toolbars and Menus
List of IDOL Dashboard Windows
Manage Projects
Connect to a Different Network
View Help
For information about where IDOL Dashboard fits into a high-level workflow, see “IDOL Administration Sample Workflow” on page 24.
For information on network design tasks and procedures, see “Plan and Design an IDOL Network” on page 101.
For information on service configuration, see “Configure Service Entities” on page 111.
For information on deploying a project to a network, see “Deploy a Project” on page 133.

3 IDOL Dashboard InterfaceNavigate the IDOL Dashboard Interface
62 IDOL Administration 7.4 User Guide
Navigate the IDOL Dashboard Interface
The IDOL Dashboard interface uses a flexible set of windows and tabs. You can quickly customize the layout by dragging and dropping windows to different locations.
Windows and tabs layout tasks include:
Change the Layout
Minimize Windows
Maximize Windows
Close Windows
Undock and Dock Windows
You can close or minimize Windows to make space for others, but are always accessible from the Window menu.

3 IDOL Dashboard InterfaceNavigate the IDOL Dashboard Interface
IDOL Administration 7.4 User Guide 63
Below is an example of a possible window layout.
Figure 3-1 IDOL Dashboard Interface—Sample Window Arrangement
Change the LayoutTo move a window to a different location, drag the title bar and drop it to your desired location. An orange outline indicates where the window will drop.
Reset the Window LayoutTo reset windows to their default layout, click Reset Windows from the Window menu.

3 IDOL Dashboard InterfaceNavigate the IDOL Dashboard Interface
64 IDOL Administration 7.4 User Guide
Minimize WindowsSome windows can be minimized to clear up space. Click or to minimize a window.
Windows are minimized to the right and left edges of the interface and their title bars become show/hide toggle buttons.
Figure 3-2 Windows Minimized to Edges
To restore a minimized window, click its title bar, and then click Pin . When a window is restored, the layout resets to its previous arrangement.

3 IDOL Dashboard InterfaceNavigate the IDOL Dashboard Interface
IDOL Administration 7.4 User Guide 65
Maximize WindowsTo maximize a window, double-click on its title bar. All other windows are automatically minimized to the right and left edges. To undo this action, double-click on the title bar again.
Close WindowsTo close a window, click the X on upper right corner of the tab or window.
Undock and Dock WindowsTo undock, or separate a window from the main interface:
Right-click the title bar and select Undock Window.
or
With the window selected, press Alt + Shift + D.
To dock an undocked window back onto the main interface:
Right-click the title bar and select Dock Window.
or
With the window selected, press Alt + Shift + D.
About the CanvasThe canvas is the largest window of the IDOL Dashboard interface and is used for several tasks. For most tasks, the canvas determines the contents of the surrounding windows.
The following canvases are available:
Network Editor
Network Project Monitor
Conceptual Node Binding Editor
Conceptual Node Binding
Service Information

3 IDOL Dashboard InterfaceToolbars and Menus
66 IDOL Administration 7.4 User Guide
Toolbars and Menus
The standard toolbar under the menus includes the following buttons:
Process Control ToolbarOnce the project is deployed, use the following buttons to start, stop, restart, or kill services:
For more information, see “Start and Stop Services” on page 154.
Selection/Move/Link. Use to drag or move service entities on the Network Editor.
Zoom. Use the mouse wheel to zoom in and out of the Network Editor.
Panning. Click to grab the canvas to move around the page both horizontally and vertically.
Expand/Collapse. Used only with the Index Task Editor to expand or collapse index tasks.
Starts a service.
Stops a service.
Restarts (stops, and then starts) a service.
Kills a service.
3 IDOL Dashboard InterfaceList of IDOL Dashboard Windows
IDOL Administration 7.4 User Guide 67
List of IDOL Dashboard Windows
These are brief introductions to each window in the IDOL Dashboard interface, in alphabetical order.
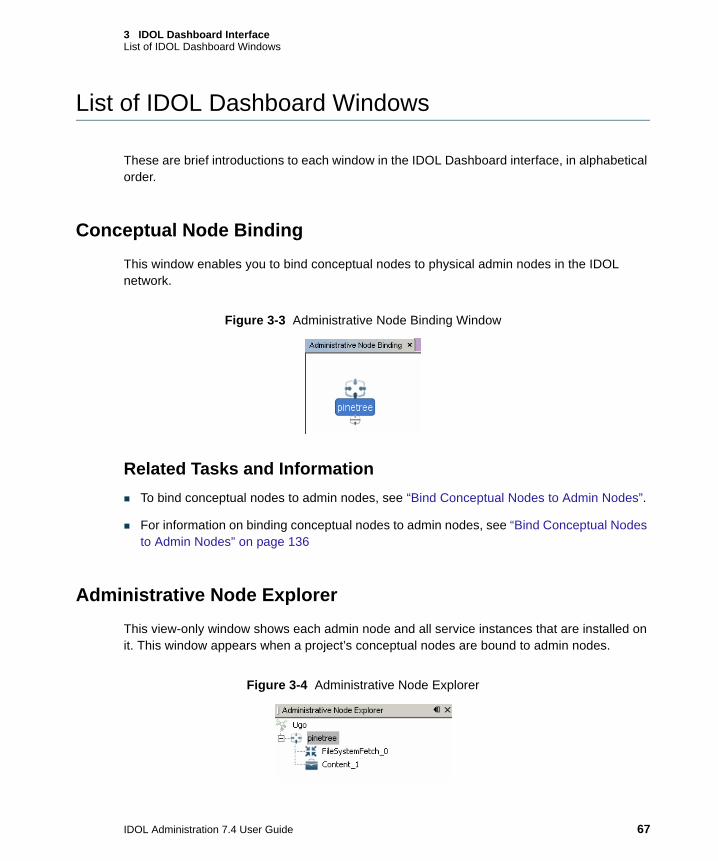
Conceptual Node BindingThis window enables you to bind conceptual nodes to physical admin nodes in the IDOL network.
Figure 3-3 Administrative Node Binding Window
Related Tasks and InformationTo bind conceptual nodes to admin nodes, see “Bind Conceptual Nodes to Admin Nodes”.
For information on binding conceptual nodes to admin nodes, see “Bind Conceptual Nodes to Admin Nodes” on page 136
Administrative Node ExplorerThis view-only window shows each admin node and all service instances that are installed on it. This window appears when a project’s conceptual nodes are bound to admin nodes.
Figure 3-4 Administrative Node Explorer

3 IDOL Dashboard InterfaceList of IDOL Dashboard Windows
68 IDOL Administration 7.4 User Guide
Related Tasks and InformationFor information on binding conceptual nodes to admin nodes, see “Bind Conceptual Nodes to Admin Nodes” on page 136
Aspect EditorYou can create new entity definitions by adding or removing parameters in its configuration aspects. This overrides the settings specified in the Template Configuration Editor.
Figure 3-5 Aspect Editor
3 IDOL Dashboard InterfaceList of IDOL Dashboard Windows
IDOL Administration 7.4 User Guide 69
To modify the definition of a service entity instance, see “Modify Service Definitions” on page 187.
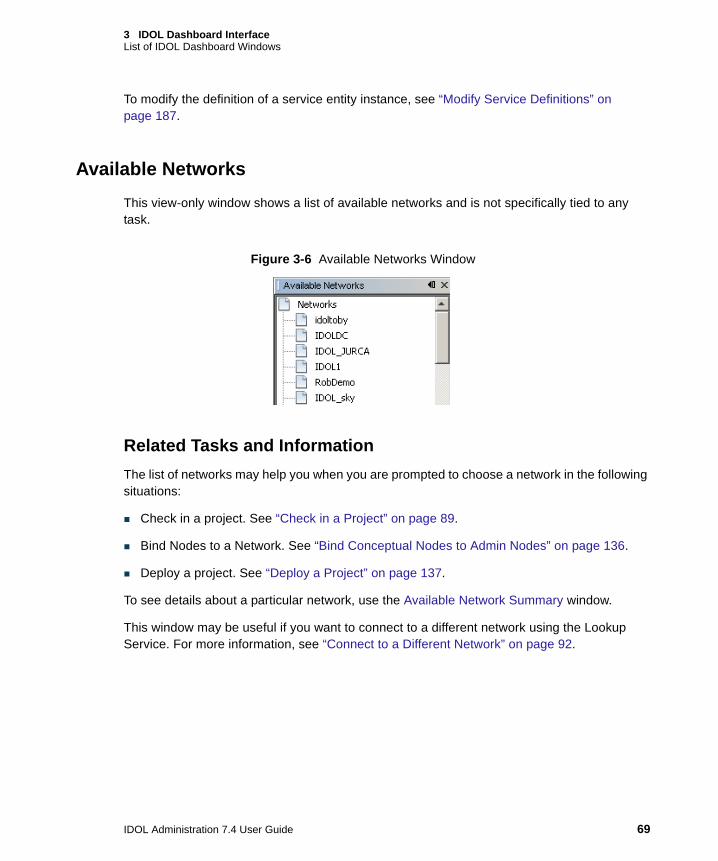
Available NetworksThis view-only window shows a list of available networks and is not specifically tied to any task.
Figure 3-6 Available Networks Window
Related Tasks and InformationThe list of networks may help you when you are prompted to choose a network in the following situations:
Check in a project. See “Check in a Project” on page 89.
Bind Nodes to a Network. See “Bind Conceptual Nodes to Admin Nodes” on page 136.
Deploy a project. See “Deploy a Project” on page 137.
To see details about a particular network, use the Available Network Summary window.
This window may be useful if you want to connect to a different network using the Lookup Service. For more information, see “Connect to a Different Network” on page 92.

3 IDOL Dashboard InterfaceList of IDOL Dashboard Windows
70 IDOL Administration 7.4 User Guide
Available Network Summary This is a view-only window showing details about a selected host and is not specifically tied to any task.
Figure 3-7 Available Network Summary Window
Related Tasks and InformationThis information may help you when you are prompted to choose a network in the following situations:
Check in a project. See “Check in a Project” on page 89.
Bind Nodes to a Network. See “Bind Conceptual Nodes to Admin Nodes” on page 136.
Deploy a project. See “Deploy a Project” on page 137.
The Available Network Summary window shows the following information about hosts on the selected network:
administrative node name
host name(s)
version of Administrative Node components
platform

3 IDOL Dashboard InterfaceList of IDOL Dashboard Windows
IDOL Administration 7.4 User Guide 71
Conceptual Node Binding Editor This is a canvas that allows you to associate services to a conceptual node. A conceptual node is a conceptual representation of an admin node.
Figure 3-8 Binding Services to a Node
Related Tasks and InformationTo bind services to conceptual nodes, see “Bind Services to Nodes” on page 133.
For more information about the canvas, see “About the Canvas” on page 65.
Configuration Aspect ExplorerThis window shows a list of configuration aspects for a service entity. To configure an entity’s settings, click on a configuration aspect—for example, Ports—and use the Properties window to add or change the configuration.
Figure 3-9 Aspect Explorer Window

3 IDOL Dashboard InterfaceList of IDOL Dashboard Windows
72 IDOL Administration 7.4 User Guide
Related Tasks and InformationTo configure service entities, see “Configure Service Entities” on page 111.
For information about configuration aspects, see “About Configuration Aspects” on page 114.
Configuration ViewerThis view-only window shows a configuration file view of the selected configuration aspect and is not specifically tied to any task.
Figure 3-10 Configuration Viewer
Related InformationFor information about configuration aspects, see “About Configuration Aspects” on page 114.
Edit Configuration TemplateThe Edit Configuration Template is another method that allows you to make changes to service entities. This can be useful if you have existing templates which can be pasted in directly. However, the typical method is through modifying parameter values in the Properties window.

3 IDOL Dashboard InterfaceList of IDOL Dashboard Windows
IDOL Administration 7.4 User Guide 73
Figure 3-11 Edit Configuration Template
Related Tasks and InformationTo configure service entities, see “Configure Service Entities” on page 111.
Edit Field ProcessingThe Edit Field Processing dialog box allows you to categorize data into fields, and specify how the data should be processed when it is indexed. To access the dialog box, right-click the Field Processing configuration aspect and click Edit.
There are two tabs available:
Field Processing. This is used to modify IDOL fields.
Processing Profiles. This is used to modify field processes.

3 IDOL Dashboard InterfaceList of IDOL Dashboard Windows
74 IDOL Administration 7.4 User Guide
Figure 3-12 Edit Field Processing Dialog Box—Field Processing Tab
Related Tasks and InformationFor information about field processing, see “Field Processing” on page 128.

3 IDOL Dashboard InterfaceList of IDOL Dashboard Windows
IDOL Administration 7.4 User Guide 75
Entity Definition ExplorerThis is a view-only list of available service entities whose definitions you can modify.
Figure 3-13 Entity Definition Explorer
Related Tasks and InformationTo modify or create a new a service definition, see “Modify Service Definitions” on page 187.

3 IDOL Dashboard InterfaceList of IDOL Dashboard Windows
76 IDOL Administration 7.4 User Guide
Entity ExplorerThe network service entities displayed on the Network Editor are shown in a tree structure. This provides a way to determine the number of instances of each service in the project when it in checked out.
Figure 3-14 Entity Explorer Window
Related Tasks and InformationTo add or remove service entities from the project, see “Create a Network Topology” on page 106.
To configure service entities, see “Configure Service Entities” on page 111.

3 IDOL Dashboard InterfaceList of IDOL Dashboard Windows
IDOL Administration 7.4 User Guide 77
Field MapperThe Field Mapper is used to match external (often proprietary) fields with Autonomy database fields. This option is available for databases and certain connectors; for example, Notes.
Figure 3-15 Field Mapper
Related Tasks and InformationTo configure a Notes connector, see “Configure Notes Connectors” on page 120 .
For information about field processing, see “Field Processing” on page 128.
Index Task EditorThe Index Task Editor is a canvas that allows you to manipulate data before it is indexed. Like the Network Editor, a number of types of index tasks are available from the Palette and are dragged onto the canvas, where they are set up in a flowchart style.
3 IDOL Dashboard InterfaceList of IDOL Dashboard Windows
78 IDOL Administration 7.4 User Guide
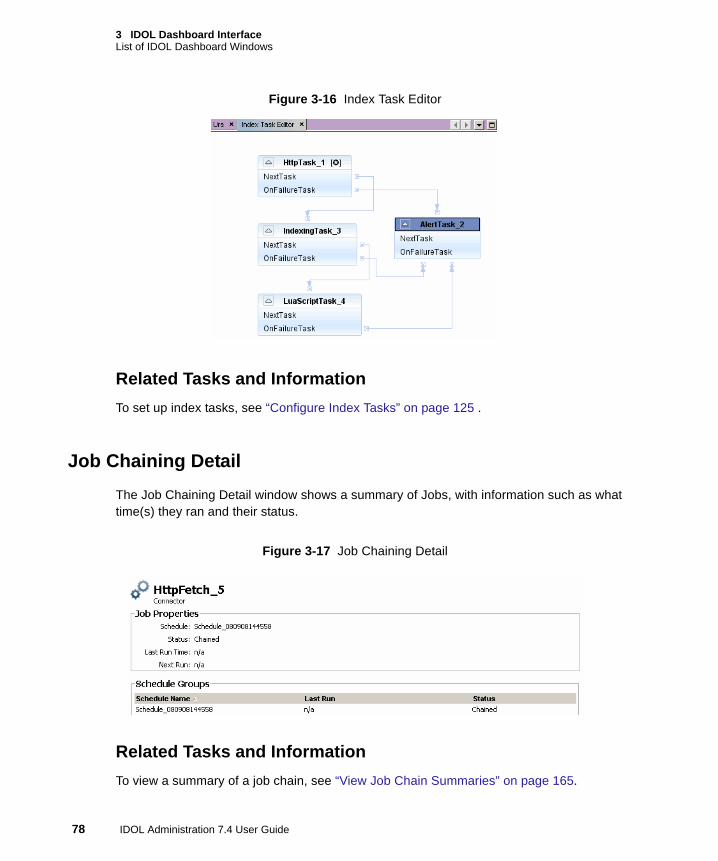
Figure 3-16 Index Task Editor
Related Tasks and InformationTo set up index tasks, see “Configure Index Tasks” on page 125 .
Job Chaining DetailThe Job Chaining Detail window shows a summary of Jobs, with information such as what time(s) they ran and their status.
Figure 3-17 Job Chaining Detail
Related Tasks and InformationTo view a summary of a job chain, see “View Job Chain Summaries” on page 165.

3 IDOL Dashboard InterfaceList of IDOL Dashboard Windows
IDOL Administration 7.4 User Guide 79
Job Chaining EditorThe Job Chaining Editor is a canvas that allows you to create job schedules and job chains. Like the Index Task Editor, a number of types of jobs are available from the Palette and are dragged onto the canvas, where they are set up in a flowchart style.
Figure 3-18 Job Chaining Editor
Related Tasks and InformationFor information about creating and scheduling jobs chains, see “About Jobs and Job Scheduling” on page 161.
Job Chaining ExplorerThe jobs displayed on the Job Chaining Editor are shown in a tree structure. This provides a way to determine the number of jobs, and which jobs are part of a schedule.
Figure 3-19 Job Chaining Explorer

3 IDOL Dashboard InterfaceList of IDOL Dashboard Windows
80 IDOL Administration 7.4 User Guide
Related Tasks and InformationFor information about creating and scheduling jobs chains, see “About Jobs and Job Scheduling” on page 161.
To view a summary of a job chain, see “View Job Chain Summaries” on page 165.
Lookup ServiceThe Lookup Service dialog box is accessed from the Tools menu and is used to connect IDOL Dashboard to a different network.
Figure 3-20 Lookup Service Dialog Box
Related Tasks and InformationFor information on using the Lookup Service, see “Connect to a Different Network” on page 92.

3 IDOL Dashboard InterfaceList of IDOL Dashboard Windows
IDOL Administration 7.4 User Guide 81
Network EditorThe Network Editor is a canvas where you can design a topology of a network of service entities and their relationships. Service entities are dragged onto the canvas from the Palette.
Figure 3-21 Network Editor Window
Related Tasks and InformationThe Network Editor is the first tool used in creating a network topology. For more information, see “Plan and Design an IDOL Network” on page 101.
The Network Editor is a canvas. For more information, see “About the Canvas” on page 65.

3 IDOL Dashboard InterfaceList of IDOL Dashboard Windows
82 IDOL Administration 7.4 User Guide
Network Project MonitorThe Network Project Monitor is an administration canvas that shows a network after deployment.
Figure 3-22 Network Project Monitor Showing Deployed Network
Related Tasks and InformationFrom this window, you can administer the network after it has been deployed. Use this window for the following tasks:
“Start and Stop Services” on page 154
“View a Service’s Log Files” on page 155
“View or Edit Configuration Files” on page 159

3 IDOL Dashboard InterfaceList of IDOL Dashboard Windows
IDOL Administration 7.4 User Guide 83
Network Service ExplorerThis window shows an expandable view of the installed services on each administrative node in an IDOL network.
This window is connected to the Service Information canvas, which shows the details of the item selected.
Figure 3-23 Network Service Explorer
PaletteThe Palette provides the entities used in creating a network. The content on the canvas determines the options on the Palette.
Figure 3-24 Palette Window—Network Editor Canvas View
Related Tasks and InformationUsing the Network Editor, the Palette displays entities that can be arranged onto the canvas. For information on creating a network topology, see “Create a Network Topology” on page 106.
For information about the canvas, see “About the Canvas” on page 65.

3 IDOL Dashboard InterfaceList of IDOL Dashboard Windows
84 IDOL Administration 7.4 User Guide
PluginsYou can access the Plugins dialog box from the Tools menu and use it to manage IDOL Dashboard. A plugin is an update to the IDOL Dashboard interface.
Figure 3-25 Plugins Dialog Box—Viewing Installed Plugins
Related Tasks and InformationUse this window to view installed plugins, download and install new plugins, activate and deactivate plugins, and set up automatic updates. For details, see “Manage IDOL Dashboard Plugins” on page 175.
For information on setting up automatic updates, see “Check for Plugin Updates Automatically” on page 180.
Note Plugins are for the Dashboard interface only. For IDOL component release management, see “Manage IDOL Component Releases” on page 183.

3 IDOL Dashboard InterfaceList of IDOL Dashboard Windows
IDOL Administration 7.4 User Guide 85
PropertiesThis window displays the properties or configurations of the selected service entity on the active canvas. Use this window to edit entity names, instances, and parameter values.
Related Tasks and InformationThe options change in this window depending on the active canvas. For example:
On the Network Editor, you can edit the basic properties of a selected entity .
Figure 3-26 Properties Window Showing a Service Entity’s Basic Properties
For more information on configuring basic properties, see “Configure an Entity’s Basic Properties” on page 111.
When using the Configuration Aspect Explorer, you can:
Change the scope of the configuration aspect. For information about configuration aspects, see “About Configuration Aspects” on page 114.
Edit configuration parameter values. For more information about configuring parameters, see “Configure Parameter Values” on page 116.

3 IDOL Dashboard InterfaceList of IDOL Dashboard Windows
86 IDOL Administration 7.4 User Guide
Figure 3-27 Properties Window Showing List of Parameters
When configuring Logical Databases (using the Configuration Aspect Explorer), the Field Processing tab appears at the top of the window.
Figure 3-28 Properties Window Showing Field Processing Tab

3 IDOL Dashboard InterfaceList of IDOL Dashboard Windows
IDOL Administration 7.4 User Guide 87
The Field Processing tab of the Properties window shows lists of field types in sections that are expandable and collapsible. For details about configuring databases and field processing, see “Configure Logical Databases” on page 128.
In the area at the bottom of the Properties window, there is a brief description of the selected parameter, as well as a link to the help window.
Figure 3-29 Properties Window Showing Description and Help
For more information about the Help, see “View Help” on page 93.
Repository and ReleasesYou can access this dialog box by selecting Update Repository on the Tools menu and use it to install new releases of IDOL components.
Figure 3-30 Repository and Releases
Related Tasks and InformationTo manage releases, see “Manage IDOL Component Releases” on page 183.

3 IDOL Dashboard InterfaceList of IDOL Dashboard Windows
88 IDOL Administration 7.4 User Guide
Service InformationThis window, driven by the Network Service Explorer, allows you to view the properties of a selected administrative node or service in your IDOL network.
Figure 3-31 Service Information
To view an administrative node’s properties, see “View an Administrative Node’s Properties” on page 151.

3 IDOL Dashboard InterfaceManage Projects
IDOL Administration 7.4 User Guide 89
Topology OverviewThis window displays a satellite view of the network.
Figure 3-32 Topology Overview Window
If the view of the project does not fit in the Network Editor window, you can zoom in to a specific area on the canvas by dragging the shaded box onto it.
Manage Projects
The term Project is used to describe an IDOL Dashboard network as it moves from design to deployment. You can be modify, check in, check out and deploy projects to physical networks and then monitor them. The following section provides information to keep track of your project within IDOL Dashboard.
Check in a ProjectTo commit changes to a project for deployment, you must check it in to a network.
At each check in, the project is saved as a new version.
3 IDOL Dashboard InterfaceManage Projects
90 IDOL Administration 7.4 User Guide
Note It is advisable to check in projects and test deployment on a staging network.
To check in a project1. On the File menu, click Check In Project.
2. Select a network from the list.
3. Click OK.
While working on a project, all changes (except changes in text editors) are maintained even if you close windows within IDOL Dashboard.
Once you check in a project, you cannot make changes to it unless you check it out. See “Check Out a Project” on page 90 for details.
CheckpointsA checkpoint is a check-in and check-out in one step.
To check in a project and immediately check it out again, click Checkpoint on the File menu.
Check Out a Project To edit a previously checked-in project, you must check it out.
On the File menu, click Open and Check Out Project.
Note A project can only be checked out and edited by one user at a time.
By default, the most current version of a project is automatically selected for checkout.
To check out a previous version of a project1. On the File menu, click Open and Check Out Project.
2. Select the network and project from the list.
If the project is checked out, there is a Lock icon beside the name.

3 IDOL Dashboard InterfaceManage Projects
IDOL Administration 7.4 User Guide 91
If it is checked out on the same host you are currently working on, you can open it.
If it is checked out on a different host, you will see an error message. In this case, the project must be checked in before you can check it out.
3. Click Options.
The Version list appears.
4. Select a version number and click OK.
Note When you check in this version, it is one version number higher than the highest existing version.
For example, if there are versions 1.0, 2.0, and 3.0, and you check out version 2.0, when you check it in, it becomes version 4.0.
Undo a Check OutIf you check out and edit a project, and decide to discard the changes, you can revert to the state of the last check in using Undo Check Out.
Click Undo Check Out on the File menu.
Delete a ProjectUse this procedure to delete a project.
To delete a project1. Click Tools > Manage Project > Delete Project. A Delete Project dialog box appears.
2. Select the Network Domain where the project is checked in, and then the Project name.
3. Click OK.
Close a ProjectClosing a project saves changes you have made to your local host before it closes.
Click Close Project on the File menu.

3 IDOL Dashboard InterfaceConnect to a Different Network
92 IDOL Administration 7.4 User Guide
Note Using the X to close the canvas does not close the project.
Connect to a Different Network
The Lookup Service is used to connect IDOL Dashboard to a host on another network.
To connect to another network1. Click Lookup Service on the Tools menu.
Figure 3-33 Lookup Service
2. Enter the Host and Port.
Depending on your network, you can enter the Host as an IP address, hostname, or fully qualified hostname.
The Port number is the Starting Port number (as specified during the installation) plus 3. For example, if your start port is 10000, enter 10003.

3 IDOL Dashboard InterfaceView Help
IDOL Administration 7.4 User Guide 93
View Help
A brief description of a selected parameter is available at the bottom of the Properties window.
Figure 3-34 Brief Parameter Description
For more detailed information, such as defaults, minimums, maximums, ranges, and examples, click .
An IDOL Dashboard Help window opens.
You can also access IDOL Dashboard Help for information on other parameters using the Help menu:
Click Help Contents on the Help menu.

3 IDOL Dashboard InterfaceView Help
94 IDOL Administration 7.4 User Guide

95
4 IDOL Dashboard Web Interface
The IDOL Dashboard Web Interface provides central and secure access to core IDOL Administration functionality. It is not a central part of IDOL Administration; however, it is required for several key tasks.
Launch IDOL Dashboard Web Interface
Log on to Security-Enabled IDOL Administration
IDOL Dashboard Web Interface Tasks
Most of the tasks in implementing an IDOL network require IDOL Dashboard. For more information about IDOL Dashboard, see “IDOL Dashboard Interface” on page 61.
Launch IDOL Dashboard Web Interface
You can launch the Dashboard Web Interface in three ways:
From the Hub installer. If the Launch IDOL Dashboard check box was selected in the last installation dialog box, IDOL Dashboard opens automatically in a browser.
From the Windows Start menu on an Administrative Node.
From a browser on any computer on the network. Enter the following URL in the Address bar:
http://NodeNostName:10000/dashboard
4 IDOL Dashboard Web InterfaceLaunch IDOL Dashboard Web Interface
96 IDOL Administration 7.4 User Guide
where NodeHostName is the machine name or IP address of the host on which you installed the Hub.
For example, if the Hub is installed on the host oxbow, the typical URL would be:
http://oxbow:10000/dashboard
From the IDOL Dashboard Web Interface, you can download and install IDOL Dashboard to administer the Hub and the Nodes. See “Navigate the IDOL Dashboard Interface” on page 62 for more information.
IDOL Dashboard Web Interface Home PageWhen you launch the IDOL Dashboard Web Interface, the Home Page appears.
The section of the right pane entitled Home Page provides resources and convenient links for administrators:
Introducing IDOL Administration. Launches a short animated introduction to the IDOL Administration architecture.
Install an Administrative Node. Launches the Administrative Node installer, either on the current host (if one has not yet been installed) or on another host. Use IDOL Dashboard for this. See “Install an Administrative Node from the Dashboard Web Interface” on page 47.
Launch IDOL Dashboard. Launches a drag-and-drop graphic editor, which allows administrators to:
Design and configure an IDOL network where components can be later deployed to hosts.
Organize IDOL services and connectors.
Control services and jobs.
Manage IDOL component updates
View log files
Historical Statistics. Provides access to the Data Layer Component Monitor (DLCM), a service that gathers statistics about processes, components and services on an IDOL system. See “Network Statistics” on page 167.
Autonomy Technical Support. Opens the Autonomy Technical Support home page in a new browser window.

4 IDOL Dashboard Web InterfaceLog on to Security-Enabled IDOL Administration
IDOL Administration 7.4 User Guide 97
The IDOL Services on all Administrative Nodes section of the right pane gives a summary of all IDOL services installed on Nodes in the IDOL administrative network. For each service installed on the system, the following information appears:
name (DLCM and License are system-created names, other services are named by the administrator who created them).
type of component (for example, Statistics server, License server, IDOL server, HTTP Connector, File System Connector).
administrative Node on which the service is installed.
version of the IDOL service.
The left pane of the Home Page, entitled Administrative Nodes, lists all the Administrative Nodes. Clicking one shows a summary of that Administrative Node’s properties. See “View an Administrative Node’s Properties” on page 151.
At any time during an IDOL Dashboard Web Interface session, you can click Home on the menu bar to display the Home Page.
Log on to Security-Enabled IDOL Administration
If logon security is enabled on your system, a logon page or dialog box appears when you first launch the IDOL Dashboard Web Interface and again when you launch IDOL Dashboard.
To log on:
1. Enter your network username and password. If you are not sure which username and password to use, contact your system administrator.
2. Click Login.
When you are finished using the system, click Logout, located at the top right corner of the IDOL Dashboard Web Interface, to finish your session.
For information on how to set up logon security, see “Set up Logon Security” on page 143.

4 IDOL Dashboard Web InterfaceIDOL Dashboard Web Interface Tasks
98 IDOL Administration 7.4 User Guide
IDOL Dashboard Web Interface Tasks
Using the IDOL Dashboard Web Interface, you can:
Install administrative nodes. See “Install an Administrative Node from the Dashboard Web Interface” on page 47.
View properties of administrative nodes. See “View an Administrative Node’s Properties” on page 151.
View network statistics. See “Network Statistics” on page 167.

III Project Planning and Deployment
IDOL Dashboard is the interface used for planning and deploying projects which involves the following tasks:
Chapter 5: Plan and Design an IDOL Network
Chapter 6: Configure Service Entities
Chapter 7: Deploy a Project


101
5 Plan and Design an IDOL Network
The Network Editor canvas allows for the visual conceptualization and planning of a network. A network is an interconnected system of a hub and its nodes. This tool has the advantage of being able to design a network that does not need to be bound physically, so the project can be deployed at a later time.
Sample Workflow: Creating a Network Topology
IDOL Service Entities
Create a Network Topology
Scenarios for Design Consideration
For information on configuring a network, see “Configure Service Entities” on page 111.
For information on deploying a network, see “Deploy a Project” on page 133.
Sample Workflow: Creating a Network Topology
IDOL is a flexible technology that can be adapted to any organization’s needs. As a result, it is difficult to describe a typical IDOL network structure. It may be useful, however, to see one possible network structure and the workflow required to set it up.
For some possible scenarios and network topology examples, see “Scenarios for Design Consideration” on page 108 and “Simple Network” on page 108.

5 Plan and Design an IDOL NetworkSample Workflow: Creating a Network Topology
102 IDOL Administration 7.4 User Guide
A distributed IDOL network is illustrated in Figure 5-1.
Figure 5-1 Structure of a Simple IDOL Network
The network in Figure 5-1 includes the following IDOL components:
HTTP Connector. An Autonomy connector used to index documents from HTTP Web servers (Internet or Intranets).
File System Connector. An Autonomy connector used to index documents from the organization’s central data storage facility.
Logical Databases. Conceptual databases, which are not installed services.
The Distributed Index Handler (DIH). This distributes the indexing of documents across the four Content components.

5 Plan and Design an IDOL NetworkSample Workflow: Creating a Network Topology
IDOL Administration 7.4 User Guide 103
Content (four instances). The actual indexed data, distributed for efficiency under the Logical Database. There are four icons to show each instance for the purpose of visibility, but IDOL Dashboard can represent any number of instances using a single icon.
The Distributed Action Handler (DAH). This distributes ACI (Autonomy Content Infrastructure) action commands from the search interface across the four Content components.
Hosts such as the Administrative Hub and Nodes are not shown. Depending on the size of the system, the number of hosts is flexible. You could install every entity on one host, one entity per host, or in combination spread across many hosts.
Note A host is not necessarily the same as an Administrative Node. It is possible to install multiple Nodes on a single host.
The following hypothetical workflow covers only the planning of the network topology:
1. Using the IDOL installer, install an Administrative Hub on a central host.
2. Using IDOL Dashboard, create and configure the network design on the Network Editor. See “Create a Network Topology” on page 106.
3. From another host, access the Administrative Hub using a Web browser and install a local Administrative Node from IDOL Dashboard Web Interface.

5 Plan and Design an IDOL NetworkIDOL Service Entities
104 IDOL Administration 7.4 User Guide
IDOL Service Entities
Service entities are the components that make up an IDOL network. Using the Network Editor canvas, the following service entities are available from the Palette:
Table 5-1 IDOL Service Entity Descriptions
Service Entity Description
Category Stores predefined and/or customized categories in which data is organized.
Community Stores information about users, roles, and permissions.
Content Indexes, collects, manipulates and stores data indexed by Connectors. A Logical Database usually represents a number of Content instances.
DiSH Distributed Service Handler. Manages IDOL licenses.
IndexTasks Manipulates the index files / IDX files (for example, adds additional fields relevant to the content) before the data is passed to Content for indexing.
IDOL Server A central repository that holds indexed data. IDOL Server also includes Community, Category, Content, Agentstore, Index Tasks, IDOL Proxy and View.
Refer to the IDOL Server Administration Guide for more information.
Distributed IDOL Server
A central repository that holds indexed data. Distributed IDOL server is a package that includes DAH and DIH, and all IDOL server components except Content.
LogicalDatabase A conceptual database to which Connectors index. It is connected (optionally via a DIH) to a number of IDOL Servers or Contents, where the content is stored. The Logical Database is not a service and does not store data.

5 Plan and Design an IDOL NetworkIDOL Service Entities
IDOL Administration 7.4 User Guide 105
For more information about these components, refer to the IDOL Server Administration Guide.
For information on configuring service entities, see “Configure Service Entities” on page 111.
VirtualDatabase A conceptual database to which action queries are sent. It is connected (optionally via a DAH) to a number of IDOL Servers or Contents.
Virtual databases are useful for grouping conceptually similar databases together for easier querying. For example, instead of querying multiple logical databases named Biology, Chemistry, and Physics, you can set up a Science virtual database to query all three.
DAH Distributes action requests across IDOL servers or Content components.
Refer to the DAH Administration Guide for more information.
DIH Distributes indexing requests across IDOL servers or Content components.
Refer to the DIH Administration Guide for more information.
File System Connector
Gathers data from system files.
HTTP Connector Gathers data from Web servers (Internet or Intranet).
Introspect Connector
Gathers data from Introspect files.
Notes Connector Gathers data from Lotus Notes files.
Introspect Image Server
Converts native files to image files for Introspect.
Service Entity Description
5 Plan and Design an IDOL NetworkCreate a Network Topology
106 IDOL Administration 7.4 User Guide
Create a Network Topology
Use this procedure to create a network topology.
To create a network topology1. On the File menu, click New Local Project.
The project is considered local until it is checked into a network. A dialog box prompts you to enter a name for the project.
2. Enter a name and click OK.
A blank Network Editor canvas appears, surrounded by its associated windows. For information about IDOL Dashboard windows, see “List of IDOL Dashboard Windows” on page 67.
Note You can open only one project at a time. If you have a project open, check it in or close it before opening a different one.
3. From the Palette, drag service entity icons from the Palette onto the Network Editor as required. For more information, see “Add Service Entities” on page 106.
For information on service entities, see “IDOL Service Entities” on page 104.
4. Establish relationships between entities. For instructions, see “Establish Entity Relationships” on page 107.
Add Service EntitiesUse this procedure to add service entities.
To create or add a service entity to a network topology1. Select a service entity icon on the Palette.
2. Drag the icon onto the Network Editor.
To create more than one instance, in the Properties window, enter a number in the Instances value field. Each service entity icon can represent a number of instances.

5 Plan and Design an IDOL NetworkCreate a Network Topology
IDOL Administration 7.4 User Guide 107
Note There is no difference between single icon entities and multiple instances contained in the same icon. You can configure 10 instances represented by one icon the same way you could configure 10 distinct icons.
Depending on whether you want an uncluttered canvas or would prefer to see all network elements, either choice is available.
3. If you changed the number of instances, click Enter.
If required, you can rename the service entities at this point. For details on renaming entities and setting instances., see “Configure an Entity’s Basic Properties” on page 111.
Establish Entity RelationshipsTo connect the entities into a network, the entities must be linked. Links between entities show the direction of data flow. A dashed line represents a relationship with a conceptual database, and a solid line represents data flow, although the data may move in both directions.
To establish relationships between entities1. In the Network Editor, click and drag from the name of one entity to any point on another
entity.
A line with an arrow appears between the entities.
Figure 5-2 Entity Relationship
From a Connector to a Logical Database, for example, it represents one or more jobs.
Only certain types of connections can be made. For examples of network topologies, see “Scenarios for Design Consideration” on page 108.

5 Plan and Design an IDOL NetworkScenarios for Design Consideration
108 IDOL Administration 7.4 User Guide
Once a network is established, you can configure each service entity. See “Configure Service Entities” on page 111.
To edit the names of service entities or to change the number of instances, see “Configure an Entity’s Basic Properties” on page 111.
Scenarios for Design Consideration
Network configurations can vary enormously depending on different priorities, such as resource availability, size of data, fault tolerance, and so on. This section discusses and explains a few possible scenarios and corresponding network designs.
Scenario 1: SimpleThe following is an example of a simple setup that you would use for searching.
Figure 5-3 Simple Network

5 Plan and Design an IDOL NetworkScenarios for Design Consideration
IDOL Administration 7.4 User Guide 109
The example shows a File System Connector, but you could use any connector here. This IDOL network can be installed on a single host.
Scenario 2: High Availability RequirementThis is typical for an enterprise scenario in which it is important to have no single point of failure.
Figure 5-4 High Availability Network
To ensure there is no single point of failure, the multiple instances of Content, DIH, and DAH components, should be installed on separate servers. A mirrored network is common in this situation, so the data is always available in any Content server, even if one of the others fails.

5 Plan and Design an IDOL NetworkScenarios for Design Consideration
110 IDOL Administration 7.4 User Guide
This setup can support a network with non-homogenous operating systems. The following combination is recommended:
Each Content on a separate Linux or Unix server.
Each DAH and DIH on a separate server.
Connectors on other servers (Windows or Unix)
IDOL Administration installed on each server, but the IDOL management should be done from a Windows server.

111
6 Configure Service Entities
Once you have established a network definition using the Network Editor, you can begin configuring service entities.
You configure an IDOL service by setting its parameter values.
Configure an Entity’s Basic Properties
About Configuration Aspects
Configure Parameter Values
Service Entity-Specific Configuration
Merge Parameter Values
Edit a Service’s Configuration File
Additional Configuration Resources
Configure an Entity’s Basic Properties
When you select a service entity from the Network Editor, the Properties window typically shows two fields that you can edit:
DisplayName. Name of the service entity. For example, Content.
Instances. Replication count of a service entity.

6 Configure Service EntitiesConfigure an Entity’s Basic Properties
112 IDOL Administration 7.4 User Guide
Rename Service EntitiesUse this procedure to change the display name of service entities.
To change the display name of a service entity1. In the Network Editor, select the service entity.
2. In the Properties window, click the value field to the right of DisplayName.
The cursor highlights the text in the field.
3. Overwrite the text by typing in a new name.
Figure 6-1 Properties—Rename Entity
You can also name each entity instance. For details, see “Rename Entity Instances” on page 113.
Change the Number of Service Entity InstancesUse this procedure to change the number of service entity instances.
To change the number of instances for a selected service entity1. In the Properties window, click the value field to the right of Instances.
2. Overwrite the number by typing in a new number.
For information on naming each entity instance, see “Rename Entity Instances” on page 113.
IMPORTANT For a list of names that should not be used, see “Naming Conventions” on page 25.
3. If you choose to remove an instance, a dialog box appears to allow you to choose which instance to delete. Use the arrows to select the instance(s) to be removed and click OK.

6 Configure Service EntitiesConfigure an Entity’s Basic Properties
IDOL Administration 7.4 User Guide 113
Figure 6-2 Remove Instances
Rename Entity InstancesUse this procedure to change the name of entity instances.
To rename a service entity instance1. In the Configuration Aspect Explorer, select the instance.
Figure 6-3 Configuration Aspect Explorer—Instance Selected
2. In the Properties window, click the value field to the right of Service Alias field.

6 Configure Service EntitiesAbout Configuration Aspects
114 IDOL Administration 7.4 User Guide
Figure 6-4 Properties — Rename Entity Instance
3. Enter a new name and click Enter.
IMPORTANT For a list of names that should not be used, see “Naming Conventions” on page 25.
About Configuration Aspects
You typically configure service using the Configuration Aspect Explorer. Configuration aspects are logical sets of configuration parameters that allow you to quickly view parameters related to a particular topic, rather than viewing them in different sections of the configuration file.
For example, Default Constraints is a standard configuration aspect for connectors. This collection of parameters determines which data is filtered out during importing. Parameters in this aspect may include the following:
CantHaveCSVsCantHaveCheckImportAttachmentsMustHaveCSVsImportCantHaveCSVsImportCantHaveCheckImportCantHaveFieldCSVsImportMustHaveCSVsImportMustHaveCheckImportMustHaveFieldCSVs
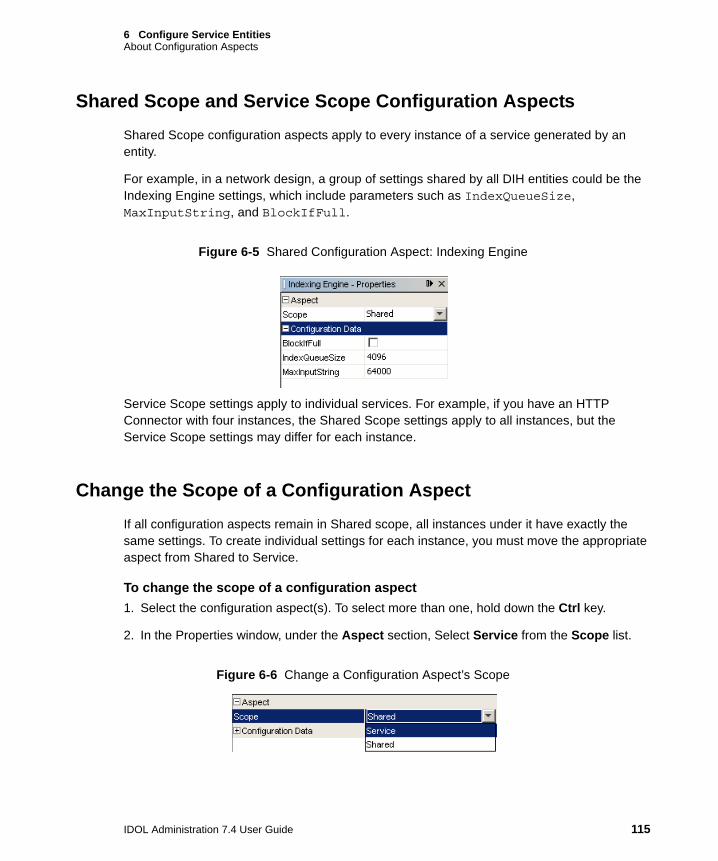
6 Configure Service EntitiesAbout Configuration Aspects
IDOL Administration 7.4 User Guide 115
Shared Scope and Service Scope Configuration AspectsShared Scope configuration aspects apply to every instance of a service generated by an entity.
For example, in a network design, a group of settings shared by all DIH entities could be the Indexing Engine settings, which include parameters such as IndexQueueSize, MaxInputString, and BlockIfFull.
Figure 6-5 Shared Configuration Aspect: Indexing Engine
Service Scope settings apply to individual services. For example, if you have an HTTP Connector with four instances, the Shared Scope settings apply to all instances, but the Service Scope settings may differ for each instance.
Change the Scope of a Configuration AspectIf all configuration aspects remain in Shared scope, all instances under it have exactly the same settings. To create individual settings for each instance, you must move the appropriate aspect from Shared to Service.
To change the scope of a configuration aspect1. Select the configuration aspect(s). To select more than one, hold down the Ctrl key.
2. In the Properties window, under the Aspect section, Select Service from the Scope list.
Figure 6-6 Change a Configuration Aspect’s Scope

6 Configure Service EntitiesConfigure Parameter Values
116 IDOL Administration 7.4 User Guide
In the Configuration Aspect Explorer, the configuration aspect populates under each instance.
Figure 6-7 Configuration Aspects Under Service Scope
Configure Parameter Values
To change the value of a parameter within a configuration aspect, use the Properties window. The parameters are listed under the Configuration Data section.
Click in the value field to the right of the parameters to enter a value, or change a value by overwriting it.

6 Configure Service EntitiesConfigure Parameter Values
IDOL Administration 7.4 User Guide 117
Figure 6-8 Configure Parameters
For information on viewing parameter help information, see “View Help” on page 93.
Find a Parameter in the ListUse this procedure to find a parameter in the Properties window.
To find a parameter in the Properties window1. Click an area inside the window that is not a text field. Anywhere on the left side is
recommended. It does not matter if you select a parameter.
2. Start typing the name of the parameter.
A Quick Search window appears, and the closest match is highlighted.
Figure 6-9 Find a Parameter
The Quick Search window disappears when you click anywhere in IDOL Dashboard.
6 Configure Service EntitiesService Entity-Specific Configuration
118 IDOL Administration 7.4 User Guide
Service Entity-Specific Configuration
This section describes the minimum steps required to deploy and run services. For more specific information for each service entity, see the appropriate guide, listed in “Additional Configuration Resources” on page 131.
The following services run without any additional configuration:
IDOL Server
Category
Community
Content
DiSH
Group Server
DAH
DIH
For more specific configuration, see the relevant guide for each service: “Additional Configuration Resources” on page 131.
Configure File System Connectors File System Connectors require at least one valid directory path and the specification of file types to index.
To enter the starting path1. In the Configuration Aspect Explorer, expand the job configuration aspect branch. It
appears when the connector is linked, and is named after the Logical Database to which it is connected.
For example, if the Logical Database is named Earth, the branch of configuration aspects is Earth_job.
2. Select the Directory Polling configuration aspect.

6 Configure Service EntitiesService Entity-Specific Configuration
IDOL Administration 7.4 User Guide 119
3. In the Properties window, in the DirectoryPathCSVs field, type or paste in the starting directory path(s). Separate multiple paths with a comma.
4. Click Enter.
To specify the types of files the connector retrieves1. Select the Directory Polling configuration aspect.
2. In the DirectoryFileMatch field in the Properties window, enter the file types you want retrieved. Separate multiple entries with commas.
By default, the DirectoryFileMatch field is pre-populated with *.txt,*.pdf,*.doc. You can add more file types, or enter *.* to retrieve all files.
To set up a connector to use Import Module Advanced, see “Import Module Advanced” on page 122.
Configure HTTP ConnectorsHTTP Connector require at least one valid URL.
To enter the starting URL1. In the Configuration Aspect Explorer, select the URL configuration aspect. It is located in a
nested tree for job aspects, named after the Logical Database to which it is connected.
Figure 6-10 URL Configuration Aspect
2. In the Properties window, enter the starting URL in the URL field. For example,
http://www.wikipedia.org

6 Configure Service EntitiesService Entity-Specific Configuration
120 IDOL Administration 7.4 User Guide
3. Click Enter.
To set up a connector to use Import Module Advanced, see “Import Module Advanced” on page 122.
Configure Notes Connectors The Notes Connector must connect to specific Lotus Notes databases on Lotus Notes servers. You can map Lotus Notes fields to the appropriate IDOL fields using the Field Mapper.
When you select a Notes job configuration aspect, the Field Mapper appears.
Note To use the Field Mapper, you must have a Lotus Notes client installed on the same host as IDOL Dashboard.
Figure 6-11 Field Mapper
To view fields1. Click Connect.
2. In the Dashboard Access section of the dialog box that appears, enter the Notes Server name and password.
3. Fill in the Connector Configuration section with logon information so that the connector can access the Notes server. Enter this information even if Lotus Notes is running on the same host as IDOL Dashboard so the information will be added to the configuration file.

6 Configure Service EntitiesService Entity-Specific Configuration
IDOL Administration 7.4 User Guide 121
4. Select or clear the following options as required:
Show View Columns
Case Sensitive
Get Attachments
Verbose
Map all
For more information about these options, refer to the Notes Connector Administration Guide.
Note These settings can be changed later using the Change Settings button.
5. Click OK.
Figure 6-12 Field Mapper—Connected to Notes Server
6. Select a Notes database from the list.
7. Select a View from the list.
To map fields1. Click on the left side of the table.
The Add Field Mapping dialog box appears.
Figure 6-13 Field Mapping Tabs
2. There are three options for field mapping:

6 Configure Service EntitiesService Entity-Specific Configuration
122 IDOL Administration 7.4 User Guide
a. Map single Lotus Notes fields to IDOL fields.
Simple Mapping. On the Simple Mapping tab, select a Lotus Notes document field and the IDOL field to which the selected Notes field should map, or enter a new IDOL field.
b. Map Lotus Notes forms to IDOL fields.
Notes Form Mapping. On the Notes Form Mapping tab, select a Lotus Notes form and form field, and the IDOL field to which the selected Notes fields should map, or enter a new IDOL field.
c. Map Lotus Notes formulas to IDOL fields.
Notes Formula Mapping. On the Notes Formula Mapping tab, select a Lotus Notes form and enter a formula. Then, select the IDOL field to which the selected Notes values should map, or enter a new IDOL field.
3. Click OK. To map more fields, repeat from step 1.
Note If you created new IDOL fields, you must specify how the fields should be processed when the data is indexed. See “Create Field Processing Profiles” on page 123.
To set up a connector to use Import Module Advanced, see “Import Module Advanced” on page 122.
Import Module AdvancedYou can set up connectors to use Import Module Advanced, which uses customized scripts. For more information about Import Module and Import Module Advanced, refer to the Import Module Administration Guide.
To configure your connector to use Import Module Advanced1. Right-click the selected connector and click Edit Configuration Template.
2. Change the value of ImportDefaultSlaveDirectory to <BinInstallPath>filters_enhanced
3. Click Save and close the window.

6 Configure Service EntitiesCreate Field Processing Profiles
IDOL Administration 7.4 User Guide 123
Configure Distributed IDOL ServerSince Distributed IDOL Server does not include the Content component, it must be connected to one or more Content services to run.
Figure 6-14 Distributed IDOL Servers Connected to Contents
Create Field Processing Profiles
If you created a new IDOL field, the Processing Profiles column is blank. Create a processing profile to specify how the field should be indexed.
To create a field processing profile for a new IDOL field1. In the Field Mapper window, under the Processing Profiles column, double click the cell.
The Edit Field Processing dialog box appears.
2. Click the Processing Profiles tab.
3. Click Add.
4. Enter a name for the new processing profile and click OK.
The new profile appears in the list.
5. Ensure the new profile is selected. Select the data type(s) relevant, and/or specify values in the following fields if applicable:
Language Type Name
Security Type Name

6 Configure Service EntitiesCreate Field Processing Profiles
124 IDOL Administration 7.4 User Guide
Synonym Job Name
Field Value Match
Weight
Numeric Type Maximum Memory
6. Click the Field Processing tab.
7. To assign one or more processing profile(s) to the IDOL field, select the new processing profile from the Available Processing Profiles list, and click the < to move the profile to the Assigned Processing Profiles list. To select several profiles, hold down the Shift or Ctrl key.
8. Click OK.
To modify field processing for an IDOL field, see “Modify Field Processing” on page 124.
For more information about fields and field types, refer to the IDOL Server Administration Guide.
Modify Field ProcessingUse this procedure to modify field processing.
To change the way an existing IDOL field is processed1. In the Field Mapper window, under the Processing Profiles column, double click the cell.
The Edit Field Processing dialog box appears.
2. To assign one or more processing profile(s) to the IDOL field, select the new processing profile from the Available Processing Profiles list, and click the < to move the profile to the Assigned Processing Profiles list. To select several profiles, hold down the Shift or Ctrl key.
To remove a processing profile from the Available Processing Profiles list, select it and click the >. To select several profiles, hold down the Shift or Ctrl key.
3. Click OK.

6 Configure Service EntitiesCreate Field Processing Profiles
IDOL Administration 7.4 User Guide 125
Configure Index TasksIndex Tasks are scripts that IDOL executes to manipulate data before it is indexed. Index tasks are set up in a flowchart style on the canvas.
When you initially link an index task to a Content or IDOL Server on the Network Editor, a dialog box appears, asking you to select the initial index task from a drop-down list box.
Figure 6-15 Select an Index Task
You can configure further tasks by selecting the aspect from the Configuration Aspect Explorer.
To set up index tasks1. In the Configuration Aspect Explorer, click IndexTasks.
A new canvas, the Index Tasks Editor window opens. On the Palette, there are several default tasks, such as LUA Script Task, Category Task, Indexing Task, and so on.
Figure 6-16 Index Tasks Palette
2. From the Palette, drag the index task that will be the first task in the series onto the canvas, such as NextTask or OnFailureTask.
Each index task lists one or more chain task settings. These can be linked to other index tasks.
3. Right-click on the title bar of the index task and click Set as Start Task.
A star appears beside the name of the index task on the title bar.

6 Configure Service EntitiesCreate Field Processing Profiles
126 IDOL Administration 7.4 User Guide
Figure 6-17 Start Task
Create a Chain of TasksYou can chain tasks together using NextTask and OnFailureTask chain task settings.
To set up a chain of index tasks to follow the start task1. Drag a line from the start task’s setting onto the next task’s title bar.
Different index tasks have different settings. Refer to the IDOL Server help for details on which settings are available for different task types.
Figure 6-18 Index Task—Create a Chain
A link from the first index task’s setting to the second index task appears.
Figure 6-19 Index Tasks—Two Tasks Linked
2. Continue making connections between index tasks with the settings as appropriate, using the above steps.

6 Configure Service EntitiesCreate Field Processing Profiles
IDOL Administration 7.4 User Guide 127
To set a different index task as the Start Task1. Select the index task that you want to be the Start Task. This is the first task you want IDOL
to execute on incoming data.
2. Right-click the title bar of the index task and click Set as Start Task.
A star appears beside the name of the index task on the title bar.
To delete a connection between tasks1. Select the line between the index tasks.
The line is highlighted when selected.
Figure 6-20 Index Tasks—Delete Links Between Tasks
2. Right-click the selected line and click Delete.
The index task connection disappears.
To delete an index task, right-click the index task and click Delete.
Figure 6-21 Index Tasks—Delete

6 Configure Service EntitiesField Processing
128 IDOL Administration 7.4 User Guide
Configure Logical DatabasesLogical Databases must be named. See “Rename Service Entities” on page 112 for details.
Databases are not services—they are abstract and their instances are represented by the instances of Content or IDOL Server entities to which they are connected, so they do not have an Instance field in their Properties window.
You can control database fields using field processing. For details, see “Field Processing” on page 128.
Field Processing
Field processing allows you to categorize data into fields, and specify how it should be processed when it is indexed. This is done to make searches easier and more accurate for end users.
To configure field processing for a Logical Database1. In the Configuration Aspect Explorer, right-click the Field Processing configuration aspect
and click Edit.
The Edit Field Processing dialog box appears.
2. Select an IDOL Field from the list.
3. Assign one or more processing profile(s) to the IDOL field by selecting them in the Available Processing Profiles list on the right side, and click the < to move them to the left side. To select several profiles, hold down Shift or Ctrl.
4. Click OK.
To create new field processing profiles, see “Create Field Processing Profiles” on page 123.
For details on field processing, refer to the IDOL Server Administration Guide.

6 Configure Service EntitiesMerge Parameter Values
IDOL Administration 7.4 User Guide 129
Merge Parameter Values
You can easily merge values for the same parameter among instances. For example, if you had previously set up 10 instances of DAHs with distinct SuggestTerms values, you can later merge them to the same value.
To merge parameter values1. Hold down the Ctrl key and select the configuration aspects containing the parameter value
from each service instance to be merged.
Figure 6-22 Select Configuration Aspects of Multiple Instances
The Properties window shows that you have selected multiple objects. Value fields show the text <Different Values> when the values are different among the selected instances.

6 Configure Service EntitiesMerge Parameter Values
130 IDOL Administration 7.4 User Guide
Figure 6-23 Multiple Properties Selected
2. Enter the values.
3. Click Enter.
Change Configuration Aspect Scope From Service to Shared Changing the scope of the configuration aspect from Service to Shared results in a merge of parameter values together, since Shared configuration aspects apply to all service instances.
To change the scope of a configuration aspect from Service to Shared1. Holding the Ctrl key and select the configuration aspects from each instance to be merged.
See Figure 6-22 on page 129.
2. In the Properties window, in the Aspect section, select Shared from the Scope list.
In the Configuration Aspect Explorer, the selected configuration aspect(s) appears under Shared.
Figure 6-24 Configuration Aspect—Shared Scope

6 Configure Service EntitiesEdit a Service’s Configuration File
IDOL Administration 7.4 User Guide 131
Edit a Service’s Configuration File
You can edit a service’s configuration after the project has been deployed. See “View or Edit Configuration Files” on page 159.
Additional Configuration Resources
For more detailed conceptual and procedural information on a service entity, refer to the appropriate guide:
IDOL Server Administration Guide
Distributed Action Handler (DAH) Administration Guide
Distributed Index Handler (DIH) Administration Guide
File System Connector Administration Guide
HTTP Connector Administration Guide
Notes Connector Administration Guide

6 Configure Service EntitiesAdditional Configuration Resources
132 IDOL Administration 7.4 User Guide
133
7 Deploy a Project
Deploying a project means installing a configured IDOL Dashboard project to a physical network. The installation files for all services are typically installed only with the first administrative node, known as the Hub. Upon deployment, hosts download the required installation files from the Hub.
A project can be deployed after its service entities have been configured and the project has been checked in. For more information, see “Configure Service Entities” on page 111 and “Check in a Project” on page 89.
Bind Services to Nodes
Bind Conceptual Nodes to Admin Nodes
Deploy a Project
Bind Services to Nodes
When the network topology has been configured, you can assign services to nodes. At this point, you can decide which services should deploy to which administrative nodes while still unbound to a network. This is done by associating service instances with conceptual nodes, which are representations of admin nodes installed on network hosts.

7 Deploy a ProjectBind Services to Nodes
134 IDOL Administration 7.4 User Guide
Create Conceptual NodesUse this procedure to create conceptual nodes.
To create conceptual nodes1. Click Window > Edit Project > Bind Editor.
2. From the Palette, drag as many Conceptual Nodes onto the canvas as required.
Typically, one conceptual node is assigned per host, but it is possible to install more than one onto a single host. This would potentially be done for a testing or staging deployment.
3. Rename the Conceptual Nodes. You can do this as you add them to the canvas. In the Properties window, select the conceptual node and type a new name in the AdminName field.
Bind Services to Conceptual NodesUse this procedure to bind services to conceptual nodes.
To bind services to the conceptual nodesAfter you create conceptual nodes, drag services from the Palette directly onto them.
An entity icon appears under the Node.
Figure 7-1 Binding Services to Conceptual Nodes
After all the services are assigned to conceptual nodes, you can assign them to admin nodes. For more information, see “Bind Conceptual Nodes to Admin Nodes” on page 136.

7 Deploy a ProjectBind Services to Nodes
IDOL Administration 7.4 User Guide 135
Unbind Services from Conceptual NodesUse this procedure to unbind services to conceptual nodes.
To unbind all services from a conceptual node1. Right-click the conceptual node.
2. Select Unbind.
All entities previously attached to that conceptual node are removed and reappear on the Palette.
Figure 7-2 Unbinding Services from Conceptual Nodes
Delete Conceptual NodesUse this procedure to delete conceptual nodes.
To delete a conceptual node, and unbind all services from it1. Right-click the conceptual node.
2. Select Delete.
All entities previously attached to that node are removed and reappear on the Palette.
Figure 7-3 Deleting Conceptual Nodes

7 Deploy a ProjectBind Conceptual Nodes to Admin Nodes
136 IDOL Administration 7.4 User Guide
Bind Conceptual Nodes to Admin Nodes
After you bind services to conceptual nodes and check in the project, you can assign, or bind, conceptual nodes to admin nodes.
For information about conceptual nodes, see “Bind Services to Nodes” on page 133.
For information about admin nodes, see “Install an Administrative Node from the Dashboard Web Interface” on page 47.
Note Although the network defined during the installation is visible in the Available Networks window, individual hosts on the network must have the Administrative Node installed before they are visible in IDOL Dashboard.
For more information, see “Install an Administrative Node from the Dashboard Web Interface” on page 47.
To bind conceptual nodes to hosts1. On the File menu, click Bind Project to Network.
You are prompted to select a network to which to deploy.
Figure 7-4 Select a Network
2. Select a target network from the Bind to Network list and click OK.
The Administrative Node Binding window opens.
3. From the Palette, drag an administrative node onto the canvas.
4. Drag a conceptual node from the Palette directly onto the administrative node.

7 Deploy a ProjectDeploy a Project
IDOL Administration 7.4 User Guide 137
A Conceptual Node icon appears under the admin node.
Figure 7-5 Binding Conceptual Node to Network Admin Node
In the Administrative Node Explorer, the list of services for that admin node is populated under the host(s).
Figure 7-6 List of Services On Host(s) for Deployment
Deploy a Project
A project can be deployed when:
1. The network topology is created. For more information, see “Create a Network Topology” on page 106.
2. The network entities are configured. For more information, see “Configure Service Entities” on page 111.
3. IDOL Administrative Nodes are installed on each host on the network. For more information, see “Install an Administrative Node from the Dashboard Web Interface” on page 47.
4. All services are bound to conceptual nodes. For more information, see “Bind Services to Nodes” on page 133.
5. Conceptual nodes are bound to hosts. For more information, see “Bind Conceptual Nodes to Admin Nodes” on page 136.

7 Deploy a ProjectDeploy a Project
138 IDOL Administration 7.4 User Guide
To deploy a project1. Check in the project. Click Check In Project on the File menu.
For information on checking in, see “Check in a Project” on page 89.
After a successful check-in, you are prompted to deploy.
2. Click Deploy Project.
The Deploy Project dialog box appears.
Figure 7-7 Deploy Project
3. Select a network from the from the Bind to Network list and click OK.
The project deploys and services are installed onto the host(s).
Figure 7-8 Project Deploying Progress
4. When deployment is finished, a confirmation dialog box appears. Click OK.
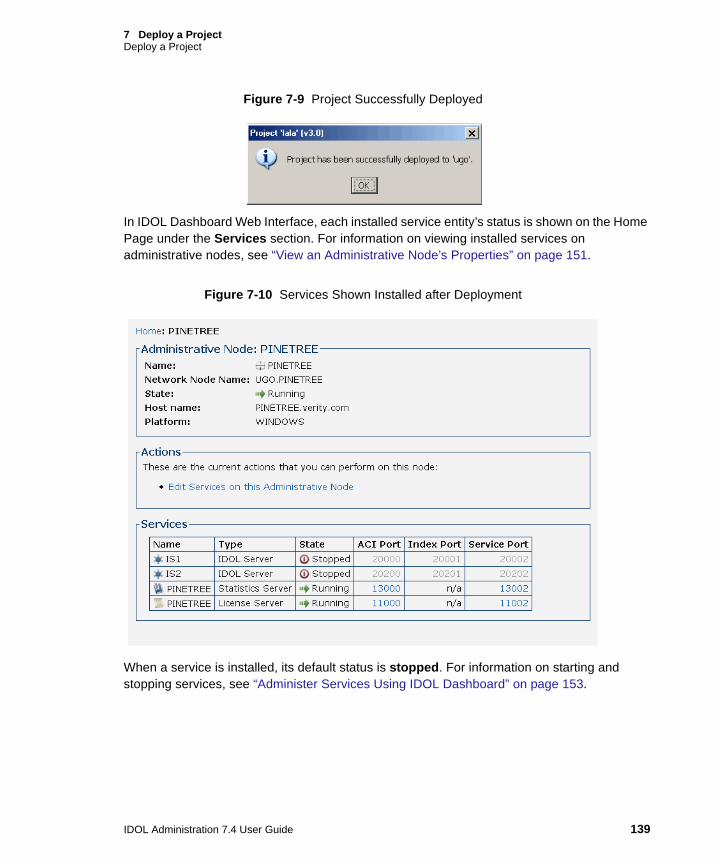
7 Deploy a ProjectDeploy a Project
IDOL Administration 7.4 User Guide 139
Figure 7-9 Project Successfully Deployed
In IDOL Dashboard Web Interface, each installed service entity’s status is shown on the Home Page under the Services section. For information on viewing installed services on administrative nodes, see “View an Administrative Node’s Properties” on page 151.
Figure 7-10 Services Shown Installed after Deployment
When a service is installed, its default status is stopped. For information on starting and stopping services, see “Administer Services Using IDOL Dashboard” on page 153.

7 Deploy a ProjectDeploy a Project
140 IDOL Administration 7.4 User Guide

IV Service Management
This section focuses on administering, monitoring, and updating an IDOL Administration network after it has been deployed.
Chapter 8: Set up Logon Security
Chapter 9: Service Administration and Monitoring
Chapter 10: Network Statistics
Chapter 11: Manage Updates


143
8 Set up Logon Security
Logon security requires all users to log on to use both IDOL Dashboard and IDOL Dashboard Web Interface, and their permissions can be restricted based on the role(s) assigned to them.
If your system does not have logon security enabled, you do not need to provide security credentials to use it and can simply access IDOL Dashboard and the IDOL Dashboard Web Interface.
Enable Logon Security
Disable the Current Logon Module
Enable Logon Security
Using IDOL Dashboard, you can enable logon security through the Tools > Configure Login Module menu. If you do this, all administrative users must provide credentials to log on to the Dashboard Web Interface or launch Dashboard Console.
Three logon modules are provided with IDOL Administration: Windows, LDAP, and Network Information Service (NIS).
Windows. See “Set Up a Windows Logon Module” on page 144.
LDAP. See “Set Up an LDAP Logon Module” on page 145.
NIS. See “Set up an NIS Logon Module” on page 146.

8 Set up Logon SecurityEnable Logon Security
144 IDOL Administration 7.4 User Guide
Set Up a Windows Logon ModuleUse this procedure to enable Windows logon security.
To enable Windows logon security1. Click Configure Login Module from the Tools menu.
2. Click Configure.
3. Select Windows Login Module from the Login Module list.
Figure 8-1 Create a logon module
4. Click Next.
5. Enter the Default Domain. This is the domain used for each user created, unless a different one is entered. If all or most of the users permitted to access the system exist in the same domain, enter that domain here.
Note If you do not include a domain in either of the Default Domain or Domain fields, the user is treated as a local Windows user from the current machine. For example, the users bsmith with no domain entered and bsmith with the domain autonomy are treated as two separate users and both are displayed in the user list.

8 Set up Logon SecurityEnable Logon Security
IDOL Administration 7.4 User Guide 145
6. Click Next.
7. Enter the following information to specify an initial administrative user:
User name. Existing username of the first user permitted to access the system, usually the system administrator. The first user created is automatically assigned to the System Administrator role, which has global permissions, to ensure someone has full access to the system. This user’s role can be edited later, if appropriate, but it is important to ensure at least one user holds this role.
Password. The existing password associated with the current user and domain.
8. Click Finish.
Set Up an LDAP Logon ModuleUse this procedure to set up an LDAP logon module.
To enable LDAP logon security1. Click Tools > Configure Login Module.
2. Click Configure.
3. Select LDAP Login Module from the Login Module list.
4. Click Next. Enter the information described in the table:
LDAP Connection Enter the server name and port for the LDAP connection. The default port is 389.
Select the Follow Referrals check box if desired. Enabling this option can help locate extra users, but searches may take longer for large systems.
Binding Information Enter the Authorized User DN and password. This is required for LDAP servers that have anonymous binding turned off, for example, Active Directory servers.
User Configuration:User Object Class Enter the object class associated with the user.

8 Set up Logon SecurityEnable Logon Security
146 IDOL Administration 7.4 User Guide
5. Click Next.
6. Enter the Initial Administrative User’s username and password. This should be the logon of the first user permitted to access the system.
The first user created is automatically assigned to the System Administrator role, which has global permissions, to ensure someone has full access to the system. This user’s role can be edited later, if appropriate, but it is important to ensure at least one user holds this role.
7. Click Finish.
Set up an NIS Logon ModuleNIS logon security requires extra setup due to licensing restrictions that prevent Autonomy from redistributing a third-party library called nis.jar. However, you can obtain it from the Sun website.
To obtain the nis.jar file1. Go to http://java.sun.com/products/jndi/downloads.
2. Click the Download icon to the right of Download JNDI 1.2.1 & More.
3. Read and accept the license agreement.
4. Click NIS Service Provider in the list of available downloads and save the zip file to your hard drive.
5. Unzip the package and locate the nis.jar file in the lib folder.
Base DN for User Location
Enter the base DN in which to search for the user. The higher the hierarchy the longer the search takes to verify and authenticate the user.
For example, if the user DN is in the form of:
uid=boba,ou=People,ou=Development,dc=Autonomy,dc=Com
the userBaseDN value would be:
ou=People,ou=Development,dc=autonomy,dc=Com.
Entry Containing User ID
Enter the entry containing the user ID. In the example above, this would be uid.
Attribute Containing User ID
Enter the attribute associated with the user ID. In the example above, this would be uid.
8 Set up Logon SecurityEnable Logon Security
IDOL Administration 7.4 User Guide 147
6. Add the location of the nis.jar file to the administrative services class path as follows:
The class path for administrative nodes’ services needs to be specified in the adminService.conf files. These files are located in the IDOL Administrative Hub/Node installation directory, for example:
C:\Autonomy\IDOL\idoldata\IDOL.PINETREE\administration\PINETREE\config\NodeAdminService.conf
Modify this file by adding a wrapper.java.classpath.<N> property, for example:
wrapper.java.classpath.5=C:/nis/lib/nis.jar
7. Restart IDOL services. For more information, see “Start and Stop Services” on page 154.
8. In IDOL Dashboard, click Tools > Configure Login Module.
9. Click Configure.
10.Select NIS Login Module from the Login Module list.
11.Enter the NIS Connection information:
Hostname. The hostname or IP address of the NIS server.
Domain. The NIS domain (for example, autonomy.com).
12.Click Next. Enter the Initial Administrative User’s username and password. This should be the logon of the first user permitted to access the system.
The first user created is automatically assigned to the System Administrator role, which has global permissions, to ensure someone has full access to the system. This user’s role can be edited later, if appropriate, but it is important to ensure at least one user holds this role.
13.Click Finish.
14.Click Create.
The Login Modules tab now displays the type of logon module created and its settings.

8 Set up Logon SecurityEnable Logon Security
148 IDOL Administration 7.4 User Guide
Add a New UserOnce the logon module has been activated, additional administrative users can be given access to the system.
To add a new user1. From the Configure Login Module dialog box, click Add... on the Administrative Users tab.
2. In the Manage Administrator dialog box that opens, enter the following information:
For a Windows Login Module:Username The username of the user you are giving permission to access the system.
Domain The user’s domain, if different from the default domain.
Leave this field blank to use the default domain.
For an LDAP Login Module:User name The username of the user you are giving permission to access the
system.Domain Leave this field blank.
All LDAP settings are inherited from those set up when you created the first user.
For an NIS Login Module:User name The username of the user you are giving permission to access the system.
Domain Leave this field blank.
All NIS settings are inherited from those set up when you created the first user.

8 Set up Logon SecurityEnable Logon Security
IDOL Administration 7.4 User Guide 149
3. Select the role(s) to which the user will have access:
4. Click OK.
The new user is added to the Administrative Users list on the Import Modules page, along with the user’s available role(s).
Edit a User’s PropertiesYou can change the role(s) assigned to one or more existing users. A user’s username and domain cannot be edited, so if they need to be changed, you must delete the user and add a new one.
To edit a user’s role1. From the Administrative Users list, select the user(s) whose role(s) you want to change.
To give multiple users the same role(s) with a single edit, use the Shift or Ctrl keys to select each of them. Selected users are highlighted.
2. Click Edit....
A Manage Administrator dialog box appears.
3. Change the user’s assigned role(s), as described in “Add a New User” on page 148.
4. Click OK.
System Administrator This role allows the user full control of all services (distributors, IDOL servers, connectors), process control of DLCM and License and management of administrative users.
Because this role has global permissions, when System Administrator is selected, all other roles are selected by default and vice versa—if all other roles are selected, System Administrator is automatically selected.
To select only one or two of the other three options, first clear the System Administrator check box, then make your selection(s).
Distribution Handlers This role allows the user full control of DIH and DAH services.IDOL Services This role allows the user full control of IDOL server (and its
subprocesses content, community, and so on).Connectors This role allows the user full control of all connectors (File
System Connector, HTTP Connector, and so on).

8 Set up Logon SecurityDisable the Current Logon Module
150 IDOL Administration 7.4 User Guide
Delete a UserUse this procedure to delete users who should no longer have administrative access to the system.
To delete users1. Select the user(s) from the Administrative Users list. To delete multiple users at once, use
the Shift or Ctrl keys to select each of them.
Selected users are highlighted.
2. Click Delete.
3. Click OK to proceed with deleting the user(s) or Cancel to close the dialog box without deleting the user.
Disable the Current Logon Module
Note If you disable the logon module, its settings are not saved. If you enable the logon module again, you must reenter all data.
Use this procedure to disable the current logon module, allowing users to access the Dashboard Web Interface and Dashboard Console without providing credentials.
To disable the current logon module1. From the Configure Login Module dialog box, click Disable.
2. In the Confirm Disable Security Settings dialog box that opens, click OK to indicate that you want to remove the current logon module and delete all existing administrative users from the system.

151
9 Service Administration and Monitoring
After a project is deployed, you can monitor and administer the network from IDOL Dashboard.
View an Administrative Node’s Properties
Administer Services Using IDOL Dashboard
About Jobs and Job Scheduling
View an Administrative Node’s Properties
To view an administrative node’s properties, in IDOL Dashboard, click Open Network on the File menu and select a network.
The Network Service Explorer and Service Information windows appear. The Network Service Explorer shows an expandable list of all the Administrative Nodes and their installed services in your IDOL network.

9 Service Administration and MonitoringView an Administrative Node’s Properties
152 IDOL Administration 7.4 User Guide
Figure 9-1 Network Service Explorer
For information on a particular node or service, select it, and a summary appears on the Service Information canvas. For example, the following information may be shown for an administrative node:
host name, platform
services installed
state and port numbers for each installed service
version numbers for each installed component
Figure 9-2 Service Information Window
This information is also available on the IDOL Dashboard Web Interface. For information on launching IDOL Dashboard Web Interface, see “Launch IDOL Dashboard Web Interface” on page 95.

9 Service Administration and MonitoringAdminister Services Using IDOL Dashboard
IDOL Administration 7.4 User Guide 153
Figure 9-3 View an Administrative Node’s properties in the Dashboard Web Interface
In the example shown above, the Node CANMORE was selected in the left pane of the Dashboard Web Interface; its properties are displayed in the right pane.
To install or administer services on an administrative node, use IDOL Dashboard. For details, see “Add or Remove Service Entities” on page 160.
Administer Services Using IDOL Dashboard
Once a project has been deployed, the Monitor window shows the same network topology as in the Network Editor, but with the following functions:
Controlling services. See “Start and Stop Services” on page 154.
Viewing log files. See “View a Service’s Log Files” on page 155.
Editing configuration files. See “View or Edit Configuration Files” on page 159.

9 Service Administration and MonitoringAdminister Services Using IDOL Dashboard
154 IDOL Administration 7.4 User Guide
You can install, configure, and administer the following IDOL services through IDOL Dashboard:
The following services are automatically installed with an IDOL Administrative Hub, but can be administered through the IDOL Dashboard:
License server
Statistics server
A type, or category, of IDOL service (for example, DAH, IDOL server, HTTP Connector) is referred to as a component. An installed instance of a component (for example, a particular installed instance of IDOL server) is referred to as a service.
Start and Stop ServicesUse this procedure to start, stop, restart, or kill a service on the Monitor window.
To start, stop, restart, or kill a service on the Monitor window1. Right-click the selected service.
2. Select Start, Stop, Restart, or Kill.
The icon below the service reflects the change.
IDOL server Distributed Action Handler (DAH)
Content Distributed Index Handler (DIH)
Group server File System Connector
Community HTTP Connector
Category Notes Connector
DiSH Exchange Connector
Index Tasks Documentum Connector
Sharepoint Connector

9 Service Administration and MonitoringAdminister Services Using IDOL Dashboard
IDOL Administration 7.4 User Guide 155
You can also use the toolbar buttons to perform the same actions.
Start Services in OrderDepending on your network configuration, some services should be started before others. Here are a few guidelines.
1. Start Content services first.
2. Start a Distributed IDOL Server after the Content services are running and stable.
3. Start DAH and DIH services.
4. Start Connectors when IDOL Server and Content services are running and stable.
View a Service’s Log FilesUse this procedure to view a service’s log files.
To view a service’s log files1. Right-click the selected service and select Service Log Files.
The Services Log Files window appears.
Starts a service.
Stops a service.
Restarts (stops, and then starts) a service.
Kills a service.

9 Service Administration and MonitoringAdminister Services Using IDOL Dashboard
156 IDOL Administration 7.4 User Guide
Figure 9-4 Service Log Files
2. From the list of available log files, click the one you want to view.
The contents of the log file are now visible in the right pane. By default, the last 25 KB of the log file’s contents are displayed.
3. As needed, change the portion of the log file’s contents that appears using the View list, located at the top of the Service Log File window:
To view the entire contents of the log file, select All from the View list.
To view a portion of the log file’s contents from the beginning of the file, select Top from the View list, and select or type in the KB box how much of the file you want to view. The default is 25 KB.
To view a portion of the log file’s contents from the end of the file, select Bottom from the View list, and select or type in the KB box how much of the file you want to view. The default is 25 KB.
For information about log files for License server, Statistics server and Administrative Node, see “Network-Level Component Log Files” on page 156.
Network-Level Component Log FilesThis section describes the log files available for the network-level components of IDOL that are not shown on the network topology: License server, Statistics server, and Administrative Node. For information on how to view log files, see “View a Service’s Log Files” on page 155.
For a list of the available log files for a particular IDOL service, refer to the appropriate component guide.

9 Service Administration and MonitoringAdminister Services Using IDOL Dashboard
IDOL Administration 7.4 User Guide 157
License ServerUse this procedure to view a License server’s log files.
To view License server log files1. Click Open Network on the File menu.
2. In the Network Service Explorer window, expand the tree view down to the bottom, which shows License Server.
3. Right-click the administrative node at the bottom of the expanded tree, and select Service Log Files.
The log files appear in the Service Log Files window.
The following log files are available for the License server:
Table 9-1 License server log files
Statistics Server (Data Layer Component Monitor)Use this procedure to view a Statistics server log files.
To view Statistics server log files1. Click Open Network on the File menu.
2. In the Network Service Explorer window, expand the tree view: AdministrativeNodeName > DLCM Server.
3. Right-click the administrative node at the bottom of the expanded tree and select Service Log Files.
Log File Description
DiSHcfg.log Contains configuration file information for License Server.
license.log Contains license validation information for License server.
logs\action.log Logs all the ACI requests sent to the License server.
logs\application.log Logs general application errors, warnings, and information related to the License server.
logs\licenseserver.log Logs all the licensed functionality and licensed products detected in the license key.
service.log Contains information related to License server running as a service.

9 Service Administration and MonitoringAdminister Services Using IDOL Dashboard
158 IDOL Administration 7.4 User Guide
The log files appear in the Service Log Files window at the bottom of the window.
The following log files are available for the Statistics server:
Table 9-2 Statistics server log files
Administrative NodeUse this procedure to view Administrative Node log files.
To view administrative node log filesClick View > Administrative Service Logs > AdministrativeNodeName.
The log files appear in the Service Log Files window at the bottom of the window.
The following log files are available for the Administrative Node:
Table 9-3 Administrative Node log files
Log File Description
DLCMcfg.log Contains configuration file information for the Statistics server.
license.log Contains license validation information for the Statistics server.
logs\application.log Logs general application errors, warnings, and information related to the Statistics server.
service.log Contains information related to the Statistics server running as a service.
Log File Description
application.log Logs general application errors, warnings, and information related to the Node.
client_deployment.log Logs information about the status of a deployment.
deployment.log Logs implementation details which are used by developers. It is generally not used by administrators.
external_Registration.log Logs implementation details which are used by developers. It is generally not used by administrators.
jobscheduling.log Logs information related to job scheduling.

9 Service Administration and MonitoringAdminister Services Using IDOL Dashboard
IDOL Administration 7.4 User Guide 159
View or Edit Configuration FilesYou can edit a service’s configuration file (for example, idolserver.cfg) directly in Dashboard and then synchronize with the service by restarting it. This function is primarily used for testing.
To save changes in the network definition for a future (re)deployment, check out the network definition, make the changes, and check it back in.For more information about checking out projects, see “Manage Projects” on page 89.
WARNING! Editing a service’s configuration file only affects that particular instance and the changes are not saved in the network definition. IDOL does not validate configuration values or detect and propagate changes affecting other services.
1. Right-click the selected service.
2. Click Service Configuration.
The Service Configuration Editor appears.
notificationLogFile_Hub.log Logs notifications from IDOL Administration which is useful to developers for certain issues. It is generally not used by administrators.
notificationLogFile_Node.log Logs notifications from IDOL Administration which is useful to developers for certain issues. It is generally not used by administrators.
ServiceWrapper.log Log file for the Java wrapper service that runs the Administrative Node as a Windows service (or daemon on Unix).
By default, this file is only allowed to reach a maximum size of 10 MB before the earliest entries are rolled over into one or more numbered copies of the file (for example, ServiceWrapper.log.1). By default, up to five numbered copies (equivalent to 50 MB) are maintained.
Log File Description

9 Service Administration and MonitoringAdminister Services Using IDOL Dashboard
160 IDOL Administration 7.4 User Guide
Figure 9-5 Service Configuration Editor
3. Edit the file as you would in a text editor.
Note When you edit a service’s configuration file directly, all of its parameters are displayed. They are not grouped into configuration aspects.
4. When you are finished editing the file, click Save at the top of the window.
5. Restart the service to put the changes into effect. For more information, see “Start and Stop Services” on page 154.
Add or Remove Service EntitiesTo add or remove a service entity, you must check out the project to make changes to the network, check in the project, and redeploy.
For information, see “Create a Network Topology” on page 106.

9 Service Administration and MonitoringAbout Jobs and Job Scheduling
IDOL Administration 7.4 User Guide 161
About Jobs and Job Scheduling
There are two types of jobs in IDOL Administration:
Connector indexing jobs. Specify details for the indexing process, such as which documents to include in an index, or what time indexing should occur.
User-defined jobs. Specify details for a task. However, this task is not limited to the indexing process. User-defined jobs give you the flexibility to set up tasks with any command-line tool directly from the IDOL Dashboard.
These commands can run utilities such as .cmd and .bat files in Windows or shell scripts in UNIX. Following are examples of tasks you can accomplish through the Dashboard with a user-defined job:
schedule a connector to run
verify a database is valid
send e-mail notifications when indexing is finished
User-defined jobs allow you to automate administration. For example, you can run a user-defined job right away, or schedule it to run later. You can also chain jobs to set up two or more jobs to run in sequence.
Job scheduling allows you to specify when jobs should run, and schedule multiple jobs together to run in a job chain. This is typically done after the project is deployed.
Note Before you can set up user-defined jobs, specify your tasks in the userdefinedjob.xml file, which will populate the Command list in the Dashboard interface. See “Define Commands for User-Defined Jobs” on page 163 for details.
Create Connector JobsUse this procedure to schedule a connector job.
To schedule a connector job1. With the Monitor window open, select Chain and Schedule Jobs on the File menu.
2. Select the appropriate network from the list and click OK.

9 Service Administration and MonitoringAbout Jobs and Job Scheduling
162 IDOL Administration 7.4 User Guide
The Job Chaining Editor appears with a blank canvas.
3. From the Palette, drag a connector onto the canvas.
This connector job can now be connected to a job schedule or a job chain. For more information, see “Schedule Jobs” on page 164 and “Set up a Job Chain” on page 164.
The connector itself cannot be edited. To make changes to the connector—for example, the starting URL for an HTTP connector—check out the project first, and make the changes on the Network Editor. For more information, see “Service Entity-Specific Configuration” on page 118.
Create User-Defined JobsBefore you can schedule a user-defined job, you must:
Create a utility or script to perform the user-defined task.
Define the location of the utility or script in the userdefinedjob.xml file. See “Define Commands for User-Defined Jobs” on page 163 for details.
To schedule a user-defined job1. With the Monitor window open, select Chain and Schedule Jobs on the File menu.
2. Select the appropriate network from the list and click OK.
The Job Chaining Editor appears with a blank canvas.
3. From the Palette, drag a user-defined job onto the canvas.
4. Right-click the job on the canvas, and select Edit.
5. Enter a Job Name.
6. Select a Node Name (an admin node) from the list.
7. Select a Command from the list. The commands listed in this list are defined in the userdefinedjob.xml.
8. Enter command-line arguments in the Arguments field if required. This field is optional and is only relevant when the selected command uses parameters.
9. Enter a Working Directory if you want to output log files to a directory other than the default directory. Otherwise, leave this field empty.
10.Click OK.

9 Service Administration and MonitoringAbout Jobs and Job Scheduling
IDOL Administration 7.4 User Guide 163
Define Commands for User-Defined Jobs Use this procedure to add commands to the Command list in the User-defined Job dialog box.
To add commands1. Navigate to your installDir\idoldata\resources folder.
2. Open userdefinedjob.xml in an XML or text editor.
3. Edit the tasks as required.
For example, the following is a sample task to ping a host:
<UserDefinedTask name="ping_hostname"> <Description>Pings hostname</Description> <Command>c:\temp\ping_hostname.bat</Command> <OutputStream overwrite="true">c:\temp\logs\output.log</OutputStream> <WorkingDirectory>c:\temp</WorkingDirectory>
where:
In this example, you would create a ping_hostname.bat file, to which you would add ping hostname.
4. Save the file.
5. If you have IDOL Dashboard running, the User-defined Job dialog box updates automatically (a restart is not required).
For information on scheduling and chaining jobs together, see “Schedule Jobs” on page 164 and “Set up a Job Chain” on page 164.
<UserDefinedTask name> Appears as the job name on the Command list.<Description> Enter a description of the job. This is for your own information
only and does not appear on the interface.
<Command> Enter the command.
<OutputStream overwrite=”true”>
Specifies a location for internal output.
<WorkingDirectory> Enter a directory if you want to output log files to a directory other than the default directory. Otherwise, leave this field empty.
9 Service Administration and MonitoringAbout Jobs and Job Scheduling
164 IDOL Administration 7.4 User Guide
Set up a Job ChainUse this procedure to set up a job chain.
To set up a job chain1. With the Monitor window open, click Chain and Schedule Jobs on the File menu.
2. Select the appropriate network from the list and click OK.
The Job Chaining Editor opens.
3. From the Palette, drag connector jobs and/or user-defined jobs that are to be included in the chain onto the canvas.
4. To link the first job to another job, drag a line from one of the three options to point to the title bar of the next job. The options are as follows:
On Succeed (green). If this job finishes successfully, the next job runs.
On Failure (red). If this job fails or does not finish, the next job does not run.
Always (blue). The next job runs whether this job finishes successfully or not.
5. Continue connecting jobs in this manner until your job chain is complete.
To attach a job chains to a schedule, so the jobs can be automatically run at a specific time or frequency, see “Schedule Jobs” on page 164.
Schedule Jobs Use this procedure to set up a job schedule.
To set up a job schedule1. With the Monitor window open, select Chain and Schedule Jobs on the File menu.
2. Select the appropriate network from the list and click OK.
The Job Chaining Editor appears with a blank canvas.
3. From the Palette, drag a Schedule onto the canvas.
4. Drag a line from the Schedule_xxxxx on the canvas to point to the title bar of the first job in the job chain. For information about setting up a job chain, see “Set up a Job Chain” on page 164.

9 Service Administration and MonitoringAbout Jobs and Job Scheduling
IDOL Administration 7.4 User Guide 165
5. Right-click on the Schedule_xxxxx, and select Edit Schedule.
6. Specify the following options:
earliest scheduled start date and time
latest scheduled start date and time
frequency of running the schedule
7. Click OK.
To save the schedule and jobs settings, right-click the schedule, and select Save Schedule and Job Settings.
To activate the schedule, right-click the schedule, and select Start as Scheduled, or select Start Now to run it immediately.
View Job Chain Summaries
To view the summary of a job chain1. With the Monitor window open, select Chain and Schedule Jobs on the File menu.
2. Select the appropriate network from the list and click OK.
3. In the Job Chaining Explorer, right-click on a selected job and click Job Chaining Detail. The Job Chaining Detail window appears.
Figure 9-6 Job Chaining Detail

9 Service Administration and MonitoringAbout Jobs and Job Scheduling
166 IDOL Administration 7.4 User Guide

167
10 Network Statistics
The Historical Statistics page in IDOL Dashboard Web Interface allows you to view statistical data for your IDOL network.
Use Historical Statistics
Launch a Statistics Request
Add New Meters to the Historical Statistics Options
Use Historical Statistics
To access the Historical Statistics page, open the Dashboard Home Page. Click the Historical Statistics link in the right pane, or the Statistics link in the top left corner of the top of the page.
There are a number of statistical calculations, also referred to as meters, that you can select to be performed on your network data. You can perform these calculations for a single host at a time or for all the hosts in your IDOL network combined. The following table lists a few examples of meters:

10 Network StatisticsLaunch a Statistics Request
168 IDOL Administration 7.4 User Guide
Launch a Statistics Request
Use this procedure to launch a statistics request.
To launch a statistics request1. From the Metric field, select one or more meters you want calculated. If you select multiple
meters, their results are all displayed on a single graph with a legend that indicates which colored line corresponds to each meter.
By default, the only meter available in this field following IDOL installation is cpu, load. If a meter you want to use is not visible in the field, see “Add New Meters to the Historical Statistics Options” on page 171.
2. From the list in the Host field, select the Node in your network for which you want to view data, or select All Hosts to have the statistics calculated for the aggregation of all Nodes in the network.
3. If you want to calculate statistics only for a particular date/time period, select the Constrain Statistics check box.
Meter Data Returned
cpu, load CPU load (%) on the selected host(s).
memory, total physical Amount of physical memory available on the selected host(s).
network, connections active Number of active network connections associated with the selected host(s).

10 Network StatisticsLaunch a Statistics Request
IDOL Administration 7.4 User Guide 169
From the Choose Constraint Type list, select one of the following options:
4. If you want the resulting graph to be a particular size, enter the dimensions, in pixels, in the Width and Height fields. The default graph size is 800 pixels by 600 pixels.
Start & End Dates Returns statistics for a date/time range. Enter the start date/time and end date/time in the Start Date and End Date fields. Note that the time fields use a 24-hour clock.
At Date Returns statistics for an exact date/time. Enter the date/time in the At Date fields. Note that the time fields use a 24-hour clock.
Since Date Returns statistics for the period since a particular date/time. Enter the starting date/time in the Since Date fields. Note that the time fields use a 24-hour clock.
Use of this parameter can create large results, so it is advisable to specify a limit to restrict the maximum time span that is returned. To do so, enter an appropriate value (in seconds, maximum value = 2000000000) in the Limit field.
Before Date Returns statistics for the period preceding a particular date/time. Enter the date/time in the Before Date fields. Note that the time fields use a 24-hour clock.Use of this parameter can create large results, so it is advisable to specify a limit to restrict the maximum time span that is returned. To do so, enter an appropriate value (in seconds, maximum value = 2000000000)) in the Limit field.

10 Network StatisticsLaunch a Statistics Request
170 IDOL Administration 7.4 User Guide
Figure 10-1 Historical Statistics options
5. Click Submit. Once calculations are complete, the graph appears in the Statistics section of the page.
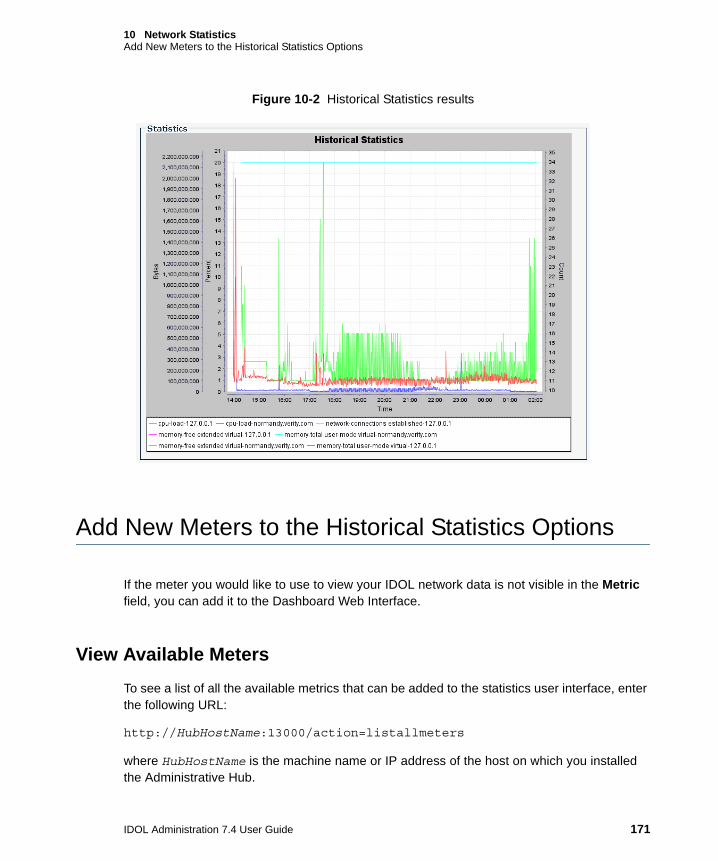
10 Network StatisticsAdd New Meters to the Historical Statistics Options
IDOL Administration 7.4 User Guide 171
Figure 10-2 Historical Statistics results
Add New Meters to the Historical Statistics Options
If the meter you would like to use to view your IDOL network data is not visible in the Metric field, you can add it to the Dashboard Web Interface.
View Available MetersTo see a list of all the available metrics that can be added to the statistics user interface, enter the following URL:
http://HubHostName:13000/action=listallmeters
where HubHostName is the machine name or IP address of the host on which you installed the Administrative Hub.

10 Network StatisticsAdd New Meters to the Historical Statistics Options
172 IDOL Administration 7.4 User Guide
For example, if your Hub is installed on the host CANMORE, the typical URL is:
http://canmore:13000/action=listallmeters
Available meters are listed in the following format:
<autn:meter class="MeterClass" autnid="Meter_autnid" name="MeterName" procname="MeterProcname" />
Figure 10-3 Statistics meters available on the Hub
Add a Single MeterTo make a new meter available in the Metric field on the Historical Statistics page, enter the following URL:
http://HubHostName:13000/action=addmeter&class=MeterClass&name=MeterName
MeterClass The meter’s class, always part of a meter configuration, and required for adding a meter to the Dashboard.
Meter_autnid The meter’s unique ID, sometimes part of a meter configuration, and not used for adding a meter to the Dashboard.
MeterName The meter’s name, always part of a meter configuration, and required for adding a meter to the Dashboard.
MeterProcName The process associated with the meter, sometimes part of a meter configuration, and not used for adding a meter to the Dashboard.

10 Network StatisticsAdd New Meters to the Historical Statistics Options
IDOL Administration 7.4 User Guide 173
For example, to add the meter memory, load, enter the following URL:
http://canmore:13000/action=addmeter&class=memory&name=load
Add All Available MetersTo make all the meters available in the Metric field on the Historical Statistics page, enter the following URL:
http://HubHostName:13000/action=addmeter&class=network&name=*
where HubHostName is the machine name or IP address of the host on which you installed the Administrative Hub.
HubHostName The machine name or IP address of the host on which you installed the Administrative Hub
MeterClass and MeterName
The class and name of the meter you want to add.

10 Network StatisticsAdd New Meters to the Historical Statistics Options
174 IDOL Administration 7.4 User Guide

175
11 Manage Updates
You can manage Dashboard plugin updates, IDOL Administration component releases, and license keys using IDOL Dashboard.
Manage IDOL Dashboard Plugins
Update License Keys
Manage IDOL Component Releases
Manage IDOL Dashboard Plugins
Updates for the Dashboard interface, which are referred to as Plugins, are downloaded and installed using the Plugins dialog box. This dialog box shows the plugins that have been downloaded, installed, and active.
You can also set up an Update Center to automatically check for and install updates. For information, see “Check for Plugin Updates Automatically” on page 180.
View Installed PluginsTo view installed releases of plugins:
1. On the Tools menu, click Plugins.
A Plugins dialog box appears.

11 Manage UpdatesManage IDOL Dashboard Plugins
176 IDOL Administration 7.4 User Guide
2. Select the Installed tab.
The left pane shows a table of installed plugins, providing their names, categories, and whether they are active. Use the check boxes on the left pane to uninstall one or more plugins at the same time. For details, see “Uninstall a Plugin” on page 180.
The right pane provides details about the selected plugin. Use the right pane to deactivate the selected plugin. For details, see “Deactivate a Plugin” on page 177.
Figure 11-1 Installed Plugins
Install PluginsUse this procedure to install plugins.
To add a plugin1. On the Tools menu, click Plugins.
2. Click the Downloaded tab.

11 Manage UpdatesManage IDOL Dashboard Plugins
IDOL Administration 7.4 User Guide 177
3. Click Add Plugins.
An explorer window opens.
4. Browse to the directory of the new plugin and select the nbm file(s).
5. Click Open.
The plugin appears in the list.
6. Select the plugin(s) to install. At the bottom of the dialog box, click Install.
Deactivate a Plugin Deactivating a plugin does not delete it, but removes its functions from the interface.
To deactivate a plugin1. On the Tools menu, click Plugins.
2. Click the Installed tab if it is not already selected.
3. On the left pane, select the plugin(s) to deactivate.
4. On the right pane, click Deactivate.
A confirmation and restart dialog box appears, indicating that the Dashboard must be restarted to complete deactivation.

11 Manage UpdatesManage IDOL Dashboard Plugins
178 IDOL Administration 7.4 User Guide
Figure 11-2 Deactivate—Confirmation and Restart Dialog Box
5. Select Restart Now or Restart Later and click Finish.
If you selected Restart Now, IDOL Dashboard will restart immediately.
In the Installed tab, under the Active list, the plugin is shown as not active.

11 Manage UpdatesManage IDOL Dashboard Plugins
IDOL Administration 7.4 User Guide 179
Figure 11-3 Plugin Deactivated
To activate a plugin, see “Activate a Plugin” on page 179.
To uninstall a plugin, see “Uninstall a Plugin” on page 180.
Activate a PluginPlugins are automatically activated when installed. However, if a plugin has been deactivated by you or another user, you can reactivate it.
To activate a plugin1. On the Tools menu, click Plugins.
2. Click the Installed tab if it is not already selected.
3. On the left pane, select the plugin(s) to activate.
4. On the right pane, click Activate.
The plugin is activated and a confirmation dialog box appears.

11 Manage UpdatesManage IDOL Dashboard Plugins
180 IDOL Administration 7.4 User Guide
5. Click Finish.
To deactivate a plugin, see “Deactivate a Plugin” on page 177.
Uninstall a PluginUse this procedure to uninstall a plugin.
To uninstall a plugin:
1. On the Tools menu, click Plugins.
2. Click the Installed tab if it is not already selected.
3. On the left pane, select the check boxes on the left for the plugins you want to uninstall.
4. Click Uninstall.
A confirmation dialog box appears, showing the plugins to be uninstalled.
5. Select Restart Now or Restart Later.
6. Click Uninstall.
The plugin uninstalls. If you selected Restart Now, IDOL Dashboard closes and restarts immediately.
To temporarily deactivate a plugin instead of uninstalling it, see “Deactivate a Plugin” on page 177.
Check for Plugin Updates Automatically To have IDOL Dashboard automatically check for updates, set up an Update Center.
To set up an Update Center1. On the Tools menu, click Plugins.
2. Click the Settings tab.
3. Click Add.
An Update Center Customizer dialog box appears.

11 Manage UpdatesManage IDOL Dashboard Plugins
IDOL Administration 7.4 User Guide 181
Figure 11-4 Update Center Customizer
4. Enter a Name and a URL.
Typically, you can find the update center at:
http://HubHostName:HubStartingPort/updatecenter
For example, for a host named pinetree, the update center URL would be:
http://pinetree:10000/updatecenter
When changes are made to the IDOL repository, IDOL Dashboard will automatically check for new plugins. To turn off this function, clear the Check for updates automatically check boxes.
5. Click OK.
The new Update Center appears in the table.
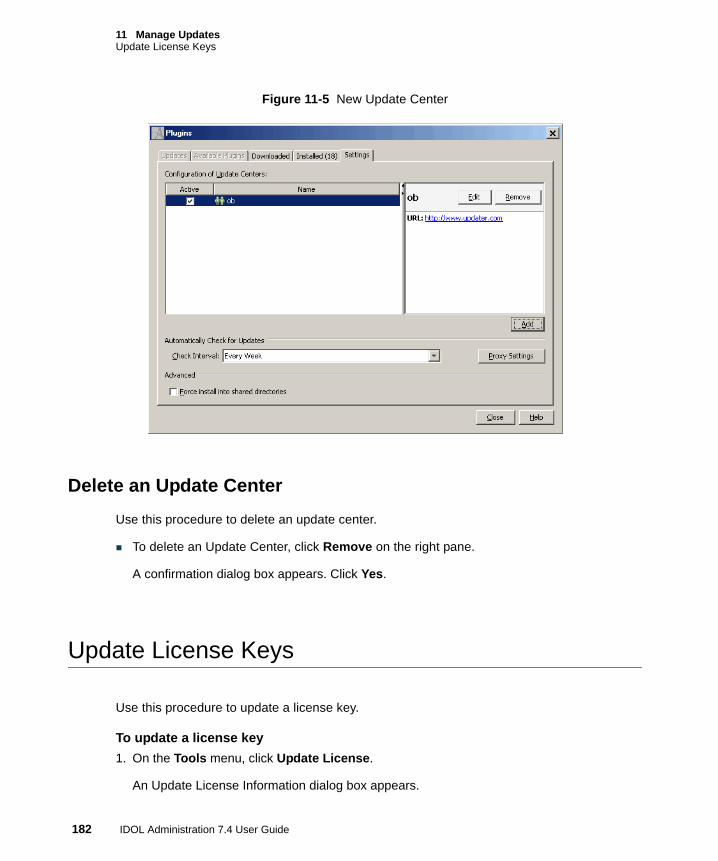
11 Manage UpdatesUpdate License Keys
182 IDOL Administration 7.4 User Guide
Figure 11-5 New Update Center
Delete an Update CenterUse this procedure to delete an update center.
To delete an Update Center, click Remove on the right pane.
A confirmation dialog box appears. Click Yes.
Update License Keys
Use this procedure to update a license key.
To update a license key1. On the Tools menu, click Update License.
An Update License Information dialog box appears.

11 Manage UpdatesManage IDOL Component Releases
IDOL Administration 7.4 User Guide 183
Figure 11-6 Update License Information
2. Browse to the new license key, or type in the path.
3. Enter the license server host. This must be a fully qualified host name. For example, pinetree.forest.com.
4. Enter the license server port. For example, 12345.
5. Click OK.
The installed license server can be seen in the Service Information window and in the IDOL Dashboard Web Interface. See “View an Administrative Node’s Properties” on page 151 for details.
Manage IDOL Component Releases
This section describes how to install IDOL Administration updates using IDOL Dashboard.
To install a release of an IDOL component1. On the Tools menu, click Update Repository.
The Repository and Releases dialog box appears.
Figure 11-7 Repository and Releases

11 Manage UpdatesManage IDOL Component Releases
184 IDOL Administration 7.4 User Guide
2. Select the Releases tab.
3. Click Add Release.
The Add New Release dialog box appears.
Figure 11-8 Add New Release
4. Choose a repository and type in the path to the file or URL of the release.
5. Click OK.
The new release appears in the list.

185
APPENDIXES
This section provides information on advanced features and tasks.
Appendix A: Advanced Configuration
Appendix B: Non-Project Services

186

187
A Advanced Configuration
This appendix describes several advanced configuration procedures for IDOL Dashboard.
Modify Service Definitions
Install Notes Connector into IDOL Dashboard
Modify Service Definitions
Service definitions are made up of configuration aspects, which contain configuration parameters that define the basic characteristics of a service. The default service definitions apply across all projects, but customized definitions apply on a per project basis. However, you can import previously created definitions into projects. For details, see “Import Service Definitions” on page 189.
You can customize a service definition by changing the parameters within its configuration aspects, or adding and removing configuration aspects.
To modify a service definition based on the default definition1. On the Tools menu, click Definition Explorer.
The Definition Explorer appears on the left, and the Aspect Editor appears on the canvas.
2. In the Definition Explorer, expand the service one level.
3. Right-click the service and select Clone Definition.

A Advanced ConfigurationModify Service Definitions
188 IDOL Administration 7.4 User Guide
Figure A-1 Clone Definition
4. Enter a new name. For example, SpecialHTTPConnector.
A new service definition appears. This is a copy of the original.
5. To modify the service definition, select a configuration aspect in the Definition Explorer.
The Aspect Editor displays the parameters for that configuration aspect.
To remove a parameter from a configuration aspect, right-click it, and select Delete Property.
To add a parameter to a configuration aspect, select a parameter from the Palette, and drag it onto the Aspect Editor.
It immediately appears on the list in the Aspect Properties region.
To modify the properties of a parameter—for example, to change the default value—select the parameter in the list and edit values or properties in the Metadata region of the Aspect Editor.
To add a new configuration aspect to this service definition, see “Add Configuration Aspects to Service Definitions” on page 189.
To create and add a new parameter to a configuration aspect, see “Create New Parameters” on page 190.
6. When you are finished, right-click your service definition in the Definition Explorer, and select Save Definition.
7. Right-click your service definition, and select Convert to XML. Select a location to save the XML file, enter a name for it, and click Save. The location should be in a network-accessible directory.
8. To add the new service definition to the Palette, click Import Definition from the Tools menu.
9. Browse to the XML file you saved in step 7, and click Open.

A Advanced ConfigurationModify Service Definitions
IDOL Administration 7.4 User Guide 189
Your customized service definition appears on the Palette. You can add it to your network topology and configured it as you would with the default service definitions.
Import Service DefinitionsYou can import previously defined or customized service definitions into a project.
To import a pre-existing definition1. On the File menu, click Import Definition.
2. Browse to the XML file, and click Open.
When the Network Editor is active, the imported service definition appears on the Palette.
Add Configuration Aspects to Service DefinitionsYou can add new configuration aspects to a customized service definition—you cannot modify default service definitions. For information about creating customized service definitions, see “Modify Service Definitions” on page 187.
To add a configuration aspect to an existing service definition1. Right-click the service definition, and select Add Aspect.
The Edit Aspect dialog box appears.
2. Enter a Name and Description.
If this aspect is related to connector jobs, select Job from the Type list. This populates the palette with the parameters appropriate for connectors.
3. Click OK.
The new aspect appears in the list under the service definition.
4. To add parameters to a selected configuration aspect, drag the parameters from the list in the Palette onto the Aspect Editor window. The parameters appear in a list under the configuration aspect.
To modify the properties of a parameter—for example, to change the default value—select the parameter, and edit values or properties in the Metadata region of the Aspect Editor.
You can also create new parameters for configuration aspects. See “Create New Parameters” on page 190.

A Advanced ConfigurationModify Service Definitions
190 IDOL Administration 7.4 User Guide
Create New ParametersUse this procedure to create new parameters.
To create a new parameter for a configuration aspect1. In the Aspect Editor, right-click the configuration aspect, and select Add Custom Property.
2. Enter a Name, and click OK.
3. Fill in the details of the parameter in the Metadata region of the Aspect Editor.
Figure A-2 Aspect Editor—Metadata

A Advanced ConfigurationInstall Notes Connector into IDOL Dashboard
IDOL Administration 7.4 User Guide 191
The information is automatically saved. Close the window when you are finished.
Install Notes Connector into IDOL Dashboard
The Notes Connector is not packaged with IDOL Dashboard. This section describes how to add it to IDOL Dashboard Palette so that it can be incorporated into a network topology.
1. Lotus Notes must be installed on your machine. If it is not, install it first.
2. Unpack NotesConnector_VersionNumber_WINDOWS_pkg.zip. The location does not matter. These files can be deleted when this process is finished.
3. Unpack NotesFetch_VersionNumber_WINDOWS.zip. This file is within the NotesConnector_VersionNumber_WINDOWS_pkg.zip package. The location does not matter. These files can be deleted when this process is finished.
4. In the unpacked NotesFetch_VersionNumber_WINDOWS.zip, navigate to VersionNumber/WINDOWS/NotesFetch/admin/gui and unpack idol-notesgateway-suite.zip.
5. From your Lotus Notes installation directory, copy the Notes.jar file (typically from Program Files\lotus\notes) to the idol-notesgateway-suite directory.
6. Download and install Netbeans IDE 6.x from the Netbeans Web site:
http://www.netbeans.org/
7. In Netbeans, click Open Project on the File menu.
8. Navigate to IDOLNotesGateway in the unpack directory and click Open Project.
9. In the Projects window, right-click on IDOLNotesGatewaySuite, and select Create NBMs.
Netbeans creates NBM files, which can be found in UnpackDirectory/build/updates.
10.Open IDOL Dashboard.
11.On the Tools menu, click Plugins.
12.Click the Downloaded tab, and click Add Plugins.

A Advanced ConfigurationInstall Notes Connector into IDOL Dashboard
192 IDOL Administration 7.4 User Guide
13.Navigate to NBM files unpacked in step 3:
com-autonomy-idolconsole-fieldmapper-notes.nbm
com-autonomy-management-packaging-notes.nbm
Note The file com-autonomy-idolconsole-gateway-notes.nbm does not need to be added because it will be replaced with the NBM file created in Netbeans.
14.Click Open.
15.Click Add Plugins and browse to the NBM file you created in step 9 (com-autonomy-idolconsole-gateway-notes.nbm), and click Open.
16.Install the three plugins by clicking Install at the bottom of the dialog box.
The Notes Connector appears in the palette (for all new projects from this point forward), when the Network Editor is active.

193
B Non-Project Services
This appendix describes how to manage services not created through a typical IDOL Dashboard project.
Add Local Services
Link to Pre-Existing Services
Add Local Services
For testing purposes, you can install services after deployment, to avoid having to check in a and re-deploy a project.
Note If you install services locally, the changes are not kept in the project.
To install a new service after deployment1. In the Network Service Explorer, right-click a selected service (not the entity), and click
Create Service. The Create New Service dialog box appears.
2. Enter a Name, and select a Release from the drop-down list box, if required.
3. Select a Template:
Default. The default service definition.
Local Template. If you have a local template configured, select this option.

B Non-Project ServicesLink to Pre-Existing Services
194 IDOL Administration 7.4 User Guide
URL. To use another template, enter the path for that configuration file.
4. Click OK. The service appears in the Network Service Explorer and also on the Dashboard Web Interface. It does not appear on the Monitoring canvas.
Since services created in this manner are not saved in the project, if you wish to keep them, it is recommended that you check in the project and add them there. In the case of a re-deployment, the changes will persist. This means you must delete the local service, check in the project, add the service and its configurations, and re-deploy the project. For more information on managing projects, see “Manage Projects” on page 89.
Link to Pre-Existing Services
If you have pre-existing services that were not created using IDOL Dashboard, you can link them to your project and monitor them as you would with regular services.
To link pre-existing services to your project1. In the Network Service Explorer, right-click a selected service (not the entity), and click
Define Service. The Define New Service dialog box appears.
2. Enter a Name, and select a Release from the drop-down list box, if required.
3. In the Service Configuration section, you have two options:
Use File Path to control the service, such as starting and stopping using IDOL Dashboard.
Enter the path to the service configuration file.
For example, \\hostname\ExistingHTTPConnector3\HTTPFetch.cfg
Use the Service URL option if you want to monitor the service only. You will not be able to start and stop services using IDOL Dashboard with this option.
Enter the service’s Host and Port.
4. Click OK. The service appears in the Network Service Explorer and also on the Dashboard Web Interface. It does not appear on the Monitoring canvas.

195
Index
Aadd configuration aspects to service definitions
189Administration, IDOL 21
about nodes 23about the Dashboard 23about the Dashboard Web Interface 23about the hub 23about the repository 23introduction 23
administrative hub. see hub.administrative node binding window 67administrative node explorer window 67administrative node. see node.advanced configuration 187aspect editor 68Autonomy infrastructure 20available network summary window 70available networks window 69
Bbind conceptual nodes to admin nodes 136bind project editor 71bind services to nodes 133binding 24browser
launch Dashboard Web Interface from 46, 95
Ccanvas 65
network editor 101Category 104chain index tasks 126check in projects 89check out projects 90checkpoint 90close projects 91Community 104components
list of available guides 131conceptual nodes 24
create 134configuration aspect explorer window 71configuration aspects 24
add new to service definitions 189explanation 114
configuration file 159configuration viewer window 72configure
additional resources 131file system connectors 118HTTP connectors 119index tasks 125
chain tasks 126logical databases 128Notes connectors 120service entities 111
connector jobs 161connectors 22
Import Module Advanced 122introduction 22
Content 104content server 21create network topologies 106customize service definitions 187

Index
196 IDOL Administration 7.4 User Guide
DDAH 105Dashboard
home page 96install a Node 96Introducing IDOL Administration 96statistics 96technical support 96
Dashboard Web Interfaceinstall a Node 47introduction to 23launch during Hub installation 45launch from browser 46, 95launch from Start menu 46, 95
Data Layer Component Monitor 157definition explorer 187deploy
checklist 137deploy a project 133, 138DIH 105
introduction to 22DiSH 104Distributed IDOL Server 22, 104distributed systems, IDOL 22DLCM 157
Eedit configuration template 72edit field processing window 73edit service definitions 187entity definition explorer 75entity explorer 76
Ffield mapper window 77field mapping
Notes connector configuration 120
field processing 123, 128create profiles 123
File System Connector 105
Hhardware specifications
minimum 30recommended 30
HTTP Connector 105Hub
installation 31introduction 23
IIDOL Administration
introduction 23IDOL Administration sample workflow 24IDOL component releases
install 183IDOL Dashboard 23, 96
change the layout 63interface 62introduction to 23launch from IDOL Dashboard Web Interface
home page 96where to install 59
IDOL Dashboard Web InterfaceHome Page 96launch 95
IDOL releases 183IDOL server
introduction to 21IDOL service entities 104Import Module Advanced 122import service definitions 189index task editor 77index tasks 22IndexTasks 104

Index
IDOL Administration 7.4 User Guide 197
install service post-deployment 193installation
launch Dashboard Web Interface after 45of Hub 31of Node from Dashboard 47where to install IDOL Dashboard 59
instances 106, 111modify 111
interfaces, IDOL 22Autonomy Desktop Suite 22Dashboard Web Interface 23IDOL Dashboard 23portlets 22
Introspect Connector 105Introspect Image Server 105
Jjob chaining 161, 164job chaining detail window 78job chaining editor 79job chaining explorer 79job scheduling 161, 164jobs 161
connectors 161user-defined 161
JRE, JVM 30, 39, 47
LLDAP
logon module 145license key. see licensing.license keys
update 182licensing
get a license key file 60licensekey.dat 35, 60
link Dashboard to pre-existing services 194link service entities 107
local services 193log files
administrative node 158License server 157license server 157Node 158Statistics server 157statistics server 157
log on 97Logical Database 104logon module
add new user 148delete users 150disable 150edit user properties 149set up 144Windows 144
logon security 143add users 148disable 150enable 143LDAP 145log on 97NIS 146Windows 144
lookup service 80, 92port 92
Mmeters 167
add new 171add a single meter 172add all meters 173
view available 171
Nnaming conventions 25network editor 81, 101

Index
198 IDOL Administration 7.4 User Guide
network project monitor window 82network scenarios
high availability requirement 109simple 108
network topologies 24new IDOL component releases 183NIS
before setting up logon module 182logon module 146
Nodes 23installation from Dashboard 47introduction 23log files 158
Notes Connector 105Notes connector
field mapping 120install into IDOL Dashboard 191
Pparameters
create new 190platforms 30plugins 84
activate 179check for updates 180deactivate 177uninstall 180
PODS 22post-deployment service creation 193pre-existing services 194process control 154project
create network topologies 106deploy 133
projects 24, 89check in 89check out 90checkpoint 90
close 91save 89undo a check out 91
properties window 85
Rrepository 31
introduction 23repository and releases window 87roles
available roles 149connectors role 149Distribution Handlers role 149IDOL services role 149system administrator role 149
Ssample workflow 24, 101save projects 89schedule user-defined jobs 162scopes
merge service scope settings 129service 115shared 115shared vs. service 115
securityadd a new user 148delete users 150disable login module 150edit user properties 149roles 149set up logon module 144
service definitionsadd configuration aspects 189clone definitions 187customize 187import 189modify 187

Index
IDOL Administration 7.4 User Guide 199
service entitiesconfigure 111service scope 115shared scope 115
service information window 88service instances 106service logs 155service scope 115
merge settings 129services
create 160find parameters 117list of available guides 131
shared scope 115start menu
launch Dashboard from 46, 95starting and stopping services 154starting port 92statistics
add meters 171add a single meter 172add all meters 173
launch a request 168meters 167options 168, 170results 171
supported platforms 30system requirements 30
basic requirements 30hardware specifications 30supported platforms 30
Ttopology overview window 89
Uundo a check out 91update center 180
update IDOL 183user-defined jobs 163
create 162define commands 163schedule 162
userdefinedjob.xml 163
VVirtual Database 105
WWindows
logon module 144windows
administrative node binding 67administrative node explorer 67aspect editor 68available network summary 70available networks 69bind services to nodes 71configuration aspect explorer 71configuration viewer 72definition explorer 187edit configuration template 72edit field processing 73entity definition explorer 75entity explorer 76field mapper 77index task editor 77job chaining detail 78job chaining editor 79job chaining explorer 79lookup service 80network editor 81, 101network project monitor 82plugins 84properties 85

Index
200 IDOL Administration 7.4 User Guide
repository and releases 87service information 88topology overview 89