Embed Size (px)
Citation preview
Canon Inc.
imagePROGRAF Direct Print & Share Guide
imagePROGRAF Direct Print & Share Guide Ver. 2.1
2
1. Features of imagePROGRAF Direct Print & Share
The features of imagePROGRAF Direct Print & Share are as follows.
- Note that "imagePROGRAF Direct Print & Share" is referred to as "Direct Print & Share" in this manual.
1. You can print your PDF documents and drawings, JPEG and TIFF images, or HP-GL/2
format drawings directly, without opening each application.
- Encrypted PDF are not supported.
2. You can confirm the print layout by using the preview. Also, you can make print settings
without opening up driver properties.
3. You can print files without displaying the Direct Print & Share screen by creating a shortcut
print icon and dropping the files onto the shortcut print icon.
4. Since it is possible to print multiple files at the same time, you can efficiently print a large
number of drawings and images.
5. Direct Print & Share allows you to access cloud storage, upload and download files, and print
the files.
- Cloud storage is compatible with "Google Drive" and WebDAV compatible cloud storage.
- Access to cloud storage is only guaranteed for "Google Drive".
- To use the cloud service, you first have to create an account for the cloud service.
- Printers that can print from Direct Print & Share are Canon imagePROGRAF series printers.
6. You can share files with other users after uploading them to cloud storage. E-mail
notifications are sent to users to share files at the same time uploads are made. (Google
Drive only)
- Although it is not possible to preview or print file types other than PDF, JPEG, TIFF, and HP-GL/2,
you can still upload them to cloud storage.
7. By using a plug-in, drawings made in Autodesk AutoCAD are automatically registered to the
Direct Print & Share file list. Direct Print & Share makes it easy to print the drawings you
made as well as share them with other users through cloud storage.
- For details on how to use Direct Print & Share, refer to the Help.

3
- Read the Readme file for cautions regarding using Direct Print & Share. Click the icon in the top
left of the main window, then open the About imagePROGRAF Direct Print & Share dialog box from the
menu and click Readme to display the Readme file.
4
2. Installation Procedure
The procedure for installing Direct Print & Share is as follows.
1. Unpack the downloaded file.
2. Run Setup.exe.
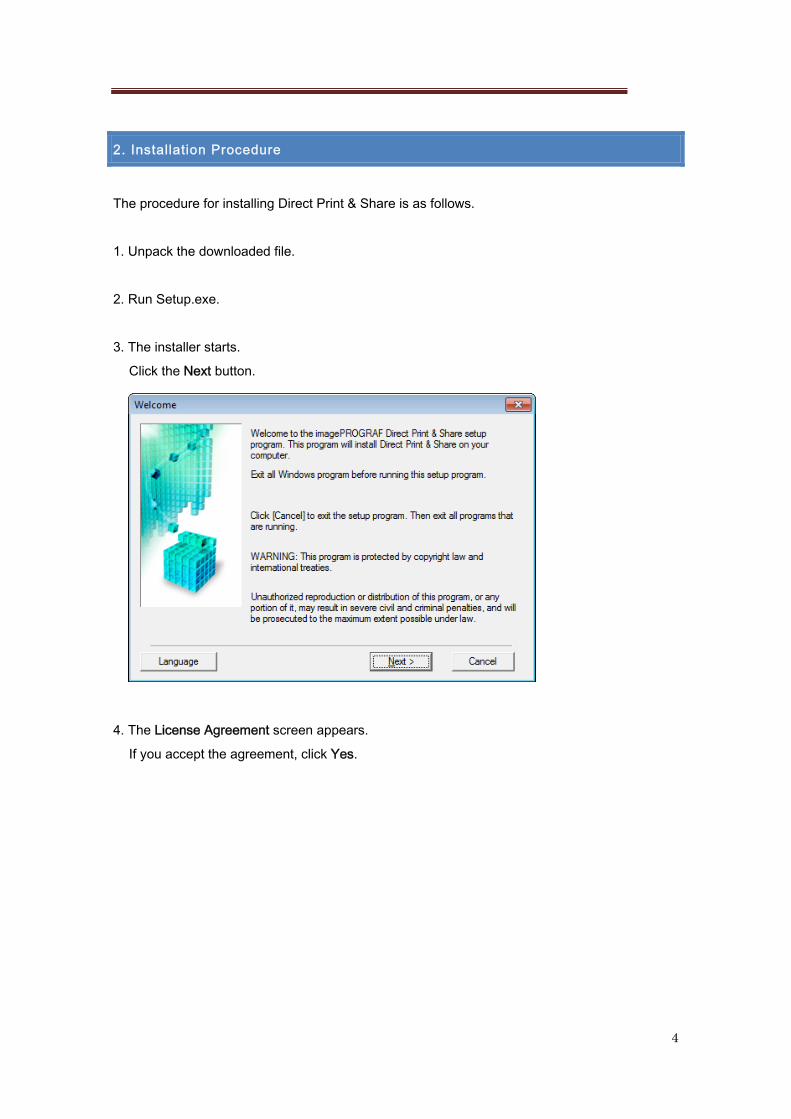
3. The installer starts.
Click the Next button.
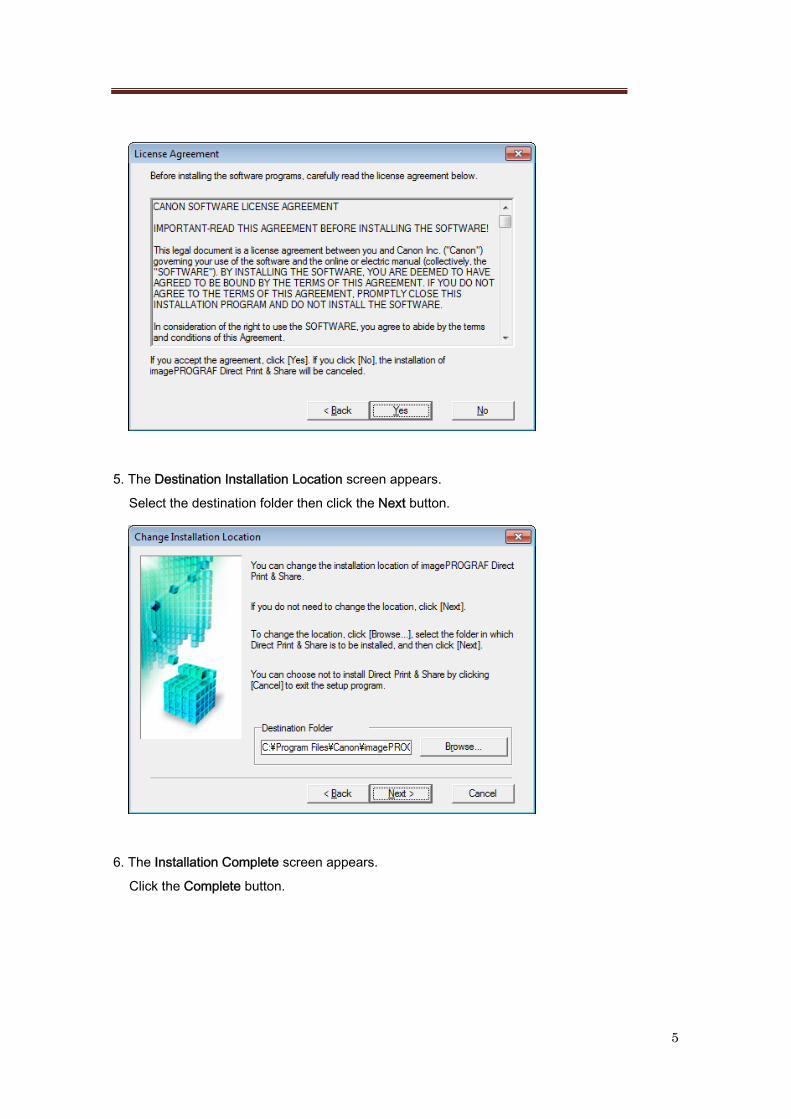
4. The License Agreement screen appears.
If you accept the agreement, click Yes.
5
5. The Destination Installation Location screen appears.
Select the destination folder then click the Next button.
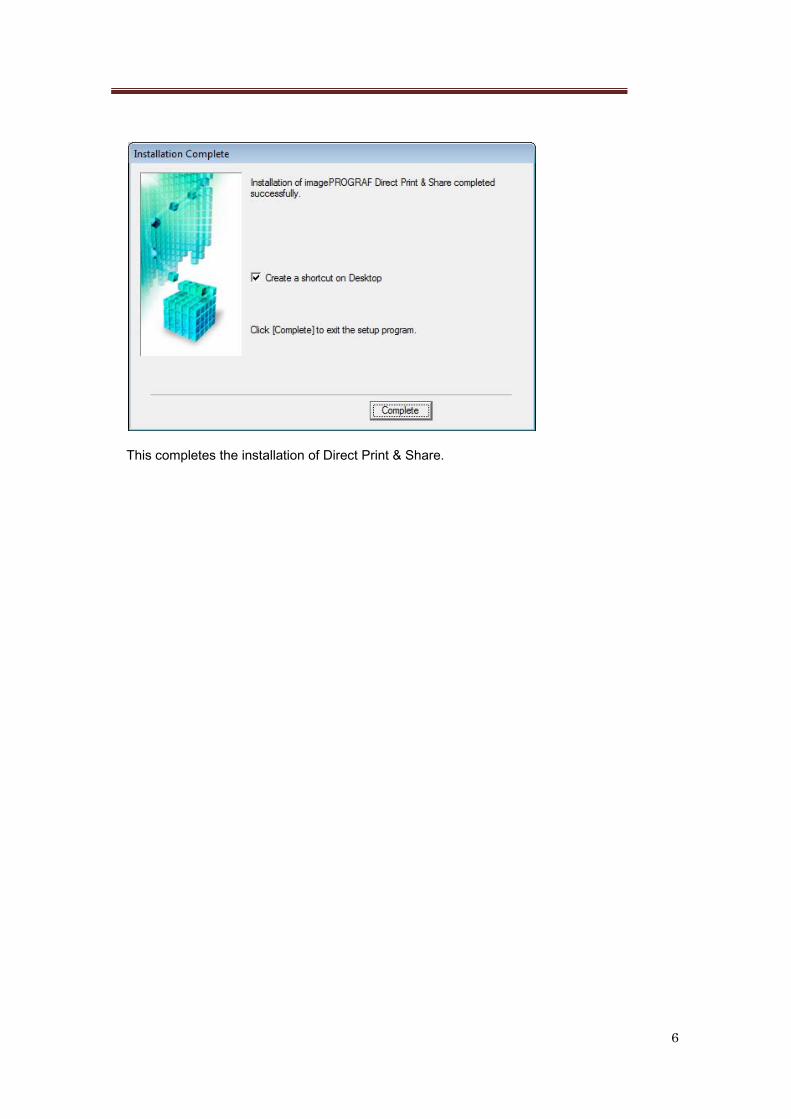
6. The Installation Complete screen appears.
Click the Complete button.
6
This completes the installation of Direct Print & Share.
7
3. Printing
3.1 Registering the Printers to Use
Printers to be used in Direct Print & Share must be registered in the Printer pull-down menu.
To add a printer to the Printer pull-down menu, follow these steps.
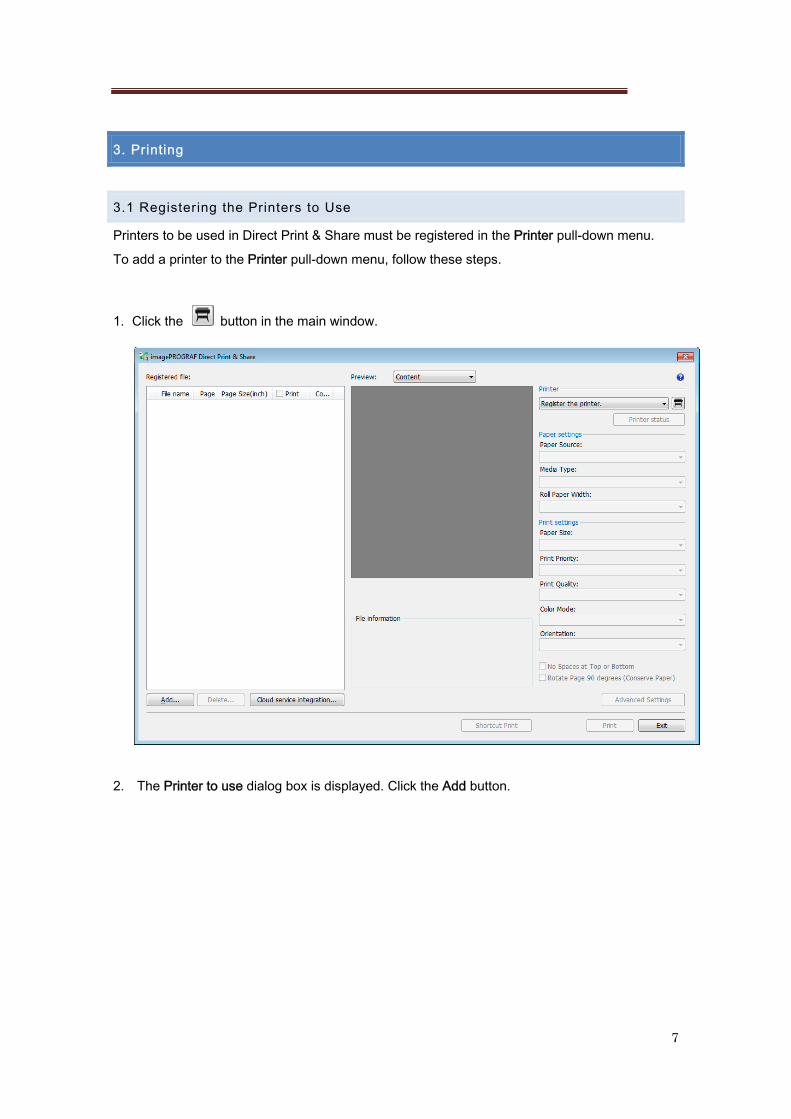
1. Click the button in the main window.
2. The Printer to use dialog box is displayed. Click the Add button.
8
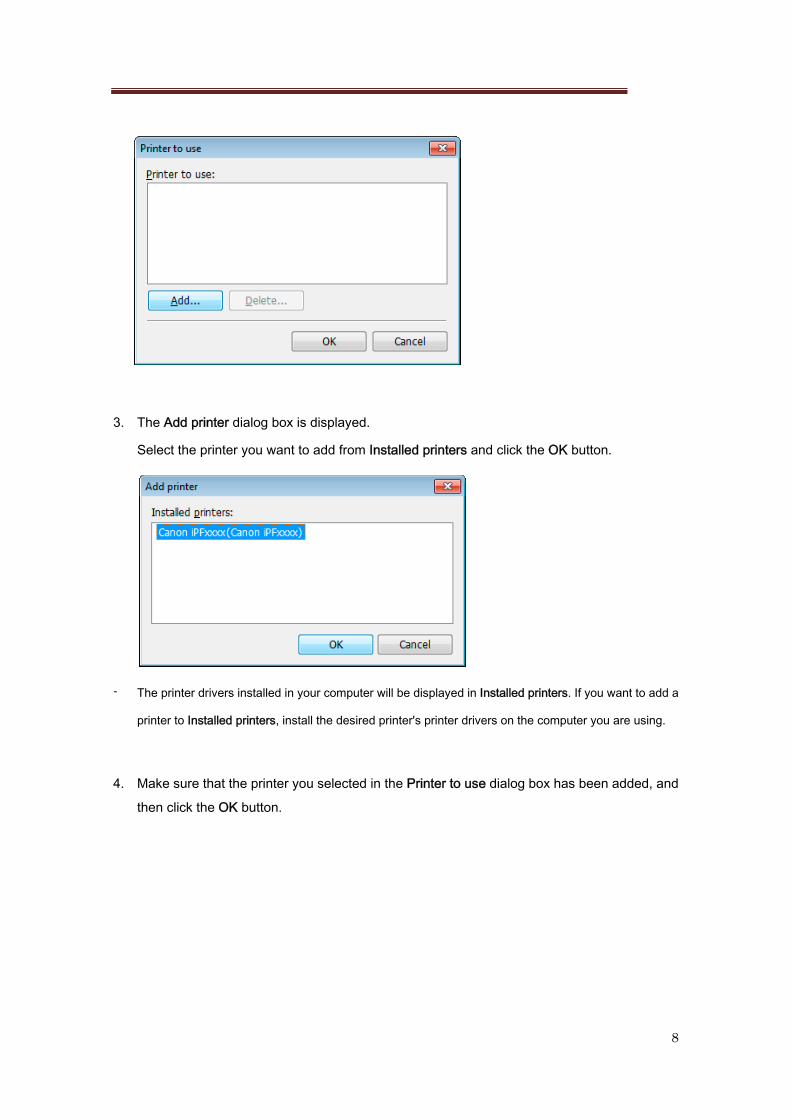
3. The Add printer dialog box is displayed.
Select the printer you want to add from Installed printers and click the OK button.
- The printer drivers installed in your computer will be displayed in Installed printers. If you want to add a
printer to Installed printers, install the desired printer's printer drivers on the computer you are using.
4. Make sure that the printer you selected in the Printer to use dialog box has been added, and
then click the OK button.
9
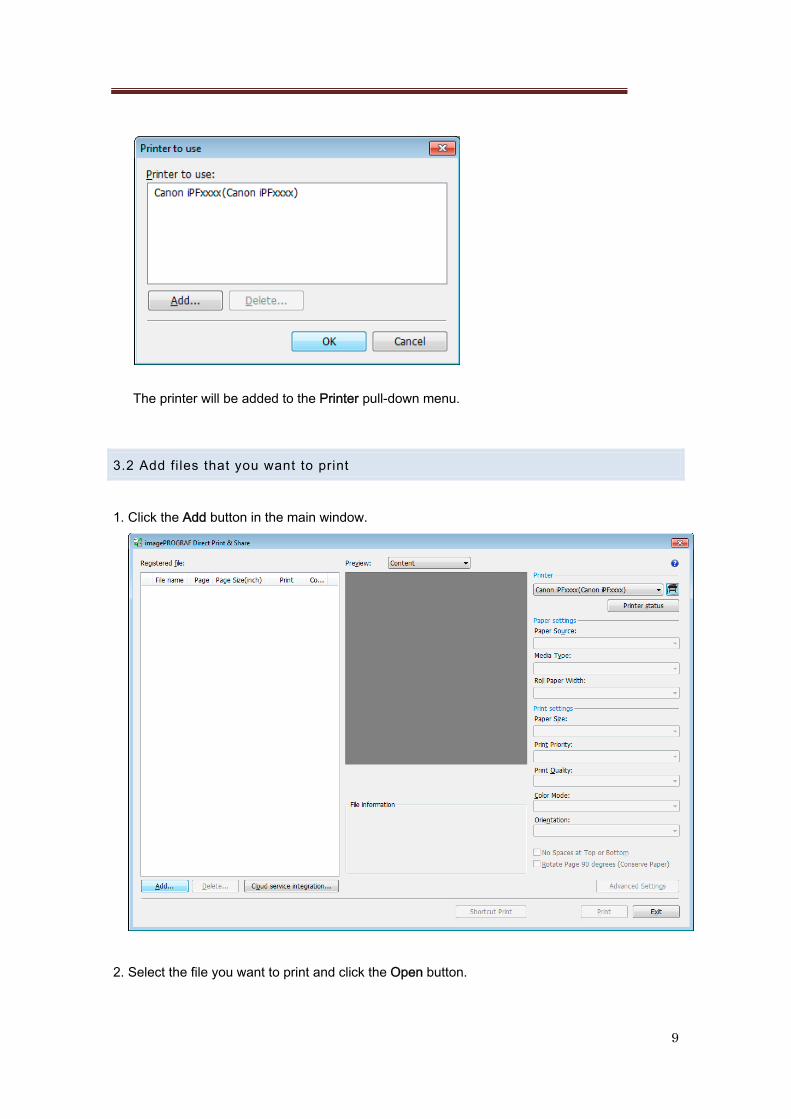
The printer will be added to the Printer pull-down menu.
3.2 Add fi les that you want to print
1. Click the Add button in the main window.
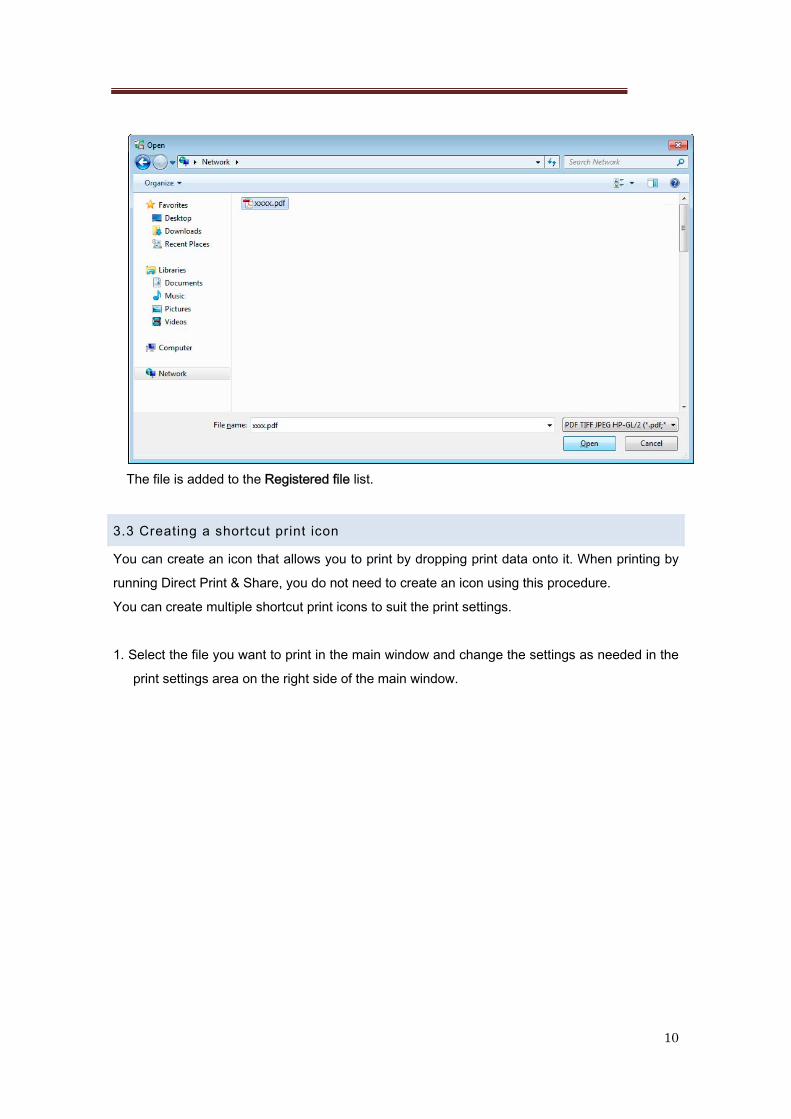
2. Select the file you want to print and click the Open button.
10
The file is added to the Registered file list.
3.3 Creating a shortcut print icon
You can create an icon that allows you to print by dropping print data onto it. When printing by
running Direct Print & Share, you do not need to create an icon using this procedure.
You can create multiple shortcut print icons to suit the print settings.
1. Select the file you want to print in the main window and change the settings as needed in the
print settings area on the right side of the main window.
11
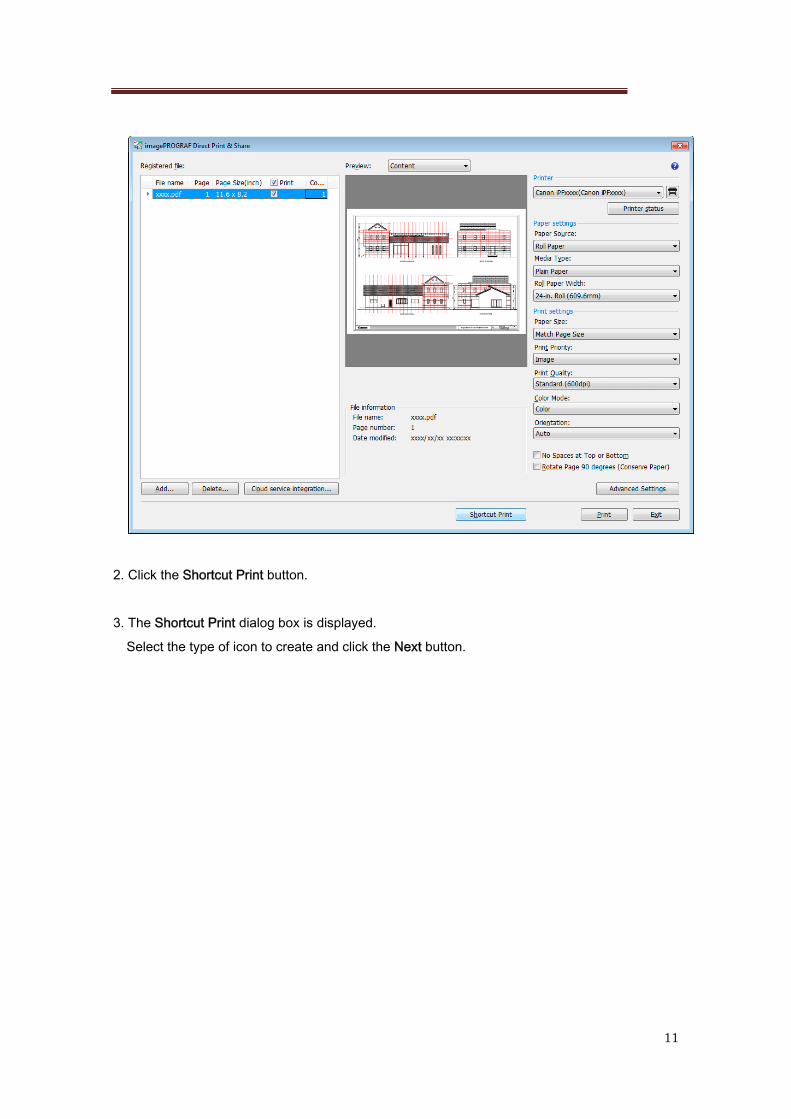
2. Click the Shortcut Print button.
3. The Shortcut Print dialog box is displayed.
Select the type of icon to create and click the Next button.

12
4. The Save As dialog box is displayed.
Enter the icon name to create in File name and click the Save button.
The created icon is added to the folder specified in the Save As dialog box.
13
3.4 Printing
The available methods for printing files using Direct Print & Share are to print by running Direct
Print & Share or to print by creating a shortcut print icon and dropping the files onto the shortcut
print icon.
Printing by running Direct Print & Share
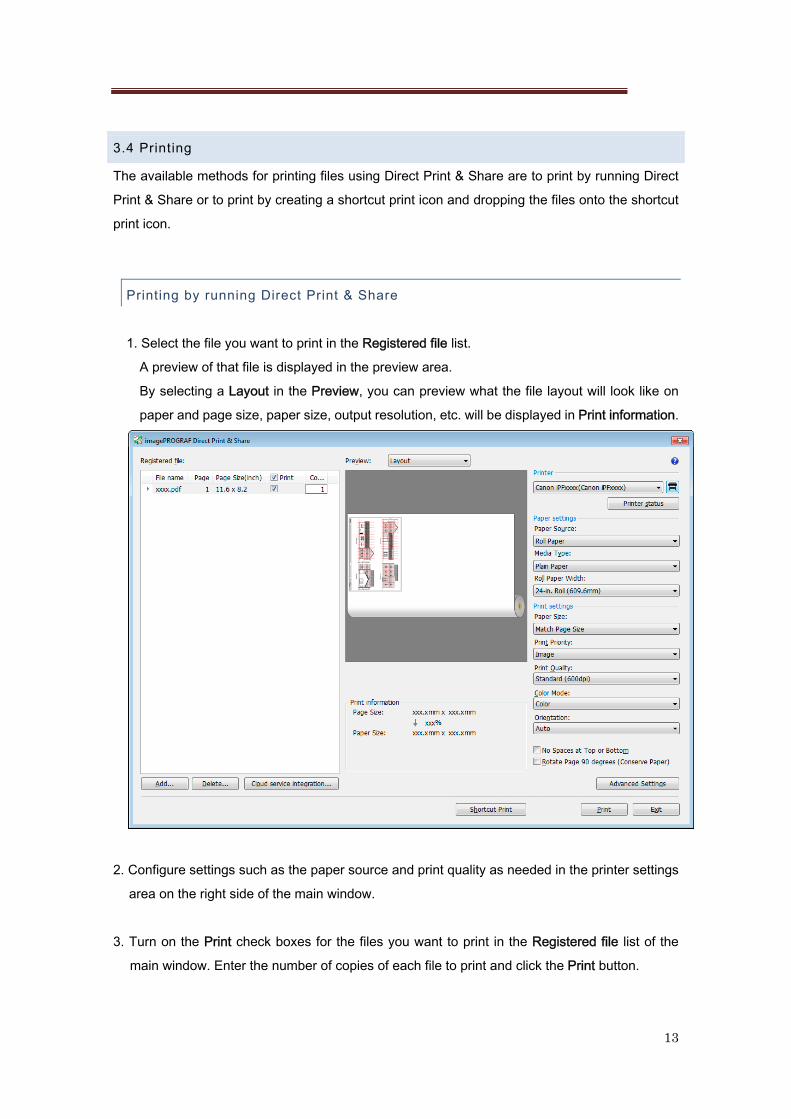
1. Select the file you want to print in the Registered file list.
A preview of that file is displayed in the preview area.
By selecting a Layout in the Preview, you can preview what the file layout will look like on
paper and page size, paper size, output resolution, etc. will be displayed in Print information.
2. Configure settings such as the paper source and print quality as needed in the printer settings
area on the right side of the main window.
3. Turn on the Print check boxes for the files you want to print in the Registered file list of the
main window. Enter the number of copies of each file to print and click the Print button.
14
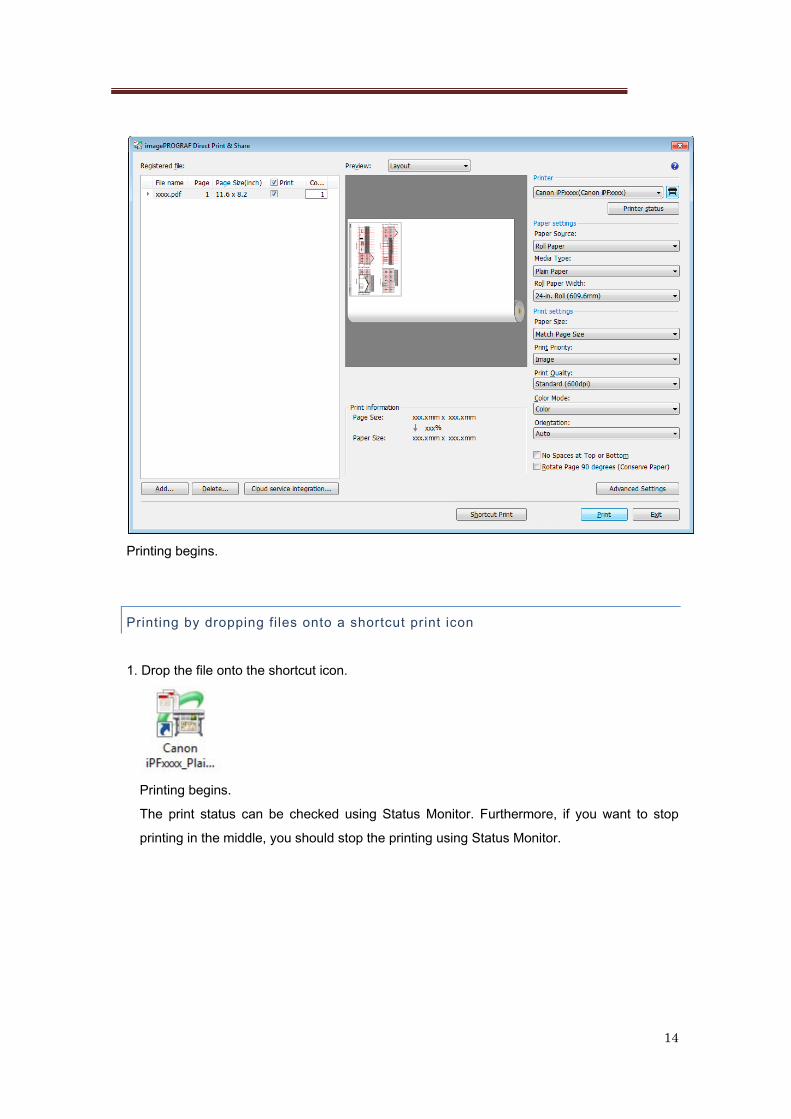
Printing begins.
Printing by dropping files onto a shortcut print icon
1. Drop the file onto the shortcut icon.
Printing begins.
The print status can be checked using Status Monitor. Furthermore, if you want to stop
printing in the middle, you should stop the printing using Status Monitor.
15
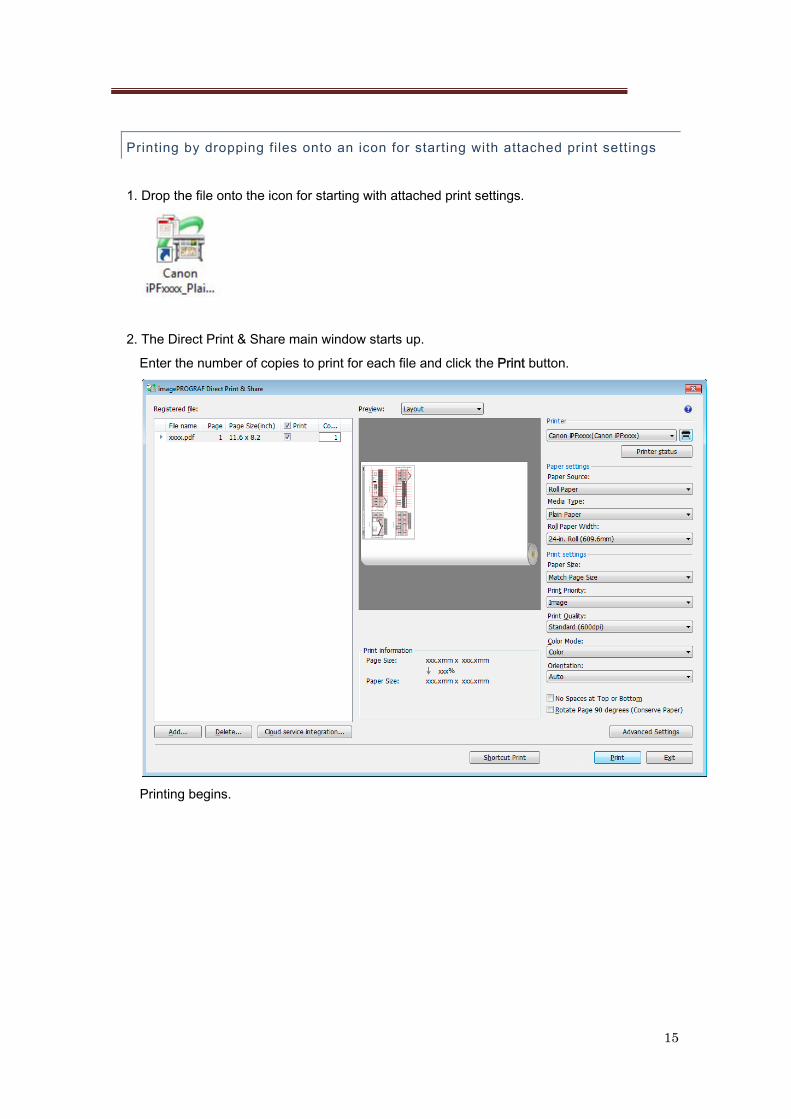
Printing by dropping files onto an icon for starting with attached print settings
1. Drop the file onto the icon for starting with attached print settings.
2. The Direct Print & Share main window starts up.
Enter the number of copies to print for each file and click the Print button.
Printing begins.
16
4. Using the Cloud Storage
4.1 Adding cloud storage that supports WebDAV
You can use cloud storage that supports WebDAV as cloud storage. If you are using Google
Drive, you do not need to perform this procedure because Google Drive is registered in advance.
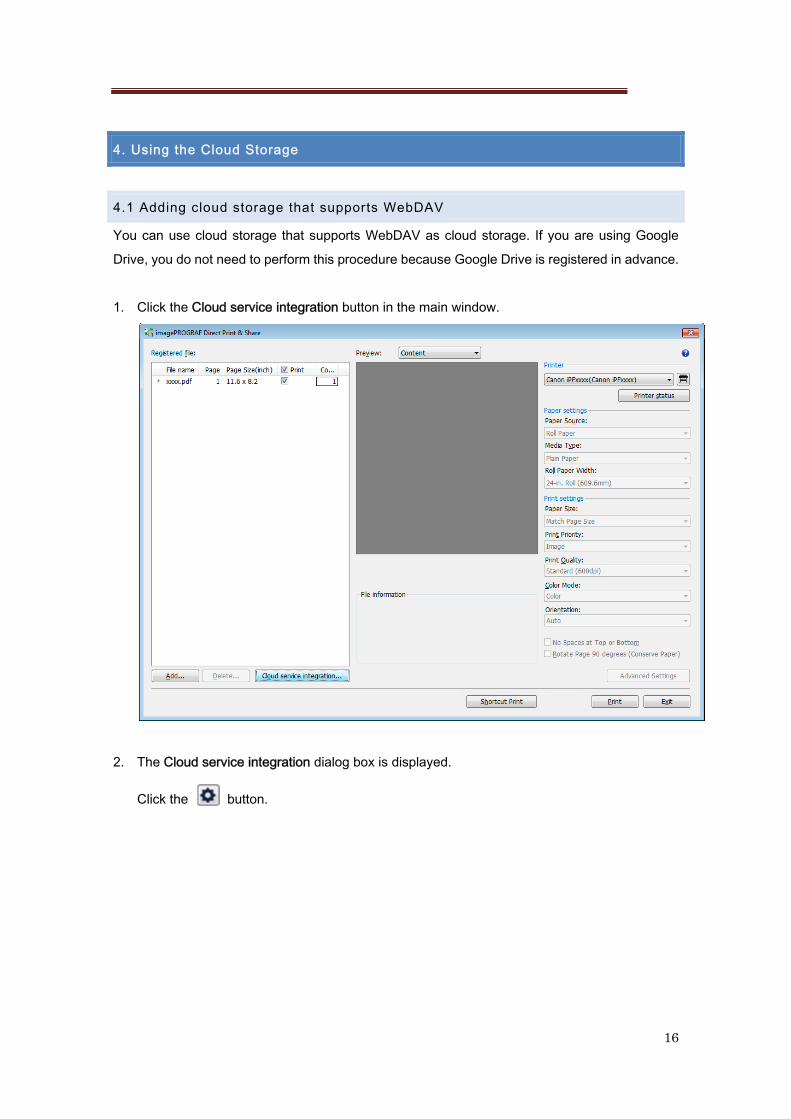
1. Click the Cloud service integration button in the main window.
2. The Cloud service integration dialog box is displayed.
Click the button.
17
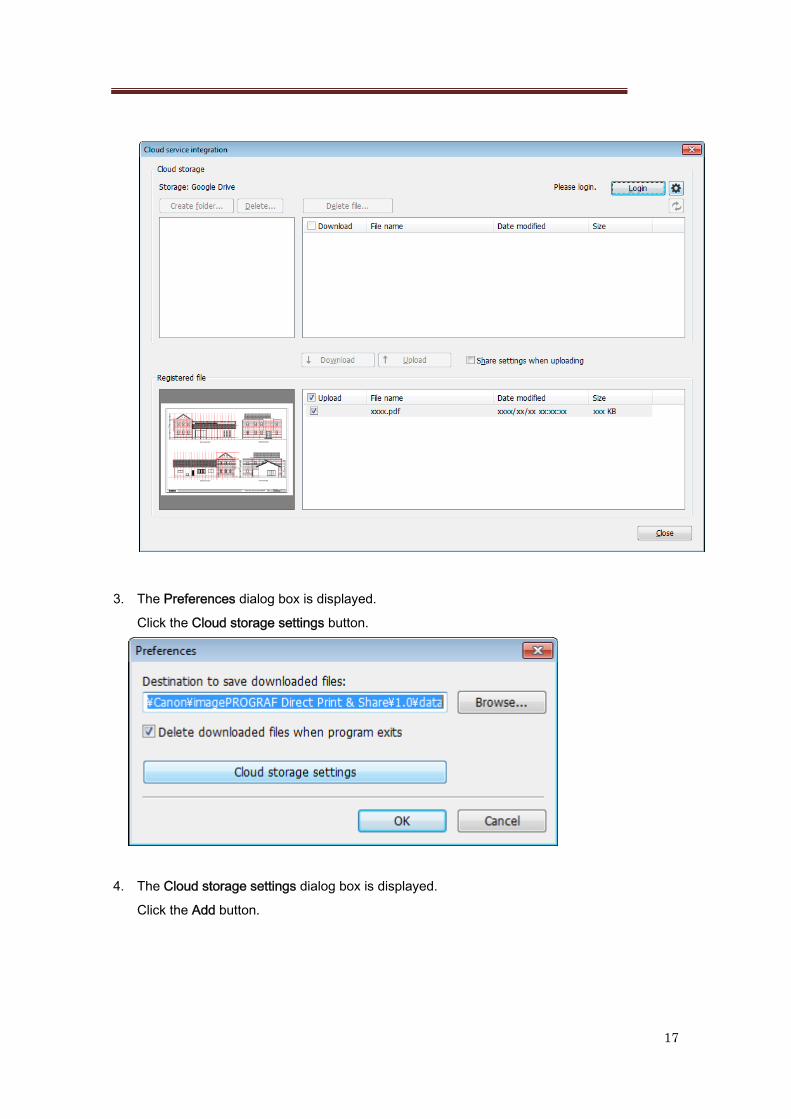
3. The Preferences dialog box is displayed.
Click the Cloud storage settings button.
4. The Cloud storage settings dialog box is displayed.
Click the Add button.
18
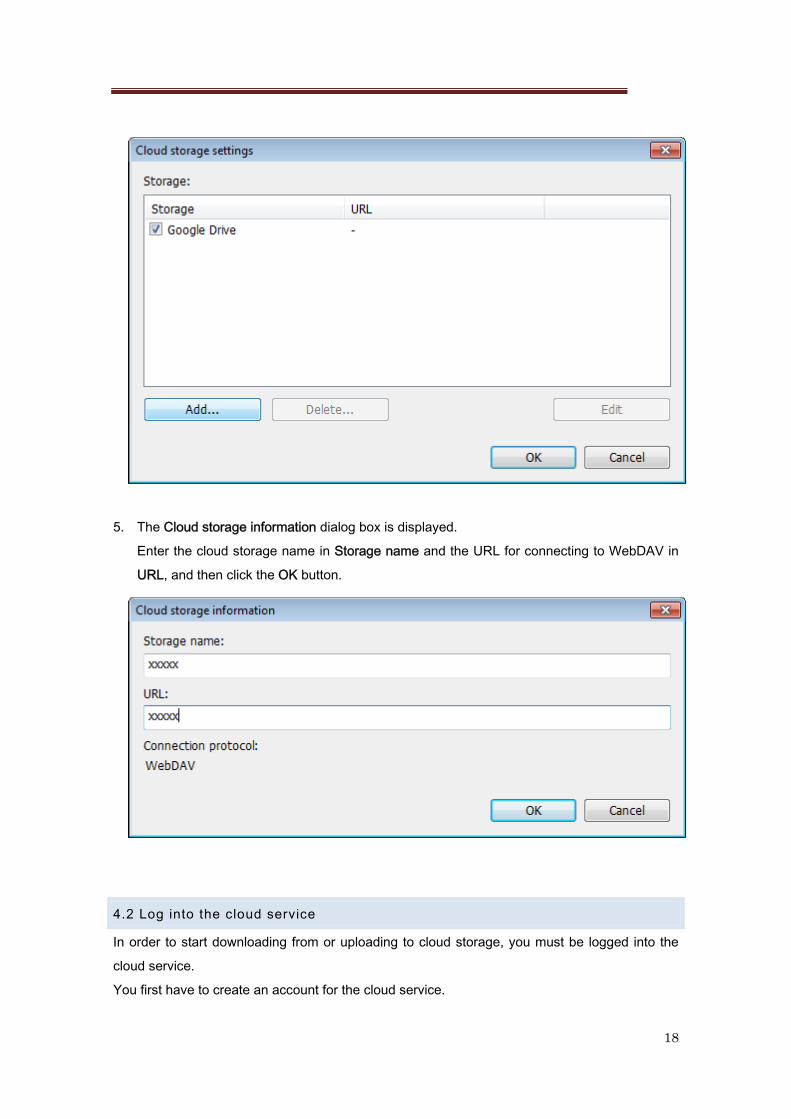
5. The Cloud storage information dialog box is displayed.
Enter the cloud storage name in Storage name and the URL for connecting to WebDAV in
URL, and then click the OK button.
4.2 Log into the cloud service
In order to start downloading from or uploading to cloud storage, you must be logged into the
cloud service.
You first have to create an account for the cloud service.
19
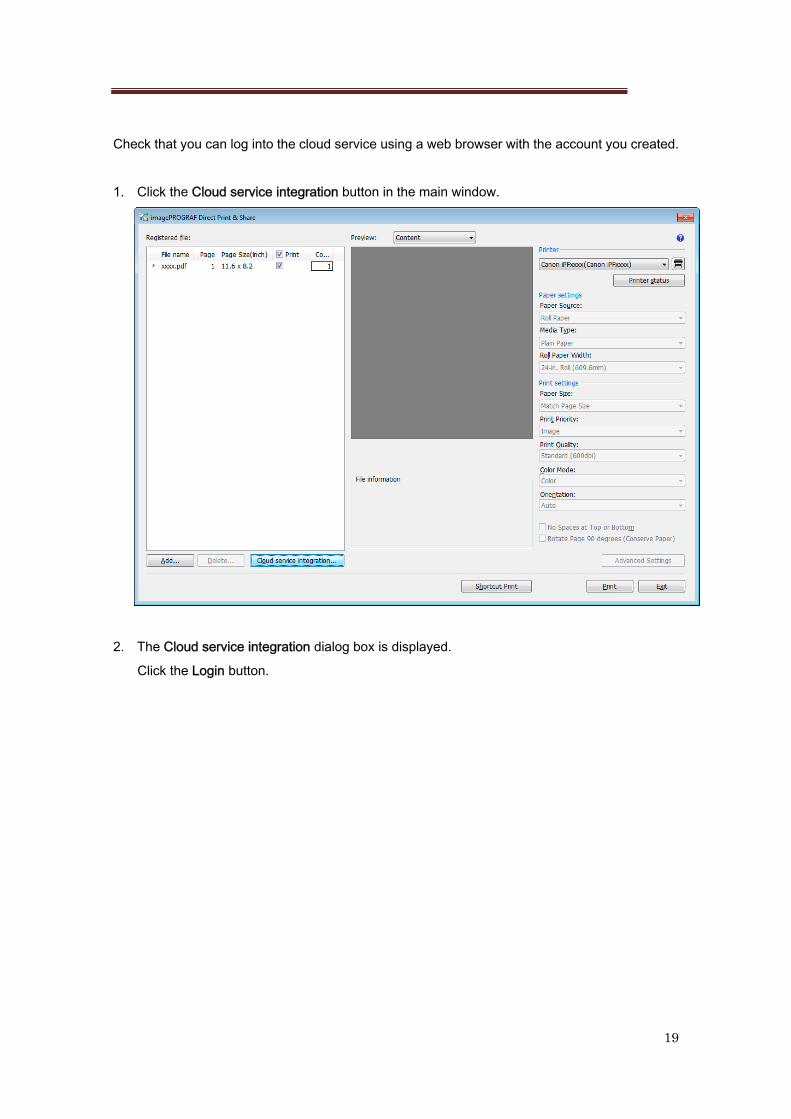
Check that you can log into the cloud service using a web browser with the account you created.
1. Click the Cloud service integration button in the main window.
2. The Cloud service integration dialog box is displayed.
Click the Login button.
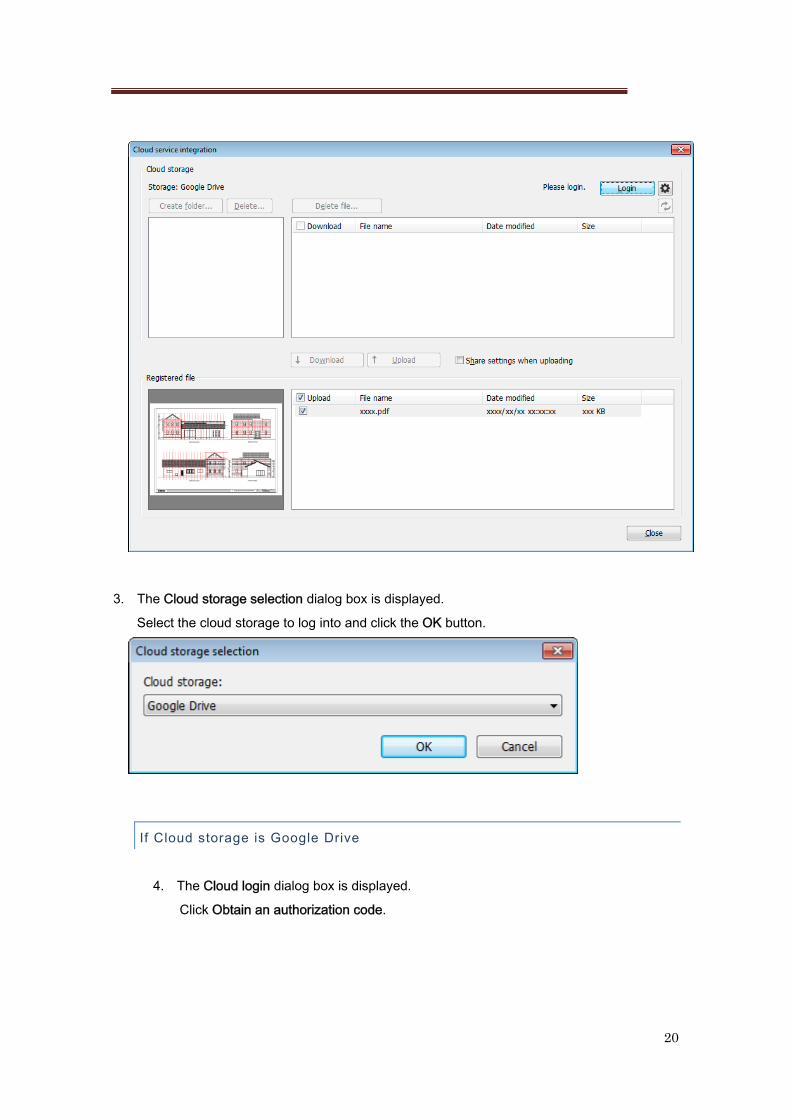
20
3. The Cloud storage selection dialog box is displayed.
Select the cloud storage to log into and click the OK button.
If Cloud storage is Google Drive
4. The Cloud login dialog box is displayed.
Click Obtain an authorization code.
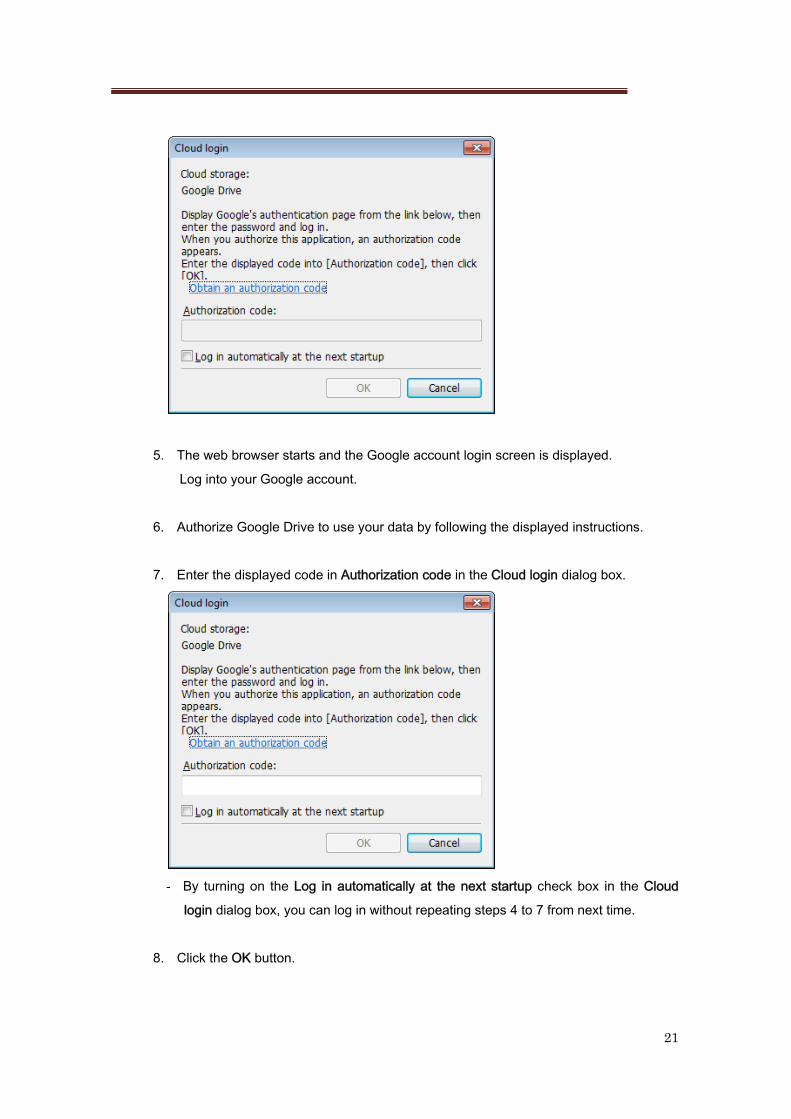
21
5. The web browser starts and the Google account login screen is displayed.
Log into your Google account.
6. Authorize Google Drive to use your data by following the displayed instructions.
7. Enter the displayed code in Authorization code in the Cloud login dialog box.
- By turning on the Log in automatically at the next startup check box in the Cloud
login dialog box, you can log in without repeating steps 4 to 7 from next time.
8. Click the OK button.
22
Once you have logged in, the Login button changes to the Logout button and your login
ID is displayed next to the button.
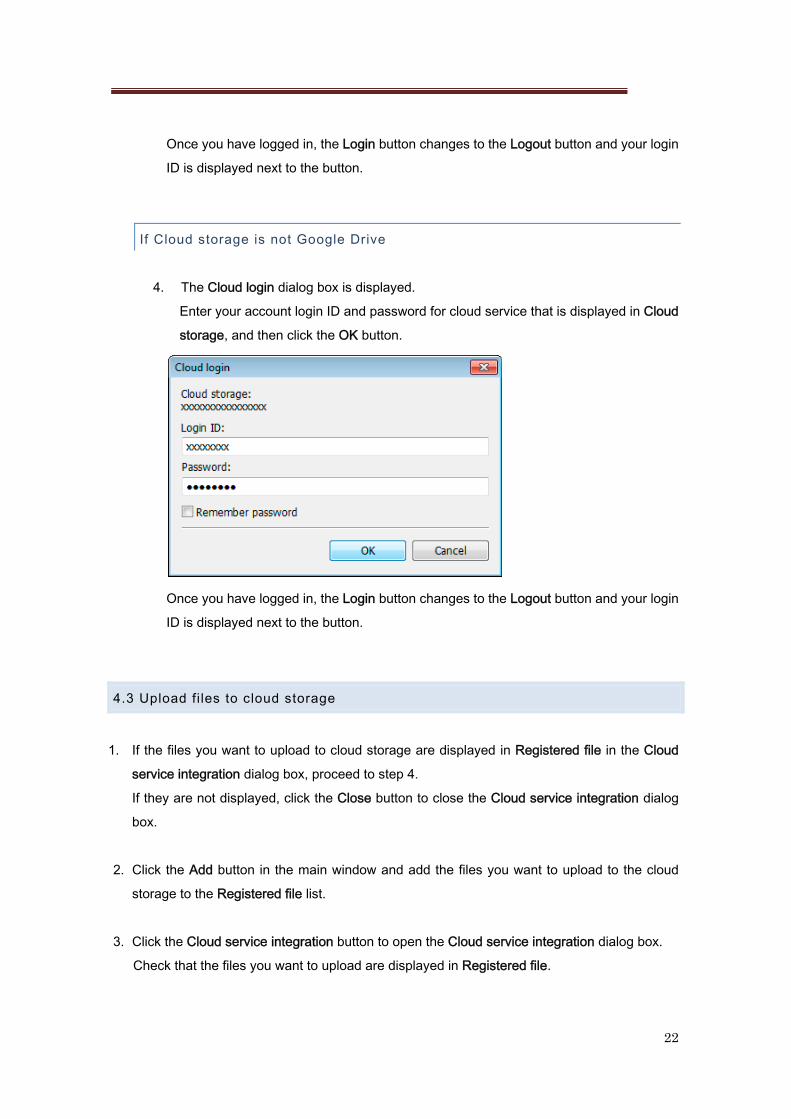
If Cloud storage is not Google Drive
4. The Cloud login dialog box is displayed.
Enter your account login ID and password for cloud service that is displayed in Cloud
storage, and then click the OK button.
Once you have logged in, the Login button changes to the Logout button and your login
ID is displayed next to the button.
4.3 Upload files to cloud storage
1. If the files you want to upload to cloud storage are displayed in Registered file in the Cloud
service integration dialog box, proceed to step 4.
If they are not displayed, click the Close button to close the Cloud service integration dialog
box.
2. Click the Add button in the main window and add the files you want to upload to the cloud
storage to the Registered file list.
3. Click the Cloud service integration button to open the Cloud service integration dialog box.
Check that the files you want to upload are displayed in Registered file.
23
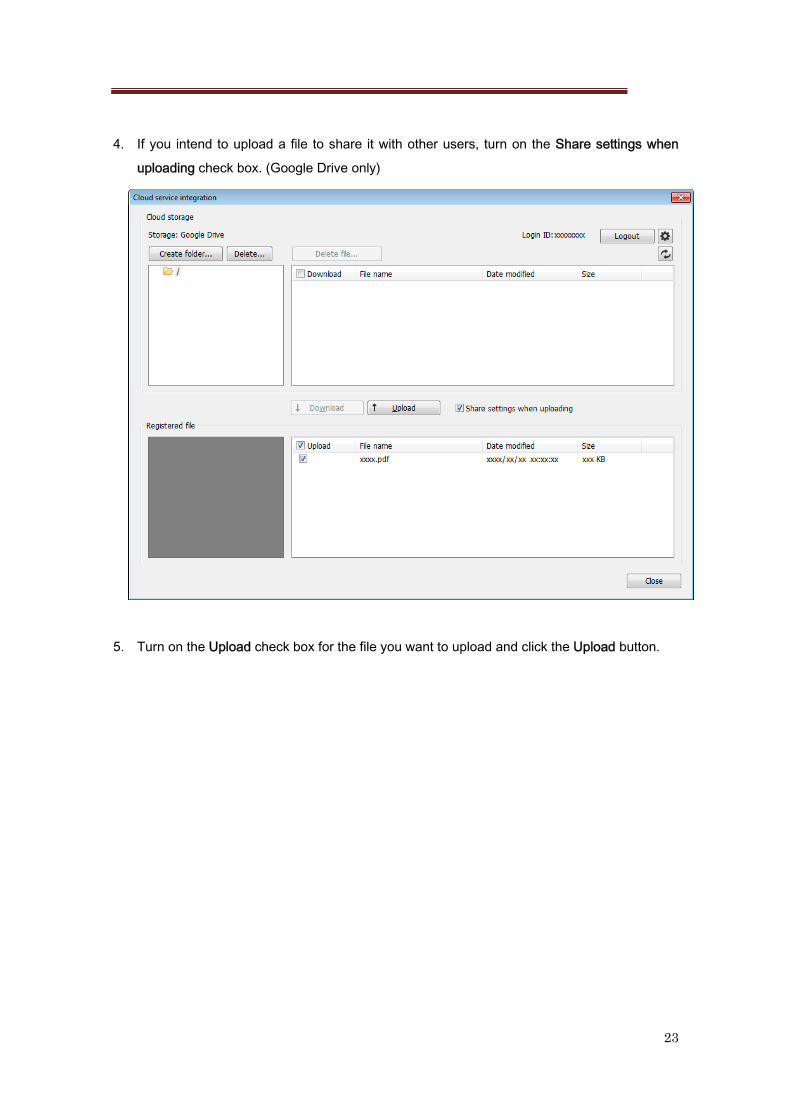
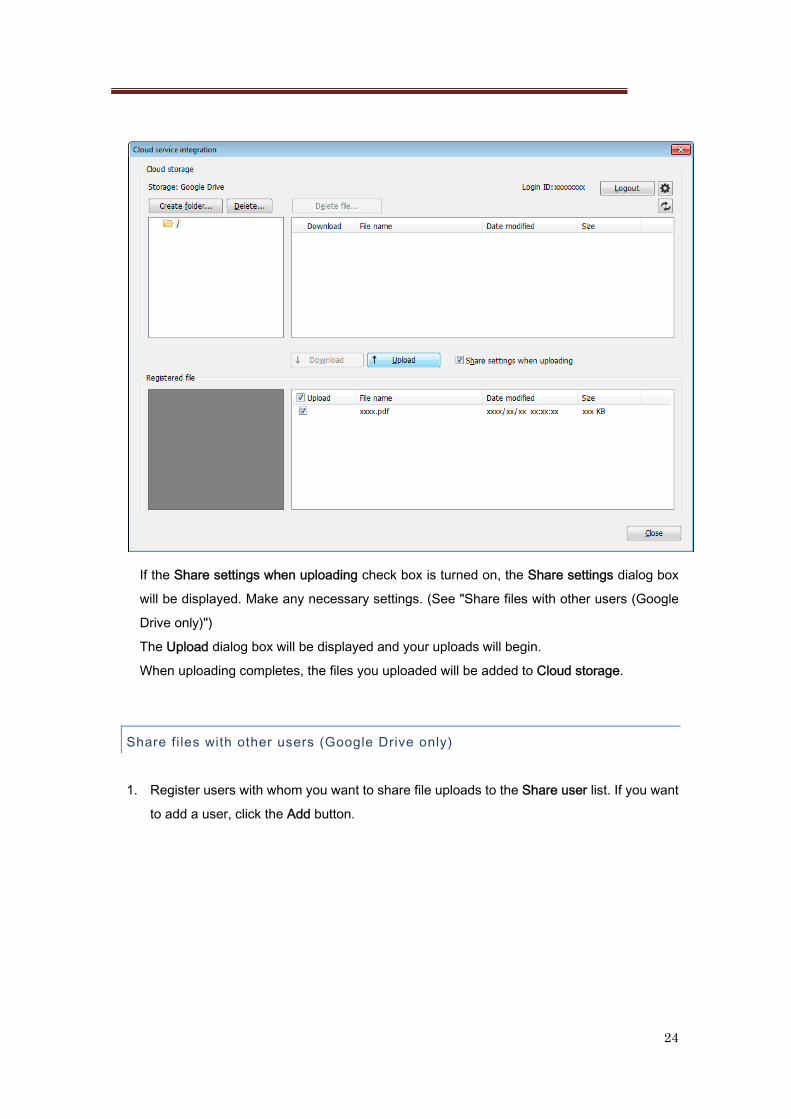
4. If you intend to upload a file to share it with other users, turn on the Share settings when
uploading check box. (Google Drive only)
5. Turn on the Upload check box for the file you want to upload and click the Upload button.
24
If the Share settings when uploading check box is turned on, the Share settings dialog box
will be displayed. Make any necessary settings. (See "Share files with other users (Google
Drive only)")
The Upload dialog box will be displayed and your uploads will begin.
When uploading completes, the files you uploaded will be added to Cloud storage.
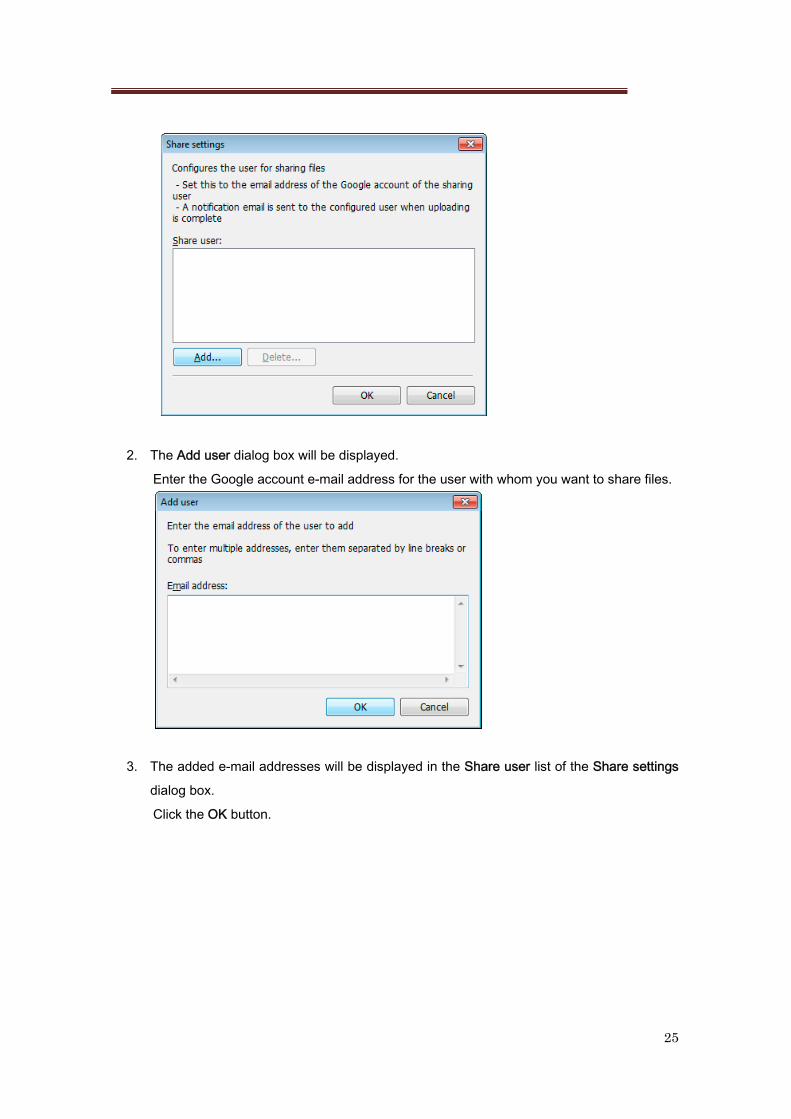
Share fi les with other users (Google Drive only)
1. Register users with whom you want to share file uploads to the Share user list. If you want
to add a user, click the Add button.
25
2. The Add user dialog box will be displayed.
Enter the Google account e-mail address for the user with whom you want to share files.
3. The added e-mail addresses will be displayed in the Share user list of the Share settings
dialog box.
Click the OK button.
26
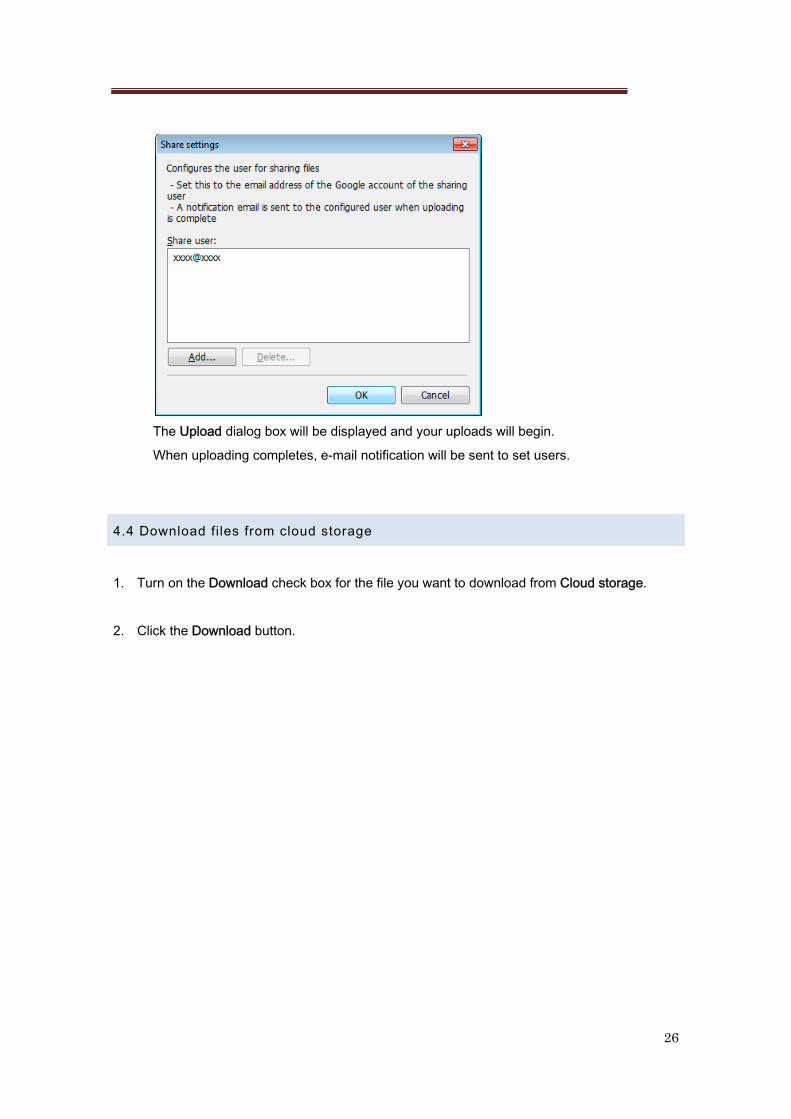
The Upload dialog box will be displayed and your uploads will begin.
When uploading completes, e-mail notification will be sent to set users.
4.4 Download files from cloud storage
1. Turn on the Download check box for the file you want to download from Cloud storage.
2. Click the Download button.
27
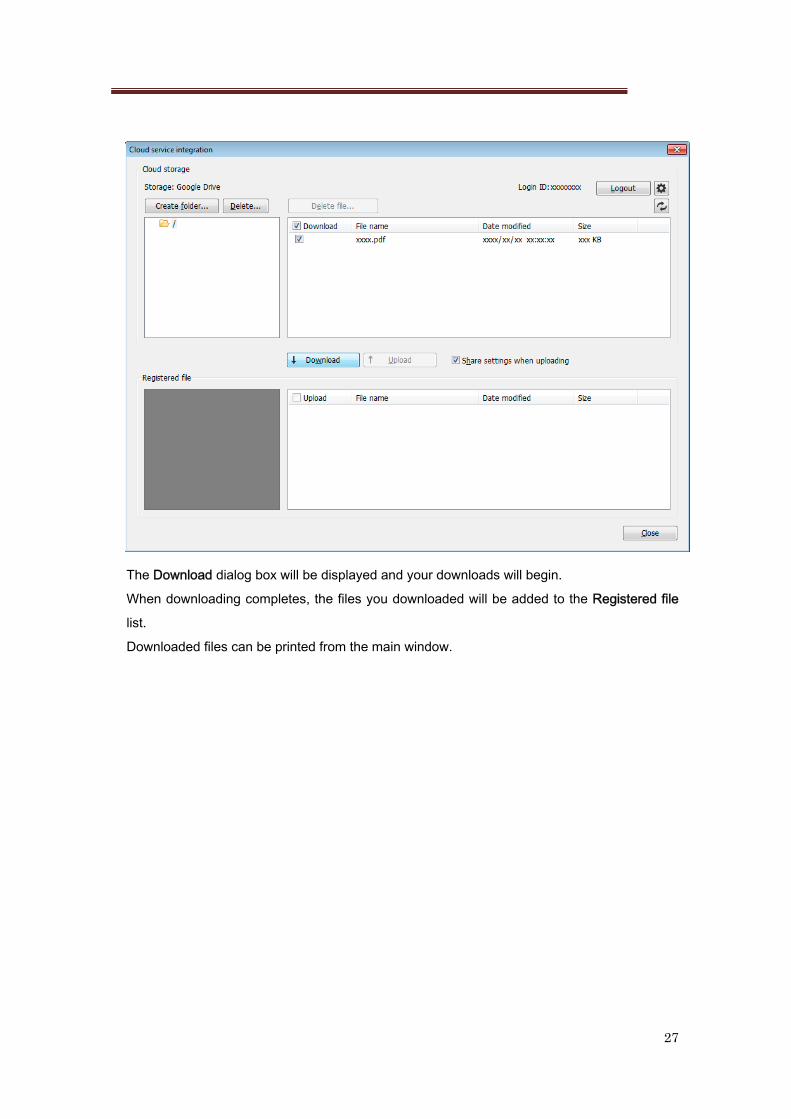
The Download dialog box will be displayed and your downloads will begin.
When downloading completes, the files you downloaded will be added to the Registered file
list.
Downloaded files can be printed from the main window.
28
5. Print from AutoCAD
If you install Direct Print & Share on a computer that has Autodesk's CAD software AutoCAD
installed on it, a Direct Print & Share plug-in will be added to AutoCAD.
You can start Direct Print & Share from AutoCAD and easily print drawings and make uploads to
cloud storage. - You can use the AutoCAD plug-in with AutoCAD 2008 and later versions of AutoCAD.
- If you install AutoCAD 2011 or an earlier version of AutoCAD after installing Direct Print &
Share, install the AutoCAD plug-in from the Direct Print & Share change install.
1. Open a drawing in AutoCAD. - Open AutoCAD's Layout space. The AutoCAD plug-in cannot be used from the Model space.
2. Click Print and Preview from either AutoCAD's ribbon menu or by right clicking and selecting
it from the displayed menu.
3. The Direct Print & Share will start after the PDF files that reflect the layout of open drawings
are generated. - If you want to change the layout of a PDF file, change the layout of the drawing in AutoCAD and then
click Print and Preview again.
4. Confirm that the PDF file that was generated from the AutoCAD drawing is displayed in the
Registered file list of the Direct Print & Share's main window.
The generated PDF files can be printed and uploaded to cloud storage.
29
<Trademarks>
- Canon and imagePROGRAF are trademarks or registered trademarks of Canon Inc.
- Microsoft and Windows are either registered trademarks or trademarks of Microsoft Corporation in the
United States and/or other countries.
- Google, Google Drive and Google Apps are trademarks of Google Inc.
- AutoCAD and other Autodesk product names are trademarks or registered trademarks of Autodesk,
Inc. in the United States and other countries.
- Other company names and product names in this document are trademarks or registered
trademarks of their respective companies.


![imagePROGRAF Direct Print & Share ガイド...Print & Shareについて]ダイアログボックスを開き、[Readme]をクリックすると表示されます。 4 2.インストール手順](https://img.pdfslide.net/doc/110x75/6004b6edb6864654a3758483/imageprograf-direct-print-share-f-print-sharefffoeffereadmefffecoe.jpg)