Embed Size (px)
Citation preview

index (arbitrarily chosen to be the concept index).
Texinfo

Texinfo
The GNU Documentation FormatEdition 2.23, for Texinfo Version Three
October 1996
Robert J. ChassellRichard M. Stallman

Copyright c 1988, 1990, 1991, 1992, 1993, 1995, 1996 Free Software Foun-dation, Inc.
This is the second edition of the Texinfo documentation,and is consistent with version 2 of `texinfo.tex'.
Published by the Free Software Foundation59 Temple Place Suite 330,Boston, MA 02111-1307 USAPrinted copies are available for $15 each.ISBN 1-882114-64-7
Permission is granted to make and distribute verbatim copies of this manualprovided the copyright notice and this permission notice are preserved on allcopies.
Permission is granted to copy and distribute modi�ed versions of this manualunder the conditions for verbatim copying, provided that the entire resultingderived work is distributed under the terms of a permission notice identicalto this one.
Permission is granted to copy and distribute translations of this manual intoanother language, under the above conditions for modi�ed versions, exceptthat this permission notice may be stated in a translation approved by theFree Software Foundation.
Cover art by Etienne Suvasa.

Texinfo Copying Conditions 1
Texinfo Copying Conditions
The programs currently being distributed that relate to Texinfo includeportions of GNU Emacs, plus other separate programs (including makeinfo,info, texindex, and `texinfo.tex'). These programs are free; this meansthat everyone is free to use them and free to redistribute them on a freebasis. The Texinfo-related programs are not in the public domain; theyare copyrighted and there are restrictions on their distribution, but theserestrictions are designed to permit everything that a good cooperating citizenwould want to do. What is not allowed is to try to prevent others fromfurther sharing any version of these programs that they might get from you.
Speci�cally, we want to make sure that you have the right to give awaycopies of the programs that relate to Texinfo, that you receive source codeor else can get it if you want it, that you can change these programs or usepieces of them in new free programs, and that you know you can do thesethings.
To make sure that everyone has such rights, we have to forbid you todeprive anyone else of these rights. For example, if you distribute copies ofthe Texinfo related programs, you must give the recipients all the rights thatyou have. You must make sure that they, too, receive or can get the sourcecode. And you must tell them their rights.
Also, for our own protection, we must make certain that everyone �ndsout that there is no warranty for the programs that relate to Texinfo. Ifthese programs are modi�ed by someone else and passed on, we want theirrecipients to know that what they have is not what we distributed, so thatany problems introduced by others will not re ect on our reputation.
The precise conditions of the licenses for the programs currently beingdistributed that relate to Texinfo are found in the General Public Licensesthat accompany them.
2 Texinfo 2.23

Chapter 1: Overview of Texinfo 3
1 Overview of Texinfo
Texinfo1 is a documentation system that uses a single source �le to pro-duce both on-line information and printed output. This means that insteadof writing two di�erent documents, one for the on-line help or other on-lineinformation and the other for a typeset manual or other printed work, youneed write only one document. When the work is revised, you need reviseonly one document. (You can read the on-line information, known as an Info�le, with an Info documentation-reading program.)
Using Texinfo, you can create a printed document with the normal fea-tures of a book, including chapters, sections, cross references, and indices.From the same Texinfo source �le, you can create a menu-driven, on-lineInfo �le with nodes, menus, cross references, and indices. You can, if youwish, make the chapters and sections of the printed document correspond tothe nodes of the on-line information; and you use the same cross referencesand indices for both the Info �le and the printed work. The GNU EmacsManual is a good example of a Texinfo �le, as is this manual.
To make a printed document, you process a Texinfo source �le with theTEX typesetting program. This creates a dvi �le that you can typeset andprint as a book or report. (Note that the Texinfo language is completelydi�erent from TEX's usual language, plain TEX.) If you do not have TEX,but do have troff or nroff, you can use the texi2roff program instead.
To make an Info �le, you process a Texinfo source �le with the makeinfoutility or Emacs's texinfo-format-buffer command; this creates an Info�le that you can install on-line.
TEX and texi2roff work with many types of printer; similarly, Infoworks with almost every type of computer terminal. This power makesTexinfo a general purpose system, but brings with it a constraint, which isthat a Texinfo �le may contain only the customary \typewriter" characters(letters, numbers, spaces, and punctuation marks) but no special graphics.
A Texinfo �le is a plain ascii �le containing text and @-commands (wordspreceded by an `@') that tell the typesetting and formatting programs whatto do. You may edit a Texinfo �le with any text editor; but it is especiallyconvenient to use GNU Emacs since that editor has a special mode, calledTexinfo mode, that provides various Texinfo-related features. (See Chapter 2[Texinfo Mode], page 15.)
1 Note that the �rst syllable of \Texinfo" is pronounced like \speck", not\hex". This odd pronunciation is derived from, but is not the same as,the pronunciation of TEX. In the word TEX, the `X' is actually the Greekletter \chi" rather than the English letter \ex". Pronounce TEX as if the`X' were the last sound in the name `Bach'; but pronounce Texinfo as ifthe `x' were a `k'. Spell \Texinfo" with a capital \T" and write the otherletters in lower case.

4 Texinfo 2.23
Before writing a Texinfo source �le, you should become familiar withthe Info documentation reading program and learn about nodes, menus,cross references, and the rest. (See Info �le `info', node `Top', for moreinformation.)
You can use Texinfo to create both on-line help and printed manuals;moreover, Texinfo is freely redistributable. For these reasons, Texinfo is theformat in which documentation for GNU utilities and libraries is written.
1.1 Info �les
An Info �le is a Texinfo �le formatted so that the Info documentationreading program can operate on it. (makeinfo and texinfo-format-bufferare two commands that convert a Texinfo �le into an Info �le.)
Info �les are divided into pieces called nodes, each of which contains thediscussion of one topic. Each node has a name, and contains both textfor the user to read and pointers to other nodes, which are identi�ed bytheir names. The Info program displays one node at a time, and providescommands with which the user can move to other related nodes.
Each node of an Info �le may have any number of child nodes that describesubtopics of the node's topic. The names of child nodes are listed in a menuwithin the parent node; this allows you to use certain Info commands tomove to one of the child nodes. Generally, an Info �le is organized like abook. If a node is at the logical level of a chapter, its child nodes are atthe level of sections; likewise, the child nodes of sections are at the level ofsubsections.
All the children of any one parent are linked together in a bidirectionalchain of `Next' and `Previous' pointers. The `Next' pointer provides a link tothe next section, and the `Previous' pointer provides a link to the previoussection. This means that all the nodes that are at the level of sections withina chapter are linked together. Normally the order in this chain is the sameas the order of the children in the parent's menu. Each child node recordsthe parent node name as its `Up' pointer. The last child has no `Next'pointer, and the �rst child has the parent both as its `Previous' and as its`Up' pointer.2
The book-like structuring of an Info �le into nodes that correspond tochapters, sections, and the like is a matter of convention, not a requirement.The `Up', `Previous', and `Next' pointers of a node can point to any othernodes, and a menu can contain any other nodes. Thus, the node structurecan be any directed graph. But it is usually more comprehensible to follow
2 In some documents, the �rst child has no `Previous' pointer. Occasionally,the last child has the node name of the next following higher level nodeas its `Next' pointer.

Chapter 1: Overview of Texinfo 5
a structure that corresponds to the structure of chapters and sections in aprinted book or report.
In addition to menus and to `Next', `Previous', and `Up' pointers, Infoprovides pointers of another kind, called references, that can be sprinkledthroughout the text. This is usually the best way to represent links that donot �t a hierarchical structure.
Usually, you will design a document so that its nodes match the structureof chapters and sections in the printed output. But there are times whenthis is not right for the material being discussed. Therefore, Texinfo usesseparate commands to specify the node structure for the Info �le and thesection structure for the printed output.
Generally, you enter an Info �le through a node that by convention iscalled `Top'. This node normally contains just a brief summary of the �le'spurpose, and a large menu through which the rest of the �le is reached. Fromthis node, you can either traverse the �le systematically by going from nodeto node, or you can go to a speci�c node listed in the main menu, or youcan search the index menus and then go directly to the node that has theinformation you want.
If you want to read through an Info �le in sequence, as if it were a printedmanual, you can get the whole �le with the advanced Info command g* hRETi.(See Info �le `info', node `Expert'.)
The `dir' �le in the `info' directory serves as the departure point for thewhole Info system. From it, you can reach the `Top' nodes of each of thedocuments in a complete Info system.
1.2 Printed Books
A Texinfo �le can be formatted and typeset as a printed book or manual.To do this, you need TEX, a powerful, sophisticated typesetting programwritten by Donald Knuth.3
A Texinfo-based book is similar to any other typeset, printed work: it canhave a title page, copyright page, table of contents, and preface, as well aschapters, numbered or unnumbered sections and subsections, page headers,cross references, footnotes, and indices.
You can use Texinfo to write a book without ever having the intentionof converting it into on-line information. You can use Texinfo for writinga printed novel, and even to write a printed memo, although this latterapplication is not recommended since electronic mail is so much easier.
3 You can also use the texi2roff program if you do not have TEX; sinceTexinfo is designed for use with TEX, texi2roff is not described here.texi2roff is part of the standard GNU distribution.

6 Texinfo 2.23
TEX is a general purpose typesetting program. Texinfo provides a �lecalled `texinfo.tex' that contains information (de�nitions or macros) thatTEX uses when it typesets a Texinfo �le. (`texinfo.tex' tells TEX how toconvert the Texinfo @-commands to TEX commands, which TEX can thenprocess to create the typeset document.) `texinfo.tex' contains the speci-�cations for printing a document.
Most often, documents are printed on 8.5 inch by 11 inch pages (216 mmby 280 mm; this is the default size), but you can also print for 7 inch by9.25 inch pages (178 mm by 235 mm; the @smallbook size) or on EuropeanA4 size paper (@afourpaper). (See Section 20.10 [Printing \Small" Books],page 156. Also, see Section 20.11 [Printing on A4 Paper], page 156.)
By changing the parameters in `texinfo.tex', you can change the sizeof the printed document. In addition, you can change the style in whichthe printed document is formatted; for example, you can change the sizesand fonts used, the amount of indentation for each paragraph, the degree towhich words are hyphenated, and the like. By changing the speci�cations,you can make a book look digni�ed, old and serious, or light-hearted, youngand cheery.
TEX is freely distributable. It is written in a dialect of Pascal called WEBand can be compiled either in Pascal or (by using a conversion program thatcomes with the TEX distribution) in C. (See section \TEX Mode" in TheGNU Emacs Manual, for information about TEX.)
TEX is very powerful and has a great many features. Because a Texinfo�le must be able to present information both on a character-only terminalin Info form and in a typeset book, the formatting commands that Texinfosupports are necessarily limited.
See Appendix J [How to Obtain TEX], page 231.
1.3 @-commands
In a Texinfo �le, the commands that tell TEX how to typeset the printedmanual and tell makeinfo and texinfo-format-buffer how to create anInfo �le are preceded by `@'; they are called @-commands. For example,@node is the command to indicate a node and @chapter is the command toindicate the start of a chapter.
Please note: All the @-commands, with the exception of the @TeX{}command, must be written entirely in lower case.
The Texinfo @-commands are a strictly limited set of constructs. Thestrict limits make it possible for Texinfo �les to be understood both by TEXand by the code that converts them into Info �les. You can display Info �leson any terminal that displays alphabetic and numeric characters. Similarly,you can print the output generated by TEX on a wide variety of printers.

Chapter 1: Overview of Texinfo 7
Depending on what they do or what arguments4 they take, you need towrite @-commands on lines of their own or as part of sentences:
� Write a command such as @noindent at the beginning of a line as theonly text on the line. (@noindent prevents the beginning of the nextline from being indented as the beginning of a paragraph.)
� Write a command such as @chapter at the beginning of a line followedby the command's arguments, in this case the chapter title, on the restof the line. (@chapter creates chapter titles.)
� Write a command such as @dots{} wherever you wish but usually withina sentence. (@dots{} creates dots : : :)
� Write a command such as @code{sample-code} wherever you wish (butusually within a sentence) with its argument, sample-code in this ex-ample, between the braces. (@code marks text as being code.)
� Write a command such as @example at the beginning of a line of itsown; write the body-text on following lines; and write the matching@end command, @end example in this case, at the beginning of a line ofits own after the body-text. (@example : : : @end example indents andtypesets body-text as an example.)
As a general rule, a command requires braces if it mingles among other text;but it does not need braces if it starts a line of its own. The non-alphabeticcommands, such as @:, are exceptions to the rule; they do not need braces.
As you gain experience with Texinfo, you will rapidly learn how to writethe di�erent commands: the di�erent ways to write commands make it easierto write and read Texinfo �les than if all commands followed exactly the samesyntax. (For details about @-command syntax, see Appendix I [@-CommandSyntax], page 229.)
1.4 General Syntactic Conventions
All printable ascii characters except `@', `{' and `}' can appear in a Tex-info �le and stand for themselves. `@' is the escape character which introducescommands. `{' and `}' should be used only to surround arguments to certain
4 The word argument comes from the way it is used in mathematics anddoes not refer to a disputation between two people; it refers to the in-formation presented to the command. According to the Oxford EnglishDictionary, the word derives from the Latin for to make clear, prove;thus it came to mean `the evidence o�ered as proof', which is to say,`the information o�ered', which led to its mathematical meaning. In itsother thread of derivation, the word came to mean `to assert in a man-ner against which others may make counter assertions', which led to themeaning of `argument' as a disputation.
8 Texinfo 2.23
commands. To put one of these special characters into the document, putan `@' character in front of it, like this: `@@', `@{', and `@}'.
It is customary in TEX to use doubled single-quote characters to beginand end quotations: `` and '' . This convention should be followedin Texinfo �les. TEX converts doubled single-quote characters to left- andright-hand doubled quotation marks, \like this", and Info converts doubledsingle-quote characters to ascii double-quotes: `` and '' to " .
Use three hyphens in a row, `---', for a dash|like this. In TEX, a singleor even a double hyphen produces a printed dash that is shorter than theusual typeset dash. Info reduces three hyphens to two for display on thescreen.
To prevent a paragraph from being indented in the printed manual, putthe command @noindent on a line by itself before the paragraph.
If you mark o� a region of the Texinfo �le with the @iftex and@end iftex commands, that region will appear only in the printed copy;in that region, you can use certain commands borrowed from plain TEX thatyou cannot use in Info. Likewise, if you mark o� a region with the @ifinfoand @end ifinfo commands, that region will appear only in the Info �le;in that region, you can use Info commands that you cannot use in TEX.Similarly for @ifhtml and @end ifhtml. See Chapter 18 [Conditionals],page 141.
Caution: Do not use tabs in a Texinfo �le! TEX uses variable-width fonts, which means that it cannot prede�ne a tab to work inall circumstances. Consequently, TEX treats tabs like single spaces,and that is not what they look like.
To avoid this problem, Texinfo mode causes GNU Emacs to insertmultiple spaces when you press the hTABi key.
Also, you can run untabify in Emacs to convert tabs in a regionto multiple spaces.
1.5 Comments
You can write comments in a Texinfo �le that will not appear in eitherthe Info �le or the printed manual by using the @comment command (whichmay be abbreviated to @c). Such comments are for the person who readsthe Texinfo �le. All the text on a line that follows either @comment or @c isa comment; the rest of the line does not appear in either the Info �le or theprinted manual. (Often, you can write the @comment or @c in the middle of aline, and only the text that follows after the @comment or @c command doesnot appear; but some commands, such as @settitle and @setfilename,work on a whole line. You cannot use @comment or @c in a line beginningwith such a command.)

Chapter 1: Overview of Texinfo 9
You can write long stretches of text that will not appear in either the Info�le or the printed manual by using the @ignore and @end ignore commands.Write each of these commands on a line of its own, starting each commandat the beginning of the line. Text between these two commands does notappear in the processed output. You can use @ignore and @end ignore forwriting comments. Often, @ignore and @end ignore is used to enclose apart of the copying permissions that applies to the Texinfo source �le of adocument, but not to the Info or printed version of the document.
1.6 What a Texinfo File Must Have
By convention, the names of Texinfo �les end with one of the extensions`.texinfo', `.texi', or `.tex'. The longer extension is preferred since itdescribes more clearly to a human reader the nature of the �le. The shorterextensions are for operating systems that cannot handle long �le names.
In order to be made into a printed manual and an Info �le, a Texinfo �lemust begin with lines like this:
\input texinfo@setfilename info-�le-name@settitle name-of-manual
The contents of the �le follow this beginning, and then you must end aTexinfo �le with a line like this:
@bye
The `\input texinfo' line tells TEX to use the `texinfo.tex' �le, whichtells TEX how to translate the Texinfo @-commands into TEX typesettingcommands. (Note the use of the backslash, `\'; this is correct for TEX.) The`@setfilename' line provides a name for the Info �le and tells TEX to openauxiliary �les. The `@settitle' line speci�es a title for the page headers (orfooters) of the printed manual.
The @bye line at the end of the �le on a line of its own tells the formattersthat the �le is ended and to stop formatting.
Usually, you will not use quite such a spare format, but will includemode setting and start-of-header and end-of-header lines at the beginningof a Texinfo �le, like this:
\input texinfo @c -*-texinfo-*-@c %**start of header@setfilename info-�le-name@settitle name-of-manual@c %**end of header
In the �rst line, `-*-texinfo-*-' causes Emacs to switch into Texinfo modewhen you edit the �le.

10 Texinfo 2.23
The @c lines which surround the `@setfilename' and `@settitle' linesare optional, but you need them in order to run TEX or Info on just part ofthe �le. (See Section 3.2.2 [Start of Header], page 31, for more information.)
Furthermore, you will usually provide a Texinfo �le with a title page,indices, and the like. But the minimum, which can be useful for shortdocuments, is just the three lines at the beginning and the one line at theend.
1.7 Six Parts of a Texinfo File
Generally, a Texinfo �le contains more than the minimal beginning andend|it usually contains six parts:
1. Header The Header names the �le, tells TEX which de�nitions' �le touse, and performs other \housekeeping" tasks.
2. Summary Description and CopyrightThe Summary Description and Copyright segment describes thedocument and contains the copyright notice and copying per-missions for the Info �le. The segment must be enclosed be-tween @ifinfo and @end ifinfo commands so that the format-ters place it only in the Info �le.
3. Title and CopyrightThe Title and Copyright segment contains the title and copy-right pages and copying permissions for the printed manual.The segment must be enclosed between @titlepage and @endtitlepage commands. The title and copyright page appear onlyin the printed manual.
4. `Top' Node and Master MenuThe Master Menu contains a complete menu of all the nodes inthe whole Info �le. It appears only in the Info �le, in the `Top'node.
5. Body The Body of the document may be structured like a traditionalbook or encyclopedia or it may be free form.
6. End The End contains commands for printing indices and generatingthe table of contents, and the @bye command on a line of its own.
1.8 A Short Sample Texinfo File
Here is a complete but very short Texinfo �le, in 6 parts. The �rstthree parts of the �le, from `\input texinfo' through to `@end titlepage',look more intimidating than they are. Most of the material is standard

Chapter 1: Overview of Texinfo 11
boilerplate; when you write a manual, simply insert the names for your ownmanual in this segment. (See Chapter 3 [Beginning a File], page 29.)
In the following, the sample text is indented; comments on it are not. Thecomplete �le, without any comments, is shown in Appendix C [Sample Tex-info File], page 199.
Part 1: Header
The header does not appear in either the Info �le or theprinted output. It sets various parameters, including thename of the Info �le and the title used in the header.
\input texinfo @c -*-texinfo-*-@c %**start of header@setfilename sample.info@settitle Sample Document@c %**end of header
@setchapternewpage odd
Part 2: Summary Description and Copyright
The summary description and copyright segment does notappear in the printed document.
@ifinfoThis is a short example of a complete Texinfo file.
Copyright @copyright{} 1990 Free Software Foundation, Inc.@end ifinfo
Part 3: Titlepage and Copyright
The titlepage segment does not appear in the Info �le.
@titlepage@sp 10@comment The title is printed in a large font.@center @titlefont{Sample Title}
@c The following two commands start the copyright page.@page@vskip 0pt plus 1filllCopyright @copyright{} 1990 Free Software Foundation, Inc.@end titlepage

12 Texinfo 2.23
Part 4: `Top' Node and Master Menu
The `Top' node contains the master menu for the Info �le.Since a printed manual uses a table of contents rather thana menu, the master menu appears only in the Info �le.
@node Top, First Chapter, (dir), (dir)@comment node-name, next, previous, up
@menu* First Chapter:: The first chapter is the
only chapter in this sample.* Concept Index:: This index has two entries.@end menu
Part 5: The Body of the Document
The body segment contains all the text of the document, but not the indicesor table of contents. This example illustrates a node and a chapter containingan enumerated list.
@node First Chapter, Concept Index, Top, Top@comment node-name, next, previous, up@chapter First Chapter@cindex Sample index entry
This is the contents of the first chapter.@cindex Another sample index entry
Here is a numbered list.
@enumerate@itemThis is the first item.
@itemThis is the second item.@end enumerate
The @code{makeinfo} and @code{texinfo-format-buffer}commands transform a Texinfo file such as this intoan Info file; and @TeX{} typesets it for a printedmanual.
Chapter 1: Overview of Texinfo 13
Part 6: The End of the Document
The end segment contains commands both for generating an index in a nodeand unnumbered chapter of its own and for generating the table of contents;and it contains the @bye command that marks the end of the document.
@node Concept Index, , First Chapter, Top@comment node-name, next, previous, up@unnumbered Concept Index
@printindex cp
@contents@bye
The Results
Here is what the contents of the �rst chapter of the sample look like:
This is the contents of the �rst chapter.
Here is a numbered list.
1. This is the �rst item.
2. This is the second item.
The makeinfo and texinfo-format-buffer commands transforma Texinfo �le such as this into an Info �le; and TEX typesets it fora printed manual.
1.9 Acknowledgements
Richard M. Stallman wrote Edition 1.0 of this manual. Robert J. Chassellrevised and extended it, starting with Edition 1.1. Karl Berry made updatesfor the Texinfo 3.8 and subsequent releases, starting with Edition 2.22.
Our thanks go out to all who helped improve this work, particularly toFran�cois Pinard and David D. Zuhn, who tirelessly recorded and reportedmistakes and obscurities; our special thanks go to Melissa Weisshaus for herfrequent and often tedious reviews of nearly similar editions. Our mistakesare our own.
Please send suggestions and corrections to:
Internet address:[email protected]
Please include the manual's edition number and update date in your mes-sages.
14 Texinfo 2.23

Chapter 2: Using Texinfo Mode 15
2 Using Texinfo Mode
You may edit a Texinfo �le with any text editor you choose. A Texinfo�le is no di�erent from any other ascii �le. However, GNU Emacs comeswith a special mode, called Texinfo mode, that provides Emacs commandsand tools to help ease your work.
This chapter describes features of GNU Emacs' Texinfo mode but not anyfeatures of the Texinfo formatting language. If you are reading this manualstraight through from the beginning, you may want to skim through thischapter brie y and come back to it after reading succeeding chapters whichdescribe the Texinfo formatting language in detail.
Texinfo mode provides special features for working with Texinfo �les:
� Insert frequently used @-commands.
� Automatically create @node lines.
� Show the structure of a Texinfo source �le.
� Automatically create or update the `Next',`Previous', and `Up' pointers of a node.
� Automatically create or update menus.
� Automatically create a master menu.
� Format a part or all of a �le for Info.
� Typeset and print part or all of a �le.
Perhaps the two most helpful features are those for inserting frequentlyused @-commands and for creating node pointers and menus.
2.1 The Usual GNU Emacs Editing Commands
In most cases, the usual Text mode commands work the same in Texinfomode as they do in Text mode. Texinfo mode adds new editing commandsand tools to GNU Emacs' general purpose editing features. The major dif-ference concerns �lling. In Texinfo mode, the paragraph separation variableand syntax table are rede�ned so that Texinfo commands that should beon lines of their own are not inadvertently included in paragraphs. Thus,the M-q (fill-paragraph) command will re�ll a paragraph but not mix anindexing command on a line adjacent to it into the paragraph.
In addition, Texinfo mode sets the page-delimiter variable to the valueof texinfo-chapter-level-regexp; by default, this is a regular expressionmatching the commands for chapters and their equivalents, such as appen-dices. With this value for the page delimiter, you can jump from chapter titleto chapter title with the C-x ] (forward-page) and C-x [ (backward-page)commands and narrow to a chapter with the C-x p (narrow-to-page) com-mand. (See section \Pages" in The GNU Emacs Manual, for details aboutthe page commands.)

16 Texinfo 2.23
You may name a Texinfo �le however you wish, but the convention is toend a Texinfo �le name with one of the three extensions `.texinfo', `.texi',or `.tex'. A longer extension is preferred, since it is explicit, but a shorterextension may be necessary for operating systems that limit the length of�le names. GNU Emacs automatically enters Texinfo mode when you visit a�le with a `.texinfo' or `.texi' extension. Also, Emacs switches to Texinfomode when you visit a �le that has `-*-texinfo-*-' in its �rst line. Ifever you are in another mode and wish to switch to Texinfo mode, type M-xtexinfo-mode.
Like all other Emacs features, you can customize or enhance Texinfomode as you wish. In particular, the keybindings are very easy to change.The keybindings described here are the default or standard ones.
2.2 Inserting Frequently Used Commands
Texinfo mode provides commands to insert various frequently used @-commands into the bu�er. You can use these commands to save keystrokes.
The insert commands are invoked by typing C-c twice and then the �rstletter of the @-command:
C-c C-c cM-x texinfo-insert-@code
Insert @code{} and put the cursor between the braces.
C-c C-c dM-x texinfo-insert-@dfn
Insert @dfn{} and put the cursor between the braces.
C-c C-c eM-x texinfo-insert-@end
Insert @end and attempt to insert the correct following word,such as `example' or `table'. (This command does not handlenested lists correctly, but inserts the word appropriate to theimmediately preceding list.)
C-c C-c iM-x texinfo-insert-@item
Insert @item and put the cursor at the beginning of the nextline.
C-c C-c kM-x texinfo-insert-@kbd
Insert @kbd{} and put the cursor between the braces.
C-c C-c nM-x texinfo-insert-@node
Insert @node and a comment line listing the sequence for the`Next', `Previous', and `Up' nodes. Leave point after the @node.

Chapter 2: Using Texinfo Mode 17
C-c C-c oM-x texinfo-insert-@noindent
Insert @noindent and put the cursor at the beginning of thenext line.
C-c C-c sM-x texinfo-insert-@samp
Insert @samp{} and put the cursor between the braces.
C-c C-c tM-x texinfo-insert-@table
Insert @table followed by a hSPCi and leave the cursor after thehSPCi.
C-c C-c vM-x texinfo-insert-@var
Insert @var{} and put the cursor between the braces.
C-c C-c xM-x texinfo-insert-@example
Insert @example and put the cursor at the beginning of the nextline.
C-c C-c {M-x texinfo-insert-braces
Insert {} and put the cursor between the braces.
C-c C-c }C-c C-c ]M-x up-list
Move from between a pair of braces forward past the closingbrace. Typing C-c C-c ] is easier than typing C-c C-c }, whichis, however, more mnemonic; hence the two keybindings. (Also,you can move out from between braces by typing C-f.)
To put a command such as @code{: : :} around an existing word, positionthe cursor in front of the word and type C-u 1 C-c C-c c. This makes it easyto edit existing plain text. The value of the pre�x argument tells Emacs howmany words following point to include between braces|1 for one word, 2for two words, and so on. Use a negative argument to enclose the previousword or words. If you do not specify a pre�x argument, Emacs inserts the@-command string and positions the cursor between the braces. This featureworks only for those @-commands that operate on a word or words withinone line, such as @kbd and @var.
This set of insert commands was created after analyzing the frequencywith which di�erent @-commands are used in the GNU Emacs Manual andthe GDB Manual. If you wish to add your own insert commands, you canbind a keyboard macro to a key, use abbreviations, or extend the code in`texinfo.el'.
18 Texinfo 2.23
C-c C-c C-d (texinfo-start-menu-description) is an insert commandthat works di�erently from the other insert commands. It inserts a node'ssection or chapter title in the space for the description in a menu entry line.(A menu entry has three parts, the entry name, the node name, and thedescription. Only the node name is required, but a description helps explainwhat the node is about. See Section 7.2 [The Parts of a Menu], page 66.)
To use texinfo-start-menu-description, position point in a menu en-try line and type C-c C-c C-d. The command looks for and copies the titlethat goes with the node name, and inserts the title as a description; it posi-tions point at beginning of the inserted text so you can edit it. The functiondoes not insert the title if the menu entry line already contains a description.
This command is only an aid to writing descriptions; it does not do thewhole job. You must edit the inserted text since a title tends to use thesame words as a node name but a useful description uses di�erent words.
2.3 Showing the Section Structure of a File
You can show the section structure of a Texinfo �le by using the C-c C-s command (texinfo-show-structure). This command shows the sectionstructure of a Texinfo �le by listing the lines that begin with the @-commandsfor @chapter, @section, and the like. It constructs what amounts to a tableof contents. These lines are displayed in another bu�er called the `*Occur*'bu�er. In that bu�er, you can position the cursor over one of the lines anduse the C-c C-c command (occur-mode-goto-occurrence), to jump to thecorresponding spot in the Texinfo �le.
C-c C-sM-x texinfo-show-structure
Show the @chapter, @section, and such lines of a Texinfo �le.
C-c C-cM-x occur-mode-goto-occurrence
Go to the line in the Texinfo �le corresponding to the line underthe cursor in the `*Occur*' bu�er.
If you call texinfo-show-structure with a pre�x argument by typ-ing C-u C-c C-s, it will list not only those lines with the @-commands for@chapter, @section, and the like, but also the @node lines. (This is howthe texinfo-show-structure command worked without an argument in the�rst version of Texinfo. It was changed because @node lines clutter up the`*Occur*' bu�er and are usually not needed.) You can use texinfo-show-structure with a pre�x argument to check whether the `Next', `Previous',and `Up' pointers of an @node line are correct.
Often, when you are working on a manual, you will be interested only inthe structure of the current chapter. In this case, you can mark o� the region

Chapter 2: Using Texinfo Mode 19
of the bu�er that you are interested in by using the C-x n n (narrow-to-region) command and texinfo-show-structure will work on only thatregion. To see the whole bu�er again, use C-x n w (widen). (See section\Narrowing" in The GNU Emacs Manual, for more information about thenarrowing commands.)
In addition to providing the texinfo-show-structure command, Tex-info mode sets the value of the page delimiter variable to match the chapter-level @-commands. This enables you to use the C-x ] (forward-page) andC-x [ (backward-page) commands to move forward and backward by chap-ter, and to use the C-x p (narrow-to-page) command to narrow to a chap-ter. See section \Pages" in The GNU Emacs Manual, for more informationabout the page commands.
2.4 Updating Nodes and Menus
Texinfo mode provides commands for automatically creating or updatingmenus and node pointers. The commands are called \update" commandsbecause their most frequent use is for updating a Texinfo �le after you haveworked on it; but you can use them to insert the `Next', `Previous', and `Up'pointers into an @node line that has none and to create menus in a �le thathas none.
If you do not use the updating commands, you need to write menus andnode pointers by hand, which is a tedious task.
You can use the updating commands
� to insert or update the `Next', `Previous', and `Up' pointers of a node,
� to insert or update the menu for a section, and
� to create a master menu for a Texinfo source �le.
You can also use the commands to update all the nodes and menus in aregion or in a whole Texinfo �le.
The updating commands work only with conventional Texinfo �les, whichare structured hierarchically like books. In such �les, a structuring commandline must follow closely after each @node line, except for the `Top' @node line.(A structuring command line is a line beginning with @chapter, @section,or other similar command.)
You can write the structuring command line on the line that followsimmediately after an @node line or else on the line that follows after a single@comment line or a single @ifinfo line. You cannot interpose more than oneline between the @node line and the structuring command line; and you mayinterpose only an @comment line or an @ifinfo line.
Commands which work on a whole bu�er require that the `Top' node befollowed by a node with an @chapter or equivalent-level command. Notethat the menu updating commands will not create a main or master menu

20 Texinfo 2.23
for a Texinfo �le that has only @chapter-level nodes! The menu updatingcommands only create menus within nodes for lower level nodes. To createa menu of chapters, you must provide a `Top' node.
The menu updating commands remove menu entries that refer to otherInfo �les since they do not refer to nodes within the current bu�er. Thisis a de�ciency. Rather than use menu entries, you can use cross referencesto refer to other Info �les. None of the updating commands a�ect crossreferences.
Texinfo mode has �ve updating commands that are used most often: twoare for updating the node pointers or menu of a single node (or a region); twoare for updating every node pointer and menu in a �le; and one, the texinfo-master-menu command, is for creating a master menu for a complete �le,and optionally, for updating every node and menu in the whole Texinfo �le.
The texinfo-master-menu command is the primary command:
C-c C-u mM-x texinfo-master-menu
Create or update a master menu that includes all the othermenus (incorporating the descriptions from pre-existing menus,if any).
With an argument (pre�x argument, C-u, if interactive), �rstcreate or update all the nodes and all the regular menus in thebu�er before constructing the master menu. (See Section 3.5[The Top Node and Master Menu], page 41, for more about amaster menu.)
For texinfo-master-menu to work, the Texinfo �le must havea `Top' node and at least one subsequent node.
After extensively editing a Texinfo �le, you can type the follow-ing:
C-u M-x texinfo-master-menuor
C-u C-c C-u m
This updates all the nodes and menus completely and all at once.
The other major updating commands do smaller jobs and are designedfor the person who updates nodes and menus as he or she writes a Texinfo�le.
The commands are:
C-c C-u C-nM-x texinfo-update-node
Insert the `Next', `Previous', and `Up' pointers for the node thatpoint is within (i.e., for the @node line preceding point). If the@node line has pre-existing `Next', `Previous', or `Up' pointers init, the old pointers are removed and new ones inserted. With an

Chapter 2: Using Texinfo Mode 21
argument (pre�x argument, C-u, if interactive), this commandupdates all @node lines in the region (which is the text betweenpoint and mark).
C-c C-u C-mM-x texinfo-make-menu
Create or update the menu in the node that point is within.With an argument (C-u as pre�x argument, if interactive), thecommand makes or updates menus for the nodes which are eitherwithin or a part of the region.
Whenever texinfo-make-menu updates an existing menu, thedescriptions from that menu are incorporated into the new menu.This is done by copying descriptions from the existing menu tothe entries in the new menu that have the same node names. Ifthe node names are di�erent, the descriptions are not copied tothe new menu.
C-c C-u C-eM-x texinfo-every-node-update
Insert or update the `Next', `Previous', and `Up' pointers forevery node in the bu�er.
C-c C-u C-aM-x texinfo-all-menus-update
Create or update all the menus in the bu�er. With an argument(C-u as pre�x argument, if interactive), �rst insert or update allthe node pointers before working on the menus.
If a master menu exists, the texinfo-all-menus-update com-mand updates it; but the command does not create a new mas-ter menu if none already exists. (Use the texinfo-master-menucommand for that.)
When working on a document that does not merit a mastermenu, you can type the following:
C-u C-c C-u C-aor
C-u M-x texinfo-all-menus-update
This updates all the nodes and menus.
The texinfo-column-for-description variable speci�es the column towhich menu descriptions are indented. By default, the value is 32 although itis often useful to reduce it to as low as 24. You can set the variable with theM-x edit-options command (see section \Editing Variable Values" in TheGNU Emacs Manual) or with the M-x set-variable command (see section\Examining and Setting Variables" in The GNU Emacs Manual).
Also, the texinfo-indent-menu-description command may be used toindent existing menu descriptions to a speci�ed column. Finally, if you wish,

22 Texinfo 2.23
you can use the texinfo-insert-node-lines command to insert missing@node lines into a �le. (See Section 2.4.2 [Other Updating Commands],page 23, for more information.)
2.4.1 Updating Requirements
To use the updating commands, you must organize the Texinfo �le hi-erarchically with chapters, sections, subsections, and the like. When youconstruct the hierarchy of the manual, do not `jump down' more than onelevel at a time: you can follow the `Top' node with a chapter, but not with asection; you can follow a chapter with a section, but not with a subsection.However, you may `jump up' any number of levels at one time|for example,from a subsection to a chapter.
Each @node line, with the exception of the line for the `Top' node, must befollowed by a line with a structuring command such as @chapter, @section,or @unnumberedsubsec.
Each @node line/structuring-command line combination must look eitherlike this:
@node Comments, Minimum, Conventions, Overview@comment node-name, next, previous, up@section Comments
or like this (without the @comment line):
@node Comments, Minimum, Conventions, Overview@section Comments
In this example, `Comments' is the name of both the node and the section.The next node is called `Minimum' and the previous node is called `Con-ventions'. The `Comments' section is within the `Overview' node, which isspeci�ed by the `Up' pointer. (Instead of an @comment line, you can writean @ifinfo line.)
If a �le has a `Top' node, it must be called `top' or `Top' and be the �rstnode in the �le.
The menu updating commands create a menu of sections within a chapter,a menu of subsections within a section, and so on. This means that you musthave a `Top' node if you want a menu of chapters.
Incidentally, the makeinfo command will create an Info �le for a hi-erarchically organized Texinfo �le that lacks `Next', `Previous' and `Up'pointers. Thus, if you can be sure that your Texinfo �le will be format-ted with makeinfo, you have no need for the `update node' commands. (SeeChapter 21 [Creating an Info File], page 159, for more information aboutmakeinfo.) However, both makeinfo and the texinfo-format-: : : com-mands require that you insert menus in the �le.

Chapter 2: Using Texinfo Mode 23
2.4.2 Other Updating Commands
In addition to the �ve major updating commands, Texinfo mode possessesseveral less frequently used updating commands:
M-x texinfo-insert-node-linesInsert @node lines before the @chapter, @section, and othersectioning commands wherever they are missing throughout aregion in a Texinfo �le.
With an argument (C-u as pre�x argument, if interactive), thetexinfo-insert-node-lines command not only inserts @nodelines but also inserts the chapter or section titles as the names ofthe corresponding nodes. In addition, it inserts the titles as nodenames in pre-existing @node lines that lack names. Since nodenames should be more concise than section or chapter titles, youmust manually edit node names so inserted.
For example, the following marks a whole bu�er as a region andinserts @node lines and titles throughout:
C-x h C-u M-x texinfo-insert-node-lines
(Note that this command inserts titles as node names in @nodelines; the texinfo-start-menu-description command (seeSection 2.2 [Inserting], page 16) inserts titles as descriptions inmenu entries, a di�erent action. However, in both cases, youneed to edit the inserted text.)
M-x texinfo-multiple-files-updateUpdate nodes and menus in a document built from several sep-arate �les. With C-u as a pre�x argument, create and in-sert a master menu in the outer �le. With a numeric pre�xargument, such as C-u 2, �rst update all the menus and allthe `Next', `Previous', and `Up' pointers of all the included�les before creating and inserting a master menu in the outer�le. The texinfo-multiple-files-update command is de-scribed in the appendix on @include �les. See Section E.2[texinfo-multiple-files-update], page 205.
M-x texinfo-indent-menu-descriptionIndent every description in the menu following point to the spec-i�ed column. You can use this command to give yourself morespace for descriptions. With an argument (C-u as pre�x argu-ment, if interactive), the texinfo-indent-menu-descriptioncommand indents every description in every menu in the region.However, this command does not indent the second and subse-quent lines of a multi-line description.

24 Texinfo 2.23
M-x texinfo-sequential-node-updateInsert the names of the nodes immediately following and pre-ceding the current node as the `Next' or `Previous' pointersregardless of those nodes' hierarchical level. This means thatthe `Next' node of a subsection may well be the next chap-ter. Sequentially ordered nodes are useful for novels and otherdocuments that you read through sequentially. (However, inInfo, the g* hRETi command lets you look through the �le se-quentially, so sequentially ordered nodes are not strictly neces-sary.) With an argument (pre�x argument, if interactive), thetexinfo-sequential-node-update command sequentially up-dates all the nodes in the region.
2.5 Formatting for Info
Texinfo mode provides several commands for formatting part or all of aTexinfo �le for Info. Often, when you are writing a document, you want toformat only part of a �le|that is, a region.
You can use either the texinfo-format-region or the makeinfo-regioncommand to format a region:
C-c C-e C-rM-x texinfo-format-regionC-c C-m C-rM-x makeinfo-region
Format the current region for Info.
You can use either the texinfo-format-buffer or the makeinfo-buffercommand to format a whole bu�er:
C-c C-e C-bM-x texinfo-format-bufferC-c C-m C-bM-x makeinfo-buffer
Format the current bu�er for Info.
For example, after writing a Texinfo �le, you can type the following:
C-u C-c C-u mor
C-u M-x texinfo-master-menu
This updates all the nodes and menus. Then type the following to create anInfo �le:
C-c C-m C-bor
M-x makeinfo-buffer

Chapter 2: Using Texinfo Mode 25
For TEX or the Info formatting commands to work, the �le must includea line that has @setfilename in its header.
See Chapter 21 [Create an Info File], page 159, for details about Infoformatting.
2.6 Formatting and Printing
Typesetting and printing a Texinfo �le is a multi-step process in whichyou �rst create a �le for printing (called a dvi �le), and then print the�le. Optionally, you may also create indices. To do this, you must runthe texindex command after �rst running the tex typesetting command;and then you must run the tex command again. Or else run the texi2dvicommand which automatically creates indices as needed.
Often, when you are writing a document, you want to typeset and printonly part of a �le to see what it will look like. You can use the texinfo-tex-region and related commands for this purpose. Use the texinfo-tex-buffer command to format all of a bu�er.
C-c C-t C-bM-x texinfo-tex-buffer
Run texi2dvi on the bu�er. In addition to running TEX on thebu�er, this command automatically creates or updates indicesas needed.
C-c C-t C-rM-x texinfo-tex-region
Run TEX on the region.
C-c C-t C-iM-x texinfo-texindex
Run texindex to sort the indices of a Texinfo �le formattedwith texinfo-tex-region. The texinfo-tex-region com-mand does not run texindex automatically; it only runs thetex typesetting command. You must run the texinfo-tex-region command a second time after sorting the raw index �leswith the texindex command. (Usually, you do not format anindex when you format a region, only when you format a bu�er.Now that the texi2dvi command exists, there is no little needfor this command.)
C-c C-t C-pM-x texinfo-tex-print
Print the �le (or the part of the �le) previously formatted withtexinfo-tex-buffer or texinfo-tex-region.
For texinfo-tex-region or texinfo-tex-buffer to work, the �le muststart with a `\input texinfo' line and must include an @settitle line. The

26 Texinfo 2.23
�le must end with @bye on a line by itself. (When you use texinfo-tex-region, you must surround the @settitle line with start-of-header andend-of-header lines.)
See Chapter 20 [Format/Print Hardcopy], page 149, for a description ofthe other TEX related commands, such as tex-show-print-queue.
2.7 Texinfo Mode Summary
In Texinfo mode, each set of commands has default keybindings thatbegin with the same keys. All the commands that are custom-created forTexinfo mode begin with C-c. The keys are somewhat mnemonic.
Insert Commands
The insert commands are invoked by typing C-c twice and then the �rstletter of the @-command to be inserted. (It might make more sense mnemon-ically to use C-c C-i, for `custom insert', but C-c C-c is quick to type.)
C-c C-c c Insert `@code'.C-c C-c d Insert `@dfn'.C-c C-c e Insert `@end'.C-c C-c i Insert `@item'.C-c C-c n Insert `@node'.C-c C-c s Insert `@samp'.C-c C-c v Insert `@var'.C-c C-c { Insert braces.C-c C-c ]C-c C-c } Move out of enclosing braces.
C-c C-c C-d Insert a node's section titlein the space for the descriptionin a menu entry line.
Show Structure
The texinfo-show-structure command is often used within a narrowedregion.
C-c C-s List all the headings.
The Master Update Command
The texinfo-master-menu command creates a master menu; and can beused to update every node and menu in a �le as well.
Chapter 2: Using Texinfo Mode 27
C-c C-u mM-x texinfo-master-menu
Create or update a master menu.
C-u C-c C-u m With C-u as a pre�x argument, �rstcreate or update all nodes and regularmenus, and then create a master menu.
Update Pointers
The update pointer commands are invoked by typing C-c C-u and theneither C-n for texinfo-update-node or C-e for texinfo-every-node-update.
C-c C-u C-n Update a node.C-c C-u C-e Update every node in the bu�er.
Update Menus
Invoke the update menu commands by typing C-c C-u and then eitherC-m for texinfo-make-menu or C-a for texinfo-all-menus-update. Toupdate both nodes and menus at the same time, precede C-c C-u C-a withC-u.
C-c C-u C-m Make or update a menu.
C-c C-u C-a Make or update allmenus in a bu�er.
C-u C-c C-u C-a With C-u as a pre�x argument,�rst create or update all nodes andthen create or update all menus.
Format for Info
The Info formatting commands that are written in Emacs Lisp are in-voked by typing C-c C-e and then either C-r for a region or C-b for thewhole bu�er.
The Info formatting commands that are written in C and based on themakeinfo program are invoked by typing C-c C-m and then either C-r for aregion or C-b for the whole bu�er.
Use the texinfo-format: : : commands:
C-c C-e C-r Format the region.C-c C-e C-b Format the bu�er.

28 Texinfo 2.23
Use makeinfo:
C-c C-m C-r Format the region.C-c C-m C-b Format the bu�er.C-c C-m C-l Recenter the makeinfo output bu�er.C-c C-m C-k Kill the makeinfo formatting job.
Typeset and Print
The TEX typesetting and printing commands are invoked by typing C-cC-t and then another control command: C-r for texinfo-tex-region, C-bfor texinfo-tex-buffer, and so on.
C-c C-t C-r Run TEX on the region.C-c C-t C-b Run texi2dvi on the bu�er.C-c C-t C-i Run texindex.C-c C-t C-p Print the dvi �le.C-c C-t C-q Show the print queue.C-c C-t C-d Delete a job from the print queue.C-c C-t C-k Kill the current TEX formatting job.C-c C-t C-x Quit a currently stopped TEX formatting job.C-c C-t C-l Recenter the output bu�er.
Other Updating Commands
The `other updating commands' do not have standard keybindings be-cause they are rarely used.
M-x texinfo-insert-node-linesInsert missing @node lines in region.With C-u as a pre�x argument,use section titles as node names.
M-x texinfo-multiple-files-updateUpdate a multi-�le document.With C-u 2 as a pre�x argument,create or update all nodes and menusin all included �les �rst.
M-x texinfo-indent-menu-descriptionIndent descriptions.
M-x texinfo-sequential-node-updateInsert node pointers in strict sequence.

Chapter 3: Beginning a Texinfo File 29
3 Beginning a Texinfo File
Certain pieces of information must be provided at the beginning of aTexinfo �le, such as the name of the �le and the title of the document.
Generally, the beginning of a Texinfo �le has four parts:
1. The header, delimited by special comment lines, that includes the com-mands for naming the Texinfo �le and telling TEX what de�nitions' �leto use when processing the Texinfo �le.
2. A short statement of what the �le is about, with a copyright noticeand copying permissions. This is enclosed in @ifinfo and @end ifinfocommands so that the formatters place it only in the Info �le.
3. A title page and copyright page, with a copyright notice and copyingpermissions. This is enclosed between @titlepage and @end titlepagecommands. The title and copyright page appear only in the printedmanual.
4. The `Top' node that contains a menu for the whole Info �le. The con-tents of this node appear only in the Info �le.
Also, optionally, you may include the copying conditions for a programand a warranty disclaimer. The copying section will be followed by an in-troduction or else by the �rst chapter of the manual.
Since the copyright notice and copying permissions for the Texinfo docu-ment (in contrast to the copying permissions for a program) are in parts thatappear only in the Info �le or only in the printed manual, this informationmust be given twice.
3.1 Sample Texinfo File Beginning
The following sample shows what is needed.
\input texinfo @c -*-texinfo-*-@c %**start of header@setfilename name-of-info-�le@settitle name-of-manual@setchapternewpage odd@c %**end of header
@ifinfoThis file documents : : :
Copyright year copyright-owner
Permission is granted to : : :
@end ifinfo

30 Texinfo 2.23
@c This title page illustrates only one of the@c two methods of forming a title page.
@titlepage@title name-of-manual-when-printed@subtitle subtitle-if-any@subtitle second-subtitle@author author
@c The following two commands@c start the copyright page.@page@vskip 0pt plus 1filllCopyright @copyright{} year copyright-owner
Published by : : :
Permission is granted to : : :
@end titlepage
@node Top, Overview, (dir), (dir)
@ifinfoThis document describes : : :
This document applies to version : : :
of the program named : : :
@end ifinfo
@menu* Copying:: Your rights and freedoms.* First Chapter:: Getting started : : :
* Second Chapter:: : : :
: : :
: : :
@end menu
@node First Chapter, Second Chapter, top, top@comment node-name, next, previous, up@chapter First Chapter@cindex Index entry for First Chapter
Chapter 3: Beginning a Texinfo File 31
3.2 The Texinfo File Header
Texinfo �les start with at least three lines that provide Info and TEX withnecessary information. These are the \input texinfo line, the @settitleline, and the @setfilename line. If you want to run TEX on just a partof the Texinfo File, you must write the @settitle and @setfilename linesbetween start-of-header and end-of-header lines.
Thus, the beginning of a Texinfo �le looks like this:
\input texinfo @c -*-texinfo-*-@setfilename sample.info@settitle Sample Document
or else like this:
\input texinfo @c -*-texinfo-*-@c %**start of header@setfilename sample.info@settitle Sample Document@c %**end of header
3.2.1 The First Line of a Texinfo File
Every Texinfo �le that is to be the top-level input to TEX must beginwith a line that looks like this:
\input texinfo @c -*-texinfo-*-
This line serves two functions:
1. When the �le is processed by TEX, the \input texinfo command tellsTEX to load the macros needed for processing a Texinfo �le. Theseare in a �le called `texinfo.tex', which is usually located in the`/usr/lib/tex/macros' directory. TEX uses the backslash, `\', to markthe beginning of a command, just as Texinfo uses @. The `texinfo.tex'�le causes the switch from `\' to `@'; before the switch occurs, TEX re-quires `\', which is why it appears at the beginning of the �le.
2. When the �le is edited in GNU Emacs, the `-*-texinfo-*-' mode spec-i�cation tells Emacs to use Texinfo mode.
3.2.2 Start of Header
Write a start-of-header line on the second line of a Texinfo �le. Follow thestart-of-header line with @setfilename and @settitle lines and, optionally,with other command lines, such as @smallbook or @footnotestyle; andthen by an end-of-header line (see Section 3.2.7 [End of Header], page 35).
With these lines, you can format part of a Texinfo �le for Info or typesetpart for printing.
A start-of-header line looks like this:

32 Texinfo 2.23
@c %**start of header
The odd string of characters, `%**', is to ensure that no other commentis accidentally taken for a start-of-header line.
3.2.3 @setfilename
In order to serve as the primary input �le for either makeinfo or TEX, aTexinfo �le must contain a line that looks like this:
@setfilename info-�le-name
Write the @setfilename command at the beginning of a line and followit on the same line by the Info �le name. Do not write anything else on theline; anything on the line after the command is considered part of the �lename, including a comment.
The @setfilename line speci�es the name of the Info �le to be generated.This name should be di�erent from the name of the Texinfo �le. There aretwo conventions for choosing the name: you can either remove the `.tex'extension from the input �le name, or replace it with the `.info' extension.
Some operating systems cannot handle long �le names. You can run intoa problem even when the �le name you specify is itself short enough. Thisoccurs because the Info formatters split a long Info �le into short indirectsub�les, and name them by appending `-1', `-2', : : :, `-10', `-11', and soon, to the original �le name. (See Section 21.7 [Tag Files and Split Files],page 164.) The sub�le name `texinfo.info-10', for example, is too longfor some systems; so the Info �le name for this document is `texinfo' ratherthan `texinfo.info'.
The Info formatting commands ignore everything written before the@setfilename line, which is why the very �rst line of the �le (the \inputline) does not need to be commented out.
The @setfilename line produces no output when you typeset a printedmanual, but is does an essential job: it opens the index, cross-reference, andother auxiliary �les used by Texinfo.
3.2.4 @settitle
In order to be made into a printed manual, a Texinfo �le must contain aline that looks like this:
@settitle title
Write the @settitle command at the beginning of a line and follow iton the same line by the title. This tells TEX the title to use in a header orfooter. Do not write anything else on the line; anything on the line after thecommand is considered part of the title, including a comment.
Conventionally, when TEX formats a Texinfo �le for double-sided output,the title is printed in the left-hand (even-numbered) page headings and the

Chapter 3: Beginning a Texinfo File 33
current chapter title is printed in the right-hand (odd-numbered) page head-ings. (TEX learns the title of each chapter from each @chapter command.)Page footers are not printed.
Even if you are printing in a single-sided style, TEX looks for an@settitle command line, in case you include the manual title in the head-ing.
The @settitle command should precede everything that generates ac-tual output in TEX.
Although the title in the @settitle command is usually the same as thetitle on the title page, it does not a�ect the title as it appears on the titlepage. Thus, the two do not need not match exactly; and the title in the@settitle command can be a shortened or expanded version of the title asit appears on the title page. (See Section 3.4.1 [@titlepage], page 36.)
TEX prints page headings only for that text that comes after the @endtitlepage command in the Texinfo �le, or that comes after an @headingscommand that turns on headings. (See Section 3.4.6 [The @headings Com-mand], page 40, for more information.)
You may, if you wish, create your own, customized headings and footings.See Appendix F [Page Headings], page 211, for a detailed discussion of thisprocess.
3.2.5 @setchapternewpage
In a book or a manual, text is usually printed on both sides of the paper,chapters start on right-hand pages, and right-hand pages have odd numbers.But in short reports, text often is printed only on one side of the paper.Also in short reports, chapters sometimes do not start on new pages, but areprinted on the same page as the end of the preceding chapter, after a smallamount of vertical whitespace.
You can use the @setchapternewpage command with various argumentsto specify how TEX should start chapters and whether it should typeset pagesfor printing on one or both sides of the paper (single-sided or double-sidedprinting).
Write the @setchapternewpage command at the beginning of a line fol-lowed by its argument.
For example, you would write the following to cause each chapter to starton a fresh odd-numbered page:
@setchapternewpage odd
You can specify one of three alternatives with the @setchapternewpagecommand:

34 Texinfo 2.23
@setchapternewpage offCause TEX to typeset a new chapter on the same page as thelast chapter, after skipping some vertical whitespace. Also, causeTEX to format page headers for single-sided printing. (You canoverride the headers format with the @headings double com-mand; see Section 3.4.6 [The @headings Command], page 40.)
@setchapternewpage onCause TEX to start new chapters on new pages and to typesetpage headers for single-sided printing. This is the form mostoften used for short reports.
This alternative is the default.
@setchapternewpage oddCause TEX to start new chapters on new, odd-numbered pages(right-handed pages) and to typeset for double-sided printing.This is the form most often used for books and manuals.
Texinfo does not have an @setchapternewpage even command.
(You can countermand or modify an @setchapternewpage command withan @headings command. See Section 3.4.6 [The @headings Command],page 40.)
At the beginning of a manual or book, pages are not numbered|forexample, the title and copyright pages of a book are not numbered. Byconvention, table of contents pages are numbered with roman numerals andnot in sequence with the rest of the document.
Since an Info �le does not have pages, the @setchapternewpage com-mand has no e�ect on it.
Usually, you do not write an @setchapternewpage command for single-sided printing, but accept the default which is to typeset for single-sidedprinting and to start new chapters on new pages. Usually, you write an@setchapternewpage odd command for double-sided printing.
3.2.6 Paragraph Indenting
The Info formatting commands may insert spaces at the beginning ofthe �rst line of each paragraph, thereby indenting that paragraph. You canuse the @paragraphindent command to specify the indentation. Write an@paragraphindent command at the beginning of a line followed by either`asis' or a number. The template is:
@paragraphindent indent
The Info formatting commands indent according to the value of indent:
� If the value of indent is `asis', the Info formatting commands do notchange the existing indentation.

Chapter 3: Beginning a Texinfo File 35
� If the value of indent is 0, the Info formatting commands delete existingindentation.
� If the value of indent is greater than 0, the Info formatting commandsindent the paragraph by that number of spaces.
The default value of indent is `asis'.
Write the @paragraphindent command before or shortly after the end-of-header line at the beginning of a Texinfo �le. (If you write the commandbetween the start-of-header and end-of-header lines, the region formattingcommands indent paragraphs as speci�ed.)
A peculiarity of the texinfo-format-buffer and texinfo-format-region commands is that they do not indent (nor �ll) paragraphs that con-tain @w or @* commands. See Appendix H [Re�lling Paragraphs], page 227,for a detailed description of what goes on.
3.2.7 End of Header
Follow the header lines with an end-of-header line. An end-of-header linelooks like this:
@c %**end of header
If you include the @setchapternewpage command between the start-of-header and end-of-header lines, TEX will typeset a region as that commandspeci�es. Similarly, if you include an @smallbook command between thestart-of-header and end-of-header lines, TEX will typeset a region in the\small" book format.
See Section 3.2.2 [Start of Header], page 31.
3.3 Summary and Copying Permissions for Info
The title page and the copyright page appear only in the printed copy ofthe manual; therefore, the same information must be inserted in a sectionthat appears only in the Info �le. This section usually contains a briefdescription of the contents of the Info �le, a copyright notice, and copyingpermissions.
The copyright notice should read:
Copyright year copyright-owner
and be put on a line by itself.
Standard text for the copyright permissions is contained in an appendixto this manual; see Section D.1 [`ifinfo' Copying Permissions], page 202,for the complete text.
The permissions text appears in an Info �le before the �rst node. Thismean that a reader does not see this text when reading the �le using Info,except when using the advanced Info command g *.

36 Texinfo 2.23
3.4 The Title and Copyright Pages
A manual's name and author are usually printed on a title page. Some-times copyright information is printed on the title page as well; more often,copyright information is printed on the back of the title page.
The title and copyright pages appear in the printed manual, but not inthe Info �le. Because of this, it is possible to use several slightly obscureTEX typesetting commands that cannot be used in an Info �le. In addition,this part of the beginning of a Texinfo �le contains the text of the copyingpermissions that will appear in the printed manual.
See Section D.2 [Titlepage Copying Permissions], page 202, for the stan-dard text for the copyright permissions.
3.4.1 @titlepage
Start the material for the title page and following copyright page with@titlepage on a line by itself and end it with @end titlepage on a line byitself.
The @end titlepage command starts a new page and turns on pagenumbering. (See Appendix F [Page Headings], page 211, for details abouthow to generate page headings.) All the material that you want to appearon unnumbered pages should be put between the @titlepage and @endtitlepage commands. By using the @page command you can force a pagebreak within the region delineated by the @titlepage and @end titlepagecommands and thereby create more than one unnumbered page. This is howthe copyright page is produced. (The @titlepage command might perhapshave been better named the @titleandadditionalpages command, butthat would have been rather long!)
When you write a manual about a computer program, you should writethe version of the program to which the manual applies on the title page. Ifthe manual changes more frequently than the program or is independent ofit, you should also include an edition number1 for the manual. This helpsreaders keep track of which manual is for which version of the program.(The `Top' node should also contain this information; see Section 5.3 [@top],page 51.)
Texinfo provides two main methods for creating a title page. One methoduses the @titlefont, @sp, and @center commands to generate a title pagein which the words on the page are centered.
1 We have found that it is helpful to refer to versions of manuals as `editions'and versions of programs as `versions'; otherwise, we �nd we are liable toconfuse each other in conversation by referring to both the documentationand the software with the same words.

Chapter 3: Beginning a Texinfo File 37
The second method uses the @title, @subtitle, and @author commandsto create a title page with black rules under the title and author lines andthe subtitle text set ush to the right hand side of the page. With thismethod, you do not specify any of the actual formatting of the title page.You specify the text you want, and Texinfo does the formatting. You mayuse either method.
For extremely simple applications, Texinfo also provides a command@shorttitlepage which takes a single argument as the title. The argu-ment is typeset on a page by itself and followed by a blank page.
3.4.2 @titlefont, @center, and @sp
You can use the @titlefont, @sp, and @center commands to create atitle page for a printed document. (This is the �rst of the two methods forcreating a title page in Texinfo.)
Use the @titlefont command to select a large font suitable for the titleitself.
For example:
@titlefont{Texinfo}
Use the @center command at the beginning of a line to center the re-maining text on that line. Thus,
@center @titlefont{Texinfo}
centers the title, which in this example is \Texinfo" printed in the title font.
Use the @sp command to insert vertical space. For example:
@sp 2
This inserts two blank lines on the printed page. (See Section 15.4 [@sp],page 123, for more information about the @sp command.)
A template for this method looks like this:
@titlepage@sp 10@center @titlefont{name-of-manual-when-printed}@sp 2@center subtitle-if-any@sp 2@center author: : :
@end titlepage
The spacing of the example �ts an 8 1/2 by 11 inch manual.

38 Texinfo 2.23
3.4.3 @title, @subtitle, and @author
You can use the @title, @subtitle, and @author commands to createa title page in which the vertical and horizontal spacing is done for youautomatically. This contrasts with the method described in the previoussection, in which the @sp command is needed to adjust vertical spacing.
Write the @title, @subtitle, or @author commands at the beginningof a line followed by the title, subtitle, or author.
The @title command produces a line in which the title is set ush tothe left-hand side of the page in a larger than normal font. The title isunderlined with a black rule.
The @subtitle command sets subtitles in a normal-sized font ush tothe right-hand side of the page.
The @author command sets the names of the author or authors in amiddle-sized font ush to the left-hand side of the page on a line near thebottom of the title page. The names are underlined with a black rule that isthinner than the rule that underlines the title. (The black rule only occursif the @author command line is followed by an @page command line.)
There are two ways to use the @author command: you can write thename or names on the remaining part of the line that starts with an @authorcommand:
@author by Jane Smith and John Doe
or you can write the names one above each other by using two (or more)@author commands:
@author Jane Smith@author John Doe
(Only the bottom name is underlined with a black rule.)
A template for this method looks like this:
@titlepage@title name-of-manual-when-printed@subtitle subtitle-if-any@subtitle second-subtitle@author author@page: : :
@end titlepage
3.4.4 Copyright Page and Permissions
By international treaty, the copyright notice for a book should be eitheron the title page or on the back of the title page. The copyright notice

Chapter 3: Beginning a Texinfo File 39
should include the year followed by the name of the organization or personwho owns the copyright.
When the copyright notice is on the back of the title page, that pageis customarily not numbered. Therefore, in Texinfo, the information onthe copyright page should be within @titlepage and @end titlepage com-mands.
Use the @page command to cause a page break. To push the copyrightnotice and the other text on the copyright page towards the bottom of thepage, you can write a somewhat mysterious line after the @page commandthat reads like this:
@vskip 0pt plus 1filll
This is a TEX command that is not supported by the Info formatting com-mands. The @vskip command inserts whitespace. The `0pt plus 1filll'means to put in zero points of mandatory whitespace, and as much optionalwhitespace as needed to push the following text to the bottom of the page.Note the use of three `l's in the word `filll'; this is the correct usage inTEX.
In a printed manual, the @copyright{} command generates a `c' insidea circle. (In Info, it generates `(C)'.) The copyright notice itself has thefollowing legally de�ned sequence:
Copyright c year copyright-owner
It is customary to put information on how to get a manual after thecopyright notice, followed by the copying permissions for the manual.
Note that permissions must be given here as well as in the summary seg-ment within @ifinfo and @end ifinfo that immediately follows the headersince this text appears only in the printed manual and the `ifinfo' textappears only in the Info �le.
See Appendix D [Sample Permissions], page 201, for the standard text.
3.4.5 Heading Generation
An @end titlepage command on a line by itself not only marks the endof the title and copyright pages, but also causes TEX to start generating pageheadings and page numbers.
To repeat what is said elsewhere, Texinfo has two standard page headingformats, one for documents which are printed on one side of each sheetof paper (single-sided printing), and the other for documents which areprinted on both sides of each sheet (double-sided printing). (See Section 3.2.5[@setchapternewpage], page 33.) You can specify these formats in di�erentways:
� The conventional way is to write an @setchapternewpage commandbefore the title page commands, and then have the @end titlepage

40 Texinfo 2.23
command start generating page headings in the manner desired. (SeeSection 3.2.5 [@setchapternewpage], page 33.)
� Alternatively, you can use the @headings command to prevent pageheadings from being generated or to start them for either single ordouble-sided printing. (Write an @headings command immediately af-ter the @end titlepage command. See Section 3.4.6 [The @headingsCommand], page 40, for more information.)
� Or, you may specify your own page heading and footing format. SeeAppendix F [Page Headings], page 211, for detailed information aboutpage headings and footings.
Most documents are formatted with the standard single-sided or double-sided format, using @setchapternewpage odd for double-sided printing andno @setchapternewpage command for single-sided printing.
3.4.6 The @headings Command
The @headings command is rarely used. It speci�es what kind of pageheadings and footings to print on each page. Usually, this is controlled by the@setchapternewpage command. You need the @headings command only ifthe @setchapternewpage command does not do what you want, or if youwant to turn o� pre-de�ned page headings prior to de�ning your own. Writean @headings command immediately after the @end titlepage command.
You can use @headings as follows:
@headings offTurn o� printing of page headings.
@headings singleTurn on page headings appropriate for single-sided printing.
@headings doubleTurn on page headings appropriate for double-sided printing.The two commands, @headings on and @headings double, aresynonymous.
@headings singleafter@headings doubleafter
Turn on single or double headings, respectively, after the cur-rent page is output.
@headings onTurn on page headings: single if `@setchapternewpage on',double otherwise.
For example, suppose you write @setchapternewpage off before the@titlepage command to tell TEX to start a new chapter on the same page asthe end of the last chapter. This command also causes TEX to typeset page

Chapter 3: Beginning a Texinfo File 41
headers for single-sided printing. To cause TEX to typeset for double sidedprinting, write @headings double after the @end titlepage command.
You can stop TEX from generating any page headings at all by writing@headings off on a line of its own immediately after the line containing the@end titlepage command, like this:
@end titlepage@headings off
The @headings off command overrides the @end titlepage command,which would otherwise cause TEX to print page headings.
You can also specify your own style of page heading and footing. SeeAppendix F [Page Headings], page 211, for more information.
3.5 The `Top' Node and Master Menu
The `Top' node is the node from which you enter an Info �le.
A `Top' node should contain a brief description of the Info �le and anextensive, master menu for the whole Info �le. This helps the reader under-stand what the Info �le is about. Also, you should write the version numberof the program to which the Info �le applies; or, at least, the edition number.
The contents of the `Top' node should appear only in the Info �le; none ofit should appear in printed output, so enclose it between @ifinfo and @endifinfo commands. (TEX does not print either an @node line or a menu;they appear only in Info; strictly speaking, you are not required to enclosethese parts between @ifinfo and @end ifinfo, but it is simplest to do so.See Chapter 18 [Conditionally Visible Text], page 141.)
Sometimes, you will want to place an @top sectioning command line con-taining the title of the document immediately after the @node Top line (seeSection 6.2.5 [The @top Sectioning Command], page 62, for more informa-tion).
For example, the beginning of the Top node of this manual containsan @top sectioning command, a short description, and edition and versioninformation. It looks like this:
: : :
@end titlepage
@ifinfo@node Top, Copying, (dir), (dir)@top Texinfo
Texinfo is a documentation system: : :

42 Texinfo 2.23
This is edition: : :: : :
@end ifinfo
@menu* Copying:: Texinfo is freely
redistributable.* Overview:: What is Texinfo?: : :@end menu
In a `Top' node, the `Previous', and `Up' nodes usually refer to the toplevel directory of the whole Info system, which is called `(dir)'. The `Next'node refers to the �rst node that follows the main or master menu, which isusually the copying permissions, introduction, or �rst chapter.
3.5.1 Parts of a Master Menu
A master menu is a detailed main menu listing all the nodes in a �le.
A master menu is enclosed in @menu and @end menu commands and doesnot appear in the printed document.
Generally, a master menu is divided into parts.
� The �rst part contains the major nodes in the Texinfo �le: the nodesfor the chapters, chapter-like sections, and the appendices.
� The second part contains nodes for the indices.
� The third and subsequent parts contain a listing of the other, lower levelnodes, often ordered by chapter. This way, rather than go through anintermediary menu, an inquirer can go directly to a particular node whensearching for speci�c information. These menu items are not required;add them if you think they are a convenience. If you do use them, put@detailmenu before the �rst one, and @end detailmenu after the last;otherwise, makeinfo will get confused.
Each section in the menu can be introduced by a descriptive line. So longas the line does not begin with an asterisk, it will not be treated as a menuentry. (See Section 7.1 [Writing a Menu], page 66, for more information.)
For example, the master menu for this manual looks like the following(but has many more entries):
@menu* Copying:: Texinfo is freely
redistributable.* Overview:: What is Texinfo?* Texinfo Mode:: Special features in GNU Emacs.: : :
: : :

Chapter 3: Beginning a Texinfo File 43
* Command and Variable Index::An entry for each @-command.
* Concept Index:: An entry for each concept.
@detailmenu--- The Detailed Node Listing ---
Overview of Texinfo
* Info Files:: What is an Info file?* Printed Manuals:: Characteristics of
a printed manual.: : :
: : :
Using Texinfo Mode
* Info on a Region:: Formatting part of a filefor Info.
: : :
: : :
@end detailmenu@end menu
3.6 Software Copying Permissions
If the Texinfo �le has a section containing the \General Public License"and the distribution information and a warranty disclaimer for the softwarethat is documented, this section usually follows the `Top' node. The GeneralPublic License is very important to Project GNU software. It ensures thatyou and others will continue to have a right to use and share the software.
The copying and distribution information and the disclaimer are followedby an introduction or else by the �rst chapter of the manual.
Although an introduction is not a required part of a Texinfo �le, it isvery helpful. Ideally, it should state clearly and concisely what the �le isabout and who would be interested in reading it. In general, an introductionwould follow the licensing and distribution information, although sometimespeople put it earlier in the document. Usually, an introduction is put in an@unnumbered section. (See Section 5.5 [The @unnumbered and @appendixCommands], page 51.)

44 Texinfo 2.23

Chapter 4: Ending a Texinfo File 45
4 Ending a Texinfo File
The end of a Texinfo �le should include the commands that create indicesand generate detailed and summary tables of contents. And it must includethe @bye command that marks the last line processed by TEX.
For example:
@node Concept Index, , Variables Index, Top@c node-name, next, previous, up@unnumbered Concept Index
@printindex cp
@contents@bye
4.1 Index Menus and Printing an Index
To print an index means to include it as part of a manual or Info �le. Thisdoes not happen automatically just because you use @cindex or other index-entry generating commands in the Texinfo �le; those just cause the raw datafor the index to be accumulated. To generate an index, you must include the@printindex command at the place in the document where you want theindex to appear. Also, as part of the process of creating a printed manual,you must run a program called texindex (see Chapter 20 [Format/PrintHardcopy], page 149) to sort the raw data to produce a sorted index �le.The sorted index �le is what is actually used to print the index.
Texinfo o�ers six di�erent types of prede�ned index: the concept in-dex, the function index, the variables index, the keystroke index, the pro-gram index, and the data type index (see Section 12.2 [Prede�ned Indices],page 105). Each index type has a two-letter name: `cp', `fn', `vr', `ky', `pg',and `tp'. You may merge indices, or put them into separate sections (seeSection 12.4 [Combining Indices], page 108); or you may de�ne your ownindices (see Section 12.5 [De�ning New Indices], page 109).
The @printindex command takes a two-letter index name, reads thecorresponding sorted index �le and formats it appropriately into an index.
The @printindex command does not generate a chapter heading for theindex. Consequently, you should precede the @printindex command with asuitable section or chapter command (usually @unnumbered) to supply thechapter heading and put the index into the table of contents. Precede the@unnumbered command with an @node line.

46 Texinfo 2.23
For example:
@node Variable Index, Concept Index, Function Index, Top
@comment node-name, next, previous, up
@unnumbered Variable Index
@printindex vr
@node Concept Index, , Variable Index, Top
@comment node-name, next, previous, up
@unnumbered Concept Index
@printindex cp
@summarycontents
@contents
@bye
(Readers often prefer that the concept index come last in a book, since thatmakes it easiest to �nd.)
4.2 Generating a Table of Contents
The @chapter, @section, and other structuring commands supply theinformation to make up a table of contents, but they do not cause an actualtable to appear in the manual. To do this, you must use the @contents and@summarycontents commands:
@contentsGenerate a table of contents in a printed manual, including allchapters, sections, subsections, etc., as well as appendices andunnumbered chapters. (Headings generated by the @headingseries of commands do not appear in the table of contents.) The@contents command should be written on a line by itself.
@shortcontents@summarycontents
(@summarycontents is a synonym for @shortcontents; the twocommands are exactly the same.)
Generate a short or summary table of contents that lists onlythe chapters (and appendices and unnumbered chapters). Omitsections, subsections and subsubsections. Only a long manualneeds a short table of contents in addition to the full table ofcontents.
Write the @shortcontents command on a line by itself rightbefore the @contents command.

Chapter 4: Ending a Texinfo File 47
The table of contents commands automatically generate a chapter-likeheading at the top of the �rst table of contents page. Write the table ofcontents commands at the very end of a Texinfo �le, just before the @byecommand, following any index sections|anything in the Texinfo �le afterthe table of contents commands will be omitted from the table of contents.
When you print a manual with a table of contents, the table of contentsare printed last and numbered with roman numerals. You need to placethose pages in their proper place, after the title page, yourself. (This is theonly collating you need to do for a printed manual. The table of contents isprinted last because it is generated after the rest of the manual is typeset.)
Here is an example of where to write table of contents commands:
indices: : :@shortcontents@contents@bye
Since an Info �le uses menus instead of tables of contents, the Info for-matting commands ignore the @contents and @shortcontents commands.
4.3 @bye File Ending
An @bye command terminates TEX or Info formatting. None of the for-matting commands see any of the �le following @bye. The @bye commandshould be on a line by itself.
If you wish, you may follow the @bye line with notes. These notes willnot be formatted and will not appear in either Info or a printed manual; itis as if text after @bye were within @ignore : : : @end ignore. Also, you mayfollow the @bye line with a local variables list. See Section 20.6 [Using LocalVariables and the Compile Command], page 153, for more information.

48 Texinfo 2.23

Chapter 5: Chapter Structuring 49
5 Chapter Structuring
The chapter structuring commands divide a document into a hierarchy ofchapters, sections, subsections, and subsubsections. These commands gener-ate large headings; they also provide information for the table of contents ofa printed manual (see Section 4.2 [Generating a Table of Contents], page 46).
The chapter structuring commands do not create an Info node structure,so normally you should put an @node command immediately before eachchapter structuring command (see Chapter 6 [Nodes], page 57). The onlytime you are likely to use the chapter structuring commands without us-ing the node structuring commands is if you are writing a document thatcontains no cross references and will never be transformed into Info format.
It is unlikely that you will ever write a Texinfo �le that is intended onlyas an Info �le and not as a printable document. If you do, you might stilluse chapter structuring commands to create a heading at the top of eachnode|but you don't need to.
5.1 Tree Structure of Sections
A Texinfo �le is usually structured like a book with chapters, sections,subsections, and the like. This structure can be visualized as a tree (or ratheras an upside-down tree) with the root at the top and the levels correspondingto chapters, sections, subsection, and subsubsections.
Here is a diagram that shows a Texinfo �le with three chapters, each ofwhich has two sections.
Top|
-------------------------------------| | |
Chapter 1 Chapter 2 Chapter 3| | |
-------- -------- --------| | | | | |
Section Section Section Section Section Section1.1 1.2 2.1 2.2 3.1 3.2
In a Texinfo �le that has this structure, the beginning of Chapter 2 lookslike this:
@node Chapter 2, Chapter 3, Chapter 1, top@chapter Chapter 2
The chapter structuring commands are described in the sections thatfollow; the @node and @menu commands are described in following chapters.(See Chapter 6 [Nodes], page 57, and see Chapter 7 [Menus], page 65.)

50 Texinfo 2.23
5.2 Types of Structuring Command
The chapter structuring commands fall into four groups or series, eachof which contains structuring commands corresponding to the hierarchicallevels of chapters, sections, subsections, and subsubsections.
The four groups are the @chapter series, the @unnumbered series, the@appendix series, and the @heading series.
Each command produces titles that have a di�erent appearance on theprinted page or Info �le; only some of the commands produce titles that arelisted in the table of contents of a printed book or manual.
� The @chapter and @appendix series of commands produce numberedor lettered entries both in the body of a printed work and in its tableof contents.
� The @unnumbered series of commands produce unnumbered entries bothin the body of a printed work and in its table of contents. The @topcommand, which has a special use, is a member of this series (see Sec-tion 5.3 [@top], page 51).
� The @heading series of commands produce unnumbered headings thatdo not appear in a table of contents. The heading commands neverstart a new page.
� The @majorheading command produces results similar to using the@chapheading command but generates a larger vertical whitespace be-fore the heading.
� When an @setchapternewpage command says to do so, the @chapter,@unnumbered, and @appendix commands start new pages in the printedmanual; the @heading commands do not.
Here are the four groups of chapter structuring commands:
No new pages
Numbered Unnumbered Lettered and numbered Unnumbered
In contents In contents In contents Not in contents
@top @majorheading
@chapter @unnumbered @appendix @chapheading
@section @unnumberedsec @appendixsec @heading
@subsection @unnumberedsubsec @appendixsubsec @subheading
@subsubsection @unnumberedsubsubsec @appendixsubsubsec @subsubheading
5.3 @top
The @top command is a special sectioning command that you use onlyafter an @node Top line at the beginning of a Texinfo �le. The @top commandtells the makeinfo formatter which node is the `Top' node. It has the same

Chapter 5: Chapter Structuring 51
typesetting e�ect as @unnumbered (see Section 5.5 [@unnumbered], page 51).For detailed information, see Section 6.2.5 [The @top Command], page 62.
5.4 @chapter
@chapter identi�es a chapter in the document. Write the command atthe beginning of a line and follow it on the same line by the title of thechapter.
For example, this chapter in this manual is entitled \Chapter Structur-ing"; the @chapter line looks like this:
@chapter Chapter Structuring
In TEX, the @chapter command creates a chapter in the document, spec-ifying the chapter title. The chapter is numbered automatically.
In Info, the @chapter command causes the title to appear on a line byitself, with a line of asterisks inserted underneath. Thus, in Info, the aboveexample produces the following output:
Chapter Structuring*******************
Texinfo also provides a command @centerchap, which is analogous to@unnumbered, but centers its argument in the printed output. This kind ofstylistic choice is not usually o�ered by Texinfo.
5.5 @unnumbered, @appendix
Use the @unnumbered command to create a chapter that appears in aprinted manual without chapter numbers of any kind. Use the @appendixcommand to create an appendix in a printed manual that is labelled by letterinstead of by number.
For Info �le output, the @unnumbered and @appendix commands areequivalent to @chapter: the title is printed on a line by itself with a line ofasterisks underneath. (See Section 5.4 [@chapter], page 51.)
To create an appendix or an unnumbered chapter, write an @appendix or@unnumbered command at the beginning of a line and follow it on the sameline by the title, as you would if you were creating a chapter.
5.6 @majorheading, @chapheading
The @majorheading and @chapheading commands put chapter-like head-ings in the body of a document.
However, neither command causes TEX to produce a numbered headingor an entry in the table of contents; and neither command causes TEX tostart a new page in a printed manual.

52 Texinfo 2.23
In TEX, an @majorheading command generates a larger vertical whites-pace before the heading than an @chapheading command but is otherwisethe same.
In Info, the @majorheading and @chapheading commands are equivalentto @chapter: the title is printed on a line by itself with a line of asterisksunderneath. (See Section 5.4 [@chapter], page 51.)
5.7 @section
In a printed manual, an @section command identi�es a numbered sectionwithin a chapter. The section title appears in the table of contents. In Info,an @section command provides a title for a segment of text, underlinedwith `='.
This section is headed with an @section command and looks like this inthe Texinfo �le:
@section @code{@@section}
To create a section, write the @section command at the beginning of aline and follow it on the same line by the section title.
Thus,
@section This is a section
produces
This is a section=================
in Info.
5.8 @unnumberedsec, @appendixsec, @heading
The @unnumberedsec, @appendixsec, and @heading commands are, re-spectively, the unnumbered, appendix-like, and heading-like equivalents ofthe @section command. (See Section 5.7 [@section], page 52.)
@unnumberedsecThe @unnumberedsec command may be used within an unnum-bered chapter or within a regular chapter or appendix to providean unnumbered section.
@appendixsec@appendixsection
@appendixsection is a longer spelling of the @appendixseccommand; the two are synonymous.
Conventionally, the @appendixsec or @appendixsection com-mand is used only within appendices.
Chapter 5: Chapter Structuring 53
@heading You may use the @heading command anywhere you wish for asection-style heading that will not appear in the table of con-tents.
5.9 The @subsection Command
Subsections are to sections as sections are to chapters. (See Section 5.7[@section], page 52.) In Info, subsection titles are underlined with `-'. Forexample,
@subsection This is a subsection
produces
This is a subsection--------------------
In a printed manual, subsections are listed in the table of contents andare numbered three levels deep.
5.10 The @subsection-like Commands
The @unnumberedsubsec, @appendixsubsec, and @subheading com-mands are, respectively, the unnumbered, appendix-like, and heading-likeequivalents of the @subsection command. (See Section 5.9 [@subsection],page 53.)
In Info, the @subsection-like commands generate a title underlinedwith hyphens. In a printed manual, an @subheading command producesa heading like that of a subsection except that it is not numbered anddoes not appear in the table of contents. Similarly, an @unnumberedsubseccommand produces an unnumbered heading like that of a subsection andan @appendixsubsec command produces a subsection-like heading labelledwith a letter and numbers; both of these commands produce headings thatappear in the table of contents.
5.11 The `subsub' Commands
The fourth and lowest level sectioning commands in Texinfo are the `sub-sub' commands. They are:
@subsubsectionSubsubsections are to subsections as subsections are to sections.(See Section 5.9 [@subsection], page 53.) In a printed man-ual, subsubsection titles appear in the table of contents and arenumbered four levels deep.

54 Texinfo 2.23
@unnumberedsubsubsecUnnumbered subsubsection titles appear in the table of contentsof a printed manual, but lack numbers. Otherwise, unnumberedsubsubsections are the same as subsubsections. In Info, unnum-bered subsubsections look exactly like ordinary subsubsections.
@appendixsubsubsecConventionally, appendix commands are used only for appen-dices and are lettered and numbered appropriately in a printedmanual. They also appear in the table of contents. In Info, ap-pendix subsubsections look exactly like ordinary subsubsections.
@subsubheadingThe @subsubheading command may be used anywhere that youneed a small heading that will not appear in the table of con-tents. In Info, subsubheadings look exactly like ordinary sub-subsection headings.
In Info, `subsub' titles are underlined with periods. For example,
@subsubsection This is a subsubsection
produces
This is a subsubsection.......................
5.12 @raisesections and @lowersections
The @raisesections and @lowersections commands raise and lowerthe hierarchical level of chapters, sections, subsections and the like. The@raisesections command changes sections to chapters, subsections to sec-tions, and so on. The @lowersections command changes chapters to sec-tions, sections to subsections, and so on.
An @lowersections command is useful if you wish to include text thatis written as an outer or standalone Texinfo �le in another Texinfo �leas an inner, included �le. If you write the command at the beginningof the �le, all your @chapter commands are formatted as if they were@section commands, all your @section command are formatted as if theywere @subsection commands, and so on.
@raisesections raises a command one level in the chapter structuringhierarchy:
Change To
@subsection @section,@section @chapter,@heading @chapheading,
etc.

Chapter 5: Chapter Structuring 55
@lowersections lowers a command one level in the chapter structuringhierarchy:
Change To
@chapter @section,@subsection @subsubsection,@heading @subheading,
etc.
An @raisesections or @lowersections command changes only thosestructuring commands that follow the command in the Texinfo �le. Writean @raisesections or @lowersections command on a line of its own.
An @lowersections command cancels an @raisesections command,and vice versa.
Repeated use of the commands continue to raise or lower the hierarchicallevel a step at a time.
An attempt to raise above `chapters' reproduces chapter commands;an attempt to lower below `subsubsections' reproduces subsubsection com-mands.

56 Texinfo 2.23

Chapter 6: Nodes 57
6 Nodes
Nodes are the primary segments of a Texinfo �le. They do not themselvesimpose a hierarchic or any other kind of structure on a �le. Nodes containnode pointers that name other nodes, and can contain menus which are listsof nodes. In Info, the movement commands can carry you to a pointed-to node or to a node listed in a menu. Node pointers and menus providestructure for Info �les just as chapters, sections, subsections, and the like,provide structure for printed books.
The node and menu commands and the chapter structuring commandsare independent of each other:
� In Info, node and menu commands provide structure. The chap-ter structuring commands generate headings with di�erent kinds ofunderlining|asterisks for chapters, hyphens for sections, and so on;they do nothing else.
� In TEX, the chapter structuring commands generate chapter and sectionnumbers and tables of contents. The node and menu commands provideinformation for cross references; they do nothing else.
You can use node pointers and menus to structure an Info �le any way youwant; and you can write a Texinfo �le so that its Info output has a di�erentstructure than its printed output. However, most Texinfo �les are writtensuch that the structure for the Info output corresponds to the structure forthe printed output. It is not convenient to do otherwise.
Generally, printed output is structured in a tree-like hierarchy in whichthe chapters are the major limbs from which the sections branch out. Simi-larly, node pointers and menus are organized to create a matching structurein the Info output.
6.1 Node and Menu Illustration
Here is a copy of the diagram shown earlier that illustrates a Texinfo �lewith three chapters, each of which contains two sections.
Note that the \root" is at the top of the diagram and the \leaves" areat the bottom. This is how such a diagram is drawn conventionally; itillustrates an upside-down tree. For this reason, the root node is called the`Top' node, and `Up' node pointers carry you closer to the root.

58 Texinfo 2.23
Top|
-------------------------------------| | |
Chapter 1 Chapter 2 Chapter 3| | |
-------- -------- --------| | | | | |
Section Section Section Section Section Section1.1 1.2 2.1 2.2 3.1 3.2
Write the beginning of the node for Chapter 2 like this:
@node Chapter 2, Chapter 3, Chapter 1, top@comment node-name, next, previous, up
This @node line says that the name of this node is \Chapter 2", the name ofthe `Next' node is \Chapter 3", the name of the `Previous' node is \Chapter1", and the name of the `Up' node is \Top".
Please Note: `Next' refers to the next node at the same hierarchicallevel in the manual, not necessarily to the next node within theTexinfo �le. In the Texinfo �le, the subsequent node may be at alower level|a section-level node may follow a chapter-level node,and a subsection-level node may follow a section-level node. `Next'and `Previous' refer to nodes at the same hierarchical level. (The`Top' node contains the exception to this rule. Since the `Top' nodeis the only node at that level, `Next' refers to the �rst followingnode, which is almost always a chapter or chapter-level node.)
To go to Sections 2.1 and 2.2 using Info, you need a menu inside Chapter2. (See Chapter 7 [Menus], page 65.) You would write the menu just beforethe beginning of Section 2.1, like this:
@menu* Sect. 2.1:: Description of this section.* Sect. 2.2::@end menu
Write the node for Sect. 2.1 like this:
@node Sect. 2.1, Sect. 2.2, Chapter 2, Chapter 2@comment node-name, next, previous, up
In Info format, the `Next' and `Previous' pointers of a node usually leadto other nodes at the same level|from chapter to chapter or from sectionto section (sometimes, as shown, the `Previous' pointer points up); an `Up'pointer usually leads to a node at the level above (closer to the `Top' node);and a `Menu' leads to nodes at a level below (closer to `leaves'). (A cross

Chapter 6: Nodes 59
reference can point to a node at any level; see Chapter 8 [Cross References],page 69.)
Usually, an @node command and a chapter structuring command are usedin sequence, along with indexing commands. (You may follow the @node linewith a comment line that reminds you which pointer is which.)
Here is the beginning of the chapter in this manual called \Ending aTexinfo File". This shows an @node line followed by a comment line, an@chapter line, and then by indexing lines.
@node Ending a File, Structuring, Beginning a File, Top@comment node-name, next, previous, up@chapter Ending a Texinfo File@cindex Ending a Texinfo file@cindex Texinfo file ending@cindex File ending
6.2 The @node Command
A node is a segment of text that begins at an @node command andcontinues until the next @node command. The de�nition of node is di�erentfrom that for chapter or section. A chapter may contain sections and asection may contain subsections; but a node cannot contain subnodes; thetext of a node continues only until the next @node command in the �le. Anode usually contains only one chapter structuring command, the one thatfollows the @node line. On the other hand, in printed output nodes are usedonly for cross references, so a chapter or section may contain any number ofnodes. Indeed, a chapter usually contains several nodes, one for each section,subsection, and subsubsection.
To create a node, write an @node command at the beginning of a line,and follow it with four arguments, separated by commas, on the rest of thesame line. These arguments are the name of the node, and the names of the`Next', `Previous', and `Up' pointers, in that order. You may insert spacesbefore each pointer if you wish; the spaces are ignored. You must write thename of the node, and the names of the `Next', `Previous', and `Up' pointers,all on the same line. Otherwise, the formatters fail. (See Info �le `info',node `Top', for more information about nodes in Info.)
Usually, you write one of the chapter-structuring command lines imme-diately after an @node line|for example, an @section or @subsection line.(See Section 5.2 [Types of Structuring Command], page 50.)
Please note: The GNU Emacs Texinfo mode updating commandswork only with Texinfo �les in which @node lines are followed bychapter structuring lines. See Section 2.4.1 [Updating Require-ments], page 22.

60 Texinfo 2.23
TEX uses @node lines to identify the names to use for cross references.For this reason, you must write @node lines in a Texinfo �le that you intendto format for printing, even if you do not intend to format it for Info. (Crossreferences, such as the one at the end of this sentence, are made with @xrefand its related commands; see Chapter 8 [Cross References], page 69.)
The name of a node identi�es the node. The pointers enable you to reachother nodes and consist of the names of those nodes.
Normally, a node's `Up' pointer contains the name of the node whosemenu mentions that node. The node's `Next' pointer contains the nameof the node that follows that node in that menu and its `Previous' pointercontains the name of the node that precedes it in that menu. When a node's`Previous' node is the same as its `Up' node, both node pointers name thesame node.
Usually, the �rst node of a Texinfo �le is the `Top' node, and its `Up' and`Previous' pointers point to the `dir' �le, which contains the main menu forall of Info.
The `Top' node itself contains the main or master menu for the manual.Also, it is helpful to include a brief description of the manual in the `Top'node. See Section 6.2.4 [First Node], page 62, for information on how towrite the �rst node of a Texinfo �le.
6.2.1 How to Write an @node Line
The easiest way to write an @node line is to write @node at the beginningof a line and then the name of the node, like this:
@node node-name
If you are using GNU Emacs, you can use the update node commandsprovided by Texinfo mode to insert the names of the pointers; or you canleave the pointers out of the Texinfo �le and let makeinfo insert node point-ers into the Info �le it creates. (See Chapter 2 [Texinfo Mode], page 15, andSection 6.3 [makeinfo Pointer Creation], page 63.)
Alternatively, you can insert the `Next', `Previous', and `Up' pointersyourself. If you do this, you may �nd it helpful to use the Texinfo mode key-board command C-c C-c n. This command inserts `@node' and a commentline listing the names of the pointers in their proper order. The commentline helps you keep track of which arguments are for which pointers. Thiscomment line is especially useful if you are not familiar with Texinfo.
The template for a node line with `Next', `Previous', and `Up' pointerslooks like this:
@node node-name, next, previous, up
If you wish, you can ignore @node lines altogether in your �rst draft andthen use the texinfo-insert-node-lines command to create @node linesfor you. However, we do not recommend this practice. It is better to name

Chapter 6: Nodes 61
the node itself at the same time that you write a segment so you can easilymake cross references. A large number of cross references are an especiallyimportant feature of a good Info �le.
After you have inserted an @node line, you should immediately write an@-command for the chapter or section and insert its name. Next (and this isimportant!), put in several index entries. Usually, you will �nd at least twoand often as many as four or �ve ways of referring to the node in the index.Use them all. This will make it much easier for people to �nd the node.
6.2.2 @node Line Tips
Here are three suggestions:
� Try to pick node names that are informative but short.
In the Info �le, the �le name, node name, and pointer names are allinserted on one line, which may run into the right edge of the window.(This does not cause a problem with Info, but is ugly.)
� Try to pick node names that di�er from each other near the beginningsof their names. This way, it is easy to use automatic name completionin Info.
� By convention, node names are capitalized just as they would be forsection or chapter titles|initial and signi�cant words are capitalized;others are not.
6.2.3 @node Line Requirements
Here are several requirements for @node lines:
� All the node names for a single Info �le must be unique.
Duplicates confuse the Info movement commands. This means, for ex-ample, that if you end every chapter with a summary, you must nameeach summary node di�erently. You cannot just call each one \Sum-mary". You may, however, duplicate the titles of chapters, sections,and the like. Thus you can end each chapter in a book with a sectioncalled \Summary", so long as the node names for those sections are alldi�erent.
� A pointer name must be the name of a node.
The node to which a pointer points may come before or after the nodecontaining the pointer.
� You cannot use any of the Texinfo @-commands in a node name;@-commands confuse Info.Thus, the beginning of the section called @chapter looks like this:

62 Texinfo 2.23
@node chapter, unnumbered & appendix, makeinfo top, Structuring
@comment node-name, next, previous, up
@section @code{@@chapter}
@findex chapter
� You cannot use commas, colons, or apostrophes within a node name;these confuse TEX or the Info formatters.
For example, the following is a section title:
@code{@@unnumberedsec}, @code{@@appendixsec}, @code{@@heading}
The corresponding node name is:
unnumberedsec appendixsec heading
� Case is signi�cant.
6.2.4 The First Node
The �rst node of a Texinfo �le is the `Top' node, except in an included�le (see Appendix E [Include Files], page 205).
The `Top' node (which must be named `top' or `Top') should have as its`Up' and `Previous' nodes the name of a node in another �le, where there isa menu that leads to this �le. Specify the �le name in parentheses. If the �leis to be installed directly in the Info directory �le, use `(dir)' as the parentof the `Top' node; this is short for `(dir)top', and speci�es the `Top' nodein the `dir' �le, which contains the main menu for Info. For example, the@node Top line of this manual looks like this:
@node Top, Overview, (dir), (dir)
(You may use the Texinfo updating commands or the makeinfo utility toinsert these `Next' and `(dir)' pointers automatically.)
See Chapter 22 [Install an Info File], page 167, for more information aboutinstalling an Info �le in the `info' directory.
The `Top' node contains the main or master menu for the document.
6.2.5 The @top Sectioning Command
A special sectioning command, @top, has been created for use with the@node Top line. The @top sectioning command tells makeinfo that it marksthe `Top' node in the �le. It provides the information that makeinfo needsto insert node pointers automatically. Write the @top command at the be-ginning of the line immediately following the @node Top line. Write the titleon the remaining part of the same line as the @top command.
In Info, the @top sectioning command causes the title to appear on a lineby itself, with a line of asterisks inserted underneath.
In TEX and texinfo-format-buffer, the @top sectioning command ismerely a synonym for @unnumbered. Neither of these formatters require an

Chapter 6: Nodes 63
@top command, and do nothing special with it. You can use @chapter or@unnumbered after the @node Top line when you use these formatters. Also,you can use @chapter or @unnumbered when you use the Texinfo updatingcommands to create or update pointers and menus.
6.2.6 The `Top' Node Summary
You can help readers by writing a summary in the `Top' node, after the@top line, before the main or master menu. The summary should brie ydescribe the document. In Info, this summary will appear just before themaster menu. In a printed manual, this summary will appear on a page ofits own.
If you do not want the summary to appear on a page of its own in aprinted manual, you can enclose the whole of the `Top' node, including the@node Top line and the @top sectioning command line or other sectioningcommand line between @ifinfo and @end ifinfo. This prevents any of thetext from appearing in the printed output. (see Chapter 18 [ConditionallyVisible Text], page 141). You can repeat the brief description from the `Top'node within @iftex : : : @end iftex at the beginning of the �rst chapter, forthose who read the printed manual. This saves paper and may look neater.
You should write the version number of the program to which the manualapplies in the summary. This helps the reader keep track of which manualis for which version of the program. If the manual changes more frequentlythan the program or is independent of it, you should also include an editionnumber for the manual. (The title page should also contain this information:see Section 3.4.1 [@titlepage], page 36.)
6.3 Creating Pointers with makeinfo
The makeinfo program has a feature for automatically creating nodepointers for a hierarchically organized �le that lacks them.
When you take advantage of this feature, you do not need to write the`Next', `Previous', and `Up' pointers after the name of a node. However, youmust write a sectioning command, such as @chapter or @section, on theline immediately following each truncated @node line. You cannot write acomment line after a node line; the section line must follow it immediately.
In addition, you must follow the `Top' @node line with a line beginningwith @top to mark the `Top' node in the �le. See Section 5.3 [@top], page 51.
Finally, you must write the name of each node (except for the `Top' node)in a menu that is one or more hierarchical levels above the node's hierarchicallevel.
This node pointer insertion feature in makeinfo is an alternative to themenu and pointer creation and update commands in Texinfo mode. (See

64 Texinfo 2.23
Section 2.4 [Updating Nodes and Menus], page 19.) It is especially helpfulto people who do not use GNU Emacs for writing Texinfo documents.

Chapter 7: Menus 65
7 Menus
Menus contain pointers to subordinate nodes.1 In Info, you use menusto go to such nodes. Menus have no e�ect in printed manuals and do notappear in them.
By convention, a menu is put at the end of a node since a reader whouses the menu may not see text that follows it.
A node that has a menu should not contain much text. If you have alot of text and a menu, move most of the text into a new subnode|all buta few lines. Otherwise, a reader with a terminal that displays only a fewlines may miss the menu and its associated text. As a practical matter, youshould locate a menu within 20 lines of the beginning of the node.
The short text before a menu may look awkward in a printed manual.To avoid this, you can write a menu near the beginning of its node andfollow the menu by an @node line, and then an @heading line located within@ifinfo and @end ifinfo. This way, the menu, @node line, and title appearonly in the Info �le, not the printed document.
For example, the preceding two paragraphs follow an Info-only menu,@node line, and heading, and look like this:
@menu* Menu Location:: Put a menu in a short node.* Writing a Menu:: What is a menu?* Menu Parts:: A menu entry has three parts.* Less Cluttered Menu Entry:: Two part menu entry.* Menu Example:: Two and three part entries.* Other Info Files:: How to refer to a different
Info file.@end menu
@node Menu Location, Writing a Menu, , Menus@ifinfo@heading Menus Need Short Nodes@end ifinfo
The Texinfo �le for this document contains more than a dozen examplesof this procedure. One is at the beginning of this chapter; another is at thebeginning of the \Cross References" chapter.
1 Menus can carry you to any node, regardless of the hierarchical struc-ture; even to nodes in a di�erent Info �le. However, the GNU EmacsTexinfo mode updating commands work only to create menus of subor-dinate nodes. Conventionally, cross references are used to refer to othernodes.

66 Texinfo 2.23
7.1 Writing a Menu
A menu consists of an @menu command on a line by itself followed by menuentry lines or menu comment lines and then by an @end menu command ona line by itself.
A menu looks like this:
@menuLarger Units of Text
* Files:: All about handling files.* Multiples: Buffers. Multiple buffers; editing
several files at once.@end menu
In a menu, every line that begins with an `* ' is a menu entry. (Note thespace after the asterisk.) A line that does not start with an `* ' may alsoappear in a menu. Such a line is not a menu entry but is a menu commentline that appears in the Info �le. In the example above, the line `LargerUnits of Text' is a menu comment line; the two lines starting with `* ' aremenu entries.
7.2 The Parts of a Menu
A menu entry has three parts, only the second of which is required:
1. The menu entry name.
2. The name of the node (required).
3. A description of the item.
The template for a menu entry looks like this:
* menu-entry-name: node-name. description
Follow the menu entry name with a single colon and follow the node namewith tab, comma, period, or newline.
In Info, a user selects a node with the m (Info-menu) command. Themenu entry name is what the user types after the m command.
The third part of a menu entry is a descriptive phrase or sentence. Menuentry names and node names are often short; the description explains tothe reader what the node is about. The description, which is optional, canspread over two or more lines. A useful description complements the nodename rather than repeats it.

Chapter 7: Menus 67
7.3 Less Cluttered Menu Entry
When the menu entry name and node name are the same, you can writethe name immediately after the asterisk and space at the beginning of theline and follow the name with two colons.
For example, write
* Name:: description
instead of
* Name: Name. description
You should use the node name for the menu entry name whenever possi-ble, since it reduces visual clutter in the menu.
7.4 A Menu Example
A menu looks like this in Texinfo:
@menu* menu entry name: Node name. A short description.* Node name:: This form is preferred.@end menu
This produces:
* menu:
* menu entry name: Node name. A short description.* Node name:: This form is preferred.
Here is an example as you might see it in a Texinfo �le:
@menuLarger Units of Text
* Files:: All about handling files.* Multiples: Buffers. Multiple buffers; editing
several files at once.@end menu
This produces:
* menu:Larger Units of Text
* Files:: All about handling files.* Multiples: Buffers. Multiple buffers; editing
several files at once.
In this example, the menu has two entries. `Files' is both a menu entryname and the name of the node referred to by that name. `Multiples' is the

68 Texinfo 2.23
menu entry name; it refers to the node named `Buffers'. The line `LargerUnits of Text' is a comment; it appears in the menu, but is not an entry.
Since no �le name is speci�ed with either `Files' or `Buffers', theymust be the names of nodes in the same Info �le (see Section 7.5 [Referringto Other Info Files], page 68).
7.5 Referring to Other Info Files
You can create a menu entry that enables a reader in Info to go to a nodein another Info �le by writing the �le name in parentheses just before thenode name. In this case, you should use the three-part menu entry format,which saves the reader from having to type the �le name.
The format looks like this:
@menu* �rst-entry-name:(�lename)nodename. description* second-entry-name:(�lename)second-node. description@end menu
For example, to refer directly to the `Outlining' and `Rebinding' nodesin the Emacs Manual, you would write a menu like this:
@menu* Outlining: (emacs)Outline Mode. The major mode for
editing outlines.* Rebinding: (emacs)Rebinding. How to redefine the
meaning of a key.@end menu
If you do not list the node name, but only name the �le, then Info pre-sumes that you are referring to the `Top' node.
The `dir' �le that contains the main menu for Info has menu entries thatlist only �le names. These take you directly to the `Top' nodes of each Infodocument. (See Chapter 22 [Install an Info File], page 167.)
For example:
* Info: (info). Documentation browsing system.* Emacs: (emacs). The extensible, self-documenting
text editor.
(The `dir' top level directory for the Info system is an Info �le, not a Texinfo�le, but a menu entry looks the same in both types of �le.)
Note that the GNU Emacs Texinfo mode menu updating commands onlywork with nodes within the current bu�er, so you cannot use them to createmenus that refer to other �les. You must write such menus by hand.

Chapter 8: Cross References 69
8 Cross References
Cross references are used to refer the reader to other parts of the sameor di�erent Texinfo �les. In Texinfo, nodes are the places to which crossreferences can refer.
Often, but not always, a printed document should be designed so thatit can be read sequentially. People tire of ipping back and forth to �ndinformation that should be presented to them as they need it.
However, in any document, some information will be too detailed for thecurrent context, or incidental to it; use cross references to provide access tosuch information. Also, an on-line help system or a reference manual is notlike a novel; few read such documents in sequence from beginning to end.Instead, people look up what they need. For this reason, such creationsshould contain many cross references to help readers �nd other informationthat they may not have read.
In a printed manual, a cross reference results in a page reference, unlessit is to another manual altogether, in which case the cross reference namesthat manual.
In Info, a cross reference results in an entry that you can follow using theInfo `f' command. (See Info �le `info', node `Help-Adv'.)
The various cross reference commands use nodes to de�ne cross referencelocations. This is evident in Info, in which a cross reference takes you to thespeci�ed node. TEX also uses nodes to de�ne cross reference locations, butthe action is less obvious. When TEX generates a dvi �le, it records nodes'page numbers and uses the page numbers in making references. Thus, if youare writing a manual that will only be printed, and will not be used on-line,you must nonetheless write @node lines to name the places to which youmake cross references.
8.1 Di�erent Cross Reference Commands
There are four di�erent cross reference commands:
@xref Used to start a sentence in the printed manual saying `See : : :'or an Info cross-reference saying `*Note name: node.'.
@ref Used within or, more often, at the end of a sentence; same as@xref for Info; produces just the reference in the printed manualwithout a preceding `See'.
@pxref Used within parentheses to make a reference that suits both anInfo �le and a printed book. Starts with a lower case `see' withinthe printed manual. (`p' is for `parenthesis'.)
@inforef Used to make a reference to an Info �le for which there is noprinted manual.

70 Texinfo 2.23
(The @cite command is used to make references to books and manuals forwhich there is no corresponding Info �le and, therefore, no node to which topoint. See Section 9.1.8 [@cite], page 85.)
8.2 Parts of a Cross Reference
A cross reference command requires only one argument, which is thename of the node to which it refers. But a cross reference command maycontain up to four additional arguments. By using these arguments, you canprovide a cross reference name for Info, a topic description or section titlefor the printed output, the name of a di�erent Info �le, and the name of adi�erent printed manual.
Here is a simple cross reference example:
@xref{Node name}.
which produces
*Note Node name::.
and
See Section nnn [Node name], page ppp.Here is an example of a full �ve-part cross reference:
@xref{Node name, Cross Reference Name, Particular Topic,info-file-name, A Printed Manual}, for details.
which produces
*Note Cross Reference Name: (info-file-name)Node name,for details.
in Info and
See section \Particular Topic" in A Printed Manual, for details.
in a printed book.
The �ve possible arguments for a cross reference are:
1. The node name (required). This is the node to which the cross referencetakes you. In a printed document, the location of the node provides thepage reference only for references within the same document.
2. The cross reference name for the Info reference, if it is to be di�erentfrom the node name. If you include this argument, it argument becomesthe �rst part of the cross reference. It is usually omitted.
3. A topic description or section name. Often, this is the title of thesection. This is used as the name of the reference in the printed manual.If omitted, the node name is used.
4. The name of the Info �le in which the reference is located, if it is di�erentfrom the current �le.
5. The name of a printed manual from a di�erent Texinfo �le.

Chapter 8: Cross References 71
The template for a full �ve argument cross reference looks like this:
@xref{node-name, cross-reference-name, title-or-topic,info-�le-name, printed-manual-title}.
Cross references with one, two, three, four, and �ve arguments are de-scribed separately following the description of @xref.
Write a node name in a cross reference in exactly the same way as in the@node line, including the same capitalization; otherwise, the formatters maynot �nd the reference.
You can write cross reference commands within a paragraph, but notehow Info and TEX format the output of each of the various commands: write@xref at the beginning of a sentence; write @pxref only within parentheses,and so on.
8.3 @xref
The @xref command generates a cross reference for the beginning of asentence. The Info formatting commands convert it into an Info cross refer-ence, which the Info `f' command can use to bring you directly to anothernode. The TEX typesetting commands convert it into a page reference, or areference to another book or manual.
Most often, an Info cross reference looks like this:
*Note node-name::.
or like this
*Note cross-reference-name: node-name.
In TEX, a cross reference looks like this:
See Section section-number [node-name], page page.
or like this
See Section section-number [title-or-topic], page page.
The @xref command does not generate a period or comma to end thecross reference in either the Info �le or the printed output. You must writethat period or comma yourself; otherwise, Info will not recognize the endof the reference. (The @pxref command works di�erently. See Section 8.6[@pxref], page 76.)
Please note: A period or comma must follow the closing brace of an@xref. It is required to terminate the cross reference. This periodor comma will appear in the output, both in the Info �le and in theprinted manual.
@xref must refer to an Info node by name. Use @node to de�ne the node(see Section 6.2.1 [Writing a Node], page 60).
@xref is followed by several arguments inside braces, separated by com-mas. Whitespace before and after these commas is ignored.

72 Texinfo 2.23
A cross reference requires only the name of a node; but it may containup to four additional arguments. Each of these variations produces a crossreference that looks somewhat di�erent.
Please note: Commas separate arguments in a cross reference; avoidincluding them in the title or other part lest the formatters mistakethem for separators.
8.3.1 @xref with One Argument
The simplest form of @xref takes one argument, the name of anothernode in the same Info �le. The Info formatters produce output that the Inforeaders can use to jump to the reference; TEX produces output that speci�esthe page and section number for you.For example,
@xref{Tropical Storms}.
produces
*Note Tropical Storms::.
and
See Section 3.1 [Tropical Storms], page 24.
(Note that in the preceding example the closing brace is followed by a pe-riod.)
You can write a clause after the cross reference, like this:
@xref{Tropical Storms}, for more info.
which produces
*Note Tropical Storms::, for more info.
See Section 3.1 [Tropical Storms], page 24, for more info.
(Note that in the preceding example the closing brace is followed by a comma,and then by the clause, which is followed by a period.)
8.3.2 @xref with Two Arguments
With two arguments, the second is used as the name of the Info crossreference, while the �rst is still the name of the node to which the crossreference points.The template is like this:
@xref{node-name, cross-reference-name}.For example,
@xref{Electrical Effects, Lightning}.
produces:
*Note Lightning: Electrical Effects.
and

Chapter 8: Cross References 73
See Section 5.2 [Electrical E�ects], page 57.
(Note that in the preceding example the closing brace is followed by a period;and that the node name is printed, not the cross reference name.)
You can write a clause after the cross reference, like this:
@xref{Electrical Effects, Lightning}, for more info.
which produces
*Note Lightning: Electrical Effects, for more info.
and
See Section 5.2 [Electrical E�ects], page 57, for more info.
(Note that in the preceding example the closing brace is followed by a comma,and then by the clause, which is followed by a period.)
8.3.3 @xref with Three Arguments
A third argument replaces the node name in the TEX output. The thirdargument should be the name of the section in the printed output, or elsestate the topic discussed by that section. Often, you will want to use initialupper case letters so it will be easier to read when the reference is printed.Use a third argument when the node name is unsuitable because of syntaxor meaning.
Remember to avoid placing a comma within the title or topic section ofa cross reference, or within any other section. The formatters divide crossreferences into arguments according to the commas; a comma within a titleor other section will divide it into two arguments. In a reference, you needto write a title such as \Clouds, Mist, and Fog" without the commas.
Also, remember to write a comma or period after the closing brace of a@xref to terminate the cross reference. In the following examples, a clausefollows a terminating comma.The template is like this:
@xref{node-name, cross-reference-name, title-or-topic}.
For example,
@xref{Electrical Effects, Lightning, Thunder and Lightning},for details.
produces
*Note Lightning: Electrical Effects, for details.
and
See Section 5.2 [Thunder and Lightning], page 57, for details.
If a third argument is given and the second one is empty, then the thirdargument serves both. (Note how two commas, side by side, mark the emptysecond argument.)

74 Texinfo 2.23
@xref{Electrical Effects, , Thunder and Lightning},for details.
produces
*Note Thunder and Lightning: Electrical Effects, for details.
and
See Section 5.2 [Thunder and Lightning], page 57, for details.
As a practical matter, it is often best to write cross references with justthe �rst argument if the node name and the section title are the same, andwith the �rst and third arguments if the node name and title are di�erent.
Here are several examples from The GAWK Manual:
@xref{Sample Program}.
@xref{Glossary}.
@xref{Case-sensitivity, ,Case-sensitivity in Matching}.
@xref{Close Output, , Closing Output Files and Pipes},
for more information.
@xref{Regexp, , Regular Expressions as Patterns}.
8.3.4 @xref with Four and Five Arguments
In a cross reference, a fourth argument speci�es the name of anotherInfo �le, di�erent from the �le in which the reference appears, and a �fthargument speci�es its title as a printed manual.
Remember that a comma or period must follow the closing brace of an@xref command to terminate the cross reference. In the following examples,a clause follows a terminating comma.The template is:
@xref{node-name, cross-reference-name, title-or-topic,info-�le-name, printed-manual-title}.
For example,
@xref{Electrical Effects, Lightning, Thunder and Lightning,weather, An Introduction to Meteorology}, for details.
produces
*Note Lightning: (weather)Electrical Effects, for details.
The name of the Info �le is enclosed in parentheses and precedes the nameof the node.
In a printed manual, the reference looks like this:
See section \Thunder and Lightning" in An Introduction to Mete-orology, for details.
The title of the printed manual is typeset in italics; and the reference lacks apage number since TEX cannot know to which page a reference refers whenthat reference is to another manual.

Chapter 8: Cross References 75
Often, you will leave out the second argument when you use the longversion of @xref. In this case, the third argument, the topic description,will be used as the cross reference name in Info.
The template looks like this:
@xref{node-name, , title-or-topic, info-�le-name,printed-manual-title}, for details.
which produces
*Note title-or-topic: (info-�le-name)node-name, for details.
and
See section title-or-topic in printed-manual-title, for details.For example,
@xref{Electrical Effects, , Thunder and Lightning,weather, An Introduction to Meteorology}, for details.
produces
*Note Thunder and Lightning: (weather)Electrical Effects,for details.
and
See section \Thunder and Lightning" in An Introduction to Mete-orology, for details.
On rare occasions, you may want to refer to another Info �le that is withina single printed manual|when multiple Texinfo �les are incorporated intothe same TEX run but make separate Info �les. In this case, you need tospecify only the fourth argument, and not the �fth.
8.4 Naming a `Top' Node
In a cross reference, you must always name a node. This means that inorder to refer to a whole manual, you must identify the `Top' node by writingit as the �rst argument to the @xref command. (This is di�erent from theway you write a menu entry; see Section 7.5 [Referring to Other Info Files],page 68.) At the same time, to provide a meaningful section topic or titlein the printed cross reference (instead of the word `Top'), you must write anappropriate entry for the third argument to the @xref command.
Thus, to make a cross reference to The GNU Make Manual, write:
@xref{Top, , Overview, make, The GNU Make Manual}.
which produces
*Note Overview: (make)Top.
and
See section \Overview" in The GNU Make Manual.

76 Texinfo 2.23
In this example, `Top' is the name of the �rst node, and `Overview' is thename of the �rst section of the manual.
8.5 @ref
@ref is nearly the same as @xref except that it does not generate a `See'in the printed output, just the reference itself. This makes it useful as thelast part of a sentence.For example,
For more information, see @ref{Hurricanes}.
produces
For more information, see *Note Hurricanes.
and
For more information, see Section 8.2 [Hurricanes], page 123.
The @ref command sometimes leads writers to express themselves in amanner that is suitable for a printed manual but looks awkward in the Infoformat. Bear in mind that your audience will be using both the printed andthe Info format.For example,
Sea surges are described in @ref{Hurricanes}.
produces
Sea surges are described in Section 6.7 [Hurricanes], page 72.in a printed document, and the following in Info:
Sea surges are described in *Note Hurricanes::.
Caution: You must write a period or comma immediately after an@ref command with two or more arguments. Otherwise, Info willnot �nd the end of the cross reference entry and its attempt tofollow the cross reference will fail. As a general rule, you shouldwrite a period or comma after every @ref command. This looksbest in both the printed and the Info output.
8.6 @pxref
The parenthetical reference command, @pxref, is nearly the same as@xref, but you use it only inside parentheses and you do not type a commaor period after the command's closing brace. The command di�ers from@xref in two ways:
1. TEX typesets the reference for the printed manual with a lower case `see'rather than an upper case `See'.
2. The Info formatting commands automatically end the reference with aclosing colon or period.
Chapter 8: Cross References 77
Because one type of formatting automatically inserts closing punctuationand the other does not, you should use @pxref only inside parentheses aspart of another sentence. Also, you yourself should not insert punctuationafter the reference, as you do with @xref.
@pxref is designed so that the output looks right and works right be-tween parentheses both in printed output and in an Info �le. In a printedmanual, a closing comma or period should not follow a cross reference withinparentheses; such punctuation is wrong. But in an Info �le, suitable closingpunctuation must follow the cross reference so Info can recognize its end.@pxref spares you the need to use complicated methods to put a terminatorinto one form of the output and not the other.
With one argument, a parenthetical cross reference looks like this:
: : : storms cause flooding (@pxref{Hurricanes}) : : :
which produces
: : : storms cause flooding (*Note Hurricanes::) : : :
and
: : : storms cause ooding (see Section 6.7 [Hurricanes], page 72) : : :
With two arguments, a parenthetical cross reference has this template:
: : : (@pxref{node-name, cross-reference-name}) : : :
which produces
: : : (*Note cross-reference-name: node-name.) : : :
and: : : (see Section nnn [node-name], page ppp) : : :
@pxref can be used with up to �ve arguments just like @xref (see Sec-tion 8.3 [@xref], page 71).
Please note: Use @pxref only as a parenthetical reference. Do nottry to use @pxref as a clause in a sentence. It will look bad ineither the Info �le, the printed output, or both.
Also, parenthetical cross references look best at the ends of sen-tences. Although you may write them in the middle of a sentence,that location breaks up the ow of text.
8.7 @inforef
@inforef is used for cross references to Info �les for which there are noprinted manuals. Even in a printed manual, @inforef generates a referencedirecting the user to look in an Info �le.
The command takes either two or three arguments, in the following order:
1. The node name.
2. The cross reference name (optional).
3. The Info �le name.

78 Texinfo 2.23
Separate the arguments with commas, as with @xref. Also, you must ter-minate the reference with a comma or period after the `}', as you do with@xref.
The template is:
@inforef{node-name, cross-reference-name, info-�le-name},Thus,
@inforef{Expert, Advanced Info commands, info},for more information.
produces
*Note Advanced Info commands: (info)Expert,for more information.
and
See Info �le `info', node `Expert', for more information.Similarly,
@inforef{Expert, , info}, for more information.
produces
*Note (info)Expert::, for more information.
and
See Info �le `info', node `Expert', for more information.
The converse of @inforef is @cite, which is used to refer to printedworks for which no Info form exists. See Section 9.1.8 [@cite], page 85.

Chapter 9: Marking Words and Phrases 79
9 Marking Words and Phrases
In Texinfo, you can mark words and phrases in a variety of ways. TheTexinfo formatters use this information to determine how to highlight thetext. You can specify, for example, whether a word or phrase is a de�ningoccurrence, a metasyntactic variable, or a symbol used in a program. Also,you can emphasize text.
9.1 Indicating De�nitions, Commands, etc.
Texinfo has commands for indicating just what kind of object a piece oftext refers to. For example, metasyntactic variables are marked by @var,and code by @code. Since the pieces of text are labelled by commands thattell what kind of object they are, it is easy to change the way the Texinfoformatters prepare such text. (Texinfo is an intentional formatting languagerather than a typesetting formatting language.)
For example, in a printed manual, code is usually illustrated in a type-writer font; @code tells TEX to typeset this text in this font. But it wouldbe easy to change the way TEX highlights code to use another font, and thischange would not e�ect how keystroke examples are highlighted. If straighttypesetting commands were used in the body of the �le and you wanted tomake a change, you would need to check every single occurrence to makesure that you were changing code and not something else that should not bechanged.
The highlighting commands can be used to generate useful informationfrom the �le, such as lists of functions or �le names. It is possible, forexample, to write a program in Emacs Lisp (or a keyboard macro) to insertan index entry after every paragraph that contains words or phrases markedby a speci�ed command. You could do this to construct an index of functionsif you had not already made the entries.
The commands serve a variety of purposes:
@code{sample-code}Indicate text that is a literal example of a piece of a program.
@kbd{keyboard-characters}Indicate keyboard input.
@key{key-name}Indicate the conventional name for a key on a keyboard.
@samp{text}Indicate text that is a literal example of a sequence of characters.
@var{metasyntactic-variable}Indicate a metasyntactic variable.

80 Texinfo 2.23
@url{uniform-resource-locator}Indicate a uniform resource locator for the World Wide Web.
@file{�le-name}Indicate the name of a �le.
@email{email-address}Indicate an electronic mail address.
@dfn{term}Indicate the introductory or de�ning use of a term.
@cite{reference}Indicate the name of a book.
9.1.1 @code{sample-code}
Use the @code command to indicate text that is a piece of a program andwhich consists of entire syntactic tokens. Enclose the text in braces.
Thus, you should use @code for an expression in a program, for the nameof a variable or function used in a program, or for a keyword. Also, youshould use @code for the name of a program, such as diff, that is a nameused in the machine. (You should write the name of a program in theordinary text font if you regard it as a new English word, such as `Emacs'or `Bison'.)
Use @code for environment variables such as TEXINPUTS, and other vari-ables.
Use @code for command names in command languages that resembleprogramming languages, such as Texinfo or the shell. For example, @codeand @samp are produced by writing `@code{@@code}' and `@code{@@samp}'in the Texinfo source, respectively.
Note, however, that you should not use @code for shell options such as`-c' when such options stand alone. (Use @samp.) Also, an entire shellcommand often looks better if written using @samp rather than @code. Inthis case, the rule is to choose the more pleasing format.
It is incorrect to alter the case of a word inside an @code command whenit appears at the beginning of a sentence. Most computer languages arecase sensitive. In C, for example, Printf is di�erent from the identi�erprintf, and most likely is a misspelling of it. Even in languages which arenot case sensitive, it is confusing to a human reader to see identi�ers spelledin di�erent ways. Pick one spelling and always use that. If you do not wantto start a sentence with a command written all in lower case, you shouldrearrange the sentence.
Do not use the @code command for a string of characters shorter than asyntactic token. If you are writing about `TEXINPU', which is just a part ofthe name for the TEXINPUTS environment variable, you should use @samp.

Chapter 9: Marking Words and Phrases 81
In particular, you should not use the @code command when writing aboutthe characters used in a token; do not, for example, use @code when you areexplaining what letters or printable symbols can be used in the names offunctions. (Use @samp.) Also, you should not use @code to mark text that isconsidered input to programs unless the input is written in a language thatis like a programming language. For example, you should not use @code forthe keystroke commands of GNU Emacs (use @kbd instead) although youmay use @code for the names of the Emacs Lisp functions that the keystrokecommands invoke.
In the printed manual, @code causes TEX to typeset the argument in atypewriter face. In the Info �le, it causes the Info formatting commands touse single quotation marks around the text.
For example,
Use @code{diff} to compare two files.
produces this in the printed manual:
Use diff to compare two �les.
and this in the Info �le:
Use `diff' to compare two files.
9.1.2 @kbd{keyboard-characters}
Use the @kbd command for characters of input to be typed by users. Forexample, to refer to the characters M-a, write
@kbd{M-a}
and to refer to the characters M-x shell, write
@kbd{M-x shell}
The @kbd command has the same e�ect as @code in Info, but may producea di�erent font in a printed manual.
You can embed another @-command inside the braces of an @kbd com-mand. Here, for example, is the way to describe a command that would bedescribed more verbosely as \press an `r' and then press the hRETi key":
@kbd{r @key{RET}}
This produces: r hRETi
You also use the @kbd command if you are spelling out the letters youtype; for example:
To give the @code{logout} command,type the characters @kbd{l o g o u t @key{RET}}.
This produces:
To give the logout command, type the characters l o g o u thRETi.

82 Texinfo 2.23
(Also, this example shows that you can add spaces for clarity. If youreally want to mention a space character as one of the characters of input,write @key{SPC} for it.)
9.1.3 @key{key-name}
Use the @key command for the conventional name for a key on a keyboard,as in:
@key{RET}
You can use the @key command within the argument of an @kbd commandwhen the sequence of characters to be typed includes one or more keys thatare described by name.
For example, to produce C-x hESCi you would type:
@kbd{C-x @key{ESC}}
Here is a list of the recommended names for keys:
SPC Space
RET Return
LFD Linefeed (however, since most keyboards nowadays donot have a Linefeed key, it might be better to call thischaracter C-j.
TAB Tab
BS Backspace
ESC Escape
DEL Delete
SHIFT Shift
CTRL Control
META Meta
There are subtleties to handling words like `meta' or `ctrl' that are namesof shift keys. When mentioning a character in which the shift key is used,such as Meta-a, use the @kbd command alone; do not use the @key com-mand; but when you are referring to the shift key in isolation, use the@key command. For example, write `@kbd{Meta-a}' to produce Meta-a and`@key{META}' to produce hMETAi.
9.1.4 @samp{text}
Use the @samp command to indicate text that is a literal example or`sample' of a sequence of characters in a �le, string, pattern, etc. Enclose

Chapter 9: Marking Words and Phrases 83
the text in braces. The argument appears within single quotation marksin both the Info �le and the printed manual; in addition, it is printed in a�xed-width font.
To match @samp{foo} at the end of the line,use the regexp @samp{foo$}.
produces
To match `foo' at the end of the line, use the regexp `foo$'.
Any time you are referring to single characters, you should use @sampunless @kbd is more appropriate. Use @samp for the names of command-line options. Also, you may use @samp for entire statements in C and forentire shell commands|in this case, @samp often looks better than @code.Basically, @samp is a catchall for whatever is not covered by @code, @kbd, or@key.
Only include punctuation marks within braces if they are part of thestring you are specifying. Write punctuation marks outside the braces ifthose punctuation marks are part of the English text that surrounds thestring. In the following sentence, for example, the commas and period areoutside of the braces:
In English, the vowels are @samp{a}, @samp{e},@samp{i}, @samp{o}, @samp{u}, and sometimes@samp{y}.
This produces:
In English, the vowels are `a', `e', `i', `o', `u', and sometimes `y'.
9.1.5 @var{metasyntactic-variable}
Use the @var command to indicate metasyntactic variables. A meta-syntactic variable is something that stands for another piece of text. Forexample, you should use a metasyntactic variable in the documentation of afunction to describe the arguments that are passed to that function.
Do not use @var for the names of particular variables in programminglanguages. These are speci�c names from a program, so @code is correctfor them. For example, the Lisp variable texinfo-tex-command is not ametasyntactic variable; it is properly formatted using @code.
The e�ect of @var in the Info �le is to change the case of the argumentto all upper case; in the printed manual, to italicize it.
For example,
To delete file @var{filename},type @code{rm @var{filename}}.
produces
To delete �le �lename, type rm �lename.
(Note that @var may appear inside @code, @samp, @file, etc.)

84 Texinfo 2.23
Write a metasyntactic variable all in lower case without spaces, and usehyphens to make it more readable. Thus, the Texinfo source for the illus-tration of how to begin a Texinfo manual looks like this:
\input texinfo@@setfilename @var{info-file-name}@@settitle @var{name-of-manual}
This produces:
\input texinfo@setfilename info-�le-name@settitle name-of-manual
In some documentation styles, metasyntactic variables are shown withangle brackets, for example:
: : :, type rm <filename>
However, that is not the style that Texinfo uses. (You can, of course, modifythe sources to TEX and the Info formatting commands to output the <: : :>format if you wish.)
9.1.6 @file{�le-name}
Use the @file command to indicate text that is the name of a �le, bu�er,or directory, or is the name of a node in Info. You can also use the commandfor �le name su�xes. Do not use @file for symbols in a programminglanguage; use @code.
Currently, @file is equivalent to @samp in its e�ects. For example,
The @file{.el} files are inthe @file{/usr/local/emacs/lisp} directory.
produces
The `.el' �les are in the `/usr/local/emacs/lisp' directory.
9.1.7 @dfn{term}
Use the @dfn command to identify the introductory or de�ning use ofa technical term. Use the command only in passages whose purpose is tointroduce a term which will be used again or which the reader ought toknow. Mere passing mention of a term for the �rst time does not deserve@dfn. The command generates italics in the printed manual, and doublequotation marks in the Info �le. For example:
Getting rid of a file is called @dfn{deleting} it.
produces
Getting rid of a �le is called deleting it.
As a general rule, a sentence containing the de�ning occurrence of aterm should be a de�nition of the term. The sentence does not need to say

Chapter 9: Marking Words and Phrases 85
explicitly that it is a de�nition, but it should contain the information of ade�nition|it should make the meaning clear.
9.1.8 @cite{reference}
Use the @cite command for the name of a book that lacks a companionInfo �le. The command produces italics in the printed manual, and quotationmarks in the Info �le.
(If a book is written in Texinfo, it is better to use a cross referencecommand since a reader can easily follow such a reference in Info. SeeSection 8.3 [@xref], page 71.)
9.1.9 @url{uniform-resource-locator}
Use the @url command to indicate a uniform resource locator on theWorld Wide Web. For example:
The official GNU ftp site is@url{ftp://ftp.gnu.ai.mit.edu/pub/gnu}.
In Info and TEX, this acts like @samp. When Texinfo is converted toHTML, this produces a link you can follow.
9.1.10 @email{email-address}
Use the @email command to indicate an electronic mail address. Forexample:
Send bug reports to [email protected].
In Info and TEX, this acts like @samp. When we have support for conver-sion of Texinfo to HTML, this will produce a link you can follow to bringup a mail composition window initialized with email-address.
9.2 Emphasizing Text
Usually, Texinfo changes the font to mark words in the text accordingto what category the words belong to; an example is the @code command.Most often, this is the best way to mark words. However, sometimes youwill want to emphasize text without indicating a category. Texinfo has twocommands to do this. Also, Texinfo has several commands that specify thefont in which TEX will typeset text. These commands have no a�ect on Infoand only one of them, the @r command, has any regular use.
9.2.1 @emph{text} and @strong{text}
The @emph and @strong commands are for emphasis; @strong is stronger.In printed output, @emph produces italics and @strong produces bold.

86 Texinfo 2.23
For example,
@quotation@strong{Caution:} @code{rm * .[^.]*} removes @emph{all}files in the directory.@end quotation
produces the following in printed output:
Caution: rm * .[^.]* removes all �les in the directory.
and the following in Info:
*Caution*: `rm * .[^.]*' removes *all*files in the directory.
The @strong command is seldom used except to mark what is, in e�ect, atypographical element, such as the word `Caution' in the preceding example.
In the Info �le, both @emph and @strong put asterisks around the text.
Caution: Do not use @emph or @strong with the word `Note'; Infowill mistake the combination for a cross reference. Use a phrasesuch as Please note or Caution instead.
9.2.2 @sc{text}: The Small Caps Font
Use the `@sc' command to set text in the printed output in a small
caps font and set text in the Info �le in upper case letters.
Write the text between braces in lower case, like this:
The @sc{acm} and @sc{ieee} are technical societies.
This produces:
The acm and ieee are technical societies.
TEX typesets the small caps font in a manner that prevents the lettersfrom `jumping out at you on the page'. This makes small caps text easierto read than text in all upper case. The Info formatting commands set allsmall caps text in upper case.
If the text between the braces of an @sc command is upper case, TEXtypesets in FULL-SIZE CAPITALS. Use full-size capitals sparingly.
You may also use the small caps font for a jargon word such as ato (anasa word meaning `abort to orbit').
There are subtleties to using the small caps font with a jargon word suchas cdr, a word used in Lisp programming. In this case, you should use thesmall caps font when the word refers to the second and subsequent elementsof a list (the cdr of the list), but you should use `@code' when the wordrefers to the Lisp function of the same spelling.

Chapter 9: Marking Words and Phrases 87
9.2.3 Fonts for Printing, Not Info
Texinfo provides four font commands that specify font changes in theprinted manual but have no e�ect in the Info �le. @i requests italic font(in some versions of TEX, a slanted font is used), @b requests bold face,@t requests the fixed-width, typewriter-style font used by @code, and @rrequests a roman font, which is the usual font in which text is printed. Allfour commands apply to an argument that follows, surrounded by braces.
Only the @r command has much use: in example programs, you can usethe @r command to convert code comments from the �xed-width font to aroman font. This looks better in printed output.
For example,
@lisp(+ 2 2) ; @r{Add two plus two.}@end lisp
produces
(+ 2 2) ; Add two plus two.
If possible, you should avoid using the other three font commands. If youneed to use one, it probably indicates a gap in the Texinfo language.
9.2.4 Customized Highlighting
You can use regular TEX commands inside of @iftex : : : @end iftex tocreate your own customized highlighting commands for Texinfo. The easiestway to do this is to equate your customized commands with pre-existingcommands, such as those for italics. Such new commands work only withTEX.
You can use the @definfoenclose command inside of @ifinfo : : : @endifinfo to de�ne commands for Info with the same names as new commandsfor TEX. @definfoenclose creates new commands for Info that mark textby enclosing it in strings that precede and follow the text.1
Here is how to create a new @-command called @phoo that causes TEXto typeset its argument in italics and causes Info to display the argumentbetween `//' and `\\'.
1 Currently, @definfoenclose works only with texinfo-format-bufferand texinfo-format-region, not with makeinfo.

88 Texinfo 2.23
For TEX, write the following to equate the @phoo command with theexisting @i italics command:
@iftex@global@let@phoo=@i@end iftex
This de�nes @phoo as a command that causes TEX to typeset the argumentto @phoo in italics. @global@let tells TEX to equate the next argumentwith the argument that follows the equals sign.
For Info, write the following to tell the Info formatters to enclose theargument between `//' and `\\':
@ifinfo@definfoenclose phoo, //, \\@end ifinfo
Write the @definfoenclose command on a line and follow it with threearguments separated by commas (commas are used as separators in an @nodeline in the same way).
� The �rst argument to @definfoenclose is the @-command name with-out the `@';
� the second argument is the Info start delimiter string; and,
� the third argument is the Info end delimiter string.
The latter two arguments enclose the highlighted text in the Info �le. Adelimiter string may contain spaces. Neither the start nor end delimiteris required. However, if you do not provide a start delimiter, you mustfollow the command name with two commas in a row; otherwise, the Infoformatting commands will misinterpret the end delimiter string as a startdelimiter string.
After you have de�ned @phoo both for TEX and for Info, you can thenwrite @phoo{bar} to see `//bar\\' in Info and see bar in italics in printedoutput.
Note that each de�nition applies to its own formatter: one for TEX, theother for Info.
Here is another example:
@ifinfo@definfoenclose headword, , :@end ifinfo@iftex@global@let@headword=@b@end iftex
This de�nes @headword as an Info formatting command that inserts nothingbefore and a colon after the argument and as a TEX formatting commandto typeset its argument in bold.

Chapter 10: Quotations and Examples 89
10 Quotations and Examples
Quotations and examples are blocks of text consisting of one or morewhole paragraphs that are set o� from the bulk of the text and treateddi�erently. They are usually indented.
In Texinfo, you always begin a quotation or example by writing an @-command at the beginning of a line by itself, and end it by writing an @endcommand that is also at the beginning of a line by itself. For instance, youbegin an example by writing @example by itself at the beginning of a lineand end the example by writing @end example on a line by itself, at thebeginning of that line.
10.1 The Block Enclosing Commands
Here are commands for quotations and examples:
@quotationIndicate text that is quoted. The text is �lled, indented, andprinted in a roman font by default.
@example Illustrate code, commands, and the like. The text is printed ina �xed-width font, and indented but not �lled.
@lisp Illustrate Lisp code. The text is printed in a �xed-width font,and indented but not �lled.
@smallexampleIllustrate code, commands, and the like. Similar to @example,except that in TEX this command typesets text in a smaller fontfor the smaller @smallbook format than for the 8.5 by 11 inchformat.
@smalllispIllustrate Lisp code. Similar to @lisp, except that in TEXthis command typesets text in a smaller font for the smaller@smallbook format than for the 8.5 by 11 inch format.
@display Display illustrative text. The text is indented but not �lled, andno font is speci�ed (so, by default, the font is roman).
@format Print illustrative text. The text is not indented and not �lledand no font is speci�ed (so, by default, the font is roman).
The @exdent command is used within the above constructs to undo theindentation of a line.
The @flushleft and @flushright commands are used to line up the leftor right margins of un�lled text.

90 Texinfo 2.23
The @noindent command may be used after one of the above constructsto prevent the following text from being indented as a new paragraph.
You can use the @cartouche command within one of the above constructsto highlight the example or quotation by drawing a box with rounded cornersaround it. (The @cartouche command a�ects only the printed manual; ithas no e�ect in the Info �le; see Section 10.11 [Drawing Cartouches AroundExamples], page 95.)
10.2 @quotation
The text of a quotation is processed normally except that:
� the margins are closer to the center of the page, so the whole of thequotation is indented;
� the �rst lines of paragraphs are indented no more than other lines;
� in the printed output, interparagraph spacing is reduced.
This is an example of text written between an @quotation com-mand and an @end quotation command. An @quotation com-mand is most often used to indicate text that is excerpted fromanother (real or hypothetical) printed work.
Write an @quotation command as text on a line by itself. This linewill disappear from the output. Mark the end of the quotation with a linebeginning with and containing only @end quotation. The @end quotationline will likewise disappear from the output. Thus, the following,
@quotationThis isa foo.@end quotation
produces
This is a foo.
10.3 @example
The @example command is used to indicate an example that is not partof the running text, such as computer input or output.
This is an example of text written between an@example commandand an @end example command.The text is indented but not filled.

Chapter 10: Quotations and Examples 91
In the printed manual, the text is typeset in afixed-width font, and extra spaces and blank lines aresignificant. In the Info file, an analogous result isobtained by indenting each line with five spaces.
Write an @example command at the beginning of a line by itself. Thisline will disappear from the output. Mark the end of the example with an@end example command, also written at the beginning of a line by itself.The @end example will disappear from the output.
For example,
@examplemv foo bar@end example
produces
mv foo bar
Since the lines containing @example and @end example will disappear,you should put a blank line before the @example and another blank lineafter the @end example. (Remember that blank lines between the beginning@example and the ending @end example will appear in the output.)
Caution: Do not use tabs in the lines of an example (or anywhereelse in Texinfo, for that matter)! TEX treats tabs as single spaces,and that is not what they look like. This is a problem with TEX.(If necessary, in Emacs, you can use M-x untabify to convert tabsin a region to multiple spaces.)
Examples are often, logically speaking, \in the middle" of a paragraph,and the text continues after an example should not be indented. The@noindent command prevents a piece of text from being indented as if itwere a new paragraph.
(The @code command is used for examples of code that are embeddedwithin sentences, not set o� from preceding and following text. See Sec-tion 9.1.1 [@code], page 80.)
10.4 @noindent
An example or other inclusion can break a paragraph into segments.Ordinarily, the formatters indent text that follows an example as a newparagraph. However, you can prevent this by writing @noindent at thebeginning of a line by itself preceding the continuation text.

92 Texinfo 2.23
For example:
@exampleThis is an example@end example
@noindentThis line is not indented. As you can see, thebeginning of the line is fully flush left with the linethat follows after it. (This whole example is between@code{@@display} and @code{@@end display}.)
produces
This is an example
This line is not indented. As you can see, thebeginning of the line is fully ush left with the linethat follows after it. (This whole example is between@display and @end display.)
To adjust the number of blank lines properly in the Info �le output,remember that the line containing @noindent does not generate a blankline, and neither does the @end example line.
In the Texinfo source �le for this manual, each line that says `produces'is preceded by a line containing @noindent.
Do not put braces after an @noindent command; they are not necessary,since @noindent is a command used outside of paragraphs (see Appendix I[Command Syntax], page 229).
10.5 @lisp
The @lisp command is used for Lisp code. It is synonymous with the@example command.
This is an example of text written between an@lisp command and an @end lisp command.
Use @lisp instead of @example so as to preserve information regardingthe nature of the example. This is useful, for example, if you write a functionthat evaluates only and all the Lisp code in a Texinfo �le. Then you can usethe Texinfo �le as a Lisp library.1
Mark the end of @lisp with @end lisp on a line by itself.
1 It would be straightforward to extend Texinfo to work in a similar fashionfor C, fortran, or other languages.
Chapter 10: Quotations and Examples 93
10.6 @smallexample and @smalllisp
In addition to the regular @example and @lisp commands, Texinfo hastwo other \example-style" commands. These are the @smallexample and@smalllisp commands. Both these commands are designed for use withthe @smallbook command that causes TEX to produce a printed manual ina 7 by 9.25 inch format rather than the regular 8.5 by 11 inch format.
In TEX, the @smallexample and @smalllisp commands typeset text ina smaller font for the smaller @smallbook format than for the 8.5 by 11 inchformat. Consequently, many examples containing long lines �t in a narrower,@smallbook page without needing to be shortened. Both commands typesetin the normal font size when you format for the 8.5 by 11 inch size; indeed, inthis situation, the @smallexample and @smalllisp commands are de�nedto be the @example and @lisp commands.
In Info, the @smallexample and @smalllisp commands are equivalentto the @example and @lisp commands, and work exactly the same.
Mark the end of @smallexample or @smalllisp with @end smallexampleor @end smalllisp, respectively.
Here is an example written in the small font used by the @smallexampleand @smalllisp commands:
This is an example of text written between @smallexample and
@end smallexample. In Info and in an 8.5 by 11 inch manual,
this text appears in its normal size; but in a 7 by 9.25 inch manual,
this text appears in a smaller font.
The @smallexample and @smalllisp commands make it easier to preparesmaller format manuals without forcing you to edit examples by hand to �tthem onto narrower pages.
As a general rule, a printed document looks better if you write all theexamples in a chapter consistently in @example or in @smallexample. Onlyoccasionally should you mix the two formats.
See Section 20.10 [Printing \Small" Books], page 156, for more informa-tion about the @smallbook command.
10.7 @display
The @display command begins a kind of example. It is like the @examplecommand except that, in a printed manual, @display does not select the�xed-width font. In fact, it does not specify the font at all, so that the textappears in the same font it would have appeared in without the @displaycommand.
This is an example of text written between an @display commandand an @end display command. The @display commandindents the text, but does not �ll it.
94 Texinfo 2.23
10.8 @format
The @format command is similar to @example except that, in the printedmanual, @format does not select the �xed-width font and does not narrowthe margins.
This is an example of text written between an @format commandand an @end format command. As you can seefrom this example,the @format command does not �ll the text.
10.9 @exdent: Undoing a Line's Indentation
The @exdent command removes any indentation a line might have. Thecommand is written at the beginning of a line and applies only to the textthat follows the command that is on the same line. Do not use braces aroundthe text. In a printed manual, the text on an @exdent line is printed in theroman font.
@exdent is usually used within examples. Thus,
@exampleThis line follows an @@example command.@exdent This line is exdented.This line follows the exdented line.The @@end example comes on the next line.@end group
produces
This line follows an @example command.This line is exdented.
This line follows the exdented line.The @end example comes on the next line.
In practice, the @exdent command is rarely used. Usually, you un-indenttext by ending the example and returning the page to its normal width.
10.10 @flushleft and @flushright
The @flushleft and @flushright commands line up the ends of lineson the left and right margins of a page, but do not �ll the text. The com-mands are written on lines of their own, without braces. The @flushleftand @flushright commands are ended by @end flushleft and @endflushright commands on lines of their own.

Chapter 10: Quotations and Examples 95
For example,
@flushleftThis text iswritten flushleft.@end flushleft
produces
This text iswritten ushleft.
Flushright produces the type of indentation often used in the return ad-dress of letters.For example,
@flushrightHere is an example of text writtenflushright. The @code{@flushright} commandright justifies every line but leaves theleft end ragged.@end flushright
produces
Here is an example of text written ushright. The @flushright command
right justi�es every line but leaves theleft end ragged.
10.11 Drawing Cartouches Around Examples
In a printed manual, the @cartouche command draws a box with roundedcorners around its contents. You can use this command to further highlightan example or quotation. For instance, you could write a manual in whichone type of example is surrounded by a cartouche for emphasis.
The @cartouche command a�ects only the printed manual; it has noe�ect in the Info �le.
For example,
@example@cartouche% pwd/usr/local/lib/emacs/info@end cartouche@end example
surrounds the two-line example with a box with rounded corners, in theprinted manual.
In a printed manual, the example looks like this:

96 Texinfo 2.23
� �
% pwd/usr/local/lib/emacs/info

Chapter 11: Making Lists and Tables 97
11 Making Lists and Tables
Texinfo has several ways of making lists and two-column tables. Lists canbe bulleted or numbered, while two-column tables can highlight the itemsin the �rst column.
Texinfo automatically indents the text in lists or tables, and numbers anenumerated list. This last feature is useful if you modify the list, since youdo not need to renumber it yourself.
Numbered lists and tables begin with the appropriate @-command at thebeginning of a line, and end with the corresponding @end command on a lineby itself. The table and itemized-list commands also require that you writeformatting information on the same line as the beginning @-command.
Begin an enumerated list, for example, with an @enumerate commandand end the list with an @end enumerate command. Begin an itemizedlist with an @itemize command, followed on the same line by a formattingcommand such as @bullet, and end the list with an @end itemize command.
Precede each element of a list with an @item or @itemx command.
Here is an itemized list of the di�erent kinds of table and lists:
� Itemized lists with and without bullets.
� Enumerated lists, using numbers or letters.
� Two-column tables with highlighting.
Here is an enumerated list with the same items:
1. Itemized lists with and without bullets.
2. Enumerated lists, using numbers or letters.
3. Two-column tables with highlighting.
And here is a two-column table with the same items and their @-commands:
@itemize Itemized lists with and without bullets.
@enumerateEnumerated lists, using numbers or letters.
@table@ftable@vtable Two-column tables with indexing.
11.1 Making an Itemized List
The @itemize command produces sequences of indented paragraphs,with a bullet or other mark inside the left margin at the beginning of eachparagraph for which such a mark is desired.

98 Texinfo 2.23
Begin an itemized list by writing @itemize at the beginning of a line. Fol-low the command, on the same line, with a character or a Texinfo commandthat generates a mark. Usually, you will write @bullet after @itemize, butyou can use @minus, or any character or any special symbol that results ina single character in the Info �le. (When you write @bullet or @minus afteran @itemize command, you may omit the `{}'.)
Write the text of the indented paragraphs themselves after the @itemize,up to another line that says @end itemize.
Before each paragraph for which a mark in the margin is desired, writea line that says just @item. Do not write any other text on this line.
Usually, you should put a blank line before an @item. This puts a blankline in the Info �le. (TEX inserts the proper interline whitespace in eithercase.) Except when the entries are very brief, these blank lines make the listlook better.
Here is an example of the use of @itemize, followed by the output itproduces. Note that @bullet produces an `*' in Info and a round dot inTEX.
@itemize @bullet@itemSome text for foo.
@itemSome textfor bar.@end itemize
This produces:
� Some text for foo.
� Some text for bar.
Itemized lists may be embedded within other itemized lists. Here is a listmarked with dashes embedded in a list marked with bullets:

Chapter 11: Making Lists and Tables 99
@itemize @bullet@itemFirst item.
@itemize @minus@itemInner item.
@itemSecond inner item.@end itemize
@itemSecond outer item.@end itemize
This produces:
� First item.
� Inner item.
� Second inner item.
� Second outer item.
11.2 Making a Numbered or Lettered List
@enumerate is like @itemize except that the marks in the left margincontain successive integers or letters. (See Section 11.1 [@itemize], page 97.)
Write the @enumerate command at the beginning of a line. The commanddoes not require an argument, but accepts either a number or a letter as anoption. Without an argument, @enumerate starts the list with the number 1.With a numeric argument, such as 3, the command starts the list with thatnumber. With an upper or lower case letter, such as a or A, the commandstarts the list with that letter.
Write the text of the enumerated list in the same way you write anitemized list: put @item on a line of its own before the start of each paragraphthat you want enumerated. Do not write any other text on the line beginningwith @item.
You should put a blank line between entries in the list. This generallymakes it easier to read the Info �le.

100 Texinfo 2.23
Here is an example of @enumerate without an argument:
@enumerate@itemUnderlying causes.
@itemProximate causes.@end enumerate
This produces:
1. Underlying causes.
2. Proximate causes.
Here is an example with an argument of 3:
@enumerate 3@itemPredisposing causes.
@itemPrecipitating causes.
@itemPerpetuating causes.@end enumerate
This produces:
3. Predisposing causes.
4. Precipitating causes.
5. Perpetuating causes.
Here is a brief summary of the alternatives. The summary is constructedusing @enumerate with an argument of a.
a. @enumerate
Without an argument, produce a numbered list, starting with the num-ber 1.
b. @enumerate positive-integer
With a (positive) numeric argument, start a numbered list with thatnumber. You can use this to continue a list that you interrupted withother text.

Chapter 11: Making Lists and Tables 101
c. @enumerate upper-case-letter
With an upper case letter as argument, start a list in which each itemis marked by a letter, beginning with that upper case letter.
d. @enumerate lower-case-letter
With a lower case letter as argument, start a list in which each item ismarked by a letter, beginning with that lower case letter.
You can also nest enumerated lists, as in an outline.
11.3 Making a Two-column Table
@table is similar to @itemize, but the command allows you to specify aname or heading line for each item. (See Section 11.1 [@itemize], page 97.)The @table command is used to produce two-column tables, and is especiallyuseful for glossaries and explanatory exhibits.
Write the @table command at the beginning of a line and follow it onthe same line with an argument that is a Texinfo command such as @code,@samp, @var, or @kbd. Although these commands are usually followed byarguments in braces, in this case you use the command name without anargument because @item will supply the argument. This command will beapplied to the text that goes into the �rst column of each item and determineshow it will be highlighted. For example, @samp will cause the text in the�rst column to be highlighted with an @samp command.
You may also choose to use the @asis command as an argument to@table. @asis is a command that does nothing; if you use this command af-ter @table, TEX and the Info formatting commands output the �rst columnentries without added highlighting (`as is').
(The @table command may work with other commands besides thoselisted here. However, you can only use commands that normally take argu-ments in braces.)
Begin each table entry with an @item command at the beginning of aline. Write the �rst column text on the same line as the @item command.Write the second column text on the line following the @item line and onsubsequent lines. (You do not need to type anything for an empty secondcolumn entry.) You may write as many lines of supporting text as you wish,even several paragraphs. But only text on the same line as the @item willbe placed in the �rst column.
Normally, you should put a blank line before an @item line. This puts ablank like in the Info �le. Except when the entries are very brief, a blankline looks better.

102 Texinfo 2.23
The following table, for example, highlights the text in the �rst columnwith an @samp command:
@table @samp@item fooThis is the text for@samp{foo}.
@item barText for @samp{bar}.@end table
This produces:
`foo' This is the text for `foo'.
`bar' Text for `bar'.
If you want to list two or more named items with a single block of text,use the @itemx command. (See Section 11.3.2 [@itemx], page 102.)
11.3.1 @ftable and @vtable
The @ftable and @vtable commands are the same as the @table com-mand except that @ftable automatically enters each of the items in the �rstcolumn of the table into the index of functions and @vtable automaticallyenters each of the items in the �rst column of the table into the index ofvariables. This simpli�es the task of creating indices. Only the items onthe same line as the @item commands are indexed, and they are indexed inexactly the form that they appear on that line. See Chapter 12 [CreatingIndices], page 105, for more information about indices.
Begin a two-column table using @ftable or @vtable by writing the @-command at the beginning of a line, followed on the same line by an argumentthat is a Texinfo command such as @code, exactly as you would for an @tablecommand; and end the table with an @end ftable or @end vtable commandon a line by itself.
See the example for @table in the previous section.
11.3.2 @itemx
Use the @itemx command inside a table when you have two or more �rstcolumn entries for the same item, each of which should appear on a line ofits own. Use @itemx for all but the �rst entry. The @itemx command worksexactly like @item except that it does not generate extra vertical space abovethe �rst column text.

Chapter 11: Making Lists and Tables 103
For example,
@table @code@item upcase@itemx downcaseThese two functions accept a character or a string asargument, and return the corresponding upper case (lowercase) character or string.@end table
This produces:
upcasedowncase These two functions accept a character or a string as argument,
and return the corresponding upper case (lower case) characteror string.
(Note also that this example illustrates multi-line supporting text in a two-column table.)
11.4 Multi-column Tables
@multitable allows you to construct tables with any number of columns,with each column having any width you like.
You de�ne the column widths on the @multitable line itself, and writeeach row of the actual table following an @item command, with columnsseparated by an @tab command. Finally, @end multitable completes thetable. Details in the sections below.
11.4.1 Multitable Column Widths
You can de�ne the column widths for a multitable in two ways: as frac-tions of the line length; or with a prototype row. Mixing the two methodsis not supported. In either case, the widths are de�ned entirely on the sameline as the @multitable command.
1. To specify column widths as fractions of the line length, write@columnfractions and the decimal numbers (presumably less than1) after the @multitable command, as in:
@multitable @columnfractions .33 .33 .33
The fractions need not add up exactly to 1.0, as these do not. Thisallows you to produce tables that do not need the full line length.
2. To specify a prototype row, write the longest entry for each columnenclosed in braces after the @multitable command. For example:
@multitable {some text for column one} {for column two}

104 Texinfo 2.23
The �rst column will then have the width of the typeset `some text forcolumn one', and the second column the width of `for column two'.
The prototype entries need not appear in the table itself.
Although we used simple text in this example, the prototype entriescan contain Texinfo commands; markup commands such as @code areparticularly likely to be useful.
11.4.2 Multitable Rows
After the @multitable command de�ning the column widths (see theprevious section), you begin each row in the body of a multitable with @item,and separate the column entries with @tab. Line breaks are not specialwithin the table body, and you may break input lines in your source �le asnecessary.
Here is a complete example of a multi-column table (the text is from theGNU Emacs manual):
@multitable @columnfractions .15 .45 .4@item Key @tab Command @tab Description@item C-x 2@tab @code{split-window-vertically}@tab Split the selected window into two windows,with one above the other.@item C-x 3@tab @code{split-window-horizontally}@tab Split the selected window into two windowspositioned side by side.@item C-Mouse-2@tab@tab In the mode line or scroll bar of a window,split that window.@end multitable
produces:
Key Command DescriptionC-x 2 split-window-vertically Split the selected window
into two windows, with oneabove the other.
C-x 3 split-window-horizontally Split the selected windowinto two windows positionedside by side.
C-Mouse-2 In the mode line or scrollbar of a window, split thatwindow.

Chapter 12: Creating Indices 105
12 Creating Indices
Using Texinfo, you can generate indices without having to sort and collateentries manually. In an index, the entries are listed in alphabetical order,together with information on how to �nd the discussion of each entry. In aprinted manual, this information consists of page numbers. In an Info �le,this information is a menu entry leading to the �rst node referenced.
Texinfo provides several prede�ned kinds of index: an index for functions,an index for variables, an index for concepts, and so on. You can combineindices or use them for other than their canonical purpose. If you wish, youcan de�ne your own indices.
12.1 Making Index Entries
When you are making index entries, it is good practice to think of thedi�erent ways people may look for something. Di�erent people do not thinkof the same words when they look something up. A helpful index will haveitems indexed under all the di�erent words that people may use. For exam-ple, one reader may think it obvious that the two-letter names for indicesshould be listed under \Indices, two-letter names", since the word \Index" isthe general concept. But another reader may remember the speci�c conceptof two-letter names and search for the entry listed as \Two letter names forindices". A good index will have both entries and will help both readers.
Like typesetting, the construction of an index is a highly skilled, profes-sional art, the subtleties of which are not appreciated until you need to doit yourself.
See Section 4.1 [Printing Indices & Menus], page 45, for information aboutprinting an index at the end of a book or creating an index menu in an Info�le.
12.2 Prede�ned Indices
Texinfo provides six prede�ned indices:
� A concept index listing concepts that are discussed.
� A function index listing functions (such as entry points of libraries).
� A variables index listing variables (such as global variables of libraries).
� A keystroke index listing keyboard commands.
� A program index listing names of programs.
� A data type index listing data types (such as structures de�ned inheader �les).
Not every manual needs all of these, and most manuals use two or three ofthem. This manual has two indices: a concept index and an @-command

106 Texinfo 2.23
index (that is actually the function index but is called a command index inthe chapter heading). Two or more indices can be combined into one usingthe @synindex or @syncodeindex commands. See Section 12.4 [CombiningIndices], page 108.
12.3 De�ning the Entries of an Index
The data to make an index come from many individual indexing com-mands scattered throughout the Texinfo source �le. Each command says toadd one entry to a particular index; after formatting, the index will give thecurrent page number or node name as the reference.
An index entry consists of an indexing command at the beginning of aline followed, on the rest of the line, by the entry.
For example, this section begins with the following �ve entries for theconcept index:
@cindex Defining indexing entries@cindex Index entries@cindex Entries for an index@cindex Specifying index entries@cindex Creating index entries
Each prede�ned index has its own indexing command|@cindex for theconcept index, @findex for the function index, and so on.
Concept index entries consist of text. The best way to write an index isto choose entries that are terse yet clear. If you can do this, the index oftenlooks better if the entries are not capitalized, but written just as they wouldappear in the middle of a sentence. (Capitalize proper names and acronymsthat always call for upper case letters.) This is the case convention we usein most GNU manuals' indices.
If you don't see how to make an entry terse yet clear, make it longer andclear|not terse and confusing. If many of the entries are several words long,the index may look better if you use a di�erent convention: to capitalize the�rst word of each entry. But do not capitalize a case-sensitive name suchas a C or Lisp function name or a shell command; that would be a spellingerror.
Whichever case convention you use, please use it consistently!
Entries in indices other than the concept index are symbol names inprogramming languages, or program names; these names are usually case-sensitive, so use upper and lower case as required for them.
By default, entries for a concept index are printed in a small roman fontand entries for the other indices are printed in a small @code font. You maychange the way part of an entry is printed with the usual Texinfo commands,

Chapter 12: Creating Indices 107
such as @file for �le names and @emph for emphasis (see Chapter 9 [MarkingText], page 79).
The six indexing commands for prede�ned indices are:
@cindex conceptMake an entry in the concept index for concept.
@findex functionMake an entry in the function index for function.
@vindex variableMake an entry in the variable index for variable.
@kindex keystrokeMake an entry in the key index for keystroke.
@pindex programMake an entry in the program index for program.
@tindex data typeMake an entry in the data type index for data type.
Caution: Do not use a colon in an index entry. In Info, a colonseparates the menu entry name from the node name. An extracolon confuses Info. See Section 7.2 [The Parts of a Menu], page 66,for more information about the structure of a menu entry.
If you write several identical index entries in di�erent places in a Texinfo�le, the index in the printed manual will list all the pages to which thoseentries refer. However, the index in the Info �le will list only the node thatreferences the �rst of those index entries. Therefore, it is best to write indicesin which each entry refers to only one place in the Texinfo �le. Fortunately,this constraint is a feature rather than a loss since it means that the indexwill be easy to use. Otherwise, you could create an index that lists severalpages for one entry and your reader would not know to which page to turn.If you have two identical entries for one topic, change the topics slightly, orqualify them to indicate the di�erence.
You are not actually required to use the prede�ned indices for their canon-ical purposes. For example, suppose you wish to index some C preprocessormacros. You could put them in the function index along with actual func-tions, just by writing @findex commands for them; then, when you printthe \Function Index" as an unnumbered chapter, you could give it the title`Function and Macro Index' and all will be consistent for the reader. Or youcould put the macros in with the data types by writing @tindex commandsfor them, and give that index a suitable title so the reader will understand.(See Section 4.1 [Printing Indices & Menus], page 45.)

108 Texinfo 2.23
12.4 Combining Indices
Sometimes you will want to combine two disparate indices such as func-tions and concepts, perhaps because you have few enough of one of themthat a separate index for them would look silly.
You could put functions into the concept index by writing @cindex com-mands for them instead of @findex commands, and produce a consistentmanual by printing the concept index with the title `Function and ConceptIndex' and not printing the `Function Index' at all; but this is not a robustprocedure. It works only if your document is never included as part of an-other document that is designed to have a separate function index; if yourdocument were to be included with such a document, the functions fromyour document and those from the other would not end up together. Also,to make your function names appear in the right font in the concept index,you would need to enclose every one of them between the braces of @code.
12.4.1 @syncodeindex
When you want to combine functions and concepts into one index, youshould index the functions with @findex and index the concepts with@cindex, and use the @syncodeindex command to redirect the functionindex entries into the concept index.
The @syncodeindex command takes two arguments; they are the nameof the index to redirect, and the name of the index to redirect it to. Thetemplate looks like this:
@syncodeindex from to
For this purpose, the indices are given two-letter names:
`cp' concept index
`fn' function index
`vr' variable index
`ky' key index
`pg' program index
`tp' data type index
Write an @syncodeindex command before or shortly after the end-of-header line at the beginning of a Texinfo �le. For example, to merge afunction index with a concept index, write the following:
@syncodeindex fn cp
This will cause all entries designated for the function index to merge in withthe concept index instead.
To merge both a variables index and a function index into a conceptindex, write the following:

Chapter 12: Creating Indices 109
@syncodeindex vr cp@syncodeindex fn cp
The @syncodeindex command puts all the entries from the `from' index(the redirected index) into the @code font, overriding whatever default fontis used by the index to which the entries are now directed. This way, if youdirect function names from a function index into a concept index, all thefunction names are printed in the @code font as you would expect.
12.4.2 @synindex
The @synindex command is nearly the same as the @syncodeindex com-mand, except that it does not put the `from' index entries into the @codefont; rather it puts them in the roman font. Thus, you use @synindex whenyou merge a concept index into a function index.
See Section 4.1 [Printing Indices & Menus], page 45, for information aboutprinting an index at the end of a book or creating an index menu in an Info�le.
12.5 De�ning New Indices
In addition to the prede�ned indices, you may use the @defindex and@defcodeindex commands to de�ne new indices. These commands cre-ate new indexing @-commands with which you mark index entries. The@defindex command is used like this:
@defindex name
The name of an index should be a two letter word, such as `au'. Forexample:
@defindex au
This de�nes a new index, called the `au' index. At the same time, itcreates a new indexing command, @auindex, that you can use to make indexentries. Use the new indexing command just as you would use a prede�nedindexing command.
For example, here is a section heading followed by a concept index entryand two `au' index entries.
@section Cognitive Semantics@cindex kinesthetic image schemas@auindex Johnson, Mark@auindex Lakoff, George
(Evidently, `au' serves here as an abbreviation for \author".) Texinfo con-structs the new indexing command by concatenating the name of the indexwith `index'; thus, de�ning an `au' index leads to the automatic creation ofan @auindex command.

110 Texinfo 2.23
Use the @printindex command to print the index, as you do with theprede�ned indices. For example:
@node Author Index, Subject Index, , Top@unnumbered Author Index
@printindex au
The @defcodeindex is like the @defindex command, except that, in theprinted output, it prints entries in an @code font instead of a roman font.Thus, it parallels the @findex command rather than the @cindex command.
You should de�ne new indices within or right after the end-of-header lineof a Texinfo �le, before any @synindex or @syncodeindex commands (seeSection 3.2 [Header], page 31).

Chapter 13: Special Insertions 111
13 Special Insertions
Texinfo provides several commands for formatting dimensions, for insert-ing single characters that have special meaning in Texinfo, such as braces,and for inserting special graphic symbols that do not correspond to charac-ters, such as dots and bullets.
These are:
� Braces, `@' and periods.
� Format a dimension, such as `12 pt'.
� Dots and bullets.
� The TEX logo and the copyright symbol.
� A minus sign.
13.1 Inserting @ and Braces
`@' and curly braces are special characters in Texinfo. To insert thesecharacters so they appear in text, you must put an `@' in front of thesecharacters to prevent Texinfo from misinterpreting them.
Do not put braces after any of these commands; they are not necessary.
13.1.1 Inserting `@' with @@
@@ stands for a single `@' in either printed or Info output.
Do not put braces after an @@ command.
13.1.2 Inserting `{' and `}'with @{ and @}
@{ stands for a single `{' in either printed or Info output.
@} stands for a single `}' in either printed or Info output.
Do not put braces after either an @{ or an @} command.
13.2 Inserting Space
The following sections describe commands that control spacing of variouskinds within and after sentences.
13.2.1 Not Ending a Sentence
Depending on whether a period or exclamation point or question mark isinside or at the end of a sentence, less or more space is inserted after a periodin a typeset manual. Since it is not always possible for Texinfo to determinewhen a period ends a sentence and when it is used in an abbreviation, special

112 Texinfo 2.23
commands are needed in some circumstances. (Usually, Texinfo can guesshow to handle periods, so you do not need to use the special commands;you just enter a period as you would if you were using a typewriter, whichmeans you put two spaces after the period, question mark, or exclamationmark that ends a sentence.)
Use the @: command after a period, question mark, exclamation mark,or colon that should not be followed by extra space. For example, use @:after periods that end abbreviations which are not at the ends of sentences.@: has no e�ect on the Info �le output.
For example,
The s.o.p.@: has three parts : : :
The s.o.p. has three parts : : :
produces the following. If you look carefully at this printed output, you willsee a little more whitespace after `s.o.p.' in the second line.
The s.o.p. has three parts : : :
The s.o.p. has three parts : : :
@: has no e�ect on the Info output. (`s.o.p.' is an abbreviation for \Stan-dard Operating Procedure".)
Do not put braces after @:.
13.2.2 Ending a Sentence
Use @. instead of a period, @! instead of an exclamation point, and @?instead of a question mark at the end of a sentence that ends with a singlecapital letter. Otherwise, TEX will think the letter is an abbreviation andwill not insert the correct end-of-sentence spacing. Here is an example:
Give it to M.I.B. and to M.E.W@. Also, give it to [email protected] it to M.I.B. and to M.E.W. Also, give it to R.J.C.
produces the following. If you look carefully at this printed output, you willsee a little more whitespace after the `W' in the �rst line.
Give it to M.I.B. and to M.E.W. Also, give it to R.J.C.Give it to M.I.B. and to M.E.W. Also, give it to R.J.C.
In the Info �le output, @. is equivalent to a simple `.'; likewise for @! and@?.
The meanings of @: and @. in Texinfo are designed to work well withthe Emacs sentence motion commands (see section \Sentences" in GNUEmacs). This made it necessary for them to be incompatible with someother formatting systems that use @-commands.
Do not put braces after any of these commands.

Chapter 13: Special Insertions 113
13.2.3 Multiple Spaces
Ordinarily, TEX collapses multiple whitespace characters (space, tab, andnewline) into a single space. (Info output, on the other hand, preserveswhitespace as you type it, except for changing a newline into a space; thisis why it is important to put two spaces at the end of sentences in Texinfodocuments.)
Occasionally, you may want to actually insert several consecutive spaces,either for purposes of example (what your program does with multiple spacesas input), or merely for purposes of appearance in headings or lists. Texinfosupports three commands: @ , @TAB, and @NL, all of which insert a singlespace into the output. (Here, TAB and NL represent the tab character andend-of-line, i.e., when `@' is the last character on a line.)
For example,
Spacey@ @ @ @example.
produces
Spacey example.
Other possible uses of @ have been subsumed by @multitable (see Sec-tion 11.4 [Multi-column Tables], page 103).
Do not follow any of these commands with braces.
13.2.4 @dmn{dimension}: Format a Dimension
At times, you may want to write `12 pt' or `8.5 in' with little or no spacebetween the number and the abbreviation for the dimension. You can usethe @dmn command to do this. On seeing the command, TEX inserts justenough space for proper typesetting; the Info formatting commands insertno space at all, since the Info �le does not require it.
To use the @dmn command, write the number and then follow it immedi-ately, with no intervening space, by @dmn, and then by the dimension withinbraces.For example,
A4 paper is 8.27@dmn{in} wide.
produces
A4 paper is 8.27 in wide.
Not everyone uses this style. Instead of writing `8.27@dmn{in}' in theTexinfo �le, you may write `8.27 in.' or `8.27 inches'. (In these cases, theformatters may insert a line break between the number and the dimension.Also, if you write a period after an abbreviation within a sentence, you shouldwrite `@:' after the period to prevent TEX from inserting extra whitespace.See Section 13.2 [Inserting Space], page 111.

114 Texinfo 2.23
13.3 Inserting Accents
Here is a table with the commands Texinfo provides for inserting oat-ing accents. The commands with non-alphabetic names do not take bracesaround their argument (which is taken to be the next character). (Excep-tion: @, does take braces around its argument.) This is so as to make thesource as convenient to type and read as possible, since accented charactersare very common in some languages.
Command Output What@"o �o umlaut accent@'o �o acute accent@,{c} �c cedilla accent@=o �o macron/overbar accent@^o o circum ex accent@`o �o grave accent@~o ~o tilde accent@dotaccent{o} _o overdot accent@H{o} }o long Hungarian umlaut@ringaccent{o} �o ring accent@tieaccent{oo} �oo tie-after accent@u{o} �o breve accent@ubaraccent{o} o
�underbar accent
@udotaccent{o} o. underdot accent@v{o} �o hacek or check accent
This table lists the Texinfo commands for inserting other characters com-monly used in languages other than English.
@exclamdown{} < upside-down !@questiondown{} > upside-down ?
@aa{},@AA{} �a,�A A,a with circle@ae{},@AE{} �,� ae,AE ligatures@dotless{i} � dotless i@dotless{j} � dotless j@l{},@L{} l, L suppressed-L,l@o{},@O{} �,� O,o with slash@oe{},@OE{} �,� OE,oe ligatures@ss{} � es-zet or sharp S
13.4 Inserting Ellipsis, Dots, and Bullets
An ellipsis (a line of dots) is not typeset as a string of periods, so a specialcommand is used for ellipsis in Texinfo. The @bullet command is special,too. Each of these commands is followed by a pair of braces, `{}', without

Chapter 13: Special Insertions 115
any whitespace between the name of the command and the braces. (Youneed to use braces with these commands because you can use them nextto other text; without the braces, the formatters would be confused. SeeAppendix I [@-Command Syntax], page 229, for further information.)
13.4.1 @dots{}
Use the @dots{} command to generate an ellipsis, which is three dots in arow, appropriately spaced, like this: `: : :'. Do not simply write three periodsin the input �le; that would work for the Info �le output, but would producethe wrong amount of space between the periods in the printed manual.
Similarly, the @enddots{} command generates an end-of-sentence ellipsis(four dots) : : : :
Here is an ellipsis: : : : Here are three periods in a row: ...
In printed output, the three periods in a row are closer together than thedots in the ellipsis.
13.4.2 @bullet{}
Use the @bullet{} command to generate a large round dot, or the closestpossible thing to one. In Info, an asterisk is used.
Here is a bullet: �
When you use @bullet in @itemize, you do not need to type the braces,because @itemize supplies them. (See Section 11.1 [@itemize], page 97.)
13.5 Inserting TEX and the Copyright Symbol
The logo `TEX' is typeset in a special fashion and it needs an @-command.The copyright symbol, ` c ', is also special. Each of these commands isfollowed by a pair of braces, `{}', without any whitespace between the nameof the command and the braces.
13.5.1 @TeX{}
Use the @TeX{} command to generate `TEX'. In a printed manual, thisis a special logo that is di�erent from three ordinary letters. In Info, it justlooks like `TeX'. The @TeX{} command is unique among Texinfo commandsin that the T and the X are in upper case.
13.5.2 @copyright{}
Use the @copyright{} command to generate ` c '. In a printed manual,this is a `c' inside a circle, and in Info, this is `(C)'.

116 Texinfo 2.23
13.6 @pounds{}
Use the @pounds{} command to generate `$'. In a printed manual, thisis the symbol for the currency pounds sterling. In Info, it is a `#'. Othercurrency symbols are unfortunately not available.
13.7 @minus{}: Inserting a Minus Sign
Use the @minus{} command to generate a minus sign. In a �xed-widthfont, this is a single hyphen, but in a proportional font, the symbol is thecustomary length for a minus sign|a little longer than a hyphen.
You can compare the two forms:
`�' is a minus sign generated with `@minus{}',
`-' is a hyphen generated with the character `-'.
In the �xed-width font used by Info, @minus{} is the same as a hyphen.
You should not use @minus{} inside @code or @example because the widthdistinction is not made in the �xed-width font they use.
When you use @minus to specify the mark beginning each entry in anitemized list, you do not need to type the braces (see Section 11.1 [@itemize],page 97.)
13.8 @math: Inserting Mathematical Expressions
You can write a short mathematical expression with the @math command.Write the mathematical expression between braces, like this:
@math{(a + b)(a + b) = a^2 + 2ab + b^2}This produces the following in TEX:
(a + b)(a + b) = a^2 + 2ab + b^2
and the following in Info:
(a + b)(a + b) = a^2 + 2ab + b^2
The @math command has no e�ect on the Info output. Currently, it haslimited e�ect on typeset output. However, this may change since TEX itselfis designed for mathematical typesetting and does a splendid job.
Certainly, for complex mathematical expressions, you could use TEX di-rectly. See Section 18.1 [Using Ordinary TEX Commands], page 141. Whenyou use TEX directly, remember to write the mathematical expression be-tween one or two `$' (dollar-signs) as appropriate.

Chapter 14: Glyphs for Examples 117
14 Glyphs for Examples
In Texinfo, code is often illustrated in examples that are delimited by@example and @end example, or by @lisp and @end lisp. In such examples,you can indicate the results of evaluation or an expansion using `)' or ` 7!'.Likewise, there are commands to insert glyphs to indicate printed output,error messages, equivalence of expressions, and the location of point.
The glyph-insertion commands do not need to be used within an example,but most often they are. Every glyph-insertion command is followed by apair of left- and right-hand braces.
) @result{} points to the result of an expression.
7! @expansion{} shows the results of a macro expansion.
a @print{} indicates printed output.
error @error{} indicates that the following text is an error message.
� @equiv{} indicates the exact equivalence of two forms.
? @point{} shows the location of point.
14.1 ): Indicating Evaluation
Use the @result{} command to indicate the result of evaluating an ex-pression.
The @result{} command is displayed as `=>' in Info and as `)' in theprinted output.
Thus, the following,
(cdr '(1 2 3))) (2 3)
may be read as \(cdr '(1 2 3)) evaluates to (2 3)".
14.2 7!: Indicating an Expansion
When an expression is a macro call, it expands into a new expression. Youcan indicate the result of the expansion with the @expansion{} command.
The @expansion{} command is displayed as `==>' in Info and as ` 7!' inthe printed output.
For example, the following
@lisp(third '(a b c))
@expansion{} (car (cdr (cdr '(a b c))))@result{} c
@end lisp

118 Texinfo 2.23
produces
(third '(a b c))7! (car (cdr (cdr '(a b c))))) c
which may be read as:
(third '(a b c)) expands to (car (cdr (cdr '(a b c)))); the re-sult of evaluating the expression is c.
Often, as in this case, an example looks better if the @expansion{} and@result{} commands are indented �ve spaces.
14.3 a : Indicating Printed Output
Sometimes an expression will print output during its execution. You canindicate the printed output with the @print{} command.
The @print{} command is displayed as `-|' in Info and as ` a ' in theprinted output.
In the following example, the printed text is indicated with ` a ', and thevalue of the expression follows on the last line.
(progn (print 'foo) (print 'bar))
a foo
a bar) bar
In a Texinfo source �le, this example is written as follows:
@lisp(progn (print 'foo) (print 'bar))
@print{} foo@print{} bar@result{} bar
@end lisp
14.4 error : Indicating an Error Message
A piece of code may cause an error when you evaluate it. You can desig-nate the error message with the @error{} command.
The @error{} command is displayed as `error-->' in Info and as` error ' in the printed output.
Thus,
@lisp(+ 23 'x)@error{} Wrong type argument: integer-or-marker-p, x@end lisp

Chapter 14: Glyphs for Examples 119
produces
(+ 23 'x)error Wrong type argument: integer-or-marker-p, x
This indicates that the following error message is printed when you evaluatethe expression:
Wrong type argument: integer-or-marker-p, x
Note that ` error ' itself is not part of the error message.
14.5 � : Indicating Equivalence
Sometimes two expressions produce identical results. You can indicatethe exact equivalence of two forms with the @equiv{} command.
The @equiv{} command is displayed as `==' in Info and as `� ' in theprinted output.
Thus,
@lisp(make-sparse-keymap) @equiv{} (list 'keymap)@end lisp
produces
(make-sparse-keymap) � (list 'keymap)
This indicates that evaluating (make-sparse-keymap) produces identicalresults to evaluating (list 'keymap).
14.6 Indicating Point in a Bu�er
Sometimes you need to show an example of text in an Emacs bu�er. Insuch examples, the convention is to include the entire contents of the bu�erin question between two lines of dashes containing the bu�er name.
You can use the `@point{}' command to show the location of point inthe text in the bu�er. (The symbol for point, of course, is not part of thetext in the bu�er; it indicates the place between two characters where pointis located.)
The @point{} command is displayed as `-!-' in Info and as `?' in theprinted output.
The following example shows the contents of bu�er `foo' before and afterevaluating a Lisp command to insert the word changed.
---------- Buffer: foo ----------This is the ?contents of foo.---------- Buffer: foo ----------

120 Texinfo 2.23
(insert "changed ")) nil
---------- Buffer: foo ----------This is the changed ?contents of foo.---------- Buffer: foo ----------
In a Texinfo source �le, the example is written like this:
@example---------- Buffer: foo ----------This is the @point{}contents of foo.---------- Buffer: foo ----------
(insert "changed ")@result{} nil
---------- Buffer: foo ----------This is the changed @point{}contents of foo.---------- Buffer: foo ----------@end example

Chapter 15: Making and Preventing Breaks 121
15 Making and Preventing Breaks
Usually, a Texinfo �le is processed both by TEX and by one of the Infoformatting commands. Line, paragraph, or page breaks sometimes occur inthe `wrong' place in one or other form of output. You must ensure that textlooks right both in the printed manual and in the Info �le.
For example, in a printed manual, page breaks may occur awkwardly inthe middle of an example; to prevent this, you can hold text together usinga grouping command that keeps the text from being split across two pages.Conversely, you may want to force a page break where none would occurnormally. Fortunately, problems like these do not often arise. When theydo, use the break, break prevention, or pagination commands.
The break commands create or allow line and paragraph breaks:
@* Force a line break.
@sp n Skip n blank lines.
@- Insert a discretionary hyphen.
@hyphenation{hy-phen-a-ted words}De�ne hyphen points in hy-phen-a-ted words.
The line-break-prevention command holds text together all on one line:
@w{text} Prevent text from being split and hyphenated across two lines.
The pagination commands apply only to printed output, since Info �lesdo not have pages.
@page Start a new page in the printed manual.
@group Hold text together that must appear on one printed page.
@need milsStart a new printed page if not enough space on this one.
15.1 @*: Generate Line Breaks
The @* command forces a line break in both the printed manual and inInfo.
For example,
This line @* is broken @*in two places.
produces
This lineis brokenin two places.

122 Texinfo 2.23
(Note that the space after the �rst @* command is faithfully carried downto the next line.)
The @* command is often used in a �le's copyright page:
This is edition 2.0 of the Texinfo documentation,@*and is for : : :
In this case, the @* command keeps TEX from stretching the line across thewhole page in an ugly manner.
Please note: Do not write braces after an @* command; they arenot needed.
Do not write an @refill command at the end of a paragraph con-taining an @* command; it will cause the paragraph to be re�lledafter the line break occurs, negating the e�ect of the line break.
15.2 @- and @hyphenation: Helping TEX hyphenate
Although TEX's hyphenation algorithm is generally pretty good, it doesmiss useful hyphenation points from time to time. (Or, far more rarely, insertan incorrect hyphenation.) So, for documents with an unusual vocabularyor when �ne-tuning for a printed edition, you may wish to help TEX out.Texinfo supports two commands for this:
@- Insert a discretionary hyphen, i.e., a place where TEX can (butdoes not have to) hyphenate. This is especially useful when younotice an overfull hbox is due to TEX missing a hyphenation (seeSection 20.9 [Overfull hboxes], page 155). TEX will not insertany hyphenation points in a word containing @-.
@hyphenation{hy-phen-a-ted words}Tell TEX how to hyphenate hy-phen-a-ted words. As shown, youput a `-' at each hyphenation point. For example:
@hyphenation{man-u-script man-u-scripts}
TEX only uses the speci�ed hyphenation points when the wordsmatch exactly, so give all necessary variants.
Info output is not hyphenated, so these commands have no e�ect there.
15.3 @w{text}: Prevent Line Breaks
@w{text} outputs text and prohibits line breaks within text.
You can use the @w command to prevent TEX from automatically hy-phenating a long name or phrase that accidentally falls near the end of aline.
You can copy GNU software from @w{@file{prep.ai.mit.edu}}.
Chapter 15: Making and Preventing Breaks 123
produces
You can copy GNU software from `prep.ai.mit.edu'.
Caution: Do not write an @refill command at the end of a para-graph containing an @w command; it will cause the paragraph tobe re�lled and may thereby negate the e�ect of the @w command.
15.4 @sp n: Insert Blank Lines
A line beginning with and containing only @sp n generates n blank linesof space in both the printed manual and the Info �le. @sp also forces aparagraph break. For example,
@sp 2
generates two blank lines.
The @sp command is most often used in the title page.
15.5 @page: Start a New Page
A line containing only @page starts a new page in a printed manual. Thecommand has no e�ect on Info �les since they are not paginated. An @pagecommand is often used in the @titlepage section of a Texinfo �le to startthe copyright page.
15.6 @group: Prevent Page Breaks
The @group command (on a line by itself) is used inside an @example orsimilar construct to begin an unsplittable vertical group, which will appearentirely on one page in the printed output. The group is terminated by aline containing only @end group. These two lines produce no output of theirown, and in the Info �le output they have no e�ect at all.
Although @group would make sense conceptually in a wide variety of con-texts, its current implementation works reliably only within @example andvariants, and within @display, @format, @flushleft and @flushright.See Chapter 10 [Quotations and Examples], page 89. (What all these com-mands have in common is that each line of input produces a line of output.)In other contexts, @group can cause anomalous vertical spacing.
This formatting requirement means that you should write:
@example@group: : :
@end group@end example

124 Texinfo 2.23
with the @group and @end group commands inside the @example and @endexample commands.
The @group command is most often used to hold an example togetheron one page. In this Texinfo manual, more than 100 examples contain textthat is enclosed between @group and @end group.
If you forget to end a group, you may get strange and unfathomable errormessages when you run TEX. This is because TEX keeps trying to put therest of the Texinfo �le onto the one page and does not start to generate errormessages until it has processed considerable text. It is a good rule of thumbto look for a missing @end group if you get incomprehensible error messagesin TEX.
15.7 @need mils: Prevent Page Breaks
A line containing only @need n starts a new page in a printed manual iffewer than n mils (thousandths of an inch) remain on the current page. Donot use braces around the argument n. The @need command has no e�ecton Info �les since they are not paginated.
This paragraph is preceded by an @need command that tells TEX to starta new page if fewer than 800 mils (eight-tenths inch) remain on the page. Itlooks like this:
@need 800This paragraph is preceded by : : :
The @need command is useful for preventing orphans (single lines at thebottoms of printed pages).

Chapter 16: De�nition Commands 125
16 De�nition Commands
The @deffn command and the other de�nition commands enable you todescribe functions, variables, macros, commands, user options, special formsand other such artifacts in a uniform format.
In the Info �le, a de�nition causes the entity category|`Function', `Vari-able', or whatever|to appear at the beginning of the �rst line of the de�ni-tion, followed by the entity's name and arguments. In the printed manual,the command causes TEX to print the entity's name and its arguments onthe left margin and print the category next to the right margin. In bothoutput formats, the body of the de�nition is indented. Also, the name ofthe entity is entered into the appropriate index: @deffn enters the nameinto the index of functions, @defvr enters it into the index of variables, andso on.
A manual need not and should not contain more than one de�nition for agiven name. An appendix containing a summary should use @table ratherthan the de�nition commands.
16.1 The Template for a De�nition
The @deffn command is used for de�nitions of entities that resemblefunctions. To write a de�nition using the @deffn command, write the @deffncommand at the beginning of a line and follow it on the same line by thecategory of the entity, the name of the entity itself, and its arguments (ifany). Then write the body of the de�nition on succeeding lines. (You mayembed examples in the body.) Finally, end the de�nition with an @end deffncommand written on a line of its own. (The other de�nition commands followthe same format.)
The template for a de�nition looks like this:
@deffn category name arguments: : :body-of-de�nition@end deffn
For example,
@deffn Command forward-word countThis command moves point forward @var{count} words(or backward if @var{count} is negative). : : :
@end deffn
produces
Commandforward-word countThis function moves point forward count words (or backwardif count is negative). : : :

126 Texinfo 2.23
Capitalize the category name like a title. If the name of the categorycontains spaces, as in the phrase `Interactive Command', write braces aroundit. For example:
@deffn {Interactive Command} isearch-forward: : :
@end deffn
Otherwise, the second word will be mistaken for the name of the entity.
Some of the de�nition commands are more general than others. The@deffn command, for example, is the general de�nition command for func-tions and the like|for entities that may take arguments. When you usethis command, you specify the category to which the entity belongs. The@deffn command possesses three prede�ned, specialized variations, @defun,@defmac, and @defspec, that specify the category for you: \Function",\Macro", and \Special Form" respectively. The @defvr command also isaccompanied by several prede�ned, specialized variations for describing par-ticular kinds of variables.
The template for a specialized de�nition, such as @defun, is similar to thetemplate for a generalized de�nition, except that you do not need to specifythe category:
@defun name arguments: : :body-of-de�nition@end defun
Thus,
@defun buffer-end flagThis function returns @code{(point-min)} if @var{flag}is less than 1, @code{(point-max)} otherwise.: : :
@end defun
produces
Functionbu�er-end agThis function returns (point-min) if ag is less than 1,(point-max) otherwise. : : :
See Section 16.6 [A Sample Function De�nition], page 137, for a more de-tailed example of a function de�nition, including the use of @example insidethe de�nition.
The other specialized commands work like @defun.
16.2 Optional and Repeated Arguments
Some entities take optional or repeated arguments, which may be spec-i�ed by a distinctive glyph that uses square brackets and ellipses. For
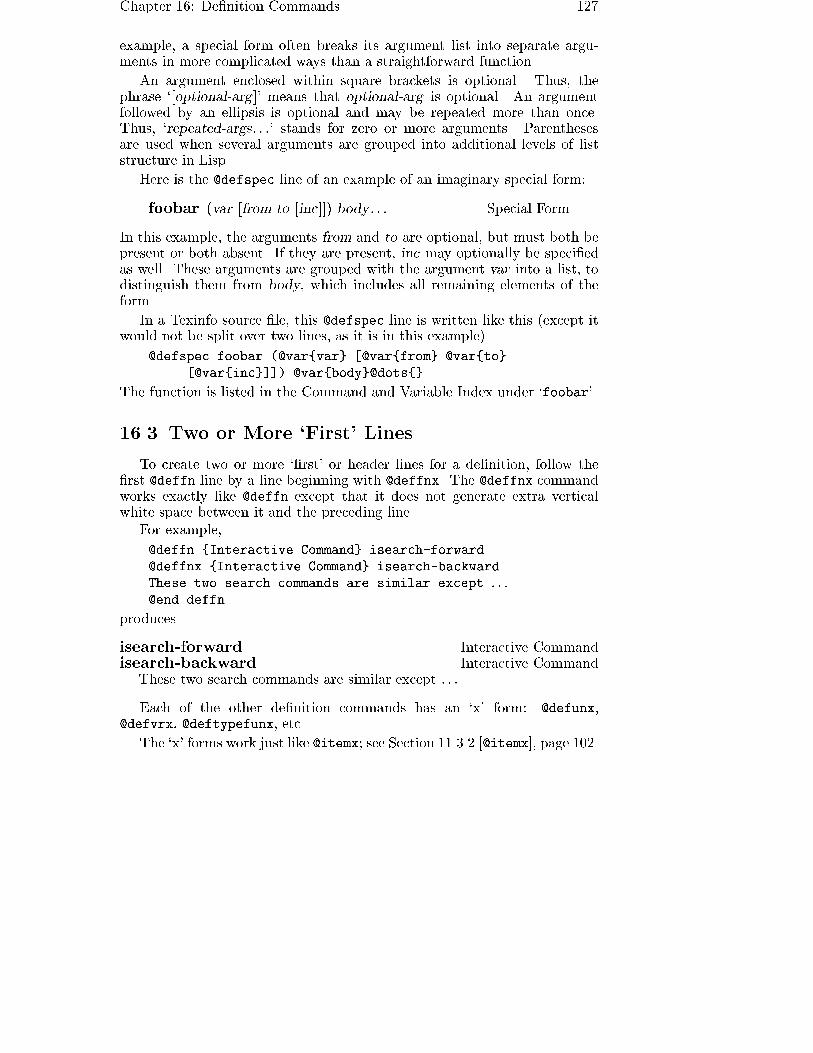
Chapter 16: De�nition Commands 127
example, a special form often breaks its argument list into separate argu-ments in more complicated ways than a straightforward function.
An argument enclosed within square brackets is optional. Thus, thephrase `[optional-arg ]' means that optional-arg is optional. An argumentfollowed by an ellipsis is optional and may be repeated more than once.Thus, `repeated-args: : :' stands for zero or more arguments. Parenthesesare used when several arguments are grouped into additional levels of liststructure in Lisp.
Here is the @defspec line of an example of an imaginary special form:
Special Formfoobar (var [from to [inc]]) body : : :
In this example, the arguments from and to are optional, but must both bepresent or both absent. If they are present, inc may optionally be speci�edas well. These arguments are grouped with the argument var into a list, todistinguish them from body, which includes all remaining elements of theform.
In a Texinfo source �le, this @defspec line is written like this (except itwould not be split over two lines, as it is in this example).
@defspec foobar (@var{var} [@var{from} @var{to}[@var{inc}]]) @var{body}@dots{}
The function is listed in the Command and Variable Index under `foobar'.
16.3 Two or More `First' Lines
To create two or more `�rst' or header lines for a de�nition, follow the�rst @deffn line by a line beginning with @deffnx. The @deffnx commandworks exactly like @deffn except that it does not generate extra verticalwhite space between it and the preceding line.
For example,
@deffn {Interactive Command} isearch-forward@deffnx {Interactive Command} isearch-backwardThese two search commands are similar except : : :
@end deffn
produces
Interactive Commandisearch-forwardInteractive Commandisearch-backward
These two search commands are similar except : : :
Each of the other de�nition commands has an `x' form: @defunx,@defvrx, @deftypefunx, etc.
The `x' forms work just like @itemx; see Section 11.3.2 [@itemx], page 102.

128 Texinfo 2.23
16.4 The De�nition Commands
Texinfo provides more than a dozen de�nition commands, all of whichare described in this section.
The de�nition commands automatically enter the name of the entity inthe appropriate index: for example, @deffn, @defun, and @defmac enterfunction names in the index of functions; @defvr and @defvar enter variablenames in the index of variables.
Although the examples that follow mostly illustrate Lisp, the commandscan be used for other programming languages.
16.4.1 Functions and Similar Entities
This section describes the commands for describing functions and similarentities:
@deffn category name arguments: : :The @deffn command is the general de�nition command forfunctions, interactive commands, and similar entities that maytake arguments. You must choose a term to describe the cate-gory of entity being de�ned; for example, \Function" could beused if the entity is a function. The @deffn command is writtenat the beginning of a line and is followed on the same line by thecategory of entity being described, the name of this particularentity, and its arguments, if any. Terminate the de�nition with@end deffn on a line of its own.For example, here is a de�nition:
@deffn Command forward-char ncharsMove point forward @var{nchars} characters.@end deffn
This shows a rather terse de�nition for a \command" namedforward-char with one argument, nchars.
@deffn prints argument names such as nchars in italics or uppercase, as if @var had been used, because we think of these namesas metasyntactic variables|they stand for the actual argumentvalues. Within the text of the description, write an argumentname explicitly with @var to refer to the value of the argument.In the example above, we used `@var{nchars}' in this way.
The template for @deffn is:
@deffn category name arguments: : :body-of-de�nition@end deffn

Chapter 16: De�nition Commands 129
@defun name arguments: : :The @defun command is the de�nition command for functions.@defun is equivalent to `@deffn Function : : :'.
For example,
@defun set symbol new-valueChange the value of the symbol @var{symbol}to @var{new-value}.@end defun
shows a rather terse de�nition for a function set whose argu-ments are symbol and new-value. The argument names on the@defun line automatically appear in italics or upper case as ifthey were enclosed in @var. Terminate the de�nition with @enddefun on a line of its own.
The template is:
@defun function-name arguments: : :body-of-de�nition@end defun
@defun creates an entry in the index of functions.
@defmac name arguments: : :The @defmac command is the de�nition command for macros.@defmac is equivalent to `@deffn Macro : : :' and works like@defun.
@defspec name arguments: : :The @defspec command is the de�nition command for specialforms. (In Lisp, a special form is an entity much like a func-tion.) @defspec is equivalent to `@deffn {Special Form} : : :'and works like @defun.
16.4.2 Variables and Similar Entities
Here are the commands for de�ning variables and similar entities:
@defvr category nameThe @defvr command is a general de�nition command for some-thing like a variable|an entity that records a value. You mustchoose a term to describe the category of entity being de�ned;for example, \Variable" could be used if the entity is a variable.Write the @defvr command at the beginning of a line and fol-lowed it on the same line by the category of the entity and thename of the entity.
Capitalize the category name like a title. If the name of thecategory contains spaces, as in the name `User Option', write

130 Texinfo 2.23
braces around it. Otherwise, the second word will be mistakenfor the name of the entity, for example:
@defvr {User Option} fill-columnThis buffer-local variable specifiesthe maximum width of filled lines.: : :
@end defvr
Terminate the de�nition with @end defvr on a line of its own.
The template is:
@defvr category namebody-of-de�nition@end defvr
@defvr creates an entry in the index of variables for name.
@defvar nameThe @defvar command is the de�nition command for variables.@defvar is equivalent to `@defvr Variable : : :'.
For example:
@defvar kill-ring: : :
@end defvar
The template is:
@defvar namebody-of-de�nition@end defvar
@defvar creates an entry in the index of variables for name.
@defopt nameThe @defopt command is the de�nition command for user op-tions. @defopt is equivalent to `@defvr {User Option} : : :' andworks like @defvar.
16.4.3 Functions in Typed Languages
The @deftypefn command and its variations are for describing functionsin C or any other language in which you must declare types of variables andfunctions.
@deftypefn category data-type name arguments: : :The @deftypefn command is the general de�nition commandfor functions and similar entities that may take arguments andthat are typed. The @deftypefn command is written at the

Chapter 16: De�nition Commands 131
beginning of a line and is followed on the same line by the cat-egory of entity being described, the type of the returned value,the name of this particular entity, and its arguments, if any.
For example,
@deftypefn {Library Function} int foobar(int @var{foo}, float @var{bar})
: : :
@end deftypefn
(where the text before the \: : :", shown above as two lines, wouldactually be a single line in a real Texinfo �le) produces the fol-lowing in Info:
-- Library Function: int foobar (int FOO, float BAR)
: : :
In a printed manual, it produces:
Library Functionint foobar (int foo, floatbar)
: : :
This means that foobar is a \library function" that returns anint, and its arguments are foo (an int) and bar (a float).
The argument names that you write in @deftypefn are not sub-ject to an implicit @var|since the actual names of the argu-ments in @deftypefn are typically scattered among data typenames and keywords, Texinfo cannot �nd them without help.Instead, you must write @var explicitly around the argumentnames. In the example above, the argument names are `foo'and `bar'.
The template for @deftypefn is:
@deftypefn category data-type name arguments : : :
body-of-description@end deftypefn
Note that if the category or data type is more than one wordthen it must be enclosed in braces to make it a single argument.
If you are describing a procedure in a language that has pack-ages, such as Ada, you might consider using @deftypefn in amanner somewhat contrary to the convention described in thepreceding paragraphs.
For example:

132 Texinfo 2.23
@deftypefn stacks private push(@var{s}:in out stack;@var{n}:in integer)
: : :
@end deftypefn
(The @deftypefn arguments are shown split into three lines, butwould be a single line in a real Texinfo �le.)
In this instance, the procedure is classi�ed as belonging to thepackage stacks rather than classi�ed as a `procedure' and itsdata type is described as private. (The name of the procedureis push, and its arguments are s and n.)
@deftypefn creates an entry in the index of functions for name.
@deftypefun data-type name arguments: : :The @deftypefun command is the specialized de�nition com-mand for functions in typed languages. The command is equiv-alent to `@deftypefn Function : : :'.
Thus,
@deftypefun int foobar (int @var{foo}, float @var{bar})
: : :
@end deftypefun
produces the following in Info:
-- Function: int foobar (int FOO, float BAR): : :
and the following in a printed manual:
Functionint foobar (int foo, float bar): : :
The template is:
@deftypefun type name arguments: : :body-of-description@end deftypefun
@deftypefun creates an entry in the index of functions for name.
16.4.4 Variables in Typed Languages
Variables in typed languages are handled in a manner similar to functionsin typed languages. See Section 16.4.3 [Typed Functions], page 130. Thegeneral de�nition command @deftypevr corresponds to @deftypefn and thespecialized de�nition command @deftypevar corresponds to @deftypefun.

Chapter 16: De�nition Commands 133
@deftypevr category data-type nameThe @deftypevr command is the general de�nition commandfor something like a variable in a typed language|an entitythat records a value. You must choose a term to describe thecategory of the entity being de�ned; for example, \Variable"could be used if the entity is a variable.
The @deftypevr command is written at the beginning of a lineand is followed on the same line by the category of the entitybeing described, the data type, and the name of this particularentity.For example:
@deftypevr {Global Flag} int enable: : :
@end deftypevr
produces the following in Info:
-- Global Flag: int enable: : :
and the following in a printed manual:
Global Flagint enable: : :
The template is:
@deftypevr category data-type namebody-of-description@end deftypevr
@deftypevr creates an entry in the index of variables for name.
@deftypevar data-type nameThe @deftypevar command is the specialized de�nition com-mand for variables in typed languages. @deftypevar is equiva-lent to `@deftypevr Variable : : :'.
For example:
@deftypevar int fubar: : :
@end deftypevar
produces the following in Info:
-- Variable: int fubar: : :
and the following in a printed manual:
Variableint fubar: : :

134 Texinfo 2.23
The template is:
@deftypevar data-type namebody-of-description@end deftypevar
@deftypevar creates an entry in the index of variables for name.
16.4.5 Object-Oriented Programming
Here are the commands for formatting descriptions about abstract ob-jects, such as are used in object-oriented programming. A class is a de�nedtype of abstract object. An instance of a class is a particular object that hasthe type of the class. An instance variable is a variable that belongs to theclass but for which each instance has its own value.
In a de�nition, if the name of a class is truly a name de�ned in theprogramming system for a class, then you should write an @code around it.Otherwise, it is printed in the usual text font.
@defcv category class nameThe @defcv command is the general de�nition command forvariables associated with classes in object-oriented program-ming. The @defcv command is followed by three arguments:the category of thing being de�ned, the class to which it be-longs, and its name. Thus,
@defcv {Class Option} Window border-pattern: : :
@end defcv
illustrates how you would write the �rst line of a de�nition ofthe border-pattern class option of the class Window.
The template is
@defcv category class name: : :
@end defcv
@defcv creates an entry in the index of variables.
@defivar class nameThe @defivar command is the de�nition command for instancevariables in object-oriented programming. @defivar is equiva-lent to `@defcv {Instance Variable} : : :'
The template is:
@defivar class instance-variable-namebody-of-de�nition@end defivar

Chapter 16: De�nition Commands 135
@defivar creates an entry in the index of variables.
@defop category class name arguments: : :The @defop command is the general de�nition command forentities that may resemble methods in object-oriented program-ming. These entities take arguments, as functions do, but areassociated with particular classes of objects.
For example, some systems have constructs called wrappers thatare associated with classes as methods are, but that act morelike macros than like functions. You could use @defop Wrapperto describe one of these.
Sometimes it is useful to distinguish methods and operations.You can think of an operation as the speci�cation for a method.Thus, a window system might specify that all window classeshave a method named expose; we would say that this windowsystem de�nes an expose operation on windows in general. Typ-ically, the operation has a name and also speci�es the patternof arguments; all methods that implement the operation mustaccept the same arguments, since applications that use the op-eration do so without knowing which method will implementit.
Often it makes more sense to document operations than meth-ods. For example, window application developers need to knowabout the expose operation, but need not be concerned withwhether a given class of windows has its own method to im-plement this operation. To describe this operation, you wouldwrite:
@defop Operation windows expose
The @defop command is written at the beginning of a line andis followed on the same line by the overall name of the categoryof operation, the name of the class of the operation, the nameof the operation, and its arguments, if any.
The template is:
@defop category class name arguments: : :body-of-de�nition@end defop
@defop creates an entry, such as `expose on windows', in theindex of functions.
@defmethod class name arguments: : :The @defmethod command is the de�nition command for meth-ods in object-oriented programming. A method is a kind of func-tion that implements an operation for a particular class of ob-

136 Texinfo 2.23
jects and its subclasses. In the Lisp Machine, methods actuallywere functions, but they were usually de�ned with defmethod.
@defmethod is equivalent to `@defop Method : : :'. The commandis written at the beginning of a line and is followed by the nameof the class of the method, the name of the method, and itsarguments, if any.
For example,
@defmethod bar-class bar-method argument: : :
@end defmethod
illustrates the de�nition for a method called bar-method of theclass bar-class. The method takes an argument.
The template is:
@defmethod class method-name arguments: : :body-of-de�nition@end defmethod
@defmethod creates an entry, such as `bar-method on bar-class', in the index of functions.
16.4.6 Data Types
Here is the command for data types:
@deftp category name attributes: : :The @deftp command is the generic de�nition command for datatypes. The command is written at the beginning of a line andis followed on the same line by the category, by the name of thetype (which is a word like int or float), and then by namesof attributes of objects of that type. Thus, you could use thiscommand for describing int or float, in which case you coulduse data type as the category. (A data type is a category ofcertain objects for purposes of deciding which operations can beperformed on them.)
In Lisp, for example, pair names a particular data type, and anobject of that type has two slots called the car and the cdr.Here is how you would write the �rst line of a de�nition of pair.
@deftp {Data type} pair car cdr: : :
@end deftp

Chapter 16: De�nition Commands 137
The template is:
@deftp category name-of-type attributes: : :body-of-de�nition@end deftp
@deftp creates an entry in the index of data types.
16.5 Conventions for Writing De�nitions
When you write a de�nition using @deffn, @defun, or one of the otherde�nition commands, please take care to use arguments that indicate themeaning, as with the count argument to the forward-word function. Also,if the name of an argument contains the name of a type, such as integer,take care that the argument actually is of that type.
16.6 A Sample Function De�nition
A function de�nition uses the @defun and @end defun commands. Thename of the function follows immediately after the @defun command and itis followed, on the same line, by the parameter list.
Here is a de�nition from The GNU Emacs Lisp Reference Manual. (Seesection \Calling Functions" in The GNU Emacs Lisp Reference Manual.)
Functionapply function &rest argumentsapply calls function with arguments, just like funcall butwith one di�erence: the last of arguments is a list of argu-ments to give to function, rather than a single argument. Wealso say that this list is appended to the other arguments.
apply returns the result of calling function. As with funcall,function must either be a Lisp function or a primitive func-tion; special forms and macros do not make sense in apply.
(setq f 'list)) list
(apply f 'x 'y 'z)error Wrong type argument: listp, z(apply '+ 1 2 '(3 4))
) 10(apply '+ '(1 2 3 4))
) 10
(apply 'append '((a b c) nil (x y z) nil))) (a b c x y z)

138 Texinfo 2.23
An interesting example of using apply is found in the de-scription of mapcar.
In the Texinfo source �le, this example looks like this:
@defun apply function &rest arguments
@code{apply} calls @var{function} with@var{arguments}, just like @code{funcall} but with onedifference: the last of @var{arguments} is a list ofarguments to give to @var{function}, rather than a singleargument. We also say that this list is @dfn{appended}to the other arguments.
@code{apply} returns the result of calling@var{function}. As with @code{funcall},@var{function} must either be a Lisp function or aprimitive function; special forms and macros do not makesense in @code{apply}.
@example(setq f 'list)
@result{} list(apply f 'x 'y 'z)@error{} Wrong type argument: listp, z(apply '+ 1 2 '(3 4))
@result{} 10(apply '+ '(1 2 3 4))
@result{} 10
(apply 'append '((a b c) nil (x y z) nil))@result{} (a b c x y z)
@end example
An interesting example of using @code{apply} is foundin the description of @code{mapcar}.@refill@end defun
In this manual, this function is listed in the Command and Variable Indexunder apply.
Ordinary variables and user options are described using a format like thatfor functions except that variables do not take arguments.

Chapter 17: Footnotes 139
17 Footnotes
A footnote is for a reference that documents or elucidates the primarytext.1
17.1 Footnote Commands
In Texinfo, footnotes are created with the @footnote command. Thiscommand is followed immediately by a left brace, then by the text of thefootnote, and then by a terminating right brace. The template is:
@footnote{text}
Footnotes may be of any length, but are usually short.
For example, this clause is followed by a sample footnote2; in the Texinfosource, it looks like this:
: : :a sample footnote @footnote{Here is the samplefootnote.}; in the Texinfo source: : :
Warning: Don't use footnotes in the argument of the @item commandfor a @table table. This doesn't work; because of limitations of TEX, thereis no way to �x it. To avoid the problem, move the footnote into the bodytext of the table.
In a printed manual or book, the reference mark for a footnote is a small,superscripted number; the text of the footnote appears at the bottom of thepage, below a horizontal line.
In Info, the reference mark for a footnote is a pair of parentheses withthe footnote number between them, like this: `(1)'.
17.2 Footnote Styles
Info has two footnote styles, which determine where the text of the foot-note is located:
� In the `End' node style, all the footnotes for a single node are placedat the end of that node. The footnotes are separated from the rest ofthe node by a line of dashes with the word `Footnotes' within it. Eachfootnote begins with an `(n)' reference mark.
1 A footnote should complement or expand upon the primary text, but areader should not need to read a footnote to understand the primary text.For a thorough discussion of footnotes, see The Chicago Manual of Style,which is published by the University of Chicago Press.
2 Here is the sample footnote.

140 Texinfo 2.23
Here is an example of a single footnote in the end of node style:
--------- Footnotes ---------
(1) Here is a sample footnote.
� In the `Separate' node style, all the footnotes for a single node areplaced in an automatically constructed node of their own. In this style,a \footnote reference" follows each `(n)' reference mark in the body ofthe node. The footnote reference is actually a cross reference which youuse to reach the footnote node.
The name of the node containing the footnotes is constructed by ap-pending `-Footnotes' to the name of the node that contains the foot-notes. (Consequently, the footnotes' node for the `Footnotes' node is`Footnotes-Footnotes'!) The footnotes' node has an `Up' node pointerthat leads back to its parent node.
Here is how the �rst footnote in this manual looks after being formattedfor Info in the separate node style:
File: texinfo.info Node: Overview-Footnotes, Up: Overview
(1) Note that the first syllable of "Texinfo" is
pronounced like "speck", not "hex". : : :
A Texinfo �le may be formatted into an Info �le with either footnotestyle.
Use the @footnotestyle command to specify an Info �le's footnote style.Write this command at the beginning of a line followed by an argument,either `end' for the end node style or `separate' for the separate node style.
For example,
@footnotestyle end
or
@footnotestyle separate
Write an @footnotestyle command before or shortly after the end-of-header line at the beginning of a Texinfo �le. (If you include the@footnotestyle command between the start-of-header and end-of-headerlines, the region formatting commands will format footnotes as speci�ed.)
If you do not specify a footnote style, the formatting commands use theirdefault style. Currently, texinfo-format-buffer and texinfo-format-region use the `separate' style and makeinfo uses the `end' style.
This chapter contains two footnotes.

Chapter 18: Conditionally Visible Text 141
18 Conditionally Visible Text
Sometimes it is good to use di�erent text for a printed manual and itscorresponding Info �le. In this case, you can use the conditional commandsto specify which text is for the printed manual and which is for the Info �le.
@ifinfo begins segments of text that should be ignored by TEX whenit typesets the printed manual. The segment of text appears only in theInfo �le. The @ifinfo command should appear on a line by itself; endthe Info-only text with a line containing @end ifinfo by itself. At thebeginning of a Texinfo �le, the Info permissions are contained within a regionmarked by @ifinfo and @end ifinfo. (See Section 3.3 [Info Summary andPermissions], page 35.)
The @iftex and @end iftex commands are similar to the @ifinfo and@end ifinfo commands, except that they specify text that will appear inthe printed manual but not in the Info �le. Likewise for @ifhtml and @endifhtml, which specify text to appear only in HTML output.
For example,
@iftexThis text will appear only in the printed manual.@end iftex
@ifinfoHowever, this text will appear only in Info.@end ifinfo
The preceding example produces the following line:
This text will appear only in the printed manual.
Note how you only see one of the two lines, depending on whether you arereading the Info version or the printed version of this manual.
The @titlepage command is a special variant of @iftex that is usedfor making the title and copyright pages of the printed manual. (See Sec-tion 3.4.1 [@titlepage], page 36.)
18.1 Using Ordinary TEX Commands
Inside a region delineated by @iftex and @end iftex, you can embedsome plain TEX commands. Info will ignore these commands since theyare only in that part of the �le which is seen by TEX. You can write theTEX commands as you would write them in a normal TEX �le, except thatyou must replace the `\' used by TEX with an `@'. For example, in the@titlepage section of a Texinfo �le, you can use the TEX command @vskipto format the copyright page. (The @titlepage command causes Info toignore the region automatically, as it does with the @iftex command.)

142 Texinfo 2.23
However, many features of plain TEX will not work, as they are overriddenby features of Texinfo.
You can enter plain TEX completely, and use `\' in the TEX commands,by delineating a region with the @tex and @end tex commands. (The @texcommand also causes Info to ignore the region, like the @iftex command.)
For example, here is a mathematical expression written in plain TEX:
@tex$$ \chi^2 = \sum_{i=1}^N
\left (y_i - (a + b x_i)\over \sigma_i\right)^2 $$
@end tex
The output of this example will appear only in a printed manual. If youare reading this in Info, you will not see anything after this paragraph. In aprinted manual, the above expression looks like this:
�2 =NXi=1
�yi � (a + bxi)
�i
�2
18.2 @set, @clear, and @value
You can direct the Texinfo formatting commands to format or ignoreparts of a Texinfo �le with the @set, @clear, @ifset, and @ifclear com-mands.
In addition, you can use the @set ag command to set the value of agto a string of characters; and use @value{ ag} to insert that string. Youcan use @set, for example, to set a date and use @value to insert the datein several places in the Texinfo �le.
18.2.1 @ifset and @ifclear
When a ag is set, the Texinfo formatting commands format text betweensubsequent pairs of @ifset ag and @end ifset commands. When the agis cleared, the Texinfo formatting commands do not format the text.
Use the @set ag command to turn on, or set, a ag ; a ag can be anysingle word. The format for the command looks like this:
@set ag
Write the conditionally formatted text between @ifset ag and @endifset commands, like this:
@ifset agconditional-text@end ifset

Chapter 18: Conditionally Visible Text 143
For example, you can create one document that has two variants, suchas a manual for a `large' and `small' model:
You can use this machine to dig up shrubswithout hurting them.
@set large
@ifset largeIt can also dig up fully grown trees.@end ifset
Remember to replant promptly : : :
In the example, the formatting commands will format the text between@ifset large and @end ifset because the large ag is set.
Use the @clear ag command to turn o�, or clear, a ag. Clearing a agis the opposite of setting a ag. The command looks like this:
@clear ag
Write the command on a line of its own.
When ag is cleared, the Texinfo formatting commands do not formatthe text between @ifset ag and @end ifset; that text is ignored and doesnot appear in either printed or Info output.
For example, if you clear the ag of the preceding example by writingan @clear large command after the @set large command (but before theconditional text), then the Texinfo formatting commands ignore the textbetween the @ifset large and @end ifset commands. In the formattedoutput, that text does not appear; in both printed and Info output, you seeonly the lines that say, \You can use this machine to dig up shrubs withouthurting them. Remember to replant promptly : : :".
If a ag is cleared with an @clear ag command, then the formattingcommands format text between subsequent pairs of @ifclear and @endifclear commands. But if the ag is set with @set ag , then the for-matting commands do not format text between an @ifclear and an @endifclear command; rather, they ignore that text. An @ifclear commandlooks like this:
@ifclear ag
In brief, the commands are:
@set ag Tell the Texinfo formatting commands that ag is set.
@clear agTell the Texinfo formatting commands that ag is cleared.

144 Texinfo 2.23
@ifset agIf ag is set, tell the Texinfo formatting commands to formatthe text up to the following @end ifset command.
If ag is cleared, tell the Texinfo formatting commands to ignoretext up to the following @end ifset command.
@ifclear agIf ag is set, tell the Texinfo formatting commands to ignore thetext up to the following @end ifclear command.
If ag is cleared, tell the Texinfo formatting commands to formatthe text up to the following @end ifclear command.
18.2.2 @value
You can use the @set command to specify a value for a ag, which isexpanded by the @value command. The value is a string a characters.
Write the @set command like this:
@set foo This is a string.
This sets the value of foo to \This is a string."
The Texinfo formatters replace an @value{ ag} command with the stringto which ag is set.
Thus, when foo is set as shown above, the Texinfo formatters convert
@value{foo}to
This is a string.
You can write an @value command within a paragraph; but you mustwrite an @set command on a line of its own.
If you write the @set command like this:
@set foo
without specifying a string, the value of foo is an empty string.
If you clear a previously set ag with an @clear ag command, a subse-quent @value{flag} command is invalid and the string is replaced with anerror message that says `{No value for " ag"}'.
For example, if you set foo as follows:
@set how-much very, very, very
then the formatters transform
It is a @value{how-much} wet day.into
It is a very, very, very wet day.
If you write
@clear how-much
then the formatters transform

Chapter 18: Conditionally Visible Text 145
It is a @value{how-much} wet day.into
It is a {No value for "how-much"} wet day.
18.2.3 @value Example
You can use the @value command to limit the number of places you needto change when you record an update to a manual. Here is how it is donein The GNU Make Manual:Set the ags:
@set EDITION 0.35 Beta@set VERSION 3.63 Beta@set UPDATED 14 August 1992@set UPDATE-MONTH August 1992
Write text for the �rst @ifinfo section, for people reading the Texinfo �le:
This is Edition @value{EDITION},last updated @value{UPDATED},of @cite{The GNU Make Manual},for @code{make}, Version @value{VERSION}.
Write text for the title page, for people reading the printed manual:
@title GNU Make@subtitle A Program for Directing Recompilation@subtitle Edition @value{EDITION}, : : :
@subtitle @value{UPDATE-MONTH}
(On a printed cover, a date listing the month and the year looks less fussythan a date listing the day as well as the month and year.)Write text for the Top node, for people reading the Info �le:
This is Edition @value{EDITION}of the @cite{GNU Make Manual},last updated @value{UPDATED}for @code{make} Version @value{VERSION}.
After you format the manual, the text in the �rst @ifinfo section lookslike this:
This is Edition 0.35 Beta, last updated 14 August 1992,of `The GNU Make Manual', for `make', Version 3.63 Beta.
When you update the manual, change only the values of the ags; youdo not need to rewrite the three sections.

146 Texinfo 2.23

Chapter 19: Macros: De�ning New Texinfo Commands 147
19 Macros: De�ning New TexinfoCommands
A Texinfo macro allows you to de�ne a new Texinfo command as anysequence of text and/or existing commands (including other macros). Themacro can have any number of parameters|text you supply each time youuse the macro. (This has nothing to do with the @defmac command, whichis for documenting macros in the subject of the manual; see Section 16.1[Def Cmd Template], page 125.)
19.1 De�ning Macros
You use the Texinfo @macro command to de�ne a macro. For example:
@macro macro-name{param1, param2, : : :}text : : : \param1\ : : :
@end macro
The parameters param1, param2, : : : correspond to arguments suppliedwhen the macro is subsequently used in the document (see the next section).
If a macro needs no parameters, you can de�ne it either with an emptylist (`@macro foo {}') or with no braces at all (`@macro foo').
The de�nition or body of the macro can contain any Texinfo commands,including previously-de�ned macros. (It is not possible to have mutuallyrecursive Texinfo macros.) In the body, instances of a parameter name sur-rounded by backslashes, as in `\param1\' in the example above, are replacedby the corresponding argument from the macro invocation.
You can unde�ne a macro foo with @unmacro foo. It is not an error tounde�ne a macro that is already unde�ned. For example:
@unmacro foo
19.2 Invoking Macros
After a macro is de�ned (see the previous section), you can use (invoke)it in your document like this:
@macro-name {arg1, arg2, : : :}
and the result will be just as if you typed the body of macro-name at thatspot. For example:
@macro foo {p, q}Together: \p\ & \q\.@end macro@foo{a, b}
produces:

148 Texinfo 2.23
Together: a & b.
Thus, the arguments and parameters are separated by commas and de-limited by braces; any whitespace after (but not before) a comma is ignored.To insert a comma, brace, or backslash in an argument, prepend a backslash,as in
@macro-name {\\\{\}\,}
which will pass the (almost certainly error-producing) argument `\{},' tomacro-name.
If the macro is de�ned to take a single argument, and is invoked withoutany braces, the entire rest of the line after the macro name is supplied asthe argument. For example:
@macro bar {p}Twice: \p\, \p\.@end macro@bar aah
produces:
Twice: aah, aah.

Chapter 20: Format and Print Hardcopy 149
20 Format and Print Hardcopy
There are three major shell commands for making a printed manual froma Texinfo �le: one for converting the Texinfo �le into a �le that will beprinted, a second for sorting indices, and a third for printing the formatteddocument. When you use the shell commands, you can either work directlyin the operating system shell or work within a shell inside GNU Emacs.
If you are using GNU Emacs, you can use commands provided by Texinfomode instead of shell commands. In addition to the three commands toformat a �le, sort the indices, and print the result, Texinfo mode o�ers keybindings for commands to recenter the output bu�er, show the print queue,and delete a job from the print queue.
The typesetting program called TEX is used for formatting a Texinfo�le. TEX is a very powerful typesetting program and, if used right, does anexceptionally good job. See Appendix J [How to Obtain TEX], page 231, forinformation on how to obtain TEX.
The makeinfo, texinfo-format-region, and texinfo-format-buffercommands read the very same @-commands in the Texinfo �le as does TEX,but process them di�erently to make an Info �le; see Chapter 21 [Create anInfo File], page 159.
20.1 Format using tex and texindex
Format the Texinfo �le with the shell command tex followed by the nameof the Texinfo �le. This command produces a formatted dvi �le as well asseveral auxiliary �les containing indices, cross references, etc. The dvi �le(for DeVice Independent �le) can be printed on a wide variety of printers.
The tex formatting command itself does not sort the indices; it writesan output �le of unsorted index data. This is a misfeature of TEX. (Thetexi2dvi command automatically generates indices; see Section 20.2 [For-mat using texi2dvi], page 150.) To generate a printed index after runningthe tex command, you �rst need a sorted index to work from. The texindexcommand sorts indices. (The source �le `texindex.c' comes as part of thestandard GNU distribution and is usually installed when Emacs is installed.)
The tex formatting command outputs unsorted index �les under namesthat obey a standard convention. These names are the name of your maininput �le to the tex formatting command, with everything after the �rstperiod thrown away, and the two letter names of indices added at the end.For example, the raw index output �les for the input �le `foo.texinfo'would be `foo.cp', `foo.vr', `foo.fn', `foo.tp', `foo.pg' and `foo.ky'.Those are exactly the arguments to give to texindex.

150 Texinfo 2.23
Or else, you can use `??' as \wild-cards" and give the command in thisform:
texindex foo.??
This command will run texindex on all the unsorted index �les, includingany that you have de�ned yourself using @defindex or @defcodeindex. (Youmay execute `texindex foo.??' even if there are similarly named �les withtwo letter extensions that are not index �les, such as `foo.el'. The texindexcommand reports but otherwise ignores such �les.)
For each �le speci�ed, texindex generates a sorted index �le whose nameis made by appending `s' to the input �le name. The @printindex commandknows to look for a �le of that name. texindex does not alter the raw indexoutput �le.
After you have sorted the indices, you need to rerun the tex formattingcommand on the Texinfo �le. This regenerates a formatted dvi �le withup-to-date index entries.1
To summarize, this is a three step process:
1. Run the tex formatting command on the Texinfo �le. This generatesthe formatted dvi �le as well as the raw index �les with two letterextensions.
2. Run the shell command texindex on the raw index �les to sort them.This creates the corresponding sorted index �les.
3. Rerun the tex formatting command on the Texinfo �le. This regeneratesa formatted dvi �le with the index entries in the correct order. Thissecond run also corrects the page numbers for the cross references. (Thetables of contents are always correct.)
You need not run texindex each time after you run the tex formatting. Ifyou do not, on the next run, the tex formatting command will use whateversorted index �les happen to exist from the previous use of texindex. Thisis usually ok while you are debugging.
20.2 Format using texi2dvi
The texi2dvi command is a shell script that automatically runs bothtex and texindex as many times as necessary to produce a dvi �le with
1 If you use more than one index and have cross references to an index otherthan the �rst, you must run tex three times to get correct output: onceto generate raw index data; again (after texindex) to output the text ofthe indices and determine their true page numbers; and a third time tooutput correct page numbers in cross references to them. However, crossreferences to indices are rare.

Chapter 20: Format and Print Hardcopy 151
up-to-date, sorted indices. It simpli�es the tex|texindex|tex sequencedescribed in the previous section.
The syntax for texi2dvi is like this (where `prompt$' is the shell prompt):
prompt$ texi2dvi �lename: : :
20.3 Shell Print Using lpr -d
You can print a dvi �le with the dvi print command. The precise printingcommand to use depends on your system; `lpr -d' is common. The dvi printcommand may require a �le name without any extension or with a `.dvi'extension.
The following commands, for example, sort the indices, format, and printthe Bison Manual (where `%' is the shell prompt):
% tex bison.texinfo% texindex bison.??% tex bison.texinfo% lpr -d bison.dvi
(Remember that the shell commands may be di�erent at your site; but theseare commonly used versions.)
Using the texi2dvi shell script, you simply need type:
% texi2dvi bison.texinfo% lpr -d bison.dvi
20.4 From an Emacs Shell : : :
You can give formatting and printing commands from a shell within GNUEmacs. To create a shell within Emacs, type M-x shell. In this shell, youcan format and print the document. See Chapter 20 [Format and PrintHardcopy], page 149, for details.
You can switch to and from the shell bu�er while tex is running and doother editing. If you are formatting a long document on a slow machine, thiscan be very convenient.
You can also use texi2dvi from an Emacs shell. For example, here ishow to use texi2dvi to format and print Using and Porting GNU CC froma shell within Emacs (where `%' is the shell prompt):
% texi2dvi gcc.texinfo% lpr -d gcc.dvi
20.5 Formatting and Printing in Texinfo Mode
Texinfo mode provides several prede�ned key commands for TEX format-ting and printing. These include commands for sorting indices, looking at

152 Texinfo 2.23
the printer queue, killing the formatting job, and recentering the display ofthe bu�er in which the operations occur.
C-c C-t C-bM-x texinfo-tex-buffer
Run texi2dvi on the current bu�er.
C-c C-t C-rM-x texinfo-tex-region
Run TEX on the current region.
C-c C-t C-iM-x texinfo-texindex
Sort the indices of a Texinfo �le formatted with texinfo-tex-region.
C-c C-t C-pM-x texinfo-tex-print
Print a dvi �le that was made with texinfo-tex-region ortexinfo-tex-buffer.
C-c C-t C-qM-x tex-show-print-queue
Show the print queue.
C-c C-t C-dM-x texinfo-delete-from-print-queue
Delete a job from the print queue; you will be prompted forthe job number shown by a preceding C-c C-t C-q command(texinfo-show-tex-print-queue).
C-c C-t C-kM-x tex-kill-job
Kill the currently running TEX job started by texinfo-tex-region or texinfo-tex-buffer, or any other process runningin the Texinfo shell bu�er.
C-c C-t C-xM-x texinfo-quit-job
Quit a TEX formatting job that has stopped because of an errorby sending an hxi to it. When you do this, TEX preserves a recordof what it did in a `.log' �le.
C-c C-t C-lM-x tex-recenter-output-buffer
Redisplay the shell bu�er in which the TEX printing and format-ting commands are run to show its most recent output.

Chapter 20: Format and Print Hardcopy 153
Thus, the usual sequence of commands for formatting a bu�er is as follows(with comments to the right):
C-c C-t C-b Run texi2dvi on the bu�er.C-c C-t C-p Print the dvi �le.C-c C-t C-q Display the printer queue.
The Texinfo mode TEX formatting commands start a subshell in Emacscalled the `*tex-shell*'. The texinfo-tex-command, texinfo-texindex-command, and tex-dvi-print-command commands are all run in this shell.
You can watch the commands operate in the `*tex-shell*' bu�er, andyou can switch to and from and use the `*tex-shell*' bu�er as you wouldany other shell bu�er.
The formatting and print commands depend on the values of severalvariables. The default values are:
Variable Default value
texinfo-texi2dvi-command "texi2dvi"texinfo-tex-command "tex"texinfo-texindex-command "texindex"texinfo-delete-from-print-queue-command "lprm"texinfo-tex-trailer "@bye"tex-start-of-header "%**start"tex-end-of-header "%**end"tex-dvi-print-command "lpr -d"tex-show-queue-command "lpq"
You can change the values of these variables with the M-x edit-optionscommand (see section \Editing Variable Values" in The GNU Emacs Man-ual), with the M-x set-variable command (see section \Examining andSetting Variables" in The GNU Emacs Manual), or with your `.emacs' ini-tialization �le (see section \Init File" in The GNU Emacs Manual).
20.6 Using the Local Variables List
Yet another way to apply the TEX formatting command to a Texinfo �leis to put that command in a local variables list at the end of the Texinfo�le. You can then specify the tex or texi2dvi commands as a compile-command and have Emacs run it by typing M-x compile. This creates aspecial shell called the `*compilation*' bu�er in which Emacs runs thecompile command. For example, at the end of the `gdb.texinfo' �le, afterthe @bye, you could put the following:
@c Local Variables:@c compile-command: "texi2dvi gdb.texinfo"@c End:

154 Texinfo 2.23
This technique is most often used by programmers who also compile pro-grams this way; see section \Compilation" in The GNU Emacs Manual.
20.7 TEX Formatting Requirements Summary
Every Texinfo �le that is to be input to TEX must begin with a \inputcommand and must contain an @setfilename command and an @settitlecommand:
\input texinfo@setfilename arg-not-used-by-TEX@settitle name-of-manual
The �rst command instructs TEX to load the macros it needs to process aTexinfo �le, the second command opens auxiliary �les, and the third speci�esthe title of printed manual.
Every Texinfo �le must end with a line that terminates TEX processingand forces out un�nished pages:
@bye
Strictly speaking, these four lines are all a Texinfo �le needs for TEX,besides the body. (The @setfilename line is the only line that a Texinfo�le needs for Info formatting.)
Usually, the �le's �rst line contains an `@c -*-texinfo-*-' comment thatcauses Emacs to switch to Texinfo mode when you edit the �le. In addition,the beginning usually includes an @setchapternewpage command, a titlepage, a copyright page, and permissions. Besides an @bye, the end of a �leusually includes indices and a table of contents.
For more information, see Section 3.2.5 [@setchapternewpage], page 33,Appendix F [Page Headings], page 211, Section 3.4 [Titlepage & CopyrightPage], page 36, Section 4.1 [Printing Indices & Menus], page 45, and Sec-tion 4.2 [Contents], page 46.
20.8 Preparing to Use TEX
TEX needs to know where to �nd the `texinfo.tex' �le that you havetold it to input with the `\input texinfo' command at the beginning ofthe �rst line. The `texinfo.tex' �le tells TEX how to handle @-commands.(`texinfo.tex' is included in the standard GNU distributions.)
Usually, the `texinfo.tex' �le is put in the default directory that con-tains TEX macros (the `/usr/lib/tex/macros' directory) when GNU Emacsor other GNU software is installed. In this case, TEX will �nd the �le and youdo not need to do anything special. Alternatively, you can put `texinfo.tex'in the directory in which the Texinfo source �le is located, and TEX will �ndit there.

Chapter 20: Format and Print Hardcopy 155
However, you may want to specify the location of the \input �le yourself.One way to do this is to write the complete path for the �le after the \inputcommand. Another way is to set the TEXINPUTS environment variable inyour `.cshrc' or `.profile' �le. The TEXINPUTS environment variable willtell TEX where to �nd the `texinfo.tex' �le and any other �le that youmight want TEX to use.
Whether you use a `.cshrc' or `.profile' �le depends on whether youuse csh, sh, or bash for your shell command interpreter. When you use csh,it looks to the `.cshrc' �le for initialization information, and when you usesh or bash, it looks to the `.profile' �le.
In a `.cshrc' �le, you could use the following csh command sequence:
setenv TEXINPUTS .:/usr/me/mylib:/usr/lib/tex/macros
In a `.profile' �le, you could use the following sh command sequence:
TEXINPUTS=.:/usr/me/mylib:/usr/lib/tex/macrosexport TEXINPUTS
This would cause TEX to look for `\input' �le �rst in the current directory,indicated by the `.', then in a hypothetical user's `me/mylib' directory, and�nally in the system library.
20.9 Overfull \hboxes"
TEX is sometimes unable to typeset a line without extending it into theright margin. This can occur when TEX comes upon what it interprets asa long word that it cannot hyphenate, such as an electronic mail networkaddress or a very long title. When this happens, TEX prints an error messagelike this:
Overfull \hbox (20.76302pt too wide)
(In TEX, lines are in \horizontal boxes", hence the term, \hbox". The back-slash, `\', is the TEX equivalent of `@'.)
TEX also provides the line number in the Texinfo source �le and the textof the o�ending line, which is marked at all the places that TEX knows how tohyphenate words. See Section G.2 [Catching Errors with TEX Formatting],page 219, for more information about typesetting errors.
If the Texinfo �le has an overfull hbox, you can rewrite the sentence sothe overfull hbox does not occur, or you can decide to leave it. A smallexcursion into the right margin often does not matter and may not even benoticeable.
However, unless told otherwise, TEX will print a large, ugly, black rectan-gle beside the line that contains the overfull hbox. This is so you will noticethe location of the problem if you are correcting a draft.

156 Texinfo 2.23
To prevent such a monstrosity from marring your �nal printout, writethe following in the beginning of the Texinfo �le on a line of its own, beforethe @titlepage command:
@finalout
20.10 Printing \Small" Books
By default, TEX typesets pages for printing in an 8.5 by 11 inch format.However, you can direct TEX to typeset a document in a 7 by 9.25 inchformat that is suitable for bound books by inserting the following commandon a line by itself at the beginning of the Texinfo �le, before the title page:
@smallbook
(Since regular sized books are often about 7 by 9.25 inches, this commandmight better have been called the @regularbooksize command, but it cameto be called the @smallbook command by comparison to the 8.5 by 11 inchformat.)
If you write the @smallbook command between the start-of-header andend-of-header lines, the Texinfo mode TEX region formatting command,texinfo-tex-region, will format the region in \small" book size (see Sec-tion 3.2.2 [Start of Header], page 31).
The Free Software Foundation distributes printed copies of The GNUEmacs Manual and other manuals in the \small" book size. See Section 10.6[@smallexample and @smalllisp], page 93, for information about com-mands that make it easier to produce examples for a smaller manual.
20.11 Printing on A4 Paper
You can tell TEX to typeset a document for printing on European sizeA4 paper with the @afourpaper command. Write the command on a lineby itself between @iftex and @end iftex lines near the beginning of theTexinfo �le, before the title page:
For example, this is how you would write the header for this manual:
\input texinfo @c -*-texinfo-*-@c %**start of header@setfilename texinfo@settitle Texinfo@syncodeindex vr fn@iftex@afourpaper@end iftex@c %**end of header

Chapter 20: Format and Print Hardcopy 157
20.12 Cropmarks and Magni�cation
You can attempt to direct TEX to print cropmarks at the corners of pageswith the @cropmarks command. Write the @cropmarks command on a lineby itself between @iftex and @end iftex lines near the beginning of theTexinfo �le, before the title page, like this:
@iftex@cropmarks@end iftex
This command is mainly for printers that typeset several pages on onesheet of �lm; but you can attempt to use it to mark the corners of a bookset to 7 by 9.25 inches with the @smallbook command. (Printers will notproduce cropmarks for regular sized output that is printed on regular sizedpaper.) Since di�erent printing machines work in di�erent ways, you shouldexplore the use of this command with a spirit of adventure. You may haveto rede�ne the command in the `texinfo.tex' de�nitions �le.
You can attempt to direct TEX to typeset pages larger or smaller thanusual with the \mag TEX command. Everything that is typeset is scaledproportionally larger or smaller. (\mag stands for \magni�cation".) This isnot a Texinfo @-command, but is a plain TEX command that is pre�xed witha backslash. You have to write this command between @tex and @end tex(see Section 18.1 [Using Ordinary TEX Commands], page 141).
Follow the \mag command with an `=' and then a number that is 1000times the magni�cation you desire. For example, to print pages at 1.2 normalsize, write the following near the beginning of the Texinfo �le, before the titlepage:
@tex\mag=1200@end tex
With some printing technologies, you can print normal-sized copies thatlook better than usual by using a larger-than-normal master.
Depending on your system, \mag may not work or may work only atcertain magni�cations. Be prepared to experiment.

158 Texinfo 2.23

Chapter 21: Creating an Info File 159
21 Creating an Info File
makeinfo is a utility that converts a Texinfo �le into an Info �le;texinfo-format-region and texinfo-format-buffer are GNU Emacsfunctions that do the same.
A Texinfo �le must possess an @setfilename line near its beginning,otherwise the Info formatting commands will fail.
For information on installing the Info �le in the Info system, see Chap-ter 22 [Install an Info File], page 167.
The makeinfo utility creates an Info �le from a Texinfo source �le morequickly than either of the Emacs formatting commands and provides bettererror messages. We recommend it. makeinfo is a C program that is inde-pendent of Emacs. You do not need to run Emacs to use makeinfo, whichmeans you can use makeinfo on machines that are too small to run Emacs.You can run makeinfo in any one of three ways: from an operating systemshell, from a shell inside Emacs, or by typing a key command in Texinfomode in Emacs.
The texinfo-format-region and the texinfo-format-buffer com-mands are useful if you cannot run makeinfo. Also, in some circumstances,they format short regions or bu�ers more quickly than makeinfo.
21.1 Running makeinfo from a Shell
To create an Info �le from a Texinfo �le, type makeinfo followed by thename of the Texinfo �le. Thus, to create the Info �le for Bison, type thefollowing at the shell prompt (where `%' is the prompt):
% makeinfo bison.texinfo
(You can run a shell inside Emacs by typing M-x shell.)
21.2 Options for makeinfo
The makeinfo command takes a number of options. Most often, optionsare used to set the value of the �ll column and specify the footnote style.Each command line option is a word preceded by `--'1 or a letter precededby `-'. You can use abbreviations for the option names as long as they areunique.
For example, you could use the following command to create an Info �lefor `bison.texinfo' in which each line is �lled to only 68 columns (where`%' is the prompt):
1 `--' has replaced `+', the old introductory character, to maintain POSIX.2compatibility without losing long-named options.

160 Texinfo 2.23
% makeinfo --fill-column=68 bison.texinfo
You can write two or more options in sequence, like this:
% makeinfo --no-split --fill-column=70 : : :
This would keep the Info �le together as one possibly very long �le and wouldalso set the �ll column to 70.
If you wish to discover which version of makeinfo you are using, type:
% makeinfo --version
The options are:
-D var Cause var to be de�ned. This is equivalent to @set var in theTexinfo �le.
--error-limit limitSet the maximum number of errors that makeinfo will reportbefore exiting (on the assumption that continuing would be use-less). The default number of errors that can be reported beforemakeinfo gives up is 100.
--fill-column widthSpecify the maximum number of columns in a line; this is theright-hand edge of a line. Paragraphs that are �lled will be�lled to this width. (Filling is the process of breaking up andconnecting lines so that lines are the same length as or shorterthan the number speci�ed as the �ll column. Lines are brokenbetween words.) The default value for fill-column is 72.
--footnote-style styleSet the footnote style to style, either `end' for the end nodestyle or `separate' for the separate node style. The valueset by this option overrides the value set in a Texinfo �le byan @footnotestyle command. When the footnote style is`separate', makeinfo makes a new node containing the foot-notes found in the current node. When the footnote style is`end', makeinfo places the footnote references at the end of thecurrent node.
-I dir Add dir to the directory search list for �nding �les that areincluded using the @include command. By default, makeinfosearches only the current directory.
--no-headersDo not include menus or node lines in the output. This resultsin an ascii �le that you cannot read in Info since it does notcontain the requisite nodes or menus; but you can print sucha �le in a single, typewriter-like font and produce acceptableoutput.

Chapter 21: Creating an Info File 161
--no-splitSuppress the splitting stage of makeinfo. Normally, large out-put �les (where the size is greater than 70k bytes) are split intosmaller sub�les, each one approximately 50k bytes. If you spec-ify `--no-split', makeinfo will not split up the output �le.
--no-pointer-validate
--no-validateSuppress the pointer-validation phase of makeinfo. Normally,after a Texinfo �le is processed, some consistency checks aremade to ensure that cross references can be resolved, etc. SeeSection 21.3 [Pointer Validation], page 162.
--no-warnSuppress the output of warning messages. This does not sup-press the output of error messages, only warnings. You mightwant this if the �le you are creating has examples of Texinfocross references within it, and the nodes that are referenced donot actually exist.
--no-number-footnotesSuppress automatic footnote numbering. By default, makeinfonumbers each footnote sequentially in a single node, resettingthe current footnote number to 1 at the start of each node.
--output �le-o �le Specify that the output should be directed to �le and not to the
�le name speci�ed in the @setfilename command found in theTexinfo source. �le can be the special token `-', which speci�esstandard output.
--paragraph-indent indentSet the paragraph indentation style to indent. The value setby this option overrides the value set in a Texinfo �le by an@paragraphindent command. The value of indent is interpretedas follows:
� If the value of indent is `asis', do not change the existingindentation at the starts of paragraphs.
� If the value of indent is zero, delete any existing indentation.
� If the value of indent is greater than zero, indent each para-graph by that number of spaces.
--reference-limit limitSet the value of the number of references to a node thatmakeinfo will make without reporting a warning. If a nodehas more than this number of references in it, makeinfo willmake the references but also report a warning.

162 Texinfo 2.23
-U var Cause var to be unde�ned. This is equivalent to @clear var inthe Texinfo �le.
--verboseCause makeinfo to display messages saying what it is doing.Normally, makeinfo only outputs messages if there are errors orwarnings.
--versionReport the version number of this copy of makeinfo.
21.3 Pointer Validation
If you do not suppress pointer-validation, makeinfo will check the valid-ity of the �nal Info �le. Mostly, this means ensuring that nodes you havereferenced really exist. Here is a complete list of what is checked:
1. If a `Next', `Previous', or `Up' node reference is a reference to a node inthe current �le and is not an external reference such as to `(dir)', thenthe referenced node must exist.
2. In every node, if the `Previous' node is di�erent from the `Up' node,then the `Previous' node must also be pointed to by a `Next' node.
3. Every node except the `Top' node must have an `Up' pointer.
4. The node referenced by an `Up' pointer must contain a reference to thecurrent node in some manner other than through a `Next' reference.This includes menu entries and cross references.
5. If the `Next' reference of a node is not the same as the `Next' referenceof the `Up' reference, then the node referenced by the `Next' pointermust have a `Previous' pointer that points back to the current node.This rule allows the last node in a section to point to the �rst node ofthe next chapter.
21.4 Running makeinfo inside Emacs
You can run makeinfo in GNU Emacs Texinfo mode by using either themakeinfo-region or the makeinfo-buffer commands. In Texinfo mode,the commands are bound to C-c C-m C-r and C-c C-m C-b by default.
C-c C-m C-rM-x makeinfo-region
Format the current region for Info.
C-c C-m C-bM-x makeinfo-buffer
Format the current bu�er for Info.

Chapter 21: Creating an Info File 163
When you invoke either makeinfo-region or makeinfo-buffer, Emacsprompts for a �le name, o�ering the name of the visited �le as the default.You can edit the default �le name in the minibu�er if you wish, before typinghRETi to start the makeinfo process.
The Emacs makeinfo-region and makeinfo-buffer commands run themakeinfo program in a temporary shell bu�er. If makeinfo �nds any errors,Emacs displays the error messages in the temporary bu�er.
You can parse the error messages by typing C-x ` (next-error). Thiscauses Emacs to go to and position the cursor on the line in the Texinfosource that makeinfo thinks caused the error. See section \Running makeor Compilers Generally" in The GNU Emacs Manual, for more informationabout using the next-error command.
In addition, you can kill the shell in which the makeinfo command isrunning or make the shell bu�er display its most recent output.
C-c C-m C-kM-x makeinfo-kill-job
Kill the current running makeinfo job created by makeinfo-region or makeinfo-buffer.
C-c C-m C-lM-x makeinfo-recenter-output-buffer
Redisplay the makeinfo shell bu�er to display its most recentoutput.
(Note that the parallel commands for killing and recentering a TEX job areC-c C-t C-k and C-c C-t C-l. See Section 20.5 [Texinfo Mode Printing],page 151.)
You can specify options for makeinfo by setting the makeinfo-optionsvariable with either the M-x edit-options or the M-x set-variable com-mand, or by setting the variable in your `.emacs' initialization �le.
For example, you could write the following in your `.emacs' �le:
(setq makeinfo-options"--paragraph-indent=0 --no-split--fill-column=70 --verbose")
For more information, see Section 21.2 [Options for makeinfo], page 159,as well as \Editing Variable Values,"\Examining and Setting Variables," and\Init File" in the The GNU Emacs Manual.
21.5 The texinfo-format: : : Commands
In GNU Emacs in Texinfo mode, you can format part or all of a Texinfo�le with the texinfo-format-region command. This formats the currentregion and displays the formatted text in a temporary bu�er called `*InfoRegion*'.

164 Texinfo 2.23
Similarly, you can format a bu�er with the texinfo-format-buffer com-mand. This command creates a new bu�er and generates the Info �le init. Typing C-x C-s will save the Info �le under the name speci�ed by the@setfilename line which must be near the beginning of the Texinfo �le.
C-c C-e C-rtexinfo-format-region
Format the current region for Info.
C-c C-e C-btexinfo-format-buffer
Format the current bu�er for Info.
The texinfo-format-region and texinfo-format-buffer commandsprovide you with some error checking, and other functions can provide youwith further help in �nding formatting errors. These procedures are de-scribed in an appendix; see Appendix G [Catching Mistakes], page 217.However, the makeinfo program is often faster and provides better errorchecking (see Section 21.4 [makeinfo in Emacs], page 162).
21.6 Batch Formatting
You can format Texinfo �les for Info using batch-texinfo-format andEmacs Batch mode. You can run Emacs in Batch mode from any shell,including a shell inside of Emacs. (See section \Command Line Switchesand Arguments" in The GNU Emacs Manual.)
Here is the command to format all the �les that end in `.texinfo' in thecurrent directory (where `%' is the shell prompt):
% emacs -batch -funcall batch-texinfo-format *.texinfo
Emacs processes all the �les listed on the command line, even if an erroroccurs while attempting to format some of them.
Run batch-texinfo-format only with Emacs in Batch mode as shown;it is not interactive. It kills the Batch mode Emacs on completion.
batch-texinfo-format is convenient if you lack makeinfo and want toformat several Texinfo �les at once. When you use Batch mode, you cre-ate a new Emacs process. This frees your current Emacs, so you can con-tinue working in it. (When you run texinfo-format-region or texinfo-format-buffer, you cannot use that Emacs for anything else until the com-mand �nishes.)
21.7 Tag Files and Split Files
If a Texinfo �le has more than 30,000 bytes, texinfo-format-bufferautomatically creates a tag table for its Info �le; makeinfo always creates a

Chapter 21: Creating an Info File 165
tag table. With a tag table, Info can jump to new nodes more quickly thanit can otherwise.
In addition, if the Texinfo �le contains more than about 70,000 bytes,texinfo-format-buffer and makeinfo split the large Info �le into shorterindirect sub�les of about 50,000 bytes each. Big �les are split into smaller�les so that Emacs does not need to make a large bu�er to hold the whole ofa large Info �le; instead, Emacs allocates just enough memory for the small,split o� �le that is needed at the time. This way, Emacs avoids wastingmemory when you run Info. (Before splitting was implemented, Info �leswere always kept short and include �les were designed as a way to create asingle, large printed manual out of the smaller Info �les. See Appendix E[Include Files], page 205, for more information. Include �les are still used forvery large documents, such as The Emacs Lisp Reference Manual, in whicheach chapter is a separate �le.)
When a �le is split, Info itself makes use of a shortened version of theoriginal �le that contains just the tag table and references to the �les thatwere split o�. The split o� �les are called indirect �les.
The split o� �les have names that are created by appending `-1', `-2', `-3'and so on to the �le name speci�ed by the @setfilename command. Theshortened version of the original �le continues to have the name speci�ed by@setfilename.
At one stage in writing this document, for example, the Info �le was savedas `test-texinfo' and that �le looked like this:
Info file: test-texinfo, -*-Text-*-produced by texinfo-format-bufferfrom file: new-texinfo-manual.texinfo
^_Indirect:test-texinfo-1: 102test-texinfo-2: 50422
test-texinfo-3: 101300^_^LTag table:(Indirect)Node: overview^?104Node: info file^?1271
Node: printed manual^?4853Node: conventions^?6855: : :
(But `test-texinfo' had far more nodes than are shown here.) Eachof the split o�, indirect �les, `test-texinfo-1', `test-texinfo-2', and
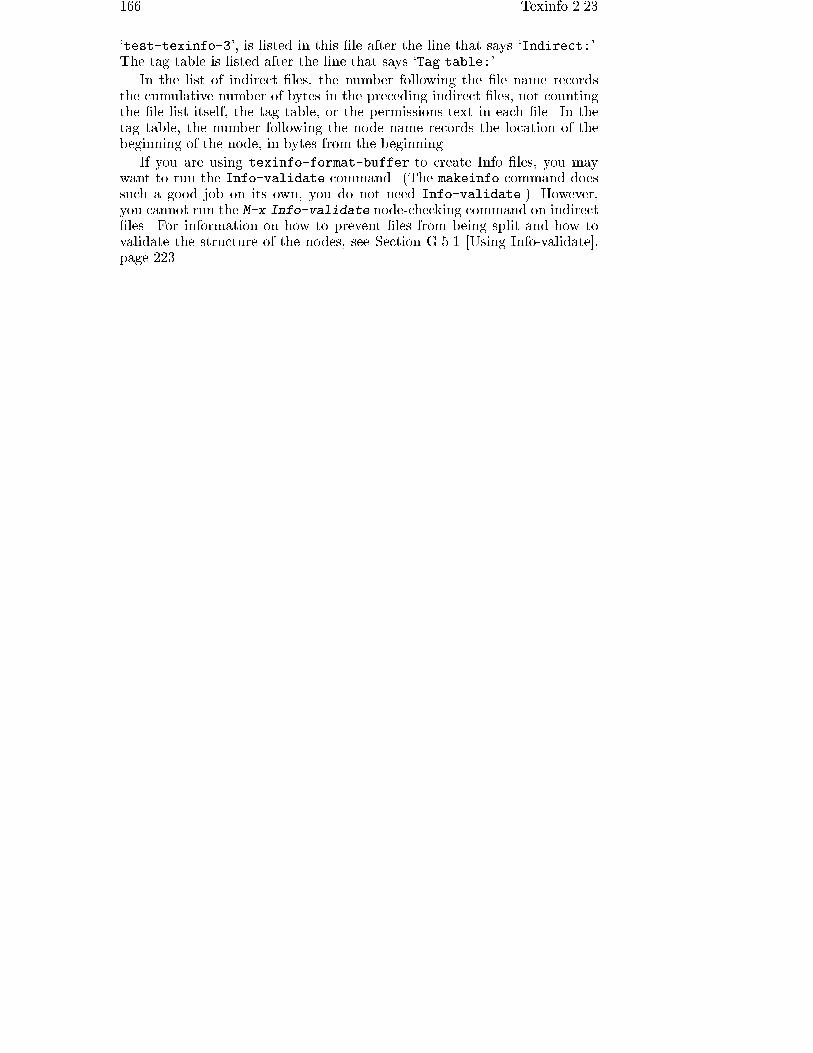
166 Texinfo 2.23
`test-texinfo-3', is listed in this �le after the line that says `Indirect:'.The tag table is listed after the line that says `Tag table:'.
In the list of indirect �les, the number following the �le name recordsthe cumulative number of bytes in the preceding indirect �les, not countingthe �le list itself, the tag table, or the permissions text in each �le. In thetag table, the number following the node name records the location of thebeginning of the node, in bytes from the beginning.
If you are using texinfo-format-buffer to create Info �les, you maywant to run the Info-validate command. (The makeinfo command doessuch a good job on its own, you do not need Info-validate.) However,you cannot run the M-x Info-validate node-checking command on indirect�les. For information on how to prevent �les from being split and how tovalidate the structure of the nodes, see Section G.5.1 [Using Info-validate],page 223.

Chapter 22: Installing an Info File 167
22 Installing an Info File
Info �les are usually kept in the `info' directory. You can read Info �lesusing the standalone Info program or the Info reader built into Emacs. (SeeInfo �le `info', node `Top', for an introduction to Info.)
For Info to work, the `info' directory must contain a �le that serves asa top level directory for the Info system. By convention, this �le is called`dir'. (You can �nd the location of this �le within Emacs by typing C-hi to enter Info and then typing C-x C-f to see the pathname to the `info'directory.)
The `dir' �le is itself an Info �le. It contains the top level menu for allthe Info �les in the system. The menu looks like this:
* Menu:
* Info: (info). Documentation browsing system.* Emacs: (emacs). The extensible, self-documenting
text editor.* Texinfo: (texinfo). With one source file, make
either a printed manual usingTeX or an Info file.
: : :
Each of these menu entries points to the `Top' node of the Info �le that isnamed in parentheses. (The menu entry does not need to specify the `Top'node, since Info goes to the `Top' node if no node name is mentioned. SeeSection 7.5 [Nodes in Other Info Files], page 68.)
Thus, the `Info' entry points to the `Top' node of the `info' �le and the`Emacs' entry points to the `Top' node of the `emacs' �le.
In each of the Info �les, the `Up' pointer of the `Top' node refers back tothe dir �le. For example, the line for the `Top' node of the Emacs manuallooks like this in Info:
File: emacs Node: Top, Up: (DIR), Next: Distrib
(Note that in this case, the `dir' �le name is written in upper case letters|itcan be written in either upper or lower case. Info has a feature that it willchange the case of the �le name to lower case if it cannot �nd the name aswritten.)
22.1 Listing a New Info File
To add a new Info �le to your system, you must write a menu entry toadd to the menu in the `dir' �le in the `info' directory. For example, if youwere adding documentation for GDB, you would write the following newentry:

168 Texinfo 2.23
* GDB: (gdb). The source-level C debugger.
The �rst part of the menu entry is the menu entry name, followed by a colon.The second part is the name of the Info �le, in parentheses, followed by aperiod. The third part is the description.
The name of an Info �le often has a `.info' extension. Thus, the Info�le for GDB might be called either `gdb' or `gdb.info'. The Info readerprograms automatically try the �le name both with and without `.info'; soit is better to avoid clutter and not to write `.info' explicitly in the menuentry. For example, the GDB menu entry should use just `gdb' for the �lename, not `gdb.info'.
22.2 Info Files in Other Directories
If an Info �le is not in the `info' directory, there are three ways to specifyits location:
� Write the pathname in the `dir' �le as the second part of the menu.
� If you are using Emacs, list the name of the �le in a second `dir' �le,in its directory; and then add the name of that directory to the Info-directory-list variable in your personal or site initialization �le.
This tells Emacs's Info reader where to look for `dir' �les. Emacsmerges the �les named `dir' from each of the listed directories. (InEmacs Version 18, you can set the Info-directory variable to thename of only one directory.)
� Specify the `info' directory name in the INFOPATH environment variablein your `.profile' or `.cshrc' initialization �le. (Only you and otherswho set this environment variable will be able to �nd Info �les whoselocation is speci�ed this way.)
For example, to reach a test �le in the `~bob/manuals' directory, youcould add an entry like this to the menu in the `dir' �le:
* Test: (/home/bob/manuals/info-test). Bob's own test file.
In this case, the absolute �le name of the `info-test' �le is written as thesecond part of the menu entry.
Alternatively, you could write the following in your `.emacs' �le:
(setq Info-directory-list'("/home/bob/manuals"
"/usr/local/emacs/info"))
This tells Emacs to merge the `dir' �le from the `/home/bob/manuals'directory with the `dir' �le from the `"/usr/local/emacs/info'" directory.Info will list the `/home/bob/manuals/info-test' �le as a menu entry inthe `/home/bob/manuals/dir' �le.
Finally, you can tell Info where to look by setting the INFOPATH environ-ment variable in your `.cshrc' or `.profile' �le.
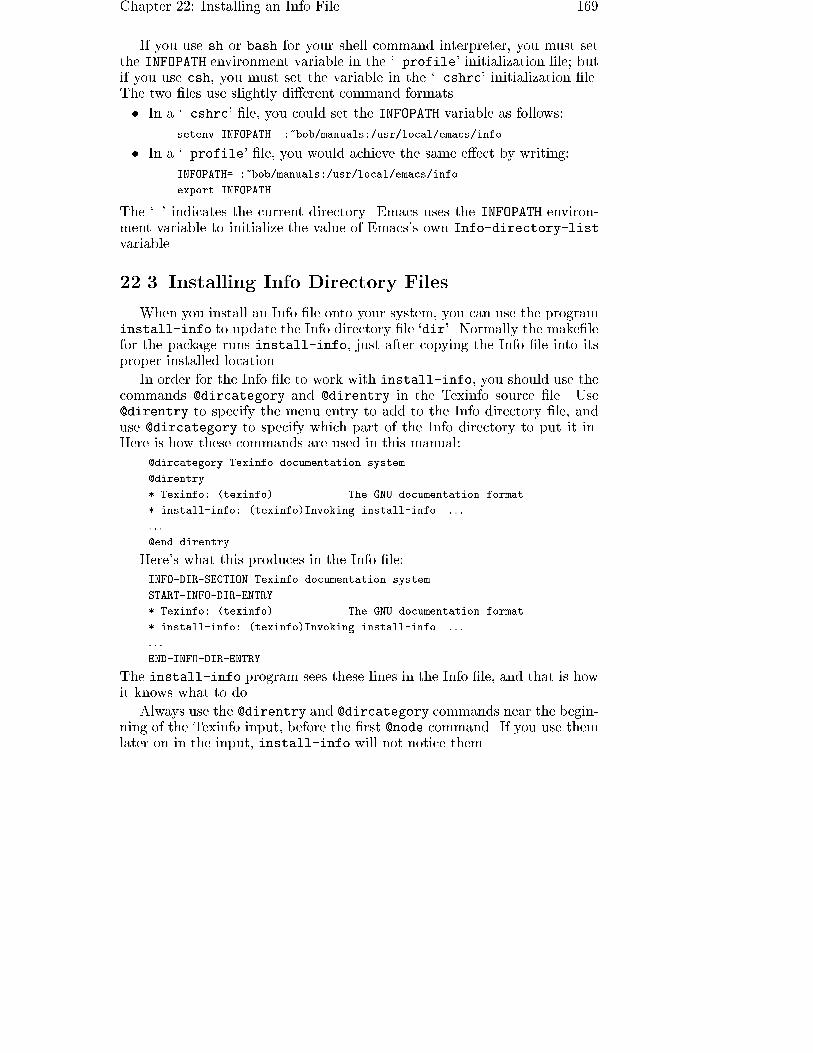
Chapter 22: Installing an Info File 169
If you use sh or bash for your shell command interpreter, you must setthe INFOPATH environment variable in the `.profile' initialization �le; butif you use csh, you must set the variable in the `.cshrc' initialization �le.The two �les use slightly di�erent command formats.
� In a `.cshrc' �le, you could set the INFOPATH variable as follows:
setenv INFOPATH .:~bob/manuals:/usr/local/emacs/info
� In a `.profile' �le, you would achieve the same e�ect by writing:
INFOPATH=.:~bob/manuals:/usr/local/emacs/info
export INFOPATH
The `.' indicates the current directory. Emacs uses the INFOPATH environ-ment variable to initialize the value of Emacs's own Info-directory-listvariable.
22.3 Installing Info Directory Files
When you install an Info �le onto your system, you can use the programinstall-info to update the Info directory �le `dir'. Normally the make�lefor the package runs install-info, just after copying the Info �le into itsproper installed location.
In order for the Info �le to work with install-info, you should use thecommands @dircategory and @direntry in the Texinfo source �le. Use@direntry to specify the menu entry to add to the Info directory �le, anduse @dircategory to specify which part of the Info directory to put it in.Here is how these commands are used in this manual:
@dircategory Texinfo documentation system
@direntry
* Texinfo: (texinfo). The GNU documentation format.
* install-info: (texinfo)Invoking install-info. : : :
: : :
@end direntry
Here's what this produces in the Info �le:
INFO-DIR-SECTION Texinfo documentation system
START-INFO-DIR-ENTRY
* Texinfo: (texinfo). The GNU documentation format.
* install-info: (texinfo)Invoking install-info. : : :
: : :
END-INFO-DIR-ENTRY
The install-info program sees these lines in the Info �le, and that is howit knows what to do.
Always use the @direntry and @dircategory commands near the begin-ning of the Texinfo input, before the �rst @node command. If you use themlater on in the input, install-info will not notice them.

170 Texinfo 2.23
If you use @dircategorymore than once in the Texinfo source, each usagespeci�es one category; the new menu entry is added to the Info directory �lein each of the categories you specify. If you use @direntry more than once,each usage speci�es one menu entry; each of these menu entries is added tothe directory in each of the speci�ed categories.
22.4 Invoking install-info
install-info inserts menu entries from an Info �le into the top-level`dir' �le in the Info system (see the previous sections for an explanation ofhow the `dir' �le works). It's most often run as part of software installation,or when constructing a dir �le for all manuals on a system. Synopsis:
install-info [option]: : : [info-�le [dir-�le]]
If info-�le or dir-�le are not speci�ed, the various options (describedbelow) that de�ne them must be. There are no compile-time defaults, andstandard input is never used. install-info can read only one info �le andwrite only one dir �le per invocation.
Options:
`--delete'Only delete existing entries in info-�le; don't insert any newentries.
`--dir-file=name'Specify �le name of the Info directory �le. This is equivalent tousing the dir-�le argument.
`--entry=text'Insert text as an Info directory entry; text should have the formof an Info menu item line plus zero or more extra lines startingwith whitespace. If you specify more than one entry, they areall added. If you don't specify any entries, they are determinedfrom information in the Info �le itself.
`--help' Display a usage message listing basic usage and all availableoptions, then exit successfully.
`--info-file=�le'Specify Info �le to install in the directory. This is equivalent tousing the info-�le argument.
`--info-dir=dir'Equivalent to `--dir-file=dir/dir'.
`--item=text'Same as {entry=text. An Info directory entry is actually a menuitem.

Chapter 22: Installing an Info File 171
`--quiet' Suppress warnings.
`--remove'Same as {delete.
`--section=sec'Put this �le's entries in section sec of the directory. If you specifymore than one section, all the entries are added in each of thesections. If you don't specify any sections, they are determinedfrom information in the Info �le itself.
`--version'Display version information and exit successfully.

172 Texinfo 2.23

Appendix A: @-Command List 173
Appendix A @-Command List
Here is an alphabetical list of the @-commands in Texinfo. Square brack-ets, [ ], indicate optional arguments; an ellipsis, `: : :', indicates repeatedtext.
@whitespaceAn @ followed by a space, tab, or newline produces a nor-mal, stretchable, interword space. See Section 13.2.3 [MultipleSpaces], page 113.
@! Generate an exclamation point that really does end a sen-tence (usually after an end-of-sentence capital letter). See Sec-tion 13.2.2 [Ending a Sentence], page 112.
@"@' Generate an umlaut or acute accent, respectively, over the next
character, as in �o and �o. See Section 13.3 [Inserting Accents],page 114.
@* Force a line break. Do not end a paragraph that uses @* with an@refill command. See Section 15.1 [Line Breaks], page 121.
@,{c} Generate a cedilla accent under c, as in �c. See Section 13.3[Inserting Accents], page 114.
@- Insert a discretionary hyphenation point. See Section 15.2 [- andhyphenation], page 122.
@. Produce a period that really does end a sentence (usually afteran end-of-sentence capital letter). See Section 13.2.2 [Ending aSentence], page 112.
@: Indicate to TEX that an immediately preceding period, questionmark, exclamation mark, or colon does not end a sentence. Pre-vent TEX from inserting extra whitespace as it does at the end ofa sentence. The command has no e�ect on the Info �le output.See Section 13.2.1 [Not Ending a Sentence], page 111.
@= Generate a macro (bar) accent over the next character, as in �o.See Section 13.3 [Inserting Accents], page 114.
@? Generate a question mark that really does end a sentence (usu-ally after an end-of-sentence capital letter). See Section 13.2.2[Ending a Sentence], page 112.
@@ Stands for an at sign, `@'.See Section 13.1 [Inserting @ and braces], page 111.

174 Texinfo 2.23
@^@` Generate a circum ex (hat) or grave accent, respectively, over
the next character, as in o. See Section 13.3 [Inserting Accents],page 114.
@{ Stands for a left brace, `{'.See Section 13.1 [Inserting @ and braces], page 111.
@} Stands for a right-hand brace, `}'.See Section 13.1 [Inserting @ and braces], page 111.
@= Generate a tilde accent over the next character, as in ~N. SeeSection 13.3 [Inserting Accents], page 114.
@AA{}@aa{} Generate the uppercase and lowercase Scandinavian A-ring let-
ters, respectively: �A, �a. See Section 13.3 [Inserting Accents],page 114.
@AE{}@ae{} Generate the uppercase and lowercase AE ligatures, respec-
tively: �, �. See Section 13.3 [Inserting Accents], page 114.
@appendix titleBegin an appendix. The title appears in the table of contents ofa printed manual. In Info, the title is underlined with asterisks.See Section 5.5 [The @unnumbered and @appendix Commands],page 51.
@appendixsec title@appendixsection title
Begin an appendix section within an appendix. The section titleappears in the table of contents of a printed manual. In Info,the title is underlined with equal signs. @appendixsection is alonger spelling of the @appendixsec command. See Section 5.8[Section Commands], page 52.
@appendixsubsec titleBegin an appendix subsection within an appendix. The titleappears in the table of contents of a printed manual. In Info, thetitle is underlined with hyphens. See Section 5.10 [SubsectionCommands], page 53.
@appendixsubsubsec titleBegin an appendix subsubsection within a subappendix. Thetitle appears in the table of contents of a printed manual. InInfo, the title is underlined with periods. See Section 5.11 [The`subsub' Commands], page 53.

Appendix A: @-Command List 175
@asis Used following @table, @ftable, and @vtable to print the ta-ble's �rst column without highlighting (\as is"). See Section 11.3[Making a Two-column Table], page 101.
@author authorTypeset author ushleft and underline it. See Section 3.4.3 [The@title and @author Commands], page 38.
@b{text} Print text in bold font. No e�ect in Info. See Section 9.2.3[Fonts], page 87.
@bullet{}Generate a large round dot, or the closest possible thing to one.See Section 13.4.2 [@bullet], page 115.
@bye Stop formatting a �le. The formatters do not see the contentsof a �le following an @bye command. See Chapter 4 [Ending aFile], page 45.
@c commentBegin a comment in Texinfo. The rest of the line does notappear in either the Info �le or the printed manual. A synonymfor @comment. See Section 1.5 [Comments], page 8.
@cartoucheHighlight an example or quotation by drawing a box withrounded corners around it. Pair with @end cartouche. No ef-fect in Info. See Section 10.11 [Drawing Cartouches AroundExamples], page 95.)
@center line-of-textCenter the line of text following the command. See Section 3.4.2[@center], page 37.
@centerchap line-of-textLike @chapter, but centers the chapter title. See Section 5.4[@chapter], page 51.
@chapheading titlePrint a chapter-like heading in the text, but not in the table ofcontents of a printed manual. In Info, the title is underlined withasterisks. See Section 5.6 [@majorheading and @chapheading],page 52.
@chapter titleBegin a chapter. The chapter title appears in the table of con-tents of a printed manual. In Info, the title is underlined withasterisks. See Section 5.4 [@chapter], page 51.
@cindex entryAdd entry to the index of concepts. See Section 12.1 [De�ningthe Entries of an Index], page 105.

176 Texinfo 2.23
@cite{reference}Highlight the name of a book or other reference that lacks acompanion Info �le. See Section 9.1.8 [@cite], page 85.
@clear agUnset ag, preventing the Texinfo formatting commands fromformatting text between subsequent pairs of @ifset ag and@end ifset commands, and preventing @value{ ag} from ex-panding to the value to which ag is set. See Section 18.2 [@set@clear @value], page 142.
@code{sample-code}Highlight text that is an expression, a syntactically complete to-ken of a program, or a program name. See Section 9.1.1 [@code],page 80.
@comment commentBegin a comment in Texinfo. The rest of the line does not appearin either the Info �le or the printed manual. A synonym for @c.See Section 1.5 [Comments], page 8.
@contentsPrint a complete table of contents. Has no e�ect in Info, whichuses menus instead. See Section 4.2 [Generating a Table of Con-tents], page 46.
@copyright{}Generate a copyright symbol. See Section 13.5.2 [@copyright],page 115.
@defcodeindex index-nameDe�ne a new index and its indexing command. Print entries inan @code font. See Section 12.5 [De�ning New Indices], page 109.
@defcv category class name@defcvx category class name
Format a description for a variable associated with a class inobject-oriented programming. Takes three arguments: the cat-egory of thing being de�ned, the class to which it belongs, andits name. See Chapter 16 [De�nition Commands], page 125, andSection 16.3 [Def Cmds in Detail], page 127.
@deffn category name arguments: : :@deffnx category name arguments: : :
Format a description for a function, interactive command, orsimilar entity that may take arguments. @deffn takes as argu-ments the category of entity being described, the name of thisparticular entity, and its arguments, if any. See Chapter 16[De�nition Commands], page 125.

Appendix A: @-Command List 177
@defindex index-nameDe�ne a new index and its indexing command. Print entries ina roman font. See Section 12.5 [De�ning New Indices], page 109.
@definfoenclose new-command, before, after,Create new @-command for Info that marks text by enclosing itin strings that precede and follow the text. Write de�nition in-side of @ifinfo : : : @end ifinfo. See Section 9.2.4 [CustomizedHighlighting], page 87.
@defivar class instance-variable-name@defivarx class instance-variable-name
This command formats a description for an instance variable inobject-oriented programming. The command is equivalent to`@defcv {Instance Variable} : : :'. See Chapter 16 [De�nitionCommands], page 125, and Section 16.3 [Def Cmds in Detail],page 127.
@defmac macro-name arguments: : :@defmacx macro-name arguments: : :
Format a description for a macro. The command is equivalentto `@deffn Macro : : :'. See Chapter 16 [De�nition Commands],page 125, and Section 16.3 [Def Cmds in Detail], page 127.
@defmethod class method-name arguments: : :@defmethodx class method-name arguments: : :
Format a description for a method in object-oriented program-ming. The command is equivalent to `@defop Method : : :'.Takes as arguments the name of the class of the method, thename of the method, and its arguments, if any. See Chapter 16[De�nition Commands], page 125, and Section 16.3 [Def Cmdsin Detail], page 127.
@defop category class name arguments: : :@defopx category class name arguments: : :
Format a description for an operation in object-oriented pro-gramming. @defop takes as arguments the overall name of thecategory of operation, the name of the class of the operation,the name of the operation, and its arguments, if any. See Chap-ter 16 [De�nition Commands], page 125, and Section 16.3 [DefCmds in Detail], page 127.
@defopt option-name@defoptx option-name
Format a description for a user option. The command is equiva-lent to `@defvr {User Option} : : :'. See Chapter 16 [De�nitionCommands], page 125, and Section 16.3 [Def Cmds in Detail],page 127.

178 Texinfo 2.23
@defspec special-form-name arguments: : :@defspecx special-form-name arguments: : :
Format a description for a special form. The command is equiva-lent to `@deffn {Special Form} : : :'. See Chapter 16 [De�nitionCommands], page 125, and Section 16.3 [Def Cmds in Detail],page 127.
@deftp category name-of-type attributes: : :@deftpx category name-of-type attributes: : :
Format a description for a data type. @deftp takes as argumentsthe category, the name of the type (which is a word like `int'or `float'), and then the names of attributes of objects of thattype. See Chapter 16 [De�nition Commands], page 125, andSection 16.3 [Def Cmds in Detail], page 127.
@deftypefn classi�cation data-type name arguments: : :@deftypefnx classi�cation data-type name arguments: : :
Format a description for a function or similar entity that maytake arguments and that is typed. @deftypefn takes as argu-ments the classi�cation of entity being described, the type, thename of the entity, and its arguments, if any. See Chapter 16[De�nition Commands], page 125, and Section 16.3 [Def Cmdsin Detail], page 127.
@deftypefun data-type function-name arguments: : :@deftypefunx data-type function-name arguments: : :
Format a description for a function in a typed language. Thecommand is equivalent to `@deftypefn Function : : :'. SeeChapter 16 [De�nition Commands], page 125, and Section 16.3[Def Cmds in Detail], page 127.
@deftypevr classi�cation data-type name@deftypevrx classi�cation data-type name
Format a description for something like a variable in a typedlanguage|an entity that records a value. Takes as argumentsthe classi�cation of entity being described, the type, and thename of the entity. See Chapter 16 [De�nition Commands],page 125, and Section 16.3 [Def Cmds in Detail], page 127.
@deftypevar data-type variable-name@deftypevarx data-type variable-name
Format a description for a variable in a typed language. Thecommand is equivalent to `@deftypevr Variable : : :'. SeeChapter 16 [De�nition Commands], page 125, and Section 16.3[Def Cmds in Detail], page 127.

Appendix A: @-Command List 179
@defun function-name arguments: : :@defunx function-name arguments: : :
Format a description for functions. The command is equiv-alent to `@deffn Function : : :'. See Chapter 16 [De�nitionCommands], page 125, and Section 16.3 [Def Cmds in Detail],page 127.
@defvar variable-name@defvarx variable-name
Format a description for variables. The command is equiv-alent to `@defvr Variable : : :'. See Chapter 16 [De�nitionCommands], page 125, and Section 16.3 [Def Cmds in Detail],page 127.
@defvr category name@defvrx category name
Format a description for any kind of variable. @defvr takesas arguments the category of the entity and the name of theentity. See Chapter 16 [De�nition Commands], page 125, andSection 16.3 [Def Cmds in Detail], page 127.
@detailmenu{}Use to avoid Makeinfo confusion stemming from the detailednode listing in a master menu. See Section 3.5.1 [Master MenuParts], page 42.
@dfn{term}Highlight the introductory or de�ning use of a term. See Sec-tion 9.1.7 [@dfn], page 84.
@dircategory dirpartSpecify a part of the Info directory menu where this �le's entryshould go. See Section 22.3 [Installing Dir Entries], page 169.
@direntryBegin the Info directory menu entry for this �le. See Section 22.3[Installing Dir Entries], page 169.
@display Begin a kind of example. Indent text, do not �ll, do not select anew font. Pair with @end display. See Section 10.7 [@display],page 93.
@dmn{dimension}Format a unit of measure, as in 12 pt. Causes TEX to insert athin space before dimension. No e�ect in Info. See Section 13.2.4[@dmn], page 113.
@dots{} Insert an ellipsis: `: : :'. See Section 13.4.1 [@dots], page 115.

180 Texinfo 2.23
@email{address}Indicate an electronic mail address. See Section 9.1.10 [@email],page 85.
@emph{text}Highlight text; text is displayed in italics in printed output, andsurrounded by asterisks in Info. See Section 9.2 [EmphasizingText], page 85.
@end environmentEnds environment, as in `@end example'. See Section 1.3 [@-commands], page 6.
@enddots{}Generate an end-of-sentence of ellipsis, like this : : : : See Sec-tion 13.4.1 [@dots{}], page 115.
@enumerate [number-or-letter]Begin a numbered list, using @item for each entry. Optionally,start list with number-or-letter. Pair with @end enumerate. SeeSection 11.2 [@enumerate], page 99.
@equiv{} Indicate to the reader the exact equivalence of two forms with aglyph: `� '. See Section 14.5 [Equivalence], page 119.
@error{} Indicate to the reader with a glyph that the following text isan error message: ` error '. See Section 14.4 [Error Glyph],page 118.
@evenfooting [left] @| [center] @| [right]Specify page footings for even-numbered (left-hand) pages. Notrelevant to Info. See Section F.3 [How to Make Your Own Head-ings], page 213.
@evenheading [left] @| [center] @| [right]Specify page headings for even-numbered (left-hand) pages.Only supported within @iftex. See Section F.3 [How to MakeYour Own Headings], page 213.
@everyfooting [left] @| [center] @| [right]@everyheading [left] @| [center] @| [right]
Specify page footings resp. headings for every page. Not relevantto Info. See Section F.3 [How to Make Your Own Headings],page 213.
@example Begin an example. Indent text, do not �ll, and select �xed-widthfont. Pair with @end example. See Section 10.3 [@example],page 90.
@exclamdown{}Generate an upside-down exclamation point. See Section 13.3[Inserting Accents], page 114.

Appendix A: @-Command List 181
@exdent line-of-textRemove any indentation a line might have. See Section 10.9[Undoing the Indentation of a Line], page 94.
@expansion{}Indicate the result of a macro expansion to the reader with a spe-cial glyph: ` 7!'. See Section 14.2 [7! Indicating an Expansion],page 117.
@file{�lename}Highlight the name of a �le, bu�er, node, or directory. SeeSection 9.1.6 [@file], page 84.
@finaloutPrevent TEX from printing large black warning rectangles besideover-wide lines. See Section 20.9 [Overfull hboxes], page 155.
@findex entryAdd entry to the index of functions. See Section 12.1 [De�ningthe Entries of an Index], page 105.
@flushleft@flushright
Left justify every line but leave the right end ragged. Leave fontas is. Pair with @end flushleft. @flushright analogous. SeeSection 10.10 [@flushleft and @flushright], page 94.
@footnote{text-of-footnote}Enter a footnote. Footnote text is printed at the bottom of thepage by TEX; Info may format in either `End' node or `Separate'node style. See Chapter 17 [Footnotes], page 139.
@footnotestyle styleSpecify an Info �le's footnote style, either `end' for the end nodestyle or `separate' for the separate node style. See Chapter 17[Footnotes], page 139.
@format Begin a kind of example. Like @example or @display, but donot narrow the margins and do not select the �xed-width font.Pair with @end format. See Section 10.3 [@example], page 90.
@ftable formatting-commandBegin a two-column table, using @item for each entry. Automat-ically enter each of the items in the �rst column into the indexof functions. Pair with @end ftable. The same as @table, ex-cept for indexing. See Section 11.3.1 [@ftable and @vtable],page 102.
@group Hold text together that must appear on one printed page.Pair with @end group. Not relevant to Info. See Section 15.6[@group], page 123.

182 Texinfo 2.23
@H{c} Generate the long Hungarian umlaut accent over c, as in }o.
@heading titlePrint an unnumbered section-like heading in the text, but not inthe table of contents of a printed manual. In Info, the title is un-derlined with equal signs. See Section 5.8 [Section Commands],page 52.
@headings on-o�-single-doubleTurn page headings on or o�, and/or specify single-sided ordouble-sided page headings for printing. See Section 3.4.6 [The@headings Command], page 40.
@i{text} Print text in italic font. No e�ect in Info. See Section 9.2.3[Fonts], page 87.
@ifclear agIf ag is cleared, the Texinfo formatting commands format textbetween @ifclear ag and the following @end ifclear com-mand. See Section 18.2 [@set @clear @value], page 142.
@ifhtml@ifinfo Begin a stretch of text that will be ignored by TEX when it type-
sets the printed manual. The text appears only in the HTMLresp. Info �le. Pair with @end ifhtml resp. @end ifinfo. SeeChapter 18 [Conditionally Visible Text], page 141.
@ifset agIf ag is set, the Texinfo formatting commands format text be-tween @ifset ag and the following @end ifset command. SeeSection 18.2 [@set @clear @value], page 142.
@iftex Begin a stretch of text that will not appear in the Info �le,but will be processed only by TEX. Pair with @end iftex. SeeChapter 18 [Conditionally Visible Text], page 141.
@ignore Begin a stretch of text that will not appear in either the Info �leor the printed output. Pair with @end ignore. See Section 1.5[Comments and Ignored Text], page 8.
@include �lenameIncorporate the contents of the �le �lename into the Info �le orprinted document. See Appendix E [Include Files], page 205.
@inforef{node-name, [entry-name], info-�le-name}Make a cross reference to an Info �le for which there is no printedmanual. See Section 8.7 [Cross references using @inforef],page 77.
\input macro-de�nitions-�leUse the speci�ed macro de�nitions �le. This command is usedonly in the �rst line of a Texinfo �le to cause TEX to make use

Appendix A: @-Command List 183
of the `texinfo' macro de�nitions �le. The backslash in \inputis used instead of an @ because TEX does not recognize @ untilafter it has read the de�nitions �le. See Section 3.2 [The TexinfoFile Header], page 31.
@item Indicate the beginning of a marked paragraph for @itemize and@enumerate; indicate the beginning of the text of a �rst columnentry for @table, @ftable, and @vtable. See Chapter 11 [Listsand Tables], page 97.
@itemize mark-generating-character-or-commandProduce a sequence of indented paragraphs, with a mark insidethe left margin at the beginning of each paragraph. Pair with@end itemize. See Section 11.1 [@itemize], page 97.
@itemx Like @item but do not generate extra vertical space above theitem text. See Section 11.3.2 [@itemx], page 102.
@kbd{keyboard-characters}Indicate text that is characters of input to be typed by users.See Section 9.1.2 [@kbd], page 81.
@key{key-name}Highlight key-name, a name for a key on a keyboard. See Sec-tion 9.1.3 [@key], page 82.
@kindex entryAdd entry to the index of keys. See Section 12.1 [De�ning theEntries of an Index], page 105.
@L{}@l{} Generate the uppercase and lowercase Polish suppressed-L let-
ters, respectively: L, l.
@global@letnew-command=existing-commandEquate a new highlighting command with an existing one. Onlyfor TEX. Write de�nition inside of @iftex : : : @end iftex. SeeSection 9.2.4 [Customized Highlighting], page 87.
@lisp Begin an example of Lisp code. Indent text, do not �ll, andselect �xed-width font. Pair with @end lisp. See Section 10.5[@lisp], page 92.
@lowersectionsChange subsequent chapters to sections, sections to subsec-tions, and so on. See Section 5.12 [@raisesections and@lowersections], page 54.
@macro macro-name {params}De�ne a new Texinfo command @macro-name{params}. Onlysupported by Makeinfo and Texi2dvi. See Section 19.1 [De�ningMacros], page 147.

184 Texinfo 2.23
@majorheading titlePrint a chapter-like heading in the text, but not in the table ofcontents of a printed manual. Generate more vertical whites-pace before the heading than the @chapheading command. InInfo, the chapter heading line is underlined with asterisks. SeeSection 5.6 [@majorheading and @chapheading], page 52.
@math{mathematical-expression}Format a mathematical expression. See Section 13.8 [@math:Inserting Mathematical Expressions], page 116.
@menu Mark the beginning of a menu of nodes in Info. No e�ect in aprinted manual. Pair with @end menu. See Chapter 7 [Menus],page 65.
@minus{} Generate a minus sign, `�'. See Section 13.7 [@minus], page 116.
@multitable column-width-specBegin a multi-column table. Pair with @end multitable. SeeSection 11.4.1 [Multitable Column Widths], page 103.
@need n Start a new page in a printed manual if fewer than n mils (thou-sandths of an inch) remain on the current page. See Section 15.7[@need], page 124.
@node name, next, previous, upDe�ne the beginning of a new node in Info, and serve as a locatorfor references for TEX. See Section 6.2 [@node], page 59.
@noindentPrevent text from being indented as if it were a new paragraph.See Section 10.4 [@noindent], page 91.
@O{}@o{} Generate the uppercase and lowercase Owith-slash letters, re-
spectively: �, �.
@oddfooting [left] @| [center] @| [right]@oddheading [left] @| [center] @| [right]
Specify page footings resp. headings for odd-numbered (right-hand) pages. Only allowed inside @iftex. See Section F.3 [Howto Make Your Own Headings], page 213.
@OE{}@oe{} Generate the uppercase and lowercase OE ligatures, respec-
tively: �, �. See Section 13.3 [Inserting Accents], page 114.
@page Start a new page in a printed manual. No e�ect in Info. SeeSection 15.5 [@page], page 123.

Appendix A: @-Command List 185
@paragraphindent indentIndent paragraphs by indent number of spaces; delete indenta-tion if the value of indent is 0; and do not change indentation ifindent is asis. See Section 3.2.6 [Paragraph Indenting], page 34.
@pindex entryAdd entry to the index of programs. See Section 12.1 [De�ningthe Entries of an Index], page 105.
@point{} Indicate the position of point in a bu�er to the reader witha glyph: `?'. See Section 14.6 [Indicating Point in a Bu�er],page 119.
@pounds{}Generate the pounds sterling currency sign. See Section 13.6[@pounds{}], page 116.
@print{} Indicate printed output to the reader with a glyph: ` a '. SeeSection 14.3 [Print Glyph], page 118.
@printindex index-namePrint an alphabetized two-column index in a printed manual orgenerate an alphabetized menu of index entries for Info. SeeSection 4.1 [Printing Indices & Menus], page 45.
@pxref{node-name, [entry], [topic-or-title], [info-�le], [manual]}Make a reference that starts with a lower case `see' in a printedmanual. Use within parentheses only. Do not follow commandwith a punctuation mark|the Info formatting commands auto-matically insert terminating punctuation as needed. Only the�rst argument is mandatory. See Section 8.6 [@pxref], page 76.
@questiondown{}Generate an upside-down question mark. See Section 13.3 [In-serting Accents], page 114.
@quotationNarrow the margins to indicate text that is quoted from an-other real or imaginary work. Write command on a line of itsown. Pair with @end quotation. See Section 10.2 [@quotation],page 90.
@r{text} Print text in roman font. No e�ect in Info. See Section 9.2.3[Fonts], page 87.
@raisesectionsChange subsequent sections to chapters, subsections to sec-tions, and so on. See Section 5.12 [@raisesections and@lowersections], page 54.

186 Texinfo 2.23
@ref{node-name, [entry], [topic-or-title], [info-�le], [manual]}Make a reference. In a printed manual, the reference does notstart with a `See'. Follow command with a punctuation mark.Only the �rst argument is mandatory. See Section 8.5 [@ref],page 76.
@refill In Info, re�ll and indent the paragraph after all the other pro-cessing has been done. No e�ect on TEX, which always re�lls.This command is no longer needed, since all formatters nowautomatically re�ll. See Appendix H [Re�lling Paragraphs],page 227.
@result{}Indicate the result of an expression to the reader with a specialglyph: `)'. See Section 14.1 [@result], page 117.
@ringaccent{c}Generate a ring accent over the next character, as in �o. SeeSection 13.3 [Inserting Accents], page 114.
@samp{text}Highlight text that is a literal example of a sequence of char-acters. Used for single characters, for statements, and often forentire shell commands. See Section 9.1.4 [@samp], page 82.
@sc{text} Set text in a printed output in the small caps font andset text in the Info �le in uppercase letters. See Section 9.2.2[Smallcaps], page 86.
@section titleBegin a section within a chapter. In a printed manual, the sec-tion title is numbered and appears in the table of contents. InInfo, the title is underlined with equal signs. See Section 5.7[@section], page 52.
@set ag [string]Make ag active, causing the Texinfo formatting commands toformat text between subsequent pairs of @ifset ag and @endifset commands. Optionally, set value of ag to string. SeeSection 18.2 [@set @clear @value], page 142.
@setchapternewpage on-o�-oddSpecify whether chapters start on new pages, and if so, whetheron odd-numbered (right-hand) new pages. See Section 3.2.5[@setchapternewpage], page 33.
@setfilename info-�le-nameProvide a name to be used by the Info �le. This command isessential for TEX formatting as well, even though it produces nooutput. See Section 3.2.3 [@setfilename], page 32.

Appendix A: @-Command List 187
@settitle titleProvide a title for page headers in a printed manual. See Sec-tion 3.2.4 [@settitle], page 32.
@shortcontentsPrint a short table of contents. Not relevant to Info, whichuses menus rather than tables of contents. A synonym for@summarycontents. See Section 4.2 [Generating a Table of Con-tents], page 46.
@shorttitlepage{title}Generate a minimal title page. See Section 3.4.1 [@titlepage],page 36.
@smallbookCause TEX to produce a printed manual in a 7 by 9.25 inchformat rather than the regular 8.5 by 11 inch format. SeeSection 20.10 [Printing Small Books], page 156. Also, see Sec-tion 10.6 [@smallexample and @smalllisp], page 93.
@smallexampleIndent text to indicate an example. Do not �ll, select �xed-widthfont. In @smallbook format, print text in a smaller font thanwith @example. Pair with @end smallexample. See Section 10.6[@smallexample and @smalllisp], page 93.
@smalllispBegin an example of Lisp code. Indent text, do not �ll, se-lect �xed-width font. In @smallbook format, print text in asmaller font. Pair with @end smalllisp. See Section 10.6[@smallexample and @smalllisp], page 93.
@sp n Skip n blank lines. See Section 15.4 [@sp], page 123.
@ss{} Generate the German sharp-S es-zet letter, �. See Section 13.3[Inserting Accents], page 114.
@strong textEmphasize text by typesetting it in a bold font for the printedmanual and by surrounding it with asterisks for Info. See Sec-tion 9.2.1 [Emphasizing Text], page 85.
@subheading titlePrint an unnumbered subsection-like heading in the text, but notin the table of contents of a printed manual. In Info, the title isunderlined with hyphens. See Section 5.10 [@unnumberedsubsec@appendixsubsec @subheading], page 53.
@subsection titleBegin a subsection within a section. In a printed manual, thesubsection title is numbered and appears in the table of contents.
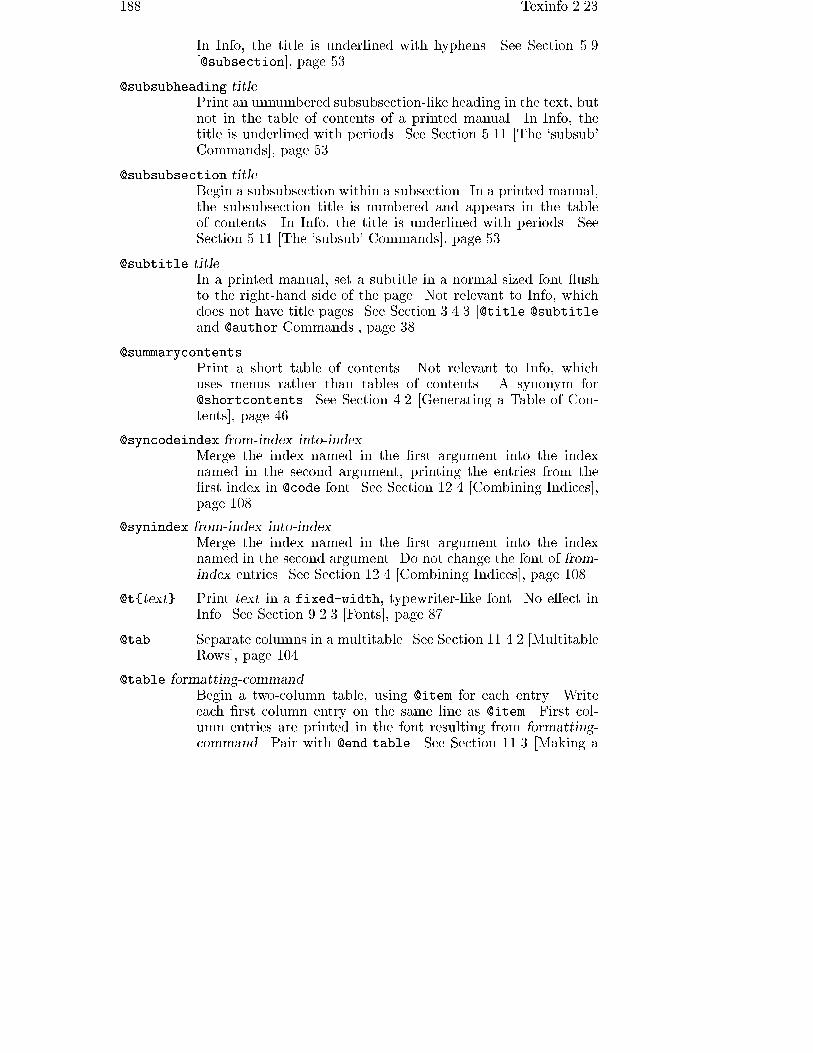
188 Texinfo 2.23
In Info, the title is underlined with hyphens. See Section 5.9[@subsection], page 53.
@subsubheading titlePrint an unnumbered subsubsection-like heading in the text, butnot in the table of contents of a printed manual. In Info, thetitle is underlined with periods. See Section 5.11 [The `subsub'Commands], page 53.
@subsubsection titleBegin a subsubsection within a subsection. In a printed manual,the subsubsection title is numbered and appears in the tableof contents. In Info, the title is underlined with periods. SeeSection 5.11 [The `subsub' Commands], page 53.
@subtitle titleIn a printed manual, set a subtitle in a normal sized font ushto the right-hand side of the page. Not relevant to Info, whichdoes not have title pages. See Section 3.4.3 [@title @subtitleand @author Commands], page 38.
@summarycontentsPrint a short table of contents. Not relevant to Info, whichuses menus rather than tables of contents. A synonym for@shortcontents. See Section 4.2 [Generating a Table of Con-tents], page 46.
@syncodeindex from-index into-indexMerge the index named in the �rst argument into the indexnamed in the second argument, printing the entries from the�rst index in @code font. See Section 12.4 [Combining Indices],page 108.
@synindex from-index into-indexMerge the index named in the �rst argument into the indexnamed in the second argument. Do not change the font of from-index entries. See Section 12.4 [Combining Indices], page 108.
@t{text} Print text in a fixed-width, typewriter-like font. No e�ect inInfo. See Section 9.2.3 [Fonts], page 87.
@tab Separate columns in a multitable. See Section 11.4.2 [MultitableRows], page 104.
@table formatting-commandBegin a two-column table, using @item for each entry. Writeeach �rst column entry on the same line as @item. First col-umn entries are printed in the font resulting from formatting-command. Pair with @end table. See Section 11.3 [Making a
Appendix A: @-Command List 189
Two-column Table], page 101. Also see Section 11.3.1 [@ftableand @vtable], page 102, and Section 11.3.2 [@itemx], page 102.
@TeX{} Insert the logo TEX. See Section 13.5 [Inserting TEX and c ],page 115.
@tex Enter TEX completely. Pair with @end tex. See Section 18.1[Using Ordinary TEX Commands], page 141.
@thischapter@thischaptername@thisfile@thispage@thistitle
Only allowed in a heading or footing. Stands for the number andname of the current chapter (in the format `Chapter 1: Title'),the chapter name only, the �lename, the current page number,and the title of the document, respectively. See Section F.3 [Howto Make Your Own Headings], page 213.
@tindex entryAdd entry to the index of data types. See Section 12.1 [De�ningthe Entries of an Index], page 105.
@title titleIn a printed manual, set a title ush to the left-hand side of thepage in a larger than normal font and underline it with a blackrule. Not relevant to Info, which does not have title pages. SeeSection 3.4.3 [The @title @subtitle and @author Commands],page 38.
@titlefont{text}In a printed manual, print text in a larger than normal font.Not relevant to Info, which does not have title pages. SeeSection 3.4.2 [The @titlefont @center and @sp Commands],page 37.
@titlepageIndicate to Texinfo the beginning of the title page. Write com-mand on a line of its own. Pair with @end titlepage. Nothingbetween @titlepage and @end titlepage appears in Info. SeeSection 3.4.1 [@titlepage], page 36.
@today{} Insert the current date, in `1 Jan 1900' style. See Section F.3[How to Make Your Own Headings], page 213.
@top title In a Texinfo �le to be formatted with makeinfo, identify the top-most @node line in the �le, which must be written on the lineimmediately preceding the @top command. Used for makeinfo'snode pointer insertion feature. The title is underlined with
190 Texinfo 2.23
asterisks. Both the @node line and the @top line normallyshould be enclosed by @ifinfo and @end ifinfo. In TEX andtexinfo-format-buffer, the @top command is merely a syn-onym for @unnumbered. See Section 6.3 [Creating Pointers withmakeinfo], page 63.
@uc@ubaraccentc@udotaccentc
Generate a breve, underbar, or underdot accent, respectively,over or under the character c, as in �o, o
�, o. . See Section 13.3
[Inserting Accents], page 114.
@unnumbered titleIn a printed manual, begin a chapter that appears without chap-ter numbers of any kind. The title appears in the table ofcontents of a printed manual. In Info, the title is underlinedwith asterisks. See Section 5.5 [@unnumbered and @appendix],page 51.
@unnumberedsec titleIn a printed manual, begin a section that appears without sec-tion numbers of any kind. The title appears in the table ofcontents of a printed manual. In Info, the title is underlinedwith equal signs. See Section 5.8 [Section Commands], page 52.
@unnumberedsubsec titleIn a printed manual, begin an unnumbered subsection withina chapter. The title appears in the table of contents of aprinted manual. In Info, the title is underlined with hy-phens. See Section 5.10 [@unnumberedsubsec @appendixsubsec@subheading], page 53.
@unnumberedsubsubsec titleIn a printed manual, begin an unnumbered subsubsection withina chapter. The title appears in the table of contents of a printedmanual. In Info, the title is underlined with periods. See Sec-tion 5.11 [The `subsub' Commands], page 53.
@url{url} Highlight text that is a uniform resource locator for the WorldWide Web. See Section 9.1.9 [@url], page 85.
@vc Generate check accent over the character c, as in �o. See Sec-tion 13.3 [Inserting Accents], page 114.
@value{ ag}Replace ag with the value to which it is set by @set ag . SeeSection 18.2 [@set @clear @value], page 142.

Appendix A: @-Command List 191
@var{metasyntactic-variable}Highlight a metasyntactic variable, which is something thatstands for another piece of text. See Section 9.1.5 [IndicatingMetasyntactic Variables], page 83.
@vindex entryAdd entry to the index of variables. See Section 12.1 [De�ningthe Entries of an Index], page 105.
@vskip amountIn a printed manual, insert whitespace so as to push text on theremainder of the page towards the bottom of the page. Usedin formatting the copyright page with the argument `0pt plus1filll'. (Note spelling of `filll'.) @vskip may be used onlyin contexts ignored for Info. See Section 3.4.4 [The CopyrightPage and Printed Permissions], page 38.
@vtable formatting-commandBegin a two-column table, using @item for each entry. Automat-ically enter each of the items in the �rst column into the indexof variables. Pair with @end vtable. The same as @table, ex-cept for indexing. See Section 11.3.1 [@ftable and @vtable],page 102.
@w{text} Prevent text from being split across two lines. Do not end aparagraph that uses @w with an @refill command. See Sec-tion 15.3 [@w], page 122.
@xref{node-name, [entry], [topic-or-title], [info-�le], [manual]}Make a reference that starts with `See' in a printed manual. Fol-low command with a punctuation mark. Only the �rst argumentis mandatory. See Section 8.3 [@xref], page 71.

192 Texinfo 2.23

Appendix B: Tips and Hints 193
Appendix B Tips and Hints
Here are some tips for writing Texinfo documentation:
� Write in the present tense, not in the past or the future.
� Write actively! For example, write \We recommend that : : :" ratherthan \It is recommended that : : :".
� Use 70 or 72 as your �ll column. Longer lines are hard to read.
� Include a copyright notice and copying permissions.
Index, index, index!
Write many index entries, in di�erent ways. Readers like indices; theyare helpful and convenient.
Although it is easiest to write index entries as you write the body of thetext, some people prefer to write entries afterwards. In either case, writean entry before the paragraph to which it applies. This way, an index entrypoints to the �rst page of a paragraph that is split across pages.
Here are more hints we have found valuable:
� Write each index entry di�erently, so each entry refers to a di�erentplace in the document.
� Write index entries only where a topic is discussed signi�cantly. Forexample, it is not useful to index \debugging information" in a chap-ter on reporting bugs. Someone who wants to know about debugginginformation will certainly not �nd it in that chapter.
� Consistently capitalize the �rst word of every concept index entry, orelse consistently use lower case. Terse entries often call for lower case;longer entries for capitalization. Whichever case convention you use,please use one or the other consistently! Mixing the two styles looksbad.
� Always capitalize or use upper case for those words in an index for whichthis is proper, such as names of countries or acronyms. Always use theappropriate case for case-sensitive names, such as those in C or Lisp.
� Write the indexing commands that refer to a whole section immediatelyafter the section command, and write the indexing commands that referto the paragraph before the paragraph.
In the example that follows, a blank line comes after the index entry for\Leaping":

194 Texinfo 2.23
@section The Dog and the Fox@cindex Jumping, in general@cindex Leaping
@cindex Dog, lazy, jumped over@cindex Lazy dog jumped over@cindex Fox, jumps over dog@cindex Quick fox jumps over dogThe quick brown fox jumps over the lazy dog.
(Note that the example shows entries for the same concept that arewritten in di�erent ways|`Lazy dog', and `Dog, lazy'|so readers canlook up the concept in di�erent ways.)
Blank lines
� Insert a blank line between a sectioning command and the �rst followingsentence or paragraph, or between the indexing commands associatedwith the sectioning command and the �rst following sentence or para-graph, as shown in the tip on indexing. Otherwise, a formatter mayfold title and paragraph together.
� Always insert a blank line before an @table command and after an@end table command; but never insert a blank line after an @tablecommand or before an @end table command.For example,
Types of fox:
@table @samp@item QuickJump over lazy dogs.
@item BrownAlso jump over lazy dogs.@end table
@noindentOn the other hand, : : :
Insert blank lines before and after @itemize : : : @end itemize and@enumerate : : : @end enumerate in the same way.
Complete phrases
Complete phrases are easier to read than : : :
� Write entries in an itemized list as complete sentences; or at least, ascomplete phrases. Incomplete expressions : : : awkward : : : like this.

Appendix B: Tips and Hints 195
� Write the prefatory sentence or phrase for a multi-item list or table as acomplete expression. Do not write \You can set:"; instead, write \Youcan set these variables:". The former expression sounds cut o�.
Editions, dates and versions
Write the edition and version numbers and date in three places in everymanual:
1. In the �rst @ifinfo section, for people reading the Texinfo �le.
2. In the @titlepage section, for people reading the printed manual.
3. In the `Top' node, for people reading the Info �le.
Also, it helps to write a note before the �rst @ifinfo section to explain whatyou are doing.For example:
@c ===> NOTE! <==@c Specify the edition and version numbers and date@c in *three* places:@c 1. First ifinfo section 2. title page 3. top node@c To find the locations, search for !!set
@ifinfo@c !!set edition, date, versionThis is Edition 4.03, January 1992,of the @cite{GDB Manual} for GDB Version 4.3.: : :
|or use @set and @value (see Section 18.2.3 [@value Example], page 145).
De�nition Commands
De�nition commands are @deffn, @defun, @defmac, and the like, andenable you to write descriptions in a uniform format.
� Write just one de�nition command for each entity you de�ne with ade�nition command. The automatic indexing feature creates an indexentry that leads the reader to the de�nition.
� Use @table : : : @end table in an appendix that contains a summary offunctions, not @deffn or other de�nition commands.
Capitalization
� Capitalize `Texinfo'; it is a name. Do not write the `x' or `i' in uppercase.
� Capitalize `Info'; it is a name.

196 Texinfo 2.23
� Write TEX using the @TeX{} command. Note the uppercase `T' and `X'.This command causes the formatters to typeset the name according tothe wishes of Donald Knuth, who wrote TEX.
Spaces
Do not use spaces to format a Texinfo �le, except inside of @example : : :@end example and similar commands.
For example, TEX �lls the following:
@kbd{C-x v}@kbd{M-x vc-next-action}
Perform the next logical operationon the version-controlled filecorresponding to the current buffer.
so it looks like this:
C-x v M-x vc-next-action Perform the next logical operation onthe version-controlled �le corresponding to the current bu�er.
In this case, the text should be formatted with @table, @item, and @itemx,to create a table.
@code, @samp, @var, and `---'
� Use @code around Lisp symbols, including command names. For exam-ple,
The main function is @code{vc-next-action}, : : :
� Avoid putting letters such as `s' immediately after an `@code'. Suchletters look bad.
� Use @var around meta-variables. Do not write angle brackets aroundthem.
� Use three hyphens in a row, `---', to indicate a long dash. TEX typesetsthese as a long dash and the Info formatters reduce three hyphens totwo.
Periods Outside of Quotes
Place periods and other punctuation marks outside of quotations, unlessthe punctuation is part of the quotation. This practice goes against publish-ing conventions in the United States, but enables the reader to distinguishbetween the contents of the quotation and the whole passage.
For example, you should write the following sentence with the periodoutside the end quotation marks:
Evidently, `au' is an abbreviation for ``author''.

Appendix B: Tips and Hints 197
since `au' does not serve as an abbreviation for `author.' (with a periodfollowing the word).
Introducing New Terms
� Introduce new terms so that a reader who does not know them canunderstand them from context; or write a de�nition for the term.
For example, in the following, the terms \check in", \register" and\delta" are all appearing for the �rst time; the example sentence shouldbe rewritten so they are understandable.
The major function assists you in checking in a �le to your ver-sion control system and registering successive sets of changesto it as deltas.
� Use the @dfn command around a word being introduced, to indicatethat the reader should not expect to know the meaning already, andshould expect to learn the meaning from this passage.
@pxref
Absolutely never use @pxref except in the special context for which it isdesigned: inside parentheses, with the closing parenthesis following imme-diately after the closing brace. One formatter automatically inserts closingpunctuation and the other does not. This means that the output looks rightboth in printed output and in an Info �le, but only when the command isused inside parentheses.
Invoking from a Shell
You can invoke programs such as Emacs, GCC, and GAWK from a shell.The documentation for each program should contain a section that describesthis. Unfortunately, if the node names and titles for these sections are alldi�erent, readers �nd it hard to search for the section.
Name such sections with a phrase beginning with the word `Invoking : : :',as in `Invoking Emacs'; this way users can �nd the section easily.
ansi c Syntax
When you use @example to describe a C function's calling conventions,use the ansi c syntax, like this:
void dld_init (char *@var{path});
And in the subsequent discussion, refer to the argument values by writingthe same argument names, again highlighted with @var.

198 Texinfo 2.23
Avoid the obsolete style that looks like this:
#include <dld.h>
dld_init (path)char *path;
Also, it is best to avoid writing #include above the declaration just toindicate that the function is declared in a header �le. The practice maygive the misimpression that the #include belongs near the declaration ofthe function. Either state explicitly which header �le holds the declarationor, better yet, name the header �le used for a group of functions at thebeginning of the section that describes the functions.
Bad Examples
Here are several examples of bad writing to avoid:
In this example, say, \ : : : you must @dfn{check in} the new version."That ows better.
When you are done editing the �le, you must perform a @dfn{checkin}.
In the following example, say, \: : : makes a uni�ed interface such as VCmode possible."
SCCS, RCS and other version-control systems all perform simi-lar functions in broadly similar ways (it is this resemblance whichmakes a uni�ed control mode like this possible).
And in this example, you should specify what `it' refers to:
If you are working with other people, it assists in coordinatingeveryone's changes so they do not step on each other.
And Finally : : :
� Pronounce TEX as if the `X' were a Greek `chi', as the last sound in thename `Bach'. But pronounce Texinfo as in `speck': `teckinfo'.
� Write notes for yourself at the very end of a Texinfo �le after the @bye.None of the formatters process text after the @bye; it is as if the textwere within @ignore : : : @end ignore.

Appendix C: A Sample Texinfo File 199
Appendix C A Sample Texinfo File
Here is a complete, short sample Texinfo �le, without any commentary.You can see this �le, with comments, in the �rst chapter. See Section 1.8 [AShort Sample Texinfo File], page 10.
\input texinfo @c -*-texinfo-*-@c %**start of header@setfilename sample.info@settitle Sample Document@c %**end of header
@setchapternewpage odd
@ifinfoThis is a short example of a complete Texinfo file.
Copyright 1990 Free Software Foundation, Inc.@end ifinfo
@titlepage@sp 10@comment The title is printed in a large font.@center @titlefont{Sample Title}
@c The following two commands start the copyright page.@page@vskip 0pt plus 1filllCopyright @copyright{} 1990 Free Software Foundation, Inc.@end titlepage
@node Top, First Chapter, (dir), (dir)@comment node-name, next, previous, up
@menu* First Chapter:: The first chapter is the
only chapter in this sample.* Concept Index:: This index has two entries.@end menu
@node First Chapter, Concept Index, Top, Top@comment node-name, next, previous, up@chapter First Chapter

200 Texinfo 2.23
@cindex Sample index entry
This is the contents of the first chapter.@cindex Another sample index entry
Here is a numbered list.
@enumerate@itemThis is the first item.
@itemThis is the second item.@end enumerate
The @code{makeinfo} and @code{texinfo-format-buffer}commands transform a Texinfo file such as this intoan Info file; and @TeX{} typesets it for a printedmanual.
@node Concept Index, , First Chapter, Top@comment node-name, next, previous, up@unnumbered Concept Index
@printindex cp
@contents@bye

Appendix D: Sample Permissions 201
Appendix D Sample Permissions
Texinfo �les should contain sections that tell the readers that they havethe right to copy and distribute the Texinfo �le, the Info �le, and the printedmanual.
Also, if you are writing a manual about software, you should explainthat the software is free and either include the GNU General Public License(GPL) or provide a reference to it. See section \Distribution" in The GNUEmacs Manual, for an example of the text that could be used in the software\Distribution", \General Public License", and \NO WARRANTY" sectionsof a document. See [Texinfo Copying Conditions], page 1, for an exampleof a brief explanation of how the copying conditions provide you with rights.
In a Texinfo �le, the �rst @ifinfo section usually begins with a line thatsays what the �le documents. This is what a person reading the unprocessedTexinfo �le or using the advanced Info command g * sees �rst. See Info �le`info', node `Expert', for more information. (A reader using the regularInfo commands usually starts reading at the �rst node and skips this �rstsection, which is not in a node.)
In the @ifinfo section, the summary sentence is followed by a copy-right notice and then by the copying permission notice. One of the copyingpermission paragraphs is enclosed in @ignore and @end ignore commands.This paragraph states that the Texinfo �le can be processed through TEXand printed, provided the printed manual carries the proper copying permis-sion notice. This paragraph is not made part of the Info �le since it is notrelevant to the Info �le; but it is a mandatory part of the Texinfo �le sinceit permits people to process the Texinfo �le in TEX and print the results.
In the printed manual, the Free Software Foundation copying permissionnotice follows the copyright notice and publishing information and is locatedwithin the region delineated by the @titlepage and @end titlepage com-mands. The copying permission notice is exactly the same as the noticein the @ifinfo section except that the paragraph enclosed in @ignore and@end ignore commands is not part of the notice.
To make it simple to insert a permission notice into each section of theTexinfo �le, sample permission notices for each section are reproduced in fullbelow.
Note that you may need to specify the correct name of a section mentionedin the permission notice. For example, in The GDB Manual, the name of thesection referring to the General Public License is called the \GDB GeneralPublic License", but in the sample shown below, that section is referred togenerically as the \GNU General Public License". If the Texinfo �le doesnot carry a copy of the General Public License, leave out the reference to it,but be sure to include the rest of the sentence.

202 Texinfo 2.23
D.1 `ifinfo' Copying Permissions
In the @ifinfo section of a Texinfo �le, the standard Free Software Foun-dation permission notice reads as follows:
This file documents : : :
Copyright 1992 Free Software Foundation, Inc.
Permission is granted to make and distribute verbatimcopies of this manual provided the copyright notice andthis permission notice are preserved on all copies.
@ignorePermission is granted to process this file through TeXand print the results, provided the printed documentcarries a copying permission notice identical to thisone except for the removal of this paragraph (thisparagraph not being relevant to the printed manual).
@end ignorePermission is granted to copy and distribute modifiedversions of this manual under the conditions forverbatim copying, provided also that the sectionsentitled ``Copying'' and ``GNU General Public License''are included exactly as in the original, and providedthat the entire resulting derived work is distributedunder the terms of a permission notice identical to thisone.
Permission is granted to copy and distributetranslations of this manual into another language,under the above conditions for modified versions,except that this permission notice may be stated in atranslation approved by the Free Software Foundation.
D.2 Titlepage Copying Permissions
In the @titlepage section of a Texinfo �le, the standard Free SoftwareFoundation copying permission notice follows the copyright notice and pub-lishing information. The standard phrasing is as follows:
Permission is granted to make and distribute verbatimcopies of this manual provided the copyright notice andthis permission notice are preserved on all copies.

Appendix D: Sample Permissions 203
Permission is granted to copy and distribute modifiedversions of this manual under the conditions forverbatim copying, provided also that the sectionsentitled ``Copying'' and ``GNU General Public License''are included exactly as in the original, and providedthat the entire resulting derived work is distributedunder the terms of a permission notice identical to thisone.
Permission is granted to copy and distributetranslations of this manual into another language,under the above conditions for modified versions,except that this permission notice may be stated in atranslation approved by the Free Software Foundation.

204 Texinfo 2.23

Appendix E: Include Files 205
Appendix E Include Files
When TEX or an Info formatting command sees an @include commandin a Texinfo �le, it processes the contents of the �le named by the commandand incorporates them into the dvi or Info �le being created. Index entriesfrom the included �le are incorporated into the indices of the output �le.
Include �les let you keep a single large document as a collection of con-veniently small parts.
E.1 How to Use Include Files
To include another �le within a Texinfo �le, write the @include commandat the beginning of a line and follow it on the same line by the name of a�le to be included. For example:
@include buffers.texi
An included �le should simply be a segment of text that you expect to beincluded as is into the overall or outer Texinfo �le; it should not contain thestandard beginning and end parts of a Texinfo �le. In particular, you shouldnot start an included �le with a line saying `\input texinfo'; if you do, thatphrase is inserted into the output �le as is. Likewise, you should not end anincluded �le with an @bye command; nothing after @bye is formatted.
In the past, you were required to write an @setfilename line at thebeginning of an included �le, but no longer. Now, it does not matter whetheryou write such a line. If an @setfilename line exists in an included �le, itis ignored.
Conventionally, an included �le begins with an @node line that is followedby an @chapter line. Each included �le is one chapter. This makes iteasy to use the regular node and menu creating and updating commandsto create the node pointers and menus within the included �le. However,the simple Emacs node and menu creating and updating commands do notwork with multiple Texinfo �les. Thus you cannot use these commands to�ll in the `Next', `Previous', and `Up' pointers of the @node line that beginsthe included �le. Also, you cannot use the regular commands to create amaster menu for the whole �le. Either you must insert the menus and the`Next', `Previous', and `Up' pointers by hand, or you must use the GNUEmacs Texinfo mode command, texinfo-multiple-files-update, that isdesigned for @include �les.
E.2 texinfo-multiple-files-update
GNU Emacs Texinfo mode provides the texinfo-multiple-files-update command. This command creates or updates `Next', `Previous',and `Up' pointers of included �les as well as those in the outer or overall

206 Texinfo 2.23
Texinfo �le, and it creates or updates a main menu in the outer �le. De-pending whether you call it with optional arguments, the command updatesonly the pointers in the �rst @node line of the included �les or all of them:
M-x texinfo-multiple-files-updateCalled without any arguments:
� Create or update the `Next', `Previous', and `Up' pointersof the �rst @node line in each �le included in an outer oroverall Texinfo �le.
� Create or update the `Top' level node pointers of the outeror overall �le.
� Create or update a main menu in the outer �le.
C-u M-x texinfo-multiple-files-updateCalled with C-u as a pre�x argument:
� Create or update pointers in the �rst @node line in eachincluded �le.
� Create or update the `Top' level node pointers of the outer�le.
� Create and insert a master menu in the outer �le. Themaster menu is made from all the menus in all the included�les.
C-u 8 M-x texinfo-multiple-files-updateCalled with a numeric pre�x argument, such as C-u 8:
� Create or update all the `Next', `Previous', and `Up' point-ers of all the included �les.
� Create or update all the menus of all the included �les.
� Create or update the `Top' level node pointers of the outeror overall �le.
� And then create a master menu in the outer �le. This issimilar to invoking texinfo-master-menu with an argu-ment when you are working with just one �le.
Note the use of the pre�x argument in interactive use: with a regularpre�x argument, just C-u, the texinfo-multiple-files-update commandinserts a master menu; with a numeric pre�x argument, such as C-u 8, thecommand updates every pointer and menu in all the �les and then inserts amaster menu.
E.3 Include File Requirements
If you plan to use the texinfo-multiple-files-update command, theouter Texinfo �le that lists included �les within it should contain nothing

Appendix E: Include Files 207
but the beginning and end parts of a Texinfo �le, and a number of @includecommands listing the included �les. It should not even include indices, whichshould be listed in an included �le of their own.
Moreover, each of the included �les must contain exactly one highestlevel node (conventionally, @chapter or equivalent), and this node must bethe �rst node in the included �le. Furthermore, each of these highest levelnodes in each included �le must be at the same hierarchical level in the �lestructure. Usually, each is an @chapter, an @appendix, or an @unnumberednode. Thus, normally, each included �le contains one, and only one, chapteror equivalent-level node.
The outer �le should contain only one node, the `Top' node. It should notcontain any nodes besides the single `Top' node. The texinfo-multiple-files-update command will not process them.
E.4 Sample File with @include
Here is an example of a complete outer Texinfo �le with @include �leswithin it before running texinfo-multiple-files-update, which wouldinsert a main or master menu:
\input texinfo @c -*-texinfo-*-@setfilename include-example.info@settitle Include Example
@setchapternewpage odd@titlepage@sp 12@center @titlefont{Include Example}@sp 2@center by Whom Ever
@page@vskip 0pt plus 1filllCopyright @copyright{} 1990 Free Software Foundation, Inc.@end titlepage
@ifinfo@node Top, First, (dir), (dir)@top Master Menu@end ifinfo
@include foo.texinfo@include bar.texinfo@include concept-index.texinfo

208 Texinfo 2.23
@summarycontents@contents
@bye
An included �le, such as `foo.texinfo', might look like this:
@node First, Second, , Top@chapter First Chapter
Contents of first chapter : : :
The full contents of `concept-index.texinfo' might be as simple as this:
@node Concept Index, , Second, Top@unnumbered Concept Index
@printindex cp
The outer Texinfo source �le for The GNU Emacs Lisp Reference Manualis named `elisp.texi'. This outer �le contains a master menu with 417entries and a list of 41 @include �les.
E.5 Evolution of Include Files
When Info was �rst created, it was customary to create many small Info�les on one subject. Each Info �le was formatted from its own Texinfo source�le. This custom meant that Emacs did not need to make a large bu�er tohold the whole of a large Info �le when someone wanted information; instead,Emacs allocated just enough memory for the small Info �le that containedthe particular information sought. This way, Emacs could avoid wastingmemory.
References from one �le to another were made by referring to the �le nameas well as the node name. (See Section 7.5 [Referring to Other Info Files],page 68. Also, see Section 8.3.4 [@xref with Four and Five Arguments],page 74.)
Include �les were designed primarily as a way to create a single, largeprinted manual out of several smaller Info �les. In a printed manual, allthe references were within the same document, so TEX could automaticallydetermine the references' page numbers. The Info formatting commandsused include �les only for creating joint indices; each of the individual Texinfo�les had to be formatted for Info individually. (Each, therefore, required itsown @setfilename line.)
However, because large Info �les are now split automatically, it is nolonger necessary to keep them small.

Appendix E: Include Files 209
Nowadays, multiple Texinfo �les are used mostly for large documents,such as The GNU Emacs Lisp Reference Manual, and for projects in whichseveral di�erent people write di�erent sections of a document simultaneously.
In addition, the Info formatting commands have been extended to workwith the @include command so as to create a single large Info �le that issplit into smaller �les if necessary. This means that you can write menusand cross references without naming the di�erent Texinfo �les.

210 Texinfo 2.23

Appendix F: Page Headings 211
Appendix F Page Headings
Most printed manuals contain headings along the top of every page ex-cept the title and copyright pages. Some manuals also contain footings.(Headings and footings have no meaning to Info, which is not paginated.)
Texinfo provides standard page heading formats for manuals that areprinted on one side of each sheet of paper and for manuals that are printedon both sides of the paper. Usually, you will use one or other of theseformats, but you can specify your own format, if you wish.
In addition, you can specify whether chapters should begin on a new page,or merely continue the same page as the previous chapter; and if chaptersbegin on new pages, you can specify whether they must be odd-numberedpages.
By convention, a book is printed on both sides of each sheet of paper.When you open a book, the right-hand page is odd-numbered, and chap-ters begin on right-hand pages|a preceding left-hand page is left blank ifnecessary. Reports, however, are often printed on just one side of paper,and chapters begin on a fresh page immediately following the end of thepreceding chapter. In short or informal reports, chapters often do not beginon a new page at all, but are separated from the preceding text by a smallamount of whitespace.
The @setchapternewpage command controls whether chapters begin onnew pages, and whether one of the standard heading formats is used. Inaddition, Texinfo has several heading and footing commands that you canuse to generate your own heading and footing formats.
In Texinfo, headings and footings are single lines at the tops and bottomsof pages; you cannot create multiline headings or footings. Each header orfooter line is divided into three parts: a left part, a middle part, and a rightpart. Any part, or a whole line, may be left blank. Text for the left part ofa header or footer line is set ushleft; text for the middle part is centered;and, text for the right part is set ushright.
F.1 Standard Heading Formats
Texinfo provides two standard heading formats, one for manuals printedon one side of each sheet of paper, and the other for manuals printed onboth sides of the paper.
By default, nothing is speci�ed for the footing of a Texinfo �le, so thefooting remains blank.
The standard format for single-sided printing consists of a header line inwhich the left-hand part contains the name of the chapter, the central partis blank, and the right-hand part contains the page number.

212 Texinfo 2.23
A single-sided page looks like this:
_______________________| || chapter page number || || Start of text ... || ... || |
The standard format for two-sided printing depends on whether the pagenumber is even or odd. By convention, even-numbered pages are on the left-and odd-numbered pages are on the right. (TEX will adjust the widths ofthe left- and right-hand margins. Usually, widths are correct, but duringdouble-sided printing, it is wise to check that pages will bind properly|sometimes a printer will produce output in which the even-numbered pageshave a larger right-hand margin than the odd-numbered pages.)
In the standard double-sided format, the left part of the left-hand (even-numbered) page contains the page number, the central part is blank, andthe right part contains the title (speci�ed by the @settitle command).The left part of the right-hand (odd-numbered) page contains the name ofthe chapter, the central part is blank, and the right part contains the pagenumber.
Two pages, side by side as in an open book, look like this:
_______________________ _______________________| | | || page number title | | chapter page number || | | || Start of text ... | | More text ... || ... | | ... || | | |
The chapter name is preceded by the word `Chapter', the chapter numberand a colon. This makes it easier to keep track of where you are in themanual.
F.2 Specifying the Type of Heading
TEX does not begin to generate page headings for a standard Texinfo �leuntil it reaches the @end titlepage command. Thus, the title and copyrightpages are not numbered. The @end titlepage command causes TEX tobegin to generate page headings according to a standard format speci�ed bythe @setchapternewpage command that precedes the @titlepage section.

Appendix F: Page Headings 213
There are four possibilities:
No @setchapternewpage commandCause TEX to specify the single-sided heading format, with chap-ters on new pages. This is the same as @setchapternewpage on.
@setchapternewpage onSpecify the single-sided heading format, with chapters on newpages.
@setchapternewpage offCause TEX to start a new chapter on the same page as thelast page of the preceding chapter, after skipping some verticalwhitespace. Also cause TEX to typeset for single-sided print-ing. (You can override the headers format with the @headingsdouble command; see Section 3.4.6 [The @headings Command],page 40.)
@setchapternewpage oddSpecify the double-sided heading format, with chapters on newpages.
Texinfo lacks an @setchapternewpage even command.
F.3 How to Make Your Own Headings
You can use the standard headings provided with Texinfo or specify yourown.
Texinfo provides six commands for specifying headings and footings.The @everyheading command and @everyfooting command generate pageheaders and footers that are the same for both even- and odd-numberedpages. The @evenheading command and @evenfooting command gen-erate headers and footers for even-numbered (left-hand) pages; and the@oddheading command and @oddfooting command generate headers andfooters for odd-numbered (right-hand) pages.
Write custom heading speci�cations in the Texinfo �le immediately afterthe @end titlepage command. Enclose your speci�cations between @iftexand @end iftex commands since the texinfo-format-buffer commandmay not recognize them. Also, you must cancel the prede�ned heading com-mands with the @headings off command before de�ning your own speci�-cations.
Here is how to tell TEX to place the chapter name at the left, the pagenumber in the center, and the date at the right of every header for botheven- and odd-numbered pages:

214 Texinfo 2.23
@iftex@headings off@everyheading @thischapter @| @thispage @| @today{}@end iftex
You need to divide the left part from the central part and the central partfrom the right had part by inserting `@|' between parts. Otherwise, thespeci�cation command will not be able to tell where the text for one partends and the next part begins.
Each part can contain text or @-commands. The text is printed as ifthe part were within an ordinary paragraph in the body of the page. The@-commands replace themselves with the page number, date, chapter name,or whatever.
Here are the six heading and footing commands:
@everyheading left @| center @| right@everyfooting left @| center @| right
The `every' commands specify the format for both even- andodd-numbered pages. These commands are for documents thatare printed on one side of each sheet of paper, or for documentsin which you want symmetrical headers or footers.
@evenheading left @| center @| right@oddheading left @| center @| right@evenfooting left @| center @| right@oddfooting left @| center @| right
The `even' and `odd' commands specify the format for even-numbered pages and odd-numbered pages. These commandsare for books and manuals that are printed on both sides ofeach sheet of paper.
Use the `@this: : :' series of @-commands to provide the names of chaptersand sections and the page number. You can use the `@this: : :' commands inthe left, center, or right portions of headers and footers, or anywhere else in aTexinfo �le so long as they are between @iftex and @end iftex commands.
Here are the `@this: : :' commands:
@thispageExpands to the current page number.
@thischapternameExpands to the name of the current chapter.
@thischapterExpands to the number and name of the current chapter, in theformat `Chapter 1: Title'.

Appendix F: Page Headings 215
@thistitleExpands to the name of the document, as speci�ed by the@settitle command.
@thisfileFor @include �les only: expands to the name of the current@include �le. If the current Texinfo source �le is not an@include �le, this command has no e�ect. This command doesnot provide the name of the current Texinfo source �le unless itis an @include �le. (See Appendix E [Include Files], page 205,for more information about @include �les.)
You can also use the @today{} command, which expands to the current date,in `1 Jan 1900' format.
Other @-commands and text are printed in a header or footer just as ifthey were in the body of a page. It is useful to incorporate text, particularlywhen you are writing drafts:
@iftex@headings off@everyheading @emph{Draft!} @| @thispage @| @thischapter@everyfooting @| @| Version: 0.27: @today{}@end iftex
Beware of overlong titles: they may overlap another part of the headeror footer and blot it out.

216 Texinfo 2.23

Appendix G: Formatting Mistakes 217
Appendix G Formatting Mistakes
Besides mistakes in the content of your documentation, there are twokinds of mistake you can make with Texinfo: you can make mistakes with@-commands, and you can make mistakes with the structure of the nodesand chapters.
Emacs has two tools for catching the @-command mistakes and two forcatching structuring mistakes.
For �nding problems with @-commands, you can run TEX or a regionformatting command on the region that has a problem; indeed, you can runthese commands on each region as you write it.
For �nding problems with the structure of nodes and chapters, you canuse C-c C-s (texinfo-show-structure) and the related occur commandand you can use the M-x Info-validate command.
The makeinfo program does an excellent job of catching errors andreporting them|far better than texinfo-format-region or texinfo-format-buffer. In addition, the various functions for automatically cre-ating and updating node pointers and menus remove many opportunities forhuman error.
If you can, use the updating commands to create and insert pointersand menus. These prevent many errors. Then use makeinfo (or its Texinfomode manifestations, makeinfo-region and makeinfo-buffer) to formatyour �le and check for other errors. This is the best way to work withTexinfo. But if you cannot use makeinfo, or your problem is very puzzling,then you may want to use the tools described in this appendix.
G.1 Catching Errors with Info Formatting
After you have written part of a Texinfo �le, you can use the texinfo-format-region or the makeinfo-region command to see whether the regionformats properly.
Most likely, however, you are reading this section because for some reasonyou cannot use the makeinfo-region command; therefore, the rest of thissection presumes that you are using texinfo-format-region.
If you have made a mistake with an @-command, texinfo-format-region will stop processing at or after the error and display an error message.To see where in the bu�er the error occurred, switch to the `*Info Region*'bu�er; the cursor will be in a position that is after the location of the error.Also, the text will not be formatted after the place where the error occurred(or more precisely, where it was detected).
For example, if you accidentally end a menu with the command @endmenus with an `s' on the end, instead of with @end menu, you will see anerror message that says:

218 Texinfo 2.23
@end menus is not handled by texinfo
The cursor will stop at the point in the bu�er where the error occurs, or notlong after it. The bu�er will look like this:
---------- Buffer: *Info Region* ----------* Menu:
* Using texinfo-show-structure:: How to use`texinfo-show-structure'to catch mistakes.
* Running Info-Validate:: How to check forunreferenced nodes.
@end menus?
---------- Buffer: *Info Region* ----------
The texinfo-format-region command sometimes provides slightly odderror messages. For example, the following cross reference fails to format:
(@xref{Catching Mistakes, for more info.)
In this case, texinfo-format-region detects the missing closing bracebut displays a message that says `Unbalanced parentheses' rather than`Unbalanced braces'. This is because the formatting command looks formismatches between braces as if they were parentheses.
Sometimes texinfo-format-region fails to detect mistakes. For exam-ple, in the following, the closing brace is swapped with the closing parenthe-sis:
(@xref{Catching Mistakes), for more info.}
Formatting produces:
(*Note for more info.: Catching Mistakes)
The only way for you to detect this error is to realize that the referenceshould have looked like this:
(*Note Catching Mistakes::, for more info.)
Incidentally, if you are reading this node in Info and type f hRETi (Info-follow-reference), you will generate an error message that says:
No such node: "Catching Mistakes) The only way : : :
This is because Info perceives the example of the error as the �rst crossreference in this node and if you type a hRETi immediately after typing theInfo f command, Info will attempt to go to the referenced node. If you type fcatch hTABi hRETi, Info will complete the node name of the correctly writtenexample and take you to the `Catching Mistakes' node. (If you try this, youcan return from the `Catching Mistakes' node by typing l (Info-last).)

Appendix G: Formatting Mistakes 219
G.2 Catching Errors with TEX Formatting
You can also catch mistakes when you format a �le with TEX.
Usually, you will want to do this after you have run texinfo-format-buffer (or, better, makeinfo-buffer) on the same �le, because texinfo-format-buffer sometimes displays error messages that make more sensethan TEX. (See Section G.1 [Debugging with Info], page 217, for more infor-mation.)
For example, TEX was run on a Texinfo �le, part of which is shown here:
---------- Buffer: texinfo.texi ----------name of the Texinfo file as an extension. The@samp{??} are `wildcards' that cause the shell tosubstitute all the raw index files. (@xref{sortingindices, for more information about sortingindices.)@refill---------- Buffer: texinfo.texi ----------
(The cross reference lacks a closing brace.) TEX produced the followingoutput, after which it stopped:
---------- Buffer: *tex-shell* ----------Runaway argument?{sorting indices, for more information about sortingindices.) @refill @ETC.! Paragraph ended before @xref was complete.<to be read again>
@parl.27
?---------- Buffer: *tex-shell* ----------
In this case, TEX produced an accurate and understandable error mes-sage:
Paragraph ended before @xref was complete.
`@par' is an internal TEX command of no relevance to Texinfo. `l.27' meansthat TEX detected the problem on line 27 of the Texinfo �le. The `?' is theprompt TEX uses in this circumstance.
Unfortunately, TEX is not always so helpful, and sometimes you musttruly be a Sherlock Holmes to discover what went wrong.
In any case, if you run into a problem like this, you can do one of threethings.
1. You can tell TEX to continue running and ignore just this error by typinghRETi at the `?' prompt.

220 Texinfo 2.23
2. You can tell TEX to continue running and to ignore all errors as best itcan by typing r hRETi at the `?' prompt.
This is often the best thing to do. However, beware: the one error mayproduce a cascade of additional error messages as its consequences arefelt through the rest of the �le. (To stop TEX when it is producing suchan avalanche of error messages, type C-d (or C-c C-d, if you are runninga shell inside Emacs.))
3. You can tell TEX to stop this run by typing x hRETi at the `?' prompt.
Please note that if you are running TEX inside Emacs, you need to switchto the shell bu�er and line at which TEX o�ers the `?' prompt.
Sometimes TEX will format a �le without producing error messages eventhough there is a problem. This usually occurs if a command is not endedbut TEX is able to continue processing anyhow. For example, if you fail toend an itemized list with the @end itemize command, TEX will write a dvi�le that you can print out. The only error message that TEX will give youis the somewhat mysterious comment that
(@end occurred inside a group at level 1)
However, if you print the dvi �le, you will �nd that the text of the �le thatfollows the itemized list is entirely indented as if it were part of the lastitem in the itemized list. The error message is the way TEX says that itexpected to �nd an @end command somewhere in the �le; but that it couldnot determine where it was needed.
Another source of notoriously hard-to-�nd errors is a missing @end groupcommand. If you ever are stumped by incomprehensible errors, look for amissing @end group command �rst.
If the Texinfo �le lacks header lines, TEX may stop in the beginning ofits run and display output that looks like the following. The `*' indicatesthat TEX is waiting for input.
This is TeX, Version 3.14159 (Web2c 7.0)(test.texinfo [1])*
In this case, simply type \end hRETi after the asterisk. Then write the headerlines in the Texinfo �le and run the TEX command again. (Note the use ofthe backslash, `\'. TEX uses `\' instead of `@'; and in this circumstance, youare working directly with TEX, not with Texinfo.)
G.3 Using texinfo-show-structure
It is not always easy to keep track of the nodes, chapters, sections, andsubsections of a Texinfo �le. This is especially true if you are revising oradding to a Texinfo �le that someone else has written.

Appendix G: Formatting Mistakes 221
In GNU Emacs, in Texinfo mode, the texinfo-show-structure com-mand lists all the lines that begin with the @-commands that specify thestructure: @chapter, @section, @appendix, and so on. With an argument(C-u as pre�x argument, if interactive), the command also shows the @nodelines. The texinfo-show-structure command is bound to C-c C-s in Tex-info mode, by default.
The lines are displayed in a bu�er called the `*Occur*' bu�er, indentedby hierarchical level. For example, here is a part of what was produced byrunning texinfo-show-structure on this manual:
Lines matching "^@\\(chapter \\|sect\\|subs\\|subh\\|unnum\\|major\\|chapheading \\|heading \\|appendix\\)"in buffer texinfo.texi.: : :
4177:@chapter Nodes4198: @heading Two Paths4231: @section Node and Menu Illustration4337: @section The @code{@@node} Command4393: @subheading Choosing Node and Pointer Names4417: @subsection How to Write an @code{@@node} Line4469: @subsection @code{@@node} Line Tips: : :
This says that lines 4337, 4393, and 4417 of `texinfo.texi' begin withthe @section, @subheading, and @subsection commands respectively. Ifyou move your cursor into the `*Occur*' window, you can position the cursorover one of the lines and use the C-c C-c command (occur-mode-goto-occurrence), to jump to the corresponding spot in the Texinfo �le. Seesection \Using Occur" in The GNU Emacs Manual, for more informationabout occur-mode-goto-occurrence.
The �rst line in the `*Occur*' window describes the regular expressionspeci�ed by texinfo-heading-pattern. This regular expression is the patternthat texinfo-show-structure looks for. See section \Using Regular Ex-pressions" in The GNU Emacs Manual, for more information.
When you invoke the texinfo-show-structure command, Emacs willdisplay the structure of the whole bu�er. If you want to see the structureof just a part of the bu�er, of one chapter, for example, use the C-x n n(narrow-to-region) command to mark the region. (See section \Narrow-ing" in The GNU Emacs Manual.) This is how the example used above wasgenerated. (To see the whole bu�er again, use C-x n w (widen).)
If you call texinfo-show-structure with a pre�x argument by typingC-u C-c C-s, it will list lines beginning with @node as well as the lines be-ginning with the @-sign commands for @chapter, @section, and the like.

222 Texinfo 2.23
You can remind yourself of the structure of a Texinfo �le by looking atthe list in the `*Occur*' window; and if you have mis-named a node or leftout a section, you can correct the mistake.
G.4 Using occur
Sometimes the texinfo-show-structure command produces too muchinformation. Perhaps you want to remind yourself of the overall structureof a Texinfo �le, and are overwhelmed by the detailed list produced bytexinfo-show-structure. In this case, you can use the occur commanddirectly. To do this, type
M-x occur
and then, when prompted, type a regexp, a regular expression for the patternyou want to match. (See section \Regular Expressions" in The GNU EmacsManual.) The occur command works from the current location of the cursorin the bu�er to the end of the bu�er. If you want to run occur on the wholebu�er, place the cursor at the beginning of the bu�er.
For example, to see all the lines that contain the word `@chapter' inthem, just type `@chapter'. This will produce a list of the chapters. It willalso list all the sentences with `@chapter' in the middle of the line.
If you want to see only those lines that start with the word `@chapter',type `^@chapter' when prompted by occur. If you want to see all the linesthat end with a word or phrase, end the last word with a `$'; for example,`catching mistakes$'. This can be helpful when you want to see all thenodes that are part of the same chapter or section and therefore have thesame `Up' pointer.
See section \Using Occur" in The GNU Emacs Manual, for more infor-mation.
G.5 Finding Badly Referenced Nodes
You can use the Info-validate command to check whether any of the`Next', `Previous', `Up' or other node pointers fail to point to a node. Thiscommand checks that every node pointer points to an existing node. TheInfo-validate command works only on Info �les, not on Texinfo �les.
The makeinfo program validates pointers automatically, so you do notneed to use the Info-validate command if you are using makeinfo. Youonly may need to use Info-validate if you are unable to run makeinfo andinstead must create an Info �le using texinfo-format-region or texinfo-format-buffer, or if you write an Info �le from scratch.

Appendix G: Formatting Mistakes 223
G.5.1 Running Info-validate
To use Info-validate, visit the Info �le you wish to check and type:
M-x Info-validate
(Note that the Info-validate command requires an upper case `I'. Youmay also need to create a tag table before running Info-validate. SeeSection G.5.3 [Tagifying], page 224.)
If your �le is valid, you will receive a message that says \File appearsvalid". However, if you have a pointer that does not point to a node, errormessages will be displayed in a bu�er called `*problems in info file*'.
For example, Info-validate was run on a test �le that contained onlythe �rst node of this manual. One of the messages said:
In node "Overview", invalid Next: Texinfo Mode
This meant that the node called `Overview' had a `Next' pointer that didnot point to anything (which was true in this case, since the test �le hadonly one node in it).
Now suppose we add a node named `Texinfo Mode' to our test case butwe do not specify a `Previous' for this node. Then we will get the followingerror message:
In node "Texinfo Mode", should have Previous: Overview
This is because every `Next' pointer should be matched by a `Previous' (inthe node where the `Next' points) which points back.
Info-validate also checks that all menu entries and cross referencespoint to actual nodes.
Note that Info-validate requires a tag table and does not work with�les that have been split. (The texinfo-format-buffer command auto-matically splits large �les.) In order to use Info-validate on a large �le,you must run texinfo-format-buffer with an argument so that it doesnot split the Info �le; and you must create a tag table for the unsplit �le.
G.5.2 Creating an Unsplit File
You can run Info-validate only on a single Info �le that has a tagtable. The command will not work on the indirect sub�les that are generatedwhen a master �le is split. If you have a large �le (longer than 70,000 bytesor so), you need to run the texinfo-format-buffer or makeinfo-buffercommand in such a way that it does not create indirect sub�les. You willalso need to create a tag table for the Info �le. After you have done this,you can run Info-validate and look for badly referenced nodes.
The �rst step is to create an unsplit Info �le. To prevent texinfo-format-buffer from splitting a Texinfo �le into smaller Info �les, give apre�x to the M-x texinfo-format-buffer command:

224 Texinfo 2.23
C-u M-x texinfo-format-buffer
or else
C-u C-c C-e C-b
When you do this, Texinfo will not split the �le and will not create a tagtable for it.
G.5.3 Tagifying a File
After creating an unsplit Info �le, you must create a tag table for it. Visitthe Info �le you wish to tagify and type:
M-x Info-tagify
(Note the upper case `I' in Info-tagify.) This creates an Info �le with atag table that you can validate.
The third step is to validate the Info �le:
M-x Info-validate
(Note the upper case `I' in Info-validate.) In brief, the steps are:
C-u M-x texinfo-format-bufferM-x Info-tagifyM-x Info-validate
After you have validated the node structure, you can rerun texinfo-format-buffer in the normal way so it will construct a tag table and splitthe �le automatically, or you can make the tag table and split the �le man-ually.
G.5.4 Splitting a File Manually
You should split a large �le or else let the texinfo-format-buffer ormakeinfo-buffer command do it for you automatically. (Generally youwill let one of the formatting commands do this job for you. See Chapter 21[Create an Info File], page 159.)
The split-o� �les are called the indirect sub�les.
Info �les are split to save memory. With smaller �les, Emacs does nothave make such a large bu�er to hold the information.
If an Info �le has more than 30 nodes, you should also make a tag table forit. See Section G.5.1 [Using Info-validate], page 223, for information aboutcreating a tag table. (Again, tag tables are usually created automatically bythe formatting command; you only need to create a tag table yourself if youare doing the job manually. Most likely, you will do this for a large, unsplit�le on which you have run Info-validate.)
Visit the Info �le you wish to tagify and split and type the two commands:
M-x Info-tagifyM-x Info-split

Appendix G: Formatting Mistakes 225
(Note that the `I' in `Info' is upper case.)
When you use the Info-split command, the bu�er is modi�ed into a(small) Info �le which lists the indirect sub�les. This �le should be savedin place of the original visited �le. The indirect sub�les are written in thesame directory the original �le is in, with names generated by appending `-'and a number to the original �le name.
The primary �le still functions as an Info �le, but it contains just the tagtable and a directory of sub�les.

226 Texinfo 2.23

Appendix H: Re�lling Paragraphs 227
Appendix H Re�lling Paragraphs
The @refill command re�lls and, optionally, indents the �rst line of aparagraph.1 The @refill command is no longer important, but we describeit here because you once needed it. You will see it in many old Texinfo �les.
Without re�lling, paragraphs containing long @-constructs may look badafter formatting because the formatter removes @-commands and shortenssome lines more than others. In the past, neither the texinfo-format-region command nor the texinfo-format-buffer command re�lled para-graphs automatically. The @refill command had to be written at the endof every paragraph to cause these formatters to �ll them. (Both TEX andmakeinfo have always re�lled paragraphs automatically.) Now, all the Infoformatters automatically �ll and indent those paragraphs that need to be�lled and indented.
The @refill command causes texinfo-format-region and texinfo-format-buffer to re�ll a paragraph in the Info �le after all the other pro-cessing has been done. For this reason, you can not use @refill with aparagraph containing either @* or @w{ : : : } since the re�lling action willoverride those two commands.
The texinfo-format-region and texinfo-format-buffer commandsnow automatically append @refill to the end of each paragraph that shouldbe �lled. They do not append @refill to the ends of paragraphs thatcontain @* or @w{ : : :} and therefore do not re�ll or indent them.
1 Perhaps the command should have been called the @refillandindentcommand, but @refill is shorter and the name was chosen before in-denting was possible.

228 Texinfo 2.23

Appendix I: @-Command Syntax 229
Appendix I @-Command Syntax
The character `@' is used to start special Texinfo commands. (It hasthe same meaning that `\' has in plain TEX.) Texinfo has four types of@-command:
1. Non-alphabetic commands.These commands consist of an @ followed by a punctuationmark or other character that is not part of the alphabet. Non-alphabetic commands are almost always part of the text withina paragraph, and never take any argument. The two characters(@ and the other one) are complete in themselves; none is fol-lowed by braces. The non-alphabetic commands are: @., @:, @*,@@, @{, and @}.
2. Alphabetic commands that do not require arguments.These commands start with @ followed by a word followed by left-and right-hand braces. These commands insert special symbolsin the document; they do not require arguments. For exam-ple, @dots{} ) `: : :', @equiv{} ) `� ', @TeX{} ) `TEX', and@bullet{} ) `�'.
3. Alphabetic commands that require arguments within braces.These commands start with @ followed by a letter or a word,followed by an argument within braces. For example, thecommand @dfn indicates the introductory or de�ning use ofa term; it is used as follows: `In Texinfo, @@-commands are@dfn{mark-up} commands.'
4. Alphabetic commands that occupy an entire line.These commands occupy an entire line. The line starts with @,followed by the name of the command (a word); for example,@center or @cindex. If no argument is needed, the word isfollowed by the end of the line. If there is an argument, it isseparated from the command name by a space. Braces are notused.
Thus, the alphabetic commands fall into classes that have di�erent ar-gument syntaxes. You cannot tell to which class a command belongs bythe appearance of its name, but you can tell by the command's meaning:if the command stands for a glyph, it is in class 2 and does not require anargument; if it makes sense to use the command together with other text aspart of a paragraph, the command is in class 3 and must be followed by anargument in braces; otherwise, it is in class 4 and uses the rest of the line asits argument.
The purpose of having a di�erent syntax for commands of classes 3 and4 is to make Texinfo �les easier to read, and also to help the GNU Emacs

230 Texinfo 2.23
paragraph and �lling commands work properly. There is only one exceptionto this rule: the command @refill, which is always used at the end ofa paragraph immediately following the �nal period or other punctuationcharacter. @refill takes no argument and does not require braces. @refillnever confuses the Emacs paragraph commands because it cannot appear atthe beginning of a line.

Appendix J: How to Obtain TEX 231
Appendix J How to Obtain TEX
TEX is freely redistributable. You can obtain TEX for Unix systems viaanonymous ftp or on tape or CD-ROM. The core material consists of KarlBerry's Web2c TEX distribution.
On-line retrieval instructions are available from either:
`ftp://ftp.tug.org/tex/unixtex.ftp'`http://www.tug.org/unixtex.ftp'
The Free Software Foundation provides a core distribution on its SourceCode CD-ROM suitable for printing Texinfo manuals; the University ofWashington maintains and supports a tape distribution; the TEX UsersGroup co-sponsors a complete CD-ROM TEX distribution.
For the FSF Source Code CD-ROM, please contact:
Free Software Foundation, Inc.59 Temple Place Suite 330Boston, MA w 02111-1307USA
Telephone: +1{617{542{5942Fax: (including Japan) +1{617{542{2652Free Dial Fax (in Japan):
0031{13{2473 (KDD)0066{3382{0158 (IDC)
Electronic mail: [email protected]
To order a full distribution on CD-ROM, please see:
`http://www.tug.org/tex-live.html'
(The distribution is also available by FTP; see the URL's above.)
To order a full distribution from the University of Washington on eithera 1/4 in 4-track QIC-24 cartridge or a 4 mm DAT cartridge, send $210 to:
Pierre A. MacKayDenny Hall, Mail Stop DH-10University of WashingtonSeattle, WA 98195USA
Telephone: +1{206{543{2268Electronic mail: [email protected]
Please make checks payable to the University of Washington. Checksmust be in U.S. dollars, drawn on a U.S. bank.
Prepaid orders are the only orders that can now be handled. Overseassites: please add to the base cost, if desired, $20.00 for shipment via airparcel post, or $30.00 for shipment via courier.

232 Texinfo 2.23
Please check with the above for current prices and formats.

Appendix K: Second Edition Features 233
Appendix K Second Edition Features
The second edition of the Texinfo manual describes more than 20 newTexinfo mode commands and more than 50 previously undocumented Tex-info @-commands. This edition is more than twice the length of the �rstedition.
Here is a brief description of the new commands.
K.1 New Texinfo Mode Commands
Texinfo mode provides commands and features especially designed forworking with Texinfo �les. More than 20 new commands have been added,including commands for automatically creating and updating both nodesand menus. This is a tedious task when done by hand.
The keybindings are intended to be somewhat mnemonic.
Update all nodes and menus
The texinfo-master-menu command is the primary command:
C-c C-u mM-x texinfo-master-menu
Create or update a master menu. With C-u as a pre�x argu-ment, �rst create or update all nodes and regular menus.
Update Pointers
Create or update `Next', `Previous', and `Up' node pointers.
See Section 2.4 [Updating Nodes and Menus], page 19.
C-c C-u C-nM-x texinfo-update-node
Update a node.
C-c C-u C-eM-x texinfo-every-node-update
Update every node in the bu�er.
Update Menus
Create or update menus.
See Section 2.4 [Updating Nodes and Menus], page 19.
C-c C-u C-mM-x texinfo-make-menu
Make or update a menu.

234 Texinfo 2.23
C-c C-u C-aM-x texinfo-all-menus-update
Make or update all the menus in a bu�er. With C-u as apre�x argument, �rst update all the nodes.
Insert Title as Description
Insert a node's chapter or section title in the space for the description in amenu entry line; position point so you can edit the insert. (This commandworks somewhat di�erently than the other insertion commands, which insertonly a prede�ned string.)
See Section 2.2 [Inserting], page 16.
C-c C-c C-d Insert title.
Format for Info
Provide keybindings both for the Info formatting commands that are writtenin Emacs Lisp and for makeinfo that is written in C.
See Section 2.5 [Info Formatting], page 24.
Use the Emacs lisp texinfo-format: : : commands:
C-c C-e C-r Format the region.
C-c C-e C-b Format the bu�er.
Use makeinfo:
C-c C-m C-r Format the region.
C-c C-m C-b Format the bu�er.
C-c C-m C-l Recenter the makeinfo output bu�er.
C-c C-m C-k Kill the makeinfo formatting job.
Typeset and Print
Typeset and print Texinfo documents from within Emacs.
See Section 2.6 [Formatting and Printing], page 25.
C-c C-t C-b Run texi2dvi on the bu�er.
C-c C-t C-r Run TEX on the region.
C-c C-t C-i Run texindex.
C-c C-t C-p Print the dvi �le.
C-c C-t C-q Show the print queue.

Appendix K: Second Edition Features 235
C-c C-t C-d Delete a job from the print queue.
C-c C-t C-k Kill the current TEX formatting job.
C-c C-t C-x Quit a currently stopped TEX formatting job.
C-c C-t C-l Recenter the output bu�er.
Other Updating Commands
The \other updating commands" do not have standard keybindings becausethey are used less frequently.
See Section 2.4.2 [Other Updating Commands], page 23.
M-x texinfo-insert-node-linesInsert missing @node lines using section titles as node names.
M-x texinfo-multiple-files-updateUpdate a multi-�le document. With a numeric pre�x, suchas C-u 8, update every pointer and menu in all the �les andthen insert a master menu.
M-x texinfo-indent-menu-descriptionIndent descriptions in menus.
M-x texinfo-sequential-node-updateInsert node pointers in strict sequence.
K.2 New Texinfo @-Commands
The second edition of the Texinfo manual describes more than 50 com-mands that were not described in the �rst edition. A third or so of thesecommands existed in Texinfo but were not documented in the manual; theothers are new. Here is a listing, with brief descriptions of them:
Indexing
Create your own index, and merge indices.
See Chapter 12 [Indices], page 105.
@defindex index-nameDe�ne a new index and its indexing command. See also the@defcodeindex command.
@synindex from-index into-indexMerge the from-index index into the into-index index. Seealso the @syncodeindex command.

236 Texinfo 2.23
De�nitions
Describe functions, variables, macros, commands, user options, specialforms, and other such artifacts in a uniform format.
See Chapter 16 [De�nition Commands], page 125.
@deffn category name arguments: : :Format a description for functions, interactive commands,and similar entities.
@defvr, @defop, : : :15 other related commands.
Glyphs
Indicate the results of evaluation, expansion, printed output, an error mes-sage, equivalence of expressions, and the location of point.
See Chapter 14 [Glyphs], page 117.
@equiv{}� Equivalence:
@error{}error Error message
@expansion{}7! Macro expansion
@point{}? Position of point
@print{}a Printed output
@result{}) Result of an expression
Page Headings
Customize page headings.
See Appendix F [Headings], page 211.
@headings on-o�-single-doubleHeadings on or o�, single, or double-sided.
@evenfooting [left] @| [center] @| [right]Footings for even-numbered (left-hand) pages.
@evenheading, @everyheading, @oddheading, : : :Five other related commands.

Appendix K: Second Edition Features 237
@thischapterInsert name of chapter and chapter number.
@thischaptername, @thisfile, @thistitle, @thispageRelated commands.
Formatting
Format blocks of text.
See Chapter 10 [Quotations and Examples], page 89, andChapter 11 [Making Lists and Tables], page 97.
@cartouche Draw rounded box surrounding text (not in Info).
@enumerate optional-argEnumerate a list with letters or numbers.
@exdent line-of-textRemove indentation.
@flushleft Left justify.
@flushright Right justify.
@format Do not narrow nor change font.
@ftable formatting-command@vtable formatting-command
Two-column table with indexing.
@lisp For an example of Lisp code.
@smallexample@smalllisp Like @table and @lisp but for @smallbook.
Conditionals
Conditionally format text.
See Section 18.2 [@set @clear @value], page 142.
@set ag [string]Set a ag. Optionally, set value of ag to string.
@clear ag Clear a ag.
@value{ ag} Replace with value to which ag is set.
@ifset ag Format, if ag is set.
@ifclear agIgnore, if ag is set.

238 Texinfo 2.23
@heading series for Titles
Produce unnumbered headings that do not appear in a table of contents.
See Chapter 5 [Structuring], page 49.
@heading titleUnnumbered section-like heading not listed in the table ofcontents of a printed manual.
@chapheading, @majorheading, @subheading, @subsubheadingRelated commands.
Font commands
See Section 9.2.2 [Smallcaps], page 86, andSection 9.2.3 [Fonts], page 87.
@r{text} Print in roman font.
@sc{text} Print in small caps font.
Miscellaneous
See Section 3.4.3 [@title @subtitle and @author Commands], page 38,see Section 9.2.4 [Customized Highlighting], page 87,see Section 20.9 [Overfull hboxes], page 155,see Chapter 17 [Footnotes], page 139,see Section 13.2.4 [Format a Dimension], page 113,see Section 5.12 [@raisesections and @lowersections], page 54,see Section 13.8 [@math: Inserting Mathematical Expressions], page 116.see Section 13.7 [Inserting a Minus Sign], page 116,see Section 3.2.6 [Paragraph Indenting], page 34,see Section 8.1 [Cross Reference Commands], page 69,see Section 3.4.3 [@title @subtitle and @author], page 38, andsee Section F.3 [How to Make Your Own Headings], page 213.
@author authorTypeset author's name.
@finalout Produce cleaner printed output.
@footnotestyle end-or-separateSpecify footnote style.
@dmn{dimension}Format a dimension.
@global@letnew-cmd=existing-cmdDe�ne a highlighting command for TEX. (TEX only.)

Appendix K: Second Edition Features 239
@lowersectionsReduce hierarchical level of sectioning commands.
@math{mathematical-expression}Format a mathematical expression.
@minus{} Generate a minus sign.
@paragraphindent asis-or-numberSpecify paragraph indentation.
@raisesectionsRaise hierarchical level of sectioning commands.
@ref{node-name, [entry ], [topic-or-title], [info-�le], [manual]}Make a reference. In the printed manual, the reference doesnot start with the word `see'.
@title title Typeset title in the alternative title page format.
@subtitle subtitleTypeset subtitle in the alternative title page format.
@today{} Insert the current date.

240 Texinfo 2.23

Command and Variable Index 241
Command and Variable Index
This is an alphabetical list of all the @-commands, assorted Emacs Lispfunctions, and several variables. To make the list easier to use, the commandsare listed without their preceding `@'.
(Index is nonexistent)

242 Texinfo 2.23

Concept Index 243
Concept Index
(Index is nonexistent)

244 Texinfo 2.23

i
Short Contents
Texinfo Copying Conditions . . . . . . . . . . . . . . . . . . . . . . . . . . . 1
1 Overview of Texinfo . . . . . . . . . . . . . . . . . . . . . . . . . . . . . 3
2 Using Texinfo Mode . . . . . . . . . . . . . . . . . . . . . . . . . . . . 15
3 Beginning a Texinfo File . . . . . . . . . . . . . . . . . . . . . . . . . 29
4 Ending a Texinfo File . . . . . . . . . . . . . . . . . . . . . . . . . . . 45
5 Chapter Structuring . . . . . . . . . . . . . . . . . . . . . . . . . . . . 49
6 Nodes . . . . . . . . . . . . . . . . . . . . . . . . . . . . . . . . . . . . . . 57
7 Menus . . . . . . . . . . . . . . . . . . . . . . . . . . . . . . . . . . . . . . 65
8 Cross References . . . . . . . . . . . . . . . . . . . . . . . . . . . . . . . 69
9 Marking Words and Phrases . . . . . . . . . . . . . . . . . . . . . . . 79
10 Quotations and Examples . . . . . . . . . . . . . . . . . . . . . . . . 89
11 Making Lists and Tables . . . . . . . . . . . . . . . . . . . . . . . . . 97
12 Creating Indices . . . . . . . . . . . . . . . . . . . . . . . . . . . . . . 105
13 Special Insertions . . . . . . . . . . . . . . . . . . . . . . . . . . . . . 111
14 Glyphs for Examples . . . . . . . . . . . . . . . . . . . . . . . . . . . 117
15 Making and Preventing Breaks . . . . . . . . . . . . . . . . . . . . 121
16 De�nition Commands . . . . . . . . . . . . . . . . . . . . . . . . . . 125
17 Footnotes . . . . . . . . . . . . . . . . . . . . . . . . . . . . . . . . . . . 139
18 Conditionally Visible Text . . . . . . . . . . . . . . . . . . . . . . . 141
19 Macros: De�ning New Texinfo Commands . . . . . . . . . . . . 147
20 Format and Print Hardcopy . . . . . . . . . . . . . . . . . . . . . . 149
21 Creating an Info File . . . . . . . . . . . . . . . . . . . . . . . . . . . 159
22 Installing an Info File. . . . . . . . . . . . . . . . . . . . . . . . . . . 167
Appendix A @-Command List . . . . . . . . . . . . . . . . . . . . . . . 173
Appendix B Tips and Hints. . . . . . . . . . . . . . . . . . . . . . . . . 193
Appendix C A Sample Texinfo File . . . . . . . . . . . . . . . . . . . 199
Appendix D Sample Permissions . . . . . . . . . . . . . . . . . . . . . 201
Appendix E Include Files . . . . . . . . . . . . . . . . . . . . . . . . . . 205
Appendix F Page Headings . . . . . . . . . . . . . . . . . . . . . . . . . 211
Appendix G Formatting Mistakes . . . . . . . . . . . . . . . . . . . . . 217

ii Texinfo 2.23
Appendix H Re�lling Paragraphs . . . . . . . . . . . . . . . . . . . . . 227
Appendix I @-Command Syntax . . . . . . . . . . . . . . . . . . . . . 229
Appendix J How to Obtain TEX . . . . . . . . . . . . . . . . . . . . . 231
Appendix K Second Edition Features . . . . . . . . . . . . . . . . . . 233
Command and Variable Index . . . . . . . . . . . . . . . . . . . . . . . . 241
Concept Index . . . . . . . . . . . . . . . . . . . . . . . . . . . . . . . . . . . 243

iii
Table of Contents
Texinfo Copying Conditions . . . . . . . . . . . . . . . . . . . 1
1 Overview of Texinfo. . . . . . . . . . . . . . . . . . . . . . . . 31.1 Info �les . . . . . . . . . . . . . . . . . . . . . . . . . . . . . . . . . . . . . . . . . . . . . . . . 41.2 Printed Books . . . . . . . . . . . . . . . . . . . . . . . . . . . . . . . . . . . . . . . . . . 51.3 @-commands . . . . . . . . . . . . . . . . . . . . . . . . . . . . . . . . . . . . . . . . . . . . 61.4 General Syntactic Conventions . . . . . . . . . . . . . . . . . . . . . . . . . . . 71.5 Comments . . . . . . . . . . . . . . . . . . . . . . . . . . . . . . . . . . . . . . . . . . . . . . 81.6 What a Texinfo File Must Have . . . . . . . . . . . . . . . . . . . . . . . . . . 91.7 Six Parts of a Texinfo File . . . . . . . . . . . . . . . . . . . . . . . . . . . . . . 101.8 A Short Sample Texinfo File . . . . . . . . . . . . . . . . . . . . . . . . . . . . 101.9 Acknowledgements . . . . . . . . . . . . . . . . . . . . . . . . . . . . . . . . . . . . . 13
2 Using Texinfo Mode . . . . . . . . . . . . . . . . . . . . . . 152.1 The Usual GNU Emacs Editing Commands . . . . . . . . . . . . . . 152.2 Inserting Frequently Used Commands . . . . . . . . . . . . . . . . . . . . 162.3 Showing the Section Structure of a File . . . . . . . . . . . . . . . . . . 182.4 Updating Nodes and Menus . . . . . . . . . . . . . . . . . . . . . . . . . . . . . 19
2.4.1 Updating Requirements . . . . . . . . . . . . . . . . . . . . . . . . 222.4.2 Other Updating Commands . . . . . . . . . . . . . . . . . . . . 23
2.5 Formatting for Info . . . . . . . . . . . . . . . . . . . . . . . . . . . . . . . . . . . . . 242.6 Formatting and Printing . . . . . . . . . . . . . . . . . . . . . . . . . . . . . . . . 252.7 Texinfo Mode Summary . . . . . . . . . . . . . . . . . . . . . . . . . . . . . . . . 26
3 Beginning a Texinfo File . . . . . . . . . . . . . . . . . . 293.1 Sample Texinfo File Beginning . . . . . . . . . . . . . . . . . . . . . . . . . . 293.2 The Texinfo File Header . . . . . . . . . . . . . . . . . . . . . . . . . . . . . . . . 31
3.2.1 The First Line of a Texinfo File . . . . . . . . . . . . . . . . . 313.2.2 Start of Header . . . . . . . . . . . . . . . . . . . . . . . . . . . . . . . . 313.2.3 @setfilename . . . . . . . . . . . . . . . . . . . . . . . . . . . . . . . . . 323.2.4 @settitle . . . . . . . . . . . . . . . . . . . . . . . . . . . . . . . . . . . . 323.2.5 @setchapternewpage . . . . . . . . . . . . . . . . . . . . . . . . . . 333.2.6 Paragraph Indenting . . . . . . . . . . . . . . . . . . . . . . . . . . . 343.2.7 End of Header . . . . . . . . . . . . . . . . . . . . . . . . . . . . . . . . . 35
3.3 Summary and Copying Permissions for Info . . . . . . . . . . . . . . 353.4 The Title and Copyright Pages . . . . . . . . . . . . . . . . . . . . . . . . . . 36
3.4.1 @titlepage . . . . . . . . . . . . . . . . . . . . . . . . . . . . . . . . . . . 363.4.2 @titlefont, @center, and @sp . . . . . . . . . . . . . . . . . 373.4.3 @title, @subtitle, and @author . . . . . . . . . . . . . . . 38

iv Texinfo 2.23
3.4.4 Copyright Page and Permissions . . . . . . . . . . . . . . . . 383.4.5 Heading Generation . . . . . . . . . . . . . . . . . . . . . . . . . . . . 393.4.6 The @headings Command. . . . . . . . . . . . . . . . . . . . . . 40
3.5 The `Top' Node and Master Menu . . . . . . . . . . . . . . . . . . . . . . . 413.5.1 Parts of a Master Menu . . . . . . . . . . . . . . . . . . . . . . . . 42
3.6 Software Copying Permissions . . . . . . . . . . . . . . . . . . . . . . . . . . . 43
4 Ending a Texinfo File . . . . . . . . . . . . . . . . . . . . . 454.1 Index Menus and Printing an Index . . . . . . . . . . . . . . . . . . . . . . 454.2 Generating a Table of Contents. . . . . . . . . . . . . . . . . . . . . . . . . . 464.3 @bye File Ending . . . . . . . . . . . . . . . . . . . . . . . . . . . . . . . . . . . . . . . 47
5 Chapter Structuring . . . . . . . . . . . . . . . . . . . . . . 495.1 Tree Structure of Sections . . . . . . . . . . . . . . . . . . . . . . . . . . . . . . . 495.2 Types of Structuring Command . . . . . . . . . . . . . . . . . . . . . . . . . 505.3 @top . . . . . . . . . . . . . . . . . . . . . . . . . . . . . . . . . . . . . . . . . . . . . . . . . . 505.4 @chapter . . . . . . . . . . . . . . . . . . . . . . . . . . . . . . . . . . . . . . . . . . . . . . 515.5 @unnumbered, @appendix . . . . . . . . . . . . . . . . . . . . . . . . . . . . . . . 515.6 @majorheading, @chapheading . . . . . . . . . . . . . . . . . . . . . . . . . . 515.7 @section . . . . . . . . . . . . . . . . . . . . . . . . . . . . . . . . . . . . . . . . . . . . . . 525.8 @unnumberedsec, @appendixsec, @heading . . . . . . . . . . . . . . 525.9 The @subsection Command . . . . . . . . . . . . . . . . . . . . . . . . . . . . 535.10 The @subsection-like Commands . . . . . . . . . . . . . . . . . . . . . . 535.11 The `subsub' Commands . . . . . . . . . . . . . . . . . . . . . . . . . . . . . . . 535.12 @raisesections and @lowersections . . . . . . . . . . . . . . . . . . 54
6 Nodes . . . . . . . . . . . . . . . . . . . . . . . . . . . . . . . . . . . . 576.1 Node and Menu Illustration . . . . . . . . . . . . . . . . . . . . . . . . . . . . . 576.2 The @node Command . . . . . . . . . . . . . . . . . . . . . . . . . . . . . . . . . . . 59
6.2.1 How to Write an @node Line . . . . . . . . . . . . . . . . . . . . 606.2.2 @node Line Tips . . . . . . . . . . . . . . . . . . . . . . . . . . . . . . . 616.2.3 @node Line Requirements . . . . . . . . . . . . . . . . . . . . . . 616.2.4 The First Node . . . . . . . . . . . . . . . . . . . . . . . . . . . . . . . . 626.2.5 The @top Sectioning Command . . . . . . . . . . . . . . . . . 626.2.6 The `Top' Node Summary . . . . . . . . . . . . . . . . . . . . . . 63
6.3 Creating Pointers with makeinfo . . . . . . . . . . . . . . . . . . . . . . . . 63
7 Menus . . . . . . . . . . . . . . . . . . . . . . . . . . . . . . . . . . . 657.1 Writing a Menu . . . . . . . . . . . . . . . . . . . . . . . . . . . . . . . . . . . . . . . . 667.2 The Parts of a Menu . . . . . . . . . . . . . . . . . . . . . . . . . . . . . . . . . . . 667.3 Less Cluttered Menu Entry . . . . . . . . . . . . . . . . . . . . . . . . . . . . . 677.4 A Menu Example . . . . . . . . . . . . . . . . . . . . . . . . . . . . . . . . . . . . . . 677.5 Referring to Other Info Files . . . . . . . . . . . . . . . . . . . . . . . . . . . . 68

v
8 Cross References . . . . . . . . . . . . . . . . . . . . . . . . . 698.1 Di�erent Cross Reference Commands . . . . . . . . . . . . . . . . . . . . 698.2 Parts of a Cross Reference . . . . . . . . . . . . . . . . . . . . . . . . . . . . . . 708.3 @xref . . . . . . . . . . . . . . . . . . . . . . . . . . . . . . . . . . . . . . . . . . . . . . . . . 71
8.3.1 @xref with One Argument . . . . . . . . . . . . . . . . . . . . . 728.3.2 @xref with Two Arguments . . . . . . . . . . . . . . . . . . . . 728.3.3 @xref with Three Arguments . . . . . . . . . . . . . . . . . . . 738.3.4 @xref with Four and Five Arguments . . . . . . . . . . . 74
8.4 Naming a `Top' Node . . . . . . . . . . . . . . . . . . . . . . . . . . . . . . . . . . . 758.5 @ref . . . . . . . . . . . . . . . . . . . . . . . . . . . . . . . . . . . . . . . . . . . . . . . . . . 768.6 @pxref . . . . . . . . . . . . . . . . . . . . . . . . . . . . . . . . . . . . . . . . . . . . . . . . 768.7 @inforef . . . . . . . . . . . . . . . . . . . . . . . . . . . . . . . . . . . . . . . . . . . . . . 77
9 Marking Words and Phrases. . . . . . . . . . . . . . . 799.1 Indicating De�nitions, Commands, etc. . . . . . . . . . . . . . . . . . . 79
9.1.1 @code{sample-code} . . . . . . . . . . . . . . . . . . . . . . . . . . . 809.1.2 @kbd{keyboard-characters} . . . . . . . . . . . . . . . . . . . . . 819.1.3 @key{key-name} . . . . . . . . . . . . . . . . . . . . . . . . . . . . . . . 829.1.4 @samp{text} . . . . . . . . . . . . . . . . . . . . . . . . . . . . . . . . . . . 829.1.5 @var{metasyntactic-variable} . . . . . . . . . . . . . . . . . . . 839.1.6 @file{�le-name} . . . . . . . . . . . . . . . . . . . . . . . . . . . . . . 849.1.7 @dfn{term} . . . . . . . . . . . . . . . . . . . . . . . . . . . . . . . . . . . 849.1.8 @cite{reference} . . . . . . . . . . . . . . . . . . . . . . . . . . . . . . 859.1.9 @url{uniform-resource-locator} . . . . . . . . . . . . . . . . . 859.1.10 @email{email-address} . . . . . . . . . . . . . . . . . . . . . . . . 85
9.2 Emphasizing Text . . . . . . . . . . . . . . . . . . . . . . . . . . . . . . . . . . . . . . 859.2.1 @emph{text} and @strong{text} . . . . . . . . . . . . . . . . 859.2.2 @sc{text}: The Small Caps Font . . . . . . . . . . . . . . . . 869.2.3 Fonts for Printing, Not Info . . . . . . . . . . . . . . . . . . . . 879.2.4 Customized Highlighting . . . . . . . . . . . . . . . . . . . . . . . 87
10 Quotations and Examples . . . . . . . . . . . . . . . . 8910.1 The Block Enclosing Commands . . . . . . . . . . . . . . . . . . . . . . . 8910.2 @quotation . . . . . . . . . . . . . . . . . . . . . . . . . . . . . . . . . . . . . . . . . . 9010.3 @example . . . . . . . . . . . . . . . . . . . . . . . . . . . . . . . . . . . . . . . . . . . . . 9010.4 @noindent . . . . . . . . . . . . . . . . . . . . . . . . . . . . . . . . . . . . . . . . . . . . 9110.5 @lisp . . . . . . . . . . . . . . . . . . . . . . . . . . . . . . . . . . . . . . . . . . . . . . . . 9210.6 @smallexample and @smalllisp . . . . . . . . . . . . . . . . . . . . . . . 9310.7 @display . . . . . . . . . . . . . . . . . . . . . . . . . . . . . . . . . . . . . . . . . . . . . 9310.8 @format . . . . . . . . . . . . . . . . . . . . . . . . . . . . . . . . . . . . . . . . . . . . . . 9410.9 @exdent: Undoing a Line's Indentation . . . . . . . . . . . . . . . . . 9410.10 @flushleft and @flushright . . . . . . . . . . . . . . . . . . . . . . . . 9410.11 Drawing Cartouches Around Examples . . . . . . . . . . . . . . . . 95

vi Texinfo 2.23
11 Making Lists and Tables . . . . . . . . . . . . . . . . . 9711.1 Making an Itemized List . . . . . . . . . . . . . . . . . . . . . . . . . . . . . . . 9711.2 Making a Numbered or Lettered List . . . . . . . . . . . . . . . . . . . 9911.3 Making a Two-column Table . . . . . . . . . . . . . . . . . . . . . . . . . . 101
11.3.1 @ftable and @vtable . . . . . . . . . . . . . . . . . . . . . . . . 10211.3.2 @itemx . . . . . . . . . . . . . . . . . . . . . . . . . . . . . . . . . . . . . 102
11.4 Multi-column Tables . . . . . . . . . . . . . . . . . . . . . . . . . . . . . . . . . 10311.4.1 Multitable Column Widths . . . . . . . . . . . . . . . . . . . 10311.4.2 Multitable Rows . . . . . . . . . . . . . . . . . . . . . . . . . . . . . 104
12 Creating Indices . . . . . . . . . . . . . . . . . . . . . . . . 10512.1 Making Index Entries . . . . . . . . . . . . . . . . . . . . . . . . . . . . . . . . 10512.2 Prede�ned Indices . . . . . . . . . . . . . . . . . . . . . . . . . . . . . . . . . . . . 10512.3 De�ning the Entries of an Index . . . . . . . . . . . . . . . . . . . . . . . 10612.4 Combining Indices . . . . . . . . . . . . . . . . . . . . . . . . . . . . . . . . . . . 108
12.4.1 @syncodeindex . . . . . . . . . . . . . . . . . . . . . . . . . . . . . . 10812.4.2 @synindex . . . . . . . . . . . . . . . . . . . . . . . . . . . . . . . . . . 109
12.5 De�ning New Indices . . . . . . . . . . . . . . . . . . . . . . . . . . . . . . . . . 109
13 Special Insertions . . . . . . . . . . . . . . . . . . . . . . . 11113.1 Inserting @ and Braces . . . . . . . . . . . . . . . . . . . . . . . . . . . . . . . . 111
13.1.1 Inserting `@' with @@ . . . . . . . . . . . . . . . . . . . . . . . . . 11113.1.2 Inserting `{' and `}'with @{ and @} . . . . . . . . . . . . 111
13.2 Inserting Space . . . . . . . . . . . . . . . . . . . . . . . . . . . . . . . . . . . . . . 11113.2.1 Not Ending a Sentence . . . . . . . . . . . . . . . . . . . . . . . 11113.2.2 Ending a Sentence . . . . . . . . . . . . . . . . . . . . . . . . . . . 11213.2.3 Multiple Spaces . . . . . . . . . . . . . . . . . . . . . . . . . . . . . 11313.2.4 @dmn{dimension}: Format a Dimension . . . . . . . . 113
13.3 Inserting Accents . . . . . . . . . . . . . . . . . . . . . . . . . . . . . . . . . . . . 11413.4 Inserting Ellipsis, Dots, and Bullets . . . . . . . . . . . . . . . . . . . . 114
13.4.1 @dots{} . . . . . . . . . . . . . . . . . . . . . . . . . . . . . . . . . . . . 11513.4.2 @bullet{} . . . . . . . . . . . . . . . . . . . . . . . . . . . . . . . . . . 115
13.5 Inserting TEX and the Copyright Symbol . . . . . . . . . . . . . . 11513.5.1 @TeX{} . . . . . . . . . . . . . . . . . . . . . . . . . . . . . . . . . . . . . 11513.5.2 @copyright{} . . . . . . . . . . . . . . . . . . . . . . . . . . . . . . . 115
13.6 @pounds{} . . . . . . . . . . . . . . . . . . . . . . . . . . . . . . . . . . . . . . . . . . . 11613.7 @minus{}: Inserting a Minus Sign . . . . . . . . . . . . . . . . . . . . . 11613.8 @math: Inserting Mathematical Expressions . . . . . . . . . . . . 116

vii
14 Glyphs for Examples. . . . . . . . . . . . . . . . . . . . 11714.1 ): Indicating Evaluation . . . . . . . . . . . . . . . . . . . . . . . . . . . . . 11714.2 7!: Indicating an Expansion . . . . . . . . . . . . . . . . . . . . . . . . . . 11714.3 a : Indicating Printed Output . . . . . . . . . . . . . . . . . . . . . . . . 11814.4 error : Indicating an Error Message . . . . . . . . . . . . . . . . . . 11814.5 � : Indicating Equivalence . . . . . . . . . . . . . . . . . . . . . . . . . . . . 11914.6 Indicating Point in a Bu�er . . . . . . . . . . . . . . . . . . . . . . . . . . . 119
15 Making and Preventing Breaks . . . . . . . . . . 12115.1 @*: Generate Line Breaks . . . . . . . . . . . . . . . . . . . . . . . . . . . . . 12115.2 @- and @hyphenation: Helping TEX hyphenate . . . . . . . . . 12215.3 @w{text}: Prevent Line Breaks . . . . . . . . . . . . . . . . . . . . . . . . 12215.4 @sp n: Insert Blank Lines . . . . . . . . . . . . . . . . . . . . . . . . . . . . . 12315.5 @page: Start a New Page . . . . . . . . . . . . . . . . . . . . . . . . . . . . . 12315.6 @group: Prevent Page Breaks . . . . . . . . . . . . . . . . . . . . . . . . . 12315.7 @need mils: Prevent Page Breaks . . . . . . . . . . . . . . . . . . . . . . 124
16 De�nition Commands . . . . . . . . . . . . . . . . . . . 12516.1 The Template for a De�nition . . . . . . . . . . . . . . . . . . . . . . . . . 12516.2 Optional and Repeated Arguments . . . . . . . . . . . . . . . . . . . . 12616.3 Two or More `First' Lines . . . . . . . . . . . . . . . . . . . . . . . . . . . . . 12716.4 The De�nition Commands . . . . . . . . . . . . . . . . . . . . . . . . . . . . 128
16.4.1 Functions and Similar Entities . . . . . . . . . . . . . . . . 12816.4.2 Variables and Similar Entities . . . . . . . . . . . . . . . . 12916.4.3 Functions in Typed Languages. . . . . . . . . . . . . . . . 13016.4.4 Variables in Typed Languages . . . . . . . . . . . . . . . . 13216.4.5 Object-Oriented Programming . . . . . . . . . . . . . . . . 13416.4.6 Data Types . . . . . . . . . . . . . . . . . . . . . . . . . . . . . . . . . 136
16.5 Conventions for Writing De�nitions . . . . . . . . . . . . . . . . . . . . 13716.6 A Sample Function De�nition . . . . . . . . . . . . . . . . . . . . . . . . . 137
17 Footnotes . . . . . . . . . . . . . . . . . . . . . . . . . . . . . . 13917.1 Footnote Commands . . . . . . . . . . . . . . . . . . . . . . . . . . . . . . . . . 13917.2 Footnote Styles . . . . . . . . . . . . . . . . . . . . . . . . . . . . . . . . . . . . . . 139
18 Conditionally Visible Text . . . . . . . . . . . . . . 14118.1 Using Ordinary TEX Commands. . . . . . . . . . . . . . . . . . . . . . . 14118.2 @set, @clear, and @value . . . . . . . . . . . . . . . . . . . . . . . . . . . . 142
18.2.1 @ifset and @ifclear . . . . . . . . . . . . . . . . . . . . . . . . 14218.2.2 @value . . . . . . . . . . . . . . . . . . . . . . . . . . . . . . . . . . . . . 14418.2.3 @value Example. . . . . . . . . . . . . . . . . . . . . . . . . . . . . 145

viii Texinfo 2.23
19 Macros: De�ning New Texinfo Commands. . . . . . . . . . . . . . . . . . . . . . . . . . . . . . . . . . . . . . . 14719.1 De�ning Macros . . . . . . . . . . . . . . . . . . . . . . . . . . . . . . . . . . . . . 14719.2 Invoking Macros . . . . . . . . . . . . . . . . . . . . . . . . . . . . . . . . . . . . . 147
20 Format and Print Hardcopy . . . . . . . . . . . . . 14920.1 Format using tex and texindex . . . . . . . . . . . . . . . . . . . . . . . 14920.2 Format using texi2dvi . . . . . . . . . . . . . . . . . . . . . . . . . . . . . . . 15020.3 Shell Print Using lpr -d . . . . . . . . . . . . . . . . . . . . . . . . . . . . . . 15120.4 From an Emacs Shell : : : . . . . . . . . . . . . . . . . . . . . . . . . . . . . . . 15120.5 Formatting and Printing in Texinfo Mode . . . . . . . . . . . . . . 15120.6 Using the Local Variables List . . . . . . . . . . . . . . . . . . . . . . . . 15320.7 TEX Formatting Requirements Summary . . . . . . . . . . . . . . . 15420.8 Preparing to Use TEX . . . . . . . . . . . . . . . . . . . . . . . . . . . . . . . . 15420.9 Overfull \hboxes" . . . . . . . . . . . . . . . . . . . . . . . . . . . . . . . . . . . . 15520.10 Printing \Small" Books . . . . . . . . . . . . . . . . . . . . . . . . . . . . . . 15620.11 Printing on A4 Paper . . . . . . . . . . . . . . . . . . . . . . . . . . . . . . . 15620.12 Cropmarks and Magni�cation . . . . . . . . . . . . . . . . . . . . . . . . 157
21 Creating an Info File . . . . . . . . . . . . . . . . . . . 15921.1 Running makeinfo from a Shell . . . . . . . . . . . . . . . . . . . . . . . 15921.2 Options for makeinfo . . . . . . . . . . . . . . . . . . . . . . . . . . . . . . . . 15921.3 Pointer Validation . . . . . . . . . . . . . . . . . . . . . . . . . . . . . . . . . . . . 16221.4 Running makeinfo inside Emacs . . . . . . . . . . . . . . . . . . . . . . 16221.5 The texinfo-format: : : Commands . . . . . . . . . . . . . . . . . . . 16321.6 Batch Formatting . . . . . . . . . . . . . . . . . . . . . . . . . . . . . . . . . . . . 16421.7 Tag Files and Split Files . . . . . . . . . . . . . . . . . . . . . . . . . . . . . . 164
22 Installing an Info File . . . . . . . . . . . . . . . . . . . 16722.1 Listing a New Info File . . . . . . . . . . . . . . . . . . . . . . . . . . . . . . . 16722.2 Info Files in Other Directories . . . . . . . . . . . . . . . . . . . . . . . . . 16822.3 Installing Info Directory Files . . . . . . . . . . . . . . . . . . . . . . . . . 16922.4 Invoking install-info . . . . . . . . . . . . . . . . . . . . . . . . . . . . . . . . . . 170
Appendix A @-Command List . . . . . . . . . . . . . . 173
Appendix B Tips and Hints . . . . . . . . . . . . . . . . 193
Appendix C A Sample Texinfo File . . . . . . . . . 199

ix
Appendix D Sample Permissions . . . . . . . . . . . 201D.1 `ifinfo' Copying Permissions . . . . . . . . . . . . . . . . . . . . . . . . . 202D.2 Titlepage Copying Permissions . . . . . . . . . . . . . . . . . . . . . . . . 202
Appendix E Include Files . . . . . . . . . . . . . . . . . . 205E.1 How to Use Include Files . . . . . . . . . . . . . . . . . . . . . . . . . . . . . . 205E.2 texinfo-multiple-files-update . . . . . . . . . . . . . . . . . . . . . 205E.3 Include File Requirements . . . . . . . . . . . . . . . . . . . . . . . . . . . . . 206E.4 Sample File with @include . . . . . . . . . . . . . . . . . . . . . . . . . . . . 207E.5 Evolution of Include Files . . . . . . . . . . . . . . . . . . . . . . . . . . . . . 208
Appendix F Page Headings . . . . . . . . . . . . . . . . 211F.1 Standard Heading Formats . . . . . . . . . . . . . . . . . . . . . . . . . . . . 211F.2 Specifying the Type of Heading . . . . . . . . . . . . . . . . . . . . . . . . 212F.3 How to Make Your Own Headings . . . . . . . . . . . . . . . . . . . . . . 213
Appendix G Formatting Mistakes . . . . . . . . . . 217G.1 Catching Errors with Info Formatting . . . . . . . . . . . . . . . . . . 217G.2 Catching Errors with TEX Formatting . . . . . . . . . . . . . . . . . . 219G.3 Using texinfo-show-structure . . . . . . . . . . . . . . . . . . . . . . . 220G.4 Using occur. . . . . . . . . . . . . . . . . . . . . . . . . . . . . . . . . . . . . . . . . . 222G.5 Finding Badly Referenced Nodes . . . . . . . . . . . . . . . . . . . . . . . 222
G.5.1 Running Info-validate . . . . . . . . . . . . . . . . . . . . . 223G.5.2 Creating an Unsplit File . . . . . . . . . . . . . . . . . . . . . . 223G.5.3 Tagifying a File . . . . . . . . . . . . . . . . . . . . . . . . . . . . . . 224G.5.4 Splitting a File Manually . . . . . . . . . . . . . . . . . . . . . 224
Appendix H Re�lling Paragraphs . . . . . . . . . . . 227
Appendix I @-Command Syntax . . . . . . . . . . . . 229
Appendix J How to Obtain TEX . . . . . . . . . . . . 231
Appendix K Second Edition Features . . . . . . . 233K.1 New Texinfo Mode Commands . . . . . . . . . . . . . . . . . . . . . . . . 233K.2 New Texinfo @-Commands. . . . . . . . . . . . . . . . . . . . . . . . . . . . . 235
Command and Variable Index . . . . . . . . . . . . . . . 241
Concept Index . . . . . . . . . . . . . . . . . . . . . . . . . . . . . . 243

x Texinfo 2.23