Embed Size (px)
Citation preview

HOME & BATH
© 2011 ICERA USA
INSTALLATION & CARE GUIDE
ON E ‐ P I E C E TO I L E T
Concealed Bolt Holes
January 2012
.
© 2011 ICERA USA
2
BEFORE YOU BEGIN
Please read these instructions carefully to familiarize yourself with the required tools, materials, and installation sequences. This will help you avoid costly mistakes. In addition, read all operating and safety instructions. All information in this guide is based upon the latest product information available at the time of publication. Icera reserves the right to make changes in product characteristics, packaging, or availability at any time without notice. FIRST STEPS
Carefully inspect the new fixture for any sign of damage. Ensure that the new drain has the correct rough‐in dimension. This toilet has a 12” (305 mm) rough‐in dimension.
Closet flange must be 12” (305 mm) on‐center from the wall. Seat post holes are on 5 ½” (140 mm) centers. Shut off the water supply. For new construction, refer to dimensions for locating the shut‐off valve.
Fixture dimensions are nominal and conform to tolerances established by ASME Standards (A112.19.2‐2003). Observe all local plumbing and building codes. WARNING: Risk of injury or product damage. Handle ceramic products carefully. Product can break and chip if you over‐tighten bolts and nuts.
WARNING: Risk of external leakage. The fill valve nut has been factory‐tightened to design specifications. If re‐tightening is required, wrench tighten one turn past finger tight.
WARNING: Risk of injury. If the new toilet is not installed immediately, temporarily place a rag in the closet flange. Hazardous gases may leak from the flange opening if it is not blocked.
.
© 2011 ICERA USA
3
CAUTION: Ensure that the water supply pressure is a minimum of 35 psi (2.5 kg/cm). The toilet will not function properly without minimum pressure. TOOLS AND MATERIALS REQUIRED (not supplied)
10” (254 mm) adjustable wrench 12” (305 mm) pipe wrench Screwdriver Power drill (3/8” bit) Metal file (file cut) Tape measure Tubing cutter Level Putty knife Screwdriver Toilet installation flange Toilet gasket (e.g., wax seal) Water supply line Toilet supply shut‐off valve, 3/8” (10 mm) recommended
PARTS PROVIDED
Mounting anchors, bolts, washers, brackets and caps Mounting template
NOTICE: If the existing toilet does not have a supply shut‐off valve below the tank, install one before installing the new toilet.
.
© 2011 ICERA USA
4
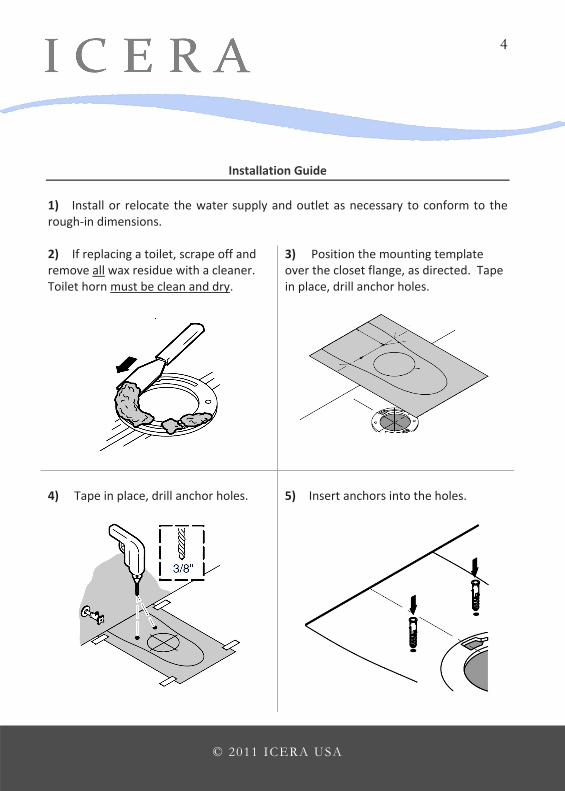
Installation Guide 1) Install or relocate the water supply and outlet as necessary to conform to the rough‐in dimensions. 2) If replacing a toilet, scrape off and remove all wax residue with a cleaner. Toilet horn must be clean and dry.
3) Position the mounting template over the closet flange, as directed. Tape in place, drill anchor holes.
4) Tape in place, drill anchor holes.
5) Insert anchors into the holes.
.
© 2011 ICERA USA
5
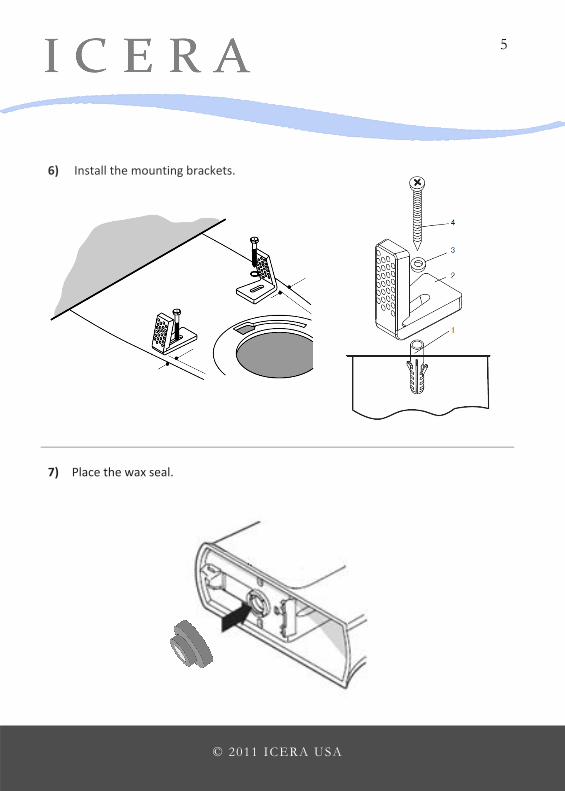
6) Install the mounting brackets.
7) Place the wax seal.
.
© 2011 ICERA USA
6
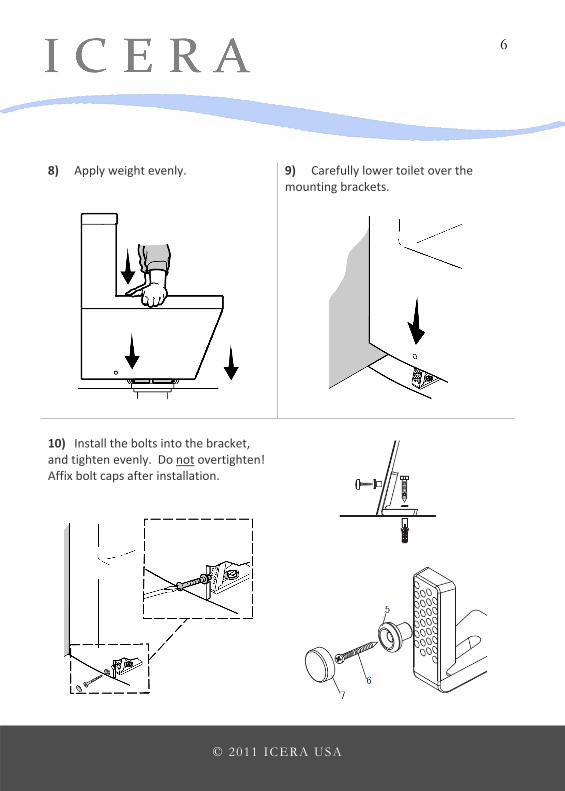
8) Apply weight evenly.
9) Carefully lower toilet over the mounting brackets.
10) Install the bolts into the bracket, and tighten evenly. Do not overtighten! Affix bolt caps after installation.
.
© 2011 ICERA USA
7
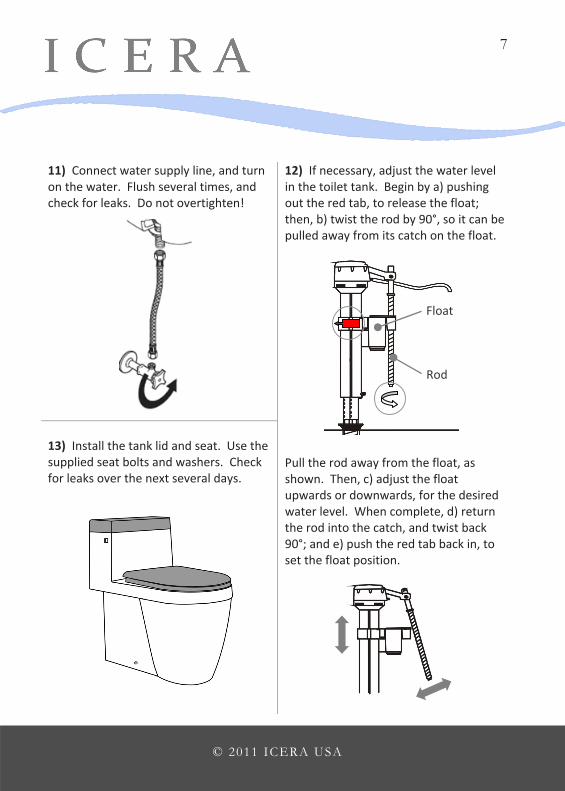
11) Connect water supply line, and turn on the water. Flush several times, and check for leaks. Do not overtighten!
13) Install the tank lid and seat. Use the supplied seat bolts and washers. Check for leaks over the next several days.
12) If necessary, adjust the water level in the toilet tank. Begin by a) pushing out the red tab, to release the float; then, b) twist the rod by 90°, so it can be pulled away from its catch on the float.
Pull the rod away from the float, as shown. Then, c) adjust the float upwards or downwards, for the desired water level. When complete, d) return the rod into the catch, and twist back 90°; and e) push the red tab back in, to set the float position.
Float
Rod
.
© 2011 ICERA USA
8
TROUBLESHOOTING GUIDE
Problem Recommended Action
Poor Flush • Adjust the tank water level to match the waterline.
• Fully open the water supply shut‐off valve.
• Clear obstructions from the trapway, jet or rim holes.
No Flush
• Reconnect the chain to the trip lever or flush valve.
• Adjust chain assembly to remove excessive slack.
Fill valve turns on or off by itself, without toilet being flushed; or it runs, allowing water to enter the tank
• Adjust flapper chain for proper slack, so flapper closes.
• Clean or replace the flapper if it is worn, dirty, or misaligned with the opening.
• Clean area around the opening to allow flapper to seal.
• Adjust the tank water level if it is too high.
• Replace the fill valve if the valve float sinks.
Tank takes excessive time to fill
• Fully open the water supply shut‐off valve.
• Check supply line for a kink. Remove kink.
• Clean valve inlet, valve head, or supply line. Flush lines.
There is excessive noise when the tank is filling
• Partially close the water supply shut‐off valve if the water pressure to the toilet is too high. Check the toilet performance following any such adjustment.
• Remove dirt or obstructions from the valve head. Flush the lines.
.
© 2011 ICERA USA
9
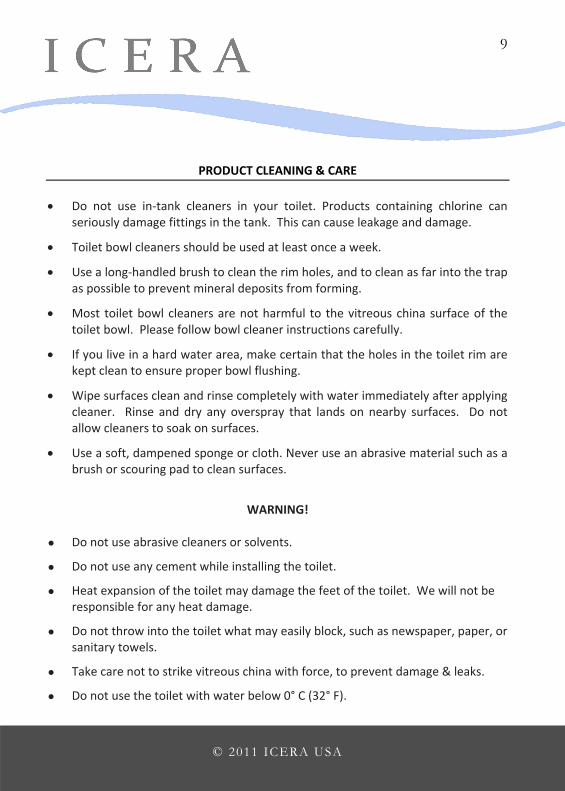
PRODUCT CLEANING & CARE
• Do not use in‐tank cleaners in your toilet. Products containing chlorine can seriously damage fittings in the tank. This can cause leakage and damage.
• Toilet bowl cleaners should be used at least once a week.
• Use a long‐handled brush to clean the rim holes, and to clean as far into the trap as possible to prevent mineral deposits from forming.
• Most toilet bowl cleaners are not harmful to the vitreous china surface of the toilet bowl. Please follow bowl cleaner instructions carefully.
• If you live in a hard water area, make certain that the holes in the toilet rim are kept clean to ensure proper bowl flushing.
• Wipe surfaces clean and rinse completely with water immediately after applying cleaner. Rinse and dry any overspray that lands on nearby surfaces. Do not allow cleaners to soak on surfaces.
• Use a soft, dampened sponge or cloth. Never use an abrasive material such as a brush or scouring pad to clean surfaces.
WARNING!
Do not use abrasive cleaners or solvents.
Do not use any cement while installing the toilet.
Heat expansion of the toilet may damage the feet of the toilet. We will not be responsible for any heat damage.
Do not throw into the toilet what may easily block, such as newspaper, paper, or sanitary towels.
Take care not to strike vitreous china with force, to prevent damage & leaks.
Do not use the toilet with water below 0° C (32° F).
.
© 2011 ICERA USA
10
TWO‐YEAR LIMITED WARRANTY Icera products are warranted to be free of defects in material and workmanship for two (2) years from the date of delivery. Product defects attributable to abuse, misuse, improper installation, improper maintenance or cleaning, environmental conditions, hard water, water‐borne sediments or debris, ordinary wear‐and‐tear and accidental damage are not covered by any warranty. Use of in‐tank toilet cleaners will void the warranty. Warranty claims are to be accompanied by a full description of the alleged product defect, serial numbers or other product identification and place of purchase, and submitted to Icera within the warranty period. Icera will, at its election, repair or replace products that fail to conform to this warranty. Icera will not be responsible for freight, removal or installation costs. ICERA'S SOLE LIABILITY FOR ANY PRODUCT THAT FAILS TO CONFORM TO THIS WARRANTY IS LIMITED TO REPAIR OR REPLACEMENT OF SUCH PRODUCT. THERE ARE NO OTHER WARRANTIES, EXPRESS OR IMPLIED, INCLUDING THAT OF MERCHANTABILITY AND FITNESS FOR A PARTICULAR PURPOSE. ICERA DISCLAIMS ANY LIABILITY FOR SPECIAL, INDIRECT, INCIDENTAL OR CONSEQUENTIAL DAMAGES. Some states do not allow limitations on how long an implied warranty lasts, or the exclusion or limitation of special, incidental or consequential damages, so some of these limitations and exclusions may not apply to you. This is Icera’s exclusive written warranty.
.
© 2011 ICERA USA
11
FOR ANY INSTALLATION OR SERVICE ISSUES, PLEASE CONTACT:
Icera USA 531 Main Street, Unit 860
El Segundo, California 90245 Toll Free: (855) 444‐2372
www.icerausa.com

.
© 2011 ICERA USA
12