Embed Size (px)
Citation preview
CdmCL Language -
Installation Guide & User Manual This documents illustrates the steps to install CDM and NetCDF Validation Tool
September, 2014
Version 1.0
by Ahmed AHMED, Jean Philippe BABAU
CdmCL Language – Installation Guide & User Manual 2 2
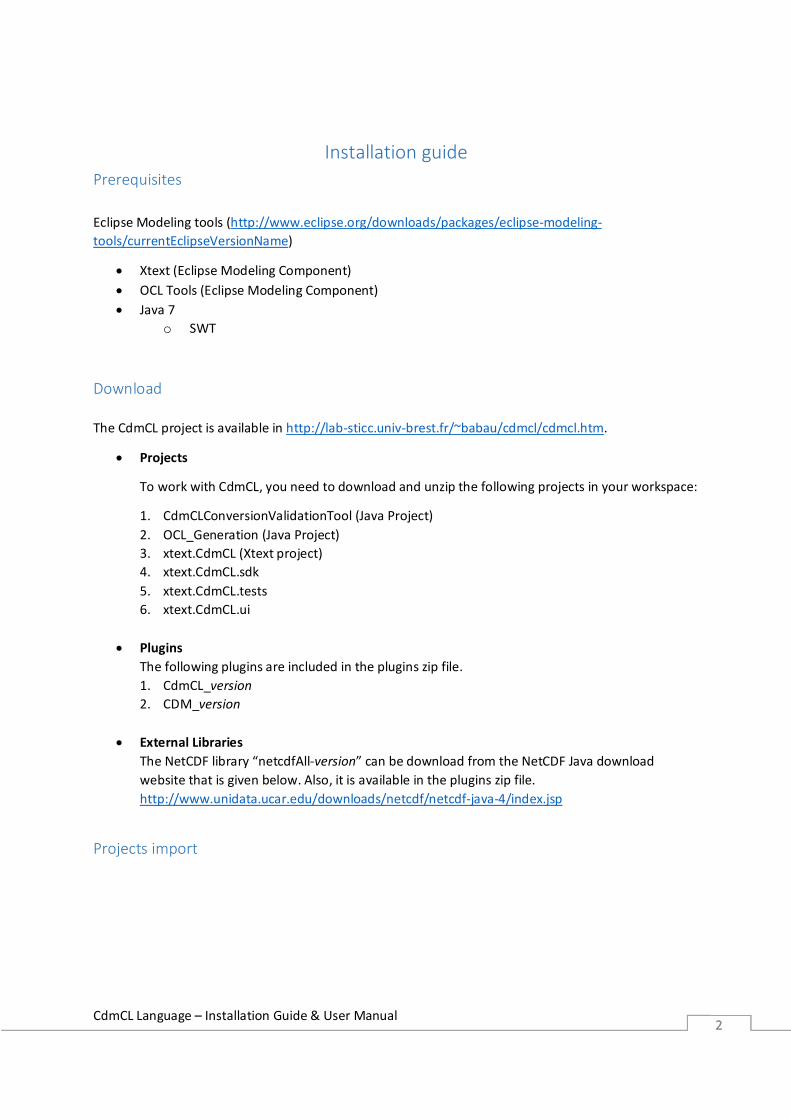
Installation guide Prerequisites Eclipse Modeling tools (http://www.eclipse.org/downloads/packages/eclipse-modeling-tools/currentEclipseVersionName)
• Xtext (Eclipse Modeling Component) • OCL Tools (Eclipse Modeling Component) • Java 7
o SWT
Download The CdmCL project is available in http://lab-sticc.univ-brest.fr/~babau/cdmcl/cdmcl.htm.
• Projects
To work with CdmCL, you need to download and unzip the following projects in your workspace:
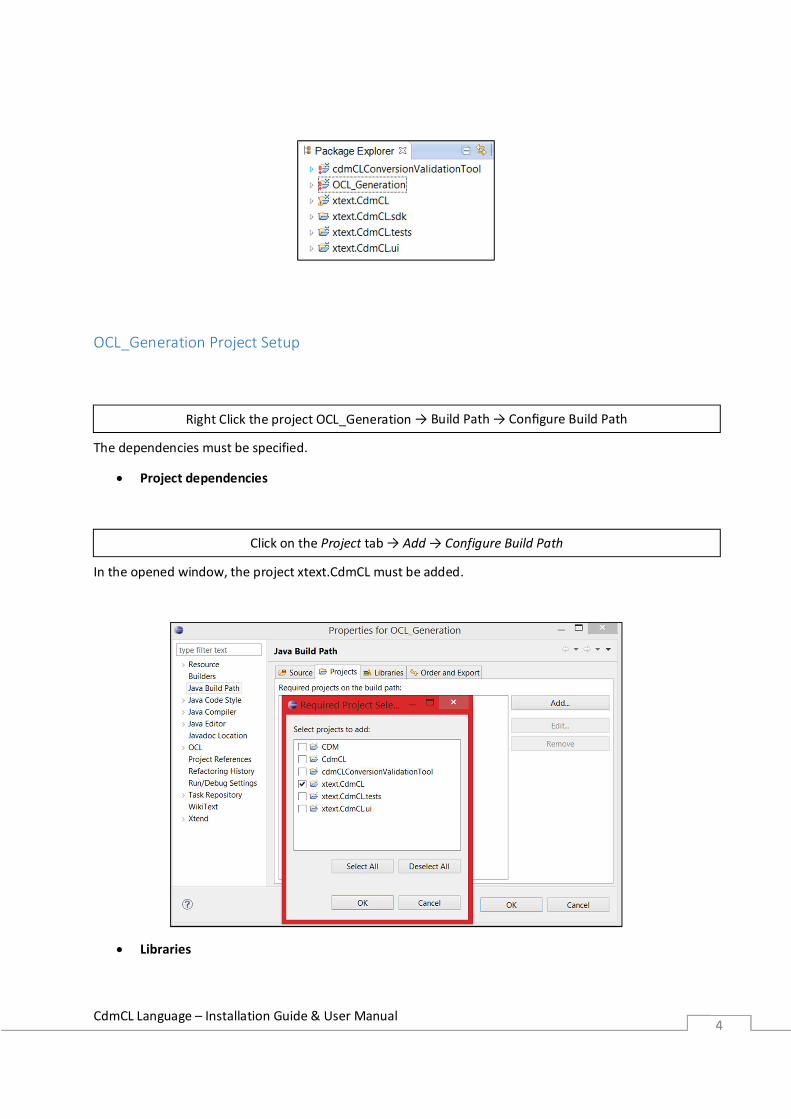
1. CdmCLConversionValidationTool (Java Project) 2. OCL_Generation (Java Project) 3. xtext.CdmCL (Xtext project) 4. xtext.CdmCL.sdk 5. xtext.CdmCL.tests 6. xtext.CdmCL.ui
• Plugins The following plugins are included in the plugins zip file. 1. CdmCL_version 2. CDM_version
• External Libraries The NetCDF library “netcdfAll-version” can be download from the NetCDF Java download website that is given below. Also, it is available in the plugins zip file. http://www.unidata.ucar.edu/downloads/netcdf/netcdf-java-4/index.jsp
Projects import
CdmCL Language – Installation Guide & User Manual 3 3
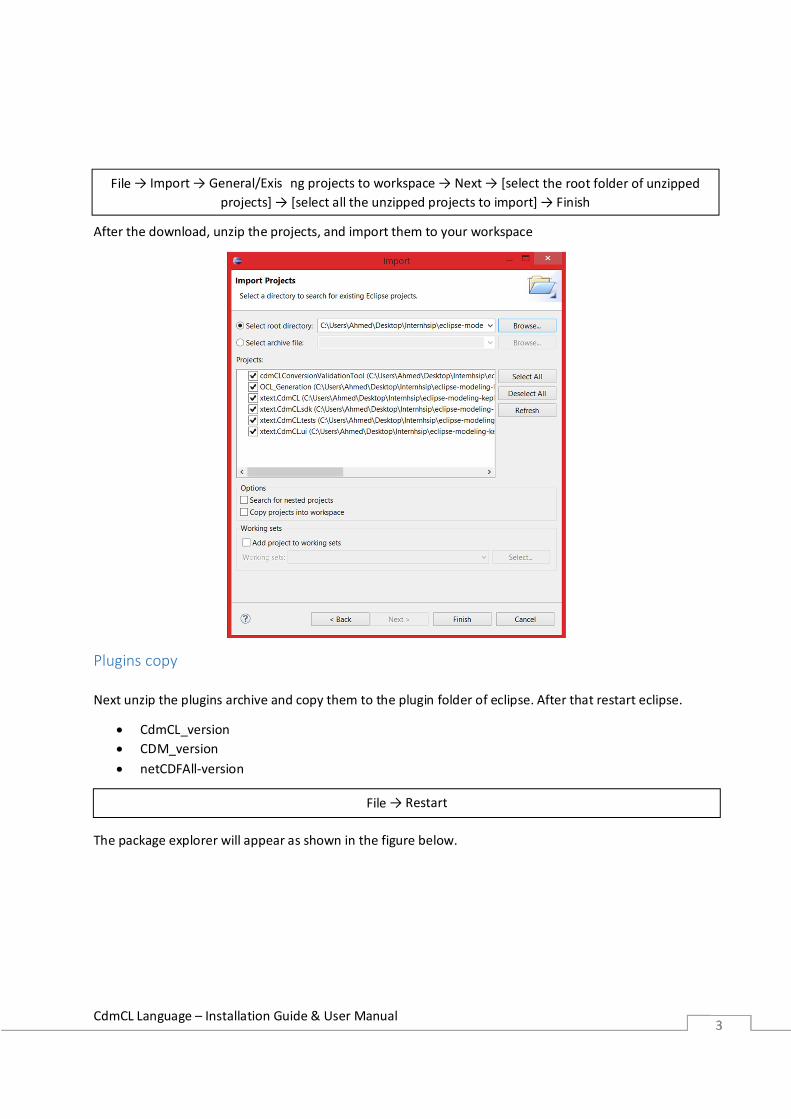
After the download, unzip the projects, and import them to your workspace
Plugins copy Next unzip the plugins archive and copy them to the plugin folder of eclipse. After that restart eclipse.
• CdmCL_version • CDM_version • netCDFAll-version
The package explorer will appear as shown in the figure below.
File → Restart
File → Import → General/Exis�ng projects to workspace → Next → [select the root folder of unzipped projects] → [select all the unzipped projects to import] → Finish
CdmCL Language – Installation Guide & User Manual 4 4
OCL_Generation Project Setup
The dependencies must be specified.
• Project dependencies
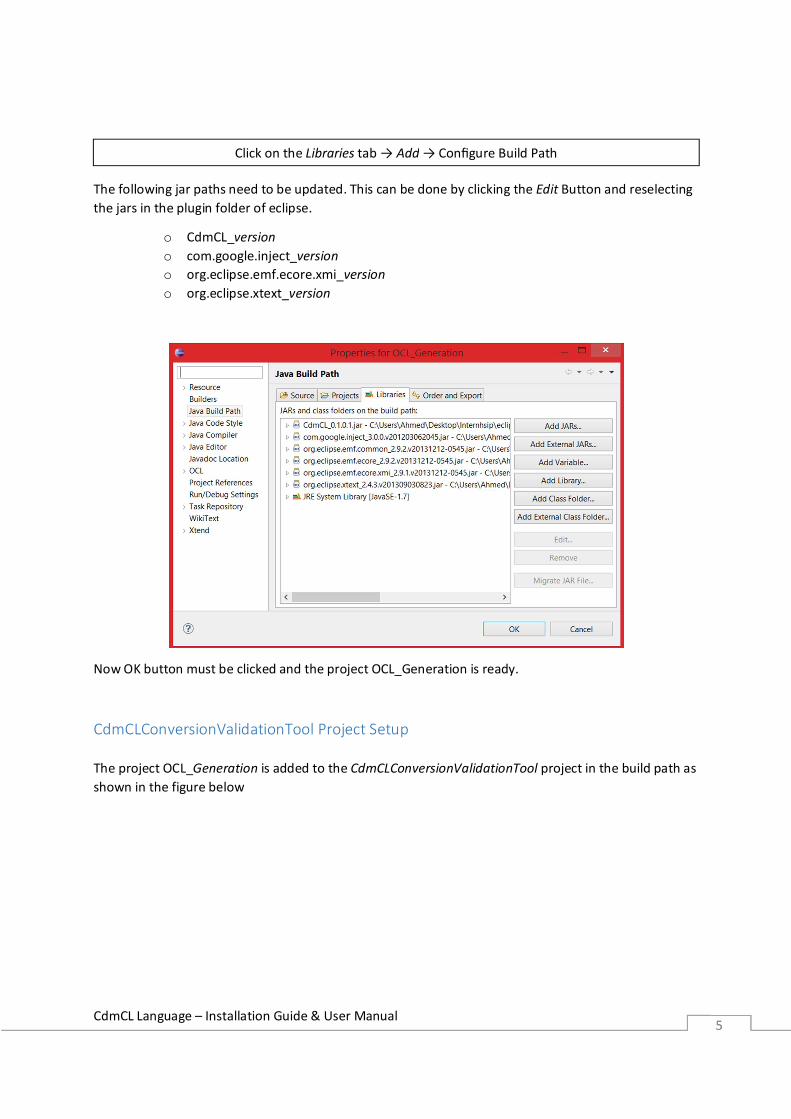
In the opened window, the project xtext.CdmCL must be added.
• Libraries
Right Click the project OCL_Generation → Build Path → Configure Build Path
Click on the Project tab → Add → Configure Build Path
CdmCL Language – Installation Guide & User Manual 5 5
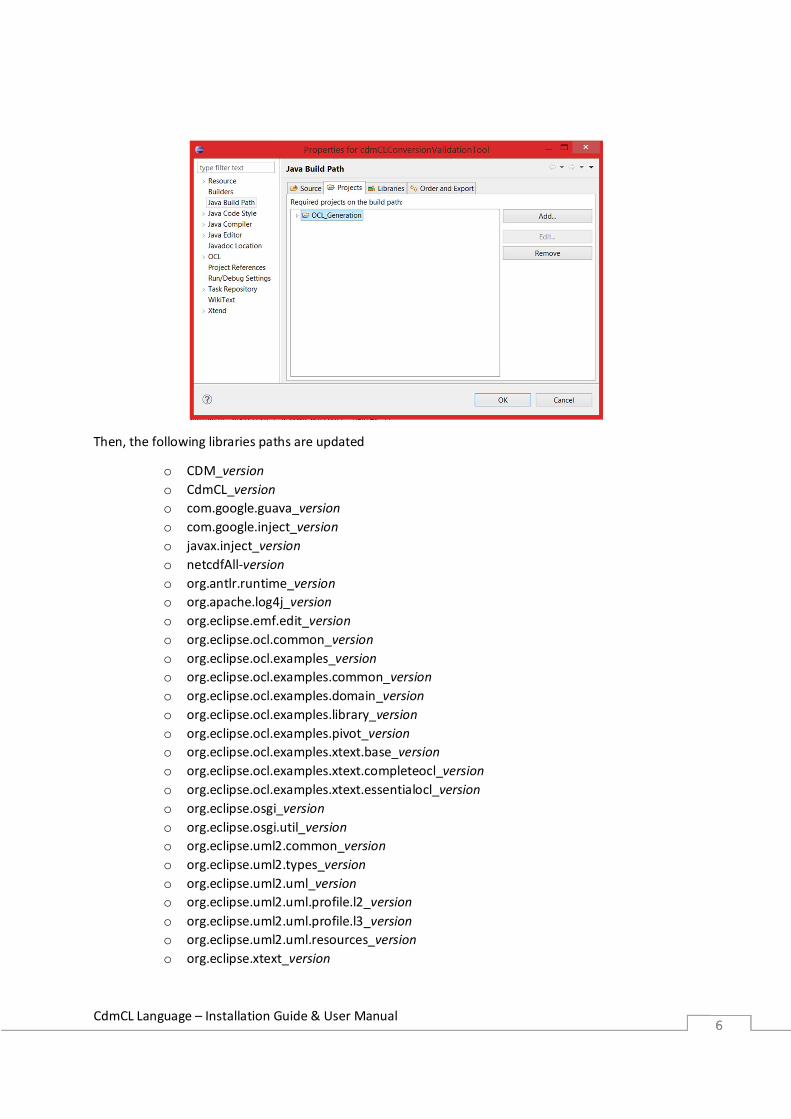
The following jar paths need to be updated. This can be done by clicking the Edit Button and reselecting the jars in the plugin folder of eclipse.
o CdmCL_version o com.google.inject_version o org.eclipse.emf.ecore.xmi_version o org.eclipse.xtext_version
Now OK button must be clicked and the project OCL_Generation is ready.
CdmCLConversionValidationTool Project Setup The project OCL_Generation is added to the CdmCLConversionValidationTool project in the build path as shown in the figure below
Click on the Libraries tab → Add → Configure Build Path
CdmCL Language – Installation Guide & User Manual 6 6
Then, the following libraries paths are updated
o CDM_version o CdmCL_version o com.google.guava_version o com.google.inject_version o javax.inject_version o netcdfAll-version o org.antlr.runtime_version o org.apache.log4j_version o org.eclipse.emf.edit_version o org.eclipse.ocl.common_version o org.eclipse.ocl.examples_version o org.eclipse.ocl.examples.common_version o org.eclipse.ocl.examples.domain_version o org.eclipse.ocl.examples.library_version o org.eclipse.ocl.examples.pivot_version o org.eclipse.ocl.examples.xtext.base_version o org.eclipse.ocl.examples.xtext.completeocl_version o org.eclipse.ocl.examples.xtext.essentialocl_version o org.eclipse.osgi_version o org.eclipse.osgi.util_version o org.eclipse.uml2.common_version o org.eclipse.uml2.types_version o org.eclipse.uml2.uml_version o org.eclipse.uml2.uml.profile.l2_version o org.eclipse.uml2.uml.profile.l3_version o org.eclipse.uml2.uml.resources_version o org.eclipse.xtext_version

CdmCL Language – Installation Guide & User Manual 7 7
o org.eclipse.xtext.util_version
CdmCL is ready now to be used
CdmCL Language – Installation Guide & User Manual 8 8
Advanced Topics Plugin Generation To work on CDM and CdmCL model, the projects source code are included in the downloaded archive. These projects generate the corresponding model code, to be further exported as plugin. Similarly to the previous projects importation, the CDM and CdmCL projects are imported to the workspace.
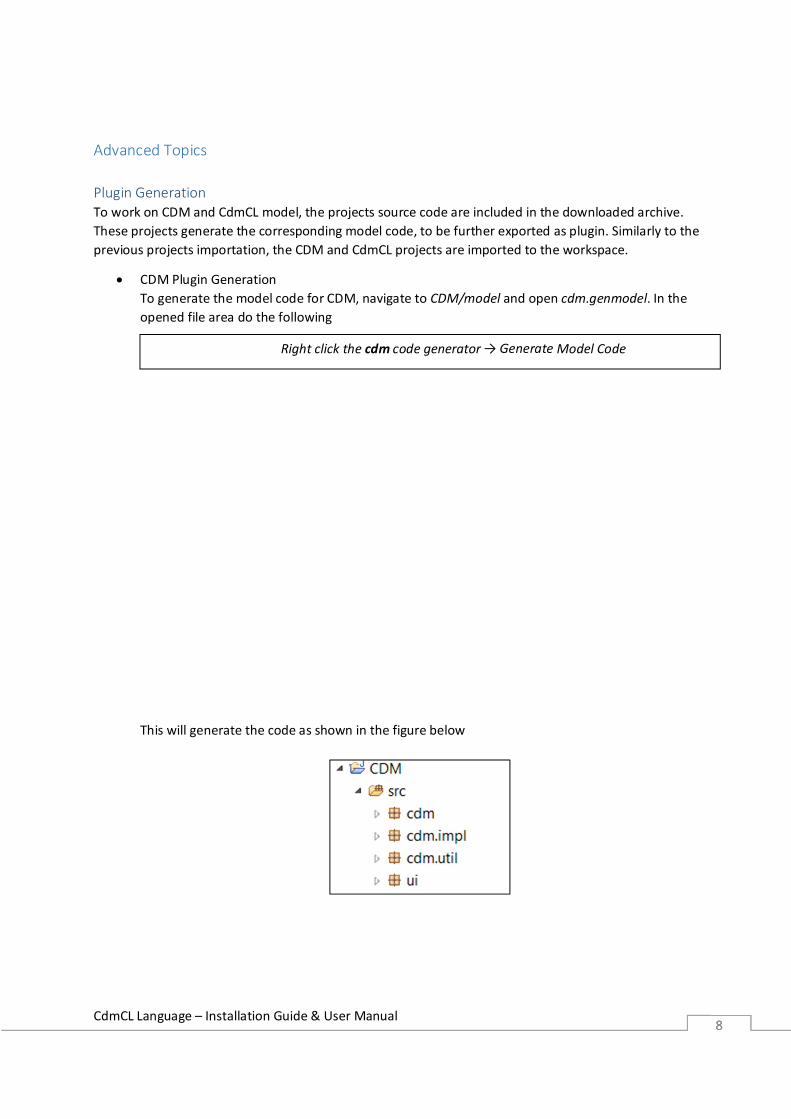
• CDM Plugin Generation To generate the model code for CDM, navigate to CDM/model and open cdm.genmodel. In the opened file area do the following
This will generate the code as shown in the figure below
Right click the cdm code generator → Generate Model Code
CdmCL Language – Installation Guide & User Manual 9 9
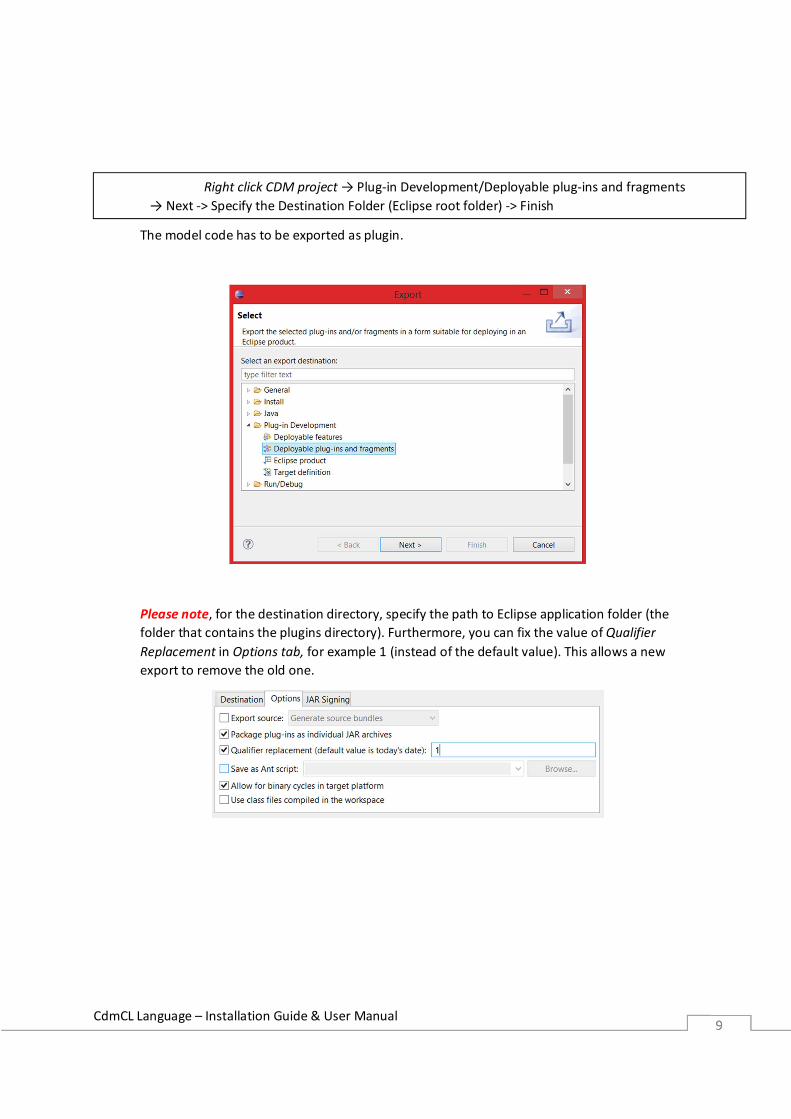
The model code has to be exported as plugin.
Please note, for the destination directory, specify the path to Eclipse application folder (the folder that contains the plugins directory). Furthermore, you can fix the value of Qualifier Replacement in Options tab, for example 1 (instead of the default value). This allows a new export to remove the old one.
Right click CDM project → Plug-in Development/Deployable plug-ins and fragments → Next -> Specify the Destination Folder (Eclipse root folder) -> Finish
CdmCL Language – Installation Guide & User Manual 10 10
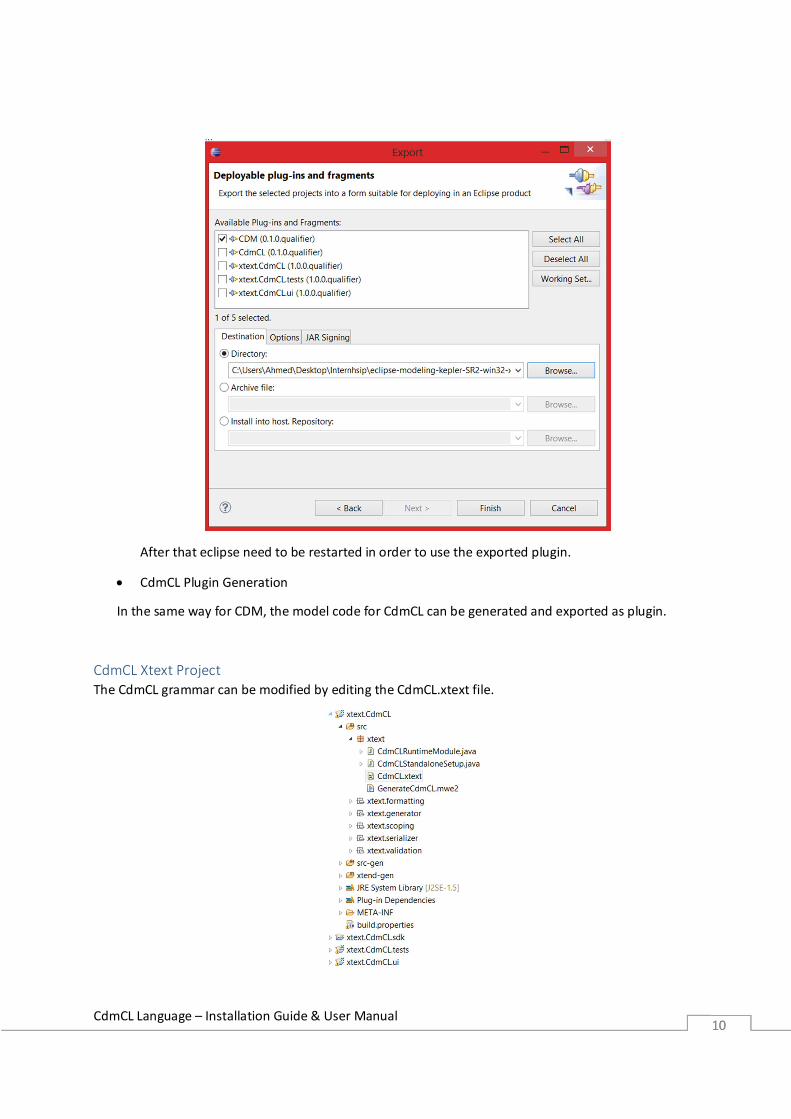
After that eclipse need to be restarted in order to use the exported plugin.
• CdmCL Plugin Generation
In the same way for CDM, the model code for CdmCL can be generated and exported as plugin.
CdmCL Xtext Project The CdmCL grammar can be modified by editing the CdmCL.xtext file.
CdmCL Language – Installation Guide & User Manual 11 11
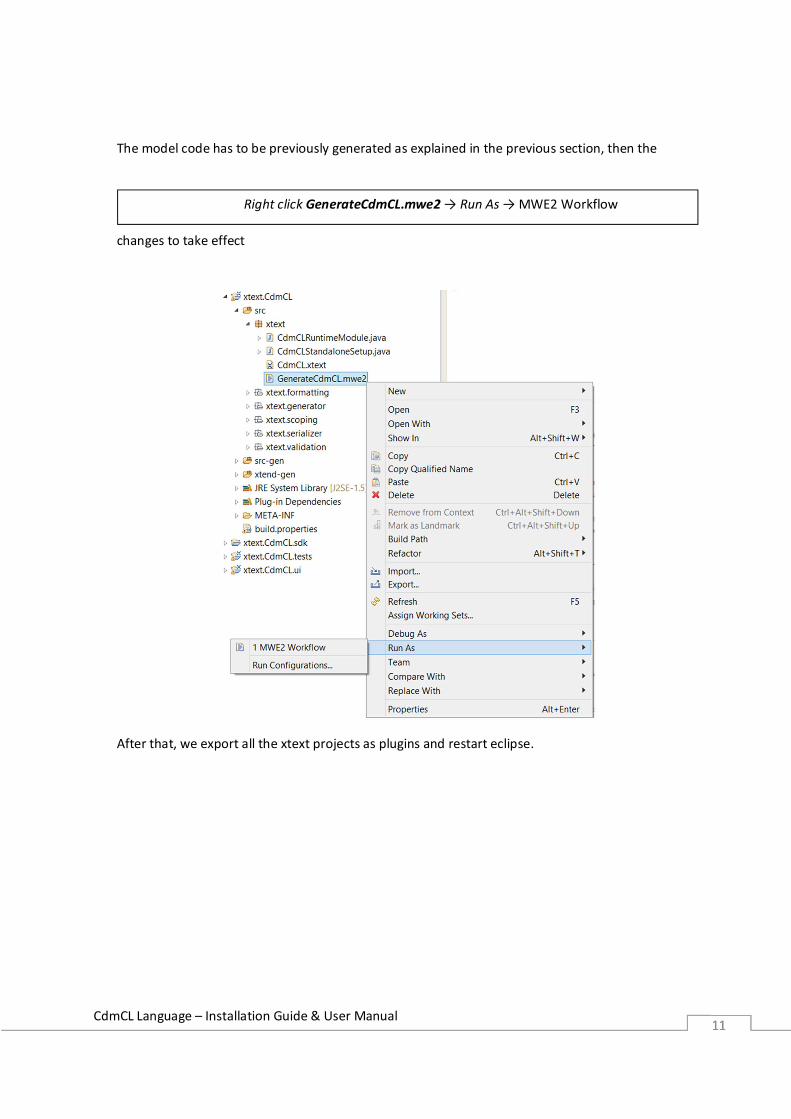
The model code has to be previously generated as explained in the previous section, then the
changes to take effect
After that, we export all the xtext projects as plugins and restart eclipse.
Right click GenerateCdmCL.mwe2 → Run As → MWE2 Workflow
CdmCL Language – Installation Guide & User Manual 12 12
User Manual
In this section, a step by step example will be presented for the conversion validation tool.
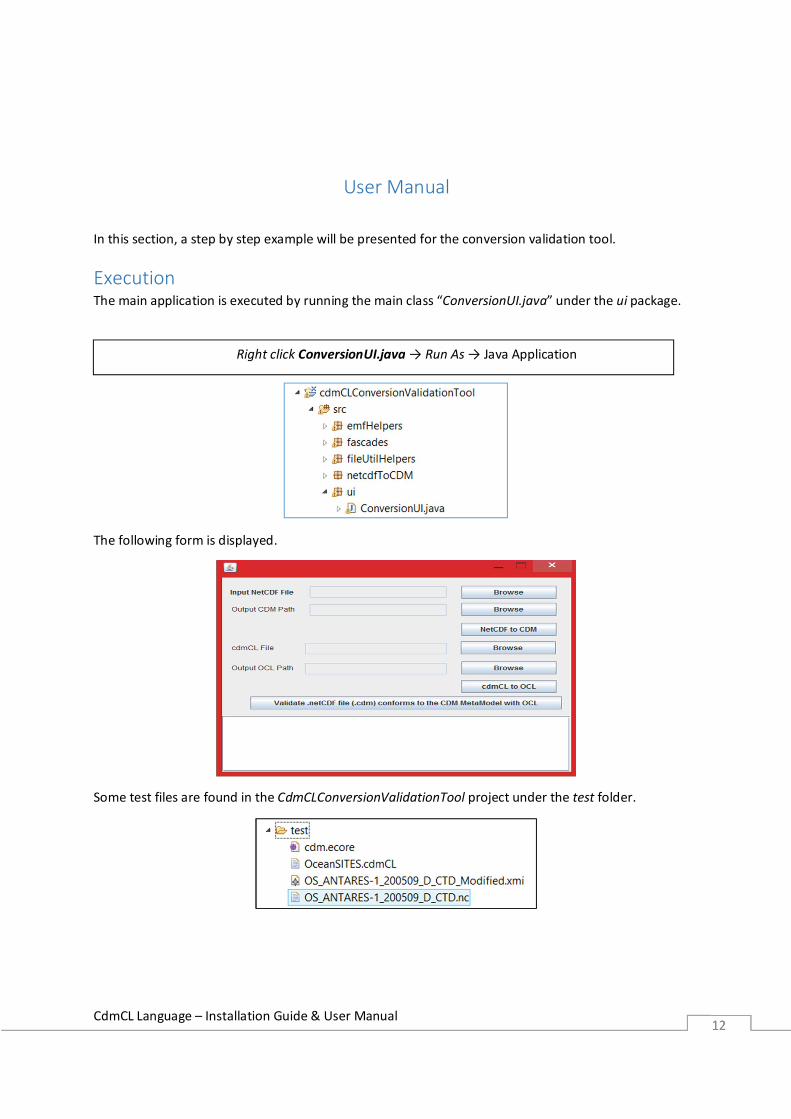
Execution The main application is executed by running the main class “ConversionUI.java” under the ui package.
The following form is displayed.
Some test files are found in the CdmCLConversionValidationTool project under the test folder.
Right click ConversionUI.java → Run As → Java Application
CdmCL Language – Installation Guide & User Manual 13 13
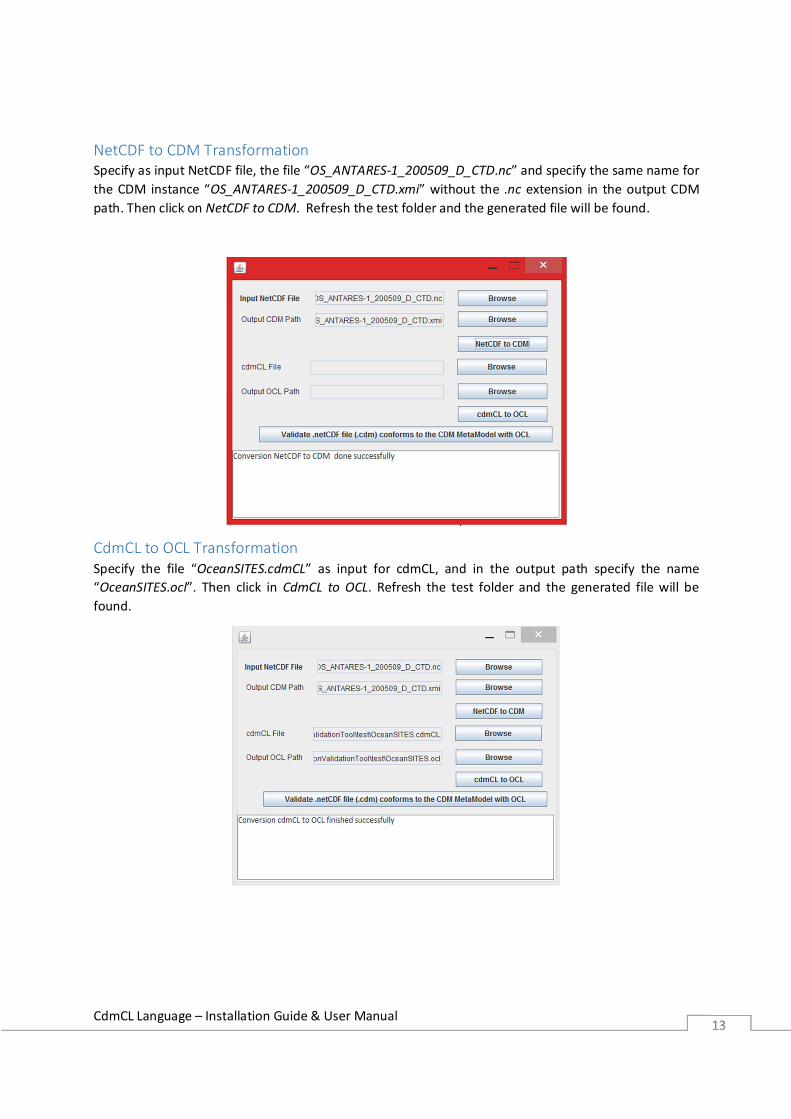
NetCDF to CDM Transformation Specify as input NetCDF file, the file “OS_ANTARES-1_200509_D_CTD.nc” and specify the same name for the CDM instance “OS_ANTARES-1_200509_D_CTD.xmi” without the .nc extension in the output CDM path. Then click on NetCDF to CDM. Refresh the test folder and the generated file will be found.
CdmCL to OCL Transformation Specify the file “OceanSITES.cdmCL” as input for cdmCL, and in the output path specify the name “OceanSITES.ocl”. Then click in CdmCL to OCL. Refresh the test folder and the generated file will be found.
CdmCL Language – Installation Guide & User Manual 14 14
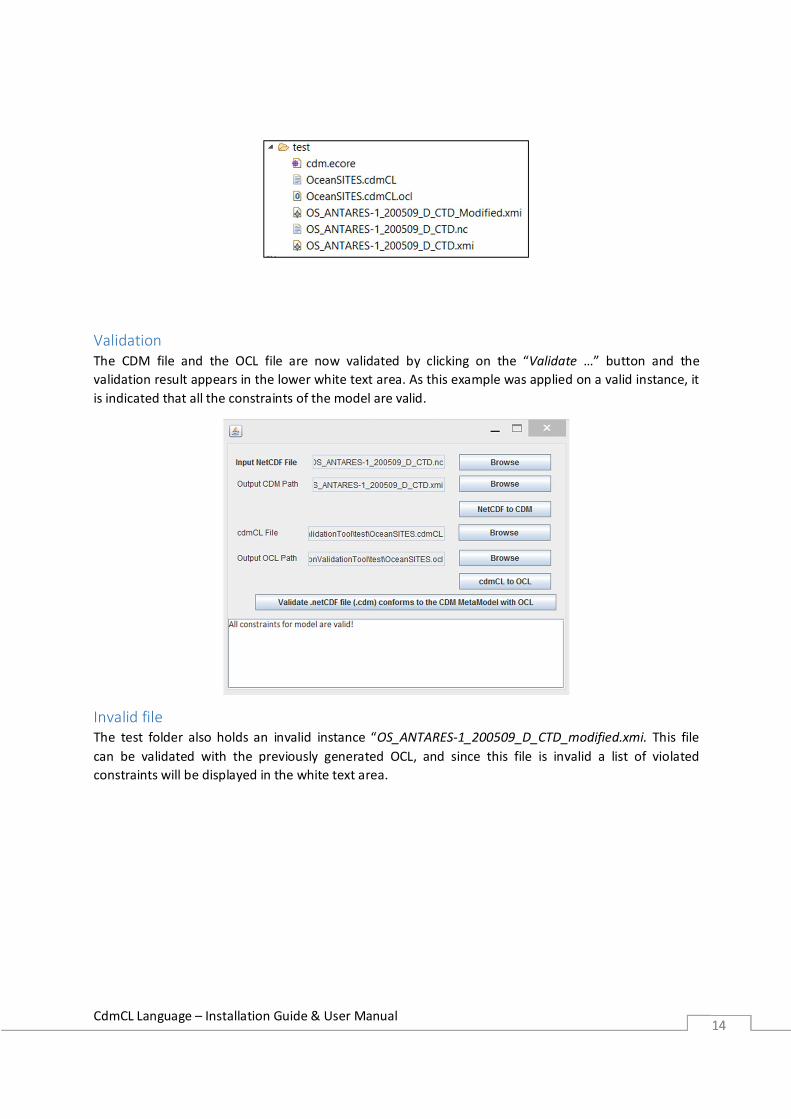
Validation The CDM file and the OCL file are now validated by clicking on the “Validate …” button and the validation result appears in the lower white text area. As this example was applied on a valid instance, it is indicated that all the constraints of the model are valid.
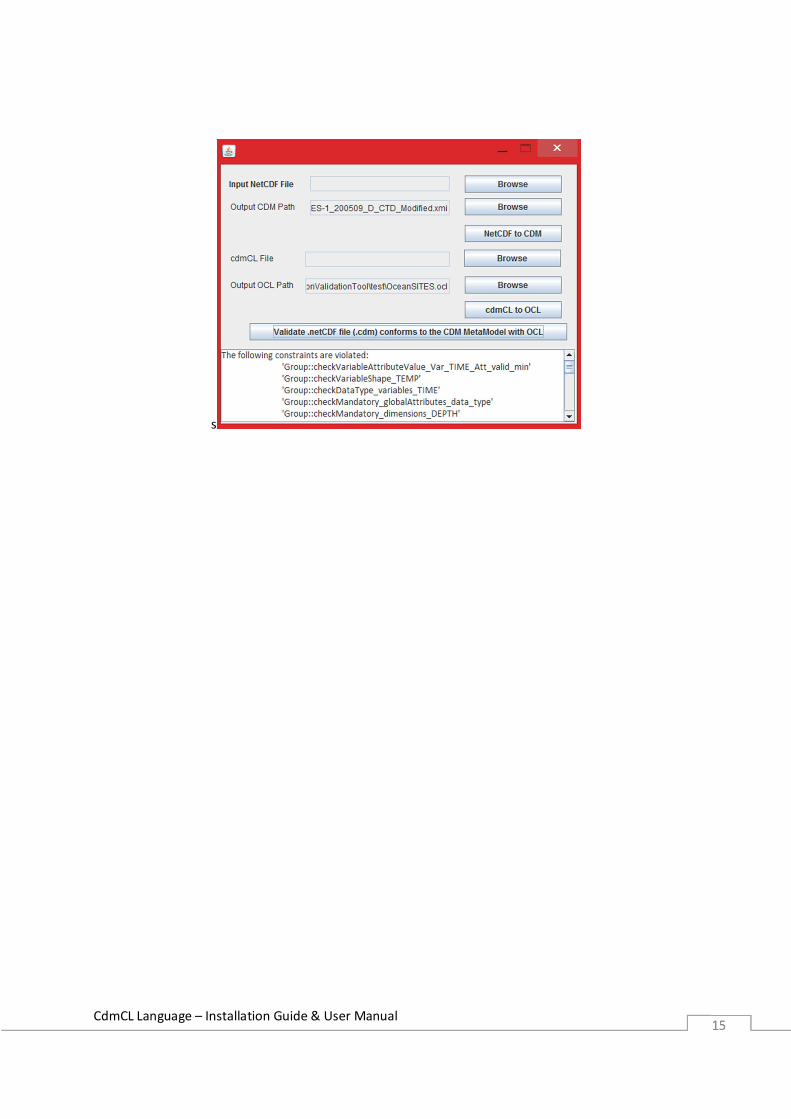
Invalid file The test folder also holds an invalid instance “OS_ANTARES-1_200509_D_CTD_modified.xmi. This file can be validated with the previously generated OCL, and since this file is invalid a list of violated constraints will be displayed in the white text area.
CdmCL Language – Installation Guide & User Manual 15 15
s