Embed Size (px)
Citation preview
INSTALLATION GUIDE
Product Snow License Manager
Version 8.0
Release date 2016-05-16
Document date 2016-05-16
Page 2 of 14
CONTENTS ABOUT THIS DOCUMENT .................................................................................................................................. 3
PREREQUISITES ........................................................................................................................................................ 3
RUN THE SETUP ................................................................................................................................................ 5
REMOVE A PREVIOUS VERSION OF SNOW LICENSE MANAGER ........................................................................................... 5 INSTALL SNOW LICENSE MANAGER ............................................................................................................................. 6
COMPLETE THE INSTALLATION ....................................................................................................................... 12
COMPLETE WEB APPLICATION SETUP .......................................................................................................................... 12 ADD INVENTORY SOURCE ........................................................................................................................................ 12 SYNCHRONIZE THE SRS DATABASE ............................................................................................................................ 13 ADD INVENTORY DATA TO SNOW LICENSE MANAGER .................................................................................................... 14
Page 3 of 14
ABOUT THIS DOCUMENT This document describes how to install Snow License Manager 8.0.
The document also covers upgrades from Snow License Manager 7.0, 6.2, 6.1, 2011 (6.0), 2010 (5.x), and 2009 (4.x).
PREREQUISITES
NOTE: Read this chapter carefully before an installation or an upgrade is started.
Before you begin an upgrade, backup all your databases!
SYSTEM REQUIREMENTS
Verify that the servers meets the system requirements for this product. System requirements and information on dependencies on other Snow products are gathered in the document System Requirements for all Snow products, which is available for download at www.snowsoftware.com/int/download
Before any upgrade, read the document Snow License Manager 8 – Core feature changes to get information on changes that might affect your current environment.
PREPARATIONS
It is highly recommended to install all dependent Snow products before installing Snow License Manager:
Regardless of which inventory solution you use, you have to install the Snow Inventory server as the inventory data source for Snow License Manager.
The Snow License Manager database and the Snow Inventory database must reside on the same SQL Server.
For processing of inventory data to the Snow Inventory server, install the Snow Inventory Data Processor (IDP) version 4.6.07 or higher.
Before installation:
Make sure you have ASP.NET 4.5 with all features enabled as a role on your server.
If you are using the IIS (Internet Information Services) to host other web applications, make sure you have a web hostname or a specific port assigned to the Snow License Manager website.
Page 4 of 14
USER ACCOUNT AND LICENSE KEYS
Have the following available:
An SQL user account with database administration privileges (sa or equivalent account with sysadmin rights) and password
The license key for Snow License Manager, as well as your organization/company name as supplied by Snow Software.
The SRS activation key, if you plan to install and activate the Software Recognition Service (SRS).
UPGRADE
Before upgrade, verify that the Software Recognition Service (SRS) database has been updated with the latest recognition rules for the current Snow License Manager installation.
Any previous version of Snow License Manager must be uninstalled.
The SLM 8 setup package automatically uninstalls the following versions:
Snow License Manager 7.0 versions (7.0.00-7.0.xx)
Snow License Manager 6.2 versions (6.2.00-6.2.xx)
Snow License Manager 6.1 versions (6.1.00-6.1.xx)
The following versions must be manually uninstalled:
Snow License Manager 2011 versions (6.0.00-6.0.10)
Snow License Manager 2010 versions (5.0.00-5.1.08)
Snow License Manager 2009 versions (4.0.00-4.1.02)
To upgrade even earlier versions of Snow License Manager, you must first upgrade to Snow License Manager 2009 at least.
Page 5 of 14
RUN THE SETUP To start the installation, double-click the setup file SnowLicenseManagerSetup.exe.
The installation needs to be run with administrative privileges.
REMOVE A PREVIOUS VERSION OF SNOW LICENSE MANAGER If the setup program detects a previous version of Snow License Manager, you are prompted to remove this version before upgrading. The Snow License Manager database is not affected by the removal.
VERSION 7.0, 6.2, AND 6.1
1. In the installation wizard for Snow License Manager, click Uninstall. The dialog Snow License Manager appears.
2. Click OK to confirm the removal.
3. Wait while the setup program removes the previous version of Snow License Manager.
4. Click Finish to exit the installation wizard.
5. To run the setup of SLM 8, double-click the setup file SnowLicenseManagerSetup.exe once again.
VERSION 2011 (6.0) AND EARLIER
For earlier versions of Snow License Manager, the software must be removed manually via Windows Control Panel.
Page 6 of 14
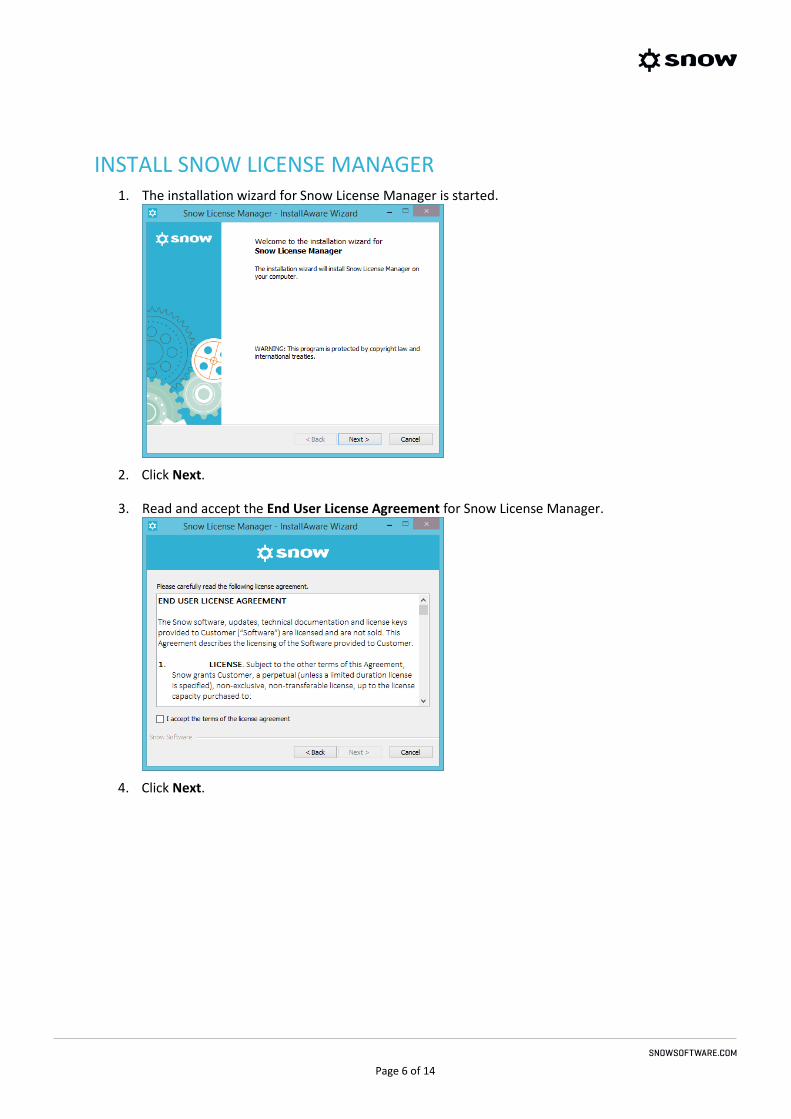
INSTALL SNOW LICENSE MANAGER 1. The installation wizard for Snow License Manager is started.
2. Click Next.
3. Read and accept the End User License Agreement for Snow License Manager.
4. Click Next.
Page 7 of 14
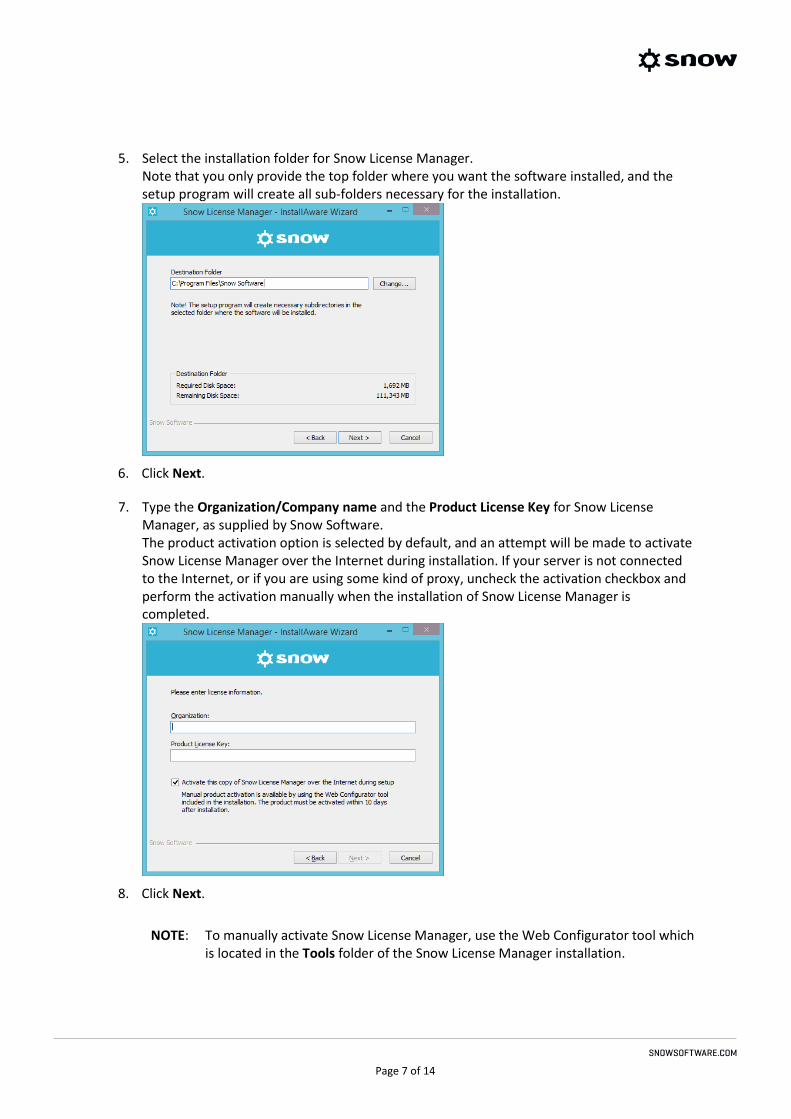
5. Select the installation folder for Snow License Manager. Note that you only provide the top folder where you want the software installed, and the setup program will create all sub-folders necessary for the installation.
6. Click Next.
7. Type the Organization/Company name and the Product License Key for Snow License Manager, as supplied by Snow Software. The product activation option is selected by default, and an attempt will be made to activate Snow License Manager over the Internet during installation. If your server is not connected to the Internet, or if you are using some kind of proxy, uncheck the activation checkbox and perform the activation manually when the installation of Snow License Manager is completed.
8. Click Next.
NOTE: To manually activate Snow License Manager, use the Web Configurator tool which is located in the Tools folder of the Snow License Manager installation.
Page 8 of 14
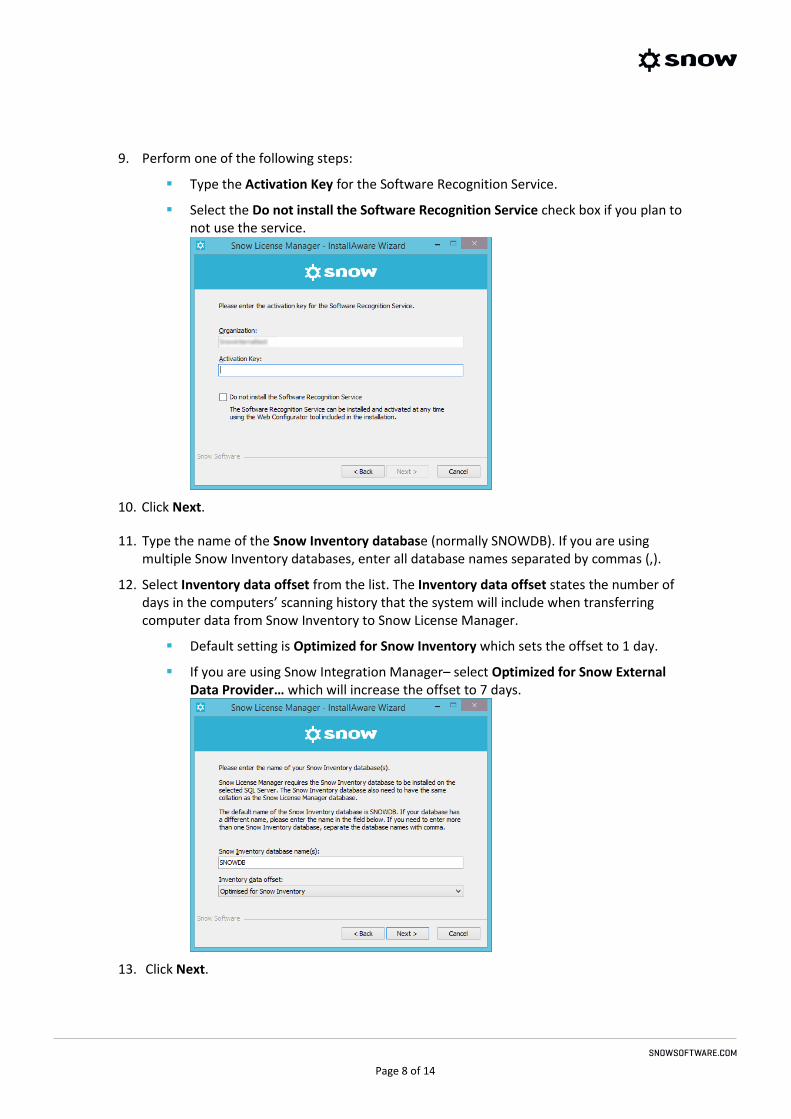
9. Perform one of the following steps:
Type the Activation Key for the Software Recognition Service.
Select the Do not install the Software Recognition Service check box if you plan to not use the service.
10. Click Next.
11. Type the name of the Snow Inventory database (normally SNOWDB). If you are using multiple Snow Inventory databases, enter all database names separated by commas (,).
12. Select Inventory data offset from the list. The Inventory data offset states the number of days in the computers’ scanning history that the system will include when transferring computer data from Snow Inventory to Snow License Manager.
Default setting is Optimized for Snow Inventory which sets the offset to 1 day.
If you are using Snow Integration Manager– select Optimized for Snow External Data Provider… which will increase the offset to 7 days.
13. Click Next.
Page 9 of 14
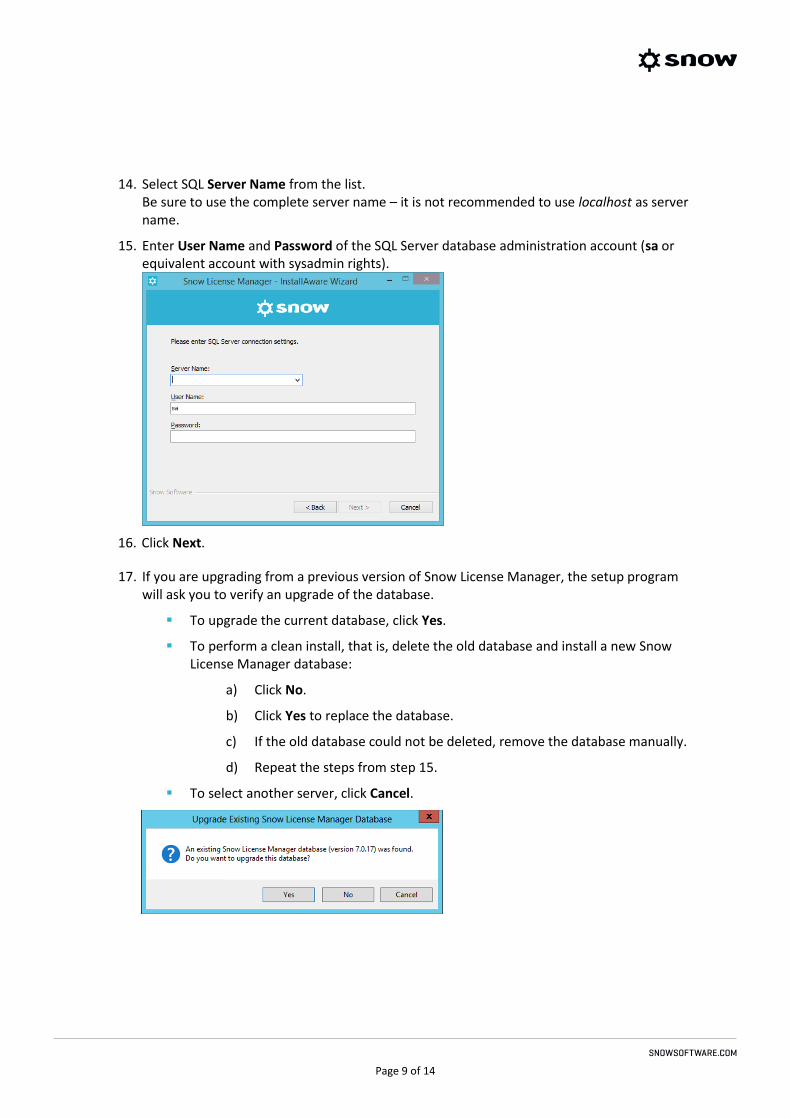
14. Select SQL Server Name from the list. Be sure to use the complete server name – it is not recommended to use localhost as server name.
15. Enter User Name and Password of the SQL Server database administration account (sa or equivalent account with sysadmin rights).
16. Click Next.
17. If you are upgrading from a previous version of Snow License Manager, the setup program will ask you to verify an upgrade of the database.
To upgrade the current database, click Yes.
To perform a clean install, that is, delete the old database and install a new Snow License Manager database:
a) Click No.
b) Click Yes to replace the database.
c) If the old database could not be deleted, remove the database manually.
d) Repeat the steps from step 15.
To select another server, click Cancel.
Page 10 of 14
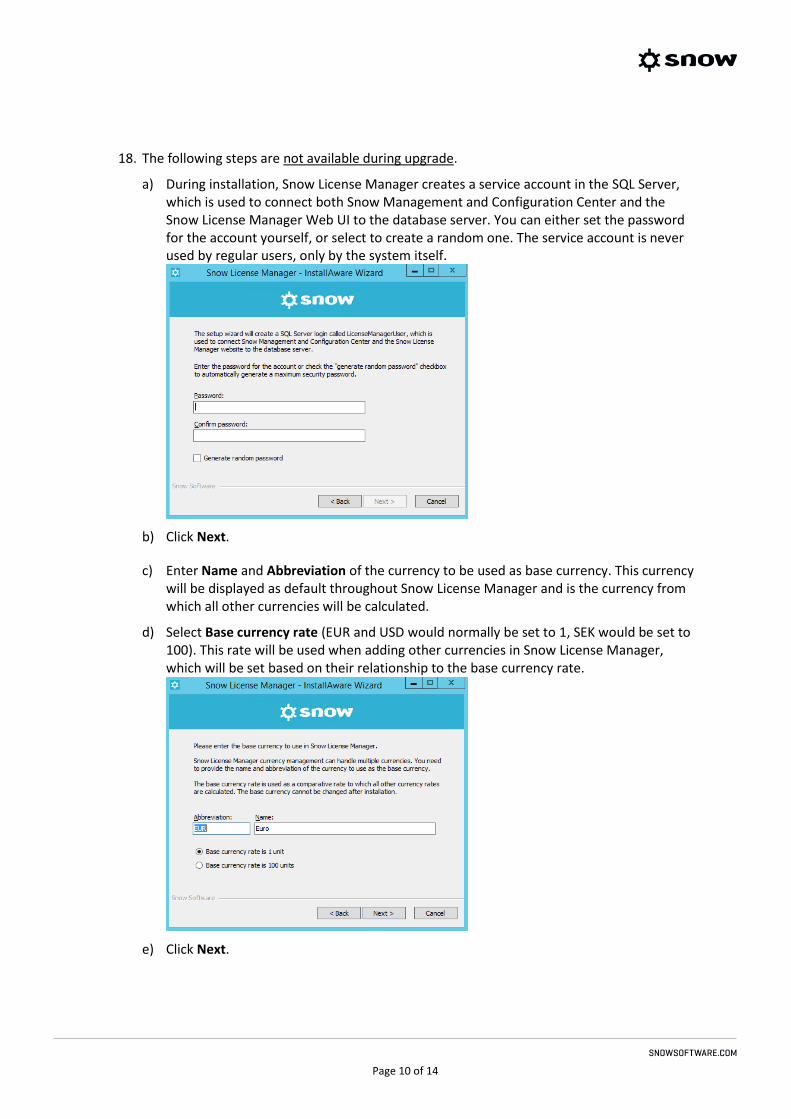
18. The following steps are not available during upgrade.
a) During installation, Snow License Manager creates a service account in the SQL Server, which is used to connect both Snow Management and Configuration Center and the Snow License Manager Web UI to the database server. You can either set the password for the account yourself, or select to create a random one. The service account is never used by regular users, only by the system itself.
b) Click Next.
c) Enter Name and Abbreviation of the currency to be used as base currency. This currency will be displayed as default throughout Snow License Manager and is the currency from which all other currencies will be calculated.
d) Select Base currency rate (EUR and USD would normally be set to 1, SEK would be set to 100). This rate will be used when adding other currencies in Snow License Manager, which will be set based on their relationship to the base currency rate.
e) Click Next.
Page 11 of 14
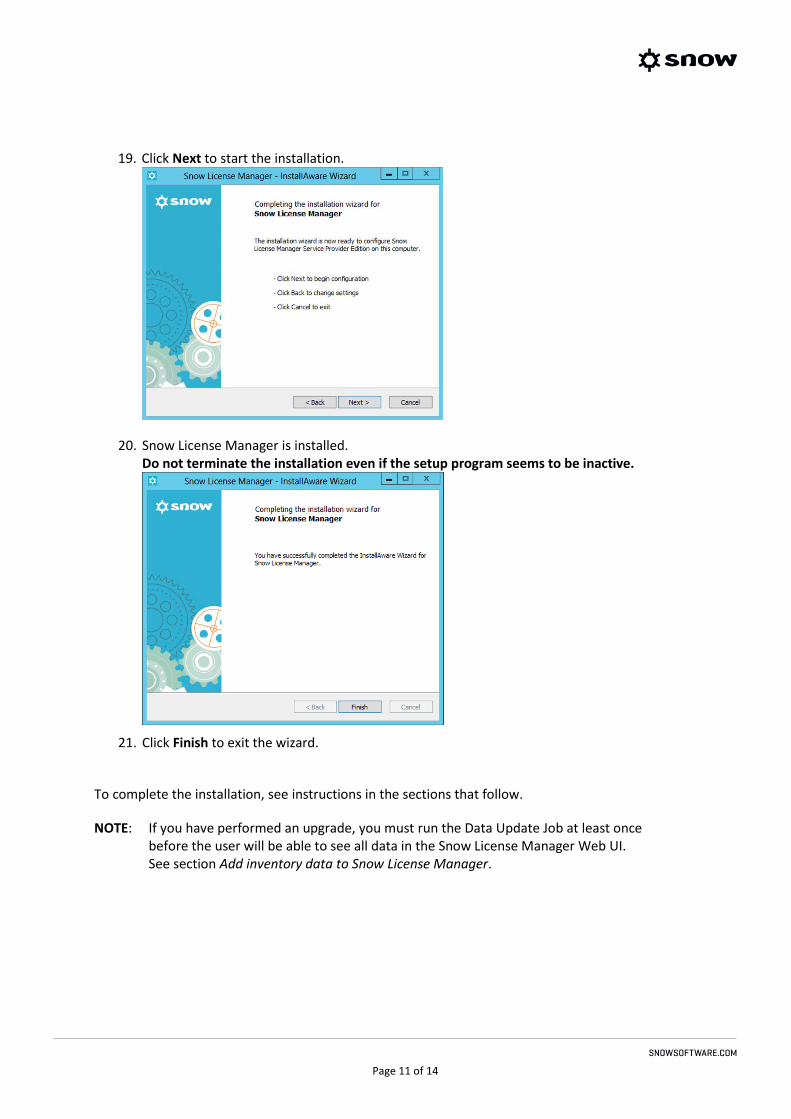
19. Click Next to start the installation.
20. Snow License Manager is installed. Do not terminate the installation even if the setup program seems to be inactive.
21. Click Finish to exit the wizard.
To complete the installation, see instructions in the sections that follow.
NOTE: If you have performed an upgrade, you must run the Data Update Job at least once before the user will be able to see all data in the Snow License Manager Web UI. See section Add inventory data to Snow License Manager.
Page 12 of 14
COMPLETE THE INSTALLATION
COMPLETE WEB APPLICATION SETUP 1. Open the Internet Information Services (IIS) Manager from the Windows Start menu.
2. If you are not using a hostname to identify your website (for example www.myserver.com), you have to stop any websites on the server using the TCP port 80, or select another port for Snow License Manager. If you plan to use more than one website on the server, it is highly recommended that you use hostnames for each website.
3. If you installed Snow License Manager and were unable to activate the product, or the website log states that the hardware key could not be extracted, do the following:
a) Set the identity for the Snow License Manager application pool in the IIS to Local System.
b) If necessary, re-activate the product with the Web Configurator tool, which is located in the Tools folder of the Snow License Manager installation.
4. Close the Internet Information Services (IIS) Manager.
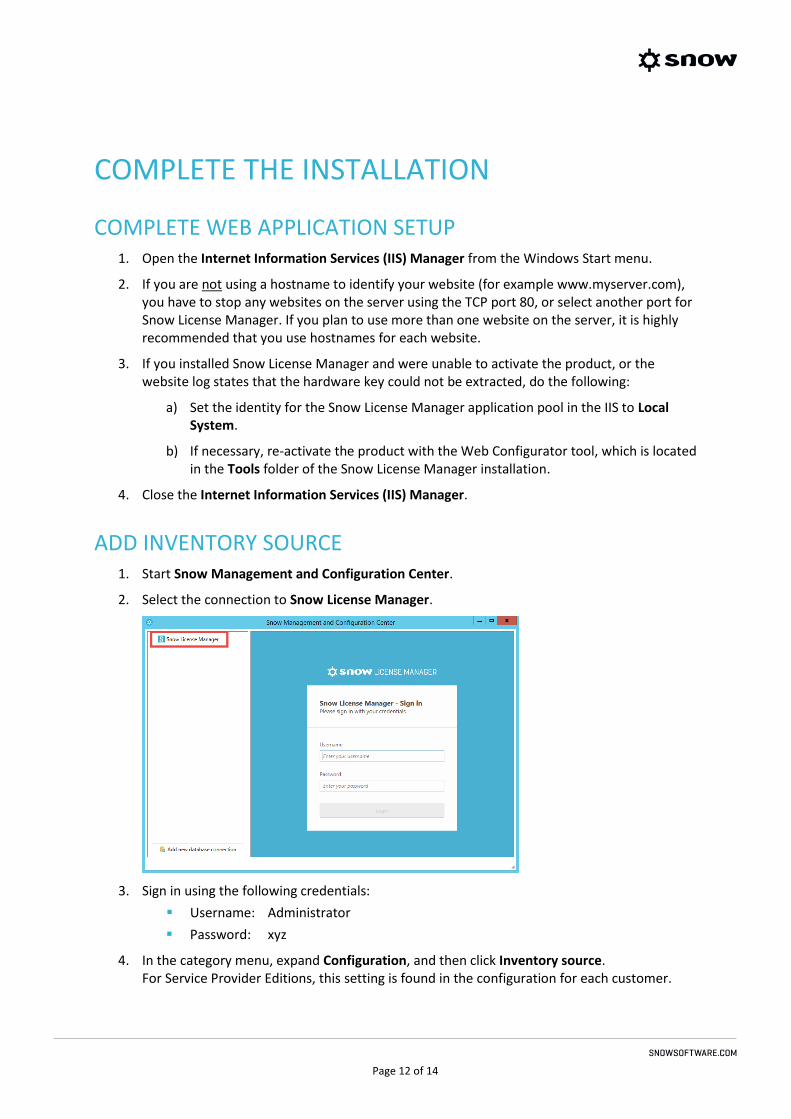
ADD INVENTORY SOURCE 1. Start Snow Management and Configuration Center.
2. Select the connection to Snow License Manager.
3. Sign in using the following credentials:
Username: Administrator
Password: xyz
4. In the category menu, expand Configuration, and then click Inventory source. For Service Provider Editions, this setting is found in the configuration for each customer.
Page 13 of 14
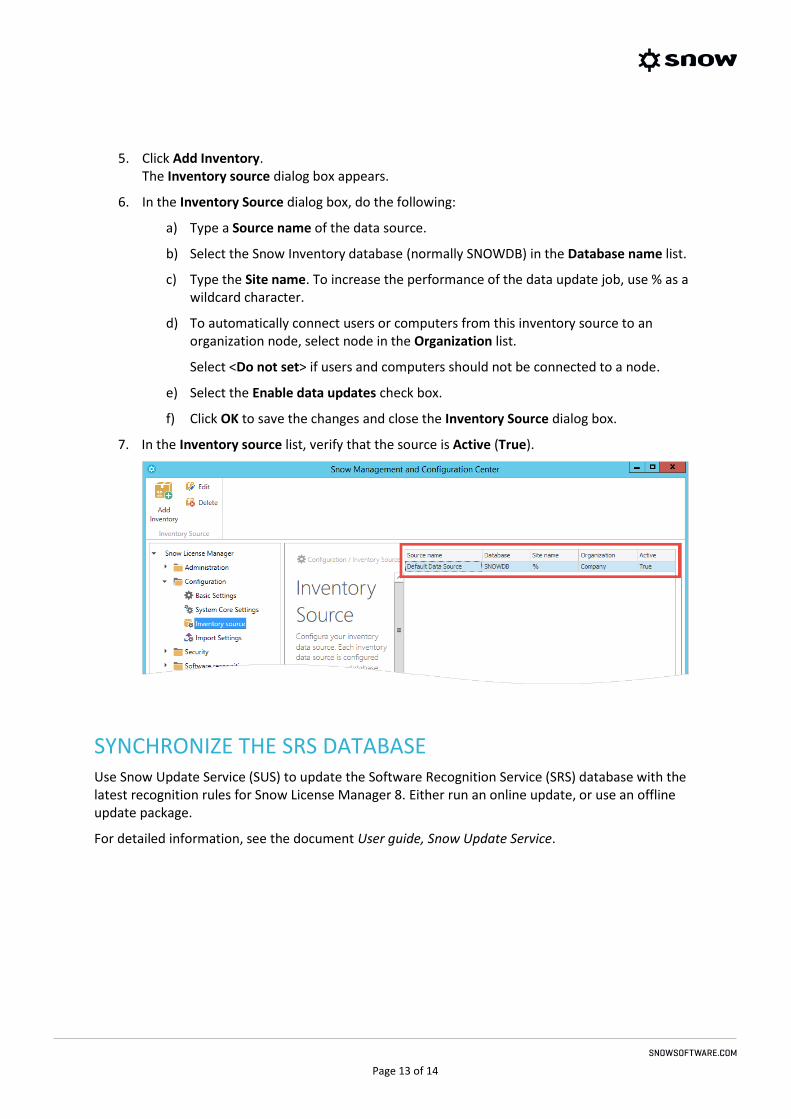
5. Click Add Inventory. The Inventory source dialog box appears.
6. In the Inventory Source dialog box, do the following:
a) Type a Source name of the data source.
b) Select the Snow Inventory database (normally SNOWDB) in the Database name list.
c) Type the Site name. To increase the performance of the data update job, use % as a wildcard character.
d) To automatically connect users or computers from this inventory source to an organization node, select node in the Organization list.
Select <Do not set> if users and computers should not be connected to a node.
e) Select the Enable data updates check box.
f) Click OK to save the changes and close the Inventory Source dialog box.
7. In the Inventory source list, verify that the source is Active (True).
SYNCHRONIZE THE SRS DATABASE Use Snow Update Service (SUS) to update the Software Recognition Service (SRS) database with the latest recognition rules for Snow License Manager 8. Either run an online update, or use an offline update package.
For detailed information, see the document User guide, Snow Update Service.
Page 14 of 14
ADD INVENTORY DATA TO SNOW LICENSE MANAGER
NOTE: The Data Update Job must be run both after a new installation and after an upgrade; otherwise the user will not be able to see all data in the Snow License Manager Web UI
1. Start Snow Management and Configuration Center and login to the Snow License Manager connection.
2. In the Category menu, expand Administration, and then click Data Update Job.
3. In the Data Update Job view, click Start update job manually.
4. The duration of the job depends on the amount of data in your Inventory database. The progress of the job is displayed in the action log. When completed, “Job finished successfully” is displayed in the action log.
When the job is successfully finished, you will be able to login to the Snow License Manager Web UI and see all data.