Embed Size (px)
DESCRIPTION
midas gen
Citation preview

Bridging Your Innovations to Realities
midas Gen (Design+ and Dshop)
Installation Guide
1. Create ID & Password
1.Go to http://en.midasuser.com
2.Click New Account and Create ID / Password. (If you are a MUSS user already, you do not need to create new ID/Password.)
3.Download the installation files (Download > Commercial Version)
MIDAS Information Technology Co., Ltd.

2. Install midas Gen
1.Run the "setup.exe" file.2 Follow the instructions of the midas2.Follow the instructions of the midas Gen Installation.3.Click [Next] and follow the next step.
4.See the agreement.5.Click [Yes] and follow the next step.
MIDAS Information Technology Co., Ltd.
2. Install midas Gen
1 I t U N /C N1.Insert User Name/Company Name.2.Click [Next] and follow the next step.
3.Select the download folder.4.Click [Next] and follow the next step.
MIDAS Information Technology Co., Ltd.

2. Install midas Gen
1 S l t th f t t t i t ll1.Select the feature you want to install.2.Click [Next] and follow the next step.
3.Click [Next] and follow the next step.
MIDAS Information Technology Co., Ltd.
2. Install midas Gen
1.Click [Next] and follow the next step.[ ] p
2.Read the following license agreement.3.Select "I Agree" and Click [Next] and follow the next step.p
MIDAS Information Technology Co., Ltd.

2. Install midas Gen
1 Select download folder1.Select download folder.2.Click [Next] and follow the next step.
3.Click [Next] and follow the next step.
MIDAS Information Technology Co., Ltd.
2. Install midas Gen
1.Select "Do not install"2.Click [Next] and follow the next step.
* N t I f H d L k (St d* Note : In case of Hardware Lock (Stand alone or Network Dongle), Select “Stand alone or Lan Client and follow the next step to install Sentinel Protection Driver.
3.Click [Finish] and Run midas Gen. The installation of midas Gen is completed.
MIDAS Information Technology Co., Ltd.

3. Install midas Design+
MIDAS Information Technology Co., Ltd.
3. Install midas Design+
1.Run the "setup.exe" file.2 Follow the instructions of the midas2.Follow the instructions of the midas Design + Installation.3.Click [Next] and follow the next step.
4.See the agreement.5.Click [Yes] and follow the next step.
MIDAS Information Technology Co., Ltd.

3. Install midas Design+
1 I t U N /C N1.Insert User Name/Company Name.2.Click [Next] and follow the next step.
3.Select the download folder.4.Click [Next] and follow the next step.
MIDAS Information Technology Co., Ltd.
3. Install midas Design+
3.Click [Next] and follow the next step.
1.Select "Do not install"2.Click [Next] and follow the next step.
* Note : In case of Hardware Lock (Stand l N k D l ) S l “S dalone or Network Dongle), Select “Stand
alone or Lan Client and follow the next step to install Sentinel Protection Driver.
MIDAS Information Technology Co., Ltd.

4. Install Dshop
MIDAS Information Technology Co., Ltd.
4. Install Dshop
1.Run the "setup.exe" file.2 Follow the instructions of the Dshop2.Follow the instructions of the DshopInstallation.3.Click [Next] and follow the next step.
4.Click [Yes] and follow the next step.
MIDAS Information Technology Co., Ltd.
4. Install Dshop
1.See the agreement.2 Select [Accept] and follow the next2.Select [Accept] and follow the next step.
3.Insert User Name/Company Name.4.Click [Next] and follow the next step.
MIDAS Information Technology Co., Ltd.
4. Install Dshop
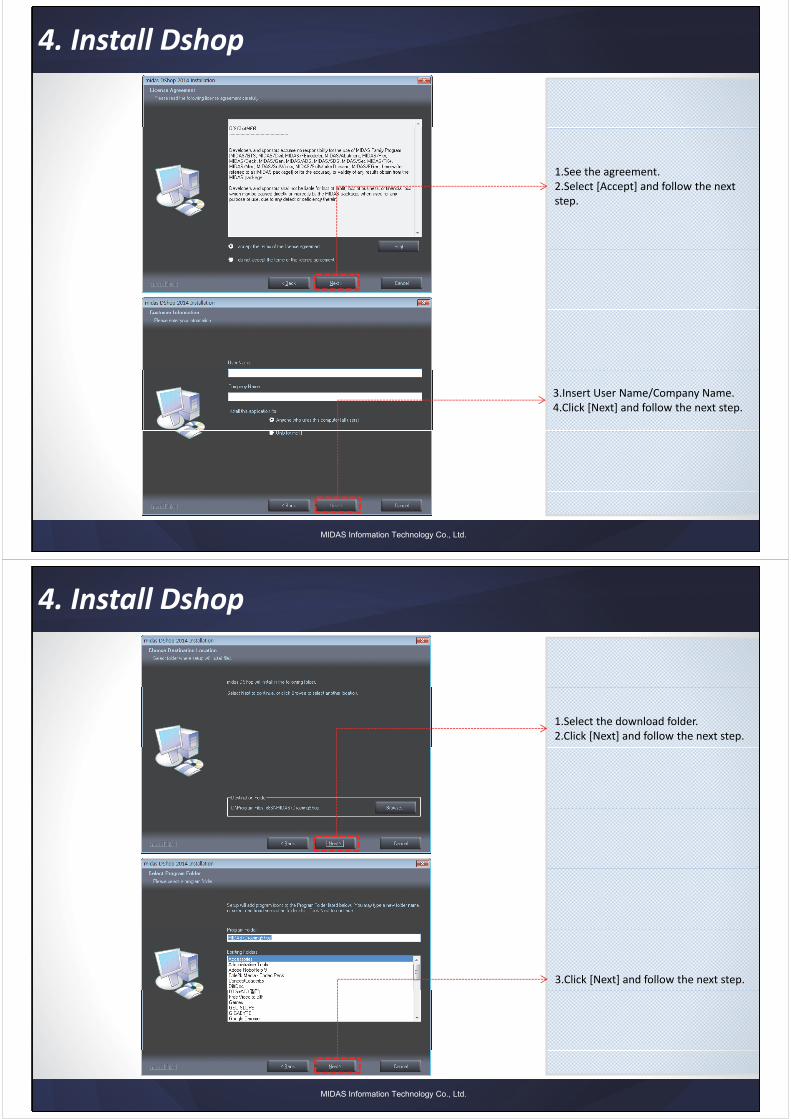
1.Select the download folder.2.Click [Next] and follow the next step.
3.Click [Next] and follow the next step.
MIDAS Information Technology Co., Ltd.

5. Web-Authenticate
MIDAS Information Technology Co., Ltd.