Embed Size (px)
Citation preview
Installation instruction
KPA-Solutions
Camper 112 Plus kit
www.kpa-solutions.com

Table of content :
1. Introduction (page 3-4)
2. Preparation (page 5-7)
3. Recommended tools (page 8-10)
4. Routing the hole for the tweeter (page 11-19)
5. Installation of the back plate (20-23)
6. Wiring the sockets and speakers (24-30)
7. Applying the new label on the terminal plate (optional ; page 30-34)
8. Last steps to complete your new speaker cabinet (page 35)
9. Congratulations ! (page 36)
www.kpa-solutions.com
1. Introduction
Thank you very much for purchasing the Camper Plus kit !
With this kit you will be able to build your own high quality full-range flat response and guitar range flat response speaker cabinet.
The Camper Plus cabinet is designed for the use with guitar profiling or modelling gear, where the speaker profile / model will remain part of the overall sound experience.
The frequency range of the Camper Plus cabinet is quite large.
We do not recommended to use it as a guitar speaker cabinet behind a traditionalvalve amplifier. The Camper Plus is designed to leave the smallest possible footprint on the overall sound as possible.A traditional guitar speaker is leaves a very large footprint on the overall sound.Such speakers act like a low pass filter and will filter many of the higher frequencies out of the sound. In the traditional tube world, this is a good thing, because higher frequencies generated by distorted guitar sound will sound harsh, if the are smoothed and even taken out of the sound.
www.kpa-solutions.com
The Camper Plus cabinet will leave those higher frequencies intact, so that different traditional guitar speaker models / profiles can be heard.
The finished cabinet will give you the choice to run it in either mode FRFR or GRFR.
If the cabinet is run in FRFR mode, it can be used the same way a good full range stage monitor or even studio monitor would be used.The use of the cabinet is not limited to electric guitar sounds but can be used for vocals, keyboards, acoustic guitar and even string instruments.
In GRFR mode the cabinet is especially useful for classic electric guitar sounds.Since the Camper Plus cabinet is designed to leave a very small footprint on the overall sound, you will be able to listen to different speaker profiles or models as they were profiled or modelled by the gear you use to shape your guitars sound.
www.kpa-solutions.com
2. Preparation
To install the kit into the Palmer 112 unloaded cabinet you will need some mechanical skills, several tools and some work space.Unless you have tools which have a suction device attached to it, there will be dust and splinters polluting your work space and surrounding areas.
If you feel you do not have the tools, the skills or the work space, please do not attempt to install this kit yourself.You can order the Camper Plus cabinet completely build and finished for a reasonable surcharge from us.
OK, lets do it !
• Make sure you have some flat work space available on which you can put the cabinet onto to do the drilling and the other woodwork. A 1 x 0,6m workbench would be perfect.
• Unpack the Palmer 1x12” unloaded cabinet and take the cabinet out of the plastic bag.
• Unpack our Camper Plus kit and check all of its components.
www.kpa-solutions.com
Our Camper Plus kit will include :
– a 12” double cone broad band speaker
– a tweeter with two wires and a crossover network already connected to it
– 14 pieces 4,5mmx27mm flat head chipboard screws for panel mounting
– 4 pieces 4,5x12mm flat head chipboard screws for the tweeter
www.kpa-solutions.com
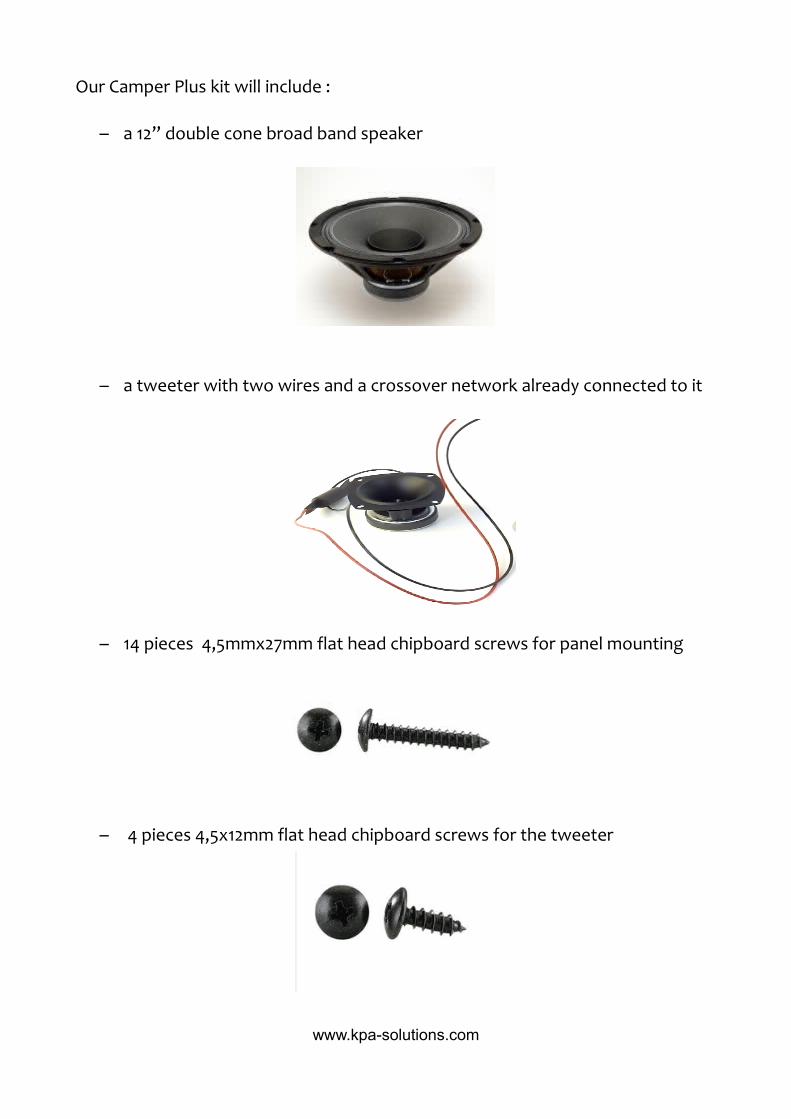
– back plate with venting holes
– mounting plate
– terminal plate label
www.kpa-solutions.com

3. Recommended tools
– drill machine– soldering iron (>40W is recommended)– solder– short screw driver Philips 2 (PH2)
– half round bastard file for wood
– 60 mm hole saw
www.kpa-solutions.com
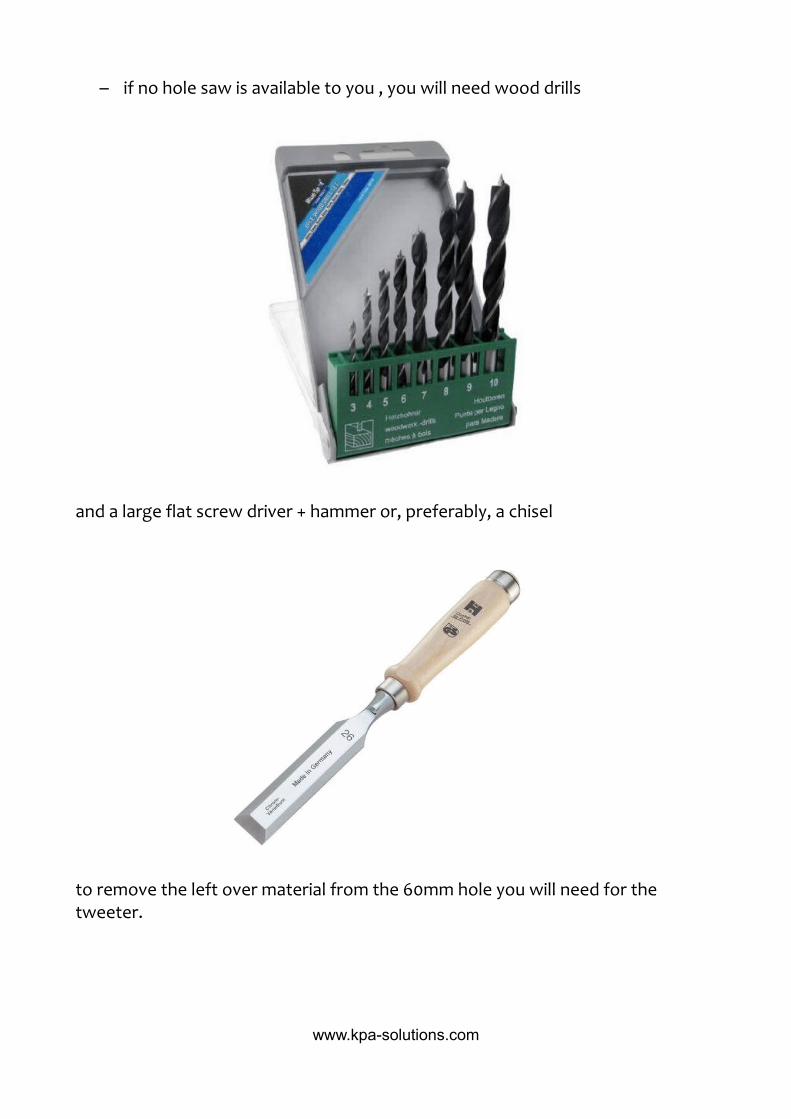
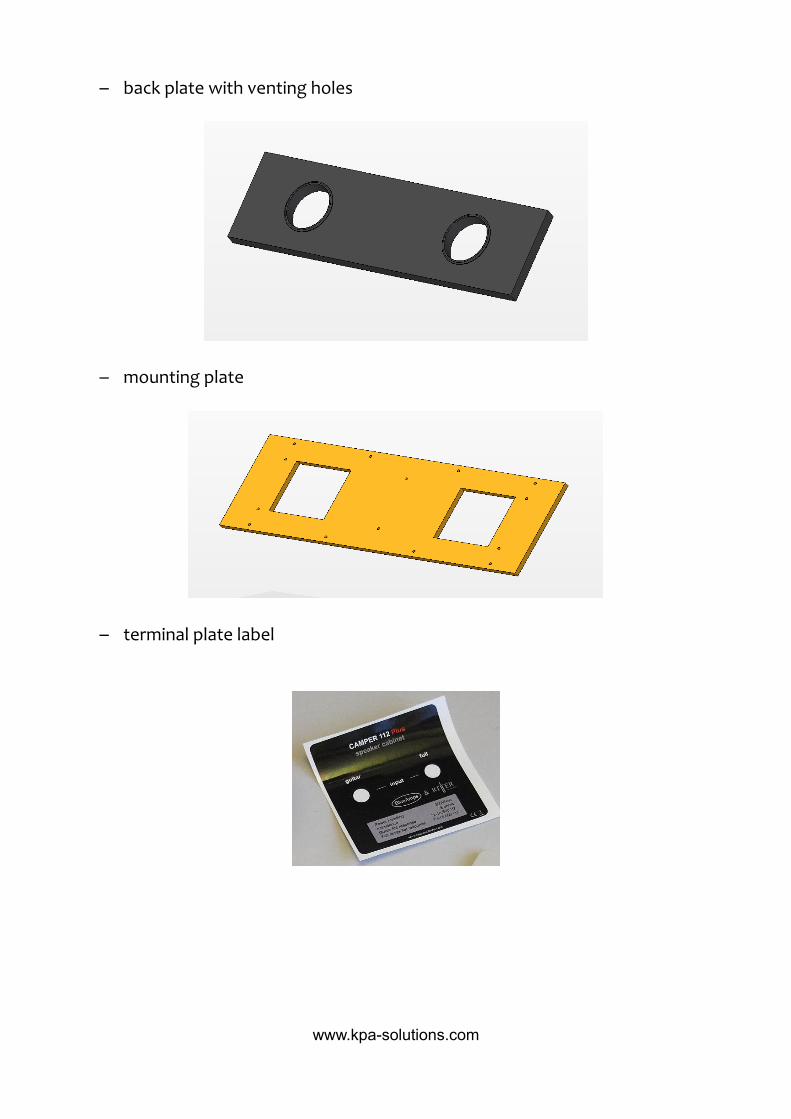
– if no hole saw is available to you , you will need wood drills
and a large flat screw driver + hammer or, preferably, a chisel
to remove the left over material from the 60mm hole you will need for the tweeter.
www.kpa-solutions.com

If you want to apply the new label on the terminal plate, you will need some :
– paper towels– technical alcohol– a little bit of water– soap– squeegee or credit card
www.kpa-solutions.com

4. Routing the hole for the tweeter
Firstly, unscrew the 6 screws that hold the terminal plate and remove the terminal plate from the Palmer cabinet.
If you own a 60mm hole saw, put the Palmer cabinet on its back side on your workbench and mark the centre of the tweeter hole 9,5cm from the upper inner side and from the right inner side of the cabinet.
www.kpa-solutions.com

Drill the hole with the hole saw into the speaker baffle.Do not use to much pressure on the saw and lift the saw every so often to remove dust and splinters from the cutting area.
After the hole has been drilled, remove dust from the cabinets inside and baffle with a vacuum cleaner.
www.kpa-solutions.com
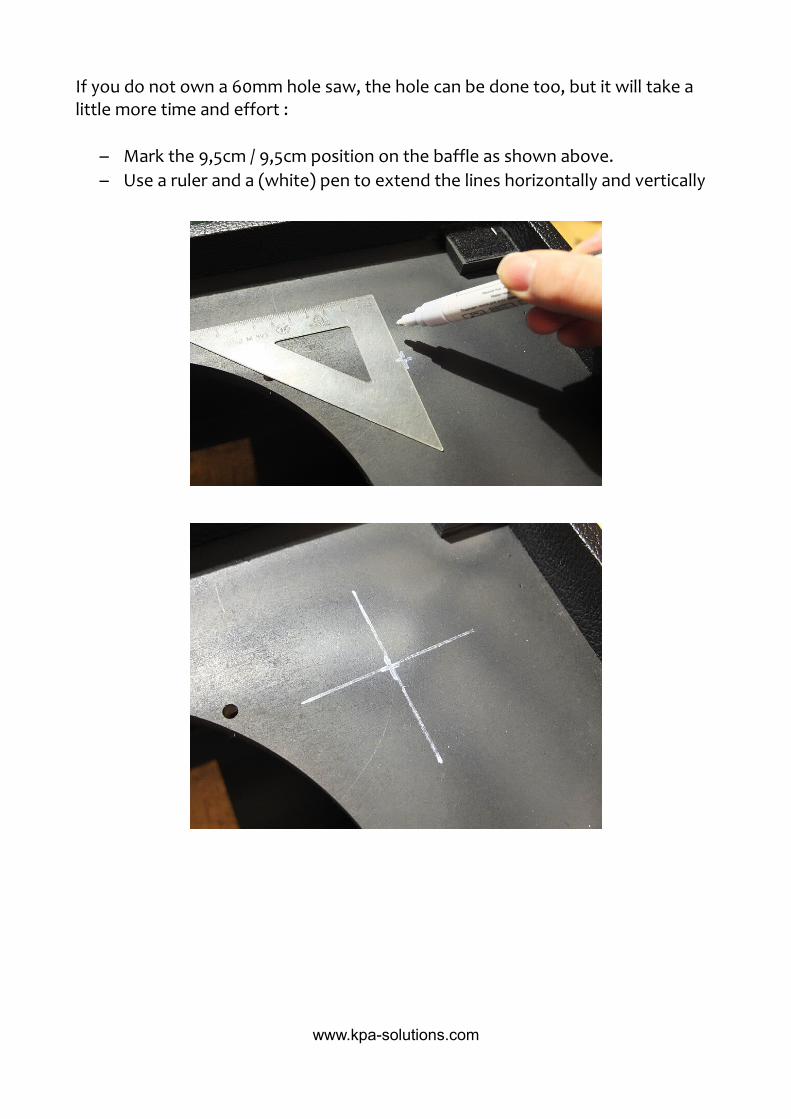
If you do not own a 60mm hole saw, the hole can be done too, but it will take a little more time and effort :
– Mark the 9,5cm / 9,5cm position on the baffle as shown above.– Use a ruler and a (white) pen to extend the lines horizontally and vertically
www.kpa-solutions.com
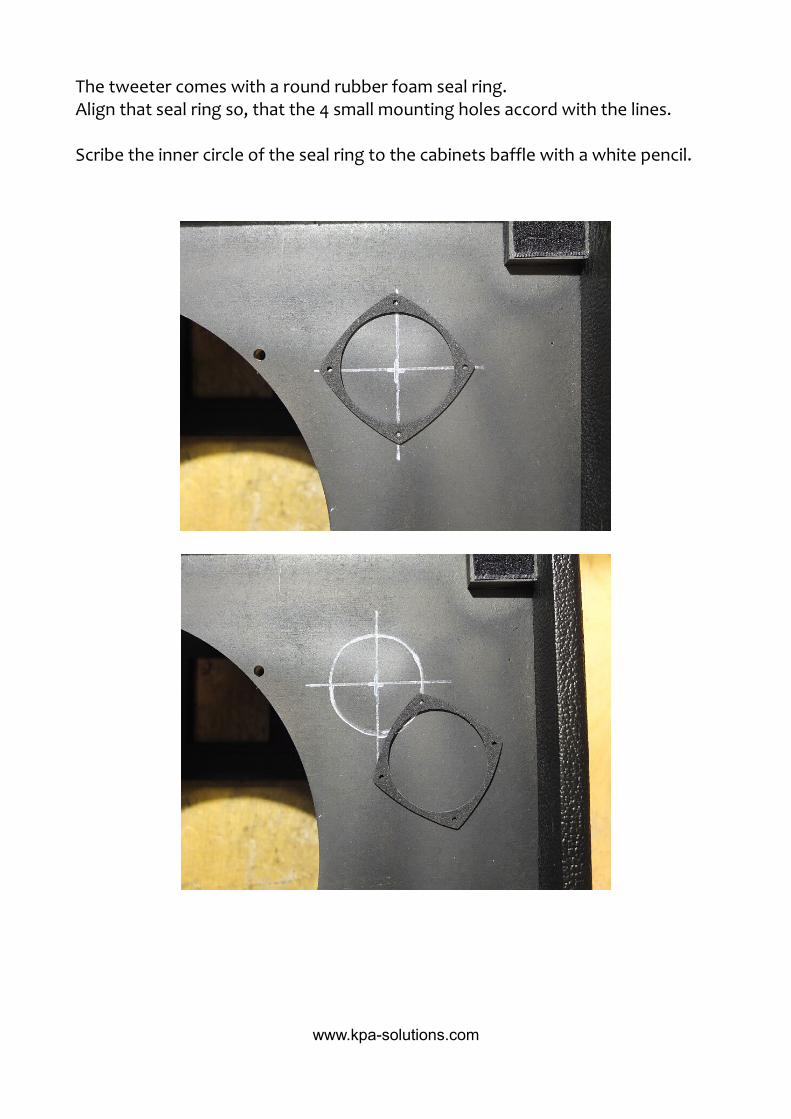
The tweeter comes with a round rubber foam seal ring.Align that seal ring so, that the 4 small mounting holes accord with the lines.
Scribe the inner circle of the seal ring to the cabinets baffle with a white pencil.
www.kpa-solutions.com

Drill the first hole with a wood drill. Align the drill so that the outer diameter of the drill tangents the circle from the inside. I used a 10mm wood drill here to demonstrate the process.
Drill one hole after another.The holes should be as close to each other as possible, but stay just inside the 60mm circle.
www.kpa-solutions.com

Use a flat screw driver or a chisel to cut through the left over material between the holes and remove the material from inside the circle.
www.kpa-solutions.com
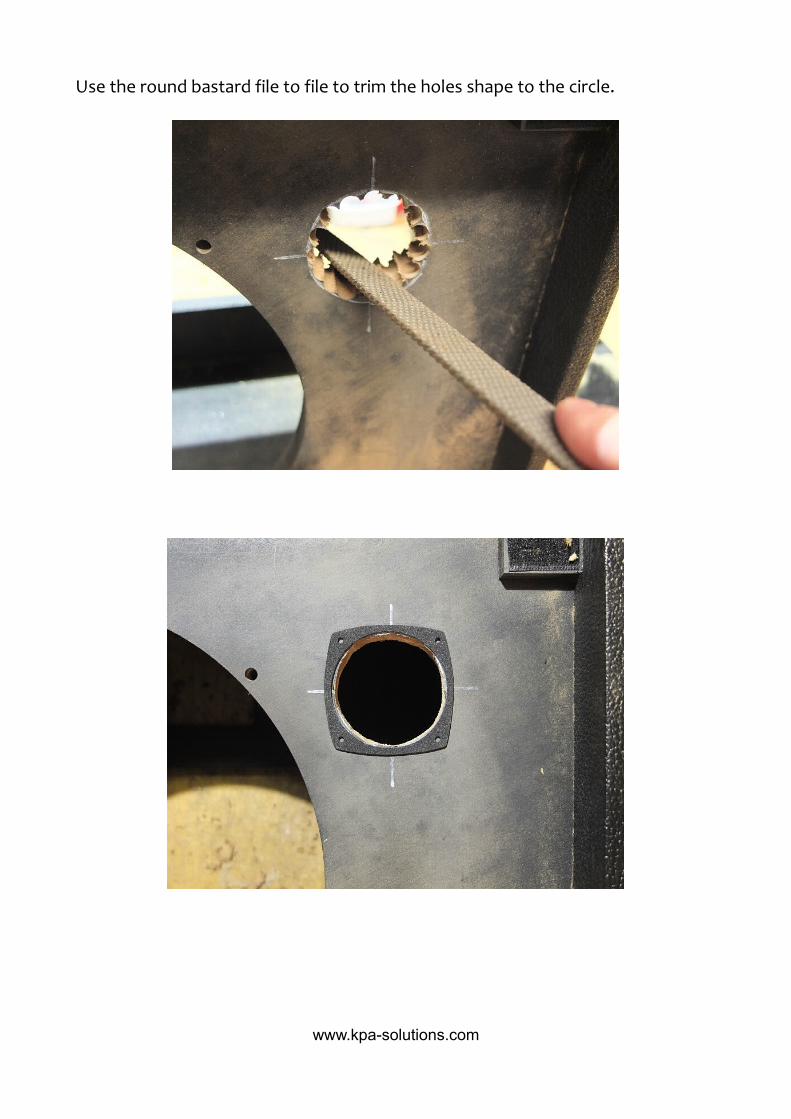
Use the round bastard file to file to trim the holes shape to the circle.
www.kpa-solutions.com
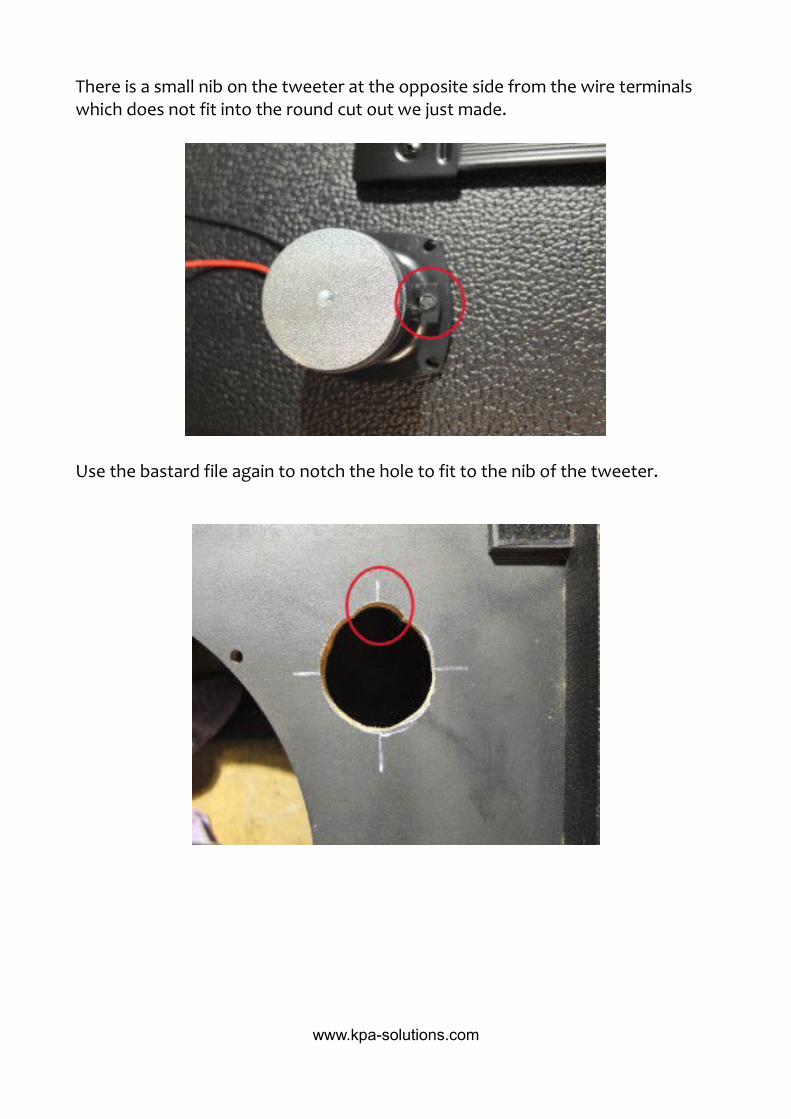
There is a small nib on the tweeter at the opposite side from the wire terminals which does not fit into the round cut out we just made.
Use the bastard file again to notch the hole to fit to the nib of the tweeter.
www.kpa-solutions.com
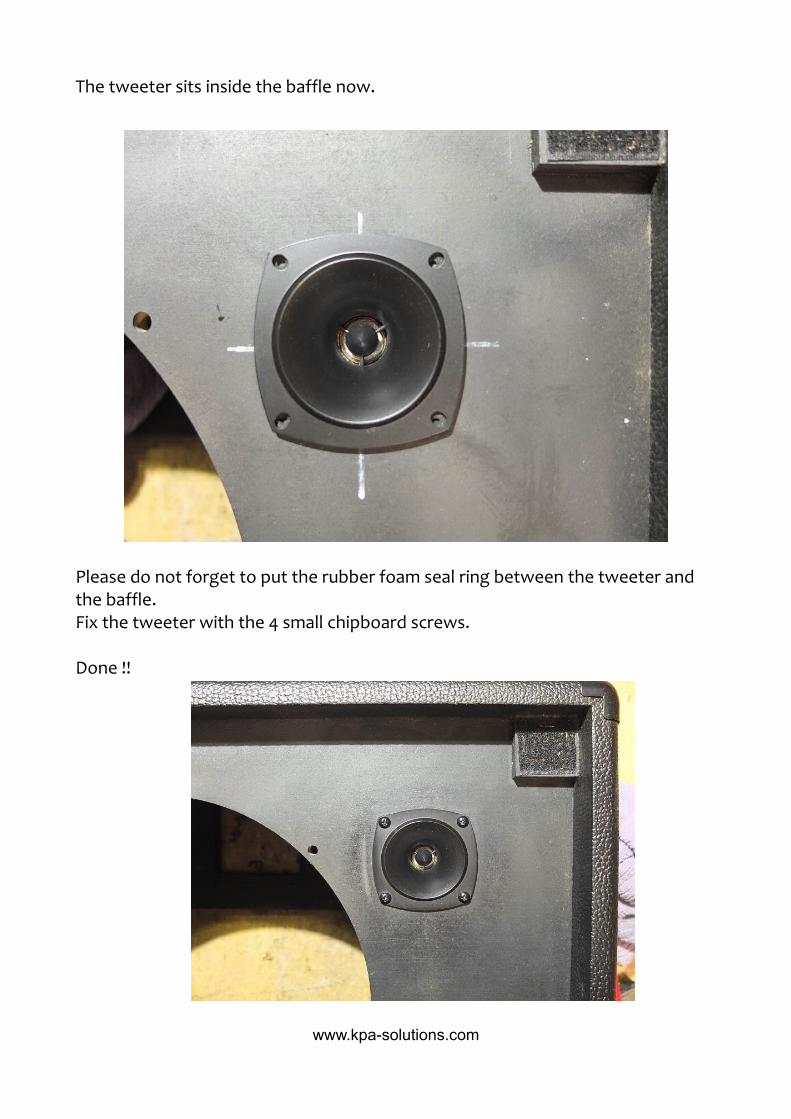
The tweeter sits inside the baffle now.
Please do not forget to put the rubber foam seal ring between the tweeter and the baffle.Fix the tweeter with the 4 small chipboard screws.
Done !!
www.kpa-solutions.com

5. Installation of the back plate
If you haven’t done already, please remove dust and splinters from the inside of the cabinet now.I also recommend to take out the tweeter again because the wires connected to the tweeter will be in the way when you assemble the back plate and the mounting plate.
– Put the mounting plate into the Palmer cabinet first.
– Put the back plate into the Palmer cabinet secondly.
www.kpa-solutions.com

– Push the back panel into the opening of the Palmer cabinet.
– Press the mounting plate to the inner wall of the cabinet and align it to the back plate.
– Use the markings we made on the back plates inner surface to align both plates to each other.
www.kpa-solutions.com
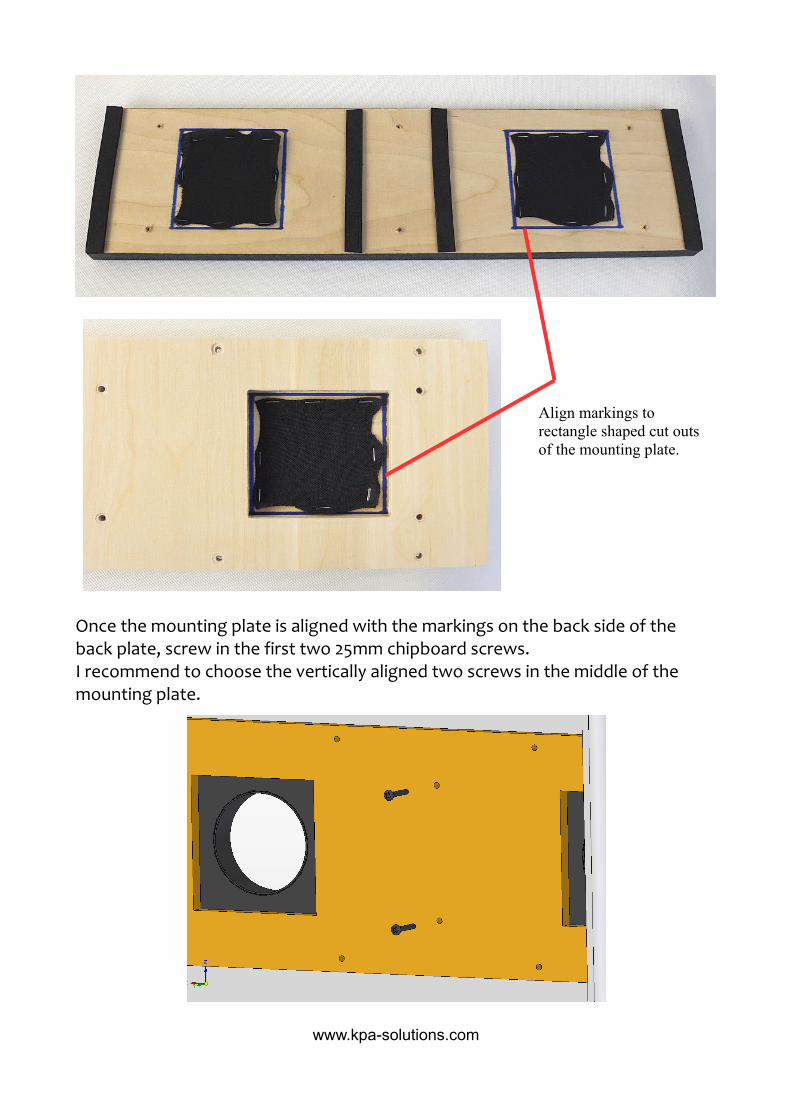
Once the mounting plate is aligned with the markings on the back side of the back plate, screw in the first two 25mm chipboard screws.I recommend to choose the vertically aligned two screws in the middle of the mounting plate.
www.kpa-solutions.com
Align markings to rectangle shaped cut outs of the mounting plate.
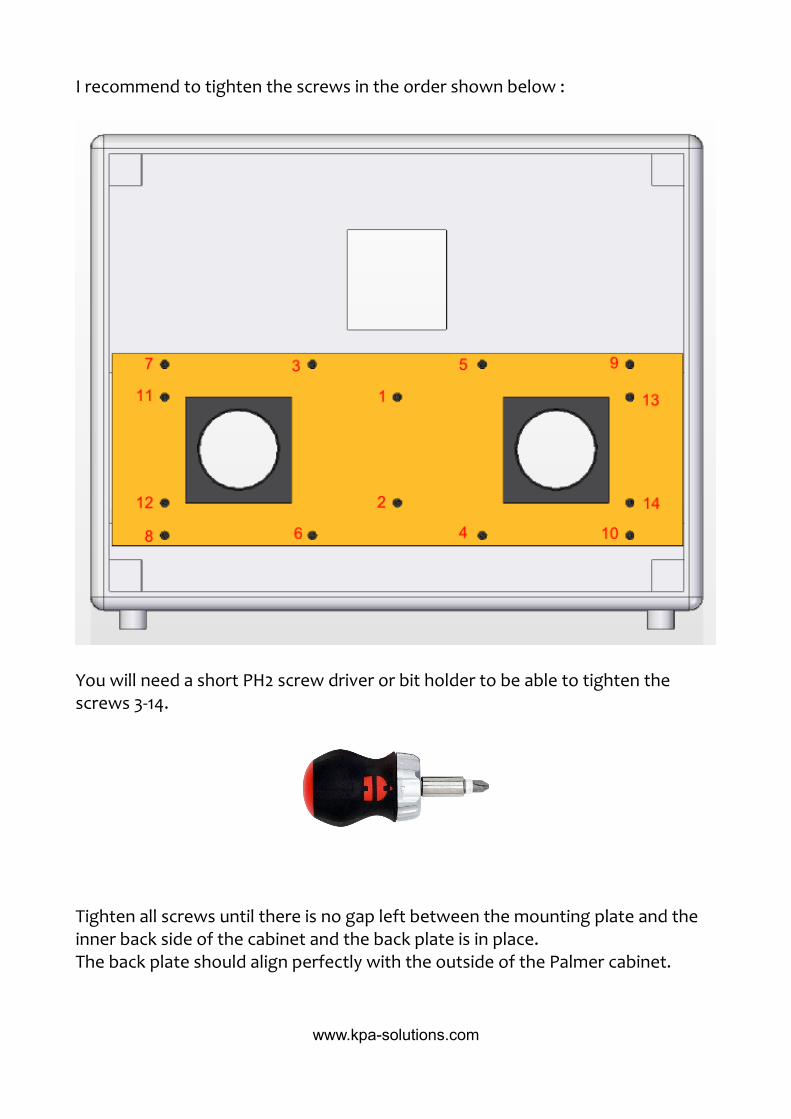
I recommend to tighten the screws in the order shown below :
You will need a short PH2 screw driver or bit holder to be able to tighten the screws 3-14.
Tighten all screws until there is no gap left between the mounting plate and the inner back side of the cabinet and the back plate is in place.The back plate should align perfectly with the outside of the Palmer cabinet.
www.kpa-solutions.com
6. Wiring the sockets and speakers
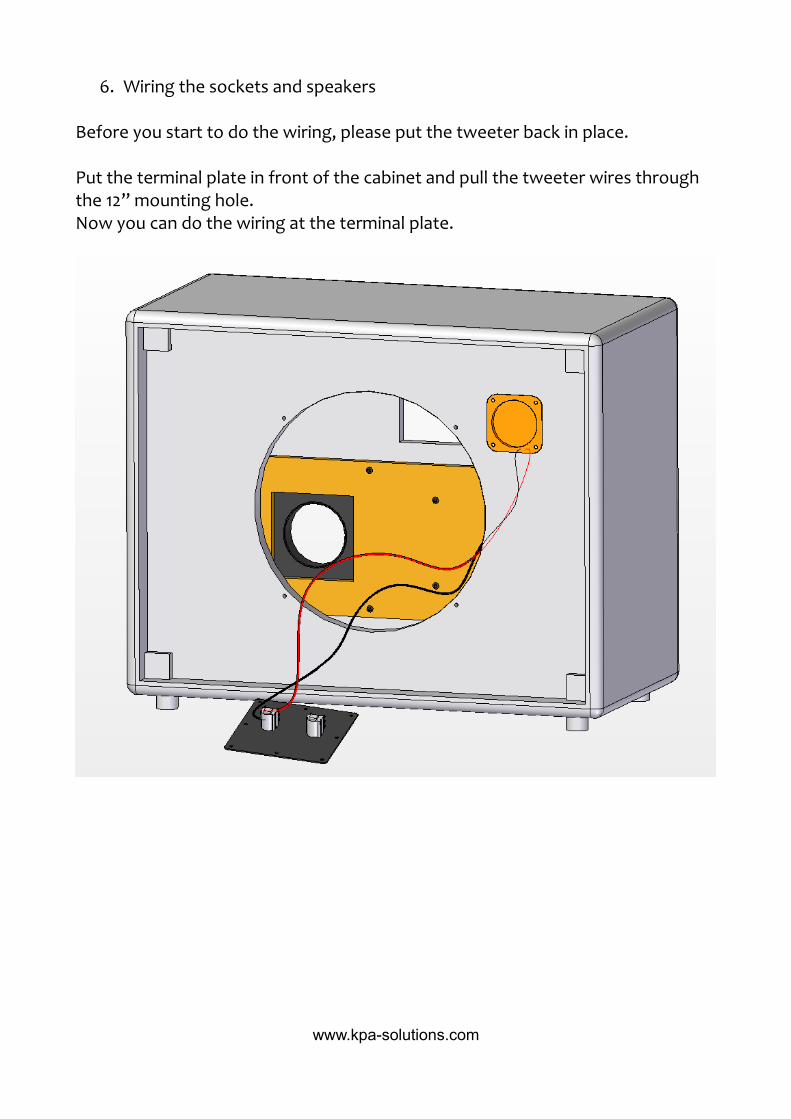
Before you start to do the wiring, please put the tweeter back in place.
Put the terminal plate in front of the cabinet and pull the tweeter wires through the 12” mounting hole.Now you can do the wiring at the terminal plate.
www.kpa-solutions.com
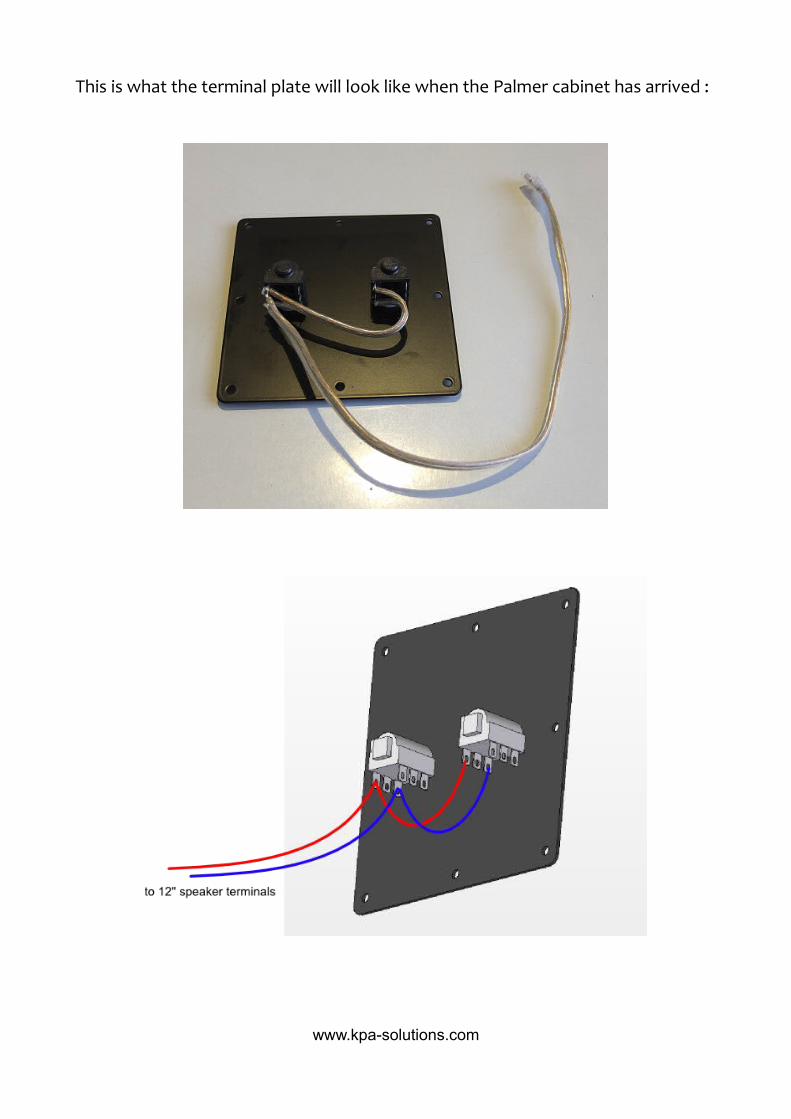
This is what the terminal plate will look like when the Palmer cabinet has arrived :
www.kpa-solutions.com

And this is what it will look like after we have finished the wiring :
www.kpa-solutions.com

There are many ways to do this, but I will show you the method I think is the fastest and easiest to do.
– dissemble both jacks from the terminal plate
– cut the original wires which connect both 1/4” jacks as close to the solder lugs of the 12” speaker jack as possible
www.kpa-solutions.com

– de solder the wires from the other 1/4” jack
– remove left over solder from the solder lugs. This can be done with a de-soldering pump.If you don’t have such pump available, simply melt the solder until it becomes liquid and bang the socket on the table. The solder will splash out of the solder lug on the table.
www.kpa-solutions.com

The tweeter wires will come with long wire jumpers already connected to it.
Mount both 1/4” jack to the plate to get the right distance between both jacks before soldering.
Solder the wire jumpers in place as shown bellow.
www.kpa-solutions.com

Dissemble the 1/4” jacks from the terminal plate.
www.kpa-solutions.com
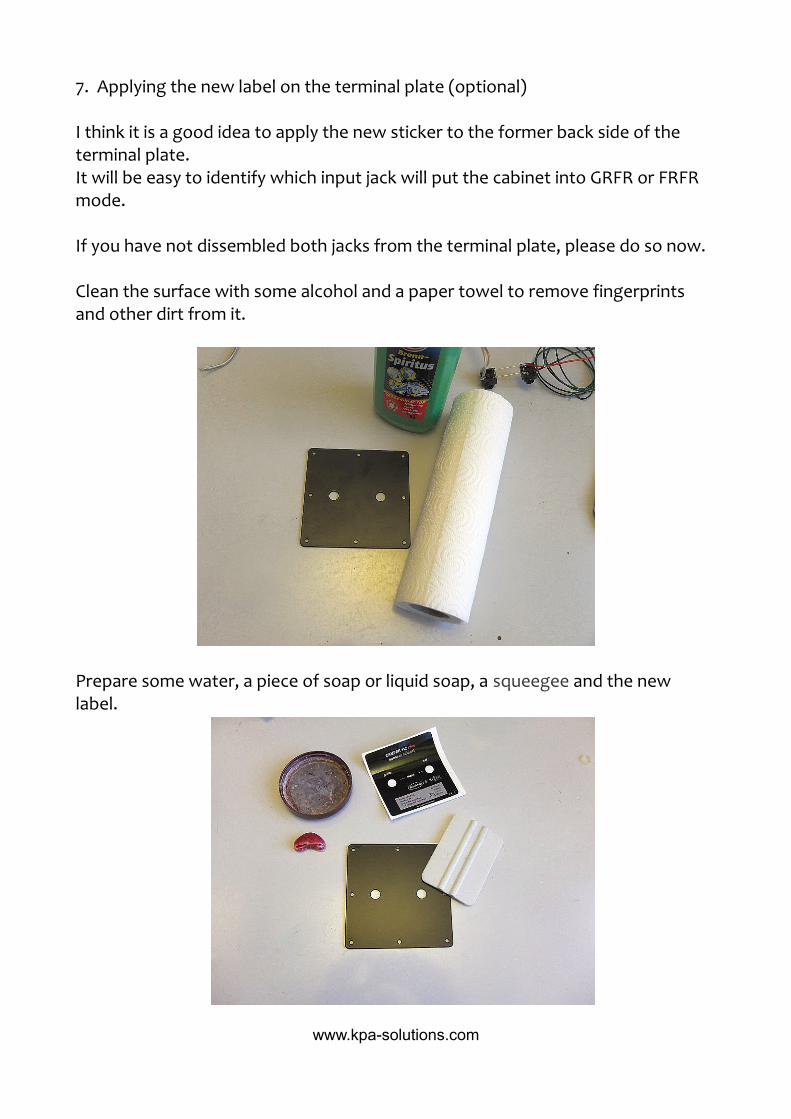
7. Applying the new label on the terminal plate (optional)
I think it is a good idea to apply the new sticker to the former back side of the terminal plate.It will be easy to identify which input jack will put the cabinet into GRFR or FRFR mode.
If you have not dissembled both jacks from the terminal plate, please do so now.
Clean the surface with some alcohol and a paper towel to remove fingerprints and other dirt from it.
Prepare some water, a piece of soap or liquid soap, a squeegee and the new label.
www.kpa-solutions.com

Damp the soap with some of the water and cover the complete surface of the terminal plate with a thin film of soaped water.
www.kpa-solutions.com
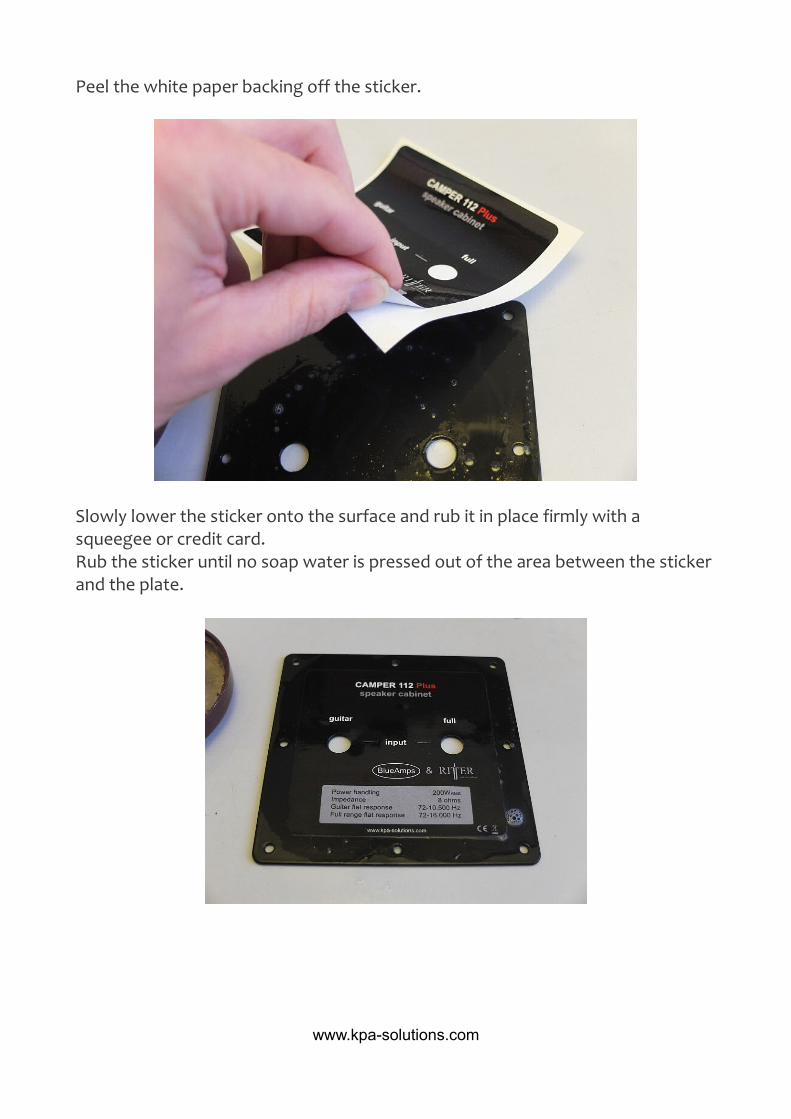
Peel the white paper backing off the sticker.
Slowly lower the sticker onto the surface and rub it in place firmly with a squeegee or credit card. Rub the sticker until no soap water is pressed out of the area between the stickerand the plate.
www.kpa-solutions.com

If the sticker moves, you can hold it in place by sticking one fingertip into on of the jack holes.After a while, the sticker will not move any more and will hold tight to the plate with no air bubbles between the sticker and the plate.
www.kpa-solutions.com

8. Last steps to complete your new speaker cabinet :
– Pull the 1/4” jacks with wires through the terminal plate opening at the back side of the cabinet.
– mount the jacks to the terminal plate– screw the terminal plate to the cabinet with the 8 original screws
– Connect the original two cable shoes to the 12” broad band speaker (pleaseconnect the plus + wire to the plus + lug of the speaker and the mini – wire to the minus – lug)
– Mount the speaker to the baffle with the 4 screws that were delivered withthe Palmer cabinet.
www.kpa-solutions.com
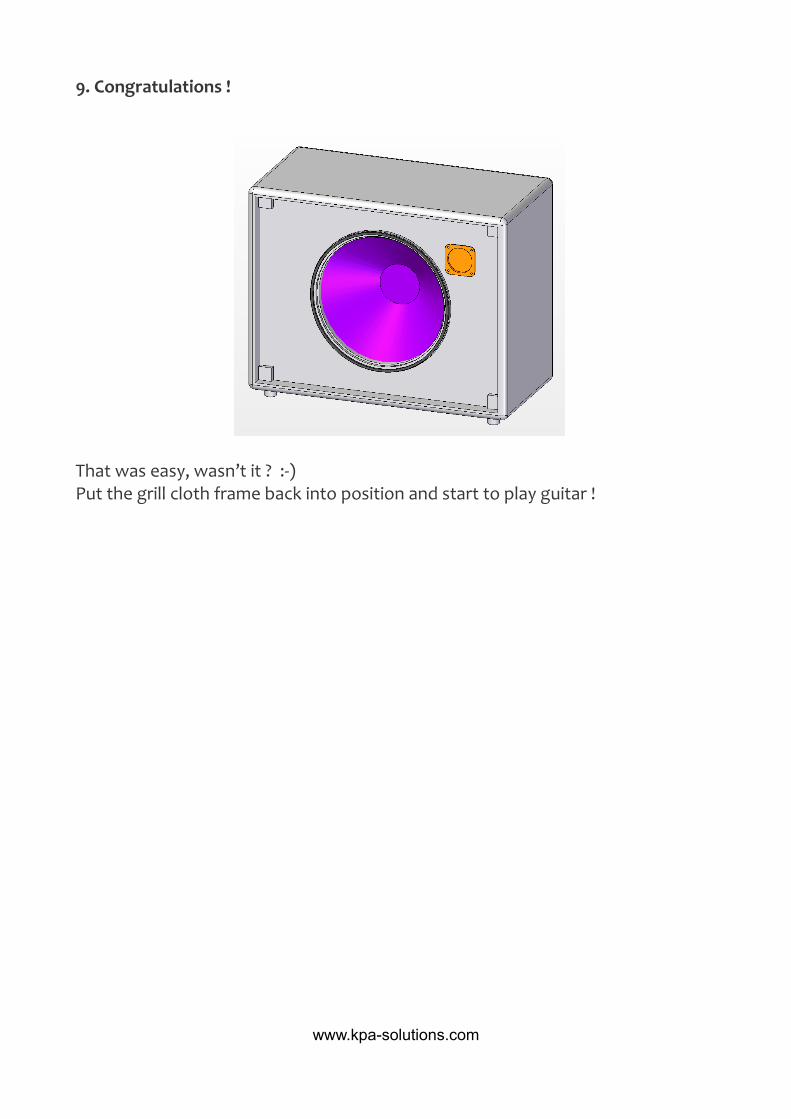
9. Congratulations !
That was easy, wasn’t it ? :-)Put the grill cloth frame back into position and start to play guitar !
www.kpa-solutions.com