Embed Size (px)
Citation preview
POWER BY THE HOUR PERFORMANCE
PBHPERFORMANCE.COM 1
Installation instructions for Coyote alternator bracket kit
PART # PBH-SWAP-ALT-S/C-UPFIT
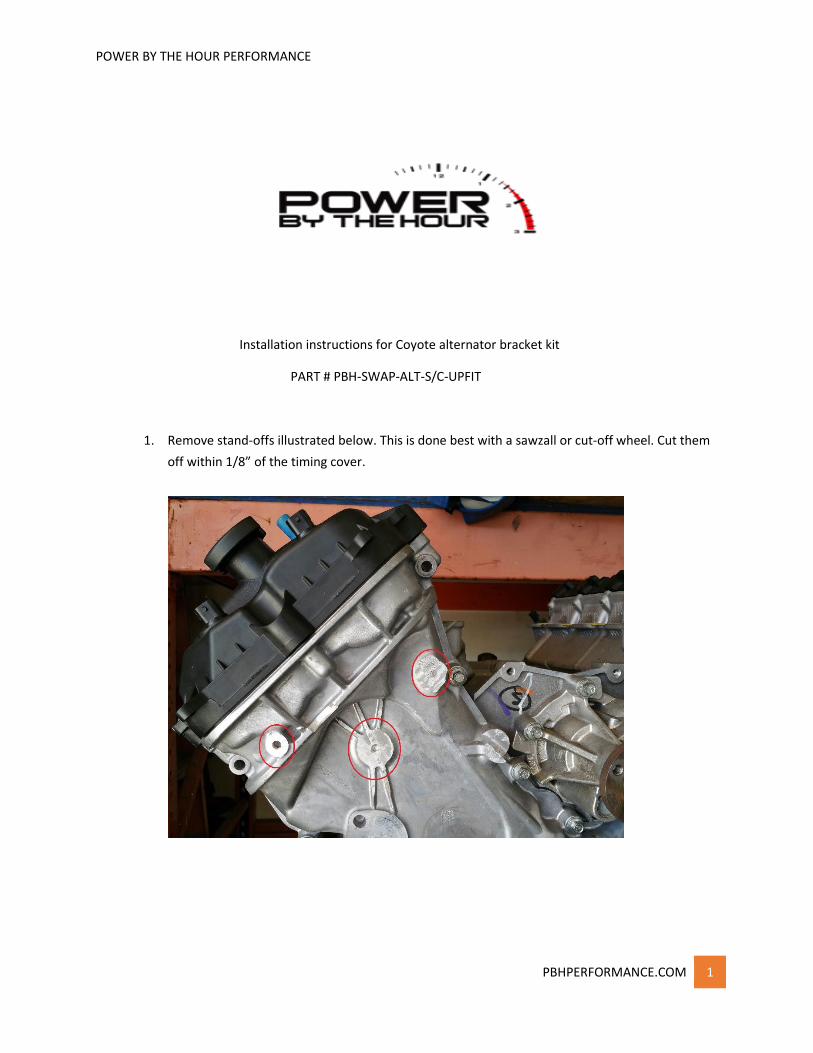
1. Remove stand-offs illustrated below. This is done best with a sawzall or cut-off wheel. Cut them
off within 1/8” of the timing cover.
POWER BY THE HOUR PERFORMANCE
PBHPERFORMANCE.COM 2
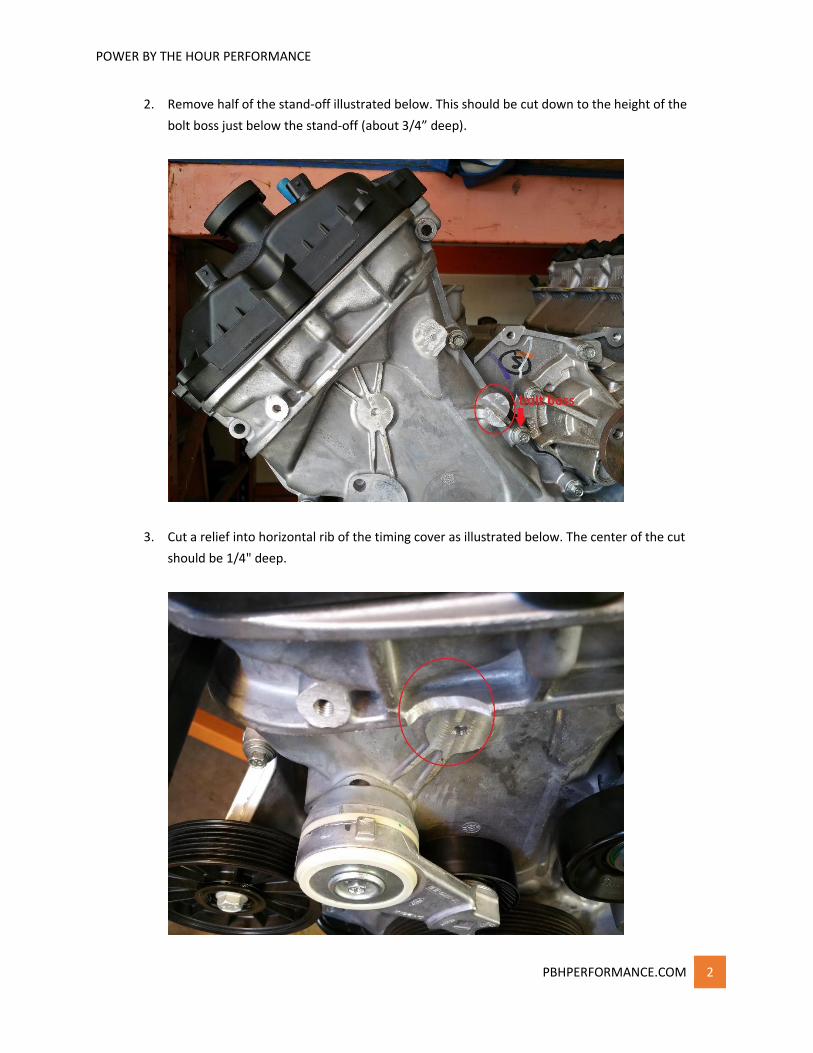
2. Remove half of the stand-off illustrated below. This should be cut down to the height of the
bolt boss just below the stand-off (about 3/4” deep).
3. Cut a relief into horizontal rib of the timing cover as illustrated below. The center of the cut
should be 1/4" deep.
POWER BY THE HOUR PERFORMANCE
PBHPERFORMANCE.COM 3
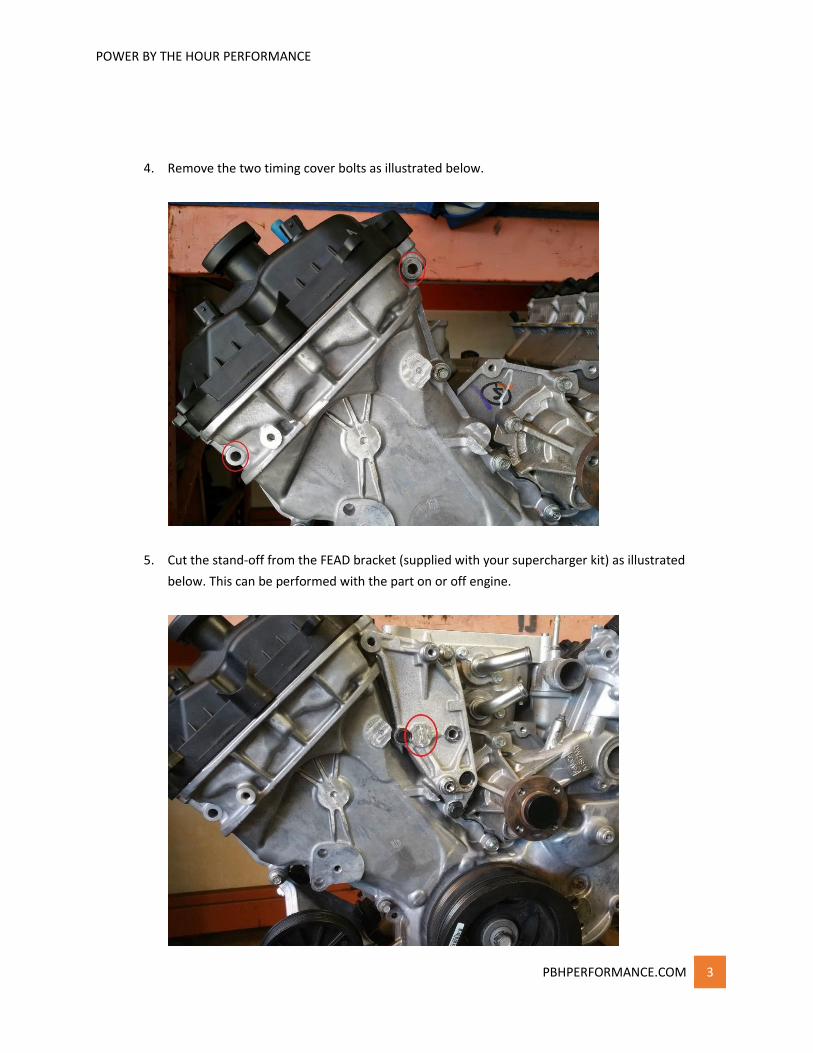
4. Remove the two timing cover bolts as illustrated below.
5. Cut the stand-off from the FEAD bracket (supplied with your supercharger kit) as illustrated
below. This can be performed with the part on or off engine.
POWER BY THE HOUR PERFORMANCE
PBHPERFORMANCE.COM 4
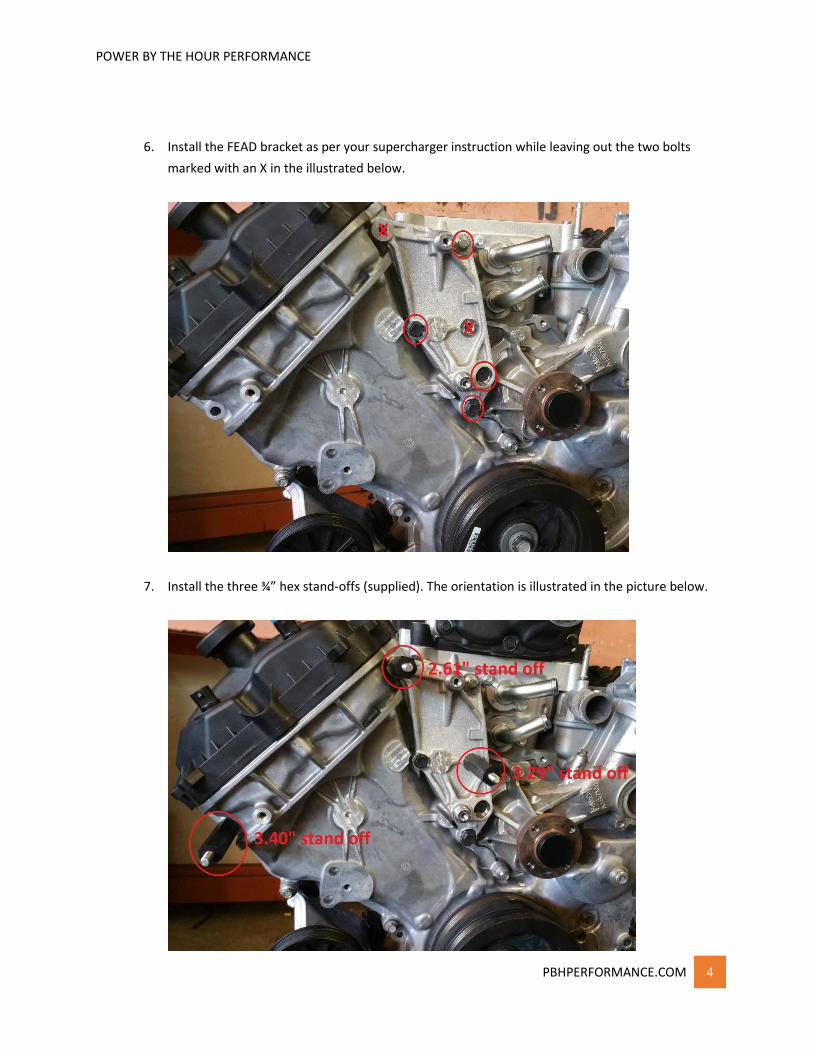
6. Install the FEAD bracket as per your supercharger instruction while leaving out the two bolts
marked with an X in the illustrated below.
7. Install the three ¾” hex stand-offs (supplied). The orientation is illustrated in the picture below.
POWER BY THE HOUR PERFORMANCE
PBHPERFORMANCE.COM 5
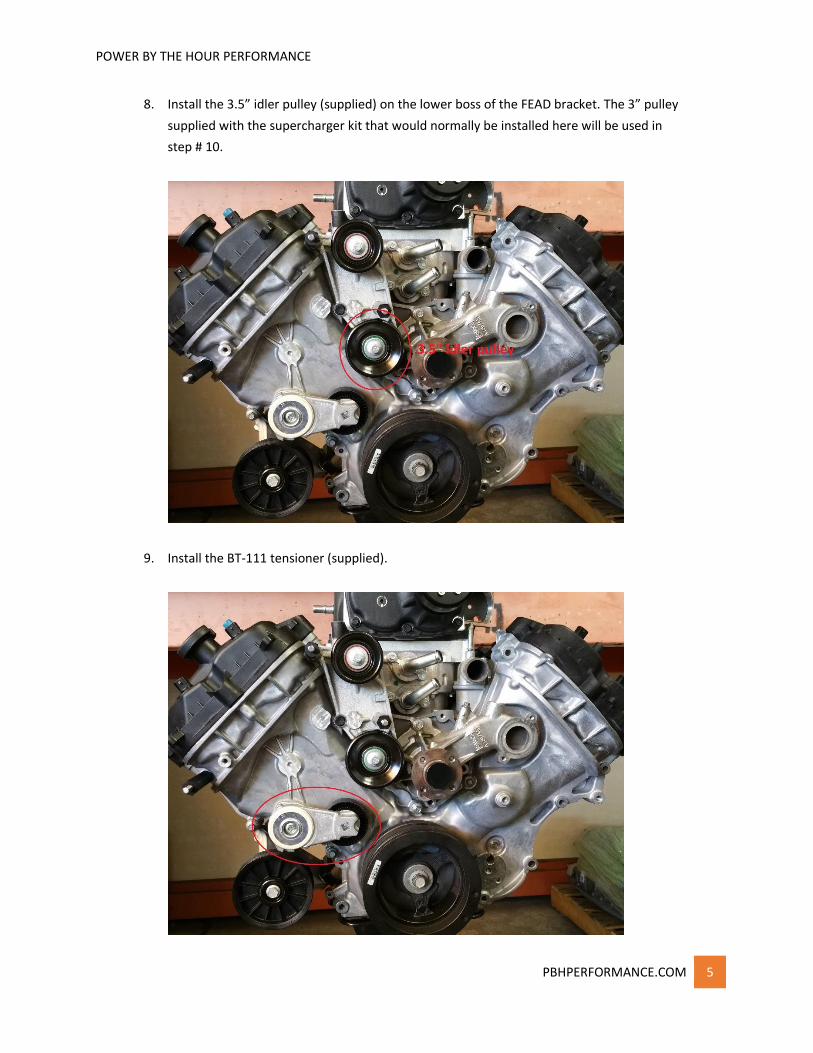
8. Install the 3.5” idler pulley (supplied) on the lower boss of the FEAD bracket. The 3” pulley
supplied with the supercharger kit that would normally be installed here will be used in
step # 10.
9. Install the BT-111 tensioner (supplied).
POWER BY THE HOUR PERFORMANCE
PBHPERFORMANCE.COM 6
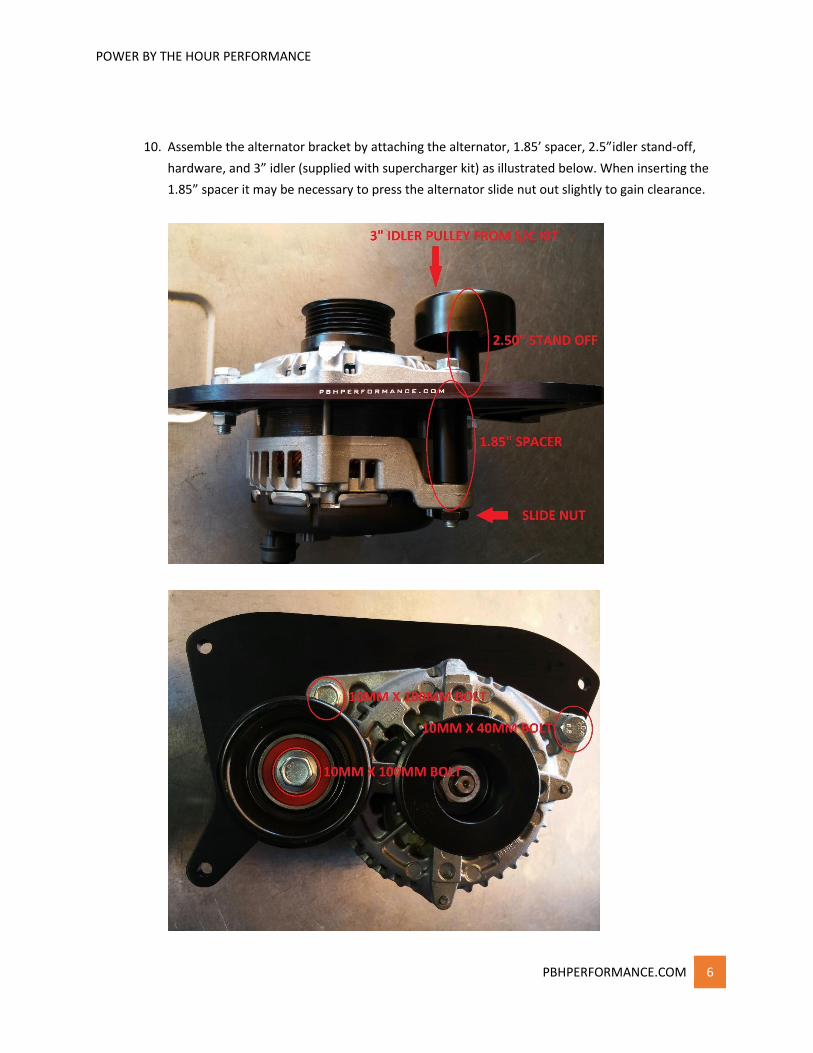
10. Assemble the alternator bracket by attaching the alternator, 1.85’ spacer, 2.5”idler stand-off,
hardware, and 3” idler (supplied with supercharger kit) as illustrated below. When inserting the
1.85” spacer it may be necessary to press the alternator slide nut out slightly to gain clearance.
POWER BY THE HOUR PERFORMANCE
PBHPERFORMANCE.COM 7
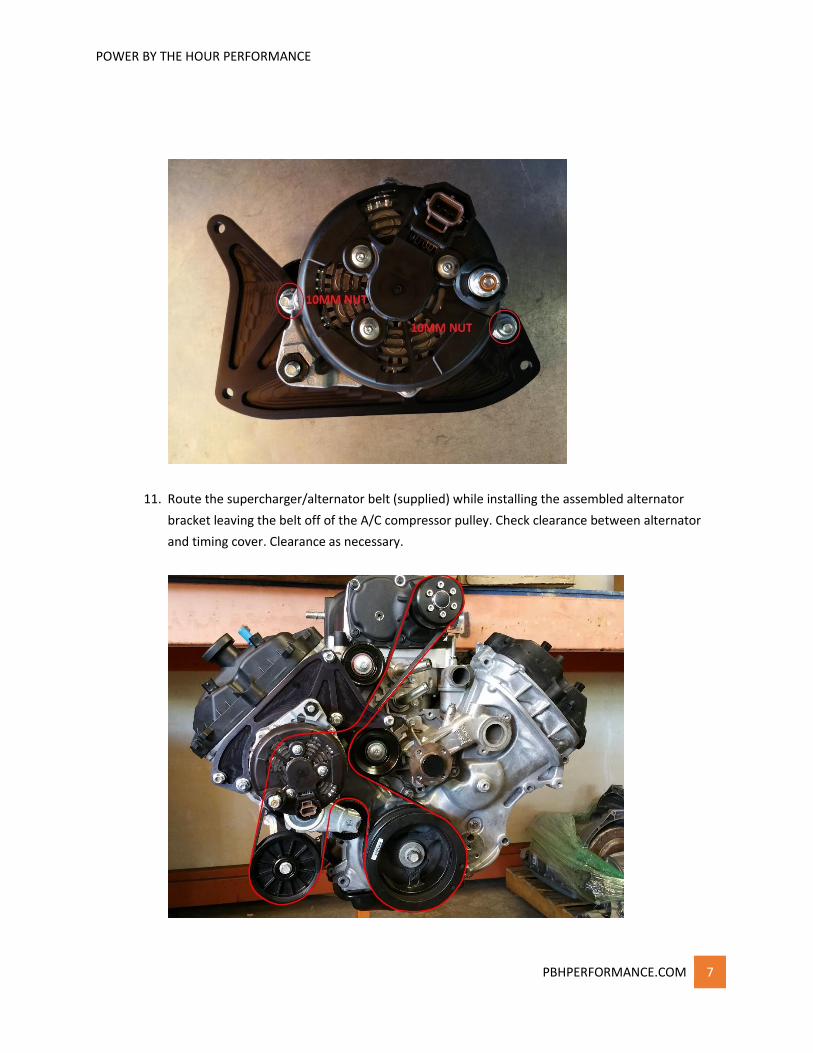
11. Route the supercharger/alternator belt (supplied) while installing the assembled alternator
bracket leaving the belt off of the A/C compressor pulley. Check clearance between alternator
and timing cover. Clearance as necessary.
POWER BY THE HOUR PERFORMANCE
PBHPERFORMANCE.COM 8
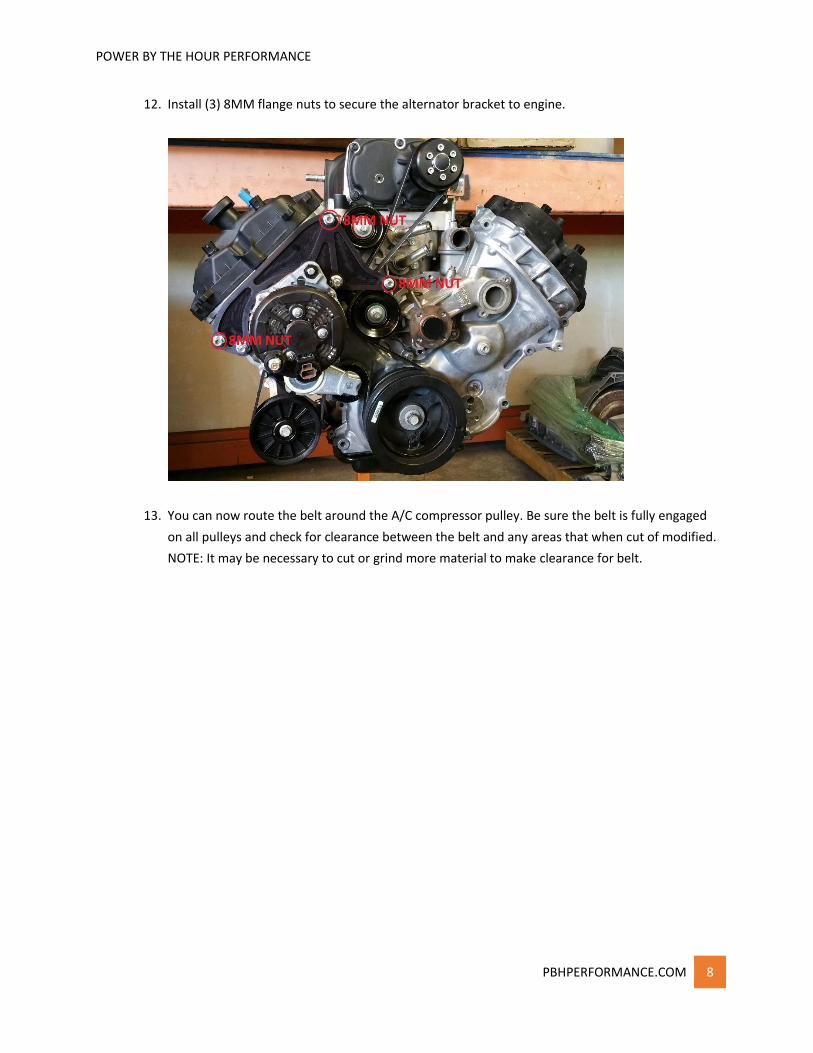
12. Install (3) 8MM flange nuts to secure the alternator bracket to engine.
13. You can now route the belt around the A/C compressor pulley. Be sure the belt is fully engaged
on all pulleys and check for clearance between the belt and any areas that when cut of modified.
NOTE: It may be necessary to cut or grind more material to make clearance for belt.