Embed Size (px)
Citation preview
prajwaldesai.com http://prajwaldesai.com/installing-and-configuring-endpoint-protection-role-in-sccm-2012-r2/
Prajwal Desai
Installing And Configuring Endpoint Protection Role In SCCM 2012 R2
In this post we will look at the steps for installing and configuring Endpoint protection role in SCCM 2012 R2. Endpoint Protection in System Center 2012 R2 Configuration Manager allows you to manage antimalware policies and Windows Firewall security for client computers in your Configuration Manager hierarchy. Endpoint Protection helps protect your PC from malicious software (malware) such as viruses, spyware, and other potentially harmful software. Before you install the Endpoint protection role you need to install the prerequisites. Windows Server Update Services (WSUS) must be installed and configured for software updates synchronization if you want to use Configuration Manager software updates to deliver definition and engine updates.
For SCCM 2012 R2 Step by Step Guides click here.
When you install the Endpoint Protection with Configuration Manager you get following advantages :-
Endpoint Protection in Configuration Manager allows you to manage Windows Firewall settings in the Configuration Manager console. You can also configure antimalware policies and apply that to selected groups of computers, by using custom antimalware policies and client settings.
Configuration Manager software updates can be used to download the latest antimalware definition files to keep client computers up-to-date.
You can send email notifications, use in-console monitoring, and view reports to keep administrative users informed when malware is detected on client computers.
Where Should I Install the Endpoint Protection Role ?
The Endpoint Protection point site system role must be installed on one site system server only, and it must be installed at the top of the hierarchy on a central administration site or a stand-alone primary site.
Before you begin installing the endpoint protection role, you must have the WSUS installed and configured for software updates synchronization. A software update point site system role must be installed and configured to deliver definition updates if you want to use Configuration Manager software updates to deliver definition and engine updates.
Installing WSUS for Configuration Manager 2012 R2
Deploy Software Updates Using SCCM 2012 R2
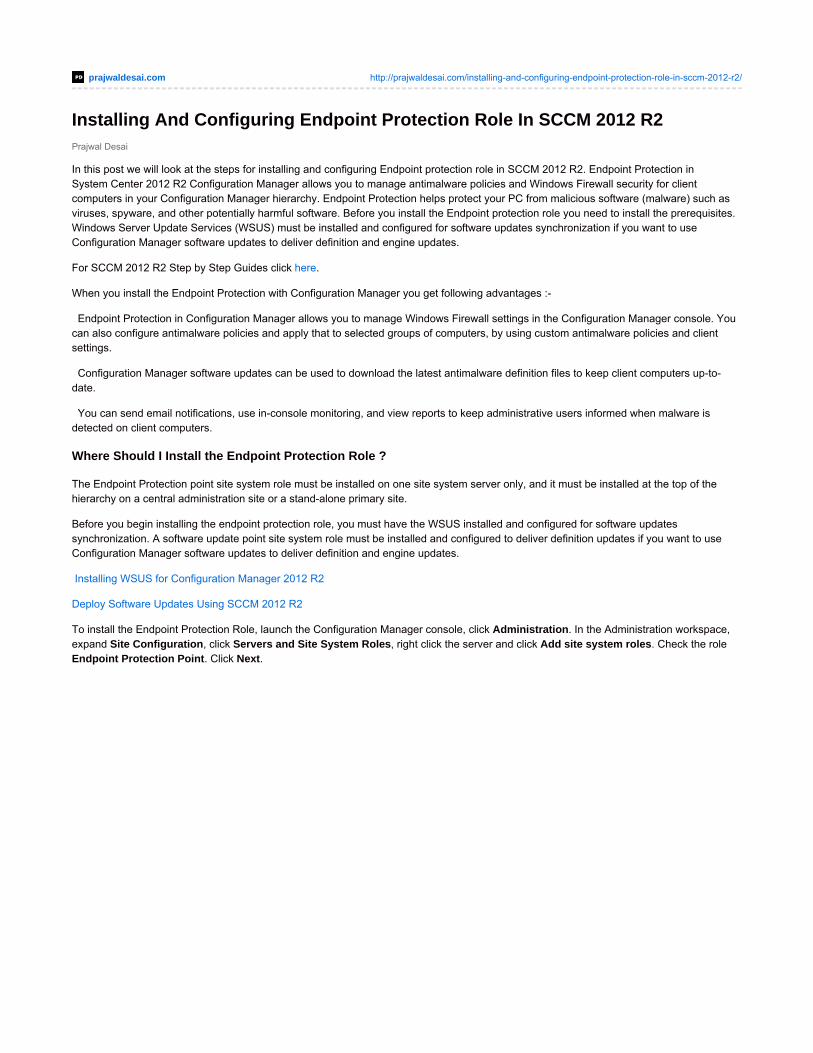
To install the Endpoint Protection Role, launch the Configuration Manager console, click Administration. In the Administration workspace, expand Site Configuration, click Servers and Site System Roles, right click the server and click Add site system roles. Check the role Endpoint Protection Point. Click Next.
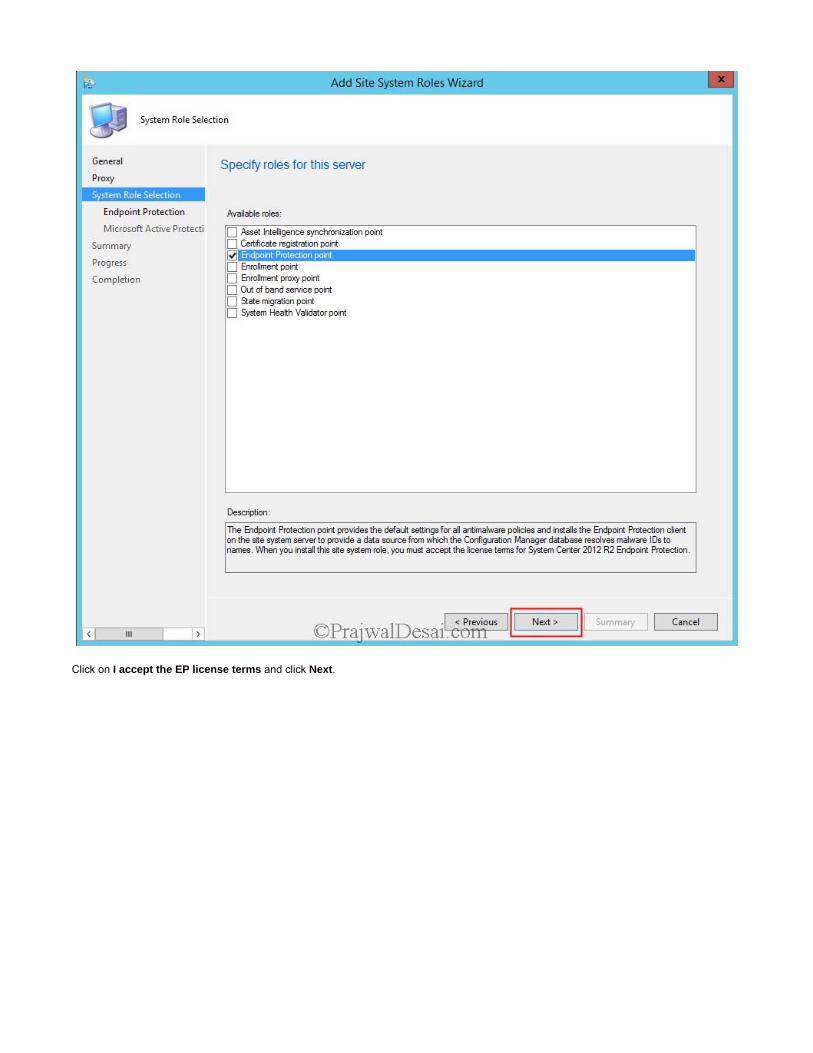
Click on I accept the EP license terms and click Next.
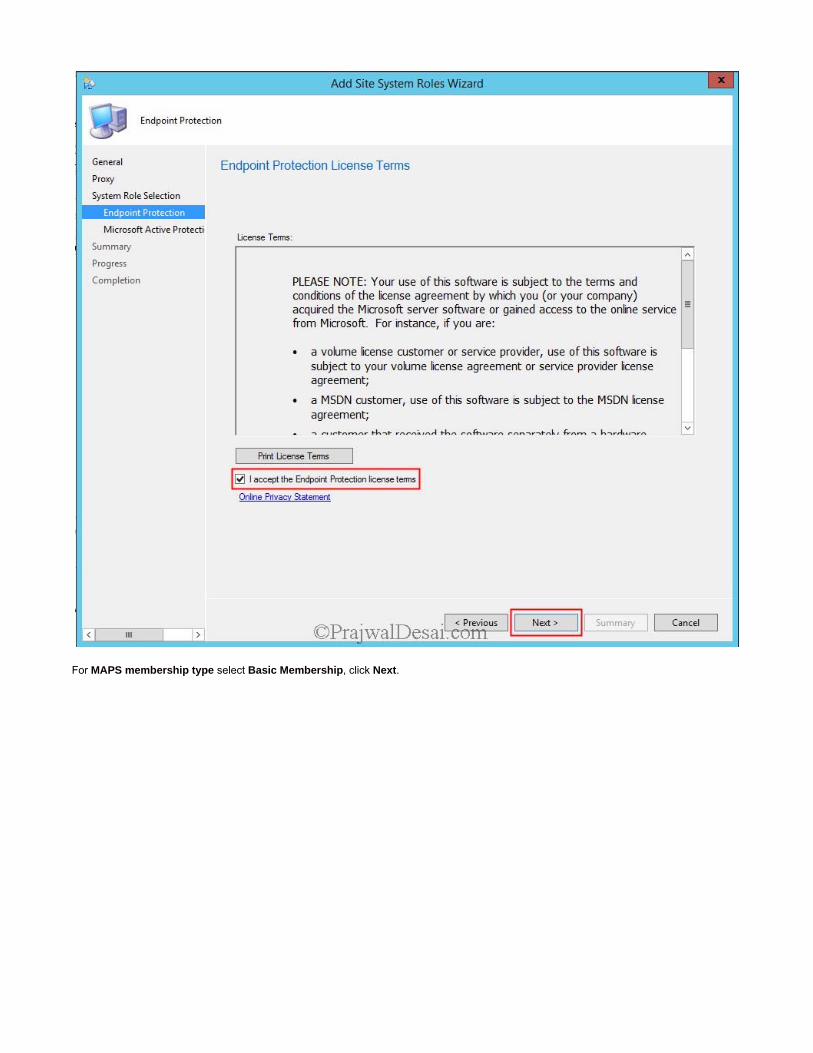
For MAPS membership type select Basic Membership, click Next.
The Endpoint Protection role has been installed successfully. Click Close.

After the installation of Endpoint Protection role, we will now create a Custom client device settings for Endpoint protection. You need to enable this setting to install Endpoint Protection client on systems. In the Configuration Manager console click Administration, under Site Configuration, right click Client Device settings and click on Create Custom Client Device Settings. Specify a name for the custom client device settings and check Endpoint Protection and click OK.
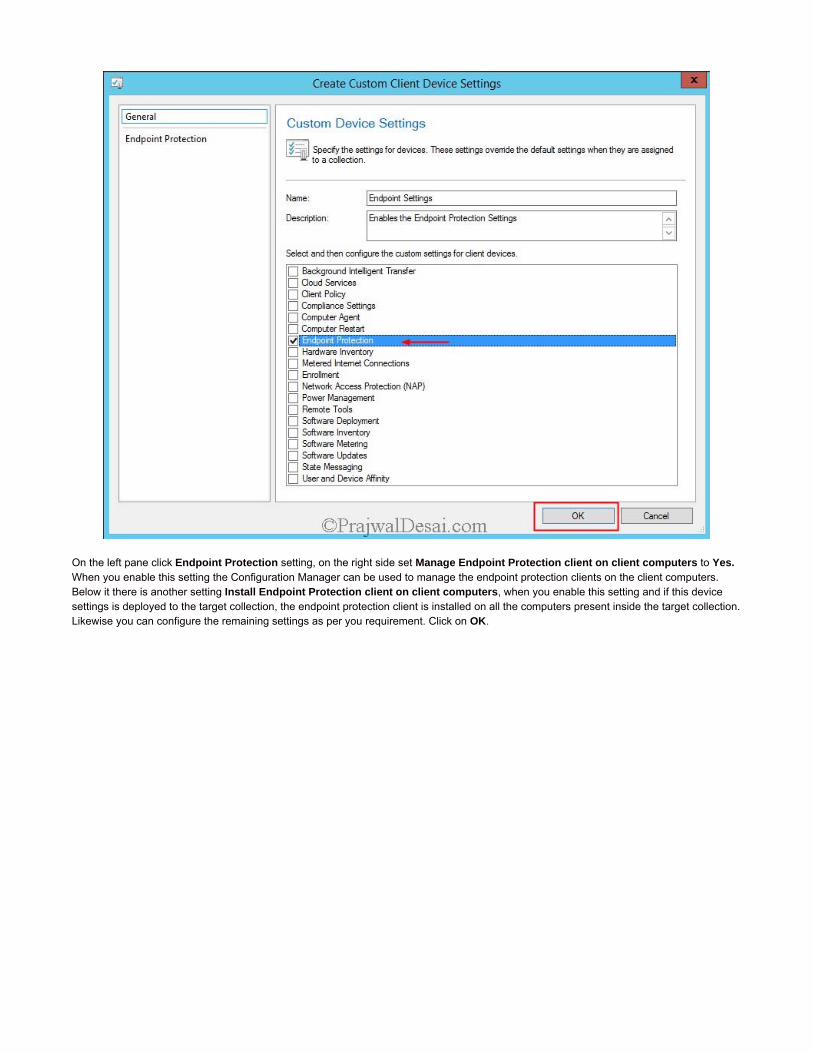
On the left pane click Endpoint Protection setting, on the right side set Manage Endpoint Protection client on client computers to Yes. When you enable this setting the Configuration Manager can be used to manage the endpoint protection clients on the client computers. Below it there is another setting Install Endpoint Protection client on client computers, when you enable this setting and if this device settings is deployed to the target collection, the endpoint protection client is installed on all the computers present inside the target collection. Likewise you can configure the remaining settings as per you requirement. Click on OK.
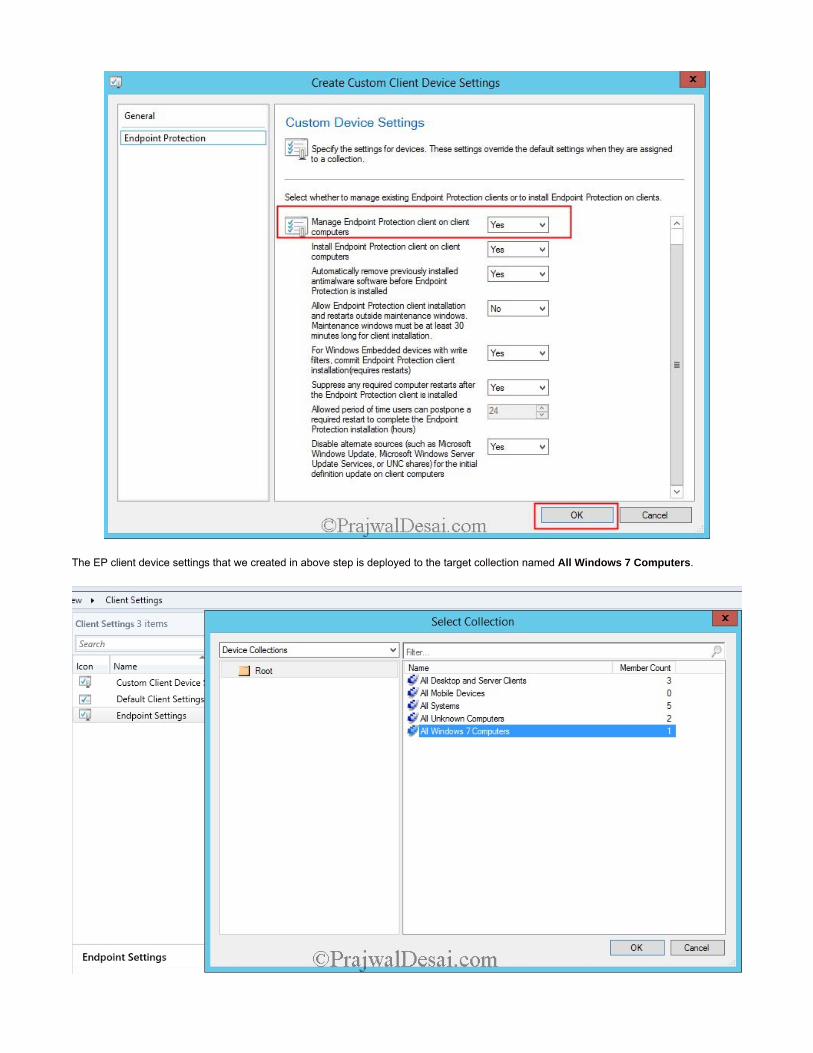
The EP client device settings that we created in above step is deployed to the target collection named All Windows 7 Computers.
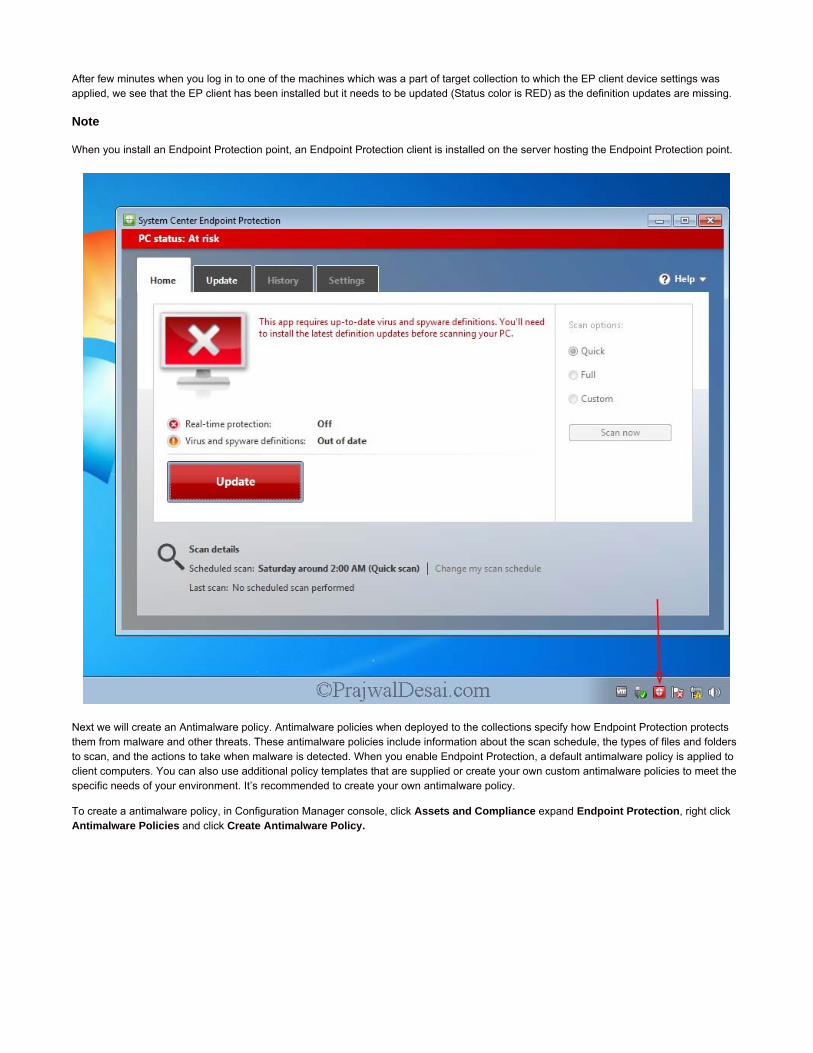
After few minutes when you log in to one of the machines which was a part of target collection to which the EP client device settings was applied, we see that the EP client has been installed but it needs to be updated (Status color is RED) as the definition updates are missing.
Note
When you install an Endpoint Protection point, an Endpoint Protection client is installed on the server hosting the Endpoint Protection point.
Next we will create an Antimalware policy. Antimalware policies when deployed to the collections specify how Endpoint Protection protects them from malware and other threats. These antimalware policies include information about the scan schedule, the types of files and folders to scan, and the actions to take when malware is detected. When you enable Endpoint Protection, a default antimalware policy is applied to client computers. You can also use additional policy templates that are supplied or create your own custom antimalware policies to meet the specific needs of your environment. It’s recommended to create your own antimalware policy.
To create a antimalware policy, in Configuration Manager console, click Assets and Compliance expand Endpoint Protection, right click Antimalware Policies and click Create Antimalware Policy.
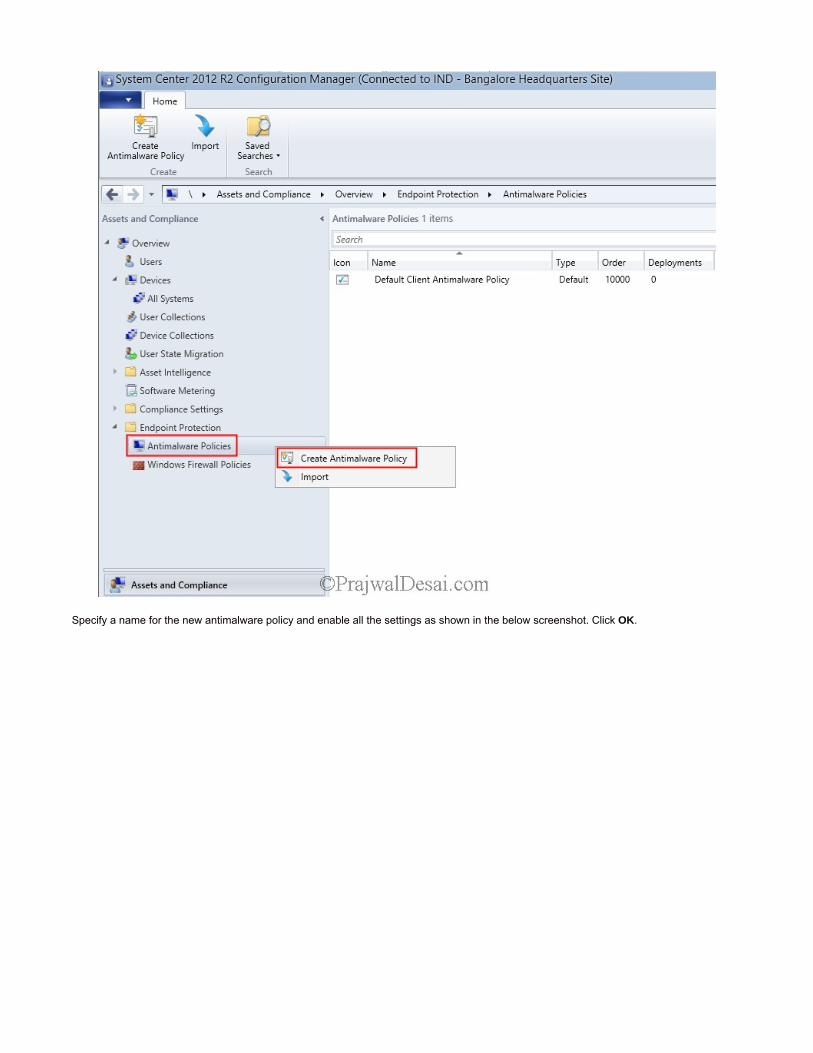
Specify a name for the new antimalware policy and enable all the settings as shown in the below screenshot. Click OK.
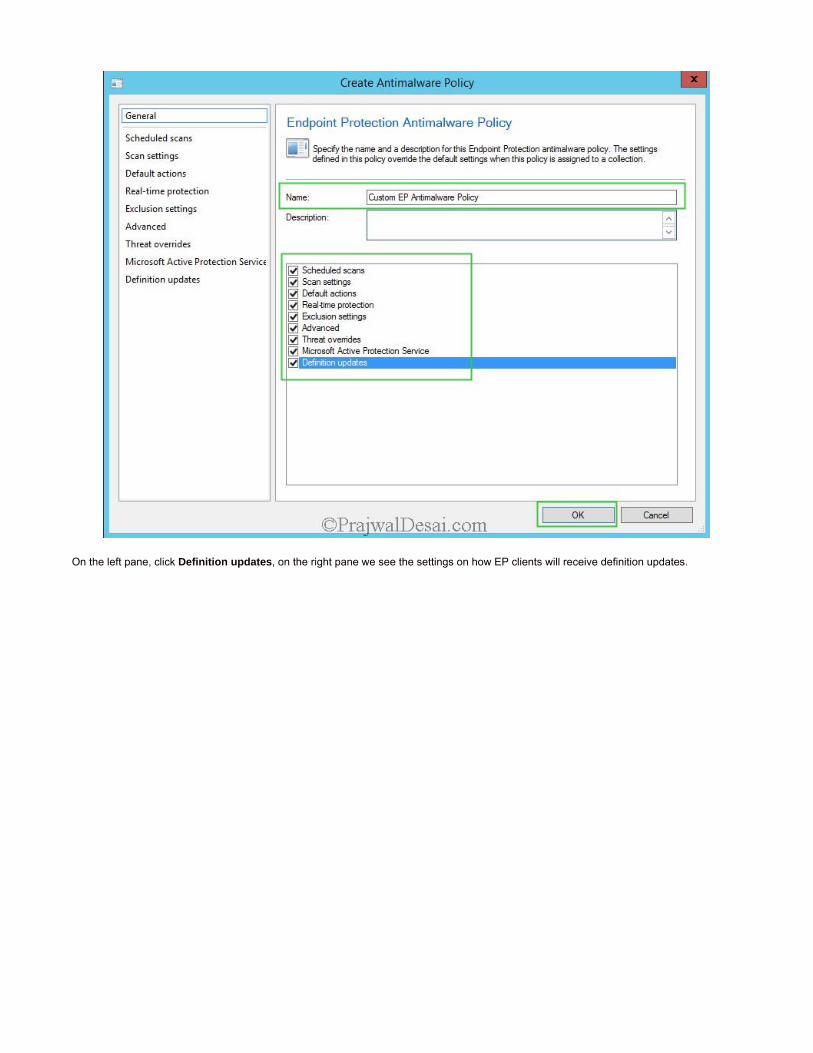
On the left pane, click Definition updates, on the right pane we see the settings on how EP clients will receive definition updates.
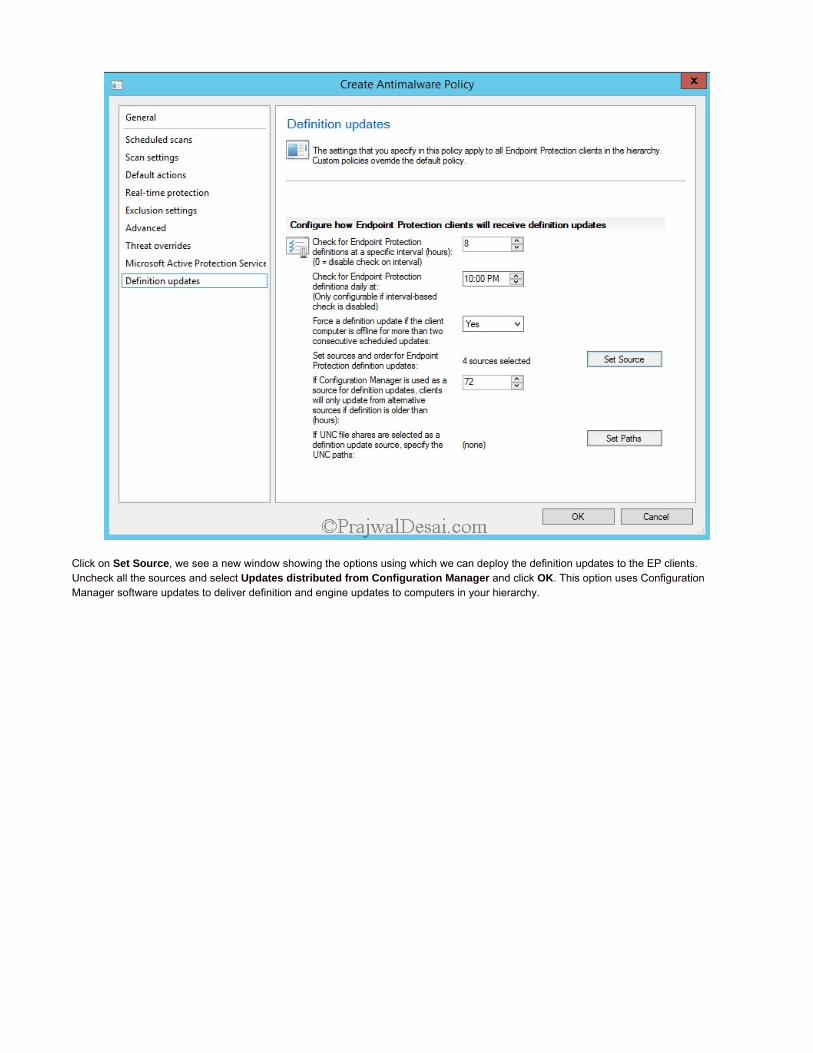
Click on Set Source, we see a new window showing the options using which we can deploy the definition updates to the EP clients. Uncheck all the sources and select Updates distributed from Configuration Manager and click OK. This option uses Configuration Manager software updates to deliver definition and engine updates to computers in your hierarchy.
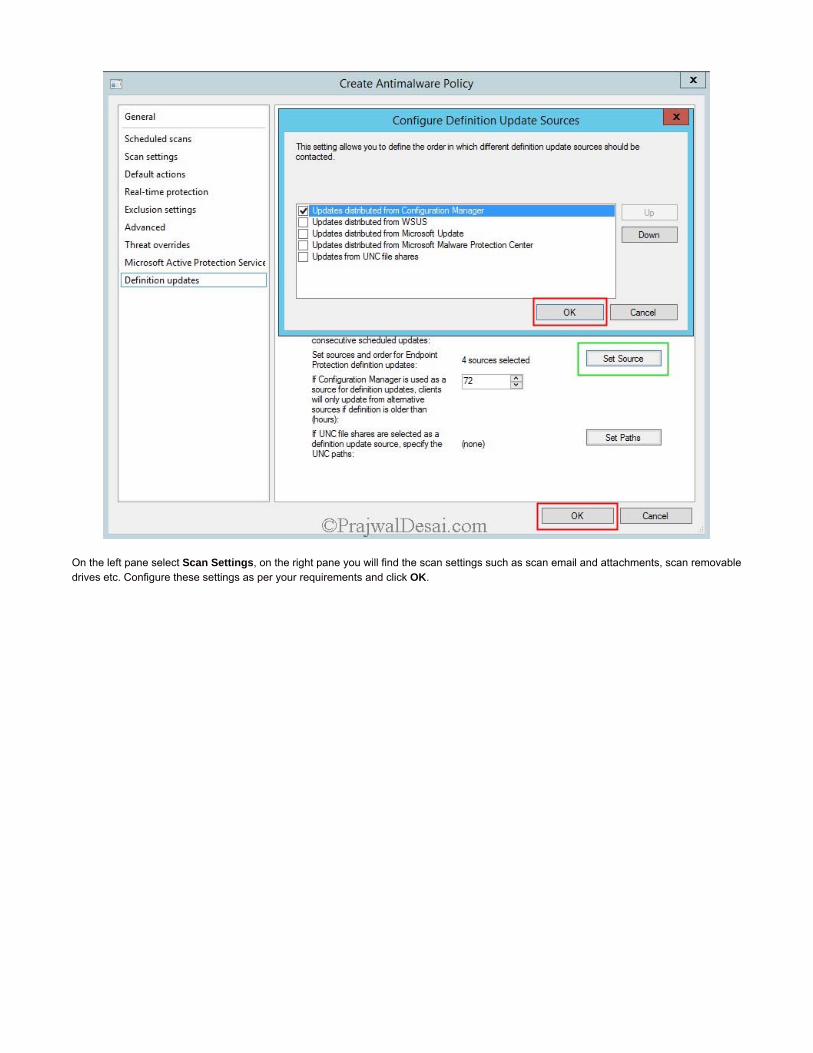
On the left pane select Scan Settings, on the right pane you will find the scan settings such as scan email and attachments, scan removable drives etc. Configure these settings as per your requirements and click OK.
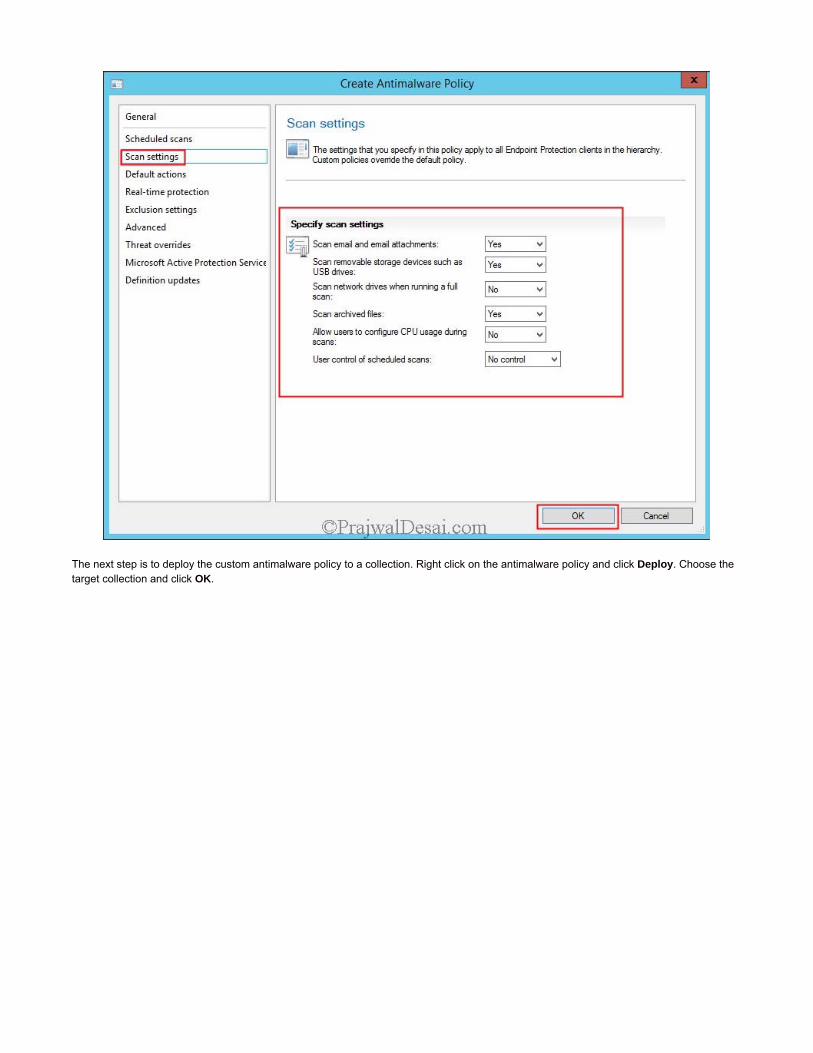
The next step is to deploy the custom antimalware policy to a collection. Right click on the antimalware policy and click Deploy. Choose the target collection and click OK.
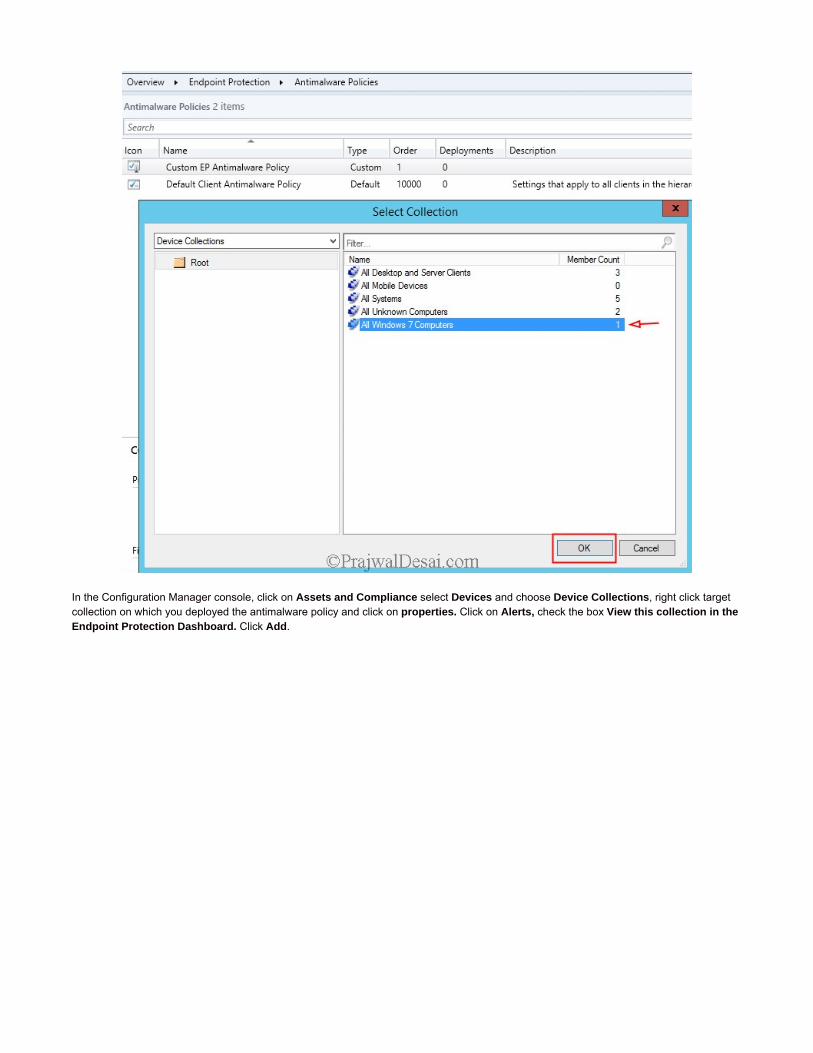
In the Configuration Manager console, click on Assets and Compliance select Devices and choose Device Collections, right click target collection on which you deployed the antimalware policy and click on properties. Click on Alerts, check the box View this collection in the Endpoint Protection Dashboard. Click Add.

In Add New Collection Alerts window, check all the boxes and click OK. Click OK again to close the Computer properties window.
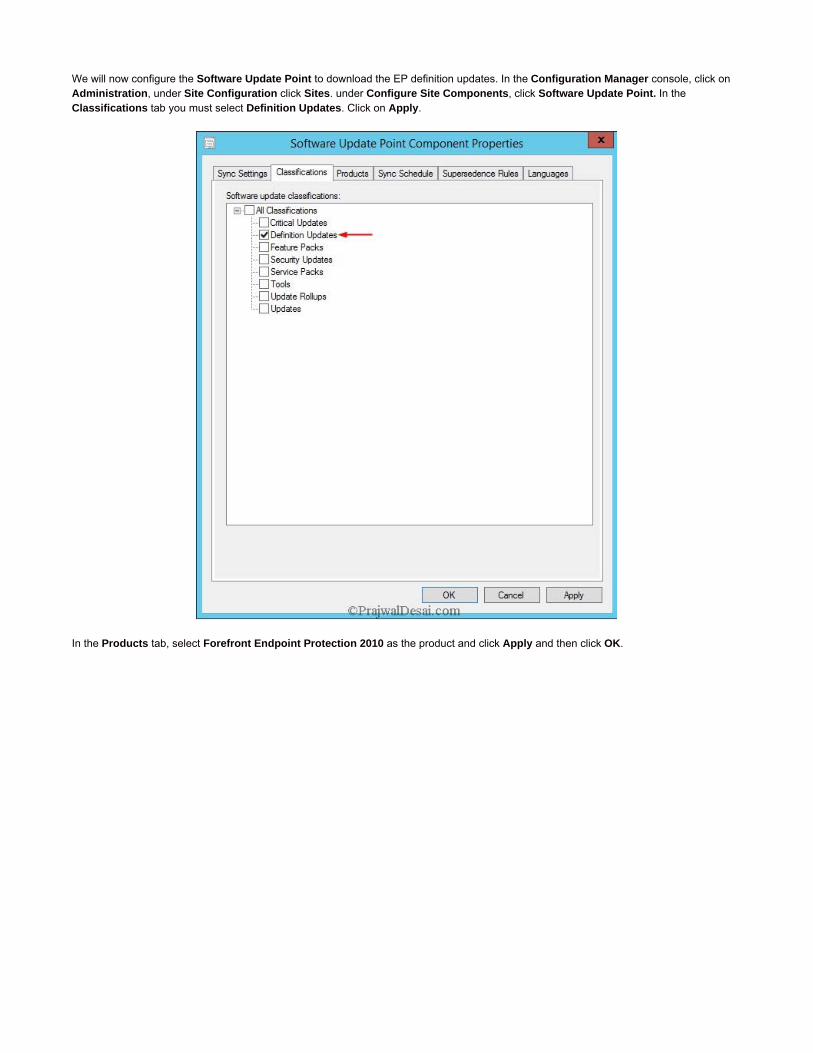
We will now configure the Software Update Point to download the EP definition updates. In the Configuration Manager console, click on Administration, under Site Configuration click Sites. under Configure Site Components, click Software Update Point. In the Classifications tab you must select Definition Updates. Click on Apply.
In the Products tab, select Forefront Endpoint Protection 2010 as the product and click Apply and then click OK.
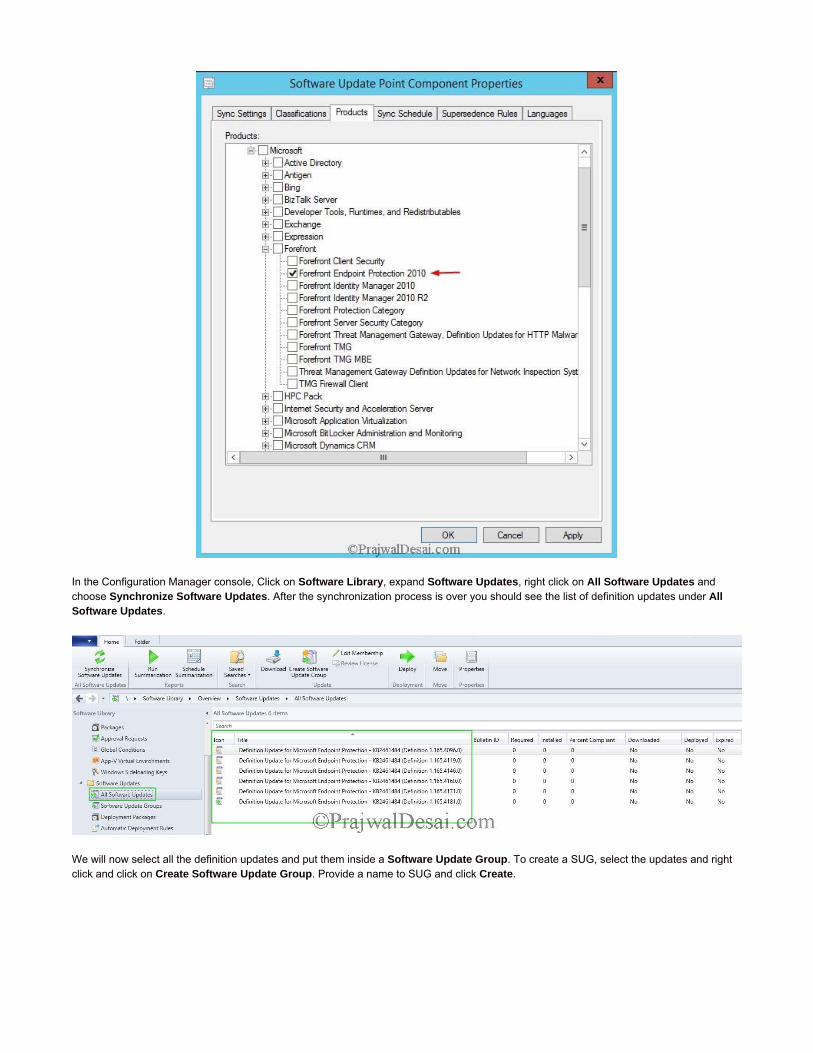
In the Configuration Manager console, Click on Software Library, expand Software Updates, right click on All Software Updates and choose Synchronize Software Updates. After the synchronization process is over you should see the list of definition updates under All Software Updates.
We will now select all the definition updates and put them inside a Software Update Group. To create a SUG, select the updates and right click and click on Create Software Update Group. Provide a name to SUG and click Create.
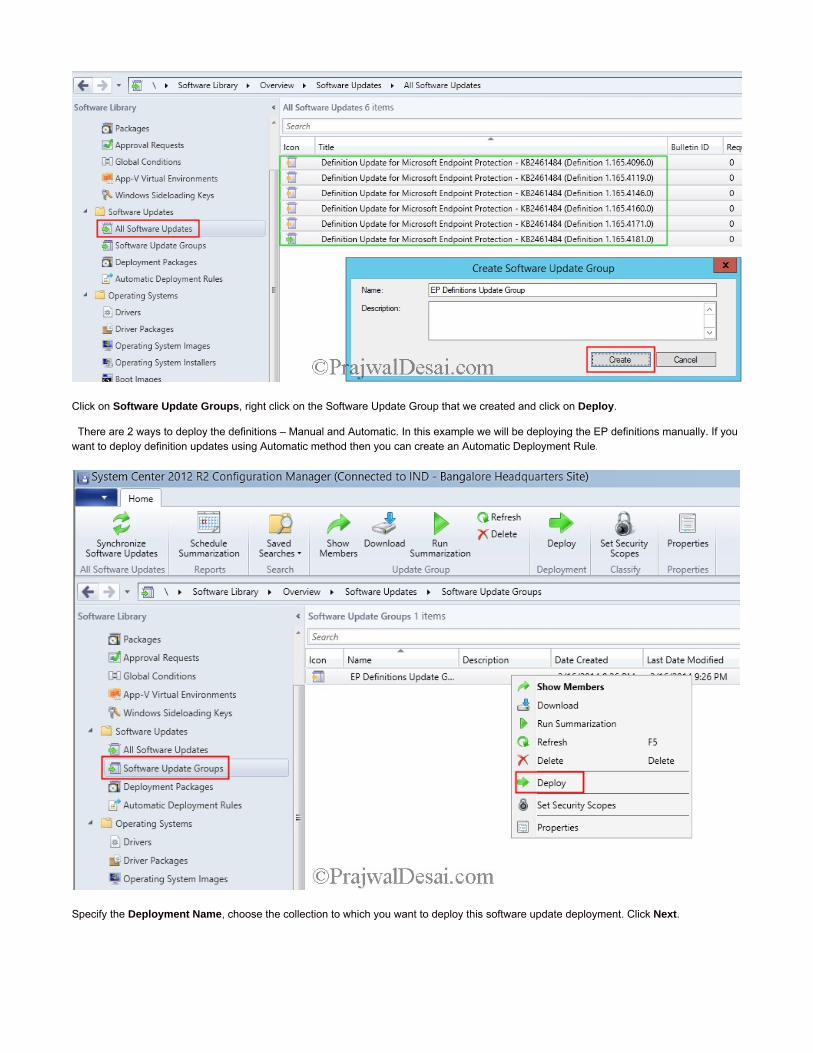
Click on Software Update Groups, right click on the Software Update Group that we created and click on Deploy.
There are 2 ways to deploy the definitions – Manual and Automatic. In this example we will be deploying the EP definitions manually. If you want to deploy definition updates using Automatic method then you can create an Automatic Deployment Rule.
Specify the Deployment Name, choose the collection to which you want to deploy this software update deployment. Click Next.
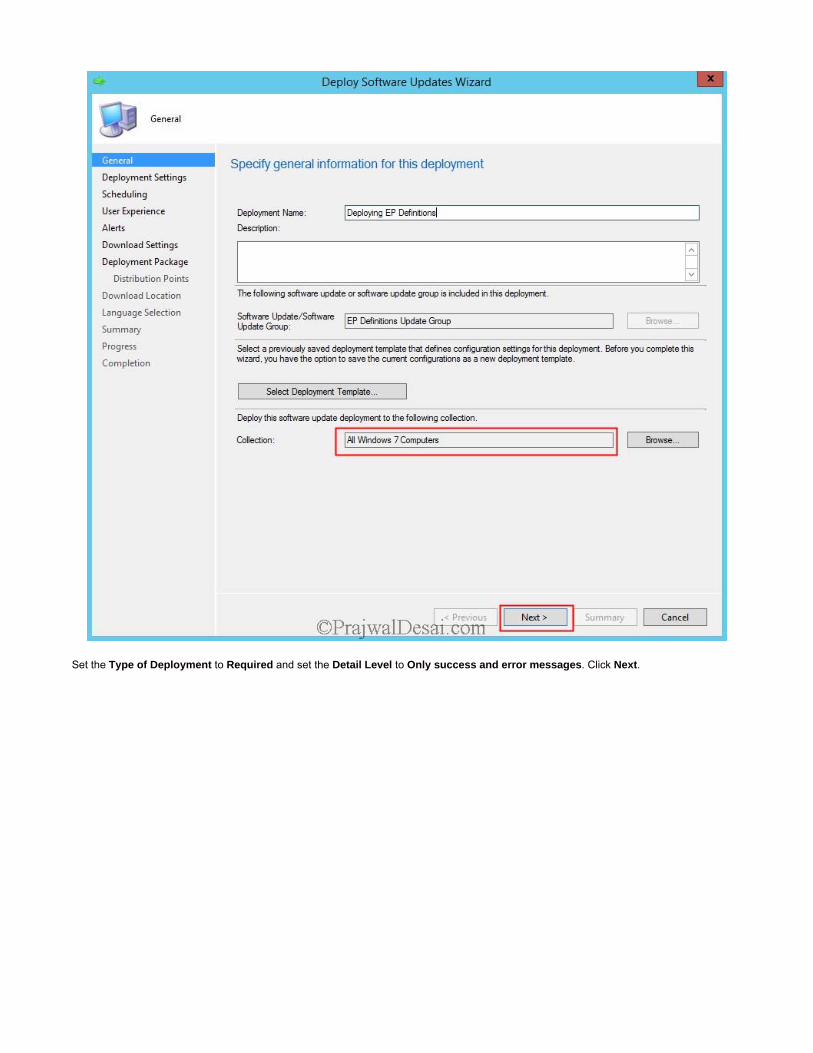
Set the Type of Deployment to Required and set the Detail Level to Only success and error messages. Click Next.
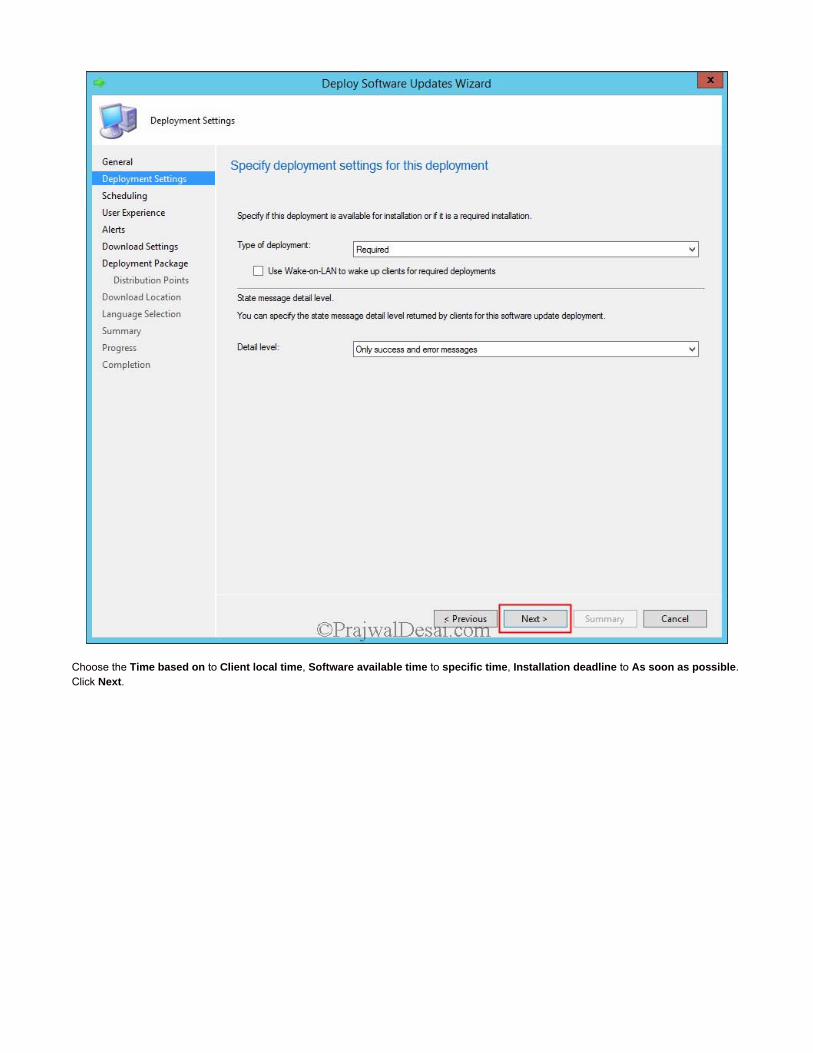
Choose the Time based on to Client local time, Software available time to specific time, Installation deadline to As soon as possible. Click Next.
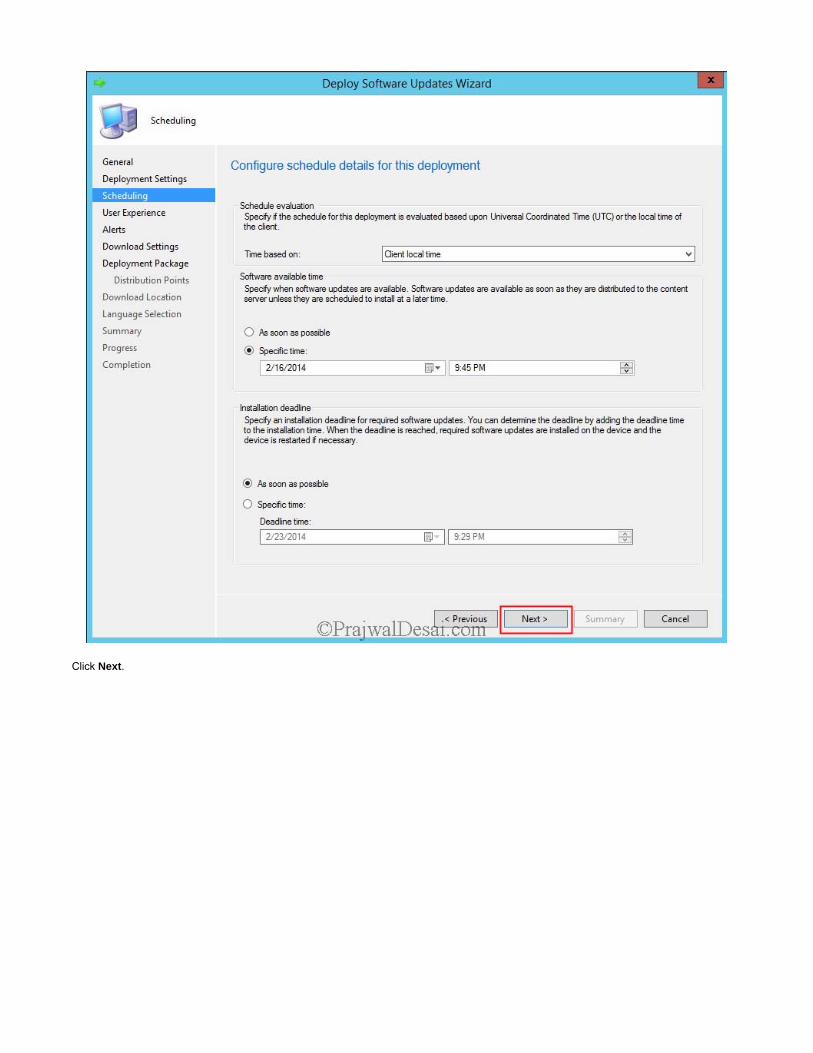
Click Next.
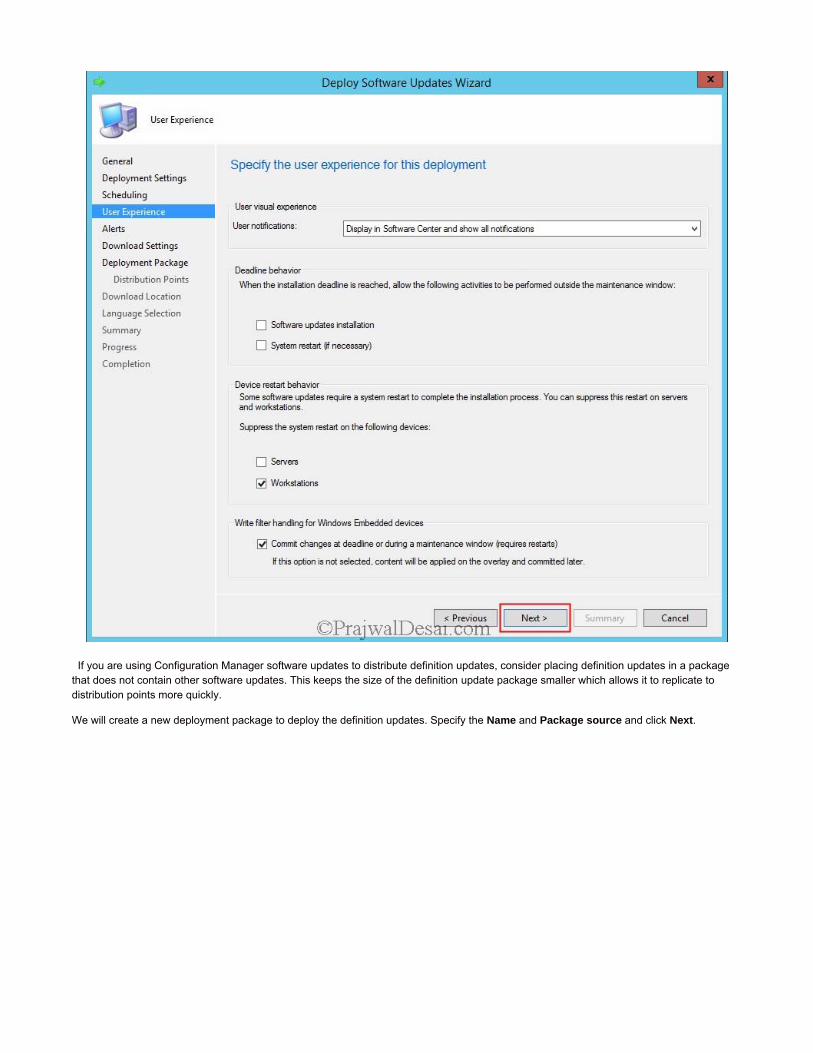
If you are using Configuration Manager software updates to distribute definition updates, consider placing definition updates in a package that does not contain other software updates. This keeps the size of the definition update package smaller which allows it to replicate to distribution points more quickly.
We will create a new deployment package to deploy the definition updates. Specify the Name and Package source and click Next.
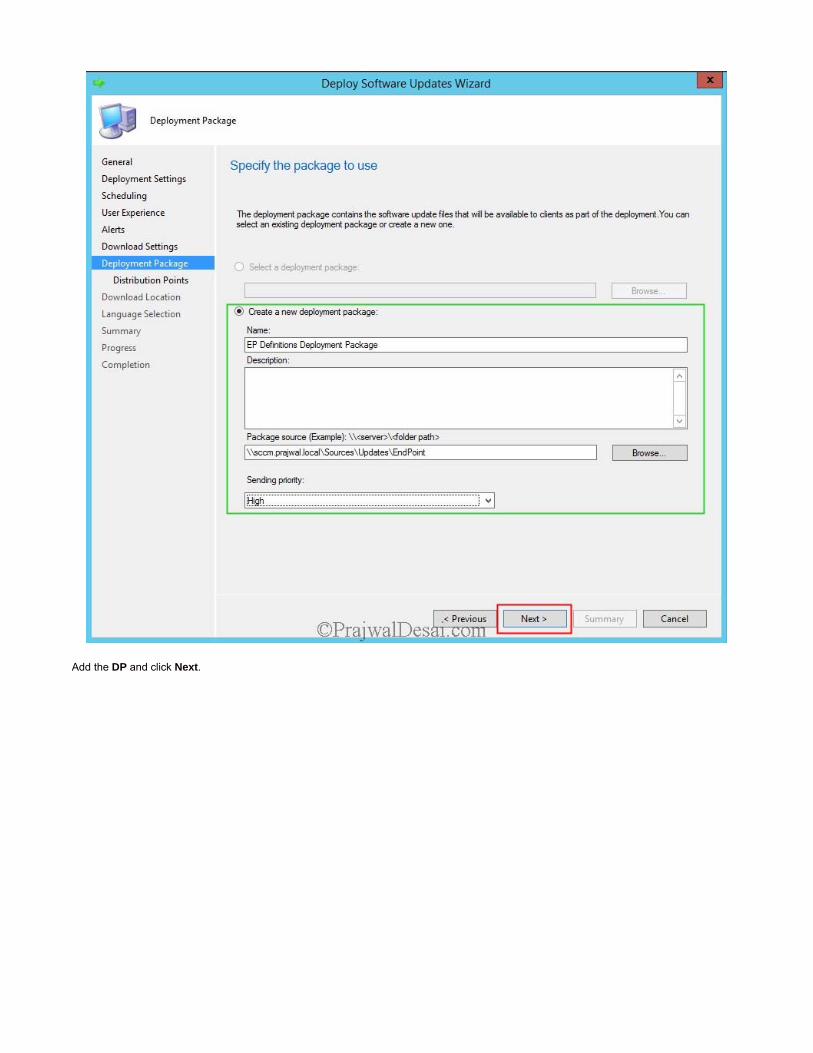
Add the DP and click Next.
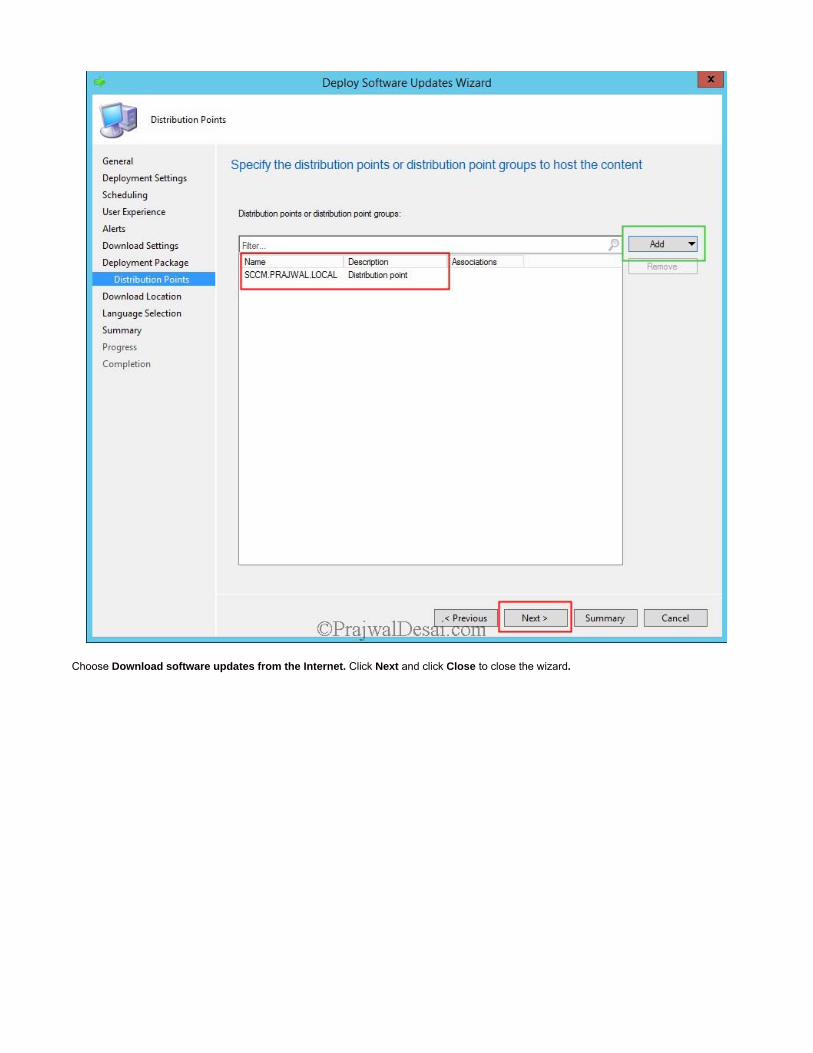
Choose Download software updates from the Internet. Click Next and click Close to close the wizard.
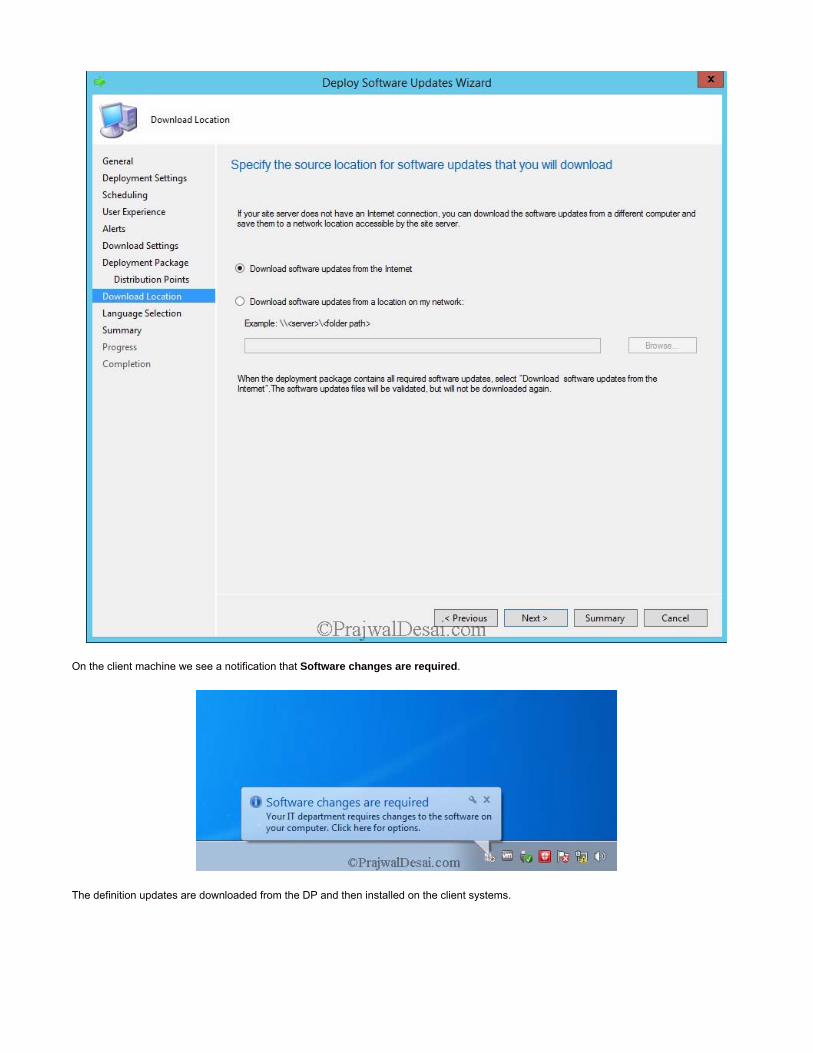
On the client machine we see a notification that Software changes are required.
The definition updates are downloaded from the DP and then installed on the client systems.
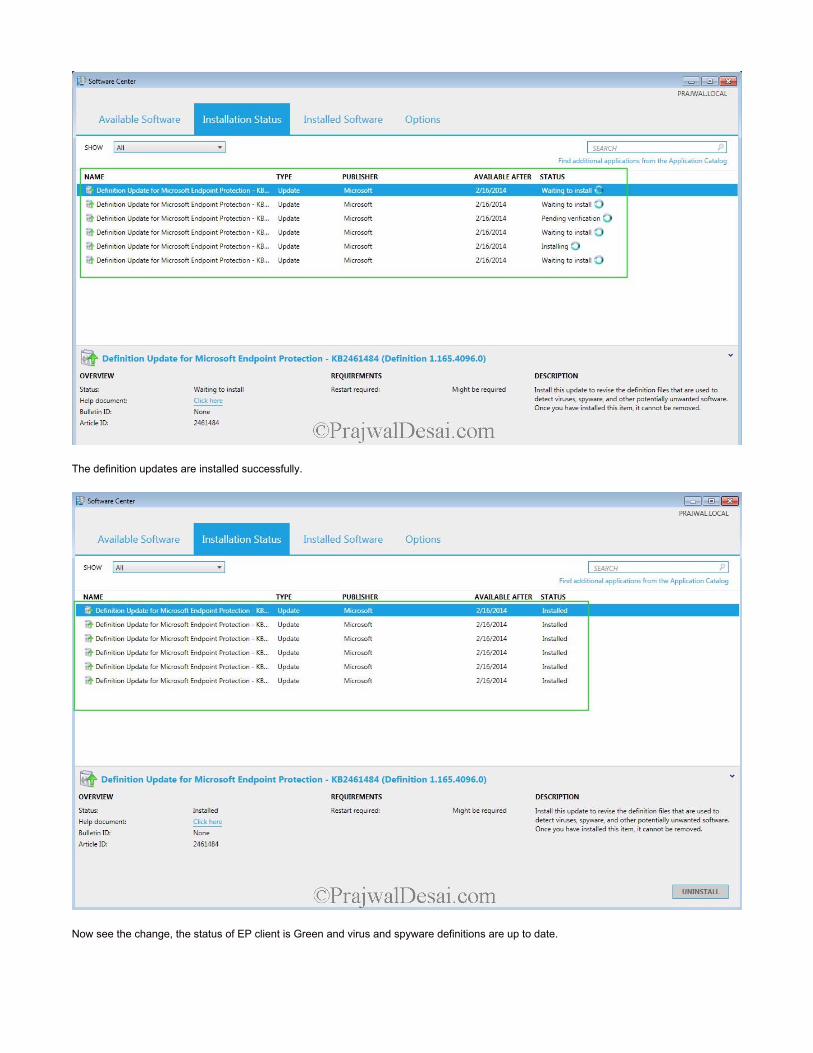
The definition updates are installed successfully.
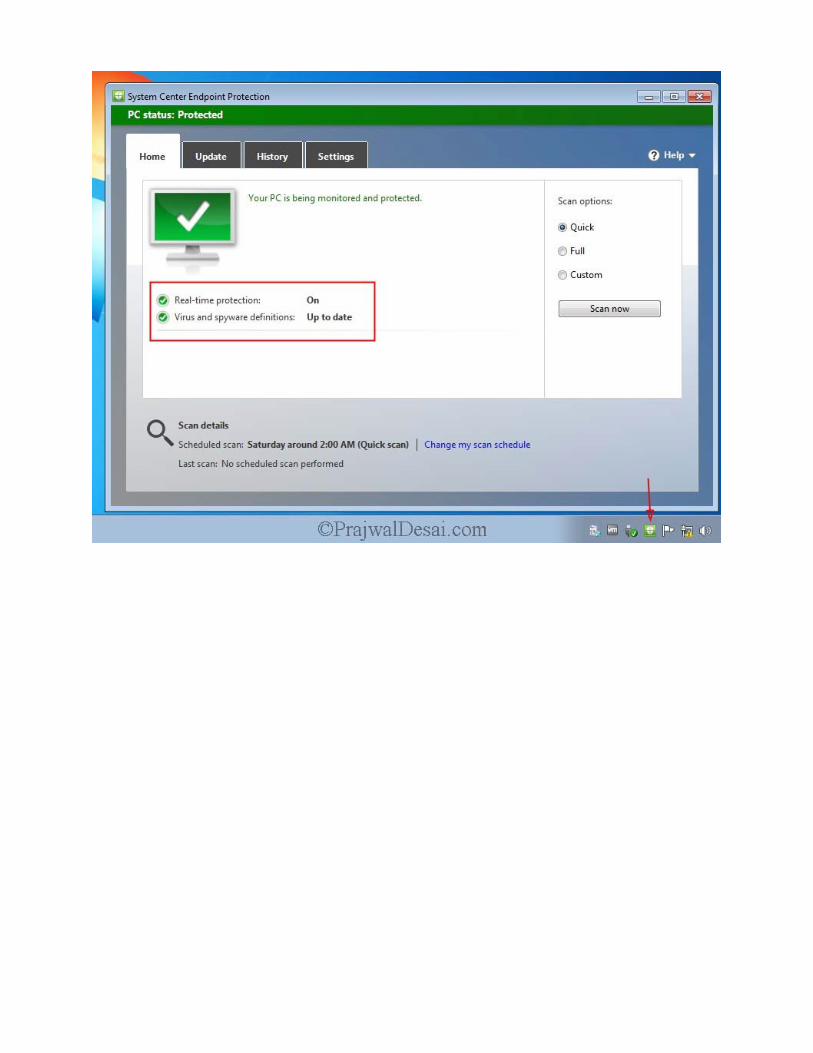
Now see the change, the status of EP client is Green and virus and spyware definitions are up to date.